#piximperfect
Explore tagged Tumblr posts
Text
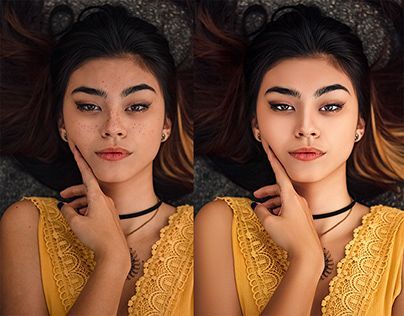
Wedding photo editing and correction in adobe Photoshop. Looking for the best photo editing service? We offer high-quality, family, model, newborn & maternity retouching at an affordable price FREE trial. 💌 Get in touch with us and DM me: [email protected] Provide us with two pictures for trial period is completely free. for Free at Background Removal Clipping path Transparent Background White Background Cut out images Hair masking/ Image masking / Alpha masking / Layar masking Drop shadow Photo Retouching Color corrections Etc.
#weddingphotoediting#lightroom#weddingphotography#imageediting#photoediting#phlearn#backgroundremoving#online#studio#photoshop#weddingshoot#photography#pics#usa#photographer#model#portrait#artwork#colorgrading#skinretouching#retouching#picediting#editing#hollywood#piximperfect#tutvid#foryou#shakeelshahid#picsart#weddingphotoeditor
0 notes
Text

Thank you @cobbbvanth for asking me for this; I’ve never been more flattered! ☺️ I’ve only been making gifs for a little more than 2 years, so I’m really still only figuring Photoshop out, and my colouring owes everything to other people’s tutorials (some of which can be found here). To be honest, I was only asked some tips, but I have no clue what to include and what to leave out; so, here’s my complete (if random) colouring process.
NOTE: This is a colouring tutorial, not a gif-making one. The tutorial that taught me everything I know about that (and to which I am eternally grateful) is this one by @hayaosmiyazaki.
I. SHARPENING My standard sharpening settings are:
One Smart Sharpen filter set to Amount: 500 | Radius: 0,4
A second Smart Sharpen filter set to Amount: 10 | Radius: 10
One Gaussian Blur filter set to Radius: 1,0 and Opacity: 30%
One Add Noise filter set to Amount 0,5 | Distribution: Gaussian
II. BASIC COLOURING This is the part where I add most of the adjustment layers available and just play around with them. Obviously different settings work for different scenes, but I do have some standard ones.
Brightness/Contrast I usually up the Brightness to +10-30, and the Contrast to about +10.
Curves
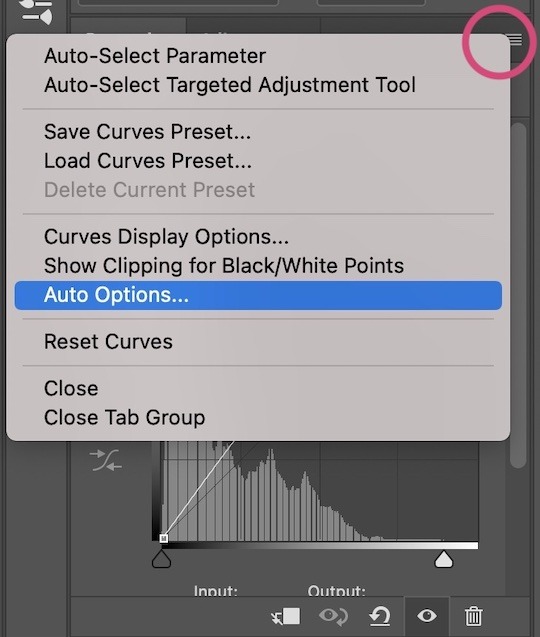
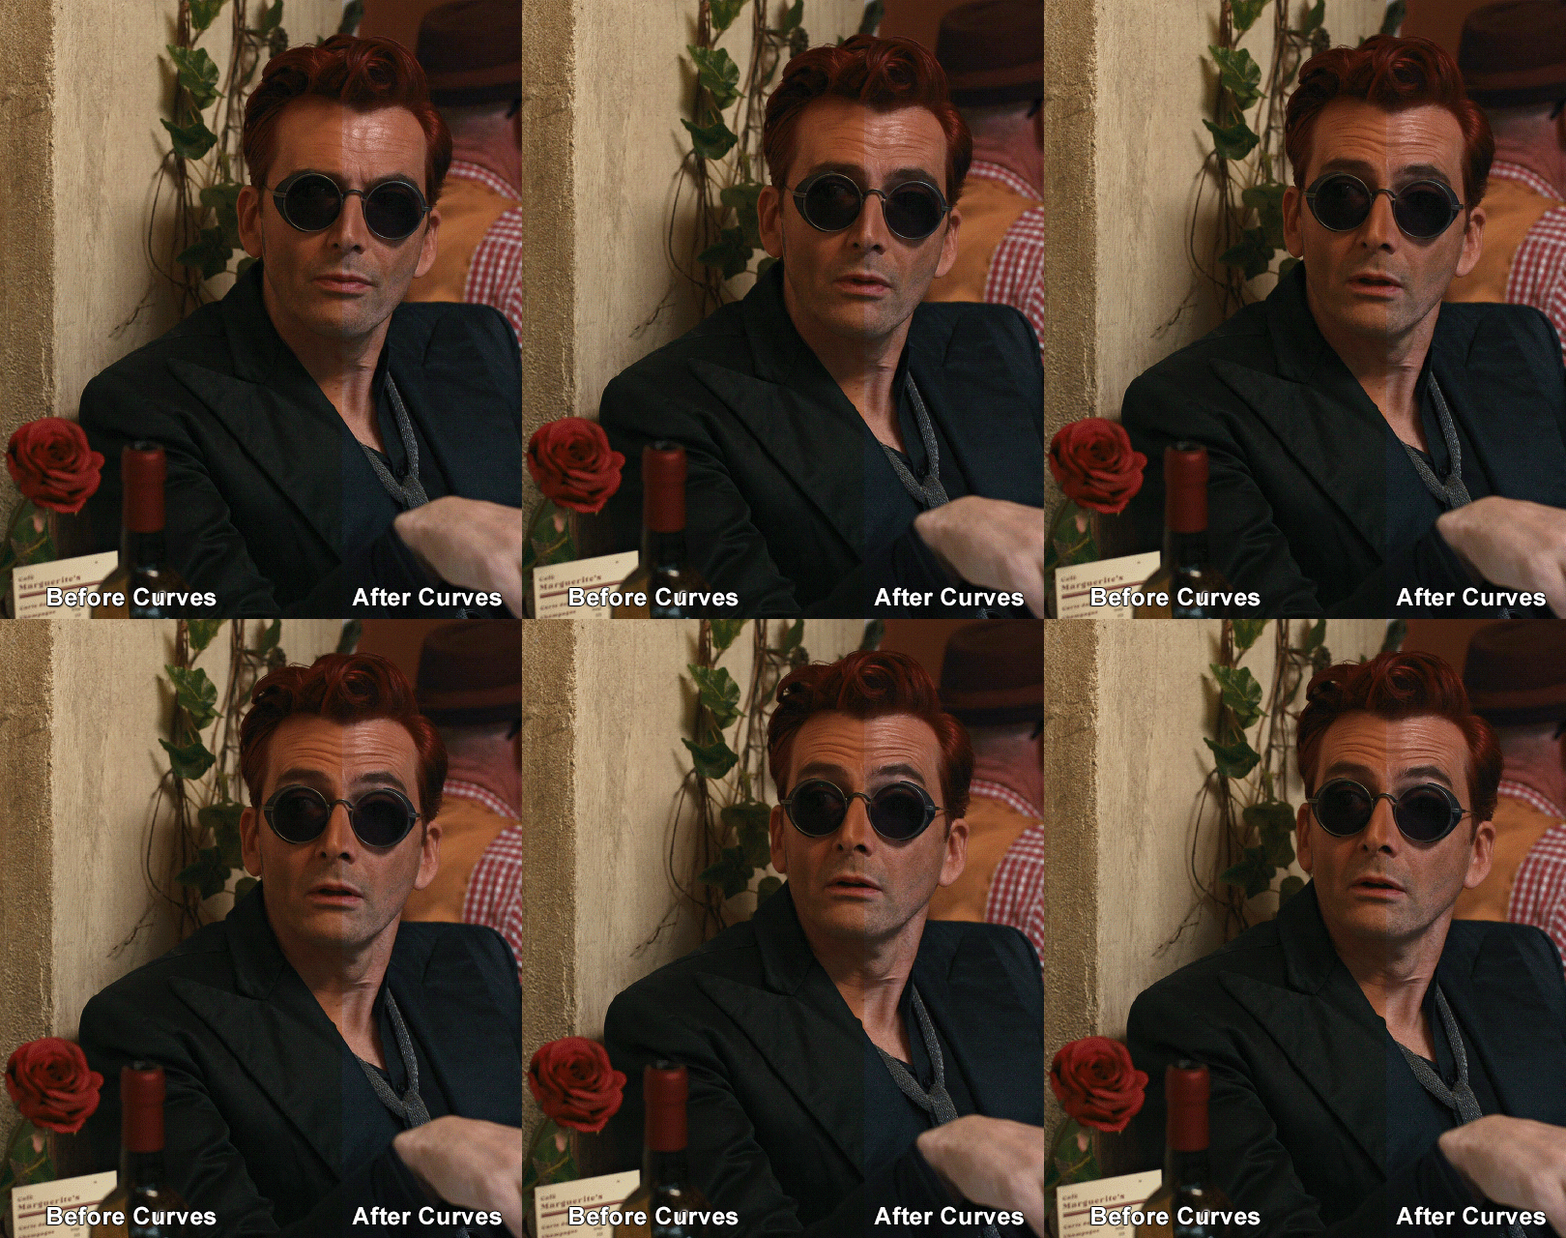
For the first Curves layer I go to Auto Options > Enhance Brightness and Contrast, and then adjust the opacity until I’m happy.
I might repeat the above step if the gif still looks too dark to me.
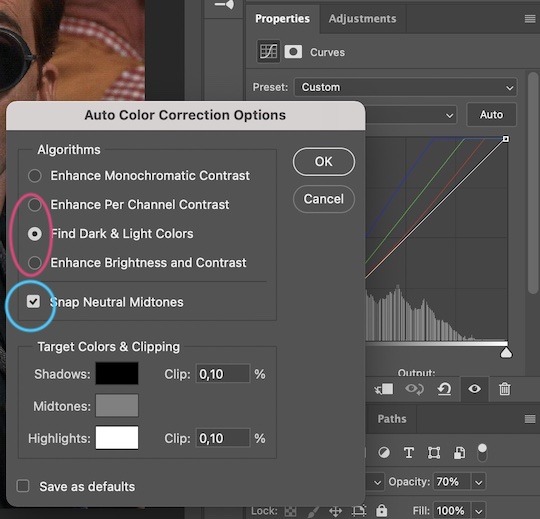
I add another Curves layer, I go to Auto Options and this time I pick either Find Dark & Light Colors or Enhance Per Channel Contrast, and check or uncheck the Snap Neutral Midtones option, until I see something I like. I will then adjust the opacity.
Levels I add a Levels layer that usually looks something like this:
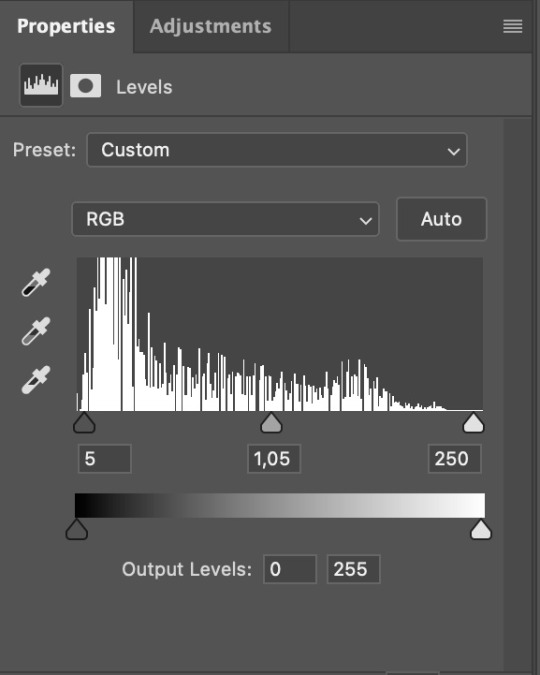
Exposure I add an Exposure layer, where I usually set the Offset to around -0,0010.
Selective Color To make the faces look okay, I create a Selective Color layer, select the Reds and usually add some Cyan (+10-20%) and play around a little (±5%) with Magenta and Yellow too. I might also add another layer, select the Yellows and make slight tweaks there too.
III. FUN COLOURING About colour manipulation: PiXimperfect just uploaded a tutorial that explains everything so much better than I ever could, so I highly recommend you go watch it. It’s made for static images though, and things are more complicated with moving images, so I also recommend @sabrinaacarpenters’s tutorial.
The reason I usually go for a softer colouring is that a more vivid one requires a lot of patience and precision, and I honestly can’t be bothered. Instead, I try to tweak the colous only a little, so that the edges can be a little rough without it looking too wrong.
One thing to remember is that each gif is different, and there isn’t one foolproof way to do this, so you will need to use a different technique depending on the gif you’re working with.
Okay, so, after I’ve decided what colour I want my background to be:
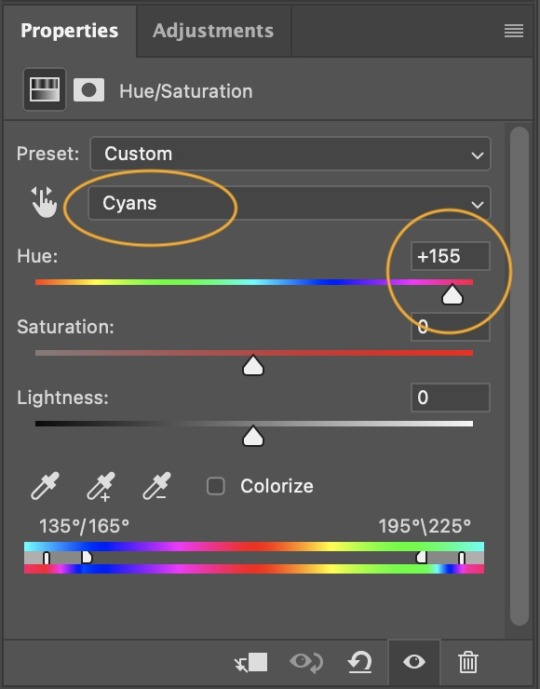
1. I create a Hue/Saturation layer and change the greens, cyans, blues and magentas to that colour. That’s easy enough, since it doesn’t mess with the face colour. I then set the blending mode to Color. If your background doesn’t include any yellow or red, you might be done here, like in the case bellow:
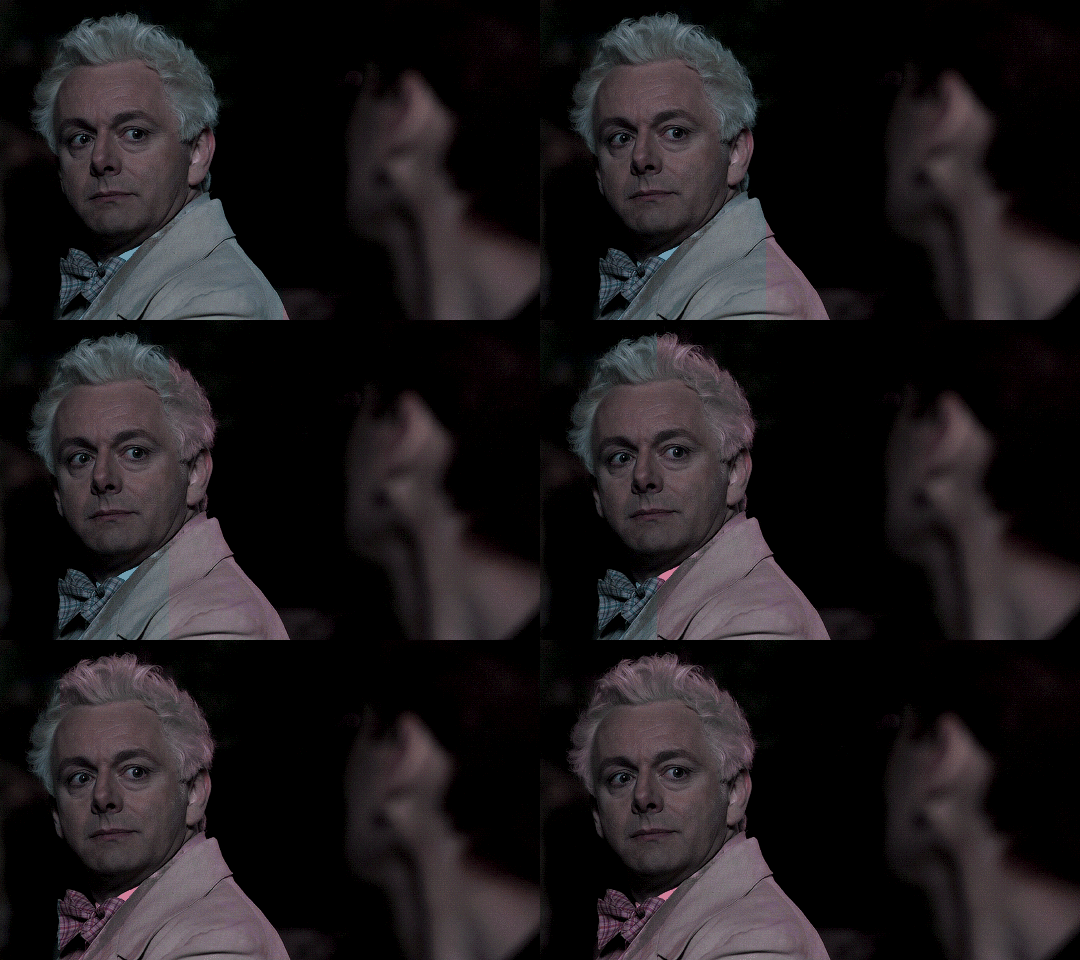
2. To change the yellows and reds, I create a new Hue/Saturation layer, select the yellows/reds, move Saturation to 100 (temporarily) and then play around with the sliders until the face colour isn’t affected. I then change it to whatever I’ve chosen and change the blending mode to Color.
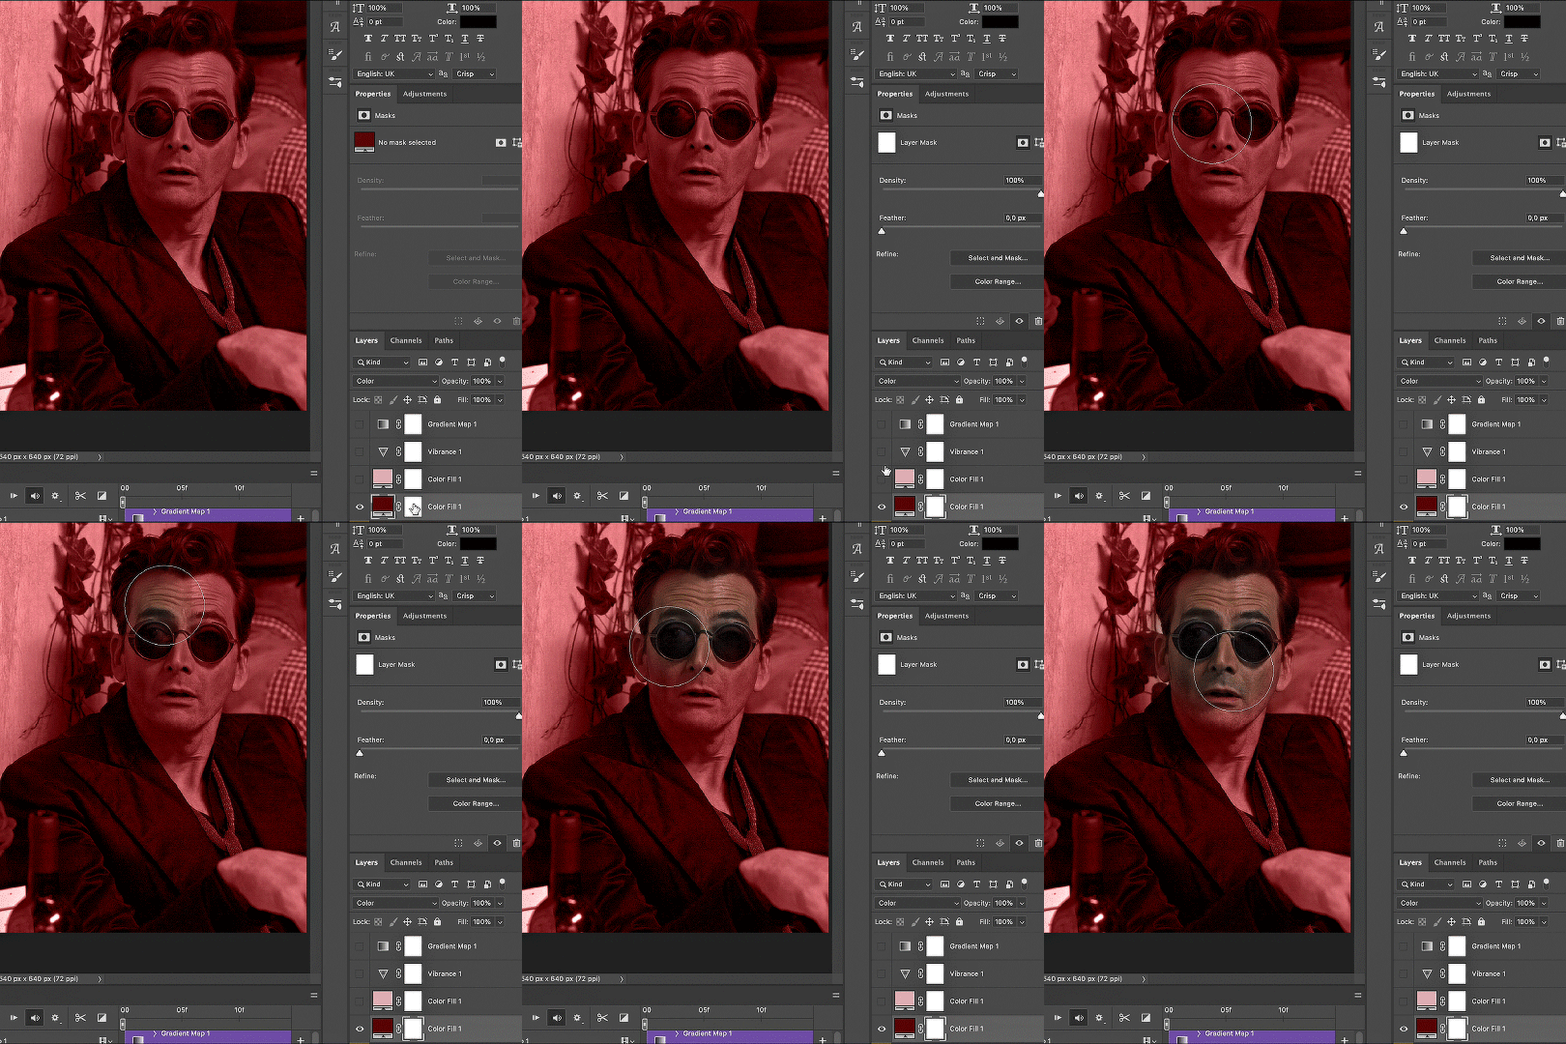
3. If for whatever reason step 3 doesn’t work (the background is white or black for example, or just too red), I might create a Solid Color layer set to whatever colour I want, set the blending mode to Color and then select the layer mask and carefully paint with a soft, black brush over the people’s faces/bodies. I will then lower the Opacity, to whatever looks smooth enough. If there’s a lot of movement in your gif, you might have to use keyframes (see sabrinaacarpenters's tutorial linked above). However, my main goal is to avoid using those; that’s why I try my hardest to tweak around as many Hue/Saturation layers as needed and not have to create a solid color layer.
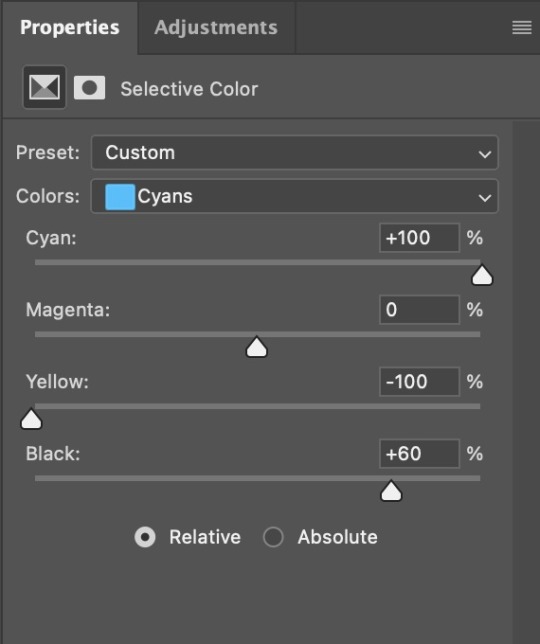
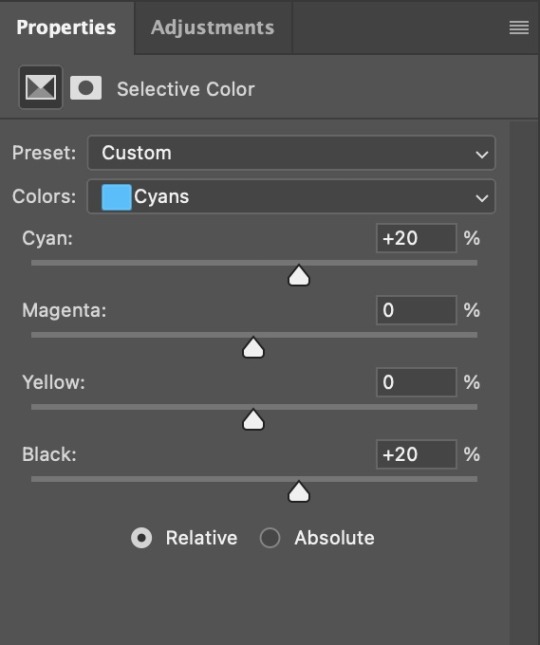
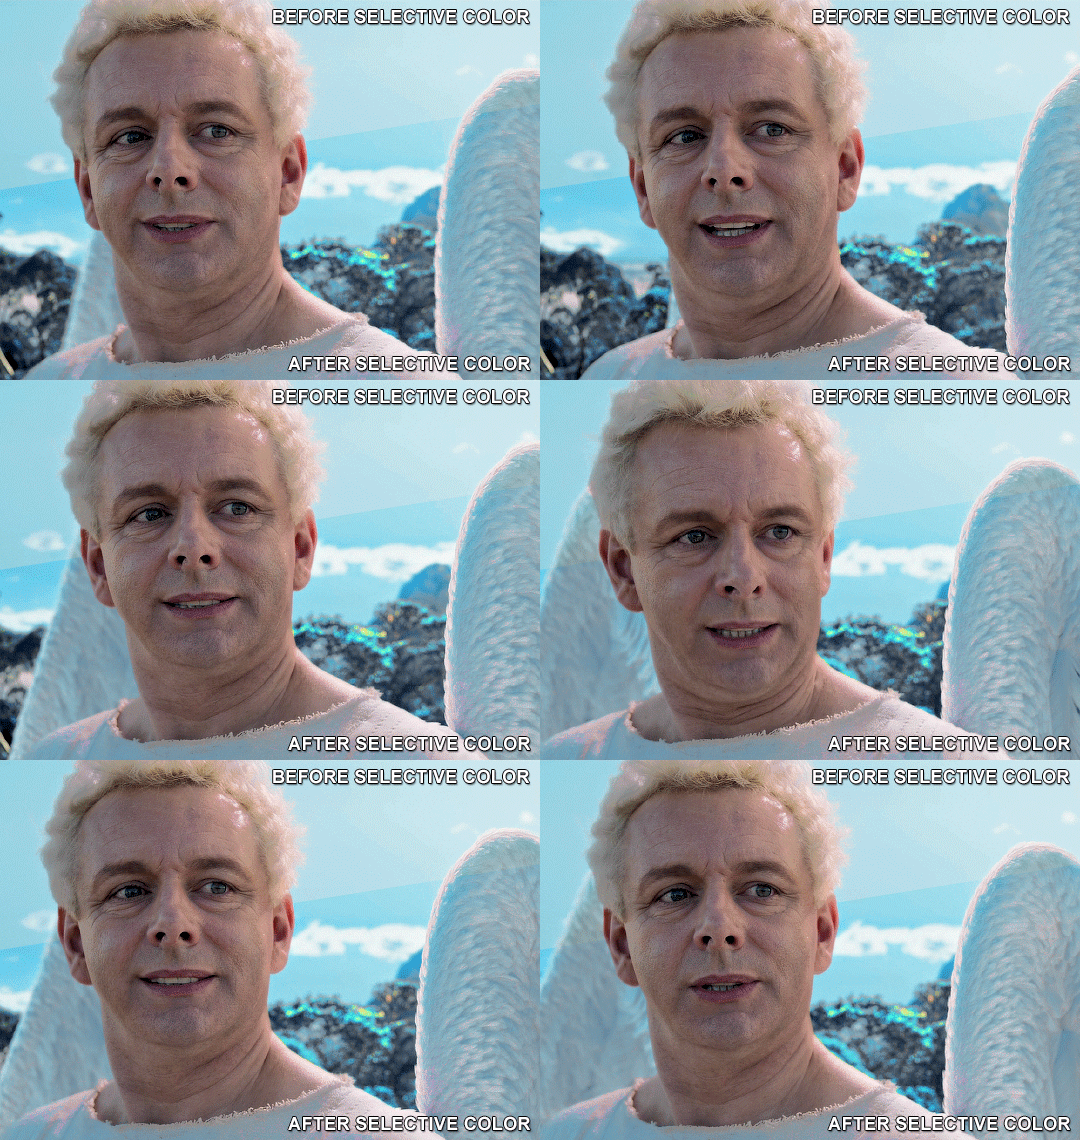
4. Once my background looks the colour I want it, I might add a Selective Color layer that matches my background color and then try to make it look more vibrant. For this Aziraphale gif below for example, I’ve selected the Cyans and then set Cyan to +100%, Yellow to -100% and Black to +60, then created another one, selected the Cyans again and then set Cyan to +20 and Black to +20.
5. If the gif has a white area, I create a Solid Color layer with a colour that matches the rest of the background and then set the Opacity low. I might also create a Selective Color layer, increase the Black and then play around with the colours.
IV. FINISHING TOUCHES
I create a Vibrance layer and set the Vibrance to around +30 and the Saturation to about +5.
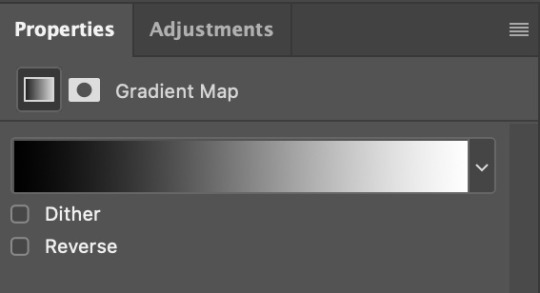
I create a black and white Gradient Map layer (with black on the left end of the spectrum and white on the right), set the blending to Luminosity and the Opacity to about 20-30%.
AAAND that’s about it I think! This ended up way too long and perhaps a little incoherent. I tried to make it as general as possible, so you might have to mix and match for best results. Feel free to ask me for further explanations about any one of these steps, and please tell me if you want me to go through the colouring of a specific gifset (although, as I said, I'm by no means an expert). Happy gifmaking!
#gif tutorial#allresources#completeresources#dailyresources#photoshop tutorial#minee#tutorial#tutorial*#chaoticresources#uservivaldi#userdanahscott#usersanshou#userfanni#userbuckleys#userrobin#tuserjen#userdavid#userzaynab#tusermimi#thingschanged#tuserju#usertj#userhallie
358 notes
·
View notes
Note
hi isa! I hope you're doing well. I was wondering if there were any tutorials you specifically followed to hone your skills with your editing? I want to get more into editing because I have a new story idea and want to be able to execute it the way I have it imagined in my head but my current editing style isn't up to par with what I need. no worries if not! thank you!
hello! i answered a similar ask here with links to basic editing tutorials i used to start. (keep in mind this is all for photoshop!) and i’ll say again that the piximperfect youtube channel has helped me learn sooo much about photoshop so i highly recommend checking him out, he has videos on pretty much everything you could need! if there’s anything specific you’d like to know, you can always message or dm and i’ll try to help as much as i can! <3
7 notes
·
View notes
Note
do you have any tips to someone who wants to start to make gifs? Like what app you use or coloring tips?
this ask was all the way from july, I was busy sorry >.< this explanation will be very brief unless you ask follow-up questions for me to elaborate since I'm not sure how much you want to know.
Softwares
CapCut / HitFilm (depending on how big the file is)
VapourSynth
Adobe Photoshop
Colouring Tips
Download PSDs
everything i've learned about colouring has been through downloading the PSD of other creators and analysing how they use certain Photoshop features to colour different stage lighting and create contrast. no PSD fits all, and there's no singular tutorial that works for every single video. this way you can learn how to create your own PSDs and adjust it for every different scene.
Join a Community for Photoshop Resources
to learn colouring and other photoshop techniques i really suggest you join a community of fellow giffers. there's plenty of photoshop resources that get reblogged and this is how you learn new tricks since the search function on tumblr is crap, and it barely shows up on google tbh.
some other resources that I learned from:
limyouna
PiXimperfect
sorry i dont have specific sources to link since I learned everything through trial and error.
2 notes
·
View notes
Text
Sims get to know me Tag
Thanks to @simlishpiadina for tagging me.
1. What’s your favourite sims death? - FEED THE COWPLANT

2. Alpha CC or Maxis Match? Maxis Mix with only MM hair - smth I can't stand at all is Alpha jeans textures lmao
3. Do you cheat when your sims gain weight? - Sims gain weight? Lol I don't really play much gameplay
4. Do you use move objects? In rare occasions that I build something, definitely
5. Favorite mod? - As a CC hoarder definitely More colums in CAS
6. First expansion/game/stuff pack you got? I have no idea tbh, maybe it was Vampires?
7. Do you pronounce “live mode” like aLIVE or LIVing? - Living for sure but I never really say it lol
8. Who’s your favorite sim that you’ve made? - Has to be the Shadow the Hedgehog inspired Sim I haven't made public yet ^^
9. Have you made a simself? Yes, she can be seen in some of my old CC posts (from when I was like...16-18 maybe?). Also working on a new one.
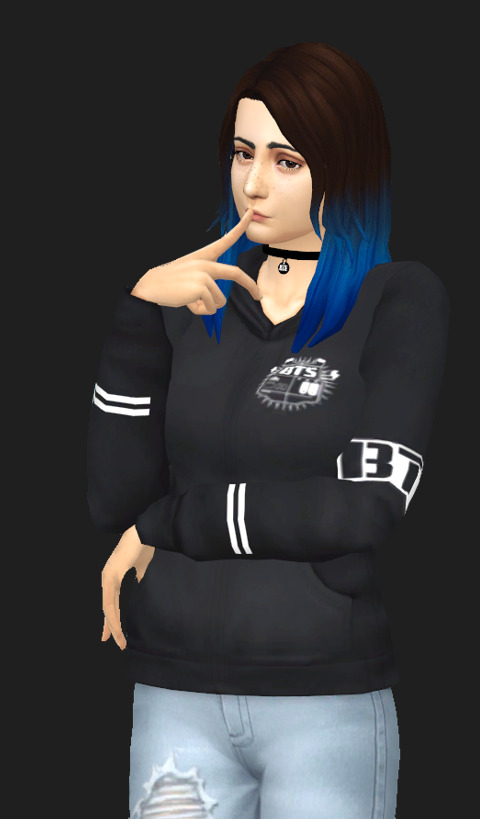
10. What sim traits do you give yourself? - As my Bio says Gloomy, Loner and Geek ^^
11. Which is your favorite EA hair color? - Red, like I have in real-life :)
12. Favorite EA hair? - Highschool Years braided ponytail
13. Favorite life stage? - As a Sim creator YA lol
14. Are you a builder or are you in it for the gameplay? - Neither, basically CAS only xd
15. Are you a CC creator? - Yes! I can't do models at all tho, Blender is such a pain
16. Do you have any simblr friends/a sim squad? - I recently joined @cozyacres Discord but not really
17. What’s your favorite game? - I can't decide on one, Fire Emblem is one of my favorites, especially Awakening or Fates, currently I enjoy Genshin Impact a lot (Xiao is best boi <3) and (sadly) I play a lot of League of Legends lmao
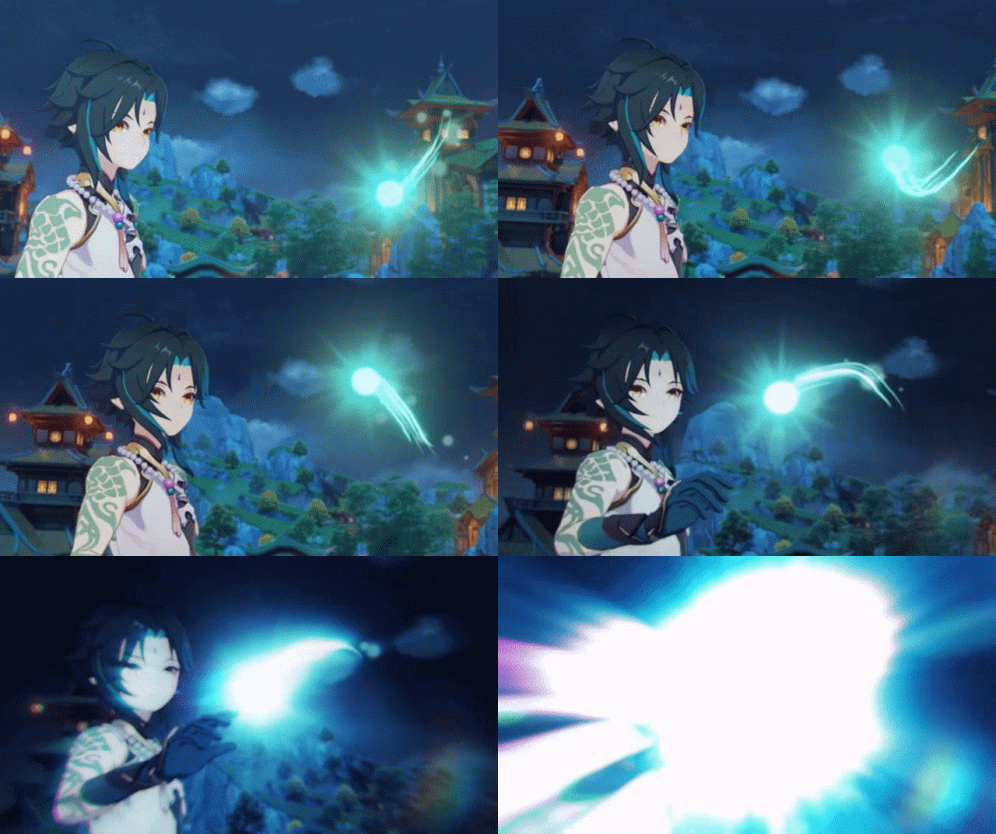
18. Do you have any sims merch? Nope
19. Do you have a YouTube for sims? - I would love to, but I currently have one for League of Legends modding: https://www.youtube.com/c/yoruqueenofnight
20. How has your “sim style” changed throughout your years of playing? - I think I went from full Alpha to full Maxis Match, then I switched to MM with Alpha hair and then to MM hair again. I still like Alpha hair and also clayified hair but I have so much CC that Alpha kills my PC kinda.
21. What’s your Origin ID? YoruQueenOfNight - I share my Sims on there too.
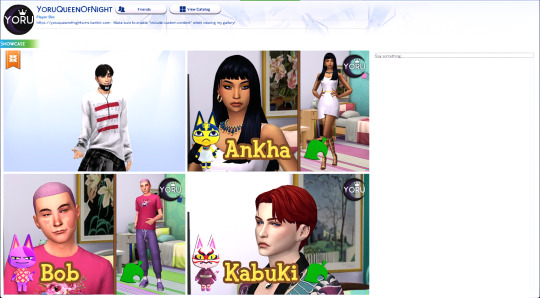
22. Who’s your favorite CC creator? - @trillyke @simandy @pralinesims @crypticsim @moonmoonsim for a bit of variety ^^
23. How long have you had a simblr? I started in 2017
24. How do you edit your pictures? - I usually like to get multiple shots of a Sim but I don't edit that much at all. I like to sometimes match Sims into a background. I also do some sort of collages I guess. But someone that helped me a lot is Piximperfect on Youtube, he has amazing Photoshop tutorials.
25. What expansion/game/stuff pack is your favorite so far? - I don't play too much but I love Pets
26. What expansion/game/stuff pack do you want next? - Maybe more Occults like fairies, horse could be cool too
I don't know who to nominate, so whoever sees this and wants to, go ahead :D
8 notes
·
View notes
Text
today iam hanging out with unmesh my best friend unmesh piximperfect
4 notes
·
View notes
Text
honestly love that Photoshop tutorial piximperfect guy and how he always shares stuff for free he's great
5 notes
·
View notes
Text
New video - Future Photoshop Tricks You Need to Know in Advance | Adobe Creative Cloud on @YouTube
Via Adobe Creative Cloud Step into the future of Photoshop with Photoshop educator and PiXimperfect founder Unmesh Dinda. Discover techniques that will shape the future of Photoshop and create edits that were impossible to think of, just a few years ago. Learn how to transform your workflow with features that cut your editing process from hours to seconds. Join us for an exclusive session where…
View On WordPress
0 notes
Text
The Power of Visuals: YouTube Photography Tutorial for Engaging Content
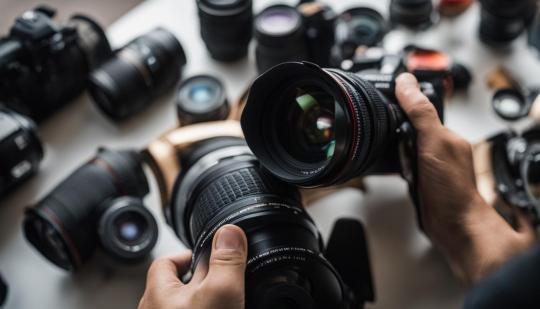
YouTube has become an invaluable resource for photographers looking to improve their skills and learn new techniques. In this section, I will explore the best YouTube channels that offer comprehensive photography tutorials, covering camera settings for YouTube videos and lighting techniques for photography tutorials. These tutorials are designed to help you master your camera skills and elevate your photography prowess. Whether you're a beginner or an experienced photographer, these tutorials provide valuable insights and practical tips to enhance your photography. From understanding camera settings for YouTube videos to mastering lighting techniques, these tutorials will empower you to create professional-quality images and captivating tutorial videos. Best YouTube Photography Tutorials When it comes to photography tutorials, YouTube serves as a goldmine of knowledge and inspiration. With countless channels dedicated to teaching the art of photography, it can be overwhelming to find the best ones. To help you navigate through the vast sea of content, I have curated a list of the top YouTube tutorial channels that are a must-watch for photography enthusiasts. 1. PHLEARN: With over 2.44 million subscribers, PHLEARN offers an extensive library of photography tutorials. From beginner-friendly content to advanced techniques, this channel covers a wide range of topics such as photo editing, retouching, and composition. The step-by-step approach of their tutorials makes it easy for viewers to follow along and implement the techniques in their own work. 2. PiXimperfect: With over 1.82 million subscribers, PiXimperfect is a go-to channel for learning advanced editing techniques. Unmesh Dinda, the host of the channel, breaks down complex editing processes into simple and easy-to-understand steps. Whether you want to learn how to create stunning composites or master retouching, PiXimperfect has got you covered. Top YouTube Photography Tutorial Channels Channel Subscribers PHLEARN 2.44 million PiXimperfect 1.82 million 3. The Photoshop Training Channel: As the name suggests, this channel focuses primarily on teaching Photoshop techniques for photographers. With over 508k subscribers, the channel covers a wide range of topics, including photo editing, retouching, and manipulation. Whether you are a beginner or an advanced user, you will find valuable tips and tricks to enhance your Photoshop skills. 4. Mango Street: Known for its visually stunning content, Mango Street provides photography tutorials that are both informative and aesthetically pleasing. With over 1.72 million subscribers, Rachel and Daniel, the hosts of the channel, share their expertise on various topics, including composition, lighting, and storytelling. Their engaging and cinematic style of videography makes learning a delightful experience. These YouTube tutorial channels offer a wealth of knowledge and inspiration for photographers of all levels. Whether you are looking to improve your editing skills, learn new techniques, or gain insights into the art of photography, these channels are a treasure trove of valuable content. Dive into their tutorials, practice your skills, and watch your photography soar to new heights. Learn Camera Settings for YouTube Videos When it comes to creating high-quality YouTube videos, having the right camera settings is essential. Whether you're shooting vlogs, tutorials, or other types of content, understanding how to optimize your camera settings can significantly impact the quality of your videos. In this section, I will explore the key camera settings for YouTube videos, including shooting in manual mode, DSLR photography tips, and techniques for achieving professional-looking videos. Shooting in Manual Mode for YouTube Tutorials Shooting in manual mode gives you full control over your camera settings, allowing you to customize the exposure, focus, and other important parameters. This level of control is crucial for achieving consistent and high-quality footage for your YouTube tutorials. By shooting in manual mode, you can adjust the aperture, shutter speed, and ISO to suit the lighting conditions and create the desired visual effects. Additionally, shooting in manual mode ensures that your videos have a consistent exposure level throughout, resulting in a more professional and polished look. DSLR Photography Tips for YouTube Videos If you're using a DSLR camera for your YouTube videos, there are several tips that can help you optimize the image quality. Firstly, make sure to choose the appropriate lens for your shooting style and subject matter. Wide-angle lenses are great for capturing landscapes or showcasing your surroundings, while telephoto lenses are ideal for portraits or detailed shots. Secondly, consider using a tripod to stabilize your camera and minimize any shaky footage. This is especially important when shooting tutorials that require steady and smooth camera movements. Lastly, don't forget to clean your camera sensor regularly to avoid dust spots or smudges that could affect the overall image quality. By implementing these camera settings and tips, you will be able to create visually appealing YouTube videos that captivate your audience and showcase your photography skills. Experiment with different settings, techniques, and camera gear to find the optimal configuration for your unique style and content. Remember, practice makes perfect, so don't be afraid to try new things and learn from your experiences. Camera Setting Description Aperture The aperture determines the depth of field, controlling how much of the image is in focus. A wider aperture (lower f-stop value) creates a shallow depth of field, blurring the background and emphasizing the subject. Shutter Speed The shutter speed controls the duration of the exposure, affecting how motion is captured in the video. Faster shutter speeds freeze the action, while slower shutter speeds create motion blur. ISO The ISO setting determines the sensitivity of the camera's image sensor to light. Lower ISO values result in less noise but require more light, while higher ISO values increase sensitivity but may introduce graininess to the footage. White Balance White balance adjusts the color temperature of the video to accurately represent the colors in the scene. It ensures that white objects appear white and that the overall color balance is correct. Exposure Compensation Exposure compensation allows you to adjust the overall exposure of the video, compensating for overly bright or dark scenes. It helps to avoid overexposure or underexposure and maintain optimal brightness. https://www.youtube.com/watch?v=ixRUpmmjmRo Lighting Techniques for Photography Tutorials Lighting is a fundamental aspect of photography that greatly impacts the outcome of tutorial videos. By understanding and implementing various lighting techniques, you can enhance the quality and visual appeal of your photography tutorials. In this section, we will explore different lighting methods that are commonly used in photography tutorials, including natural light, artificial lighting, and smartphone photography tips. Natural Light Natural light is one of the most accessible and versatile lighting sources for photography tutorials. It can create a soft and flattering illumination that beautifully highlights the subject. When shooting outdoors, utilize the golden hours, which are the hour after sunrise and the hour before sunset, for warm and golden tones. Avoid harsh midday sunlight, as it can create unflattering shadows. Experiment with different angles and positions in relation to the light source to achieve the desired effect. Artificial Lighting Artificial lighting is commonly used in indoor photography tutorials, where controlling the light becomes essential. Studio lights, such as strobes or continuous lights, provide consistent and customizable illumination. Use softboxes, umbrellas, or diffusers to soften the light and reduce harsh shadows. Additionally, consider using reflectors or bounce boards to redirect and manipulate light. Experiment with different lighting setups to achieve the desired mood and effect for your tutorials. Smartphone Photography Tips With the advancement of smartphone technology, capturing high-quality images and videos for tutorials has become more accessible than ever. When shooting with a smartphone, make use of the available light sources, such as natural light or indoor lighting. Avoid using the phone's built-in flash, as it can create harsh and unnatural lighting. Instead, try using third-party smartphone lighting accessories, such as clip-on LED lights or portable ring lights, to enhance the lighting in your tutorial videos. Experiment with different lighting techniques to find the most suitable and visually appealing approach for your smartphone photography tutorials. By incorporating these lighting techniques into your photography tutorials, you can create visually stunning and engaging content that effectively conveys your message and captures the attention of your audience. Composition Tips for YouTube Tutorials When creating tutorial videos for YouTube, composition is a key aspect that can greatly enhance the visual appeal and effectiveness of your content. Composition refers to how elements are arranged within the frame of your video, and it plays a crucial role in capturing the viewer's attention and conveying your message effectively. In this section, I will share some composition tips for YouTube tutorials that will help you create engaging and visually pleasing videos. 1. Rule of Thirds: The rule of thirds is a fundamental principle in photography and videography. It involves dividing the frame into nine equal sections using two horizontal and two vertical lines. By placing your subject or key elements along these lines or at the intersections, you can create a visually balanced and interesting composition. 2. Leading Lines: Leading lines are lines within your frame that guide the viewer's eye towards the subject or focal point of your video. These lines can be actual lines such as roads or paths, or they can be implied lines created by elements in the scene. Utilizing leading lines can add depth and visual interest to your videos. 3. Framing: Framing involves using objects or elements within the scene to frame your subject. This technique can draw attention to the subject and create a sense of context and depth. Experiment with natural frames such as archways, windows, or trees, or use objects within your environment to create interesting framing elements. Composition Techniques Technique Description Rule of Thirds Divide your frame into nine equal sections and place your subject along the lines or intersections for a balanced composition. Leading Lines Use lines within your frame to guide the viewer's eye towards the subject or focal point. Framing Employ objects or elements within the scene to frame your subject and add depth and context. By applying these composition techniques in your YouTube tutorials, you can create visually appealing and engaging videos that effectively convey your message. Remember to experiment and have fun with composition, as it can greatly enhance the overall quality of your tutorial content. https://www.youtube.com/watch?v=N-HyTRGtdSA Editing Software for YouTube Photography Tutorials When it comes to creating captivating and professional YouTube photography tutorials, having the right editing software can make all the difference. In this section, we will explore some of the top editing software options that will help you enhance your tutorial videos and showcase your photography skills. Adobe Lightroom Adobe Lightroom is a popular choice among photographers for its robust editing capabilities and user-friendly interface. With Lightroom, you can easily organize and edit your photos, apply presets, adjust exposure and white balance, and fine-tune colors. It also offers powerful features like non-destructive editing and batch processing, making it a valuable tool for editing multiple images efficiently. Photoshop Adobe Photoshop is a versatile editing software that provides photographers with endless possibilities for creating stunning imagery. With Photoshop, you can retouch photos, remove unwanted objects, and apply sophisticated adjustments and effects. It also offers advanced features like layers and masks, allowing for precise control over every aspect of your image. GIMP GIMP, which stands for GNU Image Manipulation Program, is a free and open-source editing software that provides users with a wide range of editing tools and features. While it may not have all the bells and whistles of commercial software, GIMP is a powerful alternative that can help you achieve professional-looking results. It offers tools for image retouching, color correction, and photo manipulation, making it a great option for photographers on a budget. Whether you choose Adobe Lightroom, Photoshop, or GIMP, having a reliable editing software is essential for creating polished and visually appealing YouTube photography tutorials. Each of these programs offers unique features and capabilities, so it's worth exploring and experimenting to find the one that best suits your needs and style. Feature Adobe Lightroom Photoshop GIMP Organize and manage photos ✔️ ✔️ ✔️ Non-destructive editing ✔️ ✔️ - Batch processing ✔️ ✔️ - Advanced retouching - ✔️ ✔️ Layers and masks - ✔️ ✔️ Free and open-source - - ✔️ Conclusion Throughout this article, I have discussed the importance of YouTube as a platform for photographers to enhance their skills and learn new techniques. Whether you are a beginner or an experienced photographer, there are valuable resources available on YouTube to help you improve your photography prowess. By following the advice and techniques presented in beginner photography tutorials, you can develop a solid foundation of photography techniques. These tutorials cover a range of topics, including camera settings, lighting techniques, composition tips, and editing software. Moreover, YouTube is home to a variety of photography tutorial channels that cater to different levels of expertise. Whether you are just starting out or looking to refine your techniques, these channels offer a wealth of knowledge and inspiration. So, if you're looking to expand your photography skills and techniques, I highly recommend exploring the photography tutorial channels on YouTube. With their guidance and your dedication, you can elevate your photography to new heights and create stunning images to share with the world. Happy shooting! FAQ Are these YouTube photography tutorials suitable for all levels of photographers? Yes, these tutorials cater to both beginners and experienced photographers, offering valuable resources for all skill levels. What topics do these YouTube photography tutorials cover? These tutorials cover a wide range of topics, including photo editing, composition, camera settings, lighting techniques, and more. Which YouTube channels are recommended for photography tutorials? Some recommended YouTube channels include PHLEARN, PiXimperfect, The Photoshop Training Channel, and Mango Street. Can I learn about camera settings for YouTube videos from these tutorials? Absolutely, these tutorials provide insights into shooting in manual mode, DSLR photography tips, and techniques for achieving professional-looking videos. How can I improve the lighting in my photography tutorials? The tutorials explore various lighting techniques, including natural light, artificial lighting, and smartphone photography tips. What composition tips are covered in the YouTube tutorials? The tutorials discuss composition techniques such as the rule of thirds, leading lines, and framing to help you create visually appealing tutorial videos. Which editing software is recommended for YouTube photography tutorials? Adobe Lightroom, Photoshop, and GIMP are among the recommended editing software programs covered in these tutorials. Read the full article
0 notes
Note
im so curious what coloring and lighting combination you used for that max set? I'm trying to gif the micropeter scene, and while it's *technically* fine, the black background looks so....glitchy? and its not nearly as strong in your max set and its kinda annoying me so I was wondering what you did
hi! my first step when coloring is always to use curves auto options, which i learned from this tutorial by piximperfect on youtube (the shortcut is towards the end, but it's a good watch anyway):
youtube
i don't have the psd for that set, but i believe it was curves doing the heavy lifting, then some hue/sat and selective color to make him a little less red.
i didn't really notice much glitchiness with the background, i think that's really just down to scene selection. something that could help with your problem is making a new layer and paint over the background with the background color, then change opacity and/or blending mode to make the glitchiness a little harder to see, or at least even it out a bit. i've done that before and it usually helps. if you're worried about it looking out of place you could even put a gaussian blur on the paint layer to make it extra soft, but if it's just the black stage background i don't think you'd need it? idk just something to keep in mind.
i hope this helps, can't wait to see your set! feel free to tag me if you want
1 note
·
View note
Text
Transforming Memories: Palette.fm's AI Colorization Tool Palette.fm's Innovative Solution In the age of nostalgia, Palette.fm stands as a pioneering force in reviving historical imagery with its advanced AI colorization tool. With a commitment to ease and accessibility, this tool allows users to effortlessly transform black and white photographs into vivid and lifelike depictions of the past. Unveiling the Power of Colorization This Ai editing image offers a seamless and user-friendly experience, enabling users to colorize their cherished memories within seconds. By eliminating the need for sign-ups, the platform ensures that the focus remains on the art of colorization rather than administrative hurdles. Simple Steps, Stunning Results Through a three-step process, Palette.fm reimagines history in vibrant hues. Users can choose from a variety of filters, allowing for a personalized touch. Adding to the creative journey, the tool permits text edits to ensure every detail is perfectly captured. Endorsed by Experts and Loved by Millions With an impressive endorsement from PiXimperfect, a Photoshop expert boasting four million YouTube subscribers, Palette.fm is celebrated as the "World’s best AI to color B&W photos." This recognition solidifies its position as a leader in the field of AI-driven colorization. A World of Possibilities: Pricing and Flexibility Palette.fm caters to a diverse audience with its flexible pricing options. The platform offers a free tier for those looking to explore its capabilities. For enthusiasts seeking more, subscriptions start at $72 per year, providing access to a wealth of HD colorizations. Additionally, Ai editing image one-time purchase options offer 10 HD colorizations for just $9. Transparency and Guidance Navigating the colorization journey is made easy through a comprehensive FAQ section. It addresses common queries about accuracy, payment methods, subscription benefits, and troubleshooting. Palette.fm values transparency, ensuring users have a seamless experience from start to finish. Embrace the Future: Colorize Your Memories with Palette.fm This Ai editing image colorization tool bridges the gap between the past and present, allowing us to relive history in all its colorful glory. With its intuitive process, expert endorsement, and flexible pricing, Palette.fm is not just a tool; it's an avenue for connecting with our heritage in a whole new light. Experience the magic today.
0 notes
Text
Transforming Portraits into Art: Exploring the Magic of Photoshop Extension
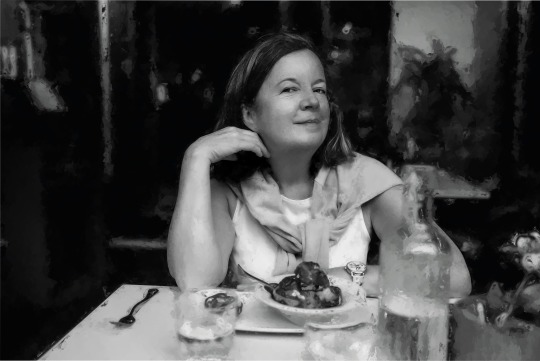
Alison Bath Engaged in a creative endeavor, I found myself experimenting with a novel extension in Photoshop that possesses the remarkable ability to elevate ordinary portraits into captivating works of art. This revelation occurred while I was engrossed in a tutorial by the Photoshop expert, Unmesh Dinda of PIXIMPERFECT, who recommended giving the filter a try. This exceptional program not…
View On WordPress
0 notes
Text
Mr piximperfect i love you a lot although i am not so sure about your hair
5 notes
·
View notes
Text
0 notes
Text
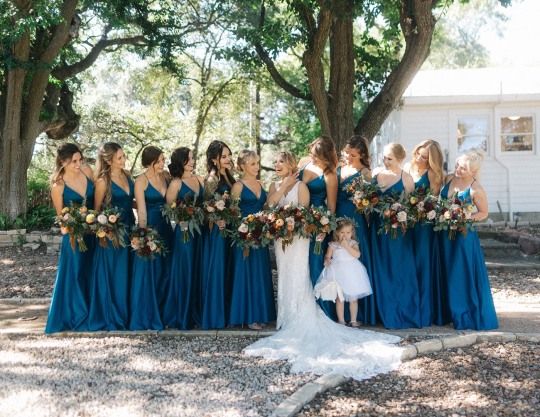
Wedding post production services for wedding photographers by @photodotedit_
Pricing started at $0.0.3
https://photodotedit.com/wedding-post-production-service/
#weddingphotoediting #lightroom #weddingphotography #imageediting #photoediting #phlearn #backgroundremoving #online #studio #photoshop #weddingshoot #photography #pics #usa #photographer #model #portrait #weddingpostproduction #colorgrading #skinretouching #retouching #picediting #editing #hollywood #piximperfect #tutvid #foryou #shakeelshahid #picsart #weddingphotoeditor
1 note
·
View note