#piecing together printer paper to get a big enough sheet of paper and doing this ten million times: 🥲😭
Explore tagged Tumblr posts
Text
why is so much of sewing just tracing and cutting and tracing again q_q i see why people get projectors and use adobe illustrator now
#drawing up a design that i can easily pattern from my sloper: 😊#actually having to make the pattern by tracing and cutting ad infinitum: 😰#piecing together printer paper to get a big enough sheet of paper and doing this ten million times: 🥲😭#not to mention the IRONING.... prewashing the fabric and having to iron 8 yards of fabric???? excuse me????#and then distorting it as i iron bc it has a slight stretch and i got so tired i stopped being careful 2 yards in#and the way that you're supposed to press every seam... excuse me... am i just supposed to have my iron heated and on standby at all times#AND THE STEAM??? i just got stay tape the other day and thought it'd be a neat alternative to stay stitching#BUT IT NEEDS STEAM TO ACTIVATE (which okay makes sense) BUT long story short i'm too afraid to use the steam function#on my iron because none of us are sure if water should go back into a tank that's been in disuse for 30+ years#so instead i get this water spray pen and delicately spray down the length of each piece of stay tape#before i cover it with a piece of gauze and iron it. and then i have to iron it extra so all the water actually evaporates#oh and the spray pen holds as much water as half a pen so i have to walk to the kitchen every 10 sprays to refill it#and i have to do this for every curved edge on my pattern pieces#i mean the alternative is just stay stitching but then i would have to calibrate my settings for a single layer of fabric instead of double#which means i have to switch my needle out more and i'm still new enough that sometimes i install a needles wrong despite going through#all the same exact motions that i usually would. i'm LITERALLY suffering out here. anyway can't wait to sew or whatever#oh and did i mention i went to a sewing meetup recently? yeah...#everyone there bought like $30-$100/yard fabric and i was there awkwardly knowing i only buy like $12/yard fabric#honestly though i have the opposite problem people usually joke about. i find it So hard to find fabric i actually like#it needs to be the right fiber + right color + right pattern/texture + right weight + i have to know exactly what i'm going to make with it
22 notes
·
View notes
Note
Can.... can I ask how... do learn bookbinding? .-. It’s like... a distant goal of mine but I am very 🤷🤷🤷🤷 on starting
The good news is that it’s extremely attainable!! So, the easiest entry level tier for bookbinding is stitching together individual signatures (the folded pieces of paper nested together to make sections of a book), and the easiest material is doing that with is just regular printer paper. That was what keyed me into this, my dad was printing little short documents for work and sewing them together so he could have a non-screen version of what he needed to reference. I usually try to work in the range of signatures that use 5-10 sheets of paper (which gives you 20-40 pages as a booklet), though it’s possible to go smaller, especially if you’re working with thicker paper. I haven’t tested the upper end, but that’s where I’m comfortable.
NOW. Before I get into printing, let me take a detour (printing is where things get, like, technologically complex, because it depends on what software and printer you have access to, but that doesn’t have to be connected to the mechanics of Making A Book
SeaLemon’s youtube channel was where I started out! A lot of her videos are about various ways to make smaller notebooks, though her videos on casebinding, kettle stitch, and making bookcloth are most relevant to what I’m doing now. but she also has a LOT of smaller-scale tutorials that are great for pulling together a little notebook of your own, or a sketchpad, things like that.
And the videos are really easy to follow. I don’t reference her anymore for the casebinding work, but I do someday want to go back in there and experiment with more of the stitches for pulling together cute little notebooks. My exposed-spine books and the ones that were covered with a single piece of fabric were done from her tutorials. I want to say that SeaLemon was my primary reference for making my text blocks, while this next channel is a really extensive look into the casebinding part of things.
I appreciate Das Bookbinding a lot, even though it was SUPER overwhelming when I was just starting out, and I wouldn’t have been able to follow anything. But even before I was able to follow along, these videos show a lot of like... the mechanics of making something so polished and complex, even if I’m not able to imitate all the steps myself. I used these videos as a reference for the set of books with the fabric spine + paper cover + fabric corners, for example. I haven’t done a deep dive into this channel, so there may be more accessible videos in there than the ones I dug up, but regardless, it’s an EXCELLENT resource.
And now... printing. This is where it’s hardest to give concrete advice, and I hate telling people they should go give money to huge corporations for their software, or pay huge amounts of money for fancy hardware, but I am also a coward who buckled and paid for word really early, and was fortunate enough to receive a color laser duplex printer as a gift a few years back, so I don’t personally have a good grasp on the most effective free/cheap options out there. So I can only speak to the expensive crap, but I know there are less expensive ways to do this too.
So! The two programs I have used are adobe acrobat and microsoft word. I originally was working out of google docs, where I printed to pdf, opened in acrobat, and printed as booklets. Adobe acrobat has a booklet option in the printing menu, where you can’t select your own signature size, but if you say ‘print as booklet’, and then print twenty pages at a time, you can generate your own ten-sheet signatures. The downside of doing this is that I was not making good use of the space, because the aspect ratios were off, and I had big margins I couldn’t control.
Once I realized that, and also realized that a lot of the files I wanted to print were larger than google docs wanted to handle, I bought a word license. Word also has a way to do booklets, where you can go to page layout, select booklet mode, and then select the number of pages you want in each signature (divide by four to get the number of sheets it will use). I print from word to pdf, which shuffles all my junk around for me to get it in order it needs to print, if that makes sense. It’s difficult to describe, but really not too difficult to do, especially if you have a short story or something to mess around with yourself, so you can print it off, fold the pages, and assemble it in order. Also, page numbers are your friend, even if they’re a pain to wrangle. I’ve had to match up dropped sheets without page numbers before, and I was FULL of regrets.
Now, I know that some people use inkjets, and some people do two-sided printing with one-sided printers, but i also know that other people have made use of other printers they have access to, or have taken books to places like staples or kinkos to use the printers there. I don’t know anything about how difficult or expensive that is, but it’s an option!
Now, one downside of this hobby is that it takes a NUMBER of small items to make it work, but they are typically small, and none of them have been that expensive. First, to assemble, I print off my sheets and fold them in half. And then I use a bone folder to really get those creases sharp. I mark off places to put holes and use an awl to punch them. I sew things up using either embroidery floss for short books (two strands, run over a block of beeswax) or waxed linen thread for long ones, using a curved needle. There are bookmaking ribbons you can use to give spines extra hold, but I haven’t used those. When it’s done, I glue my spine using a glue brush and sandwich my book somehow (I followed a sealemon tutorial to make a book press with two cutting boards, or I bury books under a stack of textbooks).
I have a stash of heavier paper and fabric that are suitable for covers and endpaper, and to convert cloth into bookcloth (another sealemon tutorial), I have iron-on adhesive sheets and tissue paper. Once my book spine is set, I may glue a piece of mull/muslin to it, and/or a piece of ribbon for a bookmark. I cut my covers and spine out of chipboard, using a craft knife, guide ruler, and cutting board, then everything is ready to assemble.
That sounds like a lot, and there are other optional items I didn’t include, but none of these things are that big, or that expensive. I think my cutting board was the most expensive item I purchased. And if you just want to start with booklets, you can absolutely get started with a regular straight needle and thread, and still accomplish plenty. It’s been interesting as a hobby, because I haven’t done many things where the tiers of increasing complexity were so clearly visible, if that makes sense? I took my time trying new techniques, and I’m consistently becoming happier and happier with my efforts, but even back at the beginning when I was aware I barely knew what I was doing, the first time I glued a text block into a case I had made was a WILD feeling, and I still feel like a hell of an amateur (and don’t know enough to gauge how accurate that feeling is asdgsfda), but the earliest steps of learning to bind a book are highly, highly attainable, and I absolutely recommend it.
475 notes
·
View notes
Text
Stressed Out ~ MYG [Request]
WORD COUNT:1.4K
PAIRING: Yoongi x Stressed!Reader
GENRE: Short fic, established-relationship, fluffy yoongi, stressed out reader who snaps at him
A/N: You’re totally going to kill me when you find out I wrote this while I was supposed to be on my break but sdfghjkl; I love you

The whole day yesterday everything that could have gone wrong...Went wrong. It felt as though the entire universe was out to get you or something. First, you were late to work because of the rain, then you spilt coffee on the floor, then the toner in the printer exploded all over you and to top it all off you ran into your boss chest first getting ink down his new suit, which you had to pay for. It seemed ridiculous in making you pay for his suit when he could quite clearly do it himself or pay someone else to clean it.
Heading home hadn't been a walk in the park either, you'd managed to run out of gas on the motorway before blowing a tired after pulling out of a garage. It was as if the world was giving you a big, "Fuck you Y/n," right in the face and it appeared as though it wasn't over yet. Staring down at the piece of paper your eyes read the same number over and over again trying to see if you had made some kind of mistake.
"Who the fuck spends $3K on a suit," You mumbled as you stared down at the invoice that had been given to you yesterday, it was the first time you'd opened it. The night before you'd gone home, gotten straight into bed and ignored the whole world.
It had to be some kind of joke he was making but no, the suit was really $3K. No one you knew spent that on something to wear not even the boys who were famous and went to award shows all of the time.
"Fuck," You groaned to yourself laying back down on the pillows as you stared up at the ceiling. A part of you wished that something great would happen but knowing your luck the ceiling would probably crack and fall on you. Deciding to sit up again you looked at the invoice, screaming out loud as you looked at it once again, luckily for you, the house was empty so you wouldn't have to justify having a day off or screaming the way you did to your husband. Not that Yoong would have minded, he wasn't bothered if you worked or not but you needed something to do in the day though looking back on it now you wish you didn't go yesterday.

Getting out of the car Yoongi smiled as he looked around the streets, it was sunny and warm. Not to warm to the point where he wanted to take off layers of his skin but just warm enough that it was nice out. Kicking off his shoes as he got in he was excited for a day of working from home, he was going to surprise you with dinner that night for when you came home from work. It seemed as though you'd had a bad day the day before and he hadn't been able to do anything to help. As he was about to walk into the living room he heard a loud scream of mental anguish from the bedroom.
"Babe?!" Panicked he began rushing up the stairs to see what was wrong, it could have been anything from seeing a spider to something happening on TV. He was too busy worrying about you he hadn't stopped to think about what you were doing home at this time of day. Panting as he reached the door he frowned as he saw you holding a sheet of paper in one hand and your head in the other.
Turning to look at the bedroom door you saw Yoongi standing there with a smile on his face, normally that would have been enough to brighten your day and wash away everything bad that had happened but apparently it wasn't working.
"Did you finish early?" He questioned as he got onto the bed behind you, putting his long legs on either side of your body and smiling even more. He appeared more smiley than usual and it was a little unsettling, he was only like this if he was hiding something about his music. But damn that smile you wanted to wipe it off his face, make him feel as bad as you did right then. How was it that even Yoongi could make you feel annoyed by standing there. Frustration was just bubbling up inside of you and all you wanted to do was be left alone.
"Baby? What's this?" He picked up the invoice and whistled as he saw the price of the suit, even his wedding suit didn't cost that much. When you said nothing Yoongi continued to talk and talk and talk trying to get you to say something, he could sense that something was bothering you and he wanted to get to the bottom of it.
"Your boss sending you on shopping trips for him?" He laughed loudly which normally would make your heart skip and you could smile brightly with him, his voice alone made you feel as though you could take on the while but today...Today was different. His laugh went through you like nails on a chalkboard and the longer he spoke the more you began to grow annoyed.
"You're being so quiet, that's not like-"
"Shut up! Please just shut up!" You called out to him as he stared back at you shocked, his face turning red as he felt embarrassed. It was the first time he'd ever heard you yell like that at something other than traffic or some idiot driving like a manic on the roads.
"Babe-" He tried to apologise but you shook your head at him, snatching the paper from his hand,
"Leave me alone," You mumbled getting up from the bed and heading for the staircase, Yoongi waited for a couple of minutes trying to do as you had wished but it was hard knowing that his wife was clearly upset about something. Causing her to lash out at those around her, he wasn't going to hold it against you.

As he sat there his mind wandered to what you were doing, it had been silent since you went downstairs. He was about to lay down when he heard you scream out in frustration and something clattering against the floor.
"Y/n?! What happened?!" He practically sprinted down the stairs to find you on the floor, back against the back door with your knees pressed tightly against your chest. Sobbing into your knees as you mumbled something to him that he didn’t understand,
"Come again?" Yoongi questioned about to walk into the room when he noticed the ice cream that was leaking down the floor, a spoon that had been the cause of the clattering.
"I can't do anything right, I'm always spilling things, dropping things and making a mess." You sobbed uncontrollably into your knees again, taking in large breaths as you tried not to hyperventilate yourself.
"Hey baby, shhh, shhh." Yoong stepped over the ice cream reminding himself to clean it when he'd calmed you down, all he did was sit beside you. Taking your hand in his own just to let you know that he was there. He'd seen this before and not just with you but with the boys when your mind and body had been so worn down you just broke down snapping at anything and everything around you. It would be one small insignificant thing like ice cream falling to the floor that could tip someone over the edge.
"Come on." He grunted as he stood up, picking you up carefully so he could go and get you into bed for the day.
"What are we doing, it's almost 11 am." You sniffled as he walked towards the staircase, he simply shook his head at you.
"It's one of those days. We will just lay in bed together, order food...Watch movies or TV...We'll do anything except what we're supposed to be doing." He told you as he began climbing the stairs, your head resting on his shoulder as he carefully made his way to the bedroom.
"I'm sorry I snapped at you," You mumbled as he laid you down in the bed, grabbing a t-shirt from the closet to give to you.
"It's fine. Get changed while I clean up and grab the menus...Find something for us to watch, anything you want-"
"Including Full House?!" You asked excitedly as you stared at him, sighing to himself he nodded. Despite seeing the show a total of almost 12 times he was willing to watch it again just for you.

Tagline: @lyoongx @mitzwinchester @rjsmochii @taestannie @sw33tnight @inner @sweeneyblue1 @jin-from-the-block @acciocriativity @mwitsmejk @taeechwitaa @justbangtanthingz

#Bts#bts x reader#bts x you#bts x y/n#bts imagine#bts imagines#yoongi#min yoongi#yoongi x reader#yoongi imagine#yoongi imagines#min yoongi x reader#min yoongi imagine#min yoongi imagines#suga#suga x reader#suga imagine#suga imagines#agust d
165 notes
·
View notes
Text
Make Addy’s House With Me!!
So.. I made Addy a house. More like a room, but same difference. While this house isn’t completely modeled on Addy’s main house in her books (the house owned and managed by the Golden’s), as I wanted to use this as a photography set some of my other dolls (Kirsten, Kit), it still models after what a house could of looked like.
And because I like to talk, I will give you a not so concise tutorial on how I made this set. This project took about ten days. Sorry for no “keep reading,” I’m on mobile.

You’ll Need:
Thick Cardboard (I used three big boxes that were used to ship dolls)
A cereal box (or a similar weight of card board)
Card stock. I used an entire stack in the printing of all the different wood pieces. Printer paper tends to wrinkle and tear, it’s not ideal for making a photo set that you’ll eventually be putting doll furniture on.
Acrylic paint. I used two dark browns and a reddish brown.
Modge Podge. I used a matte all purpose modge podge and then a glossy paper modge podge. I definitely recommend using matte all purpose, it was much easier to work with and well.. not annoyingly shiny. I ended up using two full bottles, so you will need a lot.
Tacky glue. Make sure it dries CLEAR.
Two clear sheet protectors.
Duck tape. Or weird, off brand washi tape that your weird slavic grandma gave you.
Yarn.
A good pair of scissors. Or a craft knife if you’re fancy.
A sharp pencil to poke holes in things.
A color printer (or you can go to the store and buy paper that looks like wood, but that can get expensive)
Free stock photos and/or digital download scrap book papers. I got the floor of my set from as a digital download from an Etsy seller, and everything else was a free stock photo.
Paint brushes. You’ll need a large one for modge podge, and a couple smaller ones for the paint. Make sure you don’t like the large paint brush because it will get ruined. Even if you wash it.
A ruler.
A dark permanent marker
Something sharp to poke a hole into the tacky glue lid. And keep poking a hole in it because it WILL glue itself shut.
First off, you need the walls and floor, or else you will have no house. Unless you have really large boxes and are able to cut an entire wall from one card board piece, you will need to duck tape a couple pieces of cardboard together in order to make a wall. You’ll need two side walls, a floor and a back wall. I didn’t take measurements of my walls and floor because I was generally just trying to work with what cardboard I had.
Double check and make sure your walls are tall enough for your AG, preferably a couple inches higher. If you’re planning to put specific furniture into your set, make sure it fits in comfortably!! I checked the floor space with an AG bed I had on hand.
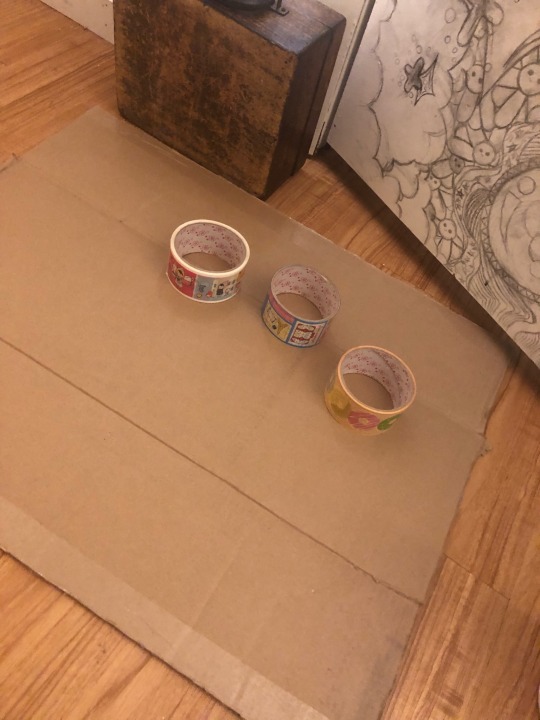
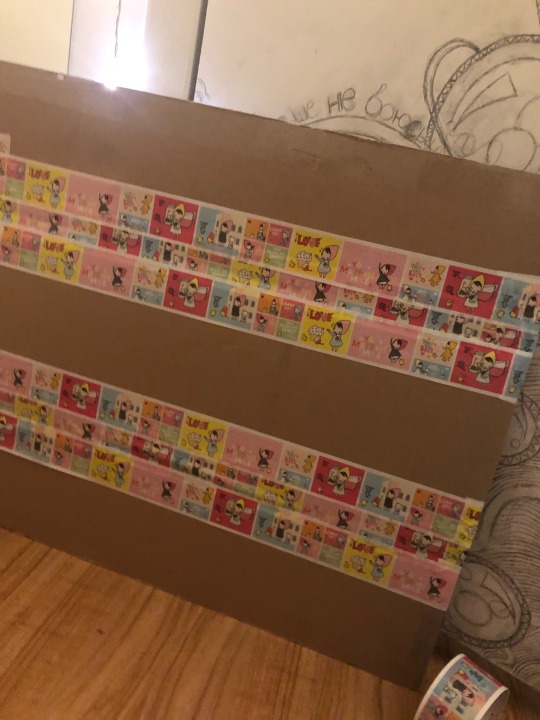
Make sure the walls are sturdy. I promise that you’re wasting less ducktape by wrapping it around a couple times, then you would be if you needed to fix your set everytime you wanted to use it. Make sure you can move it, and walk past it without it coming undone and dying.
One of my favorite things about my set is that I made it so it can fold in on itself. I do not have a lot of space for sets, so the fact that I can fold it up when I’m done is great (not to mention means that I can have more than one set). Now that you have your walls, it’s time to poke some holes with your sharp pencil.
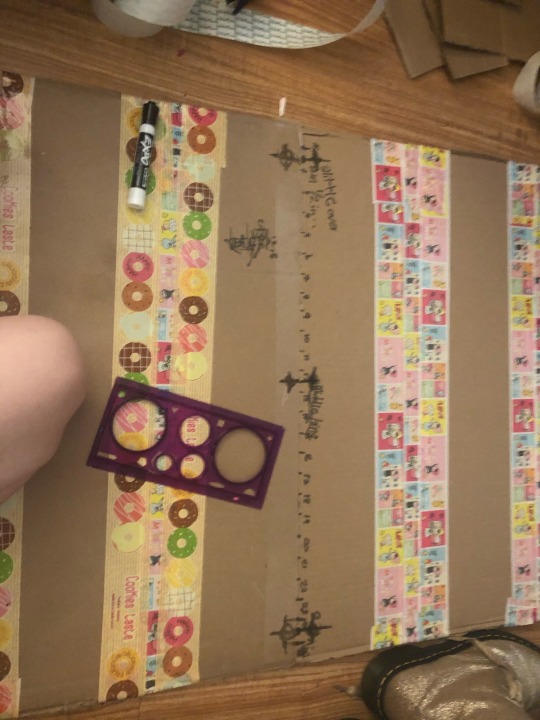
This is me attaching the floor and the back wall. I marked out how many inches across the two pieces of cardboard were, and then from that I decided where to poke my holes. You can eyeball this, but that makes me anxious. Don’t poke your holes to close to the edge, or else the cardboard might rip (not fun). You’ll want to do the same with your two side walls, although you will be attaching the side walls to the back wall, not the floor.
After you poke all your holes, you’ll want to string the walls together with yarn or twine. Make sure it’s tight enough that the walls stand on their own without flopping, but loose enough so that it doesn’t tear the cardboard, and you can fold it up with ease. I left a generous amount of string left with each “hinge” in case I ever need to tinker with it, and I just tied each “hinge” with a double knotted bow.
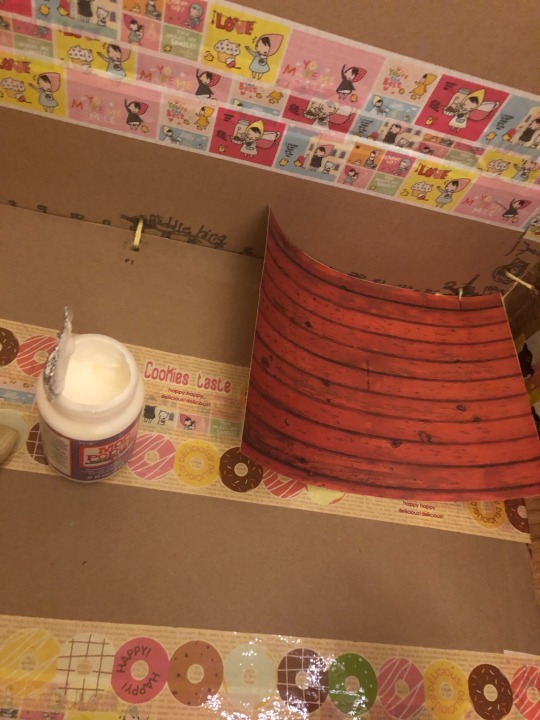
Thus began my long relationship with modge podge. You’ll need to modge podge the wallpaper and flooring to the card board, which is very time consuming and boring, so make sure you have something to watch. Be sure what you’re using is of a heavier weight than printer paper, or it will wrinkle. And tear. And then you will cry. Don’t be overly concerned with white spots, or small places where the cardboard shows, because you can go over those later with paint.
**BE SURE YOUR PATTERNS LINE UP OR YOU WILL CRY**

Wow!! The modge podge is done!! That only took a week!! As you can see, I added some texture and touched things up with paint. (The popsicle sticks are not supposed to be there, long story)
Now for my other favorite part, the windows.

I wanted to be able to change the scene in my windows, so I used clear sheet protectors!! I cut it to be roughly 9in x 9in. Make sure you don’t accidentally glue the sheet protectors shut. That wouldn’t be fun. I made the window frame out of singular wood planks from the photo I used for the floor, and I glued each one to thick cardboard.
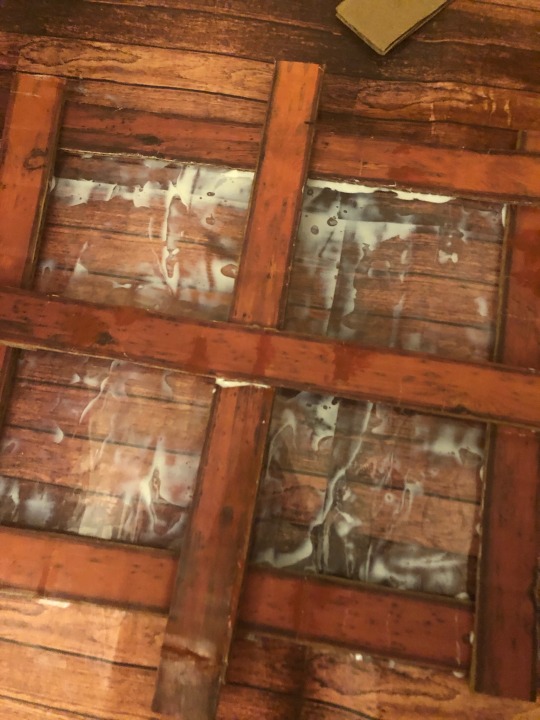
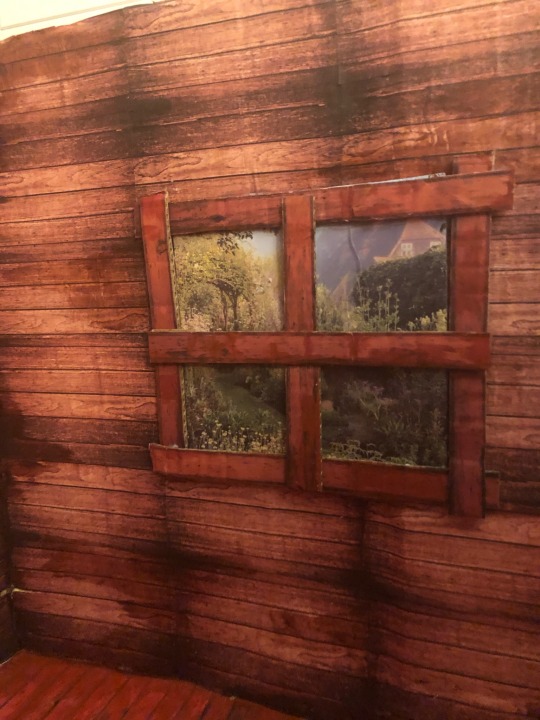
You’ll want to tacky glue the window frame together, and then to the wall. BE SURE NOT TO GLUE THE WINDOW SHUT WHILE DOING THIS!!!
For the background, I just found a scene on Google and glued to to a cereal box weight cardboard, before sliding it into the sheet protector.
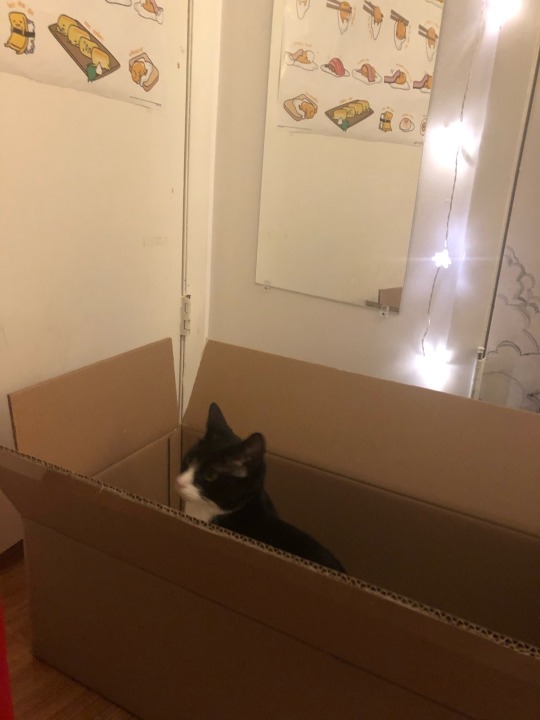
That should lead you to having a really cool house for your dolls!! I can’t wait to fill this one with furniture. For reading (or scrolling past this long post) have a picture of my cat interfering:
#long post#american girl doll#ag#ag dolls#diy#dollblr#tutorial#dollhouse#addy Walker#pleasant company#dolls
58 notes
·
View notes
Text
Still Into You
genre: songfic, fluff, smut
pairing: graffiti artist!changbin x afab!reader (gender-neutral language)
word count: 2k
warnings: drug use (cannabis,) trespassing, oral sex (f,) car sex, little dialogue, changbin and reader run from the cops lol
a/n: i was listening to still into you by paramore and this just kinda. came into existence. it’s also very song focused so if you’ve never listened to 2000s alt rock... i’m sorry lmao. the sugarmill in the story is also a real place that my friends and i used to visit and smoke take pictures at, although the cops never found us there haha. anyways enjoy folks.

Your nails had been tapping on the windowsill enough to wear them down to nubs by the time Changbin pulled up in front of your house. When his beat up Subaru pulled up next to the curb, you just about jumped out of your skin from excitement. Today was your fourth anniversary, as well as Valentine’s Day, and the adrenaline rushing through your blood was a sign that you were more than looking forward to whatever fun plans he had up his sleeve.
Compared to most couples on Valentine’s day, your outfit was pretty plain and not at all glamorous. Practical boots, jeans, an old band hoodie and Changbin’s dark green parka were your clothes of choice, but you knew that your boyfriend wasn’t going to take you to some fancy restaurant. No, you two were going adventuring.
As soon as you hop in the passenger seat of the car, shoving a couple of receipts into the foot well, Changbin reaches into his hoodie pocket and gives you a card. It’s crude, made of a folded sheet of printer paper and hastily scribbled on in pen but it’s very fitting for him.
“You better enjoy the card,” he says with a smirk, “because it came to me in a dream. This is pure, undiluted Changbin, packaged for your enjoyment and convenience.”
Giggling, you open the card. Inside is a barely legible “i love you so much y/n” surrounded by hearts, and in the corner is a drawing of a cow dressed in a lab coat and holding a beaker labeled “Moorie Curie.” It’s perfect, but what else did you expect from him?
“Happy anniversary, my love.” When you look up at Changbin, he has the widest smile on his face, cheeks dotted with flecks of paint and eyes crinkled up into little crescents. He’s dressed similarly to you, hair sitting in a pile on top of his head, clearly not having been paid attention to before leaving the house. It doesn’t matter, though, since the both of you will be wearing hoods over your heads anyways. You lean over the center console to give him a quick kiss, although it takes a couple of tries to get his lips since you’re both smiling so hard.
Changbin kicks his old car into gear as he sets off towards his destination. He’s explaining where you’re going, but you can barely hear him over the car speakers blasting Simple Plan and Green Day.
“So yeah, it’s this sugarmill that caught on fire in, like, 1910, and they never renovated it. There’s a bunch of cool abandoned shit around there, too. I think there’s, like, three fucked up couches.”
As you listen to him talk, you stick your fingers through the gap at the top of the side window. It’s permanently cracked open like that, and you have vivid memories of trying to throw cigarette butts through the gap when the two of you were bored.
After a while of listening to pop punk and playing with Changbin’s fingers over the gear shift, you arrive at your destination. Several charred brick buildings sit in the middle of a field, dead trees framing an open area in the center where someone has set up some logs and rocks to form a makeshift circle. Your boyfriend’s eyes scan the landscape, looking for his next canvas. Eventually, he tugs your arm and leads you towards one of the buildings, smiling back at you. “C’mon, let’s go explore this place.”
The two of you wander for a while, over rickety walkways and up staircases, taking pictures with your Polaroid and holding hands the whole time. Eventually, Changbin finds a stretch of wall big enough to start his work. Setting his duffel bag on the ground, he beckons you over and crouches down, inviting you to hop onto his back.
He pulls out a can of white spray paint, shaking it and popping the cap with his thumb. As he starts to paint, making large, sweeping motions with his arms, you really wished he had worn something sleeveless, however impractical. After lighting a slightly crushed joint you’d fished out of your pocket, you nestled your nose into his shoulder, holding the joint up to Changbin’s lips. He takes a few pulls as he works, the previously bland wall turning into a beautiful blend of blues, purples, and whites. It’s always fascinating to see how he works, seemingly not thinking before laying down a line of paint, yet each stroke seems to perfectly fit in with the others.
As he’s switching colors, Changbin lets you off his back, settling his hands on your sides. He stares at you for a bit, trying to study every bit of your face that isn’t covered by the oversized hood of his jacket. After a while, he smiles, pulling you close and kissing your forehead. Changbin always called you his muse, but you never expected him to take it as literally as he did, often staring at you or asking unrelated questions when he was stuck with a piece. He sways gently back and forth, pressing little kisses to your head, as Good Charlotte emanates from the tiny phone speaker in his back pocket. Occasionally, he’ll pull back just a tiny bit to really study your face, kissing you softly and muttering something along the lines of “i really can’t believe how fucking incredible you are” or “i love you so much it’s unreal.”
It’s not until a few more songs have ended that he pulls away, inviting you back onto his back as you light another joint. The piece is almost done, the tag “SPEARB” painted in blobby letters, shining artificially. All he has left is the outline, but his work is cut short when you hear the faint sound of sirens approaching and the light creeping in from the broken windows flashes a faint red and blue.
What happens next is like clockwork. You hop off of Changbin’s back, putting out the joint on the wall and throwing it into his duffel bag along with the other cans of paint he’s left out. What you’re supposed to do next is grab the bag and run, but Changbin is trying his best to finish a really specific detail and the more time he has that can in his hand, the less time you guys have to get the fuck out. After what seems like an eternity of whisper-yelling and (gently) stomping your foot at him, he caps the can and throws it into the bag. Finally, the two of you are off. As he’s picking up the bag, however, you notice what he was taking so long to finish. In tiny lettering, in the bottom corner of the piece, 4 words. “fuck cops” on one line, and “for y/n” on another.
As the two of you clamber over wooden planks and piping, pulling your hoods over your heads and your masks over your faces to hide your identities, Changbin grabs your hand and squeezes. He lets go almost as quickly as he grabbed it but the sentiment is still there; i’m here, i’m gonna keep us safe. It’s a welcome sentiment when shouts of “police,” and “show yourselves” echo through the abandoned hall.
Fifteen minutes of running and one chain link fence climb later, you’re back at the car, cops nowhere in sight. You’re panting heavily as you throw off the parka and throw it into the backseat, and Changbin doesn’t look any better as he’s gulping water and fanning his face. Right as you’re about to climb in, he grabs your arm and spins you so you’re pressed between him and the car, holding your cheeks in his hands and grinning at you.
“God. Fuck. Wow. You’re unreal. I love you so much.”
You’re unable to do anything but nod. The two of you are still breathless and in that moment you realize that’s what your love was like. In the four years of you dating, your love never went stale, you never settled into a routine. You were always doing new things, like going on spur of the moment road trips or fucking around at playgrounds in the early hours of the morning. You never thought about the future, just did your best to enjoy your time in the present and bask in the glow of each other’s affection. You expected that after such a long time together you’d at least feel a little duller, but everything still feels as fresh and new as when you were teenagers and sneaking out to make out on park benches when no one was looking.
As you’re lost in thought, Changbin pulls you impossibly closer and presses his lips to yours, hard. Music is still playing from his phone as the kiss becomes more heated, and you make sure to add 1985 by Bowling for Soup to your “running from the cops” playlist later. Almost every memory you have with Changbin is attached to a song, and this one is no exception.
Changbin pulls away to wrench open the back seat door, guiding you to sit and kneeling on the dirty floor. He heaves the duffel bag on the seat next to you and you dig through it, searching for the joint you threw into it earlier. Once you’ve gotten to My Own Worst Enemy, you’ve lit it and Changbin has gotten your jeans halfway down your legs and your thighs over his shoulders.
Your boyfriend wastes no time in burying his face in your heat, licking hot stripes up and down and moaning loudly into your core. He pulls away to rest his head on your thigh and take a few puffs of the joint, and in that moment you remember your Polaroid exists and manage to snap a picture of him blowing out smoke, with your hand in his hair and his face squished between your legs.
Changbin pays it no mind and gets straight back to work, sucking on your clit and easing his tongue into your hole. Your grip on his hair tightens and you arch into his mouth, fucking yourself back on his tongue. Picking up on this, he hooks his arms under your thighs and pulls your towards him, close enough that you’re afraid he’s going to suffocate himself trying to pleasure you.
It’s hot and sticky and perfect, and the atmosphere combined with the weed and the fact that Seo fucking Changbin is eating you out is too much for you and you cum all over his tongue, which eagerly laps up your release, taking long, languid strokes to make sure he gets every drop. As you come down, Changbin is stroking your thighs and sucking hickeys into the soft flesh, and you register that Misery Business needs to be added to your “dirty car sex” playlist.
After basking in the yellow glow of the car’s overhead light and the thrilling afterglow of just having done something you shouldn’t have for a while, lazily finishing off the rest of your joint, the two of you get your things in order and begin the journey to Changbin’s apartment, speeding down the highway with the windows cracked the whole way. He carries you into the building like he always does, setting you down gently on the couch before heading off to the kitchen so you can make some blueberry muffins together. You do, and they’re terrible, so you heat up leftovers instead and watch reruns of old James Bond movies, cuddling on the couch. The night ends with Chasing Cars and you laying on Changbin’s chest, naked and sweaty and anticipating lots of aches in the morning, whispering tiny i love yous into each others’ skin and it’s perfect. But everything is always perfect with him. What else could you possibly expect?

please let me know if you guys enjoyed this!! feel free to send an ask, i always love receiving them🤌🏻🤌🏻
#stray kids imagines#changbin imagines#changbin x reader#stray kids fluff#stray kids smut#changbin fluff#changbin smut#stray kids x reader#skz imagines#skz fluff#skz smut#skz#stray kids#stray kids fanfic#skz x reader#changbin#can u guys tell i miss hanging out with my friends 😔
58 notes
·
View notes
Note
That Allister cosplay is outstanding!! How did you make the mask and the gym symbol+endorsements? I'm planning on doing an Allister cosplay in the future myself
Thank you so much, and happy to answer! I took lots of pictures through the process so I’ll answer this in two parts.
“How did you make the gym symbol/ endorsements?”
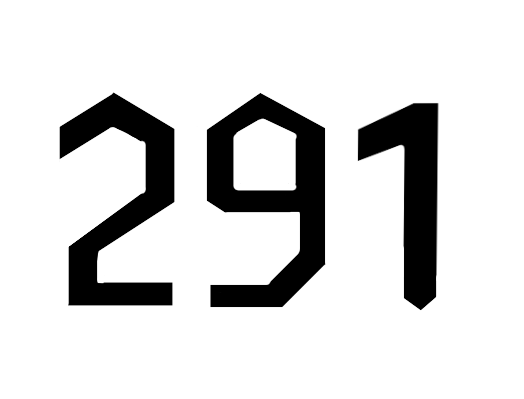
So the first thing I did is take a TON of screenshots I have almost 300 screenshots of reference images of allister and the gym league trainers and the pokejobs logos and so on to get good references for all the logos I needed.Once I was done taking all the screenshots I spent hours tracing them to the best of my ability to create these images: (Not all of these were the final versions which were modified right before printing, apologies)Gym Logo - QUAY/ Gym Logo

XXA - Sponsor (This is the logo for MC Insurance, Allisters Sponsor)

291 - Number
ASTSA - Name (This is the new pokemon language for Onion, Allister’s japanese name)
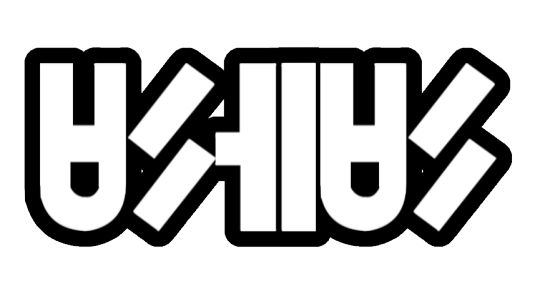
The square with the diamond - This I nicknamed the “NIKE” cause its the logo for the spotswear company in game

Galar league logo - Galar League logo (this is the logo thats the red and blue pokeball with white marks, and “galar league written underneath it)

And then I put together this ref sheet to make sure the logos looked good together color wise, and some of the colors were still altered later but it all looked pretty good

And then once the logos were all set, I printed them onto heat transfer vinyl and let me explain why I did that specifically. The fabric I used was polyester, which is the kind of fabric that sports jerseys are made of. I did that because the gym’s uniforms are based on soccer jersey’s so it felt fitting!IT WAS A HUGE PAIN I DONT RECOMMEND ITbut now because of the fact that it was polyester paint wouldnt’ work on that fabric because of how stretchy it is and the fact it doesn’t absorb moisture easily. So we printed it onto heat transfer vinyl with my cheap ink printer and then I ironed them onto my clothes! I made sure they were placed correctly by first taping them to my clothes and making a note of the location before ironing it, and then once I was happy with a placement I’d carefully iron it on. This vinyl seems kinda cheap and like the ink might come off with too much water so watch out if you choose to use it. There are also printable iron on paper for other types of fabric as well and are cheaper iirc!
Same goes for the dots, thos were all cut using a CNC/ off brand cricut (just a bunch of circles all at once) and I placed them by hand using painters tape and trimmed as needed to make the designs:

Hopefully that was helpful!
“How did you make the mask?”
So this ones a little more complicated to answer because its not complicated but its not something everyone can do.
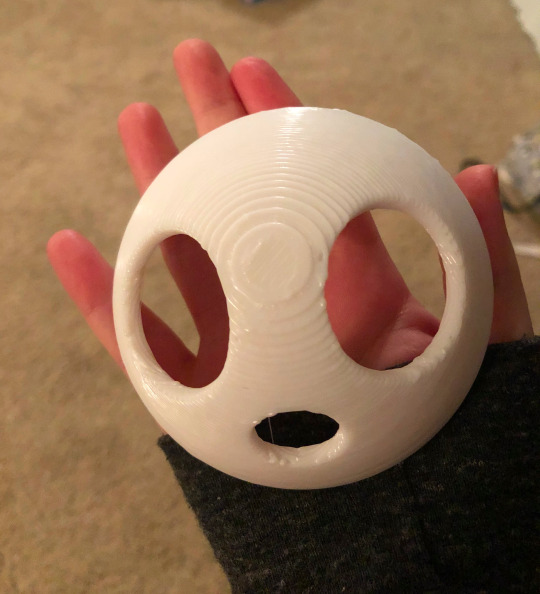
So we started on this one before the game came out, and before I’d gotten to Allisters battle in the game but we had enough reference material to figure out the general look of Allister’s mask, so we made a 3D model of it that we planned to 3D print (my bf has a 3D printer and a CNC and helped me a TON for this project) and did a test print of a tiny mask to start to make sure we were happy with the 3D model (here is the tiny mask in my tiny hand, we affectionally nicknamed it “mini mask”)
Now after we had the 3D model we had another issue of how big does it need to be? I have a round head on my own so I didn’t need to modify the shape of the mask thankfully (one time my fat head came in handy!) But we needed to figure out how big to make the mask to make sure it “fit” correctly.
So we tried cutting out a circle with paper in a few sizes until we thought we found a good size for my face (which for me was a little over 7 inches)
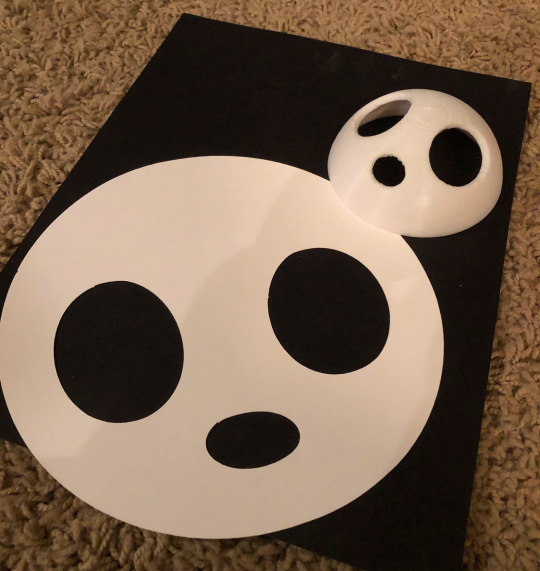
went and bought a styrofoam dome from the craft store in that size to make an EVA foam dome and then checked if that fit my face (later this worked fantastic as a way to transport the mask as a protective shell around it) I don’t have a picture of this EVA foam dome but all it was used for was putting it on my face and making sure it went over my chin and such. Once we had that we were ready to start printing the final mask.
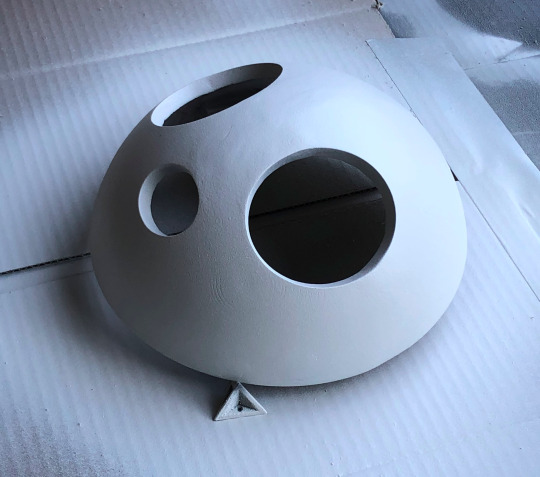
Once the 3D model was scaled for the final mask, it was too big for my bf’s printer to print all in one go so we split it into 4 pieces. Each piece took about 9 hours to print, and a few of the prints failed and had to be redone, so after a few days of printing it looked something like this:

for those who don’t know much about 3D printing all those beams are the supports that lets the printer print raised surfaces like that and have to all be removed. So after about 2 hours of pulling plastic with pliers it looked more like this:

so we left small gaps in the edges of the mask so that we could put metal pins between each piece to help hold it together so we cut our metal pins and assembled the mask and it was starting to come together!
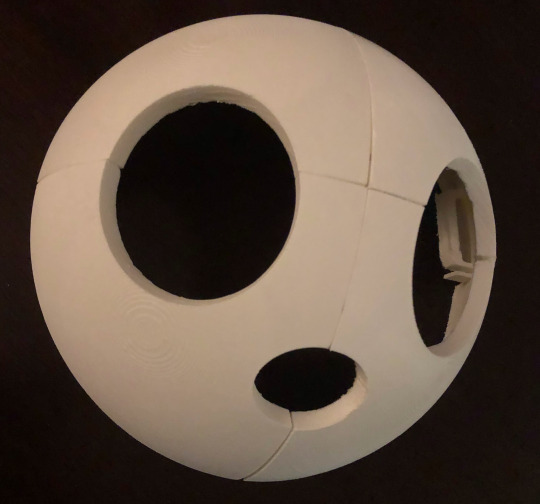
So from here we melted some plasitc onto the seams (plastic welding!) with a wood burner and - wow that looks gross
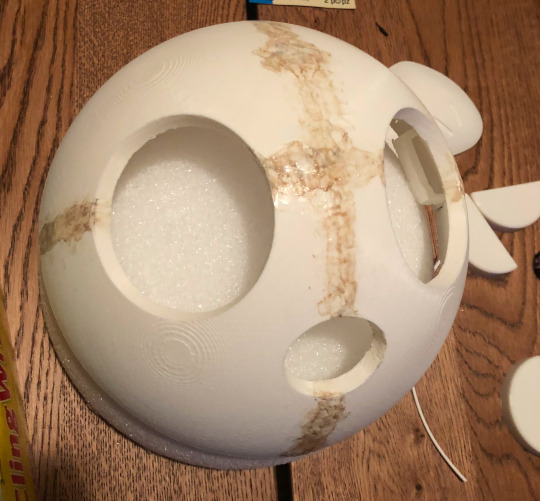
but trust me its better than gaps in the mask. so after a bit of sanding here we entered the rounds of priming it with spraypaint primer and sanding it for like an hour and doing that again, occasionally using bondo putty to try and even out those seams and those rounds tended to look like allister just murdered a village:
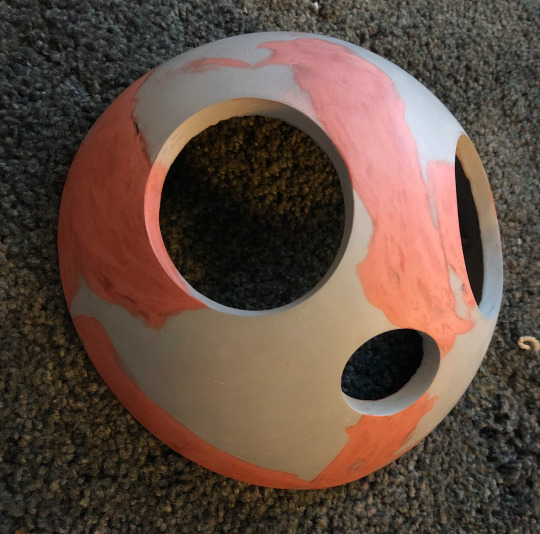
but you can see compared to the previous image that the mask is a lot smoother! This was the final round of sanding and you can tell that most of the layer lines from the printer have been sanded down! You can almost not see the seams anymore! (though now they’re also very red but they’re very smooth in comparison to the beginning trust me…I sat there sanding for many hours for this)
But after this all that needed to be done with a final priming in grey, and then painted it gray!
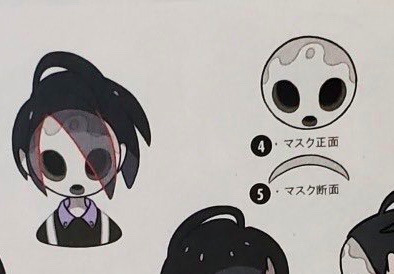
While the paint was drying, we prepared some masking in the design of allisters mask which if you don’t know what the full mask looks like I wanna reference this from the collectors guidebook (which I just now got my hands on today but saw these on twitter)
So we cut out a sticker sheet in that design and placed it down with some painters tape to keep that part of the mask gray and then it was painted white, and that was the painting done!
For the black in the eyes, I got a scrap of black fabric for cheap at joann’s that I picked up and pulled and it was a very soft polyester/spandex material that you’d use for pantyhose so i’m sure you could also cut up some of those for a similar effect. But when stretched you can see out of them.
So we made small rings the same shape as the inside of the mask behind the eyes, glued the fabric using super glue to that ring (and the mouth as well) and viola:
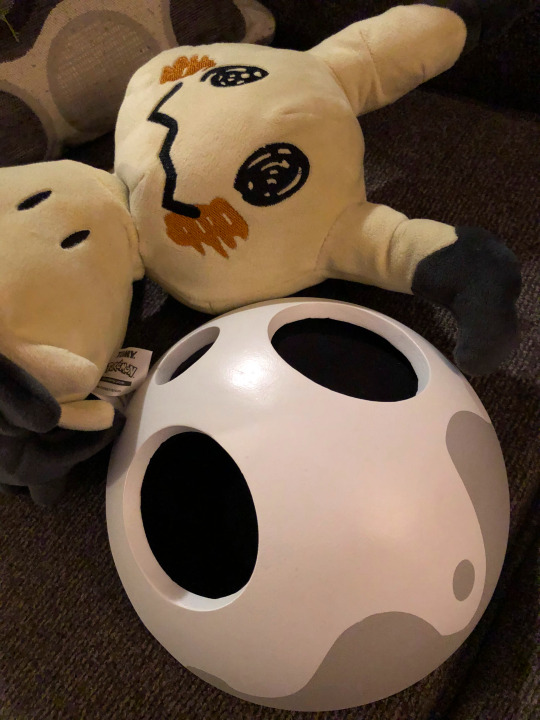
and then the final step was to get that mask on my face, and basically we had some rings on the left and right sides of the inside of the mask that I attatched some elastic too, and then needed to glue a third strap over the top of my head. and sewed it all in place and put some craft foam along the forehead and chin inside the mask for some cushioning and it was done!
I really hope that was helpful and I tried to make sure I took lots of photos along the way so I hope they were helpful. If you have other questions feel free to ask! Sorry for the novel but just wanted to be as detailed as I could be!
Thank you for your nice words and best of luck!! Allister is a detailed boy but he’s very fun!
#my cosplay#allister cosplay#allister#gym leader allister#cosplay help#cosplay reference#allister reference#galar#swsh cosplay#cosplay description#ask#answered#long post#if theres other tags I should add let me know#anon
101 notes
·
View notes
Note
Do you have a father's day AU written? If not that's fine but if you do I would love to read it
I do now! :) Hope you enjoy!
Father’s Day
[Read on AO3]
Rated: General
Summary:
Philip and Eliza plan the perfect Father’s Day: breakfast in bed, a homemade card, and the obligatory tie. Despite a few bumps along the way, things turn out in the end. A fluffy modern hamliza au.
“No!” Pip’s shout sliced through the sleepy Sunday morning.
Alexander froze in the entry to the kitchen, palm of his heel resting on his eye where he’d been rubbing away the last of the sleep crust. His son ran over to him and started insistently pushing on his knees. He looked over at Eliza, who was squatting by the cabinet where they kept their cookware, her hand braced against her rounded belly.
“No yelling, Pip. You know better,” Eliza scolded.
Pip pouted up at him. “Back to bed.”
“What?”
“We were trying to make you breakfast in bed.” Eliza heaved herself up with the aid of the counter. “You got up too soon.”
He smiled. “Oh. Sorry.”
“Well, it’s not much of a surprise now, but happy father’s day.”
“Thanks.”
“Bed.” Pip ordered again.
“I think I’d rather eat out here with you and Mom, anyway,” he said, lifting Pip up and carrying him towards the table. Pip’s hair was adorably bed mussed, and he placed a kiss to the messy mop before settling him into his booster seat. “What are we having?”
Eliza popped open the fridge and replaced a carton of eggs. “Scrambled eggs and sausage. Want some coffee?”
“Yes, please.”
He sifted through the pile of mail on the table, intending to clear it for their meal. A powder blue envelope peeked out from under the coupon mailer from the local grocery store. Picking it up for a closer look, he felt his stomach drop. Stamped in red over the addressee were the words, “No forwarding address. Return to sender.”
“What’s that?” Eliza placed a steaming mug down on the table and touched a hand to his shoulder blade.
He tilted the card so she could see it. “I guess my dad moved again.”
“Oh, honey.” Her arms wrapped around his waist, her pregnant belly hard and firm against his back, and she hooked her chin on his shoulder. “I’m sorry.”
He shook his head. “Me too.”
She pressed a kiss to his cheek before pulling away to finish breakfast.
Using his thumb to tear open the back of the envelope, he pulled out the card decorated with a row boat reminiscent of the one his father had used to take him fishing when he was six. Inside, he’d scrawled a long, heartfelt message about all the wonderful developments in his life over the past few years: updates about his work for the Senator, the little house he and Eliza had purchased, and silly stories about his irrepressible two year old. He retrieved the photo of Pip, mugging for the camera with chocolate ice cream smeared across his lips, and the sonogram of their expected little girl.
“That’s me,” Pip announced. He’d stood up on his booster seat to see what his father was looking at. His little fingers reached out to point at the photo, as though Alexander might be having difficulty identifying the subject.
“Yeah it is. That’s my little goofball,” he laughed, kissing his son again. Spirits lifted slightly, he propped the pictures up in front of the vase of flowers and gathered up the rest of the mail to place on the counter.
“Do you want to give Daddy his present before we eat?” Eliza asked, attention fixed on the frying pan.
“Present!” Pip exclaimed, scrambling down from the chair to race into the living room.
He caught Eliza’s eye, and they shared a smile.
Pip returned seconds later, his flat feet pounding on the wood floor, carrying a long, skinny box with a card taped to the front. “Here,” Pip said, thrusting the box at Alexander.
“What do you say, Pip?” Eliza pressed.
“Happy Daddy’s day,” Pip added, distracted as climbed back up into his seat.
“Thank you.” Turning the box around, he smiled. “Well, now, I wonder what this could be.”
The card was an 8 ½ by 11 sheet of printer paper folded down the side with ‘Happy Father’s Day!’ printed along the top in Eliza’s neat handwriting. Pip had scribbled a rainbow of colors with crayon all over the front in no discernible pattern. He opened the paper up to find a drawing of a square and three stick figures, a big yellow blob at the top presumably meant to be the sun.
“You and me and Mommy,” Pip explained, leaning over the table to point again. Eliza’s stick figure had a circle drawn around the middle, meant to signify her belly, Alexander guessed. “Is this your little sister?”
Pip nodded. “And that’s my slide.”
He saw a big blue line going up from the grass off the side of the page. They’d bought a plastic swing-set weeks ago to set up in the yard, but he hadn’t actually had time to put it together yet. Tracing his finger over the line, he suggested, “We should put your slide together after we eat.”
Pip bounced excitedly in his seat.
“Open the present, already,” Eliza said, grinning as she scooped eggs onto three plates.
“I’m opening,” he said, grinning back at her. Tearing the wrapping paper off the box, he pulled off the top to find a garishly patterned green and yellow tie inside. He laughed and looked over at his wife.
“Pip picked it out all by himself at the store,” she explained with a pointed look.
That made sense. “Thank you, Pip. I love it.”
“It has green. That’s your favorite,” Pip said, clearly proud of himself.
“I’ll wear it to work tomorrow,” he promised. Clattering dishes and silverware drew his attention to Eliza. “Do you need help, Bets?”
“Please,” she said.
He jumped up and grabbed two of the plates, placing the plastic Power Rangers one down in front of his son. Pip dug in immediately, grabbing a sausage link with his hands, not bothering with utensils. Tussling Pip’s hair, he said, “I’ll get the napkins.”
They’d barely finished eating when Pip clambered out of his seat and bounded towards the back door. “Slide!” he demanded, grubby hands twisting futilely over the plastic child protected doorknob.
“In a minute,” Alexander said. “First, we wash our hands and help Mommy load the dishes into the dishwasher.”
Pip pouted, but slunk back to the kitchen. Alexander lifted him by the armpits onto a stool so he could reach the sink, and squirted a generous amount of hand soap into the boy’s palm. Pip shoved his hands under the tap, letting the water wash off the soap.
“Rub your hands together, honey,” Eliza directed.
Most of the soap had already run off by the time Pip clapped his hands together. He pumped the hand soap over Pip’s hands again, helped him wash properly, then gave him a paper towel to dry off. Then he helped Eliza clear the table, loading the dirty dishes into the washer and squirting dish soap into the frying pan.
“Thank you, sweetheart,” Eliza said, kissing him.
He ran his palm over the side of her belly. “Thank you for breakfast.”
“Slide!” Pip demanded again, waiting impatiently by the back door.
“Yes, yes, okay. Slide.”
“Think you can manage by yourself?” Eliza asked, smirking at him as she handed over a box cutter.
“I think I can manage to pop a few pieces of plastic together,” he said.
The door knob was slick with sausage grease, and it took him two tries to turn it properly. When the door opened, Pip raced outside, bounding across their fenced in yard with his usual manic energy. The swing-set was in three large boxes, leaning against the house. He stooped down to start unpacking the pieces.
The walls around the slide support clicked into place easily enough. Pip was ecstatic to help install the slide itself, though his only job was to kneel at the bottom and try to keep it from moving too much. The inside support system created a tunnel that Pip watched come together with wide eyes.
Sun blared down on them as Alexander fought with the last of the tunnel structure, sweat beading on his brow. The final piece didn’t seem to want to line up properly. Wiping a hand over his forehead, he tried again, biting down a swear with the piece slipped again.
“Can I slide, now, Daddy?” Pip asked.
“Just a minute, bud.”
“How’s it going?” Eliza called from the backdoor, watching them with a soft expression.
“The last piece won’t go in,” he replied, frustration in his tone.
“Need some help?”
He nodded.
She made her way over and knelt beside him. With hardly any effort at all, she slid the final piece into place, then gave him a smug smile. He rolled his eyes.
“Yeah, okay, you’re better at this than me.”
“Just nice to hear you say it,” Eliza said.
He kissed her firmly. “Will you help assemble the swing piece?”
“Happily.”
Together, they worked at attaching the plastic swings to the bar supports and digging the poles deep enough into the earth to keep the whole structure steady. Pip raced around them, touching every surface with barely contained excitement. When at last they declared the set complete, Pip let out a whoop of joy and bounded headfirst into the slide tunnel, crawling around the twists and peeking out at them through the little transparent window.
Eliza relaxed back into his arms and waved at Pip when he emerged at the top of the slide. Alexander rested his head against hers and rubbed his hand over their baby, delighted to feel the little nudges from a foot or elbow. He kissed her temple, feeling blissfully content.
#hamilton fanfic#hamliza#alexander hamilton#eliza hamilton#philip hamilton#modern au#father's day#short and sweet#fluff
46 notes
·
View notes
Text

Big Plans Tiny Planner
Ta-da!! :D It took forever, but I think this is quite possibly my favorite book-making project I've done to date! A while back while JoAnn's was having a sale on decorative paper (I think it was 10 sheet for $2 or something like that?) and I stocked up on a few combinations I thought would work well for future book projects, and among my choices, I had picked out a page that consisted of tiny calendar pages for a full year and a piece of heavy-duty paper that I thought worked well with the various colors on that page (not all the calendar pages were as drab as the January page here, I just didn't have the patience to try and photograph all twelve of them for this ). However, it wasn't until I saw this video by SeaLemon, my go-to person for DIY book things, that I knew how to get pages that work well for a tiny planner. I had originally gotten some small lined memo pads from the dollar store, hoping to use a couple of them for pages in this theoretical mini-planner...only to find out that nope! Those pages are just a little bit too big. Trying to get them and the calendar pages lined up to glue the spine would be infuriatingly difficult. Naturally, this left me semi-up-creek without a paddle. But then I saw the aforementioned video and learned something that had never occurred to me: You can make dot-grid paper...by printing a dot grid onto regular paper!! It seems so obvious and so simple now, but it had honestly never even crossed my mind. I guess because I have actually tried using regular grid paper for a book before and it didn't go as smoothly as I had hoped, in addition to me knowing that making your own lined paper in a similar fashion would be much more tedious task. Lining up lines when you're not a machine capable of cutting pages with laser-precision is both time-consuming and next to impossible to get perfectly aligned pages from. The dot-grid, on the other hand, provides guidelines to use for writing and drawing (the biggest disadvantage to unlined paper), and a guide for cutting, but the dots are spaced in such a way that the cut has to be pretty egregiously bad for it to be immediately noticeable if they aren't quite lined up correctly. Additionally, in this case, specifically, the dots are so faint that 1. it makes any misalignment even harder to notice, and 2. they will not show up on camera for anything, and so I didn't bother trying to include a photo to show said dot-grid. That said, I just printed off the dot grid SeaLemon made and shared in the video description onto normal printer paper. Twelve pages; printed the grid onto the front side of each, then flipped them over and printed it onto the backsides. That way I had double-sided pages and I could cut multiple small pages--four 3" x 4" pages per piece of paper--without worrying about if anything was going in the wrong or right direction. Once the grid was printed, I then used a paper cutter to first slice all twelve pages to be the same size, cutting off the excess where the dot grid didn't print because of printer margins. Then I went back through and cut them down to be the size I needed. After which I counted out four pages for each calendar page, and having learned my lesson about end pages (the pages that connect the text block to the splash pages) from the SweetTarts book I made, I cut two more pages out of cardstock to put on the front/top and back/bottom of the stack. And then I carefully lined up one side of the page stack, clasped it in place with a binder clip, and got gluing. While I waited for the coats of glue on the spine to dry, I started on the covers and splash pages. The splash pages I cut and dealt with without much fuss. The covers, on the other hand... Originally, I meant to cut the covers large enough that I could have a little overhang on the edges to make the book a bit nicer. However, I mismeasured/calculated and didn't realize it until I'd already cut the covers in one direction. It wasn't too late to adjust for the height, but it was too late to adjust for the width. However, that wasn't too terrible, as I figured I could just move the covers over slightly and covered the missing area with the tape over the spine. That did complicate things slightly in that, later on, I had to cut and add strips of paper to the spine area to cover the under of the tape to keep the adhesive from folding and/or sticking to everything. But before the anti-sticky-spine steps happened, I was playing with placement for the cover. Earlier in the process, I had recouped the frame sticker on the front cover from my sticker collection to use in conjunction with the "big plans" placard I wanted to make in a similar fashion to how the names of the months are printed on the calendar pages. While I was fiddling with how it was going to look with the covers, I also started thinking about my choices for the tape on the spine. I ended up thinking that I liked the color of the lines on one of the covers better than the other, based on the frame and the tape options I had, combined with the color of the splash pages that were already attached to the text block by that point. I tried not to. I really did. But I couldn't help myself; I cut out another cover identical to the one of the two that I liked better. To be fair, I'm glad I did because it makes my brain feel better knowing they match nicely, but part of me can't help but wonder if it really would've mattered, provided I had put the other cover on the back. So with that "problem" solved, I could then move on to attaching the covers and placing the tape. And I did. And I am still not very good at getting the spine tape straight on the first try. This was a problem this time, not because this tape was any less forgiving than the other options I've used in the past, but rather because of the thinner paper I'd put in place to cover the adhesive. It did not want to let go of the tape once they were stuck together. As a result, instead of repositioning or even removing the tape, I instead placed another piece on top to fix the unstraight edges. That piece I could reposition, and it's a good thing because it still took me a few tries to get it exactly where it needed to be. I almost thought I was done once that was taken care of and the frame and placard were attached to the front cover. Then I realized this is a tiny planner (of sorts) and a planner could really benefit from book pockets...Which I believe I had originally planned on adding to the book, but it had somehow slipped my mind among everything else. So after I spent way too long deciding on what paper to use for the pockets (and ultimately decided to use some that was leftover from when I made splash pages on the Duck Tape mini sketchbook) and to simply clip the corners instead of using my paper punch to round them because it's started not doing its job very well as of late, I applied the pockets by carefully prying the covers away from the splash pages on the appropriate corners, wedging the pockets in, and then squeezing in a bit of tape and glue to the best of my ability to reinforce them. (Normally reinforcement wouldn't've been an issue because I would've securely taped them to the back of the splash pages before trying to attach the covers.) This time I really did think I was done. And, technically, I was. I was quite proud of my little baby planner, too. The next day I videoed a little flip through of the book to show it to a couple of friends because I figured that would be faster than taking my staging photos like I normally do. In that process, I discovered that it was fairly tricky to flip through the pages and find each calendar page quickly, and also the September page decided to pop out. Apparently it wasn't quite far over enough or didn't get quite enough glue or something. Also, I was a little bothered that one edge of the sticker frame on the front didn't want to stay flat down but also didn't pop up far enough to be able to get more glue under it without making a mess. I've never attempted to reinstate a page that fell out of one of these books before, despite having at least two fall out of one of the first ones I ever made. Fortunately, it went more smoothly than I expected. A little very carefully placed tacky glue and few minutes' patience to hold it still, then some time to dry long-term with extra paper on both sides to absorb any extra glue, it appears fairly stable now. The page-turning took a little more thought, but I settled on using these teeny-tiny heart stickers (one on each side to, again, keep the adhesive from sticking to things it shouldn't) as tiny little page tabs. And when I say teeny-tiny, I'm not kidding. I have fairly small, nimble fingers, and I still found it easier to manipulate the stickers with the help of a pair of tweezers. But they are just big enough to work in this form. The only problem is that they don't stick out uniformly solely because the pages themselves don't, and they have to be stuck on about halfway down the sticker so that they stick to the page securely but still stick out enough to be useful at all once the pages start fanning open. While I had the sticker sheets out to get the hearts off, I peaked at the other options and settled on a few to stick to the frame on the front to fix that other problem about one side not sticking down to my liking. Then I added a couple more on the other side just to balance things out. It's a bit much, but it still feels better than leaving the frame to just stick up like it was. After all of that though, now it's finished. And I'm still very happy, if not even more so, with how it turned out. It was a piece of work, but it looks so nice and it's functional, too! I'm not even sure I'll use it--I haven't decided yet since it is so nice, I'm thinking I might want to keep it as an unmarred example for future projects like it--but I just enjoy knowing it exists and how good the end product looks that it was worth it to me anyway. This was also a bit of an extra learning experience to 1. Plan these book projects out a little more thoroughly in advance, and 2. Pay closer attention before and during the process of cutting anything. Which, I mean, I already try to do those things, but evidently not quite enough, lest I wouldn't have some of the problems I do that often crop up in my making process. I'm not quite sure what the next book project will be, but I do have a few more pieces of that paper that I picked out for some, so we'll see what happens next time I sit down and make some. ____ Artwork © me, MysticSparkleWings ____ Where to find me & my artwork: My Website | Commission Info + Prices | Ko-Fi | dA Print Shop | RedBubble | Twitter | Tumblr | Instagram
1 note
·
View note
Text
I didn't put him up to it PART 2! 😊😊😊😊

It was currently 5am. You were half dead in a little coffee shop about to write an essay on a piece Shakespeare's work. You were up all night with Mikey celebrating, you weren't really a big fan of hot sweaty nightclubs but someone had to watch drunk Mik and make sure she didn't jump into some strange man's car. The good thing was Mikey's paper was finished, It was completed in its entirety next to your laptop. It had been the one you finished a week ago for your own assignment.
"I love you babe. You are an angel." She gushed, "Ima go get our coffees." She skipped up to the counter.
✒✒❇✒✒
He needed a pick-me-up after his run. He placed his order and waited off to the side as a girl rushed past him to order.
"Can i get a caramel macchiato cappuccino for me and just a normal boring coffee for my friend."
"Uhh yeah yeah sure." The pimply kid sputtered. He typed it into the cash register and as the blonde took out some cash he quickly exclaim, "i-i-i'll pay for it." She perked up.
"Oh! You will?Thank you so so much!" She leaned over the counter to kiss his cheek, "You can pay for mine, I'll go get some cash from her."
"I've got it." He replied, the pimply kid and the girl looked over to him as he pulled the two dollars from his wallet. There was something off about the girl, a strange malice undertone to her niceness. "And put some sugar and cream in it i highly doubt she drinks it black."
"What flavor?" The kid asked.
"Oh, uh, carmel" He said off the top of his head.
The girl snorted, "She may not but she doesn't need the extra calories." She muttered under her breath. The boy worked on her coffee first and as soon as it was done she snatched it up and headed toward the door
"(Y/N)! I'm headed out! Scotty just texted me, sounds important, gotta blast." And before the girl in the corner had time to answer she was out the door. The boy finally handed him his tea and her coffee. He smirked at the irony of the situation as he joined (Y/N) at the booth in the back corner. She looked up not expecting a booth mate or the coffee he sat next to her hand and her beautiful (Y/E/C) eyes snapped into focus.
"Mr. Hiddleston! Hey!" She smiled to him before turning back to her screen
"(Y/N)." He greeted her politely, "I think you can call me Tom now." She nodded briefly while typing at an incredible speed.
"Tom it is then. Sorry i'm not being a better host, Mrs. Young assigned us a paper on Shakespeare as a final a week ago and i'm a little behind...its due in….exactly two hours and thirteen minutes, it was due at midnight but i got an extension to the start of the school day."
"And you've just started working on it?" He asked her she didn't seem like the type to put work off.
"Well no, i finished mine a few days after it was assigned, but Mikey doesn't understand Shakespeare so i'm helping her out."
"Helping her out." He repeated looking at her in disbelief. He quickly scanned the first page of the printed work, it was about Macbeth, and also read through the ending of the one on the laptop screen, Romeo and Juliet. "How many pages is this?" He asked pointing to the screen.
"Three front and back."
"And this one?"
"Uhhh seven front and back, why?"
"What's this?" He asked suddenly swiping over to an email you had received months ago.
"Just an internship with some company….i uh haven't responded yet…"
"May I see your computer?" He asked in turn she moved down some in the booth and he jumped over into her seat quickly pulling up the Macbeth document and quickly typing in your name and placing Mikey's on the crappier rushed project before sending them both to the printer.
"Hey! What are you doing!?!" You asked shocked following him up to the counter.
"Print it on front and back." He told the pimply kid.
"It's 50 cents a sheet of paper." The kid told him, he handed him five dollars. The kid handed him the ten pages. He separated the two projects before stapling them and handing you the Macbeth one with your name and the Romeo and Juliet with Mikey's.
"She's using you, and you are letting her do it. I don't claim to know you but i didn't think the woman who transformed me into the most magnificent Hades with a few hours, some blue paint, and a few crystal spikes was a cowering little girl who would put up with someone like her."
"Mikey's my friend." You defended quickly.
"She is toxic." He answered back just as quickly, "I'm willing to bet she is the reason for the dark circles under your eyes, and the bruises on your wrist, and the unanswered email on your laptop about the internship with that company. Or was all that last week just a hobby?" You were fuming as well as him. But mostly he was right. Mik drug you out last night, when you didn't want to jump from club to club and frat party to frat party she forcefully grabbed you and drug you along, and when you approached Scott and her excited about the internship she had demanded you deny it.
'Her and you had gone through primary, elementary, junior high, highschool, and now college together; how could you possibly leave her now?!' Eleven years you had been doing all of her Literature assignments for her...anything really that didn't have to be in her handwriting, that could be typed or created.
He hadnt meant to be so cross with you. That Mikey girl had obviously been manipulating you for a very long time. You had been standing there with your arms crossed staring past him for what felt like forever. He was just about to apologize to you when you turned on your heel suddenly and went out the door. He stood there in shock for a moment before moving back to the table to grab your laptop.
✒✒❇✒✒
Ahh the teacher's lounge window had such a grand view of the parking lot. Professor Del Toro watched as a little navy blue rental car pulling into the parking lot. One Mr. Thomas Hiddleston popped out with a familiar white laptop. Painted on the front was yellow, pink, blue, and purple (really any color you could think up) imaginary flowers that closely resemble those from Dr. Seuss' Lorax.
"Mr. Celman are you headed toward Patricia's classroom?" She asked the man just as he was about to turn the handle on the door making him jump a mile high. He hadn't seen her lurking there with her steaming mug
"Well yes." To say the least Mrs. Del Toro scared him more than the creepy movies her brother directed.
"Could you have her send me Miss (Y/L/N), I'll be in my classroom." Mr. Celman would be praying for poor (Y/N).
✒✒❇✒✒
Tom simply wanted to leave the laptop and go. But Professor Del Toro kept holding him up. The door opened and he turned to see you. He expected a lot of things to happen. What he hadn't expected was, for you to rush him and wrap your arms around him in a hug with enough force to knock him into the desk.
"Thank you." You said softly. He wasted no time wrapping his own long neverending arms around you.
"I am so sorry I hadn't meant to be so cross." You shook your head as he spoke.
"I needed the rude awake-"
"Why do i have an incomplete grade on the stupid Lit project?!?!" Mikey stormed into the room, you untangled yourself from Tom's arms and took his hand instead.
"Because you didn't write a paper." You answered her.
"You wrote my paper for me." You fake surprise.
"You are absolutely right. I am so sorry!" You apologize you saw out of the corner of your eye as Tom's face fell when you handed her the seven page document. "Run run quickly tell her it got mixed up with some other school work and that i was supposed to hand it in with mine." Mikey smiled a large fake smile and You reciprocated it,
"Don't be such a little bitch." She said through gritted teeth, then left in a hurry slamming the door
"Would anyone like to read the carbon copy?" You asked with a smile taking you're laptop and booting it up to Mikey's document. " 'insert Shakespeare here' written over 15 hundred times."
"I'm proud of you." Tom told you squeezing your hand gently. Professor Del Toro let out a sigh then handed you both slips of paper.
"(Y/N) hand that to Tom. Tom hand this to (Y/N)." You swapped pieces of paper.
"What is this?"
"Each other's phone number. What happens from here on out is out of my control."
#tom hiddelson#tom hiddelston x reader#tom hiddelston imagine#tom hiddleston fanfiction#tom hiddleston#loki (marvel)#long live king loki#loki fanfic#loki#loki odinson#loki laufeyson
20 notes
·
View notes
Text
Cheap Ass Bitch Millennium Puzzle Tutorial

As requested by @cipheral, here’s how I made my Millennium Puzzle. This method will get you one that looks like an actual 3D puzzle and not just a pyramid with some lines drawn on, but still costs... Probably less than $10 depending on how much paint you need to buy. Fair warning, though, it is somewhat time consuming.
Materials needed:
Cardboard
Thin craft foam (two sheets ought to do I think? I used stuff leftover from another costume so idk), white, grey, or yellow is best but any color works
Hot glue gun + glue sticks
Regular glue of some sort (I used mod podge + occasionally superglue where needed, but white glue or tacky glue would also probably work fine)
Gold acrylic paint
Optional: Black acrylic paint + very tiny paintbrush
Plastic chain (can be obtained at a hardware store, usually sold by the yard, mine came out to like $2)
Silver spray paint + primer
Printer paper
Scotch tape
Craft knife (technically you COULD use scissors but it’d be a major pain in the ass)
Step 1: Preparing the template
The first thing you need is a template for all 5 sides. I used this, since it was the best example I could find that had all 5 sides laid out flat and was accurate to the actual design of the Puzzle. I actually did some image editing to turn it into black and white lineart (for ease of tracing, this is probably optional though) and scale it to uhhhh A Size, I forgot how big mine is? Anyway, you can decide how big you want your Puzzle to be, and then scale it to fit. Print it out.
Step 2: Making the base
Take your template and tape it to the cardboard. Cut out the basic shape of each side (i.e. the four triangles + square). Remove the template.
Now for the tricky part: Hot glue all of the pieces together into a pyramid. Be careful not to burn yourself! When you’re done, remove any particularly large lumps of glue, and paint the whole thing gold. I recommend doing two sides at a time, and then the top.

Step 3: Lots of cutting, unfortunately
Tape your template pieces on all sides to your craft foam, and use the knife to carefully cut out each individual piece. When you do the front, ignore the eye and just cut the main pieces; When you’re done, tape the front template back together, and cut out the pieces for the eye as well. Also, when you arrange your template on the foam, make sure you leave a decent size empty strip (at least an inch wide).
IMPORTANT: Make sure you keep all the pieces of each side together in the right layout, and all right side up. This shit took Yugi 8 years to solve, so unless you want to do that, make sure it stays together!
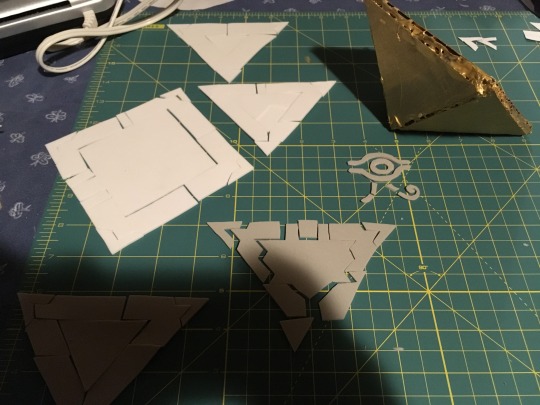
Step 4: Lots of gluing
Glue each piece to the sides of the base, using your regular glue. In order to get that 3D look, the pieces will be spaced out slightly; Try to make sure the corners are touching, and if necessary, trim down some pieces to make them fit properly as you like it. I would recommend doing one side at a time, and be careful to keep all the sides in the right order! Finally, add the eye.
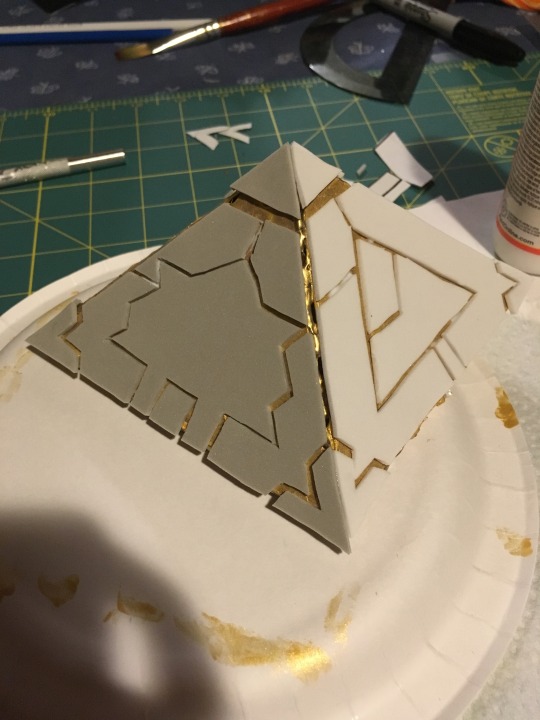
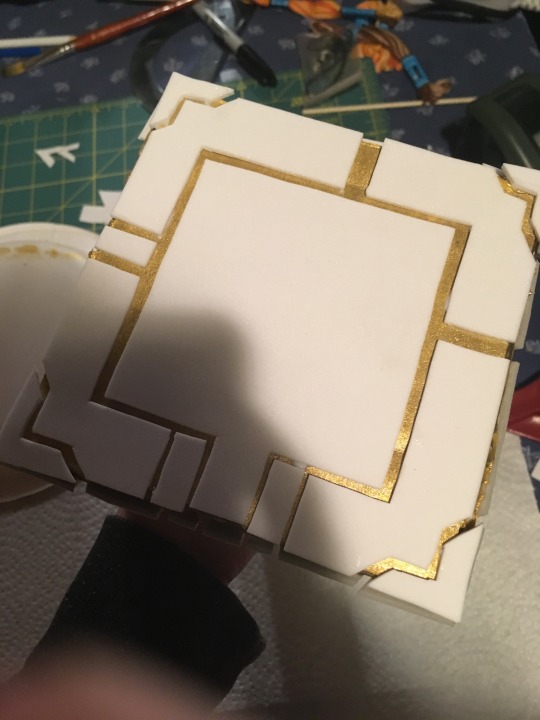
Step 5: Paint
Just like you did before, paint the whole thing gold. I would recommend at least two coats.

After you do that, if you want to add extra depth to the eye, you can take your black paint and Very Tiny Paintbrush and paint the inside of the eye. If necessary, touch up any mess with more gold paint afterwards.
Step 6: The loopy bit
This part is a bit tricky. Basically what you’re going to do is take a strip of craft foam, and roll it up lengthwise, while hot gluing the inside. Fold it over a few times to make sure it’s thick/sturdy enough, but don’t worry too much if it’s not perfectly round!
Use the craft knife to trim off the excess so it’s as flush as possible, and bend the whole thing into a loop, about however big you think is proportional to your Puzzle. Trim the end as needed, and hot glue it to the Puzzle- make sure you use enough glue to keep it in place! Finally, paint it to match.

(Ignore the other accessories, lmao.)
Step 7: CHAAAAAAAAAAAAAAAAAAAAAAIN KEEP US TOGETHER (RUNNING IN THE SHADOOOOOWWWSSS)
Unfortunately, I don’t have many pictures for this step, but get a plastic chain like this:

Spray paint it silver. I won’t explain how to spray paint things, because that’d be a whole other tutorial and there are 500 already on the internet, but please make sure you use proper safety precautions!
When you’re done, put the chain through the Puzzle, and secure the ends together however you like (I used a paperclip). If you find that your Puzzle tends to twist the wrong way when you wear it, you can tie or clip the chain to itself near the loop of the Puzzle.
And that’s it! You’re done! The Puzzle is fairly sturdy, but please be gentle with it anyway, and avoid any particularly flammable-looking warehouses or suspicious game stores. Enjoy!
26 notes
·
View notes
Text
A Step by Step Guide to Make Handmade Awards for Amtgard (At Least How I Do It)
I enjoy making awards for Amtgard, and I’ve been doing it since I started playing back in 2001. Here is a few awards that I’ve made over the years, after doing a cursory glance at my facebook photos.
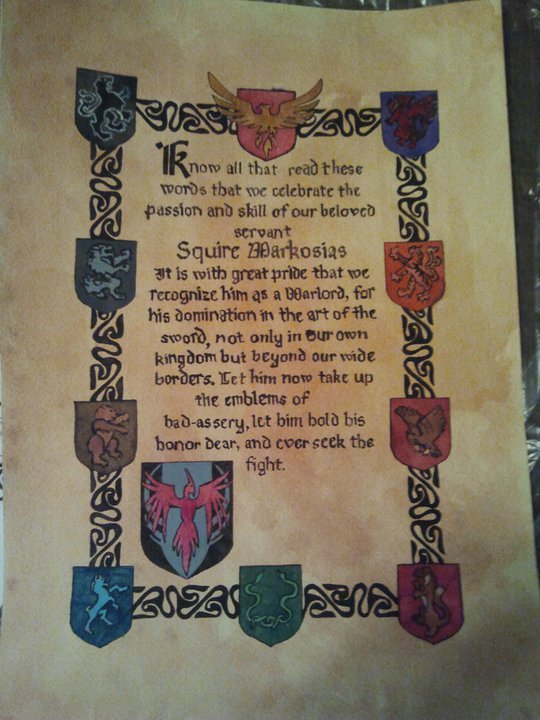
(Warlord Title, gouache on cold press watercolor paper)
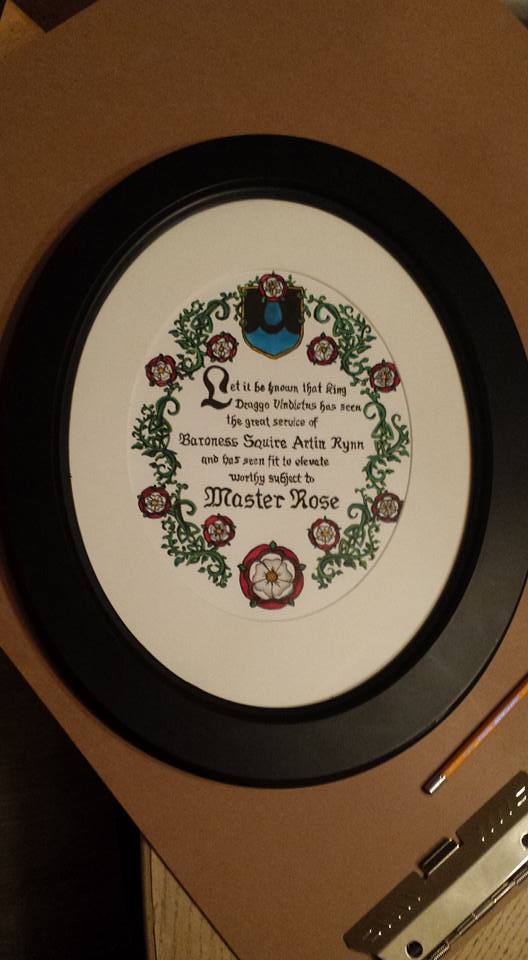
(Master Rose, gouache on cold press watercolor paper)
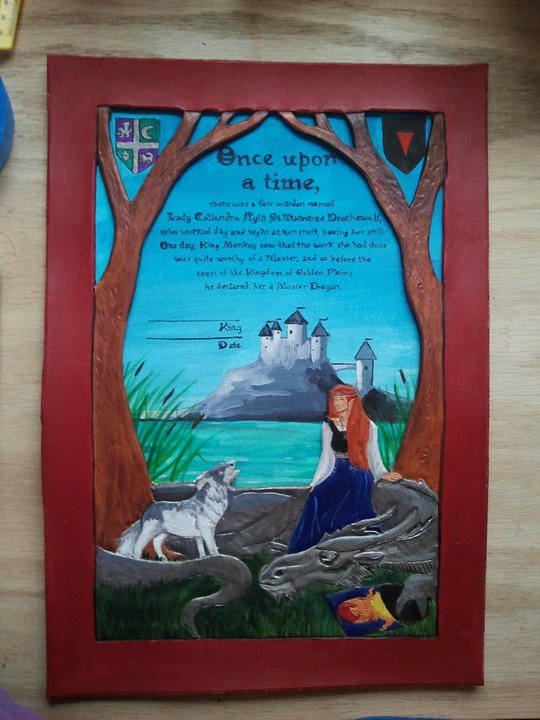
(Master Dragon, mixed media, leather and gouche on watercolor paper)
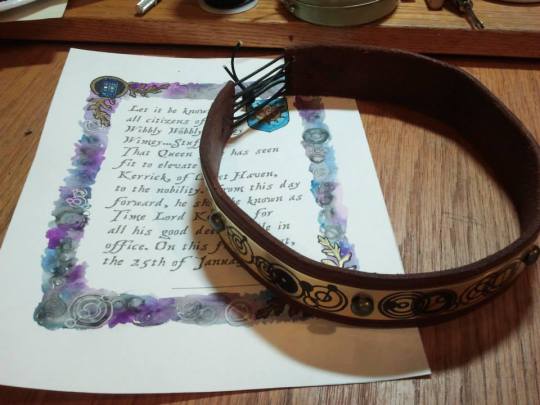
(Time Lord Title, digital and watercolor on cold press watercolor paper, run through a printer and hand painted, and a circlet, leather with metal, and drawn on designs with a sharpie)
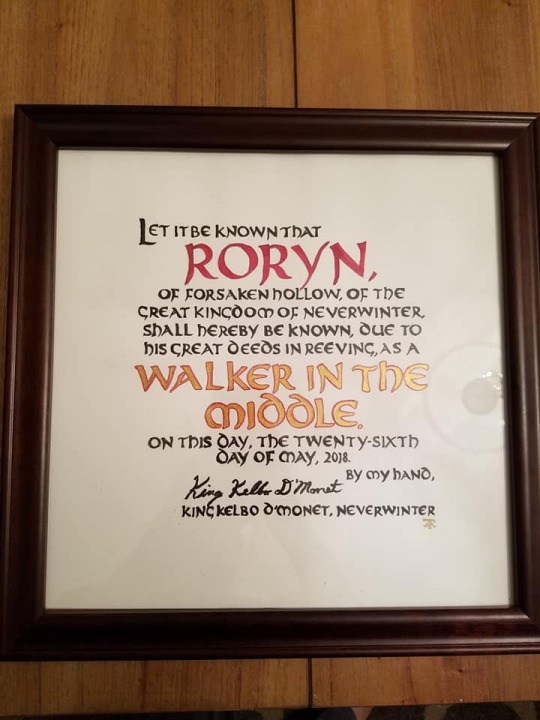
(Walker in the Middle, gouache on hot press watercolor paper)
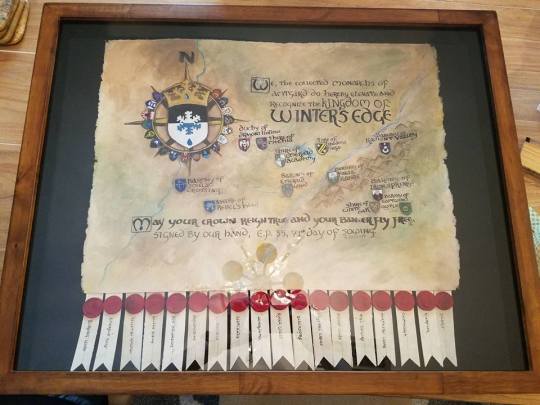
(Winter’s Edge Kingdom Elevation Scroll, gouache on hot press watercolor paper, plastic clay kingdom seals in a shadow box)
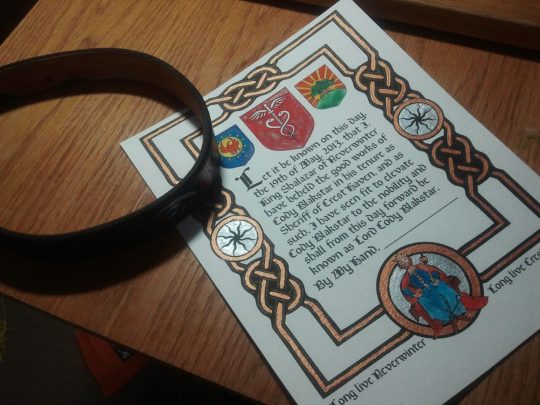
Lord Title, digital and acrylic, on cold press watercolor paper run through a printer)
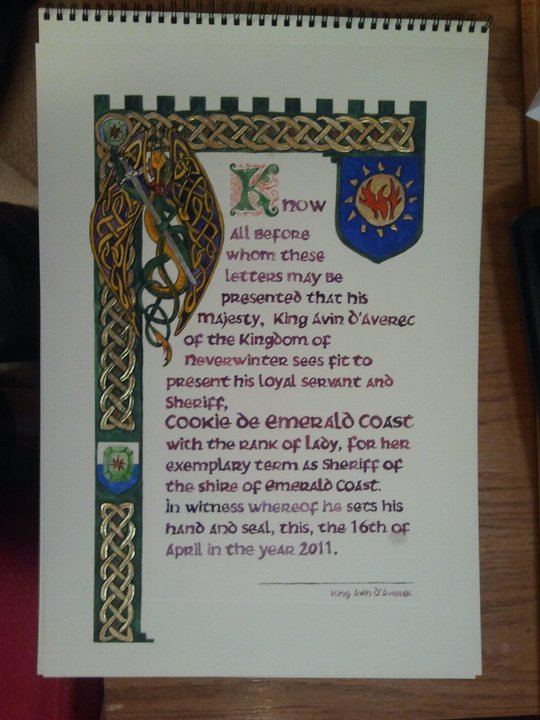
(Lady Title, gouache on cold press watercolor paper)
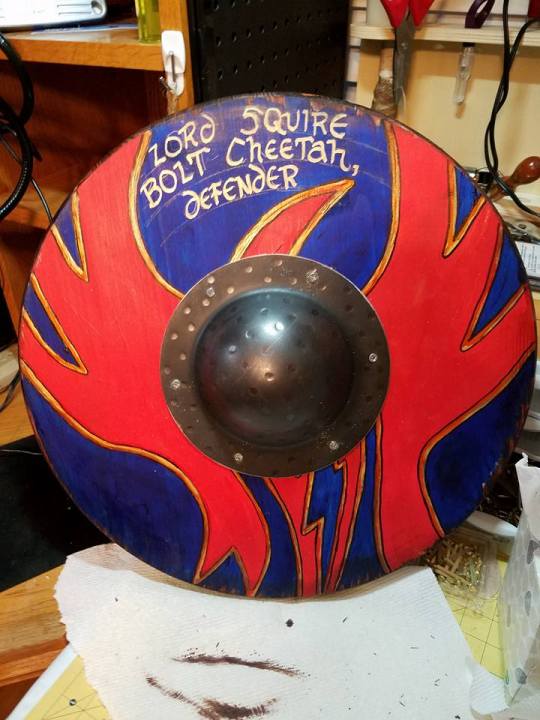
(Defender Title, acrylic on wood, designed to resemble a shield, I erased those lines later)
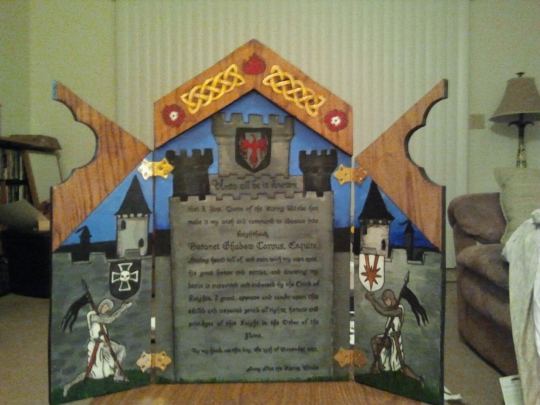
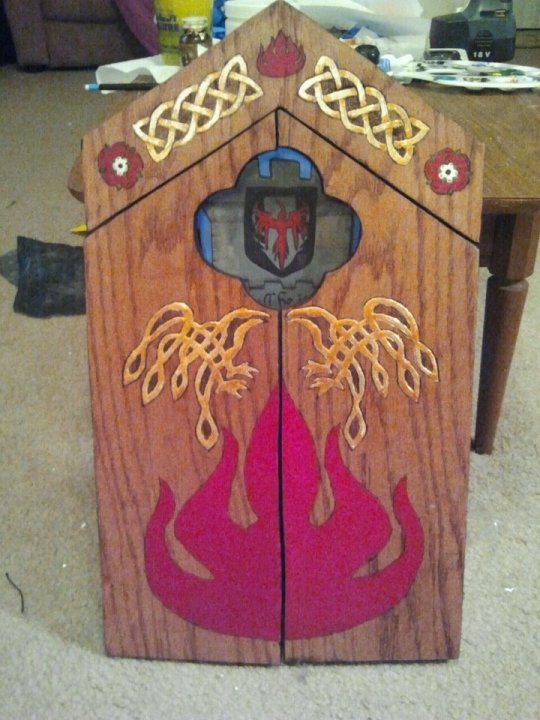
(Flame Knighthood Triptych, it opens and closes)
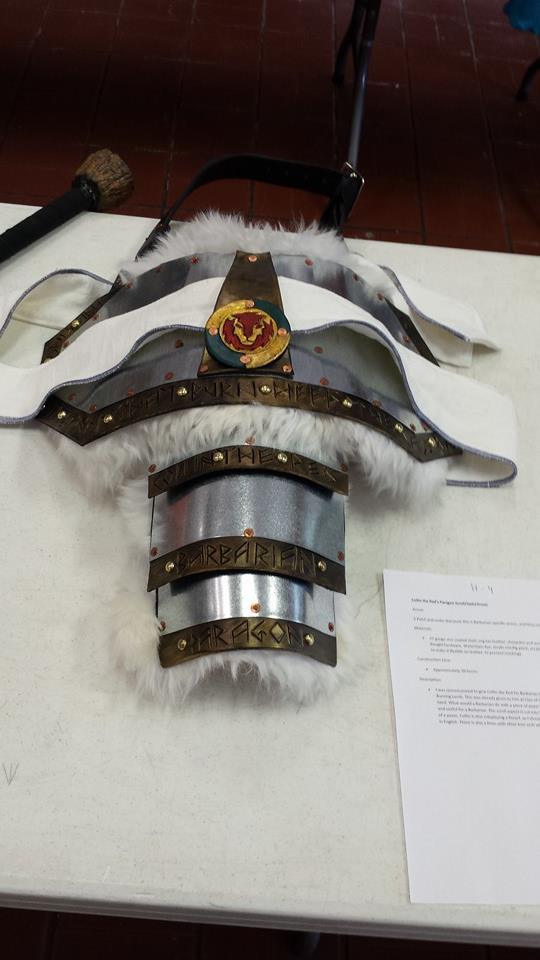
(Yes, this last one is an award itself, for a Paragon Barbarian, the text is cut into the leather along the edges.)
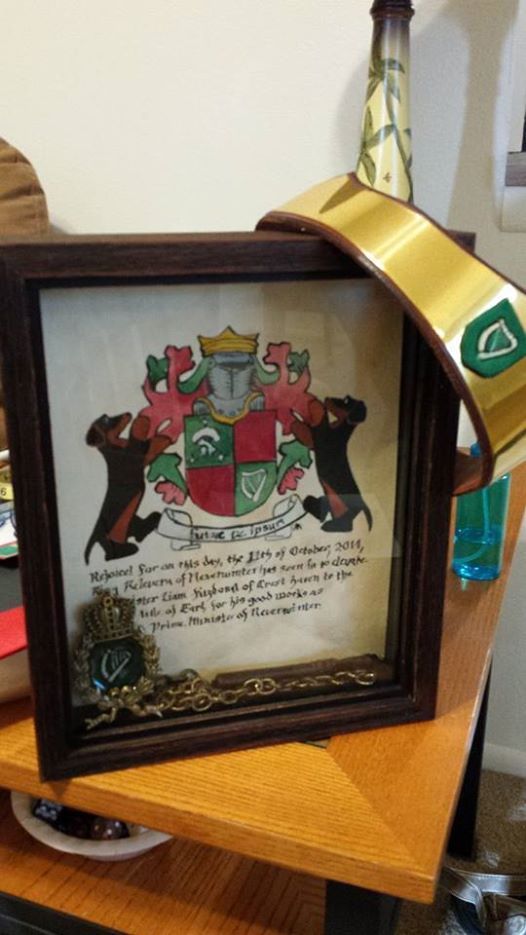
(Earl Title, gouache on watercolor paper, leather and brass circlet)
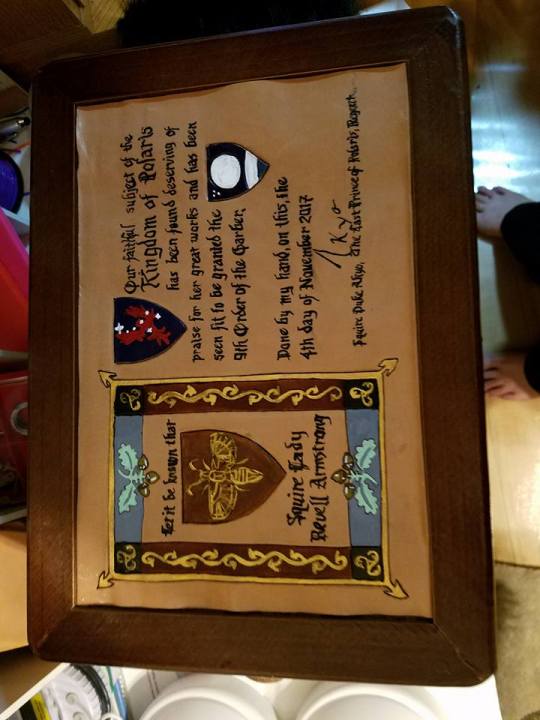
(9th garber, a sewing basket with a leather inset scroll in eco flow waterstain dye and acrylic)
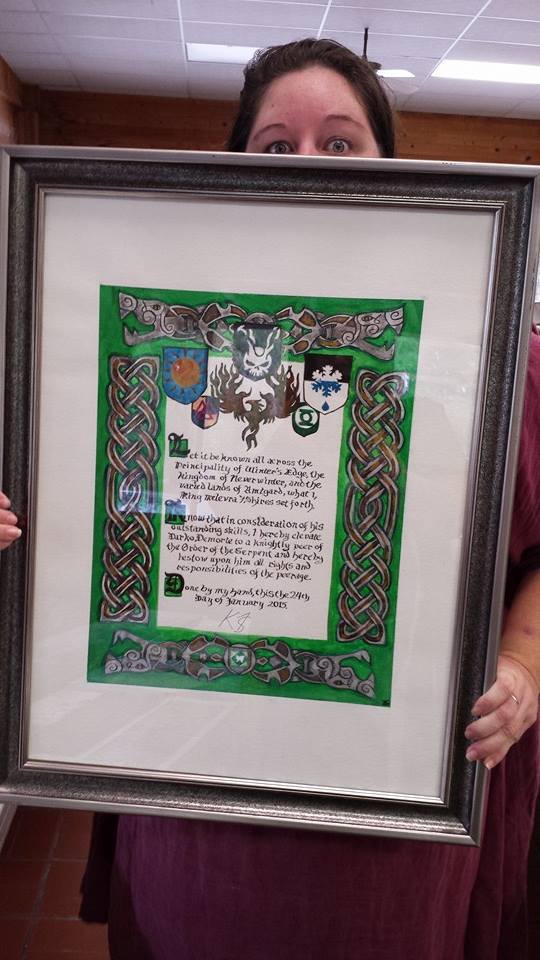
(Serpent Knighting Scroll, gouache on cold press watercolor paper)
I like to try new techniques, from paper to leather to metal to wood.I also have designed countless digital awards, but that is for another post.
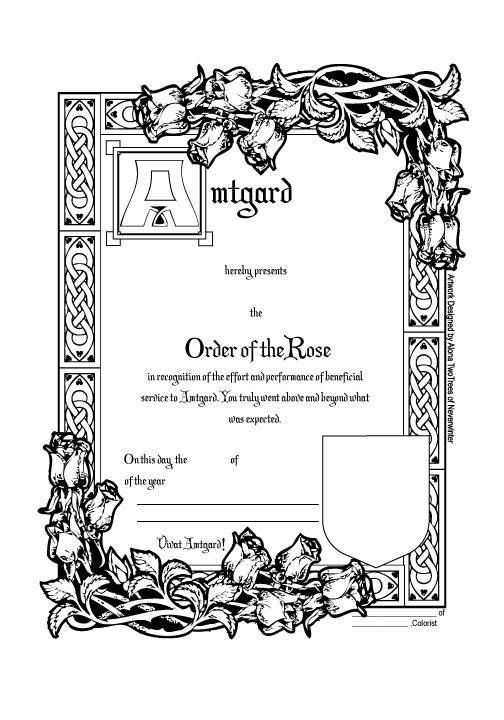
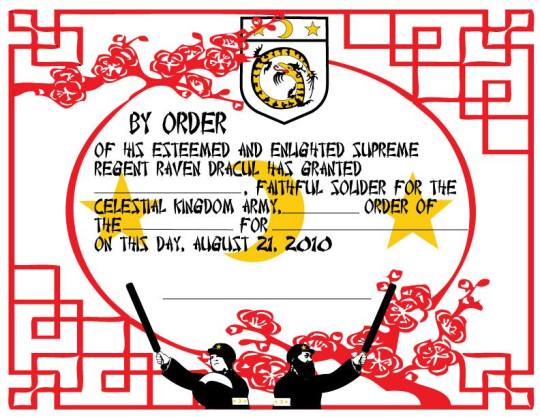

I’d like to teach you how to make awesome handmade awards to help your corner of amtgard be more awesome in recognition of so many amtgarders who have dedicated so much to the game, that deserve to be recognized. You too can do this, and cheaply. The following is a step by step guide in how I do it for paper awards.
Preface: My Personal Goal for Awards
I’ve been doing this a long time. And for me, as an artisan and scribe, the ultimate goal is this:
To make them cry.
I want everyone who receives an award I make them to cry. Ugly cry, in front of everyone in court. It’s how I show my love. So if I make you cry, I love you! And think you deserve an awesome handmade award gift, made by me, TO MAKE YOU CRY.
Its how I stay young.
Step One: The Commission
The first step in designing awards is finding out if there are awards that need to be made. Contact your local park or kingdom monarchy and offer your services, at whatever level you are comfortable with. Personally, I like to make 8+ level awards, titles, masterhoods, knighthoods and kingdom elevation scrolls. I feel like those are the things that should be special and handmade. However, your mileage may vary, depending where you are, I happen to live close to my kingdom, and how comfortable you are making awards. If this is a new thing for you, start small if you want to.
Talk to your monarchy, see if they need anything made, and try to ask them as quick as you can, so they are thinking about it. Because nothing sucks more than an award that was commissioned three days before an event.
This is where you want to start thinking about the specifics of the award. Do you want to give them a hand painted award? A part digital, part handmade award? Something outside the normal means of what you would consider an award, like the shield defender title, or the armor/sash of the paragon barbarian, or the sewing basket 9th garber I’ve made? Think outside the box, and try something new, if you’ve done this before. This award should be special to the person receiving it, if it can be.
Sometimes I don’t really know the person I’m making the award for. When that happens, the first place you should go is the amtwiki and find things about that person, if they have heraldry, what park they belong to, and the park’s heraldry, what kingdom they belong to, and that kingdom’s heraldry. What kind of persona they play, if they do play one. It would be awkward to make a ninja based award when they play a pirate, is what I’m saying. Find out what they like, and build from there.
Step Two: The Materials and Tools
What are you going to make this award out of? What tools do you need? Here is some examples of things that you want to think about, a quick rundown for paper awards, but really, if you can manipulate it, you can probably make an award out of it
Material:
(When working with watercolor, watercolor pencils, or gouache)
I prefer hot press watercolor paper if I am working in gouache. This paper is very similar to cold press, except it is much smoother, harder to source locally, and more expensive. But it is, for me, hands down the best paper I can find locally. I haven’t seen pads of it at stores like Michaels or Joanns, but you can find it in single large sheets at hobby lobby. Or if you are lucky like me and live in an art school city. Amazon always has everything, as well. Arches is a good brand.
Cold press watercolor paper is a rougher feel, but much more affordable and readily available.
You can also cut down either of these papers and run them through your printer, if you prefer to design your award digitally, and then have your calligraphy be done by the computer, and you can simply let it dry, then color in your design in whatever paint/colored pencil, etc, you choose.
Leather:
I admit I love working in leather for awards, I love how Eco Flow Waterstain flows though a dip pen onto leather. It just...feels good. You can work with leather dyes and acrylics in leather, and experiment with tooling and pyrography and layering, as I did with the Master Dragon, above, as well.
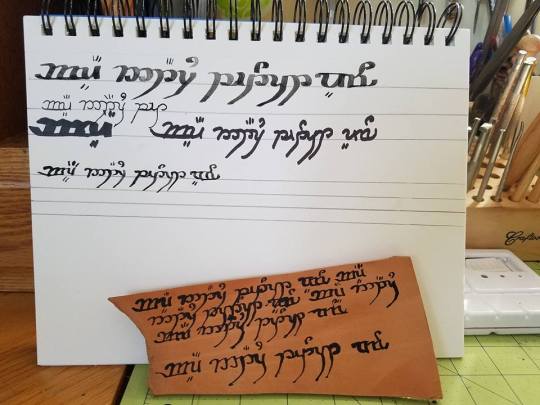
Wood:
Wood is good if you want to do something more structural, like the triptych and the shield I have done above. Ideal for pyropraphy (woodburning) and acrylic. Make sure you sand and clean the piece before you paint.
Other:
I haven’t used these materials for awards, but I’ve had ideas to build on them, maybe this list will inspire you: Plasterboard, you can carve into it to create a relief sculpture. Tile, I’m sort of in love with the geometric tessellation of arabic design, and would love to create something with this in mind, especially in tile...if I had a tile saw handy.
(Epcot, Morocco Pavilion)
Stone, I would love to have the tools to work in stone, something like this, perhaps:
(Epcot, Norway Pavilion)
Felt, I have played with the idea of wet felting and needle felting, combined with embroidery to create a wearable scroll. One day.
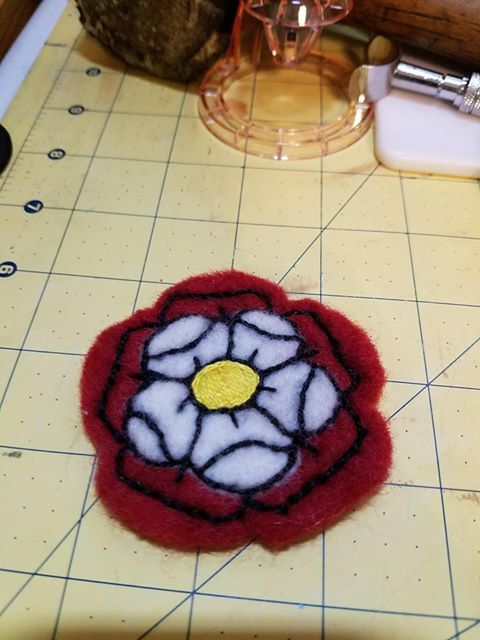
The Medium:
You can work in almost anything. Pencil, watercolor pencil, pastel, oil pastel, fabric paint, acrylic, watercolor, oil paint, gouache, tempura, pyrography, really, the mediums are endless.
Right now, I like gouache. It has the best qualities of both watercolor and acrylics. You can paint light on top of dark, which is, just a miracle, really.
I love using gold in my work, or any metalics, really. I have some special ways to create that effect, from special paints to a calligraphy pen, to mini-fig paints.
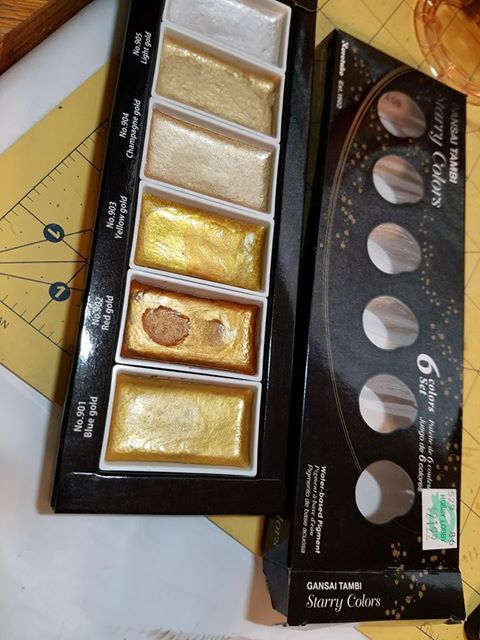
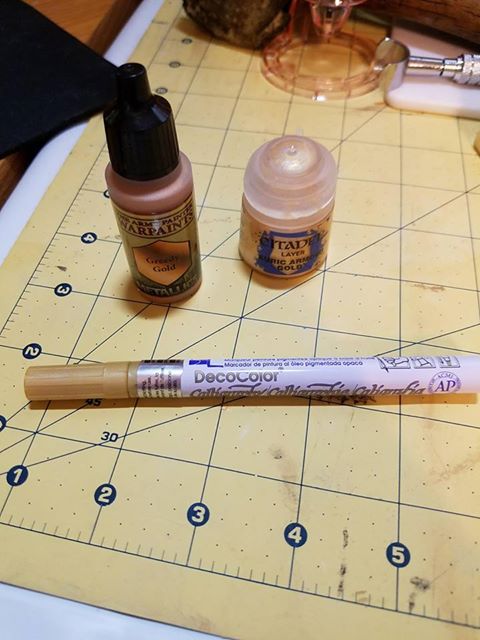
Tools:
Brushes by the bunch. I just keep buying them when I inevitably leave one in acrylic too long, or don’t wash it well enough.
Dip pen, which is my favorite. Especially with gouache. Like all things here, practice first. You can get a variety of different nibs.
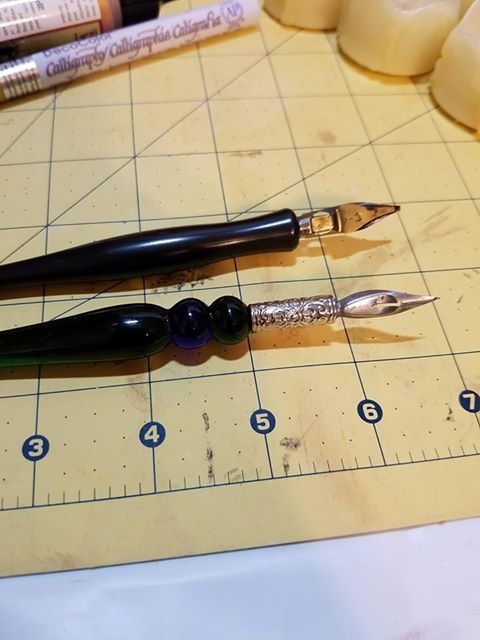
For paper awards I tend to use a big drawing board that I use painters tape to secure my paper to, and block out the space around the design so I don’t smudge pencil, or paint, in that area.
Step Three: Layout
You have your commission, you have your materials and tools gathered, now to put it all together in a cohesive way. I do a quick drawing of the layout, so I know what I am doing for the next step. Need ideas on how to arrange your award?
Here is Linden’s awards.
Here is about 90 ideas on my pinterest board.
Here is an example of a layout from an award I made:
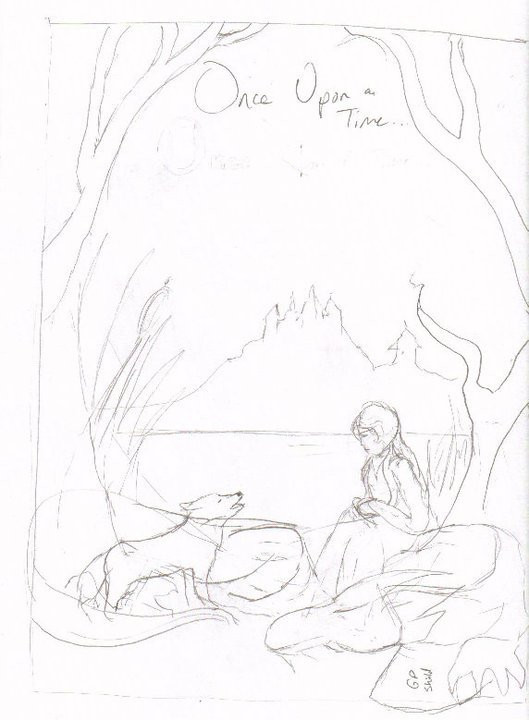
This is the first draft, the basic idea of how the award should be set up. You don’t need specifics yet. Just an idea. Don’t use good paper at this point, just some scratch to work out the details.
Step Four: The Text
This is the part that is hardest for me. I tend to find text by doing a google image search of sca and amtgard awards, and using that as a base. Sometimes its just easier to ask a friend for help with this part.
Now is also when you want to figure out your “hand” or what font you want to use. Practice! I use a dip pen and, lets be honest here, my calligraphy sucks, I tend to find a good font on my computer and emulate that. There are some good books you can use if you want to go more historical.
A good award will have the basics:
Who is giving the award, Who is getting the award, WHY they are getting the award, The date the award is to be given, A signature for the person giving the award.
Fancy it up to your flavor level.
Here is also a neat thing to add into your award:
http://www.electricsamurai.com/ad/ the date of the award given in amtgard dates.
Step Five: The Cartoon
Here is where you work out the details. I spend my work life as a graphic artist, so I am much more comfortable scanning and manipulating my artwork on the computer, and it all depends on the piece, if I use photoshop, illustrator, or indesign. Here is that same image above scanned in and text added, and designed. This was done in illustrator. You can use whatever tools you prefer, digital or not. This should be your second draft, not on good paper.
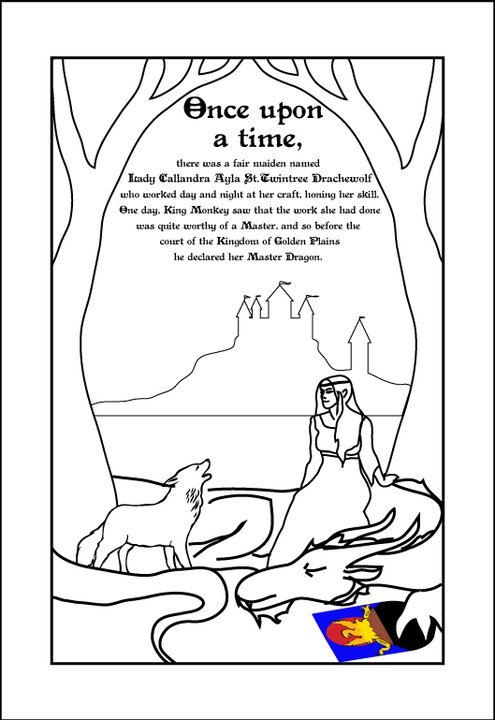
This is my cartoon, and it’s ready to be printed out to size, and transferred to my good paper. If using digital means to create your cartoon, and the finished piece is going to be larger than your printer can handle, I highly recommend this website:
http://www.blockposters.com/
You can upload your design and have it print in however large you want, in 8.5 x 11 in pieces of paper. All you have to do is tape them together.
Step Six: Transferring to the Good Paper
Now is the time to get cracking. You have your good paper, you have your cartoon, you have your text. Now to transfer it. You can do it it many ways, from as simple as taping your cartoon to a sunny window and taping your good paper over it, and tracing lightly with a pencil, to using a lightbox (I prefer this) to taping your cartoon over your good paper and sandwiching in a piece of graphite paper in between and tracing. You can even use a projector to help you trace your design.
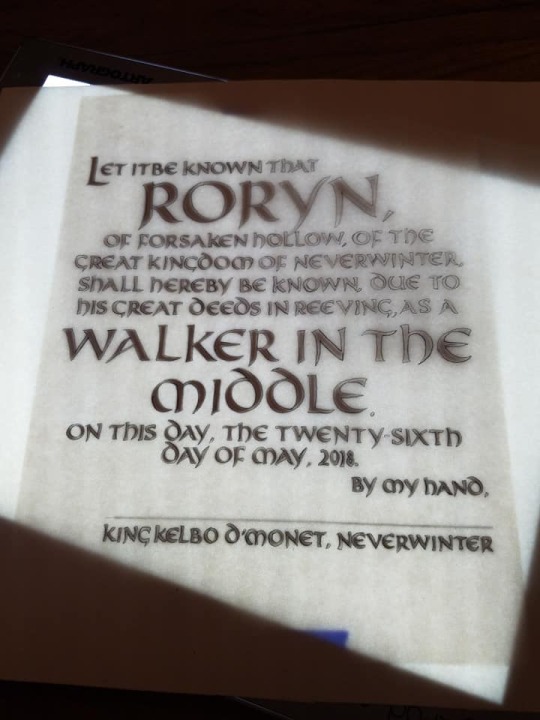
(I like the lightbox best)
Get your image onto your good paper.
Step Seven: Painting
So, despite being a graphic artist, I was not trained to paint. Airbrush, sure, but not painting. I left that to my friends who liked to smoke in the oil painting classroom in college. I just use whatever paint I am working in, and color in the lines with either a paintbrush or dip pen, and then fill it out. It’s very much like paint by numbers for me. I try to do multiple layers, with my mediums, then darks, then highlights. Whatever works best for you.
Step Eight: Calligraphy
Practice this. Over and over and over. Or....cheat, and fill it in with paint, outlining and then filling in the blanks.
Step Nine: Sign it!
I sign every piece on the back of the frame or paper, with a <3 Alona TwoTrees, but I also tend to use my signet, usually done in gold, on the front right bottom corner.

I think they are neat.
Also, if it is difficult to have the giver of this award sign it, ask for a copy of their signature, and fake it for them. Makes it easier at court.
Step Ten: Finishing Touches
Frame your pieces. Seriously. It’s a cheap and easy way to make your award pop. You can get frames at any dollar store that are 8.5 x 11 in. It’s a dollar, and it makes it so much cooler. OR head to your local thrift store and buy a frame in the art section.
Step Eleven: Give it Away and Drink in the Tears
Make them cry. Stay young.
31 notes
·
View notes
Text
The Biqu B1 Is an Incredible 3D Printer for Under $300: What Are You Waiting for?
Biqu B1
9.50 / 10
Read Reviews
Read More Reviews
Read More Reviews
Read More Reviews
Read More Reviews
Read More Reviews
Read More Reviews
Read More Reviews
Read More Reviews
Read More Reviews
Read More Reviews
Read More Reviews
Read More Reviews
Read More Reviews
Read More Reviews
Read More Reviews
Read More Reviews
Read More Reviews
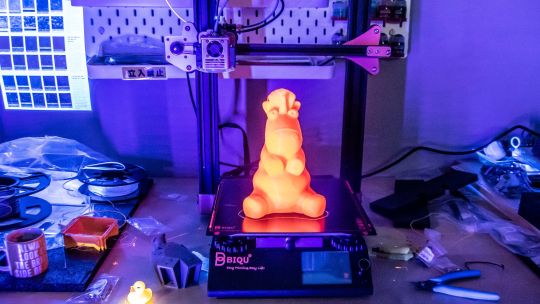
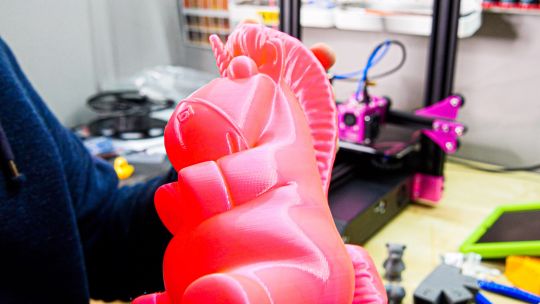
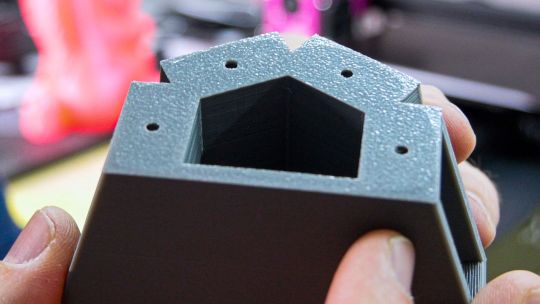
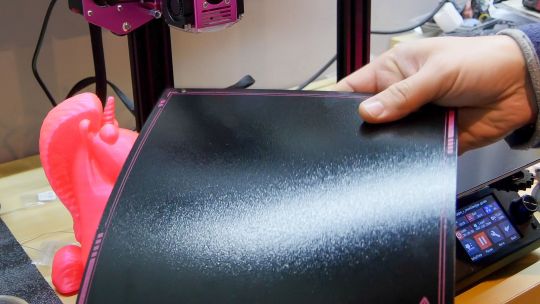

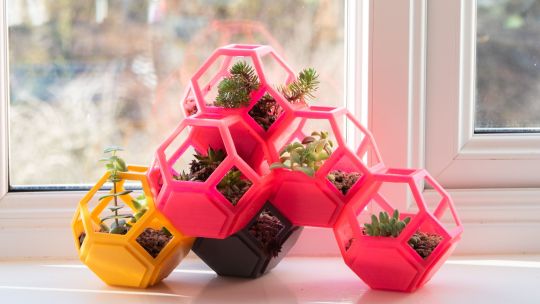
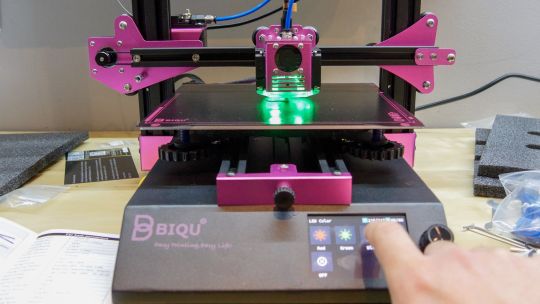
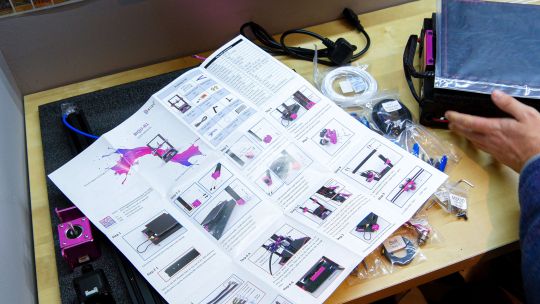
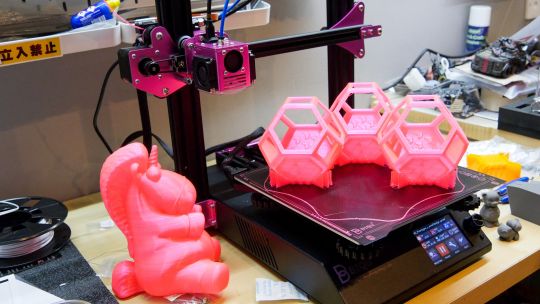
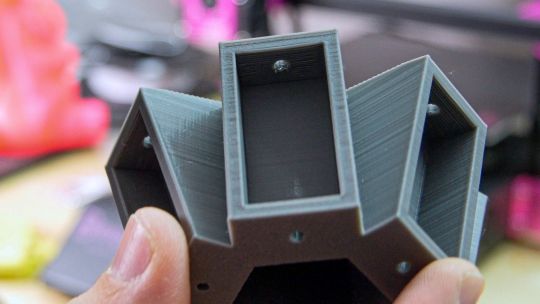
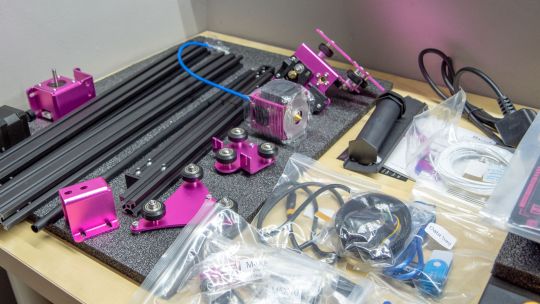
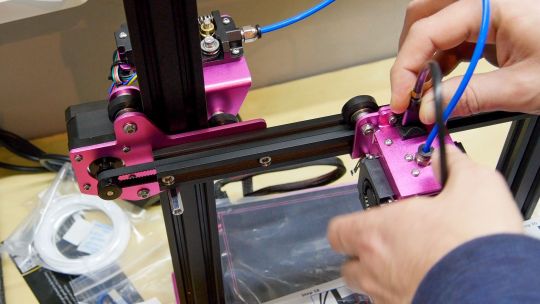
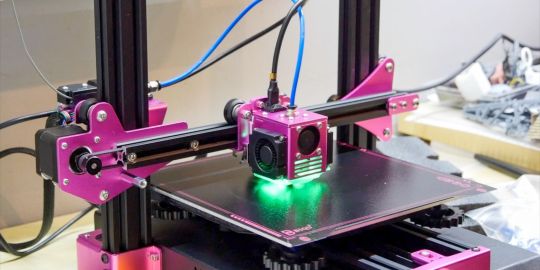
See on amazon
The Biqu B1 isn't just great for the price; it's great, period. It prints reliably, and it's easy to operate. Although it needs some construction, the build guide is comprehensive and everything is well labeled, so any skill level should have no issues putting it together.
Specifications
Brand: Big Tree Tech
Build Volume: 9.25x9.25x10.62 inches (235x235x270 mm)
Connectivity: Micro-SD and USB
Heated Build Plate: Yes, with removable spring steel sheet
Feed Type: Bowden tube
Dimensions: 16.2x19.4x15.8 inches (412x492x402 mm)
Weight: 17.6lbs (8kg)
Pros
Great instructions and labeled part bags
Superb adhesion and double-sided print bed for extended lifespan
RGB lighting in the print head and control dial
Very reliable printing
Easily upgradeable
Cons
Noisy fans, even when idling
Buy This Product

Biqu B1 amazon
Shop
// Bottom var galleryThumbs1 = new Swiper('.gallery-thumbs-1', { spaceBetween: 10, slidesPerView: 10, freeMode: true, watchSlidesVisibility: true, watchSlidesProgress: true, centerInsufficientSlides: true, allowTouchMove: false, preventClicks: false, breakpoints: { 1024: { slidesPerView: 6, } }, }); // Top var galleryTop1 = new Swiper('.gallery-top-1', { spaceBetween: 10, allowTouchMove: false, loop: true, preventClicks: false, breakpoints: { 1024: { allowTouchMove: true, } }, navigation: { nextEl: '.swiper-button-next', prevEl: '.swiper-button-prev', }, thumbs: { swiper: galleryThumbs1 } });
It's not often that a printer comes along which only unique selling point seems to be that it's available in pink and has some RGB lights, but at first glance, that's exactly what the Biqu B1 is. But if you can look past that, you'll find a remarkably well built and reliable printer at an affordable price point. I wasn't expecting much, but the Biqu B1 taken the spot as my daily printer of choice; it's just that good. And it's also available in black.
Note: if you purchase from Amazon, we have an exclusive coupon for the black version of this printer. Enter code 6SB64EP7 at checkout for $30 off, taking the price to $250! (Valid until the end of February 2021). And be sure to enter the competition to win a Biqu B1 at the end of this review.
youtube
Biqu B1 Design and Specifications
In terms of core design, there's nothing remarkable or innovative about the Biqu B1 at all. It's an Ender 3 clone, and arrives half-built, with the bottom half (which includes the power supply and motherboard) already made. Parts are all machined and anodized (in a gorgeous pink, no less), and fixed onto a standard t-slot frame.

After unpacking the printer, I admit I panicked a little. I had glossed over the small print about this printer being a kit build, and the sheer number of bits and screws was quite overwhelming. I've tried to build a 3D printer from a full kit before, and it went horribly wrong and is still sitting in my loft to this day, mocking me relentlessly every time I venture up there.

Thankfully, every small bag of screws is labeled with the precise contents, and which step it relates to. It's this sort of attention to detail that makes the Biqu B1 stand above the competition.

A full color illustrated 20-step build pamphlet is included, and I'm confident that you won't have any problems putting this together even if you have zero experience. A bag of all the tools you need is also included.
Bed Leveling
Although a BLTouch auto-leveling upgrade is available as an optional purchase (and a bracket included in the core set), I wouldn't bother. The manual leveling process is easy enough.

After homing all of the axes, enter the manual leveling interface screen, and place a piece of A4 paper underneath the nozzle. At each of the five points, in turn, raise or lower the print bed using the dials underneath such that you can move the paper around with the slightest of friction. The last of the five points is in the center, with no dial underneath, but if the other four points are correct, that should confirm it. You will need to repeat the process a few times, as leveling one side will invariably affect the others.
Once completed, you're ready to start printing. There are some small test small files included on the SD card, but they're not particularly impressive, so I'd recommend slicing your own right away.
Slicing
The Biqu B1 is natively supported by a range of slicing software. I used Cura on Mac OS, and found a ready-made profile included in the download. Print quality ranges from 0.12mm layer height to 0.28mm.

Export your sliced Gcode files to the included micro-SD card, or a USB drive, then insert that into the side of the control panel on the printer.
Printer Interface
The 3.5" touchscreen interface on the Biqu B1 is one of the cleanest, intuitive, and comprehensive I've seen yet. Menu items are obvious, and you can even delve into the terminal to directly talk to the printer in Gcode if you wish. Uniquely, a retro Marlin interface can also be used, thanks to a unique dual-operation mode. I'd recommend sticking with the default Biqu Touch mode, however.

Live Z-adjustment is possible during prints (curiously named "BabyStep"), but leveling was so easy and accurate that I never actually needed to use this feature.

If the filament sensor detects a run-out, the print head is moved off safely to the side and the print paused. You can then retract the remainder through the Bowden tube (I'd suggest using a little piece of card to divert it and ensure it doesn't get stuck in the filament sensor on the way back), and insert a new one. Unlike some models I've used which restricted retraction and feeding to 10mm intervals, the interface on the Biqu BH1 goes up to 200mm at a time. Filament changes don't take more than a few minutes to complete.
Heated Bed and Spring Steel Sheet
A heated bed and removable steel print surface is certainly not unique on this type of printer, but dig deeper and a few things stand out here.

Firstly, I want to point out that I have yet to experience any curling around the edges or other adhesion issues, and the first layers were superb with every model I printed, in both PLA and PETG. I didn't use any glue, tape, or hairspray; just a simple wipe-down wipe 99% alcohol between prints. In my experience, this is quite remarkable.

This also indicates that the heat distribution to the heated bed is even across the whole surface, and there's no inherent warping in the bed. Though initial small prints on the center of a bed can often go well, it's only while trying to print much larger objects that fill the whole print bed where you'll start to see the effects of uneven heating and a warped surface.

As an aside, the surface of the steel sheet produces a pleasing stippled effect on the bottom layer.

The thin spring steel sheet is designed to be removed when a print is finished, such that you can remove stubborn prints by bending the sheet and snapping the print off. In reality, I haven't needed to do this yet. Without fail, once cooled, every print has naturally detached itself from the surface.

Lastly, the steel sheet is double-sided, so if one side has worn down over time, simply use the reverse side to double the life span.
Repairability
After a week of printing with the Biqu B1, my initial impressions are outstanding, but of course, I don't yet know how it'll perform in the long term.
Though I wouldn't normally attempt any kind of repair on a 3D printer, the experience of at least half-building this one makes me believe I could, should the need arise. Having a printed instruction manual on how to put it together again is also comforting. But there are other factors that make the Biqu B1 a good candidate for repairs and upgrades.
Inside the base, the SKR1.4 motherboard has removable TMC2088 stepper drivers. These could be replaced or upgraded easily.
The hot-end assembly is connected with only two screws, a custom USB-C cable, and a Bowden tube. Replacing the entire hot-end, or swapping out for a CNC or laser module, should be trivial. In fact, Biqu has a direct drive print head (ie, one which the filament feeds directly into rather than via a Bowden tube) available now as an optional upgrade.

The spring steel is double-sided to extend the life-span, but this implies it will eventually need to be replaced. Thankfully, it's quite a lightweight component, and you can purchase another from a number of outlets for less than $30.
Should You Buy a Biqu B1 Printer?
The Biqu B1 isn't just great for the price; it's great, period. I've been reviewing 3D printers for around a decade, and models that cost over $1000 haven't printed this reliably. The Biqu B1 will take pride of place in my workshop as my daily printer.

The only downside is the noise—not from the stepper motors (which are virtually silent), but from the fan in the base. This is running whether the machine is actively printing or not, so you'll probably want to shut it down completely when idle. It's noisy enough that I wouldn't want it in the office with me. But this is a minor flaw in an otherwise superb printer, and perhaps something you could upgrade if it really bothered you.

(Stackable planter from Thingiverse)
If you're worried about the fact it's only half built when it arrives: don't be. The instructions are comprehensive, illustrated at every step, and the component bags are fully labeled. All the tools you need are provided.
At less than $300, the Biqu B1 is a steal.
The Biqu B1 Is an Incredible 3D Printer for Under $300: What Are You Waiting for? published first on http://droneseco.tumblr.com/
0 notes
Text
(GL/Yuri) Shoujo Heroine... and Friends Chapter 2

Second chapter is up! Please comment your thoughts and like it if you, well, like it.
Rated: T
Fandom: Original story
Relationship type: F/F with some F/M
Description:
Sahana is friendly, innocent and optimistic, making her the perfect shoujo anime heroine… except she’s not the main character of this story.
When school prince Toyomi asks her out, she starts hanging out with him and leaves her friends behind. Prim and proper Masami and tomboyish slob Kunie don’t seem to have much in common outside of their friendship with Sahana, but they try to make the best out of a lonely situation.
So why is the god of love and marriage watching them, red string of fate at the ready? CONTENT WARNING: Some homophobic language and bullying.
Chapter 2: Break her heart and I’ll break your gallbladder
With her laptop where it’s supposed to be, Masami created a spreadsheet. She was sitting straight-backed and straight-legged on her bed.
She titled one column, ‘Hobbies’, another ‘Average grade per year’. The third column was for ‘Intentions’ and the fourth was ‘Methods’. Yes, this is very typical teenage girl behaviour, I know.
After saving the spreadsheet, she took her laptop to the printer in the study. Her smile patted her back for her. Toyomi’s Friendful page gave little information, and she refused to follow him just to see if he had any secret posts.
Naturally, she brought the sheet to school and slammed it on Toyomi’s desk before homeroom. He looked at her like she came in with a rainbow umbrella hat on her head and a wearable sleeping bag on her body.
All he could ask was, ‘Can I help you?’
‘Today at lunch we will discuss your relationship with Sahana and determine your worthiness.’ You can bet your life savings she practised that line on the train ride to school. If you want an instant win, of course. You can trust me on this. I was there.
After their arrival, Kunie and Sahana headed to Toyomi’s desk to see what the commotion was all about.
Masami whipped her head towards Kunie, who held her hands up like she was facing a police officer.
‘Kunie, you can join me. We’re going to learn more about Toyomi Hane at lunch. And Hane…’ She remembered Ukiwa’s order for her homeroom students. ‘...er, Toyomi, you cannot skip this interview. If you do, it shows a lack of care for our dear Sahana. Break her heart and I’ll break your gallbladder. Understand?’
Toyomi nodded and Kunie walked closer to him, taking advantage of her superior height. Masami hid Sahana behind her arm, while Sahana looked between the three parties, looking for a way to lighten the mood.
‘You know, while walking to the train station I saw this truck for a restaurant near me that had ‘You can’t beat our meat’ painted on its side in big English letters. I was super shocked since it’s not true. Not by a long shot. My mum is an excellent cook and has been beating their meat for years.’
First came Masami’s suppressed chuckle and then came Kunie and Toyomi’s open laughter.
‘What’s so funny?’ Sahana asked.
Masami and Kunie wrapped their arms around Sahana. ‘Never lose your innocence,’ Kunie said, wiping a single tear from her eye. The tear was from the prior laughter, but Sahana didn’t need to know that.
For the lunch interview, Kunie combined her and Masami’s desks, a difficult task given how far away theirs were from each other. They sat together on one side while Toyomi and Sahana sat opposite to them. Sahana’s friends peered at the spreadsheet.
Masami cleared her throat with a little cough. ‘What are your hobbies? I believe you’re in the theatre club, correct?’
Toyomi nodded. ‘And the student council. I also like baking, sewing and reading shoujo manga. Oh, and I’m a big fan of action movies and professional wrestling.’
Sahana turned to her boyfriend. ‘You are?’
Masami clicked her pen. ‘Interesting.’ She wrote about Sahana’s surprise in tiny characters in the ‘Hobbies’ column.
Kunie gave a quick glance at the sheet. ‘So how do you fit in these hobbies with your schoolwork? What are your grades like?’
‘Oh, pretty good. I think I’m ranked 15th this year level.’
‘And last year?’
‘I believe I finished... 17th?’
‘Did you or did you not finish 17th?’ Masami asked with a tone befitting of a bad cop from a movie.
Sahana fiddled with the hem of her skirt, looking up at Toyomi and searching for a crack in his expression that could ruin everything. But her dear Toyomi kept the contented smile and patient stillness of a meditating Buddhist monk.
‘I finished 17th. I make sure to spend my time wisely. Because of this, I promise you I won’t waste Sahana’s time.’
The corners of Sahana’s lips leapt up and she hugged a now blushing Toyomi. I’d do the same if someone said that about me.
The smiling spread to Masami, who took note of his words in the space on the paper beneath the spreadsheet.
‘Now, speaking of which, what are your intentions with Sahana?’
That question got a rare frown from Sahana, who was still hugging Toyomi. Her front arm doubled as a shield for her boyfriend.
‘Can we stop this? Don’t you know enough?’
Guilt pricked Masami’s heart, but she shook her head. She had a mission and not even the reason for said mission could get in her way.
‘It’s fine,’ Toyomi reassured Sahana. Determination burst from his eyes as he looked into Masami’s. ‘I like Sahana a lot and I want to spend more time with her.’
‘Can’t you do that as a friend?’ Masami asked.
Sahana pouted. ‘Masami!’
Toyomi answered with the same look in his eyes despite the jitters I know he felt. ‘To be honest with you, I want to kiss her someday. It would probably be considered weird if we kissed as friends.’
Masami raised an eyebrow. ‘Just kissing?’
Before Sahana or Toyomi could voice their discomfort, Kunie snatched Masami’s pen and scribbled all over the sheet.
‘That’s enough. We only need one more piece of information. How did you ask her out?’
Toyomi stroked his chin for a second before heading to his own desk and pulling a bag of chocolates out of his bag. He asked Sahana to hand him the poem that rested in her bag.
‘I’m so sorry, Sahana. I had some leftover chocolates and was going to give them to you today when this happened.’ He dropped the bag of chocolates and slid the poem onto Kunie and Masami’s conjoined desk. ‘I recited this and gave her chocolates similar to these. Enjoy.’
Kunie started with the chocolates while Masami silently read the poem. The mix of rich chocolate and sweet yet savoury matcha greeted Kunie’s tastebuds with the same friendliness that Toyomi himself possessed. Her eyes popped out in shock and she gulped down several chocolates with a grin.
She offered one to Masami, who seemed preoccupied, judging by the tears coming out of her eyes. Masami stood up and bowed.
‘Please take care of Sahana for us.’
Toyomi returned the bow. He took Sahana’s hand and lead her to the garden outside, where they chatted for the rest of lunch.
After spending a few minutes in the theatre club after school, Toyomi headed to the student council room. The president scowled at him and looked at his watch. Meet Atsuji Chinen, a tall and skinny boy with large, round, clear-framed glasses and short purple hair that would not be seen on a real-life student council president. But hey, he’s got to stand out, right? How else are you supposed to recognise his importance?
‘It looks like your various… hobbies are stretching you rather thin. Maybe you should consider eating more of your desserts.’
Missing the point of that comment, Toyomi looked down at his own body. ‘Do I really look that thin?’
Atsuji massaged one of his temples. ‘Just sit down.’
Meanwhile, Sahana and Kunie rehearsed a scene they shared. They both constantly looked to Ukiwa for approval but she was busy staring at her phone.
Dooru sighed. ‘I guess it’s not the same without The Prince here.’
‘We’ll survive,’ Kunie replied with a shrug.
‘I still don’t get you. Prince Toyomi is a wonderful person. He should be enjoyed by all.’
‘I’m pretty sure he’s only able to be enjoyed by Sahana. Does that make her a princess?’
‘Wait, what? Do you mean…’ Dooru turned to Sahana and smiled at her. Believe it or not, that smile was genuine. ‘Congratulations. At least someone appreciates him.’ She said that last sentence facing Kunie, who rolled her eyes.
Sahana looked at her watch and gasped. ‘I’ve got to get to my other club. I promise I’ll practice at home!’
Ukiwa waved her hand dismissively, still looking at her phone. Sahana raced to the Home Ec room. As soon as she arrived, Masami turned off her stove so she could hug Sahana.
‘Making something new?’ Sahana asked.
Masami smirked and lifted the lid on the pot. The stench of mustard, custard and fish filled the room, prompting the rest of the cooking club to pinch their noses.
Sahana grabbed a spoon and had a taste of the broth. ‘Delicious as always. You’ve really outdone yourself.’ She scooped another spoonful and pointed it at Fumie, who gave her an awkward smile.
‘Um, I wouldn’t want to take food from you.’
Sahana frowned but nodded in understanding. ‘Oh, Masami, thank you for earlier.’ Masami looked at her like a fish would look at a bird toy being randomly thrown into its tank. ‘You know, for looking out for me. Remind me to thank Kunie too.’
Masami patted Sahana on the head. ‘I’m sure you’ll be fine with Toyomi. Consider his digestive system safe.’ She grabbed another spoon and sipped the broth she made, scrunching her nose. ‘Unlike mine.’
#lesbian#yuri#anime#fiction#romance#writing#LGBT#lgbt romance#Breaking Stereotypes#original fiction#drama#comedy#parody#Shoujo Heroine... and Friends
0 notes
Text
How to make a HUGE upholstered bulletin board
Hello there! I'm back with a project I've been planning for a few months! I was finally able to get to it last week. I've been holding off on starting until I could get a sconce installed on the wall first. I've only shared this side of my office once because it's hasn't been much to look at. I showed you this wall early last year:
It certainly wasn't awful, but it wasn't nearly as cool as the other side of the room!:
You can see how I built that wall of office built ins here.
Since that before picture I've changed out the TV for a slightly larger one and moved the dresser to another room. The bookcases gave me plenty of storage. (I replaced the dresser with a smaller table for the printer.)
I've had an idea for a big bulletin board in my head for a long time, but as I mentioned, I wanted to get a sconce installed first. If you have an outlet it's pretty easy for an electrician to run wiring for a sconce and switch. I've done it many times over the years!
I taped out the size for the board before starting:
I use painter's tape all of the time to figure out the placement and sizing of things -- it's great for figuring out furniture layouts too!
This post may contain affiliate links for your convenience.
See my policies and disclosure page for more information.
I found the brass sconce here (I'll show you a closer pic in a bit) and it was only $36! It is an LED light, so if you don't like that brighter daylight look, you'll want to pick something else.
Step one: Hang particle board
I had to give my bulletin board a base on the wall -- otherwise I would be gluing the foam directly to the wall. I learned a long time ago avoid glue on the wall at all costs. :) My bulletin board size is four by six feet so three 2x4 boards were enough:
I think they were $7 each. (It would be slightly cheaper to get a 4x8 piece cut down, but I get impatient sometimes.) As you can see, the TV was staying. I left it up as I worked because I wanted the bulletin board to surround the TV mount as closely as possible.
At the bottom I cut the boards short so the cords could go through that channel:
I don't have a pic, but I later put my favorite cord hider down the middle with the cords inside. If I have to remove the TV I can still take it off the wall and pull the cords through the bottom.
Step two: Install foam boards over the particle board
I've used the large 4x8 insulation boards you can find at the hardware store for bulletin boards before, but they are bulky and hard to get home. (I'd have to score and cut it there to get it in my car.)
So instead I used this insulation kit I found at Home Depot:
I can't remember the exact price because I bought it so long ago, but it wasn't bad!
It comes with six sheets and they are about 3/4 inch I believe. One kit was plenty!:
I used Liquid Nails (in a caulk gun) on the back of each piece of foam to secure it to the wood:
As you can see I just pieced it together as well as I went. Cutting it down is easy, it's just MESSY. I used a razor to score the foam and it popped off with a pretty clean edge.
It looked like it had snowed in my office after I was done, but it worked!
Step three: Attach the fabric
This is where I made a little misstep, so learn from my mistake! It ended up working out much better in the end thankfully!
I used a staple gun to attach my fabric at the top and then started working my way down. You'll need to be patient with this part! To make sure the fabric stayed against the foam, I used this spray glue as I worked. Just spray over the foam and then smooth your fabric down as you staple it around the boards.
I removed the TV for the middle part and just cut through the fabric:
Trim the fabric and staple around the hole like so:
I could have taken the TV mount off and installed it over the particle board, but that seemed like extra work to me. Either way would work -- just be careful not to put the foam and fabric right up against the vents of your TV so it can "breathe."
The spray glue method worked GREAT! Almost too well -- the problem was, after I was done I could see the minor imperfections in the foam (because the fabric adhered so well). I wish I would have taken a photo to show you. It wasn't crazy noticeable, but enough that I knew it would bug me.
Thing is, I bought a fabric for this project months ago, but when it came time to install it, I chickened out. It was out of my comfort zone a bit, so I went with a basic cream tweed fabric instead -- trying to play it safe. But when I got it up, not only could I see the imperfections...but it was BORING. 😂
Sooooo...I went back with my original fabric and LOVED it. I should have stuck with my gut, but it ended up being a good mistake because the first layer of fabric hid the imperfections. (I installed the final fabric over the first.) After I got my fabric up, I painted and installed trim around the whole thing to frame it out:
I carried the beautiful green (called Vintage Vogue) on the built ins over to this side of the room and I absolutely love it against the fabric.
The fabric makes a statement but isn't busy. A larger print (like a floral) would look great, but I was worried it would get super busy with the photos/notes I want to put on here. Here's a closer view of the art light:
You can see how bright the LED light is!
I am SO in love with how this turned out!! I found my antelope (faux) fabric at Hobby Lobby for 40 percent off, but you can also find it here online:
The little console was from At Home and it's perfect for extra printer paper and ink.
I've already started filling up the board with things I've wanted to display for awhile -- some inspiration pics, mementos and recent magazine spreads:
Aren't those huge letters fun? I found those at Hobby Lobby too. I think they still have them!
It turned out just as I had envisioned all these months. I love that I have a spot to display these in a "neat" way:
Here are a few things to think about if you tackle this project:
Use a fabric with a loose weave -- something that will allow your pins to get through easily (and won't show or snag when you pull them out).
Remember you can only go as big as your fabric width -- length can be as long as you want. If you want one piece of fabric, you can only go about 50 inches across.
To avoid seeing any imperfections in the foam you can do a layer of a thin fabric (like muslin) over it first. I think anything with a pattern (like what I ended up with) would also help to hide it.
Here's a look at the before of this wall again:
And how it looks now!:
I have plans for one more big project in this room! But after wanting to do this big bulletin board for so long, it feels complete to me for now. Have you created a big bulletin board like this for your home?
------------------------------------------------------
Here are a couple of other ideas for office organization! You can also make a HUGE chalkboard using my tutorial here:
Or use an old frame to create a bulletin board as well:
(I later changed it out to a magnetic board instead of using pins!) See more of our home here. To shop items in our home, click here! Never miss a post by signing up to get posts via email.
This content is property of Thrifty Decor Chick LLC. If you are reading this on any other site other than https://ift.tt/1kRxOJ2 or one of her social media platforms, please contact her immediately (thriftydecorchick at gmail dot com). Any other use of this content is strictly forbidden.
This industry information is provided by ThompsonsComfortConnection.com.
Copyright © Thrifty Decor Chick. All Rights Reserved.
By: Thompsons Comfort Connection Blog Feed https://ift.tt/3aTABBW
0 notes
Photo

Zine Prototyping — Printing/Binding Exploration @ the IDM Print Lab!
Before I could actually print and bind my zine, I first wanted to explore the options available to me at the IDM print lab. I set up a consultation appointment with Andrew Lau, the print lab TA, and together, we did a bunch of exploration in preparation for my zine printing!
First, I showed Andrew my files and explained to him what I was thinking for my zine (printing two pages of my zine on one sheet of 8.5x11 paper and folding the sheet for zine pages that measure 8.5x5.5). I also spoke to him about my vision on what kind of paper I wanted to use (I was thinking a light cardstock or possibly a thicker and more substantial inkjet paper), as well as binding (I was thinking of a “stitch” binding where I staple at the crease of the zine).
After explaining my vision to Andrew, we then got into the more technical stuff. First, I expressed my concerns about printing my pages full-bleed (the layout of my pages all have full bleeds). I asked him how we could possibly get this done, and he suggested that we size down the page files and then print on regular 8.5x11, then trim the margins created by sizing down the images. To explore this, we ended up trying out this technique. Below is an image of our test-run:

My test-run of my zine after trimming the margins created by the printer (and the size-down approach). Notice how it is slightly smaller than a 5.5x8.5 page (the dimensions of the “Gene Zine” placed alongside my zine).
I loved the way this test-run came out! The size is absolutely perfect— it is small enough to fit in your hand and is super easy to pass around/out, which is exactly the vibe I was going for. Now that I’ve tested out this size, I’ve actually found the 8.5x5.5 dimensions are a little too big for my liking, so it all ends up working out!
We then took a look at different kinds of paper. Although I expressed to Andrew what I was going for (something small yet substantial and something that would make colors/ink pop), we did explore the options to see if there was maybe something different I would like to use. Below is a picture of some different paper materials we perused:

We took a look at various printing papers, including standard photocopy paper, parchment paper, and news paper.
After looking over the options, I decided on using a piece of paper that was a better version of photocopy paper (something that’s a bit thicker and that’s whiter than traditional photocopy paper so the colors pop and the pages feel substantial to the hand). Andrew advised me to go to a print shop like Staples to buy this paper in preparation for printing.
We then focused our attention toward binding. Using the stitch binding stapler in the lab, we did a couple of test runs of the stitch binding. Below is a picture of our exploration:

A test-run of the stitch binding stapler on regular photocopy paper.
Overall, the stapler was pretty easy to use. I am planning on using one staple at the center of the crease (as shown above) to bind my zine, as I believe that will be enough to hold it all together since I only have two 8.5x11 sheets (8 zine pages).
Finally, we did some exploration on the risograph printer to see if I wanted to possibly use it for the front and back covers of my zine! Below is an image of the risograph prints we made:

The front and back pages printed with the risograph technique. Note how the collage image on the front cover is missing (this will need to be ink-jetted).
I absolutely LOVE this new front and back design! It is so vintage-looking and zine-y! Andrew told me that we could ink-jet print the collage image onto the front cover, then risograph the elements pictured above, which I think is a wonderful idea because that further reiterates my concept of collage in this project! I am so happy we did this exploration because I literally would have never thought about doing this for my project if I hadn’t. I am so happy with the way it has turned out and I honestly feel like my project has become way cooler than I ever imagined it would be.
I learned so much about printing just from this hour-long consultation with Andrew. From how to achieve full-bleeds, to simple binding, to risography, my process is so much more informed now and I think I have a great, bold project on my hands. I am looking forward to the actual printing and binding moving forward and am even more excited to see the final product!
0 notes
Text
The Design Edit
In the Newhaven studio of furniture-maker Marc Fish, Claudia Barbieri discovers how the designer bends wood to his will.
17th September 2019

ONE MIDNIGHT IN July, the SushiSamba restaurant at 110 Bishopsgate, high above London’s financial district, closed earlier than usual and a team of workmen moved in. Taking infinite care they manoeuvred three intriguing objects, made from around 5,000 wood shavings layered and interleaved with resin, into the service lift that whisked them to the 39th floor of the building formerly known as Heron Tower. There, working against the clock with chronometric coordination, installers, electricians and riggers assembled the objects into a 2.5-metre-wide, light-emitting, revolving conch.
“We had to make the pieces the right size to fit through a metre-wide lift door – there was just 15 millimetres clearance,” says the designer Marc Fish. “At 4 o’clock in the morning it was finally being winched into place, just as the sun was rising behind it.” SushiSamba’s marine mollusc is pure Fish: organic form; technical complexity; extreme precision and creative innovation. “It was quite a special night for us. The restaurant opened at 10 am the next morning all cleaned up, almost as if we hadn’t been there – except there was a large shell hanging from the ceiling,” says Fish.
In the past ten years Fish, now 48, has emerged as a rising star of art furniture, with clients from as far afield as Hollywood queuing for up to two years for his creations – and international students flocking to learn his methods at the Robinson House Studio Furniture School. What attracts clients, students and design mavens is a particular fusion of traditional and high-tech craft skills, daring aesthetics and experimental materials science.
Marc Fish with ‘Sycamore Seed Sculpture’, 2019 COURTESY: Marc Fish / PHOTOGRAPHER: Simon Eldon
Despite his global status he still operates from Newhaven, a nondescript south coast port near Brighton with a tradition of furniture-making, where he first set up a studio cum workshop 22 years ago. Now, in an unpretentious single-storey backstreet shed, up to fifteen would-be cabinet makers at a time learn traditional woodworking skills under the eye of master craftsman Theo Cook (Fish’s partner in the school, and a pupil of the 20th century British and American masters Edward Barnsley and James Krenov).
In the main workshop next door, three makers on a recent day are working on a mirrored pair of ‘Ethereal’ console tables – as well as a surreal seven-foot high armchair that Salvador Dali could have conceived for Game of Thrones. In his studio Fish lays swatches of ink from a broad -tipped pen onto a sheet of paper: calligraphic doodles that may germinate into an exotic new species of Fish furniture, or end in the waste bin.

Marc Fish working on ���Adhesion console’ 2017 COURTESY: Marc Fish / PHOTOGRAPHER: Simon Eldon
Furniture has function and Fish takes care to tick that box. An ‘Ethereal’ console table may swirl and curve but it’s flat enough at its centre to hold a phone or a lamp; a ‘Babel’ drinks cabinet may look like a man-sized caterpillar’s cocoon but, hinged open, it displays bottles and glasses. Still, what fires his imagination is form. “It’s nice to make sculpture, and not to have practical limitations forced on you,” he says. “Often you come up with a form and then you think, ‘How do I make it into a table?’ Almost as an afterthought, you put a glass top on it. I don’t want to go down that route anymore. The reality is, a lot of what we do is sculpture.”
Marc Fish, ‘Mokumi-Gani’ console, 2019 COURTESY: Marc Fish / PHOTOGRAPHER: Simon Eldon

Marc Fish, ‘Mokumi-Gani’ console, 2019 (detail) COURTESY: Marc Fish / PHOTOGRAPHER: Simon Eldon
While his reputation has soared these past few years, his career path has been anything but linear: in fact it has been almost as sinuous as his signature style. Aged 14 he wanted to be an architect, but he left school at 16 and went to work in a bank for the next seven years. As a hobby, he started restoring vintage Porsche and Volkswagen cars – one of his restored VW campers was bought by the company for its museum in Germany. Then he turned his self-taught metalworking skills to making metal furniture.
For a couple of years he did well. “In 1998/99 we were selling work through three shops in Brighton,” he remembers. “Then those three shops all went bust in three months. Taste suddenly changed. Metal furniture died a death, it was considered cold and sterile. Everybody in Brighton was getting into heavy, chunky dark timber furniture from Indonesia. Suddenly there were no more orders. It was pretty dire.”
By then, the design bug was in his blood. Rather than dwell on the setback, he went with the flow and switched into wood. After studying for a City and Guilds furniture-making qualification, he trained for six months under the cabinetmaker John Lloyd in Ditchling – spiritual home of Eric Gill and the Sussex Arts and Crafts movement.

Marc Fish with ‘Vortex’ dining table, 2018 COURTESY: Marc Fish / PHOTOGRAPHER: Simon Eldon
As his materials evolved, so did techniques and styles. The early metal furniture was, “more Bauhaus, more 1920s, art deco but a little bit contemporary.” After learning to work with wood he spent several years making traditional joinery pieces. Then, in 2009, “I woke up one morning and thought, ‘Why am I doing this? I don’t like what I’m making. There’s no creative outlet’,” Fish remembered. So he decided to change direction.
He set up his school to earn a living from teaching the skills he’d learnt, and in parallel started experimenting with supple wood veneers. Bent into shape, stacked sequentially together, suspended in and bonded together with resin glues, the flexible slivers of wood lent themselves to naturalistic shapes. “I just fell into my design identity,” he says.
Marc Fish, ‘Ethereal Desk’, 2018 COURTESY: Marc Fish / PHOTOGRAPHER: Simon Eldon
His first ‘Nautilus’ edition of tables, like the ‘SushiSamba luminaire’, was inspired by the Fibonacci spiral of a seashell. His ‘Ethereal’ range of desks and chairs draws on the lacy translucency of a skeletal leaf. Perhaps oddly, his own taste lies elsewhere. His favourite designer, he says, is the 1930s French modernist architect Pierre Chareau, a visionary pioneer of the use of mechanical engineering and heterogeneous materials. “I would like his aesthetic in my own home,” Fish says. As for his own work: “I design furniture for a different market. I am not my own market.”
Though his style may bring to mind the voluptuous ripples of Art Nouveau and the fluid idiom of his Irish contemporary Joseph Walsh, Fish denies consanguinity with either. Art Nouveau he dismisses as “almost treacly”, and asked for historical role models he looks no further back than the last century, pointing to the pioneering work of John Makepeace and Wendell Castle.

Marc Fish, ‘Laminaria chaise’, 2015 COURTESY: Marc Fish / PHOTOGRAPHER: Simon Eldon
Walsh he respects; but for all the similarities of conceptual idiom, he says they inhabit different technical worlds. Where Walsh crafts his willowy structures from saw-cut 2-millimetre veneers, Fish works only with thousands of knife-pared veneers, each no more than 0.6 millimetres thick. The thinness of the wood allows it to be bent like paper, without steaming. It’s a technique that he says allows a purer aesthetic. But it is also extraordinarily time-consuming, technically challenging and costly. The ‘Nautilus’ table was built from a stack of 4,000 veneers and took a thousand hours to make.

Marc Fish, ‘Nautilus’ coffee table, 2014 COURTESY: Marc Fish / PHOTOGRAPHER: Simon Eldon
The translucent resins too, binding the veneers together into batches, are the end-product of a painstaking process of trial-and-error and materials-science research. “We’ve had five resins that we’ve used in the past four years,” Fish says, “We’ve experimented absolutely to death. We’ve had a nightmare journey!” A big challenge is the way the resins react with the wood: to speed up production, the liquid resins are heated to harden faster, but in this curing process exothermic reactions happen that can suck air out of the wood and form bubbles in the resin. Flawed batches go into the bin. “It’s taken us three years to get the technique right,” he said. Everything he does is now made this way. A chair leg, for example, could be cut and shaped more simply out of solid timber, “but it’s important to us that we keep the same narrative running all the way through our work,” Fish says.
Marc Fish, ‘Ethereal Desk’ chair, 2019 COURTESY: Marc Fish / PHOTOGRAPHER: Simon Eldon
Still, narrative and aesthetic purity carry a cost. Though advanced industrial technology has its place – the workshop is equipped with a laser cutter and a three-D printer for mocking up prototype models – there’s no economy of scale from batch production, no compromise on the individuality of every piece, the consideration given to every line and facet. Prices reflect this. The ‘Nautilus’ desk sold for £96,000, and the first ‘Ethereal’ desk (a translucent wisp of Sycamore veneer, resin and carbon fibre), was sold by Todd Merrill at last December’s Miami Design for $130,000. Smaller pieces, such as the ‘Ethereal’ chair taking shape in the workshop for display at this year’s PAD London in October, will be priced nearer £20,000.

Marc Fish, ‘Relics Triptych’, 2016 COURTESY: Marc Fish / PHOTOGRAPHER: Simon Eldon
That may seem a lot for a chair, however exquisite. But take off the production costs and divide by the hundreds of hours that go into the conception, design and making, and it doesn’t match the return on, say, a Jeff Koons balloon dog. On some of his smaller pieces, such as his intricately constructed memento mori ‘Relic’ vase series, the return on invested time comes in at about £30 an hour. Larger commissions are more profitable: Still, “I don’t think anybody gets into furniture-making for the money,” Fish says. “You get into it for the creative freedom that it gives you.”
You can view the article here also; https://thedesignedit.com/in-the-studio/marc-fish/
0 notes