#opened it in PS and exported it so I think this is as HQ as it gets
Explore tagged Tumblr posts
Text
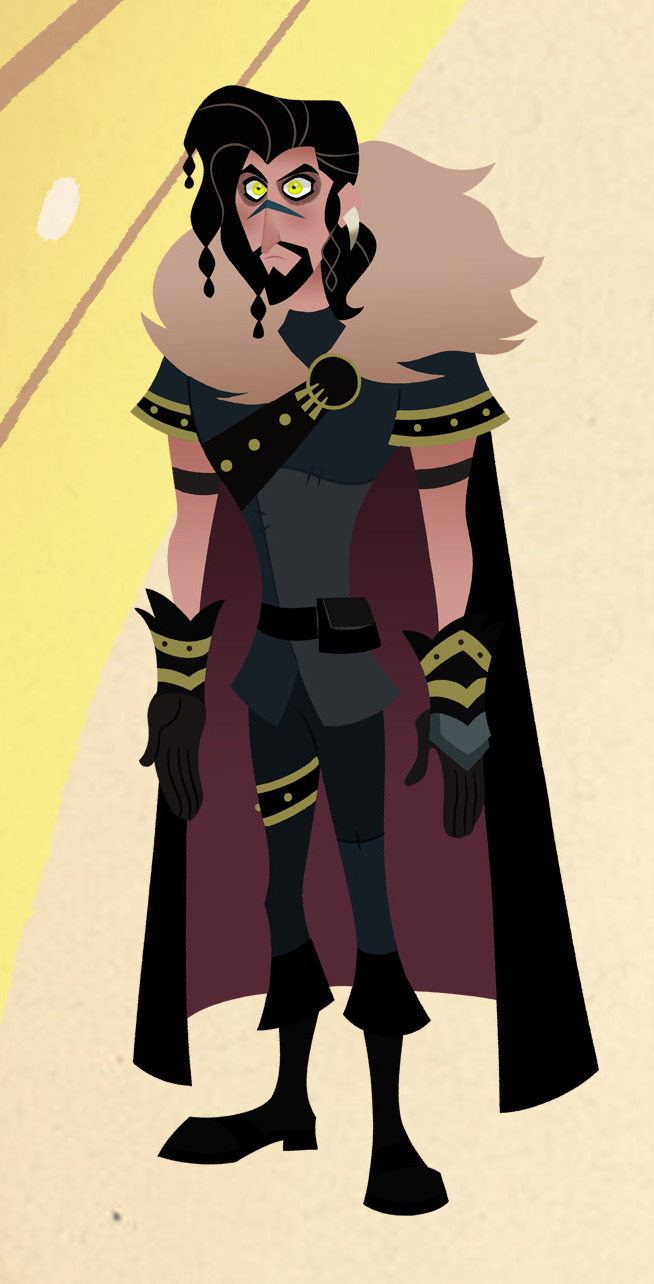

Full res of Hector from [redacted] along w/ the episode description for 'Rapunzel and the Great Tree'
#opened it in PS and exported it so I think this is as HQ as it gets#tangled the series#tts hector#hector#official art#still looking through the book but I'm grateful Hector's render is p crisp? Adira's seemed lower quality
72 notes
·
View notes
Photo
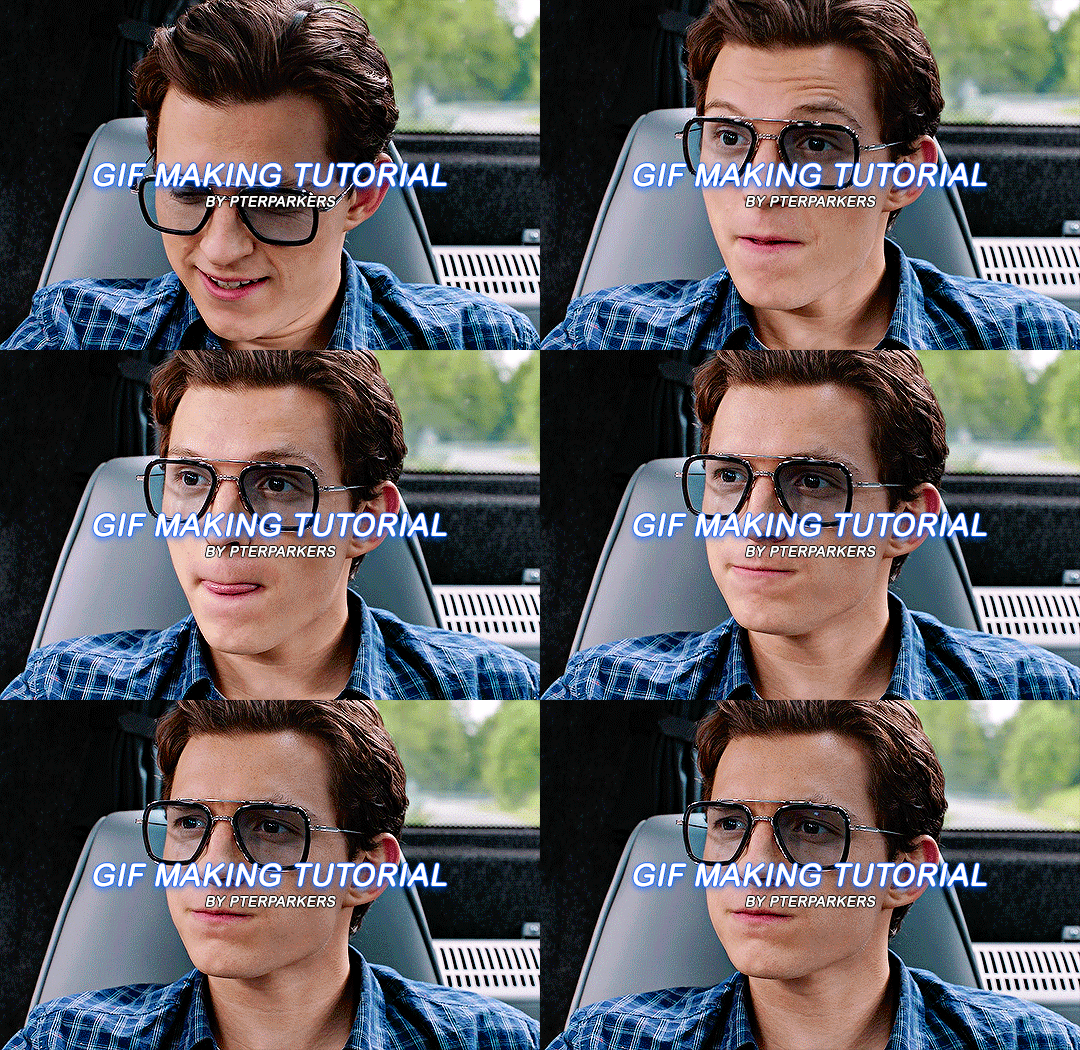
i finally decided to take the time & do a heavily requested gif tutorial! this will be very detailed & is how i make every single one of my gifs from start to finish! i’ll also include resources for ps downloads, actions, etc. if you have any questions, don’t be afraid to ask! & if this helps you, pls rb!!
TUTORIAL UNDER THE CUT!
i’m going to break it down into sections to hopefully make it easier to understand!
1. software i use
2. hq movie/tv show/video downloads
3. screencaps
4. importing screencaps into photoshop
5. cropping
6. actions/sharpening/gaussian blur
7. image sizing
8. time delay
9. coloring
10. saving
1. software i use
photoshop - i use photoshop cc 2020 on my macbook air but any version of photoshop with video timeline/frame timeline will work for creating gifs! i pay for my photoshop but i know there are ways to get it for free. if you don’t want to/can’t pay for photoshop, here (x, x, x, x) are some links to download it without paying!
mplayer osx extended - this is the software i use for my screencaps. there are a lot of software’s out there & i think it truly comes down to preference. i’m just more familiar with mplayer & the screencaps come out really smooth in my opinion. it’s free as well & here is a link to download it!
2. hq movie/tv show/video downloads
ok so i’ll be real, i never used t*rrents until recently & i’ve personally noticed a huge difference when it comes to quality. before using them, i was using files from MEGA & if you’re not comfortable with t*rrents, i would definitely recommend MEGA links! when it comes to downloading any videos, try to make sure they are 1080p or 2160p if available! 720p is also ok but always try to get 1080p. also i’ve found that with movies, 1080p Blu-ray versions look better but again, it’s all about preference!
t*rrents - i only use one t*rrent site which is r*rbg. they have a huge variety of tv shows & movies from what i can tell.
MEGA - MEGA is really nice for people that aren’t comfortable with t*rrents. the way i used to use MEGA was, i followed accounts on twitter that would upload MEGA links to tv shows. here (x, x, x, x, x, x) are some of the accounts that post a wide variety of links to MEGA downloads! i will say, the only downside to MEGA links is that they seem to take longer to download & you can cap out at a certain amount of GB each day.
folx - i use this to download stuff from r*rbg! download this before you try to download anything from r*rbg. its free to use & there are multiple sites you can download this software from but i’ll link a few right here (x, x, x this one is a link directly from the apple store but it costs $15.00). if you don’t want to download from any of those links, you can just simply look up ‘folx mac/windows download’ in google!
4k video downloader - i use this to download videos from youtube! it’s free as well & you can download it here!
3. screencaps
once you’ve downloaded a movie or tv show or whatever you want to gif, open whichever screencap software you’re using & start playing the video. for mplayer osx extended, to screencap you just go to the scene you want to gif, pause the video, & hold down shift + command + S on mac (i think it’s the same for windows i’m not sure).
4. importing screenshots into photoshop
now that you’ve got the screencaps of the scene you want to gif, it’s time to open photoshop! to upload the screencaps, in photoshop go up in the lefthand corner to file > scripts > load files into stack. once you click on that, you’ll click ‘browse’ over to the right & the files on your computer will pop up. go to wherever you saved your screenshots & select all of them! once you’re done selecting them, hit ‘open’ in the bottom right corner.
5. cropping
now all of your screencaps are imported!!! now it’s time to crop the screencaps. go to the crop icon over to the left.

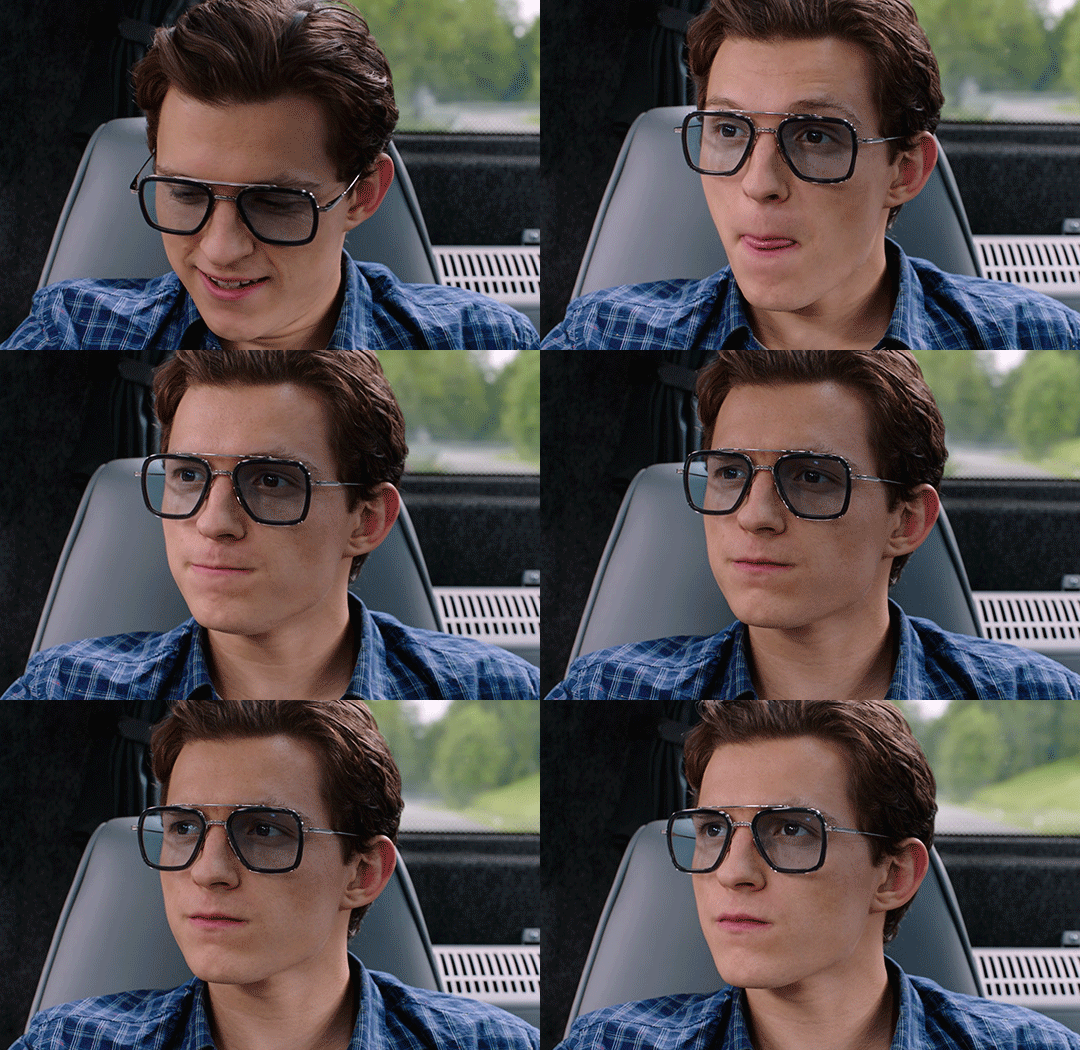
for this gif, i want dimensions to be 540 x 350, so i go up top & type it in

great! now the gif will look like this:
6. actions/sharpening/gaussian blur
now that the gif is cropped, we’re going to sharpen it. i use actions because they are so much faster & easier. i use the action that kylos uses in her giffing tutorial & the direct link to download the action is right here! to access actions, you can either go to window > actions or go over to the play button to the right that looks like this:
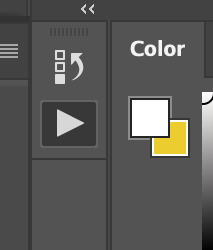
when you hit that play button, you will see the actions that you have downloaded pop up! select where it says ‘select here!’ & then go down to the play button at the bottom to play the action. i circled both steps down below

the default radius in this action is 0.3 & i normally change it to 0.4 (it’ll normally pop up & ask you like shown below & just change it to 0.4!)

now the action has been played!! i add an extra step but it’s optional! what i do next is i add a layer of gaussian blur on top of the action. to do that, go to filter > blur > gaussian blur. once you select that, it’ll have a pop up that looks like the one below & you’ll just select ok or hit the enter button

once you do that, you’ll notice your gif looks soft or not sharpened so the next step is to change the percentage of the gaussian blur layer you just applied. to do this, you go to the bottom right corner & hold down option by clicking on the gaussian blur layer. there will be options that pop up & you’ll select ‘edit smart filter blending options’ like shown below (my handwriting looks like a five-year-olds ik)

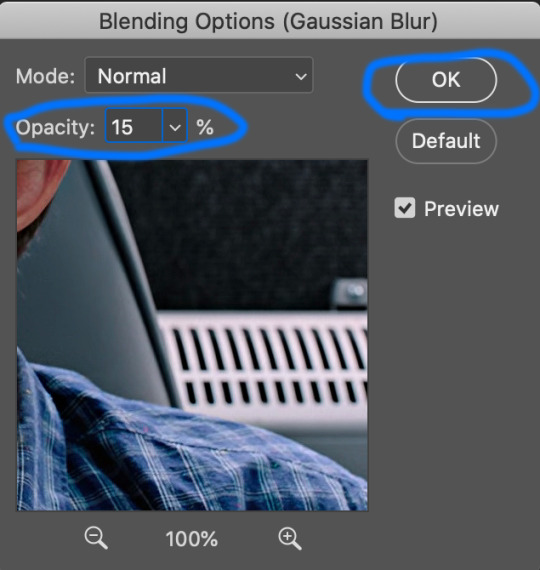
another pop up will show up in the middle of the screen & you’ll be able to select which percentage you want to place on your gif. the opacity really depends on the gif but i normally do 10%-30%. for a lot of my gifs recently i’ve applied 15% which is what i did on this gif! once you change the opacity to whatever you want, hit ok!
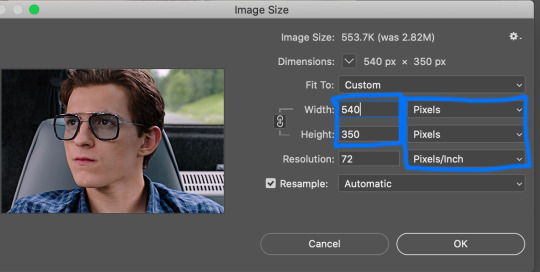
after that you want to change the image size to the same size you cropped the gif to. to do this, you’ll go to image > image size > & change it to 540 x 350 (or whatever the size of your gif is! also make sure it’s switched to pixels instead of inches! once you’ve done that hit ‘ok’ or press enter.
once that’s done, go ahead & save the gif! to do this, go to file > export > save for web (legacy). it’ll show you the size of the gif down in the bottom left & as long as it’s under 10mb you’ll be fine!!! down below i circled my save settings as well! also its SUPER IMPORTANT THAT YOU SET LOOPING OPTIONS TO FOREVER! once you’ve done all that, save your gif by hitting the ‘save...’ button down below that’s circled. you can name your gif however you like just make sure you keep the .gif after it!

now my gif looks sharper than before:

now for time delay & coloring!!!
7. time delay
open the gif you just saved in photoshop by going to file > open. once it’s opened, you’ll see a timeline of all the frames towards the bottom. it’ll likely say 0.07 sec with a small little downward arrow next to it. select the downward arrow & select other. change the speed from ‘0.07′ to ‘0.05′! gifs look much better & more natural at this speed. (also yes i did delete a few frames because i felt it was too long so to delete frames you just select the ones you want to delete & click the trash button down by the scroller!)

8. coloring
coloring can be so much fun but so tricky! i personally use a base psd that i made for all of my gifs & then adjust it according to the gif i’m coloring but for this gif i colored it from scratch! so for most of my gifs i only color/edit them using levels, selective color, brightness/contrast, curves, color balance, & vibrance (in that order) to access these, go to layer > new adjustment layer > & then select whichever one you want to start with.
1. levels

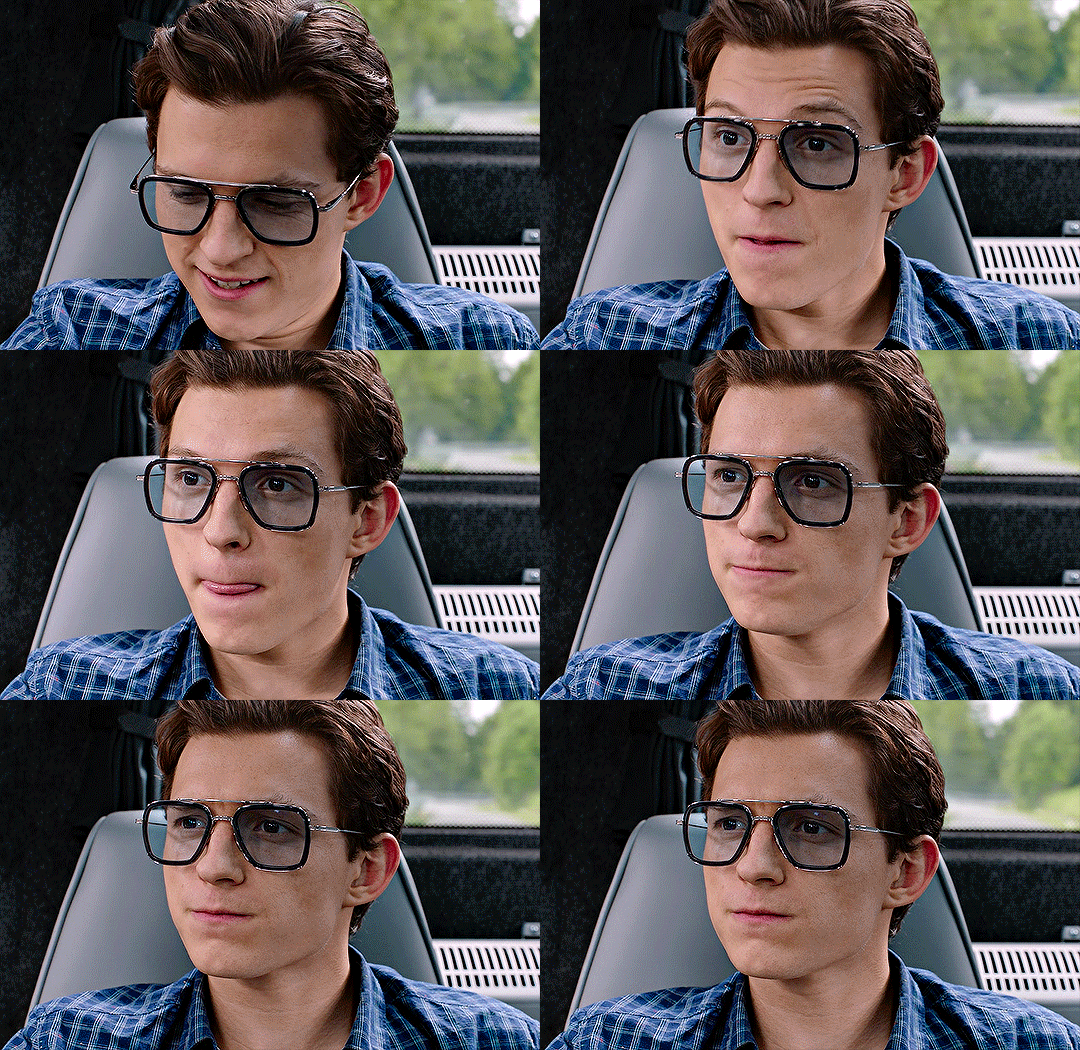
2. selective color
blacks: black +2
reds: cyan -9, magenta +1, yellow -3
cyan: cyan +100
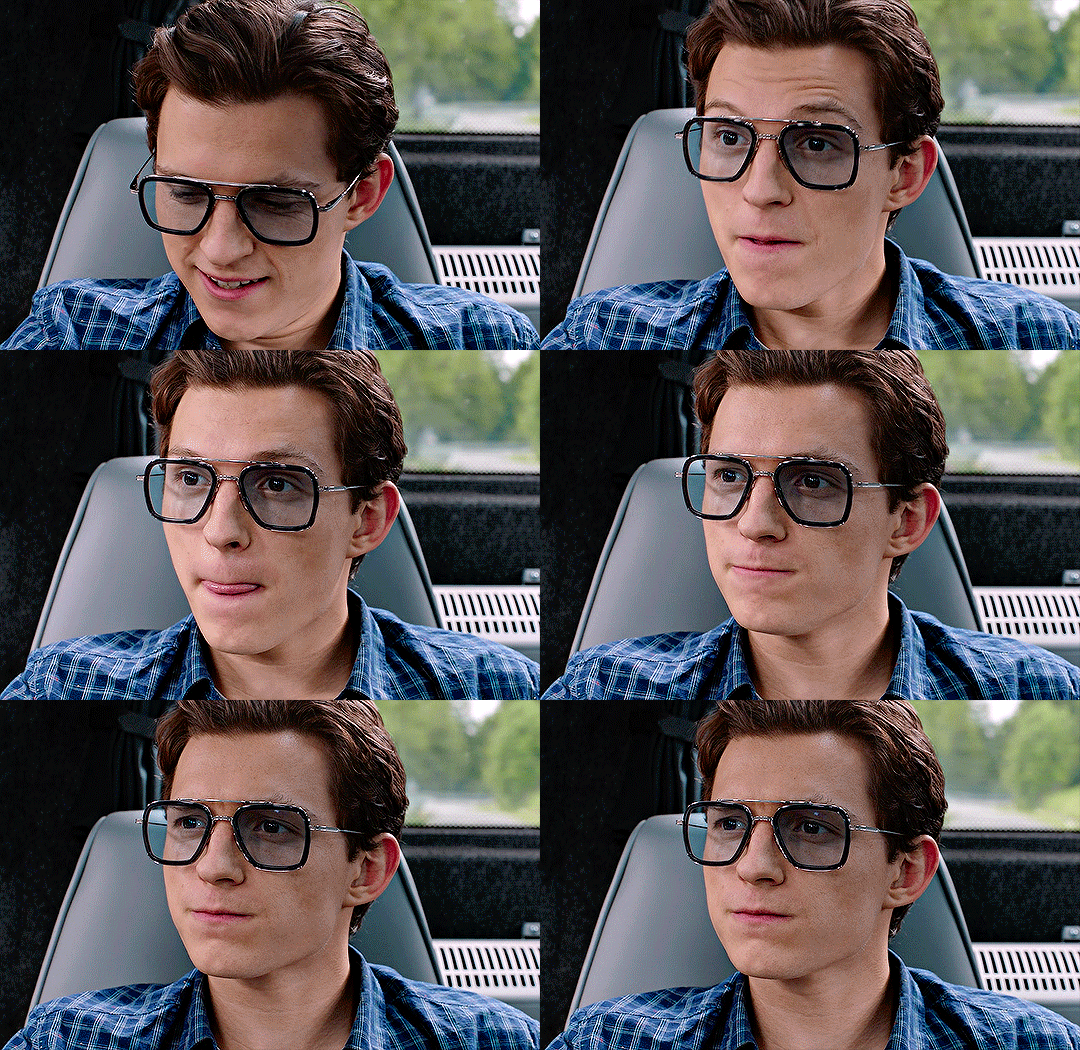
3. brightness/contrast
brightness: 5
contrast: 6

4. curves
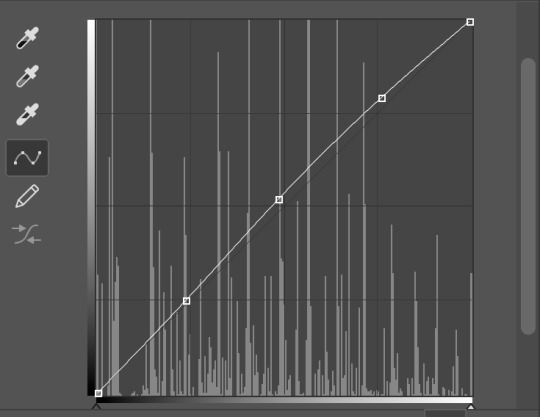

5. vibrance
vibrance: +16
saturation: 0

then you save it just like earlier by going to file > export > save for web (legacy) & you’re all set!!!! i hope this helps anyone who is trying to get into gif making & if you have any questions, don’t be afraid to reach out!!!!
#this is so long i apologize#gif tutorial#allresources#resources#completeresources#quirkyresources#my tutorial#photoshop
640 notes
·
View notes
Note
Hello! Hi! Your stuff is AMAZING! I have been using photoshop my entire life and have always been deathly afraid of trying GIFs. Is it hard? It seems so & when i start to try and google Im like hmm nah lol. I notice on tumblr people comment stuff like “wow your smoothness is great” or the quality & also I see some say the coloring of a certain scene made the GiF edit hard for them. Do you have any pointers for this stuff or some resource where I can pick up and learn to make nice gif sets :) TY
awww, thank you, that’s so sweet!
no, i don’t think making gifs is hard at all :) especially once you get it down it’s just basically following steps. i could do it in my sleep lol.
one of my internet friends actually taught me how to make them via text/videos a few years ago! so i was able to ask her about certain things i was confused about as i was learning. it probably only took an afternoon to really get it down! and once i got the basic structure down i could learn more about sharpening, coloring, text, etc. on my own.
i can teach you some basics, but there are tons of good tutorials on here you can follow as well :) under the cut cause it’s gonna be long
To answer your questions: 1. some scenes/shows are really hard to color. sometimes that’s due to the lighting of the scene itself (i.e. dark/bright lights, etc.) or just due to the color palette the show itself uses. 2. i’m assuming you’re talking about sharpness when you say smoothness, but correct me if i’m wrong. gifs will look the best when they are taken from high quality content (netflix/hulu, HQ youtube videos) and you can sharpen them in photoshop itself (much like you would a picture). i have a sharpening action presaved in photoshop that is the first thing i do when opening up the video i want to gif in photoshop.
Now for some giffing basics! 1. I typically screen record whatever it is i want to gif unless i can find a hq youtube video to download, but i find screen recording works best for quality. i use QuickTime Player for this. once i have what i want captured i export it in 4k and save it to a folder i have designated for videos i want to gif. 2. moving to photoshop the first step is opening the video you want to edit. to do this you go to file -> import -> video frames to layers once you do that a window will pop up asking for you to pick a range. you do not want to import the entire video bc you’d end up with way too much and if it’s too large ps won’t be able to process it. you’ll pick ‘selected range only’ and ‘limit to every 2 frames’. then i typically move the middle slider to the part of the clip i want to use and use the first and last sliders to pick the beginning and end of the clip you want (it’s okay if you get stuff in the beginning or end you don’t want as you can delete it later) 3. once i do that the first thing i do before messing with anything is use my sharpening action shortcut i have programmed in photoshop and wait for it to do it’s thing (this step you’ll have to skip until you can learn more about that and i really don’t remember how i actually set it up) 4. after that i’ll use the timeline and delete the frames i absolutely don’t want in my gif (i.e. if you got any extra stuff from the beginning/end). never never never delete from the middle as it won’t look right in the end. 5. after that i click on the three little lines on the far right of the timeline and click ‘select all frames’ then i click the three lines again and choose ‘flatten frames into layers’. then on the layers panel you’ll have frames that were just added on top of the layers. you want to then delete all the layers so you’re just left with frames 1-X. 6. after that i use the timeline to time delay the clips. It’ll usually say 0.02, but that’s much too fast so we want to slow it down. I usually change it to 0.07, but if i am working with something where i have fewer frames (like 25 or less) i will use anything from 0.07-0.11, just depends what looks right. 7. now comes cropping! you should know what you want your gif to look like before even making it (probably even before you start gathering clips). With my new Brio edit I had to figure out which lyrics i wanted to use, how many gifs i was going to use, what size i wanted them to be, and what scenes i wanted to use. the size i used for that one was 540 x 280 (you want to make sure your sizes are in pixels, not inches). For the smaller gifs that are side by side i usually use 245 x 160 and you can put up to 12 of those in your set. 8. since i suck at coloring i use pre-saved psds for my coloring. i have some basic ones saved, but also some more fun ones as well. these are pretty easy to find around tumblr and all you have to do is save them to your computer and then just open then in photoshop! you’ll want to select all the layers on the psd then drag it over on top of all the layers on your gif. note that not all psds work for everything and you may have to do some adjustments on different layers to get it to look right. 9. after editing it’s time to save! tumblr has some size restriction so if you pass them your gif won’t move or might just be a blank space. all gifs must be under 3 MB and i think your whole set has to be under 10 MB for it to work correctly. When saving I select those 3 little lines on the far right of the timeline again, make sure all layers are selected, then again flatten all frames into layers. after that you go to file -> export -> save for web. after that you’ll just hit save in the next window then you’ll be able to save it in .gif format and it’s ready for tumblr!
there are tons of different ways to gif, this is just how i do it :) the more you practice the more you’ll learn
#i am no ps expert#and i haven't been giffing much the past year#but i hope this helps#xenalovesoq#ask
5 notes
·
View notes
Text
Andy’s Gif Tutorial
Hello, everyone!
Since a few people have been interested in my gif making process, I have decided to compile a detailed tutorial with some tips that I find useful, screenshots and links to other posts that have helped me along the way.
What you need:
a version of Photoshop (I use CC 2017);
HQ clips/movies (720p or 1080p for best results);
a screencapping tool (I use KMPlayer, but I hear there are some other programs that work just fine);
patience and perseverance.
I will try to make this as comprehensive as possible, but please feel free to ask me any questions if you have to and, of course, please like/reblog if you find this helpful.
STEP 1 - Frame extraction
As I previously said, I use KMPlayer for screencapping, it’s free to download on the official website for Windows and also has a beta version for Mac. I hope that by now you have decided on what scene you want to gif, so now all you have to do is open your video in KMPlayer and go to said scene TIP: I usually pause the video just before the scene starts to make sure that when I start extracting, I’ll have all the frames I need.
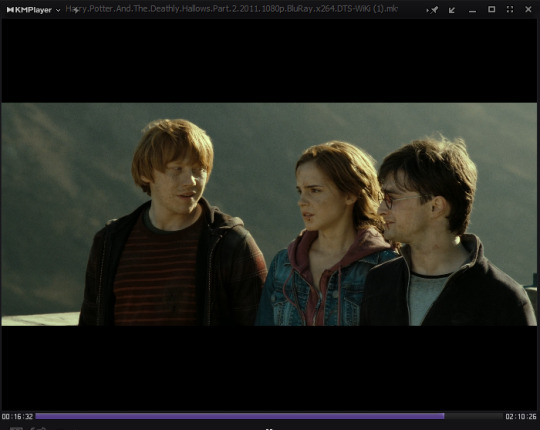
Now hit CTRL + G in the player and a new window called ‘Frame Extraction’ will open up. These are the settings I use 99% of the time:

As you might notice I prefer using a smaller image size from the beginning because my laptop is slow enough as it is and also because it’ll be easier later on when I load the caps into PS. I always choose the size as if I’d make 540px gifs and I adjust the width accordingly, but I always take into account the video’s ratio and the fact that I need some extra pixels in there in case I need to crop my image. Once you’ve settled on your settings and your scene, you just have to click the ‘Start’ button in the ‘Frame Extraction’ window and you’re good to go, then click ‘Stop’ when you’re done. Alternative: If you need to make longer gifs, but also be able to stay withing the 3MB limit, in the ‘Frames to extract’ tab you can choose the second option, that will extract every second frame of the video, but I must warn you, the quality of your gif might decrease a bit.
STEP TWO - Loading frames
First of all, make sure your PS version has a timeline. If I am not mistaken (that would be embarassing) for older versions you can find the Timeline option directly in the dropdown Window menu, but for CC 2017 you have to click Window > Workspace > Motion.
Your workspace should now look like this:
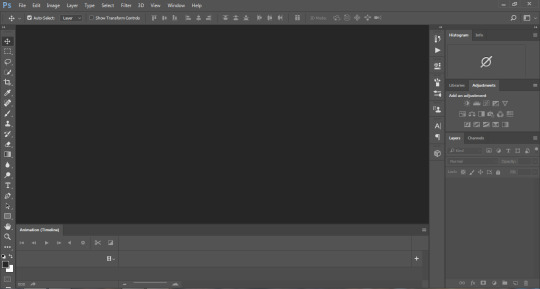
See the space called Animation (Timeline) on the lower part of the window? Well, this is your new best friend.
What you need to do next is load the frames you’ve previously extracted into Photoshop and this is how you do it:

This will open up the ‘Load Layers’ window where you will hit ‘Browse’ and open up your screencaps folder, choose the frames you want to use wait a few seconds for them to load and then click ‘OK’.
STEP THREE - Making your gif
Once the all the frames have been loaded into layers (again, there’s a bit of waiting, depending on how fast your computer is), your timeline will look like this:

Click one ‘Create Video Timeline’ and then you will have this:

Now click on the button on the bottom left of the image (the one that looks like three tiny squares), that’s called ‘Convert to Frame Animation’. On the top right of the timeline click on the dropdown menu and choose ‘Make Frames from Layers’. This will transform all the layers you’ve loaded into frames that you can use in your gif.
If you hit the ‘Play’ button now, you might notice your gif is moving backwards. There’s an easy fix for that. Go again to the timeline dropdown menu and click ‘Reverse Frames’.
This is when you are going to pick how many and which of the frames you loaded will be in the final version of your gif. Delete all the ones you don’t use.
STEP FOUR - Resizing
One of the most important steps in gif making in my opinion, because if it’s not done well, then the quality of the gif is affected. If you need to crop your image, this is the time to do it.
To resize your image, go to the ‘Image’ menu and pick ‘Image Size…’.
WHAT I USE: For two column gifs, I use 268px width with 150px or 170px height and for big 540px gifs in width I use 250px or 270px height. I pick the height depending on the initial ratio of the image or how wide is the scene I want to gif. Also, again, when I crop, I use 5px extra that I take care of later.
You probably noticed that your image isn’t exactly the right size now. You might think cropping it again is the best way to go, but there’s a better way, in my opinion, and that’s Image > Canvas Size.

You might’ve noticed when you opened gifs on tumblr, that some of them have a very thin, although inaesthetic for my taste, transparent area between the edge of the image and the gif area. Using ‘Canvas Size’ and playing those 5px extra is how I get rid of that and make my gif look neat all, even at the edges.
In this window you just have to set the exact dimensions you want your gif to have (mine is 268x150), and you’re all set.
STEP FIVE - Sharpening
Most tutorials will now tell you to set your frame delay, sharpen, colour and save. What I am going to do next, I learned from this tutorial and it honestly saved my life. Now I will sharpen my gif in a few easy steps and by the end I will have all of my frames sharpened and open in the timeline.
Click on the ‘Convert to Timeline Animation’ button on the lower left of your timeline, the one just under the first frame.

Select all your layers, the ones that are in use in your timeline will have a small eye symbol next to them, those are the ones you need (I usually delete all the layers I don’t use), right click on them and choose ‘Convert to Smart Object’.
The smart object you have now is the one you will apply your sharpening settings or action to.
There are a few sharpening actions here, but you can always look up more on resources blogs, there are a lot of them around.
Go into the timeline menu again and pick Convert Frames > Flatten Frames into Layers. Now you have all your layers again, but they are also sharpened. Now convert back to frame animation like you did on the first step (I delete the smart object because I don’t need it anymore, I have layers now) and make frames from your layers again.
STEP SIX - Frame Delay
To set a frame delay aka how fast or slow your gif will move, you have to select all your frames and click on the tiny arrow button under the image.
I prefer using 0.05 seconds between my frames, but honestly, ultimately it depends on what you want your gif to look like so I reccommend playing around with different values and see how the gif moves before settling on one.
You will have to make sure that your gif will be playing on a continuous loop.
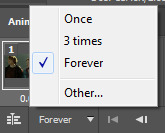
By default you will have the ‘Once’ option ticked, you have to make sure it’s set on ‘Forever’ before you save your gif.
My gif now looks like this:

Now all you need to do is apply a PSD, or if you’re me, make your own colouring and then you’re all set. (I will maybe discuss colouring another time, maybe, depending on time and how useful people find this one.)
STEP SEVEN - Saving your gif
In CC 2017 you have to go to File > Export > Save for Web, but in older versions you will find ‘Save for Web’ in the ‘File’ dropdown menu. These are my saving settings:

And congratulations you’ve just made your own gif!
LINKS: gif tutorials | gif colouring | ps basics
Please message me for feedback and also if you have any questions regarding this tuorial or like…in general.
210 notes
·
View notes