#my recipe :]
Explore tagged Tumblr posts
Text
I made some strawberry freezer jam for a love spell.

This strawberry freezer jam will not only bring sweetness but will also carry your love magic, manifesting the intentions you’ve infused in it.
Ingredients
2 cups fresh strawberries, hulled and mashed (symbolizing love and passion)
1 ¾ cups sugar (for sweetness in love)
4 tablespoons lemon juice (for clarity and purity in relationships)
1 packet of powdered pectin
A pinch of pink Himalayan salt (for protection in love)
Instructions
Clean your workspace and set the mood with candles or rose quartz. Focus on your intentions for love and affection as you begin.
In a bowl, gently mash the strawberries while visualizing the sweetness and love you want to attract or strengthen.
Combine the sugar, lemon juice, and mashed strawberries. Stir in the powdered pectin and mix thoroughly. If using rose water, dried petals, or vanilla bean, add them now.
As you stir, repeat a love-focused affirmation, such as: “With sweetness and love, this jam I create, To nurture the bonds and open the gate. A love that is pure, a love that is true, Let this magic work, through and through.”
Let the mixture rest for 10 minutes to allow the flavors to meld and the pectin to activate.
Pour the mixture into a clean glass jar, leaving a bit of space at the top for expansion in the freezer. Seal tightly.
Place the jar in the freezer. As you do, visualize the love energy being preserved within the jam.
Use a spoonful of the jam in a romantic breakfast with your lover or crush.
#strawberry freezer jam for a love spell#love magic#kitchen witchcraft#white magic#food photography#my recipe#witchcraft#witch community#witchblr#witches of Tumblr
102 notes
·
View notes
Text
Hey guys random but I wanna share this spinach pasta recipe I improvised the other day bc it's really east and tasty and a nice way to eat my greens... I've eaten it for the last several meals lol
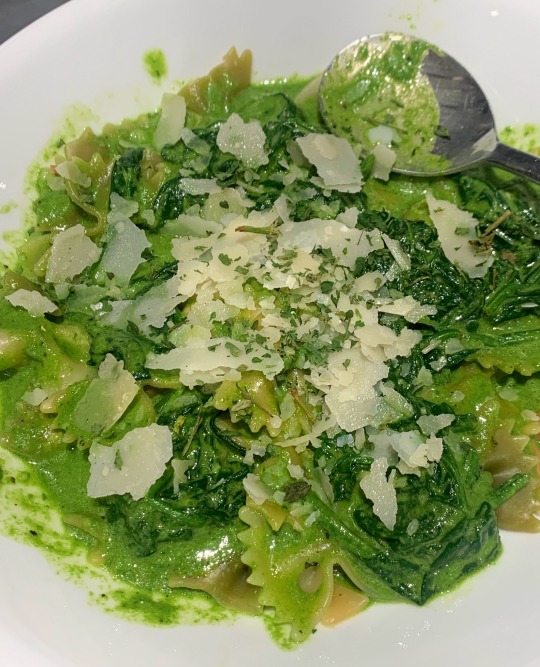
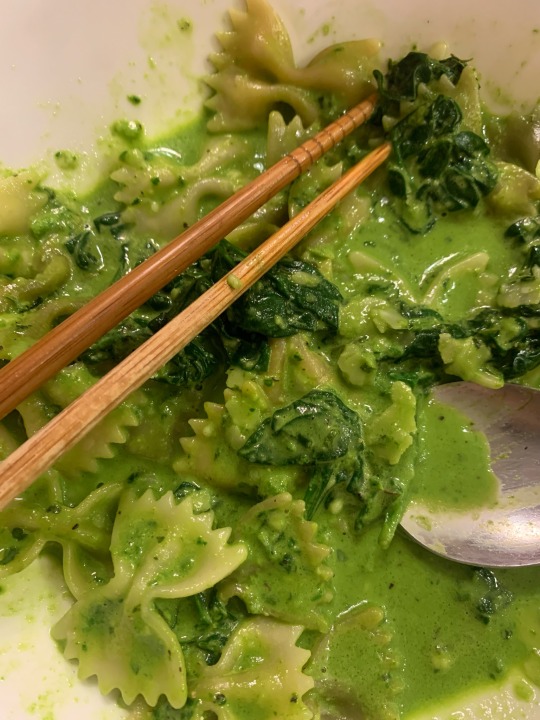
sauce recipe (1 serving)
fresh spinach several(3?) handfuls (blended with sauce)
oat milk ~1/3 c (or a diff unsweetened milk)
small pat of butter(flavor) + 3 spoonfuls olive oil
lots of black pepper + couple shakes garlic powder (or minced garlic)
tiny pat of miso/deonjang (if u dont have it, just add more cheese, or some salt to taste)
Lots of pecorino romano or parmesan cheese (or both)
+
more handfuls spinach to eat w pasta whole, opt (several/3 handfuls; keep in mind spinach shrinks a lot when cooked) (cooked in microwave, with sauce liquid)
more cheese, black pepper, parsley etc for serving
Note: need a blender to make the spinach sauce green. I used a small bullet blender. If you don't have a blender, just cook and eat the spinach pieces whole alongside the pasta instead of blending it w the sauce, like an alfredo cream sauce.
With whole spinach pieces:
>combine sauce ingred in tall, microwave safe bowl except spinach & cheese; microwave 30 sec to melt butter/miso and mix thoroughly
>add several handfuls of spinach to the sauce liquid; this is the whole spinach pieces.
>cover + microwave for 1 min /until the spinach leaves are completely wilted and tender but still green
if u dont have a blender you'd be done here (microwave longer to reduce, add more cheese/oil to make it thicker, etc)
>add 2-3 handfuls fresh spinach into bullet blender and pour in most of the sauce liquid; Blend until fully broken down into a creamy green sauce. (add a splash more milk if it's not blending)
>combine w rest of sauce in the bowl; add cheese and microwave 30+ sec more uncovered (*i add cheese at the end bc it's harder to blend with the spinach)
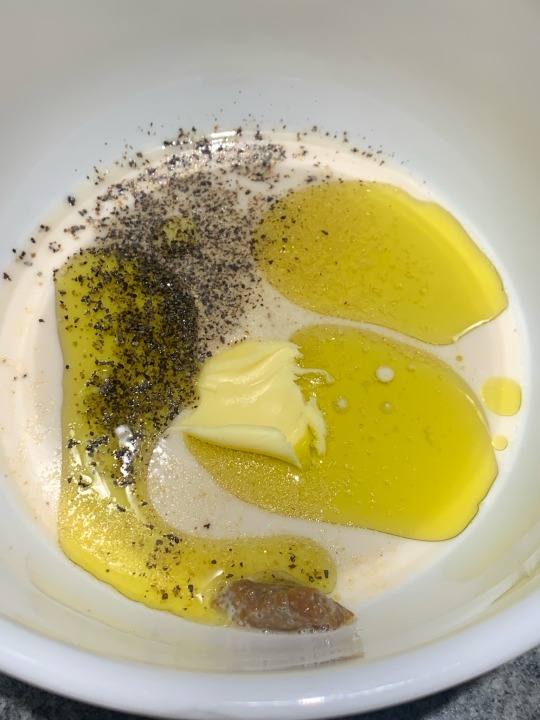
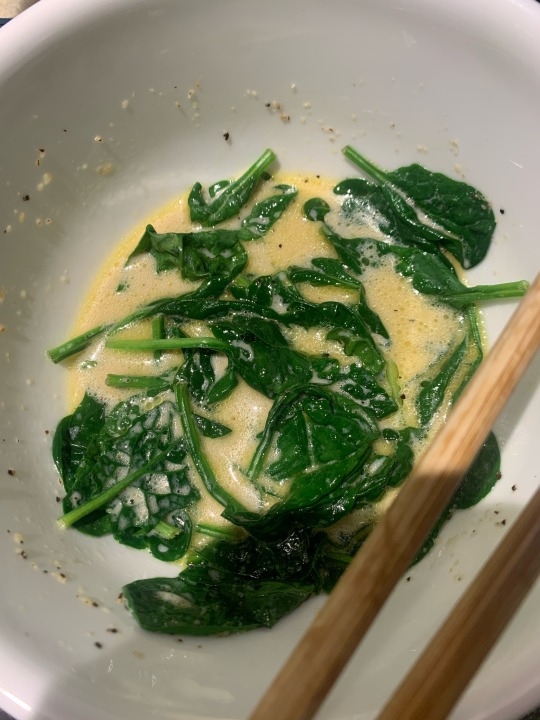
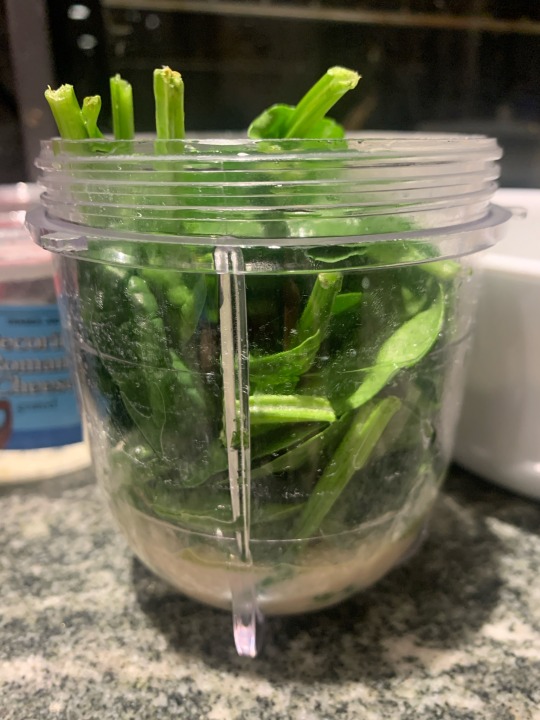
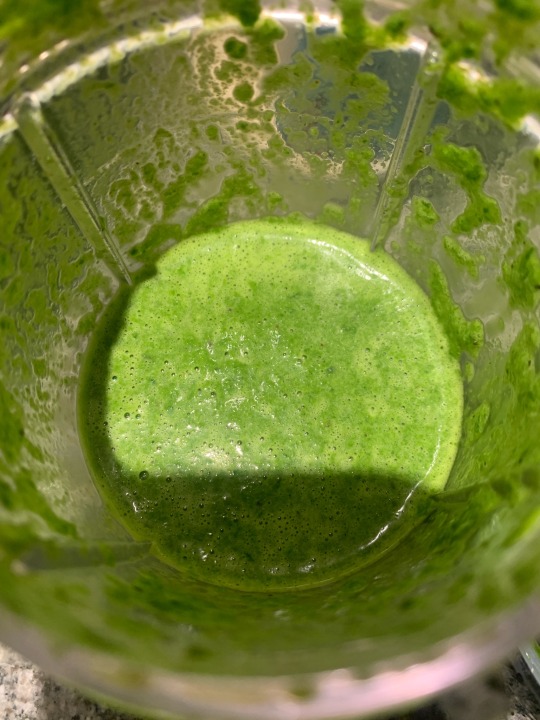
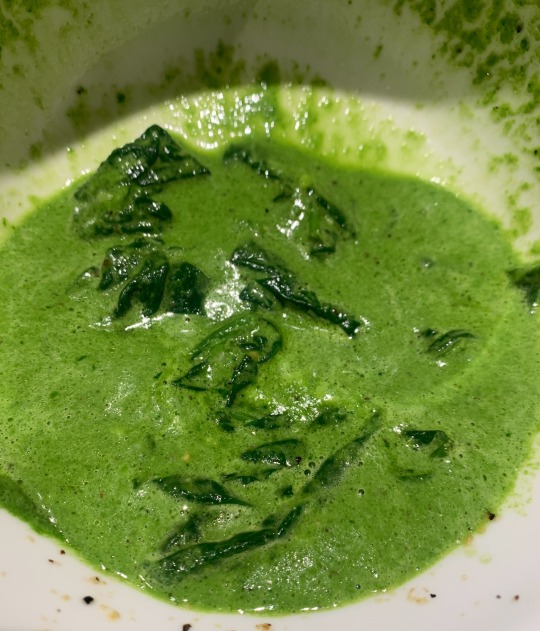
Without whole spinach pieces (just green sauce): combine all sauce ingred Including spinach into bullet blender; blend until fully combined; transfer to bowl & microwave 1 min + longer as needed to reduce (uncovered)
Pasta:
> boil pasta in salted water according to directions (go a min under and test if its cooked, for al dente pasta)
> drain + return to pot, add the sauce + stir
note: if doing this method u can also make the sauce in the same pot instead of using a microwave; after draining the pasta, leave it in strainer, and make the sauce in the same pot and simmer... turn up the heat to boil + reduce as desired, then add the pasta back in and stir until hot. (If i was making a bigger portion for multiple ppl i'd prob do this)
USING LEFTOVER COOKED PASTA (this is what i did, bc i had made a lot of pasta a few days ago, and had the leftovers stored in fridge):
> microwave pasta by itself in a bowl/plate for 1 min, covered
> add the hot sauce on top of hot pasta (microwave first if it's not hot enough)
(^i microwave sauce + pasta separately to ensure the pasta stays al dente btw... if u microwave sauce with pasta it gets soft)
(If making large batches ahead I'd store the pasta and sauce separately for the same reason... I'd prob do the same thing I did, make a large batch of pasta and then make the sauce right before eating... I just hate soft pasta tho so if u dont then dw abt it🫡 lol)
> Top w extra cheese, black pepper, parsley and serve/eat immediately!!
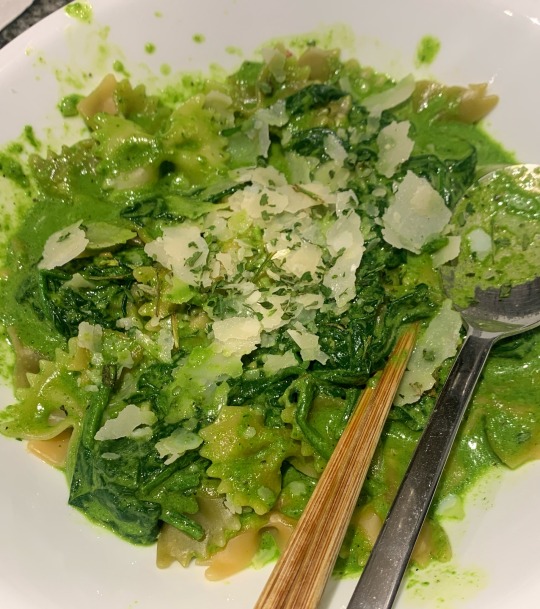
#food#pasta#spinach#spinach pasta#recipe#my recipe#cooking#easy meals#its rly easy and tasty... and its easier to eat spinach this way lmao#if u dont want to eat the whole spinach pieces blend all the spinach w the sauce#its rly delicious... ive eaten this for the past 3 meals to use up my leftover pasta#and its so good...#if u added basil leaves too thatd basically be pesto...#i dont have basil rn tho#i like this bc it reminds me of that peruvian dish that i rly like... what was it called?#green noodles...#*googles* tallarines verdes... i should try actually making that sometime its prob not much harder#but for now i rly like this recipe and wanted to share... success...
375 notes
·
View notes
Text
Performer's Tea

I do community theatre, and after rehearsals, my throat ends up dry and painful. I like to make this tea to soothe it. It works well for singers, actors, or anyone else using their voice. Makes enough for one serving but can easily be multiplied so you can share it with the whole cast.
Ingredients
♡ 1/4 tsp ground cinnamon
♡ 1/8 tsp ground turmeric
♡ 1 tsp ground ginger
♡ ≈1 cup boiling water
♡ 1 tsp honey
♡ 1 tsp lemon juice
Instructions
☆ Bring water to a boil in kettle. If using an electric kettle, set it to "Herbal". This should be around 212°F or 100°C
☆ Add ground spices to a teacup or mug.
☆ When water has boiled, pour small amount into cup and mix until consistency of paste. Then slowly add desired amount of water, stirring continuously
☆ Stir in honey and lemon juice
#my recipe#my recipes#gluten free#recipe#gluten free recipe#gluten free recipes#vegetarian#nut free#dairy free#medicinal tea#tea recipe#tea#musical theatre#musical theater#theatre#theater
43 notes
·
View notes
Note
Now u have to share this famous recipe 😛
Healy's Amazing Aubergine Sandwich
RECIPE MAKES 2 SANDWICHES.
You'll need:
1 loaf of Trader Joe's foccassia bread made with sun-dried tomatoes and parmesan (I may one day experiment with making my own, but I love the Trader Joe's one)
1/2 large aubergine
2 heaping tablespoons pesto (I usually make it myself, but Barilla pesto works in a pinch)
1/2 log goat cheese with herbs and spices
Olive oil for cooking
A dash of salt
A dash of pepper
Directions:
Preheat the oven to 400 degrees Fahrenheit.
While it preheats, cut up the 1/2 aubergine into thin slices. Cut those slices into quarters.
Take your 1/2 goat cheese log and crumble it into a bowl. Set the bowl aside.
Fend off any cats that start bothering you for cheese.
Put the foccassia in the oven and set it to bake for 11 minutes.
Pour olive oil into a frying pan and heat it up on the stove until it's very hot. This usually takes about 1-2 minutes.
Pour the aubergine into the pan.
Fry the aubergine for 5 minutes on medium heat. If needed, add more olive oil halfway through.
Set the aubergine aside when it finishes frying.
Fend off any lingering cats until the foccassia is done.
Take the focassia out of the oven and transfer it from a baking sheet to the cutting board.
Make sure that it is upside down on the cutting board.
While the bread is still hot (but not so hot to burn you), cut it into quarters. Again, be careful not to burn yourself.

Spread half the goat cheese onto 1 and the other half onto 3.
Place half the aubergine on 1 and the other half the aubergine 3.
Spread 1 tablespoon of pesto onto 2 and 1 tablespoon of pesto onto 4.
Let sit for 3 minutes (so the heat from the aubergine and bread melts the goat cheese.
Put 1 and 2 together to form one sandwich. Put 3 and 4 together for form another.
Eat one sandwich.
Put one in a Pyrex container in the fridge. It's good cold too and you can have it tomorrow!

Note: I usually get 2 pieces of focassia bread because it enables me to do the recipe twice for 4 sandwiches. This stops me from wasting the other aubergine half and goat cheese log half.
19 notes
·
View notes
Text


Are you not an alcoholic? Legally not allowed to drink? Going to a friend's party you weren't invited to and seeing they only have juice? Or a pregnant woman?
Perhaps this nonalcoholic drink called Synthehol, can help you not feel left out!
All you need is 1 1/2 cups of Blueberry Lemonade
1/2 cup of Pineapple juice
And one to 2 drops of blue food dye
Mix all together, garnish with a blueberry and ice. Enjoy!
#mocktails#my recipe#i rlly dk what i made tbh#i just had some juice that needed to be drank#but hey#it works!#star trek#ten forward#goth drink#purple
15 notes
·
View notes
Text
Do you have a crisper drawer full of dubious apples you know you'll never eat?
MAKE APPLE CIDER!
This is a technique, not a recipe. Don't stress about exact amounts.
It takes literally 4 minutes. Maybe 6 if you have a lot of apples and are really slow at cutting. All you need are apples, a crockpot, a knife, and water. Everything else is Nice To Have but not necessary.
It could not be easier. It's cheap. It's DELICIOUS. It makes your place smell amazing. Give it a try!
Grab your crockpot/slow cooker
Cut all the apples languishing at the bottom of your crisper drawer into quarters and toss them in. The more kinds of apples you have the better.
If you only have a few apples, pour in enough water to cover them by 3ish inches. If you have enough apples to mostly fill the crockpot, then fill it all the way up, leaving 1 inch of space at the top so it doesn't boil over.
If you have it, add a cinnamon stick, 3-5 cardamom pods, a star anise, and/or 1-12 cloves (I don't know you. How clovey do you want it?). Literally none of that is required. They're all Nice To Have.
Got any dubious citrus in your fridge? Don't waste the good stuff! Grab that shrunken lemon or orange, cut it into quarters, and toss it in, too. Again, this isn't required. All you actually need are the apples themselves.
Put on the lid. Plug it in. Come back in anywhere from 4-24 hours. Yeah, I've left mine overnight and not drained it until I got home from work the next day and it was fine.
Straining it is the only "tricky" bit.
If you have a wire mesh strainer, pour everything through that twice. It'll catch enough of the solids to give you a "full bodied" cider.
If you have a regular pasta strainer, line it with cheesecloth and pour the liquid through. It'll catch even more of the solids, but then you have to deal with the messy cheesecloth afterwards.
Throw away the apple mush afterwards and enjoy your amazing cider!
What's that? You don't want to throw away the apple mush? Okay. Fine. You CAN make applesauce too, but that will require minutes of actual work.
If you want both apple cider and cider spiced apple sauce then peel and core the apples before putting them in the crockpot. That's it. Once it's bubbled away, you strain the liquid from the solids and store them separately.
The apple mush will be much smoother than the applesauce you get at the grocery store. It's GREAT in baked goods or oatmeal.
Store both in the fridge for up to a week.
#this is so easy#and a great way to use up fruit you know you're not actually going to eat because it's probably gone mealy#it tastes amazing#give those mealy apples in your crisper drawer a new life!#recipe#my posts#my recipe#apple cider#crockpot#winter recipes#cozy drinks
13 notes
·
View notes
Text


Root Beer Ice Cream
#ice cream#dessert#my recipe#foodie#food photography#root beer#photography#original photography#photographers on tumblr#original photographers#summer#root beer ice cream
18 notes
·
View notes
Text
Hey hey here have a recipe
Penis Envy
absinthe
ginger beer
sprite
dollop of clover honey
licorice stick for garnish
Enjoy!
10 notes
·
View notes
Text


Pampering my kitchen by some cinnamon rolls 🤍🍯
11 notes
·
View notes
Text
Butternut Squash, Mushrooms, and Sage Brown Butter Galettes

Crust: (from Smitten Kitchen, with added vinegar and salt) 1 1/4 cups (165 grams) all-purpose flour 1/2 teaspoon fine sea salt 8 tablespoons (4 ounces or 115 grams) cold unsalted butter, cut into pieces 1/4 cup (60 grams) plain yogurt or sour cream 3 to 4 tablespoons (45 to 60 ml) cold water 1/2 T white fig balsamic Make crust - I use a food processor because I have a three year old. You just put the dry ingredients in and the butter and pulse until the butter is pea-sized, then add the wet (pre-mixed together) and pulse till it comes together. Then chill for an hour or so. Then cut into four pieces and roll thinly (a little less than an eight of an inch thick, I think).
Filling:
1 lb cremini mushrooms, sliced 6 leaves sage 2-4 T butter salt garlic or granulated garlic 1 medium butternut squash, cubed garlic or granulated garlic powder 2 sage leaves olive oil (browned butter would be good here too, if you made it and divided it before you cooked the mushrooms) ancho chili pepper (light - again, depth of flavor) thyme (light! flavor should be sage, not thyme) salt Feta Cheddar 4 T Cream cheese, warmed or otherwise softened Brown butter, toast sage leaves. Cook mushrooms in browned butter with salt and LIGHT garlic - you're trying to add depth of flavor here, not make garlic-flavored mushrooms. Meanwhile, steam the squash for 6 or 7 minutes in the microwave (covered container - I like to use a lidded casserole dish), then roast at 400 till browned. Mix cooled mushrooms with feta and cheddar. Add roasted squash. Mix. Taste for salt. Smear cream cheese, 1T per galette, in the center of each, leaving a rim of about an inch, inch and a half. Add filling on top. Fold the rim over so the filling doesn't ooze out. Add an egg wash if you have time and energy. Bake 35 minutes or so at 400, till browned.
8 notes
·
View notes
Text
I made some matcha milk tea with sakura foam on top for a self-love spell.

Infuse your spirit with self-compassion and inner beauty with this soothing, magical drink.
Ingredients
1 tsp matcha powder (for self-reflection and harmony)
½ cup hot water (to cleanse and purify energy)
½ cup milk (for nourishment and comfort)
1 tbsp honey (for sweetness in life)
¼ cup heavy cream (to hold love close to your heart)
1 tbsp sakura syrup (for beauty, grace, and love)
½ tsp vanilla extract (for warmth and self-acceptance)
A pinch of pink food coloring (to embody love energy)
2 strawberry matcha Pocky sticks (for playful self-expression)
Instructions
In a heatproof bowl, whisk the matcha powder with hot water until smooth and frothy. Warm the milk and stir in honey. Pour the matcha mixture into the milk and mix well, setting the intention of self-love and balance.
In a small bowl, whisk the cream with sakura syrup, vanilla extract, and pink food coloring until lightly thickened. As you whisk, affirm: “I embrace myself with love, kindness, and grace.”
Pour the sakura foam gently over the matcha milk tea. Place strawberry matcha Pocky sticks as a final touch, visualizing joy and lighthearted self-care.
Hold the cup in your hands and take three deep breaths, feeling warmth and love flow through you. Say: “I honor myself with love and care. I am worthy, whole, and beautifully rare. With each sip, my heart shines bright, filling my soul with loving light.”
Drink slowly and mindfully, allowing the flavors and energy to wrap around you like a warm embrace.
#matcha milk tea with sakura foam on top for a self-love spell#self-love magic#kitchen witchcraft#white magic#drink photography#tea recipe#my recipe#witchcraft#witch community#witchblr#witches of Tumblr
48 notes
·
View notes
Text

THE WORKING VACATION MOCKTAIL!!!!!!!!!!! BECAUSE WHO SAYS YOU SHOULDN’T TAKE SOME TIME FOR YOURSELF?
#my edit#my recipe#saw x#saw franchise#Okay some tips:#I took espresso grounds and put them in a French press for my coffee but I’m sure any black coffee will be fine#But I did 4 tablespoons of the espresso grounds for the 16 ounces of water and let that brew for about 6/7 minutes before I pressed it down#My orange simple syrup is also one I made but I’m sure you can buy one but simple syrup is easy to make as well#And now the important part - I say if you’re spiking it put an orange liquor#But now I’m done AGAIN all the Saw movies have a mocktail recipe
11 notes
·
View notes
Text
My Grandma's Muffins

My grandma makes these muffins with fresh ingredients from her garden. I haven't had them since I was diagnosed with celiac disease at age 7, but I found her recipe and decided to convert it to gluten free. I don't think it will ever be as good as the muffins she makes, but they are close enough!
Ingredients
♡ 1 1/2 cup gluten free all purpose flour
♡ 3/4 cup ground flax seeds
♡ 3/4 cup oat bran or rolled oats
♡ 1 cup brown sugar
♡ 2 tsp baking soda
♡ 1 tsp baking powder
♡ 1 tsp salt
♡ 1 Tblsp ground cinnamon
♡ 3/4 cup milk
♡ 2 eggs, beaten
♡ 1 tsp vanilla
♡ 1/2 cup vegetable oil
♡ 2 cups shredded carrots
♡ 2 small zucchinis, shredded
♡ 2 granny smith apples, peeled and shredded
♡ 1/2 cup raisins
♡ 1/2 cup currants
Instructions
☆ Preheat oven to 350°F and prepare muffin tray
☆ Mix together dry ingredients
☆ In seperate bowl, mix milk, eggs, vanilla, and oil, then add to dry ingredients
☆ Fold in fruits and vegetables
☆ Fill muffin tins 2/3 of the way
☆ Bake 15-20 minutes
#gluten free#my recipe#my recipes#gluten free recipe#gluten free recipes#recipe#recipes#celiac#dessert#muffins#breakfast
10 notes
·
View notes
Text


had some leftovers nuts and made “cookie butter”
Toasted the cashews + macadamias at 400 degrees Fahrenheit for 12 minutes, the food processed with 2/3 cup brown sugar (can use honey or maple if you like, just cut down on oil or don’t use altogether), 2tbsp sunflower oil (any other oil is fine too, don’t use if you have a high powered food processor and want it to be thick), touch of salt, and “speculoos” spice mix (3 tsp Ceylon cinnamon, 1 tsp cardamom, 1 tsp nutmeg, 1/2 tsp ground ginger, 1/4 tsp ground clove, couple cracks of black pepper)
thank goodness my goodwill Cuisinart food processor survived 10 minutes of grinding LOL
5 notes
·
View notes
Text
Hey. Don't cry. 1 part water with 1 part 5% distilled white vinegar. 1/4 cup salt for every 4 cups of brine. A pinch or two of msg (or more, I'm not a cop). Heat until everything dissolves together. Pack chopped celery and a jalapeño or two into airlock jars (pickling jar, if you have one). Add mustard seeds and peppercorns (as many as you want), and then your brine. Let sit for 3 days to 2 weeks. Yummy. Enjoy
#recipes#my recipe#spicy pickled celery#god im obsessed with this stuff its so fucken delicious#its my snack every day#im eating a pound of celery every week#its becoming a problem#try it! its delicious!#food#recipe#cooking#ish
2 notes
·
View notes
