#milk boiled corn on the cob
Explore tagged Tumblr posts
Photo

Corn - Daddy K's Milk Boiled Corn on the Cob The tastiest, quickest, and most tender corn has ever been made by simmering ears of corn on the cob in milk, cream, sugar, and butter.
0 notes
Text

Boiled corn on the cob (milk & butter boiled corn)
#corn#corn on the cob#cheese#butter#food#parmesan#side dish#vegetables#garlic#boiled corn#vegetarian#veggies#tasty#foodporn#delicious#cooking#food photography#foodgasm#recipes#dinner
589 notes
·
View notes
Text
What Ukrainians ate to survive Holodomor
(translated excerpts from an Історична Правда article): + images source
The villagers would dig up the holes of the polecats to find at least a handful of grain hidden by these animals. They pounded it in a mortar, added a handful of oilcake (from hemp seed), beetroot, potato peelings, and baked something from this mixture.
Those who managed to hide at least a little grain would grind it in iron mills made from wheel axles and cook "zatyrukha" (a concoction made from a small amount of flour ground from ears of grain).
Acacia flowers were boiled and eaten raw, and green quinoa was mixed with crushed corn cobs. Those who could - and this was considered lucky - added a handful of bran. This food made their feet swell and their skin crack.
The peasants dried the husked ears of corn and millet husks, pounded them, ground them with weeds, and cooked soups and baked pancakes. Such dishes were impossible to chew, the body could not digest them, so people had stomach aches. Pancakes, the so-called "matorzhenyky", were made from oilcake and nettle or plantain.
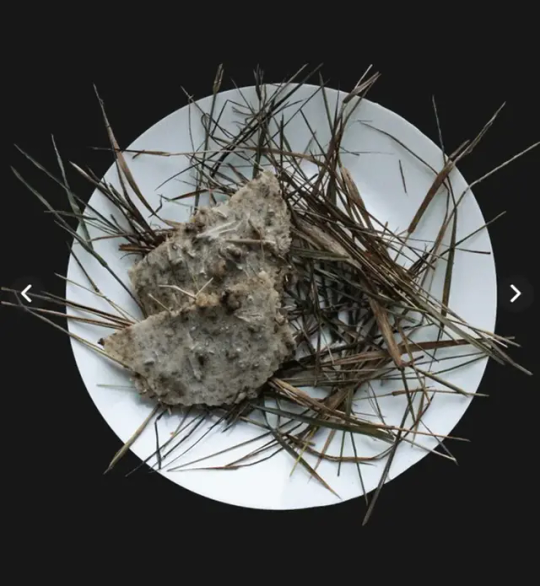
It went so far that peasants would crumble straw into small chips and pound it in a mortar together with millet and buckwheat chaff, and tree bark. All this was mixed with potato peelings, which were very poisonous, and this mixture was used to bake "bread", the consumption of which caused severe stomach diseases.
There were cases when village activists took away and broke millstones, mortars, poured water on the heat in their ovens. After all, anything found or saved from the food had to be cooked on fire, and matches could only be purchased by bartering for their own belongings or by buying them in the city, which was impossible from villagers that were on "black lists".
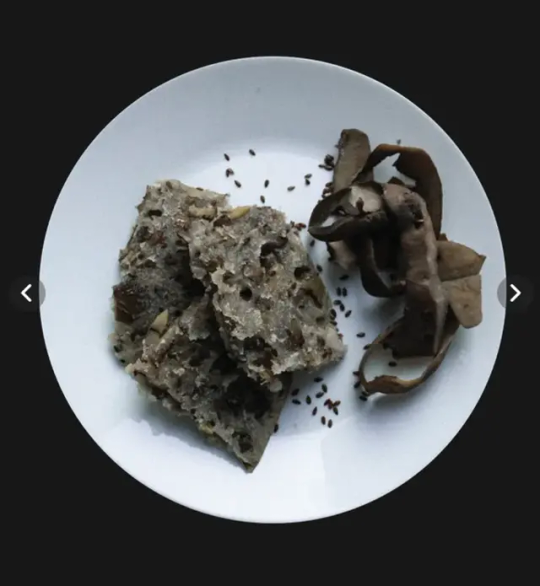
Chestnuts, aspen and birch bark, buds, reed roots, hawthorn and rose hips, which were the most delicious, were used as food substitutes; various berries, even poisonous ones, were picked; grass seeds were ground into flour; "honey" from sugar beets was cooked, and water brewed with cherry branches was drunk. They also ate the kernels of sunflower seeds.
Newborns had the worst of it, because their mothers had no breast milk. According to testimonies, a mother would let her child suck the drink from the top of the poppy head, and the child would fall asleep for three days.
In early spring, the villagers began to dig up old potato fields. They would bake dumplings from frozen potatoes, grind rotten potatoes in a mash and make pancakes, greasing the frying pan with wheel grease. They also baked "blyuvaly" (transl. "vomities") from such potatoes and oatmeal mixed with water, which was so called because they were very smelly.

They ate mice, rats, frogs, hedgehogs, snakes, beetles, ants, worms, i.e. things that weren't a part of food bans and had never been eaten by people before. The horror of the famine is also evidenced by the consumption of spiders, which are forbidden to kill in Ukrainian society for ritual reasons.
In some areas, slugs were boiled into a soup, and the cartilaginous meat was chopped and mixed with leaves. This prevented swelling of the body and contributed to survival. People caught tadpoles, frogs, lizards, turtles, and mollusks. They boiled them, adding a little salt if there was salt. The starving people caught cranes, storks, and herons, which have been protected in Ukraine for centuries, and their nests were never destroyed. According to folk beliefs, eating stork meat was equated with cannibalism.
The consumption of horse meat began in 1931, before the mass famine. People used to take dead horsemeat from the cemeteries at night, make jelly out of it and salt it for future use.
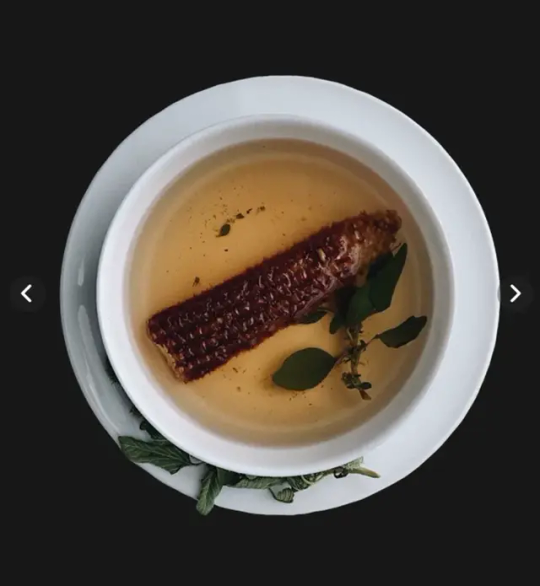
Dead horses were poured with carbolic acid to prevent people from taking their meat, but it hardly stopped anybody. Dead collective farm pigs were also doused with kerosene to prevent people from dismantling them for food, but this did not help either.
After long periods of starvatiom, the process of digestion is very costing for the human body, and many people who would eat anything would drop dead immediately out of exhaustion.
If a family had a cow hidden somewhere in the forest, they had a chance to survive. People living near forests could hunt/seek out berries and mushrooms, but during winter this wouldn't save them. People living near rivers could fish in secret, but it was banned and punishable by imprisonment/death.
697 notes
·
View notes
Text

Tam Khao Pod Kai Kem (Thai Corn Salad With Salted Duck Egg)
Ingredients
1 cup (240ml) full-fat coconut milk, such as Aroy-D (see note)
1/2 teaspoon Diamond Crystal kosher salt; for table salt use half as much by volume
1/2 teaspoon granulated sugar
3 ears fresh corn, shucked
1 cooked salted duck egg (45g) (see note)
2 small garlic cloves
2 to 3 fresh red or green Thai chiles, stemmed (see note)
1 tablespoon (8g) dried shrimp (see note)
1 tablespoon (25g) palm sugar, softened (see note)
4 cherry tomatoes (about 2 ounces; 60g)
2 long beans (about 1 ounce; 30g), ends trimmed, cut crosswise into 1-inch pieces
2 tablespoons plus 2 teaspoons (40ml) fresh lime juice from 2 limes
2 tablespoons (30ml) fish sauce
Cooked jasmine or sticky rice, for serving

Directions
In a medium Dutch oven, combine coconut milk, salt and granulated sugar. Bring to a boil over medium-high heat, stirring occasionally to help dissolve salt and sugar. Add corn, and use tongs to turn ears until evenly coated on all sides with coconut milk. Reduce heat to medium, cover, and cook, checking and turning occasionally with tongs, until corn is tender, about 6 minutes. Transfer corn to a cutting board and allow to cool slightly; remove coconut milk mixture from heat and reserve.
2. Once corn is cool enough to handle, working with one ear at a time, use a sharp knife to cut kernels off of cob in large planks, rotating ear 90 degrees onto freshly cut side between cuts. Do your best to keep corn pieces as large as possible and not separate into individual kernels. Repeat with remaining ears of corn; discard cobs, and set corn aside.
3. Using a sharp knife, halve salted duck egg lengthwise, cutting through the shell. Scoop egg out of the shell with a spoon; discard shell. Using clean hands, crumble egg into small pieces, and set aside.
4. In a clay or wooden mortar and pestle, combine garlic and chiles and pound to a very coarse paste, about 30 seconds. Add palm sugar and dried shrimp and pound until slightly broken down, about 20 seconds. Add tomatoes and long beans, and pound lightly until beans are lightly crushed and tomatoes have released some of their juices but are still mostly intact, about 15 seconds. Take care not to over-pound; you want the ingredients to maintain their integrity and texture. Add fish sauce and lime juice, and using the pestle, stir in a circular motion, applying gentle pressure to the mortar to fully dissolve the palm sugar, about 15 seconds.
5. Add reserved corn and salted duck egg. Using a large spoon, mix gently to combine, while doing your best to keep corn in large clusters (some of the corn will break down into individual kernels, and that’s fine). Transfer to a serving plate and drizzle with 1/4 cup (60ml) of reserved coconut milk mixture. Serve immediately with cooked jasmine or sticky rice.

2 notes
·
View notes
Text
Ishikari Nabe with Yuba (Makes 5 Servings)
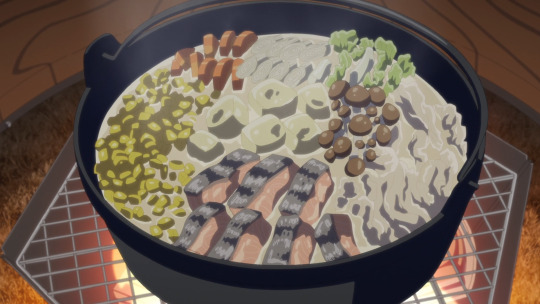
We bring you this recipe from our panel, “Anime Foodies: Laid-Back Camp The Movie”.
After the first, Scandinavian inspired salmon soup of the evening, Aoi brings over a previously hidden second pot containing something more traditionally Japanese: a hot pot. This Ishikari nabe she and Nadeshiko prepare is a classic Hokkaido nabe using salmon and miso that is perfect for the winter. As is not uncommon for our group, however, they decide on some additional, personal touches to the hot pot in for form of milk, yuba – tofu skin – and houtou to finish everything off.
5 Cups – Dashi
2 Medium – Carrot
1 Ear – Corn
1 Small – Russet Potato
¾ Lb. Skin-On – Salmon
2 oz. – Shimeji Mushrooms
4-5 Large Leaves – Napa Cabbage
8 – Green Onion Bases (Negi)
4 3-Inch Sections – Dried Tofu Skin Sticks (Fresh Tofu Skin)
3 TBSP – Miso
2 TBSP - Mirin
2 Cups – Whole Milk
3 TBSP – Unsalted Butter
200 Grams Plus Some Extra – Flour
7 TBSP – Water
At home, mix your flour and water in a large bowl and stir until a rough dough is formed.
Move to a floured work surface and knead the dough for a few minutes until it is pretty smooth.
Place the dough ball back into the bowl, cover, and let rest for 10 minutes.
After the rest, further flour the work surface and roll out the dough with a rolling pin into a rectangle to about 3-4 mm thick.
Sprinkle the top of the dough with additional flour, fold the rolled-out dough into thirds, and cut 1 cm thick noodles from the flattened dough.
Sprinkle the noodles with additional flour and store in a container in the cooler to take to the campsite.
Once on site, at least 6 hours before cooking, take your tofu skin and put into a container of water to rehydrate.
When it is time to make the hotpot, peel the carrots and chop them into bite-sized pieces, slice the salmon into 7 large nuggets, separate the shimeji and chop off any dirty bases, cut the green onion bases into large lengths, and wash and chop the napa cabbage leaves into large chunks.
Place the dashi in the hotpot pot over high heat to bring to a boil.
As that boils, peel the potato and cut into large bite-sized pieces.
Once the dashi is boiling, add the potatoes, yuba, and the ear of corn, cover, reduce the heat to medium, and simmer for 5 minutes.
After this simmers for 5 minutes, remove the ear of corn and slice the kernels off the cob.
Now slide the potato and yuba together in the dashi and add the carrots, salmon, shimeji, green onion, napa cabbage, and corn into their own sections.
Cover and continue to simmer for 5 minutes.
As this simmers, get your mirin, milk, and butter out and take your miso and place it into a large ladle.
When the simmering finishes, dunk the ladle into the broth to get some in there and, using chopsticks or a fork, muddle the dashi into the miso until most of the chunks are gone and you have a thick slurry.
Dump this slurry, the mirin, milk, and the butter into the stock, cover the pot, and lightly shake the pot to get the ingredients mixed in with the rest of the liquid.
Cover again, simmer another 5 minutes, turn off the heat, and the hotpot is ready to eat.
Once the solid chunks in the hotpot are all or mostly gone, turn the heat back on high and grab the houtou from its container.
Once at a boil, add the houtou, allow it to come back to a boil, and then reduce the heat to medium and cover.
Simmer for 15 minutes – adding additional water to the leftover broth if necessary – cut the heat, and serve.

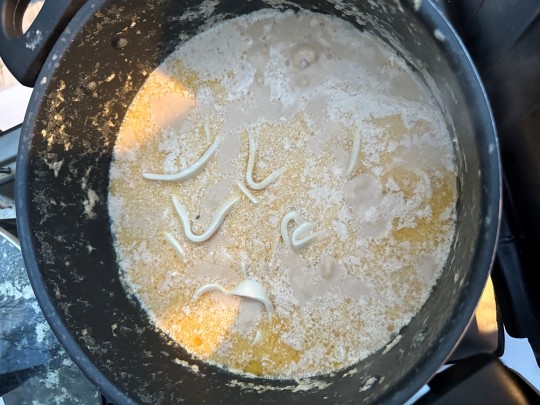
Optional/Notes:
If you don’t feel like messing with the houtou, you can use any flat dried noodles of your choice. Keep in mind that you will almost certainly need to add additional water if using dried noodles.
Any kind of dashi will work for this. We used a kombu/katsuobushi dashi made at home and brought in jars, but powdered dashi made on site would also work fine.
2 oz. of shimeji is half of the standard packs you’ll find it in at grocery stores.
You can use any miso you choose, but we used a dark, brown rice miso, so you may need extra miso if you’re using something milder.
The yuba can be kept in water to soak for up to a day without concern, so this can be prepared even further ahead of time or before going camping entirely depending on when it will be eaten.
If you have access to and are using fresh yuba, no soaking is required and it can be added into the nabe with the salmon and other ingredients.
#anime#camping food#food#camping#nos anime#laid back camp#yuru camp#anime foodies#anime food#yurucamp#laid back camp the movie
19 notes
·
View notes
Text
How to Boil Corn on the Cob
This website may contain affiliate links and advertising so that we can provide recipes to you. Read my disclosure policy. This is the BEST recipe for how to boil corn on the cob! Fresh summer corn gets boiled in a sweet creamy mixture of milk, butter, sugar, and salt. Cook and flavor your corn all in one pot! Corn makes the perfect side dish and is so versatile! Try my easy Air Fryer Corn, this…
2 notes
·
View notes
Note
I’ve been missing home lately and reading Midwestern AU is so comforting. I’m a suburban gal but grew up midwestern enough that my best friend said “melk” instead of milk and we ran around her grandma’s fields barefoot picking through the leftover pumpkins come Halloween.
I was telling a coworker the other day about our local Cornfest- how there’d be a Giant tub of boiled corn and back in the day it was Free! You’d get in line, and they’d shuck your ear (leaving the husk as a handle of course) and then proceed to Dunk it in a vat of Butter. 🤤 🤤 oh my gosh I want some boiled sweet corn so bad I could cry.
What’s Lexa’s favorite fest/fair around town? And what’s it like when she shares it with Clarke the first time?
Melk.
The way Lexa would hang her head in shame 😔
ANYWAYYY Lexa's favorite fairs would have to be the bigger state and county fairs. I mean the state fair kinda sucks but it's a right of passage and this can't be missed. I mean where the hell else are you supposed to eat a fried twinkie, deep fried pork chop sandwich, foot long corndog, potato tornado, and a lemonade shakeup all in under an hour??? (Note to Clarke for next year. Do not immediately follow it up with a frolicking turn on the tilt-a-whirl.) Of course there's the sweet corn festivals where, honestly, it's impressive that someone as tiny as Lexa can manage to mow through so many cobs in one sitting. "Corn's a way of life here, love." And can't forget a trip to see the yearly winner of the Butter Cow exhibit. Taking an, albiet quick, stroll through the livestock pavilions so her city girl can make friends with a few pigs and pat some horses. Maybe get her sneaker bit by a goat just for good measure. "It's part of the experience, babe. You'll get used to it 😌."
Now, her favorite autumn festivals would definitely be more of the nature variety. She is a fanatic about riding around the backwoods country side to get to the best apple picking spots, the pumpkin patches that let you walk through the rows for hours with your little pull wagon until you pick the perfect ones for Jack-o-lanterns. She's like a kid taking Clarke around to all the orchids around them and letting her smell the scent of the earth in Fall.
And oh. Oh. When Halloween time rolls around? Saddling Clarke up for hay rack rides and haunted mazes, taking her to the big events like Fright Fest and Terror on the Square (it helps that Lexa of course knows everyone who volunteers, because of course she does) and walking her around while they'r booth dressed up in costumes. It's all the best parts of living where they do. It's probably not all that impressive to anyone but the people who live there, but it's what she loves and dammit it's all tradition 😤
#greentoethumbs#FOR THE RECORD I DO NOT SAY MELK 😩#and neither does Lexa... when she's paying attention
11 notes
·
View notes
Text
Boiled corn on the cob is a simple yet delightful dish, celebrated for its sweet and tender kernels. Preparing it involves selecting fresh ears of corn, preferably with bright green husks and plump kernels. After husking the corn and removing the silk, the ears are placed in a large pot of boiling water. Some people add a pinch of sugar or a splash of milk to the water to enhance the corn's natural sweetness. The corn is typically boiled for about 5-7 minutes, just enough to become tender while retaining its juicy texture.
0 notes
Text
Tossing this out here because my oldest wanted my soup recipe and it's easier to type it up and post it here so they can find it as needed. And also if anyone wants a new recipe I guess.
Corn chowder
4-5 ears of fresh corn
2-3 potatoes
Dried onion flakes or powder
A good chunk of fresh parsley (well chopped)
Half and half or heavy cream
Vegetarian faux chicken powder
Smoked paprika to taste
Salt and pepper to taste
Boil the cleaned ears of corn in a large pot with just enough water to cover (use a smaller pan lid to keep them under the water) for about 15 minutes, then remove from pot. Let cool for a bit then scrap the corn off the ears, making sure to go back to the cobs with a spoon or butter knife to get the remaining bits/milk off the cobs. Set the removed corn/bits aside and place the empty cobs back into the water. Boil until reduced and the water has a noticeable corn like smell/taste. Remove cobs and discard.
Peel and cube 2-3 potatoes and add to the corn water, along with dried onions and broth powder and cream (add enough cream so it's roughly half water half cream. If using heavy cream aim more for 1/3 or so) Cook at mid to low heat until tender. Remember to check on it and stir it often so the milk doesn't burn. Add in corn at this point, along with parsley and paprika and salt and pepper.
Let simmer until corn is tender, then use a corn starch slurry (2-3 tbs corn starch in a small bit of COLD water) or wonder flour to thicken to a chowder consistency.
1 note
·
View note
Text
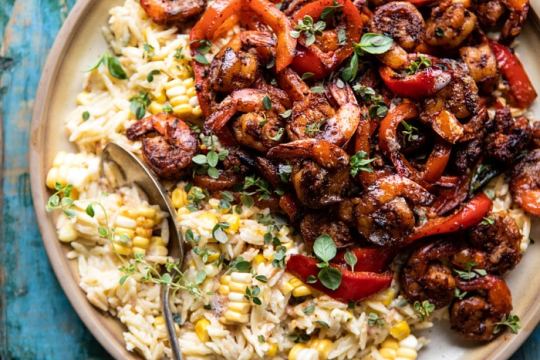
Cajun Pepper Shrimp with Creamed Corn Orzo
Prep Time 15 minutes Cook Time 15 minutes Total Time 30 minutes Servings 4-6
Ingredients
4 tablespoons salted butter
4 ears corn kernels, removed from the cob
3 tablespoons fresh thyme leaves
kosher salt and black pepper
1 cup dry orzo pasta
1/3 cup dry white wine such as Pinot Grigio or Sauvignon Blanc
1/2 cup canned coconut cream or heavy cream
1/2 cup grated parmesan or Asiago cheese
1-pound large shrimp, peeled and deveined, tail on or off (about 24 shrimp)
1 tablespoon Cajun seasoning
1 uncooked Andouille sausage links, meat removed from casings
2 bell peppers, sliced
1 tablespoon extra-virgin olive oil
2 cloves garlic, minced or grated
juice from 1 lemon
1/4 cup fresh basil roughly chopped
Instructions
1. To make the orzo. Heat a large skillet over medium-high heat. Add 2 tablespoons of the butter, the corn, 2 tablespoons thyme, and a pinch each of salt and pepper. Cook 5 minutes or until the corn is golden. Stir in the orzo and cook until toasted, about 2-3 minutes. Add the wine to the skillet and de-glaze the pan. Add the 2 cups water and bring to a boil over high heat. Simmer 8-10 minutes until the orzo is al dente. Stir in the milk and parmesan, cook another few minutes until warmed through.
2. Meanwhile, make the shrimp. In a medium bowl, toss together the shrimp, Cajun seasoning, and a large pinch of pepper.
3. Heat a large skillet over high heat. Add the sausage and brown all over, about 5 minutes. Add the peppers and season with salt and pepper. Cook 5 minutes or until the peppers are soft and tender, remove the sausage and peppers from the skillet to a plate.
4. Return the skillet to high heat and add the olive oil. Add the shrimp and sear on both sides until pink, about 2-3 minutes. Add 2 tablespoons butter, the garlic, and 1 tablespoon thyme, toss to coat and cook until the garlic is fragrant and caramelized, about 1-2 minutes. Remove from the heat and stir in the basil, lemon juice, and reserved sausage and peppers.
5. To serve, spoon the orzo onto plates, top with shrimp and peppers. Enjoy!
1 note
·
View note
Photo

Daddy K's Milk Boiled Corn on the Cob Recipe The tastiest, quickest, and most tender corn has ever been made by simmering ears of corn on the cob in milk, cream, sugar, and butter.
0 notes
Text
August 5, 2023
Goal of the day: minimize eating high in sugar foods and processed foods. Trying to follow an anti-acne diet closely by avoiding proseases foods, high in sugar foods, dairy products like milk and cheese.
Focusing on eating more greens and good proteins.
Breakfast log (meal done at 11:30am) : 2 pieces of whole wheat bread, a hard boiled egg, a head of steamed broccoli and a mandarin.
Rest of meals:
Steamed tacos of beans and some with chicken. I drank only water today. I also had a cob of corn, plain and simple. It was a very satisfying day!
0 notes
Text
Loaded Corn Chowder
When fresh corn is in season, we enjoy it all kinds of ways… cold in Fiesta Corn Salad, charred in Cast Iron Skillet Corn, and of course, added to a big pot of Low Country Boil. Oh, and did I mention I use the cobs to make Corn Stock? Yep, nothing goes to waste in this kitchen… I remove the corn kernels from the cobs, use the cobs to make a flavorful stock, then use the stock to make this amazing Loaded Corn Chowder.
*The corn stock has to be made a head of time. Follow the directions below so you can have it ready before making this recipe.
Items used to make this recipe:
(affiliate links)
corn stripper https://amzn.to/3q4QMsp
knorr chicken bouillon cubes https://amzn.to/3Yaa8Jb
vacuum sealer https://amzn.to/3DvEJHO
vacuum sealer bags https://amzn.to/3Osm99J
zip-top freezer bags https://amzn.to/3QdRL41
Loaded Corn Chowder
makes 8-12 servings
Printable Recipe
Ingredients
For the Corn Stock:
8 corn cobs, kernels removed
3 quarts water
pinch of salt
For the Chowder:
4 slices thick cut bacon, cut into small strips
1 1/2 cups diced yellow onion
1 cup diced carrots
1 cup diced celery
3 knorr chicken bouillon cubes
5-6 cups corn kernels (from 8 ears of corn)
2 cups diced Yukon gold potatoes
1 1/2 cups whole milk
1 cup heavy cream
2 teaspoons kosher salt
1/2 teaspoon ground black pepper
1/4 teaspoon cayenne pepper (optional)
2 tablespoons chopped fresh parsley (fresh or dried)
2 tablespoons chopped fresh chives (fresh or dried)
Directions
To Make the Corn Stock:
In a 8-quart or larger stock pot, place naked corn cobs, salt, and 3 quarts of water.
Bring to a boil, reduce heat and simmer, uncovered, for 2 hours.
Remove corn cobs from stock; discard cobs.
Bring corn stock to a boil and continue boiling until it reduced down to 4 cups of liquid. Use right away or chill for up to 5 days before proceeding to the chowder recipe.
To Make the Chowder:
In a 6-quart or larger stock pot, cook bacon over medium-high heat until crispy; remove cooked bacon from pan drippings and set aside until needed.
In the same stock pot, cook onions, carrots, and celery in the rendered bacon for 8-10 minutes or until the onions are translucent, stirring occasionally.
Add the reduced corn stock, diced potatoes, corn kernels, bouillon cubes, milk, cream, salt, black pepper, and ground cayenne (if using); heat until just under a boil, then reduce heat and simmer for 20 minutes or until the potatoes are tender.
Remove from heat and stir in parsley, chives, and reserved bacon; stir well.
Taste and add more salt if needed. Allow leftovers to cool, then chill in airtight airtight container for up to 5 days. See notes below before you consider freezing.
Notes
Alternate corn stock directions using an Instant Pot or Slow Cooker can be found HERE. Whichever way you choose, reduce the finished corn stock down until it measures 4 cups - use the concentrated stock to make this chowder recipe.
Chowders containing potatoes and dairy don’t freeze well, but you can freeze blanched corn on the cob so you can make this recipe any time of the year. Alternatively, you can cut the corn kernels off the cob and make corn stock with the cobs, then freeze the corn kernels and stock separately until needed. For that matter, you could freeze this chowder before adding the potatoes, milk, or heavy cream (just add them on the day you want to serve the chowder, allowing enough time for the potatoes to simmer long enough to become tender).
To blanch corn on the cob, remove husks and silks. Boil cobs for 7-11 minutes (see suggested times below), then chill in iced water for the same length of time. Place in freezer bags and freeze for up to 1 year. Personally, I feel vacuum sealed bags offer a bit more protection than zip-top freezer bags.
small cobs - boil for 7 minutes; cool in ice water for 7 minutes.
medium cobs - boil for 9 minutes; cool in ice water for 9 minutes.
large cobs - boil for 11 minutes; cool in ice water for 11 minutes.
recipe adapted from Natasha’s kitchen
1 note
·
View note
Text
Hello Roger, the following healing information is the Tree Of Life diet for the cure for cancer and all debilitating diseases. I want you to have the best and eat the best. Only a better doctor can heal someone so that they don't die from a disease.
If you desire the best of care, you have to take control of your health and heal yourself from within if you are sick with an incurable disease. It takes six months to truly heal the human body if you stay on a strict regimen of eating a vegetarian diet.
Choose foods that you like that are healthy and always cook with onion and garlic. When you make tea use fresh lemons, or fresh ginger, peppermint tea leaves are also great if the leaves are not contaminated or artificially made through GMO.
The way to make lemon tea is to cut a lemon in 4 wedge pieces, peel off the skin and then put the lemons in a pot with 4 cups of clean water, bring the desired contents to a boil, then cover and simmer for 15 minutes or more until the pulp bursts in the water and the water’s color is light yellow. You can add a piece of peeled ginger (that is rinsed first) to the lemon tea or you can chew the ginger if you prefer, then wash it down with a bowl of pegged grapefruit slices.
When your body gets cold, eat any nuts you like that you are not allergic to like peanuts, almonds, pistachios, etc. with ripe bananas, then make yourself some hot chocolate which is made with a wedge piece of 100% pure unsweetened dark chocolate bar, which should be sweetened with raw brown sugar, not honey, make sure it is 100% pure unsweetened dark chocolate, and not milk chocolate.
Packaged foods can be laced on purchase, so take care when you shop for groceries, don’t turn your back on your shopping cart, and never request or ask for food to be delivered to you. The following information will help to guide you to a plan of designing your own menu that will help you to heal and get better faster, if you become sick. An ounce of prevention is a pound of cure.
The red apple gave humans a heart and blood vessels, so eating all the red foods will heal the heart and nourish the blood while it cleanses every organ associated with the blood and it's functioning. Examples of the red foods are apples, cherries, beets, tomatoes, red beans, radishes, red cabbage, watermelon, red potatoes, guava, strawberries, etc.
The orange foods created the nervous system, so eating all the orange foods will heal, nourish and cleanse the nerves. Habitually eating this color food will heal anyone suffering from severe pain, nervousness, inflammation, dizziness, or paralysis due to damages of the nerves connecting spinal cords together and or nerves connecting to other nerves inside the tissues of the body. Examples of the orange foods are oranges, carrots, mangoes, cantaloupes, apricots, peaches, nectarines, sweet yams, squash, acorn, pumpkin, etc. The yellow foods give the body back its life, like the sun gives the earth life, so eat and consume vast amounts of yellow foods every day, it will enable the human body to survive any and every disease that debilitates it. Prime examples of some energy boosting foods are lemon, banana, ginger, turmeric, pineapple, squash, grapefruit, mangoes, corn on the cob, plantains, Jackfruit, June Plum, (found in Jamaica W. I.), etc.
The white foods gave the human body it’s bone and the muscles to support the bone. To nourish, heal or cleanse the bone and the muscles in the human body, one must eat all the white foods that will give the body strength and stamina. Examples of the white foods that will give the body strength are potatoes, rice, Yucca, yams, coconut, the white sweet potato, navy beans, cabbage, cauliflower, cassava, calabash, sweet sop, sour sop, (found in Jamaica W. I.), almonds, peanuts, walnuts, cashews, pecans, etc. These are just samples of the white foods that will give the human body strength, when consumed. There are other white foods I have not suggested which can be found in South America, the Island of Jamaica, or other hot climate countries.
The green foods gave the human body it’s cells and its tissues, so to heal, cleanse and nourish the cells in the human body, one must eat all the green foods available to them. Examples of the green foods are lettuce, green peas, spinach, granny smith apples, okra, string beans, kale, broccoli, zucchini, Lima beans, avocado, green peppers, collard greens, cucumbers, marijuana, etc. The purple foods will heal, nourish and cleanse the outer skin of the human body, because it helps the skin to retain its elasticity, especially after a trauma injury.
To stay supple and smooth one must wash their skin properly and rinse it thoroughly leaving no soap or a greasy feeling. Examples of the purple foods are eggplant, grapes, purple cabbage, star apples, (found in Jamaica W.I.), purple onion, etc.
The blue foods will heal, nourish and cleanse the skin inside the human body that covers organs, cells and tissues. Example of the blue food is the blueberry. There is also the black bean, or the blackberry, they are still part of the blue foods because when science links dark colored foods together, a new generation of foods will be born which will look black in color. Stay safe and be well.
The following is a sample of a vegetarian diet one must follow to achieve optimum health. The foods in this menu are foods that will heal the human body from any disease that is afflicting it or any disease it is dying from, especially if the fresh foods you are eating to heal your body is not laced with poisons, contaminated with infectious bodily fluids, or is artificially made like GMO foods. You must seek to buy 100% fresh foods, still in its pure state without any added preservatives. The human body is made up of colors, follow the colors that will help you to heal faster. Do not forget that all the red foods you eat will heal your blood, the yellow foods will stop sickness and death, the orange foods will heal your nerves, the white foods will give you bone and muscle strength, the green foods will heal your cells and your tissues, the purple foods will heal your skin outside, and the blue foods will heal your skin inside. Every dinner meal should consist of natural fresh seasonings, which is usually always onion, garlic, pepper, celery, parsley, etc. Minus the foods you are allergic to, if you stay on the path and follow a strict regimen, you will get better GUARANTEED! There are foods that I did not list in the following sample menus because I do not know your taste. You must apply to your diet any foods you like that are fresh and not processed. Sea salt is better than regular salt.
PHASE 1 BREAKFAST A bowl of peanuts, sunflower seeds, pistachios, pecans, walnuts, hazelnuts, cashews, and almonds. Rinse the nuts in hot water and eat them with ripe bananas. Wash down your meal with lemon and ginger tea, add no sugar.
LUNCH A bowl of fruits of all the colors like red cherries or apples, ripe bananas or fresh pineapple slices, oranges or peaches, shredded fresh coconut or almonds, green granny smith apples or kiwi, purple grapes or star apples (found in Jamaica WI), and blueberries. Rinse them well before eating with meticulously clean fingers.
DINNER A bowl of homemade vegetable soup, made with fresh all natural seasonings only, no powder. Any red, yellow, orange, white, green, or black beans cooked in clean water for 2 hours until it is soft. Beans must be rinsed in a colander under hot water thoroughly before cooking. Then add fresh seasonings like garlic, hot peppers, and onions, potatoes, carrots, tomatoes, plantains, yucca, eggplant, squash, and any greens you love. Drink all the color fruits by liquefying them in a blender. If you want a thick smoothie, add banana.
PHASE 2 BREAKFAST Homemade bread, made with milled rice, barley and corn. It's Ok to add your favorite nuts to your bread by grounding them. Toast it and place ripe bananas on top. Wash down your meal with ginger and dark chocolate tea. Sweeten it with raw brown sugar that is not laced to cause sweating or a hot body syndrome.
LUNCH Repeat Phase 1 DINNER Rice and Beans, cooked with fresh all natural seasonings, served with boiled plantains, corn on the cob, carrots, zucchini, avocado, pumpkin, yams, lettuce, tomatoes and cucumbers. Wash down your meal with lemon water, which is the same as lemons boiled to make tea that is then cooled naturally.
PHASE 3 BREAKFAST Eat diced carrots, chopped celery, tomatoes, avocado, bananas, and oranges. Wash down your meal with ginger and lemon tea, add no sugar.
LUNCH Homemade salad soup is made with onions, celery, garlic, carrots, potatoes, and lentils that is rinsed first then added to clean boiling water which is then simmered for half hour or longer until all ingredients are cooked. After which the stove is turned off, and all the salads you love are then added immediately while still hot. Take care to rinse each leaf thoroughly before adding it to your soup mix. Wash down your meal with natural orange tea which is made by boiling the orange without the skin in clean water, then cover and simmer until the pulp bursts. Let it cool and add no sugar.
DINNER Fruit salad medley consists of two of a kind of all the different color fruits, rinsed well and eaten with meticulously clean fingers. I would recommend apples/pomegranate, bananas/grapefruit, oranges/nectarines, granny smith apples/pears, coconut/almonds, grapes/plums, and blueberries.
PHASE 4 BREAKFAST A bowl of your favorite nuts, rinsed in hot water, and eaten with bananas, or you can make cornmeal porridge, but rinse it in a strainer first if it's laced to cause sweating, then add fresh nutmeg and cinnamon, sweeten with raw brown sugar, then add ripe bananas. Wash down your meal with lemon and ginger tea, add no sugar.
LUNCH Salad combo is like lettuce, spinach, cucumbers, avocado, cherry tomatoes, diced celery, shredded carrots, and cooked corn kernel that is mixed in with rinsed first then cooked lentil peas, that gets sauteed in butter with natural seasonings like garlic, onions, thyme, parsley and celery. (It replaces salad dressing because they have oil in them which is not good for the heart because vegetable oil and some olive oil are all made from crude oil which has been processed and refined to become highly favored as cooking oil. So, if you never want to develop heart disease of any kind whatsoever, you should use butter if you’re desperate to eat fried or sauteed foods) Wash down your meal with carrot juice mixed with nutmeg and sweetened with raw brown sugar that does not cause sweating.
DINNER Boiled green bananas, plantains, yellow yam, breadfruit, sweet potato, yucca. Add yellow and green split peas that are rinsed first before cooking with garlic, onions and jalapeno pepper; add red beans seasoned with thyme, extra onion and garlic; and add okra with spinach that is sauteed in pepper, onion, and extra garlic. Wash down your meal with fresh mango and pineapple juice.
These are sample menus. Again, I say if there is anything you are allergic to on this menu, you must eliminate it and replace it with any food of the same color. There is no water in this sample menu because the living waters will quench your thirst. By that I mean the waters from the soups and the fruits will nourish, cleanse, and heal you from the inside. When your soup or fruit is not contaminated or laced with poisons, you will endure and live to prosper. If your sickness is Cancer, or a debilitating disease like Multiple Sclerosis, Lupus, Fibromyalgia, Osteoporosis, etc. in order to achieve optimum health, you must flush out your private parts with saline solution twice daily for six months. Saline solution is made by adding a teaspoon of sea salt to one cup of hot water, mix, then let cool before using a sterile detachable syringe or a sanitized medication dispenser to flush out the male's private parts, and for the female, a sterilized empty reusable douche bottle with a nozzle that is kept sanitized with hot water before and after each use, then stored in a clean towel or rag afterwards. During this cleansing process, you must not engage in any sex including oral sex because a potential reinfection can be born which will slow down the healing process and prolong contamination and exposures to the disease you are trying to cure, doing it God’s way with God’s foods. The sample menu and diet plan will heal your body from any disease it is suffering from, especially when you amplify your intake of the yellow herbs and the yellow fruits, and it will also help you to lose weight. Good luck, stay safe, and get better.
Kathleen Slowley

0 notes
Text

Pickled Corn: Appalachian Treat of Yesteryear- Folks in Appalachia can enjoy tomatoes, beef, apples, pork, and corn year round without giving any thought as to the arduous task of food preservation.
One of the favorite preservation methods was “pickled corn” and it became an Appalachian specialty from the North to the South. The recipe for pickled corn is rather simple.
•Recipe for Pickled Corn:
Blanch corn on the cob in boiling water for three minutes. Plunge into cold water and cut from the cob. Pack into a small stone crock and add one cup of salt to every nine cups of corn. Mix thoroughly. Put plate on top of corn and hold down with a heavy weight. After a few days brine from the corn should form over the rim of the plate. If not, add brine made from one half cup of salt to one quart of cold water. Pour into the crock to cover the plate.
•To Use:
Take out the amount of corn needed, putting the plate in place again. Rinse in cold water. Cover corn with plenty of water and bring to the boil. Then pour off the water. Repeat this process. Drain through a colander and put in the oven to dry out. It is now ready to serve. Add milk butter or butter substitute and seasoning.
These days pickled corn is but a faint memory for many, but in some parts of Appalachia, it is still a late-fall and winter treat.
1 note
·
View note
Text
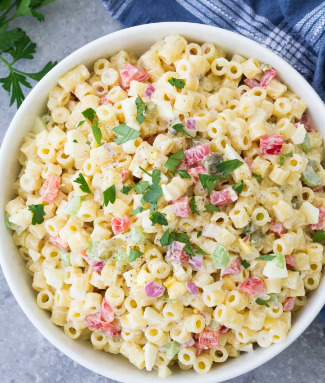
Best Macaroni Coleslaw Salad Recipe
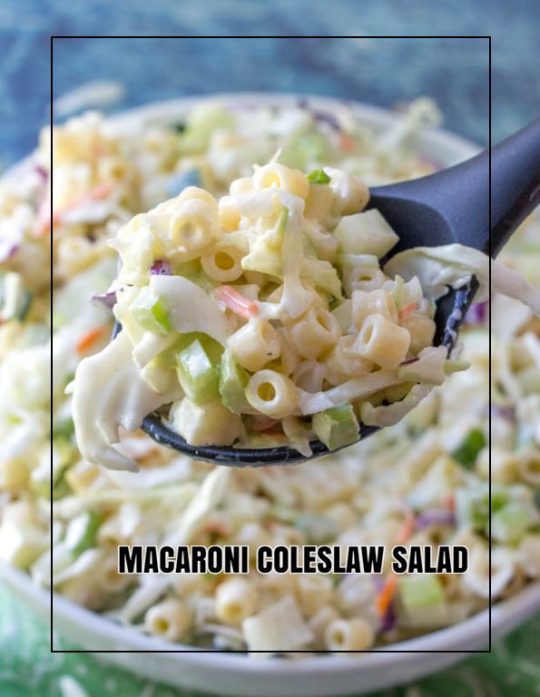
Coleslaw and macaroni salad combine well in Macaroni Coleslaw Salad, which is brimming with vegetables, noodles, sliced apples, and your two favorite summer side dishes! Take this delicious, simple recipe to a BBQ or potluck.

Macaroni coleslaw A traditional coleslaw salad and macaroni salad with a creamy dressing! A straightforward recipe that makes the ideal side dish for summer picnics and family get-togethers! What exactly is this mixture? This dish is essentially a combination of macaroni salad and coleslaw! The ideal of both worlds is combined in one salad! There are plenty of vegetables, macaroni noodles, and a quick homemade coleslaw dressing. As well as being crunchy, sweet, and tangy. The best dish to bring to a summer potluck or BBQ is macaroni coleslaw salad. The main course of your next barbeque, potluck, or quick lunch can be this simple Coleslaw and Macaroni Salad. It is easy to prepare and has a delectable flavor and texture. You'll adore the creamy dressing that includes mustard, relish, and a touch of sweetness. It is the ideal accompaniment to grilled pork chops or barbecued chicken. One of the simplest meals to prepare is macaroni salad with coleslaw. After the macaroni has finished cooking, all that is left is to combine the creamy dressing with the slaw and noodles. Put it together in a matter of minutes, then let it sit in the refrigerator for a few hours. Just like that! Making a bit extra of this meal is advised if you're serving it at a gathering. You'll be surprised at how much food is consumed; leftovers are always welcome. It's excellent to have on hand for a quick lunch because coleslaw macaroni salad keeps nicely in the fridge for a few days.
WHAT IS AL DENTE?
To obtain the most excellent texture possible while cooking pasta, it's crucial to cook the pasta until it's al dente. If you are unfamiliar with the phrase "al dente," it refers to cooking pasta until it is firm and chewy but retains its shape when the sauce is applied. Alternative Video Recipe: Coleslaw Macaroni https://youtu.be/VnXpIBI-Z4w Macaroni Coleslaw Recommended Posts: - Delicious Milk Butter Boiled Corn on the Cob Recipe - Easy to cook Mushroom Risotto Recipe - Delicious Fried Squash Recipe
INGREDIENTS YOU'LL NEED:
The following ingredients are required to create this macaroni salad (for serving sizes, see recipe card): Among the ingredients are macaroni, apple cider vinegar, celery stalks, red onion, green bell peppers, cucumbers, mayonnaise, white sugar, salt, ground black pepper.
INGREDIENTS FOR A MACARONI SALAD WITH COLESLAW
- Apple cider vinegar and macaroni. Elbow macaroni is highly recommended for this recipe, although other short noodle shapes would work. Because the noodles are so thin, there are many crevices for the dressing and other small components to tuck into, allowing them to be equally distributed throughout the pasta. To prevent the cooked pasta from sticking and clumping together, we toss a tiny dab of apple cider vinegar after it has been drained. - Salad dressing. Simple is best in this case; a packet of coleslaw from the grocery works wonderfully! Most coleslaw mixes are next to other packaged salad mixes in the grocery store's produce area. - Celery. This traditional ingredient gives the macaroni salad a pleasant crunch. - Cucumber. In this salad, we prefer English or Persian cucumbers (also called little cucumbers). Regular cucumbers don't have enough texture and flavor. They degrade faster and are relatively watery, which is undesirable in this salad. - Onion red. If you can't stand the taste of raw red onion, soak the sliced onions in ice-cold water with salt for ten minutes. Before using, drain thoroughly. So that you know, the red onion flavor gets stronger the longer this salad sits and keeps in the fridge. - A green bell pepper Another item that gives the salad a wonderful crunch and savory quality is this one.
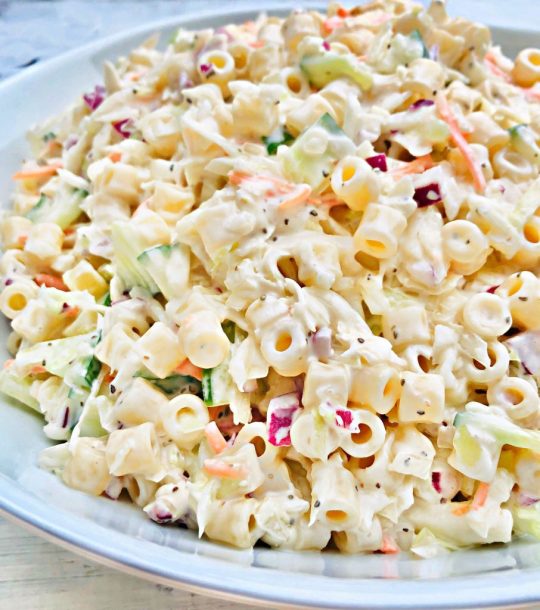
Macaroni coleslaw
INGREDIENTS IN DRESSING
- Mayo. The mayonnaise in this recipe is possibly the key component because it significantly affects the flavor. We adore Best Foods® by Hellman's® the most (not sponsored). It isn't overly sweet and somewhat creamy. We like their standard (full-fat) mayo in this salad since it makes the creamiest dressing. - Sugar. This macaroni salad is typical in that it is purposefully sugary. The sugar balances the vegetables by reducing the acidity of the vinegar in the dressing. If you don't like sweetness, add sugar gradually and according to taste. - Alcohol from apple cider. The vinegar adds a pleasant tang to the salad and counteracts the sweetness of the mayo and sugar. - Seasonings. Minor additives like salt, pepper, and garlic powder all have a significant impact on flavor. A little extra salt may be all the salad needs if the flavors appear bland. - Juice of fresh lemon. This acidic component harmonizes flavors and gives the salad a little more zing. If you enjoy fresh lemon juice, you may wish to add more of this ingredient! We firmly believe that fresh lemon is superior to bottled lemon. Seriously! For best results, use fresh lemon juice.
HOW TO PREPARE MACARONI COLESLAW SALAD
- Bring salted water to a boil in a kettle. As directed on the package, prepare the macaroni al dente—transfer the macaroni to a sizable serving bowl after draining and rinsing it in cool water. - The macaroni should be tossed with a tablespoon of apple cider vinegar. - Add the chopped cucumbers and green pepper to the macaroni. Mix everything together thoroughly by tossing. Chopped celery and red onion should be added to the bowl. Mix the coleslaw mix in after adding it. - In a small mixing bowl, combine all of the dressing's components. To blend, whisk. When everything is thoroughly coated, drizzle the dressing over the macaroni mixture and toss to combine. - Before serving, put a tight lid on the bowl and place it in the fridge for at least an hour.

Macaroni coleslaw
TIPS FOR MACARONI COLESLAW SALAD
- The pasta water with salt. The flavors of this pasta tend to become silenced when served cold. Since this is the only opportunity to season the pasta, ensure it is - well-seasoned as it cooks. Learn how to correctly salt pasta water by reading this article. Generally, I usually add one teaspoon of salt for every 4 cups of water. - Don't worry if the dressing appears lumpy initially; the lumps will dissolve when the dressing is stirred with the salad. - Take a 30-minute break. This salad can be served immediately after preparation, but it tastes better cold after the ingredients have had some time to mingle with the dressing.
MACARONI COLESLAW SALAD STORAGE
- Put this salad together just before eating. Did we not just say that the salad should be chilled for 30 minutes? That's not the same as keeping it in storage for four or five days. Pasta salads don't keep well with the dressing after a day—the noodles bloat as they soak up dressing juice, giving the salad a disagreeable texture. Additionally, the vegetables become mushy, and the salad gets watery. So kindly chill it for 30 minutes, then take it out and serve. - If making it ahead of time, refrigerate the salad and dressing separately and combine them just before serving. Do not exceed serving sizes for meals.
Macaroni coleslaw
WHY YOU'LL LOVE THIS RECIPE
- A creamy pasta salad fit for a summer barbecue or gathering! - Spaghetti with excellent coleslaw! With two traditional salads in one! - A simple evening meal would also be complete with this coleslaw pasta salad!
INGREDIENT NOTES AND SUBSTITUTIONS
- Black pepper can be substituted for white pepper, but the flavor won't be the same. Give white pepper a try if you've never used it before! Since white pepper has a much superior flavor, I rarely use black pepper. - Red, green, and carrots can all be swapped out with a package of coleslaw mix in the recipe for cabbage. About 4 cups of coleslaw mix are required. - White vinegar can occasionally be swapped out for apple cider vinegar. - Ditalini pasta is the pasta I use in this macaroni and slaw recipe. If you like, you might use another type of tiny pasta, elbow macaroni. - Miracle whip can be used in place of mayonnaise. - Red onions can be used in place of green onions in this recipe.
FAQs
What's in the macaroni coleslaw salad dressing? Mayo, white vinegar (apple cider vinegar can also be used for a little added sweetness), sugar, dijon mustard (I prefer one with a little more bite to it), salt, pepper, and a tiny bit of sweet pickle relish should all be combined in a bowl. What ingredients are in Amish slaw? A traditional mayo-based slaw is heavier and tangier than Amish Vinegar Slaw. They are made from chopped cabbage, diced onion, dry mustard, and apple cider vinegar. You can bring this fast side dish to barbecues, potlucks, and family events. How can macaroni salad stay moist? The pasta is crucial in preventing the macaroni salad from drying out. The pasta won't adhere to the dressing if you don't cook it long enough, and it will also dry up. The spaghetti will be soggy and disgusting if you overcook it. Your macaroni salad will remain creamy if the pasta is cooked to perfection. What ingredients are in slaw dressing? The main ingredients in coleslaw dressing are mayonnaise, a sweetener (like honey), apple cider vinegar, celery seeds, salt, and pepper. Buttermilk is sometimes used in coleslaw dressings, but I don't think it's necessary and prefer this dairy-free alternative. How is Amish macaroni salad prepared? Mix eggs, onion, celery, bell pepper, and relish in a big bowl. Whisk the salad dressing ingredients in a small bowl—sugar, mustard, vinegar, celery seed, and salt. Pour over the vegetables and eggs. Add the macaroni that has cooled on top and mix thoroughly.
More Alternative Salad Recipes to try!
STRAWBERRY SALAD

One of our most well-liked salad dishes features luscious strawberries and a delicious strawberry vinaigrette dressing. This green salad is the ideal way to savor seasonal berries because it's paired with crunchy red onions, toasted almonds, feta cheese crumbles, and those lovely sweet berries. For a similar tasty variation, try blackberries or raspberries. Try our equally excellent Strawberry Salad with Balsamic Vinaigrette if you'd like. See here: VEGAN PASTA SALAD

This enormous bowl of joy is vegan pasta salad! Green beans, yellow squash, and cherry tomatoes are just a few of the colorful produce options. Artichokes and olives lend a delightful briny flavor. I prepare a tart, creamy tahini dressing to bring everything together. This dressing travels well because it is entirely free of mayo. As a result, this vegan pasta salad is ideal as a side dish at a picnic or BBQ. I intend to prepare it for the entire summer because it is energizing, colorful, and enjoyable. You will be once you give it a try! Click here: - Mediterranean Orzo Pasta Salad - Spinach Apple Salad - Perfect Italian Salad Read the full article
0 notes