#lolita pattern
Explore tagged Tumblr posts
Text
I'm aliveeee! I'm not that good with social media, it seems, but I have some progress! I'll be printing my patterns again soon and can start working on my first Lolita piece since I first tried it in 2011 with an ELG McCall's pattern.
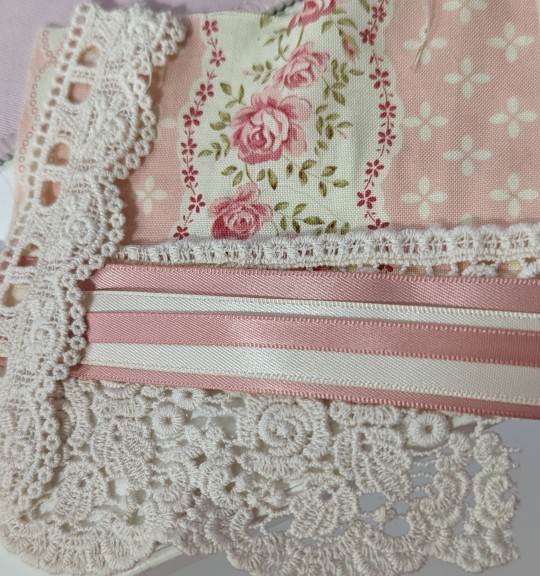
The plan isn't for anything too complicated, a simple jsk with lace trim and layered ribbons going perpendicular to the stripes. Now to measure, refit and reprint my bodice blocks!
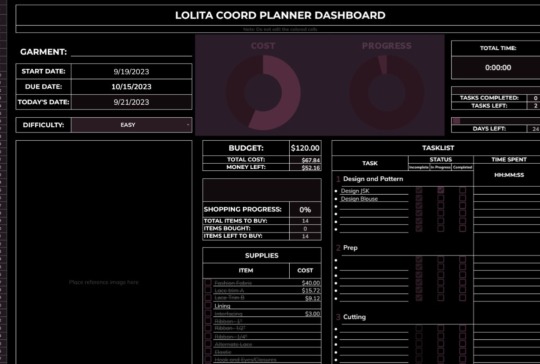
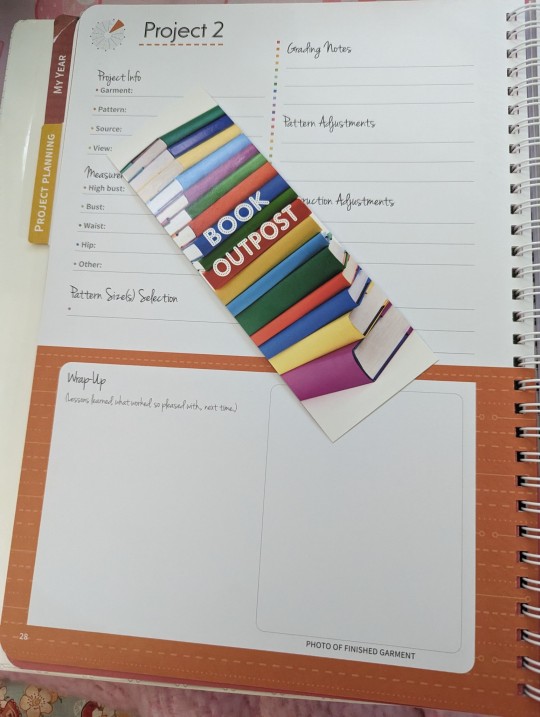
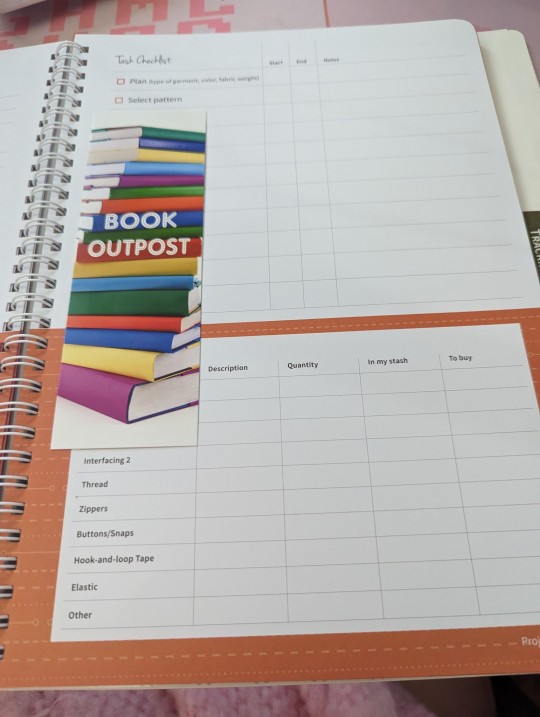
I recently got two planners to use for projects, one technically for cosplay as a Google sheet, and a physical one they both have differing spaces for each step laid out. I love them so much already! And they were both under $10!
I also recently made a rice bag for warmth on bad pain days (aka almost all days recently), it works really well! I plan to use the fabric for another jsk, and am looking forward to that!
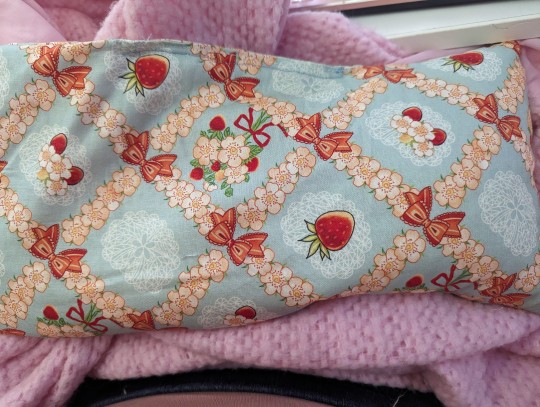
That's most it for me, have a great day everyone!
#lolita sewing#plus size lolita#homemade lolita#lolita fashion#lolita pattern#lolita community#lolita dress#lolita coord#lolita jsk#sewing#seamstress#sewist#pattern drafting#self drafted pattern#custom dress#early steps#planning stage#tall lolita
25 notes
·
View notes
Text


BABY, the Stars Shine Bright - Rose Pattern Lace Blouse (2003)
#sweet lolita#lolita fashion#baby the stars shine bright#egl fashion#egl community#btssb#egl#elegant gothic lolita#kawaii fashion#harajuku fashion#jfashion#old school lolita#alt fashion#rose pattern lace blouse#my post tag
849 notes
·
View notes
Text
Lolita Accessory tutorial pages from Japanese mook “Gothic & Lolita Patterns”, 2004
Included are: head dresses, hair clips/ties, camisole pattern, drawers pattern, sock stoppers, multiple bag patterns, detachable collars, and jewelry.
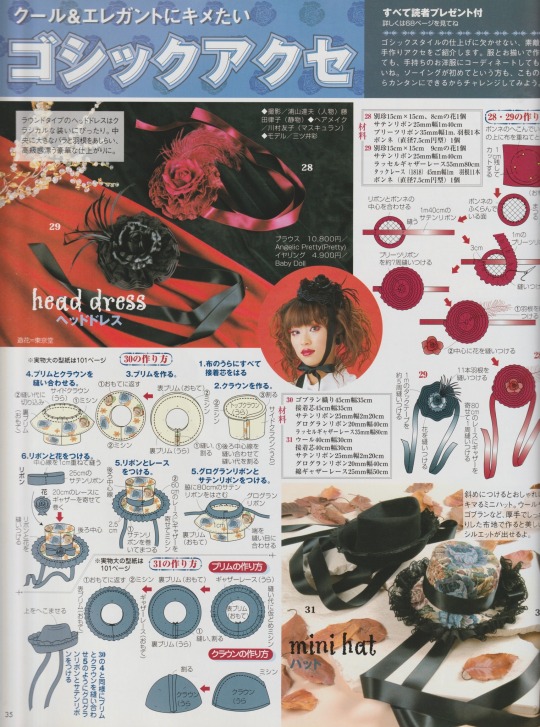
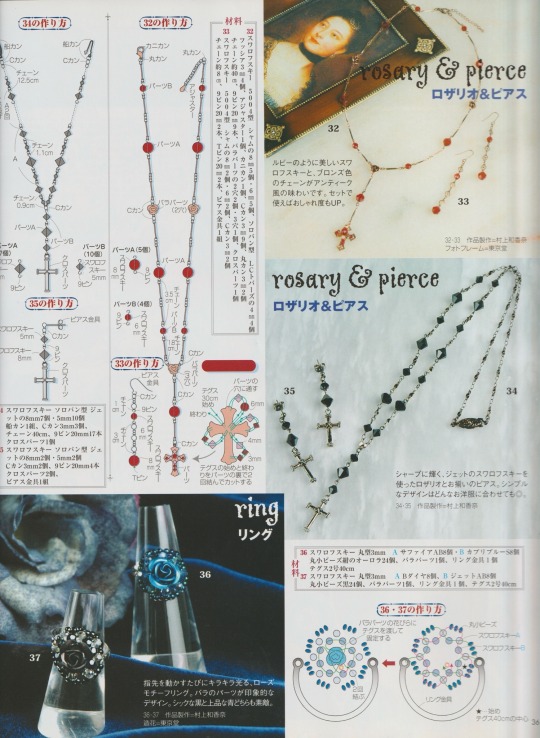
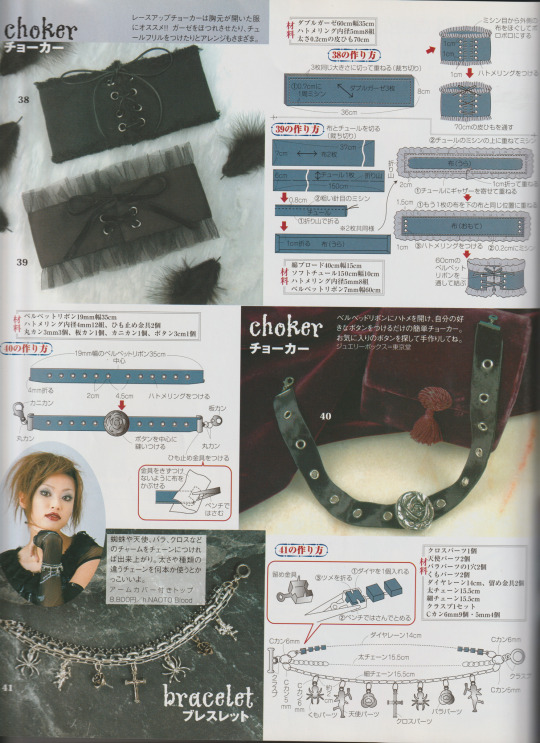
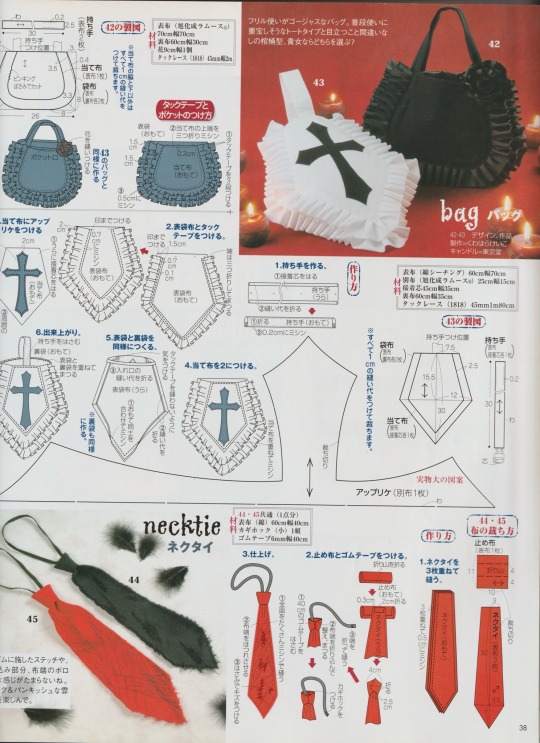
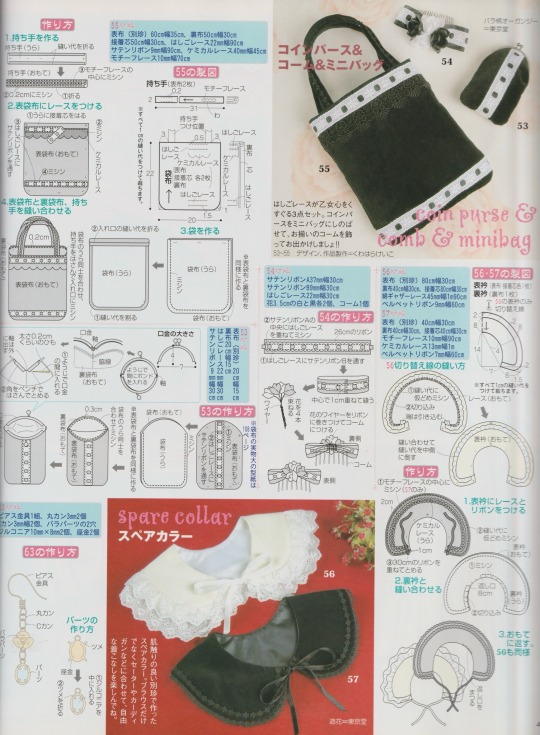
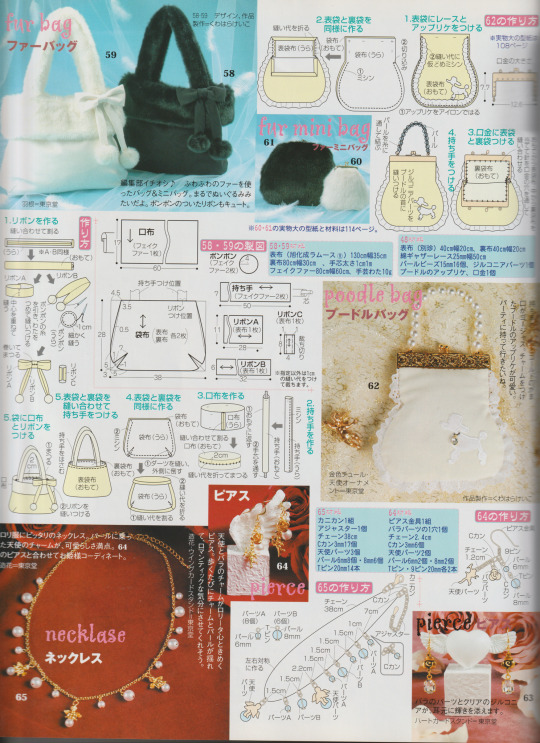
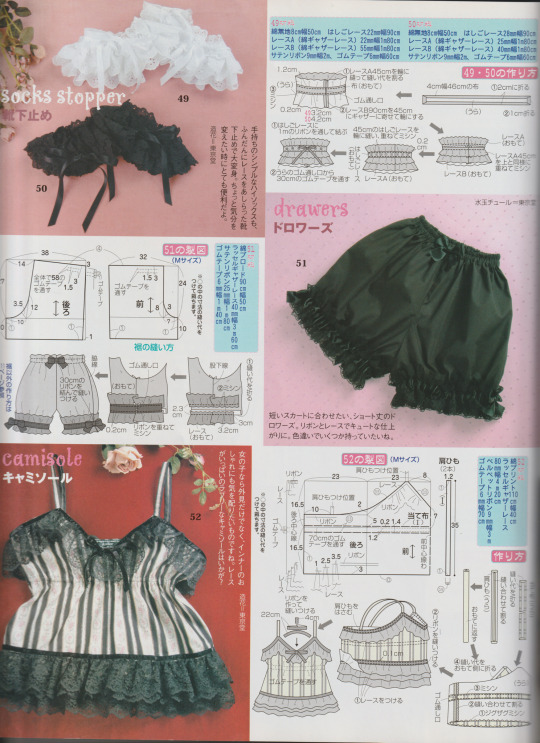
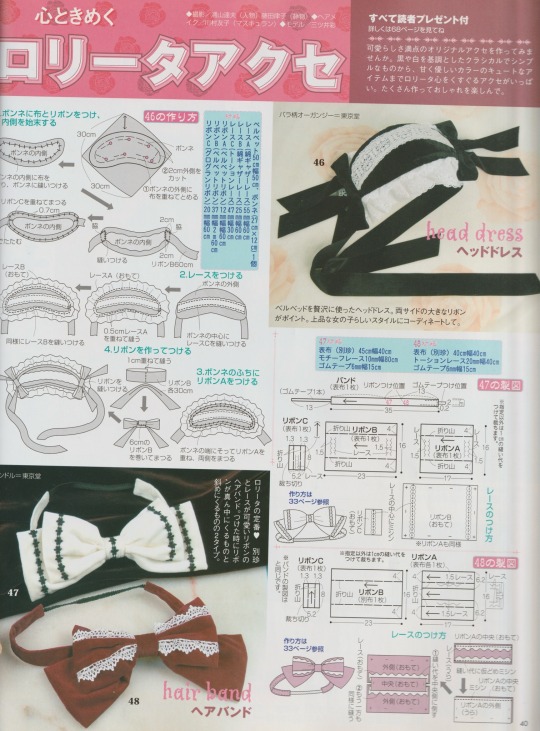
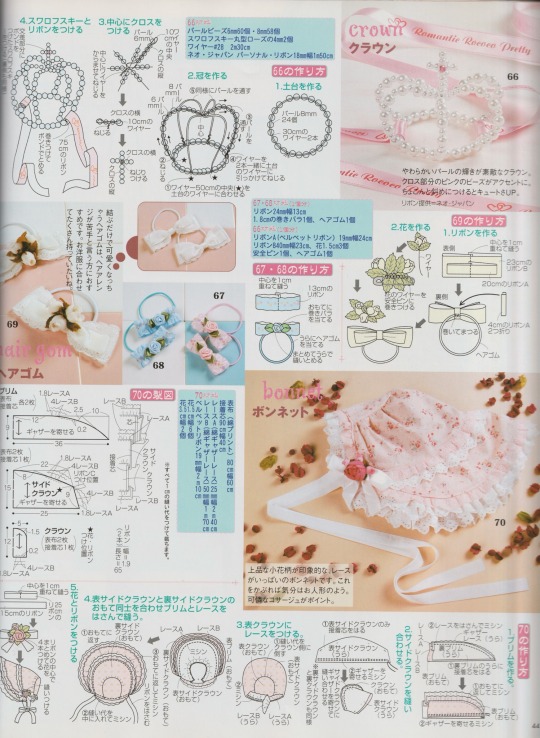
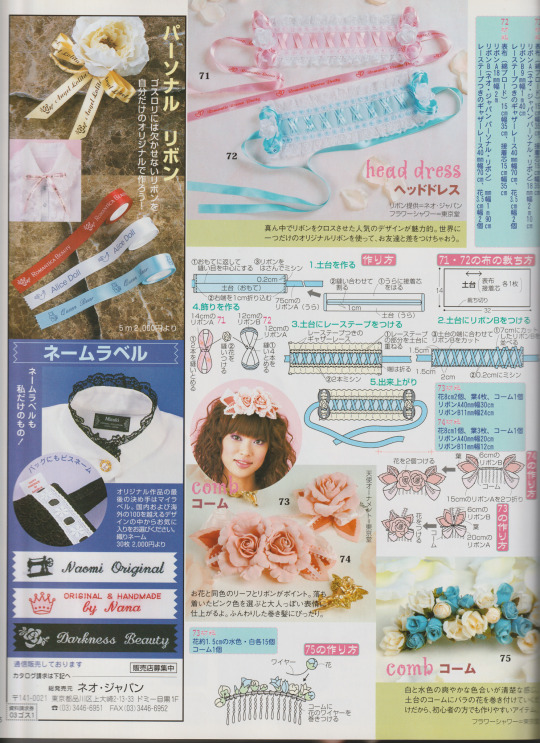
Consider this as my Valentine’s gift to you guys!! Thank you for being very kind about my post ^-^
*Also* If you would like the patterns to some of the tutorials (ie: the mini top hats, pattern 62) let me know so I can make a post later!
#gothic lolita#lolita fashion#j fashion#old school lolita#egl#egl fashion#coord#fashion#tutorial#magazine#sewing patterns#jewelry#goth#archive#my scans#happy valentine's day
1K notes
·
View notes
Text
toga in yami kawaii & jirai kei!!


half self indulgent half the styles reminded me of her
#mha#bnha#my hero academia#toga himiko#himiko toga#pike art#i just love love a lotta jfashion#my favs always been classic lolita#but thats not very toga-esque#i was gonna do gurokawa instead of yami kawaii#and i think that shows a tad#i just hateee drawing patterns 😭😭
455 notes
·
View notes
Text

I keep finding coords I really like on Pintrest but people pin them in ways that do not preserve info on who the original poster was. :/
I'm gonna introduce a new tag: photo credit needed. If you see a post on my blog with that tag and know who the picture belongs to please let me know!
#other people's photos#egl#elegant gothic lolita#angelic pretty#honey cake#lolita fashion#j fashion#alt fashion#fashion inspo#pattern mixing#photo credit needed
37 notes
·
View notes
Text
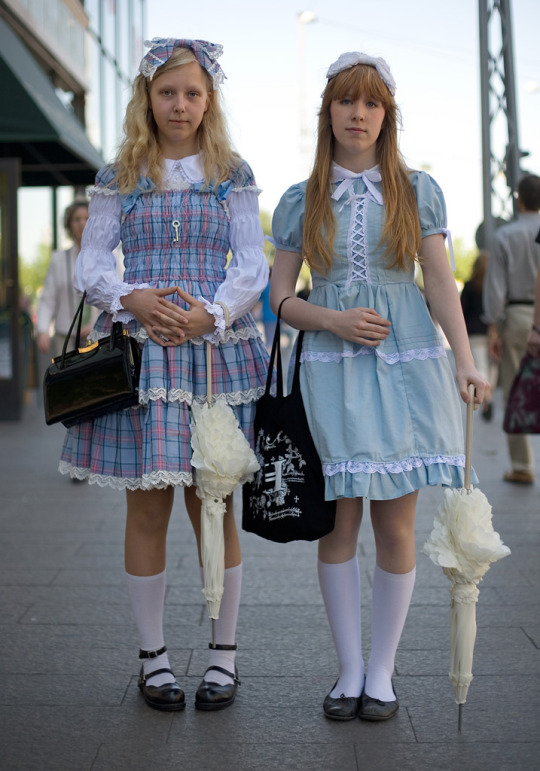
Reetta, 14, Elina, 14
Reetta: “I bought this dress in Osaka, Japan. It cost about 150 euros. The shoes and our parasols are from Japan, too.”
Elina: “I made this dress myself. I found the patterns in a gothic lolita paper. It took two days to finish the dress.”
June 2006, @hel-looks
#apologies for the repost - i searched their blog but couldn't find the original post#also damn i want the pattern for elina's dress#its giving cornet#egl#old school lolita#lolita fashion
176 notes
·
View notes
Text
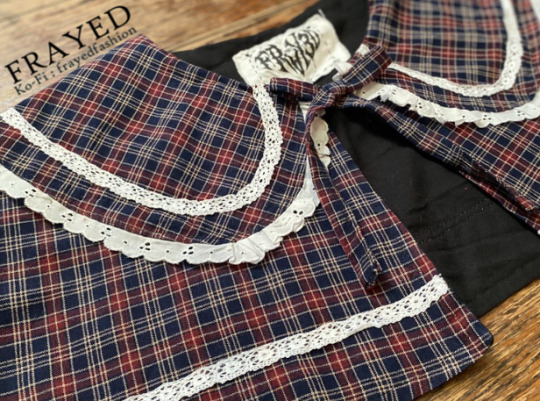
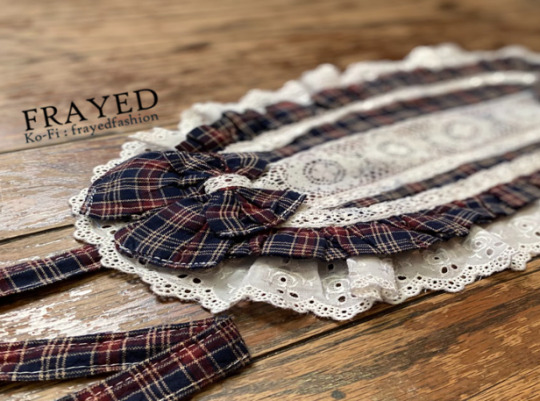

this small batch is going live ˚₊‧ tomorrow ‧₊˚ alongside the ౨ৎ⋆˚。⋆ Valentine's Day Accessories drop ˚₊‧AND‧₊˚ the Black Rose Embroidery Jsk Made-to-Order listing will be live as well! Big day ooo
#artists on tumblr#embroidery#egl fashion#egl#egl community#lolita fashion#is this tartan or plaid lmao#it's not black its really dark blue#handmade#handmade egl#sewing#small biz#slow fashion#otome no sewing#cape is not my pattern#i dont claim the pattern#i just made it and will keep it if it doesnt sell#i did make the headdress and tote patterns myself tho#Frayed#sneaky peek
38 notes
·
View notes
Text
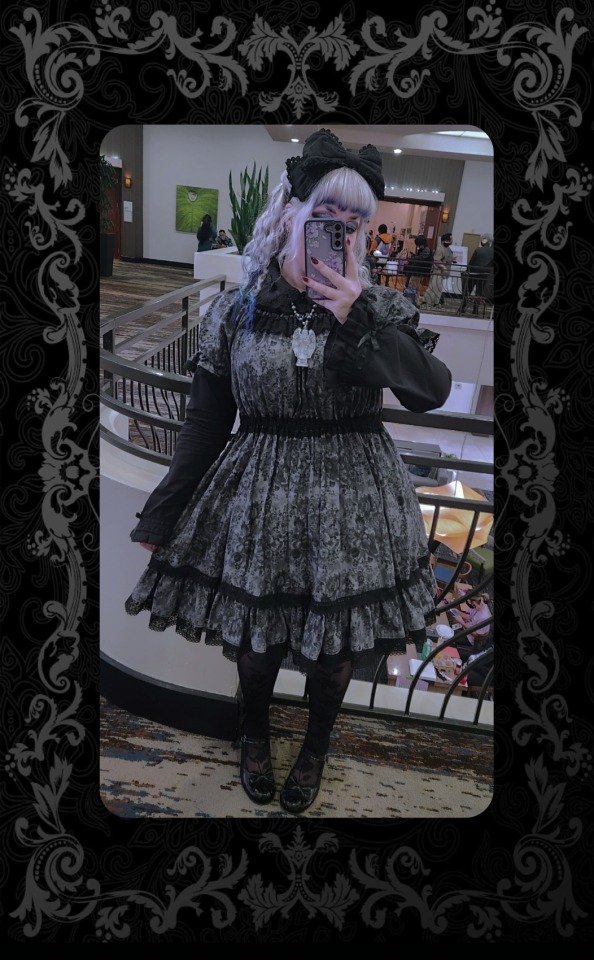
🩶OP/necklace - handmade 🩶blouse/shoes - Bodyline 🩶headbow - Metamorphose
#this OP is so comfortable i should wear it more#its adapted from an otome no sewing pattern and im quite proud of it :>#egl#egl fashion#egl community#lolita fashion#gothic lolita#jfashion#egl coord#lolita coord#handmade lolita#otome no sewing
47 notes
·
View notes
Text
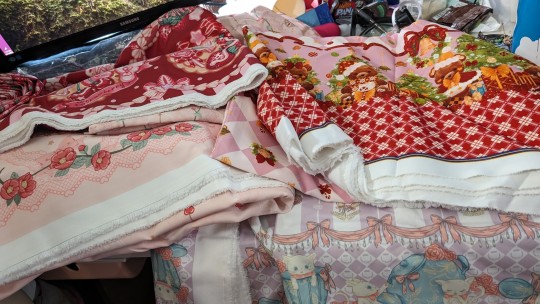
My taobao order arrived on my birthday!!
The picture isn't great at showing everything, due to not having enough room, but lookit all my fabrics! I got 21.5m of fabric that came out to 12lb/5kg (and expensive AF shipping!).
The purple cat and teacup/pot print is not on the selvage, which is extremely frustrating as it's only about 20in/50cm in length, and I am toll. So some splicing or tiers will be done so as to have a skirt that goes past mid thigh.
Everything is lovely and a nice texture, I'm excited AF to start sewing...except that I still need to do patterns, as well as finish my first two pieces that I've already gathered everything for, before I start buying even moar trimmings and lace.
#homemade lolita#lolita sewing#lolitafashion#lolita sewing blog#plus size lolita#pattern drafting#sewing#lolita fashion#sweet lolita#lolita pattern#taobao order#taobao fabric#fabric stash#handmade lolita#lolita fabric
15 notes
·
View notes
Text
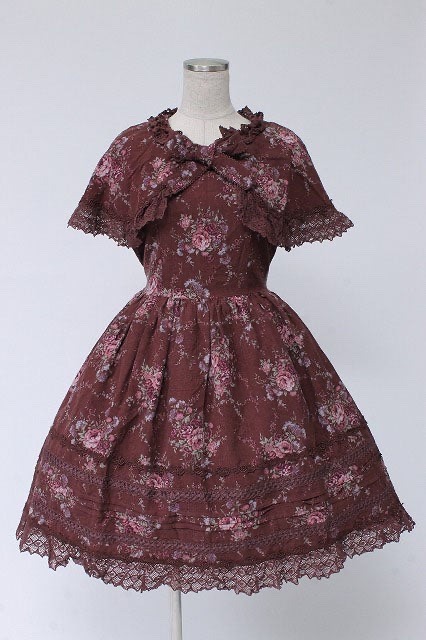
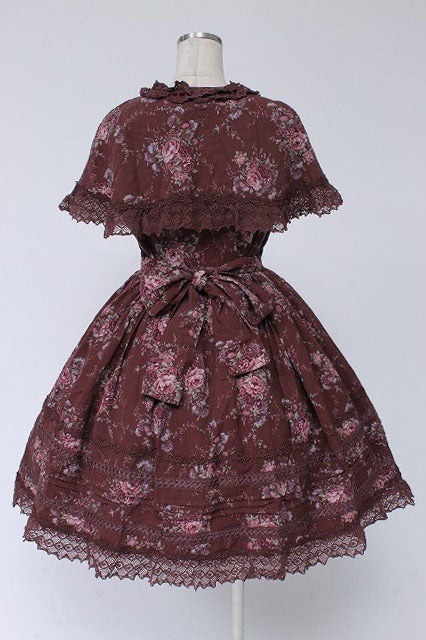
Innocent World - Rose Pattern JSK with Cape (2001)
#innocent world#classic lolita#old school lolita#sweet lolita#egl fashion#egl#elegant gothic lolita#egl community#lolita fashion#kawaii fashion#jfashion#harajuku fashion#alt fashion#capes#rose pattern jsk with cape (IW)#my post tag
632 notes
·
View notes
Text
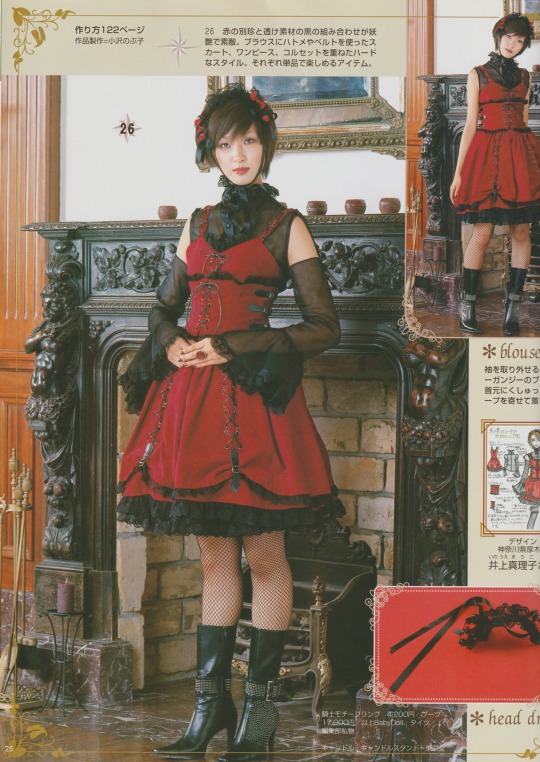
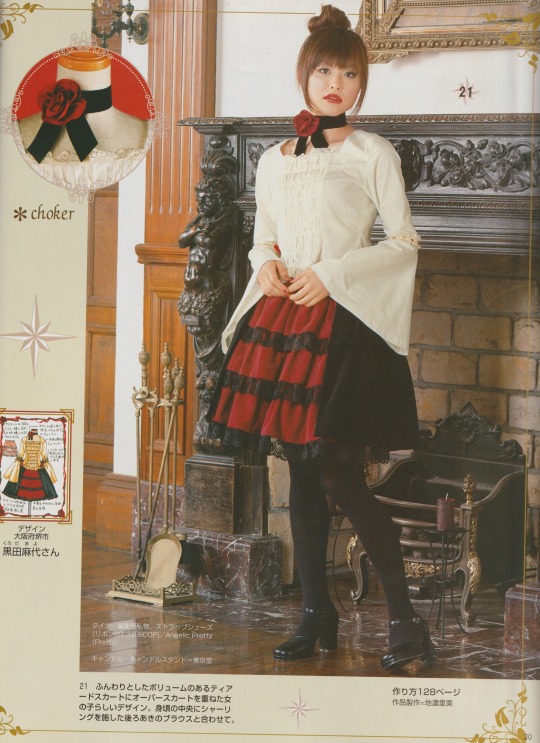
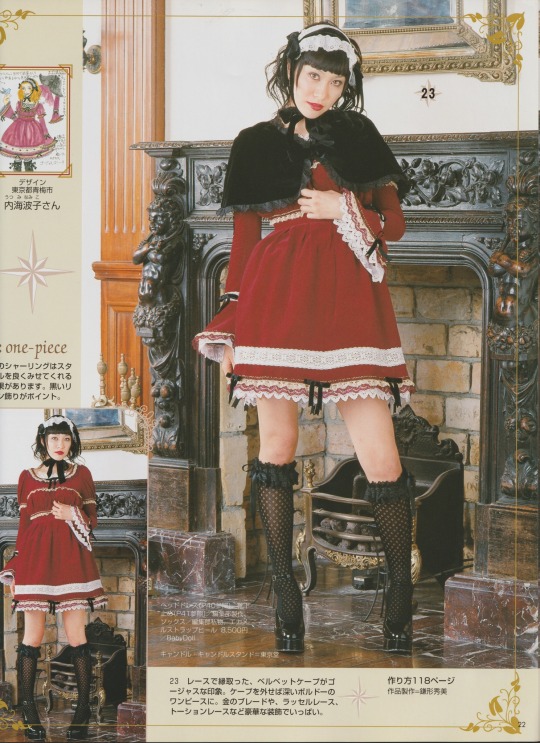
Gothic Lolita cords from the Japanese mook “Gothic and Lolita Patterns”, 2004.
Patterns 21, 23, 24, and 26

I should make a proper pinned bio soon…
#egl fashion#gothic lolita#j fashion#lolita fashion#egl#old school lolita#coord#gothic#archive#my scans#i adore pattern 26
355 notes
·
View notes
Text

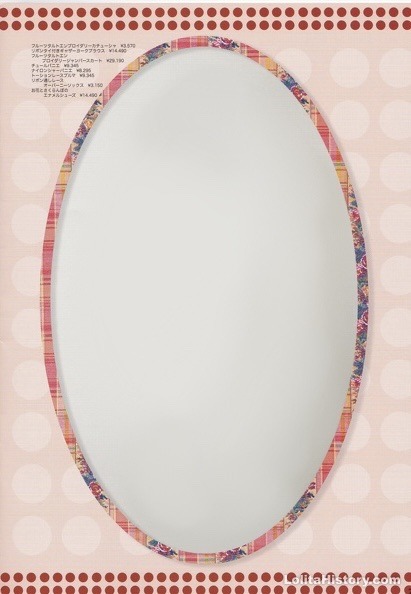
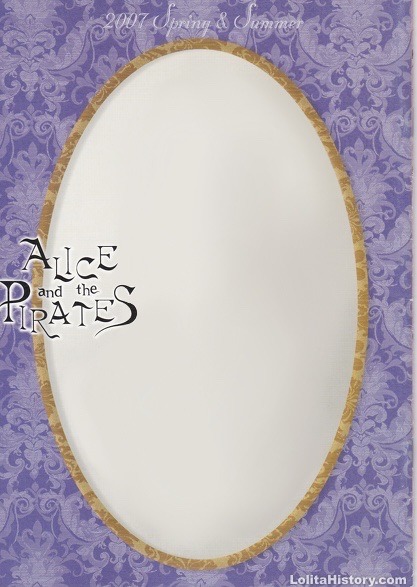
Edit yourself in a Baby catalogue! Blank templates edited from the BTSSB Spring/Summer 2007 catalogue. Original scans from Lolita History, edits by me.
#lolita fashion#baby the stars shine bright#oldschool lolita#egl fashion#egl community#sweet lolita#mine#if anyone has better scans or wants to edit out the text over the patterned background you’re more than welcome#just don’t delete the lolitahistory watermark#I have some pre-2007 baby stuff I wanna edit in here like a catalogue spread…
76 notes
·
View notes
Text
Can you believe it? 20dollarlolita Pattern School Step 2!
Only took me a year and a half. For people who don't remember a year and a half ago, we've started a project about learning to sew from patterns. The eventual goal is to help people become proficient enough at reading patterns to be able to tell what's going on in a pattern with instructions in another language, taking a pattern that doesn't fit and resizing it so that it does, and taking a pattern that isn't technically lolita and make it work in lolita fashion.
Step 1 was to make a non-fitted item from a commercial pattern. There were two goals of step 1: first to ensure that everyone was familiar with notches, grainlines, and other pattern markings; second was to give people experience with selecting fabric and trims to help give a non-lolita pattern a more lolita feeling.

For step 2, we're modifying a commercial pajama pants pattern into bloomers. In this step, we're going to become familiar with how to prepare a commercial pattern for modification, to compare pattern size to body size and to use your tape measure to judge added fullness, and how to do some basic flat pattern manipulation to add in style ease. Bloomers are a great first manipulation/fitted project due to the loose fit and the fact that, in most lolita applications, the vast majority of it is under your skirt and therefore invisible.
For this specific sample, I'm going to use Gertie's Harlow Pajama Pants pattern for this. I'm doing this because I bought a commercial pattern from Green Store and then promptly lost it, and these pajama pants are a free download. If you are printing the tiled version on your home computer printer, you only need pages 41-52 and 58-71, which will save you about 40 pages of printing.

I highly recommed doing some research and having a good idea of how long the bloomers you want to make should be, as well as how they are decorated. This is my research board.
You can use any pajama pants pattern that has a casing (elastic or drawstring) at the top, and no zipper. In this case, pants with a looser fit are going to be easier to turn into bloomers. If you like wearing your pants at a certain point on your body, I'd check for pajama pants that are at that waistline. The pants that I'm using are designed to sit at your natural waist, which might be too high for some people.

Your first step is to assemble and fortify your pattern. If you're printing this on copy paper, it's going to be strong enough, provided you use enough tape when tiling your pattern. If you're using a tissue paper pattern, like the kind you'd buy at the craft store, it helps to fuse some inexpensive interfacing onto the back of the pattern. We're going to work with these patterns a lot, so it's important to make them a little bit stronger.
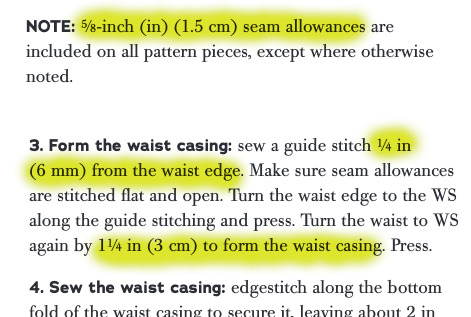
Now, you are going to need to go into your pattern instructions and find two important things. The first is your overall seam allowance. In most commercial patterns, this is 5/8 of an inch. Some other patterns might have different seam allowance.
The second is how big your elastic casing at the top will be. In this case, my seam allowance is 5/8" of an inch. Because my hem casing is .25"+1.25" (the amount you turn up plus them amount you turn up the second time), I know that my elastic casing will take up 1.5".

You're now going to mark on your pattern what the stitching line is. Your pattern has seam allowance included. This is very useful for when you cut out the pattern. However, if we take our pattern measurements with seam allowance, we won't have accurate numbers. So we have to clarify where the seam allowance is.
The first thing that I do (not pictured) is to write how much I'm removing along each line. In this case, I write 5/8" along the side and crotch seams, and "1+1/2" at the top where the casing is. Since we're going to drastically shorten these pants, it doesn't matter what the hem allowance is.
Then, I take my ruler, and I mark my stitching line. I do it in pencil, check that I'm correct, and then go back and re-draw it with a red marker. This helps me make sure that I'm following the correct lines.
Make sure you transfer your notches onto your new stitching line. You can see in the picture above how I'm using the ruler to measure where the notch is going to go.
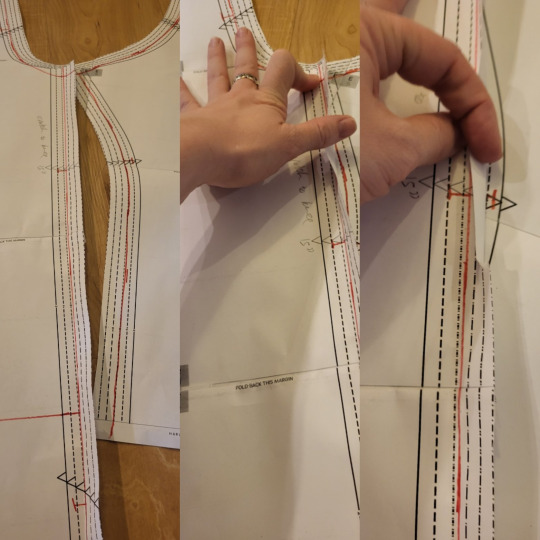
The next step, walking the pattern, is a little tricky to explain. Here's a post that goes into it in great detail.
Basically, you're going to overlap the seam lines, to make sure they line up. The only problem with doing this is that both seam lines are curved. So, instead of lining it all up at once, you're going to go about an inch at a time, letting the pattern rotate so that it stays flat on the table. At any given point, you're only going to have an inch or so of the line overlapping, but that's all you need. If you run into notches that don't line up, cross one out and re-draw it so that it matches the other notch.
If this seems really complicated, you don't really need to do that on this project. It just is a good practice to have.
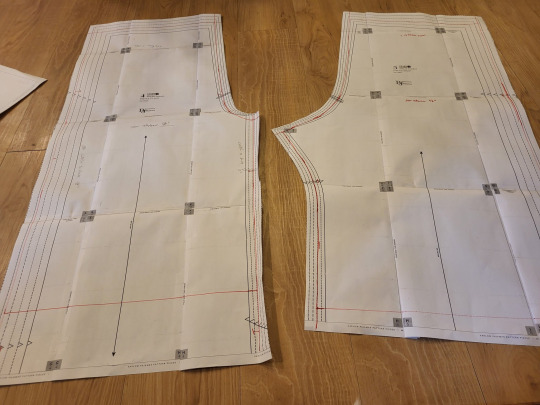
So you now should have a pattern with all the commercial markings, but where you've drawn the stitching line.

So now, you're going to put your two pieces together along the outseam. Since this is a pretty straight part of a pajama pant, it shouldn't be too difficult to get them to line up. Remember to overlap them on your stitching line, and not on the edge of the pattern.
We're putting them together so that you can measure them both at the same time. it saves us some math.

In bloomers, there are three major measurements to take into consideration. You need to know how big you want the leg to be, how big you want the booty to be, and how long you want the leg of the bloomer to be. In addition, you need to make sure that the waist of your pants will be big enough to fit your waist. In most pajama pants patterns, this isn't a problem, but checking it is good practice.
So, in this picture, you can see that I've measured the cuff of the pants. These two pieces together make up one pant leg, so I just need to measure the two pieces to know how big the pant leg will be.

I then take my tape measure and hold it around my leg at the same size that the pattern is at that point. I just use my eyes and judge if I think that'll be enough room to make my bloomers nice and poofy.
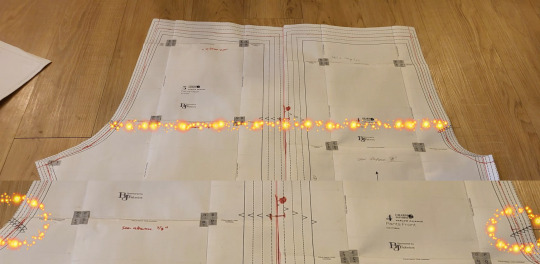
If your pattern doesn't tell you your hip line (mine didn't), it's usually at the point where the two notches on the crotch curve are. One of the reasons why we're doing this on a commercial pattern is that someone did the work for us and put those notches where they should be.
Now, remember, these two pieces are only half of the pant pattern. When we measure the hips of the pattern, we have to multiply this measurement by 2. Half the hip measurement x 2 is the full hip measurement.

Once again, hold this out next to your body and make sure that you like how much fullness you need. Remember that, in addition to having extra fullness because bloomers are poofy, you need room to be able to move and sit down. This measure between the size of my body and the size of the pattern looked pretty good to me. I could definitely have gone a little bit bigger.
The pant leg measurement is okay to be a little bit too long. You can always make it shorter. However, feel free to chop about 18" off the bottom of a full length pant leg. This just makes things a little easier.

Now, we're going to move the two pattern pieces until they're the size we like. If both the hip measurement and the leg measurement are too small, we're going to move both pattern pieces apart. To turn pajama pants into bloomers, this is likely to be the most common adjustment.
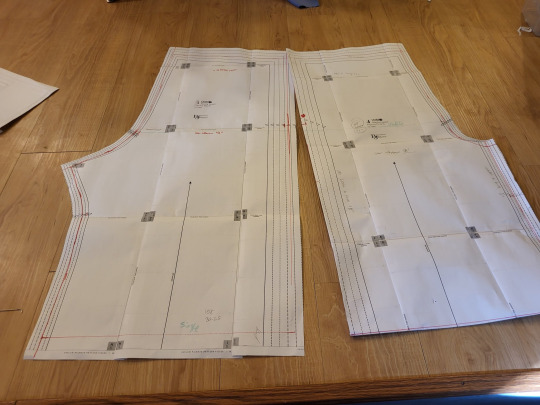
If the hip measurement is pretty okay, but the cuff measurement is too small, you're just going to move the bottom part of the pattern apart.
You'll notice that this is still enlarging the hip measurement a little bit. This is fine for bloomers since the style is for a lot of fullness in that area.

And if your cuff is the correct size, but your hip measure is too big, you can keep the cuff size the same and move the hip line apart until it's the size you want.
This technique of lining up the pattern pieces, and then moving them until they're the size you want, is the basics of flat patterning. As long as you follow the philosophy of keeping the measurements you like roughly the same, and moving the areas that you don't like until they measure what you need, you can easily resize a pattern without having to re-draw everything.
If you had to spread your pieces apart, tape some paper underneath the gap. This piece of paper should bridge the gap between the two pieces, turning them into one piece. Really quickly double-check that these pieces measure how you want. Then, mark a line in the middle of the paper bridge. Draw your notches onto the cut line. Cut the two pieces apart on that line. You've now made both pieces bigger. Tape another little piece of paper onto the cut edge of each piece, mark out your seam allowance, and cut that off.
Bonus points: swap the position of the pattern pieces, so that the crotch curve is one continuous line. Measure the length of that. Then, hold your tape measure along where the crotch curve of your pants will fit, and make sure that you have clearance there. I'm not going to photograph that, andi t's not super necessary with most pajama patterns.
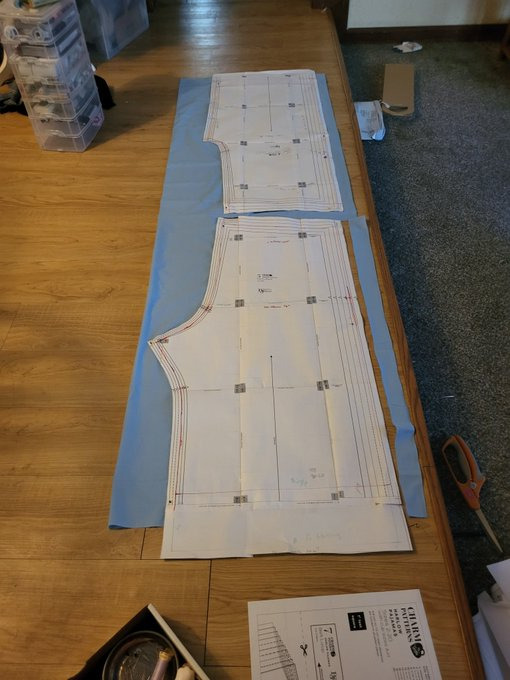
Go ahead and cut your pieces out.Even though I'd shortened the pattern, mine were still too long to fit on a 2-yard cut of fabric. Since I knew that my pants were a little long, I just let the end hang off the edge of the fabric.
Here's the really magical part about this. Even though you've resized your pattern, you still have all your seam allowance, notches, grainlines, and your pattern instructions. Since you kept all your pattern markings consistent, you can now follow the instructions that came with your pattern. Go up until it tells you to hem the pants, and then try them on.
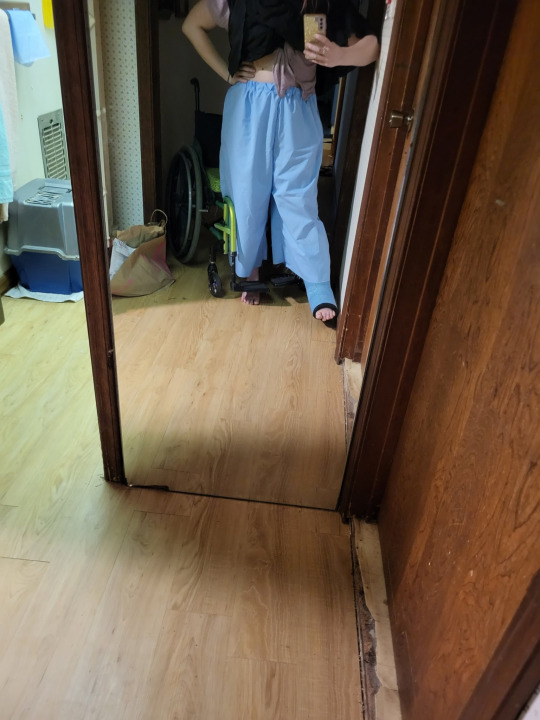
In my case, my pants were way too long to be bloomers. I knew that I wanted to do a casing with a heading, which does use s pretty big hem allowance, but even so, I'd need to shorten them.
Check out your bloomer research board to see how long you want them to be. I wanted some long ones that did the old-school bloomer peek, so I made them on the longer side. I also didn't want them to ride up into my butt when sitting in a wheelchair.
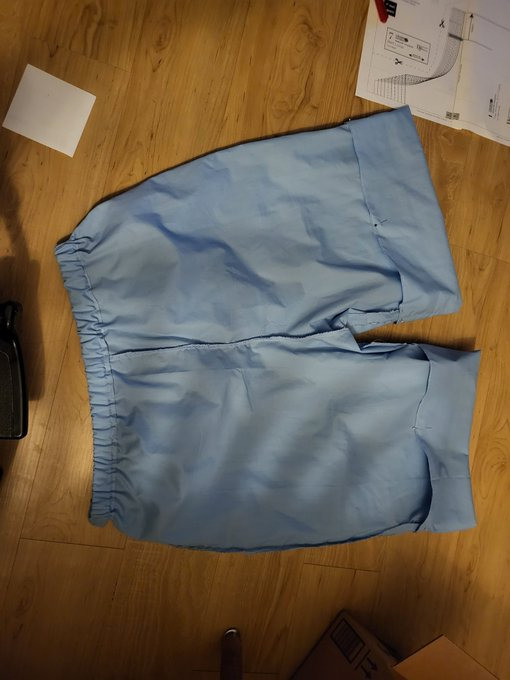
So, time to fold up the bottoms, add my elastic, and call the basic construction finished.
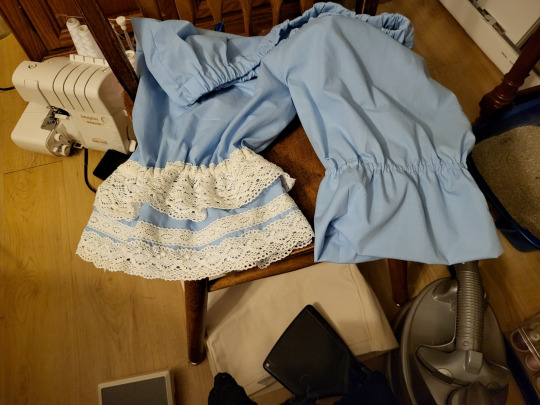
I looked up on my research board to try to find a good way to decorate these. One of the nice things about bloomers is that you can wear them with a wide variety of coords. This makes them one of those items where you can add some extra lace, and then use that lace in multiple coords. I feel like, since these bloomers are a good way of adding detail in multiple coords, it's a good excuse to add a little bit extra lace. You can see how much of a difference it makes in this picture. It really turns them from baggy shorts into real bloomers. I really recommend sometimes investing in a couple of big purchases of lace. If you have lots of lace on hand, you're more likely to include it in your projects, which can really help push a meh project into proper lolita fashion territory. I have a rule that I don't spend more than $1.50 a yard on lace unless it's really fantastic, and I manage to find things at that point on Aliexpress and sites like Cheeptrims.

Now go on and let them peek out of your favorite skirt. And remember, definitely don't press that skirt before putting this picture in your tutorial.
#20dollarlolita#dollar chan's pattern school#step 2#lolita fashion#patternmaking#handmade lolita#lolita bloomers#sewing tutorial#hey guys look i actually made somethign#long post
112 notes
·
View notes
Text
Check out this blog I found with sewing patterns for lolita fashion! The patterns are in Japanese but if you can read Japanese or know enough about sewing to figure out a pattern without reading the labels, it would be a great resource.
7 notes
·
View notes
Text


Something evil is afoot. Ignore rarafi she's just there for image size we're matching accidentally
#🗨️#I've had a passive interest in this fashion for many years and i finally caved recently... still trying to determine whether it's a bad ide#ignore the censor. i need to look for a better headpiece because the headbow that matches this pattern looks too over the top on me#it's a bit funny that i stopped bindinh regularly a few years ago because my top dysphoria completely disappeared#and now I'm binding again only to wear lolita#also. ignore the crumpled up lace. i still need to iron this i was just cheking the fit#coord
8 notes
·
View notes
Text
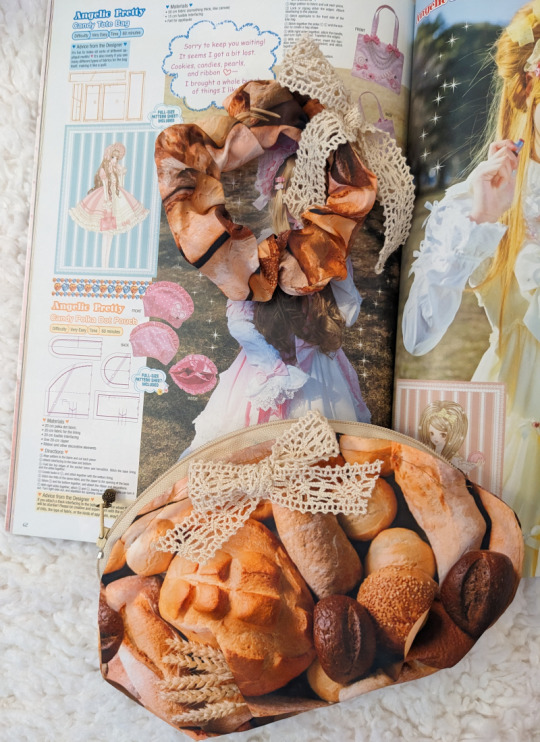
For the #LITERALLY20dollarlolita challenge by @20dollarlolita , I made this bread pouch and scrunchie (and headbow clip) for basically free.99! Read more at my blog below or not.
This is very goofy, but I'm happy I attempted another pattern from the GLB and while I probably wouldn't use it for an actual lolita coord, at least it's there if I really feel the urge to buy a ton of baguettes.
36 notes
·
View notes