#lokta
Explore tagged Tumblr posts
Text

Ribbon Fish
Also available as a print on my Inprnt!
#witch hat atelier#wha#tongari boushi no atelier#richeh#my art#lokta renders smth (NOT CLICKBAIT!!!)
922 notes
·
View notes
Text

Portal
linocut on lokta paper
#I’d previously been printing these on mulberry paper because I thought the lokta might be too textured for the small details to read well#but it turns out I like it way more on the lokta!#no suprise there actually I like most of my prints better on lokta#it’s just such a lovely paper#linoprint#printmaker#printmaking#block printing#relief print#salted snail studio#reliefprint#block print#relief printmaking#linocut relief prints#linocut#linocut printmaker
162 notes
·
View notes
Text


Mumins wundersame Inselabenteuer - Tove Jansson
(Moominpappa at sea)
materials used:
inner book textblock - purchased book in signatures, (partially repaired with japanese tissue paper) endpapers - lokta, backed with Schirting (thin, seized fabric) endbands - buttonhole silk case boards - grey board 1,5mm spine stiffener - cardboard covering material, spine - leather (vegetable tanned) covering material boards - laser printed publishing paper cover art - original by Tove Jansson (altered for this case) title - hot stamped with genuine gold foil
original case of the purchased book

#bookbinding#rebinding#Moomins#mumins#tove jansson#sewn endbands#half leather binding#lokta endpapers#in hindsight... perhaps I went a bit heavy on the water theme
73 notes
·
View notes
Text
i love nothing more than confidently fucking up while using expensive art materials because i didn't do the smart thing and test out a technique on scraps, despite thinking it would have been useful,
#rip to the beautiful handmade lokta paper i just RUINED with the wrong color of ink#i have turned a piece of paper worth at least $5 individually into scrap. oh my god.#bolt crafts
8 notes
·
View notes
Text
Go Astray Binding
Strap in everyone, I have binding woes galore for this one! So this next binding is @liesmyth‘s excellent work Go Astray. It’s actually two stories in a series, and the book I made contains both. If you ever want a masterclass in how to write character development through amazing sex scenes, go and read this! It’s so great, it’s one of the few stories that I love to death that IMO rivals the canon material. It’s SO well done.
Anyway, I promised woes. Before that, behold the glorious author copy that I made.

This is oatmeal duo cloth, and it’s fantastic. It looks SO rich and fancy in person. The foil is sisal, which I will get to in a moment. I wanted something really clean and fancy for the cover, so I went with the “astray” theme and did a compass rose that’s off kilter. The “Astray” in the title is also off kilter, although I’m not sure if that comes across so well. It’s more evident in person, I think. The font is Cinzel, which was the closest thing to the Captive Prince font that I could find. And I wanted this to be nice and clean because when you open it:

I’ve got these crazy, blood red endpapers. I LOVE the contrast between the cover and this, I think it fits with the book SO WELL and also this paper is just gorgeous. Also peep the little ribbon bookmark! The gold doesn’t go along so well with the gold in the book, but I think it’s cute.


If you’re not interested in my tale of woe of how I got here, please feel free to skip, look at the pretty pictures again, and go about your day. If you’re interested in a lot of technical book bindy stuff (as much technical stuff as a relative beginner is capable of, I guess) then keep reading! Warning, it’s long.
Okay. Here’s where it all went wonky:
I ordered some short grain paper from Colophon. You know, as a treat. What I didn’t realize, because I am a beginner, is that 80lb paper is fucking thick. And that the Mohawk paper in eggshell finish, while a freaking gorgeous paper on its own, is fucking hell on my printer. So I had to redo about 5 signatures, cleaning the drum after every one, just to make it legible. And there are still parts that have smudges on them. I don’t know if it was the weight or the finish, but my printer absolutely cannot handle this again. I would NOT recommend this paper if you have a standard brother toner printer.
The other fun thing I realized after sewing and gluing everything together was that 150 pages of 80lb paper, while technically under the 200 pages my guillotine says it can handle, is too fucking thick to fit through the guards. Luckily I had another guillotine I could use, but if I didn’t this thing would’ve been dead in the water. While I was waiting for the opportunity to use the other guillotine I decided to make my own copy out of normal printer paper, which would fit in my cutter. And here is that, on top of the author’s copy.

Yes, you’ve seen that correctly. I wanted to try and round my copy, despite not having any of the correct tools. Why? I can’t exactly say now, except I guess I thought I could? Reader, I could not. The rounding turned out extremely wonky, and as you can make out a bit in the picture, something weird happened to the bottom end of the spine (it creased? or cracked?) I’m not sure, but I think it happened because the textblock itself is twisted a bit. I had to make two cases for this thing and I don’t think the one I ended up covering works well. I measured everything like a crazy person and it still turned out too big, I think. Here’s a pic of the spine from the top and bottom.


And of course, not having any tools I just did this by hand with a normal hammer. I watched the DAS video like seven times! He did it by hand and it turned out great! (And he’s a freaking expert at book binding and had a real rounding hammer lol) I just don’t know. The gutters are weird, but I couldn’t really work out why. The crease in the bottom (second picture) is way more pronounced the further you get down, and it just doesn’t hug the book right. All in all rounding isn’t worth it for me, and I don’t particularly care for the look even when it’s done right. It helped with the swell of the signatures, for sure, but I’d rather deal with a triangle book than try and round another one. I actually really like the flat spine.
Also, you may have noticed the endpapers on this one are not quite the same as the first:

Because I cut the the red papers with the correct grain (more idiot me), I didn’t have enough left over for a second copy. HOWEVER, I love this blue (blue’s my favorite color) and I love that one copy is red and the other is blue. It doesn’t hit as well as the red when you open it, I don’t think, but the SYMBOLISM! Also I messed up the cover lol

I forgot to weed out just a few areas there, and as difficult as this stupid sisal HTV was to stick on I didn’t notice until there was no coming back from it. SIDE NOTE: I hate the sisal foil paper. It’s way easier to weed than the cricut, that’s for sure, but it sticks so much worse. It takes forever for it to stick (same as cricut, honestly) but it gets really gummy and it’s way harder to take it off the transfer paper than the cricut is. I am for sure not going to use this brand again, although after a little crying and begging it eventually turned out looking pretty good. Except for that “y” on the spine, lol. It’s peeking up there.
Also, if you want to see the difference between 80lb paper and 20lb paper, here you go:

Same book, same amount of pages. 80lb paper is over 1/4 inch thicker. It sits so well though. It’s very nice paper.
My last note, I swear, is that this is the first book I’ve done with these dimensions. It’s about 5.5 by 8 (the rounded one is a bit smaller in all directions) and it’s great. It has a great feeling when you hold it, it was easy to cut (printed on 8.5x11 paper, cut .5 inches off of each side once bound) and as long as the books are long enough I’m probably going to make everything else I do going forward this size.

Look at her. She’s beautiful. And soon she’ll get to live on her author’s bookshelf! @liesmyth, thank you so much for gracing us with this wonderful work, and I hope you enjoy!
#captive prince#ao3 author#bookbinding#fanfic bookbinding#duo bookcloth i love you till the day i die#marbled lokta#bookbinding woes#my binding#imp press
44 notes
·
View notes
Text
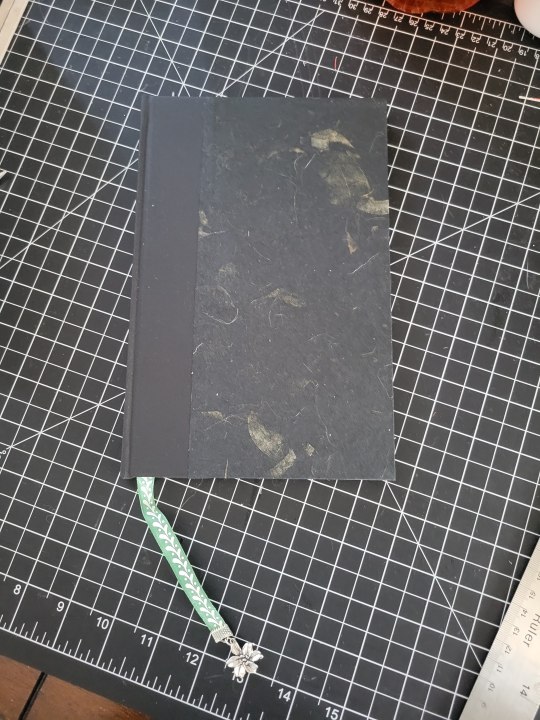
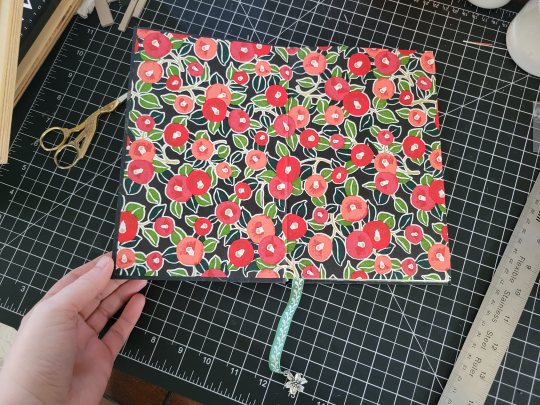
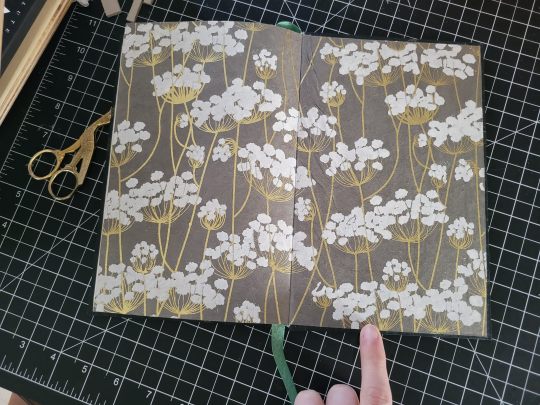
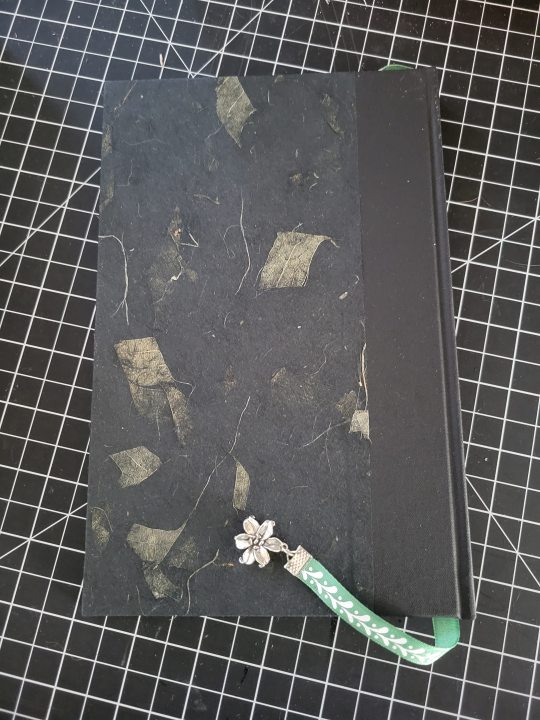
My second book with the imprint! Crest Control is special to me because I got a chance to witness this story's whole creation process, from the earliest concepts through to the posting of the final chapter on AO3. I love the story in particular for how it tackles trauma and recovery, and how that process is neither linear nor swift -- but it's not impossible, even if there are backslides in the process.
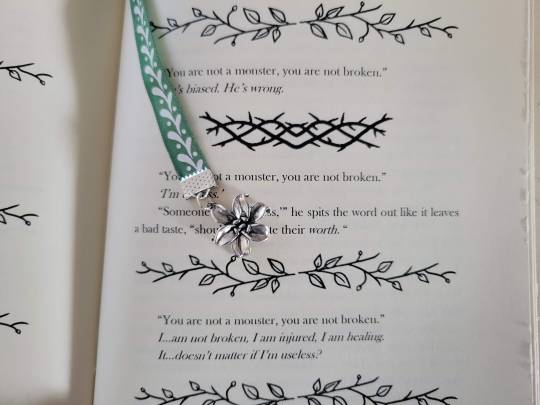
Given that this is a shorter story overall, making it a flat back bind was an easy choice. Because of the heavy focus on flowers throughout the narrative, I decided to go with a plant theme for the entire bind: the covers have visible leaves in the paper, and the front and end papers are different to show the arc of progress throughout the story. The text ornaments are also handmade, keeping with the plant theme and transitioning from thorny vines to budding branches to a blooming rose throughout the narrative arc.
I really love how this bind turned out, and I'm so happy I could get a copy to @cheeseandcake-from-ao3 -- this story is a wonderful achievement, and I'm honored that I could both witness its creation and make it into a book for the author to hold as proof of the amazing work they did. ❤
Text Block
Title: Horrible Brush
Chapter Headings: Horrible Brush (Chapters 1-3), The Monster (Chapters 4-8), ediana (Chapters 9-12), and Ralgani (Epilogue, Gallery, Appendix)
Body Font: Baskerville Old Face
Front Matter and Appendix: Garamond
Center Ornaments: Modified from generic text decorations including thorny vines, budding branches, and a blooming rose
Sewing: Dark Green Irish Linen
Case
Cover Papers: Black Mango Leaf Tissue
End Papers: Red and Coral Flowers Chiyogami (Front) and White and Gold Flowers on Slate Lokta (Back)
Book Cloth: Jet Black Starched Linen Bookcloth
Headband: Green and White Cotton Check
Bookmark: Sprig Green and White Twill, 3/8"; Silver end crimp and Sterling Silver Lily charm
#fanbinding#ficbinding#fire emblem: three houses#i had so much fun with this one#though it definitely taught me to pay attention to endpaper order#lokta paper is really wet and wrinkles easily when glued#so starting with that one when doing pastedowns is a good idea#the second copy turned out so nicely with that lesson in mind
10 notes
·
View notes
Text
4 notes
·
View notes
Text
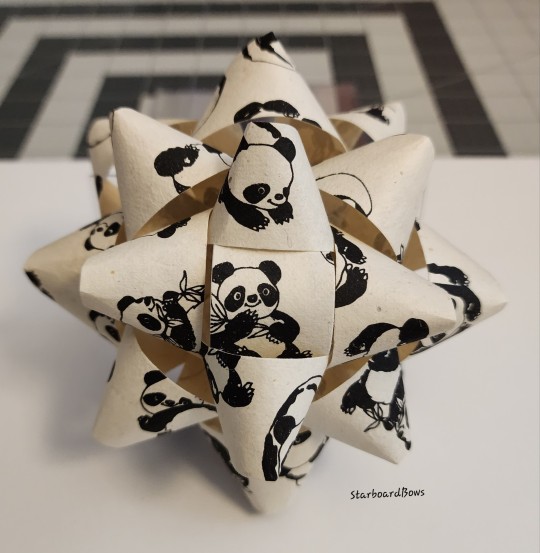
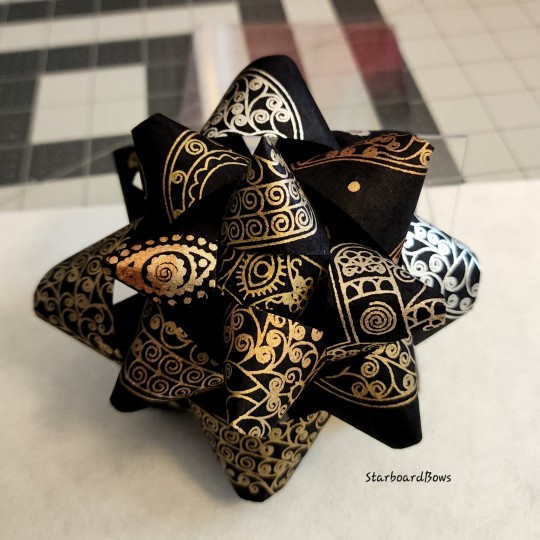
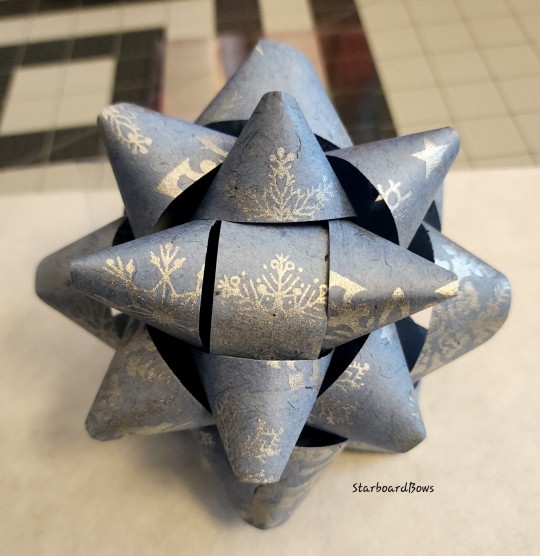
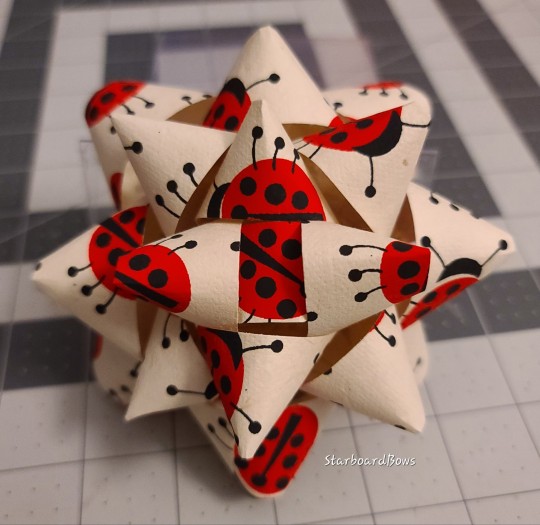
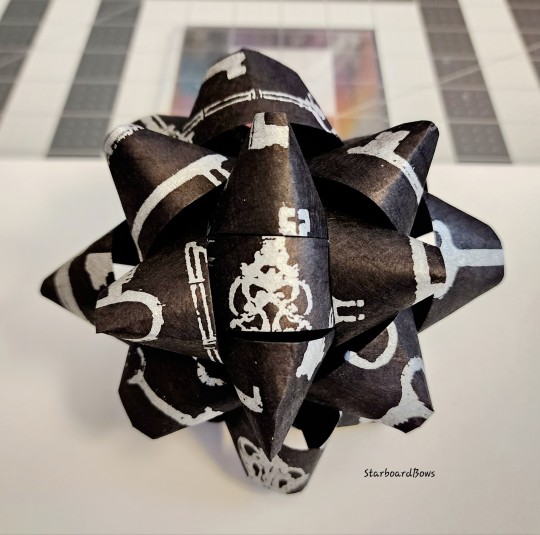
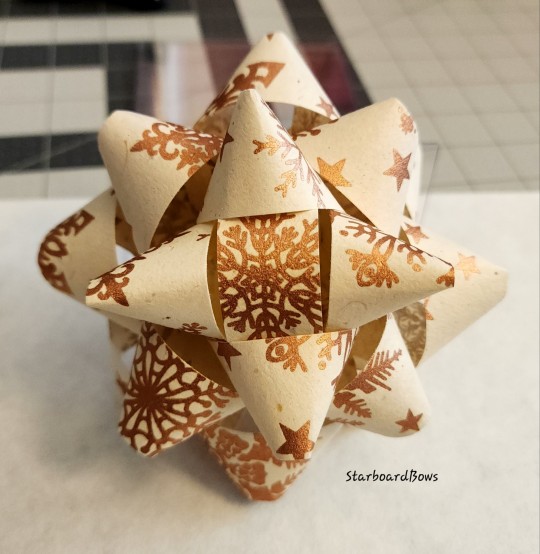
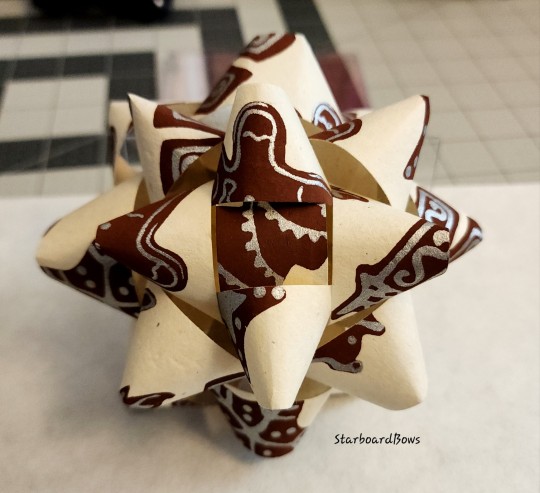
Some of my Lokta paper bows
3 notes
·
View notes
Text

Journal Diaries: Unleash Your Imagination on Handmade Paper
Handmade paper journals are more than just tools—they’re expressions of individuality, sustainability, and creativity. Whether you’re using a handmade recycled paper notebook for your daily musings or a moonster refillable leather journal for long-term projects, these journals inspire you to create, reflect, and preserve your thoughts in the most authentic way.
#Kalpana Handmade Paper#Handmade Paper Journal#Paper Journal#Journal#Handmade Leather Journal#Leather Journal#Leather Notebooks#Leather Diary#Leather Diaries#moonster leather journal#lokta paper journal#deckle edge journal#lokta journal#handmade spiral notebook#italian leather journals#handmade amalfi pages#handmade recycled paper journal#lokta paper notebook#deckle edge notebook#moonster refillable leather journal#handmade recycled paper notebooks#journal with handmade paper#leather journal handmade paper#homemade paper journal#lokta notebook#hand made paper journal#handmade sari journal#leather bound handmade paper journal#leather journal with cotton paper#leather bound journal handmade paper
0 notes
Text
so, you wanted to start bookbinding?
so @princetofbone mentioned on my post for "factory settings" about wanting to know more about the binding style that i used for it. so i thought i might make a post about it.
i was as terrible as i always am for taking in progress shots, but i can link you to the resources i used in order to make my book. i would also like to point out that "factory settings" is my 120th bind, and i have been doing bookbinding as a hobby for just over 3 years now. unfortunately this means some of the methods that i used for that bind aren't particularly beginner friendly, just in terms of the tools and methods i have used, but i would love to point you in the right direction when it comes to resources. i dont say this to sound pretentious which i fear i might come across, just so that youre fully informed. getting into this hobby is fun and rewarding, but it can definitely be intimidating.
with that caveat, heres a list of links and resources that i have used for bookbinding in general, with additional links to methods i used specifically in regards to this bind.
ASH's how to make a book document. it gives you a great introduction into typesetting fics (where you format the text of fics to look like a traditionally published books) and then turning them into a case-bound book (the style i used for "factory settings"). it is comprehensive, and explains how to use microsoft word to do your bidding. it was invaluable to me when i was just starting out! currently i use affinity publisher to typeset/format my fics for printing, but i only bought and learned how to use that after i had been binding books for a year and a half. i made some beautiful typesets with word, and some of my close friends use it still and design stuff that i never would be able to in my wildest dreams (basically anything by @no-name-publishing)
DAS Bookbinding's Square Back Bradel Binding. a great style to do your first bind in! this method requires, when making the case, to attach the cover board and the spine board to a connecting piece of paper, which makes it so much easier to match the size of the case to the size of the text block (your printed out and sewn fic). using this method is what allowed me to get much more accurately fitting cases, and made me much more confident with the construction of the books i was making. a well-made book is something that is so wonderful to hold in your hands!
DAS Bookbinding's Rounded and Backed Cased Book. This is the specific method that i used to create my bind for "factory settings"! even before i could back my books, i found that watching DAS's videos in particular helped me see how books were traditionally made, and i was able to see different tips and tricks about how to make nicer books.
Book Edge Trimming Without... i trim the edges of my text block using my finishing press and a chisel i have sharpened using a whetstone and leather strop with buffing compound on it. i follow the method for trimming shown in this video!
Made Endpapers. i follow this method for my endpapers, as i used handmade lokta endpapers, and they can be quite thin, but they look beautiful! i used "tipped on" endpapers (where you have your endpaper and then put a thin strip of glue on the edge and attach it to your text block) i used for a very long time before this, but these feel like they are much more stable, as they are sewn with your text block.
Edge Sprinkling. this is the method that i used for decorating the edges of my text block. but the principle is basically clamping your text block tight and then sprinkling the edges. i do not believe you need to trim the edges in order to do sprinkles on the edges, and that's what makes it accessible! i personally just use really cheap acrylic paint that i water down and then flick it onto the edges with my thumb and a paint brush.
Double-Core Endbands. i sew my own endbands, which i followed this tutorial for. that being said, it's kind of confusing, and this video is a bit easier to follow, but it is a slightly different type of endband.
Case decoration. i used my silhouette cameo 4 to cut out my design for "factory settings" in htv (heat transfer vinyl). i also used my cameo 4 to cut out the oval of marbled paper on the front, as i honestly didn't want to try my hand at cutting an oval lol. i also glued some 300 gsm card with an oval cut out of the centre of it onto the cover before covering it with bookcloth, to get a kind of recess on the cover. i then glued the oval of marbled paper onto the top of the recessed area once it was covered with bookcloth, so that it was protected. the images i used were sourced from a mix of rawpixel, canva and pixabay. a more accessible way to get into cover decoration is by painting on a design for your cover as described in @a-gay-old-time's tutorial just here. or even doing paper labels, which look classy imo.
physical materials. sourcing these will depend on your country. i am located in australia, and have compiled a list with some other aussie bookbinders of places to buy from. here is a great post describing beginning materials for getting started binding.
@renegadepublishing. this tumblr is great! its what got me started bookbinding, and being in the discord has been inspiring, motivating, and honestly just one of the best online experiences i have ever had. it is full of resources, and most people in there are amateur bookbinders, with a couple of professionals thrown in. the discord is 18+, and anyone can join!
i'm sorry this post got so long, but i hope that this has a lot of information for you if you would like to get started bookbinding. its one of the best hobbies ive ever had, and i genuinely believe i will have it for the rest of my life.
3K notes
·
View notes
Text

Happy anniversary to poetry
#traffic smp#double life smp#pearlescentmoon#scott smajor#dangthatsalongname#my art#and in true Lokta fashion this is a day and then some late LOL#had to draw something for the life series that got me back into hermitcraft cmon#pls don't mind the rough composition#this was just supposed to be a small doodle and then colour suddenly appeared on the canvas whoops
4K notes
·
View notes
Text

a few linocuts from this past year
#man do I love lokta and kitakata huh#they’re just so nice to print on#and I love a warm creamy white paper#linoprint#printmaker#printmaking#block printing#relief print#salted snail studio#reliefprint#block print#kitakata paper#lokta paper#linocut#Linocut printmaking#Linocut prints#relief printmaking
220 notes
·
View notes
Text


square antiprism box
materials used
box 1,5 grey board paper self made book cloth lokta paper
lid 1 grey board 1,5 grey board 2,4 grey board self made book cloth lokta paper leather
square base: 10cm x 10cm
see WIP pics here
34 notes
·
View notes
Text

tiny landscape sketch on scrap of thai lokta paper
667 notes
·
View notes
Text
Fanbinding: Hibernating with Ghosts by @fayet
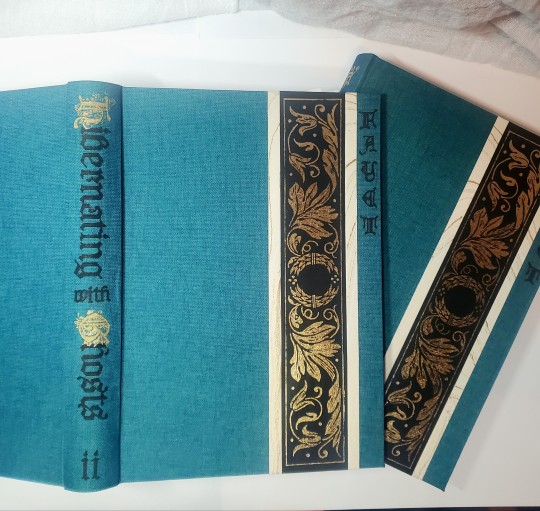
Getting stuck in Kaedwen in winter had never been on Jaskier's plan.
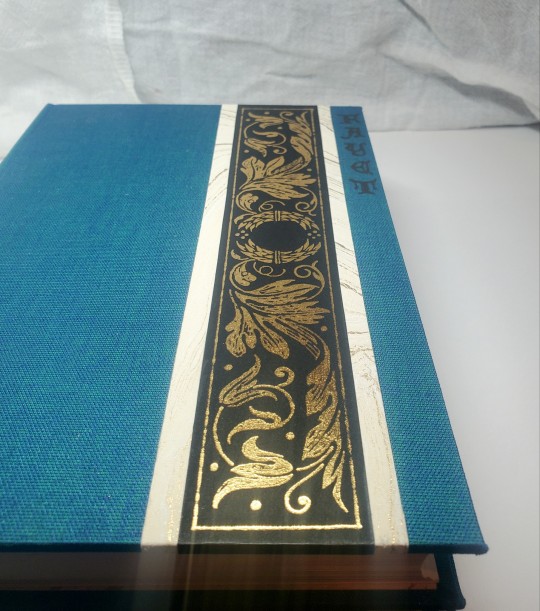

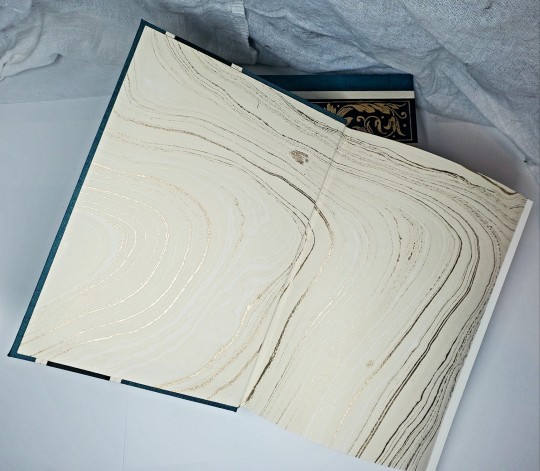
Hyped to share photos of the set I made at the end of 2023 for the @renegadepublishing annual exchange! In addition to "Hibernating With Ghosts" these volumes include 30 pencil illustrations by @saeculorum-art, the fic's prequel Silent friend of many distances, and a song (The Siren Song) by @stillmadaboutpetra. I was over the moon that they all agreed to allow their work included so i could make this for the lovely Kitty / @perfectlynormalbooks (thank you for the intro to the wonderful fic!!).
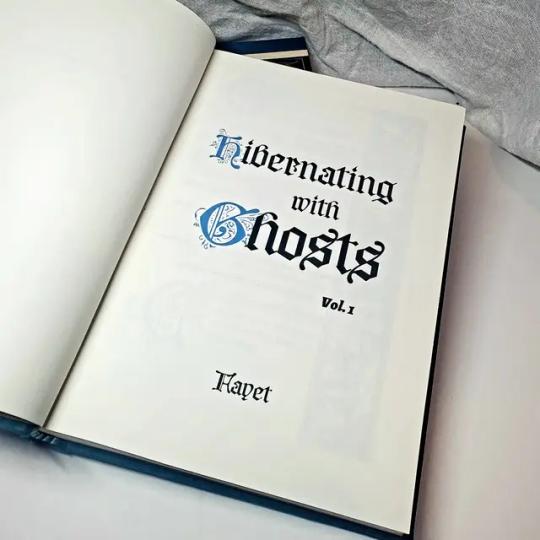


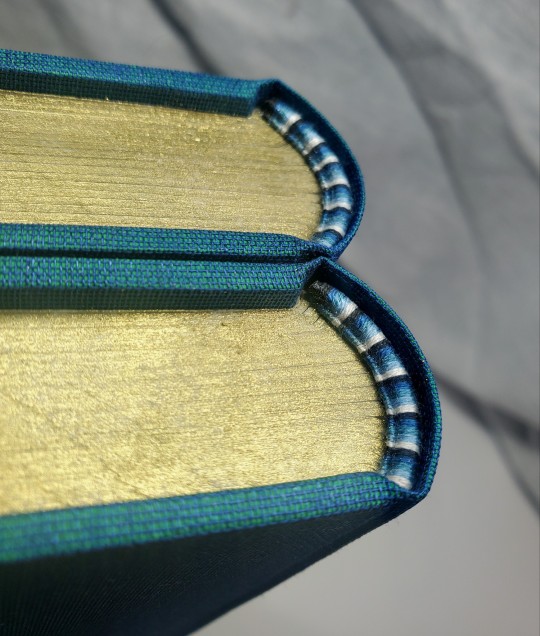
This book was bound in Duo dragonfly cloth, with marbled lokta and hand-foiled cover accents. All art not by saeculorum is sourced from public domain woodcuts. I went a little harder than usual on the typeset, but it was a lot of fun and I finally had a good reason to use a vertical header (the chapter titles are SO LONG) and colored dropcaps (i was printing color for the art, anyway!). I justified my embroidery thread spending with a fun five-color color endband, and I colored the top edge.

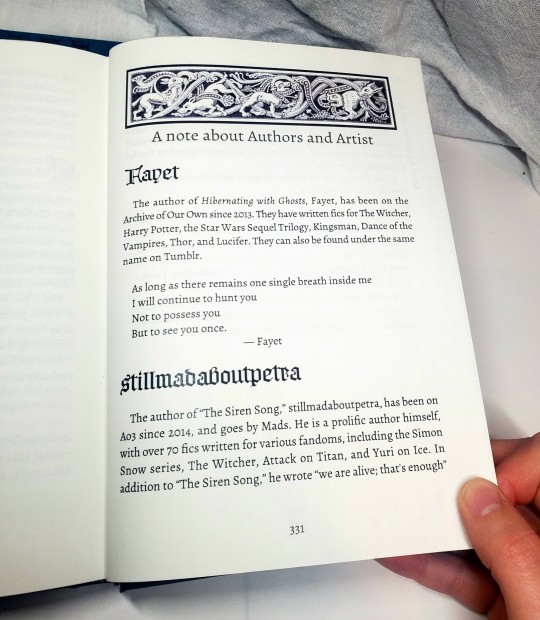
I had a lot of fun making this and trying our a few different ways of doing things! Thanks again to everyone for a wonderful Renegade Exchange!
#fanbinding#celestial sphere press#ficbinding#renegadeexchange2023#renegadepublishing#the witcher#geralt of rivia#jaskier#geraskier#hibernating with ghosts#this is actually the first Witcher fic i have bound#what a great place to start!
505 notes
·
View notes
Text


How Ray Got His Groove Back by Aristide and Bone, due South, Fraser/RayK
A quintessential due South RayK fic and a classic of the fandom for a reason! I knew when I started this whole crazy adventure of binding fanfic that I wanted to make hard copies of things across the fandoms that have been a part of over the years, and due South will always have a special place in my heart, since that's where I met my wife.
I'm to be able to share this fanbind with @the-cimmerians just in time for Fanfic Writers' Appreciation Day! (And thanks to @renegadeguild for encouraging us all to share with the authors we love this day in particular.)
The title of How Ray Got His Groove Back is a riff on the movie How Stella Got Her Groove Back, and the fic even has its own fanlore page. Because it was imported into AO3 from another archive as part of an Open Doors initiative, you too can enjoy some genuine vintage formatting as part of the reading experience! (Get your pre-AO3 mailing list flashbacks right here...)
The spine is Duo magpie bookcloth, and marbled paper found by chance in a household gift shop last winter (I wish they'd restocked it!), and the lettering is stencilled acrylic paint.


I leaned into the romance novel vibe for the typesetting, using the notorious yellow paper of the great paper misorder of 2023 for an aged paperback vibe, and a flowery frame for the cover. Gelli-plate printed endpapers, and a hand-sewn double-core endband in hot pink and purple thread to match.
And about that marbled paper and the stencilled title... this was the book where I discovered that the other paper I had stencilled on with no problems (mulberry fibre Lokta paper, it's lovely) is the exception rather than the rule, and some emergency repairs were needed when the stencil vinyl started to pull up the paper. I did my best with some paint and a fine-tipped maker and a pencil, but hoo boy. We won't be trying that again with this paper.


I'm glad to have this piece of personal fandom history, and also to say, happy Fanfic Writers' Appreciation Day, Aristide & Bone!
#renegade loves fic#fanfic writers appreciation day#ffwad 2024#due south fanfic#aristide and bone#how ray got his groove back#benton fraser#ray kowalski#fraser/rayk#fanbinding#ficbinding
154 notes
·
View notes