#involving having photoshop do all of that in-program for me
Explore tagged Tumblr posts
Visit Tumblr Blog
Explore Tumblr blogs with no restrictions, modern design and the best experience.
Last Seen Tumblr Blogs


Fun Fact
In Q3 of 2020, 31% of US users access the Tumblr app daily.
Text
i refuse to reinstall a Totally Legit (tm) copy of photoshop just for a few gifs every once in a blue moon. but also. doing this shit without my dozens of actions and the animation window Sucks So So Bad. but i will push through... For Him...
#i've officially 'revived' my ancient gif blog so i can freely post whatever the fuck whenever the fuck...#but now i actually have to Make the Things without my usual tools. cries....#and since i have to export frames manually and import them into photopea i can't do my usual tricks#involving having photoshop do all of that in-program for me#so i have folders and folders of images... totaling like 15gb... and that's just from the first 1/3 of the movie........#i had to stop exporting frames bc i'd run out of diskspace aaaaaaa.....#god i don't want to go through the Process of setting all of that up... but if i end up doing this again sooner than i'd expect#i might have to. bc this is awful. lol.#i am getting very high quality images from it tho. can't wait to make a folder for him on my phone teehee~~#📌 [ my posts. ]#💭 [ my thoughts. ]
2 notes
·
View notes
Text
⭐ So you want to learn pixel art? ⭐
🔹 Part 1 of ??? - The Basics!
Edit: Now available in Google Doc format if you don't have a Tumblr account 🥰
Hello, my name is Tofu and I'm a professional pixel artist. I have been supporting myself with freelance pixel art since 2020, when I was let go from my job during the pandemic.


My progress, from 2017 to 2024. IMO the only thing that really matters is time and effort, not some kind of natural talent for art.
This guide will not be comprehensive, as nobody should be expected to read allat. Instead I will lean heavily on my own experience, and share what worked for me, so take everything with a grain of salt. This is a guide, not a tutorial. Cheers!
🔹 Do I need money?
NO!!! Pixel art is one of the most accessible mediums out there.
I still use a mouse because I prefer it to a tablet! You won't be at any disadvantage here if you can't afford the best hardware or software.
Because our canvases are typically very small, you don't need a good PC to run a good brush engine or anything like that.
✨Did you know? One of the most skilled and beloved pixel artists uses MS PAINT! Wow!!
🔹 What software should I use?
Here are some of the most popular programs I see my friends and peers using. Stars show how much I recommend the software for beginners! ⭐
💰 Paid options:
⭐⭐⭐ Aseprite (for PC) - $19.99
This is what I and many other pixel artists use. You may find when applying to jobs that they require some knowledge of Aseprite. Since it has become so popular, companies like that you can swap raw files between artists.
Aseprite is amazingly customizable, with custom skins, scripts and extensions on Itch.io, both free and paid.
If you have ever used any art software before, it has most of the same features and should feel fairly familiar to use. It features a robust animation suite and a tilemap feature, which have saved me thousands of hours of labour in my work. The software is also being updated all the time, and the developers listen to the users. I really recommend Aseprite!
⭐ Photoshop (for PC) - Monthly $$
A decent option for those who already are used to the PS interface. Requires some setup to get it ready for pixel-perfect art, but there are plenty of tutorials for doing so.
Animation is also much more tedious on PS which you may want to consider before investing time!
⭐⭐ ProMotion NG (for PC) - $19.00
An advanced and powerful software which has many features Aseprite does not, including Colour Cycling and animated tiles.
⭐⭐⭐ Pixquare (for iOS) - $7.99 - $19.99 (30% off with code 'tofu'!!)
Probably the best app available for iPad users, in active development, with new features added all the time.

Look! My buddy Jon recommends it highly, and uses it often.
One cool thing about Pixquare is that it takes Aseprite raw files! Many of my friends use it to work on the same project, both in their office and on the go.
⭐ Procreate (for iOS) - $12.99
If you have access to Procreate already, it's a decent option to get used to doing pixel art. It does however require some setup. Artist Pixebo is famously using Procreate, and they have tutorials of their own if you want to learn.
⭐⭐ ReSprite iOS and Android. (free trial, but:) $19.99 premium or $$ monthly
ReSprite is VERY similar in terms of UI to Aseprite, so I can recommend it. They just launched their Android release!
🆓 Free options:
⭐⭐⭐ Libresprite (for PC)
Libresprite is an alternative to Aseprite. It is very, very similar, to the point where documentation for Aseprite will be helpful to Libresprite users.
⭐⭐ Pixilart (for PC and mobile)
A free in-browser app, and also a mobile app! It is tied to the website Pixilart, where artists upload and share their work. A good option for those also looking to get involved in a community.
⭐⭐ Dotpict (for mobile)
Dotpict is similar to Pixilart, with a mobile app tied to a website, but it's a Japanese service. Did you know that in Japanese, pixel art is called 'Dot Art'? Dotpict can be a great way to connect with a different community of pixel artists! They also have prompts and challenges often.
🔹 So I got my software, now what?
◽Nice! Now it's time for the basics of pixel art.
❗ WAIT ❗ Before this section, I want to add a little disclaimer. All of these rules/guidelines can be broken at will, and some 'no-nos' can look amazing when done intentionally.
The pixel-art fundamentals can be exceedingly helpful to new artists, who may feel lost or overwhelmed by choice. But if you feel they restrict you too harshly, don't force yourself! At the end of the day it's your art, and you shouldn't try to contort yourself into what people think a pixel artist 'should be'. What matters is your own artistic expression. 💕👍
◽Phew! With that out of the way...
🔸"The Rules"
There are few hard 'rules' of pixel art, mostly about scaling and exporting. Some of these things will frequently trip up newbies if they aren't aware, and are easy to overlook.
🔹Scaling method
There are a couple ways of scaling your art. The default in most art programs, and the entire internet, is Bi-linear scaling, which usually works out fine for most purposes. But as pixel artists, we need a different method.


Both are scaled up x10. See the difference?
On the left is scaled using Bilinear, and on the right is using Nearest-Neighbor. We love seeing those pixels stay crisp and clean, so we use nearest-neighbor.
(Most pixel-art programs have nearest-neighbor enabled by default! So this may not apply to you, but it's important to know.)
🔹Mixels
Mixels are when there are different (mixed) pixel sizes in the same image.

Here I have scaled up my art- the left is 200%, and the right is 150%. Yuck!
As we can see, the "pixel" sizes end up different. We generally try to scale our work by multiples of 100 - 200%, 300% etc. rather than 150%. At larger scales however, the minute differences in pixel sizes are hardly noticeable!
Mixels are also sometimes seen when an artist scales up their work, then continues drawing on it with a 1 pixel brush.

Many would say that this is not great looking! This type of pixels can be indicative of a beginner artist. But there are plenty of creative pixel artists out there who mixels intentionally, making something modern and cool.
🔹Saving Your Files
We usually save our still images as .PNGs as they don’t create any JPEG artifacts or loss of quality. It's a little hard to see here, but there are some artifacts, and it looks a little blurry. It also makes the art very hard to work with if we are importing a JPEG.

For animations .GIF is good, but be careful of the 256 colour limit. Try to avoid using too many blending mode layers or gradients when working with animations. If you aren’t careful, your animation could flash afterwards, as the .GIF tries to reduce colours wherever it can. It doesn’t look great!

Here's an old piece from 2021 where I experienced .GIF lossiness, because I used gradients and transparency, resulting in way too many colours.
🔹Pixel Art Fundamentals - Techniques and Jargon
❗❗Confused about Jaggies? Anti-Aliasing? Banding? Dithering? THIS THREAD is for you❗❗ << it's a link, click it!!
As far as I'm concerned, this is THE tutorial of all time for understanding pixel art. These are techniques created and named by the community of people who actually put the list together, some of the best pixel artists alive currently. Please read it!!
🔸How To Learn
Okay, so you have your software, and you're all ready to start. But maybe you need some more guidance? Try these tutorials and resources! It can be helpful to work along with a tutorial until you build your confidence up.
⭐⭐ Pixel Logic (A Digital Book) - $10 A very comprehensive visual guide book by a very skilled and established artist in the industry. I own a copy myself.
⭐⭐⭐ StudioMiniBoss - free A collection of visual tutorials, by the artist that worked on Celeste! When starting out, if I got stuck, I would go and scour his tutorials and see how he did it.
⭐ Lospec Tutorials - free A very large collection of various tutorials from all over the internet. There is a lot to sift through here if you have the time.
⭐⭐⭐ Cyangmou's Tutorials - free (tipping optional) Cyangmou is one of the most respected and accomplished modern pixel artists, and he has amassed a HUGE collection of free and incredibly well-educated visual tutorials. He also hosts an educational stream every week on Twitch called 'pixelart for beginners'.
⭐⭐⭐ Youtube Tutorials - free There are hundreds, if not thousands of tutorials on YouTube, but it can be tricky to find the good ones. My personal recommendations are MortMort, Brandon, and AdamCYounis- these guys really know what they're talking about!
🔸 How to choose a canvas size
When looking at pixel art turorials, we may see people suggest things like 16x16, 32x32 and 64x64. These are standard sizes for pixel art games with tiles. However, if you're just making a drawing, you don't necessarily need to use a standard canvas size like that.
What I like to think about when choosing a canvas size for my illustrations is 'what features do I think it is important to represent?' And make my canvas as small as possible, while still leaving room for my most important elements.
Imagine I have characters in a scene like this:

I made my canvas as small as possible (232 x 314), but just big enough to represent the features and have them be recognizable (it's Good Omens fanart 😤)!! If I had made it any bigger, I would be working on it for ever, due to how much more foliage I would have to render.
If you want to do an illustration and you're not sure, just start at somewhere around 100x100 - 200x200 and go from there.
It's perfectly okay to crop your canvas, or scale it up, or crunch your art down at any point if you think you need a different size. I do it all the time! It only takes a bit of cleanup to get you back to where you were.
🔸Where To Post
Outside of just regular socials, Twitter, Tumblr, Deviantart, Instagram etc, there are a few places that lean more towards pixel art that you might not have heard of.
⭐ Lospec Lospec is a low-res focused art website. Some pieces get given a 'monthly masterpiece' award. Not incredibly active, but I believe there are more features being added often.
⭐⭐ Pixilart Pixilart is a very popular pixel art community, with an app tied to it. The community tends to lean on the young side, so this is a low-pressure place to post with an relaxed vibe.
⭐⭐ Pixeljoint Pixeljoint is one of the big, old-school pixel art websites. You can only upload your art unscaled (1x) because there is a built-in zoom viewer. It has a bit of a reputation for being elitist (back in the 00s it was), but in my experience it's not like that any more. This is a fine place for a pixel artist to post if they are really interested in learning, and the history. The Hall of Fame has some of the most famous / impressive pixel art pieces that paved the way for the work we are doing today.
⭐⭐⭐ Cafe Dot Cafe Dot is my art server so I'm a little biased here. 🍵 It was created during the recent social media turbulence. We wanted a place to post art with no algorithms, and no NFT or AI chuds. We have a heavy no-self-promotion rule, and are more interested in community than skill or exclusivity. The other thing is that we have some kind of verification system- you must apply to be a Creator before you can post in the Art feed, or use voice. This helps combat the people who just want to self-promo and dip, or cause trouble, as well as weed out AI/NFT people. Until then, you are still welcome to post in any of the threads or channels. There is a lot to do in Cafe Dot. I host events weekly, so check the threads!
⭐⭐/r/pixelart The pixel art subreddit is pretty active! I've also heard some of my friends found work through posting here, so it's worth a try if you're looking. However, it is still Reddit- so if you're sensitive to rude people, or criticism you didn't ask for, you may want to avoid this one. Lol
🔸 Where To Find Work
You need money? I got you! As someone who mostly gets scouted on social media, I can share a few tips with you:
Put your email / portfolio in your bio Recruiters don't have all that much time to find artists, make it as easy as possible for someone to find your important information!
Clean up your profile If your profile feed is all full of memes, most people will just tab out rather than sift through. Doesn't apply as much to Tumblr if you have an art tag people can look at.
Post regularly, and repost Activity beats everything in the social media game. It's like rolling the dice, and the more you post the more chances you have. You have to have no shame, it's all business baby
Outside of just posting regularly and hoping people reach out to you, it can be hard to know where to look. Here are a few places you can sign up to and post around on.
/r/INAT INAT (I Need A Team) is a subreddit for finding a team to work with. You can post your portfolio here, or browse for people who need artists.
/r/GameDevClassifieds Same as above, but specifically for game-related projects.
Remote Game Jobs / Work With Indies Like Indeed but for game jobs. Browse them often, or get email notifications.
VGen VGen is a website specifically for commissions. You need a code from another verified artist before you can upgrade your account and sell, so ask around on social media or ask your friends. Once your account is upgraded, you can make a 'menu' of services people can purchase, and they send you an offer which you are able to accept, decline, or counter.
The evil websites of doom: Fiverr and Upwork I don't recommend them!! They take a big cut of your profit, and the sites are teeming with NFT and AI people hoping to make a quick buck. The site is also extremely oversaturated and competitive, resulting in a race to the bottom (the cheapest, the fastest, doing the most for the least). Imagine the kind of clients who go to these websites, looking for the cheapest option. But if you're really desperate...
🔸 Community
I do really recommend getting involved in a community. Finding like-minded friends can help you stay motivated to keep drawing. One day, those friends you met when you were just starting out may become your peers in the industry. Making friends is a game changer!
Discord servers Nowadays, the forums of old are mostly abandoned, and people split off into many different servers. Cafe Dot, Pixel Art Discord (PAD), and if you can stomach scrolling past all the AI slop, you can browse Discord servers here.
Twitch Streams Twitch has kind of a bad reputation for being home to some of the more edgy gamers online, but the pixel art community is extremely welcoming and inclusive. Some of the people I met on Twitch are my friends to this day, and we've even worked together on different projects! Browse pixel art streams here, or follow some I recommend: NickWoz, JDZombi, CupOhJoe, GrayLure, LumpyTouch, FrankiePixelShow, MortMort, Sodor, NateyCakes, NyuraKim, ShinySeabass, I could go on for ever really... There are a lot of good eggs on Pixel Art Twitch.
🔸 Other Helpful Websites
Palettes Lospec has a huge collection of user-made palettes, for any artist who has trouble choosing their colours, or just wants to try something fun. Rejected Palettes is full of palettes that didn't quite make it onto Lospec, ran by people who believe there are no bad colours.
The Spriters Resource TSR is an incredible website where users can upload spritesheets and tilesets from games. You can browse for your favourite childhood game, and see how they made it! This website has helped me so much in understanding how game assets come together in a scene.
VGMaps Similar to the above, except there are entire maps laid out how they would be played. This is incredible if you have to do level design, or for mocking up a scene for fun.
Game UI Database Not pixel-art specific, but UI is a very challenging part of graphics, so this site can be a game-changer for finding good references!
Retronator A digital newspaper for pixel-art lovers! New game releases, tutorials, and artworks!
Itch.io A website where people can upload, games, assets, tools... An amazing hub for game devs and game fans alike. A few of my favourite tools: Tiled, PICO-8, Pixel Composer, Juice FX, Magic Pencil for Aseprite
🔸 The End?
This is just part 1 for now, so please drop me a follow to see any more guides I release in the future. I plan on doing some writeups on how I choose colours, how to practise, and more!
I'm not an expert by any means, but everything I did to get to where I am is outlined in this guide. Pixel art is my passion, my job and my hobby! I want pixel art to be recognized everywhere as an art-form, a medium of its own outside of game-art or computer graphics!

This guide took me a long time, and took a lot of research and experience. Consider following me or supporting me if you are feeling generous.
And good luck to all the fledgling pixel artists, I hope you'll continue and have fun. I hope my guide helped you, and don't hesitate to send me an ask if you have any questions! 💕
My other tutorials (so far): How to draw Simple Grass for a game Hue Shifting
28K notes
·
View notes
Note
How do you make your stamps? :0
Disclaimer: this is an obscenely long explanation, with pictures. Efficiency is stupid
So, for the static ones, I make a 99x56 px file on ibis paint x. Other programs are probably available online but I don't use them.
After that, I either upload an image I want to make into a stamp, or I draw one.
Then, I find a frame I want to use. Ill upload them here but let it be known I stole all of these right from deviantart


Most of them are from Lil-Devil-Melii on deviantart. The rest i have no idea. They're not all 99x56px but you can crop the canvas it's fine
Make sure to erase the edges of the picture , so they're transparent. It's not as cute otherwise
Upload those frames over your image in whatever art program you're using and viola, stamp.
For moving ones, it's a lot harder. Mostly because I refuse to download Photoshop.
There are a couple ways to do this. Some are simple animations, like with flashing text and whatnot. For these, you download the individual animation frames from your art program. Make sure it's transparent.
Then, upload each frame to ezgif.com under the option "GIF maker." You can play around with how fast each frame goes and whatnot but in the end, it'll be a stamp with some rad text that moves. This is easy, and doesn't make me want to shit my pants and cry. If you're new, do this. This is fun. This is good. This does not kill me inside
I made that↓ stamp with this method :)

this next one is how we turn gifs into stamps. This one makes me sad. It involves math and sucks. But we gotta do it. For the vibe
First, grab your gif. I'm using this cow gif because it's awesome

Then, I resize it using ezgif. Literally everything for this will be using ezgif. I am a simple man
At this point you should decide what frame to use. I'm using this one because its the first one I clicked
Figured out what size the inside of the frame is. That's what I resize the gif to, so the edges can be transparent. The inside of this one is 93x50 px, so those are the dimensions I'm making the gif.
Figure it out by putting the frame into ibis paint and realizing the canvas to fit just the inside of the frame, then seeing what the dimensions are. But there could be easier ways

Woah it's so small now
Then, still on ezgif, I go to the "crop" option.
Make sureeee to upload the smaller gif
press the button that says "extend canvas size", and then put the "width" and "height" as the dimensions for your FRAME. This'll put a bit of a transparent border around the gif. For this frame, I did 99px and 56px.
The "left" and "top" boxes show how many pixels the cropping happens from the edges of the canvas. The formula for finding that is
(width of gif / 2) - (difference between gif width and frame width / 2) = left box
For me it's (93 / 2) - (6 / 2) = 43.5
Then you do the same.for the height, which for me ends up being 22 from the top
This is reallyyy touchy and annoying though
Here's my result , with no visible difference

Okay so THEN you go to the "overlay" option, under "effects." And upload your frame. If the cropping was done right, you shouldn't have to move the frame at all and can just download it
Here's my result:

if you don't care about transparency, you can resize your gif to be the same size as the frame, and then put the frame over it. But I'm a slut for transparency
Anyways. I'm sorry if anything was unclear, it's two am. And I hope this was helpful :) these really are fun to make once you get it down
also if anyone has an easier way to make stamps from gifs, please god tell me
#web graphics#old web#neocities#custom#custom blinkies#stamps#page decor#web resources#da stamps#deviantart stamps#blinking gif#How to#tutorial#How to make stamps#Spacehey#deviantart#rentry graphics#old internet#early internet#stamp collecting#ezgif#stamp making#stamp template#Stamp frames#blinkies
7K notes
·
View notes
Text
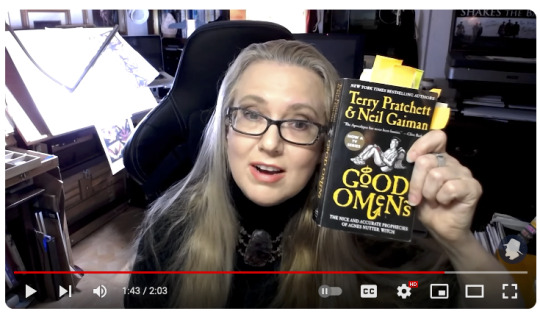
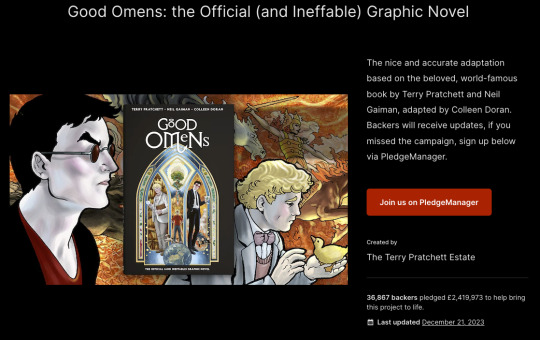
Great Big Good Omens Graphic Novel Update
AKA A Visit From Bildad the Shuhite.
The past year or so has been one long visit from this guy, whereupon he smiteth my goats and burneth my crops, woe unto the woeful cartoonist.
Gaze upon the horror of Bildad the Shuhite.

You kind of have to be a Good Omens fan to get this joke, but trust me, it's hilarious.
Anyway, as a long time Good Omens novel fan, you may imagine how thrilled I was to get picked to adapt the graphic novel.
Go me!
This is quite a task, I have to say, especially since I was originally going to just draw (and color) it, but I ended up writing the adaptation as well. Tricky to fit a 400 page novel into a 160-ish page graphic novel, especially when so much of the humor is dependent on the language, and not necessarily on the visuals.
Not complainin', just sayin'.
Anyway, I started out the gate like a herd of turtles, because right away I got COVID which knocked me on my butt.
And COVID brain fog? That's a thing. I already struggle with brain fog due to autoimmune disease, and COVID made it worse.
Not complainin' just sayin'.
This set a few of the assignments on my plate back, which pushed starting Good Omens back.
But hey, big fat lead time! No worries!
Then my computer crawled toward the grave.
My trusty MAC Pro Tower was nearly 15 years old when its sturdy heart ground to a near-halt with daily crashes. I finally got around to doing some diagnostics; some of its little brain actions were at 5% functionality. I had no reliable backups.
There are so many issues with getting a new computer when you haven't had a new computer or peripherals in nearly fifteen years and all of your software, including your Photoshop program is fifteen years old.
At the time, I was still on rural internet...which means dial-up speed.
Whatever you have for internet in the city, roll that clock back to about 2001.
That's what I had. I not only had to replace almost all of my hardware but I had to load and update all programs at dial-up speed.
Welcome to my gigabyte hell.
The entire process of replacing the equipment and programs took weeks and then I had to relearn all the software.
All of this was super expensive in terms of money and time cost.
But I was not daunted! Nosirree!
I still had a huge lead time! I can do anything! I have an iron will!
And boy, howdy, I was going to need it.
At about the same time, a big fatcat quadrillionaire client who had hired me years ago to develop a big, major transmedia project for which I was paid almost entirely in stock, went bankrupt leaving everyone holding the bag, and taking a huge chunk of my future retirement fund with it.
I wrote a very snarky almost hilarious Patreon post about it, but am not entirely in a position to speak freely because I don't want to get sued. Even though I had to go to court over it, (and I had to do that over Zoom at dial-up speed,) I'm pretty sure I'll never get anything out of this drama, and neither will anyone else involved, except millionaire dude and his buddies who all walked away with huge multi-million dollar bonuses weeks before they declared bankruptcy, all the while claiming they would not declare bankruptcy.
Even the accountant got $250,000 a month to shut down the business, while creators got nothing.
That in itself was enough drama for the year, but we were only at February by that point, and with all those months left, 2023 had a lot more to throw at me.
Fresh from my return from my Society of Illustrators show, and a lovely time at MOCCA, it was time to face practical medical issues, health updates, screening, and the like. I did my adult duty and then went back to work hoping for no news, but still had a weird feeling there would be news.

I know everyone says that, but I mean it. I had a bad feeling.
Then there was news.
I was called back for tests and more tests. This took weeks. The ubiquitous biopsy looked, even to me staring at the screen in real time, like bad news.
It also hurt like a mofo after the anesthesia wore off. I wasn't expecting that.
Then I got the official bad news.
Cancer which runs in my family finally got me. Frankly, I was surprised I didn't get it sooner.
Stage 0, and treatment would likely be fast and complication-free. Face the peril, get it over with, and get back to work.
I requested surgery months in the future so I could finish Good Omens first, but my doc convinced me the risk of waiting was too great. Get it done now.
"You're really healthy," my doc said. Despite an auto-immune issue which plagues me, I am way healthier than the average schmoe of late middle age. She informed me I would not even need any chemo or radiation if I took care of this now.
So I canceled my appearance at San Diego Comic Con. I did not inform the Good Omens team of my issues right away, thinking this would not interfere with my work schedule, but I did contact my agent to inform her of the issue. I also contacted a lawyer to rewrite my will and make sure the team had access to my digital files in case there were complications.
Then I got back to work, and hoped for the best.
Eff this guy.
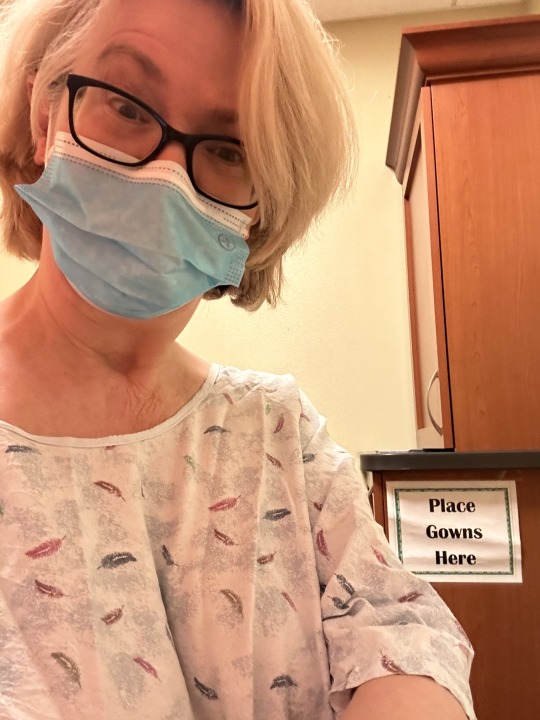
Before I could even plant my carcass on the surgery table, I got a massive case of ocular shingles.
I didn't even know there was such a thing.
There I was, minding my own business. I go to bed one night with a scratchy eye, and by 4 PM the next day, I was in the emergency room being told if I didn't get immediate specialist treatment, I was in big trouble.
I got transferred to another hospital and got all the scary details, with the extra horrid news that I could not possibly have cancer surgery until I was free of shingles, and if I did not follow a rather brutal treatment procedure - which meant super-painful eye drops every half hour, twenty-four hours a day and daily hospital treatment - I could lose the eye entirely, or be blinded, or best case scenario, get permanent eye damage.
What was even funnier (yeah, hilarity) is the drops are so toxic if you don't use the medication just right, you can go blind anyway.
Hi Ho.
Ulcer is on the right. That big green blob.
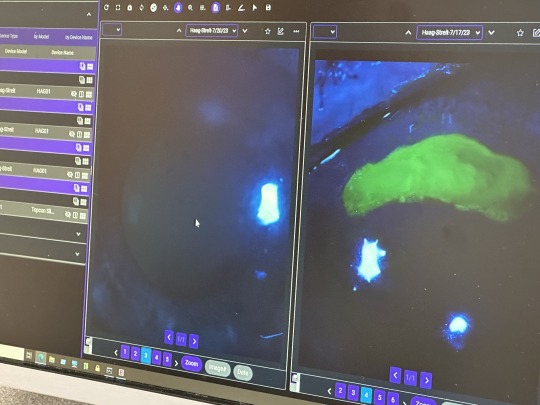
I had just finished telling my cancer surgeon I did not even really care about getting cancer, was happy it was just stage zero, had no issues with scarring, wanted no reconstruction, all I cared about was my work.
Just cut it out and get me back to work.
And now I wondered if I was going to lose my ability to work anyway.
Shingles often accompanies cancer because of the stress on the immune system, and yeah, it's not pretty. This is me looking like all heck after I started to get better.
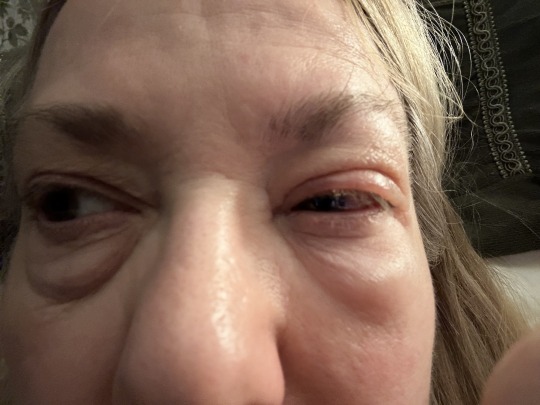
The first couple of weeks were pretty demoralizing as I expected a straight trajectory to wellness. But it was up and down all the way.
Some days I could not see out of either eye at all. The swelling was so bad that I had to reach around to my good eye to prop the lid open. Light sensitivity made seeing out of either eye almost impossible. Outdoors, even with sunglasses, I had to be led around by the hand.
I had an amazing doctor. I meticulously followed his instructions, and I think he was surprised I did. The treatment is really difficult, and if you don't do it just right no matter how painful it gets, you will be sorry.
To my amazement, after about a month, my doctor informed me I had no vision loss in the eye at all. "This never happens," he said.
I'd spent a couple of weeks there trying to learn to draw in the near-dark with one eye, and in the end, I got all my sight back.
I could no longer wear contact lenses (I don't really wear them anyway, unless I'm going to the movies,) would need hard core sun protection for awhile, and the neuralgia and sun sensitivity were likely to linger. But I could get back to work.
I have never been more grateful in my life.
Neuralgia sucks, by the way, I'm still dealing with it months later.
Anyway, I decided to finally go ahead and tell the Good Omens team what was going on, especially since this was all happening around the time the Kickstarter was gearing up.
Now that I was sure I'd passed the eye peril, and my surgery for Stage 0 was going to be no big deal, I figured all was a go. I was still pretty uncomfortable and weak, and my ideal deadline was blown, but with the book not coming out for more than a year, all would be OK. I quit a bunch of jobs I had lined up to start after Good Omens, since the project was going to run far longer than I'd planned.
Everybody on the team was super-nice, and I was pretty optimistic at this time. But work was going pretty slow during, as you may imagine.
But again...lots of lead time still left, go me.
Then I finally got my surgery.
Which was not as happy an experience as I had been hoping for.
My family said the doc came out of the operating room looking like she'd been pulled backwards through a pipe, She informed them the tumor which looked tiny on the scan was "...huge and her insides are a mess."
Which was super not fun news.
Eff this guy.
The tumor was hiding behind some dense tissue and cysts. After more tests, it was determined I'd need another surgery and was going to have to get further treatments after all.
The biopsy had been really painful, but the discomfort was gone after about a week, so no biggee. The second surgery was, weirdly, not as painful as the biopsy, but the fatigue was big time.
By then, the Good Omens Kickstarter had about run its course, and the record-breaker was both gratifying and a source of immense social pressure.
I'd already turned most of my social media over to an assistant, and I'm glad I did.
But the next surgery was what really kicked me on my keister.
All in all, they took out an area the size of a baseball. It was hard to move and wiped me out for weeks and weeks. I could not take care of myself. I'd begun losing hair by this time anyway, and finally just lopped it off since it was too heavy for me to care for myself. The cut hides the bald spots pretty well.
After about a month, I got the go-ahead to travel to my show at the San Diego Comic Con Museum (which is running until the first week of April, BTW). I was very happy I had enough energy to do it. But as soon as I got back, I had to return to treatment.
Since I live way out in the country, going into the city to various hospitals and pharmacies was a real challenge. I made more than 100 trips last year, and a drive to the compounding pharmacy which produced the specialist eye medicine I could not get anywhere else was six hours alone.
Naturally, I wasn't getting anything done during this time.
But at least my main hospital is super swank.


The oncology treatment went smoothly, until it didn't. The feels don't hit you until the end. By then I was flattened.
So flattened that I was too weak to control myself, fell over, and smashed my face into some equipment.
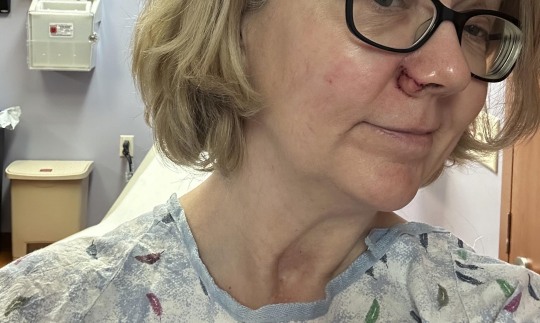
Nearly tore off my damn nostril.
Eff this guy.

Anyway, it was a bad year.
Here's what went right.
I have a good health insurance policy. The final tally on my health care costs ended up being about $150,000. I paid about 18% of that, including insurance. I had a high deductible and some experimental medicine insurance didn't cover. I had savings, enough to cover the months I wasn't working, and my Patreon is also very supportive. So you didn't see me running a Gofundme or anything.
Thanks to everyone who ever bought one of my books.
No, none of that money was Good Omens Kickstarter money. I won't get most of my pay on that for months, which is just as well because it kept my taxes lower last year when I needed a break.
So, yay.
My nose is nearly healed. I opted out of plastic surgery, and it just sealed up by itself. I'll never be ready for my closeup, but who the hell cares.
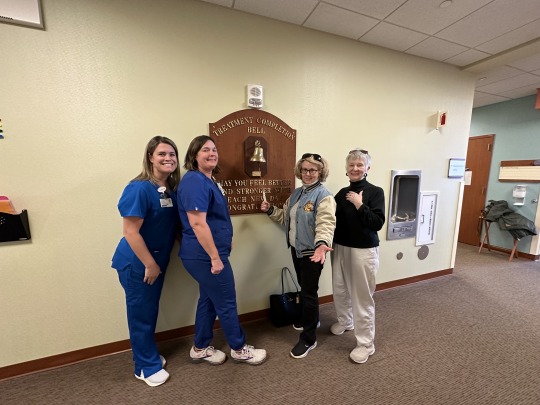
I got to ring the bell.
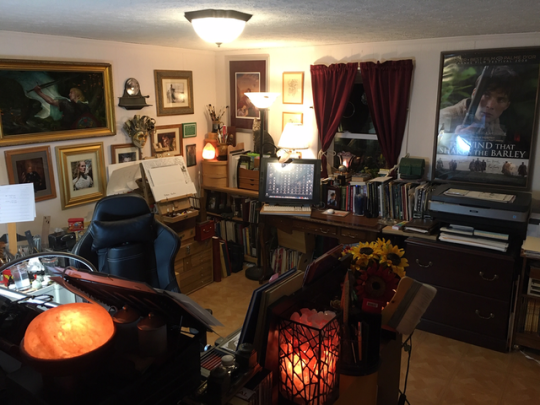
I had a very, VERY hard time getting back to work, especially with regard to focus and concentration. My work hours dropped by over 2/3. I was so fractured and weak, time kept slipping away while I sat in the studio like a zombie. Most of the last six months were a wash.
I assumed focus issues were due (in part) to stress, so sought counseling. This seemed like a good idea at first, but when the counselor asked me to detail my issues with anxiety, I spent two weeks doing just that and getting way more anxious, which was not helpful.
After that I went EFF THIS NOISE, I want practical tools, not touchy feelies (no judgment on people who need touchy-feelies, I need a pragmatic solution and I need it now,) so tried using the body doubling focus group technique for concentration and deep work.
Within two weeks, I returned to normal work hours.
I got rural broadband, jumping me from dial up speed to 1 GB per second.
It's a miracle.

Massive doses of Vitamin D3 and K2. Yay.
The new computer works great.
The Kickstarter did so well, we got to expand the graphic novel to 200 pages. Double yay.
I'm running late, but everyone on the Good Omens team is super supportive. I don't know if I am going to make the book late or not, but if I do, well, it surely wasn't on purpose, and it won't be super late anyway. I still have months of lead time left.
I used to be something of a social media addict, but now I hardly ever even look at it, haven't been directly on some sites in over a year, and no longer miss it. It used to seem important and now doesn't.
More time for real life.
While I think the last year aged me about twenty years, I actually like me better with short hair. I'm keeping it.

OK. Rough year.
Not complainin', just sayin'.
Back to work on The Book.
And only a day left to vote for Good Omens, Neil Gaiman, and Sandman in the Comicscene Awards. Thanks.
2K notes
·
View notes
Note
Hi! I download your newest Photoshop 2024 two nights ago, and it's saying there is only a 5 day grace period before it uninstalls itself if I don't license it. I thought this was meant to be free, so did something happen when the file was created or did I misunderstand what is going on with this?
Update, please have a look at this updated fix/post!
Hi there!! My apologies for posting this publicly, instead of answering you privately, but I just want to be able to make sure that if anyone else runs into this issue, that they easily have access to the fix. Now, this hasn't happened to me at present after numerous days of consistent use, nor have I heard of anyone else running into it, but I am aware that it can happen, but the fix is actually quite simple (I had to do this for a previous version). Okay, this involves a little bit of navigating and tinkering in Windows, but I'll run you through it, don't worry.
In essence what happened is that Photoshop was able to connect to the Adobe servers, where it verified itself through an automated process, and realized it wasn't quite activated yet. This is nothing concerning, and is something that us little pirates have had to deal with for years without any issue at the backhand. So the simple, very old, and private solution to this is to not let Photoshop connect to the internet at all (this will not limit it in any way), and accomplishing that is simple enough. Before you go through these steps however, please uninstall Photoshop, and reinstall it (ideally in a slightly different location, even if it's in a subfolder.) After that, here, let me run you through the steps!
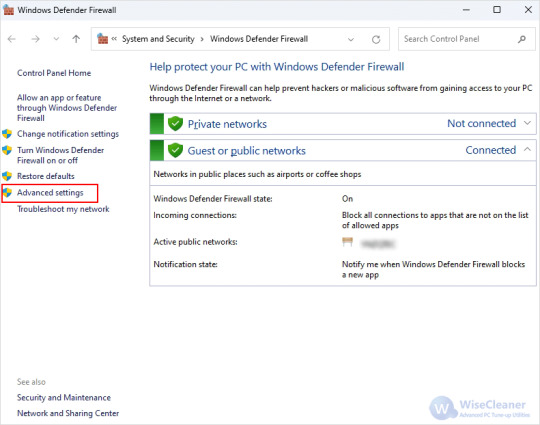
Step 1. Do a search for 'Windows Defender', and click 'Windows Defender Firewall' when it pops up as a search result. When the window pops up, navigate to the left-hand side and select 'Advanced settings', like below:
Step 2. In the new window, click 'Outbound rules' to the left-hand side, and then 'New rule' on the right-hand side immediately after:

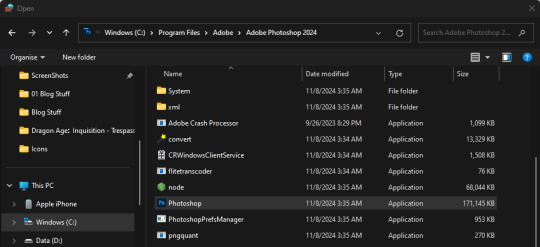
Step 3. Another window will pop up, and in the options given to you, select 'Program', and then, do you remember when you first installed Photoshop? Navigate to that folder, and you'll find the according application file called 'Photoshop' with its usual little icon on the left. To help you, the default path (where I have it installed) is as shown underneath, including the file you should select:
Step 4. Select the file, hit 'Open' in the bottom-right, hit 'Next', and make sure that you then select 'Block this connection'. On the next screen, it'll ask you when the rule should be applied and all options should be checked, if they are not, be sure to check them. You can name this rule however you want on the next screen, it won't matter! Hit 'Finish', and all should be fine from hereon out!
If you run into any problems with any of these steps, let me know, or leave me a little DM and I'll be happy to help!! I'm so sorry for the inconvenience. <3 Have a lovely night!!
#[ i need a little resources tag for asks like this-- but for now this'll work. ]#[ inquiries: out of character. ] they do not know what to make of me. i have kept to myself; for fear of giving them purchase to cling to.
133 notes
·
View notes
Note
Do you have a tutorial of where you convert objects after and make them function?
Hi! Yes and no, LOL. 😅
☽✶•.��(✶•.¸★¸.•✶´)¸.•✶´☾ ☆«´¨`•°°•´¨`»☆ ☽.¸.•✶(¸.•✶´★`✶•.¸)`✶•.☾
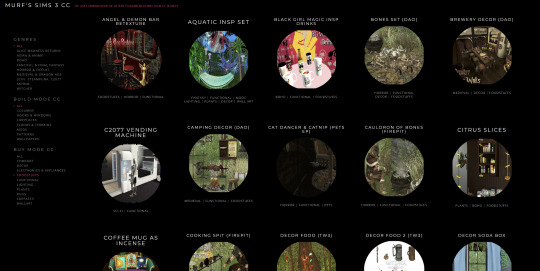
Welcome to Murf’s School of Crap and Crap-Making!
School Motto: Prepare to be tortured! For Science!
Lesson #28: FUNCTIONALITY (I love the way you move~! 🎶)
☽✶•.¸(✶•.¸★¸.•✶´)¸.•✶´☾ ☆«´¨`•°°•´¨`»☆ ☽.¸.•✶(¸.•✶´★`✶•.¸)`✶•.☾
Quick Tid-Bits about Buy Mode CC Functionality
At its most basic level, object conversion follows the same basic steps from this tutorial I made here (for TS2 to TS3 converting). Once you have an .obj mesh and your .png/.dds textures, it's really just a matter of Exporting the mesh from a 3d modelling program (Blender or Milkshape), plus the textures into an image program (Gimp, Photoshop, etc), and Importing all of them into whichever TS3-compatible program you wanna work with (I always use TSRW cuz I can't stand Blender).
But when it comes to FUNCTIONAL CC, it really does depend on what the specific function is. Anything that's not Decor is Functional (anything sims can actually use/interact with; or that you can toggle specific options on). But the Buy Mode object types were NOT created equally--some are WAY more complex than others. Some functional objects are static--they don't move around much or do anything fancy (a table, a lamp, etc), and if they do move, it's very limited and doesn't require a bunch of finagling to make them work right. But some of these turds have pieces that are mobile/etc. 😰 When a sim interacts with the object, there's animations & bits moving all over the place & lights flashing & noises beeping & all kinds of crap happening. So objects tend to get more complicated to make as their functionality increases and there are a lot more moving parts.
LEVEL 1: SCRIPTED (Decor) Objects
Scripted objects are fun(ny), cuz that's when you're changing the base function of an object, by giving it a new Script in TSRW/S3PE (The Transmogrifier mod at MTS basically does this for you in-game). For ME, I'm usually turning a decor object into a functional one. Sometimes that's as simple as taking Wall Decor and giving it a script that makes it ACT like a functional wall tv/mirror/etc instead). Other times I'm making my Edible foodstuffs & Drinkable beverages. These often REQUIRE Arsil's Beverages Mod or something, cuz the script is from a 3rd party mod not built in the game itself. So it depends, but most of the time it's super easy & simple (which is why I tend to make these a lot 😅); just a matter of copy/pasting one script into another.
LEVEL 2: VERY simple functional static objects
There's some basic functional CC that follow the exact same steps as the 2t3 tutorial I already linked above--just swap the meshes & textures, adjusting the mesh sizes/positions as needed, and you're DONE (barring any finagling with Shaders (if you want the mesh to be see-thru or have a neon glow or whatever)):
Surfaces & Comfort (tables & chairs/sofas ONLY*)
Lighting (all lighting categories)
Electronics (Radios, Alarms, Clocks ONLY*)
Hobbies & Skills: LN pianos/keyboards
Toys (SN 8-ball, basegame/AMB crafted toys)
Plumbing (toilets, sinks, & SOME tubs)
Appliances (firepits)
Party (the dance rugs, SN fairy houses, FX Machines from LN/SHT ONLY*)
Debug/Transportation: Teleporter, IP Jet-skis
Plumbing (toilets, sinks, & SOME tubs)
* there's likely exceptions I'm forgetting about, but for the most part these are the "Only" super-reliably simple functional objects sims can use AFAIK
LEVEL 3: More involved functional objects
But then there's garbage that either require you to mess with their Joints/Bones (cuz the objects move / have animations when sims use them); or Geostates (the object changes shape/state when sims interact/use them & move them around). Or worse: you have to edit BOTH. 💀
More Involved (but not bad once you get the hang of it)
Electronics (TV screen meshes need careful positioning, computers have joints/bones on the mouse)
Appliances (stoves--the oven doors have joints/bones)
Storage (toy/treasure chests -- the lid has a joint/bone IIRC)
Sports (WA training dummies have joints/bones IIRC)
Debug (WA incense has geostates)
Hobbies & Skills (SN wands have geostates)
Transportation (ITF hover boards & SN magic brooms have geostates)
Toys (teddy bears have a lot more joints, that pretty much use similar steps as CAS CC--the Mesh Toolkit is your friend!)
None of these are really complicated, once you get the basics of how joints/bones & geostates work.
IMO, other than the teddy bear, you can easily & quickly assign joints/bones to meshes manually, without needing the Mesh Toolkit to do it for you at all. But be careful when manually assigning them! If you mess up assigning the joint/bones, the object mesh will move around in effed up ways during the animations.
OR, it might not move at all--which NGL is sometimes a blessing in disguise! 😅 Sometimes--not always!--it really doesn't matter if an object doesn't have bones/joints, esp. when converting super busy meshes that don't really "FIT" within TS3--like medieval/fantasy/sci-fi meshes with all kinds of fancy bits. In those cases, it's easier to say EFF the animations and just make it a static mesh instead--the dresser/chest/oven/etc doors/lids don't open, the car/bike wheels don't turn, but the object still FUNCTIONS properly--the sim can still USE it as intended, which is all that REALLY matters. 😌
Geostates though? That's a bit different. Cuz making geostates mean you have to make multiple different version of the mesh, cuz the object has different States that show up: full/empty, broken/fixed, up/down, messy/neat, finished/incomplete, on/off, open/closed states. Wands & guitars & brooms & beds & boats etc. NEED geostates in order to act right. They're either supposed to move around with the sim a certain way; or change depending what state they're in when interacted with versus left alone/idle. And those states can be freaking annoying to work with, esp. in TSRW. 🤦 Ofttimes it's easiest to break the mesh into multiple individual groups, Import them all into TSRW separately, and then manually assign the geostates group-by-group, not vertices-by-vertices--(guitars & rowboats, I'm looking at YOU).
LEVEL 4: Harder / More Complex (frikkin irritating)
Hobbies & Skills (guitars--too many effing geostates)
Toys (dollhouses, sandcastles, etc have geostates)
Storage (bookcases have geostates) dressers & armoire/wardrobes have annoying joints/bones for opening the drawers/doors/etc)
Pets (basegame fishbowls have a lot of geostates IIRC)
Transportation (IP rowboats have TOO MANY frikkin geostates & joints--I always say never again! and then I make another one, LOL 🤡🤥)
This is where my patience gets frikkin tested.
LEVEL 5: Too Effing Intimidating / Annoying / Hard For ME*
Appliances (pretty much everything else, I don't go here)
Comfort (beds, cribs, etc. have geostates I'm too lazy for)
Plumbing (showers/tubs with moving doors/screens)
Entertainment, Hobbies & Skills (I don't go here)
Transportation (bikes, cars--absolutely not)
Pets (my rabbit mod--never again and I mean it)
* I am notoriously LAZY--once there's one too many steps or things start acting funny or going wrong, I give up HELLA quick, cuz chile, I HATE making CC. Simming is a hobby that helps me relax; not a job I'm required to do for my livelihood--I'm not tryna be stressed over frikkin pixels. There's objects I've never made before; or only made ONCE and swore to NEVER make again cuz I love myself; or I've tried to make and completely failed at and don't care enough to figure out. So I'm not saying these objects are impossible, I'M just not messing with them. 🤣
TL;DR: Your Mileage May Vary!
So yeah, your question is actually harder to answer than it seems, cuz it really depends on what functional object you wanna convert. There's objects I have no idea how to make--I see way too many moving parts, and I run in the opposite direction.

25 notes
·
View notes
Text
at what point does something stop being made by a person and start being made by a machine? is someone creating a photoshop action so the computer will run code to edit a photo they found online all that different from someone inputting words into a human made algorithm trained on human made images to generate a photo? if i use a knitting machine to make something does it count as human made or machine made or both? if i design a program that knits the object without me having to manually operate the machine does it still hold emotional value? what if i allow others to use that program to do the same thing and they input a sentence into the program articulating what they want made and the machine creates it? is 3d printing art? is technology itself capable of being art? if we define 'what gets to be art' by the % of machine involvement at what % does it stop being art? does this entire argument not feel a bit futile and arbitrary to you?
everyone will have a different answer just like how everyone has a different answer on 'what is art' and that's an argument we've been having for ages and will continue to have for the foreseeable future. i'm a weaver and an artist and my tendency is to lean toward the romantic, but in my efforts to be a materialist i ultimately find these questions largely unhelpful on the topic of 'should generative ai art be forbidden' because if we're only talking about how things make us feel and how we want the world to be and not the actual material impacts of things from a practical perspective we'll never get anything done. it's why i said that arguments against generative ai that take this stance are unconvincing and if you try to critique ai from an angle that isn't materialist you will run yourself in circles.
#these are fun questions to discuss and think about but there will never be a conclusion to them and there will always be another argument#but they are unhelpful in practical terms for precisely that reason
132 notes
·
View notes
Text
Wayne Vs Fenton 3
start of the madness
pls note I'm putting these numbers in as "what I have written." They're not gonna necessarily be in order. I hope to make a full fic to put on AO3. In the interim, here's stuff I wrote in general as it strikes me in the moment. This bit is from Tim's perspective after Damian and Danny Are Friends become a known quantity in the Wayne household. ~*~
Damian making friends didn’t make sense. Everyone else felt complacent in simply accepting it. Tim wasn’t. Considering his upbringing, autonomous socializing wasn’t part of Damian’s personality. Nor was how calm and patient the former assassin child became with all of his siblings, Tim included. Damian himself insisted he and this “Danny” were friends. Hell, Damian even called the kid by a nickname. Not his last name, not “Daniel.” His actual, preferred nickname. Tim was suspicious and instantly began investigating. Daniel “Danny” Fenton, age 15, moved to Gotham two months ago from Amity Park, Illinois with his godfather and temporary guardian, Vlad Masters, former mayor of Amity Park, head of Vladco Industries, and heir to Wisconsin’s Self Proclaimed Dairy King’s fortune. Child of Jack and Madeline Fenton, doctors of something called ectobiology, former college classmates of Vlad Masters, and founders of FentonWorks, a cottage research facility that developed antighost (Ghosts? Really?) weaponry and equipment. Brother of Jasmine Fenton, currently a student of Yale in their psychology undergraduate program, and already a shoe-in for the Dean’s list. Honestly, of all the people related to him, Danny ended up being the least interesting. Middling grades that dropped in high school along with attendance. That was probably what led to his coming to Gotham. A set of brilliant - if evidentially weird - parents and a rich and involved godfather doing what they could to help their faltering son to succeed by sending him to one of the top schools on the east coast. There was evidence that Amity Park itself had some apparently minor meta vigilante protecting it, but searches for “Phantom” turned up nothing in the Justice League’s database, suggesting whomever this was might be an actual ghost like Deadman and, thus, restricted to access by those with JLD clearance. Tim put aside that issue for later. He could just ask B for privileges later. Besides, the only information he found on this vigilante was on a few amateur fansites and local papers. No major news sites or government listings. It couldn’t be anything major. His focus remained on Daniel Fenton. Except, even when looking into the kid’s socials, there wasn’t anything interesting. He had a couple friends back in Amity, the most interesting of the two was Samantha Mason of the Mason family, though Tim already knew of her from various socialite dinners she looked ready to burn to the ground, pink and lacey dress or not. Her social media was full of activism, conservation movements, and calls for both veganism and something called ultra recycle vegetarianism. Tucker came from an average family of upper middle class parents, nothing odd there, though his social media showed his love of technology and ancient Egypt. Nothing strange there. Danny’s social media, besides his friends, included links to Nasa, occasional rambles about high school life, and, for some reason, a dog photoshopped to look green. From the replies of his few followers, it was an inside joke since they all cooed over the dog and didn’t comment on the green. Again, nothing strange. Even the one time he managed to hack into Damian’s phone to see his messages yielded nothing. He and Danny would meet for what Danny called “playdates.” For some reason, Damian played along with a name Tim knew he’d scoff as childish and beneath him. Even that would be innocuous. One or the other would suggest meeting at various parks, arcades, even the observatory, negotiating dates and times, and that was it.
Danny was a normal kid. Damian was a born and bred assassin. Why in the actual fuck were these two friends? Nothing made sense. Everyone else was happy to ignore it because of the peace the irrationality before them instilled. Tim wouldn’t become complacent. Whatever Danny was hiding, he’d find it.
#danny phantom#here i go writing again#wayne vs fenton#dpxdc#Yup#Tim is missing shit#plz allow it for now for both plot reasons and because this is#so far#just a seed for the full story#also he's tunnel focused on Danny. Some Ghost Powered Meta isn't in his radar at the moment#especially one that's probably actually just a ghost protecting a small midwestern town and of such small significance#it's not even a major file in the JL database#OBVIOUSLY the JL must know about him. Thinking otherwise is silly#He'll just ask bruce to fill him in#Shoutout to One Look because I was like “What's a word for 'Self Initializing'?”#AUTONOMOUS
214 notes
·
View notes
Note
Omg 😭 I love my MacBook so much (I use a lot of photoshop for work) but I can’t stand the built in keyboard. I love it at work tho cause I have a second monitor and an external keyboard with the 10 key and it’s so amazing that I am able to forget the built in kinda sucks balls
I love literally EVERYTHING else about my MacBook but the keyboard is going to drive me nuts one of these days. I seem to have kinda fixed the multiple ds issues though..., now it's just sometimes not working at all, which quite frankly, I'll take these days lol.
I also have a monitor and an external keyboard, which makes it much more comfortable...but there is only so many hours of the day I wanna spent sitting at my desk, when I could also spent it curled up like a shrimp goblin in my bed (great for my spine, but hey, we all have our bad habits.)
Also my external keyboard is supposed to be good for my wrists because it's "ergonomic" but I have not yet found that to be true, and am mostly just annoyed that I spent a hundred bucks on it. (also don't even get me started on the "programming" I, a woman who is very, very bad at most things computer needed to do to get a Microsoft keyboard to work with a MacBook. It involves a USB stick and three hours of google searches until a nice person in Youtube Comments took pity of me).
9 notes
·
View notes
Note
What kind of program or website do you use for the Underswap MH text box and fonts?
I use an old copy of photoshop to make my UT text boxes, which is not something I'd recommend anyone does unless they're also a horrific perfectionist like me because it took several hours to put together :'D if you're curious I have an old ask reply here that goes into all the layers involved and links to the fonts I use.
I hear most people use this site for UT text boxes, which I've not used myself but definitely seems like the easier option!
#for me the convenience of having my own set-up for text boxes was 100% worth the effort. but yeah I don't recommend most people do that ahah#holoskart asks
19 notes
·
View notes
Note
I would like to know what program you use to make your artwork
I don't have a digitizing board, so I do everything on my cell phone (or just draw in my notebook)
You know, I REALLY want to do a webcomic too, but I don't know where to start. Seeing you do this is really cool, and it seems like it's something you really enjoy.
I just wanted to say that you and a lot of people out there are great inspirations to me
So thank you, and keep up the good work, you're doing well!
I don't know if what I use is really helpful if you're a beginner! I use Photoshop (which usually involves a subscription payment) and a Wacom Cintiq since I primarily do art as a professional for my job. Those are expensive and a little intimidating if you don't have the resources for it yet! Otherwise, you can get Procreate for iPad/tablets for only $10, and it works pretty well...plus now there's an animation program for it, also cheap! There's also Sketchbook Pro, which has some great drawing tools and is now free!
Otherwise...honestly, there's absolutely nothing wrong with drawing your comics on paper and then scanning or photographing them if you want to share them. I spent years and years drawing comics on paper before I moved to doing everything digitally!
I know it can be intimidating, but if you want to start in on a webcomic, the best way to do so is just to start! A lot of comics is learning as you go...what things you're capable of and what you still need to learn. The nice thing about comics is that it forces you to try all sorts of aspects of art! If you're worried about starting, I would say try and pick a project that is small and self-contained instead of launching into your big epic first, and create a big backlog of pages before posting anything so that you don't feel overwhelmed with releasing things on time and can get a sense for how long schedule-wise it takes you to make one page.
Otherwise, thank you very much for the kind words, it means a lot to me!
40 notes
·
View notes
Note
Let me preface this: I'm an architecture major
I used to be a big LO fan but obviously fell out of love of it like a lot of us did, and I know LO uses SketchUp for backgrounds. That is not an issue I have with the comic or any comic, I want artists to have an easier time in any way they can. I was always under the impression Rachel imported the models into Photoshop and drew over them like you can see in the early episodes with the sketchy lines. Well, school just started recently for me and I now have access to SketchUp for my coursework, and I made a few discoveries: 1. Photoshop cannot read SketchUp files, and while you can import them into Clip Studio through some configuring, they can be finicky and will lose parts in the importing process, so they are best used into the original SketchUp program to export as PNGs. 2. Many of the models Rachel uses are incredibly easy to find, especially if you put "modern", "luxury", or "classy" before the main part of the search. Many of the houses and rooms for example are first page results. 3. The biggest discovery: You know how we all assumed Rachel was hand-drawing all the lines over the SketchUp models and how she gave up the longer LO went on? Well, it's actually worse. It turns out SketchUp has a thing called "Styles" in it, which means you can mess with the lines and look of the model, such as making it look more like a blueprint or playing with the colors. Well, they have a lot of styles on SketchUp known as "sketchy lines", which are the exact ones Rachel used early in the comic to fit with her style, and it takes a literal click of a button to do. All she would do is pose the model, click the sketchy line style, and export the PNG. That's it. So, yeah, Rachel is so checked out of the comic that she can't even bother to click a single button to make the models fit into the comic's style anymore. Use that information however you like.
Ouhhh sorry OP, I'm about to like, undo all the work you just put into that ask. We've already known about the 3D background problem for a long while now.
First off, it's more likely LO doesn't use SketchUp but actually Acon3D, which is a website that offers 3D models both for free and at cost, which are actually compatible with software like Clip Studio. As soon as you open it up you'll likely see a lot of very familiar backgrounds that are often used in romances, isekais, and period pieces. It's literally the go-to spot for Webtoon Originals creators. Like, to the point that I wouldn't be surprised if Naver was partnered with them because of how many of their creators use it.
Second, there's plenty of up-to-date evidence to support the fact that Rachel doesn't exclusively stick to one software, sometimes she's drawing in Photoshop, sometimes she's drawing in Clip Studio Paint, sometimes she's drawing in Procreate. She's undoubtedly using Clip Studio for her paneling, speech bubbles, and backgrounds, as there are built in tools to utilize and convert 3D materials into lineart, among other features that are recognizable as coming from CSP because they're not available in PS or Procreate.
Third, yes, she just uses filters to turn her backgrounds into lineart, this has been apparent since S1. The only backgrounds she's ever 'hand drawn' were the ones involving lots of nature and even those are mostly just Photoshop brushes stamped on.
Like I realize I'm probably bursting your bubble here and I apologize for that lmao but these buildings were never hand-drawn, this is not new information ( ̄﹏ ̄;) I appreciate you mentioning your own experiences with it as you're learning it though, I find once you start to learn the process yourself you really start to notice what others are doing. Even I've gone through that over the past couple years as I started to use 3D models and more advanced tools specifically for drawing webtoons.
I will mention btw, there's nothing wrong with using 3D models for your character drawing and backgrounds. The only time it tends to get frustrating is when you're reading a comic that isn't making any attempts to blend the background in with the art style.
Like, The Kiss Bet probably uses 3D models to help with perspective and laying out scenes quickly without second-guessing, but you can tell they still hand-draw over the models because they look natural and like they belong to the comic's stylization. The characters don't look out of place sitting in a living room and the living room doesn't look distracting.
But then you get stuff like Lore Olympus, Let's Play, and Midnight Poppy Land, and it becomes a bit more obvious they're not giving a shit about backgrounds lmao


I get it, WT's deadlines are cutthroat as fuck, but if it's getting to the point that you have an entire team behind you and you're literally just copy pasting video game models from Phantom Hourglass, then it's probably time to re-focus your priorities a bit. There are comics with as few as 1-2 assistants (and even in some cases no assistants at all!!) pulling off backgrounds better than this, even when they're taking shortcuts.
(Nevermore and City of Blank)
But a lot of that does come down to how WT manages its expectations as well as support for their creators. The deadlines and requirements WT puts their creators under are insane and awful in the long-term, and they're not acting with the amount of professionalism they ought to be for a platform that's trying to breakout as a major publisher here in the West. I feel like it comes down to WT loosening the choke chain around their creators, but also creating a standardized level of quality to ensure it's not suffering for the sake of quantity. The traditional literature industry has real editors and stages of quality control for a reason, whereas WT is more interested in just throwing as many series at the wall and dumping all their stock into the ones that stick.
#lore olympus critical#lo critical#webtoons critical#antiloreolympus#anti lore olympus#ama#ask me anything#anon ama#anon ask me anything
90 notes
·
View notes
Text
Eighth Tumblr Post!
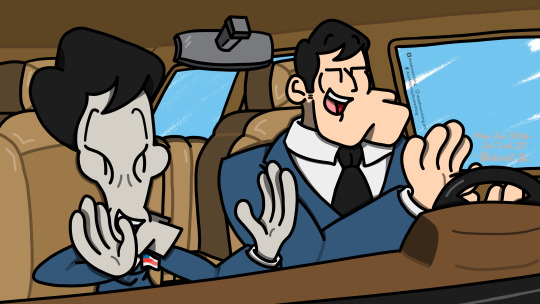
In order to better my knowledge on filmmaking, I've recently decided to start taking some classes at my local community college. Most of it has involved reading the class assigned textbook and taking notes off a Canvas LMS page, which is where this illustration was born. For whatever reason, at least one resource link provided was to a Wikipedia page on a topic, types of camera lenses, I believe. For whatever reason, I decided to start typing random page names and eventually found myself at Roger Smith (American Dad!) and Morrigan Aensland (Darkstalkers)--the mere existence of which was incredibly funny in the sleep deprived state I was in at the time. It was then and there that I decided to draw the unlikely pair, starting with Morrigan as a practice piece since, while I love the Darkstalkers games, I think I like Roger just a bit more.
Since it's my second favorite of Roger's personas throughout the series, I decided to use Stan Smith from the episode Home Adrone. I also thought it might be kind of cute to frame this as if it was part of the intro sequence, putting Roger next to the real Stan. After the reintroduction to fully digital art that the last piece was able to give me, I was a lot more prepared and thoughtful with my approach when it came to my rough sketch. I broke my reference images down into basic shapes and lines and modified them as needed. Things were going fairly smoothly for me until, in an act of drowsiness, I accidentally clicked Control+Q on Photoshop and clicked "No" when prompted to save my file (since I thought Photoshop just was asking me if I wanted to quit.) I audibly yelled out "NO!" and jumped as I realized what I had just done right as the program closed, I tried for about 20 minutes to get my file back, but was only able to get the steering wheel and Stan's torso restored. I spent the rest of the night redoing the rough sketch and ended up going to bet at around 12:50pm. On the bright side, I was able to better configure my layers and make the rest of the process a lot easier later on.
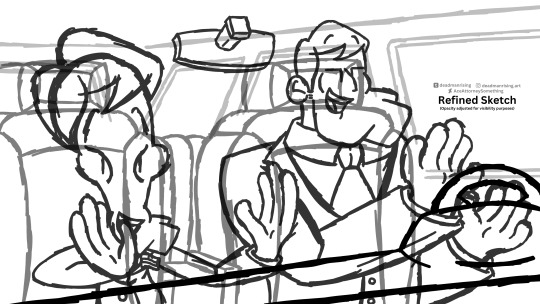
The next day, I worked all morning (or at least the couple of hours I had before needing to hop on a Zoom call) working on the refined sketch. I added both Roger and Stan's facial expressions, their suits and ties, in addition to giving a bouncier more fluid quality to all three seats in the van. It was also by this point that I realized Roger's face was going to be partially covered up by his left hand, although I didn't really mind because it isn't too obtrusive, and you can still tell he's pretty happy. Sorry if this section (and the next, for that matter) felt a little short, unlike last time, things went pretty smoothly for me after a the rough sketch.
I was honestly feeling pretty good about myself as I came into the final line art stage, I've only been doing backgrounds for school projects in recent times, so to produce my best one yet because of the different circumstances does feel somewhat nice. I continued to make modifications wherever I thought it was appropriate, particularly in the characters, because I still wasn't the happiest with the results that I got from the previous sketch. I soon got to coloring and rendering, which was honestly the shortest and smoothest experience I've ever had in with the processes. I find it somewhat funny that this Roger illustration (painful beginning, relaxing middle to end) has followed a bizzarro experience to my Morrigan illustration (relaxing beginning, painful middle to end.) It's sort of like the Wikipedia pages that started it all, the succubus' being all about development and reception, and the alien's about personality and plot relevance.
This brings me to the end my little Wikipedia and sleep deprivation induced journey. I'm really proud of how this came out, especially for my first attempt at a "for-fun" background in nearly 3 years. Although it's not perfect, I accidentally gave Roger teeth and could have tried a lot harder with the background past the van. But I'm still happy with the final product, and seriously wish to keep improving.
I hope you enjoy it, and any and all constructive criticism is welcome!
#photoshop#artists on tumblr#00's#photoshop art#digital art#digital drawing#american dad#roger smith#stan smith#fan art#fanart#fanart digital#digital fanart#roger the alien
6 notes
·
View notes
Note
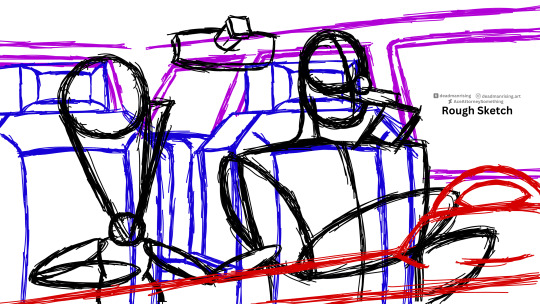
have you developed the RinNazu fake dating plot any further? I just reread your comic where Nazu is like "ohhh he doesn't know" at the end and I'm like. Who's gonna tell him
HAIII OOMF^_^)/ first i'd like to apologize for how its taken so long for me to answer ur ask i've been doing a lot of thinking and searching related to my fake dating idea hehe
i documented out how i wanted things to go in the tags of that post so there is that condensed summary :0
after i made the comic, i did some writing too since rambling in the tags wasnt enough to satisfy me hehe (my doc hasn't been touched since that day😢)
i have no memory why but i planned for nazuna to find out thru crazyb. i think the idea was to shake things up a little by making a huge deal out of the situation—hence why crazyb r acting as wingmen?—and blowing it out of proportion as a gag of some sort

^ thats all i have for that section ... i didnt leave myself any notes regarding what direction it was supposed to go in next BUT it was definitely going to be the confrontation between rinne and nazuna and their new relationship status.
nazuna gives rinne the chocolate bouquet and the two of them end up snacking on it as theyre shown the photoshopped image that caused the rumors to spiral. yup totally that
the next bit i have down is an incomplete scene based on what i drew where rinne and nazuna are preparing / scheming on what to say when they are asked about pre-relationship stuff

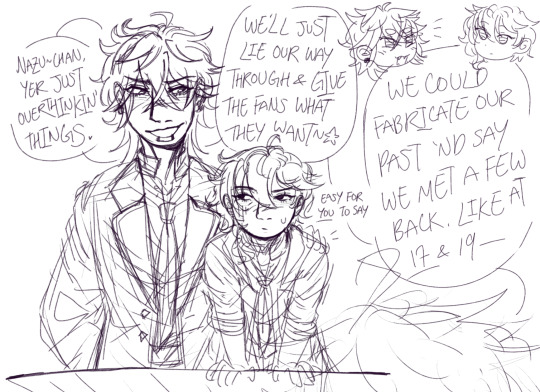
the "ohhh he doesnt know" bit is about the ages rinne suggests for their supposed "first meet." 17 and 19 does NOT work, especially not when that was when #the war was taking place. rinne suggested 17/19 because that was when they were both involved and known in the idol industry. nazuna has no plans of informing him about what happened at yumenosaki during his 2nd yr since rinne is someone he just got acquainted with (in this setting).
so nazuna politely rejects rinne's plan and just tells rinne to follow his lead when theyre out there. or something. which rinne is like "no promises ☆" since he doesnt follow anyone elses lead. but this sorta situation is kind of serious. which takes me to the interview itself. hehe.
i planned on writing 2 versions of the interview: a transcribed version of it (script format) and a properly written scene.
this 1 here is the incomplete transcribed interview:


(on nazuna correcting himself on what suffix to use for his unitmates and friends, i based his behaviour on canon since hes strictly formal on camera. i also rmbr reading a translated ra*bits interview where he corrected himself from using -chin + the nicknames he used on his friends) :3
i didn't get anywhere writing the properly written version so this is all i have:

i also planned on writing a rinnazu reaction scene to the interview but i only got so far...

with the interview, their answers were supposed to hush the rumours a little and hopefully things would die off. which was wishful thinking coming from nazuna because given how popular crazy:b are, it's hard to not talk about them without bringing up the latest gossip (which, here, becomes, "omg didnt u hear that rinne is dating a member from ra*bits? i didnt think that was his type!"). also. nazuna responding with, "one thing led to another," gave birth to chaos and discourse all around. honestly, they were doomed from the beginning
why not turn down the interview? why not tell everyone that what they saw was fake? the higher ups saw an opportunity and wanted to milk it.
so, with rinnazu being the talk of idol town, they end up doing collabs for work. like getting the opportunity to work on game shows together or to host tv programs with one another. one too many pr stunts r pulled by cospro and rhythlin. brings in good cash LOL
during the breaks of these programs, along with whatever time they spend alone together to plan for future collabs, they...... get closer to each other, show and digest each other's charming points, and say accidentally romantic things 🤯 <- is wearing a hat that proudly displays "I LOVE CLICHES" in bold
the confession...... it starts with a, "i dont know if i can do this anymore," from nazuna. rinne stops talking or whatever and becomes serious. like no thrill chasing mask—he's listening for real. he turns around to face nazuna !!!!!! so now, theyre looking each other in the eyes! rinne predicts, oh hes gonna say we should quit doin' this and tell everyone the truth, and is tense(?) at that idea because he doesnt want to stop spending time with nazuna; because rinne likes nazuna. but then nazuna goes, "i like you, rinne-chin. i mean it. i want us to start dating for real." or something like that. cue shoujo sparkles
the climax of the whole fake dating concept is rinne and nazuna actually falling in love with each other. as it should be. which is also why they break up publically. purposely. the goal of that is to get everyone off their backs so they can date in private bc i think privacy is what they both value (which is a small something i touched upon in the interview section). they put an end to the dating story they sold to the world and rebuild it by entering a real romantic relationship with genuine mutual feelings. yay
anyway ! wow that was long—sorry for all that word vomit 🙇♂️ thank youuu for sending in this question my friend and for letting me ramble about my silly au ^_^)o♡
2 notes
·
View notes
Text
Whether you approach arts and media as a creator, a fan, a professional, or a hobbyist, you are probably very well aware of the rapid growth of AI in many areas of creative life and the conversation surrounding it. Whether we are talking about fiction or text of any kind, visual arts like painting and drawing, music composition and performance, sound design and audio editing - in all of these fields AI is something we now have to deal with, and there are many unanswered questions. How do we protect our livelihoods and practices as artists? What control can we have over our own work and its incorporation into machine learning tools and datasets? How do we as lovers of art and music determine if what we are reading, watching, or listening to is made by humans? Or how do we denote the particular degree of involvement of humans in a work of art?
It’s a complicated issue because it can be hard to say exactly where to draw the line. For example, well before the current conversation about AI, composers like Brian Eno were incorporating generative and algorithmic elements into their work. Does this mean such work is not “essentially human made”? Does it matter if the non-human components of a piece are created by randomness, or by natural elements gathered in e.g. a field recording, vs. being created by a computer program?
Those kinds of questions are more about the philosophical side of the issue. There are more pressing questions to do with how AI affects our ability to actually survive as artists. And, as the technology grows more powerful and the distinction between AI-generated or AI-enhanced material and human made material or basic documentation of reality itself, what methods do we use to signify that a given piece of media is or is not AI made, and what are the exact qualifications of that? Should the label “AI art” apply to work that is entirely generated by a computer, or should that label also be applied to any art that uses AI tools in any context - e.g. the new tools in Photoshop that make it easier to remove a specific object from an image and fill it in with background. What about the world of video games, where AI has been used for decades for things like pathfinding but is new and controversial when it comes to using it for story/dialog elements or certain visual assets?
We are, I think, still very much in the early days of all this, so it’s hard to come up with firm answers as the field changes so rapidly, but this is an essential conversation to be held now. I’ve been talking to a friend who put together a survey for an organization called Verified Human, who are looking specifically into the issue of how do we determine - going forward - whether a piece of art or media is “essentially human made”, and the question of how that should be communicated.
The idea of this survey is to gather as many points of view as possible for this conversation. I know a lot of the people that follow me here are artists and lovers of art, of all different kinds, and to me it is absolutely essential that creators of all kinds be involved in this conversation from early on. Please take a few minutes and fill out the survey via the link below, and if you are interested in helping out, please spread the word. And if you have any questions or would like to discuss, please feel free to contact me directly. Thank you.
https://forms.gle/BrSbGyq9wAyzwTa88
#ai#ai art discourse#ai art discussion#ai art theft#chatgpt#gpt 4 ai technology#verified human#ai art community#artists on tumblr#musicians#writerscommunity#writers and poets#writers on tumblr#fan fic writing#fan fic art#sound design#disparition
68 notes
·
View notes
Text

another little update on the Loyalty animation: most of the key frames have had a first pass at this point, there's a couple of scenes that I wanted to revise a bit more drastically - parts that I think I could make a bit more visually interesting, one section that was originally a scene with FP and Void that I completely scrapped for one with Exe, just because it wasn't very inspired and Exe doesn't show up in any other scenes so it was a good opportunity to include her.
I think doing a more involved animation project like this is a good way of having to assess my process and think about how to streamline it, what more I could do in advance to make things easier and generally get into the groove.
Because of how photoshop works with timelines essentially knocking other things out of place, lacking onion skin/lightbox features (there's technically a plugin for this but I couldn't get it working) and how adding layers to the timeline starts to make it incredibly hard to manage and cluttered, I wanted to in essence finish each section both chronologically and all at once, so it wouldn't knock the other pieces out of time. Working lineless on the Mother Mary animation, for instance, was in part a practical choice so that my clean take would also include all the colour and minimise the amount I would need to mess around with PS's irritating video timelines.
But it is nice to have a program like Krita where I'm not limited in that way and it's easier to bounce around to different parts and modify them as I please, it's easier to compare each part, the timeline is miles easier to manage and gives a lot more options. It also means I have more to think about with how I approach it.
Because it gives me more to work with, I should be thinking about ways to tackle layout that make my life easier... and it's also good that I won't have to deal with being stuck at a bottleneck if one particular part is giving me grief.
4 notes
·
View notes