#ideally sew that and part of one of the pieces i need to make for the theater
Explore tagged Tumblr posts
Visit Tumblr Blog
Explore Tumblr blogs with no restrictions, modern design and the best experience.
Last Seen Tumblr Blogs


Fun Fact
In 2020, 27% of US Tumblr users had an annual household income of over $100,000.
Note
Hey love ❤️ hope you’re doing good
Can I request Tommy with a gentle, empathetic and sensitive reader please. It was an arranged marriage and he found out his new wife would cry herself to sleep over a book she read or just a cat. His reaction to someone who is completely opposite of him
Thank you in advance ✨
Tommy with a wife who's his complete opposite

A/N: Hey baby, thanks for the request!! I'm doing good and I hope you are too ❤️ I forgot to put on the requests post to specify if you want it as a fic or headcanons so I've made it sort of a mix of the two, hope that's okay anon. I made this blog to try and improve my writing skills and as this is my first attempt it isn't the best, so sorry about that lol. Hope you like it!! (this is set sometime around series 1-2 cause those are my fave)
It was an arranged marriage and to be honest... you weren't particularly thrilled by the notion of being married to Birmingham's most known and feared gangster. But you would do anything for your family and if your father decided that this is what would be best for securing the future of the family then you'd follow through on your part of the deal, even if it seemed like you and Tommy had absolutely nothing in common.
This was a couple months ago now and you had somewhat settled into your new life in Small Heath and with Tommy by your side, the two of you living in comfortable tandem. You had settled into a routine and life was good, or as good as it could be with the risk of being married to a Shelby.
He would buy you any book that you so much as happened to glance at and in turn you would patch up and sew back together any unfortunate pieces of clothing that got in the way of Tommy and his dangerous life style and work, fighting back tears and worrying at your lower lip as you did so. You may not quite understand why he was constantly putting himself in danger but he was your husband all the same and you had grown to love him as your marriage progressed
you would also force him to go and see an actual trained medical professional whenever he came home with said ruined clothing, as a dead husband is less than ideal and you have grown attached these last couple months
Your empathy and tendancy to cry over him when he got hurt was a shock at first but he quickly got used to it, he even tried to avoid getting hurt just so as to not have to see you cry over him
He may not say it outright but he appreciates everything you do and how much you care for him
He doesn't like to keep secrets from you but he doesn't share all aspects of work life with you as he doesn't want you to worry too much, but if being kept in the dark would worry you even more he'd make an effort to keep you in the loop
Your gentleness and compassion is a welcome contrast to his life from before you were apart of it, Tommy didn't know that he needed it before you
If there's one thing about Tommy Shelby, it's that he protects what's his and as his wife he treats you with the utmost care (especially if you have a tendancy to seek out the good in all people)
One night when Tommy (finally) came to bed he found you curled up in a ball on your side with your back to the door, tears gently running down your smooth cheeks
Unsure of what to do when confronted by your distress but still wanting to help, he'd rush to your side and scoop you up onto his lap, holding you close with your tear-stained cheek pressed against his chest and an arm thrown protectively around your shoulders. He'd cautiously rock back and forwards whilst his hand moves slowly up and down your back in what he hopes is a soothing motion. He's a little awkward and stiff but damn if he isn't fucking trying
He'd use his forefinger and thumb to tilt your chin up and force your eyes to meet his own before softly questioning you on why you were crying
"What you crying for, hmm love? Ruining your pretty face"
He'd say, wiping away your tears with his thumb
Upon hearing that the reason for your tears was a sad ending to one of the books he bought you he'd be a little taken aback and he would honestly have to suppress the urge to laugh
It all seemed rather silly to him that you'd cry over some words on paper
"Tommy it isn't funny, it was really upsetting" you'd hiccup out through your tears
he'd just shake his head and sigh, apologising, before pulling you closer, finally laying down on the bed with your legs intertwined
Tommy had hoped it would be a one of chance but when he caught you crying in bed again over the ending of Of Mice and Men, he very quickly figured that he'd have to adapt
Tommy developed a system for when you had your... shall we say moments, he'd sit down on his side of the bed with his back pressed against the headboard before he lifted you up and placed you in-between his legs
Sitting you so that your back was resting against his chest and you could feel his heartbeat
You would then explain to him the sad moments in your books as he softly hummed and nodded his head along to your words
And when he got tired from your quiet voice lulling him to sleep he'd pull you down with him as he laid on his side, caging you in against his chest with an arm around your waist
Those were the nights that he slept the best
#tommy shelby x reader#tom shelby x reader#thomas shelby x reader#peaky blinders x reader#tommy shelby#thomas shelby#peaky blinders#peaky blinder fanfic#peaky blinder headcanon
2K notes
·
View notes
Text
The Why of Sewing 1: Fabric Anatomy (Woven)
This is the first in a series I am starting that is going to talk about concepts in sewing and fiber arts and try and explain some of the whys behind the hows.
The first thing anyone should learn about sewing is the basic building block of what fabric IS. There are two basic categories for fabric: Woven and Knit. Today I am writing about woven fabric.
When you buy fabric you typically get a big rectangle of fabric - there will be two edges that ether have a clean edge, or a soft fringy edge that does not fray. These are the selvedge edges. Perpendicular to that will be two cut edges, which will almost certainly fray easily. Below is a collage showing a few types of selvedges.

Woven fabric is made with threads running in two directions at a 90 degree angle to one another. Below I have linked to an episode of How It's Made which shows fabric being woven in a factory.
youtube
The threads that runs parallel to the selvedge edge is the warp, these run the entire length of the piece of the fabric as it is manufactured on a loom. When fabric is cut on grain it is cut with the grain line on your pattern piece parallel to the selvedge edge and these warp threads. This direction is typically the most stable way to cut a woven fabric.
The threads that run perpendicular to the selvedge are the weft threads. The weft threads traditionally are held on shuttles and passed back and forth from right to left on the loom. Modern looms have changed the method for passing the weft from left to right drastically (usually air jets are used) but the position of the threads have not changed. Cutting in this direction is called cutting on the cross grain. It has more stretch than cutting on grain but in certain situations it might be a good idea to cut on the cross grain (and other situations where it is a poor choice).
If you cut at at 45 degree angle from the selvedge you are cutting on the bias. Bias can make fabric do really interesting things. It stretches, and for the most part does not fray. It is very useful in strips for binding and bias cut dresses drape and cling to the body beautifully. Because cuts on an angle (any angle, but 45 degrees will do this the most) stretch it is important to stay stitch curves and angles and handle them carefully.
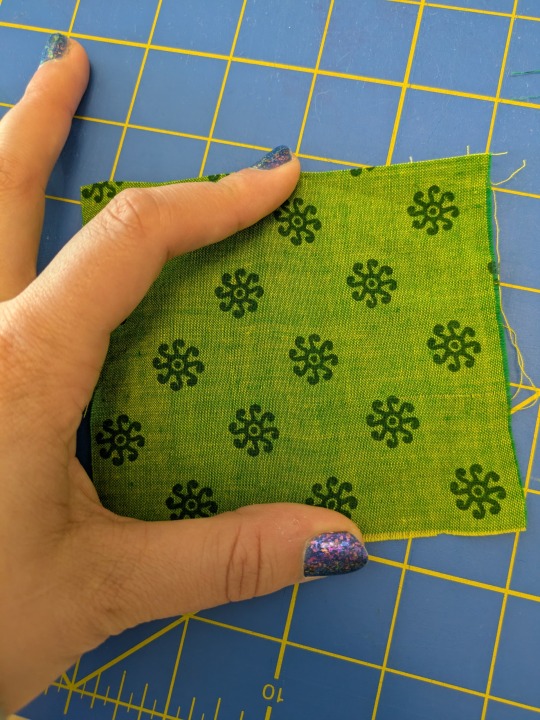
As an experiment take some woven fabric, a quilting cotton would be ideal for this, and carefully cut a small square with two sides running parallel to the grain. Tug on it on grain and cross grain and see if you can feel a difference, then tug on it from corner to corner. Pull some threads from the straight edges and see how the fraying looks. Then cut from corner to corner and try and fray it along that edge.
Below is fabric being stretched on grain. It stretches very little.
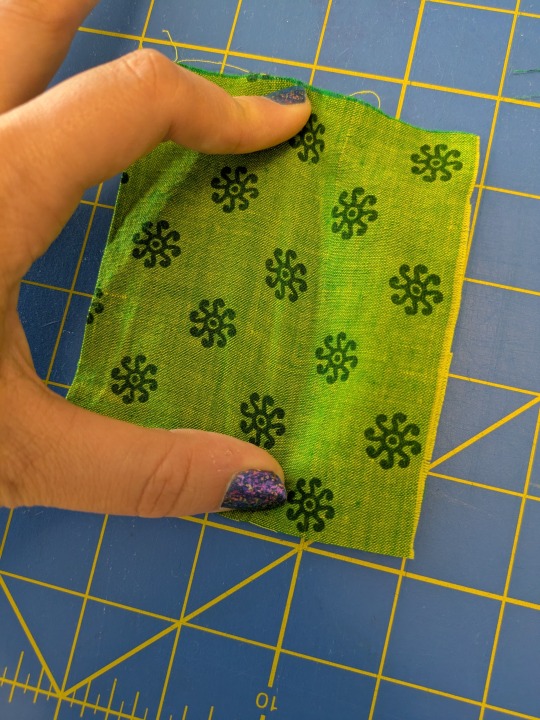
On the cross grain you get a tiny bit more stretch.
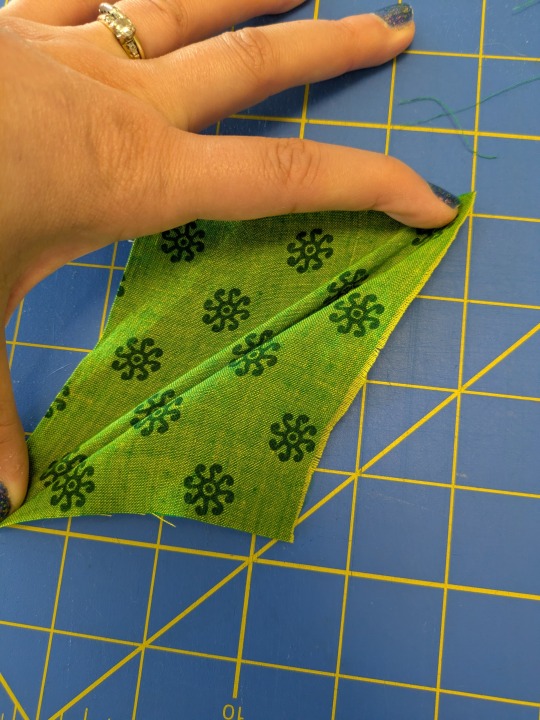
And on the bias...
As a sewist you can use all of these properties to your advantage.
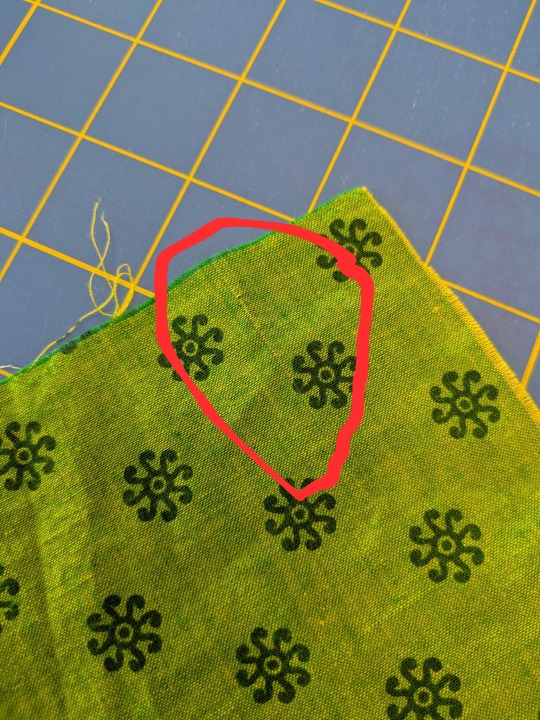
But friend! What if my fabric doesn't have an intact selvedge edge?
If you have a woven in stripe to your fabric your job is easy. Just follow the lines (a printed stripe will not always match the grain). If you don't have that what you need to do is look closely at your fabric, use a magnifier if you need to. If it is a loosely woven fabric take a pin and pull out a thread. You will see a line you can follow. You might end up on the cross grain by accident, but usually the warp is easier to pull a thread from and you might be able to feel the differences in stretch as well.
Ultimately for MOST sewing practices just following the general grain *pretty* well is good enough. You do not need to spend hours determining perfection, but learning to identify the grain and use it to your advantage is a huge part of learning to sew.
Please feel free to share, let me know if this was helpful, and ask any questions if something is unclear.
#quilting#sewing#sewing tutorial#fabric#textile art#sewing tips#sewing techniques#the why of sewing#fabric grain#Youtube
51 notes
·
View notes
Text
2025 Cosplans & Breakdown
I keep changing my 2025 cosplay plans so uh. let's write them down and post them to tumblr so i can be held accountable <3. I will (hopefully) be editing this as I go and reblogging with finished pieces :333. The breakdown is mostly for my own sake, it really helps with trying to not get overwhelmed if I break each bit down. Swapping my Biana Vacker cosplay for a medieval Harrow (the ninth). I still will do Biana eventually, I am just not feeling it right now and I would need a lot of motivation to be able to finish that project (that jacket. no. not right now).
Cosplay #1: Tails (Sonic; Group Cosplay)
Doing this as part of a group cosplay (with @/bloop-im-a-frog-now & @/mikhailovv ), so it is higher priority! It has to be done for Fan Expo Canada.
Parts:
Ears (crochet [Freehand pattern] + headband) - Done
Tails (crochet [freehand pattern]; figure out how to attach to belt; maybe wire? to keep shape better; figure out a way to store it conveniently)
Rings (wooden, paint gold. got enough for the rest of the gang, maybe make little belt clips with nametags?)
Fix hem on mustard skirt - Done
Fix brown hip bag, maybe make a second one?
Acquire & style yellow wig (in a pinch, use Adaine's wig)
Acquire & modify a brown jacket (ideally not leather, instead fabric because. I don't want to boil). Modify it in a way that works for both this and daily wear/my day-to-day-style
Acquire steampunk goggles [i don't think i can make these] - optional, would be cool but not necessary
Figure out shirt situation - in a pinch, my white scrimmage shirt should work if I have the jacket
Because this is a group cosplay, I will also be making some very casual elements for my mom so she can join us. I'll probably just make a little sonic patch that she can put on a baseball cap or something since she doesn't like to have a lot to think about in terms of outfits/cosplay.
Cosplay #2: Medieval Harrowhark (The Locked Tomb)
I mentioned a while back that I had plans to do an 1890s Harrow, and I still do. I am nowhere close to having the skills to do that, so I feel that this will still get that itch out, expand on my skills and allow me to explore a wide variety of new techniques. To the best of my ability, I will be trying to mostly hand-sew/time-appropriate techniques because I am that kind of person lol :p. I am interested in historical recreation so this really will end up accomplishing two things at once. I also do realize this will. Just make me look like a nun but that's okay (I mean. Harrow is one so it's fine :p). I hope to compete in my first ever cosplay contest in this one, so aaaaaaaaaaaaaaaaaaaaaaaaa.
Parts:
Plain black kirtle
White/off-white overdress. [Basically, make it like the kirtle but without sleeves and no gores (slit up the sides where the gores would be, to allow access to belt/bags). Embroidery (maybe cross stitch?) of the nine houses skulls along the border (9 on both sides, make two of each). Unsure of how I'm going to do the ribcage. might do it like later style lace-insertion with a different fabric]
Nalbinded knee-high socks [wool, mostly just an excuse to try this craft out, but also its historical and cool!!!!! will be making it orange/pink/white because. lesbian space necromancers and they're not visible to everyone else. also orange for gideon if i really need to justify it further :P edit: local yarn store didn’t have a good pink that I liked, so I only got orange. It does really match Gideon’s hair though :)]
White shift [optional, if time. I could do it as the mockup to the black kirtle hint hint future me, would also save on fabric. whatever colour i pick for the overdress should be the same as this]
Black garter strips [Can be plain out of kirtle fabric if have no time, but embroider them with fun designs or quotes if I have time! Orrrrr if have time, some tablet weaving !!!]
Black headdress/veil [same fabric as kirtle]
White under headdress/hair protector [either scrap fabric, same material as overdress/shift. make this early and practice tying hair properly in advance of con]
Either acquire or make a skull bandana/face mask cover. [leaning towards make but will buy and make properly later if pressed. this is to compensate for bottom half face paint since I mask. which. sidenote. remember to get face paint lol]
Either make a black corded belt (tablet weaving) to hang things or use the brown leather belt that I use for Adaine (time dependent, not pressing)
Find shoes that are at least semi-appropriate lol. tbh just some plain black shoes that i could wear otherwise is good too at this point.
Skull rosary (editing to: probably going to do this with bought silicone beads (doing alternating skull/round to spell out "one flesh. one end" in morse code) because the idea of sculpting a skull out of clay makes me wanna cry lol. But i will do something fun for the end bead to make it look more like a rosary. unsure what yet, will probably be some form of salt dough medallion painted)
6 notes
·
View notes
Text
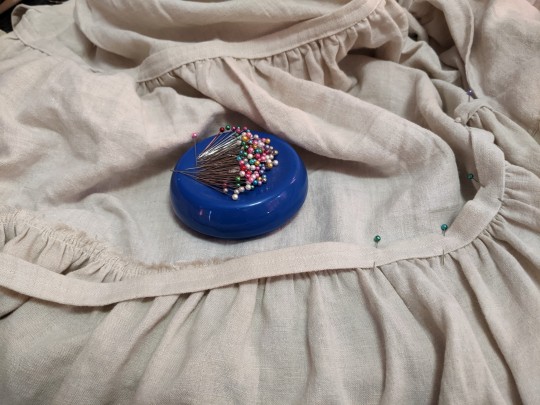
It's been almost two weeks since my last sewing update, but I have been making progress on a couple different projects, thankfully. I mentioned in my last post that I was hesitant to cut into a king-sized 100% linen bedsheet that I've been hoarding for 10+ years. I knew I wanted to make an apron, but I also knew that it wouldn't take up anywhere near the whole sheet, and I had the thought that I might be able to get two projects out of this one sheet (and the remnants of the matching fitted sheet) if I was careful about how I cut out all my pieces. Possibly a gathered tiered skirt/petticoat, along with the apron.
I measured the two long sides of the flat sheet that had identical ~1.25" deep hems, and I found that each side was 112" or just over 3 yards long, not counting the top and bottom hems. That meant if I did side seams, I could get a 6 yard wide bottom tier for the skirt and not have to do a hem at all, just use what was already there. Not the widest hemline on this kind of skirt (I have a purchased skirt with a 25 yard hem, and years ago I made a 26 yard tiered skirt out of muslin), but with this heavy weight linen it felt like 6 yards at the hem would be plenty.
Gathered tiered skirts are really just rectangles and a bit of simple math. Since the sheet's side hem determined the size of the lowest tier at 224", I figured I would do 2-to-1 gathers and make the next tier up 112" wide, and the third tier up 56" wide. A fourth tier at that 2-to-1 gathering ratio would have been only 27" wide, which wouldn't have fit over my hips, so the skirt would have 3 tiers.

I'm a short girl at not quite 5'2" and I like to wear my skirts pretty low on my hips for spoonie comfort issues, so after measuring a purchased skirt whose length I like, I decided that between 30" and 33" inches in total length would be ideal. With three tiers that length could easily be divided into tiers that are each 10"-11" tall. I added a half inch for seam allowance (but no hem allowance on the lowest tier, since I was re-using the existing hem) to get the exact measurements for each of the pieces I needed for the skirt.
I was able to tear most of my pieces, since the linen bedsheet was nicely on the grain and tore relatively cleanly, thus saving my hands from cutting all those long pieces. I had meant to cut the top tier at 14" tall so that I'd have room to turn under a nice thick waistband too -- and then I totally forgot and cut it at 12" just like the middle tier, lol. I was able to get one of the middle tier pieces and both of the top tier pieces out of the remains of the matching fitted sheet, so I only needed one middle and two bottom tiers from the flat sheet. That left me with plenty of flat sheet left over for the apron, but I'll talk more about that in my next sewing post.
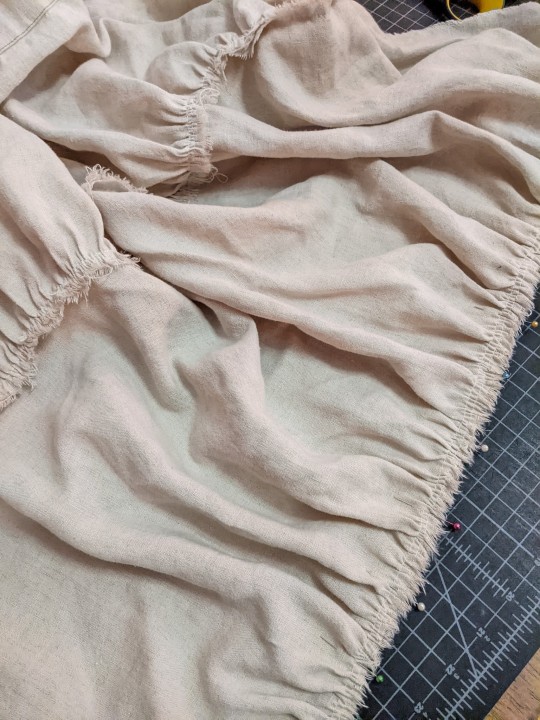
With my pieces all cut out, it was time to start the most annoying part of making a gathered tiered skirt: gathering all those tiers. I'm trying to sew with cotton thread more often these days, but for the gathers I switched back to polyester thread just for the strength. For the two bottom tier and two middle tier pieces I ran two lines of gathering stitches along the top edge, placed pins to divide each panel into quarters, and got to gathering and pinning.
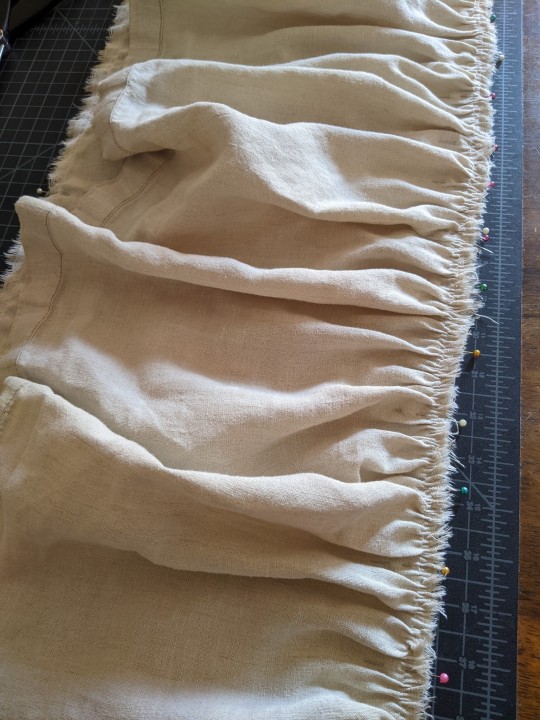
With tiered skirts I really prefer to work from the bottom up, so that I'm always attaching a gathered piece to a completely flat piece of fabric, and save side seams for last. So the bottom tier pieces got gathered up and attached to the middle tier pieces, then the middle tier got gathered up sewn to the top tier.
Since I accidentally cut my top tier pieces shorter than I'd meant to, I did play around with adding a separate waistband for the top tier to be gathered onto. But I couldn't do a full 2-to-1 gather if I wanted the waistband to pull on over my hips, and the waistband made the proportions look weird, like the top tier was too long. So I ended up cutting the waistband off after I sewed it and actually shortening the top tier even a little bit more. After turning under the top edge to enclose the raw ripped edge and then turning under 3cm (~1.2") for a waistband casing, that top tier ended up being about 9" tall, and the proportions of that look much better for some reason.
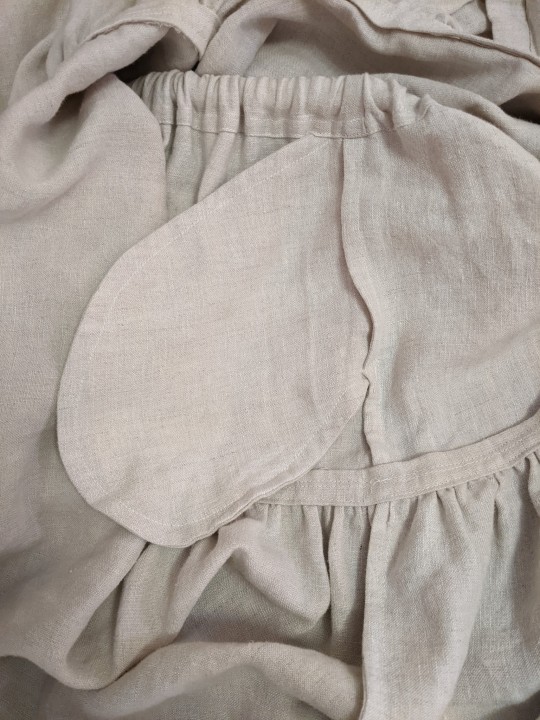
Before I sewed the side seams, I decided that this skirt needs to have pockets, of course. I knew I was planning to do French seams to protect the raw edges against unraveling, so I put the pockets in with a French seam as well.
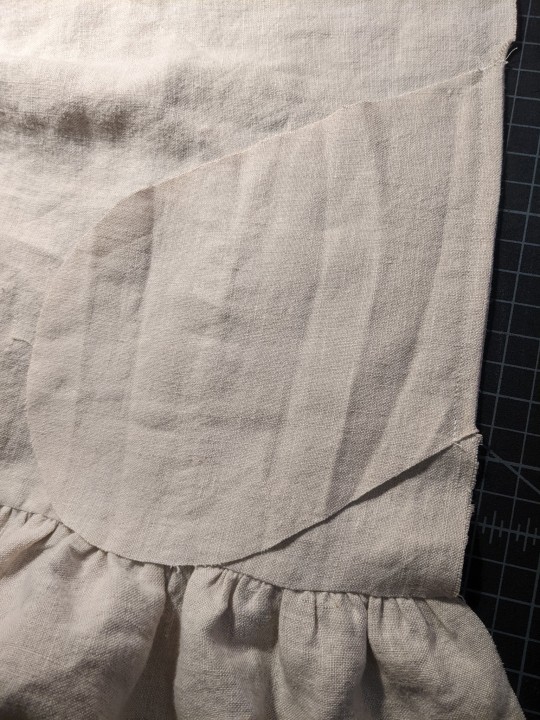
With the pockets in place, the next step was to do the side seams (including the pocket bags), being careful to match up the height of the hem and each of the tiers so everything was nice and clean and square. Then I was able to turn under that waistband casing and sew it in place -- my original plan had been put in three separate channels for narrow elastic that would result in a bit of a faux-cartridge pleating look, but actually getting the elastic strung through there turned out to be more of a pain than it was worth, so I ended up picking that out and just using a single 1" wide elastic band in the waistband casing instead.
And with that, the skirt was technically wearable, and with some fabrics I might have been happy to leave it there. But the raw ripped edges at the seams between each of the tiers worried me. I've had well-loved sewing projects just shred after many wears and washes because I left the seams unfinished, figuring I would be the only one to see the inside. Ideally I want this skirt to be in my rotation for years and years, so I decided to make the effort to finish those seams too.
My original plan had been to cover the raw edges inside with 3/4" herringbone twill tape. For some reason I was convinced that I had a bunch of it left over from a Wasteland Weekend project from 2018, only to discover that I actually only had ~3 yards left. So rather than ordering more and waiting for it to arrive (and then inevitably having some of that left over too), I decided to just make some 3/4" tape from the linen sheet itself. Since this whole skirt is rectangles on-grain and the tape wouldn't have to go around any curves, I made the tape from on-grain rectangles too, rather than bothering with proper bias tape.
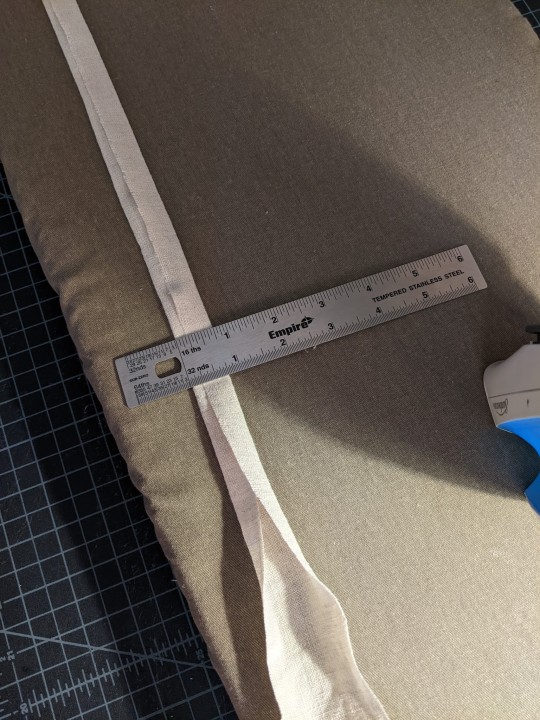
With the hem and the waistband already cleanly finished, I just needed tape to cover the ~3 yard seam between the bottom and middle tier and the ~1.5 yard seam between the middle and top tier. I tore nice straight strips, trimmed off the frayed edges, and ironed the raw edges under to give me that 3/4" width. It's three layers thick in the middle but only 2 layers thick on the sides, since it isn't a proper double-fold tape.
Then it was just an issue of pinning it over the raw edges inside the skirt -- first from the inside in roughly the right place and then from the outside to make sure it lined up with the seam well.
I stitched-in-the-ditch from the outside right where the gathers met the next tier up, and then went back and did another line of stitching just slightly up from that, using the width of my machine foot (~1cm) as a guide. That covered all the raw edges inside and reinforced the seam, and gave it a nice neat appearance from the outside.
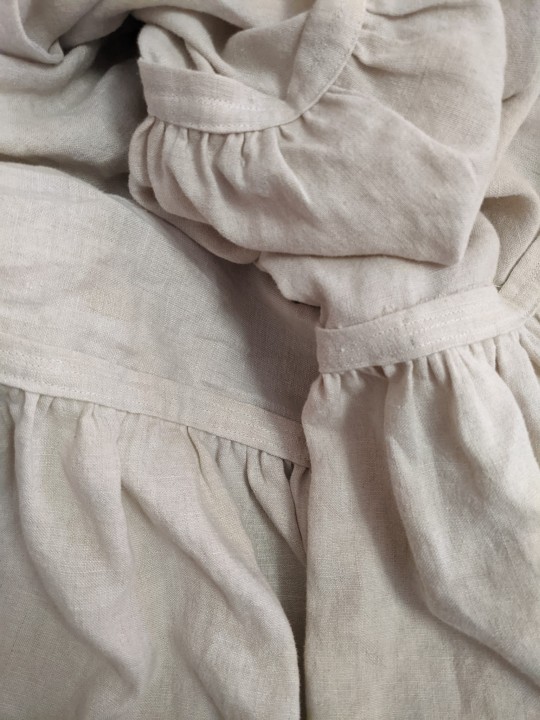
It also had the added benefit of behaving almost like cording on a corded petticoat -- the gathered seems have a lot more body and stiffness now than they did before, which gives the finished skirt a really lovely lofty structure.
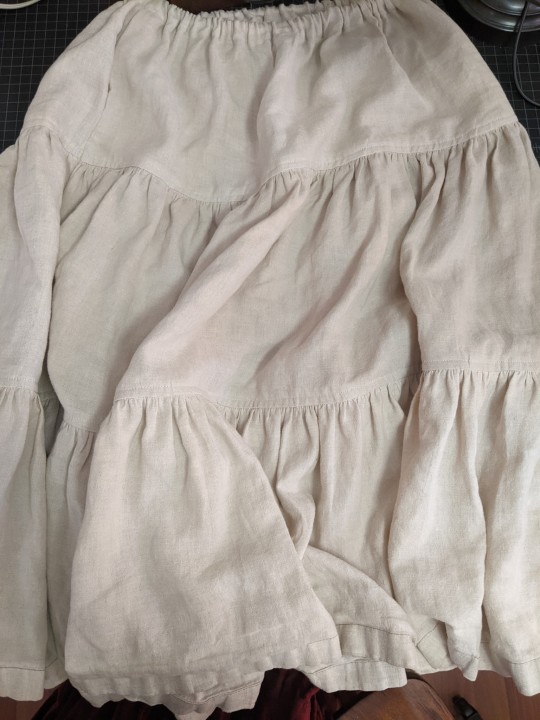
The whole skirt ended up being about 31" long, right in that 30"-33" length I had originally aimed for, and when I wear it low on my hips where it's most comfortable, it just brushes the tops of my feet.
My plan is to wear this mostly under other long skirts and dresses, more as a petticoat than a skirt on its own (tho it is heavy enough and neat enough to be worn on its own, if I want). That lofty structure from the seam finishes adds a lot of floof to my other long skirts, just barely peeking out the bottom of the purchased green skirt I originally measured to figure out the length for this one, and hiding completely under my purchased 25 yard burgundy skirt but giving it enough extra volume that it doesn't drag on the ground quite so badly.
As the colder weather sets in I'm sure this will get a lot of wear under skirts and dresses (including the several dresses I'm still planning to sew in the next couple months!), but even now in the last heat of summer it's quite comfortable to wear, since it's linen. Jack commented that it seemed like a lot of work for a skirt that won't be seen (and it did manage to remind me how much I dislike gathering long lengths of fabric), but as long as it's functional and gets used often, I feel like all the effort was worth it.
While I was putting this together, I also cut out and started assembling the apron project from the same bedsheet. Even with all those pieces cut out, I still have enough linen left over for at least one more, maybe two more projects. Next up I'm going to get to all the finishings on the apron (which will be getting its own post once it's done) and keep trucking along on the handsewn eyelets for the Lengberg Castle Bra-thing. And once those two are done, I think I just might be ready to finally start on all the dresses I want to make with my new fabric.
#sewing#tiered gathered skirt#peasant skirt#bellydance skirt#if you can sew a straight line on a sewing machine you can make this skirt#I wouldn't recommend trying to sew it by hand but it's a good beginner sewist project#the math is really easy and you can work upwards from the hem like I did or downwards from your waist measurement if you want#gathering in a 2-to-1 ratio (so the final piece is half its original width) is pretty standard but you can also do 3-to-1#bedsheets and quilting cotton are excellent options for this kind of skirt#and if you're careful with re-using hems like I did or using the finished selvedge edge of the fabric you can avoid hemming it entirely#long post#my sewing#2024 mood#linen petticoat project#linen apron project#which is actually all assembled and just needs all the hems and finishings. but that'll probably take me most of this next week I think#post on that coming eventually#and then: DRESSES
9 notes
·
View notes
Note
Hey btw if your ever in need of ranting about a blorbo/oc, this is an ask that tells your to do so. What is the most interesting thing about them? Do they have any symbolism to them and if so what is it about? Favorite ideal situation to put them in? Any romance ideas?
Anon, I want to start off by apologizing for taking EXACTLY A YEAR to reply to this! Happy One Year Anniversary! 💀😭 Obviously, I’ve been thinking about this a lot, trying to decide who I wanted to talk about and trying to put my thoughts into words. And, of course, it took even longer because I wanted to include drawings of the characters… 🤦♂️Anyway…
I’ve decided to talk about multiple characters of mine, since they are important for my upcoming comics: Boxman’s mother, father, and sister! I have some New™, Fresh™ information to share about all of them today! Hope you enjoy my ramblings!
MEREDITH (Boxman's Mother)
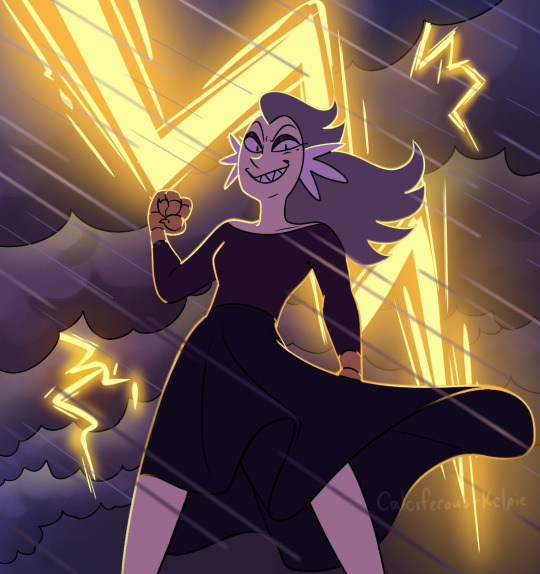
Most interesting thing: Hmm, well… the things I find most interesting about Meredith are kind of spoilers for my comics, but an interesting thing about her is her special ability! (“Every proper siren has one, darling.” 💅) It’s called Eye of the Storm, and it allows her to summon and control a raging thunderstorm at will. Obviously, this sort of thing takes a lot of energy to maintain, so this ability actually comes with a secondary feature: Meredith can occasionally choose a victim to steal the energy from, and all she has to do to steal said energy is to make direct eye contact with them. The lady’s got a mean glare as it is, but with this power on top of that? Wowza. Watch out.
Symbolism: Given my answer to the previous question, you won’t be surprised to know that I associate Meredith with storms! She is a passionate character with a wild side, and when she truly gets going, she will step aside for no one.
Favorite situation to put them in: Meredith is a complex character with a lot going on, and I don’t want to reduce her to just an antagonist… but MAN, does she make a good antagonist! 😆 I love to put her into situations in which she terrifies/intimidates other characters, and trust me, she will have a lot of chances to do that in the comics!
Romance ideas: Meredith isn’t much for romance. At least not anymore. Heron was her first love, and after her relationship with him went south, her trust in men was destroyed. (To be fair, it was shaky to begin with.) She has, however, made an attempt at another relationship or two for monetary reasons. If that even counts lol
HERON (Boxman's Father)
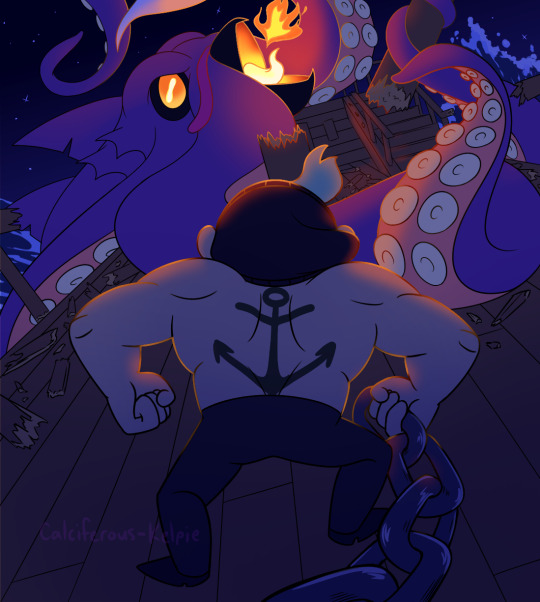
Most interesting thing: Heron has had a wide variety of experiences across his lifetime, and during that time, he has developed many, many skills. These skills include (but are not limited to): farming, fishing, sailing, cooking, baking, sewing, crochet, whittling, building, juggling, and playing the banjo! Just… don’t ask him to sing, okay?
Symbolism: Heron’s symbolism is… probably pretty obvious, huh? I mean… he’s got an anchor… tattooed… on his back… *ahem* Anyway. The anchor is connected to a lot of Heron’s positive attributes—loyalty and sturdiness being the main ones. But it is also connected to some of his character flaws and the way he views himself. In a way, Heron himself is an anchor, for all the good and bad that entails. ⚓
Favorite situation to put them in: Despite the immense amount of comic outlining and scriptwriting I’ve been doing for Siren Theory, I can say pretty confidently that any scene in which Heron interacts with Professor Venomous is one of my favorites. It’s partly due to the “meet the parents” trope, but the other part of it is that Heron is just an unusual guy who does unusual things, and having a stranger witness that firsthand is hilarious.
Romance ideas: While Heron has had his share of crushes in his youth, he has never been in a serious relationship with anyone but Meredith… and he would like to keep it that way. He still feels like he’s putting the pieces of himself back together after their messy separation.
REBECCA/SIRENA (Boxman's Sister)
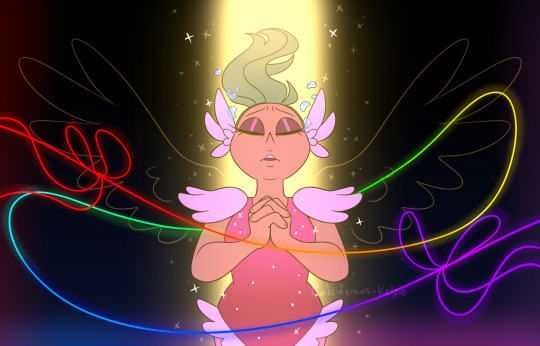
Most interesting thing: I think the thing that I enjoy most about Rebecca is the duality in her personality. She is very charismatic and graceful onstage as Sirena, but offstage, when she’s just Rebecca, she can be pretty socially awkward and kind of a klutz.
Symbolism: Some of you may have made the connection already, but Sirena’s real name, Rebecca, is a nod to Rebecca Sugar, the creator of Steven Universe and the spouse of Ian Jones-Quartey (creator of OK KO). This name was actually a suggestion by my sister (Thanks, girlie!) because she knew Sugar sang the end credit song of OK KO, and that little song was one of my inspirations for creating Sirena in the first place. Since then, the name has really proven itself to be a perfect fit for my little superstar siren! The meaning of the name Rebecca is “to tie/bind,” and Rebecca really is the character that ties her family—and the narrative of a lot of the comics—together!
Favorite situation to put them in: My favorite moments for Rebecca are the ones in which she is emotionally vulnerable. It isn’t always easy for her, but there are some things that will happen in the comics that will force her to wear her heart on her sleeve. I’m excited for that!
Romance ideas: Honestly, I’ve come up with so many ideas for OK KO that I won’t have space for all of them in the narrative, even though I’m planning to create, like, 19 comics! 😂 One of those things that won’t get a lot of time in the spotlight is Rebecca’s developing romance with a certain someone. That being said, it wouldn’t be a big spoiler for me to say… Plazecca! 🎵
Thank you so much for asking, Anon! Truly, you have enriched my enclosure. 💖
#ok ko#ok ko fanart#ok ko let's be heroes#ok ko oc#siren theory#fan characters#cal's fcs#boxman's parents#heron#meredith#lord boxman#rebecca#sirena#dj plaz#plazecca#cal screeches#cal answers#cal's art#cal shares a thing#anonymous
41 notes
·
View notes
Text
Between moving and performing in a show I didn’t know if I’d have time to finish this, but I did!!
Recently there was a LockNation meetup, and since I didn’t get to go I applied to be a part of the Pocket Friends challenge!! I had to come up with a case with certain stipulations, so I ended up writing a fic for it since that suits my skills! It’s a very cracky self insert but it was honestly a lot of fun.
My stipulations were:
-I was paired with Lucy
-the Visitor was a Limbless
-the weapon of choice was salt
-I lived in the end
This was so fun and goofy and I hope y’all like it!!
And for fun: here’s a video of me running in heels and firing a gun while performing at Disney World (this comes into play, I swear)
“Well, that settles it, then,” Lockwood said. “Lucy, you’ll have to go with the new girl.”
Lucy leaned back to glance into the kitchen at the aforementioned new girl. “Are you sure about that?” she whispered.
“Yeah, she doesn’t seem like the ‘in the field’ type of agent,” George said.
“Holly wouldn’t have recommended her if she didn’t think she’d be a good fit,” Lockwood said. “Come on, let’s ask her.”
Lucy still had her doubts. The new girl was filling in for Holly while she was on leave taking care of her elderly grandmother in Brighton; so far she had proven very capable when it came to scheduling meetings, tidying up, and cooking when George was busy (although there had been a brief incident when she made something called biscuits and gravy, she had hastily explained it was a popular dish where she came from and it did not involve anything sweet). But there hadn’t been any plans to involve her in active cases.
The three of them trooped into the kitchen. The new girl was sitting at the table mending a torn pocket in Lockwood’s coat with a novel propped open against a teapot shaped like a cottage. Between the sewing, her floral sundress, and the bow in her hair she made an oddly domestic sight in the midst of a coil of newly oiled chains and an unopened box of salt bombs.
“Oh, hi!” she said as she caught sight of them. She took another careful stitch, then paused. “Everything okay? Y’all look a little…stressed.”
“We’ve had an unexpected change of plans,” Lockwood said. He cleared his throat. “Kate, was it?”
“Caitlin, actually, but I’ll answer to Kate,” she said cheerfully.
“Caitlin,” he said. “We, uh…well, Kipps can’t make it tonight but Lucy will need some backup, so…would you mind filling in?”
Her eyes widened behind her glasses. “Oh,” she said. “Oh, boy. Uh…are you sure about that? I’m better suited to things like-“ She gestured at her sewing kit. “This is more my speed. I’ve got big Wendy Darling energy. Are you sure you need me?”
“It’s supposed to be Type Two but not a particularly strong one,” George said.
“I just need backup,” Lucy said. “I’ll handle most of it. What’s your Talent?”
Caitlin stuck the needle into the fabric of the coat. “Mostly Touch and a little Sight, not great with Listening.”
“How are you with a rapier?” Lockwood asked.
“Uh…not great,” she said.
“What grade do you have?”
“I was a theatre major?” she offered. “Did Holly give you my resume? I, uh…I’m not really ideal for combat situations.” She rummaged through her pink backpack and pulled out a slightly crumpled piece of paper. “She said you would mostly need me for cleaning and administrative stuff and a little bit of cooking. Which…I’m very good at organizing and I do like baking, but I’m more the anxious homebody type than the cool athletic agent type.”
Lucy leaned around Lockwood’s arm to scan the CV. “Why does it say you can run in heels while firing a gun?” George asked curiously.
Caitlin adjusted her gold rimmed glasses. “It’s a good conversation starter,” she said. “And also, I, um…can.”
“If you can’t use a rapier, could you use a firearm instead?” Lockwood asked. “That could work, right?”
“It’s unorthodox, but probably,” George shrugged
“I think I could make that work,” she said. “As long as Lucy doesn’t mind being stuck with me.”
“It shouldn’t be that bad of a case,” Lucy said. “I can handle it, and you can be my backup. Yeah?”
Caitlin offered a slightly anxious smile in return. “Yeah.”
A few hours later Lucy found herself in front of an old boarded-up house in Greenwich, with Caitlin trailing behind her with a kit bag slung over one shoulder and a black leather purse on the other, presumably holding her pistol.
“Oh lord, where did you find that one, a princess tea party?” Skull said. “Adorable.”
“Don’t be a dick, she’s nice,” Lucy hissed.
“She’s got heels on her boots and she’s still shorter than you. Didn’t think that was achievable.”
“I don’t need any extra distractions right now, thanks so much.”
“Yeah, because you’re going to have to keep an eye on that one in case she sees something with glitter on it and wanders off.”
Lucy flicked the valve on the jar. “All right, do you remember the plan?” she said.
“Uh-huh,” Caitlin said. She’d swapped out the floral sundress for a much more sensible denim pinafore, a gray jumper with bees on it, and black tights and boots. But the moonlight glinted off her glasses and her dirty blonde hair was held back with a dark blue ribbon. “I do the prep work, you do the hard stuff, and I’m here to look for the Source and back you up.”
Lucy nodded. “Flo said that her contact told her there was just a Shining Boy, so it shouldn’t be too bad.”
They did a sweep of the house and set up in the chains at the foot of the broad dusty staircase. “So how do you know Holly?” Lucy asked.
“Community theatre,” Caitlin said. “We did a production of Guys and Dolls together, super fun. Although we haven’t gotten to perform together in a while since y’all have been so busy, she hasn’t had time. Do you ever have time to just do fun things? Hang out, go on dates?”
“Not often,” Lucy said. “And I’m not dating anyone. I mean none of us are dating. George and Flo sort of have a thing, I think? But Lockwood and I aren’t”
Caitlin dropped another length of chain on the floor. “You know he’s got a big ol’ crush on you, right?”
Lucy choked. “I don’t know what-“
“Neither of you are particularly subtle about it either,” Caitlin said, grinning at her. “You should figure that out, though, y’all would be the cutest couple.”
“We’re not…I mean, I don’t think he thinks of me like…” Lucy frowned, desperate to find a change in topic. “You keep saying ‘y’all,’ where are you from exactly?”
“Tennessee,” Caitlin said. “You know…where Dolly Parton’s from? Except I’m not from the same town she’s from, I’m from Nashville, but I’ve been to her theme park, it’s-“ She stopped herself midsentence and blew out a slightly frazzled breath. “Sorry, I talk a lot when I’m nervous.”
“Yeah, I’ve noticed,” Lucy said, not unkindly. “It’ll be all right. Let me handle it, and just back me up.”
“Right, yeah,” Caitlin said. “Amazing. I can do that.”
And they probably could have managed, if Flo’s contact had been a bit more sure of what they were going to be up against. “It’s a Limbless!” Lucy shouted. “A fucking Limbless!”
“Oh, shit!”
Lucy could hold it off, she’d been up against Limbless dozens of times, but it was different when the weight of the job was resting on her. She lashed out with her rapier, trying to keep it at bay.
“Any luck on the Source?” she called.
“Not yet!”
Lucy kept fending off the Limbless, grimacing at the malaise dragging her down. It made her head swim and nausea pull at the pit of her stomach, and she was so off balance that she tripped over a loose floorboard and her rapier slipped from her hand.
“Oh fuck,” she panted, fumbling for the hilt in the dim light. She just needed to grab it before the Limbless got much closer-
Suddenly a violent spray of salt burst through the Limbless, dissolving it away from her. Lucy grabbed her rapier and scrambled up, shocked to find Caitlin standing halfway on the stairs with a small gun in her hand. “Oh thank fuck, it worked,” she said. “I loaded it with salt, it’s going to be a bitch to clean later though.”
“Well, keep doing it!” Lucy said as the Limbless started to reform. “And keep looking for the Source!”
“On it!” Caitlin called.
The salt-loaded pistol ended up being unexpectedly useful. The shots of salt rattled the Limbless enough for Lucy to keep pushing it back with her rapier, and between the two of them they kept it at bay until Lucy found the Source, a tarnished gold necklace with a charm in the shape of a scarab beetle. Caitlin took a final shot at the Limbless with a shower of salt from her gun while Lucy wrapped the necklace in a silver net, and the Visitor blinked out into the darkness.
“Well, we were going to see if you needed any help, but it looks like the two of you managed just fine,” Lockwood said, his voice faintly amused.
Lucy jumped. “Jesus, Lockwood, when did you get here?”
“Not too long ago, we wrapped up early and thought we would help,” he said. “You all right?”
She felt her cheeks turn a little pink at his concern. “Yeah, yeah, I’m fine,” she said, hoping she sounded nonchalant.
“I can’t believe that shooting salt actually worked!” George said. “Where did you learn to shoot, anyway?”
Caitlin laughed awkwardly. “Um…Disney World?”
George blinked. “Not the answer I expected, and yet somehow that makes sense.” He cleared his throat. “But the salt-“
“We’ll talk about that once we’re back home,” Lockwood said. “For now let’s get this wrapped up. Oh, and Caitlin-“ He raised his arm up sheepishly and the sleeve of his coat dangled in tatters from the shoulder seam. His white shirt underneath was a bit ripped too, the edges speckled and splattered with blood. “I might need you to fix this.”
“Oh, see, that I can handle,” she said. The corner of her mouth tugged up in an impish smile. “That’ll take me a while to do, though, so you ought to let Lucy patch you up.”
Lucy felt her face heat up. “Oh, I-“
But Lockwood was already turning towards her with that certain kind of smile he seemed to save only for her. “Would you, Luce?” he said. “I’d appreciate it.”
“Yeah, of course,” she said, and Caitlin shot her a surreptitious thumbs up.
8 notes
·
View notes
Note
hey dann! could you talk more about sewing? how long have you been doing it? i've wanted to start for a really long time but it seems intmidating
wow yes you caught me waiting for a telehealth appt, i sure can. so, i've been sewing for...oh! About two years actually, I just looked up when I took my first class. i started sewing bc i'm fat and taller than average and could read the writing on the walls wrt the minimizing of fat fashion options commercially. and also my ideal style is...big. bright colors, big funky sleeves, large scale patterns, etc etc. This obviously doesn't jive with the general "wow i'm so sorry you have a body" mode of most clothing for fat people wearing "women's" clothes.
tl:dr: Sewing has a steep learning curve. It's also like unlocking a whole new part of the world/your brain. I don't think you need to be intimidated, but I'm sharing the stuff I wish someone had told me before I started.
Lots of chatter under the cut incl:
context
sewing has a steep learning curve
sewing from my feminist & anticapitalist perspective
Some addtl context: my mama sews (my old machine was a hand me down from her), we've did some little projects together when I lived at home, I knew how to thread a needle and was familiar with things like a bobbin, stitch length etc. I also did a lot of googling and reading and watching youtube before I bit the bullet re: classes.
Now as far as intimidation, here's the thing. Making clothes is hard, lol. I'm very comfortable working with my hands and doing fiber arts. I do embroidery, I can knit passably well, I used to make jewerly. I've done pottery, etc etc. I like creating! I started feeling reasonably comfortable as a sewist mmmmmaybe two months ago. That's a really long time for the common fiber arts. You can pick up embroidery in like 5 minutes. You can learn basic knitting in an afternoon.
The learning curve for sewing is STEEP. (I suspect that if you're like me and you're really not able to visualize in your mind, its even more difficult.) Like bitch, what the fuck is a dart??? What are all these terms? Right side...left side? No! Right side wrong side. What the fuck is a Bernina and why does it cost literal thousands of dollars. Why is there so much MATH.
It can also be pretty expensive. Fabric is expensive, there's genuinely a lot of bits and bobs you can buy and it can be hard to know need to haves vs nice to haves. And extra tools can change needed based on projects and what you want to do. Patterns can get pricey, classes can sometimes be pricey (and I really, really recommend taking at least beginner in-person classes).
Now, the flip side of this is that once you've got the basics down, you can really go nuts. Sewing feels like one of those skills where you can either go deep - get really really good at idk, jaquards or whatever - or broad -cosplay! start a business hemming pants etc! -- and kind of infinite in how you use it. Also most things are transferable, once you've got a decent working knowledge of the different types of fabric, you can make the same pattern a billion times and come out with pieces with very different vibes.
Also to put on my feminist and anticapitalist hats for just a moment - there are definitely ways to learn sewing and sew in ways that are less convenient but cheaper. and it is really, genuinely freeing to realize that you can make and put on your body whatever the fuck you want. I want BIG pants. I was BIG sleeves. I am fat and femme and the commercial fashion industry desperately wants me to make myself smaller (and they want my ankles exposed soo bad dear god). I am just now really getting into pattern hacking and working to customize a base pattern customized to my body and I'm so excited to start mixing and matching my skills to make the clothes of my dreams. I've started paying much more attention to the ways clothes are constructed, to color and texture and movement in the world (not just clothes!), I've started curating and decorating my own surroundings in a way that just makes me feel like I'm a bit more present in my own life.
(also I stay buying people's sheets at the thrift store. My favorite pairs of comfy pants I've made and a little tent dress I can't wait to wear are all made of thrift store sheets. Loooove a thrift store haul.)
(oh also if you're fat and you start with wovens instead of knits [apparently the harder road to hoe, i've recently learned], you brain will lie to you and tell you that your clothes won't/don't fit bc they're not stretching around your body)
#ask me a thing#but seriously ask me anything about sewing#i STAYED on r/sewing when i first started#i was like plz god someone help me translate this foreign language
3 notes
·
View notes
Text
Copying a garment
I've copied two garments going straight from the garment to a pattern. I've also used a worn purse to copy the shape of the inside to sew a fresh lining. This didn't make the purse new, but it definitely made it more workable. This is sewing related, but you could apply the rules to knitting with some caveats.
Check the shape your source is in. A worn out and ragged pair of shorts could be ripped into pattern shapes and copied. A worn out sweater is likely larger / smaller than the original copy of the pattern. Anywhere with a lot of wear / holes might show that the pattern is a little small on the spot, and might distort the original pattern shape. If you are not tearing apart the garment, you can copy the shapes on to paper / using pins to mark the pattern shapes. The more fragile the garment, the harder it is to manhandle it into copying the shapes and the less accurate your copy will be.
Try the garment on, if you can. Note anything you don't like. If the shoulders are too long for your shoulder, note the approximate amount. Check if the sleeves are the right length for your arms. An accurate copy will not lose these problems, so knowing that you might want to tweak that is important. An inaccurate copy may make these problems worse.
Find some fabric that is similar to the original fabric. A slight amount of stretch will simply make the test garment "roomier" as it shifts around you. A major difference in drape / stretch will result in a different garment. If you want to demonstrate this, try on a knit garment and a stiff canvas / denim version of the same garment. If the shapes are the same, it will hang differently on you.
Walk the seams. Using a piece of paper or a measuring tape, go around the curves / edges of a garment. I prefer to do this prior to adding seam allowances, since you're talking about the finished garment shapes. Shoulder seams / side seams will often be different. A difference of 1/2" in a side seam can often get lost in the hem, and a bias seam may lose or gain the length as the fabric settles. A shoulder seam ideally should be a similar size, especially if you need to set a sleeve in it.
You are starting, I assume, with something that fits you. However, the copied pattern shapes aren't guaranteed to fit you. Take measurements of your body. For a top, I would do biceps, sleeve length, widest point of the hand (if not doing a cuff,) neck, shoulder, chest at armpits / bust point, chest at belly, hip if you're going to go down that far, armpit to hip / where you want the shirt to end. Double check the pattern will fit those numbers. It's easy on a shirt, for example, to lose width when you've got a 3D curved shape over the body, and you're trying to copy it flat. If your shirt just fits over a wide part of your body, you may want to add a bit more to your test one, since a fresh fabric will be less stretched in those areas.
Copying a collar stand is unpleasant. You can find people on the internet who talk through how to draft a collar / collar stand. On average, I'd make the collar stand a little long for my estimated curve, since you can trim it to be smaller.
Add seam allowances to the paper pattern and hem allowances if you wish. If you do not, carefully note that you did not add allowances for hems / seam allowances.
Sew the garment with as much care as you have the patience to use. If seam finishing will use more fabric, you should use it in your test. Ideally, try wearing the test copy for a while. Many fabrics change how they sit on you after they're warm and worn for a while (think of a pair of jeans fresh from the dryer or a pair after several wears.) Pay attention to irritation (do you need to bind a seam / serge a seam to have less seam allowance in an area?) or fit issues (do you need to add / remove fabric?) Is a seam under a lot of strain? Does that match the original garment or is it something in the drafting? If the result is so alien to confuse you, can you buy a pattern of a similar garment or watch someone sew a version of it to see the difference between your pattern shapes and the pattern?
Redraw the pattern, noting your changes, and try again. Repeat until you're happy, or you've got enough workable test garments to be done.
2 notes
·
View notes
Text
How I bind my fics - Part 1
So, I said to one of my mutuals (@imstressedx) that I might do a step-by-step on how I bind books, so this is as good as opportunity as any! The first glue up on the spine is drying, so while I'm waiting I'll show you how I assemble the text block ready for trimming and endbands.
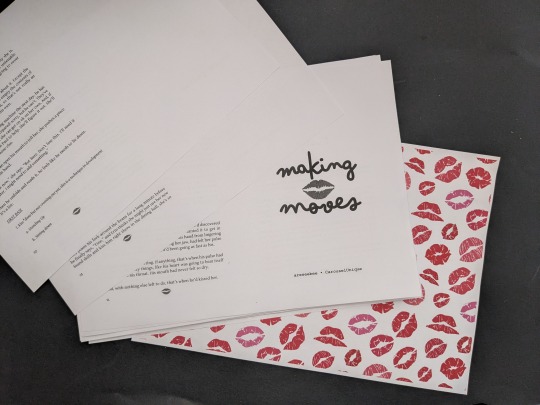
The fic I'm using for this is "Making Moves" by @areseebee and @derrygirlstrash, and starts with typesetting:
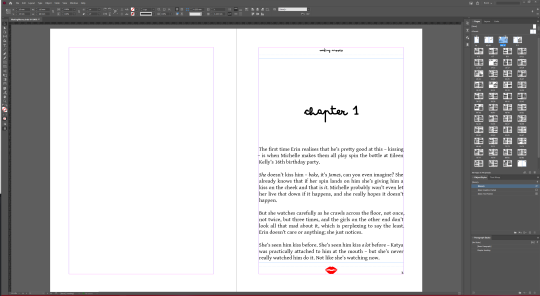
I've recently switched to using inDesign (previously I used LibreOffice), and for the most part it's pretty good - explaining how to typeset is far beyond my skills, but the basics are pretty easy to get a grip on.
Since we're printing two pages to each side of the sheet, and printing front and back, the number of pages in the document should be divisible by four - we add in extra pages or tweak the layout to get this number. Ideally the number of pages match one of the numbers in this grid, to make the signatures the same size.
For this book there ended up being 96 pages, which gave me the options of six signatures made of four sheets, four signatures of six sheets, to three signatures of eight sheets. I went with four signatures, but in retrospect I'd probably go with six signatures next time.
Next up is to print it, grouped together into the desired signature size and laid out accordingly (e.g. the first sheet would go pg 24, pg1 on one side, then pg2, pg23 on the other) so that when we fold and stack the pages they are in the correct order. We also print/cut/use the endpapers at this point. I've printed this on 100gsm A4 paper (approx 27lb letter paper for you Yanks, although the measurements aren't quite identical)
Next, we fold the pages. It's a simple case of aligning the corners, folding flat, then using a bone folder (actually made of teflon) to make the crease nice and crisp:
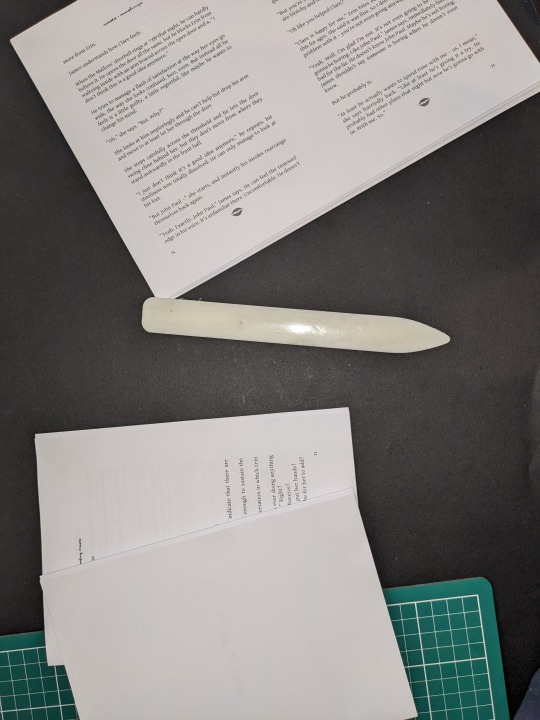
(The first two signatures folded and stacked)
Next, we need to pierce holes in the creases to sew through, so we make a template using scrap paper/card (I used a piece I was using as a glue shield on a previous bind - I like to use a bright/contrasting colour to make it easier to see):
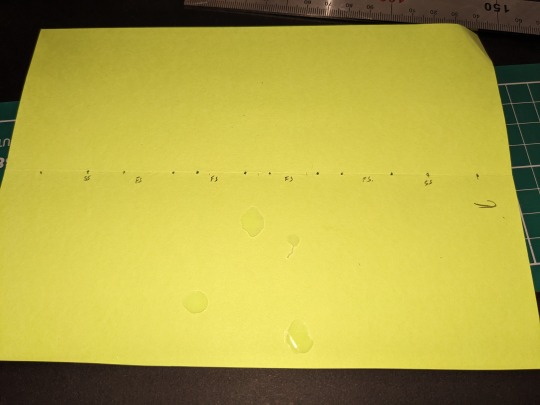
The gaps at the top and bottom are quite large on this template, and that's because I'm intending to slice off an entire inch of paper on those sides due to the way the printer scaled the margins.
We then place each signature/endpaper in my janky, homemade punching rest, and use an awl to pierce through according to the template:
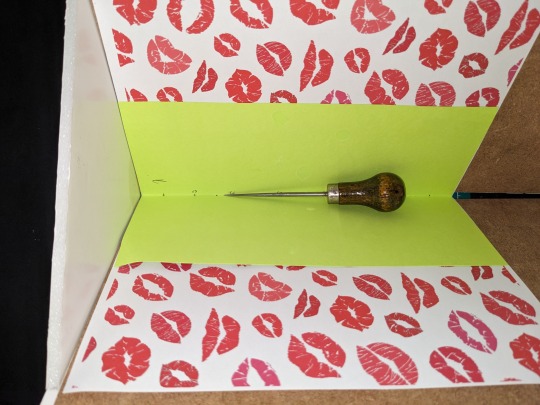
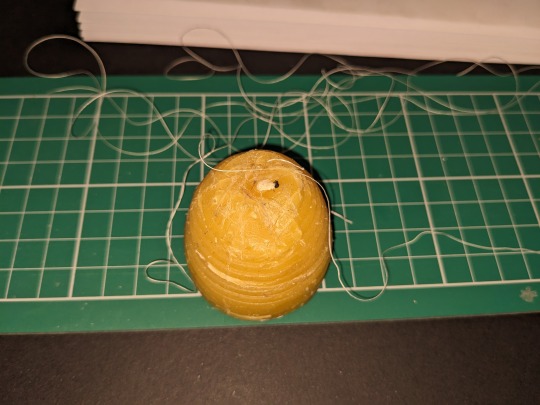
Once that's done, we can stack them ready for sewing, and wax our thread. We use thread as wide as the signatures, and use that number of passes to get a decent length. We then wax it, to make it easier to slip through the paper and to untangle any inevitable knots. I use beeswax and cotton thread, although I originally used parrafin wax and polyester - there's not much difference IMO, but if I'm doing this by hand I want materials I'm happy with.
Next, we sew - I like to use French Stitch, as it gives a nice finish. If it were thicker I'd use cotton tapes behind the wider sections, but for this book I just went with the thread. Tip - keep the thread taut, but not tight, otherwise the pages could rip.
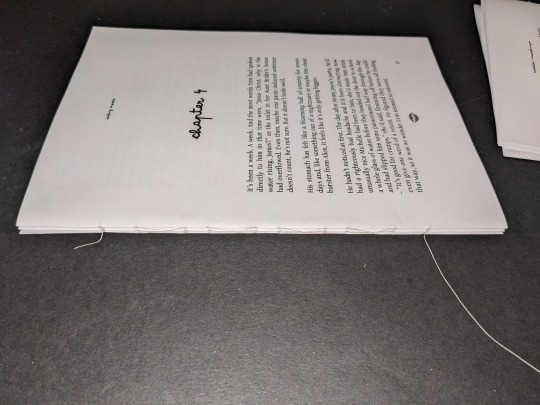
(Half way done - fun fact, chapter four takes up two of the four signatures by itself)
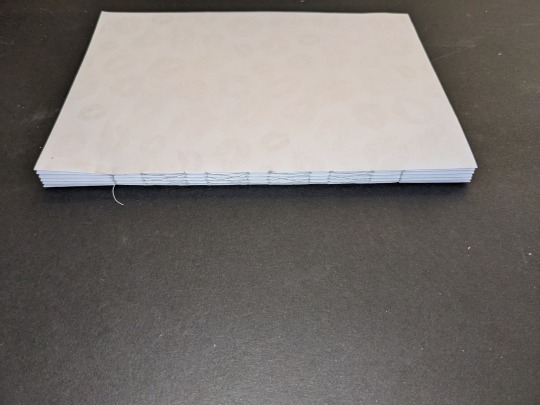
Finally, for this part, we just need to put it in my (also) homemade press, and apply two layers of glue to the edge.

Once this is dry it'll be onto the next part!
#fanfic binding#bookbinding#making moves#i may have spilled half a pot of glue in the making of this...
5 notes
·
View notes
Text
Continuing with patchwork.
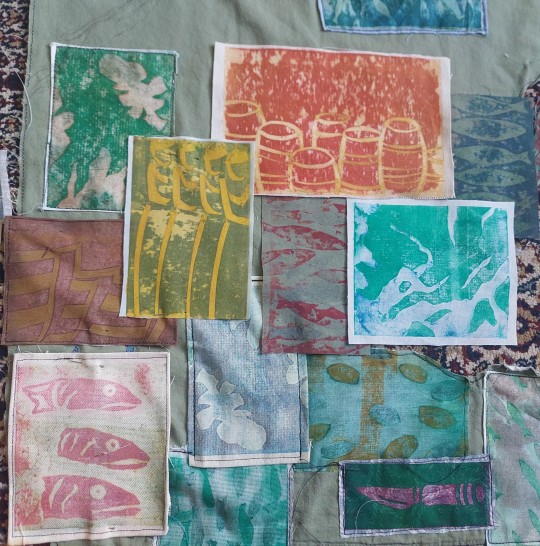
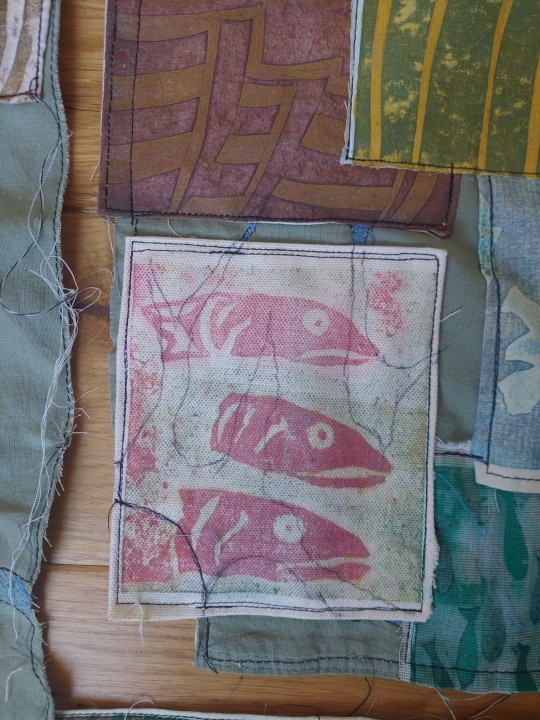
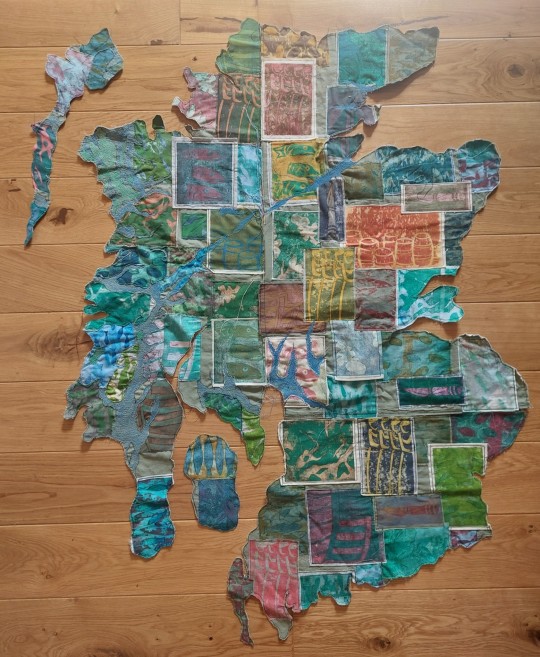
I have now begun to patchwork the east side of Scotland which was a very similar process to before. I first picked out the prints I want to be on the map. I made sure there were many different designs, colours, sizes and fabrics. I also tried to balance the colours, so even though I wanted some bright colours to pop, I also knew that I needed to keep the patches unified as one. I also wanted a lot of green tones to keep on theme with the map because it will be easier to highlight the water if the land is green.
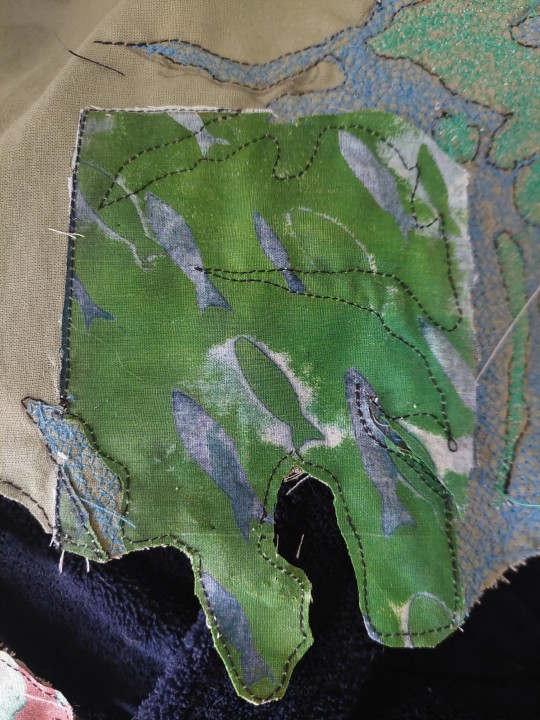
So there was a lot of playing around with many prints until I liked it. You can see below that I have sewn on some patches and then placed more. Even though I laid a lot more out at the start it was not practical to pin and sew all the patches at once. It would be to hard to keep everything where it is supposed to be.
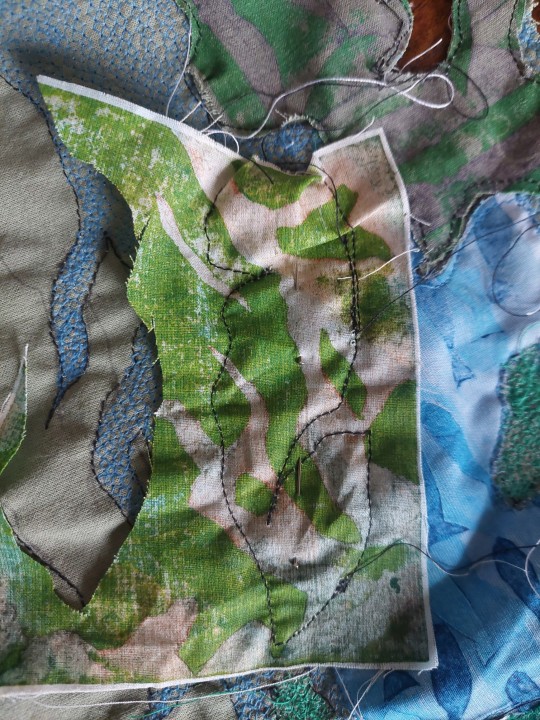
I then did the same thing for the top half of the map (right hand side).
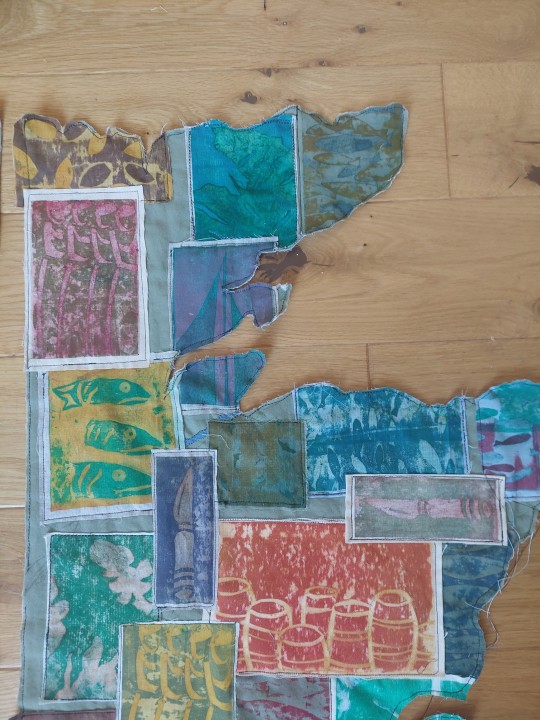
Where I had sewn over the water I traced the waters edge like in the picture below. There was not much water on this part of the map so my plan is to sewn on top of the patches where the water leaches on from the coast into the land. I think this will help to add contrast and necessary details to make the map come alive.
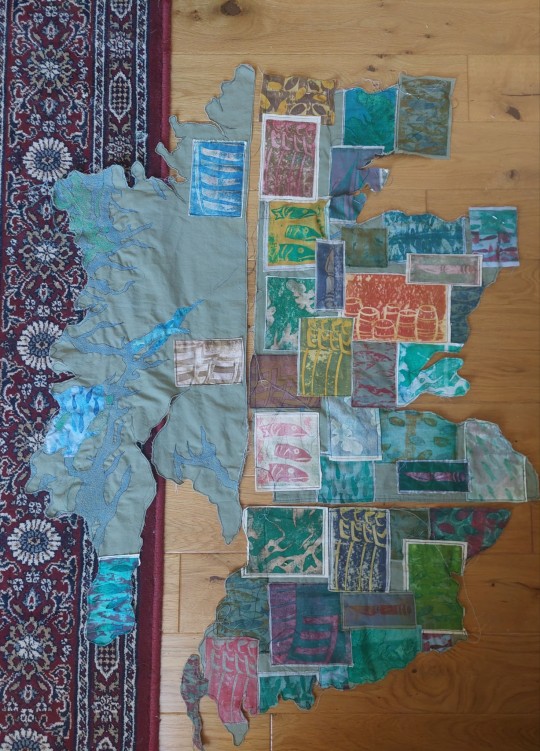
This is the map so far. I am very pleased with how it is coming along. I have attached some patches to the remaining part of the map the most successful is the blue patches that I have integrated with the water in the middle and to the far left. They made water stand out more and look more purposeful.
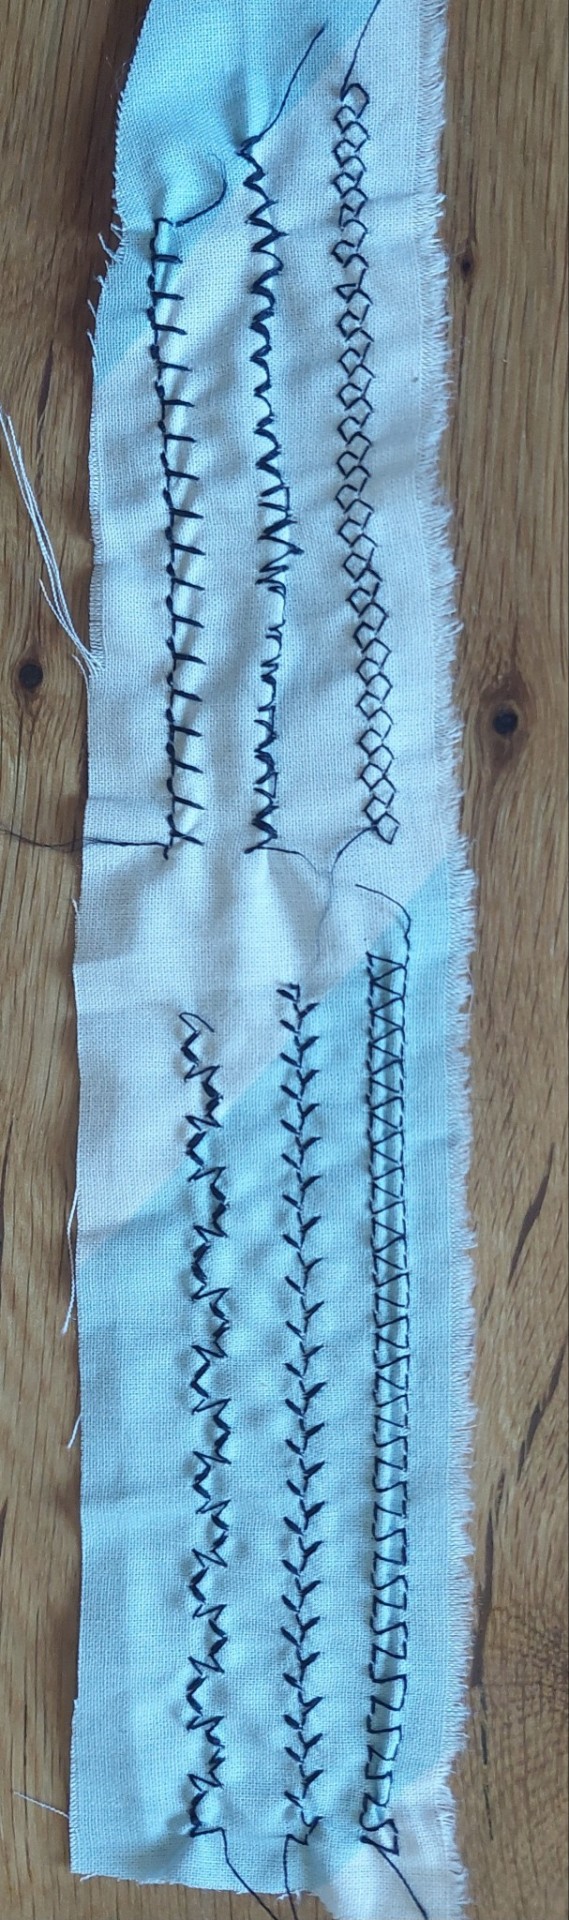
For the rest of the water and even some of the smaller islands around the west coast I have used a specific stitch, which is meant for stretchy fabric, but it covers a lot of ground and when layered up going back and forth with the sewing machine to creates a lovely texture that could resemble waves in the ocean.
To pick the right stitch I first experimented with the sewing machine. In the picture below you can see I tried multiple different stitches to see which one would work best.
The one I used was the top right because I felt it would cover the fabric the quickest. Other stitches really wanted to fold and bundle the fabric which would not be ideal.
Artist Research
Investigating ways to install my work.
West coast of Scotland- Map
I applied tha same process to this side of the map by I have to adapt my technique for going around the water. This part was tricky and time consuming but once I worked out the technical issues I repeated the process all over.
The first chose a piece of the map to work with. There are a lot of island on this half to I worked for the outside in doing a couple of islands at a time. I found a print that I like and that would cover the area I needed. Now because this was a lot of water and land mixed in together, I wanted there to be a clear difference between the two so I kept a good online and shape. To do this I chose a lot of green prints for the islands.
Below is an example of 1 island. I first pinned the patch in the correct place. I then stitched my thread so the black thread was on bottom and white ontop. This is because to get a good outline I was going to be following the previous stitched line that marked out the islands and rivers. This line was on the back of the map so after pinning I turned the piece over and traced the line. I stopped often to make sure I was on the right track and making sure I wasn't cause any ruffles.
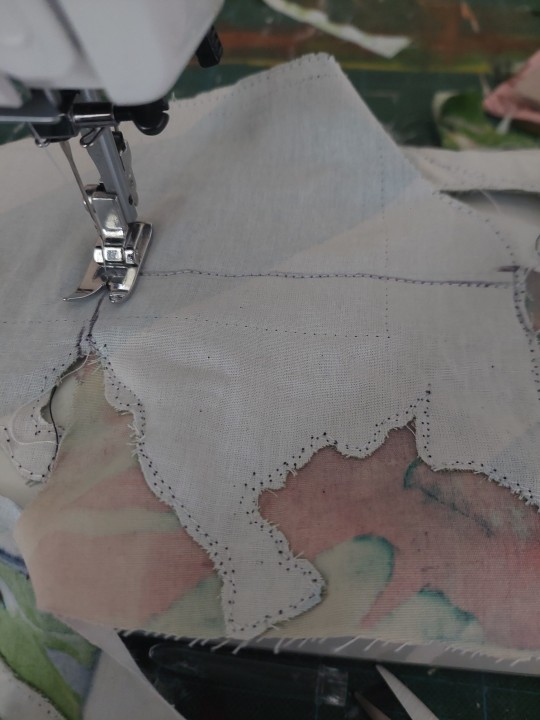
You can see above that i have traced line of where the patch ends and to give me reminders of where im going. After all the sewing is done I trimmed away any excess around the edge or from over the water.
This was definelty time-consuming, and I made a lot of mistakes which was frustrating but it was really worth it because I managed to create really clean, detailed ones around the islands and water.
0 notes
Text
ok fuck it. earthmover instructions
WHAT YOU NEED
Sewing machine
3/4 yard dark grey fabric (I personally used a woven fabric so I'm not sure how well it'd work with a more stretchy material but it'd probably be fine?)
Dark grey thread
Upholstery foam for the head and body; once piece will be 8cm x 20cm x 18cm, the other will be 8cm x 8cm x 6cm. (Getting thick enough foam can be a little pricier than ideal so I just stacked 2 smaller foam chunks on top of each other and it works just fine! You can try using stuffing but it's gonna be tough if not impossible to get the body to hold a blocky/geometric shape so I definitely recommend the foam)
Box cutter (for foam)
Stuffing
6 small white buttons
Wire
Possibly gold sequins or beads or paint if you want to add city lights/additional details? I didn't end up doing it myself but it might look cool!
INSTRUCTIONS/PATTERN
Pattern does not include seam allowance! The images are printer paper sized and should come out the exact same size as mine if you print them without margins, but if you want an itty bitty Earthmover then who am I to stop you


Use a box cutter to cut your foam into the proper size pieces (8cm x 18cm x 20cm for the body; 8cm x 8cm x 6cm for the head). (Like I mentioned before, you might need to stack pieces.) (Scissors also work for this but they kind of suck)
Sew the legs together. This part's easy. cone time

Sew the head top and sides together into most of a rectangular prism. Head Bottom is not only a new nickname for one of my friends, but also the piece you want to ignore for the time being.

Sew the neck pieces together as shown. The four Neck 1 pieces and Neck 2 piece are easy enough, but the base is a bit hard to explain? Basically you want the short ends of the trapezoids sewn to the bottom of Neck 2 without leaving any gaps; just ignore the overlap of the wider parts. After you have that, you'll want to sew the sides of the trapezoids together as shown. This part can be a bit janky, but if you don't have any gaps it should be fine.

Next you'll want to fold it in half and sew the sides together all the way down, leaving you with a long tube that flares out into a square base.
Ok... this is the part where we get to the illegal sewing technique that may get me drawn and quartered by the people who actually know how to sew. If you have a better method to attach a cylinder to a plane at a perfect 90 degree angle please let me know so I can ignore you. Also- I recommend reading ahead to the next few bullet points/image so you know what the plan is before you start.
Stuff the neck enough that it can hold its shape.
Cut a hole of a smaller diameter than the neck in the Head Bottom piece. Start off small and gradually make the hole larger until it fits snugly around the top of the neck. Don't use the dotted circle I put on the pattern! Use the neck of your own beast to measure it. The placement on the pattern isn't entirely accurate either bc I was rushing- you're going to want to have it slightly off-center (whatever side it's closest to will be the back of the head, opposite side is the front) but you still want to leave some fabric on the side.

Now, push the neck about 2cm or so through the hole, then cut and fold the top of the neck out onto the Head Bottom piece. Tape it in place (I found it easier than pins/clips in this instance since you're working in a rather small area) and kinda... sew around the hole. Look I KNOW this is terrible. I am not proud of this. But it works, it's hidden under the head, and as long as your fabric is fairly dark and your thread matches it, it shouldn't look too bad.

Repeat the same exact process to attach the legs to the Body Bottom piece. (Since the legs are cones, this is significantly easier! Just make sure the holes are smaller than the widest part of the cone, push the leg through almost all the way, and you should be fine. This is what the marks on the leg pieces were for; they should help with how far down to cut, and guide you while sewing.)
Sew the rest of the head onto the front only of the Head Bottom / Neck piece. Just let it flop for the time being.

Sew the top of the body together as shown.

Now sew the sides, front, top, and bottom of the body together into a rectangle. You should get a floppy beast like this, with the head and butt open.

Firmly stuff the legs; it's up to you if you want him to be soft or want him to stand. I didn't do it with mine, but you can also put wires in there if you'd like.
Then insert the body foam piece into his giant butthole. It should fit very snugly, but don't hesitate to trim it down a bit if you think it's pushing on the seams too much / will make it difficult to sew up by hand.
Stuff the neck, then insert the foam into the top of the head.
Hand stitch the butt and head closed. (It's a lot of hand sewing. I know. I'm sorry. There is no better way with the damn foam.)

The spear is pretty easy; just fold the spear piece in half and sew just like with the legs, fold and twist a piece of wire until you have something strong enough, wrap in some spare foam or stuffing or fabric, and shove it in there. You'll want to have a good amount of wire sticking out the end (~5cm) to help attach it to the head.
(The reason I'd use a thinner piece of wire folded/twisted to make a thicker one, rather than just using a thick wire in the first place, is because it provides more friction once it's in the foam. )
Make a small hole in the fabric on the side of his head, and stick the remaining wire into the foam to anchor it in there. If you're having trouble sliding the wire into the foam (which is good! means it will hold better once it's in) you might be able to use a lighter or something to heat it up a bit, which should make it easier to push in. I cannot stress this enough: A BIT!! Be careful! Setting the entire earthmover on fire by stabbing it with a glowing hot piece of wire may sound like a totally great idea that would certainly improve the game and Hakita should definitely 100% add, but please do not attempt it in your home. Hand-stitch the top of the spear to the head to hold it in place.
Add button eyes, and sequins if you should so desire.
Congrations you have made Benjamin

please please please if anyone uses it to make their own benjamin I want to see.
I MADE MYSELF AN EARTHMOVER
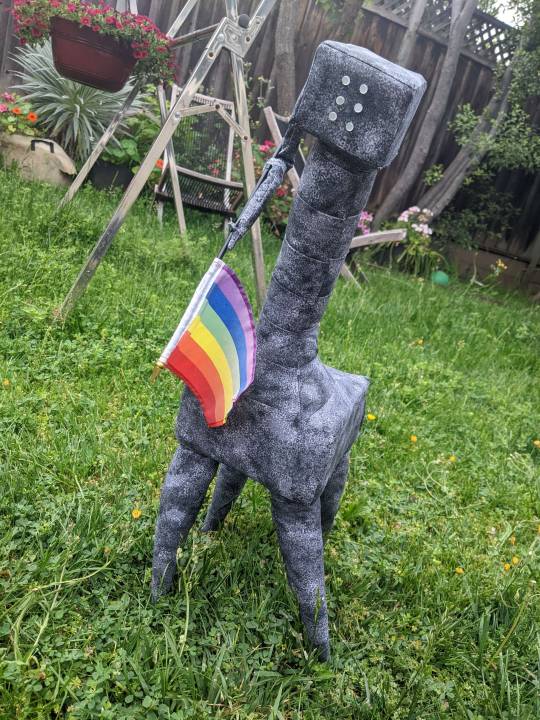
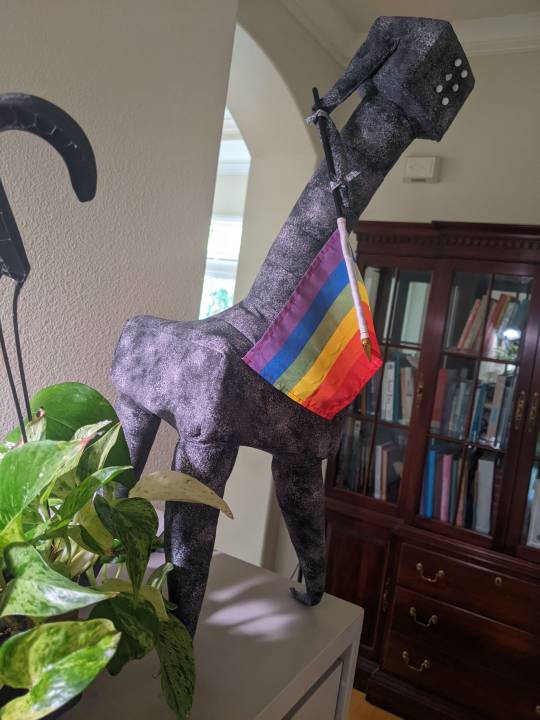
The idea that earthmover plushie was something i could realistically maybe make was beamed into my brain on friday may 10th at exactly 11:23 PM and then proceeded to consume my entire weekend. i did not know if this would work but i did it. i made him. my weird lopsided dog Benjamin
(I'd be happy to write up the pattern/instructions if people are interested- I think it'd be pretty simple to recreate since he's like 90% rectangles- but be warned that I have never tried to draft a plushie pattern from scratch before and it's kinda janky as hell the way the legs are attached feels like one of those illegal lego techniques so you have to promise not to make fun of me ok)
570 notes
·
View notes
Note
Would love to know some of your hcs about Perla🩷 I really wish we got to know more of her
LITERALLY. Like they give hints but not much, it makes me so mad at times. Anyway, prepare for rambling!
- Canonically she was born in 1922, I have her down as an August birthday (idk when exactly). Not sure where she’s from yet, might be from elsewhere in Louisiana or from Georgia (like FJ)
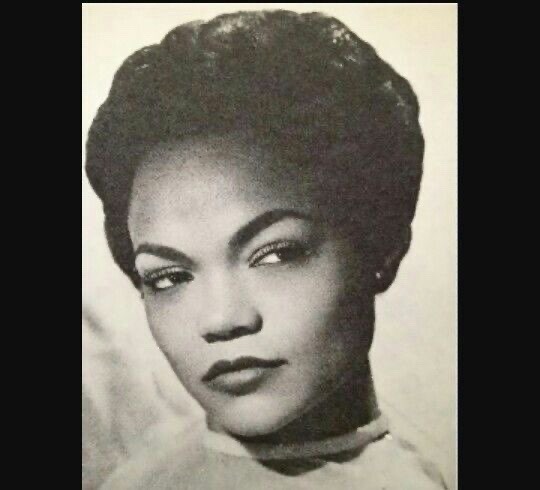
- to me she looks vaguely like Eartha Kitt! Not the same, but some overlap
- this song is just… so her to me. She’s a performer who can fake being charismatic (in reality, she’s more reserved) but even in her performances, she can’t hide the idealism inside her
- generally the more down-to-earth one compared to Sammy’s false “fatherhood” tactic— she can’t stop Sammy nor the boys he brings, but she tries to show kindness where she can
- genuinely tries to help Delray Hollow as much as possible by funding the arts and community outreach (this is also canon, fun fact!)
- I associate her with purple compared to the lighter green seen in the mural. Idk why, I just think purple suits my vision of her better
- Her and Virginia make a lot of jokes about their husbands. It’s more like Virginia bitches about things and Perla listens (and laughs when Virginia makes a good joke) but hey, it works for them
- tried to get Ellis (and later Lincoln) into theatre; Ellis liked it fine, Lincoln…. well he’s better as a part of the crew if anything
- there are hints that she might’ve been a hoodoo practitioner in canon, and she very likely hid it from Sammy (as hoodoo is commonly associated with Haiti)— Ellis never cared about it but Lincoln learned at least a few fragments
- her romance with Sammy was very whirlwind. They met in 1944, married in 1945, and had Ellis January 17, 1946. She went from “I’ll find love when I find it” to, well, this
- quite business-savvy and good with keeping records (and got on Sammy’s case whenever he missed something)
- avoids confrontation not out of fear but out of need to conserve her own energy for more “important” matters (very much unlike the rest of her family lol)
- dabbled in every form of art she could get her hands on— sewing, painting, theatre, dance, etc.— and Sammy encouraged it, keeping the pieces she was most proud of framed and in a safe upstairs. Not much survived the fire.
I have a long thing on Virginia as well (that I sent to my beloved mutual— ily Beth 🤍🤍) but I’ll save that for later!
Thank you for asking. Hopefully I’ll have more soon! Also see the comparison of Perla and Eartha Kitt below the cut

6 notes
·
View notes
Text
Me at 2am last night: I’m gonna wake up at like 10am, maybe earlier, and then immediately start sewing some projects at 11am! I have iced coffee waiting in my fridge. I will get so much done!
6am: *Still awake, mad at the world.*
7:30am: *Wakes up, gets water, goes back to bed.*
12:30pm *Wakes up and gets confused at the time*
Me: Ok, this isn’t that bad. I’ll drink the coffee and have breakfast, then start sewing only two hours later than planned.
1pm-2pm: *Youtube and Tumblr*
Me at 3pm: ...Hmm... maybe I’ll just sew tomorrow...
#god i'm the worst#my therapist wants me to create a better sleep schedule and a schedule of getting up and out of the house#while i'm unemployed and applying to jobs and not having a normal human schedule at all#and i was SO READY to do that.#especially since i have some sewing to do for a community theater and i'm using the sewing machine at my late grandma's apartment#so i am leaving my apartment to do it and being productive in some way while unemployed#and yet. still no motivation to actually get up and leave and go sew#i have to go to a birthday party at like 7-ish so now at most i'll only be able to sew for 3 hours before i need to shower and leave#but 2 days ago i got a LOT done in only two hours of sewing. so. maybe i can do that again today...#ugh. ok. 3:30. i will get up. get dressed. go to my grandma's. at the very least sew the skirt that is a personal project of mine.#ideally sew that and part of one of the pieces i need to make for the theater#ok now that i've written out this plan i gotta stick to it
4 notes
·
View notes
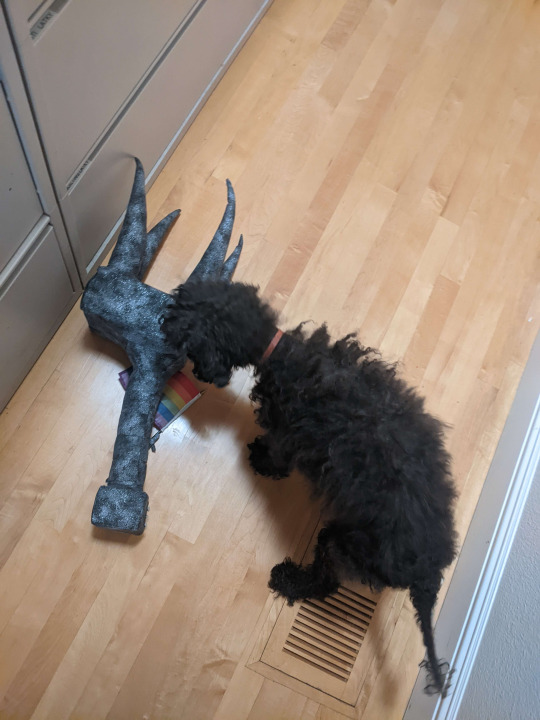
Text
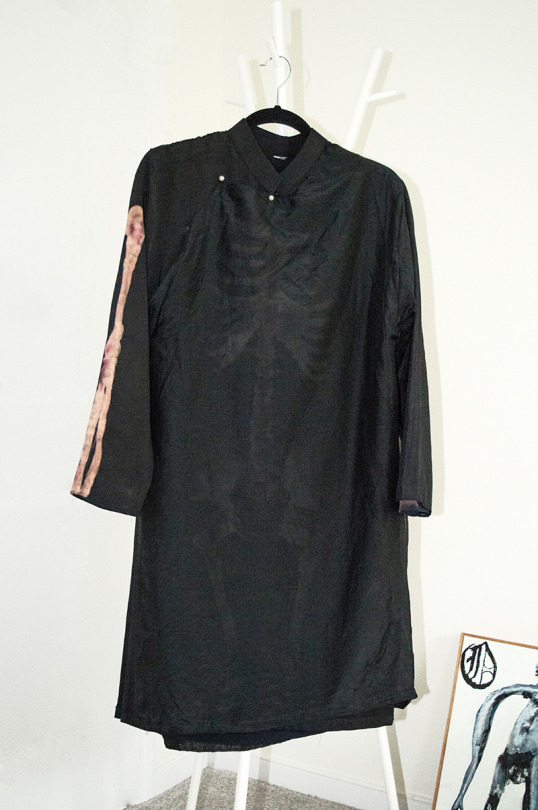
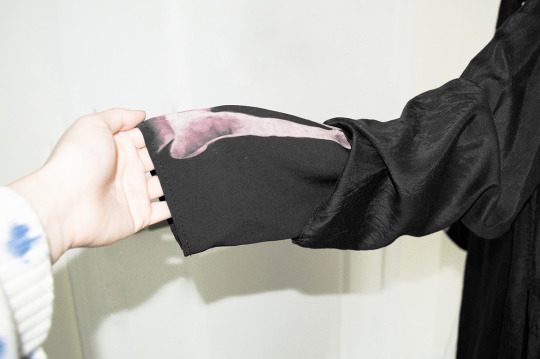
For the past few weeks I've been working on a customized áo dài with a skeleton pattern inspired by Bá Nguyệt's ghost form. It has one "exposed" sleeve and the rest of the form are layered under thin silk to create a veiled shadow of the full skeleton.
Art accidentally captured in the background is by Kevin Sabo.
Customization process summary under the cut.
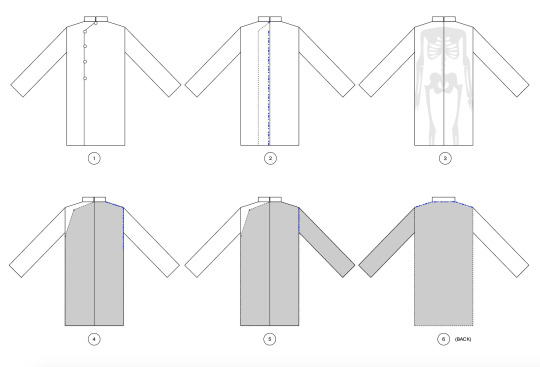
A simple graph of steps I went through to customize the áo dài.
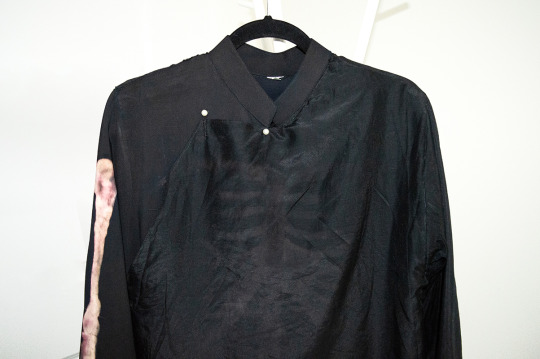
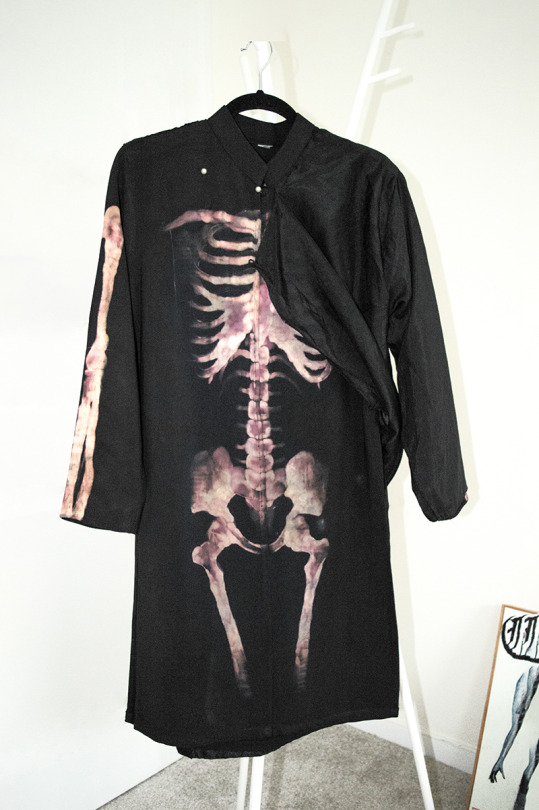
This is how the áo dài appeared at the beginning. It is a typical modernized áo dài for men, with tay chẽn (sleeve cuffs fit to wearer's wrists) sleeves, a straight form, and running button line down the right chest. My plan is to adapt it to look more like an áo ngũ thân tay chẽn, which means the left lap of the áo has to reach the right shoulder and armpit, instead of middle of right chest.
I began with tucking the left lap under the right lap and sewing the two sides together, turning the áo dài into a long shirt.
Then I painted the skeleton pattern onto the front, back and two sleeves of the áo dài with bleach. This took about 4 full days: the actual painting time took less, but I let it dry overnight after finishing every part.
By this time, the silk I ordered for a 2nd layer had come in. I cut the piece for the front piece. This would be sewn to the left shoulder, left armpit, and the left half of the neckline. It'd be left open on the right side so it can be closed by buttoning. I actually sewed the silk onto the áo dài, but then realized the color of the two types of fabric do not match up. The silk I ordered is black, but the base áo dài is a near-black dark navy. My first reaction is to get blue acid dye and give the silk layer a blue wash and turn it into a more navy color. Turning the base áo dài black would have been more ideal, but I already bleach-drew on it. Anyway, this doesn't work, considering the silk is already saturated with color (black), so I got black dye to spot dye the base áo dài, avoiding the bleach drawing. When I washed it to bleed out the extra dye, the dye washed over the bleach drawing anyway, but this is something I could live with.
I carried on to make the silk sleeve to go around the left sleeve. This ended up being shorter than the sleeve of the áo dài because I ran out of silk, so I hemmed the base sleeves to better match the silk sleeves. Thankfully, the original sleeves were too long anyway, so it ends up the right length after hemming.
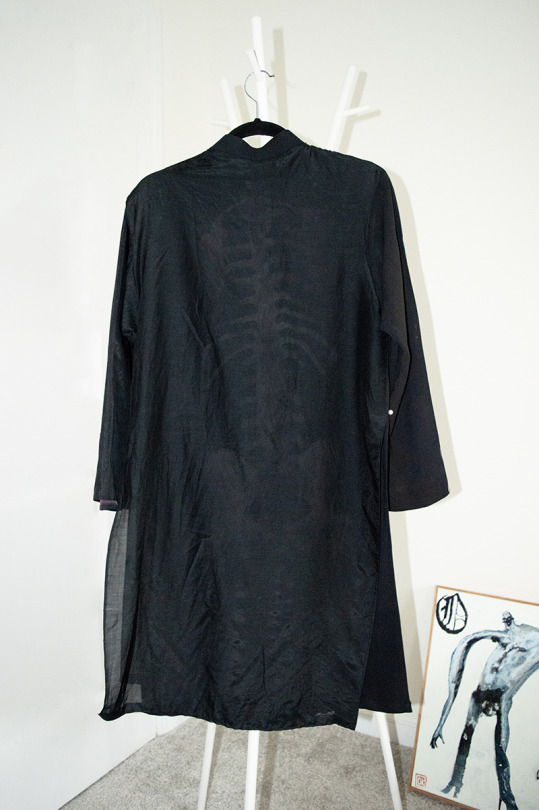
I cut out the back silk piece. The front, sleeve and back pieces are sewn together first before onto the base áo dài. Then I added buttons (mock pearls) to the base áo dài, at the collar, right collarbone, and two more on the right side of the áo. Traditionally, there should be 5 buttons (collar, collarbone, and 3 down the side) but since the side of this modern áo dài is shorter, only 2 are needed.
This isn't pictured in the diagram, but I ended up retouching the bleach drawings where they were too washed out from the dye. DONE!
33 notes
·
View notes
Text
medea-and-morticia:
Hi! So, I have received several messages about where each of the parts of my Stevonnie cosplay came from. Read on and behold, all your questions shall (hopefully) be answered…
My cosplay, as a whole:

What changed between the final test in this pic and what I wore at the convention: On the actual day of the con, I had a better gem, flip flops, better makeup, and a cheerfully colorful string handbag with my wallet, keys, and other important stuff in it.
Links to the parts:
The Wig.

I took a real gamble on this one… Most of you will probably want to get a cosplay wig and curl it yourself, but I bought this wig and it worked very well for me, once I let it sit in fabric softener overnight and brushed it carefully. Once it had attained ideal softness and puffiness, it was fixed with hairspray. I placed the front edge slightly behind my actual hairline, which made it look more natural, but that trick only works if your natural hair is a similar colour and texture to the wig. For maximum realism, you might want to consider getting a lace-front wig instead of this one.
Crop Top.

There are many coral-coloured shirts that are almost right, but I chose this one because of the higher, t-shirt style neckline.
Star.

I freehanded my star on a piece of paper, cut it out, traced it onto the linked vinyl transfer paper, cut out the proper star, and then ironed it on. Easy as pie! If you want a very precise star, you can use a printed template, but as Steven’s tends to be a little asymmetrical anyway, I didn’t bother. Besides, the star would mostly be covered up by the…
Overshirt.

This took some alteration. I simply couldn’t find the right shirt readymade, but this looked close enough to be useable. So I bought it, hacked off about five inches, hemmed the bottom (by hand, as I was too lazy to set up the sewing machine) so it wouldn’t tear, and ironed it well. Done!
Also, one note about colour… Many Stevonnies seem to go for blue or turquoise shirts. I was originally looking for a blueish one too. However, if you compare shirt colours available IRL with Stevonnie’s in any screencap, their shirt is mint as often as it is blue. Blue still looks really nice and like Stevonnie, though, so don’t worry if you’re already cosplaying them and have a blue shirt!
Gem.

Okay, this is where things get weird. I ordered the pictured gem, but it actually didn’t arrive in time so I quickly made the gem I wore to the con out of a plastic cup, paper, rice, glue, and duct tape. In the end, that gem looked just more like the one from the cartoon, though less realistic than the one linked here. If I get enough requests, I might make a tutorial for the paper gem, but the gem linked here is lovely and should work perfectly! (Oh - you’ll need some sort of glue to stick it on. I used nail glue and it stayed on me all day, but false eyelash glue or spirit gum would have been easier to remove at the end.)
(PS - The gem in the pic of me above is actually a failed attempt made of foam. If you’re better at carving foam than I am, you could probably make a nice one that way!)
Shorts.

Unfortunately, I can’t really link you to mine because I’ve had them since I was fifteen. Just go to any old store and try on several pairs until you find something that looks right. Remember to turn up the cuffs! (Are they still called cuffs when they’re on shorts? Oh, the great mysteries of life.)
Feet.

Hopefully, you’ve already got these. If you want them to stay clean and unhurt, though, at least wear flip flops or sandals.
Things to keep in mind:
While I am a huge believer in body-positive cosplay and think anyone of any size or shape can cosplay any character they want and look great, I can’t deny that one of the things that makes Stevonnie work so well for me is that I’ve got the same kind of figure they’re drawn with. I’ve seen amazing Stevonnie cosplayers of all shapes and sizes, though! Please don’t let what I said there discourage you from cosplaying them! Just, keep in mind that I’m VERY lucky in this regard.
There are, of course, many ways to make yourself look more like them: choose your shorts carefully to round out and widen your hips, cut your overshirt longer or shorter as you need to, wear a longer or shorter or straighter or curlier wig… I wore makeup, for example, to make my face look younger and fuller, like theirs. But really? It doesn’t matter, you don’t have to do that stuff! Hell, one of my favourite Stevonnie cosplayers’s shirt is a rather dark blue, and another one wears capri shorts instead of short shorts. Their cosplays are still completely recognizeable as Stevonnie. Stevonnie is an experience, remember: a lot of the resemblance lies more in the attitude than in the clothing, and the main point of cosplaying them at all is to have fun with it. And don’t worry about not being recognized: the SU fandom will know you’re cosplaying Stevonnie as soon as you step out in a mostly accurate shirt-and-shorts combo, and they will LOVE you. (Especially the young fans, they’re the most fun to meet IMO!)
So, what are you waiting for? Just do it! (And link me to your cosplay when you’re done, I’d really love to see it! ♥)
How to Get my Stevonnie Cosplay
562 notes
·
View notes
Text
Almost a year to the day after first asking @its-sixxers if I could print out and bind Half Light (after figuring out how one actually does that), I've finally finished it!!!
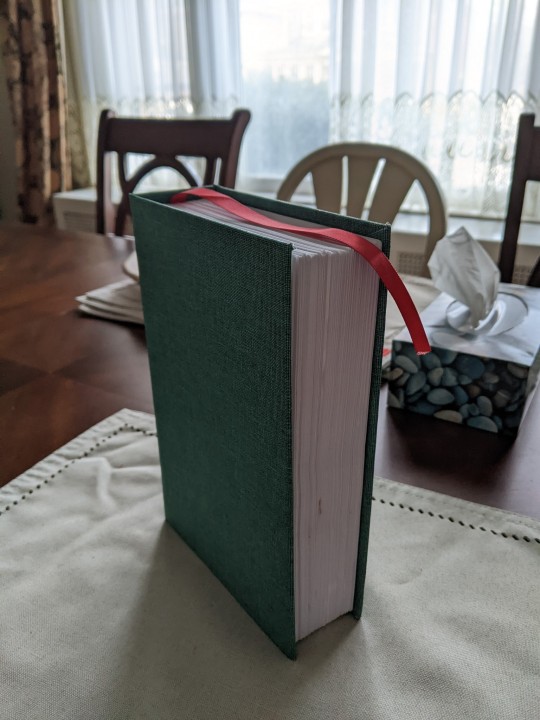

She's 825 pages long, has some of the early pages warped from glue, and blood (?) staining the text block, and I am so excited to fall in love with Nines and Mary all over again. Thanks for letting me do this, it's been a really rewarding project and I got a new hobby out of it!!!
Please go read Half Light and everything else Six has written, she is immensely talented. Mary is my favourite character in Bloodlines bar none and reading her story endeared me to VTMB when the game itself did not. Six's Fallout works are also masterpieces, and I haven't checked out her newer stuff with Elder Scrolls but I fully intend to because even if I've never touched a Skyrim game in my life, I know I'm going to adore it too!
More info about the process under the cut.
SeaLemon was an invaluable resource starting out here because I barely know how to sew and I had no idea how to approach the actual construction of a book. I'm gonna plug her right off the bat because she's very beginner-friendly if anyone else wants to learn.
But before all of that I had to format everything in Word! Chapter by chapter I copied the text over from the downloadable PDF from AO3 and would scan through the fic to ensure the formatting was correct (italicization, bolding, paragraph breaks, etc). I'd do this for about an hour at a time over the course of a couple months, until I decided to do the rest of it all at once after one March night at 10PM where I decided to learn how to bind it all, because fuck it, why not. (Answer: I was freaked out about my upcoming departmental talk and this seemed like a good distraction).

Printing all of it just on regular printer paper (don't know if I'd do that again in the future, but it's what I had on hand) it ended up being 52 signatures, or collections of 16 pages (4 pieces of paper) folded in half. Pierced holes in all of those using an awl and an old phonebook to hold the pages open, and then used my old embroidery thread to sew them together. This part took me maybe two days because I was just so damn pumped about it lmao. I also don't have any kind of bookpress to weight down the pages, so I had made due with old textbooks and MCAT prep material.

It stayed this way for LITERAL MONTHS as I gathered all the other supplies - chipboard and brushes from my local craft store, PVA glue online, and by far the hardest part was fabric. I've since learned that you can make your own fabric using book cloth and basically anything you want (if I had known this book would have been coated in red silk I swear) but for now I just wanted to be sure it was something designed for this purpose, as the woman at Fabric Land assured me it needed something specialized. So binder's buckram! Took a while to find something local and the color selection was pretty limited, I was hoping for a dark red or a dark blue but the green was the best they had in stock. Took even longer to get here. And by that point I had enough going on that it fell by the wayside until uh.... last week.
I glued the spine, again realizing that maybe I should've just made my own bookpress but powering through with textbooks to hold things in place, and let that sit for a couple days to fully dry. Ideally it would be flat, but beggars cannot be choosers. Gave her a lil ribbon too.

Not pictured because I forgot, the final text block with black construction paper glued to it to form the inside cover (would probably use something thicker/crisper in the future, something more like cardstock perhaps?). But then it came to putting the cover together! And that was just cutting chipboard to fit and gluing it correctly onto the fabric, leaving gaps around the spine.
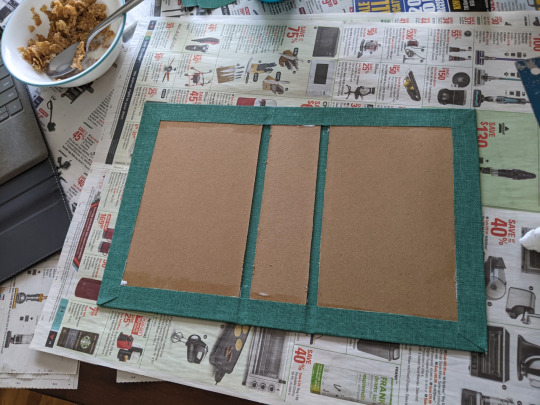
Let that dry, and then I glued the text block in and let everything sit for just over 24h, again with makeshift weights to prevent the fabric warping (it's the second book from the bottom).

And then tada! Finished book! (This one's from before it was pressed but it looks the same now)
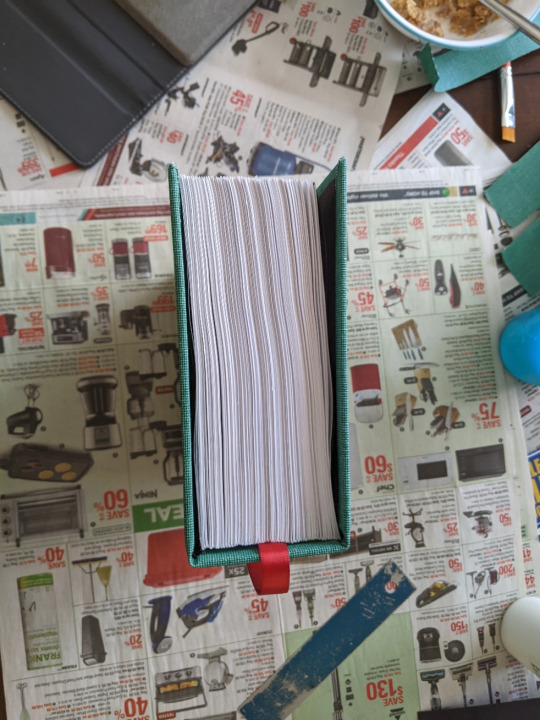
All in all extremely cool to hold in my hands and I look forward to the next fic that makes me this insane. If I get permission to do The Sun Is Now Fading I might take a crack at that and make a little set! Follow your dreams and one day you too will be able to take notes in the margins of your favourite Vampire the Masquerade fic.
#vtmb#vampire the masquerade#its-sixxers#bookbinding#mine#cant wait to read this on my flight and pray that no one asks me what it is lest i have to respond with#..... uh are you familiar with the 1991 TTRPG world of darkness and its subsequent media#em.chats
44 notes
·
View notes