#i’ve got some tutorials on my blog that you can check out too
Explore tagged Tumblr posts
Note
hiii, your crowley gifset is INCREDIBLE! i would love to know how you managed to get the purple and blue hues but kept crowley looking normal? every time i try messing around with hues i end up with very oddly coloured people 😅
thank you so much!!🥰
i mostly use selective colour layers to get the colours i want. if you’re playing around with blues for example that usually doesn’t mess with skin colour.
but i’m also an avid user of layer masks because then you can control which parts of a gif are affected by your colouring. so if a layer turns your person’s skin a funky colour you can just paint over them with the layer mask and remove the colouring from them. it’s super handy!
#ask#ps asks#hope this helps ☺️#i’ve got some tutorials on my blog that you can check out too#they’re pretty old at this point but a lot of the points still stand
1 note
·
View note
Text
KINKTOBER DAY 9

TITLE: Don't bite the hand that feeds you
PAIRING: Seungmin x reader
WARNING: minors DNI with this post or my blog. I create NSFW SKZ related content and I know I won't be able to regulate every single interaction with those posts so please do not engage with my work and page whatsoever.
SUMMARY: Featuring Seungmin as your lecturer's student assistant who runs your tutorials and possesses just as harsh a personality as he fucks.
TAGS: Mean tutor Seungmin, oral sex (f!reader receiving), unprotected sex, public sex, swearing.
KINK: Freelance
KINKTOBER23 - MASTERLIST
TAGLIST: @kbitties @luneskies @mal-lunar-28 @kibs-and-bits @aaasia111 @fairy-lixie @dreamingaboutjisung @queenmea604
A/N: this is for all the Seungmin stans out there x
There isn’t any way to work around a more stubborn person. People that you’ve met before don’t even come close to the level of arrogance that this person carries with them. That person being one of your tutors for a class at Uni, Seungmin. For some reason, he always has the time of day to help other people but has an issue with your supposed incompetence in completing a task when it comes to you.
Seungmin never checks your work, never goes over your answers, discusses your ideas or anything like that. He has a very prickly attitude yet only those needles are only for you. You see the sigh he lets out whenever you need to approach him to clarify something he went over during the tutorial. You see the crease between his eyebrows as the annoyance grows when you ask if he can read a draft of yours before you submit it.
He never does that with other students. Seungmin is happy to help them, makes conversation with them before class, and always seems to have time for them.
The difference in his behaviour towards you definitely placed an unnecessary burden on your shoulders. But you’re not one to budge. Whether his intentions are malicious or not, you’re not exactly an easy one to crack, which is why you continued to supposedly ‘bother’ him.
“Hey,” you approach him after one of his tutorials, hoping you used a good enough manner to not light a fire under his seat. “Would you be able to check this for me?”
Seungmin furrows his eyebrows -��not a good sign, and averts his eyes from the whiteboard to look at your paper, “I can’t help you with that.”
“And why is that?” You question. “You had no trouble looking at everyone else’s. How’s mine any different?”
“Judging from your grades, I’d suspect there would be a lot of differences,” he responds.
“I’ll take that as a compliment since I’m one of the top in the class thank you,” you scoff.
“And one of the top most arrogant too,” Seungmin fires back. “If you haven’t got anything relevant to show me, I suggest you leave. The next tutorial group starts in twenty minutes.”
Your face contorts slightly, “well since this isn’t relevant enough for you, is it possible for you to check over one of the drafts we have to send in on Friday?”
“Can’t do that either-“
“Then what can you do exactly?” You cut him off impatiently. “Seriously, I’ve been trying to ask you for help for the past two weeks and you’ve only ever given me vague answers to my questions and you won’t proofread any of my work which is what you’re here to do.”
Seungmin takes off his glasses and closes the distance between himself and you, “I don’t help out entitled people like you who always demand things.”
You glare up at him, “I’m not entitled. I was just merely commenting about the fact that you don’t do what you’re being paid to do.”
“And you just keep proving my point as to why you are entitled, because you don’t shut up and you always complain. After every tutorial, you come up to me and ask me for something.”
“Yeah, just like everyone else and yet, I don’t see you giving the same shit to them as you do to me,” you argue right back with him.
“That’s because you expect things to be handed to you on a silver plate. Unlike them, you don’t work for your shit with me,” Seungmin responds, placing the cap on the whiteboard marker a little bit too rough.
“Being here is me working for my shit,” you press back. “You’re just being a stubborn ass because you don’t like me.”
“Well you’re right with one thing,” he sighs.
You roll your eyes and scoff, “fuck you honestly.”
It took a lot of effort not to just shove Seungmin out of your way as you headed out the door with a fresh stormy cloud looming over your head. Felix could spot it a mile away when you went to meet up with him for lunch nearby after his class too.
“What’s wrong?” He asks carefully, studying the pained expression on your face.
“Nothing,” you sigh, trying to let it go. “Just one of my stupid tutors.”
“Is this the same one that isn’t doing his job properly?” Felix questions, remembering the conversation you both had about him a while back.
“Bingo.”
“You know, he’s probably dealing with things in the background that you don’t know about,” Felix points out, his habit of always giving people the benefit of the doubt starting to shine through.
“Yeah, pretty sure he’s dealing with ‘absolute fucking dickhead disorder’,” you spit. “And even if he was - even if the worst is happening to him, he has no right to be taking out his anger or frustration on me.”
Felix sports a disappointed look on his face, “is it just you, or are there others?”
“It’s just me, I swear.”
“Okay, I believe you,” Felix assures. “If he really is as bad as you say he is, maybe just ignore him. We’ve only got seven weeks left, that’s not too long until you can get away from him, yeah?”
It was easier said than done, because the next round of tutorials that approached in the following week, opened up that fresh wound of just seeing Seungmin’s face and dreading it. All of Felix’s advice went out the gate, almost like it was never there in the first place.
In the end, you simply chose not to speak. What’s the point in arguing with a person who won’t move?
So right after the tutorial, you don’t bother darting straight to Seungmin and asking for his help. He’s not willing to give it to you so there’s no point in lingering behind. As you pack your things up from the table and start to head out, Seungmin peers at you from behind the glasses that you so badly want to knock off his face sometimes.
He’s not entirely stumped that you haven’t approached him, but he is a bit intrigued. Maybe he had come across too strongly with you the other day - maybe within the past month without being of any help to you at all. Then again, Seungmin isn’t the most apologetic of people.
“Surprised you’re not asking me to check anything for you,” he projects his voice to you just before you leave the class.
You heard him on your way out, but what’s a retaliation going to do? Only add fuel to your own fire. Seungmin isn’t the one who’s got something to lose here. He’s just a student tutor who’s clearly got enough competence to reinforce the learning you receive during lectures. At the end of the day, his grades for this class aren’t on the line. Yours are.
“Y/N,” you hear a voice call out to you, recognising it to be Felix. Caught up in the swirl of your own thoughts, you almost forgot Felix had been waiting for your tutorial to end as he sat in a row of seats against the wall.
“Hey,” you call out to him.
“So, how was it? Did you say anything to him?” He asks as you sit down beside him.
“I just gave up,” you answer. “I forgot that you can’t get your point across to dickheads so I stopped trying. I’ll just go to the other classes' tutorials if they let me switch. Or maybe I can just cross-check my work with their tutor.”
“Geez, that bad is he?”
“The fucking worst,” you confirm.
However, you weren’t surprised to learn that Seungmin’s attitude and behaviour still continued in the following tutorial, close to an essay hand-in date which is what you didn’t need. The only saving grace is that instead of going over the content that you learned in an earlier lecture, Seungmin allowed his students to study for another upcoming in-class test in the upcoming week.
You spent that time wisely working on the essay you needed to hand in since it was the first due. Then, by two o’clock, everyone started wrapping up their study session. You slot your books into your bag, zip it up, and ready to leave.
“You, come here,” Seungmin speaks in your direction, but you really don’t want to listen. At first to begin with, you were surprised he was even talking to you.
“And if I don’t?”
“Don’t be stubborn. I want to talk about your assignment,” he replies. He set his bait and waited for you to take it. So you approach him hesitantly from your chair, leaving your bag behind at the table.
“See, how hard was that?”
You roll your eyes. Not even a full conversation in and he’s already made you reach your limit, “oh go fuck yourself.”
Upon hearing your nasty sentiment, Seungmin’s hand latches quickly onto your wrist, “what did you just say?”
You look down at your arm in disbelief, then back up to him, his eyes narrowing at you, “what?”
“Say it again.”
“I said; ‘go fuck yourself.”
“Fucking brat.”
Without warning, Seungmin’s hands grasp the sides of your arms in a flash, backing you against the wall behind him. Out of nowhere, his mouth comes down and crashes against yours in a bruising kiss. There’s no time to process what’s actually going on when you start kissing him back, allowing his tongue to delve deeper into his mouth.
In the back of your mind, you can’t believe your own actions, but at the same time, pushing back on him also feels like you’re letting some of that frustration go. To take things further, Seungmin breaks away from you for a moment, turning your body by your arms, and backs you straight into the desk until your hips hit the edge.
Your first instinct tells you to lean back while your legs automatically lift so that Seungmin can slot right in, pressing his semi-hard dick against your pussy.
It gives you the opportunity to wrap your legs around his waist, trying to bring him in closer as you hope for more friction. Seungmin pins your wrists down to the desk, kissing along your jaw and down to your throat where he bites and sucks until there’s a line of future regretful hickies for you to deal with later on.
“D-Do something,” you stammer, feeling so dizzy from the pleasure that you desperately start to chase.
“Why should I?” He mumbles into your skin.
You turn your head, watching figures of people pass by through the frosted glass of the door who could potentially walk in at any given time. In saying that, a portion of you recognises that there’s something so naughty about being caught in the act.
“Please Seungmin,” you beg for him, feeding into his ego.
His head rises from your neck, “that’s the first time I’ve ever heard you say ‘please’.”
You didn’t care what he meant by that. All you care about is relieving that itch inside the pit of your stomach because you know that horny feeling will take a long time to dissipate. Nonetheless, Seungmin seems to listen to you when he unbuttons the first two buttons of his white dress shirt.
His fingers reach down to your jeans, unzipping them and yanking them right off your legs until you’re just left in your underwear, already soaking through. Seungmin uses the pad of his thumb to brush gently over the fabric which is sticky to the touch. It makes the corner of his mouth tug up.
“Keep quiet if you don’t want people to come in,” he warns before taking his glasses off and placing them to the side of you before kneeling down.
Your chest already starts heaving just feeling his warm breath fan across your inner thighs. The anticipation leading up to it has you clawing at the desk when Seungmin starts removing your underwear.
“Look how fucking wet you are,” he speaks from a stance of astonishment just seeing what he was able to do to you from a simple makeout session and some rough and tumble.
His comment turns you into a flustered mess that is easily shattered when Seungmin moves his mouth closer to your pussy, kissing your inner thigh and inching closer until he reaches your clit. Your back arches in an instant. One hand clasps over your mouth to stifle a loud moan at the heat of Seungmin’s mouth, the other grabs a fistful of his hair and starts tugging. He doesn’t dare hold back; sucking on your clit, lapping up at what he can to make your entire body shudder.
It never occurred to you that Seungmin is like this. You’ve always made him out to be some rich, entitled, arrogant, teacher's pet with good grades and an outstanding reputation when he goes and does shit like this – eating you out in broad daylight, in public.
Whatever rabid spirit took over Seungmin, it wasn’t stopping him. His tongue dances perfect circles and random shapes against your clit, embracing your thighs quivering shamelessly around his head.
“Oh my god, feels…feels so good,” you mutter, using every drop of energy you can to subdue the moans into whimpers.
Not even the hand you’ve been trying to use to cover your mouth is working because when Seungmin keeps building you up to that edge, you increasingly become louder. But that’s all on him for initiating this, not that you’re complaining. Not when your head is just about thrashing back behind you on the wooden surface trying to syphon all the pleasure you’re getting. It’s like rouge electricity, a live wire inside of you that has no chance of being tamed.
“Fuck, gonna make me cum,” you mumble, eyelids already fluttering. “So…good.”
Seungmin heard that as a sign to press his face further into your pussy but kept the same momentum and pace that his tongue uses to make you cum, and when you do, every ounce of pleasure pours into all the cells throughout your body. It rattles you in such a good way, that you forget how hard you’re tugging on Seungmin’s hair as he continues to eat you out through to the very end. But you managed to stay quiet – just.
Your body unstiffens and your chest heaves up and down trying to catch air. The orgasm was so massive that afterwards, you couldn’t figure out what time it was or where you were. It nearly took out every bit of consciousness you had remaining.
“Been wanting to do that for a while,” he rasps.
Whatever that means – not that you can articulate it as of yet. You’re still trying to grapple with reality and when Seungmin unzips his pants to free his cock, you know there’s no point in trying.
He’s big in length and has a sizeable girth. He teases you with his tip, sliding up and down from your now oversensitive clit to your drenched hole. Just feeling how wet you are makes him wonder one thing:
“Are you a virgin?” He asks.
You’re still trying to regain a bit of consciousness, only able to muster a few words at a time, “no...no I’m not.”
“I pinned it down to either that or someone hasn’t touched you in a while,” he responds. You groan at the embarrassment. Seungmin must obviously be that experienced for him to make such an observation.
“The latter. Now just hurry up and fuck me.”
“Shut up,” Seungmin snipes, even though he begins to push his cock inside of you at a terribly slow pace.
You didn’t realise how much you had been aching to have someone inside you. Your own fingers can’t seem to do the right trick of actually feeling full and satisfied. But now that Seungmin is here, slowly thrusting in until he reaches the hilt, can he make you feel that way.
“Jesus fuck,” Seungmin bites down on his lip and has to hold onto the edge of the desk beside your body for support.
He’s never felt anything like it. Even after sleeping with other women prior to you in his past, there’s something about the way you feel that isn’t like the rest. Maybe it’s from the fact that you hadn’t been touched in a while or not, either way, Seungmin can’t contain himself when he starts thrusting properly.
His cock glides in like melted butter, the lewd wet sounds making you want to hide from embarrassment. But Seungmin revels in it like it’s about to slip through his fingers like sand. So he lowers his body onto yours, resting some of his weight comfortably on you. It’s intimate yes, but it enables Seungmin to start whispering things in your ear.
“So fucking wet for me, aren’t you?” He purrs. “Such a good girl for taking all of my cock, especially for someone who hasn’t been touched in a while. Just opened up for me so easily.”
No words could ever spring to your mind in response to that, but it causes your body and mind to have a reaction you’re all too familiar with from about five minutes ago. That tingly feeling starts creeping up inside you the longer Seungmin keeps fucking you. His cock repetitively hits such a deep sweet spot that you don’t think anyone’s ever reached before.
“S-Seungmin…it feels…fuck it feels so good,” you moan right in his ear, your arms clinging to his back.
“Yeah?” He chuckles. “I bet it does with the way that you’re clenching around me.”
Seungmin just keeps finding ways to unintentionally embarrass you, but if there’s one thing that he’s learnt about you and himself, it’s that he likes seeing you so flustered. He thinks it’s cute. In saying that, he doesn’t want to get too caught up in things when the euphoria that has already built itself impossibly high starts making itself known.
Just like you, Seungmin feels too good right now. He’s doused in warmth from the heat wrapping around his cock and the way that your walls keep involuntarily clamping around him.
“S’too much…” you gasp for air, fingers digging into his clothed arms at this point. “M’gonna cum again please.”
Seungmin presses himself up away from your body but still thrusting at his same pace, “go on then. I want to see your face when you do.”
It washes over you quickly and he’s fast to clock onto the small reactions beginning to change. The only thing that doesn’t alter is the fucked-out look you have on your face. That remains all the way up until the bliss starts packing its punch. Seungmin’s hips don’t hamper your orgasm, not when he watches your eyes roll back and sees the words to describe how you’re feeling become lodged in your throat.
“Y-Yes!” you call out, your voice echoing throughout the empty classroom. Your wet walls convulse around Seungmin’s cock, clutching onto him for dear life as you cum hard.
“I suppose that’s why you cum so easily, huh?” He asks, catching his breath. “Because nobody’s been touching you? Poor thing.”
Your cheeks burn a bright red as Seungmin continues to fuck you, right up until he’s had his fill. Regardless of how overstimulated you are, he can’t stop because he’s nearly there. His hips stutter forward a few times as he chases the tail of his orgasm, getting hit with it right at the last second.
“Fuck I’m gonna cum,” he lowers his head, watching where his cock keeps disappearing into and listening to your whimpers. It’s all enough to tip him right over the edge and into a pool of warm euphoria. “Yes – fuck!”
With a few more grunts and thrusts, Seungmin slows right down as he cums inside you. For a split second there, his vision started to go splotchy. It reminded him of the fact that he hasn’t cum that hard in a while. In saying that, you get to bask in the warm sensation that fills your lower half.
“Shit,” he gasps, breathing heavily. In the back of his mind, something told him that he shouldn’t have done that. “I’m sorry.”
“It’s fine,” you swallow, trying to dampen your dry throat. “You’re lucky I’m into that.”
He lets out a breathy chuckle and for the first time, you’ve actually seen Seungmin genuinely smile.
-
A/N: I’m not going to lie, I kind of want to make a part 2 to this but reader finds out that she’s pregnant lmao
#rosiewritesskz#stray kids smut#skz smut#lee know smut#bang chan smut#han jisung smut#hyunjin smut#changbin smut#felix smut#i.n smut#bang chan x reader#felix x reader#hyunjin x reader#i.n x reader#lee know x reader#seungmin smut#seungmin x reader#changbin x reader#han jisung x reader
1K notes
·
View notes
Text
Obsidian Tutorial - Making & Using Templates
God I love templates. Consistent layouts of notes AND less typing? I’m a simple man with simple pleasures. There are a lot of things you can do with templates, and with certain plugins they can get quite complicated, but the basics are pretty straightforward.

[ID - a purple decorative divider]
Head to the settings menu and find core plugins. Toggle on the Templates plugin.

[ID - a screenshot of the Obsidian settings menu, in the Core Plugins section. The ‘templates’ plugin is highlighted and toggled on.]
Under the core plugins section in the settings menu, head to ‘Templates’ to set up a few basics
The most important one is your template folder location - this is the place you’ll save all your templates. I have one in my Meta folder just called ‘Templates’ - I recommend making a similar, clearly named folder so it’s easy to find
The date and time format options are slightly more complicated additions: there are certain formats you can use in basic templates to automatically fill in date and time, and this is where you set how you want that format to look. Don’t worry about it too much - you’re safe to leave it as the default if you want.
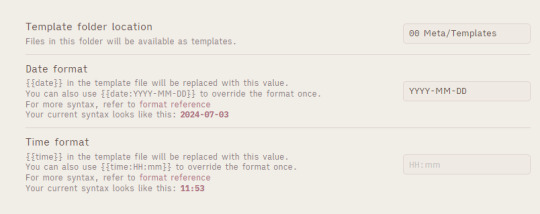
[ID - a screenshot of the Template plugin settings in Obsidian. At the top, the template folder location is filled out as ‘00 Meta/Templates’.]
Once you have your folder location set up, you can start making templates!
A simple example might be a character profile: create a new note, and lay out the text the way you’d like it to look, but without any specific details in.
Make sure the note is in your template folder
You can now use that note as a template! You can insert it into a new note either by using the command palette and the ‘insert template’ command, or you can assign a hotkey (I use Ctrl+T) and use that
Congratulations, you have now saved yourself approximately a million years of repetitive typing, and the stress of remembering how you want to lay out character profiles, journals, blog posts, and any number of other things
Bonus - free templates!
I have a handful of templates I’ve made, and you can grab them for free here:
character profile
country
fictional organisation
fic
scene yaml
RPG NPC template (requires dataview & metadata menu plugins for full automation, but you can delete those parts and use it manually as well)
RPG location template
Monthly planner (requires dataview)
Note: some of these make use of the ITS infobox custom CSS - i wrote a rough guide to installing it here

[ID - a purple decorative divider]
check out my obsidian tag for more posts
check out the tutorials tag for other obsidian tutorials
obsidian resources masterpost
download obsidian
got questions? tutorial suggestions? want to say hi?
#obsidian md#obsidian.md#obsidian tutorials#writing tools#templates my beloved#and then you can get really crazy and start using quickadd to auto-make things#and if you’re smarter than me you can use templater and do wild things#or so i’m told#i cannot wrap my head around templater so godspeed to those of you who want to use it
24 notes
·
View notes
Text
Hi everyone! Welcome to my blog!
I decided to make a new pinned post with all the information that is available on my desktop site but that will be more accessible for mobile users. Plus a few extras 😉
So an introduction.
I'm Ace. I started this blog back in February 2018 after seeing a post that referenced the whump community. I had no idea there was such a large community here on tumblr! As soon as I saw that making a whump blog was an option I immediately made one. And I haven't regretted it since. I love this blog, I love this community, and I'm thrilled to be here three years later!
Here on this blog you'll see lots of gifsets both reblogged from wonderful creators and gifs made by yours truly. I also write fanfics on occasion. You can check out my work on AO3 under the name "aceofwhump" or you can look under my tag "ace writes stuff". That tag will have some stuff not on AO3 too. I also do whump lists for certain characters, trope lists, video clips of good whump, and fanfic recs.
Click on the read more for even more information and important links to things like gifmaking tutorials, my trope tag list, my show/movie tag list, my fanfic masterlist, and more!!!
My favorite tropes are:
Emotional: panic attacks, nightmares, insecurities, feeling inadequate, fear, grief, flashbacks, flinching, emotional breakdowns full of sobbing, emotional outbursts, scar reveals, anxiety, self hatred
Environmental: accidents, natural disasters like earthquakes or storms, hit by a car, collapsed building, falling through ice, heat exhaustion, hypothermia, falls, burns, infected wounds from lack of medical equipment, sickness, being unable to breathe, drowning
Small moments: limping, feeling weak and seeking support, breathing through the pain, moving wrong in a way that aggravates the pain, and the sudden seizing of his body, shaking hands, pressing the heel of his hand against his temple because of a headache, taking a moment to close his eyes because he’s light headed/exhausted/has such a bad headache
Sci-fi: space illness, oxygen deprivation, isolation, being locked in the brig, hull of the ship getting damaged, alien attacks
Injuries: broken bones, gunshot wounds, hidden injuries, bruises, beaten, concussions, collapsed lung, slings, casts, crutches, knocked unconscious, blood loss
Torture/Captivity: Being strung up by their wrists from the ceiling, drugged, chained up, caged, tied to a chair, handcuffed to a pole, interrogated
Comfort/Caretaking: hugging, “Are you okay?”, “You’re safe now”, “I’ve got you”, hand holding, helping to walk, ice packs, covering someone with a blanket, a cool cloth on their forehead to help with a fever, a fever check, touching their face to offer comfort
Magic: magical healing that causes pain, draining of powers, powers that are painful to use, curses
Stoic or defiant whumpees
Team whump
---------------------------------------
Long detailed look at how I make my gifs
Gifmaking tutorials:
Gifmaking for Begginers: my ginormous all you need to know tutorial
Another look at how I make a gif
Tips for beginners
Tips on brightening dark scenes
How to get into gifmaking
Photoset dimensions
How to make a layout gifset
Gif speeds
---------------------------------------
Links from my desktop blog for mobile users:
My gifs
My whump videos
Ace writes stuff
My Writing Masterlist
Trope tag list
Show list
My Whumptober Masterlists
Fanfic Rec Lists
Blog Archive
---------------------------------------
Introducing…
ACEOFWHUMP’S FANFIC MASTERLIST!!
This has been a massive, ongoing project of mine for a while now in which I am endeavoring to catalog and categorize every fanfiction I’ve ever bookmarked. I fear this project will never be complete as I'm always reading and bookmarking new fics but I’m going to share it anyway.
Inside, you will find links and summaries to the fanfictions I’ve read over the years on both AO3 and FF.net. Each fic is sorted by the specific whumpee that they center on. So there’s a page for Danny Williams, for Mike Warren, for Lucifer Morningstar, and many many more. The fics are 90% whump with a touch of fluffy ones thrown in too. This list is based on the fics I’ve read and bookmarked so it leans heavily on my favorite whumpees and my favorite tropes.
I’ve been working on categorizing every fic by its tropes (so theoretically you could search for say seizure fics or sick fics) but that’s taking me a loooong time because I have to reread every fic in order to determine what kind of categories to make and to look for the specific tropes. So for now you’ll have to make do with the fic summaries and using the search function. When it’s done, each whumpee will have their specific trope categories so you won’t necessarily find the same tropes in each category but it should help narrow down the fics better once I’m done. This is an ongoing project for me.
The list gets updated all the time so check back in every now and then. There might be something new.
I do take suggestions of fics to add to this masterlist but please keep in mind that it may not end up on the list. It's nothing personal I promise. I just can't add every single fic in the world.
Here's the link (note that it opens best on desktop browser because it is large):
120 notes
·
View notes
Photo

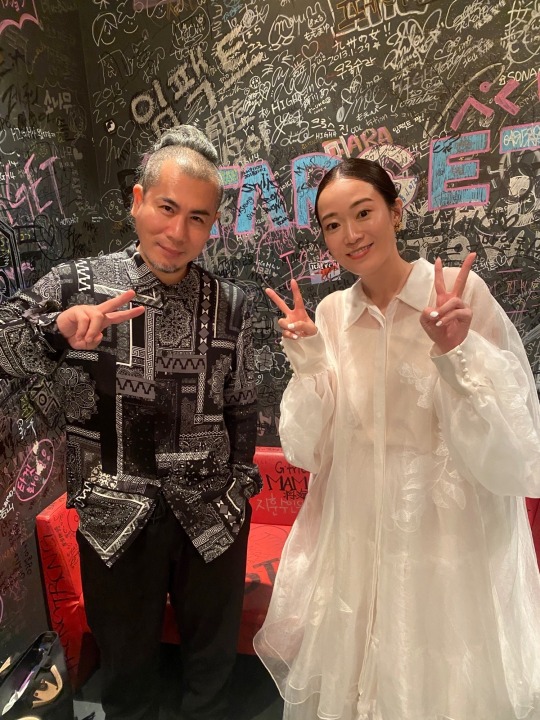
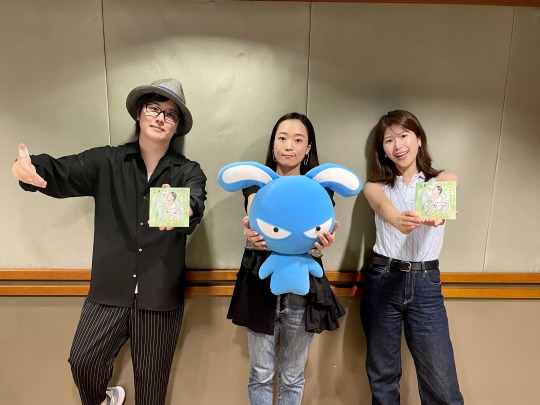
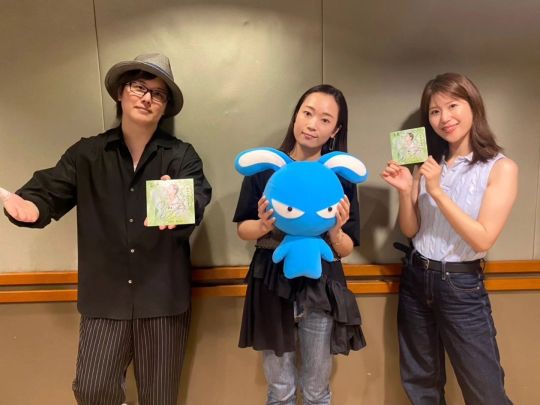
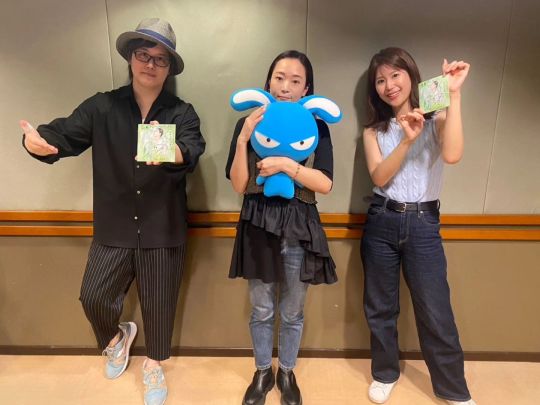
2023/06/15 Blog post by Wakana 渋谷から次は梅田へ!〜梅雨ですね〜
❗This is Fan Club EXCLUSIVE content❗ ❗PERSONAL USE ONLY❗ Do ❗NOT SHARE❗ on other sites ❗Join her FAN CLUB! Check out my detailed TUTORIAL ❗
From Shibuya to Umeda!〜It’s Rainy Season〜
I found this flower when I got off the station the other day💕What kind of flower could it be😳✨The colours and petals are so beautiful 😳✨I thought only hydrangea bloomed at this time of year but there are various flowers blooming in the world 🤗
Helo, this is Wakana (0 ̄▽ ̄0)/
It's been raining a lot lately but I unexpectedly like it... First of all, I like the sound of rain😍Also, the slightly dull and cloudy sky is even darker than usual, isn't it? I like that too 😍 When you look at it, there’s always a sense of foreboding, it's going to rain~It's going to rain ~ 😂 The temperatures are still moderate right now but I'm afraid it's going to get really hot soon...😇 I wonder if I will be able to survive the heat...😇
By the way, last Saturday I held an in-store event to commemorate the release of "Sono Saki e" at Tower Records Shibuya! I performed together with Sakurada-san who accompanied me on the piano! It's been a while since I’ve heard Saku-chan play the piano, it was a lot of fun~🥰 Saku-chan's playing style was so intense and powerful that the piano was shaking! *laughs* Truly amazing - what a dynamic performance🤭This was my first event with a live audience since my Christmas concert from last year, there was also a live stream option so people were able to watch the whole thing online. I picked a few songs from my 3rd album "Sono Saki e", some of which I hadn’t watched in front of an audience before☺️The archived video will be available until Saturday, so please be sure to check it out 😍You can watch me be super nervous during the first song😂
On June 17th, I'm going to Osaka 🥳🎉This time I’ll do a free live show at the Tower Records Umeda NU Chayamachi store♪ Everyone, please be sure to come 🌟See you in Osaka!
Until next time ☆( *'▽'*)/
***Wakana***
2023/06/15 Instagram post by Wakana
Today was dedicated to radio appearances 🥳At 16:00, I had a remote appearance on FM FUJI's "Bumpy!"☺️ I got to remain in Tokyo while the episode was live broadcast in Yamanashi prefecture...amazing time, isn't it?😳✨I got way too excited talking about movies and dramas with DJ Maya Watanabe 🤭 Maya, thank you very much!! ️
And then at 19:00, I appeared on NACK5-san's "Kirasta"🤗It's been three years and four months since my last appearance! 😳✨I was happy to be able to meet Miura-san and Momoka-san for the first time in a while😍We had a blast talking about gyoza😂It was fun 🌟 I'm definitely having gyoza tonight!! ️🥟🥟🥟🥟
Instagram post | Tweet
19 notes
·
View notes
Text
Support the Pup!
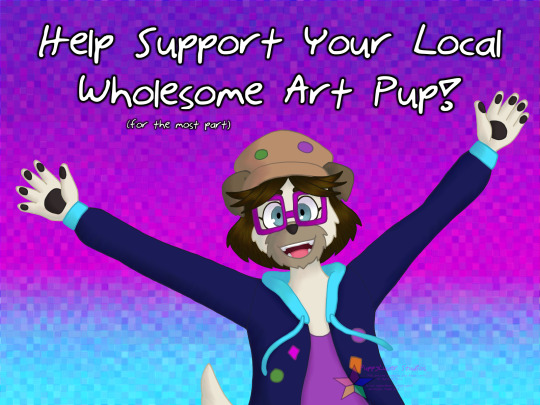
Like what you see on this blog and wanna help me out a little? I’ve got a few ways you can do just that!

-Commissions-
Would you like your own custom art piece made specifically for you? Have I got just the thing to satisfy that desire! For a decent chunk of change, I can make that happen for ya! :3
(please read the rules wrt what I’m willing to draw and payment options, otherwise I might have to refuse a potential commission, also please message me if you’re going to order a commission because I don’t regularly check the spreadsheet enough for that to be the primary way of me knowing I have one ^^; )

-Redbubble Store-
Wanna own my art in a physical form, perhaps as a sticker or phone case or even a t-shirt? I have a store available for just that purpose! I’ll try to get some newer items up soon, but the selection available right now is pretty good and a lot of the older offerings had the artwork updated recently too!
(there is unfortunately no marketable plushie option, it is merely for display ;3 )

-Patreon-
If you have a buck or several to spare per month, you can pledge to my Patreon! I charge on a monthly basis because my frequency of posting would make charging per post Absolutely Absurd. My lowest tier is at a single dollar per month, so if you feel so inclined to chip in I would greatly appreciate that!
(I have admittedly been neglecting my patron tier stuff, but I’ll be getting to that when I can. I get so into my work that I forget to save WIPs for those tiers, and I haven’t thought of anything that would make for good tutorial material lately hehe.)
If you don’t have the ability to support my work financially, that is 100% understandable and payment is never required to enjoy the vast majority of my art and writing. However, if you still want to support me in other ways, you can give my art/writing posts a few reblogs to help share them with others who might also like my work. Feel free to gush in the tags, or even leave comments in the post part of the reblog! Feedback is a very important part of artistic growth, after all, and I’d love to hear what you think! Fanart of my OCs is also a good motivator, but if you don’t have the energy/desire to do there’s no pressure for that hehe.
796 notes
·
View notes
Text
Stitch marker variety has probably improved since *checks date* whoof 2006 when this blogger made this post, and since.... idk probably around 2012, 2014? when I was looking for stitch markers and wasn’t happy with the plastic ones available commercially lol, but I think this really is still my favorite way to make stitch markers: (link to blog page here)
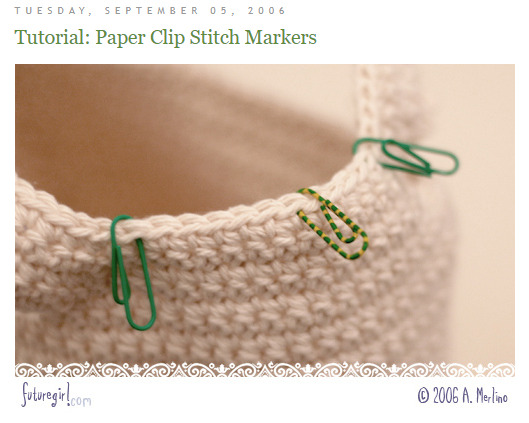
Basically the idea is you take a paperclip and tweak it to make it more convenient to use as a stitch marker. Supposedly the naked metal ones are fine, and I’ve used them before in the past, but I find I highly prefer the coated ones now. Yes, the naked ones tend to be a bit thinner than the coated ones, but really you can bend the inside part smaller than the tutorial has, and it’ll slip into smaller gauge stitches just fine. The plain metal ones tend to react to the oils in your hand, I find, and don’t seem to hold up as well in the long run. I have a couple plain silvery metal ones from years ago that I just don’t use anymore, especially since I made a bunch new coated paperclip ones recently lol. (The gold ones might be fine? I’m not sure if they’re made of a different type of metal or if they’re coated with a different metal or what. But the plain silvery paperclips, I’d recommend against.)
I really like this type of stitch marker bc you can customize them for larger or smaller needle sizes since paperclips are fairly bendable, they’re really easy to access (Dollar Tree has 250-packs of coated silver and colored paper clips, Daiso has these metallic-colored coated ones, you could probably even use those novelty-shape paperclips if they’re not too big? so many possibilities!), and they’re an easy to way to either have color-coded stitch markers, or just fun colors to have. They’re also a good weight, without being too heavy like some of the stitch markers with charms on the ends are. And also they’re removable! You can easily slip them either onto any stitch, or even onto a knitting needle if you want to add in a marker there. They’re low-profile enough to be easy to store too, they’re fairly stackable even with the inside loop bent out. Plus, they’re easy to make if you need more, and low stakes if you lose or misplace any.
The only thing I’d consider replacing them with are those bulb safety pins, and those are a bit less substantial than paperclips are; plus I’d be a bit concerned about the pin head being too sharp, which may be a problem if you’re trying to add a stitch marker to an already-worked stitch.
These are just very versatile, easy to make and easy to access, and quite fun if you can get your hands on some patterned paperclips like the OP has. 10/10 highly recommend.
(more on how I specifically bend my clips below for anyone curious)
I’ve managed to get the inner part even thinner than she has by unbending it first at one of the inside bends of the inner U, and then rebending it back down at the remaining bend point, and this is just by hand. If you have a set of jewelry-making tools (I have this mini set from Michaels I bought ages ago) then you can get it even slimmer still by clamping it with the pliers, though depending on how you unbend and rebend it, that might not even be necessary. I’m usually a bit lazy about how I unbend and rebend, but I was paying more attention this time and got it quite low profile.
So first, unbend the center loop at one of the bend points. I usually pick the loop that’s closer to the outside loop/farther down the inside loop, since I don’t want the inside part to be too long, but I also pick through my paperclips and don’t use the ones where the inside end is longer than the outside end. The green one I picture below for comparison is one I wouldn’t use for a stitch marker, I’d just use it as a paperclip.
It should look like this:
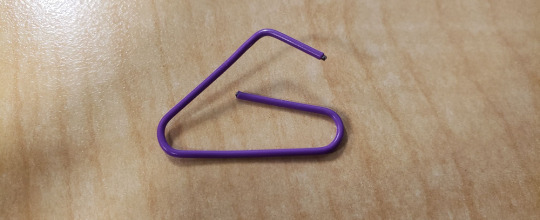
(I bend the middle part out to make it easier to access/work with. paperclips are so bendable that really you can do whatever with them to make them easier to work with, tho be aware that if you unbend the outside bends, you gotta be a bit careful bending them back or they may want to bend more at one pivot point vs another. You can rebend it around something, like the end of a pencil, to help it have a smoother curve)

^ the blue arrow points to the part I unbent
and then I put my thumbnail at the inner bend, and bend the end back down:
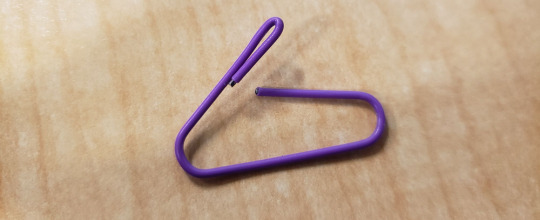
This is actually me being slightly more careful about how I bend it lmao, so I got a slimmer result.
My first attempt which I redid for the sake of explanation, and which is probably more average to what I tend to do, looks like this:
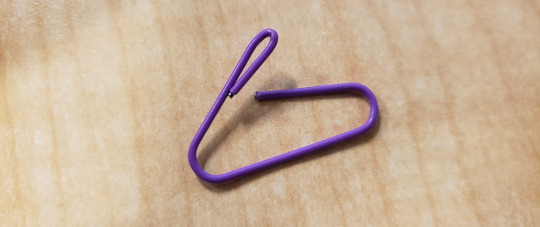
the difference being that it bent back a little at the old bend, which made the loop a bit bigger. You can remedy this with some jewelry tools, or as I show above, you can in fact make it smaller by hand.
Here’s a regular paperclip for comparison of your final inner loop:

(the green is sliiightly smaller than the purple one, but you get the idea)
I then do futuregirl’s 5th step now, where I put my nail at the very base of the end of the inside loop and bend the inner loop out:

I also tuck the end in bit so it’s “on top” of the bend now.
And then I kind of zhuzh the ends and sides back into place so the outside ring is vaguely paperclip shaped and lying flat again, like futuregirl’s 4th step:

And here is the finished thing next to the green paperclip:
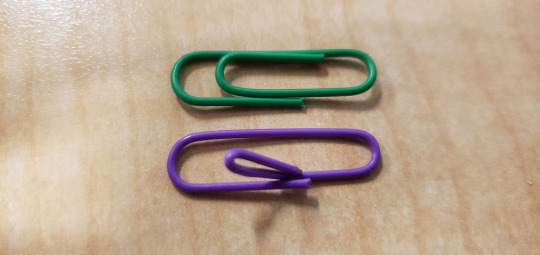
if you want the bottom loop to be bigger to fit around larger knitting needle sizes, I’ve unbent and rebent them bigger before. I recommend doing it around a rounded thing, like a pen or pencil, since otherwise it doesn’t really want to bend evenly.
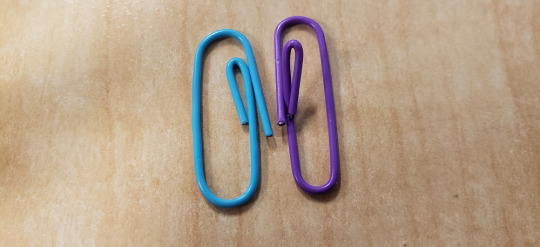
This blue one, for example, I unbent and re-bent around the end of a pen (where the pen tapers down to the point). This blue one did start its life at the same size as the purple one. The top of the loop you can see is a bit uneven, that’s where I bent it by hand. The bottom is much more rounded and even. Also, it doesn’t look it bc the purple’s inner loop sticks out more, but the blue one’s inner loop is also a bit bigger and less carefully done lol. Like I said, I find that even at this size, they slip into stitches fine; though if you wanted it slimmer still, you can get a much closer crimp with some pliers.
And there you have it! Paperclip stitch markers.
#crafts talk#actually paperclips are great#before I got some 'proper' cable needles I had this one large paperclip I unbent and bent into a large U#it's not ideal but it worked in a pinch#the other stitch markers I had are these plastic locking rings that Home Depot had yeeaaarss ago#when they had this one brand of paint that had swatches that came with little holes so you could collect a bunch of paint cards and then us#the little plastic locking ring to keep them together#they're fine but they're a bit thick so for finer gauges they're not as great. and also as I'm using them they feel a bit... breakable#mine
38 notes
·
View notes
Note
Do you have any tips on custom terraforming and custom trees? Or is there a specific YT chanel or blog you follow for advice yourself?? (Love your builds btw, I recently haven't had the energy or a good enough mood to play mc but it's always amazing to look through people's projects for my own inspiration).
heyo! so it's a bit tricky to give advice on this kind of thing bc I more go with the flow until things start looking right, but I can offer some basic (and probably very vague) advice under the cut
for terraforming: think natural, organic shapes and avoid hard edges. this seems obvious but it can be hard to remember especially when making upward slopes/mountains etc.
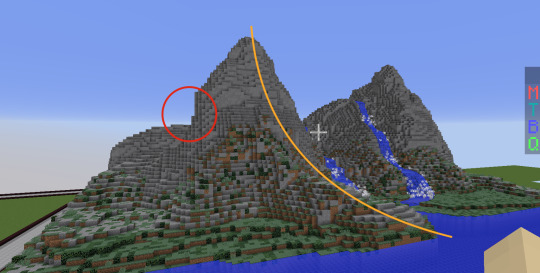
^this is from literally 7 years ago bc I'm not at my new computer but it's a good example bc it's got good and bad things to it. you can see how at the bottom of the build it gradually slopes up from the water and then transitions pretty smoothly to a steeper slope, that's a pretty good example of how mountains can look. if you've taken algebra, think exponential graph type shiz. even if you have a steep cliff it usually doesn't rise completely vertical from the ground. you can see the area I circled does pretty much that, which makes it look out of place with the rest of the build.
another good thing to keep in mind is block variation, which adds texture to the landscape. I've definitely gotten better at this over time through practice and watching other people build. the blocks you use are gonna vary depending on the biome/environment ofc, but I like to play around with multiple blocks w/ similar colors
depending again on your biome, greenery is always a plus. I tend to avoid using bonemeal to add grass/flowers/etc, because personally I don’t love the red/yellow color combo. as for custom trees, I typically make the trunk/branches first (using a combo of logs, wood planks, fences, stairs, slabs to get the right shape/colors) and then filling in leaves until it feels right lmao.
I don’t really watch tutorials on building, but I do watch a few builder youtubers when I have time. GoodTimesWithScar is known for being a super talented terraformer with a lot of large-scale builds. (his current hermitcraft starter base is a really cool tree iirc, which might be good to check out!) BDoubleO100 is another inspiration of mine, and is really good at nailing fine detailing in building (his texturing has inspired me a LOT). in my last post with the castle, those pine trees were inspired by some he made in one of his videos. he just started a new season of his youtube building series, where he talks in depth about his build process––would totally recommend. through association I know lot of other hermitcraft members have great experience (GeminiTay PearlescentMoon Grian etc etc etc), so you can check them out too!
big takeaway that I’m sure everyone’s heard before: practice makes progress woohoo yass! but it’s true, I’ve definitely seen improvement just by trial and error and experimenting with different things over time. also learning from other people can be super helpful as well. tools like worldpainter/worldedit/voxel aren’t necessary at all, but they’re sometimes super nice to use especially in the planning stages of building. if you’re able to download/willing to use them, there are a lot of youtube tutorials on how they work
this is a super general overview and I’d be glad to answer some more questions if you have any specific ones! just realized this has been sitting in my inbox for a few days and wanted to make sure I got back to you. again, I’m no expert and if anybody else wants to reply w/ extra advice feel free <3
#ask#v-mythos-v#ty for the ask I hope this helps and hope you feel up to playing minecraft again soon!!#sry it took so long to respond aaaa
9 notes
·
View notes
Photo

Hey guys! I got an ask wondering how I make my gifs and some people have asked me how I color my gifs, so here you go!
We’re going to be making this:

You’ll need:
VLC Media Player
Photoshop with working Import Video Frames to Layers function and timeline. I use Photoshop 2020, but any older versions with these functions will work!
A high-quality video (preferably 1080p)
Tutorial under the cut!
PART ONE: MAKING YOUR GIFS
You’re going to want to open up your video in VLC Media Player and open it to around a few seconds before your scene appears. If you’re giffing from a small YouTube video you can ignore this step, but for movies and TV, you’ll want to use VLC to extract the tiny part of it you want.
Pause it before your scene and click View >> Advanced Controls.
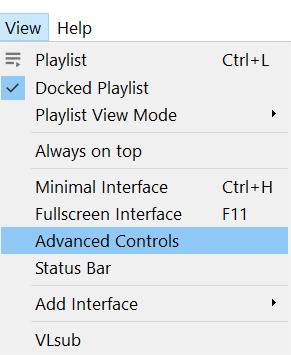
Above the play button, you should see a bunch of new controls. Focus on the red button I circled below:

Click this button and press play. VLC records are a little bit off, so this is why you want to be a few seconds before your scene actually starts so you catch it all! When your scene has played, press the button again. You’ve now recorded your scene and you can record as many scenes as you like for a full gifset.
You can find your recorded videos in the Videos folder. It’ll be named something like vlc-record-a bunch of letters and numbers.
Now that you have your scenes, it’s time to open Photoshop! When Photoshop has loaded, go to File >> Import >> Video Frames to Layers, which is a bit down to the bottom. It’ll prompt you to select a video; click on the video you just recorded, and a screen like this will pop up:
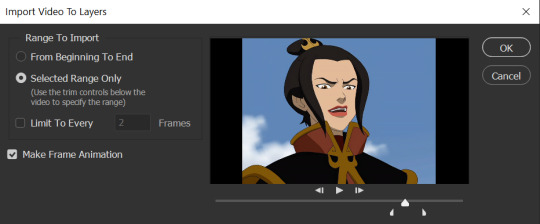
Use the white sliders to select the parameters of your scene. I would recommend going a little bit more on both sides so you catch your whole scene.
TIP: Make sure you do NOT select the button that says “Limit to Every 2 Frames,” because that will make your gifs look choppy and ugly. Love yourself!
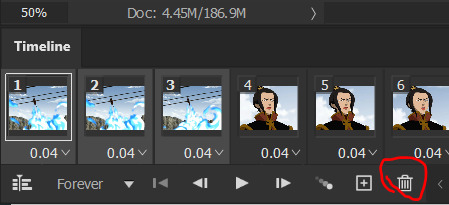
Once your frames have loaded, you might not see them on Photoshop the way mine looks. If that’s the case, make sure you go to Window >> Timeline so you can see the frames!
Delete the extra frames in your gif that you don’t need by selecting the frames you want to delete and pressing the trash can button, circled below:
Now that you’ve done that, it’s time to crop. For this particular gif, I’m going for a full-width one, so the width I chose is 540px and I chose a height of 290px. Click on the crop tool and make sure your crop settings are at W x H x Resolution, or you won’t be able to input specific dimensions the way I’ve done here:

Position the crop tool where you want your gif to be:
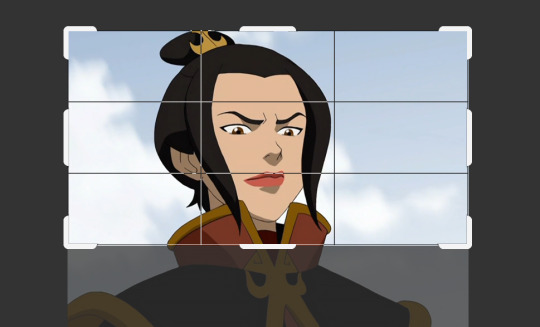
And now that your gif is all cropped and sized, it’s time to sharpen! I have a pretty specific sharpening process that I’ll outline in detail here, but I have an action for this purpose so as to save time. I’m just making this part of the tutorial so you know what you’re meant to do in Photoshop.
First, go ahead and click the three little bars at the right edge of the Timeline/Frames tab and hit Convert to Video Timeline.
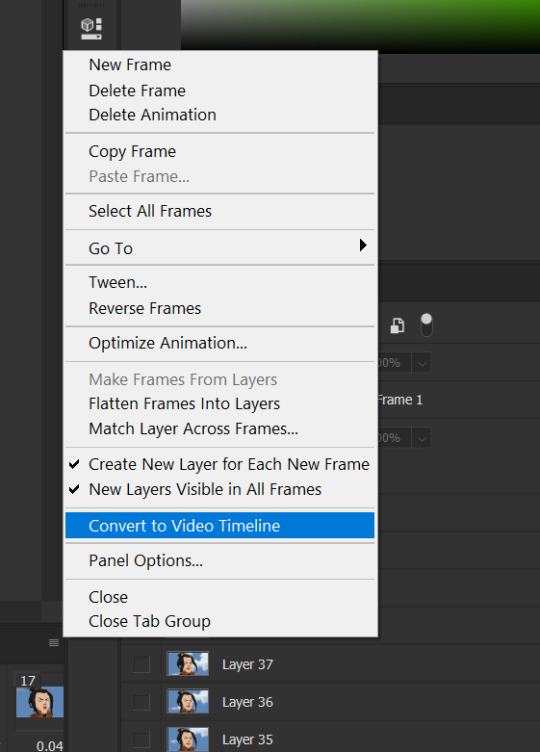
Now, your timeline should look like this:

Go to Select >> All Layers, and right-click on one of the layers in the Layers tab once they’ve all been selected. Select Convert to Smart Object. This allows us to sharpen the entire gif at once as opposed to by frame! Your timeline should now look like this, with all the little purple parts condensed into one:

It’s time to sharpen! Go to Filter >> Sharpen >> Smart Sharpen. I do two passes with the Sharpening tool; here are my settings for both:

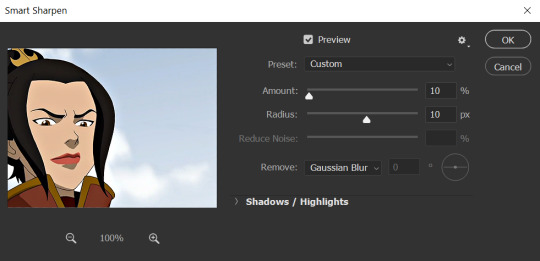
It’s not too apparent in the pictures, but it does make a difference. Don’t worry about your gifs looking too sharp; I use this action on every single one of my gifs and it always works like a charm.
Now that our gifs are nice and sharp, it’s time to take them back to frames. This is because of a glitch in Photoshop that makes gifs saved in Smart Object form much faster than they would be in frames. Click on the small bars on the right of the timeline again and select Convert Frames >> Flatten Frames into Clips.
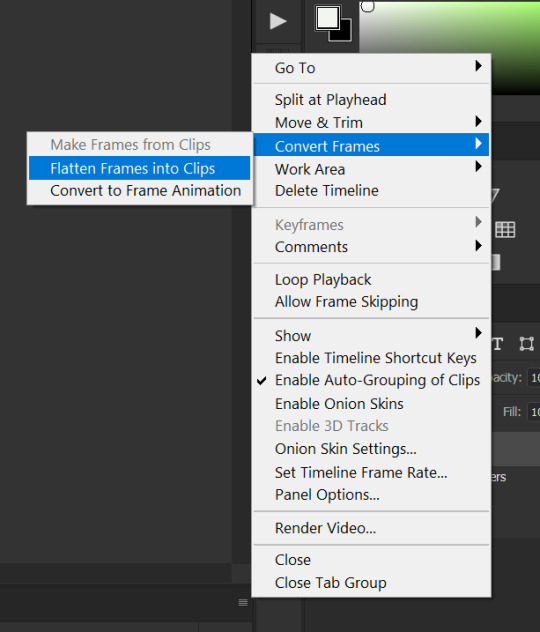
Your gif should have all those little clips that we had before we converted it into a Smart Object.
Then, go to Convert Frames >> Convert to Frame Animation.

Your gif should be back in frames again, but it’s all one frame. Don’t worry; we’re going to fix that by clicking Make Frames from Layers from the menu with the three little bars again.

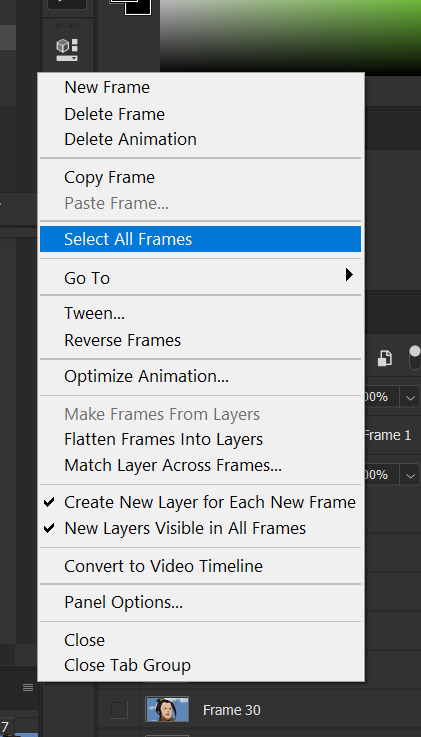
Now all your frames should be back! We’re going to set the speed of the gif now. Hit those three little bars again and click Select All Frames. Now click on the little triangle under any frame and click Other, and a little popup will appear. I always set my gifs to a speed of 0.05.

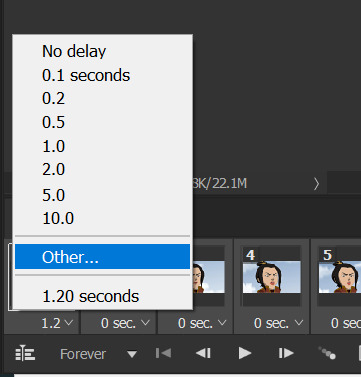

At this point, I save my gifs as a .PSD file. You can delete these PSDS after you’ve posted your gifset (I usually do to save space!), but it helps to have them so you can edit your gifs later if you want. Hit Ctrl+S, and now the screen to save it should pop up. Make sure you save it as a PSD file and not something else.

Now you have a gif that you can color! Which brings us to…
PART TWO: COLORING, ADDING SUBTITLES, AND SAVING YOUR GIFS
I do run a pale blog so this is going to be a pale coloring tutorial. You can check some popular resource blogs to see if they have any tutorials for colorful gifs!
I start out by making a group with the little folder below the layers tab; I title it “coloring.” (Not pictured: I added a layer mask and painted one black dot over it so I could reference the original!)

I always start out with a Curves layer; here are my settings:
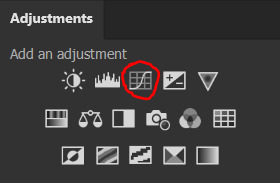
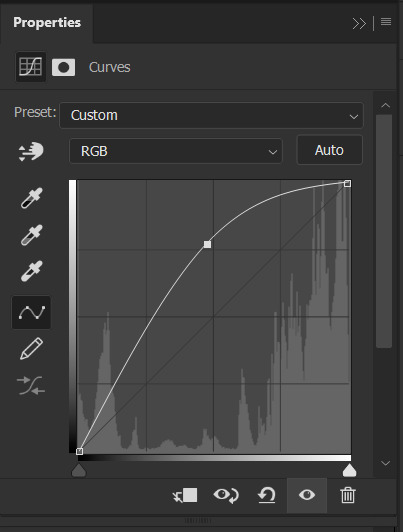
The gif at this point:

Next, I decrease saturation using the Hue/Saturation adjustment:
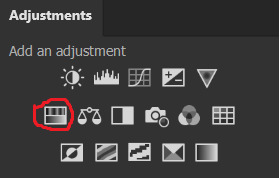

After this, I add a black and white Gradient Map layer and set it to blend mode Exclusion at 10% Opacity.


Then, (not pictured), I add a Selective Color layer and reduce blacks in Whites and Neutrals while increasing them in Blacks.
To make the background pale, I added a Hue/Sat layer, applying 100% Lightness to the Cyan and Blue channels and adding color to Azula’s skin by saturating the Yellows.

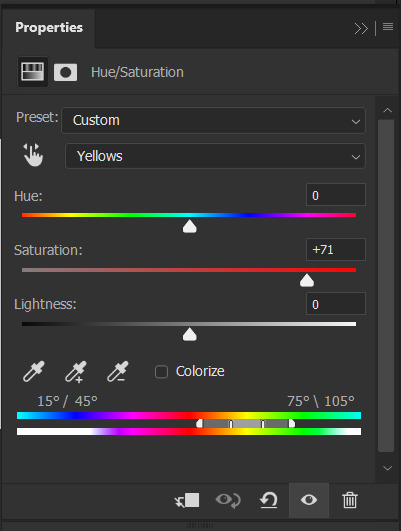
Here’s the gif after those adjustments:

Now I’m going to restore color to Azula’s skin following my own tutorial, so I’m not going to go into those details here. However, here’s the gif after all this. It’s not totally the same as Azula’s skin, but going any pinker makes the gif look awkward and oversaturated, which isn’t a good look:

After some minor adjustments and removal of the layer mask:

Now for subtitles!
Use the Text tool and make a rectangle at the bottom of your gif where subtitles go. I use Arial Rounded MT Bold, with Regular style, at 3.36pt and Sharp anti-aliasing.


Create a rectangle at the bottom of the gif where subtitles go and type in your text; then right-click on the text layer and select Blending Options and check Stroke, and these are my settings:

Now your subtitles are all ready! I’d recommend duplicating one frame of the gif and then duplicating the text layer onto a new canvas and saving it as a PSD so your settings and placement are always consistent across your gifsets!
Time to save your gif. Here are my settings, circled ones important:
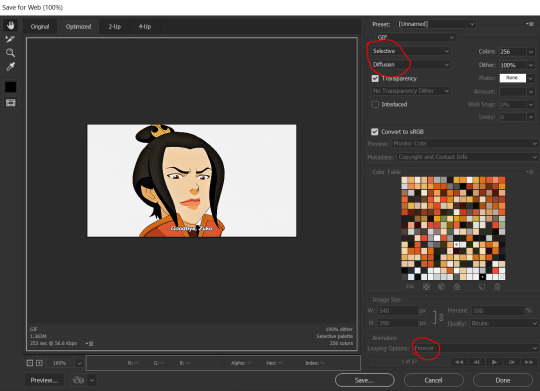
I’ve seen gifmakers use Adaptive+Pattern but I personally think that looks grainier and the pattern is really obvious; in my opinion Selective+Diffusion looks smoother, but it’s all up to you! Experiment with what you think looks best.
Make sure your gifs are set to loop Forever or they’ll only loop a limited amount.
Here’s your finished gif!

I hope this tutorial was helpful! Please reblog this if you learned something, and I hope you have a wonderful day. Happy gifmaking ❤
#allresources#chaoticresources#yeahps#biresources#resourcemarket#useradeela#usermaira#userdanisaur#userchelsea#tuserivy#*mine#resources#tutorial
411 notes
·
View notes
Note
hi!! i've seen some of your gifs/edits and they look really good! i've been wanting to try to make gifs but im not really sure where to start. what app/website do you use to make them? thank you!
Well first of all, thank you so much for the lovely compliment!! 💖🥰 I’m so happy you like my gifs. And second of all, I use Photoshop 2018 to make my gifs.
The version I use can be downloaded here for free. I’ve downloaded it on multiple PCs many times and never had any problems with it, and recommended it to quite a few people who still use it today. Out of all of them, only one person had issues with it being incompatible with their computer, so it should be fine!
I also have an #editingguides tag for photoshop tutorials and other guides like them. You may have to scroll to the bottom to reach a lot of the ones I myself used to learn photoshop, so here are some recommendations:
Basic Gifmaking Tutorial (Easy) - Includes everything from coloring to sizing to captioning the gifs, and how to create a timeline/export them.
Basic Gifmaking Tutorial (Easy) - Includes everything from coloring to sizing to captioning the gifs, and how to create a timeline/export them.
Basic Gifmaking Tutorial (Medium) - This is the gifmaking tutorial that I followed the most. It’s a good one, and seems difficult to follow at first, but once you’ve got the methods down it’s a much smoother way to make gifs, imo.
HD Gifmaking Tips (Easy) - This one covers much of what the above posts did, but has some helpful links to many useful posts that can expand your knowledge on gifmaking.
How to Use Actions (Easy) - This guide helps with actions. If you’re just beginning, I wouldn’t worry too much about them right now. I mostly just mention it to say that I use this sharpening action by @rubyredwisp, which is very helpful to use if you’re struggling with all the steps of sharpening on your own.
HERE & HERE are graphics showing how to size your gifs for tumblr!
Coloring Tutorial (Complex) & Coloring Tutorial 2 (Complex) by @inejz-ghafa - The both of these are a lot more difficult for a beginner, so I’d leave them alone until you learn the basics, but they go over how to make vibrant gifs using painting and layer masks and other such skills. If you’ve ever visited Becca’s blog before, you’ll know just how vibrant and beautiful the guides will help you make your gifs. Hers always knock me right out of the park.
How To Avoid White-Washing POC (Medium) & How To Avoid Orange-Washing POC (Easy) - These two are quite simple to follow, and are good ways to avoid coloring POC incorrectly in your gifs. I highly recommend them. The second one has been especially useful to me for dark scenes.
How To Blend Gifs (Complex) - This is the guide that I taught myself to how to blend gifs with! It covers a variety of methods and strategies and has quite a few helpful tips. It’s one of the best blending tutorials out there.
Coloring Tutorial (Medium) - I learned coloring with a tutorial that’s no longer available anymore, and I’m having trouble linking anything even close to it, but recently I’ve been taking a lot of tips from this one. It has some great advice on lighting and depth.
And there are a great many other tutorials out there as well as in the #editingguides tag! I also visit @chaoticresources whenever I need a new guide or reference. It’s got a lot of content saved to it that you should totally check out!
All in all, I use Photoshop 2018 in combination with the VLC Media Player. I download full 1080p episodes from 1337x using a VPN (although I know some people who don’t use one, so it’s really up to you), and then use VLC to record smaller scenes that I can import by frame into Photoshop.
#sorry for the ramble#I just know how hard it is to start making gifs#ps tutorials#editingguides#photoshop#myramblings#anon#ty for the ask! <3#asks and answers#gifmaking#gif tutorial
37 notes
·
View notes
Photo

Ahhhh first of all thank you so much for the compliment!! I’ve attached sort of a mini tutorial under the cut for anyone who was curious about my process! (Keep in mind that this will be specific to Procreate and Ipad + Apple pencil users because those are my tools of choice!)
First tip is to use references. I know that posing is something I tend to overthink and struggle with, so finding an image that’s sort of close to the scene I see in my head helps to solve that problem, which means I can draw panels faster! I’ll usually grab a stock image from google or use one from AdorkaStock’s endless amount of pose references to choose from. They’re a great resource if you’re looking for ideas / references. I’ve definitely used their stock as reference for my life drawing assignments back when in-person classes first got cancelled because of the ‘Rona so pls check them out!!

I start by very roughly sketching out the pose based on the image I’m referencing from (that’s the faint orange lines you see there). This sketch doesn’t have to be perfect. Just use shapes --- Circle for the head, blocks or ovals for arms, and circles for joints. What matters when doing that first sketch is getting the general feel of the pose right. Worry about details later!
Once you have that rough sketch you can lower its opacity and start a new layer above it. This is when you can start roughing out more details. I prefer to do this step quick and messy too, focusing on getting the general look right as opposed to small details and making corrections as I go. Black lineart goes on a new layer on top of that.

Now, this has to be the thing that’s sped up my process the most. I used to color all panels by hand, as in taking the brush and carefully coloring inside the lines which takes... Forever and a day. This little trick saved my entire life xsjjjsa.
When you finish your lineart, click on your lineart layer and select ‘Reference’. Then you can create a new layer under that where your colors will go. This will make it so you can just drag and drop your colors to your art and they’ll stay within the lines! It’s very important to make sure that your lines are closed and there’s no gap between sections that are different colors, otherwise your color fill will bleed into those sections!

I do all my colors on one layer since I do flats only for this blog. That’s the other thing that makes my process faster: I’ve learned to keep things (relatively) simple! You might have noticed that for regular panels (so anything without mood lighting or isn’t flashback coded) I only do enough shading to give a rough idea of where light is coming from and I don’t bother shading areas that are already filled with color. The color palette I have also tends to be almost grey-scale so I don’t have to figure out colors (because color matching is a beast djjksd. speaking of, you should absolutely create a custom palette and save all the colors you use often. it’ll save you a ton of time). I find that it works better and I don’t have to stress as much over details if I keep it this simple!
I hope these tips were useful in some way! I’m sure you’re a great artist yourself~! And on those days when drawing is tough and nothing seems to look right or go right, remember that it’s 100% okay to put down your pen / pencil and take a break from it. Do something else and come back to it with fresh eyes. As one of my profs once told me: There’s no getting worse at art. You can be out of practice but you can’t get worse, you can only get better!
44 notes
·
View notes
Photo

After a few years of trial and error, I think I've finally found the perfect organization method.
In the early years of high school, I had a bullet journal. I was an artsy kid who found a way to combine art with organization in a way that benefited other parts of my life.
However, as I approached the end of high school, my schedule got busier, and I was involved in a lot more things, so owning a bullet journal was less practical. Because of that, I switched to an app called Edo Agenda.
I continued with digital planning in college since I knew I wasn't going to have as much time. But all the apps I tried out—Taskade, Actions by Moleskine, Any.do, Todoist, Wunderlist—weren't suited to my planning and organizational needs. They didn't have the specific functions I required and didn't incorporate an organization system I liked to use. The predefined apps were too restraining, but the more customizable apps weren't customizable enough.
So then I switched to a bare bones, uber minimalist bullet journal method. That worked pretty well my second semester. It was simple, portable, and most importantly, flexible—all the things one could wish for in a planning system. However, it wasn't always the most convenient to use since I couldn't effectively integrate all the different aspects of my life, which, to no surprise, is mostly recorded digitally.
There was just one huge problem with my digital organization system that made me hesitant to switch back in the first place: everything was fragmented. Notes were in Google Docs. Financial records were in Google Sheets. To-Do Lists were in my bullet journal. Team projects were in Trello. My poetry was on Bear. Things I wanted to try are carelessly pinned to random pinterest boards or added to my YouTube "watch later" playlist. It was a mess.
Over the summer, I found out about Notion from a friend, and I thought, this has so much potential, it could even be exactly what I need. It's essentially like an empty notebook on your computer with functions that make it 10x more powerful. Notion allows you to integrate all aspects of your life and work into one app. Some of the advantages that have made me partial to Notion are:
Even greater customization level. Notion is a blank canvas with tons of predefined blocks and different file types. You can make databases, spreadsheets, Kanban boards, to do lists, etc. Also, you can remain connected to other digital services. You can link websites, collaborate with other users, use different structures (e.g. documents, databases, tasks), embed images and videos, etc. There are also tons of formatting options, e.g. text color, highlight, heading v. body text.
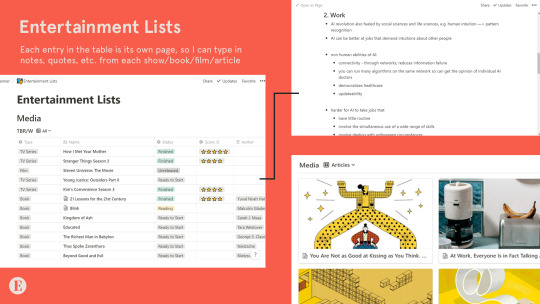
Better organization. Notion allows you to have pages within pages within pages within pages—an infinite hierarchy that you can organize with tables of contents. These pages are made of blocks, e.g. tables, checklists, boards, databases. Both pages and blocks can be rearranged by simply dragging and dropping them to where you want them to be. In other words, I guess it's kind of like building a website to organize your life. Plus, their database feature is especially powerful as it allows you to connect all your data and get into as much detail as you wish (each entry in a database is its own page).
Templates. There are tons of templates created by both Notion and the community that you can use. These are especially helpful in the beginning since Notion does have a rather steep learning curve. There are template for almost every category: personal, planning, finance, job applications, design roadmap, etc. Check out their template gallery, this medium article called "10 Notion templates to inspire your use", or read on for my own examples!
Shortcuts. This makes typing and documenting so much faster. Notion uses Markdown, which is a text-to-HTML conversion tool, e.g. # = Heading 1, *, - = bullet point, etc.
Notion has some pretty awesome features, but how does one actually use it? Personally, I have four top-level pages: my planner, my personal journal, songwriting, and blogging.
Planner
I've been using my planner to, well, plan and track my day to day activities as well as my week and month. The way I've structured it is a calendar or monthly overview with links to pages of weekly overviews, and if needed, daily overviews within the weekly overview. This links things up so nicely, i.e. I don't have to be constantly flipping pages in my physical bullet journal or planner to find what I need.
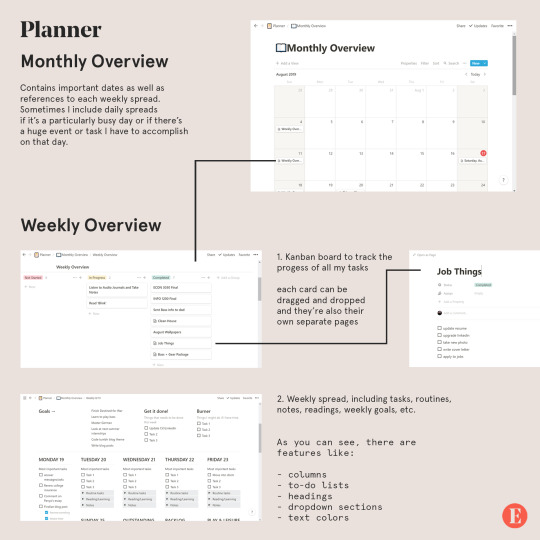
I also have entertainment lists, which is mainly a table with all the shows I want to watch, the books I want to read, etc. I keep track of whether or not I've watched them, as well as my personal ratings. What I love most about this is that each entry is its own page, so I can type my notes for each book, show, or film and easily find them in the future. (Also the reason why I have plural “lists” instead of just one entertainment list is because you can filter entries by type of entertainment, e.g. movies, tv shows, books, articles.)
Personal
For personal notes, goals, journal entries, etc. This is kind of like an extension of my daily journal and just where I dump all my thoughts and keep track of the different aspects of my life: mental, emotional, spiritual, social, physical, and travel.
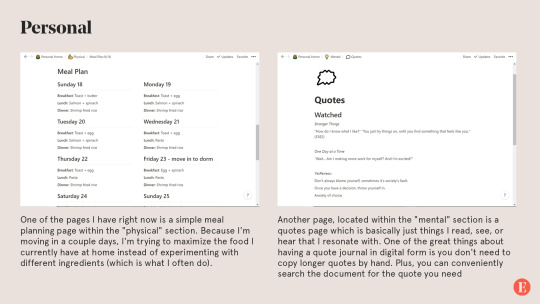
Another page I have is called "Stray Thoughts" and, well, it's pretty self explanatory. It's a lot easier to dump all my thoughts as they come and reorganize them later. Of course, this requires sacrificing the rawness of journaling, i.e. when the thoughts come and how you process them, which is why I still keep a regular journal that I write in daily.
Songwriting
I've been writing a lot of music over the summer and it's often hard to keep track of all of my songs and how far I've gotten in the songwriting process. So I created a table of songs - each entry of a song is a page with its lyrics. These are then tagged with the status of the lyrics (i.e. completed, in progress) and the status of the music itself (i.e. melody only, instrumental, mixing, mastering, revised). Eventually, I'll include demos in the database by embedding audio files in the document.
I have a separate section for inspiration and ideas, which is a kind of brain dump, e.g. words I think would make a good song, a certain theme for a song, a melody that's been stuck in my head, a vibe I'd like to try out, etc.
I've also been watching a lot of tutorials for music production and there's a section where I write my notes for that.
Eintsein
The last section of my Notion app is for this blog. Which has pages for
New posts. These are ideas for future posts, asks that I think would need longer answers, as well as posts that are currently in the draft stage (like this one was before I posted it)
Design assets. This is where I put all the visual branding material for Eintsein.com to be used in posts and any visual material on the blog.
FAQ. Having an FAQ document just makes it so much easier to make changes to your existing FAQ. Plus, if you ever change your FAQ theme, you just have to copy and paste what you already have.
Post directory. I keep track of all my previous masterposts, infographics, and generally longer and more comprehensive posts. It's the exact same as what you see on my Navigation page. And yes, the document contains direct links to the post.
New theme. A project I've been working on the past couple days is trying to create my own theme for my blog. This is where I put all my outlines, brainstorming notes, design inspiration, code snippets, etc.There are some pretty awesome features I’ve made use of in this page:

As you can probably tell, I'm absolutely obsessed with Notion since it has such awesome features and endless possibilities for customization. So far I've been using Notion for personal projects, which, since they are quite big in scale and have no set deadline, are important to organize well. My summer courses were only 6 weeks and weren't difficult to organize.
The formats above are just how I personally use notion. You could make some of your own, or if you don't think you want to build your pages from scratch, there are tons of templates to choose from. Here are some I think I'll be using in the near future and may be helpful for others as well, especially students like myself:
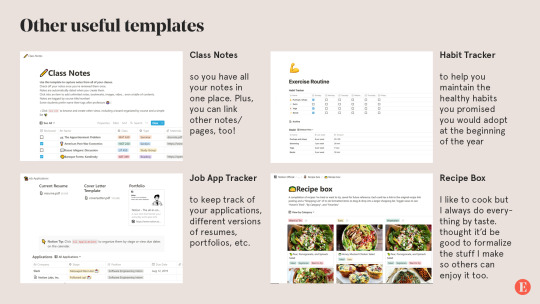
One drawback, however, is that Notion has a rather steep learning curve, but there are tons of tutorials online (especially YouTube) and I guarantee you it's all worth it.
Notion is not just a productivity app. It's a way to concretize your entire life.
Notion is free to use, but there are higher tiers that allow for more blocks, greater file size, etc. I use a personal account, which is $4 per month with unlimited block storage and no file upload limit (although I got it for $33/year). Personally I think the free plan would suit most people's needs, especially if you're not uploading large files.
#mine#eintsein#mymp#notion#apps#productivity#studyblr#studyspo#study hard#organization#document#graphic#design#infographic#masterpost#advice#tips
5K notes
·
View notes
Text
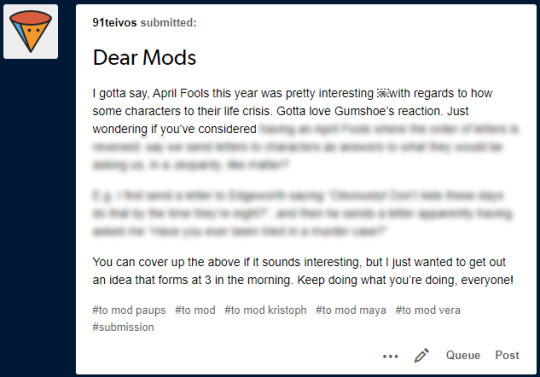
Dear 91teivos,
Mod Vera: Thanks! Everyone in the world is going through some kind of existential crisis, so it made sense for the AA characters to join the party! (And since it was another follower who gave us the idea, we might just keep that idea in the think that after all...)
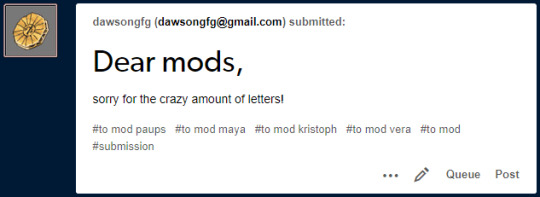
Dear dawsongfg,
Mod Vera: No need to apologize! We like to space out letters from specific people a little, but we’ll answer as many as we can!
(Referenced Letter)
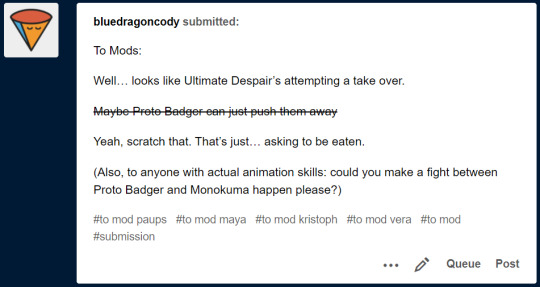
Dear Bluedragoncody,
Co-Mod: Don’t worry. I doubt they’ll have much luck against the Ace Attorney crew, even without the Proto Badger. They have the ultimate weapon against despair in their arsenal, after all.

...They’re doomed, aren’t they?
I can’t make any promises, but if I ever gain enough skill in the art of animation (which has been a dream of mine for a long time, it turns out), I’ll keep that idea in mind.

Dear skibot99,
Mod Vera: Probably Tumblr bein’ weird. (What else is new?)
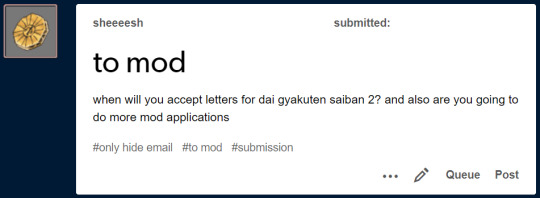
Dear sheeeesh,
Mod Vera: Mods get brought on as needed, as you can see with the arrival of Mod Edgeworth! Also, DGS2 is one of the few AA titles I’ve never played, but rest assured. Where there’s a letter, there’s a Mod who can answer it!
Mod Edgeworth: To add to Mod Vera, even if you weren’t accepted during any mod applications, that doesn’t mean you have lost all chances. I applied early January and lost to Mod Vera. Regardless, Co-Mod informed me that, even though I was rejected, he saw my potential and kept me in mind for if I was ever needed. Now, here I am.
Just because you get rejected, that doesn’t mean it’s game over. Show that you have potential and make yourself known by sending letters to us. That is what I did, after being rejected. I made myself known to the mods by sending letters. We do read them and they tell us how much you know the characters and games of AA more than any application. Of course, you must also follow the guidelines. That just goes without saying.
Co-Mod: I think my actual words were something like “Don’t tell anyone, but you were my second choice.” But yeah, what they said is true -- becoming a Mod here, like many things, may or may not happen to you, but you can definitely increase your chances by waiting patiently and demonstrating your potential.
As for DGS2 letters, I’m afraid those are still off-limits unless you know of a way to play or watch the game in its entirety, translated into English. I guess I could check to see if the Dai Gyakuten Saiban 2 channel finished translating...
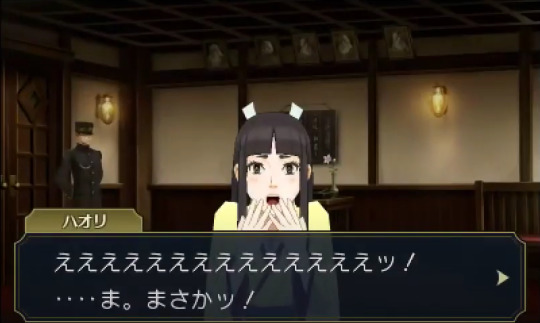
(Translation: Whaaaaaaaaaaaat?! ...D-Don’t tell me?!)
...Okay, looks like I have some watching to do. Don’t know how I missed that.
So, uh... That part in bold was what I was going to say. Now that both games are finally getting an official English version, all I can say is, hang tight!
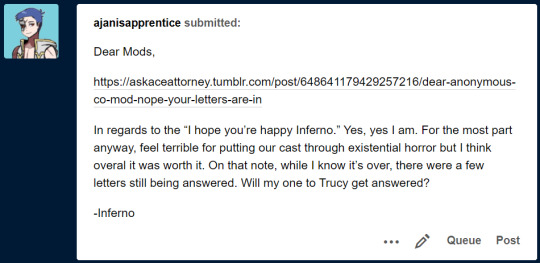
(Previous Post)
Dear Inferno again,
Co-Mod: Yeah, I agree. I was just joking around. For anyone who didn’t catch it, that was a reference to Sbemail #108.
The event’s technically over, but we’ll answer the rest of the April Fools’ Day letters when they reach the bottom of the queue. I’m as eager to see Trucy’s reaction to the news (after the stunned silence) as anyone else, after all.
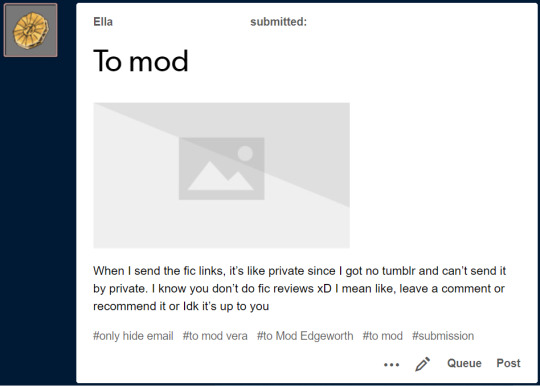
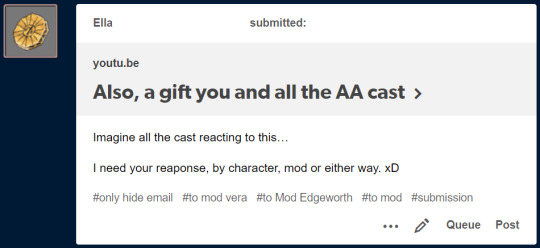
(Video in Letter -- Strong Language Warning)
Dear Ella,
Mod Edgeworth:

I can’t see the first link and....

How did you find this masterpiece and where can I play this game?
Co-Mod: We don’t check for direct messages on Tumblr, if that’s what you’re referring to, so it wouldn’t have made any difference anyway. You can always send links in your letters, of course.
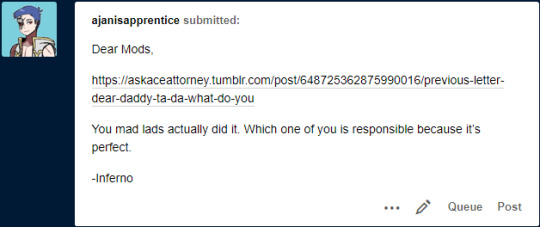
(Previous Post)
Dear Inferno,
Mod Edgeworth: That mad lad would be me and thank you.

I like to put my heart and effort when answering these letters. With this one, I figured you wanted to see Trucy in costume, so I just searched up an image on Google for the Ancient One’s costume, a sprite of Trucy and a bald head to put on her. The rest I photoshopped on GIMP.
We’re still going through letters from January. Hopefully we will get the rest of yours soon enough.
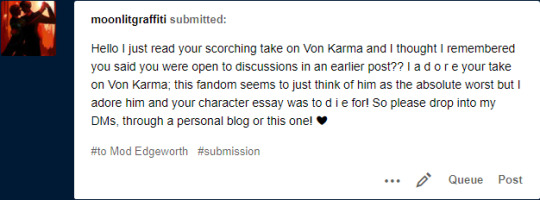
Mod Edgeworth: Thank you very much. Your support and the others’ support that have liked, commented and reblogged it mean a lot. As you have stated, a majority of the fandom seem to consider him the worst. I’d like to think it’s because how AA had created this villain of a character to be universally hated was pure genius. Not even the Phantom gets this much hate… and that’s saying something.

Unfortunately, I’d like to keep my real identity outside this blog a secret. I write a lot of letters here and I don’t want to break the spell for anyone. Think of it like a Disney theme park. The cast that play the characters will never admit their true identities, outside of family and close friends, to prevent the experience from being ruined. I want to do the same as a Mod. I don’t want to break the spell of writing to your favorite AA characters. This blog had helped me through my tough times and I want to help everyone else as a mod.
However, I will answer your letters and, if you post anything on your account, a mysterious friend I know may linger and give you a like ;)

(Previous Letter)
Dear Ali S. Fakenamington,
Co-Mod: Beautifully so.

(Previous Letter)
Dear Sinyove,
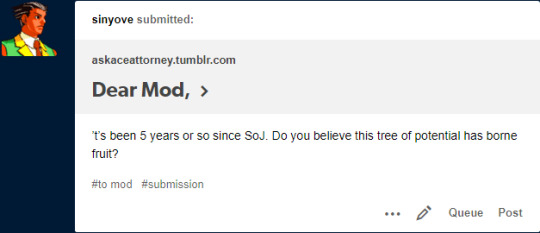
Mod Edgeworth: That letter was made in 2012 before AA5 and AA6, which was WAY before I became a part of the AA fandom. I’m certain a lot of us were not here when this letter was made, except maybe Co-Mod, but you’ll have to speak with him about this. I will say that the mod that answered this is no longer working here... I think. At the very least, I haven’t heard from him.
That being said, AA4 or Apollo Justice was the first AA game I’ve ever played. Despite all of the hate I saw towards that game, I still loved it regardless. Though, having not played the trilogy, playing the tutorial of AJ was a pain in the ass. I remember going to YouTube to find out how to beat it, because it was so hard. I also played it on PC.
I do see where The Mod was coming from. Had the two sequel games never existed, Apollo Justice would have more holes than my brothers’ socks. My only critique is that Phoenix wasn’t any better either with having Mia babysitting him during almost every trial AND investigations. Hell, Phoenix needed Mia to know how to talk to a kid, talk to a perverted old man, almost gave up in most of his trials in the first game and never conducted a trial without Mia until Turnabout Goodbyes when Maya literally couldn’t summon her. For the most part, Apollo was doing fine on his own without Phoenix, with only Trucy assisting him for the two middle trials, only almost giving up once and Phoenix having assisted him during times when Apollo was not in a normal situation (like when the criminal turned out to be his own co-council/mentor or when he had to lead a trial that included the Jury System). That’s more than Phoenix ever did on his own in the first two games and I think Apollo deserves more credit than he got in that letter in my opinion.

For me, Apollo Justice is one of those games you either like or you hate. I love it for what it is. My least favorite AA game would have to be Ace Attorney Investigations, the first game. The second one is my absolute favorite.
Co-Mod: Sadly, I haven’t seen or heard from the Mod in a while, so it may be time for us to declare him MIA again.
Erm... Sorry, poor choice of words.
I’m fairly certain I wasn’t around 5 years long ago, but I have to say, Capcom did a great job of making Apollo and his story more interesting over time. He may not be Phoenix, but he certainly carried his legacy forward pretty well, both as an attorney and as an Ace Attorney protagonist.
Now, WHAT ABOUT ATHENA ALREADY!?

Dear BDC,
Co-Mod: It fits like a glove, if you ask me...although it also kind of reminds me of 101 Dalmatians. And thanks for that bit of info! I never get tired of watching people enjoying the fun dialogue and plot twists of Ace Attorney, so I might have to look him up.
I’m not sure I feel the same about watching Dahlia’s voice actress, though. I’m sure she’s a nice person and all, but the thought of hearing that voice for so long... *shudder*
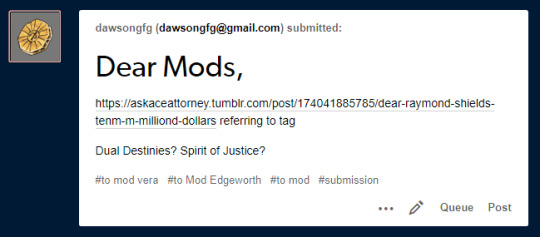
(Previous Letter)
Dear dawsongfg again,
Co-Mod: I wasn’t trying to say that natural deaths can’t happen in the Ace Attorney universe, just that most deaths aren’t what they seem. I knew right away that Archie Buff’s death was no accident, for one thing. Waaaaay too much of a coincidence, know what I mean?
-The Mods
#91teivos#dawsongfg#bluedragoncody#ajanisapprentice#skibot99#sheeeesh#Ella#moonlitgraffiti#Ali S. Fakenamington#sinyove#Mod Post#Mod Vera#Co Mod#Mod Edgeworth
15 notes
·
View notes
Text
basic manga cap tutorial || ibis paint x

I got a request on how I color my manga caps (you can check them out in #morgan-colors-bnha and #morgan-colors-hq), so I thought I’d do this step by step tutorial that walks you through my process!
I color and draw on my phone (Samsung Galaxy Note10+) using the stylus provided with the phone, however you can use your finger. For manga cap coloring, I use Ibis Paint X, which you can find HERE for the Google Play Store, and HERE for the Apple App Store! It is a FREE app, and actually really helpful for a number of reasons, which I’ll show you down below! It does go without saying - there are a limited number of brushes that you get with the free section, but I haven’t found them to be too limiting, however I’ve only done basic manga cap coloring. You can watch short ads (I haven’t watched any, so I can’t vouch for the obscenity of them) to use the non-free brushes for a short period of time, though.
The first part of this tutorial is going to be showing you how I took THIS SUGAWARA manga cap and turned it into the one you see HERE (both as pictured on the header image). The second part of this tutorial, attached at the bottom, is a timelapse video where I show you how to turn THIS BOKUTO manga cap into the one you can find HERE.
Alright - without further ado, let’s get into the tutorial! As always, if you have any questions, please feel free to drop by my ASK BOX! Hopefully this is in depth enough without being too confusing. ❤
I’m doing this in steps so it can be in depth and informative enough, but I know that can become a little confusing, so I’m going to do my best to explain each step. I’ve also highlighted using little yellow boxes where I’m referencing, as pictured below.
To start, here are the ways I usually find manga caps:
1. Google searches, Pinterest searches, etc. Sometimes they’re already transparent, other times they’re not. I’ve found that I’m able to use the non-transparent ones because of the tools that are within Ibis Paint X.
2. Tumblr blogs - there are some blogs that are meant purely for transparent manga caps.
3. Manga scans. I, personally, haven’t used manga scans, but I know others that use them! They usually require some extra clean up, which can take extra expertise. Removing speech bubbles, backgrounds, etc.
Please remember to provide credit if it’s requested from the original poster!

Step #1: Open IP (Ibis Paint - I’m not going to say it every time because WOW that would get repetitive) and click on “My Gallery”.
Step #2: This is your gallery - as you can see, all of my prior caps are here, and this is where you will either open an old cap and keep coloring, or start a new one. In the bottom lefthand side, you see I’ve highlighted the “+” sign. This will bring you to the next screenshot.
Step #3: This is where you can choose if you want to create your own canvas, or create a canvas based off of the imported photo. Since I don’t do many “official” manga cap posts where I create a full image set from them, I usually just click on “Import Picture”, and go from there! However, if you want to create an image canvas, and import the picture once you’ve gotten the canvas open, please see Step #6 for how to import the image once you’ve already created a canvas!

Step #4: This is the screen that should pop up every time you import an image. When you’re doing manga caps especially, you’ll want to hit “Ok”.
Step #5: I believe these are the automatic settings, however if they’re not on your app, these are the settings I use when selecting how to extract the line drawing. Black at 0%, White at 100%, and Middle at 50%. This will remove the background from the manga cap, and only leave the dark line art remaining.
Step #6: This is what the layer should look like once you’ve extracted the line drawing. See highlighted the “+” button - this is how you will add new layers. I chose to add a new layer, which you can see in Step #7. However, if this is where you want to add an image, see the highlighted camera button. This will let you choose an image from your camera roll and import. The “Extract Line Drawing” option will appear each time that you import an image, so don’t worry about triggering it! It will trigger itself!
Step #7: Here is the new layer! I cut out the screenshot from before, but each new layer shows up on top, so I had to use the three little lines on the righthand side to drag it beneath the layer of the Sugawara manga cap layer.
Step #8: I used this new layer to import a photo of Sugawara in his uniform from a quick google search. I actually end up grabbing another one just to make sure I know what the bottom half of his uniform looks like, but I don’t show it just yet. Because the layer is behind, it shows up underneath Suga’s face. I end up erasing the parts that interfere with the cap here in a bit.
Step #9: When you click the brush button down at the bottom, this selection screen comes up. There are a ton of brushes to choose from, but for the base colors, I use “Dip Pen (Hard)” at 100% opacity. I’ve shown it highlighted here!

Step #10: Now we’re going to create our color palette. Sometimes I will find color palettes online And import them, but for the sake of simplicity, I’m going to use this photo of Suga along with another one that I nab later to create the palette. The way you use the “dropper” tool (if you’re familiar with Photoshop) to select the colors from another portion of the image is to press down rather hard, and then this circular selection tool will pop up. You can keep the pressure and drag it to the specific spot you want to pick up a certain color for. I’ve found that it’s best to do this with my finger instead of my stylus. I’m not sure if it’s because the heat of my finger and the change in pressure is easier to pick up, but that’s what works for me!
NOTE: It is important to note that if you have the eraser tool selected instead of the brush tool, you won’t be able to use the color selector. This might come as second nature to some of you, but it STILL makes me screw up from time to time, haha.
Step #11: Using the dropper/color selection tool from Step #10, I create a small color palette, as you can see in the upper lefthand corner of the image in this step. I grab both the lightest and darkest shades from the different things I’ll need to color in for the cap. I picked up the highlights and shadows of Sugawara’s skintone, eyes, hair, and jersey. I just draw in little overlapping circles so I can switch back and forth between the colors
Step #12: I added an additional layer in the very back of this image, and colored it in completely using a blue shade. This will allow me to make sure that I’ve filled in all of the space behind the manga cap. It’s important to note that in order to color the line art in later, you’ll actually need to “overdraw”. We’ll touch on that more later.
Step #13: As I show here, I have a layer where I use the singular skin tone shade and color in behind the manga cap, filling in all the spaces where Sugawara’s skin is showing. I usually use a different layer for each different shade/color just in the event I need to do a bunch of erasing, or if I need to change the layer style later.
Step #14: Here is where I show how I “overdraw”. I’m not sure if you can see it very well here in these screenshots, but the way that these manga caps are drawn, sometimes the line art isn’t “clean”, it looks more shaded/scratchy. So, in order to combat white space, I usually overdraw and then go back in with an eraser. You can see in Step #15 the size brush I usually use - somewhere between 2.0-4.0, but most of the time I use a 3.0 size brush. I’ll go back in with the eraser with a similar size on the easy parts, and then all the way down to the smallest size - 0.3 for really close quarter erasing.
NOTE: It’s important to realize that the smaller the eraser, sometimes the circumference of the eraser can be really light in opacity as well. You can help this with the intensity of the pressure that you use with your stylus/finger, but I’ve found that sometimes using a really small eraser can be counterproductive. There are times where I’d rather “over” erase in which I actually erase into the cap and then redraw using a small brush size. You’ll have to play around with eraser/brush size and such to see what works best for you!
Step #15: Here is the skin all colored in! You’ll notice I colored in his eyes and mouth, which are going to end up being white in the end. I do this because usually it’s easy to forget that you need to color things in white if you’re doing it against a white background. I oscillate between the colored background and the white/transparent one because sometimes it can be tough to look at that bright color all the time. I’ve found that this is more of a tip/trick for me to be able to remember to color in his teeth and eyes and even sometimes the brow or other features! In the end, this just works for me. You don’t have to do this step!
NOTE: As I stated in Step #14, using pressure can change things. The same goes for this specific pen type - the dip pen. I use about size 3.0 most of the time, but I can actually do really detailed work with this size pen (see Suga’s ears, the spaces between his hair, etc.) by using lighter pressure. I do have a stylus, so this is a lot easier for me. The pressure was a little tricky for me to get down in the beginning, but once you realize how soft/hard you need to press down, you can use bigger brushes for even smaller areas. I find that makes it a lot easier for me, since I don’t have to keep changing the brush tool - which you can do using the sliding bar at the bottom of the screen labeled “Thickness”. The thickness of a brush is the circumference it has when you are using the hardest version of pressure you can muster, so keep that in mind!

Step #16: Here is where I do the basic coloring for the skin, hair, and eyes. These colors will be relatively the same as the colors from the palette, because there is not a “gray cast” caused by the line art sketch from the manga cap. This means that the skin color that is showing in the manga cap that I’ve colored is pretty close to the original color from the screencap from the anime/the palette that I’ve got in the upper lefthand corner. I do FLAT coloring for this - aka NO SHADING YET. So I only use the LIGHTEST shade for the hair and skin - the ones farthest to the left on the palettes for each section. I do use the DARKEST shade for the eyes, but that’s because usually the lighter shade is the one you use most sparingly, where as with skin, the darker shades are used for shadows only and aren’t used in excess.
NOTE: As previously stated, I do a separate layer for each different color. At this point there should be six layers, as follows (from the bottom up): Layer 1: Background Layer (Mine is blue, but for the sake of easy viewing, I made it white.) Layer 2: “Notes” Layer - this is where I keep my notes, as in the reference photos, color palette, and any other things here and there. Layers 3-5: These are the colored layers - skin, hair, and eyes. Layer 6: Manga Cap Line Art
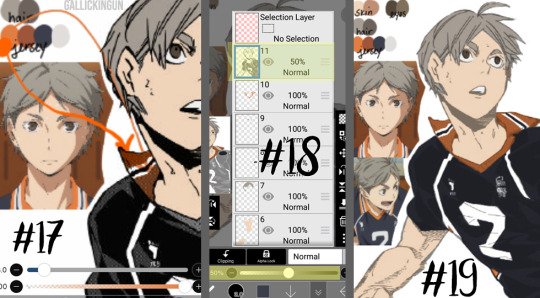
Step #17: Here’s where I’m showing the two different orange tones. This is what I meant in Step #16 - The original orange shade is the lower part of Suga’s collar - as you can see, the line art shading makes the color a lot more muted. I used the color wheel to find something brighter, just for a comparison shot. I still choose to use the traditional palette that I pulled from the anime screencap.
Step #18: Now that I’m ready to color the manga cap pieces that are skewed by shading (i.e. his jersey here), I usually turn the manga cap down in opacity, so I’m able to recognize where I need to fill in! This is where I fill in the blue of the jersey, the orange of the collar and other accents, as well as the off-white shade for the number and the line accents.
Step #19: Using the eraser and smaller brush sizes, I fill in all of the flat colors. No shading yet!
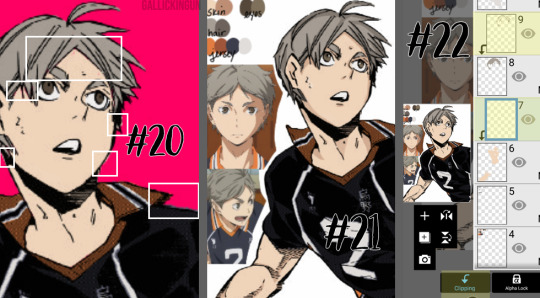
Here comes the time consuming, nuances...
Step #20: I’ve turned back on the colored background layer - sometime between when I started and now, I changed it from blue to pink. If you can zoom in on the image, you’ll see the boxes in white contain “errors”. This is areas where there are “holes” in the coloring, or where I’ve gone outside the lines. I’m going to go back in and clean this all up with the eraser and some more brush work.
NOTE: This is very important, especially if you’re trying to make this a transparent image, or if you’re going to do the extra steps and color in the line work. Any holes, overdrawn, or underdrawn areas will make the final drawing look a little funky.
Step #21: Here is the shading! Honestly, this cap kind of shaded itself, haha. Some manga caps have “built in” shading, as you can see on Sugawara’s arms and neck. I added some shading to his hair and face, trying to use the anime caps as a reference. I’m not very good at shading yet, but I wanted to show it here so you guys could see!
I used the darker shades from the palettes on the eyes, hair, and skin. I didn’t do any shading to the jersey because the manga cap lines already skew it so much, that it didn’t really seem necessary. This can be a really hit-or-miss time, both with areas that you choose to shade, as well as the colors that you use. I would really suggest searching for skin tone palettes if you’re not using the anime screencaps for reference!
Step #22: For my shading, I actually use “clipping” effects. As you can see, the two layers that are highlighted are clipped to the layers beneath. This means that the coloring on the clipped layer will “attach” aka clip itself to the layer beneath and that layer only. So, for the shading of the skin, hair, and eyes, I chose to clip the shaded parts to the base coloring, that way even if I over drew, the colors wouldn’t bleed together.
I did more of what’s called “cell shading” for this manga cap, as well as the Bokuto one that I do in the timelapse video below. What is cell shading? This wiki page explains it pretty well, but basically it’s more “harsh” shading where there’s not necessarily an airbrushed quality to it, it’s more blocky. You can see I only chose to use one color of shading, which makes the contrast much more stark. IP does have several airbrush tools, I’ve used them in my Bakugou manga caps for his gauntlets, and they work really well!
I brought up earlier that it’s important to color your base colors all the way to the edges of the manga cap line art. This clipping effect is why. On Suga’s neck and ears, the darker shade that I used for his skintone goes to the edge and actually underneath the line art of the cap, because it is clipped to the base skintone layer beneath. Had I not made sure to go all the way to the edge of the line art, this would be much more choppy, and there would be white space between Suga’s ear and his hair!
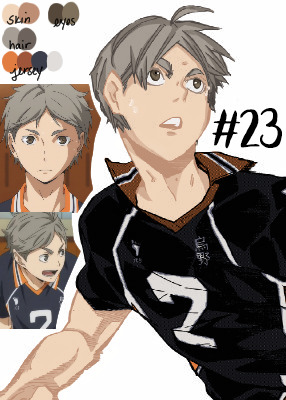
Step #23: Here is the extra step - line art shading! This can be tricky, depending on the complexity of the line art, the shading, etc. Usually, in choosing a shade to color in the line art, I grab the darkest shade for that section, and then grab something even darker. As seen in Step #18, there is that drop down box that is currently listed to “Normal” - this will need to be set to “Screen” for the current line art coloring layer. You’ll also need to “clip” the layer you’re using for the line art color to the manga cap, meaning it will need to be on top of the manga cap layer - and therefore, should be the highest layer in the image.
For this image, I only did line art coloring on Suga’s face, hair, arms, and neck. I was really satisfied with leaving the jersey alone so far as coloring. I did this mostly because of the sketchy quality of the cap, the line art would be really involved and complicated, and it just wasn’t worth it to me (so sorry lol), and I liked how it looked with the darker color outlining it anyway.
Also, I added little details like making the sweat on Suga’s face outlined in white! And yes, I do know that missed Suga’s beauty mark, but we’re going to pretend I didn’t just do that. I love you, Koushi, please forgive me.
And that’s it! I’m sure there are easier ways to do things, or better ways, haha. But this is my beginner tutorial (as in I’m the beginner, lol). I hope that this helped anyone whose doing it for the first time! I stated this before, but if you have any questions, please feel free to hop into my ASK BOX and ask me! I’d love to help anyone out! And I’ll do my best!
See below an additional manga cap coloring - Bokuto Koutarou this time! I thought doing a timelapse video of me actually coloring in the cap would help you guys out!
PLEASE BE AWARE: This video is in 2x speed so it could not be forever long and really boring lol. With that being said, I do spin the screen around several times while coloring in the cap - this could make you nauseous, so please beware of that before you watch!
Here is a link to the time lapse video on YouTube!
A special thanks to @cutesuki--bakugou who helped me a lot while I was coloring my original caps, and also to @writeiolite who nudged me in the direction of finally starting to color manga caps! And a little thanks to @rouge-heichou since I bugged her about a couple of things as well. And then as always, a huge thanks to @candychronicles because she keeps me sane. Also a special mention to @pixxiesdust because she does really cool gifs and has done a wonderful job in the bookclub of trying to share her knowledge with everyone else.
Disclaimer: I’m no artist, this is just for fun! I’m sure my shading and line art can use some work.. but I’m not focusing on that! Instead I’m just going to keep playing around and having a good time ❤
#haikyuu!!#haikyuu manga#haikyuu manga cap#sugawara koushi#bokuto koutarou#manga cap color#manga cap coloring#manga cap tutorial#coloring tutorial#manga cap coloring tutorial#morgan colors hq#morgan colors bnha#morgan does tutorials
159 notes
·
View notes
Text
How to Download Marvel comics for free!
I’ve been thinking about writing this for a while especially since we’re all stick inside but last week Marvel made the shitty decision to transition various print titles to digital only, meaning they’re directly taking revenue away from local shops rather than delay the titles, so since Marvel thinks digital comics is such a cool idea I’m gonna show you how to download as many as you’d like! (oh also this is for windows only, idk how to do it if you own a mac but also you’re rich anyways so who cares buy the comics richie)
I don’t want to take money away from the people that need it, not the actual companies of Marvel and DC fuck them they’re dying and they deserve it, but for my own rationalizing I want to take a minute to plug the Hero Initiative, basically what it is an organization that provides for comic creators that are having hard times, comics are a rough industry and you don’t get into it to get rich, I won’t go into it too much you can read for yourself but it’s been endorsed by Stan Lee, Justin Ponsor, Mike Grell, Skottie Young, Rags Morales, a lot of big names, so I’d ask if you do follow this guide and download some comics for free please consider donating to the Hero Initiative (they also sell autographed prints and you can commission some really famous artists)

anyways onto the good stuff! I’m going to be doing a fairly brief but easy to follow guide, there will be links at the bottom of the post so look for those, I’ll probably be making a few other posts with some more info so also check back for those if my blog is still here
What do I need?
You’re going to need 4 basic things if you want to do this as easily and safely as you can
1) a good anti-virus
2) anonymous web browser (Tor)
4) a safe and reliable source for the comics
4) a torrent program to download the comics
Also optional: VPN
Anti-Virus
it’s good to remember when torrenting that no one is your friend, everyone is out to trick you and no one cares, honestly you should also have a good anti-virus though, I’m not really gonna tell you which one you should have but Norton 360 is pretty good but say that in a room of CS majors is the quickest way to start a fist fight, honestly just google it, you’re gonna have to do some research, but really you’re good as long as you don’t go with Avast or Kaspersky, I’m going to go over typical tricks and traps later to ensure safety, this is just basic overall security thing
Anonymous Web Browser (Tor)
next we’re gonna download Tor (you can do this before getting a VPN, like I said either one is going to put you on a list but using one to cover you getting the other at least mitigates it lol) Tor is a great open source project that allows for basically complete anonymous web browsing, it’s a project dedicated to privacy and disruption of corporations ability to control every aspect of our lives, also a friend of mine bought K off silk road with it once in highschool, really not too much you need to know about it before using it, just download it, let it configure and you’re good, also use Duck Duck go that it comes with, don’t switch it to chrome or anything, Duck Duck go is anonymous search service which better lends to Tor’s protection
Where to get the torrents
Now this is really important because you can have everything else set up but without a safe reliable source none of this is gonna do any good, but this is the dangerous part, torrent sites are notorious traps (I bricked more than on family PC on limewire) and this is why I said earlier to remember these people are not your friends and are out to hurt you, don’t click banner ads, don’t believe pop ups, make sure your virus protection is on and it’s a very good idea to have an adblocker on, also look out for another post I’ll be making on what download buttons to trust for different popular torrent sites
when talking comics (and remember specifically only Marvel comics) there’s no other name out there than Nemesis43, he is a god and he’s going to be your new best friend, there are groups and sites out there that do comic scans that you have to pay to join or like apply to join, that shit’s dumb as hell and I’ve never used them once and I’ve got more comic than I can read in my lifetime, you don’t need em and you especially don’t need to give them money, donate to the Hero Initiative instead
Nemesis has moved around a bit in the past (if you remember the WWT debacle) right now the main site for him is ettv (there will be a link at the end of the post) sites a bit barren but he’s there, he also has a reddit he gives updates on very rarely, generally if he moves he adds where his new home is in a text doc in his recent uploads, I fully trust him and his uploads, he’s been doing this for years and I’d never have a second thought downloading from him, also because he uploads so much he’s often very highly rated and verified on whatever site he’s on
The second place I’d recommend is getcomic (again there will be a link at the end), now this is very important, never donate to them, they kinda suck, basically they’re plugged into a bunch of different scanner groups and just steal those scans and put them up and then ask for donations, basically they’re just an aggregate (Nem kinda is too but he doesn’t ask for donations and stuff), they usually use browser downloads which are a complete pain so I’d really recommend Nemesis over them but they do have TheComicGuy on torrent galaxy for larger files but that updates a lot less frequently then the main site, again I trust these guys (as long as you’re on the actual site) but don’t trust any banner ads or pop ups, also for downloading they give multiple options, a lot are very sketchy, just use the main server
also there’s other sites like readcomics or newcomics, never used em, don’t like em, use at your own behest
On sites like ettv you’re gonna want to use the magnet, someone years ago told me it was safer and I just believed them and have always used em, not sure if it’s true but it’s worked so whatever, really you shouldn’t be too worried about this stuff and if you follow this guide you’re going to be way over prepared to download comics, really no one cares about comic torrenting, movies, video games, tv shows that’s the stuff people really get caught on, this is just nerd shit
I’m going to be making another post showing how to use these sites, and other sites comic can be found on so look back at my blog for that
Torrent program
This is pretty basic, just get utorrent, it’s what I’ve always used, it works, whatever, definitely look this up with a VPN on or on Tor, it’s simple to use, I’ll be doing a short tutorial on how to make it even safer
Lastly this one is optional but a pretty good idea, for more than just this
VPN aka Virtual Privacy Network
honestly you can get the anonymous web browser (Tor) or the VPN first, their both going to help cover you downloading the other and honestly both are going to put you on a list for googling them (which is why I suggest looking for someone who just already has the .exes ((I always keep them on a thumbdrive for when I have to reset one of my computers)), I might try to make a google drive with em but also I might not bc that sounds like work and I’m already typing all this up), anyways I’m not really gonna explain what a VPN is, there’s a lot of resources that can explain it better than I can but basically it masks what you do on the internet, there’s a lot of choices when picking a VPN but the big thing I looked for when choosing mine was 1) non-US based so it’s harder for US investigation agencies to request stuff for them or get anything from them 2) one that doesn’t keep logs, honestly they all do even if they say they don’t, but you wanna look for one that hasn’t turned over many logs to US agencies and 3) unlimited peer 2 peer connections which is complicated but basically means you can torrent stuff anonymously and with decent speed. Like Anti-Virus there are a ton of different VPN’s out there, you really have to do research because there are actual accounts of FBI agencies crating VPN’s telling people they’re anonymous when really they had direct access to all the info, I haven’t done any research but NordVPN seems kinda like one of these, really the more they advertise the more suspicious I am, Just google “best vpn 2020″ and look at like 5 lists and read the the stuff, personally I use IPvanish which unfortunately is US based and while it gave over logs in 2016 even thought they said they didn’t keep any but now they’re owned by a new company that super double promises they don’t (again who cares they all do) but they’ve allow P2P and use 256-bit AES encryption
I wanna take a second to mention that this isn’t going to be free, this is the only place you’re going to be spending money (besides donating to Heroe Initative of course), a good VPN is about $100 a year which all in all isn’t terrible, technically you can just get by on the anonymous browser but this gives you an extra layer of security to pretty much ensure you won’t get caught and plus in the ever worsening internet hell world a VPN is becoming more and more important, I’m sure you can find articles about it but yea you don’t technically need a VPN but it’s useful for more than just this
How to work it all
Ok so this is gonna be a little stream of consciousness, as this all kinda has been, so sorry but I’m gonna try and explain it as best I can and also feel free to ask any questions on this blog, I’ll check back eventually I’m sure
So first thing first, make sure you’re virus protection is on and you’re connected on your VPN if you’re using it (you can google “what is my IP” to double check it’s working) then load up Tor, let it load and connect up and whatever, then go to https://www.ettvdl.com/user/Nemesis43 (I’m just gonna show this with Nemesis43, maybe I’ll make another one for getcomics but that’s pretty straight forward, also nem is better)
now remember we’re only here for Marvel comics, so scroll past all those thousands of other comics this would work exactly the same for, I’m gonna go for Ant-Man #4 which was released on the 13 as a digital only comic despite the first three issues being physical copies and now sit on my shelf forever unfinished making me look like a complete penis

it may take a while but it’s going to look like this, click on the blue words, it’s gonna take you to a page that looks like this
now from here we’re going to get the magnet link, right click and select copy link address, I like doing this because it limits my interactions with the page, note the advertisement at the top telling me I need a VPN despite thinking I’m in Guadalajara (which for legal reasons I am)

just copy that and then go to utorrent and click the add link

it’ll open a little box, it should add the link automatically, if it doesn’t just hit ctrl+V
hit ok and it’ll load it up, it might need to download some metadata but after that it should be good, oh also it might bring up a window basically asking where you want to save it and what to name it, you can set all that up in preferences, I did so I just turned that window off and can’t be assed to turn it back on, just hit ok if you don’t wanna bother with that stuff, it’ll go into your downloads by default

and that’s it really, it’s that easy, I might make another thing talking about how to make utorrent more anonymous or whatever so look for that, but stock it’s fine, also when it’s finished downloading it’s gonna start seeding (like uploading to someone else) I’ve always been a scumbag and I never seed but Nemesis seeds stuff so much you really don’t need to anyways, just select it and hit the stop button (the black square on the tool bar)
here are all the links I could think of
Hero Initiative
download Tor
here’s a guide for VPNs
download utorrent
song I found recently that I like
getcomics
Nemesis
so yea that’s pretty much the basics, be smart, be safe, any viruses you get are on you but I hope you found this helpful and feel free to ask any questions
oh and also this is all parody and I’ve never actually torrented anything, I don’t even own a computer
155 notes
·
View notes
Text
woah a pq sprite edit tutorial ft. mod kk (paint tool SAI)

MOD KK....: SO UH. this is primarily to help a pal of mine, but like i thought it’d be good to make a post / tutorial in general, so here’s a tutorial which features the process of how i did this dave
since i use sai, this is a tutorial mainly for sai, but you can follow along easily on other art programs since functions are similar and etc. the link to the sai i use can be found here.
tutorial starts under the read more:
BEFORE WE START, any sai users, here are my brush settings regarding lineart / linking, and in general, these are the settings I use for all my art and edits. Size wise, I usually draw with 1, but for line width, I’ll change between 1, 0.8, and 1.5.
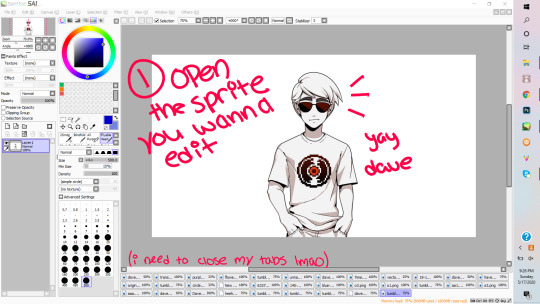
1. So first and foremost (wow, look the way I’m typing got more formal), you want to open the sprite you want to edit on. Here I have Dave. A good resource for sprites / assets from PQ is from this blog, in case any one needs it.
2. If you need to, make edits to the base. Usually, if not the hair, I’ll make an edit to the character’s shading colour or their face. In this instance, it’s going to be the latter. So in this picture, what you want to do is colour pick from his skin, make a new layer and on that layer, you’ll ‘erase’ (draw over) his expression.
2.1. Lower the opacity on the coloured over layer so that you can see his original expression- mainly I do this so I can see the proper placement of his facial features and such. Here, I’ll sketch the change I want.
2.2. After it’s sketched out, I’ll line it proper and fill it in, and now he’s like smug (shame that it gets covered up by his bangs in the finished edit).

3. Now we’re to the fun part! Well, onto the more fun parts. Here is where we’ll start our sketching. Sketching isn’t mandatory, especially on smaller, minor edits such as changing shirt colours or adding small accessories, but if you want do things like drastically change their haircut, or to give them a new outfit entirely, sketching is probably a good idea. Anyways, lower the base’s opacity, and then decide what kind of outfit you want to sketch on your base, and do it.

4. After sketching, you’re gonna line! Lower the opacity on both the base and the sketch- though that’s probably a given. Completely optional, but I tend to put my layers in a folder set for organisation purposes. Also, please name your layers, it’ll help you good (OKAY SO LMAO. I forgot to take the screenshot of me mid lining, so I eyeballed all my finished lines out to make it look like it was incomplete.)

4.1: Anyways, yay! The lining’s complete. I know this is supposed to be a tutorial, but process photos are fun too.
5. Now we’re onto pre colouring. I say pre colouring because this is like setting the base for colouring? Yeah. Anyways, I’ve made another folder set for colouring, pulled the base sprite into it, and then set a coloured background under the base for transparency and etc- I usually go with a colour which will contrast the piece’s main palette, which in this case, is blacks and shades of red.

5.1. Now we’re going to put the base colour into the newly created lineart. What we’ll do here is turn the transparency on the base sprite down till it’s completely gone, and then we select every inside of the lineart.
5.2: With the base ‘white’ (the greyish white) colour from Dave’s original sprite, we’ll fill the lineart.
5.3 However, after this, you’re going to want to check your transparency because it won’t always be perfect- actually, it won’t be perfect. Usually, you’ll get that small, shitty white outline which overall imo ruins the piece when it’s transparent.
5.4. What you’re going to want to do to rid of this, is- going back to 5.2, after you’ve filled it, and you still have the selection on, you’re going to reverse the selection (arrow pointing to it, ‘pologies for non sai users because I don’t know the equivalent), and then erase. It’ll seem like you’re just erasing the background, but I swear it’s worth it.
5.5 See? Now it’s clean. Yay!!!
5.6 After that’s figured out, you’re going to want to redirect your attention back to the base sprite, and then erase all the shit that’s leftover from it, such as Dave’s sleeve which is poking out from the side, as shown in the pic.
5.7 Bam. And now he’s all cleaned up proper and ready to roll.
5.8 A completely optional step, but my favourite since I love lining. What I usually do, so that the lines look smooth(er), and more precise with the style, is that I ink it a bit to create line width variation in certain parts of the sprite, and also to create shadows.

6. Finally on colouring- I’m probably numbering all this shit wrong, but you know what, I sucked at math. Anyways, colouring- figure out your palette, and basically base colour parts of your sprite. The blackish part on the shirt is an airbrush texture.
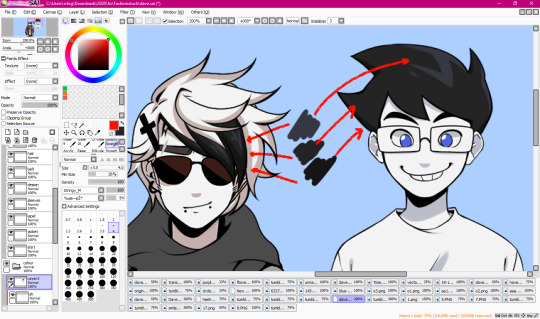
6.1. Tip: If you’re using dark greys or blacks, I’d recommend just picking the exact shades from other PQ sprites so they’re all??? Idk, the same? To put it simply??? Yeah.
6.2. Shading is- another probably basic thing, but I’m explaining my particular process, but how I go about shading is by making a clipping layer over the layer I’m currently shading on to ensure that it only colours on that part. Then, I put it on multiply, and then toggle around till I get a good mid shade. To each their own, however, these are just my tips and tricks that I use personally.
6.3. And after you’ve shaded your entire piece, you’re done! Yay, he’s edgy now!

6.4. Though I did make my end sprite with a texture, and for SAI users, it’s relatively easy. Just open the png file of your sprite so that all your layers are in one and it’s a happy pic, and then go to to the textures drop down menu and select your texture. For this, I decide to use the grunge texture. I also used this texture on my Derse Prince edit, and I used a TV screen texture on one of my Hal edits. I don’t know if texture packs come with other art programs, but if they do, just experiment and see what you like! It’s not obligatory, but it’s a nice touch for some edits.

Other than that! We’re finished! I hope you enjoyed- apologies if anything said was over complicated haha ;;.
#mod karkat#kk edits#sprite tutorial#homestuck sprite edit#homestuck sprite edits#pesterquest sprite edit#pesterquest sprite edits#homestuck sprite tutorial#pesterquest sprite tutorial#homestuck edit#pesterquest edit#dave strider#im not mass tagging this im lazy;;;;;#also that carpel tunnel is kicking in lmao
179 notes
·
View notes