#i wish they had added presets
Explore tagged Tumblr posts
Visit Tumblr Blog
Explore Tumblr blogs with no restrictions, modern design and the best experience.
Last Seen Tumblr Blogs


Fun Fact
Tumblr.com rank in the US is 25.
Text
back on the time trial grind!
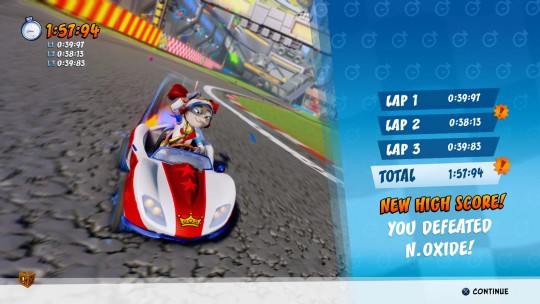
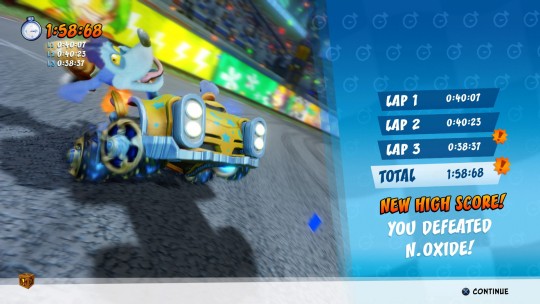
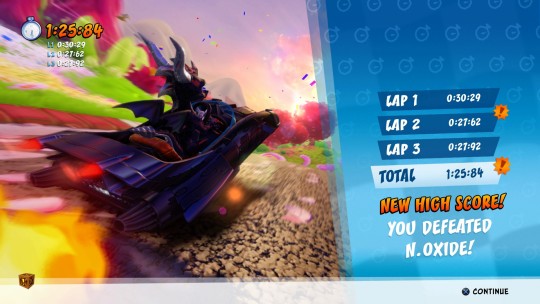
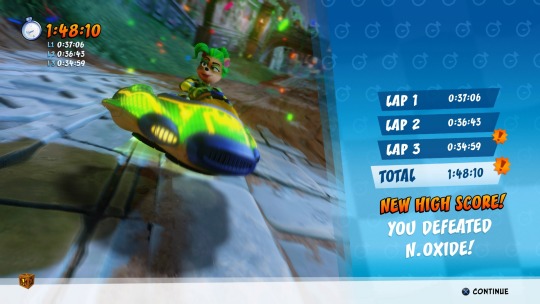
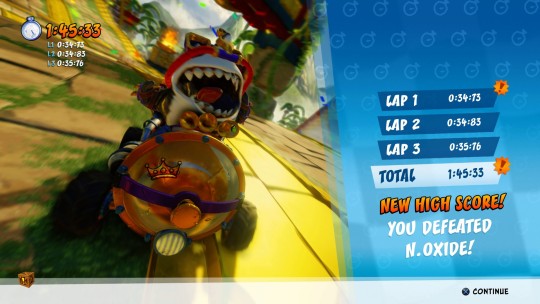
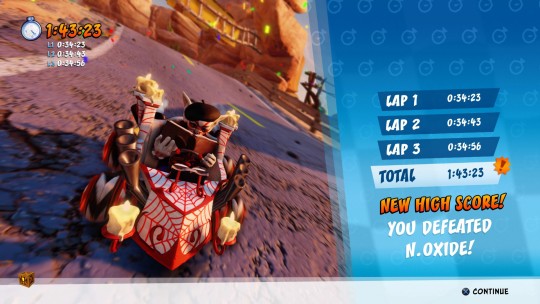
this might just be an excuse for me to show off my kart customizations but we don't talk about that-
#I'll spend hours customizing my karts if you let me#i wish they had added presets#would've been so nice#nova's games#nova plays crash team racing#crash team racing nitro fueled#ctr:nf#beenox#activision#crash bandicoot
3 notes
·
View notes
Text
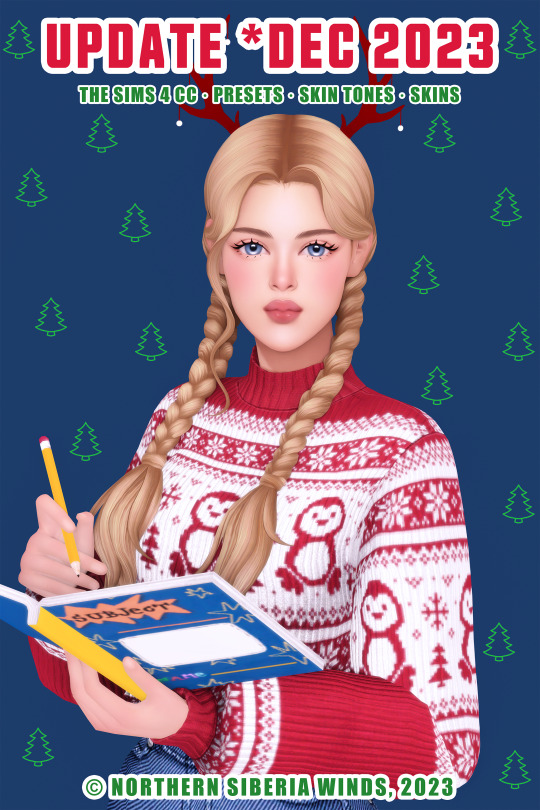
BIG CC UPDATE *DEC 2023
✅ PRESETS CHANGELOG
fixed broken presets after the "rent" patch (from child to elders);
I fixed the broken presets only for the child-elders ages. But, as you know, all the presets for the toddlers were broken too because EA added eyelashes to them. I don't have presets specially made for toddlers, but some presets made for other ages used to be displayed in this age category, I removed them from this category because they don't fit this age category anyway. I left only the ears in this category. I will fix these ears for the category of toddlers as soon as it possible (and if possible).
added compatibility with some type of custom clothes cc to FEMALE HEAD SHAPE PRESETS N1-8 (the problem of holes in the neck);
3 new files have been added (CHILD EYES PRESETS N1-2 FOR FEMALES TEEN-ELDERS, NOSE PRESET F N28-33 FOR FOR CHILDREN and NOSE PRESETS F N18-27 FOR CHILDREN).
✅ SKINS and FACE MASKS CHANGELOG
added new additional cleaner and smoother texture options to some old skins and face mask overlays:
- SKIN N4, SKIN N7, SKIN N8, SKIN N9, SKIN N10 (A and B), SKIN N11, SKIN N12, CHILD SKIN N1, SKIN FOR TODDLERS AND INFANTS N1-2 OVERLAYS;
- MICHAEL, NOAH and JAESUNG face mask overlays;
I see that many of you are still using my old skins, so I decided to update them a bit.
I changed mostly the faces. Some overlay skins have undergone very strong changes and now, I think, they look much better. Don't worry, the old options are still there and they won't be reset from your sims.
the old skins are now available for the "opposite frame", this is necessary if you want to make a gender transition for your character ;
SWEET СARTOONNY SKINBLEND A and B was fixed for a new patch (for the correct display of the added EA eyelashes);
added a non-hq version for old skins;
added compatibility of old skins and face masks with my new cc;
added new thumbnails to all skins just because I wanted everything to look the same style and I'm tired of these black and white pictures of old overlays.
✅ SKIN TONES CHANGELOG
Fixed an issue with completely black newborns with SOFT ROSE SKIN TONES;
Unfortunately, to solve this problem, I had to recreate the file for SOFT ROSE SKIN TONES. So when you download the updated version, this cc will be reset from your sims. This applies only to SOFT ROSE SKIN TONES and HETEROCHROMIA EYES. The rest of the files listed in this post will not be reset from your sims.
Added a tanning and burn functions to all my skin tones.
✅ HETEROCHROMIA EYES
fixed after the patch (the problem with the hand).
Unfortunately, to solve this problem, I had to recreate the file for HETEROCHROMIA EYES. So when you download the updated version, this cc will be reset from your sims. This applies only to SOFT ROSE SKIN TONES and HETEROCHROMIA EYES. The rest of the files listed in this post will not be reset from your sims.
All the files in all the posts have also been updated. There are really a lot of updates this time. I hope you all are not tired of this, ha-ha.
By the way, I'm going to start working on BETTER IN-GAME LIGHTING MOD v2. So you can write your wishes and suggestions!

MORE INFO AND DOWNLOAD
Any likes and reblogs is honestly appreciated! 💘
Thank you for supporting the development process!
#s4cc#ts4cc#s4cc maxis match#s4 maxis match#sims 4 maxis cc#ts4 mm cc#s4 mm cc#s4mm#ts4 genetics#s4 skin#s4cc mods#s4 preset#ts4 preset#ts4cc female#ts4cc male#sims 4 cc
2K notes
·
View notes
Text
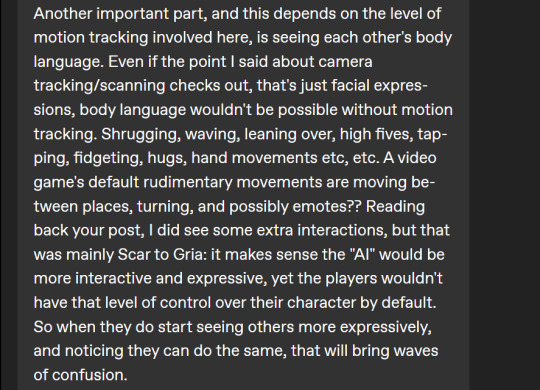
another very long analysis from @misticalnova !! 6w6 this time im going to cut your ask into parts not because i'm going to omit some points you've made like i did last time, but because the ask is really long haha. i also would like to tackle each part. so this time i'll post your ask in its entirety!

i loved that idea so much i had to add it, especially gria's reaction to scar's voice. but yes-- since third life was one of the later seasons i watched, i was so used to proximity chat that i thought it was so endearing how they were excited about it during their first session. grian was so excited about it and the fact that someone could just catch him from behind talking to his audience, and in the lens of this au it might be a detail i could just gloss over but... thinking of VR games, the surround sound and proximity chat is one of its fun features and one that makes it incredibly immersing! Virtual reality games are so easy to be immersed in, and i do believe that if i were gria i wouldnt question the npcs having voices right away. i'd have an "oh hold on," moment way later. out of all of them, it was actually him who was the first to find it strange. even if joel found out about it at the same time as him, and -- going with third life canon -- jimmy meeting scott early on, they wouldn't find it suspicious or odd right away. that's because they're all easily immersed in the game.
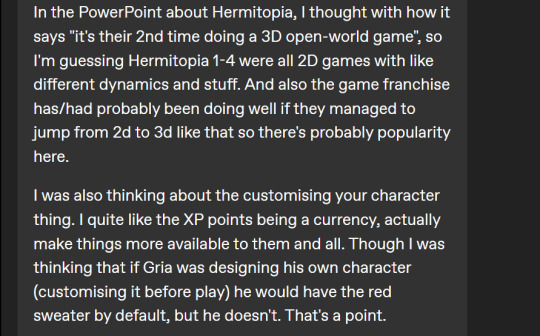
for hermitopia and the life game, it was really hard for me to explain the mechanics only through descriptions and comparisons to existing games, so i do hope to create a game UI or fake screenshot of the games for better visualization of what i imagined. and yes, hermitopia is a popular game! not one that is mainstream that anyone outside the gaming sphere would know, but it might be notorious among spaces like how the elder scrolls franchise is. it's also the titular game of an AAA video game company, one that could afford to release it not only on consoles but also port it to PC, which is how Gria got to play it. i'm excited to talk more about that one when we get there.
the XP points are something i hope to play around with so i added it, as well as the customization aspect. i'm still working on the character designs, and i should've also drawn what they looked like when they played the alpha version, which was a huge oversight on my part! (one of many, now i realize) but for now, please imagine the customization to be something like how they all (mostly) shared a steve skin on EVO smp during the starting episodes. the customization was something new to their current game, but they were still able to use preset skins in the alpha test like how we have other default skins (ie. alex, efe, noor, etc). i genuinely forgot to tackle this aspect and it's now bothering me like a finger splinter ... ToT expect a chapter 0 where theres no words and just designs because now im going crazy over this

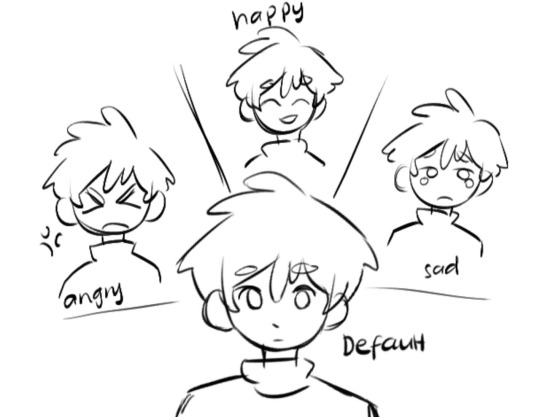
no you're not reading into it too much, but i did not think of this aspect and i now have plenty of ideas with it (and details i wish i could change in the last update ToT). I do want to say that they all look a tad bit different from what they look like irl! a good comparison would be their portraits here in the first part and something similar to my art of lifers in my style. but as for the facial expressions, that is a detail i did not think about... i was going to say they only rely on each other's tone of voice, but now im thinking maybe (at least only in this beginning part of the au) they have limited facial expression options that could show if they are smiling, frowning, or angry. something like this, maybe! :
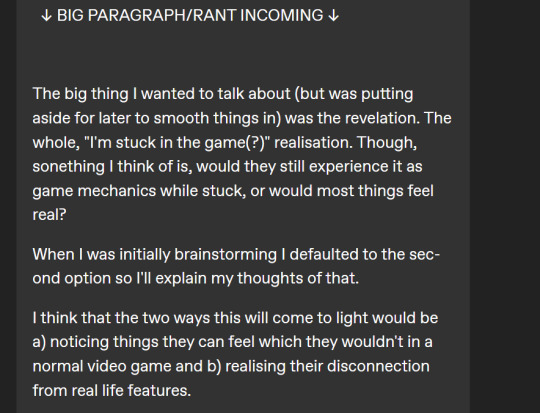
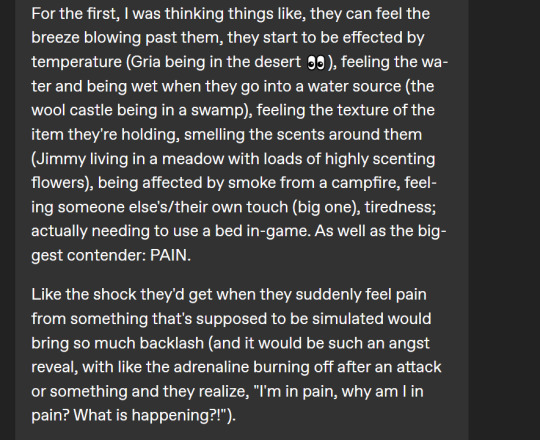
i do like this idea!!! i like it a lot. that is something i havent thought far into. currently, they do not feel pain. the beginning part will be them going through it and focusing on the game mechanics, and they would react to "pain" like an immersed gamer would (ie, the streamer you watch saying "ouch" if they have been hit in-game). i wont say when they will feel real pain, but i love your take on it and i might be inspired by this when i get to writing this part. (of course, only if you're okay with that)

the background noises are such a great detail ... and i only have thought about gria's living condition, which is him renting a small apartment with his desk setup near a window (i have to draw this at some point, too.) as for the sitting down part, i do think the evo gang + joel are all standing up when they played real life, except skizz. so that is a fun idea to play around with...
ive thought about the limited movement in minecraft vr (specifically in 'real life') so much that it was my basis when i wrote the prologues instead of nicer, better tracked movement in VRChat. so ... there is motion tracking but it's incredibly janky.
scar interacting with gria was one of the only things i was intentional about, especially him putting his arm around gria and him winking. he has more control of his actions and expressions than gria and the rest of the gang at this point of time, yes :D and i am excited for the scarian moments ahead when gria is able to move freely like him. so excited.... very excited. :)
dont be sorry! your last ask helped me out a lot when i wrote the last update and it was such a delight to read through and think about. your ideas are so cool and i love them, and i am thankful something i wrote received such a long and thoughtful feedback.

thank you again so much nova !! i'll definitely come back to this ask frequently as i draft the au haha. i hope you have nothing but wonderful days ahead!
36 notes
·
View notes
Text
Thank you for all of the love on my recent Gpose omg ; w ; I really wish I could reply directly to tabs aaaa. But thank you for your comments, they made me so happy to read, I love them. I wanted to share how I did it all and explain my process if anyone is interested ♡
More below the cut!

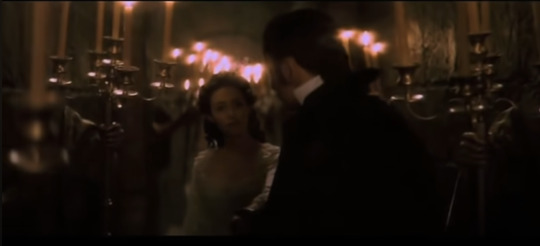
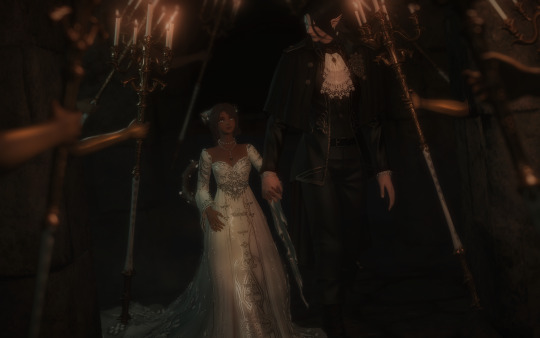
I got started by actually making the backdrop. I wanted to emulate the scene where the Phantom was taking Christine through the candlelit walkway, so I made a long tunnel to get it as close as I could to the shot.
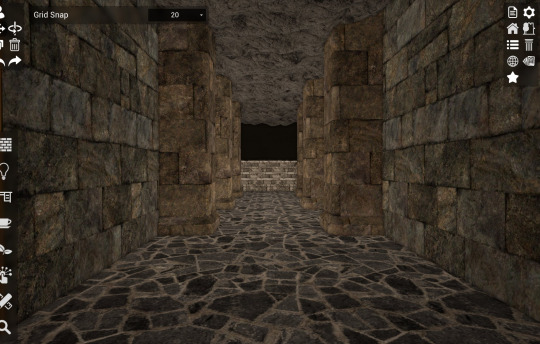
And here is the result in game :3 I knew with the back I was going to have to rely on an optical illusion to sell that this was a long dark hallway, so I dyed the back wall soot black and turned my interior lighting to 0.

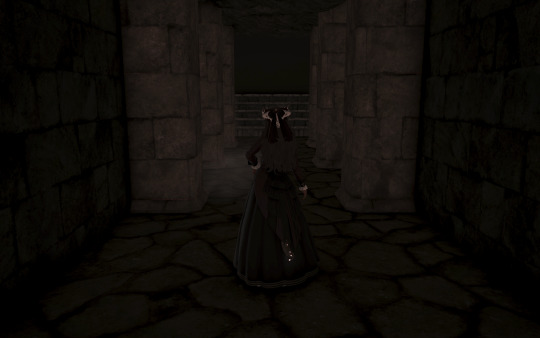
And here the setup is pre pre shaders. I cloned a few actors in using brio and had them draw the archeo kingdom WHM staff and placed them in the wall. I was really lucky that I had a long enough lookalike for the candelabras in the movie. Also, you can see that the illusion isn't being quite sold in the back at the moment, I fixed it using camera angling and having the primary source of light a little further back from the two subjects. And to create an even 3 point lighting I placed a greenish blue light to the back left of Alsene which is the blue you can see on their clothes further down. It is best to try and give yourself 3 point lighting when you gpose, you can even achieve this using the character lighting toggle built into the game itself. :3
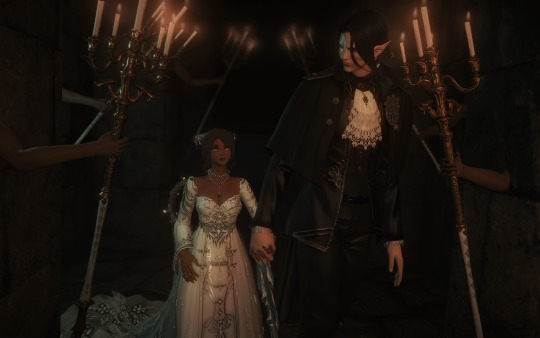
Here it is with that light placed like I mentioned before and my shaders turned on. I'm using Candle presets on this one in particular with cinematic DOF turned on and focused in between Alsene and Artoirel. It also helps blend that black wall in the back into the scenery so it isn't as obvious. Also I would like to mention that when I do large shots like this, I take MANY screens in multiple angles to pick from the best shot. In this one in particular I have 30 screens in various angles that I chose from. This ensures that you aren't leaving the pose with a product you aren't happy with. It saves you time in having to pose it again.


I ended up choosing these two shots, and I edited them in clip studio. My process for that was making the arms look more metallic to match the rod by adding highlights to them. And the second thing I did was add a retro bloom to the image to mimic the vibe in the video. And as you know the final result was this :3
In all it was a very time consuming but fun gpose to do! If anyone has any questions about it I will be happy to answer them ♡ Thank you for appreciating what I do ; w ; it was lovely to wake up to.
68 notes
·
View notes
Text


Hi! o(゚▽゚)o
I haven't posted in a while again, but I wanted to take some time to work on a bigger project. I've been working on a townie remake with all the outfits! (/^▽^)/
I present to you, Angela and Lilith Pleasant! The Pleasants were my favourite family to play in the vanilla TS2 - I loved all the drama between the two sisters and guiding them through life! I just had to give them a makeover because what they've done with them in TS4 looks-wise is honestly unforgivable (;﹏;)
I hope you enjoy my interpretation :) I thought their faces were very nice (wow a rarity in TS4), so I didn't feel the need to tweak them. They just needed a bit more style! I also hope you don't mind I changed Angela's og mint colour scheme to pink - it looked so nice and soft on her I just had to go with it!

The screenshots were taken with my GShade preset enabled! Comparison between the game's unmodified lighting vs with GShade in last four images - original on the left and with GShade on the right. Link to the preset at the end of the post.
The download includes custom content. I did not make any of the CC used with this sim! Many thanks to all the wonderful CC creators for their hard work! Links to original posts with CC listed below. Please visit their sites and support them if you like anything you see! If you are a CC creator and do not wish for your CC to be included in the package, please do contact me and I will remove it!

MediaFire (no ads)

Link (too long for tumblr's character limit ;3)

My GShade preset How to install pre-made sims
#sims 4#the sims 4#ts4#simblr#sims 4 simblr#ts4 simblr#sim download#sim dl#sim dls#sims 4 sim download#ts4 sim download#the sims 4 sim download#sims 4 sim dump#ts4 sim dump#the sims 4 sim dump#sim dump#show us your sims#sim dumps#young adult sim#pleasant family#angela pleasant#lilith pleasant#townie makeover#ts4 townie makeover#sims 4 townie makeover#the sims 4 townie makeover#sim makeover#ts4 townie#ts4 townies#ts4 sim makeover
35 notes
·
View notes
Text


*click for HQ*
I tried to make myself. It was a bit hard, ngl. Like, I wish they had various presets for the shapes of the nose, lips, eyes, and ears. Hopefully, it'll be added in the official release.
11 notes
·
View notes
Text
When I started Veilguard, I had so little confidence about enjoying the game at all that I did the unthinkable: I made my Rook a dude. A human dude. I never do that if I have any other options. I still don’t understand people who played as Cousland in Origins given the other available options. And though I am confident in my masculinity, I just prefer playing as hot bisexual butches.
Well the joke’s on me because I ended up loving my Rook. It’s to the point that I wish my artistic skills weren’t so rusty that I could draw him. His design doesn’t entirely make sense, with the tweaks I added to the preset I disliked the least, but damn I think he’s hot.
I romanced Taash, which even the game didn’t seem to expect many cis male players/Rooks to do, and it was fucking great. I wish I could get screenshots or gifs of my hot dopey male Rook getting lifted up in Taash’s arms and wrapping his legs around them to kiss.
Veilguard is a terrible Dragon Age game that annoyed me throughout, but I really loved it as a gaming experience and best friend simulator. I finished it a week ago and I still miss my friends and my stupid sexy Rook.
3 notes
·
View notes
Text
Radio Recommendations
I occassionally get asked about radio recommendations so I thought I'd share.
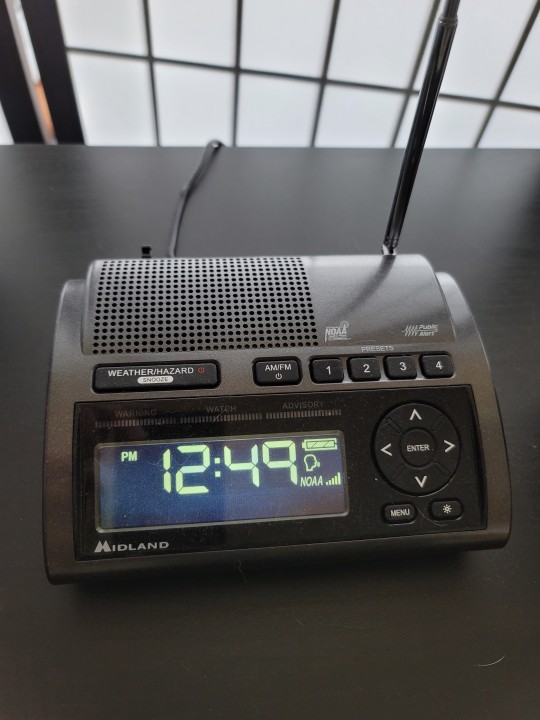
For plug in/stationary radio; my favorite is definitely this Midland WR-400. I got mine through Ryan Hall Y'all's store who is not only one of YouTubes finest weathermen, he's also a fellow Appalachian.
I recommend the WR-400 over the WR-120 because the 400 has AM/FM radio and 4 station presets so you can enjoy local radio AND program it to be a weather alarm. Ours is set to alert for Severe Thunderstorm Warnings and Tornado Warnings only at the moment. I've had it for 6 months now and love it.
The sound quality is great once you get it dialed in. I've really been enjoying turning it on during the day when I'm cleaning or working and the evening when I'm playing cards or reading. In the deluge of streaming options, it's nice to just turn on the radio and let someone else curate something fun.
I don't really have a portable favorite yet; my Sangean DT-400 is great but it runs on batteries which is kind of a pain. I'm begging radio companies to please make some genuinely good USB-C rechargeable options. If you don't mind batteries though, I do recommend it because it's also weather alert programable (though def helps to have the manual for it) and gets pretty good battery life compared to others I've tried. I've had it for 3 years now and enjoy it.
I wish I had some cheaper options to recommend. I'll keep on the lookout.
If you're not sure where to start with radio stations, the first three I find whenever I move to a new place are the local NPR affiliate, the local college station, and the nearest hyper local/low power FM station if I'm in a city. I like these because they tend to have fewer ads and a lot of variety. From there you have a whole world of commerical radio to try.
So go out and get listening!
4 notes
·
View notes
Text
Wish Larian didnt do the whole preset head thing, you get like 6 heads to choose from 4 look around middle-aged white people (which would be fine if we had more options) 2 of them are the same face except one has freckles you get 1 face if you want black features and 1 face if you want Asian features.
The whole head preset thing is dumb and made even worse by the face npcs share these presets so whenever i see someones unmodded Tavs im just sad theres nothing much unique about them they look like a huge chunk of npcs.
What if my tav had muscles, what if they were a bit fat, what i wanted my tav to not look like they have several identical siblings, what if i want my female tav to have muscles or even big titties, i cant because every female tav is skinny, small boobs (it looks dangerously close to how they did elves in DAI) rightbup to the janky walk/run animations
Whilst I have zero interest in romancing anybody (I think it feels rushed with how quickly things rush by , and hate how Astarion getsnover his aversion to sex pretty quickly id of kept his aversion all the way through the end) why is it the only black companion gets almost zero content even been sidelined in his own damn quest and his abuser gets fans too meanwhile the racist Vampire spawn keeps getting content added.
(also there is no way Astarion died as a 39 year old elf, if he was human sure but an elf nah that mf lied about his age as an elf that man would still look 18/20
Unfortunately this game attracted the type of people who can't handle anybody saying anything bad about thier super favourite game even if its valid criticism
Another also ehy are the choices ruen into mindflayer or work with the shithead emperor we have a flayer friend and no excuses are going to make me believe he couldn't help
2 notes
·
View notes
Text
Then and Now
I saw a few people in the fandom doing this and I was a bit hesitant to put this together because I started screenshotting comparably late through my timeline-- I didn't have the confidence to attempt it until 1.5, and in some cases I still am a bit resistant to sharing-- but I thought "meh, I haven't talked about Riley and I still have all my old files, let's go back in time". So here's a bit more of an in-depth look into my V's evolution from launch until now:
Click images for better quality.
Version 1-- V1.0 - 1.2
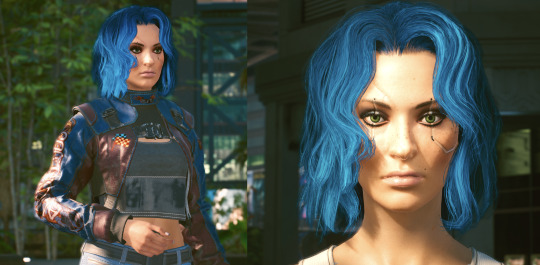
This is probably the most radically different version of Riley I've made. I used different scarring, different facial cyberware, and different eye makeup, though I believe her body, eye, freckle, and earring presets have always been the same. Her chin is squarer and her face is a bit more angled, but back in the day I really enjoyed what I had come up with even if I never took her out for photographing.
The blue hair was darker than I really wanted it to be, but back in 1.0 it was pretty much the only option for light blue so I stuck with it lol. I ended up using the bob solely because I didn't really like 95% of the hairstyles and this was one of the only ones I could tolerate, but I honestly grew to dislike it for her after a while. I hated that it covered up her ears and I never found it really photographed that well because it hung in her eyes.
I actually still really like this facial build-- it doesn't suit Riley but I like how mean it looks, like a built in RBF-- and honestly I would probably try to reuse it for a different OC if I ever made one.
Version 2-- V1.2 - 1.4

This was the new version I built for another run-through on 1.2 and serves as the bridge between the original Riley and the current Riley. I switched the scars and the facial cyberware out to what I would eventually end up sticking with, but I still stubbornly stuck with the bob and somehow I made her face....softer? That wasn't my intention but her whole face has lost the bite it originally had-- I always refer to this version as my "Valley Girl" preset because idk I just always imagine that drawl coming out of this face.
Looking back on it I hate her lip preset on this face. IDK why they look so pink bc I don't have lip makeup on (I literally checked when taking the photos) but UGH they're just not a good fit for her they make her look too...is it mean of me to say "too happy"?
Yeah this one in hindsight is my least favorite it just doesn't look good on her based on what was I going for. Feel like I missed the mark big time.
I don't know why I added that neck tattoo lol it was spur of the moment.
Version 3-- V1.5 - 1.6
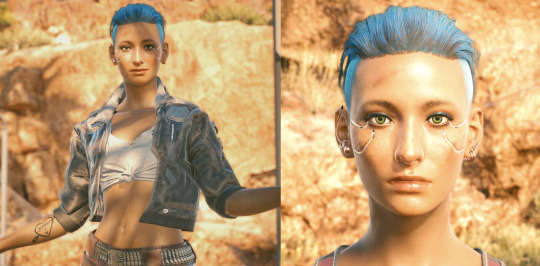
Current Riley! Remade during 1.5 when 1) I wanted to finally make a V I could screenshot and 2) we got the new cosmetics and finally got light electric-blue hair I always envisioned her having.
Finally buckled down and spent more than 15 minutes in the character creator. oven so I could properly sculpt her face. Got rid of the softness, gave her a bit more angles and a bigger nose, lightened her freckles a bit, gave her thicker eyebrows. AND I DITCHED THE BOB. BYE BOB GET OUTTA HERE.
Also finally got the chance to show off her ears-- bronze was another new preset added into 1.5 so that's what I chose, but I believe before that update all her piercings had been silver.
The one thing I wished I had done was give her a bit of a broader nose, but overall I'm pretty happy with this design and I've used it for over a year now.
I've always claimed that my V is about 55-60% accurate to how I imagined her because there's just so much I can't add in vanilla basegame, but this is probably as close as we can get with what I've been given haha.
Bonus: Below are first ever photos I took when I finally mustered the confidence to use my XBone screenshotter around the 1.5 drop. Vanilla definitely has it's limits, but I can at least say I've improved from my starting point-- definitely enough to know what decent lighting is:
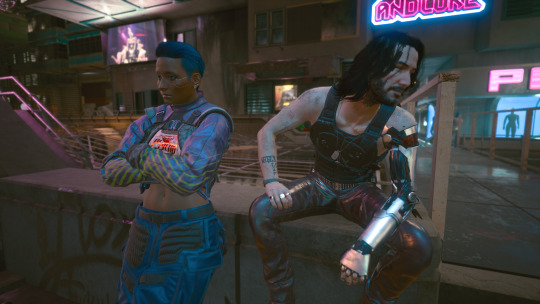

#Cyberpunk 2077#CP2077#V#My V#Riley Aldana#Long Post#God that second build ages like sour milk the more I look at it#It REALLY does not suit her Idk what I was on back in June 2021 but whatever it is please keep it away from me again#We also won't talk about her 30 minute stint with the short mohawk it was a different time and it ain't like that no more lol#Aldi speaks
13 notes
·
View notes
Text
OKAY SO LITTLE UPDATE AND SCATTERED THOUGHTS ON THE NEW EP

It turns out that removing 95% of your mods will improve the game's overall ability to run. Not shocking, but it's definitely a thing lol. I've also learned that some mods, while amazing conceptually, will probably not be added back into my game. This isn't on the modders: some mods are just so complex that I honestly can't keep up with them and therefore can't enjoy their features to the full extent. I do miss my custom recipes, wonderful whims, and a few lumpinou mods though (but that's really it so far).
I also removed all my custom sliders because I have no idea what is broken and what isn't at this point. Shocked to say I don't miss most of them, so I think it might be time I clean that folder out. I did, however, miss my presets!!! Especially body and mouth presets! Likely gonna tidy up those folders and then add those back in.
Kijiko eyelash remover seems to be working perfectly fine in my game, so if you use that one you are probably good to go.
The new pack's CAS items are good! I don't think I'm going to use a lot of it outside of sims in Tomarang, but that's okay. As of right now I am not planning to do an in-depth review of the CAS items because I pretty much just feel "fine" about all of it across the board: I don't hate anything but I'm not absolutely in love with anything either. Idk if I'm just feeling this way or if others are as well, but it seems like a lot of the items (especially the hairs) aren't really new and they're just modifications of things we already have... but that could be just me. I will say the cute dress with the slit up the side... chef's kiss. Needed more swatches though!
One unexpected item that I did love was the tea kettle!! I'm never buying a tea magic brewer or tea pot ever again. I never realized how badly I needed the ability to only make one cup of a tea/hot chocolate/coffee at time but it has been a game changer. I don't have much to say about the build/buy... it's all really nice. 🤷♀️ Wish there were more items that really stood out, but for the most part it's all just good, simple pieces with a few beautiful wall hangings (nice posters, a few good plants, love the baskets, standing toilet is a nice addition, adore the plastic garden chairs, etc.). Functional radiators, water tanks, etc. were fantastic additions with this pack and I would have been happy if they were just decor tbh (and was expecting them to be) but the fact that they aren't makes me very happy. Compatibility across packs is done far too rarely, so I'll let the sims team have this one crumb of a win.
I'm still testing this pack out so gameplay features are being dicovered bit by bit. Haven't ran into some of the big bugs people have been having, but I'm still early in the save and playing as a tenant (I stand by the fact that I have 0 interest being a property owner). The tester sim I made (Riley, she/they) vibed so hard with Vanesha Cahyaputri. Like the two of them have "amazing compatibility" and had full bar friendship almost instantly and I did not make Riley with any partner in mind... I didn't even know Vanesha was a canon lesbian! But they haven't had a single negative interaction soooo brb I'm on my way to make her over ASAP because I loooooovee a good sapphic friends to lovers arc. 😂
Lastly: I have some asks in my inbox. I swear I'm not ignoring you if you've messaged me, it's just been a chaotic few days as December is always so busy. I will answer them as soon as I can! Until the holidays are over I'll probably be posting sporadically! I'm still going to be here, but I'm enjoying just playing the game without any pressure to post about it.
Also, with updates breaking cc and sliders like crazy, it's unlikely I'll be sharing any sims outside of sim requests for a while. I'll still crank out builds, happily chat about my OCs, and reblog other people's content on here. For now I plan to just enjoy my time with my family and play the game stress free! ❤
Okay bye now!
#also idk where that gif is from but it's hilarious#okay I'm done now haha update over for real#update#personal#gif warning#ignore spelling errors this is a mess of thoughts
5 notes
·
View notes
Text
I'M LOW ENERGY, SAD I CAN'T SEW YET, AND TERRIFIED OF MY DEPRESSION CAVE
I'm going to ignore EVERYTHING and be creative in a lazy way that still makes me feel good!!
I'm going to give a preset sim a makeover!


I respect real people's style choices...
...BUT THAT DOES NOT MEAN I HAVE TO RESPECT SIMS' STYLE CHOICES THIS IS HIDEOUS!!!!
Context: I have a sims world were my sim has a industrial diy shack that's a repurposed warehouse with a bunch of cheap or upcycled things, and I allow friends and other sims I make to be friends to move in, often just adding yet another bunk, or even a tree house
so let's start with the first sim who asked to join our little punk found family (even though I've been working on making my best friend in the sims, I would show y'all my current sim but she is literally me built into the sims - my name included - and I do not wish to show that around the internet, the little portrait in the corner is too much to me anyway but I'm too lazy to do anything about it
I'm not messing with her outfit one bit yet, I'm changing her first, I love what they tried to do, but they failed to do it, so I'm going to try and make Lilith Vatore still Lilith Vatore, but more to my liking... oh yeah, the eyebrows are gone

okay maybe I like them just a bit toned down
now remember guys: I don't want a model, just someone I don't mind seeing every in game night (vampire sim)
her lips don't need to go but they do need adjusting

basically just make them wider, she's already almost model in my opinion
while I understand some people may be in love with her hairstyle, I am not

this is a similar hairstyle that doesn't throw me off for the perfectly square bangs (seriously, if you have perfectly square bangs good job idk how y'all do it)
and literally with that her physical existence is done! Now I'm gonna mess with her makeup!!
I already can't remember what she had so I'm gonna wing it!

I'd say I did good since I never do makeup
now....the outfit...


got an upgrade!
I'm antsy to get this posted so I'll just update when I do Business
3 notes
·
View notes
Text
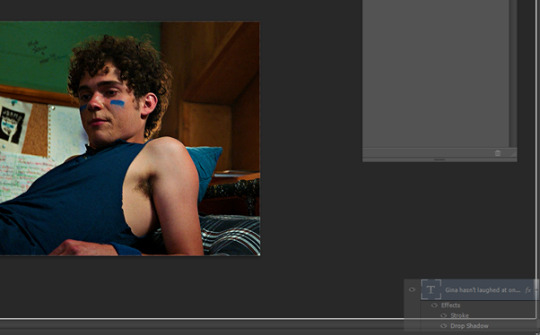
Lola’s Room: Colour Grade
I was the colorist on Lola’s Room.
I didn’t design a LUT for Lola’s Room, as we did test shoots the day before the shoot, and I didn’t have time to use it to build a look for the film. This is something I regret and really helped on The Man who Fell in Love with the Sky, and I wish I’d spent time on for Lola’s Room in pre-production.
I spent 2 & 1/2 12 hour days on the grade for Lola’s Room. The grade was a good opportunity for me to compensate for any problems I had with the images I shot, and I am significantly happier with my cinematography post-grade. A lot of the work was spent on directing the eye, and balancing the levels of exposure and saturation across the scenes, which used quite different lighting setups.
The node tree I used was the same for Lola’s Room as The Man who Fell in Love with the Sky. I was colour grading them at the same time, so using the same workflow avoided any confusion and sped up the process significantly.

The first row of nodes balances the images in exposure, contrast, temperature, saturation and skin-tone, allowing for controlled and easy manipulation of the colour. In the parallel nodes I highlighted areas of each shot, and used them for more specific changes to individual elements of the image.
The opening scene was the most consistent, and fits the soft but saturated intentions I had with the cinematography. It was relatively easy to grade. I made use of tracked masks on faces, with inverted versions to lower the exposure of anything that wasn’t the faces, directing the eye to the action and making the lighting feel more placed and deliberate. I am not entirely happy with the bathroom scene and the following scene, which stand out from the rest of the film due to different lighting, a none of the pink hue which dominates the rest of the film. The final results don’t feel out of place, but aren’t consistent with the visual style.
I added the Kodak 65 film look Davinci LUT preset at 20% intensity across the film, as it separates the luminosity scale towards a filmic look, as well as altering the hues into gently complementary positions. I added varying amounts of noise reduction to deal with some of the grain of the corrupted cards, as well as the colour noise of the grade itself.
I worked through various drafts of the grade. Paula met me at screen academy to work through the grade and give feedback on the consistency of the images. A second opinion really helps, as my eyes adjust to the current conditions of the grade, leading to the picture getting more and more contrasting and saturated.
Log Footage -> Final Image


0 notes
Text
more bg3 thoughts with my half-elf bard elenion. first i want to mention that i actually changed his face/head a bit because it had started bugging me that his ears looked longer and pointier than a half-elf's should really be--they were too much like a full elf's. so i took a closer look at what options were available in the head presets mod i have installed, and i found one that's really similar to what i already had with the biggest differences i can notice just being the ears, and also it has freckles built into it which i was thinking of adding to him anyway. he looks like this now:


i may or may not have cool dyes really early because of mods lol. also, i get really sad about gale in this post!
first thing i came across in the mountain pass was some lady who wanted us to steal a githyanki egg for her so i said no because that just sounds like bad news and i don't think my character would do it. yes i'm locking myself out of quests for the sake of roleplay LOL (i also said no to helping the zhentarim with whatever the fuck they were doing) but it is technically still open if i change my mind, and if not, then it's something i'll get to explore on another playthrough.
HEY IT'S ELMINSTER. I KNOW HIM. and elenion does too because bards get a whole class-specific conversation for this!
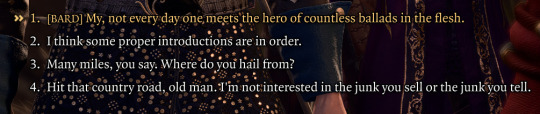
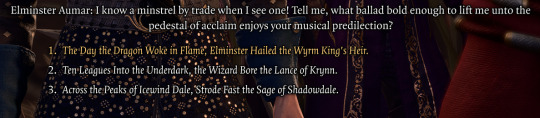
i don't usually reload just to try different options but i figure if there's class-specific stuff then i might as well, so i tried all 3 of these and saved elminster's responses. this is what he says about each option:


i actually liked the sound of the last one's title, but elenion hates anything written by volo on principle because of exactly what elminster is describing and therefore that is not going to be their actual response. i think they probably like the first one best.
???? and now elminster is telling us that mystra will only grant "forgiveness" to gale if he stops the absolute by killing himself. and gale is just not objecting to this at all. that is NOT one of the many things i was spoiled about. what the fuck.

well yeah, and elenion is a half-elf who's falling in love with a human and is already keenly aware of the difference in their lifespans and how little time they might have with him (they're not thinking about gale being a powerful wizard who could magically extend his lifespan because they'd never assume that someone would want to do that for them. and more importantly he kind of has a bomb in his chest). there is no way they'd let that time be cut even shorter by allowing gale to kill himself for mystra, and neither will i 😭😭
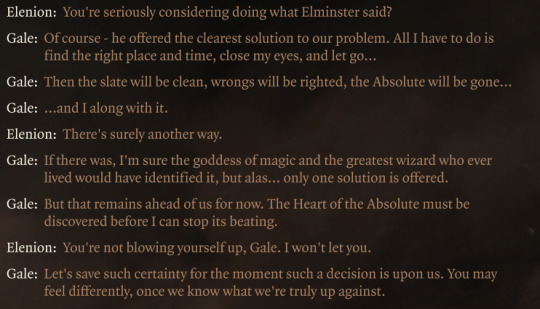
seriously. it is insane how chill gale is acting about this and how little self-worth he has. part of elenion's story is that they feel responsible for the death of their father so they are not going to let someone else they love die if they can stop it. also i hate mystra right now because literally what the fuck?! what kind of goddess asks that of someone?! before i started playing this game i saw people hate on gale and complain about how "he never stops talking about his ex" but they left out the fact that his ex is the actual goddess of magic who is abusing him!! of course he's going to talk about her!! i'm so sad wtf.
this is actually so completely insane that i'm considering having elenion eat some of the mindflayer parasite specimens and using this as a justification for them feeling desperate enough to do it, because what's the point of any of this if they once again aren't strong enough to save their loved ones? but i'm also still torn because on the one hand the power the guardian is promising could still just be a trick and i'm sure there will be some sort of story consequences down the line for putting more tadpoles in your brain. on the other hand whatever consequences there are might make things more narratively interesting. why am i so indecisive about this omg.
anyway:

this entire conversation is incredible LMAO. i love karlach. i now desperately wish we could see gale's live reaction to karlach telling him that.
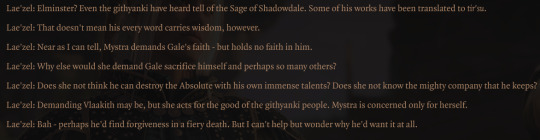
you know... maybe lae'zel's words here would help convince elenion that he doesn't need to use the illithid powers to be strong enough to protect gale, when he's got such a powerful group of allies backing him up. this also definitely makes him like and respect lae'zel more, when he's spent most of the game so far finding her abrasive and frustrating to deal with but unfortunately necessary to have around.

THIS on the other hand is not going to make him dislike astarion any less. i think you could look at this dialogue as astarion trying to express in his own fucked up way that he cares, but elenion would definitely interpret it more as "caring more about controlling the cult than about gale being ordered to kill himself" and think it was crazy insensitive of him. so it is probably going to take a long time for them to be able to be friends.
YESS THANK YOU WYLL. wyll is so sweet and good and is basically saying the exact same thing as lae'zel. and elenion puts a lot of stock in his opinion because i've got 97 approval with wyll so they're definitely besties lol. so you know what. i'm going to continue ignoring the tadpoles and i'll roleplay my own indecisiveness as elenion himself having felt really torn up and afraid after talking to elminster and gale, and very strongly considering listening to the dream guardian before speaking to everyone and feeling reassured that there must be another way that doesn't require giving himself more brain worms.
and speaking of wyll and elenion being besties--when i crossed over to rosymorn monastery i got a bit of banter between shadowheart and wyll where he named off a couple of dramatic-sounding titles and was like "i'm trying to decide on a title for this chapter of the blade's adventures!". so they are definitely bonding over wyll being kind of an overdramatic dork who loves talking about his heroic adventures.
after wandering through the monastery area a lot, i found my way to the creche. i checked out a portrait of vlaakith and had a dexterity check option to draw a new face onto it. elenion would not vandalize artwork like that but i couldn't resist so i did it and then reloaded to do the history check instead LMAO. i'm obsessed with the fact that not only is this possible to do but your tav gets this ridiculous grin on their face while lae'zel gets mad:


exploring the creche and seeing the cruel and unforgiving environment that lae'zel has been shaped by is fascinating. in the classrooms they force children to fight to the death, and i had to pass a very high persuasion check to convince the teacher to leave a student who didn't want to kill someone alone. in the infirmary, lae'zel says that if certain protocols are broken then kids are hit with barbed whips. in the hatchery, only one egg has yet to hatch and there's a letter to its caretaker that says that if it can't hatch on its own it should be destroyed--and according to lae'zel, most caretakers would do so. it really is no wonder she's the way she is, and i can't wait to see how she develops.
but also if you tell the caretaker you want to take the egg to another creche that's more forgiving lae'zel approves and then says she feels drawn to its warmth omg 🥺 i just know she has a soft spot for kids.
i keep going back and forth on how i think elenion should feel about the dream guardian. i guess i can roleplay that as them being conflicted, like they were about consuming the tadpoles. i think they definitely want to trust the guardian and believe that she's not just protecting them as a way to use them for her own motives, and generally they do choose to trust her, but they've also been afraid of what could happen if they use the tadpoles and something goes wrong. however, i also think that after getting to meet the dream guardian face-to-face and learn all of these insane things about the githyanki and vlaakith which were then backed up by kith'rak voss, they've become more inclined to believe her.
anyway i am really glad i went to the mountain pass!! and now i definitely don't want to pass up on whatever cool story beats are waiting in the underdark. so, roleplay reasoning for this is that we were already planning to double back anyway after going to check out the creche since it was seemingly the most reasonable lead on a cure, but that uhhhh did not work out and now continuing to travel through the mountain pass feels especially dangerous.
1 note
·
View note
Text

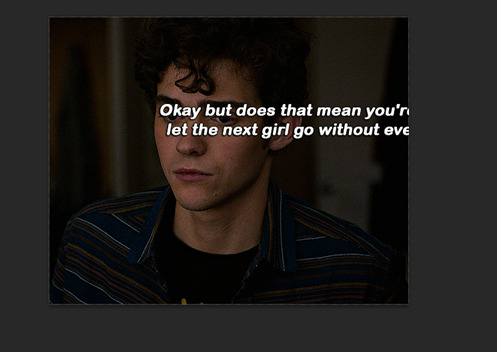
Hi so I’ve had a couple of anons asking me how I make my gifs (some specifically hsmtmts gifs lol) so I’ve decided to write up a tutorial of the basics of how I make my gifs. I’m going to try and make it as detailed and clear as possible - but I have been pretty busy with uni and stuff so if I miss anything or anything isn’t clear just lmk and I will do my best to clarify. I’m going to try and include any resources or other tutorials which may be useful as I go along. This is going to be quite long and detailed so tutorial follows under the cut. For some basic steps I know of good tutorials for - I will link tutorials rather than re-explaining :)
Before we begin with the tutorial part bear with me there are a couple of screencaps which I took out of sequence because I forgot to take them at the step I did it - and the final gif colouring result looks kind of different from the rest of the screencaps because when I was adding the gif to the gifset I was making it for I decided it needed to be brighter because the s3 scene was much brighter than the s2 gif I made for this tutorial (none of this really matters, just explaining the slight discrepancy in some of the caps).
1. SOFTWARE
To make all of my gifs I use Photoshop CS5 (this is the version I use). Any version of Photoshop should work with the methods in this tutorial and you can find a masterlist of cracked photoshops here
2. FINDING HQ VIDEO
When making gifs I always use 1080p video - but not all 1080p is created equally. Generally remux files and larger file sizes will produce better quality screencaps so this is what I search for when giffing. I know a lot of gifmakers who swear by using 4k, but personally I find 4k is more trouble than its worth in my opinion (screencaps always come out weird on my computer - like with a full on green tint, and they take forever to download). For HSMTMS in particular I like to use the release labelled 1080p SALT.
In terms of finding videos, this is a good guide on downloading.
3. SCREENCAPPING
I use mpv player to take screencaps for my gifs. This is a tutorial on how to use and install mpv. When taking your screencaps make sure you have continuous screencaps and no frames are skipped or duplicated. These missing/extra frames will make your gif look choppy and the animation won’t be smooth.
After finishing my screencaps I put them all in folders and move the folders to my desktop (but it can be anywhere you easily can access the folder) to import into Photoshop.
4. IMPORTING SCREENCAPS TO PHOTOSHOP
Open Photoshop. Open the Menu path "File > Scripts > Load Multiple DICOM files” and select the folder where the screencaps for your gif are.
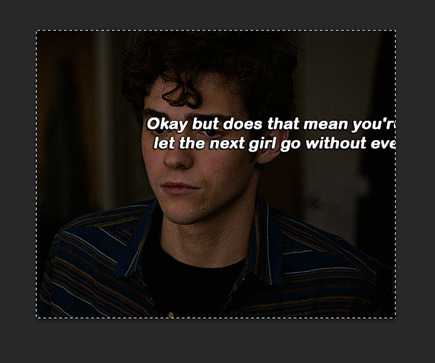
5. CROPPING AND RESIZING GIFS
Click the ‘Crop’ button on Photoshop (the little button shown in the screenshot below). Typically I like to use a preset so that all the gifs in the set I make are the same size. For this set I used the 4x5 crop preset because that is what I typically use.

Position the crop where you want the gif (typically I like the character in the center).
Then push enter (or the tick next to the crop buttons) to confirm your crop.
Use the keyboard shortcut Ctrl + Alt + I to resize your image. This will bring up a little pop up like this:

Resize your gif accordingly based on the width. It is important to use the correct dimensions for the size of the gif you wish to make. These are summarized in the below image.

When you change the width to the correct size (e.g. in this case 540px) the height will automatically change as well.

Click Ok to resize.
6. ANIMATING YOUR GIF + SHARPENING
There are quite a lot of steps to turning your frames into a timeline animation. They are covered in detail in this amazing gif tutorial (which is the main one which helped me learn to gif).
It would be useful to have a read of how the process works, but to speed things up for myself I use a Photoshop action (shared here) I made that does all these steps for me plus my sharpening😊 (Here is a tutorial explaining how to create & install Photoshop actions)
I just highlight the word animate click the play sign and it does all the tedious steps in a couple of seconds. Note it is important to keep the reverse frames one unticked as shown in the screencap otherwise your gifs will move backwards

After that runs through we have our gif in timeline mode sharpened and ready to colour :)

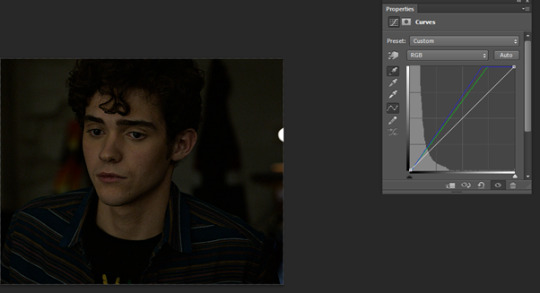
7. BASIC COLOURING TECHNIQUE
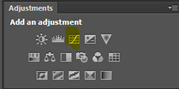
My basic colouring process is very simple and honestly it may shock some people but I primarily colour my basic scene gifs using only the curves and vibrance adjustment layers. There a few reasons for this – 1) The curves tool is a powerful tool and you can do a lot with it 2) Less adjustment layers = better quality gifs 3) This works for me and it is what I find easy. Essentially, I like to keep things simple where ever possible.
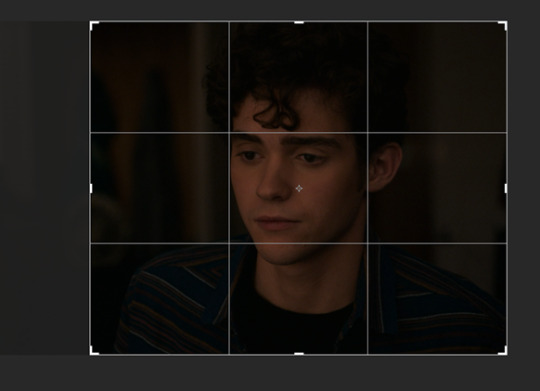
First I add a curves layer by clicking on the highlighted adjustment layer
This gives you a menu that looks like this:
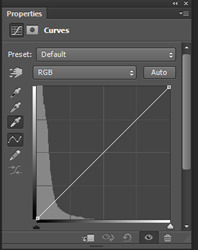
The great thing about Curves is that Photoshop will do a lot of the work for us if we use the eyedropper tools.
First I click the white eye dropper – then I pick a white point on the gif and see how it goes. This can take a few times to get right and often I will try a few times to see which I like best.
For this gif I selected the white light in the background but it looks a little green to me

After I have selected my white point I will usually do the same thing except with picking a black point of the gifs. I don’t always pick a dark point it kind of depends on how much I like what Curves has done with the white point and if I think the gif needs more contrast.
For this gif I picked a black point of the area behind Ricky. This is what the gif looks like now with the dark point chosen:
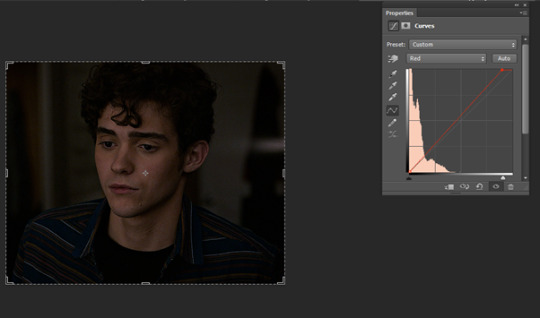
This looks a little better to me than just the white point – but the screencap still looks kind of yellowy and dark to me. So what I do now is I go into each colour channel for the curve and manually adjust it to my liking.
Since this gif is yellow I start in the blue channel and add more blue. I do this by changing the drop down menu on the curves screen from RGB to blue. This gives me something like this to work with:
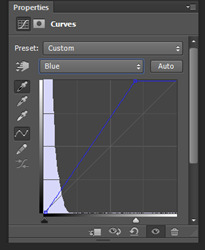
Essentially I adjust the amount of blue in the gif by sliding the white arrow down the bottom up or down to add more or less blue to the gif. For this gif I am going to slide white arrow at the bottom to the left to make the gif more blue (i.e. neutralise yellow). If I think I have added too much blue I slide it back to the right to add yellow back in.
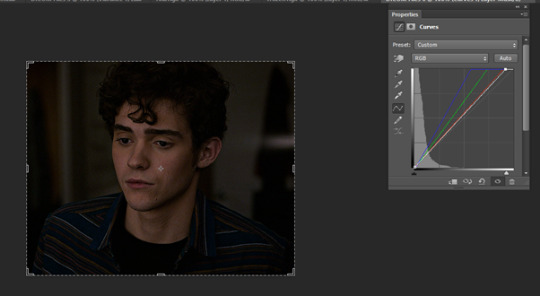
This is what I adjusted it to and it already looks a lot better
I am actually pretty happy with the overall colouring of this for the moment and I don’t think I need to go into the red and green curves. But I will briefly explain what they do/how they work by showing what some adjustments to these curves looks like.
Red curve – here is our starting point
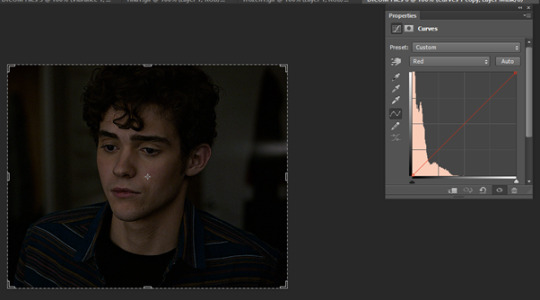
Dragging the curve to the left will introduce more red into the image

Dragging it back to the right will take out red (the gif will become more cyan)
Green curves: this is our starting point

Dragging the green curve to the left will add more green to the image
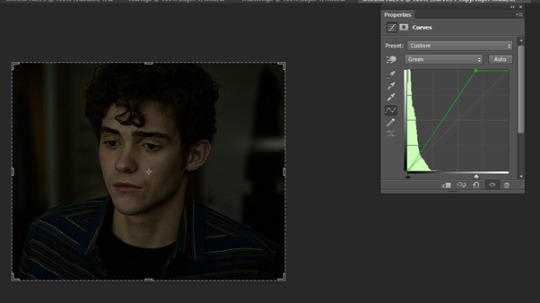
Dragging it to the right will take green out (adding pink/magenta)

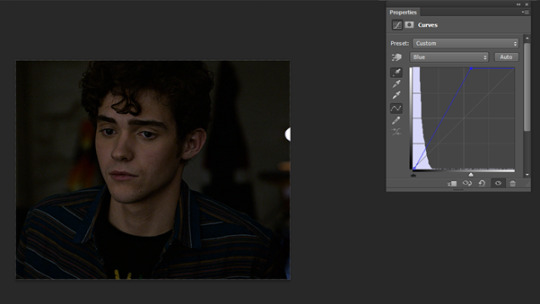
So after I am happy I have coloured the image in curves If I want the gif to be a little brighter I go back to the main RBG Curves screen and drag the white arrow a little up to the left to add some additional brightness
After colouring with Curves I add in a Vibrance layer (highlighted adjustment layer)

Typically I set the vibrance somewhere between 50 and 60.

This is what the gif looks like now:
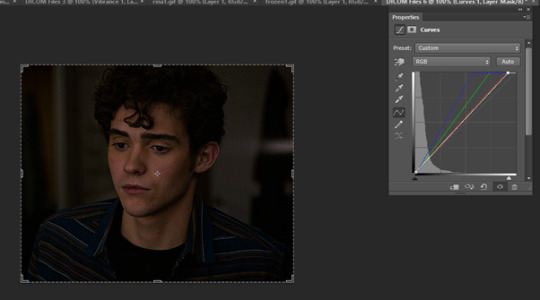
At this point I also have another quick look at the gif and see if I think I need to go back into curves and tweak the colouring a bit and add a bit of extra brightness. When I add in the Vibrance I find it easier to see if there is any underylying colours I want to go back and neutralise/adjust in my curves layer again.
This is what I end up with after making my adjustments post vibrance layer:

Another step I do sometimes is grabbing the black slider on curves and dragging it just a little bit to the right to add some depth and contrast to the gif. As s2 of hsmtmts is really dark I didn’t do it for this gif because I don’t think it needs it. But I will show an example of what this might look like:

This is basically it for my basic colouring. Of course there are a lot of different steps to making my colourful gifsets, but this is just a basic tutorial for the way I gif standard scenes so I will move on to subtitling gifs.
8. CAPTIONS
My go to subtitle font is Arial Rounded MT Bold. I have Faux Italic and Faux Bold Selected for this. I like bigger font sizes because I have bad eyesight so usually I will opt between 20 – 24 pt font size

I click the T button to add text then I type out my caption.
Obviously we don’t want our text here so I align it to the bottom and centre of the gif I do this by first selecting the move tool then going ctrl + a (this selects our gif as the boundary for our alignment). You will know this is done based on the border that comes around the gif (also please ignore that drop shadow and outline settings have already been applied here lol – I added this in because I forgot to screen cap/ explain this part initially)
Then I align my text using the following menu buttons:
Next I Ctrl +D to remove the selection (you need to do this to be able to nudge your text up for the next step). This is the result of the alignment:
Now I nudge the caption up by selecting the text layer and pushing ctrl + shift + up
This is the result:

This looks ok, but I always add an outline and dropshadow to make the text more readable. To do this I go into the blending options for the text layer. You can do this by right clicking the layer and selecting blending options or by double clicking the layer (but not on the text).
First I add Stroke with these settings
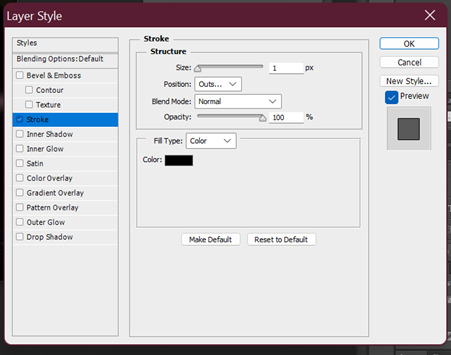
Then I add Drop Shadow with these settings:

9. SAVING GIFS
To save your file use the keyboard shortcut Ctrl + Alt + Shift + S to open the save for web settings. You will get a screen like this. The settings shown in this screen are my typical save settings (except it should say ‘Forever’ on looping options)
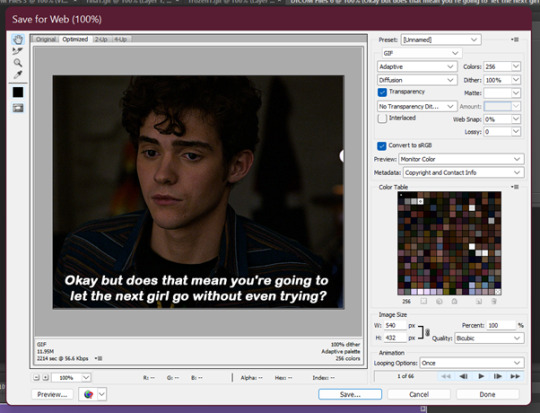
However, Tumblr’s gif limit is 10mb so the size of this gif is too big to upload (it is nearly 12 mb) so we have to go back in the timeline to shorten the gif a bit so we can upload it to tumblr.
I do this by dragging the red preview thingy (idk what else to call it) around till I find a point where I feel the gif has a natural end. Then I grab the timeline bar thingy (idk what it’s called but the silver gray bar at the end of the gif) to the red bar to shorten the gif.


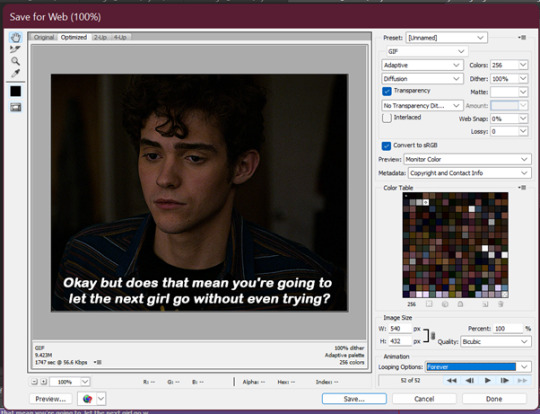
Now press Ctrl + Alt + Shift + S again to save your gif and make sure you set the Looping Option to ‘Forever’. Sometimes I have to shorten the gif a few times to get it under 10mb - but luckily I got it first go this time :)
Now your gif is saved but there is still one step left to do. Photoshop has a glitch where it automatically sets gif speed to 0.7 after saving from the timeline function – we don’t want that! The gifs look very slow and are not very smooth.
So what we do is we open the gif that we just saved and this will open in the frame format. All we have to do is select all frames and set the gif speed to 0.5 – I also have this in my action so I go back to the actions and highlight the line that says ‘set frame speed’ and play the action through

Then we just save the gif again as we just did 😊
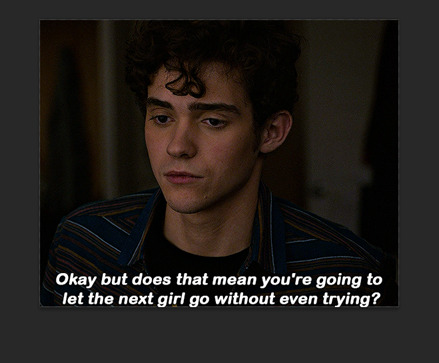
This is the end result:
and what the gif looks like without any colouring or text:

One other helpful tip:
If you are giffing from the same scene you can do your colouring and text manually as per the tutorial on the first gif for the set and then drag what you did across to the second (after cropping, resizing and animating it). All you need to do is drag the colouring outside to a different window then highlight your adjustment layers + text and drag them to the new canvas off of the gif (If you drag it on top of the gif it will place it where you put it. Make sure to go off the canvas to so it will keep you positioning/alignment of the text you made 😊)
Basically - you drag the text, curves, vibrance (and any other layers you need) to the gray area of your photoshop document and your colouring will be applied and your text will be placed in the same position as your source doc.
Ok so that is my super basic gif tutorial - if anyone has any questions feel free to ask!
#hsmtmtsedit#*mine#request#gif tutorial#resources#ps help#photoshop tutorial#usergif#allresources#yeahps#completeresources#resourcemarket#dailyresources#userelsbeth#usersavana#useraurore#userrobin#usersole#uservalentina#tuserheidi#okkk so this is kind of a weird choice of gif for the tutorial but I just followed my process as I made a gif request this morning#plus I do feel like its a really ugly screenshot so shows the results of the colouring quite well#but anyway i hope this helps someone
1K notes
·
View notes
Text


Hi! |˶˙ᵕ˙ )ノ゙
I'm so sorry for disappearing for over a month!!! (シ_ _)シ I have a lot of work and have been constantly tired over the last month :c
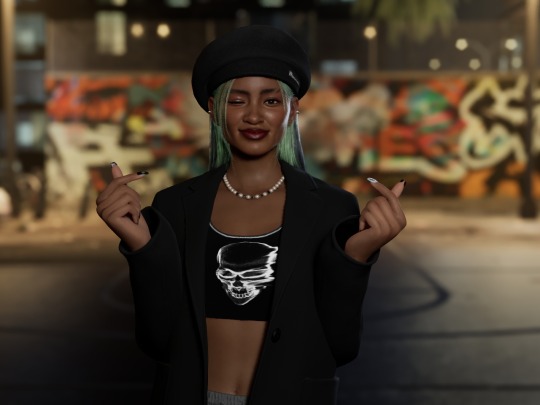
I actually made this sim quite a while ago! I enjoyed making the last sporty sim so much I had to make another one! I aimed for a more spicy style this time (⸝⸝•̀ ,<)
I'm sure she'd be happy to be your gym buddy 🏐🏐🏐

The only outfit included is the everyday outfit! The outfit is copied over to every other category.
The screenshots were taken with my GShade preset enabled! Comparison between the game's unmodified lighting vs with GShade in last four images - original on the left and with GShade on the right. Link to the preset at the end of the post.
The download includes custom content. I did not make any of the CC used with this sim! Many thanks to all the wonderful CC creators for their hard work! Links to original posts with CC listed below. Please visit their sites and support them if you like anything you see! If you are a CC creator and do not wish for your CC to be included in the package, please do contact me and I will remove it!

SFS (no ads) / MediaFire (no ads)

Obscurus' nosemask - nosebridge/nosetip/nostrils Kijiko's 3D Lashes Version2 Merci's Eyebrows N14 lamatisse's Butterfish skinblend RemusSirion's Cytosine Eyes Merci's Eyeshadow N16 Grafity-cc's Ash Garter moon-craters's thigh high socks recolours SIMANDY's nose shadow Jius-sims' Platform Sneakers 02 Pralinesims' Matte Almond Nails N06 sugar owl's Kelsey earrings nitropanic's Ripped Set (Bottom) simandy's Fiery hair RemusSirion's Pathogen Lipstick Pralinesims' Cheria Rings SayaSims' Freckles N1 Elliesimple's Knit Cropped Sweater Merci's Lilith Eyeliner MAGIC BOT's maxis teeth (default version in dl!)

My GShade preset How to install pre-made sims
#sims 4#the sims 4#ts4#simblr#sims 4 simblr#ts4 simblr#sim download#sim dl#sim dls#sims 4 sim download#ts4 sim download#the sims 4 sim download#sims 4 sim dump#ts4 sim dump#the sims 4 sim dump#ts4 cas#sims 4 cas#the sims 4 cas#sim dump#show us your sims#sims 4 female sim#ts4 female sim#sim dumps#young adult sim
3 notes
·
View notes