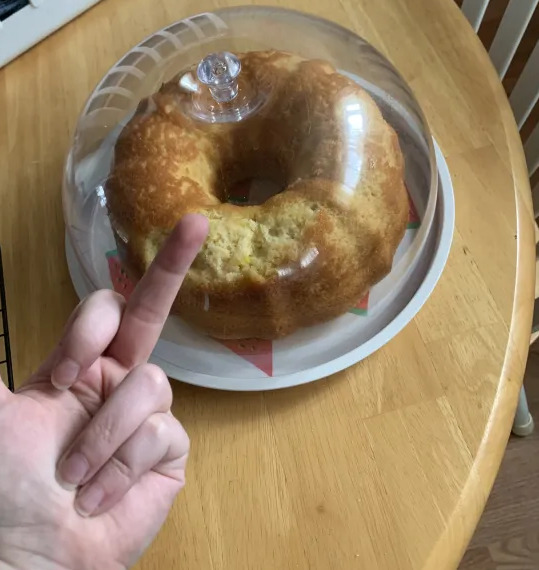
#i was about to put in 4 cups. because the recipe called for 1/4 but i misread it as 4. but i thought that was a lot so i decided to go w
Explore tagged Tumblr posts
Visit Tumblr Blog
Explore Tumblr blogs with no restrictions, modern design and the best experience.
Last Seen Tumblr Blogs


Fun Fact
28.6 is the average number of monthly visits per US mobile user.
Text

Jason Todd with s/o who loves to bake
Masterlist

The way to a man’s heart is through his stomach
Jason swears you took that saying and ran with it.
He’s afraid of gaining 50 pounds just by looking at all the delicious desserts you make.
“Some are from (insert what you call your grandma) and some are from Pinterest.” You’d say with a proud smile when he asked where you get your recipes from.
He absolutely devours everything you make him. If the others are lucky he MIGHT MIGHT share.
Alfred absolutely loves your baking skills. “One can always tell when something is made with love and pride.”
Bruce hides away in the Bat Cave as he eats the apple crisp pie you made. He couldn’t help himself.
Jason is a fiend for berries. No one can convince me otherwise.
He might enjoy the classic apple pie or chocolate cake here and there,
but make him a blackberry cobbler and he’s forever yours. Bake him up a special cherry pie, OOooOoo, he eats it like a starved man.
Now when you start to cook, that’s a game changer. Soups, pastas, oven specials, steaks (“I’m a growing boy” he’d claim)
Will cry like a boy coming home from after school sports if he comes home and sees that crockpot is out.
Absolutely loves cookies. However he likes his basic. Chocolate chip, snickerdoodle, sugar cookie.
Jason Todd would attend a one day cookie decorating class. He wouldn’t be great at it. But he would try for you.
For your birthday the first year you started dating he gifted you different shaped cookie cutters.
For the next birthday or Christmas he may or may not have dug into Bruce’s pockets to buy you a kitchenaid.
Bruce didn’t mind much though when he found out. He gets to also reap the rewards of you having a kitchen helper.
Jason one time bet that you couldn’t use a measuring cup as a weapon after you threaten him with one if he wouldn’t get out of the kitchen. He was proved wrong when you used the handle as a makeshift shank.
You love Jason but there is such a thing as too many cooks in the kitchen.
If there is ever an ingredient that you do not have, Dick is willing to go to the store for you. However you have to promise to share what you are making.
“Jay? How do I make 3/4? And how many of those tablespoons do I need to make 1 3/4 cup?”
His honest reaction:

“Do I look like a math teacher? Ask google.”
He’s no help I feel when it comes to anything math related. Especially factions. He knows how to take a car apart and put it back together. Don’t ask him to do anything else.
Don’t ask Dick either. Unless you want to make a disaster. And Tim would probably give the wrong answer on purpose.
Jason loves to watch you decorate your cakes. Sometimes you make birthday cakes for your friends and your steady hands piping the icing is so impressive to him, he could watch you for hours.
He loves watching you get excited about your hobby.
Jason really is a great supporter of your work and hobby. Sometimes he refuses to eat a cookie or cake because “it’s too pretty and you made that with your own hands.”
“MORE FOR ME!”- Dick
833 notes
·
View notes
Text
a recipe for pound cake
i was born and raised in the deep south. food has always been one of my love languages. making food for someone, accepting food someone made for me, sharing meals, sharing recipes, to me, all of these are different ways to tell someone i love them.
this is especially true for any sort of treat, as i call them. any sort of confection tbh. some of them are baked, some of them are just "fixed," they are all just Treats to me. i have a vicious sweet tooth, and that comes out in the treats i like to make.
this particular recipe comes from my late grandmother's recipe book. she compiled it years ago, had multiple copies printed through some on-demand make-your-own-cookbook printing service she found online, and gave them out as christmas gifts to multiple family members. this specific recipe, she mentions in the book, comes from my great-grandmother, her mother, who we all called mi-ma.
and if there is anything that little old southern ladies know how to do, it's make a mean cake.
INGREDIENTS:
1/2 pound (2 sticks) of butter, room temperature (~227 g)
2 1/2 cups, plus 3 tablespoons, of sugar (~672 g)
6 eggs, separated
3 cups all-purpose flour (~375 g)
1 cup sour cream, room temperature (~240 g)
1/4 teaspoon baking soda (~1.5 g)
1 teaspoon vanilla extract (~5 ml)
1 teaspoon lemon extract (~5ml)
DIRECTIONS:
cream the butter and sugar together
add the egg yolks
add the baking soda to the flour
alternate mixing in the flour mixture and the sour cream to the sugar mixture
add vanilla and lemon extracts to the egg whites, and beat to soft peaks
fold the beaten egg whites into the batter; mixture will be thick
grease either a bundt pan or a loaf pan about twice as much as you think you will need to. i am not joking. this batter is so incredibly sugary sticky and you will hate your life trying to get it to release if you don't grease the hell out of your pan.
put the pan into your COLD OVEN. COLD. DO NOT PRE-HEAT IT. PUT IT INTO THE OVEN COLD. then turn the oven to 300 degrees F (~149 C). bake 1 1/2 hours
let cool on a baking rack
be annoyed because you probably didn't grease the pan well enough
this is a dense, deliciously savory vanilla pound cake with a very lightly caramelized outer crust. they freeze well for make-ahead purposes, and they ship well for i-have-a-long-distance-friend-who-needs-a-treat purposes.
the first time i made this cake was after my grandmother died days before my father's birthday. it was my birthday cake for him that year, and i thought (hoped) that a cake from his mother's—his grandmother's—recipe might ease the heartache for just a moment. i did tell him as i cut each of us a slice where i got the recipe from, and joked that i'd never made it before, so it might not be as good as mi-ma or grandmama made it. he laughed and cut into his slice with a fork and—his eyes closed when he took a bite. and another. and then he smiled for the first time i'd seen in several days.
since then i've made the cake several more times, for friends and family in grief: frightening medical diagnoses. losing other friends. depressive bouts. and while i will not be boastful enough to claim that this pound cake actually cures anything, i WILL say that being sad with a slice of pound cake is a much nicer feeling than being sad without one. and you know what? that seems to be the general consensus among the recipients, too.
this is a pound cake that tastes like love.
i hope that this recipe helps other people to pass along some of that love too, whether to themselves or to someone else.
i think mi-ma and grandmama both would've liked that. :)
92 notes
·
View notes
Text
Pumpkin Cupcakes Feel-Good Abundance Spell Recipe
Yes yes yes, I know it's still summer and autumn is a loooong way away, but damnit, sometimes I want to call forth my Inner White Girl and indulge in pumpkin spice! Well, luckily for me (and for you!), I have a perfect recipe for you - because not only is it a dozen pumpkin spice mini cakes, but also a feel-good and abundance spell. So here's my abundance spell recipe - complete with cream cheese frosting and DIY pumpkin spice mix! So, without further ado, here we go!
What you'll need:
Pumpkin pie spice:
3 tablespoons ground cinnamon (adds power to the spell, prosperity, success)
2 teaspoons ground ginger (adds strength to the spell)
2 teaspoons ground nutmeg (money)
1 teaspoon ground allspice (money, luck)
1 teaspoon ground cloves (success)
Bowl
Spoon, fork, or whisk
Cakes:
2 eggs
1 1/4 cups granulated sugar (banishes negativity)
1 cup pumpkin puree (granting wishes, prosperity)
3/4 cup melted butter (enhances peacefulness)
1 1/2 cups all-purpose flour
1 teaspoon baking soda
1/2 teaspoon baking powder
1 1/2 teaspoons pumpkin pie spice (abundance)
1/2 teaspoon vanilla extract (self-love)
1/4 teaspoon salt (protection, grounding)
Cupcake liners (I like these! Unbleached, chlorine-free)
Wire rack (optional)
Whisk, hand mixer, or stand mixer
Large mixing bowl
Cream cheese frosting:
1/2 cup softened butter (enhances peacefulness)
8 ounces softened cream cheese (meeting goals)
4 1/2 cups powdered sugar (banishes negativity)
splash of vanilla extract (self-love)
Large mixing bowl
Hand mixer, or stand mixer (trust me, you'll want a hand or stand mixer for this)
Piping bags (optional)
What you'll do:
Pumpkin pie spice:
Add all ingredients into a bowl
Mix mix mix
All done!
Cakes:
Preheat the oven to 400 degrees (F) and line a 12-cup muffin baking pan with paper liners
Place the wet ingredients (eggs, sugar, pumpkin puree, and butter) in a bowl or stand mixer bowl. Whisk or mix until smooth.
Add the dry ingredients (flour, baking soda, baking powder, pumpkin pie spice, vanilla extract, and salt) to the bowl. Stir until just combined.
Divide the batter among the 12 muffin cups.
Bake for 15-18 minutes, or until just browned and a toothpick inserted in the center of a cupcake comes out clean. A chopstick also works but leaves a bigger hole. Don't worry, you can cover it up with frosting.
Cool for a few minutes in the pan on the wire rack, then transfer the cupcakes to the wire rack to cool completely. Don't frost until the cupcakes are completely cool!
Cream cheese frosting:
Put the butter and cream cheese in the bowl of a mixer or a mixing bowl and mix until light and fluffy, about 3-4 minutes.
Add the powdered sugar, one cup at a time, and mix on low speed until combined. Add the vanilla extract and mix for a minute.
If the frosting is too thick, add 1 teaspoon of milk at a time until desired consistency is reached. You can use any kind of milk, but I don't recommend soy.
Optionally, you can put the frosting in a piping bag and pipe the frosting on the cupcakes. Or you can just dollop it on with a spoon. Or, if you're like a monster like me, you can put a cupcake in a bowl and scoop in some frosting with it. Oh who am I kidding, I mash it all up together like an ungodly goop...
I know it's a long post, but I promise it's actually quite easy! And delicious. Very, very delicious.
As always, practice safely, do your research, and blessed be!
Support your local witch on Ko-Fi!
#in the witches book#pagan#paganism#pagan witch#kitchen witch#witch community#witchcraft#witchcraft 101#witch#witchy things#beginner witch#spellwork#spirituality#witch tricks#grimoire#green witch#green magic#spells#simple spells#witchy#witchery#baby witch#witchblr#broom closet#closet witch#witch tips#magic#magick#herbal magick#witches of tumblr
261 notes
·
View notes
Note
Maamul
I always liked these but I actually looked up a recipe in 11th grade because my Halakha teacher would go on and on about how his wife made the best maamul and her made it sound so amazing lol
רכיבים:
500 גרם קמח
2 כפות סוכר
200 גרם חמאה רכה בטמפרטורת החדר
3-4 כפות מיץ תפוזים
למלית:
ממרח תמרים
שלבים:
במיקסר עם וו גיטרה מערבבים את כל החומרים מלבד המיץ תפוזים.
מוסיפים את מיץ התפוזים ואם מתקבל בצק אחיד ונעים למגע מפסיקים. אם הבצק עוד קצת פירור ויבש מוסיפים עוד מעט מיץ תפוזים.
מחלקים את הבצק לכדורים בגודל אגוז מלך שלם פחות או יותר
מעבירים את המלית תמרים לשקית זילוף ( הכי נוח) אבל אם אין אפשר גם למלא את המעמולים עם כפית.
משטחים כל כדור לפיתה ומזלפים במרכז מלית תמרים, בערך כפית וסוגרים כמו קובה לצורת כדור.
מניחים בתבנית מרופדת בנייר אפייה כשצד "התפר" כלפי מטה. כך ממשיכים עם כל הכדורים.
בעזרת פינצטה למעמול צובטים את הכדור מסביב לכל הרוחב וגם מלמעלה ליצירת הדוגמה.
אופים בחום של 170 מעלות כ-20 דקות. העוגיות יוצאות מאוד בהירות וזה בסדר.
מצננים לחלוטין ומעבירים לצנצנת אטומה. בתיאבון !
Ingredients:
two cups flour
2 tbs sugar
200 gr room temp butter
3-4 tbs juice (the recipe calls for orange juice, I often use grape juice bc it's cheaper)
date paste
How to:
Mix the flour, sugar and butter
Add the orange juice. If the dough holds together and is smooth, stop. If the dough is still a little dry and crumbly, add some more juice.
Make balls of dough around the size of a walnut, and roll them out
Put a tsp of date paste in each one, and close.
Put the closed balls on a baking sheet with the stitch-side down.
Pinch lines into the sides of the balls.
Bake at 170 degrees c for 20 minutes
Let cool
Note: The recipe technically calls for 1 tbs of rose water along with the juice, but I'm a hater.
These cookies are eaten all over the Middle East and North Africa. Muslims often eat them to break fast on Ramadan.
Honestly these sound amazing and I can't wait to try them
Link to the original recipe :)
200gr butter- 7 ounces
170°C - 338°F
#jumblr#the jumblr cookbook#maamul#recipe#dairy#kosher#dessert#mizrachi#not inherently jewish#middle eastern#north african#עברית
14 notes
·
View notes
Text
so, because my specialty is babka, an enriched bread bordering on cake (i.e., the recipe calls for two eggs), I started thinking about substitutes, should I ever come to the point of being unable to buy eggs because they’re way too expensive.
I found a forum discussing substitutes for eggs in enriched bread (dated last year, too, so I’m putting it here because nothing on the internet lasts forever; write these down!), and these were the ones that caught my eye:
Mayonnaise. I use mayo in my “souls of black”/double chocolate muffins, and it makes them really fluffy and moist (pleasantly tangy, too!) on top of the two eggs it calls for, so can confirm right away. It’s 1 1/2 tablespoons of mayo for every egg.
Greek yogurt, preferably the plain kind. The forum as well as America’s Test Kitchen, The Kitchn, and several others swear up and down with this one; I think the next time I make a babka, I’ll try it. 1/4 cup = 1 egg. an offshoot of this: yogurt or buttermilk with baking soda. OP doesn’t say, but I’ll make an educated guess and say the conversion rate is 1/4 cup of yogurt or buttermilk + 1 teaspoon of baking soda. Does bubkes for leavening, but I guess it makes bread fluffier than a cloud.
Potato, preferably white or Russet potatoes, or potato starch, which I’ve seen in the baking aisle next to the almond and arrowroot flours. Yes. Yes, of all things. I was taken aback, too, but potatoes are starchy and not very glutinous so it keeps the crumb fine and soft and adds some moisture. 2 tablespoons of starch for 1 egg.
The “tangzhong” method, used in Japanese milk bread, where you cook a bit of flour and a bit of the water/milk in a saucepan. This is another one I want to try out, simply because of the way it makes milk bread so airy and tender—makes bread last longer, too! The basic method is 1 part flour to 5 parts liquid, by weight: I don’t know if this could work in my babka because you want hydration to be 75% of the flour, and my babka calls for 275 grams of flour with 50 milliliters of milk (or 50 grams, for those keeping score at home). Although I think it could work because eggs account for moisture as well as binding and leavening? Definitely an experiment.
Flaxseeds and water. I see things like… this will add a nuttiness or a grassiness to the bread (less than ideal for a babka, which is supposed to be warm and sweet) but it works. Hit and miss, so use this one with caution, but it does work. 1 tablespoon of flax with 3 tablespoons of water until you have a slurry thing going.
Water, baking powder, and veggie oil. The Kitchn absolutely swears by this one, like you would never guess there’s no eggs in there. The one difference is it might make the top a little darker than usual. I think this + the Greek yogurt will be my go-to egg replacements. 2 tablespoons water + 2 teaspoons baking powder + 1 teaspoon vegetable oil = 1 egg
Carbonated water/seltzer water. Another one from the Kitchn: mind, I couldn’t read the whole bullet point because the page crashed on me, but it received a 10/10 rating, though. I did see it was 1/4 cup = 1 egg.
#egg shortage#egg replacements#baking#amateur baking#bakers gonna bake#bakers of tumblr#bread#mine#text
10 notes
·
View notes
Note
heyy
all the best, hope your book arrives and that you eat yummy fulfilling food today
hi anon!
thank you!
I had chicken for breakfast 😄 I bake it with a spice mix that's soooo good! and I also had a sauce called honey dill, which a friend told me about. it's a sauce from Winnipeg, Canada! I'll put some recipes beneath the cut =)
Chicken spice mix
original found on thesaltymarshmallow.com
1/2 teaspoon salt
1/4 teaspoon black pepper
1 teaspoon paprika
2 teaspoons garlic powder
2 teaspoons onion powder
2 teaspoons Italian seasoning
-> if you do not have Italian seasoning, you can mix 1.5 teaspoons herbs de provence with 1/2 teaspoon oregano
-> if you do not have Italian seasoning or herbs de provence, google their components and see what you can yolo from your spices
Mix all these spices together.
Pat your chicken dry, spread olive oil on both sides, then sprinkle this mixture on top and cook at 400F (205C) for 35min or until the meat is 165F (74C).
I modified the original recipe to have less salt and pepper because I found the original too salty and I don't super love pepper. But you can modify as you see fit =)
I usually make 2x this amount and save the extra so I don't have to mix it the next time.
Honey Dill
I used this recipe from Celebration Generation. It calls for a mild honey and since I only have a stronger flavored honey, I used a little less than the 1/3 cup called for.
I'll copy paste the original from CG here for ease:
Ingredients
⅔ Cup Mayonnaise
⅓ Cup Honey Liquid, not Whipped
1 tablespoon Dried Dill
Instructions
Mix together the mayonnaise and honey until smooth and well blended.
Crush the dried dill in your hand (to release more flavor), add to the mayo mixture, stir well.
Refrigerate for at least an hour to allow flavors to blend.
Now, if you'd like to min-max your sauce making and not touch food, you can do it in this order:
measure out the dill into a tupperware (or other container that comes with a top) and crush it against the bottom with a spoon. mix in the mayo. mix in the honey. cover and stick in the fridge. there, now you don't have to wash a bowl, just one spoon and your measuring cups xD
I really like this sauce! I'll def make it again in the future :) Gonna see how much mild honey costs at the store next time I go. Thanks, Winnipeg! 🇨🇦❤️ Thanks @pipermca for the rec!
7 notes
·
View notes
Text
No Argument Chili (yours is best)

Ask 100 people for their chili recipe, and you will get 100 different answers. Chili is a hearty stew with a Latin American flair. I think that’s the only thing any recipe would have in common. People love to argue that theirs is the best. My Mom would make a pretty standard chili with ground beef, but she would quadruple the beans. I remember she swapped out cooked bulgur wheat for the ground beef once for a Super Bowl meal. It was fine, but that’s all—just fine.
I’m a “chili garnish” kind of girl. I think the most mediocre chili can be elevated with garnishes, the more, the better. You can use a tortilla chip instead of a spoon. One of my favorite moves. Look at and absorb this most basic of recipes and then let your mind wander from there. I’m under no illusion that this is the best chili recipe but it can be doubled or tripled. It’s the beginning step, it’s a place to go from. Would you change the meat? Would you sneak in finely chopped vegetables? Would you eliminate the ground beef and add cooked bulgur wheat instead? Don’t fight over whose recipe is the best, just create your signature dish (you do you).
Beginning Chili
Serves 4-6 depending on your appetite
1 lb ground beef
1 15-ounce can of kidney beans, drained and rinsed
1 15-ounce can of diced tomatoes
1 small onion, chopped
2 cloves garlic, minced
1 bell pepper, chopped
2 tbsp chili powder
1 tsp cumin
1 tsp paprika
Salt and pepper to taste
Instructions:
In a large pot, brown the ground beef over medium heat. Drain enough fat so you are left with 2 or 3 tablespoons (eyeball the amount, a visual check is good).
Add the chopped onion, garlic, and bell pepper to the pot. Saute until the vegetables are tender and the onions begin to look translucent. About 5 to 10 minutes.
Stir in the chili powder, cumin, paprika, salt, and pepper. Cook for about 1 minute to toast the spices.
Add the diced tomatoes and kidney beans. Stir well to combine.
Bring the mixture to a simmer. Let it cook for at least 30 minutes to allow the flavors to meld together. Simmering for up to 1 hour is recommended.
Taste and adjust seasoning if needed.
Now you have a platform to jump off of. Where are you going to go? I bet in this scenario, your instinct is right. What do you want in your chili?
Try swapping the ground beef out for anything else. From ground Chicken to ground Venison, the choice is yours.
Double the beans (any kind of beans). A great way to feed more mouths with hardly anyone noticing.
My number 1 move is to put very finely chopped carrots or mushrooms into the chili when sauteeing the onions and garlic. The carrots add a subtle sweetness and the mushrooms add umami (meaty taste). I chop these in my food processor because I’m truly sneaking these in. What do you have in your fridge that you can sneak in?
In addition to the bell pepper, I add a diced poblano pepper. They can have heat so make sure the people you are feeding are the hardy types.
Try stew meat. Any kind of stew meat will work here. Dice small and let your chili simmer for a longer time so it will be tender. Simmering close to 2 hours should be long enough. When using stew meat, there is a longer simmer time and your chili will get thick so you may want to add more liquid. Up to 1 cup of water will do but this is a great time to add 1 cup of beer (the rest of the bottle is for you). Be sure to stir occasionally while cooking.
2 to 3 tablespoons of balsamic vinegar is an amazing flavor addition and no one will be able to identify it. It’s the mystery in your chili.
Do you have a jar of mole that you once bought and never did anything with? Mole is a traditional Mexican sauce with a thousand ingredients and a complex flavor. Add 2 to 3 heaping tablespoons into your chili and stir until it’s melted through.
Go off-book and swap out the diced tomatoes for a mild green salsa. Call in Chili Verde. This is great if you use ground pork or chicken.
Eliminate the meat and add 2 cups of cooked bulghur ( a form of cracked wheat) and a cup of corn. Start by sauteeing the vegetables. You will need 2 tablespoons of vegetable oil to make up for the lack of fat that comes from the meat. Then add the bulghur and corn and continue with the rest of the recipe. Amaze your vegan friends.
Finally the spices. I would double all the measurements myself (unless I’m doing the mole inclusion). You could include oregano. You could experiment every time you make it, and take notes until you’ve achieved perfection.
Finally, the garnish. I love a heavily garnished bowl of chili. You could even make a buffet of it. It makes the chili sparkle. Chili is a simple and humble meal but it can be dialed up to something elegant and refined with garnishes. Think about bowls of these garnishes and let your diners serve themselves.
Shredded Cheese (naturally)
Sour Cream (of course)
Tortilla Chips (gotta have them)
Corn Chips
Pickled Jalapenos
Fresh Jalapenos
Diced Red Onion or Green Onion
Salsa
Cubes of avocado that’s been tossed with lemon juice.
Crumbled Cornbread (as a topping, yes!)
Oyster Crackers
Chopped Cilantro (for those who partake)
Wedges of lime
Sliced Black Olives
Thinly Sliced Radishes
Crumbled Chicharrón (pork rinds)
Corn Nuts
Finally, I did not dare to venture into the beans versus no beans. It is not mine to pass judgment. You are doing you.

6 notes
·
View notes
Note
for something to write about: do you (individually or collectively) have a favorite dish or cuisine?? if it’s something you make yourself, how did you learn to make it/do you have any strong memories of making it??
We have a few dishes we love. Collectively, we all love mashed potatoes. It’s a safe food of ours; our mom, when we were sick, would always get us one of those microwave mashed potato bowls, and we would put cheese and BBQ sauce in it to make what we called muddy mash. It was sooo delicious. We don’t usually do BBQ anymore since it’s so unpredictable (safe food = the same or nearly the same every time).
Since being with my partner (now spouse), we get homemade mashed potatoes anytime I’m sick. I love them so much; to me that’s so much effort, especially when things are so hard for us right now. But regardless, they still do it, because they love me just. That much.
In terms of individual parts, some of us gravitate to specific cuisine! Numb struggles a lot with the desire for raw meat, but Protector Instincts yell at him that it’s unsafe, so we found a lot of joy from sashimi and sushi for him. Octavian also loves Japanese food, with a major soft spot for ramen. Roy gravitates towards southern foods — because of course he does — and if we drink whiskey, he’s automatically out (even if we were unaware there was whiskey in the drink).
Debra likes all food, but she’s got a soft spot for deviled eggs and for popcorn. Extra butter obviously.
Lastly, we as a system actually love cooking. It can be stressful, yeah, but once we’re actually doing it, it’s incredibly satisfying to see a meal come together. I have a lot of good memories of cooking. A favorite dish of ours to make is this creamy spaghetti and beans dish. My parents used to call it Vendetta, which was some sort of inside joke involving V for Vendetta and the Simpsons? I couldn’t begin to explain it. I remember butterflies were involved?? Anyways.
We love the taste of it. It’s really filling, so one batch goes for awhile. When I think of my limited good memories of growing up, Vendetta is one of those memories. We found out later it’s a Rachel Ray recipe of all things, but we’ve made a few edits to the original recipe.
Here’s a quick recipe for those interested in trying it out (with the ONLY picture of it on my phone that I could find, good lord):
Creamy Spaghetti and Beans
Ingredients:
1 pound box of Spaghetti
4-6 cups of Vegetable Broth
Butter for Sautéing
At least a pound of mushrooms (I recommend mixing and matching for new flavors; if you can get your hands on some maitake, I highly suggest some of it. Paired with some oyster and some common white?? Delicious)
4 cloves of garlic, minced
1 mid onion, chopped
~1 cup of shredded carrot
1 can of cannellini beans
1 cup of white wine
1 cup of grated parm (have more for later)
As many seasonings as your little heart can carry
The only seasoning that is mandatory is lemon pepper
Instructions:
Add butter to a skillet. Let it melt, then add in the onion and garlic. Once the onion is translucent, add in the carrot. When cooked through, add in the mushrooms.
While the mushrooms sauté, add in some seasonings to the veggies. My go-to are usually red pepper flake, chili powder, lemon pepper, tumeric, rosemary, thyme, basil, and some powdered ginger. If I sees it, it goes in. Lemon pepper is a must, and you should use some later too.
Once the veggies are done, move them to a different bowl.
In the same pan, on a slightly lower heat, put the dry noodles in. Yes. Dry. Don’t boil em. Toss them in and let them burn a little — not a lot, but you want them to start browning. It should let off a nutty sort of smell. You may need more butter.
After about 3-4 minutes of toasting the noodles, add in a cup of white wine. BE CAREFUL OF STEAM BURNS. I have burnt myself numerous times because the wine steams horrendously. Let the noodles absorb the wine.
Add a cup of broth. Let the noodles absorb it. Then, add another cup. Let the noodles absorb it. Then, add another cup. Let the noodles absorb it. Magically, despite the noodles not boiling, they should now be soft and limp like a noodle should be. Incredible.
Add another cup of broth. When you do this, go ahead and now add in the veggies so they can get some good broth action.
At this point, you’ve got a choose your own adventure novel. My spouse loves saucy meals, so I do another cup of broth before tossing in the cup of parm, the can of cannellini (with about half the juice, which is disgusting but @circulars-singlet loves it), and another cup of broth if it’s not saucy enough — and some more parm if it needs to thicken. If you like it drier, you can add less broth, and drain the cannellini before putting the beans in.
Top with more parm and some lemon pepper. You should also use salt and pepper to your hearts content.
NOTES:
Mushrooms are easily replaced with bacon if you’d like that, and if you are vegetarian like Mush is, then tofu might be a good route to go — especially crumbled for the texture. But you do you boo.
The original recipe suggests doing this all at the same time, but I find that way too overwhelming. If you’d prefer to do it at the same time: start with the noodles at the same time as the onions, garlic, and carrots. Add the mushrooms at the same time as the first cup of broth. The mushrooms WILL absorb a LOT of broth, so be prepared to use closer to 6 cups.
My mother once put peas in? Feel free I guess.
If you can avoid whole wheat noodles, highly suggest you do. They taste… odd in this. They’re also thinner in my experience, and you really want a nood that can absorb nicely without being TOO thick. I haven’t tried this with a lot of other pasta types, though!
Recipes are just suggestions, you can change anything you want!!!
10 notes
·
View notes
Text
Winter Pesto: A Great February Pick-Me-Up

I’d be amiss to call myself the Pesto-Mystic and NOT talk about pesto sooner rather than later! As both a green witch and a kitchen witch, pesto is one of my all-time favorite things to make – it’s easy, comes together in less than 10 minutes, and always tastes AH-MAZING, am I right, or am I right?!? Plus, in the middle of the Winter, eating green food feels like shoving a hint of Summer into my mouth and I am all over that!
Though basil owns my heart and soul, during the dreary Winter months here in Southern New England, I turn to baby spinach for my pesto needs. By mid-winter I am always starved for a good meal full of vegetables that don’t look like they should have been eaten two weeks ago and this meal does the trick. I pair the spinach with a hearty nut like walnut or almond, a nice salty cheese like feta, and a healthy dose of garlic but any and all of these are up for adaptations – all that a pesto truly needs is the leaves and the oil. Winter Pesto can easily be made vegan by omitting the cheese or nut-free though both are part of the peak pesto experience for me.
My partner and I can eat pesto for days and days so this recipe will make enough for 3-4 meals depending on how much you like to eat at a time. It can easily be halved or quartered but I promise, once you’ve tasted this – you’ll want more!
There are SO many things that you can do with this pesto! You can add it to some pasta after it has cooked (like all pestos – this is meant to be a raw/uncooked sauce – just throw it in with 1/2 cup of the pasta water right before serving). You can add it to cooked meat before you serve. It’s great on cheese and crackers. It tastes AMAZING on eggs of all varieties (putting it inside an omelet is one of the only ways that I’ll actually cook it). It tastes great on baked potatoes. It can be added as a topping to many types of soup – if you haven’t had a good minestrone with pesto on top, you’re missing out!
As far as the witching goes – this pesto is GREEN. I tend to go with the overall color association and make it for abundance, growth, or money drawing – depending on what I need at the time. The garlic (if used) can add an element of protection or purification, dealers choice. The healthy dose of iron and trace minerals that you’ll get from the spinach will make you feel GREAT which really makes you know it’s working.
Making pesto is super simple, a good food processor helps but isn’t necessary. If you do make it by hand, make sure to mince the spinach and finely chop the nuts if adding. I use a food processor to keep the consistency and emulsify the olive oil. Ingredients
5 oz. Baby Spinach
1-4 cloves of fresh garlic (based on size and your tastes)
1/4 cup hearty nuts (almonds or walnuts) – optional
1/4 cup crumbled feta cheese – optional
3-4 tbs. Extra Virgin Olive Oil Mince or finely chop (using a food processor simplifies this process) until all ingredients are uniform in size, combine with olive oil until well coated. Serve raw/uncooked. Notes: Because feta is naturally salty, I do not salt this recipe – if omitting or using a lower salted cheese in its stead consider adding salt during the processing.
Do you like my work? You can tip me on Kofi.
40 notes
·
View notes
Text
Just Keep Baking #4 Irish Apple Cake


Sul Sul, gerbits. Today is Saint Patty’s day and because of that I wanted to find and share with you an Irish Apple cake recipe.

I will provide you with some history about Irish apple cakes. They were first steamed in pots besides an open fire. One of the main apples that you can see in Ireland is the crab apple. And Crab apples play an important part in Ireland and Celtic mythology.

Crab apples are very important to the legend of Avalon. One of the sacred places where Arthur went to recover from his wounds at the Battle of Camlann, is called the Isle of the Apple Trees.

Hearing the history of this dish, it makes sense why the apple flavor is not extremely prominent. Because they would have been using crab apples, not the large apples that we know so well.

Okay, know that you know the history of this recipe. Let’s begin.

Preheat your oven to 350 degrees F. And line a 10-inch cast iron skillet with parchment paper and set it aside.

The recipe will be in the description down below.

You will need:
flour
baking powder
butter
white sugar
cinnamon
nutmeg
1 egg
milk
vanilla.
About 1 cup of apples, which makes sense because crab apples are relatively small.
You will also need a little more sugar, cloves and cinnamon.

Add the flour and baking powder to a medium bowl. Cut 8 tablespoons of butter into the flour with a pastry cutter or your fingers until the mixture has the texture of coarse crumbs. Add sugar, cinnamon, and nutmeg to the flour and butter mixture. Whisk sugar, cinnamon and nutmeg into the flour and butter mixture.

Make a well in the middle of the bowl and add the milk, egg, and vanilla. Almost like a scone dough. Mix until soft dough forms.

Put dough into the parchment-lined skillet . Lay thinly sliced apples on the dough. Sprinkle over the apples a teaspoon of sugar and a few dashes of each cinnamon and cloves.

The skillet should be placed on the middle shelf of your oven.

You will need to bake for 30-35 minutes or until a toothpick inserted in the middle comes out clean.

The recipe states that you can broil it for 2-3 minutes if you want.


Let the cake cool slightly. Cut it into wedges and dust it with powdered sugar, if you like.

This was another simple apple recipe, and I was fascinated with how apple cakes vary across countries. Most of the ingredients are the same, but the procedure is different, so the outcome is different. I hope you enjoyed this recipe. Check out the recipe down below. Vadish, Dag Dag.
Show the original author some 💖💖💖 31 Daily
Printable version of this recipe: on the blog
Feel free to support me on:
🐥Patreon 🐥 Kofi 🐥 Facebook 🐥 Pinterest 🐥
#baking#baking therapy#recipe sharing#sweets#dessert#baking blog#baking recipes#baking adventures#recipe#baker#baked goods#bakeblr#apple recipes#apple#apple cake
8 notes
·
View notes
Text
Boston Cream Cake Pt II

Hey, every birdy. Now that you have seen the original recipe for the Boston Cream Cake. You will understand that I can’t replicate it. I was talking to Pop (my dad) about what I should do as a milestone marker for 1K followers, and he suggested that I share this recipe with you all and then do the math. For those of you who don’t know, math has never really been my strong suit.

So I have no idea how this is going to go. I am doing this post a bit differently. I am going to write up my equation and measurements that I got, and then I am going to bake the cake with the measurements and see if it is right.

Another reason why I needed to do this was because I didn't want to use a lot of eggs. In the whole recipe that I converted I am only going to be using 9 eggs, which seems like a lot but in contrast, really isn’t.

The equation that I came up with was:
Lbs = cups/ 100 = measurement then convert to grams = grams / 2 = measurement needed

This makes no sense written like this. But let me show you how I figured it out with the first ingredient of the cake shortening.
The original recipe calls for 21 lbs of shortening.
21 lbs of shortening are 43.81 cups. 43.81/100 equals 0.43 cups. 0.43 cups is equal to 93 grams. 93 grams divided by 2 is 46.5 grams or 3 Tablespoons. So it is a bit complicated but I want to see if my math works.
I hope you all are still with me, and didn’t fall asleep with all the numbers.

So with that being said. For the cake this is my number and for the simplicity of everything. I am going to keep the ingredients in grams.
47 grams shortening
136 grams of cake flour (All Purpose minus 1 tablespoon. And add 1 tablespoon of cornstarch)
84 grams sugar
1 tsp baking powder
½ tsp salt
1 tsp milk
4 eggs
43 grams water
½ vanilla
½ tsp butter

The directions for the recipe will be the same. Put the cake shorting, flour, sugar, baking powder, salt, and milk powder in a large bowl.
Add water, vanilla, and butter slowly until ingredients come together, making sure to scrape down the sides.
Next, you are going to add the eggs and mix for 3 minutes.
Scrape down the bowl and continue until well mixed.

This is where it is going to be different.
Instead of using the 1-pound 8 oz pans. I am going to be using 9-inch cake pans. Because I don’t want to slice the cake in half horizontally. I think and hope that it will work. Only future Robby will know that information.
Now onto the filling. Using the same equation for the cake recipe.
390 grams of milk
102 grams of sugar
2 Tbsps Cornstarch
5 eggs
½ tsp vanilla
Put all the ingredients in a pan and cook until thickened. Ice the cake with frosting.

The frosting, using the same equation
113 grams sugar
½ Tbsp Karo syrup
3 teaspoons water
½ Tablespoon Shortening
6 Tablespoons Cocoa Powder
¼ tsp vanilla

Put all ingredients in a pan. Heat until smooth. Ice the cake on top only. Hopefully, my math is correct and it makes only one cake.
Prediction: I think it is going to be a balanced dessert if nothing else. Because from the looks of it, the cake itself isn’t extremely sweet. It’s the filling and the frosting that is sweet. And I hope that it comes out looking and tasting good. I will always have my parent’s voice in my head “it doesn’t matter what it looks like, as long as it tastes good!”

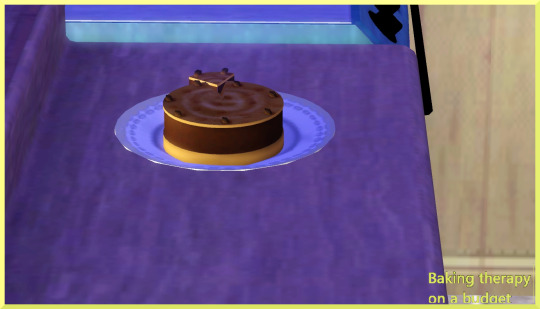
Result:
MY MATH WAS CORRECT.
I am so excited that it came out, and was edible. I can’t believe it. I mean I can, but I am a bit shocked. Because again math was never really my strong suit back in school. Even with saying that though one math class that I took in college was literally a math class called “Math of Cooking.”

Everyone told me that it tasted really good. My only criticism about this particular cake and my measurements would be to add a little bit more flour to the cake recipe. And maybe even a little bit more milk. Because when I took the cakes out of the oven they kinda looked like pancakes rather than cakes. So if I were to make the recipe again (which I think I might because it was fun to make. )

As we were going to bed, my mom told me that her only criticism was that she needed more custard in the middle. She said that it was good and she just needed a bit more. This was nice to hear. I had forgotten how to make a custard because I didn't temper the eggs before putting them on the stove. So there was a little part of me that was afraid that I was putting sweet scrambled eggs on my cake.

My dad told me that he really liked the frosting and how I put it together. You should have seen us at Walmart the three of us (Mom, Pop, and I) trying to figure out what in the world “royal fudge” was and he was the one who ended up figuring it out.

The moments when I am cutting the cake are sometimes the longest. Because some people have the dessert and they don’t want to say anything until I am in the room. To give me the results. Sometimes I don’t know if they are quiet because they are stifling a laugh about how weird it tastes, or if they are quiet because of how good it is. Thankfully with this cake, it was the latter. And I am so grateful. They all said that it was really good.

It wasn’t overly sweet. This is something that I strive for when baking because a dessert that is too sweet is not something that I want to give my family. I don’t know. It’s just a personal thing. I just don’t like overly, sickeningly sweet desserts.

I am so over the moon that this worked. Thank you all for your likes, comments reblogs, and follows. You have helped me in more ways than one. And I hope that you continue to follow my journey.

Thank you once again for helping me get to 1000 followers. I love each and every one of you, and I hope to see you in the next post.
Oh my gosh this was a long one. But, I had such a fun time putting this post together. I hope you liked it as much as I did.
Here is the condensed version of the recipe. Without the equation.
Boston Cream Cake
47 g shortening
136 g Cake Flour (I used all-purpose flour + 1 Tbsp of Cornstarch)
84 g sugar
1 tsp baking powder
1/2 tsp salt
1 tsp milk
4 eggs
43 g water
1/2 tsp vanilla
1/2 tsp butter
Put cake shortening, flour, sugar baking powder, salt, and milk powder in a very large bowl. Add water, vanilla, and butter flavor slowly until the ingredients come together. Scrape down the bowl. Next, add eggs, slowly mix for 3 minutes, scrape the bowl, and continue until well mixed. I used 2 - 9-inch cake pans, (if you want them to come out more like cake and less like pancakes,) I suggest using 2 8-inch cake pans. Bake at 350 for 25 minutes. Spread with cream filling (recipe Follows)
Boston Cream Filling :
390 g milk
102 g sugar
2 Tbsp Cornstarch
5 eggs
1/2 tsp vanilla
1/4 tsp salt
Put all ingredients in a pan and cook until thickened. The next time I make this recipe I will do this part differently. I will heat up the milk and sugar first. And when it gets to simmer I will temper my eggs and cornstarch. and I will add the vanilla and salt when it is all done. Ice the cake with frosting
Chocolate frosting for Boston Cream Cake:
113 g sugar
1/2 Tbsp Karo Syrup
3 teaspoons water
1/2 Tablespoon shortening
6 Tbsps cocoa powder
2 Tbsps milk
1/4 tsp vanilla
1/8 tsp salt
Put all ingredients in a pan, and heat until smooth. Ice the cake on the top only. Or where it wants to go. And enjoy
#baking#baking therapy#long post#Boston Cream Cake#Cake#West Point Women's Club Cookbook#Good To the Corps#Thank you again#for 1k followers#once i started typing i couldnt stop#cw long post
19 notes
·
View notes
Text
i am sharing a lovely improvised cookie recipe! gluten free but not lactose free (please do not hold me accountable for that, i do what i can).
2 and a half cups of oats flour
15gr/a small envelope of baking powder
2/3 cup of sugar
2 spoons of your preferred honey
250gr/an standard bar of butter
1 shot of spresso
70gr of 100% cocoa
Chai spices
some seeds, a handful of them, i chose poppy seeds
pinch of fine salt
some vanilla scent (optional)
2 medium sized eggs
‐------- Le recipe-------
1) put your butter to melt in a small pot in medium to low heat. This should be done in about 5 mins aprox.
2) meanwhile, in a bowl, mix your eggs with the sugar. Le them get creamy and white-ish.
3) when the butter is ready, add the honey and mix them together until they run smooth and silky.
4) Add the pot glory to the mix of eggs+sugar. Mix it, let it run smoothly. I used a hand whisker, i'm classic.
4) add the pinch of salt, the vanilla, the spices, and mix softly, let it all integrate. Remember one thing: if you are using natural vanilla you should infuse it, so you can do it by with the shot of coffee or you can use vanilla extract/scent, which can be directly put in the mix, as i did.
5) next, with a careful thought and patience add the cocoa, taking care of the chunks that may form. I used a coliander to make sure.
6) we are close to the end, stay with me. You'll find yourself with a very tempting mix that will smell like mermaids singing but: REMEMBER THOSE CHOSE VIOLENCE WITH ULYSSES, THIS BOWL CONTAINS RAW EGGS TAKE CARE AND PREVENT GUT HEALTH DRAMA.
7) now that you are tied to a post mentally, add the flour and the baking powder. Steadily? NOPE. Surely? hell yeah. Mix it making small circles from your left to your right, ending in a small upward movement to break free the whisker from your super mix.
8) your bowl mix should start feeling a bit hard to move: ask for help! I have a tendency to skeleto-muscular issues and i regret doing it without someone healthy by my side. Get that friend with you if you can!
9) once we have our super mermaid drama in a bowl, it should start calling you AGAIN: IGNORE THE MERMAID, IGNORE IT AND SEND HER TO THE OVEN (reminder: i am speaking of our cookie mix and not about killing anybody).
10) oven? OOPS THE OVEN: preheated 170°C for 11 mins aprox: sometimes 10 sometimes 12 minutes because i have a lottery/russian rulette oven.
you should enjoy about 32 medium sized cookies! (mind you: they are crumbly )
Bonus: photographs :)


#recipe#home baking#cooking recipe#cookies#gluten free#gluten intolerance#gluten sensitivity#sans gluten
3 notes
·
View notes
Note
Hello, Rosie!
What are some of your favorite ways to cook an ex? I'm not very skilled in the kitchen, but I'm eager to learn and I see no reason to let any... resources... go to waste.
Hello darling!!
A great place to start is with a nice meatloaf, I have a great recipe, very beginner friendly and absolutely delicious! Note that this makes 2 pounds per recipe, however there’s always freezing for later- and if you want make some jerky to snack on I also have quite the recipe!
INGREDIENTS
2lbs of Ex (ground preferably, avoid intestines and ‘soft’ meat, aim for thigh, rump, or arm! I have a butchering chart I’ll link)
1 cup of Crumbs (I prefer cornbread however any breadcrumbs work! all a matter of taste)
2 eggs (eggs make your mixture hold together, they’re called a binding agent!, beat both eggs together like you’re making a scramble)
1 small onion OR 1/2 a regular onion (diced, i can link a video on how to Dice an onion! Onion should be WHITE or YELLOW!!)
2 cloves garlic (Smash them darling! then chop a ridiculous amount! I recommend an insta chop they’re so nifty….)
Salt, Oregano, Pepper, to taste
For the SAUCE
3/4 Ketchup (or more! this goes on top while baking so if you want more have more! just adjust your other ingredients accordingly)
1/4 BBQ
1 TBSP Worcestershire sauce (optional! the bbq will give the tang you need!)
2 TBSP brown sugar (a touch of sweetness!)
A little bit of blood just for fun <3
STEPS
Preheat oven to 375, get a baking sheet, if you want, line with PARCHMENT paper
Start by mixing your first list of ingredients together in a big bowl, (Meat, Onion, garlic, Crumbs, seasoning) Mash, like dough. Careful not to over mix because over mixing will cause the eggs to become dense!
Put a little of the Ketchup Sauce in (about half) and do one final smush, and now you’re ready to roll onto your baking sheet!
You can make multiple small Meatloafs or one big meatloaf, shape to your desired density etc (if said ex is male i recommend making the famed dick cake, quite satisfying to Cut into)
Spread the remaining ketchup Mixture on top and Bake for about an hour!
And then you’ve got a delicious meal- turns out he WAS good for something…..
I hope that Ex doesn’t trouble you anymore Darling…
Ta!
Rosie
#rosie’s recipes#hazbin hotel#send asks#ask me anything#hazbin hotel rosie#hazbin rosie#radiorose#cooking#meatloaf#recipes
13 notes
·
View notes
Note
hey girl im starving. can you cook? i hope you can. do you have a recommendation? im to lazy to find something online. i wanna cook but idk what. your help is much appreciated girl. Love ya!
This is legitimately one of the funniest things that's ever been put in my inbox. Yes, I can cook 💀 I don't know what you want, or what you have in your kitchen, so this is incredibly difficult. I have one recipe that I've been eating somewhat religiously because it's filling and so good. I found it on TikTok a while ago.
It's called Korean BBQ ground turkey bowls. You could probably trade the turkey for ground beef, ground chicken, and maybe even tofu. The great thing about cooking is that you can change recipes around and cooking is subjective. I also make jasmine rice that I put the turkey over, but you could use whatever rice you wanted. The recipe is as follows:
If you want rice, however much you use for however many people you're feeding. If you're feeding four or more people, you'll probably have to double the recipe.
1lb of ground turkey, 1/4 cup of soy sauce, 1/4 cup of honey, 2 tsp of sesame oil, ground ginger, minced garlic, and black pepper.
For those of you that use the metric system, I believe it's 500 grams of ground turkey, 60 ml of soy sauce, 60 ml of honey, and 10 ml of sesame oil and then the ground ginger, minced garlic, and black pepper.
(if that doesn't look right, you'll have to convert it yourself. I'm so sorry that America is fucking stupid and thinks it needs it's own personal measurement system. I don't know how the metric system works)
Anyways 😀 I cook my turkey and rice at the same time in two different pots. Personally, I'm not a huge fan of sesame oil, so I leave that out. Cook your turkey. When it comes to seasoning, I season with my heart. I don't like a ton of garlic, but I love black pepper. I put in half a small spoon of minced garlic, a fuckton of black pepper sprinkled from a canister, a few sprinkles of ground ginger, and then the measured soy sauce, honey, and if you leave the sesame oil in, I think you put it in here.
(I did not save the recipe properly, I only have a screenshot of the ingredients, so I do what my heart desires)
When I first tried it, I thought it was missing something. I really like lemon and citrus flavors, so I added a small capful of lemon juice, but that's also optional. I think that added acid gives it an extra oomph that's lovely. You could add salt to it, but I don't because I put rice in a bowl and top that with soy sauce.
You get a bowl of rice, you sprinkle your turkey or whatever protein over it, and ta-dah!! That's all there is to it. I sprinkle mine with sesame seeds because it makes it look pretty, but that's also optional. If I want a little something extra, I make some type of vegetable on the side.
It's simple, it doesn't take a ton of time, and it leaves me full for so long. I don't know if you have any of that, so it might have been for nothing, but there you go. That's been the latest food that I've latched onto and consumed for so many lunches.
If you want something super duper simple, chicken strips in the air fryer, or oven. Put them in a flour tortilla shell (or a burrito shell) with lettuce, shredded cheese, and ranch. It's a homemade McDonald's snack wrap. You could also swap out the chicken strips for grilled chicken if you wanted to. Some people heat up their tortillas in a skillet, but I don't.
Everything is always personal preference and that's the best part about cooking <3
2 notes
·
View notes
Note
drop the chicken paprikash resippy 👀
caveat: I don’t use a lot a measurements and just use my eye/intuition/taste buds a lot, so if you need specific measurements you’ll probably be better off following a dedicated recipe online or comparing them to mine. Also, my recipe is by no means traditional as I am just a latino dude living in the southwest and i’m Not Hungarian in any way, and this is a riff off of my mom’s dish rather than the traditional dish itself. I also like to be really descriptive so there’s a lot of steps but this recipe is, in reality, mega easy lol. Okay-
This dish contains dairy. You can try dairy-free sour cream but I’ve never tried it. Lactose-free sour cream is a perfectly fine substitute though!
(Serves 4)
Cookery:
- a large pot big enough to line thighs on the bottom
- A wooden spoon or spatula to stir with, and tongs or something to take out the chicken with.
Ingredients:
- Chicken thighs with skins on (i really do not recommend skinless or substituting for breasts at all) enough for 1 or 2 per person
- 1 white or sweet yellow onion
- 3-4 cloves of garlic
- 5 large carrots, or two handfuls of baby carrots.
- 3 Russet Potatoes
- Sour cream (you can use 8 oz, i like to use 16oz because i always use a little more than half)
- Chicken broth (at least 4 cups, I used almost a whole 32 oz carton.)
- Any neutral oil (for frying), olive oil is ok though
- Salt and pepper
- Paprika (If you can get hungarian paprika that’s preferred, but otherwise dont sweat it. The dish is called Paprikash so make sure you have plenty)
- Cayenne pepper
- Dried red pepper strips (I happened to have a bag of them from Trader Joes. This is kinda optional but i liked it so much that i recommend it.)
Optional Ingredients:
- Any other vegetable you want (corn, peas, green beans or diced fresh bell pepper would be good!)
- Tony Chachere’s cajun seasoning (for seasoning the chicken, i put this shit in everything tbh)
- Parsley (for color)
Directions:
1. Season thighs liberally with salt, pepper (and tony chachere’s seasoning if available), allow to sit for 30 minutes or while you chop veggies.
2. Pre-cook the potatoes partway by using a microwave, oven, or cubing and boiling in water until almost done. I used a microwave since it’s much faster.
3. While potatoes are cooking, slice onion horizontally (into rings) or vertically (into strips), whichever you’d prefer. Slice large carrots into 1/2 cm coins or baby carrots in half. Smash and mince your garlic.
5. Blend entire bag of dried red pepper. It seems like a lot, but it’s not since peppers are mostly air now. If you don’t have a blender, use a mortar and pestle or put into a bag and smash the fuck out of those guys until theyre a powder. It’s okay if it’s not super duper fine. If you dont have dried red pepper, skip this step.
6. Whenever your potatoes are half done, take them out of whatever vessel you chose and carefully cut into large cubes (theyre probably really hot!)
7. At med-high heat, add a couple tablespoons of oil to your pot, enough to coat the bottom. Add your thighs skin side DOWN so that theyre in direct contact with the bottom. Allow the thighs’ fat to render out and the skin to brown a bit. It should take about 6 minutes. If the skin hasnt taken on a lot of color yet, that’s ok- allow a few more minutes and then flip the thighs. Allow the bottoms to cook for another 5 minutes in the rendered fat then remove.
8. Now put in your carrots, garlic, and onion in the pan to cook in the rendered chicken fat. Scrape whatever yummy brown fond has built on the bottom. Don’t sweat about scraping it all up, as youll get most of it later. Cook until carrots are softened but still a little firm and onions are starting to turn translucent.
9. Add your cubed potatoes in with the other vegetables, give them a toss, and take off of the heat so you can add the seasonings- papricka scorches easily. Most recipes use ~3tbs, I swear I always use more like 4. Also add in your powdered red pepper here, as well as 1 tbs of cayenne some more salt and pepper. Mix everything and bring back to the heat, which you will reduce to Medium.
10. Pour in your chicken broth, enough to submerge all of the vegetables. Add about 3 generous spoonfuls of sour cream, mixing it in so that the soup is now a creamy, luscious gravy. It’s important to not have the pot much hotter than Medium so that the sour cream doesnt curdle. This is a good time to do some extra fond-scraping if you couldnt get a lot earlier! The potatoes may soften and deteriorate, and that’s fine.
11. Re-place the thighs back into the pot as well, making sure theyre covered in the gravy. If the liquid doesnt cover the thighs, add some more chicken broth and sour cream until it does.
12. Chop up or tear up a handful of parsley and add.
13. Cover pot with a lid and allow everything to come back to a boil. Let everything mingle together for about 15-20 minutes, stirring occasionally. This will re-heat the thighs and finish cooking them. You can also taste the gravy for salt and adjust accordingly. This is also a good time to add some frozen corn, peas and stuff if desired.
And that’s it! You can serve this on top of egg noodles as well since thats pretty traditional, but the thighs and veggies alone with the gravy makes for a very savory and hearty dinner. Make sure you add another ladle-full of gravy on top.
This dish will result in something that sort of resembles a stew with a bright vibrant reddish zesty and creamy gravy, tender vegetables and juicy, tender chicken. The gravy should be chickeny, savory, and delightfully creamy. Paprika is already powdered red pepper, but I feel like adding just normal powdered paprika and then the freshly blended dried red pepper adds an additional fresh, sweet richness to the sauce. Thighs still have the bone in it, so i usually eat this dish with a fork and use my fingers to carefully tear the meat off the bone, and then just pick up the bone once it’s cooled off a little and gnaw on the rest of the meat and the softened cartilage.
My partner and friends really liked it. Next time we’re going to add some chipotle or southwestern red chile to it for some more spice and smokiness to try out.
6 notes
·
View notes
Text
Making whipped cream; A Saga.


I had a lot of heavy whipping cream + orange flavored milk that i needed to use. So i decided to see if i could use the milk to flavor whipped cream.
The internet was acting like it couldn't be done. No matter how i worded my search, i came back with nothing. But i didn't want the ingredients to go bad! I have a stand mixer and nothing to lose, so i took matters into my own hands and decided to experiment. I knew it had to be possible. And i was right! It takes a few extra ingredients than your standard whipped cream but i made it work.
Of course, i first put my mixing bowl+whisk attachment in the freezer. Most recipes say to do this for 15 minutes. Well, immediately i forgot about it, ate dinner, and sat watching tv for maybe around 3 hours. This is fine. Honestly.. i say the longer the better. Makes the bowl stay cold longer (maybe, i don't actually know. But my brain says yes.)
I had exactly 3 cups of whipping cream. I added 1/2 cup of the orange flavored milk. My recipe asked for 2 cups of whipping cream and 1/2 cup of powdered sugar. That's about a 1/4 cup of sugar per 1 cup of cream, so i increased it by 1/4. I realized my milk may also count in this so i added another 2 tbs (half of 1/4 if you weren't sure). For a stabilized whipped cream you need about 2oz of cream cheese. I didnt want to increase this much as the flavor of cream cheese can be overpowering. So i put in maybe around 3oz. And then i got to mixing.
Normally when i make whipped cream it takes maybe 5-ish minutes to whip up. But 5 minutes came and went with little changes. It was at this point i realized my flavored milk was not actually whole milk as i had initially thought! Whole milk is needed because the fat content is essential to make it whip. To fix the fat content of milk, you need butter. But i couldn't find a ratio for the small amount i had. So here i measured the butter with my heart. I added maybe 2-3tbsp. I can't be sure. Then i kept mixing. Time passed. It's been another 10 minutes and sure, it's thickened, but it hasn't whipped. I was considering calling it a fail and just using the extra thickened cream in milkshakes or as a coffee creamer. But hey, the evening is young, and i have nowhere to be. I kept going.
My last ditch was adding a bit of cream of tartar. Just about a teaspoon. Yes, it adds a tang, but it's already orange flavored so who would notice, really? Not i. I threw it in. Another 5 minutes with only nominal thickening. "Damn," i think. "Maybe it really can't be done?"
But i'm not quitter. Or at the very least, i am extremely stubborn before quitting. "It has thickened!," i say to myself. So i continue mixing. Another 5 minutes, i'm watching it so closely now. And finally... it whips! A glorious moment and it whips up thick, and fluffy, and delicious!
Admittedly it's not quite as airy as when i usually make it, but it formed peaks and holds shape, and that's all i can ask for in a whipped cream. And of course, because i am an adult and can decide what i eat for myself, i put a nice helping in a bowl and ate it alone like a wonderful fluffed, pudding dessert. Could i put it on a cake? Sure, but i don't have a cake right now, nor was i willing to make one as the entire endeavor took around 30 minutes. While i do have mostly an abundance of time, i do lack stamina. So i'm calling it mousse now and feeding it to everyone because it's delicious.
Now maybe all of this would've been obvious to others, and they could have just avoided the whole kerfuffle and just put the cream of tartar from the beginning, but it was not obvious to me, and maybe for a lot of others. Especially because i could not find a single recipe with flavored milk added in.
For those who would like to do this, here is the recipe:
3 cups heavy whipping cream
1/2 cup flavored milk
2-3 tbs melted butter (skip if the flavored milk is whole milk)
3/4 cup + 2 tbs powdered sugar
2-3 oz cream cheese
1 tsp cream of tartar
1 tsp vanilla (optional honestly, i sometimes forget it)
Chill your mixing bowl and attachment for 15 minutes (or a few hours, whatever). Mix the cream cheese and powdered sugar until creamed. Then throw in everything else. I like to mix it around medium speed for a little after added the liquid just so it doesn't splash everywhere. When it's more creamy, turn the speed on high. Wait. You want soft peaks and it should hold shape when you scoop it with a spoon. Have patience, but keep an eye on it. Don't overmix. Enjoy on whatever you like whipped cream on or on its own. I'm not your mom.
4 notes
·
View notes