#i just screenshotted my screen instead of saving the image ���
Explore tagged Tumblr posts
Visit Tumblr Blog
Explore Tumblr blogs with no restrictions, modern design and the best experience.
Last Seen Tumblr Blogs


Fun Fact
In February 2021, Tumblr had 518.6 million blog accounts.
Text
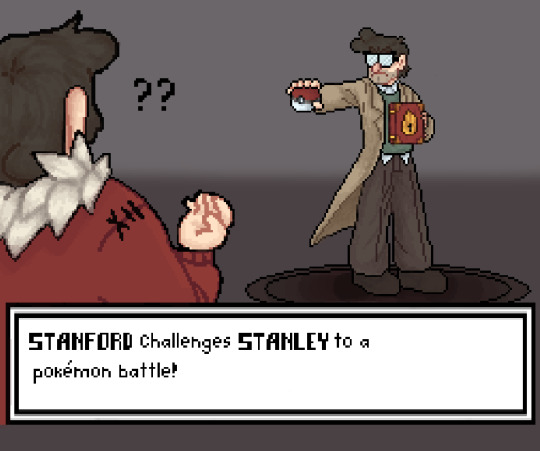
Click for better quality, I'm begging
Companion piece to this!
#okay how obvious is it that I don't do pixel art?#it was so hard oh my gosh#I didn't look up any references I know the actual Pokémon text doesn't look like that 😭#my canvas was super small when i originally went to post this the quality was soo bad 😔#i just screenshotted my screen instead of saving the image 🤞#cole's art#gravity falls#art#grunkle stan#stanley pines#grunkle ford#ford pines#stanford pines#gravity falls pokémon au#pokémon#pokémon au
2K notes
·
View notes
Text
Hello sweet beans! Since my last tutorials have been yeeted into oblivion with deactivating my previous blog @/benkeibear I figured I repost them onto here!
💫 gradient line divider tutorial 💫
This tutorial uses my simple line divider tutorial as a base. Please familiarize yourself with it first since this is just additional steps!
I use various apps and sites for gradients. The apps I mainly use Canva or Gradient+ occasionally I use GradientDaze (for when I don't have specific colors in mind)

As websites I can recommend browsing through uiGradients or Webkima if you'd like animated gradients.
I'm a little oldschool and don't use photoshop but there's plenty tutorials on how to animate gradients there on YouTube!
Starting with Canva:
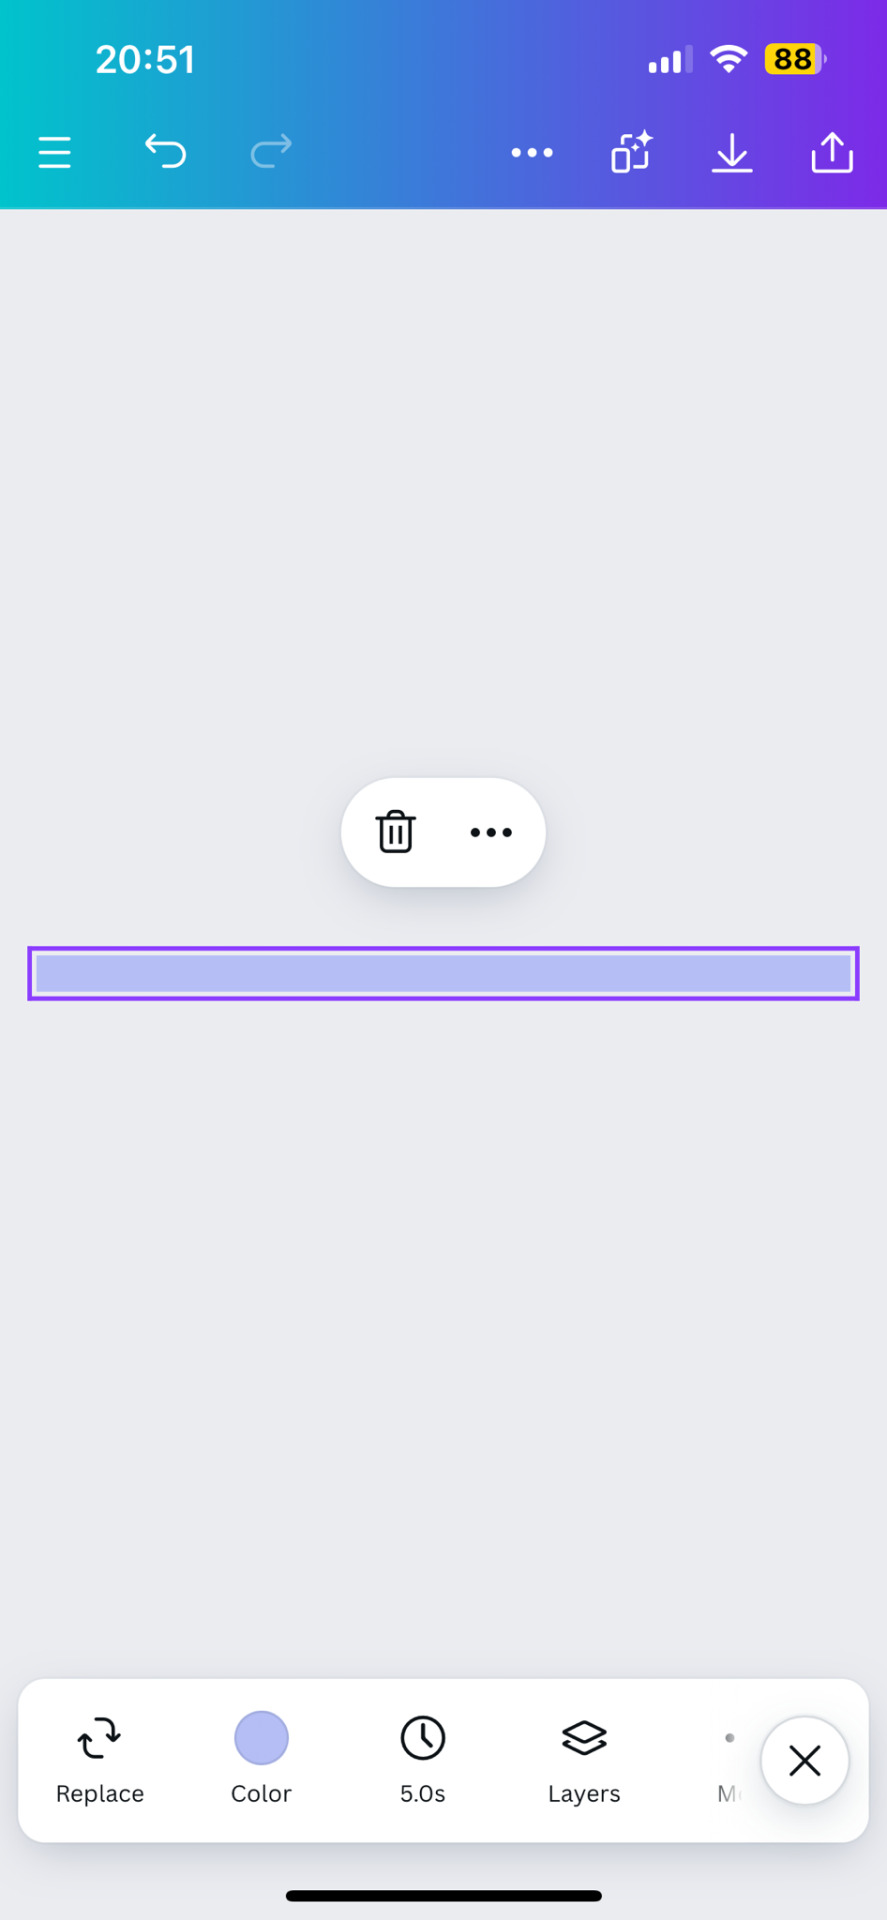
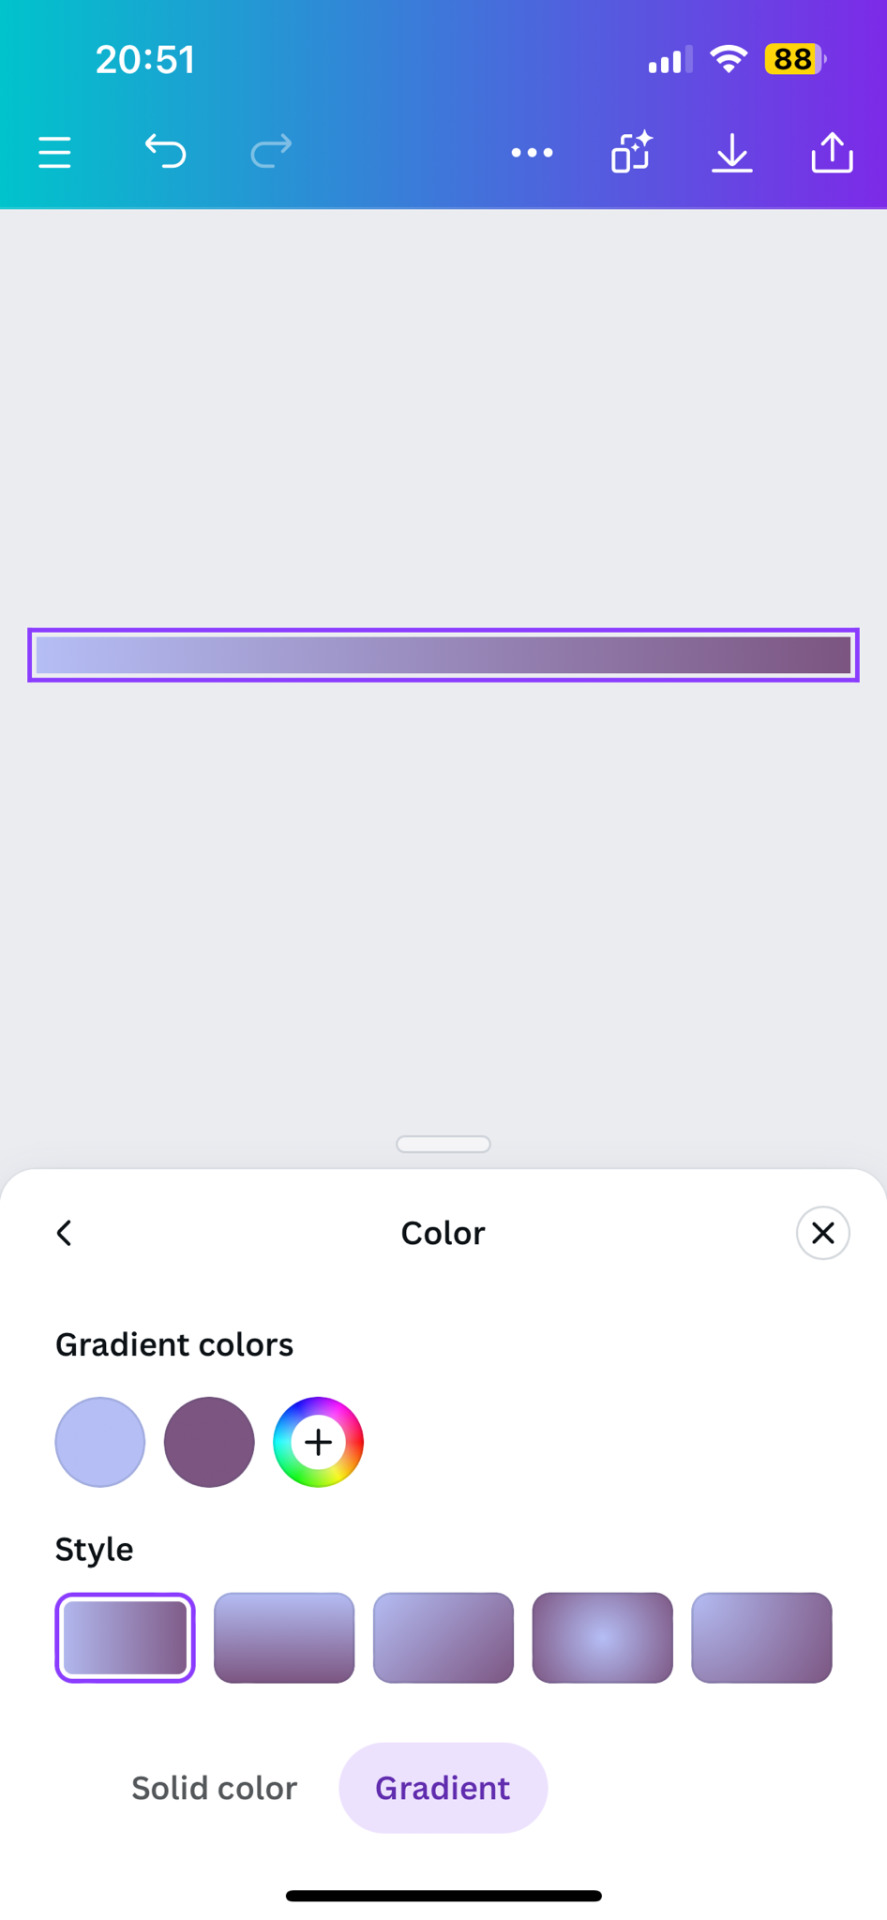
1. You first open your divider template. Mine is as in the previous tutorial the simple 1000x40.
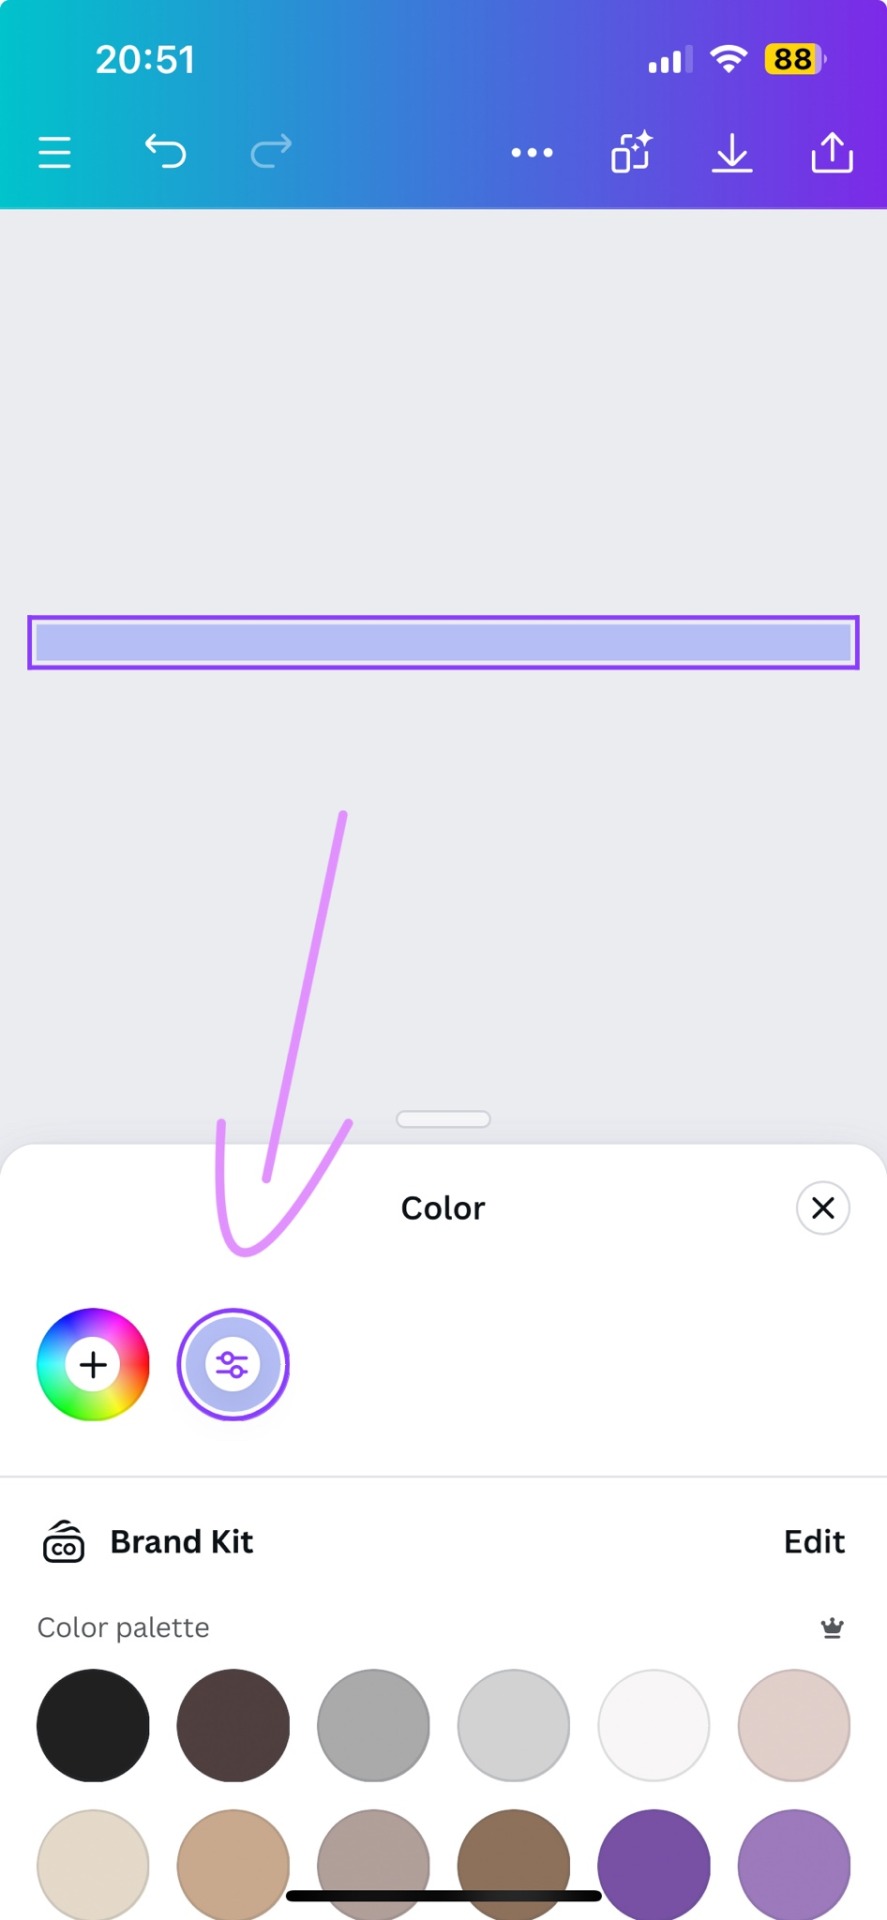
2. Next you will click on the color button and choose a color like the little arrow shows
3. Then you select "Gradient" and Canva will give you a second color option. You can change both colors here or add many more if you'd like more colors. Here you can also choose what kind of gradient you want
Just play around here and continue to resize the images you saved as explained in the previous tutorial via ezgif or any other way you found for yourself.
Next we have Gradient+
This app is built pretty simple and there's not much to explain. You choose your two colors by tapping on the colored circle at the"Color A" and "Color B" and continue further down to navigate where color A starts and color B ends.


For the classic gradient you use the settings as above.
The app also offers radial and angular gradients so you can just play around with what you like!
Make the gradient big by tapping the expansion arrows and take a screenshot - then you may resize your divider.
The last app is GradientDaze
Again, a very simple app but this time you can't enter hex codes. Instead you can move 2 circles around on a little color card and find pretty gradients you like
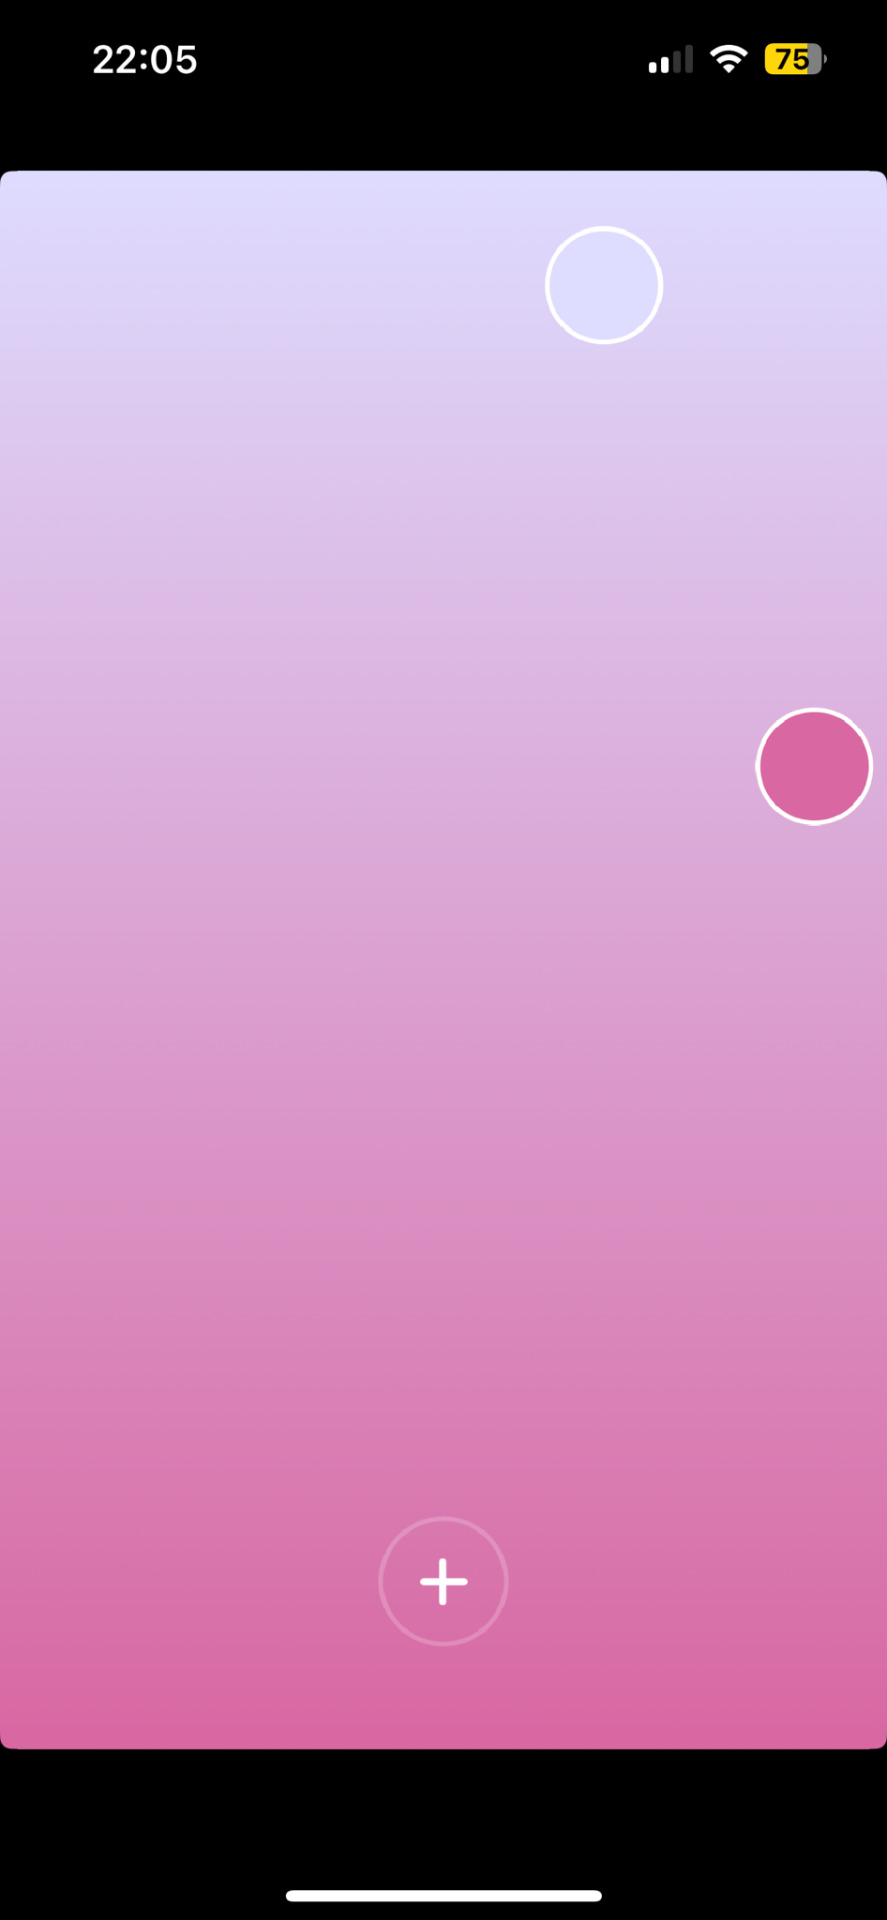
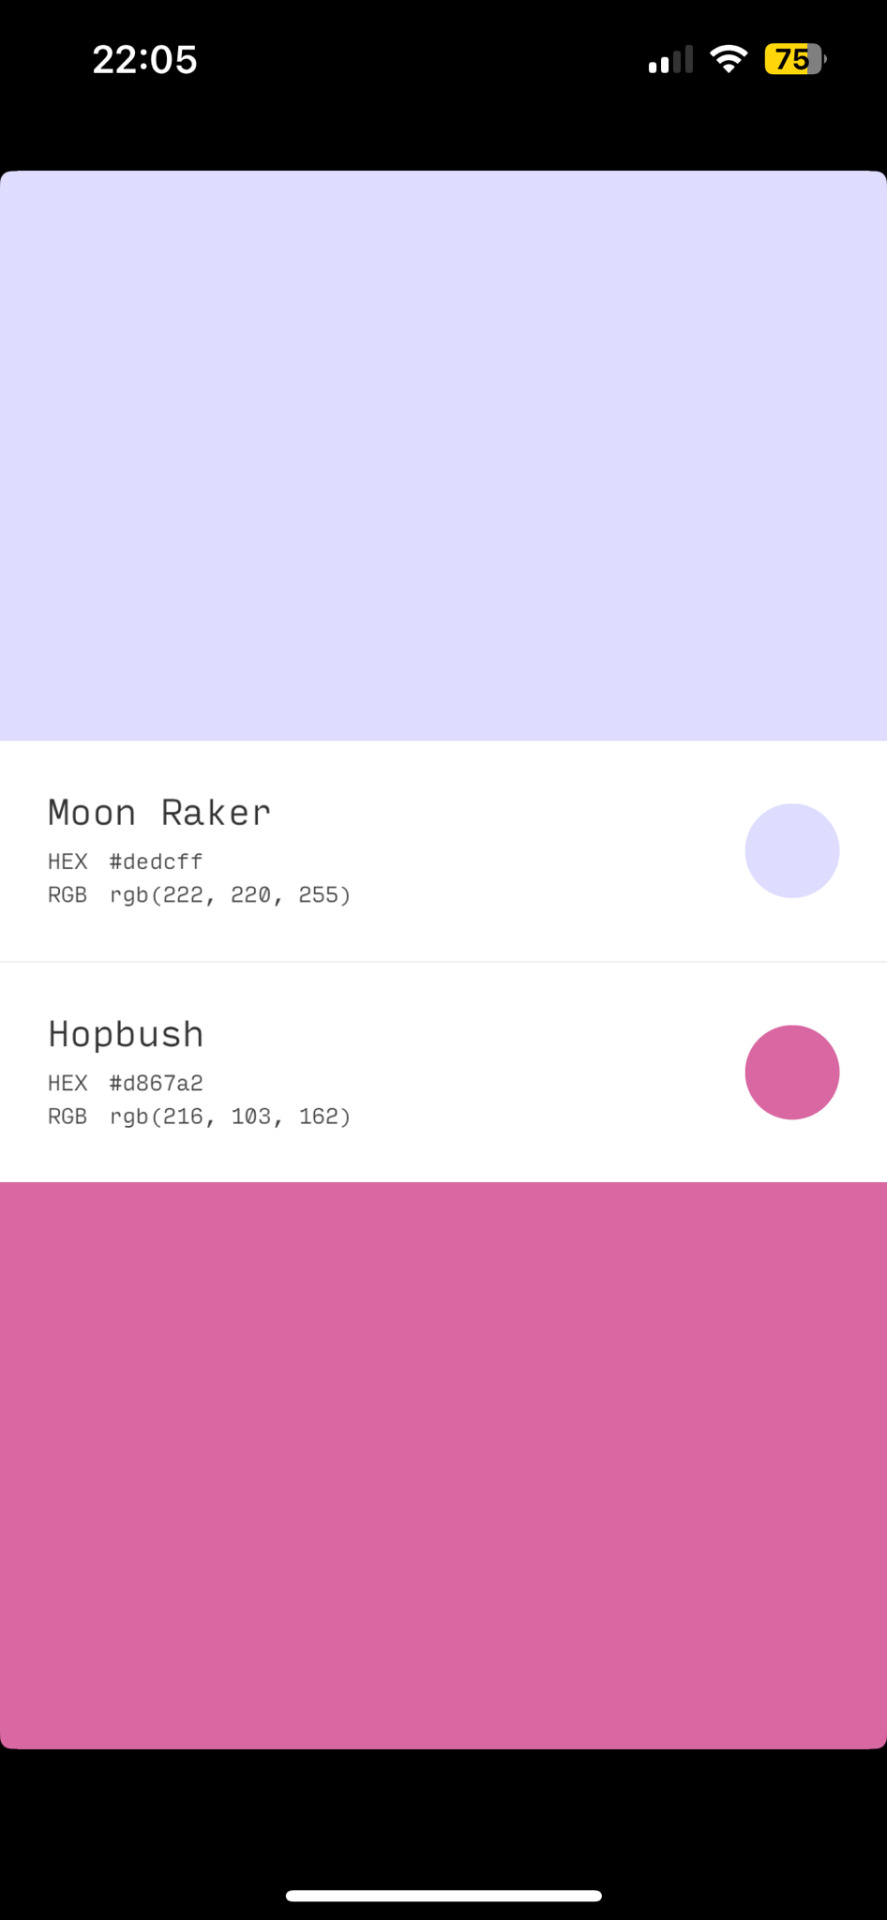
If you found two colors you like, you can click on the little + and then on "info" to see the color names and hex codes. In the menu after clicking + you also have the option to save the gradient
Once saved you can resize your dividers.
Onto the web pages.
At uiGradients you can browse through popular gradients users have made. Once you find one you like you can use the hex codes to make a gradient divider for example in Canva or you take a screenshot and resize it.
Using Webkima for animated dividers is a little inconvenient because you need to record your screen and make a gif out of if (you can do this at ezgif where you can immediately resize your animated gradient)
On Webkima you can choose up to three colors, the direction and speed at which the colors move. Personally I haven't used this yet except for a few custom dividers since it takes quite some time for one divider.

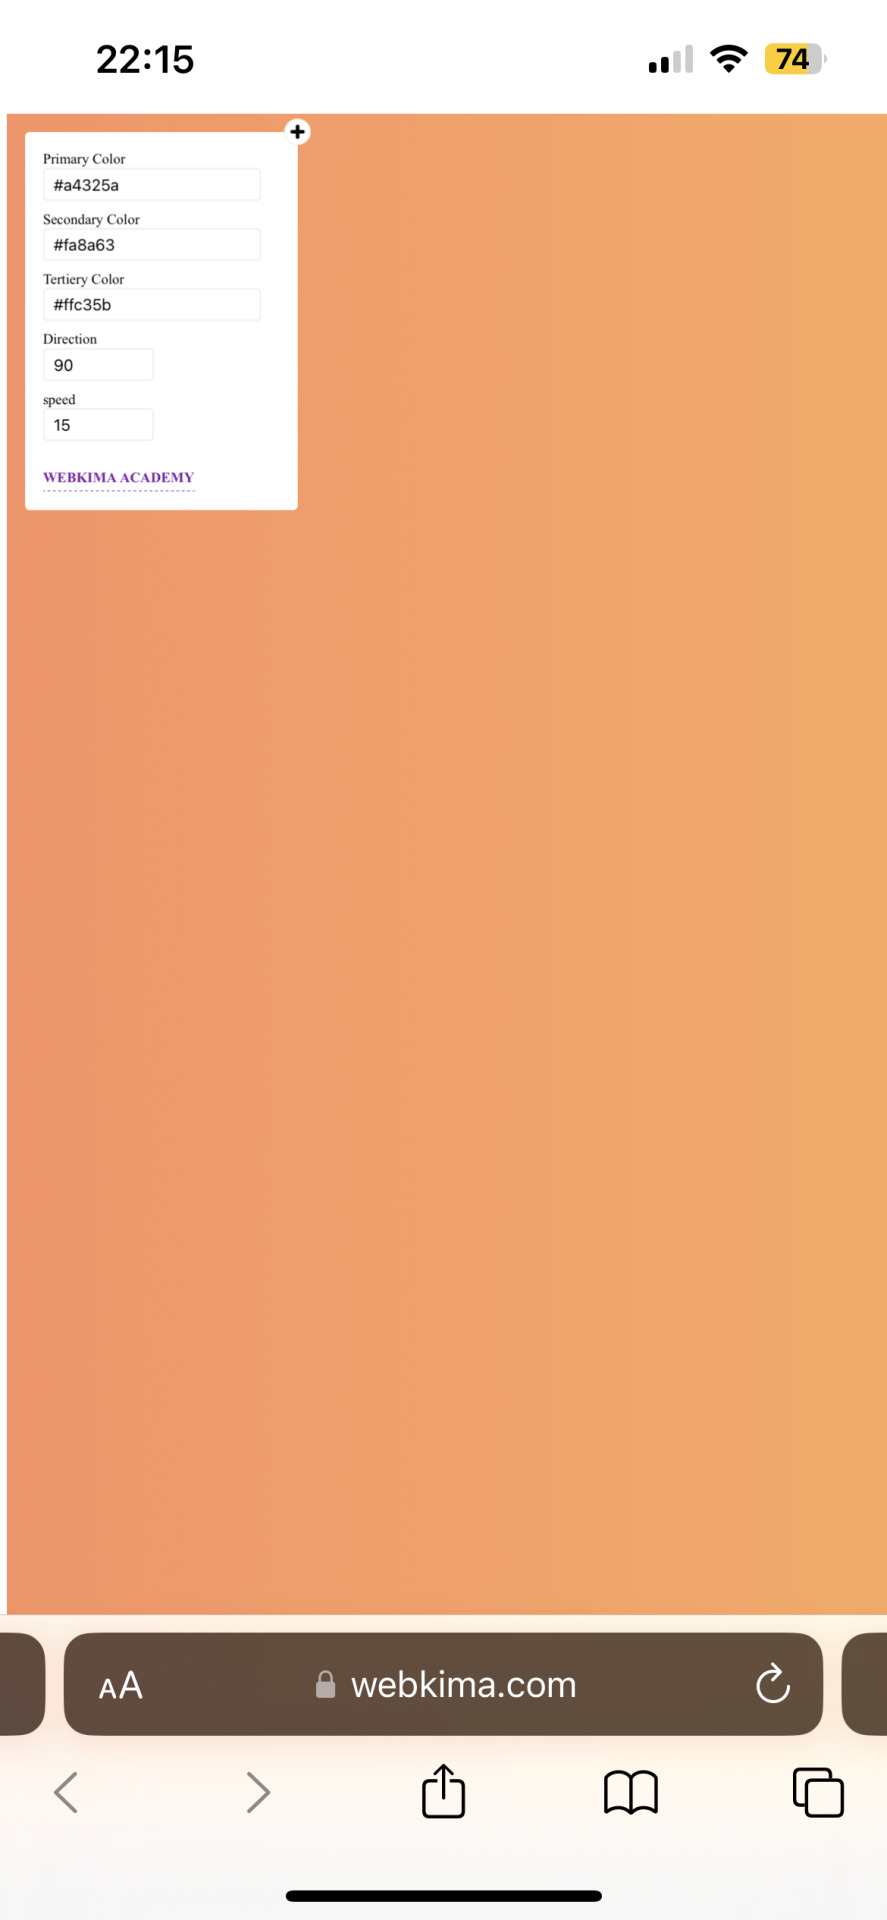
(Left: uiGradients / Right: Webkima)
Using these apps / sites is optional and I'm sure there's plenty other options out there but these are the ones I personally use and find easy to navigate, especially canva since you can do all this in the free version.
If you have any questions or something doesn't work as you thought it would please don't hesitate to reach out - I'm always happy to help!
#dividers by adornedwithlight#divider tutorial#gradient tutorial#Gradient dividers#Gradient divider tutorial#tumblr tutorial#Gradient lines#line dividers#aesthetic dividers
64 notes
·
View notes
Note
I don't know if you'll answer but I need to know the lore behind sexy times with Wangxian, like is it a fanfic? why do people hate the author??
It was the longest mdzs fic posted during its time in 2021 and gained extreme notoriety for its absurdly long tag list, frequent update schedule that consistently forced anyone scrolling any of its tags to see it at the top of their page, and escalating poor, racist, and trolling authorial behavior that ultimately culminated in the author virtual1979 being suspended from ao3 for a month because she posting an author's note saying she hoped that all her haters would contract covid and die. She deleted the fic from ao3 a little while after this happened, ig bc she wasn't getting enough attention anymore, but allegedly the thing's still up on dreamwidth under strict friendslock. The fan lore article goes pretty in depth about it:
The best summary for why it pissed people off so much is really just showing you these screenshots of what the fic looked like towards the end of its life on desktop and mobile (be warned opening the full image):

From my personal experience:
from 2019 up until around 2021 the fic really was just a normal-ish, if very strangely written and kinky, wangxian porn fic about them basically just fucking around post canon and enjoying day to day life. It updated pretty frequently and had a fair amount of tags because the author was literally just tagging anything that she wrote. But like the first few hundred, maybe even a thousand tags were pretty accurate to what the fic was because of that, and were relatively manageable for the first few years that it didn't pick up any attention really.
At some point in 2021 when cql was really starting to blow up online and the tag count was starting to pile up to the point of annoyance, the fic started receiving some comments that were just like "hey can you try to cut down on tags, I don't think it's necessary to be so specific as to tag 'Korean food' or 'eggs' or whatnot". The author did not share this idea, evidently, and instead built a grudge against commenters who would tell her to delete tags, subsequently adding more and more as time went on.
As the tag count and updates increased, the content of the fic did too-- it got a lot, lot weirder. I'm sure someone's saved it all somewhere but for reference it spun out into what I can only describe as like if Rick and Morty's plot was cut to be just the parts of the show with underage/incest plotlines with All Tomorrows level sex dystopian world building exclusively to elicit the most visceral audience reaction possible. Around this time is when more people started to notice the fic and its escalating tag issues, leading them to leaving more comments complaining about it, leading to the attention seeking author spitefully adding more tags. Around this time is when she also started adding fake tags that didn't apply to the story whatsoever (sorry to disappoint, "talking vagina" was one of those. I did check) just to boost the count, take up more space on people's screens, and bait people into commenting hate for attention.
By this time, it had become a fandom-wide annoyance as she had begun to tag entirely unrelated ships, therefore putting the near-daily updating titanic of a fic at the top of any mdzs-related tag. People were outraged about this, and calls came for ao3 to step in. Ao3 waffled around for a bit as there was no official rule at the time that imposed a tag limit, so there wasn't established ground to ban virtual1979 (who btw many people suspected of being 40 whole years old due to the username and allegedly some other internet sleuthing on Facebook or something). Meanwhile, she began to tag other fandoms-- tgcf, svsss, BTS, basically anything that would get a lot of attention and draw hate with the advent of The Monstrosity suddenly drowning out all other recently updated fics of the targeted fandoms.
People had been trying to retaliate without ao3 action, though, by coding their own themes/skins that would allow someone to block a user or work and other fic writers made their own parody, the "bland times with wangxian" collection, which were minimally tagged sfw shortfics typically featuring wangxian just doing laundry or things like that. A good amount of them were actually like just fics where wwx would explain to lwj how to install custom ao3 themes and block fics that were taking up too much space on his screen. Imo it was pretty funny, but these also sparked some controversy as people disagreed with fighting annoyance with more annoyance to people trying to find content.
Either shortly before or after ao3 staff said they'd step in due to an insane amount of reports and backlash, I forgot which atp, virtual1979 began perhaps the worst tagging spree of the fic's life by changing the title, many of the tags, and the summary to a slew of racial slurs, sexually explicit imagery, and other generally offensive statements. I'm pretty sure this came after the fic was temporarily hidden once, as this update gained considerably less attention than the rest of the tagging saga, but people were still rightfully pissed about it. Ultimately, like I mentioned before, the author was then suspended for a month for wishing covid and death on her haters, and attention seemed to die down during this time to the point where she didn't really fight much more when her suspension ended and deleted her account and the work shortly after. Again she seems to have moved to dreamwidth, but most have forgotten her and I'm not sure if her presence is public at all on there. But that's the story of the worst mdzs fic ever written

119 notes
·
View notes
Text
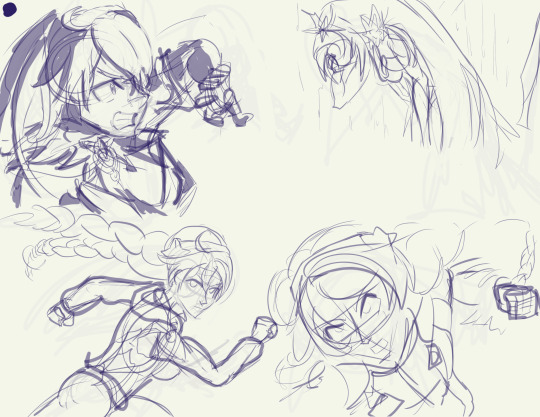
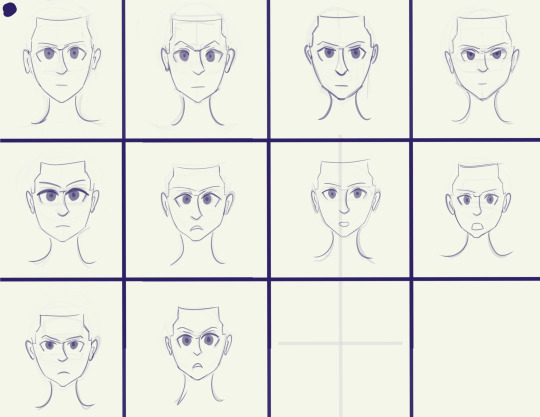
i've spent nearly 47 hours over the last ten days drawing nothing but kiana (and hov)
yeah.
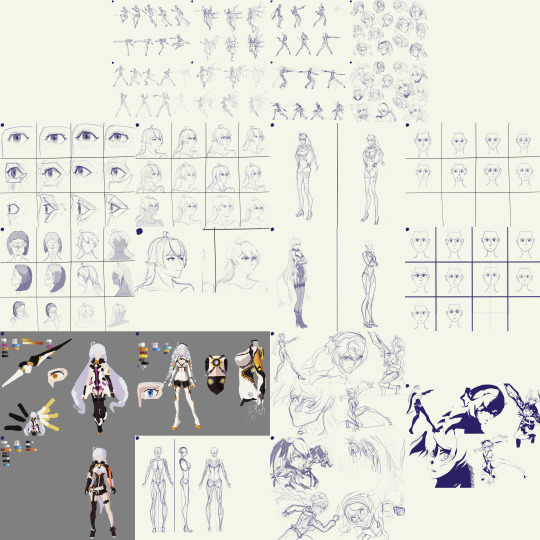
anyways, since I've had about enough of drawing Kiana for the rest of my life (/hj) I'm gonna put a pause on this project; but I'll turn it from a sprint into a marathon and try and work on it occasionally instead of all at once
I want to draw other things again x-x
Close-ups of the drawings below, as well as the reference image set, and some other misc. thoughts
.
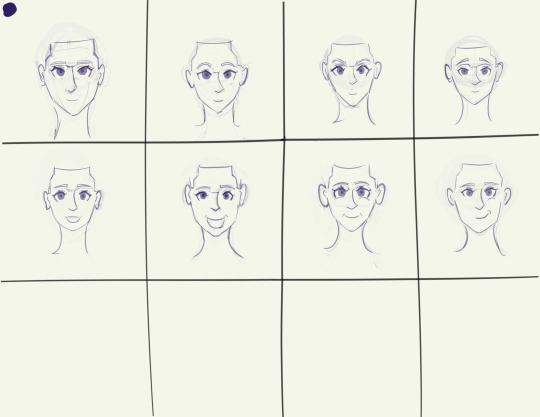
Portraits drawn from imagination

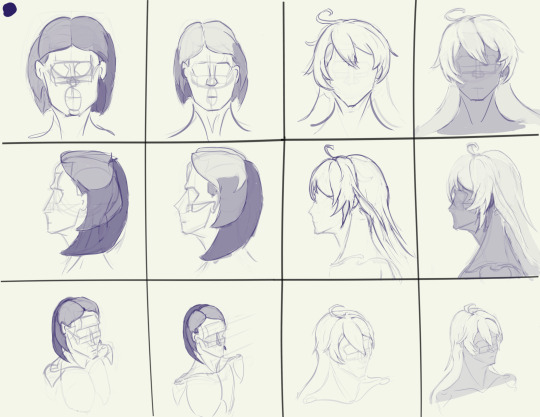
Started the process by trying to draw Kiana's head from imagination; then after each drawing I'd pause, look at some references, see what mistakes I made, then put away the references and drew from imagination (and referring to previous drawings) again. I also took breaks at two points to practice drawing eyes & hair before going back to drawing Kiana
For the last 4 portraits, I'd draw a head from imagination as a warm-up to a drawing session, and then do another head much later on instead of doing it immediately. Around halfway through this "phase" I started the other phases at random points, and finished this portion of the process in the first ~10-15 hours of drawing time. The rest of the time was split across the other exercises
Also I gave her an angry expression because I felt it was the easiest for me to do from memory since I've drawn HoV more than just "Kiana" herself. I also used a boring level 3/4 view without much perspective because it forced me to really make sure I was doing everything accurately and with care.
Basically my thinking was that if I could make a boring level 3/4 portrait look good enough, then I'd have no trouble getting it to look good in other perspectives. That seemed to be true when I got to the stage where I was doing expression practice and had to deal with more head tilt and other perspectives, lol
.
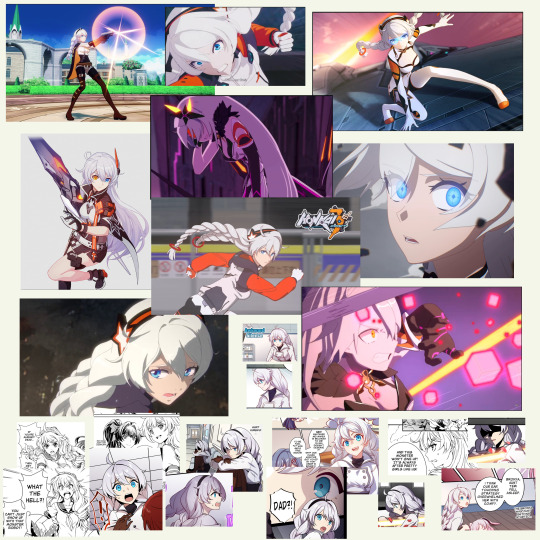
Studies of still images from screenshots of gameplay, character art, and stills from animated shorts
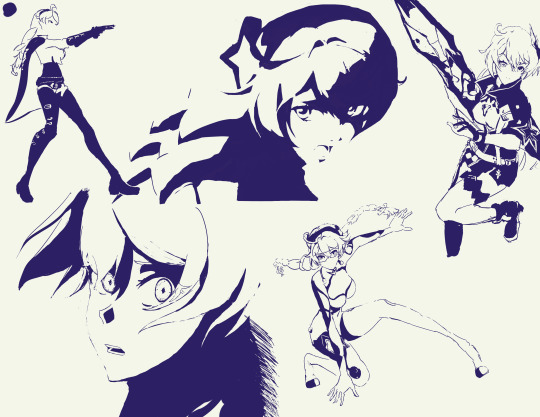
Did rough sketches first, then drew with solid color over the sketches on a separate layer. not much else to say here, lol
.
Full-bodies
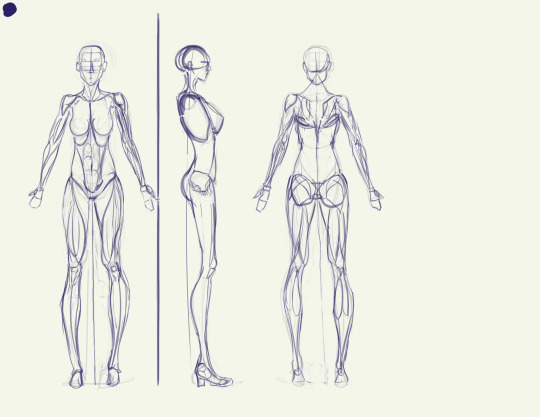
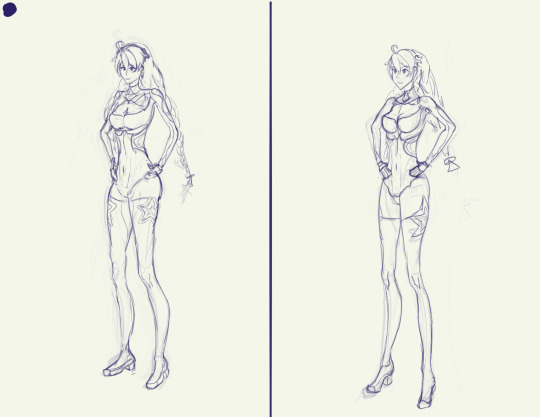
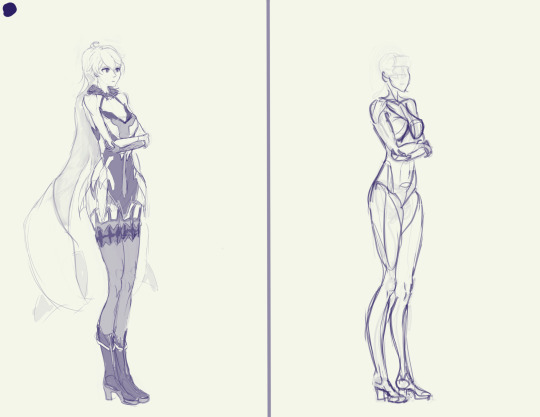
Started with an anatomy model loosely based on the proportions of Kiana's in-game model, and then two attempts at doing full-body drawings from imagination before realizing that it's bloody insane to try and do that much detail from imagination and I have much better things to do with my life than that x-x
.
Color studies
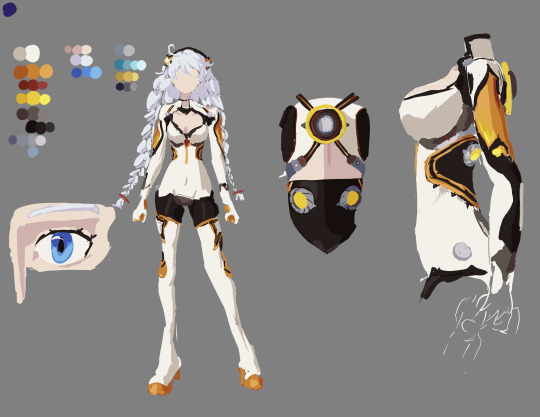
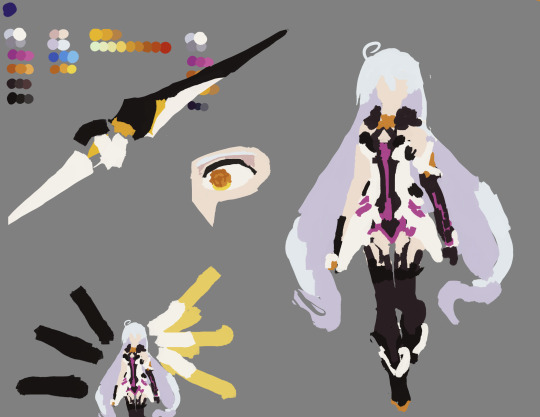
yaaaay color! yippee!
.
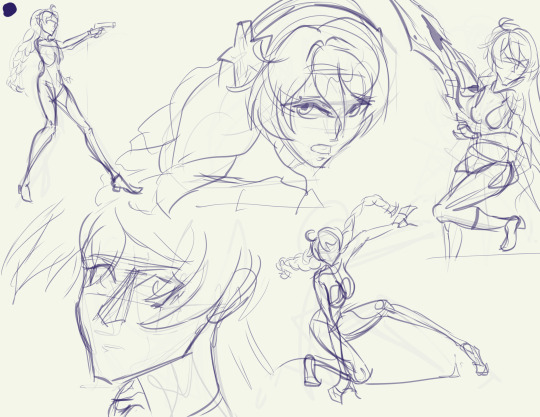
Action sketches/"gesture" drawings
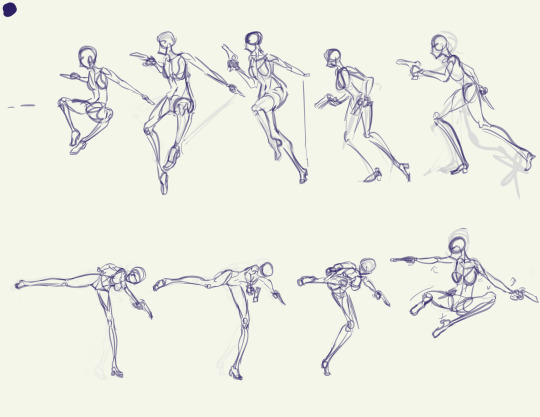
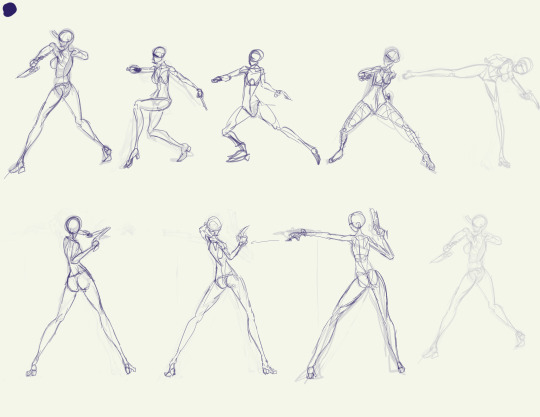
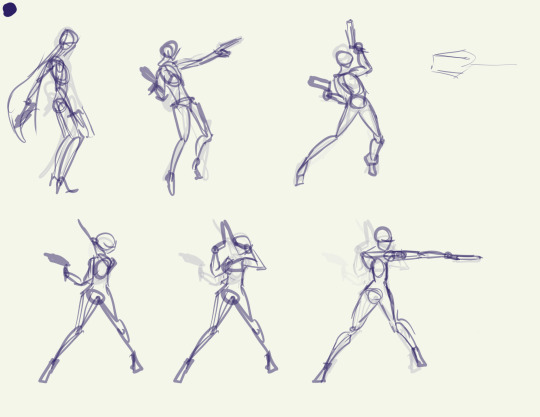
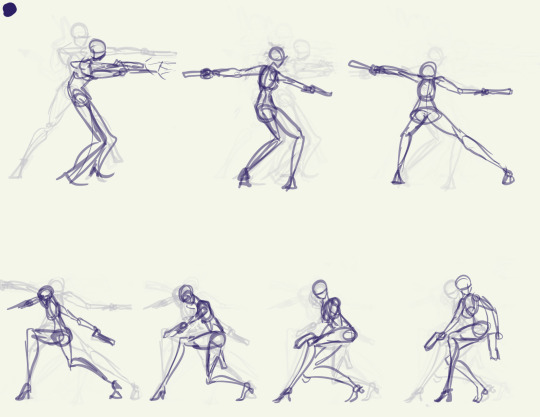
"Gesture" is in quotes because I was way too slow with these for it to really count as proper gesture drawing, imo. But the intention was to start with gesture, and I got closer to that as I went on.
It's way too tempting to start adding detail so I had to metaphysically slap myself with a frying pan to keep myself from getting derailed by that >.>
To get references for this, I did screen recording of gameplay on the PC with OBS studios, then used DaVinci Resolve to play back the recordings.
On PC, when using the mouse controls you can hold the camera fairly still when doing an attack sequence, making it awesome for getting unique angles. For instance, when I recorded Void Drifter's attacks, I was able to get at least 4 different PoVs of her attacks: from the left, the right, behind & above, and in front & below.
Unfortunately, though, it was a bit of a hassle to get good recordings because I had to go into an actual combat stage to record it instead of being able to use an empty testing stage.
With DaVinci Resolve I could "split" clips to make cuts in the timeline that let me easily mark the spots where different attack sequences started, and I could also easily play it in .5x speed to help me figure out how the animations were going from one set of frames to another.
Plus if you close the program after saving, when you open it up again it remembers which frame you were last on and takes you straight there, making it easy to continue from one day to another.
I used White Comet, Herrscher of the Void, and Void Drifter attack animations here, but I also did recordings of Knight Moonbeam and Herrscher of Flamescion, and I might give those a try someday.
.
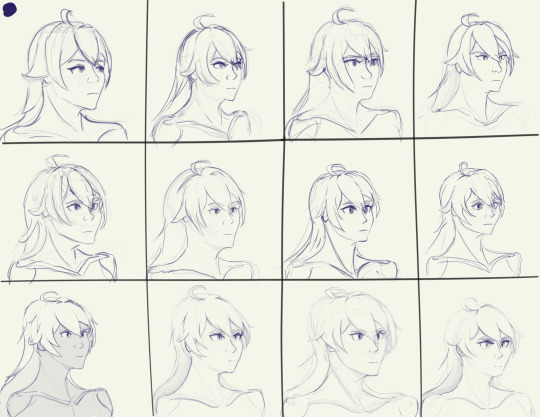
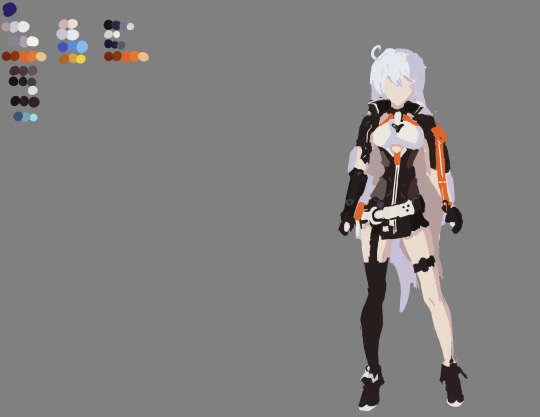
Facial expressions practice
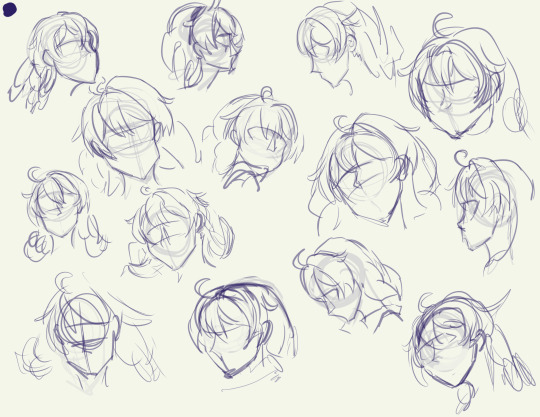
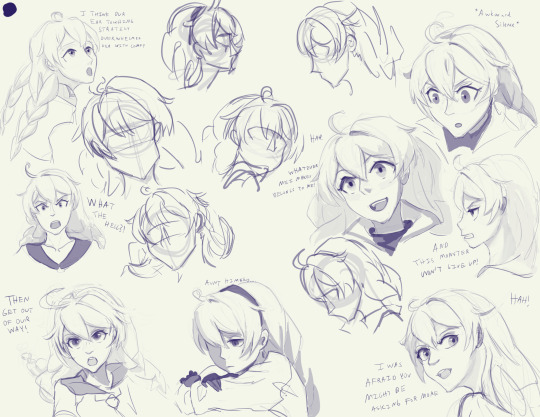
Started with the set of rough sketches (first image), then did some expression practice from imagination (second and third images) to try and get used to how the proportions of the face change slightly with movement of the eyebrows/eyelids/jaw, since the shape of the eyes and mouth is especially important when doing stylized faces (like the anime style that HI3rd uses)
Then this morning I started working through the original rough sketches and developing them one-by-one, getting through 8 before I decided to call it quits and wrap up the project for now
So the facial expression practice pretty much the culmination of all my practice. All the practice with proportions, the contours & forms of the hair, monochromatic shading, line quality, shape design, etc.
This was also one of the few times I've ever taken stylized references and actually adapted them to some extent instead of directly copying them!
This is especially noticeable in the hair, where I used a more standard style for the hair, in contrast with the variety of hairstyles and shapes used in the various manga references (i.e. black-and-white Escape from Nagazora Kiana's messy hair vs the neat and solid hair in the colored Gratitude Arc, AE Invasion, and Moon Shadow Kiana)
.
Reference images
#kiana kaslana#herrscher of the void#never doing this again /j#for real though this was honestly pretty amazing practice#I've long struggled with blending my traditional art skills with my digital art aspirations#i have literally hundreds of hours of studio time drawing with charcoal and paper but nowhere near as much time drawing digitally#basically if you give me a photo of a real person or a live model I'd do better than if I were drawing an anime or game character#I think I learned a lot about working from stylized references while still using my realistic-human anatomy knowledge#I was having trouble with that when doing some studies of Sushang (hsr ver) the other day and this was directly inspired by that struggle#honkai impact 3rd#honkai 3rd#hi3rd#honkai fanart#honkai impact#this practice was meant to address that!
32 notes
·
View notes
Text


Redone VTMB Main Menus
I didn't save my screenshots from last time so I made new ones <3
My images are 1920x1080 instead of 1280x720, so if you're having some issues, feel free to resize them in Photopea or something similar.
Here's the folder for all of the menus. Use Ctrl+F to find the one you want, and remember you can only have one. The menus are set to not show the household by default. If you want to see it switch to the store tab, then the home tab. If you did this accidentally and want to clear your screen again, just hit 'T'.
12 notes
·
View notes
Text
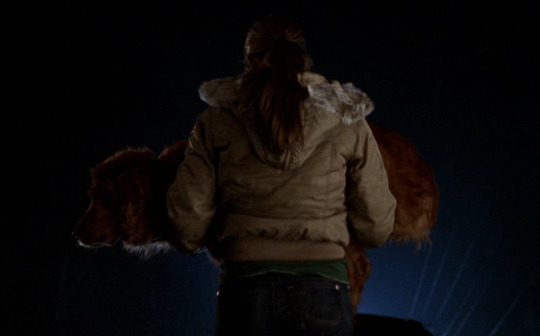
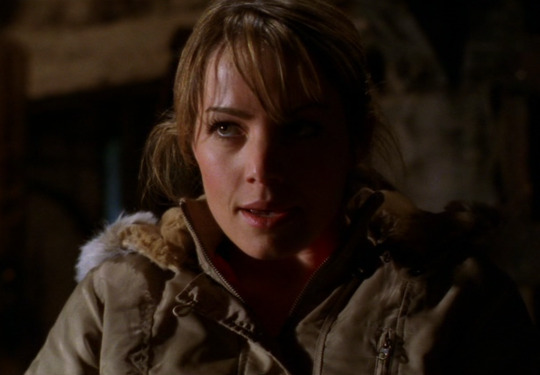
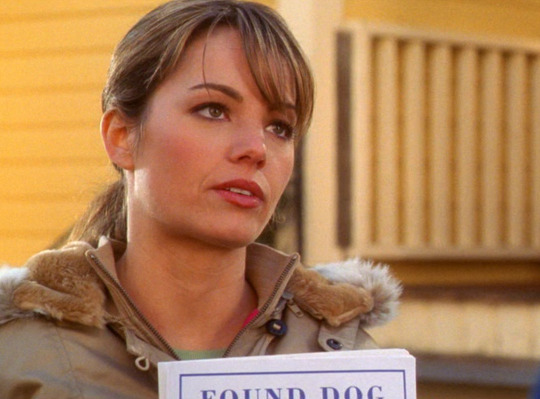
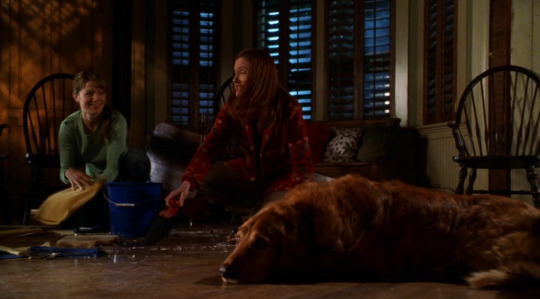
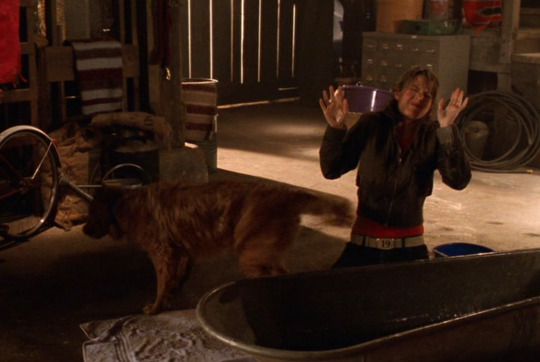
Smallville 4x14
I love this episode a lot🥹
THAT'S ADORABLE😭😭
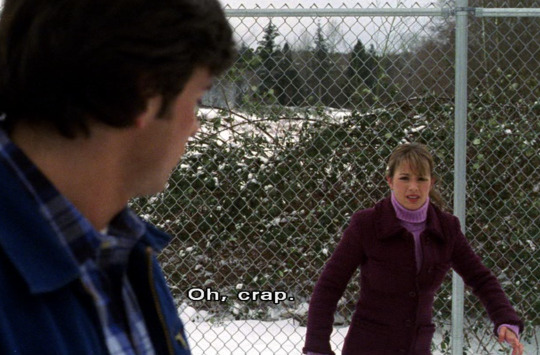
"You're gonna be fine. I know you're gonna be fine. Everyone I've ever hit was alright."
Lois -everyone I've ever hit was alright- Lane:

Clark really sleeps on the couch now that Lois lives there? LMAOOOO
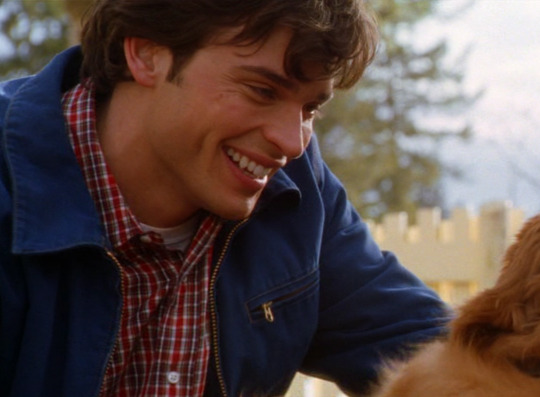
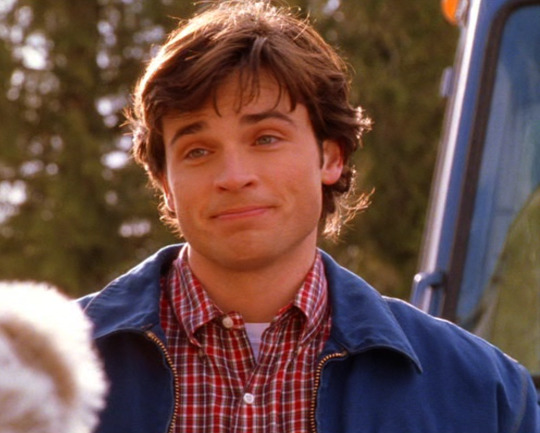
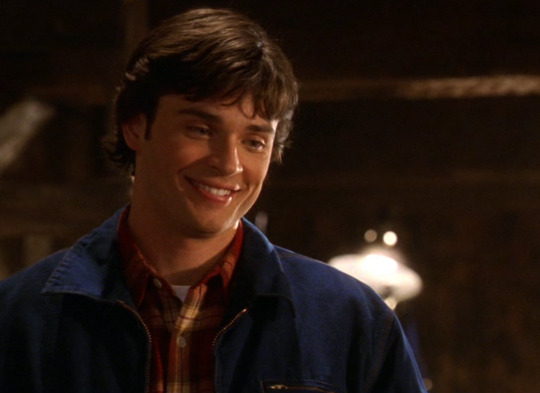
the way he immediately smiles when he sees the dog I can't🥹🥹
"You hit him? With your car?" "No, with my fist🙄🙄"
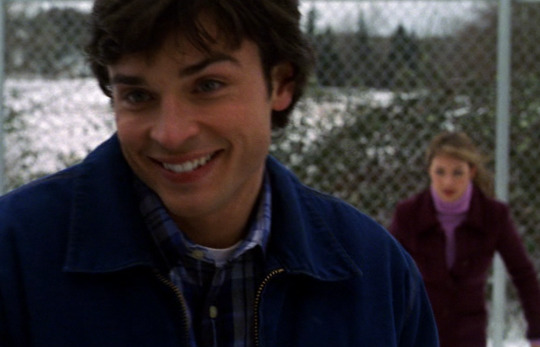
CLARK YOUR FACE-

"Actually, I think it might be fun to have a dog around."
HE'S A MENACE, HE'S A DISGRACE, HE'S A FUCKING CLOWN, I LOVE HIMMMMMMMM
I'm crying

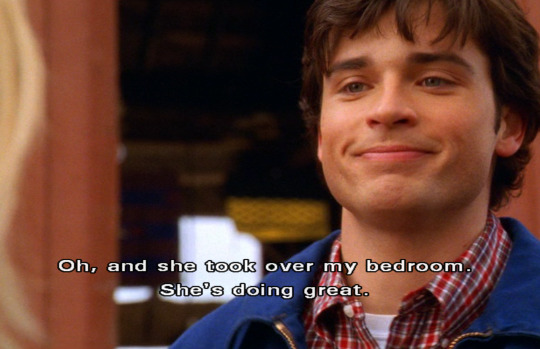
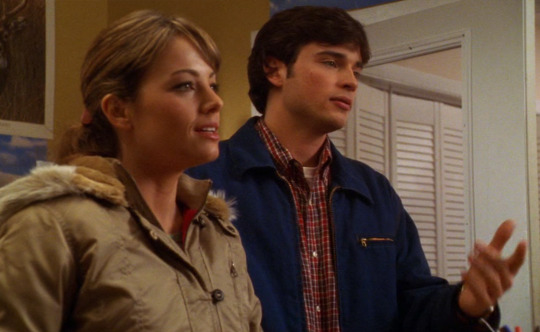
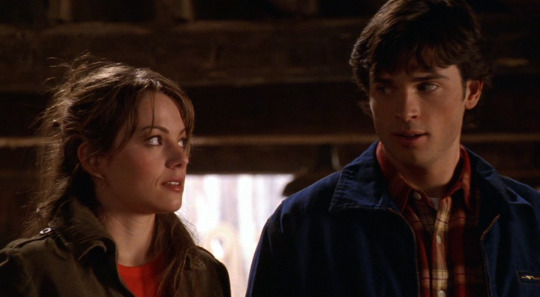
"I don't know. It's just kind of hard to be myself with her around."
that's so ironic though because apart from hiding his powers he is VERY himself around her
I need Tom Welling to stop smiling on my screen please and thank you, I'm not strong enough for this😭
ugh😩
Chloe helping Clark with his excuses, love to see it🥹 He's so bad at them he needs all the help he can get💀
Let me introduce you to my parents who have been married for about 30 years now:

"Let's see. He's annoying, and I can't get within ten feet of him without getting sick. I think we should call him Clarkie."
have I mentioned how much I love them before?
"I spent all morning on these."
they're both so cute🥹🥹
LMAOOOOOO he finds her so annoying

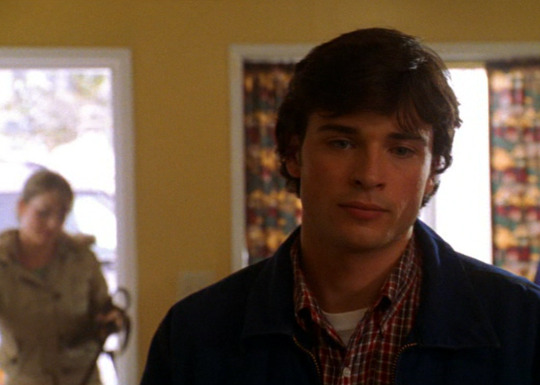
hsajaksjaksj LOOK AT HIS HAND IN THE SECOND IMAGE, HE'S SO DONE I'M SCREAMING
No because if I keep going like this I'll screenshot every single time they say something or even look at each other💀
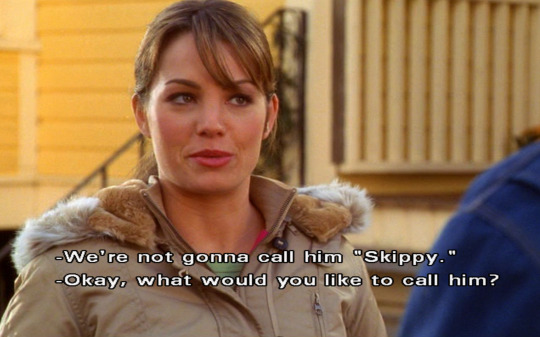
Lois: You could be Skipper😇
Clark: *fake ass smile* anyway-
STAHP I'M SCREAMING

he's about to throw hands💀

This is so confusing, I thought Jason's mom orchestrated the entire meeting with Lana but now she wants him away from her?
"Paranoia is not a very attractive quality in a woman."
Umm okay, AND? I mean I don't give a shit about Genevieve but this is such a dumb statement, as if she's supposed to give a fuck about what's "attractive" to Lex or others, like what?
Sometimes he sounds like one of those "pick up artists" that the internet makes fun of all the time, I'm sorry💀💀
I. LOVE. THIS.

That's the way someone talks to their own kid, not their guest and I love that because Lois clearly lacks parental love. Martha & Lois will always be so special to me😭😭
"Remember when Clark did that? He was only... three." LMAOOOO
Lex is clearly losing patience with Clark😬
Can I join this family pls look at themmmm
Martha is such a badass actually
I'm glad Lana overheard that whole conversation between Jason and his mother, now I'm just hoping they'll give her more agency instead of making her a passive character and her own storyline.
(edit: so she did NOT hear what they were talking about🤡🤡 At least she saw it)
Clark is such a little shit😭
Still arguing about dog names🤡
"Hold on there Forrest Gump, what are you gonna do, run?" LOL
She's like nuh uh, get in the car dude AND HE LISTENS💀💀💀
How are they acting like they're been married for decades???


NOT AN ACTUAL QUESTION BC I KNOW HOW AND I'LL TELL YOU: they're comfortable around each other even if they don't realize it

🎶and I will go down with this ship🎶 (EXCEPT I DON'T EVEN HAVE TO BECAUSE IT'S FUCKING SAILING, IT WILL NEVER GO DOWNNNNN)
let's move on
"What is this, another one of your famous hunches or are we just on a little scenic route?"
"Okay, stop here."
"Wha- where??"
"HERE. Stop here."
"OKAY."
>>>MARRIED.

they sound like my grandparents💀
LOOK AT MY LIL POOKIES INVESTIGATING STUFF TOGETHER🥺
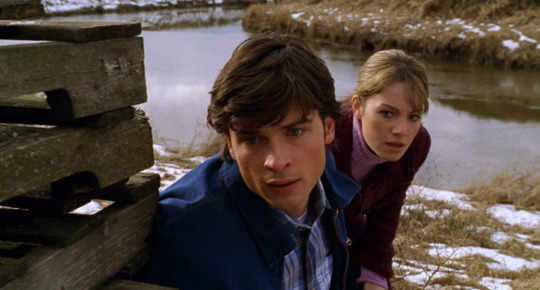
YEEEEET

I need to know where Clark gets his clothes bc that stuff withstands literally anything💀
AKJASJKAKSL STAHP😭

"He (the dog) saved my life. I'll take my chances on his loyalty." Ooof, is he calling out Lex👀
what is Lionel trying to do?🧐
CUTE.
CUTE.
Clark is happy = I'm happy, it's really that simple
this episode is premium, top tier chef's kiss EXCELLENT
83 notes
·
View notes
Text
So I’m back…
But this time, I have a tutorial!
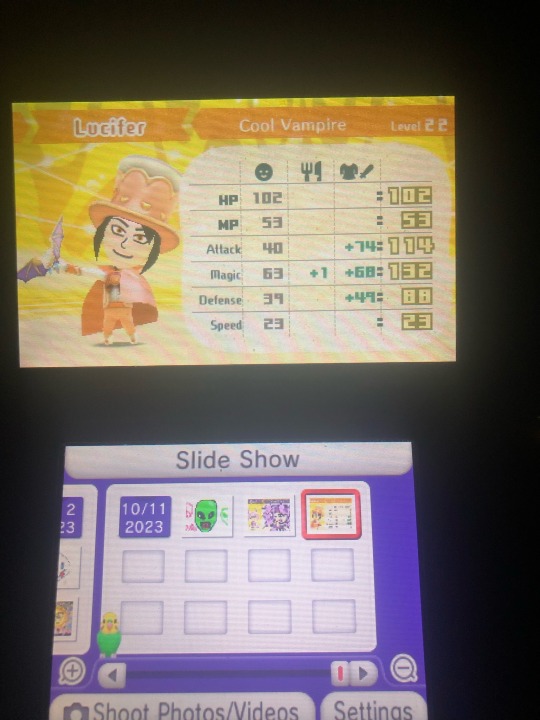
Do you have a 3DS?
(If you say yes to that, then we’re cooking).
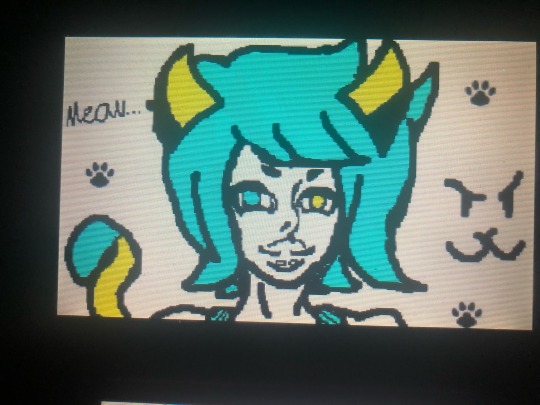
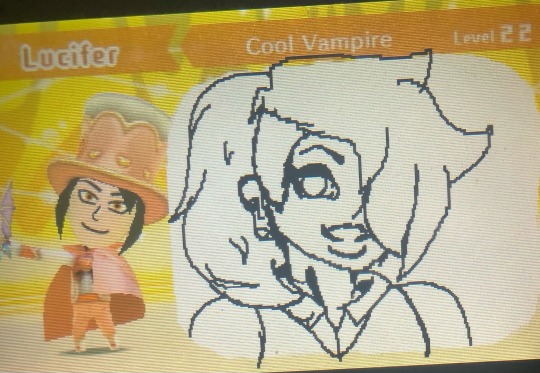
Do you want to draw something similar if not better than…
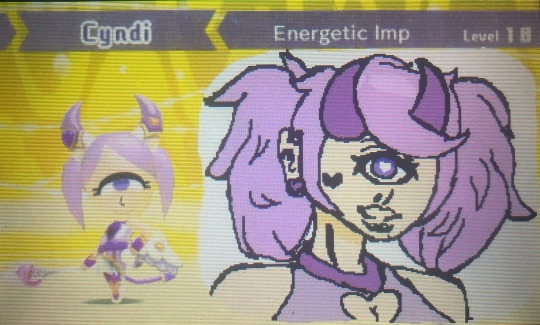
THIS?!
Then boy I have a tutorial for you!
Since this was drawn on a 3DS, I can’t really tell you anymore than for a 3DS. Sorry..
Step One: Prep!
Grab your 3DS and go to “Nintendo 3DS Camera”! Or whatever it might be called if you have a “New” one.
Optional: If you want you can take a picture within the game- if it’s capable of doing so.
For me I’m gonna use a screenshot from Miitopia.
Step 2: Background!
Part 1: Plain Backgrounds
If you want something like the following image, follow this part’s instructions.
Take a random full screen sized image. Any image will work as long as it fits the screen perfectly. (Take a screenshot from a game such as Tomodachi Life or Miitopia).
Tap the image so that it says graffiti.
Then use a stamp, such as the dialogue bubble.
Hold the stamp and make sure it fills the corners.
Then you have a plain white background! This one you can press finish,but the other method you can’t.
Here’s a quick video tutorial, because I don’t think I phrased it right!
(I took it on my phone, that’s how easy it is).
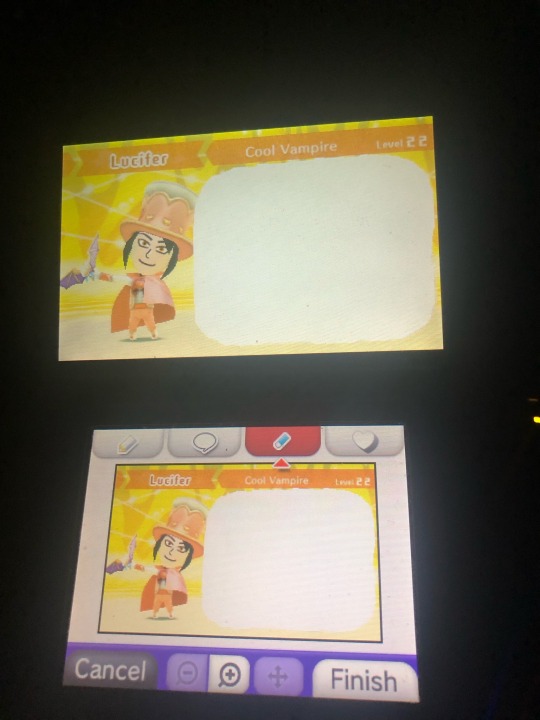
Part 2: Backgrounds that aren’t pure white!
If you want to make the starting image (but your own), then follow these steps!
(Once again, I’m using Miitopia screenshots for an example).
Once again, GRAFFITI!
Instead of using a stamp, you might have to just color it yourself. Mainly because the stamp method is harder for backgrounds like the first one.
COLOR THE BACKGROUND, BUT DON’T DRAW ANYTHING ELSE. (Unless you just want to draw a background). Trust me, it’s easier.
Boom! Plain background ready for sketching.
Don’t press finish cause it can decrease the quality with enough graffitiing and finishing.
Step 3: Draw the Base!
You gotta draw that body-ody-ody!
Just draw a bust or whatever is easier for you. “Omg IsBus you have to have drawing skills?!” Yeah I know. How could I?
I’m gonna draw the bust up because it’s easier for me.
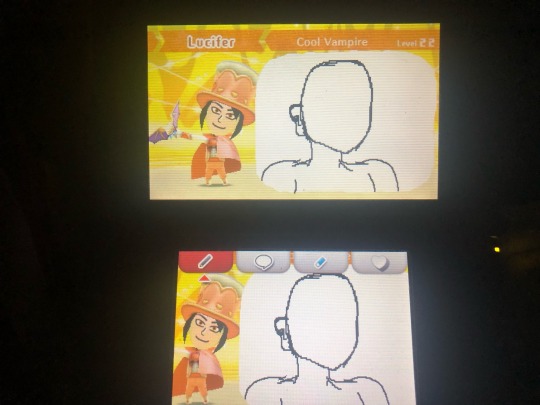
(Don’t look at me like that.)
For the plain BG ones, just do the same thing for the rest of the steps but for your screen.
Since the background hasn’t been saved, don’t use the eraser because it will remove the white BG. Unless you are using the first background method, that is. (Use the white pencil.)
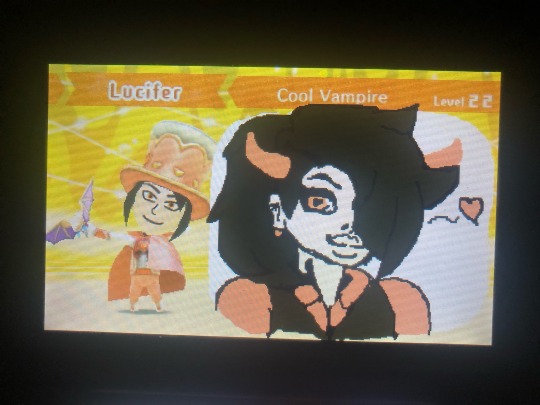
Step 4: Draw the character / Coloring Page Step!
On the plain BG you can draw what ever but for me and my Miitopia character, I’m gonna draw him. If you did the color-only-a-part-of-the-drawing method (like I’m doing), you can do whatever still.
Think of the white area as a green screen; you can draw whatever you want on it.
This phase is like the pencil part of a physical drawing. White out the base as you get to parts you want over it (for example: hair or clothes).
Bam! Coloring page!
Part 5: Coloring!
Remember when I called it a coloring page? This is why.
Color the drawing how you see fit!
If you’re using the all white bg, then you might have to use the stickers or the rainbow pencil. I recommend the stickers if you want to shade/shine, but if you want more options, use the rainbow brush.
If you’re basically doing what I’m doing, you can use the colors from the image to color your character!
Once you’re done coloring the image, remember to ink the lines again! Use a medium brush for coloring but a thin brush for inking the lines.
Part 6: Final Details!
For people who want any additional details, or need to clean up edges.
If you did the plain bg you can decorate and clean up as much as you need!
If you’re doing what I’m doing, you can clean up the edges of the white spot and add additional details.
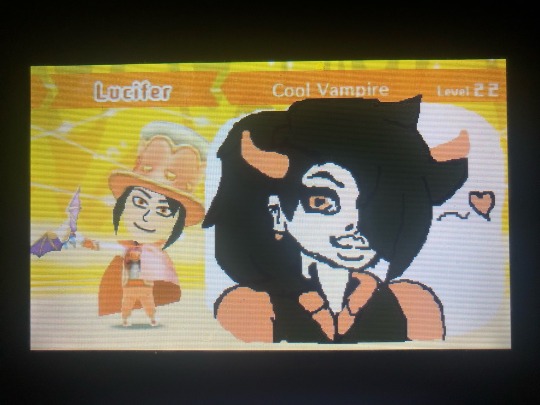
And Voila! You did it!
If you have a 3DS and followed my tutorial, show me what you did! I wanna see it!
Have a good day/night! And thank you for reading!
~IsBus
#isbus#isbus original#original art#original character#original characters#digital art#3ds art#3ds#nintendo 3ds#drawings#digital drawing#drawn on a 3ds#tutorials#tutorial#I wanna see your art#miitopia#the second one wasn’t as good#sorry lol#mission failed successfully#long post#show me what you got
27 notes
·
View notes
Note
Hi! I saw that you mentionned scrivener in your latest post and I've been meaning to try it. Is it good? I'm a one-doc-per-chapter kind of person so I wonder if it would work for me.
hi, sorry for the somewhat late reply, i wanted to include some screenshots to make my explanation a little clearer but didn't have the energy to sit down for it properly before now. if you're a one-doc-per-chapter writer i definitely think you should consider it! scrivener's most important feature, i think, is that it gives you:
the opportunity to split up your writing any way you want, whether per chapter, per scene, or even per paragraph...
...but all your writing is always within immediate reach, and you can restructure it whichever way you want.
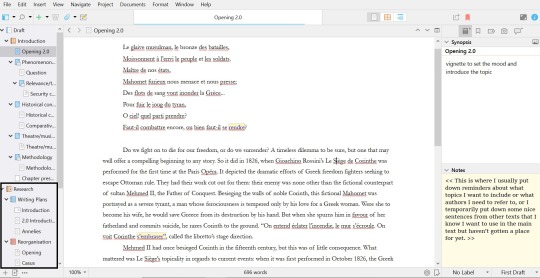
to make that a little clearer, i've included a picture from my own work. scrivener is mostly geared towards creative writing, but i use it for my dissertation and that works very well too. this is the general interface, where you can see i've been writing an introduction:

scrivener's most important feature, to me, is its 'binder', which is this bit:
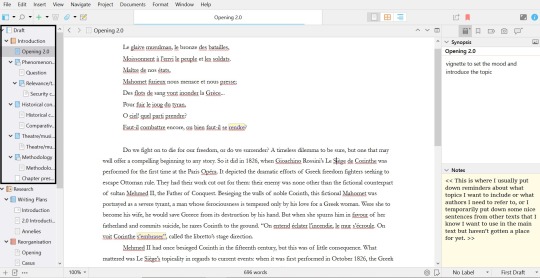
at the top, you'll see 'draft' - this is the entirety of the project you're working on. in this case, that's my dissertation. underneath, you see a little book, called 'introduction' - that's a main part of the draft. and underneath that, you can see a couple of folders and documents. that's all the different parts of my introduction. you can create as many folders and put as many different documents in those folders as you want. what i find incredible about this, is that i have an overview of all my topics, and that i can switch between all my different topics without having to open different documents OR put all my shit in one big document, which always makes me lose my way completely. and if i feel like restructuring my text? well, i can go to the binder, and drag the texts to another spot there.
since you like to work by chapter, you could just structure your binder like that in a way that works for you, but you'd still have access to all your other work if there's ever a moment when you need to refer back to it. or if you're working on multiple chapters at the same time, you can just switch between them.
something else that has helped me a lot is the 'research' part of the binder:
the 'research' part is meant for you as a writer to put down all your resources - your pdfs, your images, whatever you're using as reference while you're writing. now, because im writing an academic text and need more references than the average (fan)fiction writer, im using zotero as a reference manager. instead, im using the reserach folder to store my writing plans so i can reference and update them there. you see that 'reorganisation' folder there: it's also where i store my texts when i notice that the current structure is not working at all and i need to start over - but in such cases i don't need to write all the text itself from scratch again. this way i can keep everything within easy reach and copy-paste in the same document (you can split your screen within the program, and work in two documents at once).

what's also great are the tools. in programs like word or google docs you'll find some of these, but not all. as you can see, the first symbol leads to a sidebar where you can put a synopsis for the specific text you're working on, and it lets you add notes. the second one lets you add bookmarks to your text, like texts or references you want within reach immediately. the third one lets you add specific metadata or tags. the fourth lets you make snapshots; scrivener saves all your work immediately, but if you're about to make a big change, you can create a snapshot and roll back to that if it's not working out after all. finally, there's the comments, which speak for itself. all the way down the bar you'll also see that you can label texts ('no label' here, there's a colour system) and note what part of the writing progress this part of the text is at.
what i personally like very much is the bar at the top that now says 'opening 2.0'. you can see a light blue bar at the bottom of it: that indicates my writing progress. you can set a writing goal in number of words for your project. for my entire 'introduction', that's 8000 words, and as you can see im nearly there. if you hover over the 'opening 2.0' bar, it'll shift to show you the number of words you've written AND the number of words you've written in that specific writing session like so: 7300/8000 | 345. what i like is that it counts the actual words written - if i've deleted a sentence, my count goes down again. that's useful for me because i tend to think 'oh i've written so much today' while all i've been doing is tiny edits for 2 hours, but not actually put down more words.
there's MUCH more that scrivener offers, but i can't explain it all here. they offer a free trial for 30 days, and it comes with a practice document that explains all the features to you by making you work in the program. id recommend giving that a try if you're interested! the program is expensive (it cost me 70 euros) but it's absolutely been worth it for me. i used to have long-ass documents with half-finished paragraphs and snippets of thoughts and sentences all over, and this has helped me structure my texts more easily while also not cluttering my workspace with loose thoughts and ideas because i have more places to put them now.
#asks#long ass posts by ME feat. dumb opera shit#annotation is kinda ehh btw. like there's in-text and footnotes options but bc i use zotero they're not that great for me#there's a zotero extenstion but it's difficult to add if you're a luddite like me so i use the comments to put author and page no. instead#then i add the actual footnotes in word once i've converted the file
8 notes
·
View notes
Text
Unofficial Update Blog
Hi! This is an unofficial blog which posts updates about EWOW episodes. I might do other things, but my priority will be posting when another episode is out. You can also ask me questions, perhaps about EWOW or something related (?), and I'll try to answer to the best of my ability!
This blog is NOT run by Cary, nor affiliated with anyone on the EWOW team. It is an unofficial blog, run by a contestant of EWOW. Also, it is not related to the defunct ten-words-of-wisdom tumblr blog created a long time ago, nor is meant to do what blog used to do.
I decided to create this blog after seeing EWOW 2b2, and wanted to make another way an EWOW contestant can know there's another EWOW episode, and can vote/submit a response, in case they haven't already seen on YouTube.
I am only one person, so I might be somewhat late in posting updates about episodes. I'll try my best!
Other EWOW info:
https://www.youtube.com/watch?v=jcqE0Z5Sgbw - This video explains what EWOW is all about.
But, in short: EWOW contestants submit a response of 11 words or fewer after a prompt is revealed in a "B" episode, and both contestants and viewers can vote on those responses. Each contestant has 3 lives, and if they get in the bottom 49% they lose one, but if they get in the top 5% they gain a life. Once you reach 0, you are eliminated.
A episodes: Voting, there's also like the booksona grids with confessionals
B episodes: Leaderboards
When you submit a response, your email has to be exactly the same as the one you used in your very first submission. You can check your email (it should send you an email of what you submitted, so you can check it - it sent me one, at least). You can also go to the form itself, through like... EWOW 0A or something. I don't know how to link to the EWOW forms yet...
Deadlines will be in PDT - at least, for all of daylight savings time in america (which ends november 3 iirc). I don't know how it works after fallback.

Voting:
There is a region* on the screen. Click anywhere (and not just at the beginning) on the region to vote.
*There doesn't seem to be a region anymore. However, it's replaced with the YouTube Chapter thing, so you can use that instead.
There are several voting screens (if... that's what they're called). There will be a keyword on the upper right corner, and 11 entries are lettered (like numbered but with letters) A to K.
To vote, you comment with a square bracket, the keyword, then space, and then rank the letters from best (left) to worst (right). e.g. [FRESH AKJEIHBCGDF] (this is not a real vote).
You must rank all responses on the voting screen.
You can vote multiple times - in fact, it's encouraged to do so!
Vote weight has been changed. Voting on 20 screens will not decrease your vote weight, but if you vote on more than that, you vote weight will still equal 20 screens.
If you vote on one response multiple times, you will still have the same power that you'd have if you voted on it once. Your votes on that response will be averaged.
Images:

(This is an example of voting. There also has to be a square bracket at the end, I probably didn't get a screenshot of that part specifically.)
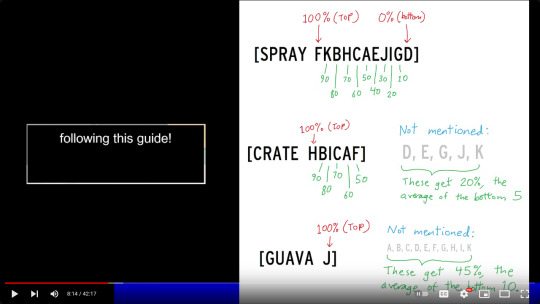
"Then the contestants will be sorted based on their entries' average score, from highest to lowest, following this guide!"
NOTE: You are now only able to vote if you vote on all responses.
7 notes
·
View notes
Note
Hihi
Can I ask you what program do you use for the animatic? And can you recommend any good program for practice? (I never used any of these programs, and they look pretty hard, so I don't want to pay yet for one, but I want to make something :c)
Hello! This might be a bit long but I hope I can help you with this (I'm holding your hand because this is also my first time doing an animatic so I have no idea on what kind of good pipeline there is to follow...) I apologize in advance if this won't be the most helpful answer :,))
okay so for the software. I use the ipad for most of my work nowadays... unfortunately, both apps that I use are paid—RoughAnimator and Procreate. I'll walk you down with how I do it. It is not the most efficient way but here's how it goes for me... :,))
Storyboard
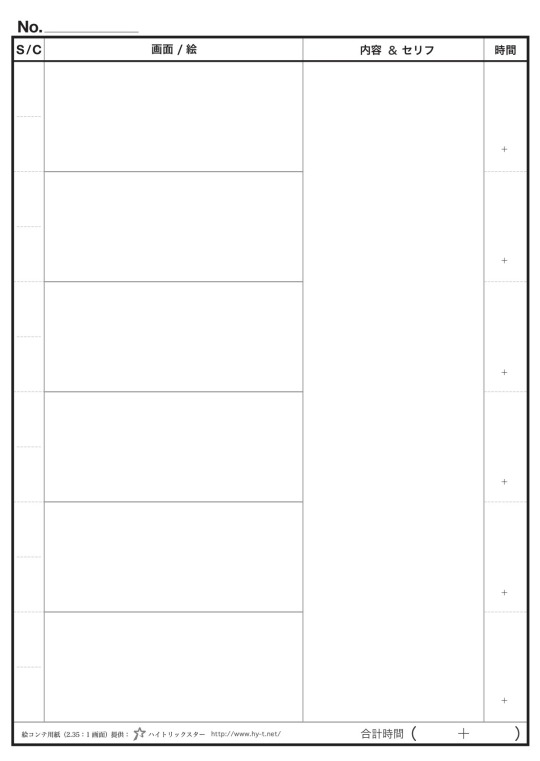
I think the most important thing for planning something like this is having a clear vision of what you want to see. I started this animatic by brainstorming in my storyboards what I want to see in timing with the song and its lyrics. Here's an example of what I previously shared... [disclaimer: I did not follow the template so yeah, feel free to ignore the kanji characters]
you can see the outline I roughly made to tell myself what scene I want to show to what lyrics (I got lazy to write the whole lyrics down lol) and also added some notes like the movement of the character and camera pans etc.

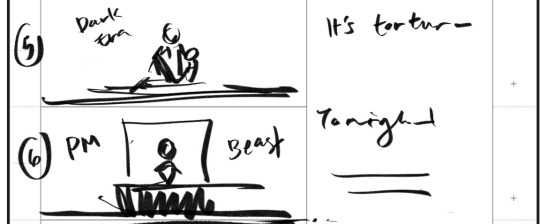
here are the corresponding drawings to it (sorry if the quality is bad, I just screenshotted this from my gallery ><;;)
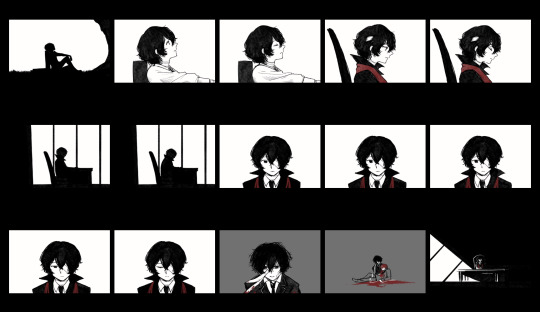
Drawing the Cuts
All of the drawings are done on Procreate. I use this software for most of my drawings now, mostly because I like the texture of the brushes there. At this point, I am not worrying about timing these drawings to the music yet but I am reassured since I already made my guide of that in the storyboards. Procreate also has an animation feature that helped me draw the breathing sequence.
Compiling and Timing the Drawings
Once I've saved my drawings to my photos, I move them to RoughAnimator. Here is where I time the drawings with the song. What I like about RoughAnimator is that it has its own drawing tools (I don't really like the brushes tho... hence, me using Procreate instead), it has a camera tool that allows me to pan across my drawings and also shows the sound wave thingy of the song that helps me with timing. It also allows me to easily adjust the exposure or how long a drawing flashes on the screen at my chosen framerate.
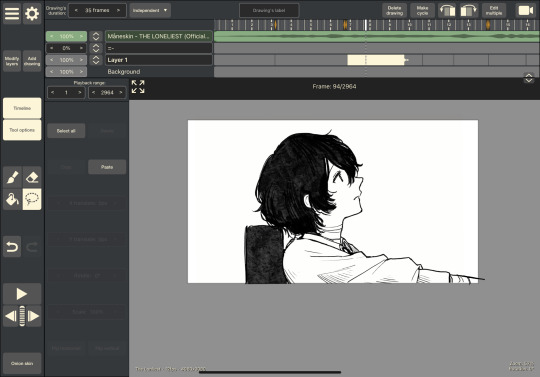
I would sometimes be unsatisfied with my initial drawings, leading to me going back and forth between Procreate and RoughAnimator to revise stuff. (which in my opinion is not efficient but I can't really think of any other way to do this...)
So yes. That's pretty much how I'm working with it so far. I am currently stuck because both Procreate and RoughAnimator have very limited features when it comes to panning images... I'm still figuring out how to do that but I'm thinking of moving to video editors for these kinds of stuff instead of relying on RoughAnimator...
I hope you aren't discouraged by this,, I know it isn't the best solution... If you are to follow this kind of workflow, I think a good combination of any drawing software (hopefully with an animation feature) and a reliable video editor to time it to the music (I recommend finding ones with camera pan and motion tween features) is sufficient enough for this.
If you're using an ipad like me, iArtbook is a good free alternative to Procreate with a good animation feature. I have yet to check it out properly but Filmora or Capcut might be a good video editor... If you're using a desktop, I think Krita is good for drawing and animating!
I'm so sorry again if this wasn't really helpful. I will definitely share it if I were to find a better workflow for this. If you'd like to have some storyboard templates, here are some I found on the internet!

I wish you all the best in your plans and practices!
(feel free to ask again if you have any questions, I hope this helps somehow :,))
#pls dont be like me and I hope you do your best making cleaner storyboards aksjdhfalskjdf#my workflow is a mess i am so sorry#i genuinely hope this helped more than discourage#inbox#art progress#wip jail
28 notes
·
View notes
Note
Hi. Why do you screen cap parts of interviews but don't include a source or credit in the posts? I can understand this in cases where the person or site is shitty and you don't want to give them attention or clicks but otherwise I don't understand why you wouldn't just include source or credit info with the screenshots. Is it not similar to people putting your gifs on their blog without proper credit, tagging, or reblogging? The interviewers or sites put work in to do the interview and post it and then you put parts of it on your blog with no credits. It seems similar to the people who save your gifs and then make their own tumblr posts using your work without crediting you. I apologize if this comes across as rude. I'm not trying to be rude. I just genuinely don't understand screen capping parts of interviews and not including at least the name of the interview in the posts so that people can easily find the interview.
mm i do see your point, but ngl i kinda consider this the same thing as when people get grouchy about song titles not being included in the caption of edits like... google is right there. these are all publicly available, (technically, supposedly) professional interviews; people posting the video recordings of scenes don't link to hulu either.
edit: originally i gave a pretty lengthy answer to this one because i wanted to be nice and engage in good faith, but actually what it all boils down to is...
fan content ≠ professional content
personally, i don't mind people reposting my stuff to twitter; another platform that i don't post my gifs to anyway, i mind having my gifs reposted here — without credit no less — onto the same platform as i do, essentially claiming it as their own.
i don't go around reposting the articles onto entertainment's weekly's website under my name and no one here looking at the screenshots thinks i'm the one who interviewed Oliver Stark...
plus while we're at it, i reblog the links to all the articles i post about, it's pretty easy to find since i use the same tags for all bts content.
anyway, while this ask isn't rude, i do feel like it's trying to be something of a gotcha, when frankly, articles are pretty much in the same group as podcasts, video interviews, tiktoks, insta posts and so on... finding them takes less than minute, they are all publicly available, while fan content is either image based which most search engines no longer capable of finding accurately (assuming that people would go out of their way to find the originals instead of just blindly reblogging the posts) or on websites with hidden sources such as ao3. one of them is paid, professional work and the other one is done for free by your fellow fans.
the two things aren't even remotely the same.
#i do link them if i use them for edits though#cuz that just feels too out of context not to#ask#anon
3 notes
·
View notes
Text
A handful of iconing tips & tricks that you may or may not already know.
Always lock your aspect ratio when scaling icons!
Don't scale your icons up- at least, not without a dedicated upscaling program / service. Upscaling with most programs' transform tools will look messy. Try to get the highest resolution scans / images you can and scale down.
Set the filter for your program's scaling tools to bilinear. I'm sure there are other options that get clean results, but whatever you do, don't set it to nearest neighbor, or you'll get crunchy / pixelated results. ( if you want pixelated results, I suggest using a filter instead. )
Windows often come with a free program called Snipping Tool already installed. You can bring up the snipping tool by pressing the Windows key + Shift + S at the same time, and set it to take caps of your screen, individual program windows, or a rectangle you click and drag. I recommend using the lattermost option.
You can also set snipping tool to automatically save any of your screenshots to a dedicated folder, though you will need to launch the program itself to access those settings instead of using the hotkey. This makes gathering caps quick and seamless- just click & drag away!
Many video players will let you use the , & . keys to go through the video frame-by-frame. Helpful for capping icons from animated sources.
You can use some programs' features to save your icons out all at once, layer by layer. What steps you need to take in order to set that up depends on your preferred program's capabilities, but I've made a tutorial for how to do it my program of choice ( Krita ) over here!
#not icons#tips & tricks#tutorial#I might remake this with screenshots sometime later#but for now I want to share my discoveries from over the years...#Save your time ( and your hands! )
2 notes
·
View notes
Text
to: @handsmotif
from: dearimasu
topic: (tumblr) jester mob fanart discussion - response
im aware its tadc fanart but im a clown rescuer and foster parent not a clownwatcher (translation: i only watch whats on cable. and bugbo)
FAQ: "You coudl've just DMed or reblogged their post respoding through the tags. Why did you do this instead?"
sot functiocreensh: M
A: NowMy screenshot function is complicated. To screenshot something i first need to pull out my stylus, which lives inside the phone, and as i pull it, it should vibrate the phone. Once it virbates, a menu shows up for about 15 seconds; if you remain idle, it will go away, leading you to repeat the process (same result as misclicking, which takes the menu away); so! once you've selected one of 6 options, it may or may not screenshot your screen. If it does, you wait about 5 seconds for the options to appear, which then will let you save the image. That image is then saved to the screenshots folder. But here's the thing: they don't let you crop it. you have to go to the screenshots folder and THEN crop it. That then moves the file to a folder called Studio, and THEN you can upload the image to tumblr. But on top of all of that, i use mobile web tumblr. It's... subpar. The post editor bugs out evey single time. Adding inages is hell.
Now, the reason i didnt just teblog my mutual's post and clarified it in the tags is. because i didnt wanna go 'i dont wanna watch this show.' on a post about the show.
7 notes
·
View notes
Text
Hi there!! ♥
I saw a post & reblog by @sirigreenhaven & @juni-ravenhall, and the post made me wanna share something! I hope you don’t mind me mentioning you :)
For people that might not know,
How does one get rid of floating quest/shop/character icons in pretty screenshots?
Luckily, nowadays just pressing F1 on your keyboard makes the UI, most icons & player names disappear, but some things stay floating around even in that case.
So here is a quick rundown of what you can do to clean up a pretty screenshot in under a minute! I’m using a simple screenshot to show how it works as an example :)
Go to Photopea.com! (Free Photoshop, you do not need an account, you can just go edit what you want and then leave again. If you have photoshop installed, use it instead!)
Select the image you want :)
On the left side of your screen, you select the Spot Healing Brush Tool!

You can change the brush size by right-clicking on your image!

Draw over the icon you want gone! Depending on the background this can be more finicky, but if it does give you issues, running over it a few times should clean it up nicely :) The bigger the icons are, the more time it might take.

Aaaand, voilà! No more store, quest or character icons to ruin your screenshots! This works with many other things too; Names, Whole Pets, Clipping Textures, Quest Effects, Interact Overlays etc - I frequently use it to edit out my Discord VC overlay :)

I hope this can help someone or save a few screenshots!! ♥
15 notes
·
View notes
Note
Is the odin one screen? How does it translate 3ds games like smtiv to a single screen?
It is one screen but I have played more DS games on this than the actual 3DS I have. I think because my 3DS, even after I literally opened it up and changed the battery to a fresh one, it STILL fucking only works for a few hours and if I close the lid, I still run out of power within the day. I can't deal with that shit.
(By comparison, I put my Vita into sleep mode, like just tapping the power button, for five months once and when I woke it up, it has like 48% battery. The Vita is amazing.)
So with DS and 3DS games, the thing is that outside a few games that REALLY utilize both screens at the same time, you don't need to be focused on both.
Here, this is what my SMT4 screenshot looked like before I cropped it.
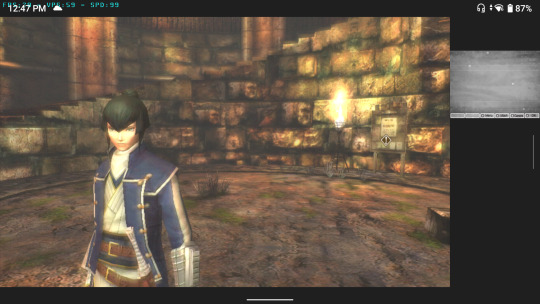
So 80% of my screen (and its a BIG beautiful screen) is the top display and on the right is the bottom. I can actually set this up so the top screen is FULL screen if I want an even bigger image.
Now, one of the things I literally adore about the Odin is the bonus buttons on the back.
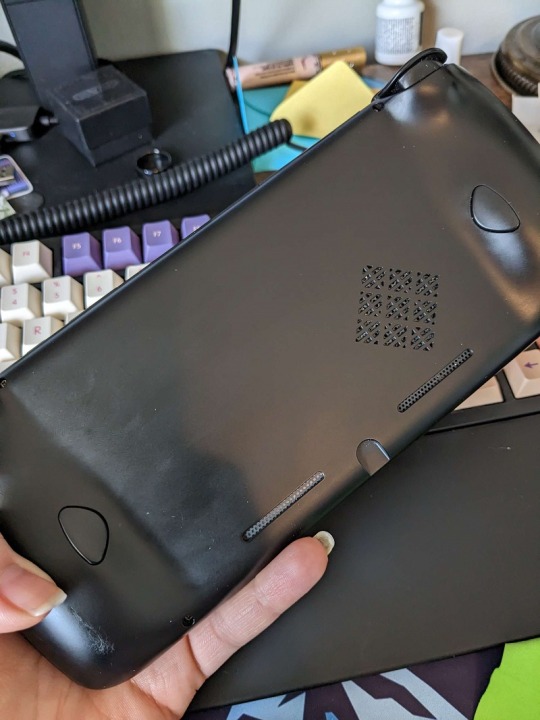
oh christ i need to wipe this down with a microfiber cloth, ignore all the lil dust specks, i've been playing gaymes
BUT my point is, there are two bonus buttons on the back of the device that you can keybind to anything.
When I'm playing normal form factor games like PSP or GBA or Dreamcast, I usually make one my screenshot button and one my save state button.
For DS/3DS, I bind one of these to be my Swap Screen button. So when I press it, the emulator swaps the screen that is taking up the majority of the display so I can focus there instead.
But genuinely? I would wager over half of DS/3DS games use the bottom screen as a pause menu/map/equipment screen/whatever, so you can ignore it until you need it.
So what I get from the Odin is playing DS games at, like, x4 or x5 resolution, and 3DS games at either original resolution on a MUCH more high quality screen, or x2 resolution if I'm lucky.
And a battery that actually lasts when I fucking put it to sleep, Nintendo. What is UP with your batteries?
17 notes
·
View notes
Note
잔 ── hello ੭ ask
ᰋ ː ՞ hello everything is fine? first I would like to say that: your tumblr is amazing and beautiful!
ᰋ ː ՞ second I would like to know if you could tell me how you make your gifs and the quality of them. please. 🪺
hi!! im doing good, hope you are as well. and thank you <3
sorry it took me a few days to get everything together. but here's a basic tutorial of how i make gifs:
to start, i explained here what programs i use and how i choose source videos to gif. that link is actually an old tutorial I put together about my gif making process, but ive changed a few things since then that i think improve quality so i figured i would explain everything instead of just the changes . for the things that have stayed the same ill just be copying and pasting
so there's a few parts that ill go over here:
importing frames
converting frames to layers
sharpening
coloring
saving
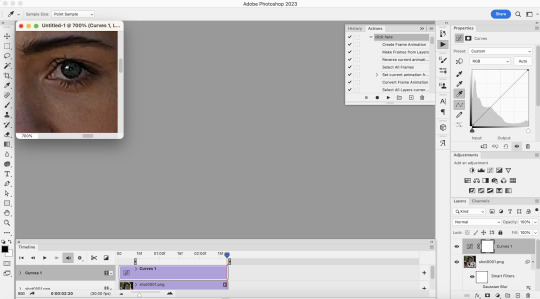
STEP ONE: IMPORTING FRAMES
to start, go to file>script>load files into stack
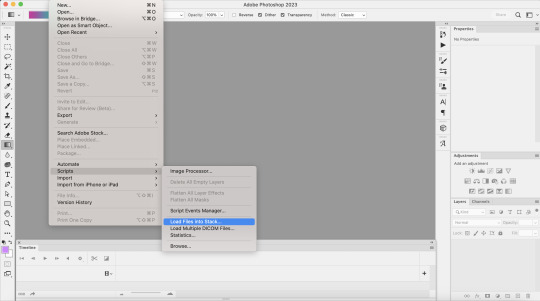
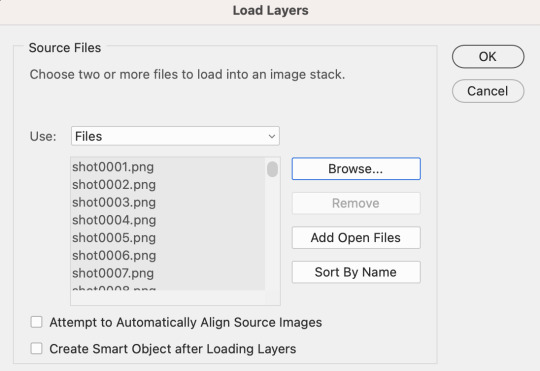
this is where you’re going to load in the screencaps you just took. go to browse, then select the first screencap and hold down shift until you select the last screencap, then hit ok
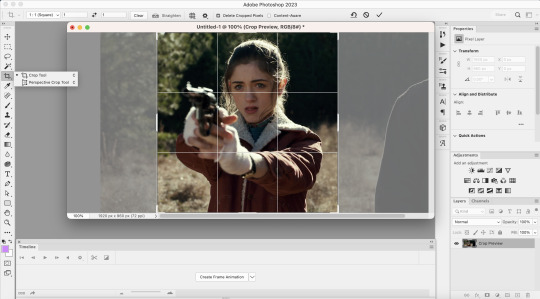
after that, i crop my gifs using the crop tool on the side of the screen. on the top of the screen i usually select square, but the exact size and shape depend on what exactly im making
next I go to image > image size. tumblrs standard width for single gifs is 540p, so thats almost always what you'll use for width
STEP TWO: CONVERTING FRAMES TO LAYERS
so here's where we actually start to make the picture move. to begin, click "create frame animation" at the bottom of the screen. this is what it looks like once you've done that

next, go to the three horizontal lines across from the word “timeline” at the bottom. once that menu opens, click “make frames from layers” at this point the gif is backwards, so you’ll want to go back to that same menu and click “reverse frames.” I forgot to take a screenshot of this point, but you should see more individual frames in the timeline now - however many you imported during the first step
now that your gif’s frames in the correct order, you can set frame delay. select all the frames in the timeline, then right click. i almost always set frame delay to .05, but if i have less than ~20 frames ill set it to 0.06
next, click the symbol in the bottom left corner (you can see it in the photo above) to convert the frames to a video timeline. after this, on the bottom right side, select each layer of the gif under the “layers” tab. right click, then select “convert to smart object.” this is what your screen should look like before converting:

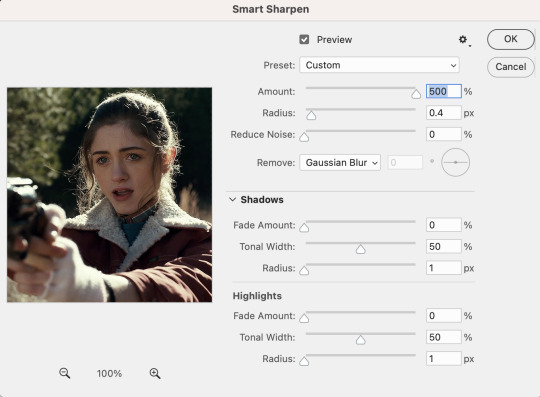
STEP THREE: SHARPENING
once you've converted your layers to a smart object, you can begin sharpening. this is the stage that can really improve the quality of your gif, especially if the source itself wasn't great.
for example, this is what my gif looks like before i begin:

i personally sharpen my gifs four times. to start, my settings are 500% at 0.4px:

next, i repeat the same steps, except my settings are 10% at 10px
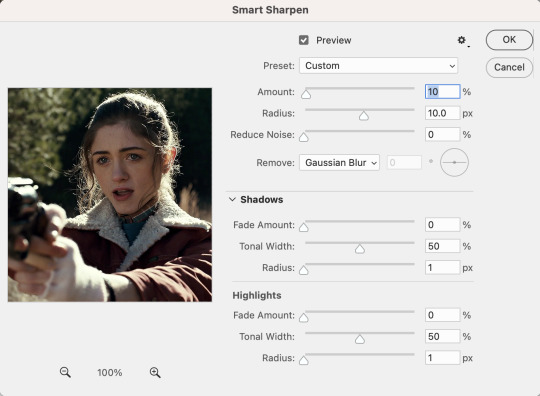
i then repeat those two steps again, so my third sharpen is 500% at 0.4px and my fourth sharpen is 10% at 10px. here's what it looks like after the third:
STEP FOUR: COLORING
so theres really two parts to coloring. first is adjusting the lighting, and second is adjusting the color. the amount of adjusting you do will depend on what exactly you're working on. for example, for this, im not really adjusting the colors, just fixing the lighting.
to add adjustment layers, you can either 1. go to layer>add adjustment layer>select the layer type 2. pick a layer type from the icons on the right side (above the layer list)
i always start with a curves layer. the key to this is using the bottom dropper tool on the right side (see below image) to select the lightest layer in the gif. personally, i always zoom in on the characters eye, because theres usually a white speck from the reflected light. your other option is just clicking "auto" and photoshop will make the adjustment for you.
next is brightness. for this, i almost always just hit auto

next is layers, and i use the same technique mentioned under curves

once these are done, i add a selective color layer specifically to increase black. to do this, i create the layer, go to black, and then increase black to whatever i think looks best. this is another way to try to improve quality, as it can kinda make the gif look sharper
next i added a vibrance layer. for this, i increase both the vibrance and saturation to make the colors stand out more.
after i added the vibrance, i realized that her face looked a little too saturated compared to how i wanted it, so i corrected it with an additional selection color layer in which i went to red and decrease the magenta and yellow a little, and then did the same under yellow. when you gif people, a lot of times you'll have to play around and figure out how to correct skintone, because sometimes adjusting lighting can make it look a little unnatural. in my experience, the easiest way to do this is by adjusting the red and yellow tones either under hue/saturation or selective color.
next, i added an exposure layer to the gif to brighten it a little more. ill usually always add this at the end because so many shows are so dark that giving it that final additional brightness can make a difference
STEP FIVE: SAVING
once you’re done coloring, you can save your gif. to do this, go to file>export>save for web (legacy)
the save settings i use are perceptual, diffusion, colors: 256, dither: 100%, quality: bicubic sharper
also, the gif size limit for tumblr is 10M, so make sure your gifs are all under that size. if they’re too big, you can either adjust the image size on the save page (or while making the gif) or shorten the gif. i would recommend shortening the gif because adjusting the image will decrease the quality
i hope this was helpful!! i tried to explain everything as much as i could, but let me know if theres anything you'd like me to explain more :)
and here's the first and last version of the gif, so you can see them side by side:
(also, i created the "tutorial" gif at the top way after i made the rest of the examples, so i dont have the full tutorial for it. but basically this is what i did:
selective color 3: green > +100% cyan +100% yellow -100% magenta, yellow > +100% cyan +100% yellow -100% magenta, then used the brush tool in black to paint over her face, getting as close to her surroundings as possible to remove the excess yellow
hue/saturation 2: green saturation +45
hue/saturation 3: green hue -60
the text effect i explain here
and the box is made by hitting "command" + clicking on the base layer of your gif > adding a new layer > "stroke" (edit > stroke) > choosing your settings, and then adjusting to the size you need)
2 notes
·
View notes