#html and css tutorial
Explore tagged Tumblr posts
Visit Tumblr Blog
Explore Tumblr blogs with no restrictions, modern design and the best experience.
Last Seen Tumblr Blogs


Fun Fact
After the announcement of the deal with Yahoo!, there were 170K signatures of unhappy Tumblr users petitioning to prevent the sale in 2013.
Text
Convert HTML to Image: A Step-by-Step Guide ✨

Do you want to turn some HTML code you've made that's on your website and have a way to convert it into an image for you to save?
Well, look no further! I too wanted to do the same thing but funny enough, there weren't any straightforward tutorials out there that could show you how! After hours of searching, I finally discovered the solution~!
This is an old tutorial I made 🐼

💛 Set your environment
Before we dive into the conversion process, I'll assume you already have your HTML code ready. What you want to learn is how to turn it into an image file. You should have a good grasp of HTML and JavaScript. For this tutorial, we'll use the following HTML code example:

We won't include the CSS code, as it doesn't affect this tutorial. The JavaScript file (script.js) at the bottom of the body element is where we'll add the functionality for the conversion.
Your page should resemble the following:

As you can see, the "Click me" button will handle the conversion. We aim to convert everything within the div.info-div into an image.
💛 Using the html2canvas JavaScript Library
The html2canvas library allows you to take screenshots of webpages and target specific elements on a screen. Here are the steps to include the library in your project:
The steps to put the library in your project:
Visit the html2canvas website for more information.
Copy the CDN link from here

and include it in a script tag in your project's head tag in the HTML file:

That's it for including the library on the HTML side. Now, let's move on to the JavaScript code.
💛 JavaScript Functionality
Here's the JavaScript code to handle the conversion:

In this code, I want to turn the whole div.info-div into an image, I put it into a variable in const div = document.querySelector(".info-div");.
I also put the button into a variable in const button = document.querySelector("button");
I added a click event listener to the button so when the user clicks the button, it will follow the code inside of the event listener!
You can find similar code like this in the documentation of the html2canvas library:

What is happening here is:
We add the div (or what the element we want to take an image of) into the html2canvas([element]).then((canvas)
Added the image file type url to a variable = const imageDataURL = canvas.toDataURL("image/png"); - You can replace the png to other image file types such as jpg, jpeg etc
Created an anchor/link tag, added the href attribute to imageDataURL
The download attribute is where we will give the default name to the image file, I added "dog.png"
Perform the click() function to the anchor tag so it starts to download the image we created
And that's it!
💛 The End
And that's it! You've successfully learned how to turn your HTML into an image. It's a great way to save and share your web content in a unique format.

If you have any questions or need further clarification, please comfortable to ask. Enjoy converting your HTML into images! 💖🐼
#my resources#coding#codeblr#programming#progblr#studying#studyblr#programmer#html#html css#javascript#neocities#coding tips#html5 tutorial#html tutorial
151 notes
·
View notes
Note
Hiii may i ask how you install fonts on bundlrs? I keep trying and it won’t work, I even looked at how you did it on your template but when I try to change the font it just doesn’t work?🥺 help please

yeah course i'll start from the very beginning
step 1
first i go to dafont and find a font i like and download it
step 2
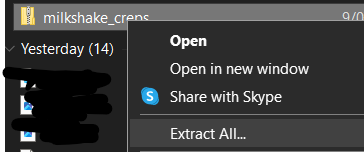
i got to my files and extract all
step 3
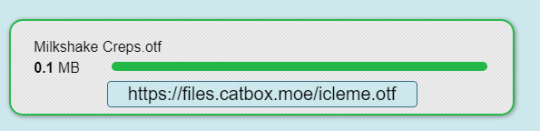
i head my way over to catbox and just drop the OTF or TTF file into the box
step 4
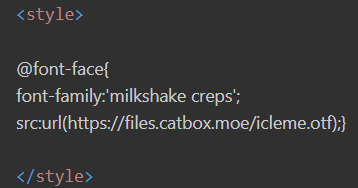
ok now it's coding time, make sure you've got your code inbetween <style> </style> or else it wont work
so what you're going to write is
@font-face{ font-family:'font name'; src:url(ur catbox url);}
step 5
to actually use this font you've got to assign it to something (go to this website if you need extra help)
if you want the font to be assigned to everything you do this
p, r { font-family:font name; }
and if you need it bigger or smaller you can add " font-size:15px; " (15 can be replaced with anything)

hope this helps


#☆ ◟ my resources !#lilay tutorial#tutorials#my resources#talking#noir 📷#bundlrs#css#html css#tutorial
88 notes
·
View notes
Note
Idk if anyone's ever asked you this but how do you go about animating? i.e. what program do you use and what's your process?
I really wanna start animating but it seems like such a daunting task lol
okay lots of words so. under the read more lmao
toon boom harmony is industry standard 2d animation software so thats what i use for freelance work and more finished things like that antibodies animation (though i did the bg painting in procreate) – but totally not the ideal software for just starting out with animation lmao not to mention the fact that its a subscription :/// small sketches like that gif of bones i posted i'll sometimes tackle in procreate or procreate dreams, which are wayy more affordable and user friendly, even if theye a bit less robust.
if youre looking for a combination of robust software with the best price, blender is free and has 2d capabilities that ive messed around with a few times – its super cool, but the interface can be confusing if you've never worked in blender before and it has a bit of a steep learning curve BUT theres also always always always good ol paper and pencil, and nowadays most people own a camera and can access video editing software to stitch things together the best things to start out with are the basics, like a ball bounce animation, different weight objects falling, walk cycles – once you get an understanding of how timing works with animation, then tackling how characters move is the next step. just going into complex characters right off the bat is an easy way to get frustrated FAST lmao starting simple is always the way to go also a lot of cartoons and stuff move A Lot Less than you would think, a 10 second animation at 12 frames per second is almost never going to be 120 different individual drawings – sometimes you can just get away with a few blinks and a bit of lip sync to really sell an animation, so while animation does take a lot of time and effort try not to be too intimidated!!
#also there are a lot of youtube tutorials out there if that helps#im not too experienced with rigging and im hoping to give myself a crash course in harmony rigging sometime soon#maybe after i finish learning html+css lmao i gotta finish that video first#ask#ghostfrog81
51 notes
·
View notes
Text

Web design is my passion
#shitpost#wobbledog#just 1#as you can see my programming class is going very well#html#i know a lot more than i did about html but i can barely do ANYTHING with what i know#fun fact i actually had to put in MORE effort to make it look like this m#quick image tutorial incoming#when you alter the image size in css you use the string img { width: 400px; } (or your desired pixel number or percentage)#and this scales your image accordingly. however.#you can also add a second value of height or width depending on what you started with and the image WILL stretch#so my code looked like this:#img { width: 100%; height: 400px; }#also ☝️ the colour of the title is dodgerblue and i think its the best blue. followed closely by aliceblue
7 notes
·
View notes
Note
Hiii this may seem silly to ask but how do you change the colors of your text to the specific colors you use rather the default palette.
Hi there! Not silly at allll.
The text color options can be limiting if you stick to the default palette. Here’s a simple way to use custom HEX codes for your text:
Highlight Your Text Select the text you want to color while editing your post.
Choose a Default Color Click the text color tool (the paint bucket icon) in the text editor and pick a color from the default palette. I recommend using red since it’s easy to spot.
Switch to HTML Mode Click the gear icon in the top-right corner of the post editor and go to the "Text Editor" section and select "HTML" from the dropdown.
Find Your Text and HEX Code Look for the line of code that corresponds to your highlighted text. It will look something like this: "<span style="color: #ff4930">Your Text Here</span>" The '#ff4930' part is the HEX code for red.
Replace the HEX Code Change the default HEX code (#ff4930 in this case) to your custom color. For example, if you want a jade color, you might use #5da271. Your updated code will look like this: "<span style="color: #5da271">Your Text Here</span>"
The website coolors is an excellent resource for color palates & hex codes
Preview and Save Go back to the visual editor to make sure the color looks right, then save or post!
7 notes
·
View notes
Text
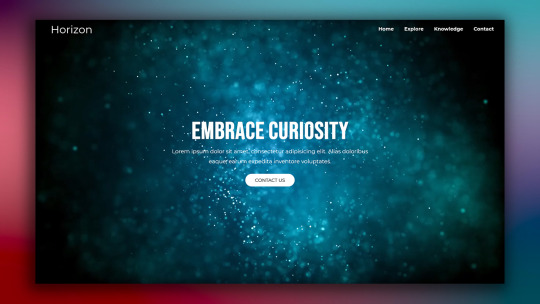
Responsive Web Layout with Video Background
#responsive web design#responsive web layout#css3#html css#divinector#frontenddevelopment#webdesign#html#learn to code#css#html5 css3#html css tutorial#css tutorial#video background
8 notes
·
View notes
Text
pspsps'ing my own fucking brain into coding rn
cmon buddy, you dont get anything rn, but you Did once with a tiny thing. you can do it again. with more. you can pile up the info
you'll be able to create cool pages on neocities and here, cmonnnnn
#zach barks#i want to work on my neocities so bad#im reading tutorials on css and html. im learning abt programing languages#time will pass anyways. autism pls get on my side on this i'll be funnnn
8 notes
·
View notes
Text

CSS Animated Text Overlay
#css animated text overlay#css animation examples#html css animation#css animation tutorial#html css#codingflicks#frontend#css#html#css3#frontenddevelopment#learn to code#webdesign#animation#css image hover effects
9 notes
·
View notes
Text
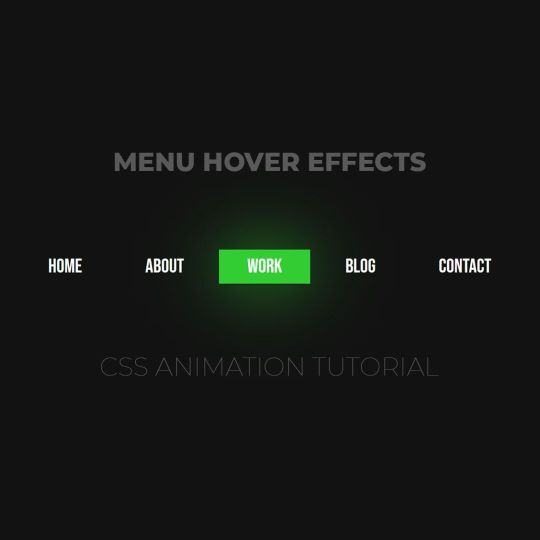
Animated menu hover
#animated menu hover#css menu hover#html css#html5 css3#codenewbies#frontenddevelopment#webdesign#css animation examples#css animation tutorial#pure css animation#css#html css animation#css menu#html css menu
7 notes
·
View notes
Note
hi! i love reading your fics but i specifically love the social media shenanigans in dearly beloathed. i was wondering how you would feel if i took some inspiration from that for a fic of mine because i would love to write something that's very similarly formatted but i wanted to make sure you were fine with that (cause i'm assuming it took some time and effort to come up with) before i did. anyways your writing is awesome and i love reading it
Yes sure of course! I took inspiration from ao3 fics (F1 fandom in particular is stunning at formatting, I have so much respect for their dedication), such as this one (I basically took the formatting from this) and this Twitch streamer AU. If you're posting on ao3, there's the option of playing with HTML/CSS for a more "realistic" socmed interface, for example this one for Twitter which is magic to me. This one is an extremely impressive Discord mockup. An Unauthorised Fandom Treatise is a nice look into mid 2010s Superwholock era fandom whereas F1 rpf and indeed mcyt / streamer stuff is more "modern". Anyways yeah there's a lot of potential in this genre of fics and loads of stuff to check out on ao3 if you wish :) I love scrolling through the Unconventional Format tag because people are just so creative. Good luck with your writing!
#im serious about the f1 thing. go into the f1 tag and search for social media or unconventional format and boom#theres also more simple css with different coloured text which can mimic socmed better than black and white#still the basic italics bold underlines is usually enough to sculpt the look of socmed#text symbols and emojis are also fun. the document is your sandbox yipppee#ao3 has a faq section about their built in html which is very helpful. lots of css tutorials on ao3 too#sorry if this is a lot i get excited about formatting <3#ask box#answered#writing#dearly beloathed#hrm posting on stuff like neocities gives even more customisation... but yeah it takes effort and time#theres also sth i like about simple mockups with no css and minimal html (it's easy to copy and paste / edit)
10 notes
·
View notes
Text
everyday I get closer to realizing my dream of creating a semi-interactive story for my ocs
#I say this after taking the first steps of learning html and css#which has been a lotta fun#idk why coding and js computers in general js kinda stump me#but the tutorial I’m currently following is pretty clear so I’m following along alright 💪💪#after learning html and css I will be learning blender (read I will be doing both at the same time and taking way longer learning both)#bullshitting
7 notes
·
View notes
Note
do u need desktop to get fonts on bundlrs or is it also on mobile?

desktop helps a lot when turning fonts into a link using catbox, but you can also do it on mobile
in the edit section, you type:
<style> @font-face { src:url("font link .ttf / .otf"); font-family: 'font name'; } p, r { font-family: font name; } </style>
the "font-face" thing will import your font, and the "p, r" just stands for "everything in the pastebin" you can change "p, r" to "em, a, strong, code" etc
this sntry really helps explaining all the "p, r, em, a, strong, etc" thing
also, if the font is too big you can add
p, r { font-family: font name; font-size: 18px !important; }
you can change the number to anything you want
hope this helps! if you want links to fonts, i upload a few into the purrfect tale discord (invite here) :D feel free to ping me (@ lavgal) in "other help" if you want me to turn a font into a link for you
also if you don't know how to turn a font into a link, i made a tutorial here


50 notes
·
View notes
Text
How to show/hide elements.
Inspired by a recent conversation with someone on discord that prompted me to make a quick demo on codepen.io I thought I would try to make an actual tutorial out of it. So! For those that are interested, here's how to easily change what different groups see when they're logged in. This tutorial is geared specifically toward JCINK coders, but can easily be adapted to any forum or webpage. Keep reading to find out how.
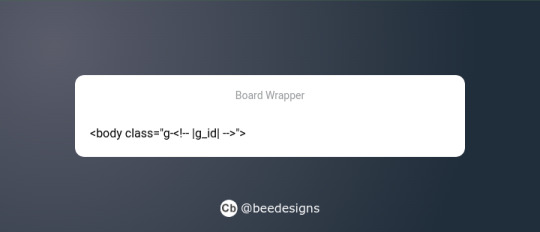
The first step is to add the group id to your board's body. To do this you need to find the <body> tag in your board wrapper and replace it with:
Now you have that in place, you can use it to dictate what different groups can and can't see. This obviously has a lot of use cases, from changing group colours to hiding certain information or forums. The most common use is to swap the navigation options depending on whether someone is logged in or not.
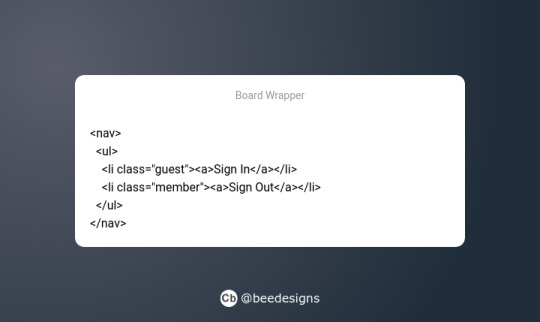
So, you've created your nav menu, and you want guests to see the "sign-in" link, but what about members who are already signed in? You want them to have the "sign-out" link instead. What we're going to do is wrap each link in a class that corresponds to who we want to see it.
Now, in the stylesheet, we're going to add the CSS to tell the board to show or hide the corresponding link depending on who is logged in. We're going to be using JCINK's default group ids #2 for guests and #3 for members.
First for guests:
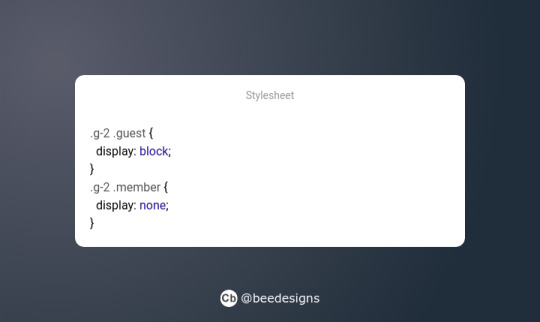
This simply says if a guest (.g-2) is viewing the page, then show anything using the class 'guest' and hide anything using the class 'member'.
Then for members:
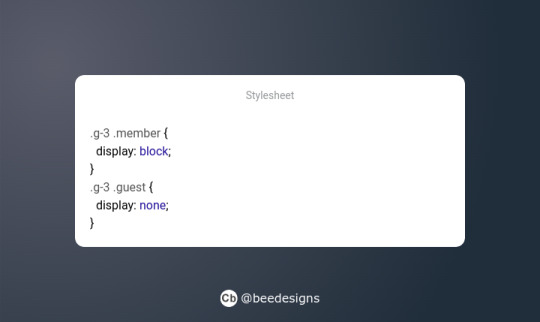
Much like the above, we're telling the site to show anything using the class 'member' and hide anything using 'guest' when the member group (g-3) is logged in.
And that's it! You can see it in action here, where I've combined it with a colour variable to demonstrate how this method can be extended to include pretty much whatever you want. Hopefully it all makes sense! This is my first ever tutorial, and I'm just a baby coder myself. So, if you see a mistake or something that doesn't make sense, please do reach out and I shall try to correct/clarify it. Thanks for reading :)
24 notes
·
View notes
Text

So you have a Tumblr account for a long time (or not), but probably you may have a theme that is not supported anymore by its developer, or they just vanished from the face of this earth.
That means that you might be having problems with the new Neue Post Format (NPF) and how is handling new post types.
For more on what went into creating the Neue Post Format, check out Tumblr's Engineering blog post.
I know some-what about coding and even made some themes for Tumblr, though those were for a client so I can share them here.
The goal of this blog is to help:
Fix an old theme that's not behaving well with the new format.
Update some JavaScript knowledge that's breaking your theme.
Update outdated code to better display your theme.
And whatever, if I can help, I will.
AND if you'd like to give me a tip for helping out, that'd be awesome but not require for me to help you. [Ko-Fi not ready yet!]
Please check the READ.ME
⬇️ Versão Português 🇧🇷🇵🇹

Então você tem uma conta no Tumblr há muito tempo (ou não), mas provavelmente você tem um tema que não é mais suportado pelo seu desenvolvedor, ou o dito cujo simplesmente desapareceu da face da Terra.
Isso significa que você pode estar tendo problemas com o novo Neue Post Format (NPF) e como ele lida com novos tipos de postagem.
Para saber mais sobre o que foi necessário para criar o Neue Post Format, confira a postagem do blog de engenharia do Tumblr (em inglês).
O objetivo deste blog é ajudar:
Corrigir um tema antigo que não está se comportando bem com o novo formato.
Atualizar algum conhecimento de JavaScript que esteja quebrando seu tema.
Atualizar o código desatualizado para exibir melhor seu tema.
E tanto faz, se eu puder ajudar, é nóis.
E se você quiser me dar uma gorjeta para ajudar, isso seria ótimo, mas não é necessário para que eu o ajude. [Ko-Fi ainda não tá pronto!]
Por favor, verifique o READ.MEediting
#tumblr theme#tumblr themes#blog theme#blog themes#tumblr glitch#tumblr layouts#theme resources#theme makeover#theme makeovers#tumblr codes#editor#theme#themes#help#pls help#free content#theme change#brblr#html css#theme commissions#tutorial#tumblr issues#editing#layout
6 notes
·
View notes
Text
HOW TO ADD LINKS TO YOUR BIO

Paste the above code into your bio, replacing the link section with the full link and the text section with your desired text. Be sure not to leave a space when copying over.
If it's breaking, or you're lost, check this post here.
*note: these links will only appear in your mobile/automatic theme. if you have a desktop theme with a custom description this method will still work.
#tumblr themes#themes#tumblr pages#tumblr codes#beginner coding#page theme#tutorial#coding#how to#for beginners#links#css#html#on the old stone wall#tumblr#tumblr tips#links in bio#how to put links in bio
55 notes
·
View notes
Text

Animated Loading Bar
#animated loading bar#css loader#css loading animation#css animation tutorial#css animation examples#html css animation#html css#frontenddevelopment#css#divinector#html#css3#learn to code
5 notes
·
View notes