#how to do 301 redirect
Explore tagged Tumblr posts
Visit Tumblr Blog
Explore Tumblr blogs with no restrictions, modern design and the best experience.
Last Seen Tumblr Blogs


Fun Fact
Tumblr’s website traffic is steadily declining.
Text
A 301 redirect is a status code that informs search engines and web browsers that a URL has permanently moved to a different location. It is a crucial tool in the field of SEO (Search Engine Optimization) to manage website traffic and ensure a positive user experience. Plus, 301 redirects don't negatively impact your SEO when implemented correctly.
Now you must be wondering how to do 301 redirect. Implementing 301 redirects is a simple process. But there are some common redirect errors and what you can do to preserve your website's user experience from them. Let's see -
Remove your 3XX pages from your sitemap
Identify and eliminate redirect loops
Eliminate unnecessary steps in a redirect chain
Keep an eye on your external links
However, you must know that the process will vary depending on the types of pages featured within the redirect process. When used correctly and in moderation, they can help ensure that your website remains search engine-friendly and user-friendly during site changes or updates.
0 notes
Text
Using 301 Redirects to Preserve SEO Value While Reorganizing or Deleting Webpages

Website restructuring is a fairly common occurrence in the digital world. Rebranding initiatives, website mergers, or simply pruning outdated content can lead to significant changes in your site's structure. However, such alterations can disrupt the SEO value of your webpage if not handled wisely. One effective strategy to retain the SEO value while reorganizing or deleting your webpages is through the judicious use of 301 redirects. In this blog post, we will explore what 301 redirects are and how they can help you preserve your page's SEO value during changes.
Understanding 301 Redirects
A 301 redirect is a status code that instructs search engines that a page has permanently moved to a new location. This serves two key purposes: 1. It redirects users who navigate to the old URL to the new location, ensuring a seamless user experience. 2. It transfers the SEO value (link equity) from the original page to the new location, helping to maintain search engine ranking. The "301" part is simply the HTTP status code for this type of redirect. In most cases, the 301 redirect is the best method for implementing redirects on a website that's accessible to search engines.
When to Use 301 Redirects
You should use a 301 redirect when: 1. You're moving your site to a new domain: This will redirect visitors who are trying to access your old site. 2. You're merging two websites or pages: A 301 redirect will ensure that users and search engines are directed to the correct page. 3. You're reorganizing your site's structure: If you're modifying your site hierarchy, 301 redirects can help preserve the SEO value of your old URLs.
How to Use 301 Redirects to Preserve SEO Value
When restructuring your website, it's crucial to set up 301 redirects appropriately to ensure you preserve your SEO value. Follow the steps given below: 1. Identify Pages with High SEO Value: Start by identifying pages on your website that have high SEO value. These pages generally have strong keyword rankings, high traffic, or a significant amount of high-quality backlinks. You can identify such pages using SEO tools, like Google Analytics, SEMrush, or Ahrefs. 2. Create New Webpages: If you're reorganizing your website, create the new pages that will replace the old ones. Make sure they offer as much, if not more, value as the old page to ensure your rankings do not drop. 3. Set Up 301 Redirects: Use your server or CMS to set up 301 redirects from the old URLs to the corresponding new URLs. This usually involves altering htaccess files on an Apache server or performing equivalent actions on other servers or CMS platforms. 4. Verify the Redirects: Once you've set up the redirects, verify them by visiting the old URLs to ensure they correctly redirect to the new location. 5. Monitor Your SEO Metrics: Keep an eye on keyword rankings, organic traffic, and other SEO metrics relevant to your site for the subsequent weeks and fine-tune your strategy as needed
Conclusion
The process of deleting or reorganizing webpages can be a tricky one from an SEO perspective. Still, with the help of 301 redirects, you can maintain the SEO value of your old URLs. And ensure a seamless transition for your users and search engines. Use this guide to properly map your old pages to new ones. Ensuring you don't sacrifice the hard-earned visibility and equity you've built up over time.
3 notes
·
View notes
Text
How many types of redirect methods are there in SEO?
There are several types of redirect methods that can be used to improve the user experience and enhance website rankings.
One example is the 301 redirect, which is a permanent redirect that informs search engines that the original page has moved permanently to a new location.
This is great for preserving the SEO value of the original page and transferring it to the new one.
How do I create a redirect?
You can create a redirect by adding some lines of code to your .htaccess file if you are using an Apache server.
Alternatively, if you are using a content management system like WordPress, there are plugins available that make redirect creation a breeze.
All you need to do is specify the old URL and the new URL, and the plugin will handle the rest for you.
What are the types of HTTP redirects?
The most common :
1. 301 redirects for permanent moves,
2. 302 redirects for temporary moves, and
3. 307 redirects for temporary moves that preserve the original HTTP method.
Each type has its own purpose and uses case, but they all serve the same goal of redirecting users and search engines to the correct page.
What are the 4 types of redirecting behaviors?
Four types of redirecting behaviors.
1. Server-side redirects,
2. Client-side redirects,
3. Meta refresh redirects, and
4. JavaScript redirects.
These behaviors can be used strategically to improve website navigation and provide a better user experience.
In conclusion, redirection methods in SEO are crucial for improving website rankings and enhancing user experience.
2 notes
·
View notes
Audio
Search engine optimization or SEO represents an online marketing plan that helps your company website, as well as services, get more online traffic and leads by enhancing your ranking in search results on search engines like Google, Bing, or Yahoo!
So you have listened to SEO, but you are not exactly sure what it signifies or how it can assist you to fulfill your business objectives. You are not alone,
What does SEO stand for? is one of the most general queries SEO beginners have.
Since 93% of digital experiences begin with search engines, SEO is important.
Now that you will understand what SEO stands for, are you prepared to know how to utilize it? Keep reading to get begun.
What does SEO stand for?
SEO stands for search engine optimization. It is utilized as a key element in many successful digital marketing plans.
What’s SEO?
SEO is the procedure of enhancing your website so it ranks well in search engine results for specific keywords. The procedure of enhancing or optimizing your company website revolves around search engine ranking aspects, which impact the algorithms that power search engine rankings.
What causes SEO, good or bad?
You understand well what SEO stands for, but how do you utilize SEO successfully?
Before you begin utilizing SEO, you require to understand the different ranking factors that power search engine algorithms. While more than 200 ranking factors exist, you can split them into two categories: On-page and off-page.
On-page SEO
On-page SEO concentrates on your website. It’s 100% in your command. You choose your page titles, navigation bar design, and content, for instance. If you like to optimize your on-page SEO, however, you’ll require the assistance of a website developer, copywriter, and marketer.
Off-page SEO
Off-page SEO concentrates on your digital presence. It’s beyond your power. You can’t make someone convey your content or link to your website, for instance. Instead, you must make content that individuals like to share or link to, which often needs outreach to get individuals aware of your content.
Optimizing for on- and off-page ranking factors concerns an assortment of optimization techniques. Before you update your first title tag or compose your first outreach email, it’s important to know the two kinds of SEO techniques: White-hat and black hat.
White-hat SEO
White-hat SEO utilizes authorized and respected optimization techniques. These are the types of techniques that search engines like to see because they don’t try to fool search engines or manipulate loopholes in a search engine’s algo.
A few instances of white-hat SEO techniques contain:
Counting relevant and accurate alt text to an image
Building informative, yet optimized page titles
Fixing 404 errors
Black-hat SEO
Black-hat SEO utilizes tricky and unapproved optimization techniques. These techniques get penalized by search engines because they manipulate search results and harm the user experience. While once the most prominent, black-hat SEO tactics rarely work today due to constant algo updates.
A few instances of black-hat SEO techniques contain:
Buying links
Keyword stuffing
Making 301 redirect chains
For the best outcomes with SEO, optimize your off- and on-page factors with white-hat SEO.
Are you looking to get your SEO off the ground? If yes then it is best to connect with the experts of an SEO company in Panchkula.
3 notes
·
View notes
Video
youtube
Cloudflare Redirects: How to Setup 301 Redirects (URL Forwarding) Using CloudFlare’s DNS & Page Rules
Setting up a 301 redirect at CloudFlare isn’t that self-explanatory…
And since nobody likes reading documentation I figured that a true hero needed to step up and make this easy on the rest of the world.
So here I am, the hero of the internet, come to make your life easier once again – with an article, video & SOP for you to save and use later.
Let’s get after it.
Table of Contents
Cloudflare Redirects: How to Setup 301 Redirects (URL Forwarding) Using CloudFlare’s DNS & Page Rules
How to setup a CloudFlare 301 redirect using “page rules”:
Free Gifts
1. Add Domain to CloudFlare
2. Update NameServers
3. Update CloudFlare DNS
4. Setup Page Rules for URL Forwarding
How to setup a CloudFlare 301 redirect using “page rules”:
The process of setting up redirects using Cloudflare’s DNS is pretty simple. You add your domain, point the CloudFlare DNS records (A record & CNAME record) to Cloudflare’s server, and then setup a URL forwarding rule. That’s pretty much it.
The first two steps of this walkthrough have nothing to do with the actual CloudFlare 301 setup. They are the things you need to do before any of this works. So, if you’ve already added your domain to your CF account and pointed your domain registrar’s nameservers to it – you can skip them and start at Step 3.
1. Add Domain to CloudFlare
At the dashboard (dash.cloudflare.com) of your CloudFlare account click the “Add a site” button, and enter your domain on the next screen.
Once you do that, you’ll be presented with pricing options. Just choose the free one (bottom of screen) and move on.
Cloudflare will scan for existing DNS records and bring them over.
Keep them or delete them – the choice is yours (and depends on what you’re trying to do).
Click continue, and you’ll get your account’s nameservers.
You’ll need to update your current domain’s nameservers, which you can find at the domain registrar – aka the place where you login to see your domain, and probably where you purchased it.
2. Update NameServers
I can’t make a tutorial for updating nameservers at every web hosting company, because there’s like a trillion of them.
But you’ll just need to go to your account > select your domain > choose ‘edit nameservers’ or something similar > paste in the nameservers that Cloudflare gave you in the last step.
Now, it will take anywhere from 10 minutes to 48 hours for those changes to take effect. This is called propagation.
But you don’t have to wait for that to continue. You will have to wait for it for all the things you do next to work, however.
3. Update CloudFlare DNS
This is where the actual process starts.
Go to your domain settings in CloudFlare and choose “DNS”.
If redirecting the whole domain I usually start with deleting the current DNS records that CloudFlare ported over. Don’t do that if you have records in there you need.
Yes, captain obvious I know but… Common sense isn’t always so common in these extremely tense IT settings…
Next, we’re going to add in the CloudFlare DNS records you need for your URL Forwarding to work.
Click ‘Add record’ and add the following information, and click the ‘Save’ button:
Type: A
Name: @
IPv4 Address: 192.0.2.1
Now, click the ‘Add record’ button again, add the following information, and click the ‘Save’ button:
Type: CNAME
Name: www
Target: @
4. Setup Page Rules for URL Forwarding
Navigate to the “Rules” area on the sidebar, then click “Page Rules” and click the ‘Create Page Rule` button.
Now it’s time to set your 301s!
I’m going to setup a 301 redirect to forward all traffic coming to ‘domain A’ to ‘domain B’, but you can easily just change the URL & destination to fit your needs.
Follow these steps:
Enter the URL pattern you want 301ing
Click the dropdown and choose ‘URL Forwarding’
Select your ‘Status Code’ from the drop down (probably 301)
Enter the destination
Click ‘Save and Deploy Page Rule’
I entered the root domain, and put an asterisk ( * ) at the end, which means that if anyone goes to an inner url, like “domain.com/whatever-asdfadf” it will also get redirected.
You can setup inner URL specific 301s too.
Now, I’m simply going to do the exact same thing again – but this time add the www. version.
Same steps from above:
Enter the URL pattern you want 301ing
Click the dropdown and choose ‘URL Forwarding’
Select your ‘Status Code’ from the drop down (probably 301)
Enter the destination
Click ‘Save and Deploy Page Rule’
That’s it! You’re done!
You should be able to go to your forwarded domain, and be taken to the destination.
If it doesn’t work, make sure:
You’ve given enough time for your nameservers to propagate (see step #2)
You clear the CloudFlare cache (if you transferred your domain from another Cloudflare account)
You clear your browser cache, or try in ‘incognito mode’ (press shift + command + n on most browsers (MAC) to open an incognito window)
Free Gifts
Get the free How to setup a Cloudflare 301 Redirect checklist, and run it anytime you need to repeat this process.
3 notes
·
View notes
Text
SEO Interview Questions: Essential Tips for SEO Job Preparation and Acing Interview Questions for SEO
repare For
Here are a few additional SEO interview questions that can help you prepare comprehensively:
What is the role of social media in SEO?
While social media doesn’t directly impact SEO rankings, it can increase brand visibility and drive traffic to your website. Be prepared to discuss how social signals can indirectly affect search engine performance.
What is the difference between a 301 redirect and a 302 redirect?
301 redirects are permanent and transfer SEO value to the new URL, while 302 redirects are temporary and do not pass SEO equity.
What tools do you use for SEO audits?
Mention tools like Screaming Frog, Ahrefs, SEMrush, Moz, and Google Search Console. Be ready to explain how you use them for site audits and identifying areas for improvement.
How would you optimize a website for mobile SEO?
Discuss responsive design, mobile page speed optimization, and the importance of user-friendly mobile experiences.
Conclusion: Mastering Your SEO Interview and Career Growth
SEO interview questions test both your technical knowledge and your strategic thinking. By following these SEO interview tips, practicing common interview questions, and preparing thoroughly for your SEO job preparation, you’ll be well-equipped to ace your SEO interview and move forward in your digital marketing career. Keep learning, stay up-to-date with the latest SEO trends, and build on your experience to become a valuable asset to any organization. With the right preparation and mindset, you’ll be well on your way to landing the SEO job of your dreams.
#SEO_interview_questions#SEO_interview_tips#prepare_for_SEO_interview#SEO_job_preparation#interview_questions_for_SEO
0 notes
Text
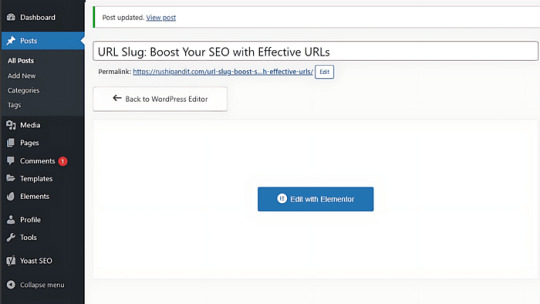
URL Slug: Simple Steps to Boost Your SEO and User Experience

Ever wanted to know why some URLs look clean and simple while others are long, complicated, and confusing? That clean part at the end of a URL, known as an “URL slug,” plays an integral role in how easily people and search engines understand a page’s purpose. In SEO, it does much more than just look pretty — it enhances search engine visibility and user experience. What makes a slug so crucial to SEO, and how can I create slugs that will attract both visitors and search engines?.
What is a URL Slug?
A slug in a URL is what one finds after the domain name. It summarizes the content of a webpage in a few words. Such as in “www.example.com/seo-tips,” “seo-tips” is the slug. It should be descriptive, concise, and perhaps contain relevant keywords. A good slug is what gives both search engines and readers a bright idea about what they will find on the page; thus, it should be one of your website’s necessary structures.
Why do URL slug matter in SEO?
Relevance for Search Engines
Keywords in the URL slug are very important because they help the search engine understand the content of that page. Incorporating keywords informs search engines that your page aligns with current searches, thereby maintaining your page’s prominence in search results.
User Experience
Link Sharing
It means that the web page with a simple URL — clean — will be shared more. Whether you are sharing via social media, email, or in a chat, a well-structured URL looks more trustworthy, which means it will be shared more.
Keyword Optimization
On-page SEO is improved by having your target keyword in the URL slug. The alignment of the URL with the page’s title and content creates an internal coherence for a search engine and helps the page in relevance representation.
Best Practices for Creating SEO-Friendly URL Slugs
It’s much more than the use of keywords — it’s a ‘court of clarity’ and simplicity in relevance to the message being communicated.
Short and descriptive: Avoid extra words. Ideally, aim for slugs that are simple, clear, and focused on a single topic.
Use Keywords: The primary keyword should creep into the slug as naturally as possible. Keyword-stuffing in slugs looks spammy and is not going to do your SEO any good.
Special Characters: Avoid and or?. These characters confuse the browser, and your URL may be unreadable. You don’t need anything but letters, numbers, and hyphens.
Hyphens instead of Underscore: For search engines, a hyphen is a space, so the URL will be more readable. “how-to-bake-cookies” is better than “how_to_bake_cookies.”
Use lowercase letters: Even if your URLs are case sensitive, do use lowercase. This avoids confusion and eliminates duplicate URLs.
Remove Stop Words: Words like “a,” “the,” and “of” are used in most slugs, but in most cases, they are not necessary, making the URLs longer than necessary. Keep it clean and to the point.
Common Mistakes to Avoid
Avoid these common mistakes for user-friendly, SEO-friendly slugs.
Long or complex slugs: The longer the slug is, the harder it is to read. More importantly, however, very long slugs dilute the meaning of the slug itself. Simplicity End.
Keyword stuffing: Loading a slug with keywords can give it a spammy look and may also hurt your SEO. Use one key word.
Urls Changing Very Frequently: It may result in a lot of broken links that will again deplete a lot of traffic and further harm SEO. Try to set the best possible slug and stick to it from day one.
How to Optimise Existing URL Slugs
If you’re optimizing existing slugs on your site, you can do this through the following step-by-step process:
When Optimizing Existing Slugs: If you change the slug of a URL, you would want to set up a 301 redirect to send the old one to the new one and keep it that way, so the SEO value is retained there and users aren’t taken to the broken page.
Track performance: Immediately after doing these changes, track them by using Google Analytics and Google Search Console regarding the traffic and rankings. It will show you whether those changes actually did happen or not.
Real-Life Examples of Good and Bad URL Slugs
Here are some examples to illustrate what works and what doesn’t in URL slugs:
Good: “www.example.com/digital-marketing-tips” is clear, contains relevant keywords, and the user knows at once what is going to be inside the page.
Bad: “www.example.com/p = 123abc456” — non-descriptive, with no keyword description, and does not create a response to either the user or a search engine.
For example, one is short and very easy to read, and the second is vague and not even memorable.
Conclusion
URL slugs are a small but powerful part of your SEO strategy. By keeping them clear, concise, and relevant, you improve both search engine rankings and user experience. Take a look at your website’s URL slugs and see if they’re up to par. By following the tips in this guide, you can create optimized slugs that contribute to your overall SEO success. Ready to improve your SEO? Start refining your URLs today!
For more information, Visit now
1 note
·
View note
Text
How to Fix Crawl Errors and Boost Your Website’s Performance
As a website owner or SEO professional, keeping your website healthy and optimized for search engines is crucial. One of the key elements of a well-optimized website is ensuring that search engine crawlers can easily access and index your pages. However, when crawl errors arise, they can prevent your site from being fully indexed, negatively impacting your search rankings.
In this blog, we’ll discuss how to fix crawl errors, why they occur, and the best practices for maintaining a crawl-friendly website.
What Are Crawl Errors?
Crawl errors occur when a search engine's crawler (like Googlebot) tries to access a page on your website but fails to do so. When these crawlers can’t reach your pages, they can’t index them, which means your site won’t show up properly in search results. Crawl errors are usually classified into two categories: site errors and URL errors.
Site Errors: These affect your entire website and prevent the crawler from accessing any part of it.
URL Errors: These are specific to certain pages or files on your site.
Understanding the types of crawl errors is the first step in fixing them. Let’s dive deeper into the common types of errors and how to fix crawl errors on your website.
Common Crawl Errors and How to Fix Them
1. DNS Errors
A DNS error occurs when the crawler can’t communicate with your site’s server. This usually happens because the server is down or your DNS settings are misconfigured.
How to Fix DNS Errors:
Check if your website is online.
Use a DNS testing tool to ensure your DNS settings are correctly configured.
If the issue persists, contact your web hosting provider to resolve any server problems.
2. Server Errors (5xx)
Server errors occur when your server takes too long to respond, or when it crashes, resulting in a 5xx error code (e.g., 500 Internal Server Error, 503 Service Unavailable). These errors can lead to temporary crawl issues.
How to Fix Server Errors:
Ensure your hosting plan can handle your website’s traffic load.
Check server logs for detailed error messages and troubleshoot accordingly.
Contact your hosting provider for assistance if you’re unable to resolve the issue on your own.
3. 404 Not Found Errors
A 404 error occurs when a URL on your website no longer exists, but is still being linked to or crawled by search engines. This is one of the most common crawl errors and can occur if you’ve deleted a page without properly redirecting it.
How to Fix 404 Errors:
Use Google Search Console to identify all 404 errors on your site.
Set up 301 redirects for any pages that have been permanently moved or deleted.
If the page is no longer relevant, ensure it returns a proper 404 response, but remove any internal links to it.
4. Soft 404 Errors
A soft 404 occurs when a page returns a 200 OK status code, but the content on the page is essentially telling users (or crawlers) that the page doesn’t exist. This confuses crawlers and can impact your site’s performance.
How to Fix Soft 404 Errors:
Ensure that any page that no longer exists returns a true 404 status code.
If the page is valuable, update the content to make it relevant, or redirect it to another related page.
5. Robots.txt Blocking Errors
The robots.txt file tells search engines which pages they can or can’t crawl. If certain pages are blocked unintentionally, they won’t be indexed, leading to crawl issues.

0 notes
Text
How to Fix Crawl Errors and Improve Your Website’s Performance
As a website owner or digital marketer, you might have encountered a frustrating issue: crawl errors. These errors occur when search engines, such as Google, attempt to access your website and encounter issues that prevent them from properly crawling or indexing your pages. Fixing crawl errors is essential to ensure that your website remains visible in search results and functions smoothly for users.
In this blog, we’ll explore the types of crawl errors, how to identify them, and practical steps to fix crawl errors, which will help you maintain a healthy website and improve its overall performance.
What Are Crawl Errors?
Crawl errors happen when search engine bots, also known as crawlers, fail to reach a specific page on your website. These errors can prevent search engines from fully indexing your site, potentially leading to lower rankings or missing pages in search results.
There are two main types of crawl errors:
Site errors: Affect the entire website and prevent crawlers from accessing it at all. These may include DNS errors, server errors, or issues with your robots.txt file.
URL errors: Occur when crawlers can’t access specific pages on your site. Common examples include 404 Not Found errors, redirect issues, or blocked resources.
Regardless of the type of error, it’s crucial to fix crawl errors as soon as possible to avoid long-term negative effects on your site’s SEO and user experience.
Identifying Crawl Errors
Before you can fix crawl errors, you need to know where they are. Fortunately, several tools can help you detect and diagnose these issues:
Google Search Console: One of the most valuable tools for webmasters, Google Search Console provides detailed reports about crawl errors. Navigate to the "Coverage" section to view all the errors that Google has encountered while crawling your website. The report will categorize errors by type and provide specific URLs where issues exist.
Screaming Frog: This SEO tool allows you to crawl your site just as search engines do. Screaming Frog can help you identify broken links, server issues, and other common problems.
Bing Webmaster Tools: Similar to Google Search Console, Bing’s webmaster tool offers insight into crawl issues from Bing’s perspective.
Once you have identified the errors, you can take the necessary steps to fix crawl errors and restore your site’s accessibility.
Common Crawl Errors and How to Fix Them
1. 404 Not Found Error
This is one of the most frequent URL errors. A 404 error occurs when a page is missing or has been moved without updating the corresponding link. It can also happen if a user mistypes a URL.
How to fix it:
Redirect to a relevant page: Set up a 301 redirect from the missing page to another relevant page on your website.
Fix broken links: Use tools like Google Search Console or Screaming Frog to identify and correct internal and external links that lead to non-existent pages.
2. Server Errors (5xx)
Server errors prevent search engines from accessing your site entirely, often due to overloaded servers or misconfigurations.
How to fix it:
Check server logs: Your server’s error logs will provide clues about what went wrong and where.
Optimize server performance: If your site is frequently down due to high traffic, consider upgrading your hosting plan or implementing caching mechanisms.
Contact your hosting provider: For more complex issues, reaching out to your hosting provider might be necessary to resolve server misconfigurations.
3. DNS Errors
A DNS (Domain Name System) error occurs when the search engine cannot connect to your website’s server. This could be due to an issue with your domain settings or server.
How to fix it:
Verify DNS configuration: Ensure that your domain is correctly pointed to the right hosting provider and that your DNS settings are accurate.
Check domain status: Make sure your domain hasn’t expired, which would cause DNS errors.
Wait for propagation: DNS changes can take time to propagate across the internet, so if you’ve made recent updates, allow up to 48 hours.
4. Robots.txt Errors
Your robots.txt file tells search engines which pages of your site they can or cannot crawl. An incorrect configuration could block important parts of your site from being indexed.
How to fix it:
Review robots.txt: Check the content of your robots.txt file to ensure that you aren’t inadvertently blocking critical pages.
Test in Google Search Console: Use the robots.txt tester in Google Search Console to see how search engines interpret your file and adjust as needed.
5. Redirect Errors
Improper redirects can confuse both users and crawlers. For example, redirect chains (where one URL redirects to another, which then redirects to another) or redirect loops (where URLs continually redirect to each other) can prevent crawlers from reaching your content.
How to fix it:
Implement proper redirects: Use 301 redirects for permanent URL changes and ensure that each redirect leads directly to the intended page.
Avoid redirect chains and loops: Check your redirects to make sure they are simple and direct, without causing unnecessary detours.
Best Practices to Prevent Crawl Errors
Fixing crawl errors is important, but preventing them from happening in the first place can save you a lot of time and hassle. Here are some best practices to follow:
Regularly audit your site: Use tools like Google Search Console and Screaming Frog to periodically check your site for crawl issues.
Keep your sitemap up to date: Ensure that your XML sitemap is current and submitted to search engines.
Monitor server performance: Slow or unresponsive servers can cause crawl errors. Make sure your server is optimized and scalable.
0 notes
Text
How to Preserve SEO Rankings When Migrating from Squarespace to Shopify

Migrating your online store from Squarespace to Shopify is a big step toward unlocking better scalability, more eCommerce features, and advanced customization options. However, one of the most critical aspects of migration is preserving your hard-earned SEO rankings. A drop in search rankings can significantly impact your online visibility, leading to a decrease in traffic and revenue. But with careful planning and execution, you can ensure your SEO performance remains intact or even improves post-migration.
Here’s a step-by-step guide to help you preserve your SEO rankings when migrating from Squarespace to Shopify.
1. Back Up Your Current SEO Data
Before starting the migration, it’s important to back up all the important SEO data from your Squarespace site. This includes:
Meta Titles and Descriptions: These are vital for your on-page SEO and should be carried over to your Shopify store.
Image Alt Tags: Ensure all image alt tags are documented so you can reuse them on your new site.
URLs: Take note of the URL structure of your existing site. If possible, keeping your URLs consistent will help avoid broken links.
Google Analytics & Search Console Data: Make sure you export reports from Google Analytics and Google Search Console to have a benchmark for tracking performance before and after migration.
Having this information on hand will make it easier to recreate and optimize your Shopify site without losing the SEO efforts you’ve already invested.
2. Set Up 301 Redirects
URL changes are one of the most common reasons for SEO issues during a migration. If your Shopify store has different URL structures from your Squarespace store, you'll need to set up 301 redirects. This tells search engines to redirect visitors from the old page to the new one.
You require 301 redirect to guide users and search engines to the new or existing URL. Shopify has built-in functionality for setting up these redirects, and doing this will prevent "404 Page Not Found" errors, which can hurt your rankings.
3. Replicate Meta Tags and Descriptions
Meta tags, titles, and descriptions play a crucial role in how search engines index and rank your site. When migrating to Shopify, it’s essential to transfer your existing meta tags over to ensure your pages remain optimized for the right keywords.
On Shopify, you can easily customize meta titles and descriptions for each page under the "Search engine listing preview" section. Make sure you transfer them accurately from Squarespace or, better yet, use this as an opportunity to fine-tune them for improved SEO.
4. Keep URL Structures Consistent (Where Possible)
If possible, maintain a similar URL structure between Shopify and Squarespace to minimize confusion for visitors and search engines. Having the same URLs means you won’t have to rely too heavily on redirects, which is better for SEO.
However, Shopify has some unique URL structures that may differ from Squarespace. For example, Shopify automatically includes certain subfolders like /products/ and /collections/. While you may not be able to change this, setting up 301 redirects will handle any discrepancies.
5. Optimize Your Shopify Store for Speed
Website speed is an important ranking factor in Google’s algorithm, and Shopify offers many options to enhance your site’s performance.To improve your Shopify store's performance, consider these optimization tips:
Compress Images: Use Shopify’s image optimization tools or third-party apps to compress your images without losing quality.
Use a Lightweight Theme: Choose a fast-loading Shopify theme that doesn’t rely heavily on large files or complex code.
Leverage Shopify’s CDN: Shopify automatically uses a Content Delivery Network (CDN) to serve your site quickly to users across the globe.
A faster site will not only enhance the user experience but also help maintain or improve your SEO rankings.
6. Recreate High-Performing Content
If you have blog posts, landing pages, or product pages that perform particularly well on Squarespace, make sure these pages are rebuilt and optimized on Shopify. Content is one of the top-ranking factors for SEO, so retaining high-quality, keyword-optimized content is essential.
Copy your existing content over, but also use this migration as an opportunity to improve it by:
Adding more relevant keywords.
Using Voice Search with conversational Language
Ensuring the content is up-to-date and accurate.
7. Use Shopify’s SEO Apps
Shopify has a robust app marketplace, and many SEO apps are designed to help improve your site’s search rankings. Tools like Plug in SEO or SEO Manager can assist with:
Meta tag optimization.
404 error monitoring.
Sitemap generation.
Structured data integration for rich snippets.
These apps can give your Shopify store a technical SEO boost, helping you preserve and enhance your rankings post-migration.
8. Create and Submit a New Sitemap
Once your Shopify store is live, you’ll need to create a new sitemap and submit it to Google Search Console. Shopify generates a sitemap, which can be found at /sitemap.xml.
After you’ve submitted the new sitemap to Google, it’s important to monitor Google Search Console for any crawling errors or warnings. This will help you catch any potential SEO issues early on and address them before they negatively affect your rankings.
9. Monitor Performance After Migration
Once your migration is complete, you should closely monitor your site’s SEO performance over the next few weeks. Use tools like Google Analytics and Search Console to keep an eye on traffic, rankings, and any crawl errors.
Look for the following:
Traffic Drops: A small dip in traffic is normal right after a migration, but if you see a significant drop, investigate any potential issues with redirects, missing pages, or errors in the site structure.
Keyword Rankings: Track how your important keywords are performing. If rankings drop significantly, check for on-page optimization issues, broken links, or content discrepancies.
10. Leverage Shopify’s Built-In SEO Tools
Shopify is built with SEO in mind, offering many features that can help maintain your rankings post-migration. Use Shopify’s built-in SEO tools like:
Customizable Meta Fields: Easily add meta titles and descriptions for each product or page.
Mobile-Friendly Themes: Shopify themes are mobile-responsive, which is crucial for SEO as Google uses mobile-first indexing.
SSL Certificates: Shopify provides free SSL certificates, which help secure your site and boost your search engine rankings.
Preserve Your SEO Rankings When Migrating from Squarespace to Shopify!
Don't let your SEO efforts go to waste during a platform switch. OyeCommerz specializes in smooth migrations that protect your search engine visibility. Our team ensures a seamless transition from Squarespace to Shopify while maintaining your rankings. Reach out to us today for expert migration services and keep your business growing strong!
Conclusion
Migrating from Squarespace to Shopify doesn’t have to mean losing your SEO rankings. By taking careful steps to back up your SEO data, set up proper redirects, replicate meta tags, and optimize your new store, you can ensure a smooth transition with minimal impact on your search performance. With the added benefits of Shopify’s robust SEO features, you might even see an improvement in your rankings over time!
Know How to Customize Your Store After Migrating from Squarespace
0 notes
Text
How to Preserve SEO Rankings When Migrating from Squarespace to Shopify

Migrating your online store from Squarespace to Shopify is a big step toward unlocking better scalability, more eCommerce features, and advanced customization options. However, one of the most critical aspects of migration is preserving your hard-earned SEO rankings. A drop in search rankings can significantly impact your online visibility, leading to a decrease in traffic and revenue. But with careful planning and execution, you can ensure your SEO performance remains intact or even improves post-migration.
Here’s a step-by-step guide to help you preserve your SEO rankings when migrating from Squarespace to Shopify.
1. Back Up Your Current SEO Data
Before starting the migration, it’s important to back up all the important SEO data from your Squarespace site. This includes:
Meta Titles and Descriptions: These are vital for your on-page SEO and should be carried over to your Shopify store.
Image Alt Tags: Ensure all image alt tags are documented so you can reuse them on your new site.
URLs: Take note of the URL structure of your existing site. If possible, keeping your URLs consistent will help avoid broken links.
Google Analytics & Search Console Data: Make sure you export reports from Google Analytics and Google Search Console to have a benchmark for tracking performance before and after migration.
Having this information on hand will make it easier to recreate and optimize your Shopify site without losing the SEO efforts you’ve already invested.
2. Set Up 301 Redirects
URL changes are one of the most common reasons for SEO issues during a migration. If your Shopify store has different URL structures from your Squarespace store, you'll need to set up 301 redirects. This tells search engines to redirect visitors from the old page to the new one.
You require 301 redirect to guide users and search engines to the new or existing URL. Shopify has built-in functionality for setting up these redirects, and doing this will prevent "404 Page Not Found" errors, which can hurt your rankings.
3. Replicate Meta Tags and Descriptions
Meta tags, titles, and descriptions play a crucial role in how search engines index and rank your site. When migrating to Shopify, it’s essential to transfer your existing meta tags over to ensure your pages remain optimized for the right keywords.
On Shopify, you can easily customize meta titles and descriptions for each page under the "Search engine listing preview" section. Make sure you transfer them accurately from Squarespace or, better yet, use this as an opportunity to fine-tune them for improved SEO.
4. Keep URL Structures Consistent (Where Possible)
If possible, maintain a similar URL structure between Shopify and Squarespace to minimize confusion for visitors and search engines. Having the same URLs means you won’t have to rely too heavily on redirects, which is better for SEO.
However, Shopify has some unique URL structures that may differ from Squarespace. For example, Shopify automatically includes certain subfolders like /products/ and /collections/. While you may not be able to change this, setting up 301 redirects will handle any discrepancies.
5. Optimize Your Shopify Store for Speed
Website speed is an important ranking factor in Google’s algorithm, and Shopify offers many options to enhance your site’s performance.To improve your Shopify store's performance, consider these optimization tips:
Compress Images: Use Shopify’s image optimization tools or third-party apps to compress your images without losing quality.
Use a Lightweight Theme: Choose a fast-loading Shopify theme that doesn’t rely heavily on large files or complex code.
Leverage Shopify’s CDN: Shopify automatically uses a Content Delivery Network (CDN) to serve your site quickly to users across the globe.
A faster site will not only enhance the user experience but also help maintain or improve your SEO rankings.
6. Recreate High-Performing Content
If you have blog posts, landing pages, or product pages that perform particularly well on Squarespace, make sure these pages are rebuilt and optimized on Shopify. Content is one of the top-ranking factors for SEO, so retaining high-quality, keyword-optimized content is essential.
Copy your existing content over, but also use this migration as an opportunity to improve it by:
Adding more relevant keywords.
Using Voice Search with conversational Language
Ensuring the content is up-to-date and accurate.
7. Use Shopify’s SEO Apps
Shopify has a robust app marketplace, and many SEO apps are designed to help improve your site’s search rankings. Tools like Plug in SEO or SEO Manager can assist with:
Meta tag optimization.
404 error monitoring.
Sitemap generation.
Structured data integration for rich snippets.
These apps can give your Shopify store a technical SEO boost, helping you preserve and enhance your rankings post-migration.
8. Create and Submit a New Sitemap
Once your Shopify store is live, you’ll need to create a new sitemap and submit it to Google Search Console. Shopify generates a sitemap, which can be found at /sitemap.xml.
After you’ve submitted the new sitemap to Google, it’s important to monitor Google Search Console for any crawling errors or warnings. This will help you catch any potential SEO issues early on and address them before they negatively affect your rankings.
9. Monitor Performance After Migration
Once your migration is complete, you should closely monitor your site’s SEO performance over the next few weeks. Use tools like Google Analytics and Search Console to keep an eye on traffic, rankings, and any crawl errors.
Look for the following:
Traffic Drops: A small dip in traffic is normal right after a migration, but if you see a significant drop, investigate any potential issues with redirects, missing pages, or errors in the site structure.
Keyword Rankings: Track how your important keywords are performing. If rankings drop significantly, check for on-page optimization issues, broken links, or content discrepancies.
10. Leverage Shopify’s Built-In SEO Tools
Shopify is built with SEO in mind, offering many features that can help maintain your rankings post-migration. Use Shopify’s built-in SEO tools like:
Customizable Meta Fields: Easily add meta titles and descriptions for each product or page.
Mobile-Friendly Themes: Shopify themes are mobile-responsive, which is crucial for SEO as Google uses mobile-first indexing.
SSL Certificates: Shopify provides free SSL certificates, which help secure your site and boost your search engine rankings.
Preserve Your SEO Rankings When Migrating from Squarespace to Shopify!
Don't let your SEO efforts go to waste during a platform switch. OyeCommerz specializes in smooth migrations that protect your search engine visibility. Our team ensures a seamless transition from Squarespace to Shopify while maintaining your rankings. Reach out to us today for expert migration services and keep your business growing strong!
Conclusion
Migrating from Squarespace to Shopify doesn’t have to mean losing your SEO rankings. By taking careful steps to back up your SEO data, set up proper redirects, replicate meta tags, and optimize your new store, you can ensure a smooth transition with minimal impact on your search performance. With the added benefits of Shopify’s robust SEO features, you might even see an improvement in your rankings over time!
1 note
·
View note
Text
Google Indexing Issues: Crawling Error and Duplicate Content
Search Engine Optimization (SEO) is the backbone of online visibility. However, even with the best efforts, website not indexed can encounter issues like crawling errors, thin content, and duplicate content, which can significantly impact their search engine rankings due to Google indexing issues. In this article, we’ll explore these common problems, offer actionable solutions, and share success stories to illustrate how these challenges, including Google indexing issues, can be overcome.
Understanding Crawling Errors in Google Indexing Issues
What are Crawling Errors?
Crawling errors occur when search engines like Google fail to access your website’s pages that are not indexed. These errors can be due to server issues, broken links, or incorrect URL structures. When a page isn’t crawled, it won’t be indexed, leading to Google indexing issues.
Common Causes of Crawling Errors in Websites Not Indexed
Server Issues: If your server is down or slow, Google indexing issues may arise as search engines can’t access your site properly.
Broken Links: Links that lead to non-existent pages can confuse search engines, contributing to Google indexing issues.
Incorrect URL Structures: Dynamic URLs or overly complex URL structures can prevent proper indexing, resulting in Google indexing issues.
How to Fix Crawling Errors in Google Indexing Issues
To address crawling errors, it’s crucial to conduct regular site audits. You can utilize tools like Google’s Search Console to identify and fix these issues. Additionally, consider seeking professional assistance from SEO Site Audit Consulting.
Thin Content: Less is Not Always More
What is Thin Content in Website Not Indexed?
Thin content refers to pages with little or no value to users. This could mean sparse information, duplicate content, or pages lacking unique insights. Issues like thin content can lead to Google indexing issues, which can negatively impact your site’s visibility.
Examples of Thin Content in Websites Not Indexed
Product Pages: Pages that only feature product descriptions without reviews or additional content. Such pages might suffer from Google indexing issues if they do not provide enough unique value to users.
Blog Posts: Short articles that offer no substantial information or engagement. These posts can cause Google indexing issues as search engines may not find them valuable enough to index properly.
Duplicate Pages: Content copied from other websites not indexed or within your own site. Duplicate content often leads to Google indexing issues, as search engines struggle to determine which version to rank and display.
How to Enhance Thin Content
Add Value: Provide in-depth information, user reviews, and unique insights.
Diversify Content: Use a mix of text, images, and videos to engage users.
SEO Services: Professional Content Marketing Services can help enrich your website not indexed content.
Duplicate Content: The SEO Nightmare in Website Not Indexed
Why Duplicate Content is Detrimental
Duplicate content confuses search engines, making it difficult to determine which version of a page is the original. This can dilute your page authority and affect rankings, especially when dealing with Google indexing issues.
Identifying Duplicate Content and Website Not Indexed
Use tools like Copyscape or SEMrush to identify duplicate content on your site. Regularly updating your content and ensuring that each page offers unique value is essential to avoid Google indexing issues.
Resolving Duplicate Content Issues in Website Not Indexed
Canonical Tags: Use canonical tags to indicate the preferred version of a page.
301 Redirects: Redirect duplicate pages to the original content.
Content SEO Strategies: Engaging with professionals can ensure that your content is unique and valuable.
Case Studies: Success Stories in Overcoming SEO Challenges in Google Indexing Issues and Websites Not Indexed
Woolworths (Australia)
Woolworths faced significant website issues that were not indexed due to crawling errors and thin content on product pages. The “Google indexing issues” were impacting their online visibility, preventing their products from appearing in search results. By implementing a comprehensive Technical SEO Optimization strategy, they addressed these “Google indexing issues” and improved their site structure. This overhaul led to a 35% increase in organic traffic within six months.
Air New Zealand (New Zealand)
Air New Zealand struggled with duplicate content across its multiple regional sites, which contributed to “Google indexing issues.” The website not indexed problems were caused by search engines being unable to distinguish unique content, leading to reduced search engine visibility. By consolidating their content and using canonical tags, they resolved these “Google indexing issues” and streamlined their SEO efforts. This strategic move resulted in a 20% increase in search engine visibility.
Shopify (Canada)
Shopify had issues with thin content on their educational blogs. By partnering with Blog Content Writing Services, they enriched their content, resulting in better user engagement and a 15% improvement in page rankings.
Practical Tips for SEO Success in Google Indexing Issues
Regular Audits and Updates
Conduct regular audits to identify and fix issues like crawling errors and thin content. Staying proactive can prevent these problems from affecting your site’s performance.
Engage with Professional Services
Whether it’s SEO Services, Local PPC Management, or AI Consulting Services, professional assistance can provide the expertise needed to navigate complex SEO challenges.
Leverage User-Generated Content in Website Not Indexed
Encourage reviews, testimonials, and community engagement to add fresh, valuable content to your site. Client Testimonials can significantly boost your site’s credibility and rankings.
Conclusion: The Path to SEO Success
Navigating the world of SEO can be daunting, especially with challenges like Google indexing issues, crawling errors, thin content, and duplicate content. These obstacles can hinder your website not indexed visibility and performance if not appropriately addressed. Partnering with a reputable agency like AI SEO Services can make all the difference for those looking to elevate their SEO game. AI SEO Services offer a comprehensive range of solutions, from On-Page SEO Services to Video SEO Strategies, ensuring your website not indexed is optimized for success.
At AI SEO Services, we understand that every business is unique, and so are its SEO needs. Our AI-driven solutions and personalized approach ensure that your website, not indexed, stands out in the crowded digital landscape. Choose AI SEO Services for your SEO needs and experience the difference that expertise and innovation can make.

0 notes
Text
The Role of Mobile Responsive Design in Landing Page Optimization

When it comes to managing an effective search engine optimization (SEO) strategy, few faux pas can be as detrimental as duplicate content. Although not penalized by Google directly, duplicate content can significantly affect your site's SEO performance. This blog post will delve into the impact of duplicate content on SEO and offer effective strategies to address and avoid it.
Duplicate Content: A Saboteur of SEO
Duplicate content refers to substantial blocks of content within or across domains that completely match other content or are appreciably similar. This can be either a result of careless copy-pasting or simply reusing content elements extensively across your site.
It may seem harmless on the surface, but duplicate content can be damaging to your SEO performance in several ways:
1. Dilutes Link Equity: When multiple pages have the same content, external sites linking to your content may link to several versions instead of concentrating on a single page. This dilutes the value of inbound links, weakening the ranking potential of your content.
2. Wastes Crawl Budget: Search engine bots have a finite resource - the crawl budget - which dictates how often and how many of your pages are crawled in a given time. If a large portion of your site hosting duplicate content, search engines could be wasting their time crawling multiple identical pages instead of discovering new or updated content.
3. Confuses Search Engines: If you have multiple versions of the same content, search engines can get confused about which version to index or rank for query results.
Addressing Duplicate Content: Best Practices
Armed with the understanding of potential problems caused by duplicate content, let's explore some methods to address and prevent such issues.
1. Use 301 Redirects
When you move a page or permanently replace it with another, make sure to implement a 301 redirect - essentially a change of address note to Google - to prevent multiple versions of the same page from existing.
2. Utilize the Canonical Tag
The canonical tag is a piece of HTML code that tells search engines which version of a page you want them to treat as the 'official' one during indexing. It can be especially useful if you have multiple URLs with similar content.
3. Carefully Craft Your Content
The best way to avoid duplicate content issues is to create original and unique content for each webpage. Avoid copying and pasting content across pages, and if you need to quote or reference external content. Make sure to do so in small volumes and include proper attributions.
4. Manage URL Parameters
URL parameters like click tracking and certain eCommerce functions can create a vast array of duplicate content within your domain. Make sure to manage these parameters correctly and consider having them excluded from search engine crawling if necessary.
5. Be Cautious with Syndicated Content
If you syndicate your content - that is, allow others to republish your posts. Ensure that they link back to your original content. And use the canonical tag to acknowledge the source page.
3 notes
·
View notes
Text

: / / ACCESSING FILE . . . RYU SOOJUNG ›››
» OCCUPATION: streamer and pinnacle institute student » ALSO KNOWN AS: ame » LAST KNOWN LOCATION: north side, x palace luxury apartments #301
: / / READ MORE . . .
second daughter of first generation a-tier enhanced agents myth (jang shinwoo) and polaris (lee yoorim)
in the spotlight from a young age due to parents' popularity
singlehandedly caused two different nannies to quit
primary ability manifested at 9 years old
saved her parents from assumed assassination attempt via mirror portal
accepted into the pinnacle institute at 21. nepotism?
does not show same dedication to training as her older sister did
streams online under the username 'jjangame'
very charming and popular despite questionable personality ??
: / / ABILITY(IES) . . .
PRIMARY: REFLECTION MANIPULATION
she’s able to manipulate reflections using any reflective surface – mirrors, glass, water, particularly shiny jewelry, etc. if you can see the reflection of something in it, she can manipulate it. this includes making you see something in the reflection that isn’t physically there, but also making those reflections “real.” they’re just illusions, and she can’t maintain them long-term, but they can appear quite realistic. she can even make reflection illusions of people speak, though if she hasn’t heard them talk herself, they will sound strange. she can’t make them appear out of thing air, though – they always emerge from the reflective surface. there are a surprising amount of applications for this power, including harnessing light that reflects off of a surface. for example, if she’s by water at night, and moonlight is reflecting off of it, she can manipulate that moonlight into something more tangible, like an orb of light she can carry in her hands to light up darker areas. the farther away she gets from the original reflection, the harder she has to focus to keep manipulating it. she has also redirected sunlight off of a surface outside directly into someone’s eyes and blinded them before. one of its most useful applications, especially at her time at pinnacle, is her ability to reflect other people’s abilities. to do this, though, the ability has to be visible in a reflective surface. she always carries a compact mirror with her and wears shiny jewelry for this reason. in the case of psychic abilities, or other abilities that can’t be seen, she’s not as consistent. she has to be aware the ability is being used, and the person using it has to be visible in a reflective surface. it also takes additional focus on her part depending on the ability and the user’s skill with it, so she’s working on it. when she "reflects" an ability, it does essentially "uno reverse" it back onto the person that used it. how it effects them depends entirely on how the original user's ability works.
SECONDARY:
PORTAL CREATION she can create portals, but only through mirrors. she can only control where she’ll end up after going through a mirror portal if she can remember the location of another mirror. otherwise, she can picture a general area she wants to go, and wind up coming out of a random mirror nearby. it’s made for some awkward moments. she can take up to two people with her through a portal, but she has to be touching them.
CHARISMA MANIPULATION she’s able to quite literally “turn on the charm,” but only for herself so far – not for lack of trying. there are plenty of likable and popular people she has tried to make less charming, but she’s never noticed a real difference. she gets tired the longer she uses this ability. she uses it often at public gatherings and while she’s streaming, and she can’t stream as long as many other streamers because of it. in theory she could go into a social event without using it, but she feels significantly more insecure when she doesn’t.
1 note
·
View note
Text
🚫 Stop Making These 10 Common SEO Mistakes 🚫
If you’re serious about improving your website’s SEO and boosting your online visibility, then it’s time to address some of the most common SEO mistakes that can hold you back. Whether you’re a business owner or a digital marketer, avoiding these mistakes is key to climbing up the search engine rankings.

Let’s dive into these issues and learn how to fix them! 👇
1️⃣ Unoptimized Image File Names & Alt Text
Images are a critical part of any website, but are you optimizing them for search engines? ❌ Mistake: Using generic image names like “IMG_1234” and not including alt text means search engines can’t understand your images. ✅ Fix: Use descriptive file names and alt text that includes your target keywords.
2️⃣ Low Backlink Quality
Backlinks are still a major ranking factor, but not all links are created equal. ❌ Mistake: Focusing on quantity over quality when it comes to backlinks can hurt your site’s authority. ✅ Fix: Prioritize getting backlinks from reputable and relevant websites in your industry.
3️⃣ Failing to Resolve 404 Errors
Broken links can frustrate users and send negative signals to search engines. ❌ Mistake: Ignoring 404 errors or not setting up proper redirects when removing or moving content. ✅ Fix: Regularly check for 404 errors and implement 301 redirects to ensure a smooth user experience.
4️⃣ Overusing 301 Redirect Hops
Redirects are helpful but overdoing it can slow down your site and confuse search engines. ❌ Mistake: Creating multiple redirect hops instead of direct connections. ✅ Fix: Keep it simple — use a single 301 redirect to the final destination URL.
5️⃣ Leaving Pages as NoIndex
Sometimes, pages that should be indexed remain hidden from search engines. ❌ Mistake: Forgetting to remove NoIndex tags from important pages once they are ready to go live. ✅ Fix: Regularly audit your pages to ensure the right ones are being indexed.
6️⃣ Staging Site Remains Indexable
If your staging site is still live and indexable, it can lead to duplicate content issues. ❌ Mistake: Forgetting to block search engines from crawling your staging site. ✅ Fix: Use robots.txt or password-protect your staging site to prevent it from being indexed.
7️⃣ Not Creating Dedicated Landing Pages
Dedicated landing pages are crucial for targeting specific keywords and user intent. ❌ Mistake: Directing all traffic to a generic homepage or single product page. ✅ Fix: Create custom landing pages that match your keywords and the user’s search intent.
8️⃣ No SSL Security Certificate Installed
Security is now a ranking factor, and having an SSL certificate is a must. ❌ Mistake: Running a site without SSL can lead to lower rankings and trust issues. ✅ Fix: Install an SSL certificate to secure your site and make it more trusted by users and search engines.
9️⃣ Not Creating Custom Meta Information
Your meta titles and descriptions are the first impression users get on search engines. ❌ Mistake: Using default or missing meta tags. ✅ Fix: Craft custom meta titles and descriptions for each page that include target keywords and encourage clicks.
🔟 Not Focusing on a Great User Experience
User experience (UX) is just as important as technical SEO. ❌ Mistake: Focusing too much on technical SEO while neglecting the user experience. ✅ Fix: Ensure your site is fast, easy to navigate, and provides value to users. Great UX can improve your SEO rankings!
💡 Conclusion SEO can be complex, but by avoiding these common mistakes, you can set your website up for long-term success. 🚀 Optimize your content, improve your site’s performance, and focus on providing value to your users. With these fixes, you’ll see your rankings improve, and your traffic grow!
Do you need help with SEO or digital marketing? Join us at Digital Study School at Mohali to master the digital marketing course.
#seo#digitalmarketing#seotips#businessgrowth#websiteoptimization#digitalmarketingstrategy#tumblrmarketing
1 note
·
View note
Text
BetterLinks Pro URL Shortener – Track & Manage Links v2.1.1 Plugin
https://themesfores.com/product/betterlinks-pro-shorten/ BetterLinks Pro – Shorten, Track, and Manage Any URL v2.1.1 Are you looking to elevate your brand’s online presence with seamless URL management? BetterLinks Pro is here to revolutionize the way you create, shorten, and manage URLs. With its user-friendly interface and robust features, BetterLinks Pro helps you cross-promote your products, analyze your marketing efforts, and streamline your link management—all within the comfort of your WordPress dashboard. Why Do You Need BetterLinks? In the digital age, managing URLs effectively is crucial for enhancing your online strategy. Here’s why BetterLinks Pro stands out: 1. Easy-to-Use WordPress Link Shortener BetterLinks Pro integrates effortlessly with WordPress, allowing you to shorten links without leaving your site. This simple yet powerful tool helps you transform long, cumbersome URLs into neat, manageable links in no time, best WordPress Plugin for URL Short. 2. Create Attractive Looking Links Instantly With BetterLinks, you can generate links that not only serve a functional purpose but also enhance your brand’s aesthetics. Say goodbye to generic, unappealing URLs and hello to custom, eye-catching links that make a strong impression. 3. Add Multiple Redirect Types (301, 302, 307) Flexibility is key in URL management. BetterLinks Pro supports various redirect types—301 for permanent, 302 for temporary, and 307 for temporary redirects. This versatility ensures your links function as intended, improving both user experience and SEO. 4. Analyze & Track Your Marketing Campaigns Understanding how your links perform is vital for optimizing your marketing strategies. BetterLinks Pro offers comprehensive analytics to track clicks, conversions, and other critical metrics, enabling you to fine-tune your campaigns for better results. 5. Enhance Your Affiliate Marketing Strategies Affiliate marketers will find BetterLinks Pro particularly useful. It simplifies the process of managing and tracking affiliate links, making it easier to monitor performance and maximize your earnings. 6. Manage Your Links Directly in Gutenberg Editor BetterLinks Pro’s integration with the Gutenberg Editor streamlines your workflow. You can manage and insert shortened links directly into your content without any hassle, enhancing your productivity. 7. Reduce Link Load Time with Optimized Queries Speed matters. BetterLinks Pro optimizes queries to ensure your shortened links load quickly, enhancing user experience and reducing bounce rates. 8. Monitor Marketing Campaigns with UTM Builder The UTM Builder feature allows you to create customized tracking parameters for your URLs. This functionality is crucial for monitoring the performance of various marketing channels and understanding what drives traffic to your site. 9. Prevent Bot Traffic and Clicks with Bot Blocker Protect your links from fraudulent activities with the built-in Bot Blocker. This feature helps prevent bots from generating fake clicks, ensuring your analytics remain accurate. 10. Create Unique, Branded, Shortened Links Stand out from the crowd with branded links that reflect your business identity. BetterLinks Pro enables you to craft unique URLs that reinforce your brand and enhance user trust. 11. Share Your Shortened Links with One Click Efficiency is key. With BetterLinks Pro, you can share your shortened links directly from the WordPress dashboard with just a click, saving you time and effort. 12. Manage Your Links with an Interactive Interface The intuitive drag-and-drop interface makes link management a breeze. Organize and modify your links quickly and easily, thanks to BetterLinks Pro’s user-friendly design. 13. Generate UTM Code Automatically in a Second Need to add UTM parameters to your URLs? BetterLinks Pro’s UTM Builder automatically generates and appends the necessary codes, streamlining your tracking process. Conclusion BetterLinks Pro is a game-changer for anyone looking to streamline their URL management and marketing efforts. Its array of features—from customizable link shortening to advanced analytics and bot protection—makes it an indispensable tool for digital marketers, affiliate managers, and brand owners alike. By integrating BetterLinks Pro into your workflow, you can enhance your online presence, improve your marketing strategies, and achieve your business goals with greater efficiency. FAQs 1. What makes BetterLinks Pro different from other URL shorteners? BetterLinks Pro offers advanced features such as multiple redirect types, UTM building, and bot protection, which are not typically found in basic URL shorteners. 2. Can I use BetterLinks Pro with any WordPress theme? Yes, BetterLinks Pro is compatible with all WordPress themes, ensuring seamless integration regardless of your website’s design. 3. How does the UTM Builder work in BetterLinks Pro? The UTM Builder allows you to input tracking parameters and automatically adds them to your URLs, helping you monitor and analyze your marketing campaigns effectively. 4. Is BetterLinks Pro suitable for affiliate marketers? Absolutely. BetterLinks Pro’s features, such as link tracking and management, are tailored to enhance affiliate marketing strategies and improve performance monitoring. 5. Can I prevent fake clicks on my links with BetterLinks Pro? Yes, BetterLinks Pro includes a Bot Blocker feature to help prevent fraudulent clicks and ensure your analytics are accurate. https://themesfores.com/product/betterlinks-pro-shorten/ #WordpressPlugins
0 notes