#how to check browsing history on wifi router
Explore tagged Tumblr posts
Visit Tumblr Blog
Explore Tumblr blogs with no restrictions, modern design and the best experience.
Last Seen Tumblr Blogs


Fun Fact
Tumblr has 4 main sources of revenue.
Text
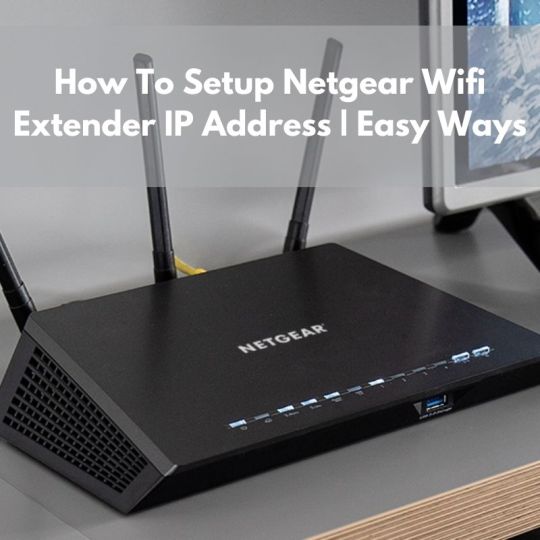
Netgear Wifi Extender IP Address | Get The Fixed
If you are unable to find the Netgear wifi extender IP address on your own. Then you are at the right place, here you will get to know How to Netgear WiFi Extender login? Netgear WiFi extender is a wireless repeater, which is placed between the base router, and the area where you want better wireless coverage. It replicates the wireless signal from your router to boost its range.
Netgear extender acts as a WiFi booster, and use to faster the speed and new features to your WiFi network. If you don’t know what is Netgear wifi extender IP address. And how to use the Netgear WiFi Extender login, then the following are instructions for the same. Here you will get to know how you can easily access the default IP address of your Netgear range extender. There are many users, who are unable to set up the WiFi extender through IP address. So before setting up the Netgear WiFi extender, you should get familiar with what is Netgear WiFi Extender login.
What is the Netgear wifi extender IP address?
The default Netgear wifi extender IP address is 192.186.1.250. You can set up your extender through the web browser and IP. And you can use the WiFi extender IP address as a substitute for the default URL.
You can get your device model IP address from the user manual of the device. Hope now you are familiar with the Netgear WiFi Extender login. And now it is time to learn how to use this. Below are the instructions for how to log in with the Netgear wifi extender IP address 192.168.1.250.
How to Log in with the Netgear wifi extender IP address?
You can easily use the Netgear wifi extender IP address for the Netgear WiFi Extender login. Doing this is not a complicated task, it is simpler than you think. You can go through the following steps if you don’t know how to do so.
Connect the Netgear wifi extender with the help of an ethernet cable.
After this, open the web browser on your computer.
Now on the search field of the browser, enter the Netgear wifi extender IP address192.168.1.250.
Also, make sure that you have entered the correct IP address, in order to easily finish the login process for the Netgear WiFi extender.
Now search for the Extender login page, and fill in your default login credentials, i.e., username and password.
After this, a pop-up message will appear on the screen, which notify you that the login process is complete and you can use the Netgear extender quickly.
Netgear WiFi Extender login through the Android
You can also log in to the Netgear wifi extender IP address, by using your Android device. Below is the guide for doing this.
Open the browser on your phone.
Then enter the Netgear wifi extender IP address 192.168.1.250.
After this, click enter, and then the login page of the extender will appear.
Now fill in your username and password, and click on login.
With this Netgear WiFi Extender login process will get completed.
How to fix the Netgear wifi extender IP address 192.168.1.250 not working?
If the IP address of the WiFi extender is not working properly, then simply obey the below troubleshooting to rectify Netgear wifi extender IP address 192.168.1.250 not working issue.
Before continuing with further steps, make sure that your WiFi extender and router are connected properly, and get a continuous power supply.
Then check that the LED lights on the extender are stable.
Once your device, which you are using to access the Netgear wifi extender IP address is connected to Netgear_Ext.
And also, ensure that both of the devices are placed within the range of each other.
Do not use the browser with junk files, caches, cookies, and browsing history, for Netgear WiFi Extender login.
Restart the device, which you are using to access the Netgear wifi extender IP address. And when your device is restarting, use another browser to log in.
Also, close all the unwanted tabs, and make sure that you have the static IP address. And power cycle the device, along with the extender, and the WiFi router.
Sum up
Certainly, these methods will help you with how to get access to the Netgear wifi extender IP address. So before seeking help from someone, go through the above guide for Netgear WiFi Extender login.
Have you ever found yourself stuck with a Netgear wifi extender IP address not working issue? If yes, then consider checking the connection between the range extender, and the host router. You can also get in touch with Netgear experts if the above instructions are unable to assist you with a Netgear WiFi Extender login. They will provide you with full assistance, and also help you with all the issues related to the WiFi extender, including Netgear wifi extender IP address.
1 note
·
View note
Link
how to check browsing history on wifi router telstra? how to check browsing history on wifi router
0 notes
Text
6 Ways Router Price Can Make You Invincible
6 Ways Router Price Can Make You Invincible
Best Top 5 WiFi Router Price in Your Budget Router Price Friends today’s world has become very digital, and the Internet cannot work without anybody, because today our work is through the Internet, such as shopping, billing, mobile, and DTH recharge, etc. And why not even because this Internet has made our lifestyle so easy. Not only can we do a lot of work from home these days, through the…

View On WordPress
#5g wifi router#best wifi modem router combo#best wifi router 2021#best wifi router for large home#best wifi router for spectrum#best wifi router for xfinity#cheap wifi router#cisco wifi router#costco wifi router#gigabit wifi router#google nest wifi router and point#google nest wifi router review#how does a wifi router work#how much is a wifi router#how to change wifi router password#how to check browsing history on wifi router#how to check wifi router history#how to connect wifi router#how to fix wifi router#how to reset wifi router password#how to restart wifi router#how to set up xfinity wifi router#linksys wifi router#mesh wifi vs router#mini wifi router#mobile wifi router#netgear cable modem wifi router combo c6250#netgear nighthawk 6-stream ax4300 wifi 6 router#netgear nighthawk cable modem wifi router combo c7000#netgear nighthawk cable modem wifi router combo c7800
0 notes
Note
About religions that are incompatible with shifting, Jehovah’s Witnesses are not allowed to shift because of how they interpret Luke 11:24-26. Meditation techniques that clear the head are considered invitations for demon possession, and are considered a form of spiritism. If a member is found doing that kind of thing, it could lead to shunning and excommunication. Any JWs who want to shift should be careful that they’re not discovered.
I did not know that, thank you very much for telling me!
I’m so sorry because I know/think this is disrespectful but,, please be careful in that religion if you’re part of it because it’s,, such a cult. I love y’all and want you to be safe!!
How to hide you’re a shifter
You do not need to hide you’re a shifter unless there’s a reason. I cannot stress this enough. Do not hide unless there is a significant reason.
Please do not get in the habit of hiding it without reason. Shifting isn’t wrong, it’s not evil, and I’d rather not accidentally encourage secretive, worrying behavior about what we’re doing. Someone pointed out that telling shifters absolutely not to tell anyone is cultish behavior and I agree.
You can tell as many people you want if you know they’re tolerant. You can tell anyone if you know they won’t put you in danger, mentally or physically or anything. Just be safe.
But if you’re in a situation you need to hide shifting or spirituality or any activity online for your safety, here are some tips off the top of my head/stuff I remember from the Internet that you can feel free to correct me on:
Incognito
Now, I don’t think Incognito mode hides your activity from the router history tech savvy people can check. But, search history vanishes from your device, I believe.
Use different browsers
Keep the automatic or a more recognizable one—safari, chrome, whichever—and download another one to use for more sensitive stuff like shifting. Don’t keep it on the bar of favorite or easily accessible apps. If someone checks your search history, they’ll be more likely to only check the obvious one. Personally, I use DuckDuckGo or Ecosia. Also hide the sensitive browser tab in other app folders if you can.
Clear your search history only of suspicious stuff
Don’t clear your entire search history—that looks suspicious when it’s squeaky clean when someone is trying to check. Try and go through and clear only spirituality, magickal, and shifting pages, and the search history page itself. Try to clear it often so you don’t miss something. Maybe clear at the end of every day or every couple hours.
Drown out unhideable stuff
You’re in a shifting discord? Join a bunch of discords the people around you would approve of. Try and place the shifting one not at the exact end but fairly close to it, it’s like a magic spot where people really start to skim when you’re scrolling through a bunch of stuff. Same applies for amino, etc. You have an app for meditation? Use a shortcut that opens the app, make it look like a calculator or a background app or soemthing, match name it’s name to the fake app icon. If it’s a calculator probably don’t put it next to your actual calculator. If you can’t shortcut the app, or even if you can, hide it in a mobile game folder or something, near the bottom of the screen and after swiping a few times, or hide it in a folder with boring background apps and make sure to name it utilities or whatever. Surround it with similarly colored apps.
Vpn?
This is probably more for anonymous browsing online but it might possibly hide it from the router history? I am really not sure though, so go and search it yourself.
Free wifi places?
I think if you’re connected to a different wifi network it won’t show on your router? Still don’t quote me on that. So maybe (assuming COVID is safe in your area) go for a walk, sit around a Starbucks or something, and use the free wifi to search about spirituality and shifting and such.
Proxy website?
I don’t understand what a proxy website or whatever is so I have no idea of this is legitimate or not but this website talks about it??
#shifting#shiftblr#reality shifting#jehovah’s witnesses#anti jehovah’s witnesses#is that what I should tag??#does it need to be tagged???#privacy#online safety tips#online safety#unreality#cult mention#cult cw#religion cw#religion mention#privacy tips
50 notes
·
View notes
Text
Protect Your Browsing/Data Sharing
For free, because in this house I don’t believe in making people pay for basic human rights.
I’ve decided to share my browsing protecting tips here. Digital security is usually quite expensive, but it doesn’t have to be! In this day and age, you’ll be told to watch out for home-born hackers and ‘hacktivists’ accessing your data, but I gotta tell you, what your own governments and ISPs are doing makes this more important (aka: they’re worse).
I know with all the TIKTOK IS SPYING ON YOU stuff, a lot of my friends have come to me seeking some advice on this. This is also great if you don’t want parents checking your browsing >_> just sayin’
If anyone has questions - drop me an ask! I’ll always answer for this topic. I am also happy to ‘expand’ on one of these suggestions if they’re unclear :)
Note: This works under the assumption you have your default ISP provided router and can’t get another one for whatever reason. I will advise that if you can get an additional router, do so! Try to avoid the one the ISP has provided to you.
Additional Note: This is not ‘optimal’. There is no such thing in security – everything has a backdoor.
Let’s get cracking! This is a long, and thorough post, but I _do _have a pdf somewhere if you want it because it looks nicer :*)
Use Tor to browse.
There you go, there’s my advice leaves
https://support.torproject.org/ to Download/Install/Run.
Don’t change anything, except maybe using Tor in ‘bridge’ mode.
Okay, you can use other browsers (see: Chrome/Firefox), but they are not as secure as Tor.
USE A VPN IF YOU ARE GOING TO USE TOR! I prefer Firefox (extensions + good security)
________________________________________________________________
Install the following extensions if you have Chrome or Firefox:
Privacy Possum
Stops tracking cookies. PSA: Cookies are not evil, certain cookies can be.
Firefox: https://addons.mozilla.org/nl/firefox/addon/privacy-possum/
Chrome: https://chrome.google.com/webstore/detail/privacy-possum/ommfjecdpepadiafbnidoiggfpbnkfbj
Ghostery
Stops tracking adverts and cookies. Why do I need this in addition to Privacy Possum? Ghostery specifically looks at tracking cookie ads. It’s like adding MOAR POWAH to Privacy Possum.
Firefox: https://addons.mozilla.org/nl/firefox/addon/ghostery/
Chrome: https://chrome.google.com/webstore/detail/ghostery-%E2%80%93-privacy-ad-blo/mlomiejdfkolichcflejclcbmpeaniij?hl=nl
HTTPS Everywhere
Enforces HTTPS. If you look next to the URL in your browser, you’ll see the little lock which indicates the specific URL is secure and uses HTTPS. Many websites still use the old HTTP, which is not as secure and you should NEVER EVER VISIT AN HTTP SITE ITS LIKE READING A BOOK OVER SOMEONE’S SHOULDER, thank you.
Firefox: https://addons.mozilla.org/nl/firefox/addon/https-everywhere/
Chrome: https://chrome.google.com/webstore/detail/https-everywhere/gcbommkclmclpchllfjekcdonpmejbdp?hl=nl
Adblock Plus
Foff, ads.* Firefox: https://addons.mozilla.org/nl/firefox/addon/adblock-plus/
Chrome: https://chrome.google.com/webstore/detail/adblock-plus-free-ad-bloc/cfhdojbkjhnklbpkdaibdccddilifddb
________________________________________________________________
DNS Settings
Ideally, you should change this on your router. ISPs use a default DNS – you don’t want to use anything those bastards say you should use.
Use Cloudflare or OpenDNS:
Cloudflare is more secure overall and keeps up to standards in addition to not storing your data, whereas OpenDNS is great at avoiding malicious websites, just take your pick really 😊There are a ton of other options, feel free to google ‘free DNS servers’. Google has it’s own as well, but, yaknow, it’s Google.
Cloudflare
Primary Server: 1.1.1.1
Secondary Server: 1.0.0.1
OpenDNS
Primary Server: 208.67.222.222
Secondary Server: 208.67.220.220
Add these to your router settings:
In a browser, go to http://192.168.1.1/ or http://192.168.1.0/ (it varies per router). This will lead to your router’s configuration portal. Don’t have a router with a configuration portal? Throw it in the trash and tell your ISP they suck for giving it to you.
Login to the admin portal. If you have not configured this or set a password, try the default combinations: usernames are usually ‘admin’ or blank, the passwords are usually blank, ‘admin’, or ‘1234’.
Each router is different, navigate to where it asks for DNS values or servers, and enter the above addresses. You will see ‘Static’ near the DNS options, select it. This also ensures you’re in the right place. If you’re not sure what to do, look up the model/make of your router and check how you can change DNS.
Whilst you’re at it, change your WiFi password from the default one, and create a proper password for the WiFi portal login. If these two things are kept as default, all these protection methods are pointless as it is easy to crack your router passwords.
Can’t do this on your router because your parents are ds?* No worries! This can be done on your device! :) Yeah, I know how parents work.
Windows OS
Go to Control Panel <Network and Internet < Network and Sharing Center
Click on the link next to “Connections:”* Click “Properties” in the dialogue that pops up.
Select Internet Protocol Version 4 < Click Properties < Select “Use Following DNS Servers” < Enter the primary and secondary server addresses
Do this again for Internet Protocol Version 6 in the list.
Boom. Windows is so nice to make this easy.
Mac OS
Go to Apple Menu < System Preferences < Network
Select the Network you’re connected to
Click Advanced
Select DNS Tab
Click the + button < Enter chosen DNS < Save
Linux OS
I’m going to assume if you’re using Linux, you know how to use the terminal and are using a modern Linux system. Enter these line by line. There are many ways to do this (Google is your friend)
· sudo apt update
· sudo apt install resolvconf
· sudo systemctl status resolvconf.service (check that it is running)
· sudo systemctl start resolvconf.service (to start it, use ‘enable’ instead of ‘start’ to enable)
· sudo nano /etc/resolvconf/resolv.conf.d/head
· nameserver YOUR.DNS.ADDRESS.HERE
· nameserver YOUR.SECOND.DNS.ADDRESS.HERE
· sudo systemctl start resolvconf.service
Android
Oh yeah, you can do this on phones too wiggles eyebrows. Note, if you’re using a VPN it will lock you out of editing this. Turn it off, edit your DNS, turn it back on. This can be tricky with mobile devices that have not been jailbroken (I don’t advise doing that if you have no clue what you’re doing).
Go to Settings < Connections < WiFi
Select the gear icon next to your current WiFi
Select Advanced < Ip Settings drop-down < Static
Enter chosen DNS options under “DNS 1” and “DNS 2”
iPhone
Go to Settings < Wi-Fi
Select the arrow button next to your current WiFi
Select DHCP tab, scroll down to DNS
Select DNS, and enter your DNS servers
TEST YOUR DNS IS WORKING:
OpenDNS: https://welcome.opendns.com/ (You’ll see a “Welcome to OpenDNS” message”
Cloudflare: https://www.cloudflare.com/ssl/encrypted-sni/ (You’ll see check marks for all fields)
________________________________________________________________
Turn of WPS on router. Enable encryption on router.
If you can access your router portal, find any sort of toggle or field that says “WPS” and disable it. WPS= bad.
Wherever there is an option for WPA2 (or higher) to enable, enable it.
Enable the firewall on your router and Operating System – ALWAYS. If you disable this, you’re disabling an additional layer of security. Firewalls are confusing things and a royal pain in the ass to configure, but having the default is better than having nothing.
________________________________________________________________
Configure your browsers.
Browsers have most things enabled by default, including tracking your location, turning your microphone on etc. Let’s disable that nonsense and make them ask you for permission because it’s 2020.
I’m using Chrome as an example below because it is INFAMOUS for this. Essentially, go through your browser and scroll through settings you don’t like.
Go to the little menu icon < select “Settings”
Sign out if it’s linked to your Google account. Let’s not give Chrome a reason to track your browsing history for your account >_>* Disable EVERYTHING:
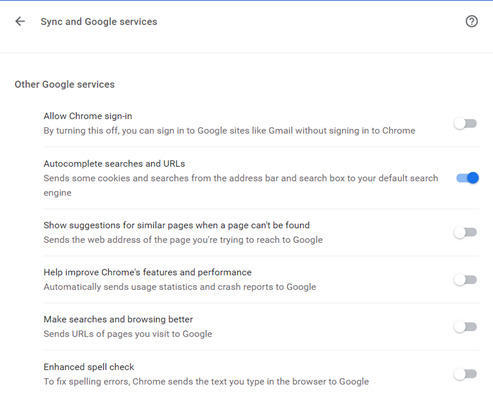
Here, I turned off everything I would find annoying except autocomplete because I’m lazy.

NICE TRY GOOGLE, YOU CANT SAVE MY CREDIT CARD. (Seriously, don’t ever EVER autosave passwords/payment info).


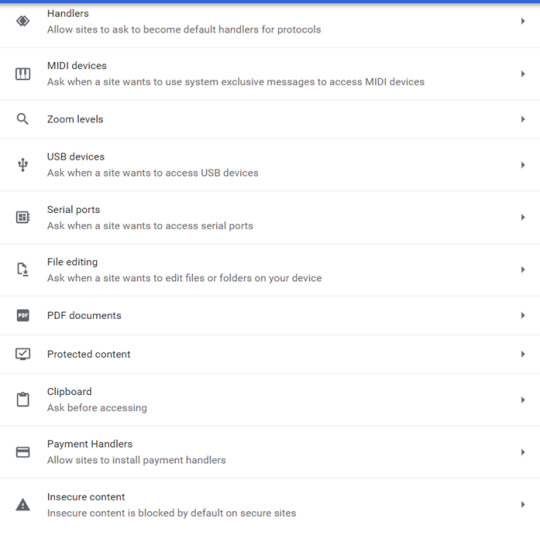
The trick is to balance ease of use with security. These may vary from person to person, in general though, if there’s a setting ‘ask before etc.’ select that over ‘allow’.
As a rule of thumb:
NEVER ENABLE FLASH (not even an ‘ask before’), NEVER ENABLE LOCATION (ask before is fine, but at your own risk), NEVER ENABLE CAMERA (ask before is fine, but at your own risk, use the desktop version of an application over the browser version), NEVER ENABLE MICROPHONE (same as camera)
________________________________________________________________
Additional Tipss
Check every single social media setting. You should disable anything that accesses your privacy, if possible.
Cover your camera with a sticker. Disable it unless it’s needed
Disable your mic unless you need it.
Turn off Bluetooth/NFC when you don’t need it.
Have two separate networks/Wi-Fi for smart devices and personal devices.
Always use two/multi-factor-authentication for every single app, site, device etc. that you can.
Biometrics are preferable and the usual chosen default (fingerprints, retina scan, NOT FACE OR VOICE THIS IS SO EASY TO IMMITATE BRO PICTURES ARE A THING)
SMS (try to avoid if you can, please)
App ‘token’ authentication. A good choice if done well.
Hard physical key or token. The best option (Google: Yubikey, for some information on how this works).
Passwords
I know you use the same password for everything – get a centralized password manager, and start using different ones. Examples include PasswordSafe, Keeper, Bitdefender etc. Try go for a Cloud provider, and pay a little bit for the extra security and backup. If they’re compromised, then you will know, and you’ll be able to change everything. You can tie password managers to a token too.
USE PASSPHRASES, 17 characters is a good average length, use a mix of characters, uppercase, lowercase, numbers, ascii etc.
It doesn’t matter if your password is ‘complex’, it matters if it is complex and long. Servers and computers these days are jacked up on tech steroids and can bruteforce many things, given enough time.
Anti-virus.
EVERYONE SHOULD HAVE ONE, ON EVERY DEVICE. If you have a device that can add AV, add it. This goes for phones, PCs, smartTVs, you name it.
Free versions are okay, some free ones I like are Bitdefender, Kaspersky, McAfee, Avast (hate their fihsfirstg89ewjg9srjgrd ads though).
Sorry Mac users, that belief that you don’t need one is from 2008. Windows has more security built in than Mac, which means Mac devices should 100% make sure they are adding an AV.
VPN
Ahhhhh. The great VPN. A tricky one. Most free versions I find incredibly slow, but give them a try – play around! A VPN is an excellent addition and these days, I’d argue it’s an absolute must. Many AV solutions include a VPN package with their deal. If you want to make sure those sites don’t share your data, this is the thing that will hurt the most - a good VPN will make it a jumbled mess.
Updates - just do them.
There is no complete security in this day and age – it really is just a matter of time. If you use social media, you’re traceable, be it by the company, ISP, some bored 10 year old, or your ex, your data is out there circulating. Once it’s on the internet, it’s there forever, so don’t worry too much and try to make sure it’s all complex binary trash so that they open it and go “WTF” 😊
#tiktok#security#it security#data#data privacy#private browsing#facebook#google#data theft#third party ad#ads#secure browsing#protect data
11 notes
·
View notes
Text
CAN’T DO COMFAST REPEATER SETUP?
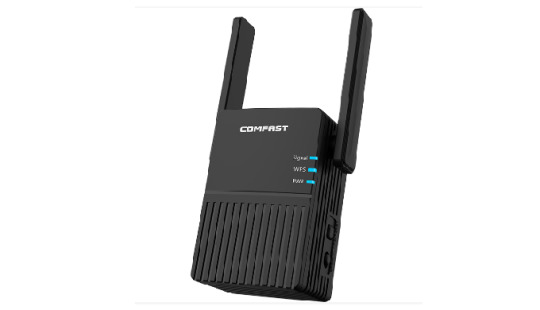
It is a known fact that having a Comfast repeater installed will make you access blazing fast and lag-free internet throughout your home. It takes care of every WiFi dead zone in your home. A Comfast repeater or Comfast WiFi range extender can be installed without a hitch. If you are in search of how to do the initial setup of your Comfast WiFi range extender, then put a stop to your search now. This blog is going to give you every minute detail on how to do the Comfast repeater setup in a hassle-free manner. Let’s get started.
WHAT IS THE NEED FOR COMFAST REPEATER SETUP?
Before getting to the actual setup process, let us discuss why there is a need of having a range extender at your home. Though routers provide optimum internet coverage in your home, however, if you have a bigger home or due to the way it is constructed, you may experience a few WiFi dead zones. No matter how hard you may try, the internet signal just refuses to reach a few hard-to-access areas. During such a situation, a WiFi range extender comes into the picture. It works by expanding the existing wireless signal thereby removing the WiFi dead spots. Let us proceed to theComfast WiFi extendersetup.
PREREQUISITES TO COMFAST REPEATER SETUP
To have a Comfast WiFi range extender installed, you need to have a home network already in place. What else do you need to get the setup completed, let us check.
Comfast range extender
Computer or laptop
An active internet connection
A non-fluctuating power supply
Damage-free Ethernet cable
DIFFERENT WAYS TO DO COMFAST REPEATER SETUP
There is more than one method to set up your Comfast repeater. We shall go through each method one after the next. The two setup methods are:
Web-based Interface setup method- This involves the web-based interface.
WPS method – This involves the WPS button on the device.
COMFAST REPEATER SETUP VIA WEB-BASED INTERFACE
The web-based setup process of the Comfast extender goes as follows:
Turn on the power button on your Comfast repeater after plugging in the power adapter into the wall electrical socket. You will notice that the LED lights on the device will start flickering and soon should get settled.
Quickly, get hold of an Ethernet cable and insert one of its ends into the Ethernet port of the Comfast repeater and the other end into the router. Having a finger-tight connection is a must here as a loose connection may prevent you from accessing the router’s network smoothly.
Now, fetch a computer or laptop and launch an internet browser on it. Consider clearing the cache and the browsing history from the browser. Also, you can opt for updating the web browser such that there is nothing hampering the setup process.
Enter the default IP address into the URL bar without making any typos to avoid landing on to an anonymous page.
Hit the Enter key on your keyboard.
The Comfast extender login page will open up.
Enter the admin username and password.
Click on the Login button.
You will be navigated to the Comfast extender setup wizard.
Follow the instructions which are displayed on the screen.
You have completed the Comfast repeater setup process using the web interface. At any point, if you find any difficulty to proceed with the setup process, you can contact our team of experts to get the setup done without much effort.
COMFAST REPEATER SETUP VIA WPS BUTTON
This method is valid only for a WPS (WiFi Protected Setup) supported router. For all the other routers, go for the above method. Below-mentioned are the steps to do the Comfast extender setup using the WPS method:
First and foremost, locate the WPS button on your Comfast WiFi range extender.
Once found, press it.
In the same manner, look for the WPS button on your router and press it.
And the Comfast WiFi range extender setup is completed. It is pretty easy to do the extender setup process using the WPS button.
WHAT TO DO AFTER COMFAST REPEATER SETUP?
Once the setup is completed, you can start accessing its network on your devices. Before enjoying your web browsing, keep in mind that you need to place the Comfast repeater at a place where you are experiencing WiFi dropping issues with your existing router. So, move the extender near to such a location. However, while relocating the device, be mindful of the fact that the Comfast extender should be placed within the range of the router. Hence, the distance should neither be too much nor less. Apart from this, choose a higher location to place your repeater as it is easy for the devices to access the repeater’s signal from here. Finally, the last point to be noted is, do not place the Comfast repeater in the attics, basements or the corners of your room.
Now that you have completed the Comfast repeater setup process and shifted the repeater to the best possible location, it is time to enjoy its network on various devices. You can always get in touch with our technical team in case you feel any trouble while performing the setup process. Happy browsing!
1 note
·
View note
Text
Netgear Orbi RBR20 Login Setup | orbilogin.com - orbilogin.net
If you want to know how to log in to your Netgear Orbi, you must first understand the different sorts of logins. There are several types of Netgear Orbi login and all of them serve different purposes. Read this post to learn the difference and how to use it the next time you're using Orbilogin. Orbilogin Types: Internet Service Orbilogin: Your Internet Service Provider will provide you with this login. Your ISP may have given you this login out of the information or may have been mentioned it in a booklet or so. If you can't locate these credentials elsewhere, simply contact your Internet service provider and ask for them. WiFi Password or Network key: This is the password for your WiFi network name (SSID). When you buy it, it comes pre-configured with your Orbi Router and satellite, and it's also printed on the backside of Orbi's label. Router Login: These credentials log you into Orbilogin Web Interface as admin.
Orbilogin Steps:- LAN Cable Connection To access the router, this access type will be used in the web browser. Power On your Orbi Router Make sure your device is connected to the Orbi Router either through an ethernet cable or the internet is active. Note: If you're a first-time user, Netgear Installation Assistant locates and connects you to the internet service instantly. Otherwise, you can choose the automatic Internet setup option, which will require the Orbilogin Internet Service. In this method, you'll have to set up the login manually. When the internet connection is not available at the time, a manual connection is required.
Open a web browser. In the web browser's address bar/URL, enter www.orbilogin.com. The automatic orbi login setup has started; to get logged in, follow the impact on the online. Here automatic Orbilogin setup is complete. Note: Before proceeding using the DSL service, review the following requirements. Again, this is required when the internet connection is not active while you're doing the automatic setup. If you're having trouble understanding internet connection settings, you can contact your ISP for support. -DSL account ISP configuration - ISP user credentials - IP address settings (static or fixed) (this is required in rare cases) WiFi/ wireless connection This type of login will be accessed over WiFi. Power On your Orbi Router Make sure your device whether a computer, laptop, or smartphone is connected to the Orbi Router through a wireless connection and the internet is active. Note: If you're a first-time user, Netgear Installation Assistant locates and connects you to the internet service quickly. Otherwise, you can choose the automatic Internet setup option, which will require the Orbilogin Internet Service. In this method, you'll have to set up the login manually. When the internet connection is not operational at the time, a manual connection is required. Open the Orbi App Its login authentication window will open. To get logged in, use the Orbilogin default username and password. The automatic installation assistant will search for the required internet access. It will connect on its own once an internet connection is found. Here automatic Orbilogin setup is complete. In case it doesn’t find the connection, you need to enter the internet Service Provider credentials manually. Orbilogin web page doesn’t display, what to do? If the Orbilogin web page is not accessible, you can perform the following.
You need to ensure that your computer is connected to the LAN ethernet cable and is joined at the router port. If your connection is wireless, check whether an internet connection is good or not accessible. You can clear the cache and browsing history if required. Try to access www.orbilogin.com again, and if the problem persists, contact your Internet provider. Common Issues Orbilogin Not working Http orbilogin com not accessible Orbilogin web page not accessible. Password reset via Www orbilogin com Orbilogin com not working Cant login to orbilogin com
0 notes
Text
How to Do 10.0.0.1 Admin Login?
10.0.0.1 is the IP address belonging to the private IP address class. Generally, private IP addresses are for the manufacturers of the router. The private IP addresses help in the configuration of the routers. This is the reason every different brand has a different IP address. So, if your router has 10.0.0.1 as its IP address, then you need to complete the 10.0.0.1 Admin Login. This article will guide you to the steps for the 10.0.0.1 Login. The private IP address is also referred to as the default IP address for routers. So, don’t get confused with the name private and default IP address. So, let’s get started with the process of login into the admin panel of your router.
Check Instructions for 10.0.0.1 Login
You need to log in to your router’s admin panel to change its username and the password for the router. For the 10.0.0.1 Admin Login, you need to follow the steps as follows:
Connect your router to the system using an ethernet cable or wireless connectivity.
Then, in your system, open the updated browser.
Now, type the IP address of your router in the URL field i.e. 10.0.0.1.
Hit Enter on the keyboard.
The login page for your router will appear on the screen.
Then, enter the default username and the default password for your router.
Click on the Login button.
If your credentials are right, you will reach the dashboard for your router.
Now, you can change the settings for your router as required.
Note: Usually, the default username and password are “admin” and “password” respectively. Also, don’t consider the WiFi name and password as the default username and password.
What if you are not able to access the 10.0.0.1 Admin Login?
Due to different reasons, you cannot access the login page for the IP address 10.0.0.1. Check the following to rectify the issue:
Make sure you have not mistyped the IP address as 10.0.0.0.1.
Also, confirm your router has the IP address as 10.0.0.1.
Turn off your router for a few minutes, and then connect again to complete the login.
Make sure your network is working fine and you can access other websites.
Clean the cache memory and browsing history for your browser.
Reset your router to bring all the settings to default by pressing the reset button at the back for the router.
All these steps will help you to complete the 10.0.0.1 login. Even if you are not able to access the login page, then the steps for the troubleshooting are explained. If still, you are facing the problem with the login after applying the troubleshooting steps, then you should reach our expert team of technicians. They will help you through all the login processes for the 10.0.0.1 login, and you will be able to do a successful login.
Visit Us: https://10001ip.com/
0 notes
Link
how to check browsing history on wifi router telstra? how to check browsing history on wifi router
0 notes
Text
My Phone Ip Location

How Can I Change My Phone Ip Location
Att Find My Phone Location
My Phone Ip Location Tracker

Usually, though, public IP address lookup databases don't provide you with enough detail to actually find your phone. While you might be able to ascertain what city the phone is located in, you usually won't be able to get anything close to an actual street address. IP geo-location maps an IP address to the physical location of the computer or device to which that address is assigned. By geographically mapping the IP address, it provides information such as the country, state, city, zip code, latitude/longitude, ISP, area code, and other information.
The IP address is used to identify you on the internet, and there can be many reasons why you may want to change your identity on the internet. Whether you want to access blocked content, set up a server, or avoid penalties from websites and forums, changing your IP address is the way to go. As compared to desktop, the steps to change IP address on Android is very different. Especially because Android supports mobile network connection as well.

No worries though, in this guide I’ll show you multiple ways to change IP address on Android. I will separately show how to change both local and public IP address along with an explanation of what each type of IP address is used for.
Note: Before following the below instructions to change IP address, make sure you know your current IP address so you could confirm later that it has been changed. For precise instructions, follow my guide on how to find IP address on Android.
How to change local IP address on Android
The local IP address is assigned by your network router to each device that is connected to it. The router uses it to identify connected devices and exchange information accordingly. If you are interested in providing custom IP addresses to each connected device while setting up a server or app, then follow the below instructions to change local IP address on Android:
1. Go to “Settings” and tap on “WiFi” option.
2. Here tap and hold on the network you are connected to and select “Manage network settings” from the menu that pops up.
3. Now tap on “Show advanced options” and select “Static” under the “IP settings” option.
How Can I Change My Phone Ip Location
4. Now just enter a custom IP address (range provided below) under the “IP address” section and hit “Save” to change the IP address.
If you don’t already know the new IP address that you want to enter, then you can pick one from the ranges given below:
From 10.0.0.0 to 10.255.255.255
From 172.16.0.0 to 172.31.255.255
From 192.168.0.0 to 192.168.255.255
For example, you can enter 10.23.103.250 or 192.168.1.20 and the address will be accepted. Just make sure that the IP address lies in the above-provided ranges.
Alternatively, you can also use an IP address changer app for Android that will let you enter required IP address in its interface to switch to it easily. For this purpose, IP CHANGE is a good IP changer app.
Note: The above instructions are only applicable to a WiFi connection, mobile data local IP address can’t be changed on the primary device.
How to change public IP address on Android
Every web page or service on the internet uses your public IP address to identify you and then offer information. If you want to change your identity on the internet or need to access blocked content, then you need to change your public IP address.
Unfortunately, public IP address is in full control of your internet service provider. If your ISP uses dynamic IP address (most do), then it should be easy to change IP address. Otherwise, you’ll have to depend on a VPN to mask your IP address. Below are some ways to change public IP address on Android.
Change public IP address on a WiFi network
For WiFi networks, simply restarting your router is all you may need to change public IP address. If your ISP assigns dynamic IP addresses, then whenever you will restart your router it will fetch a new IP address from a pool of IP addresses. Just turn off your router and wait for 2-5 minutes. Turn it back on and check if the IP address is changed or not. It may not work every time, so you should at least try this twice.
Change public IP address on a mobile network
If you are using mobile data, then the IP address provided by your carrier can also be changed. To do so, turn on Airplane mode from the notification panel (swipe down from top) and wait for 1-2 minutes. Now turn it off and the IP address should be changed. Alternatively, you can also use this IP address changer app called IP Changer that basically does the same thing but also keeps a history of IP addresses.

Contact your internet service provider
If the above doesn’t help, then you can also contact your ISP and ask them to change your IP address. This step is usually necessary when your ISP is using a static IP address.
Use a VPN to change IP address on Android
Att Find My Phone Location
If nothing works, then a VPN is a sure shot way to change your IP address on Android. Best of all, a VPN will even let you pick an IP address available in a different country, basically allowing you to spoof your location as well. All you need to do is install a VPN app and press the connect button. Once connected, whether you are using WiFi or mobile data, your public IP address will be changed to the one provided by the VPN app.
There are many VPN apps available for Android, but if you particularly want a free one then Turbo VPN is a great choice. It offers unlimited data for free with a very fast browsing speed.
If Turbo VPN doesn’t work for you, then Opera browser built-in VPN and TunnelBear are also great choices. Although, if you don’t want ads and are strict about privacy, then I will recommend you to go for a paid VPN service. The free VPN services usually keep a record of your activity for advertising purposes. However, for accessing restricted content, free VPNs do a perfect job of changing your IP address.
To conclude
It’s really easy to change local IP address on your Android phone, but for public IP address, it’s better to go for a VPN service. Do share with us in the comments why you were looking to change IP address on your Android phone.

My Phone Ip Location Tracker
Let us know if you liked the post. That’s the only way we can improve.
1 note
·
View note
Text
Internet speed test: Here’s what it does (and doesn’t) tell you
In 2019, there were 293 million internet users in the United States and you’re probably one of them. Depending on your provider and plan, you pay for a certain internet speed each month — one that’s selected based on your usage needs. You may have a faster plan with faster speeds for streaming HD video, video conferencing or online gaming, or you may have a slower plan that’s suitable for simple internet browsing. Either way, it’s important to understand if you’re actually getting the speeds advertised by your provider. One way to determine if you’re getting the right speed is to conduct an internet speed test.
Why test internet speed?
In addition to ensuring you’re getting the speeds you’re paying for in your plan, there are other reasons why testing your internet speed can be useful:
Troubleshooting a slow connection
There may be times when your internet seems to be moving slower than what you normally experience. The connection could be slow because of an issue with your provider, your computer or your router. There are reasons why you could be experiencing a slow connection, and running an internet speed test can help you to troubleshoot the issue.
Saving time
If you need to use your internet connection for tasks like uploading large files, which can take a lot of time, you can run internet speed tests throughout the week to see if there’s any pattern to when you see faster or slower speeds. You can use this information to help you decide the best times for the fastest results.
Saving money
If your internet speed is consistently running slower than your provider promised, you may be able to save money by changing your plan to reflect the actual speed you’re experiencing.
Determining what speed you need
If you have several devices using the internet at the same time, or if you enjoy playing video games online, you’ll need much higher speeds than someone who uses their internet connection for checking the weather or social media. If you’re getting a slow response at your selected internet speed, it may be time to upgrade.
How to take an internet speed test online
Checking your internet speed is easy. Here are 10 free internet speed test sites to try:
AT&T speed test: AT&T’s test will tell you your upload and download speed, along with a latency measurement.
CenturyLink speed test: This test from CenturyLink gives you upload and download speeds, along with tips for conducting the test.
Cox speed test: This test from Cox shows upload and download speeds and tips for improving test results.
Google speed test: You don’t need to log in to Google, just click the blue button labeled “Run Speed Test.” Google will tell you your upload and download speeds.
Netflix speed test: The test powered by Netflix shows you your download speed as the default. You can get your upload and latency figures by clicking on the “Show more info” button.
Ookla speed test: This popular test shows upload, download and latency figures. You can also choose a server to use to get a more accurate measurement based on your location. Ookla powers many of the provider-specific speed tests.
Speakeasy speed test: Speakeasy shows your upload and download numbers. You can also change the city where the server is doing the test and look at your results history.
Spectrum speed test: This test shows upload and download speeds with data provided by Ookla.
Xfinity speed test: You’ll see your upload and download speeds, along with an idea of the type of activities you can perform at the speed of the test.
Verizon speed test: This test gives you upload and download speeds from your device to the Verizon network.
This is what an internet speed test will tell you
The key pieces of information you will get from an internet speed test is your upload and download speeds. Many internet providers quote one speed, which is typically the download speed. You may have to ask about the upload speed, which is usually lower than the download speed.
Download speed refers to when you are downloading any data from the internet such as a photo or video, streaming media or browsing websites. Upload speeds matter for activities such as uploading data to the cloud or uploading content to YouTube. Most people generally spend more time downloading data than uploading.
The Federal Communications Commission (FCC) publishes a broadband internet standard. Since 2015, it has called for a minimum of 25 Mbps download and 3 Mbps upload. However, you may need to work with local providers who fall below those definitions. Based on your internet usage, you may not need to have even the minimum standard speeds.
When you test internet speed, it shows just a snapshot in time. When you use the internet, you’re sharing the provider’s bandwidth with all of their customers, so several things will have an effect on your test. Here are some examples:
If you use an older computer, router or modem with technology that can’t handle modern speeds, your tests will come out lower.
The location of your modem can affect speeds throughout your home.
A provider’s advertised speeds refer to wired connections only, so WiFi speeds may be slower overall than advertised speeds.
If you conduct the test while there are several devices all using your local internet connection, your tests will be lower than if you were the only one using the connection.
If you conduct tests during prime time for internet use, your speed will be low. The busiest times on the internet are from 7 p.m. to 11 p.m.
If you are running applications that make heavy use of the internet, your tests will be lower. For example, if someone is streaming a show from the internet, you’re already using a big portion of your download speed.
What internet speed do you need?
You may be surprised at how little speed you need to perform some common internet tasks. Here are the minimum download speeds you need for the following activities based on FCC standards:
Browsing, email, social media, standard video call: 1 Mbps
Streaming high definition video: 5 to 8 Mbps
Using a game console connected to the internet: 3 Mbps
File downloading: 10 Mbps
Telecommuting: 5 to 25 Mbps
Those speed requirements are only minimums and you may not be pleased with the experience. Besides that, those speeds are assuming that you are only doing one activity at a time. If you have a busy internet connection, you’ll need much more speed to handle your activities. In practice, different ranges of speed allow you to do different things:
5 Mbps or less: This is a very slow speed, but you could do basic surfing on the internet and email.
5 to 10 Mbps: With a bit more speed, you can surf the internet, send and receive emails and if you have just a few devices sharing the connection, you could play online games.
10 to 25 Mbps: This speed would allow you to stream HD video in moderation, play online games and download data with a moderate number of devices connected.
25 to 40 Mbps: At this speed, you’d have no problem with HD streaming, online gaming and downloading. You could also support more devices sharing the connection.
40 to 100 Mbps: This is your speed if you want to do a lot of streaming, online gaming and downloading. You could also support a larger household with a high number of devices.
100+ Mbps: At this point, speed just gives you a faster response from your internet. For example, at 40 Mbps you can download a 1 GB file in 3 minutes 34 seconds, while at 100 Mbps, you can download that file in 1 minute 25 seconds. If you have a 1,000 Mbps connection, you can download the same file in eight seconds.
How do internet speed tests work?
An internet speed test online performs several operations. In general, the test site will:
identify your location and the server that is closest to you to use for the test
send a ping to the chosen server and measure how long it takes for the ping to reach the server, or the upload speed
open connections from the server and measure how fast the server can send data to your device, or the download speed
measure latency, or the amount of time it takes for the server to reply to the user’s request
The amount of information the test will present to you will vary based on the test site.
Understanding internet speed lingo
Now that you’ve asked yourself, “how can I test my internet speed,” you’re ready to learn speed test internet lingo. To really understand how internet speed tests work, you need to know some of the terms that explain the process.
Bandwidth: The amount of data you can transmit through a modem, usually measured in megabits per second (Mbps)
Bit rate: How fast bits are sent from one place to another measured in bits per second
Bits: A bit is the smallest piece of data that is transmitted
Bits per second: The number of bits that are transmitted from one location to another in one second; can be shown as bps (bits per second), kbps (thousand bits per second), Mbps (million bits per second) and Gbps (billion bits per second)
Bytes: A byte is made up of eight bits
Data rate: Also called data transfer rate (DTR), it measures how fast data is sent from one place to another
Download speed: The speed at which a server can send data “down” to a device
Internet speed: A measure of performance, based on the bits per second transmitted
Latency/lag: The delay experienced while the systems on either end of a transmission respond to the user’s request; latency measures the delay time and is expressed in milliseconds (ms)
Ping: A signal that a transmitting device sends to an internet host asking for a response
Ping rate: How long it takes a ping to travel from your computer to an internet server and back
Throughput: How much information an internet-connected device can send or receive under perfect conditions; the higher the device’s data rate, the higher the throughput
Transfer rate: See data rate
Upload speed: The speed at which a device can send data “up” to a server
The post Internet speed test: Here’s what it does (and doesn’t) tell you appeared first on Freshome.com.
0 notes
Text
UNABLE TO ACCESS THE EXTENDER.LINKSYS.COM?
To configure and install the range extender you will need to access the login setup page of the extender.linksys.com re6400.
With the help of the configuration process, you will able to change and settling up the advanced settings of the Extender.
In the present scenario, the http://extender.linksys.com re6300 now comes with the advanced technology features of the Range Extender
like with the help of the login setup page you will able to secure the network and also prevent that your kids away from the inappropriate content or the websites.
How does the Linksys Extender work?
All the Linksys run extenders work with in addition the same addition, these remote range extenders support extender.linksys.com re6500 the current to cover every single no man’s land. As these gadgets rehash the upgrade remote sign that is the reason they are likewise called “Linksys Range Extender”. Range extenders are intended to function as replicators or extensions which can recreate the feeble wifi signal in an increased and helped signal.
Reasons behind This Issue
In the case of the user-facing, the issues while accessing the login setup page of the extender.linksys.com /setup. In this blog we will discuss some of the reasons behind this issue:
In case if you are entering the wrong URL or web address. In case you have the Issue with the Internet Service Provider. You were entering the Wrong login credentials. Improper Internet connectivity and power supply. Use Outdated Version of Firmware
How to Resolve this Issue?
In the foremost case, you will need to check the status of the LED placed into the Extender. Check that you are using the Appropriate Internet Connectivity. Power Cycle the Linksys Range Extender. Enter the correct login credentials. Check that your computer device is connected with the Wireless connection. Reset the factory default settings of the Range Extender. Clear cache and the browsing history before using the extender.linksys.com login. Use the default IP address instead of Using the Web Address. If your range Extender is connected with the wireless network try to connect it by using the Ethernet cable. 192.168.1.1- Default Linksys Range Extender IP Address 192.168.1.1 Is called the default IP address of the Linksys Range http:/extender.linksys.com setup. You will also able to access the login setup page of the Extender by using the IP address.
Here are some steps for 192.168.1.1 login:
In the foremost case, you will need to plug in the Linksys Range Extender to the power outlet. Open the internet browser into the connected computer device and then type the IP 192.168.1.1 login. The login admin arrangement page will appear on the screen. Here you will need to type the username and password to access the login page of the Linksys Range Extender
192.168.1.1 Login Issues?
The https://extender.linksys.com setup default IP address 192.168.1.1 Issues should be avoided or resolved by using the troubleshooting tips:
The extender.linksys.com must be connected to the power supply. Check the LED status placed into the Extender. You will need to check the single cable connection between the router and the Extender.
Reset the factory default settings of the Linksys Extender. Where do I Find the Hardware version of Linksys Range Extender? If you have a range extender and you need to discover the equipment form of extender, use the mark of the device to discover it.
For a large portion of the extenders finding the equipment adaptation and other data is extremely simple. The equipment variant, sequential rendition, MAC address and the model number of the extender is generally situated on the mark at the back of the extender itself.
The equipment variant of the extender.linksys.com is perpetual and can’t be changed or updated.
0 notes
Text
The Best Wireless Router With Parental Controls Built In: Gryphon
When I attend CES, I love to stop by smaller booths and find out what their product is all about. A couple of years ago I stopped by a super small booth at a private press event for a product called Gryphon. The owner of the company was manning the booth, and I had a chance to talk to him about his new wireless router. After our brief conversation, I could NOT wait for his product to be released.
He showed me some amazing parental controls baked right into the wireless router, and I was SOLD. I have used a ton of different wireless routers, and none of them have really gotten parental controls right yet. So, I have waited patiently for the Gryphon to come out for the last couple years, thinking that surely another router would figure it out before this one hit the market. I was wrong, and I am super happy that I was.
First, this is not a sponsored post. I WAS given one Gryphon router to facilitate this review, but honestly, I’m about to purchase a second one for my home because I like it so much.
It took me a while to get it out of the box, and then even longer to get set up, but the reason is I have SO many devices connected to my wireless network. Many IoT devices (like my garage door opener, my PetNet, and more) are a huge pain to change the wireless connection. So, I set up the Gryphon as a brand new wifi network so I could change over devices as time allowed.
The first devices I changed over to the new network were my children’s phones, tablets, gaming systems and more. This way I could take advantage of the awesome parental controls baked into the Gryphon router. I really liked connecting each device to the new network individually, because it was super easy to figure out which device it was on the router itself.
As you connect a device, the phone you use to manage the router will get a notification that a new device has been discovered.
It will then ask you to name the device, and assign the device type (it will try to autodiscover the type of device, like phone or gaming console), and then you can also assign a user to the device. Each member of the family is created as a user within the Gryphon app. You can assign some devices to the entire family (like the family computer) and other devices individually to users.
There are several settings you can create for the individual users.
Not only can you set limits for specific apps (the only downside here is it is a limited number of apps to choose from, and is not based on the actual apps installed on your child’s device). You can set bedtimes and force safe search on Google searches as well.
Another thing I wish the parental controls had was the ability to type in a specific URL to block. You can go into their browsing history and block sites from there, but you can’t just type in a URL and block it.
I do get notifications when my child wants to visit a site they have been informed is blocked, and I can allow it from my app, which works great.
Aside from the great parental controls, the Gryphon can also detect malware that someone in the family might accidentally come across. It uses my favorite antivirus company to help detect it, ESET.
One of my favorite features is the ability to put the internet to bed at a specific time every night, or just disable the internet for a specific child (for example when they get grounded… don’t ask me how I know)
The user interface for the router is extremely easy to use and looks beautiful, and I’m a HUGE user interface snob. I actually love how it separates my devices into categories like TV & Entertainment, where you would find smart TV’s and Roku devices or “Things”… of which I have several like my Ring Doorbell and my Nest thermostat.
The router works with other Gryphon routers to create a mesh system which ensures wireless coverage throughout your entire home. The company has really thought about every aspect of your home, including safety for your family. I did speed tests with my devices, and they were not any slower with the Gryphon router than they were with my ultra-powerful $ 600 router.
I really love this router. It is way better than a standard wireless router with something like a Circle device (which I have found significantly slows down wireless networks). Definitely go check it out! It gets my Family Tech Zone seal of approval!
Family Tech Zone
0 notes
Text
Maximize Your Online Data Use by Downloading OPP Open Wifi
Today is the era of globalization where you can easily access everything merely using your smartphone. Directly connect it through the internet, and you will be able to explore the world, finish your business, complete all the daily payments and many more. As we can see, in this internet era, there are lots of applications, whether free or paid, that offer us many kinds of advantages in assisting our daily life activities — for instance, online transportation application that can bring you anywhere and anything you want. Besides, there is also several online shopping or ticketing that are really helpful for the users to order things much more efficient and faster.
Moreover, all of these things can you get quickly in your smartphone within the internet connection. As a result, the internet is considered important media to access all these fascinating things. Internet bills can charge you daily, weekly, or monthly depends on the internet provider and packages that you use. For those who prefer a big internet data for their daily use, they may recognize that when the due time is over, there are still some internet data left but can’t be used because of the scheduled time. Then, you need to lose your remaining data and pay for the next term to be able to access the internet.
If we do this monthly, then calculate it for a year. You can imagine how much internet data that you lose per year. It would be such a waste if we can’t use them correctly and just disappear uselessly. Fortunately, with kinds of technology development in this globalization era, you can solve this problem quickly and effectively with only using one particular app that can give you profits instead of loses.
The main job of this app is to make sure that you can save your nearly-lost internet data that is going to be gone because of the internet payment due time. If you are interested in a brief history of this app, how this app works and what kinds of advantages you can get, you may need to take a look at the explanation below which clearly show you the way. Now, let’s start reading!
Ann Thread: https://bitcointalk.org/index.php?topic=4713287
Website: https://www.oppopenwifi.com/
White Paper: https://www.oppopenwifi.com/opplight20180627.pdf?t=v6
A Brief History of OPP Open WiFI App Company Through The Years
To achieve the primary goal successfully, each member should cooperate well with each other so that it can create a solid team. Here, creative and inspiring ideas, hard work, patience, sweats, and other exceptional abilities are fully required to provide the best services. More than a decade, the professional team in this company has worked very hard in serving the customers with what they need the most. Started in 2000, here is the brief history of OPP Open WiFI App you should know.
Began by two motivated and dedicated people, Martin and Phil had started the supplies contracts for commercial gas and electricity in 2000.
Two years ahead, approximately in 2003, an office named Bucharest office was opened and then came a hard work team to join which was called as Leo team. By another team joining, they focused more on the customers’ function and the back office operations. Also, they are responsible for maintaining the lead generation of the company.
After five years providing the best hard work and services towards the customers, fortunately, it can grow much better and widely known. Other inspiring people were also willing to join. They are Carina and Susan, who are responsible for expanding the business range of the company. Another success also started to occur in 2008 where the company entered the big hit in the telecommunications field.
Since the era is getting more globalized and mobilized, the company also started to get more mobilized by providing mobile telecommunication services, specifically in B2B and B2C areas. It was starting to develop in this company since 2010.
The following four years, which was 2014, was the born of the OPP Open WiFI routers. Being a year led by an innovative Head of Digital Marketing, Jo, the company can provide such a great product to ensure the customers’ convenience in browsing the internet using the app.
In 2016, the company just grew bigger and bigger with customers in many countries, specifically 15 countries. With growing customers, we ensure that the products always get improved, and the sales can keep growing well. One of the best marketing strategies used by this company is by adding Google as part of the digital marketing to serve and provide the customers with greater services.
A year later, in 2017, a brand new solution for smartphone users has been born, and the company starts to introduce OPP Open WiFI to the customers. By developing the features, products, and the marketing hopefully OPP Oen WiFI can ease people in assisting the daily basis much quickly and efficiently.
In this year, the company tries the best to develop the marketing field of the business so that many people can join and get the benefits as well. So, starting only from a small app, you can try to start a company that can bring you into a competitive and modern business that suits well in this globalization era.
Those are the brief history of OPP Open WiFI company through years. Apparently, it was never easy to reach such success until now. This company needs to get through some difficult and hard steps that if they are completed with full responsibility and high integrity as well as sincerity, then the results will pay all of the tough times like what you can see to this company today.
Essential Things You Should Know About OPP Open Wifi
By quick-reading several important lists below, you will be able to get to know more about this app. Starting from how this app works for you, what benefits you will get, how to join and why you should join. Let’s check them out one by one.
It is paid with Hotspot Hosts token that you can operate efficiently online. Also, there are various ways to get paid. Moreover, you can use it not only for personal use but also for your house internet convenience or even for your business matter as well. The application will record your internet use and buy only the internet data that is going to lose. Easy and beneficial, isn’t it?
Talking about the payment, by logging in to Hotspot Host, you will agree with all the requirements. Also, one of the benefits that you will get is that the tokens that you have gathered for times can be changed into kinds of currency based on your preference. Next, these amount of money will be sent into your bank account and get ready to receive your money! Additionally, other alternatives are also acceptable if you prefer to add more credits to your credit card or even to shop for things you need in the provided partner shops immediately.
Here comes the right thing! Ready to use this app for your smartphone? Then be prepared to download this app free starting from December 2018. After that, what you should do next is to activate this app for around an hour per day and enjoy the benefits immediately!
Still feeling confused whether to join or not? Just take this easy and read the surveys we get from the United Kingdom users. More than 70% of users are happy and ready to take advantage by sharing internet data. Moreover, around more than 30% are requesting investing activity using this app. Based on the data of the testimonials above, you may create your own conclusion about this application.
Last but not least, enjoy having spare money for you to save or to use in your bank account by only sharing your unused data to others. Sounds great, doesn’t it?
Those are the great things you need to know about OPP Open WiFI. Based on the information above, the sooner you join the sooner also you will receive benefits and efficiency in using your internet data. Moreover, if you apply this for your business matter, then you can see yourself how much benefits you can get and how much data you can share so it was not such a waste and even can add the inflow of your business. In the paragraph below, there will be an introduction to the OPP Open WiFI products that you should know, and you can easily adjust based on your needs and preference.
Inspiringly Amazing Products Offered by OPP Open WiFI App
Willing to develop more and more to provide the best services and experiences in using this app, OPP Open WiFI App decides to create several products that ease the customers so that they will be able to use this product in any kind of devices. Here are the products of OPP Open WiFI you should know.
Residential Router
Similar to its name, this product is well-suited to use in a particular residential area. The range of this residential router can reach 25 meters. Directly register for guest users to be able to access the internet using this app. if you don’t have any, make sure you sign up first only in simple steps. Then, you also will be asked to be directed into your social media account which eases you to stay connected with this app.
Business Router
For a broader range of users, especially for business matters. You can use this business router to be plugged in your office so that the use of OPP Open WiFI app can be much efficient. Some business fields like hotels, restaurants, and any leisure venue are highly recommended to apply this router to their existing broadband router. Moreover, you can connect this with a specific access point to expand the coverage. With elegant black color, equipped with several main important buttons and three antennas as the transmitter, the OPP Open WiFI app of Business Router is ready to apply in your office for better internet performance.
Access Point or Router
Access point or router provides you to be able to access easily into this app for personal use. 8For your information, there are two advantages that you can get by using this product. First, it can be connected with the business router for expanding the range. Also, for convenience, you can apply this router to your ceiling and wall. It’s easy to use and provide lots of benefits. So, what are you waiting for? Choose your best product to use and immediately apply it to experience the advantages yourself.
So, which is the router that suits you the most? Is it only for personal use? Or you want to provide a great internet use with additional benefits for your family at home? Or even want to ensure the customers satisfactory by adding this into your restaurant, hotels or any other business? OPP Open WiFI provides you with varies of products that you can choose to improve your internet usage and receive the benefits by sharing the internet data to others. Then, easily apply the router you select and connect your user account by logging in into the app and enjoy! Surf the internet nicely and get the benefits immediately!
If you want to know a lot more about this app, you can open the website that contains much more information about the overall essential things about this app. Willing to get in touch with the info quickly and simply? Also, make sure to check out the social media of OPP Open WiFI that are available on Facebook and Twitter. Once you decide to join this app, it means you already contribute to improving the blockchain business that is ideally suited for the future market in this global era. Individually, for those who are busy and active, thus a simple and quick business can be readily accessed in only through your smartphone. So, be the lead generation of the digital market, feel the best experience and get all your benefits. Also, dont forget to share with friends, and relatives about the advantages of using this app.
Social Media:
https://www.facebook.com/OPPopenWiFi
https://t.me/oppopenwifi
Tweets by OPPopenWiFi
0 notes