#gluten free bread
Explore tagged Tumblr posts
Visit Tumblr Blog
Explore Tumblr blogs with no restrictions, modern design and the best experience.
Last Seen Tumblr Blogs


Fun Fact
Hackers stole 65M passwords from Tumblr in 2013.
Text

Gruyere cheese, caramelized onions, gluten free sourdough 👌
19 notes
·
View notes
Text

Why is gf bread so small?
11 notes
·
View notes
Text
Never going to shut up about how awesome this gf sandwich bread is, THIS SHIT IS TASTY it doesn't crumble too much, it isn't too dry, and it's not like eating an old dish sponge! (Believe me gluten-people, it's traumatizing out there in the gf bread world)
If you're not allergic to gluten I'd reccomend saving this anyways bc it's super easy and if you make friends with someone gf they will love you forever if you make this and might consider marrying you (I don't make the rules I'm just the messenger)
Anyways here's the recipe I'm no gatekeeper<3
Gf loaf/sandwich bread
Ingredients:
Proofing the Yeast:
- ¼ cup warm water (about 100F/37C)
- 1-2 tbs honey (I do 1 bc I like savory taste. Idk if it's actually different)
- 5-7 grams active yeast
Dry:
- 260 g rice flour (white or brown is fine) (not starch, that'll change the texture) (I do plan on trying it some time but haven't yet so) (will update if I remember to ig)
- 80 g tapioca starch
- 60 g millet flour (can substitute with oat flour but millet crisps better for toast n grilled cheese)
- 5-8 grams xanthan gum
- 1/2 tsp salt
Wet:
- 3 eggs room temperature
- 1 tbs apple cider vinegar
- 1 ¼ cup water (about 100F/37C)
- ¼ cup butter
Equipment:
Bread vessel for baking it in (pan, ramekins, muffin, whatever honestly)
Baking scale
Hand Mixer
Bowl and measuring cups
Oven (typically)
Instructions:
1. Combine ¼ cup warm water (I microwave it for 20 seconds) with honey and stir well. Mix in the yeast and let sit for 10-30 minutes to proof.
2. Combine all dry ingredients in large mixing bowl and mix.
3. Add yeast mixture, (this is where I heat the water and melt the butter in the same bowl bc the yeast prefers warmth) 1 ¼ cups warm water, ¼ cup butter, eggs, and apple cider vinegar to the dry ingredients.
4. Using a hand or stand mixer, beat mixture for 1-2 minutes. It'll be a bit thicker than pancake batter but not much.
5. Scoop bread batter into an oiled pan right away.
6. Place bread dough in a warm location to rise for approximately 1 hour. Can wait longer if it's not very warm.
7. Preheat oven 350 deg F (180 C).
8. Bake uncovered for 20-30 mins depending on vessel size (muffins is 20) stab with a toothpick to know if it's done, you shouldn't have more than a tiny crumb on it.
9. Let cool completely before slicing or moving containers. Ta da! Bread 👍👍
Notes:
* Depending on your environment, the dough may take longer than an hour to rise. In this case, simply monitor how high the dough has risen in the pan until it's puffed taller than the pan/ramekin/vessel
* Keeps well in a sealed bag or container on the counter for a couple of days, in the refrigerator for like two weeks. (I never use it that slowly lol) If you refrigerate the bread, the slices taste better toasted.
* You can probably freeze it if you take a long time to use bread. I've frozen other breads just fine, I haven't tried this but I imagine it's not too different
* If you're thinking about using cup measurements for the dry ingredients instead of weight, don't. Bread is a fancy girl and doesn't like that common guestimation stuff. If the baking scale scares you, it's ok! It just tells you what number you have and you can hit reset between ingredients to avoid excessive math I didn't do written math over baking what be brave! And bake! I believe in you<3
#bread#gluten free#gluten free bread#gluten free bread recipe#recipe#the people need to know!#🌇#☁️#a wild fabian appears#anyways I'm so normal abt my breakfast sandwich just now#didn't uh#spend half an hour writing and editing this when I got shit to do........#<3#love and peace! ✌️
12 notes
·
View notes
Text
I think my body's rejecting the very concept of bread. I only recently started eating bread again, finally having found a decent gluten free brand, but it's been close to a decade since I last really ate bread semi-consistently. And my stomach seems to really hate that New Food even tho I triple checked the ingredients to make sure I wasn't having a reaction to something else. Anyways, I'll be trying to build poison immunity for a food I should totally be able to eat in theory. Fun times ahead.
8 notes
·
View notes
Text
Low-FODMAP Gluten-Free Pull-Apart Pizza Bread

I was so dubious of this recipe when I started it. I have had uneven luck with gluten-free flours (unless they're just being used as a binding agent). Also, this recipe calls for a yeasted dough, which I've never tried before with gluten-free flour.
Reader, it was fcuking amazing. Legit, I'll be making this again when I'm done with this asinine diet. To the recipe:

Low-FODMAP Gluten-Free Pull-Apart Pizza Bread
1 c warm water, divided
4 tsp active dry yeast
1/4 c sugar
3 c Bob's Red Mill All Purpose Baking Flour
1 tbsp + 2 tsp xanthan gum
2 tsp baking powder
1 3/4 tsp salt
4 eggs
1/4 c olive oil
4 tbsp Italian seasoning
2 c grated Parmesan
3 (ish) c grated mozzarella
1 lb chorizo, crumbled and browned
1/2 c chopped fresh basil
cooking spray
Place 3/4 c warm water, yeast, and sugar in a bowl. Let sit for 5 minutes or until bubbly.
Meanwhile, in a stand mixer, combine flour, xantan gum, baking powder, and salt. Whisk to combine. When the yeast mixture is ready, add that, eggs, and oil to the flour mixture. Blend on medium speed using the dough hook.
Add water as needed, 1 tbsp at a time, to achieve a sticky but touchable dough. I was never able to get the dough to keep from sticking to my fingers, but forged ahead anyway. Knead in the mixer for 5 minutes. Spray a Bundt pan with cooking spray.
In a medium bowl, mix the Parmesan and Italian seasoning. Scoop 1/3 of the dough into little marble sized balls and roll in the Parmesan mixture. I had the best luck with rolling the dough out into a tube, rolling that in the cheese mix, and then pinching off tbsp sized balls.
Evenly distribute into the prepared pan, then 1/3 of the cooked chorizo, then 1/3 of the basil, then 1/3 of the mozzarella. Keep layering for three layers, ending with cheese. If there is any leftover Parmesan mix, sprinkle this evenly on the top.
Preheat oven to 350F. Let the filled pan sit on the oven while it heats for 20-30 minutes. Place the Bundt pan on a rimmed baking sheet (it is going to overflow everywhere otherwise) and bake for 30-40 minutes. Allow to cool for 5 minutes and turn out on a platter.

Couple few notes: I just went ahead and used chorizo. even though I know it has garlic in it, because I'm of the opinion that it's a low-FODMAP diet, not a no-FODMAP diet. You could also use pork sausage tarted up with a bit of Italian seasoning and a little red pepper flake.
Which brings me to the next thing: I've been able to source an Italian seasoning mix that doesn't have either onions or garlic, but if you can't find such a thing, use a mix of oregano, thyme, and marjoram in whatever ratio pleases you. This can go in both the Parmesan mix and the pork sausage. I also used a lot of fresh basil because my cousin gave me a stupid amount recently, but that's not required or anything. You could just use some dried basil in the Italian mix instead and no one would be harmed.
You guys, this was so good. Breaking up the gluten-free dough into discrete balls made the tendency of gluten-free dough to lack coherence a non-issue. The oil from the chorizo and the mozzarella kept the dough from being too crumbly or dry. (For real though, use a pan under the Bundt pan, or you'll have a mess.) I'm going to make this again for sure.

Evergreen disclaimer: I am no dietician. I'm doing my best to minimize FODMAPs in my diet, but it's possible for me to be misinformed or mistaken about various ingredients.
#fodmap diet#low fodmap#recipes#gluten free#Bundt pan#pizza#pizza bread#pull apart bread#chorizo#gluten free flour#gluten free bread
8 notes
·
View notes
Text

Ya gotta love it.
#celiacs disease#celiacs#celiac#gluten free#gluten intolerance#gluten free bread#gluten allergy#anthro#eastern box turtle#box turtle#turtle character
10 notes
·
View notes
Text
i made a gluten free focaccia/flat bread type thing using a mix from my current favorite gf bread maker* (young kobras, they're based out of sf so shipping's not too bad in california at least) and you know, it's not half bad at all?!?
i did add salt and some herbes de provence for flavor (their gf bread is good but it def could use a little more seasoning imho) and then didn't feel like making full on pizza so just kind of went the flat bread route with what i have (it's the end of the grocery cycle, so it's just basil/parsley, then some parm + goat cheese. probably pair it with some kale/balsamic vinegar later, but honestly it could go with lots of things).


the mix came with all the dry ingredients you need- it came with a little yeast pack which was amazingly still good and rose decently as you can see (i think i bought the mix a few months ago, at least 4). it also didn't take too long (45 min to rise, then 25 min in the oven). One mix packet makes one pizza/flatbread
i don't think it'll ever make my favorite sort of pizza (which is ny style, really thin and foldable)- it was def harder to roll out thin without breaking (i probably could have rolled it out a little more) but honestly decent! esp given that gf pizza recipes can be a lot of work for less than stellar results, this is a decent low effort alternative.
(i'm also low on olive oil and used "earth balance" in the batter, which seems to have worked fine. i'm sure olive oil would have been better, but i wanted to use what i had left on the top)
[i normally don't use mixes outside some of the pre-made flour blends like better batter's etc, and usually go about working on recipes the hard way so this was a nice surprise] *if you just want to try their bread, i really like their fake "rye", the seeded buckwheat and the regular "plain" sourdough flavors. i haven't tried the others tbf (they feel less versatile tho).
#food#gluten free#gluten free baking#pizza#foccacia#gluten free pizza#gf recommendations#gluten free bread#celiac
5 notes
·
View notes
Text
Plotting that bread for later. Current plan: more pseudo-rye, this time of a less sweet type and using the dill seed instead of caraway. Haven't had anything like dill rye since before I left the US, and I really used to love whatever commercial stuff Kroger's regularly carried.
Also planning on using my judgment, with a couple of other known-good recipes for reference. Much more confident in my ability to wing it with bread by now than GF sweet baking. 🫤 But, we'll just have to see how it goes. And of course I'm going to get tiresome blogging about it along the way!
Currently waiting for a home frozen pan of lasagna to finish baking for supper and turning out some salad to go with it, while idly planning my attack. Because that's just the kind of nerd I am.
12 notes
·
View notes
Text


My homemade gluten free bread ❤️
3 notes
·
View notes
Text

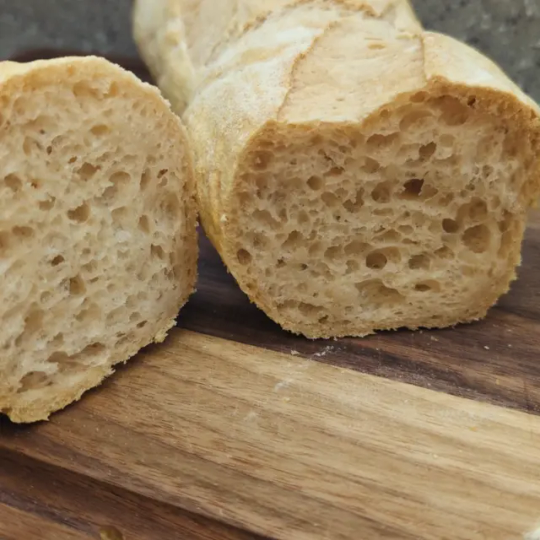


I made Naomi Devlin's baguettes and they came out pretty much perfect. HIGHLY recommend! I think I'm going to fiddle with the recipe a bit because that's what I do, but I still recommend as they are now! My only critique is that I think the flavor could be better.
7 notes
·
View notes
Text

These Gluten Free Bagels are made New York Style to get that perfect crisp and chew!
RECIPE:
2 3/4 c. Bob's Red Mill 1:1
1 1/2 tsp. xanthan gum
1/2 c. starch (tapioca or corn)
1 Tbsp. yeast
2 Tbsp. sugar
1 tsp. salt
1 egg white
6 Tbsp. butter
1 c. milk
1/2 c. water
1 egg wash (1 egg mixed with 1 Tbsp. water)
1 tsp. baking soda (for bath)
Bloom yeast with water, pinch of sugar
Combine flour, gum, starch, sugar, salt
Create a well, add egg white, butter, yeast mixture, milk, and mix well
Beat until whipped texture
Chill in airtight container for 30 min
Turn dough onto surface covered in flour/starch
Knead until soft, divide into 8 pieces
Make bagel shape
Cover, let rise in warm spot 45-60 min
Create rolling boil water bath, add soda
Boil each side 45 seconds
Bake at 375 for 15 min
Rotate pan, bake for 10 min
Enjoy!
#bagels#gluten free bagels#gluten free bread#baking#gluten free baking#mcas baking#gluten free#mcas#girlblogging
2 notes
·
View notes
Text

Making Thermomix bread without a Thermomix
My coworker told me about making this gluten-free health bread that actually tasted good in the Thermomix, and -- despite not having a Thermomix -- I wanted to try it. I've tried to make a few similar breads, but they were pretty dry and flavorless, and ended up languishing at the bottom of my freezer, uneaten.
The recipe is called "Buckwheat, Almond and Seed bread" and involves processing ingredients together to make a dough, which is then baked in a loaf pan. I used my food processor, which is less powerful than a Thermomix. Here are the steps I followed:
I soaked the buckwheat groats, blanched almonds, and 120g pumpkin seeds overnight in filtered water. Then I drained them before starting (I'd also recommend rinsing off the goo).
I processed the groats, then added the almonds and 120g pumpkin seeds and processed again.
I added the sunflower seeds, whole flaxseeds, chia seeds, ground psyllium husks, dried thyme, salt, water, and remaining pumpkin seeds and processed it again.
I greased the loaf pan and put the dough in, pushing it down and smoothing the top.
I baked the bread at 350 F for 50 minutes.
I let the bread cool a bit before taking it out, then let it cool some more before slicing it.
I really liked the result. It's not dry and it doesn't fall apart. It has a nice nutty flavor and texture. I've mostly been eating it with Trader Joe's pumpkin butter, but I've also broken it up in a salad and dipped it in stew.
2 notes
·
View notes
Text
A Beginner Baker’s Guide to Gluten

Gluten gets a lot of negative attention these days thanks to the dieting industry. Many influencers claim that by eliminating gluten from the foods you eat, you can boost your energy levels and maintain a healthy weight.
But is gluten really that bad? How does gluten actually affect you? And should you remove it from your baking?
Let’s take a closer look at gluten to answer some of the most commonly asked questions by beginning bakers.
What Is Gluten?
Gluten is a catch-all term for storage proteins found in certain grains, specifically wheat, rye, barley, and triticale. These naturally occurring proteins like to stick together, creating a structural network similar to glue. In baking, gluten gives dough its stretchy, elastic texture, and it traps gasses and moisture to give bread its soft, distinctive chew.
What Is Vital Wheat Gluten?
If you’ve browsed some of my recipes, you may have noticed that a few recipes call for high-protein bread flour or a combination of vital wheat gluten and all-purpose flour.
Vital wheat gluten is a powdered form of gluten that many bakers use as an additive to increase flour’s protein content. If you’re making an artisan-style sourdough loaf, the extra gluten can improve your dough’s stability and structure, making it easier to shape.
Is Gluten Bad for You?
The human body uses enzymes to break down consumed proteins such as gluten, though it doesn’t break down gluten completely. For some people, the undigested gluten triggers an autoimmune response when it reaches the small intestine, resulting in unpleasant symptoms such as bloating, diarrhea, headaches, and even rashes.
However, for the rest of us, undigested gluten poses no risk, and gluten itself is a reliable source of protein and fiber. Furthermore, going gluten-free does not guarantee any weight loss benefits on its own. Many gluten-free processed foods rely on starches to hold and stabilize food as a substitute for gluten. These starches can actually raise blood sugar levels and cause weight gain rather than being the advertised cure-all.
Which Flours Have the Most Gluten?

To find out which flours have the most gluten for your baking (as well as which flours are gluten free), read the rest of The Beginner Baker’s Guide to Gluten at BreadbytheHour.com
6 notes
·
View notes
Text
I made bread!

3 notes
·
View notes
Text

Overnight milk bread rolls
We celebrated Norway's national day with some freshly made rolls!
Add in this order and mix thoroughly:
6 dl cold water
2 tbsp oil
Mix and add:
2 tsp dry yeast
3 dl powdered full cream milk
8 dl gluten free flour (I use Schär type B)
4 tbsp psyllium husk
2 tbsp sugar
2 tsp salt
Leave in fridge with a loose lid overnight.
Quickly shape into buns with wet hands.
Glaze with egg wash. add poppy seeds, sesame seeds or whatever topping you prefer.
Let rest for about 30 minutes, then bake for about 20 minutes at 200C.
Best while still warm, but ok a day or two :)
Edit:
Trying now to make as pizza
Used 25 gr fresh yeast and added 1 tsp soft bake.
Also 3 dl cold and 3 dl boiling water since I will not do over night
#gluten free#gluten free recipes#gluten free baking#recipes#gluten free bread#gluten free breakfast#breakfast recipes#17th of may#gratulerer med dagen#cold rise bread#cold rise#kaldheving#rolls#gluten free rolls#breakfast rolls
4 notes
·
View notes
