#extract images from website
Explore tagged Tumblr posts
Text
Transform Text into Captivating Audio with Our Text to Audio Converter!
Unlock a world of auditory experiences with our cutting-edge text to audio converter. Instantly convert any written content into high-quality audio files that can be enjoyed on the go. Whether you're an avid reader or prefer multitasking, our converter will bring your text to life in a whole new way. Try it today and embark on a listening adventure!
#convert your text to audio#extract images from website#character count online#get all links from a website#alphabet counter
0 notes
Text


#justin herbert#los angeles chargers#nfl#week 6#found a website that extracts images from a video lol#I don't have to pause every second and screenshot anymore lol
15 notes
·
View notes
Text
🎃 Twst Halloween PSA 🎃
*pulls up the Serious Talk Chair*
Alright, so.
In the wake of the new Halloween PV posted on the TWST JP social media accounts, there’s been an explosion of hype. However, something else you may have seen circulating is people saying, "I already knew about this weeks ago!" and/or claims of having knowledge of leaked characters and costumes. Some have even directly linked to videos or images of these leaks (including fully animated character sprites) in threads discussing the next Halloween event. I myself have been sent these videos and images multiple times, unprompted, over the last few days.
To make a long story short:
You should NOT be speaking about or sharing these leaks in a public setting.
By doing so, you are running the risk of spoiling people who may not want to know these things in advance. They never gave their consent to see that, and this consent shouldn’t be assumed. I’m extremely disappointed that my own experience has been this way. I wanted the chance to react live as the information was being released. Others may feel the same as me. Additionally, openly talking about leaks is may make things more difficult for us fans in the long run.
The only reason these leaks were let out so early is because TWST started uploading assets into the game much sooner than they would actually be implemented. This has allowed dataminers in the fandom to go in and look around to see what goodies might be in store for the future. However, if fans are going to just run around blurting out what all the secrets are, it may discourage the devs from continuing to do this in the future. It will make it that much more difficult for fans to extract high quality card images ASAP. It means assets may be kept under tighter lock and key to prevent this from happening again.
Don't believe me? Something similar happened with the Japanese TWST website. The team used to upload news about the next month's schedule early, but locked behind a random string of numbers. Fans brute-forced those numbers and always managed to find the schedule sooner than it was intended to be out. The number of posts made on the website has now dropped drastically and schedules are no longer released on there. While there's no proof that these events are related, there is a real concern among some dataminers that the very same could happen regarding in-game assets.
I realize that leaks are common nowadays, but please let us at least respect other fans' rights to experience the game in their own way while also minimizing the risk of consequences for the fandom. If you must discuss these leaks at all, do it in PRIVATE. You are allowed to be excited about what's coming, but please keep it to yourselves or to your own circles where it may be a more appropriate topic.
Do not ask or talk about the leaks in my inbox, DMs, or comments. Do not link me to or share any leaks. Wait until the information has been released on official TWST social media handles, THEN I would be more than happy to talk about the news with everyone. Those who disregard this request moving forward will have their message deleted and then be blocked.
Thank you—and with that, let’s return to our regularly scheduled show!
#twst#twisted wonderland#disney twisted wonderland#notes from the writing raven#advice#disney twst#jp spoilers#twst halloween#twisted wonderland halloween#nightmare before christmas
228 notes
·
View notes
Text
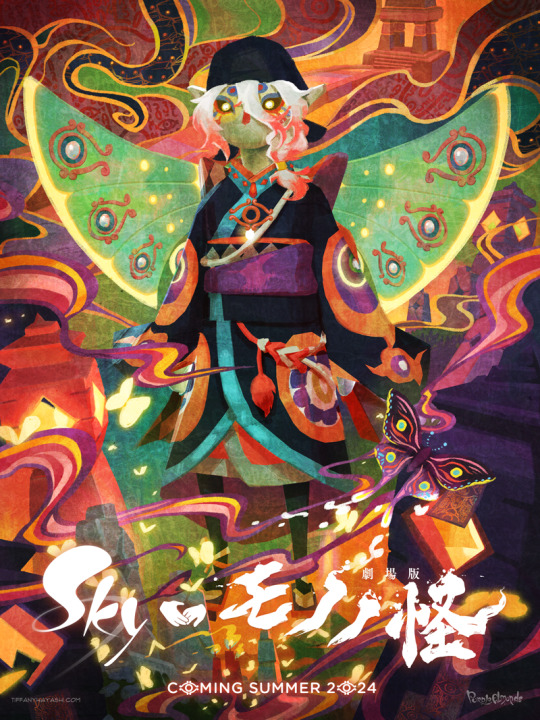
Currently, Sky: Children of the Light and Mononoke are my two favorite things and I so very badly want to will this collaboration into existence. 🕯⚖️
Process GIF & artist commentary below the cut!
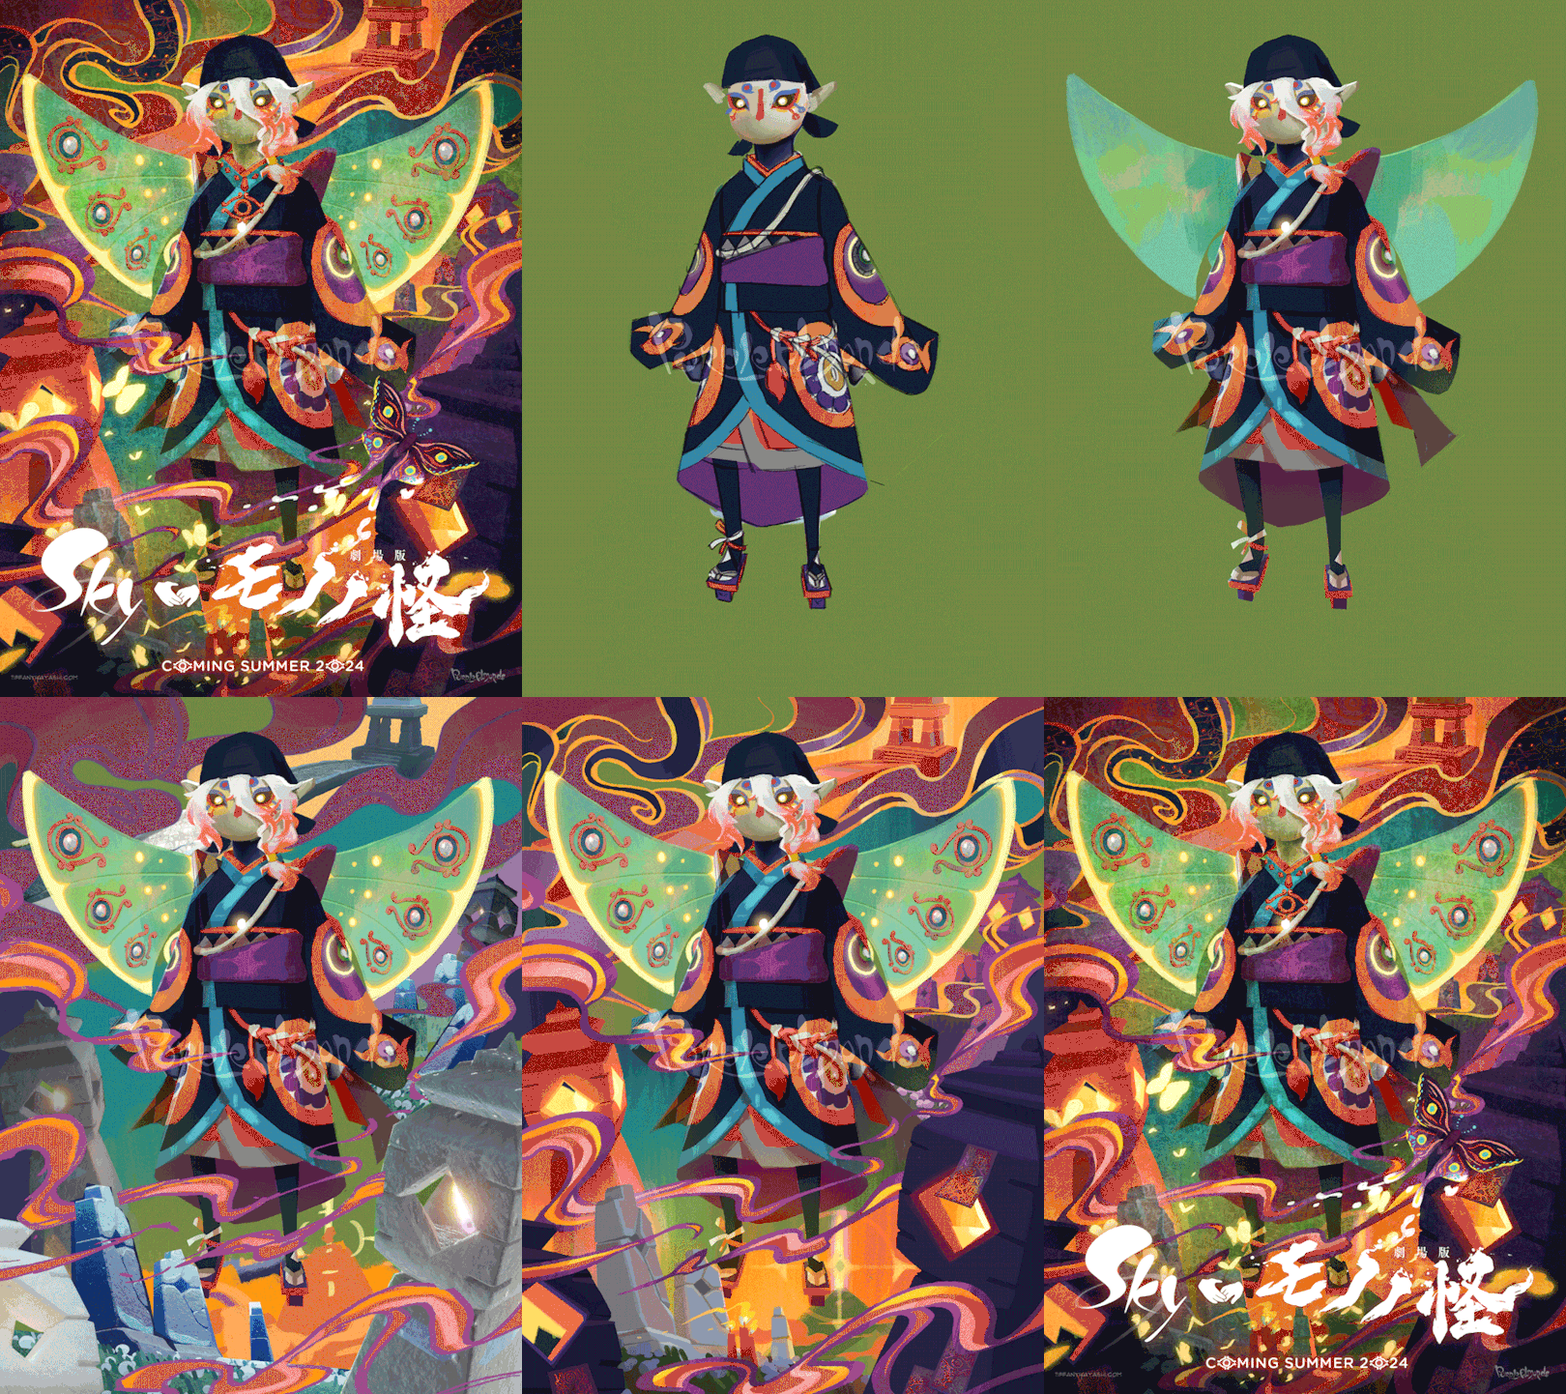
This began as a self-indulgent costume design project: aMononoke-inspired Sky cosmetic. It was supposed to be a quick-and-dirty mockup that would not be shared outside of private Discord servers, but I got...carried away.
It came out a lot nicer than anticipated. A bit rough around the edges, but when zoomed out clean enough to look like a legit Sky cosmetic. I extracted the high-res Sky and Mononoke logos from their respective websites. I custom-made the handhold collaboration icon. Then I slapped it on top of the costume design. It looked neat!

But then I started having second thoughts. The outfit was quite complex, and it didn't feel right to have it sit in a sterile, empty space like that. It looked half-baked, incomplete. So I used the Mononoke movie poster as inspiration for set dressing and color palette:
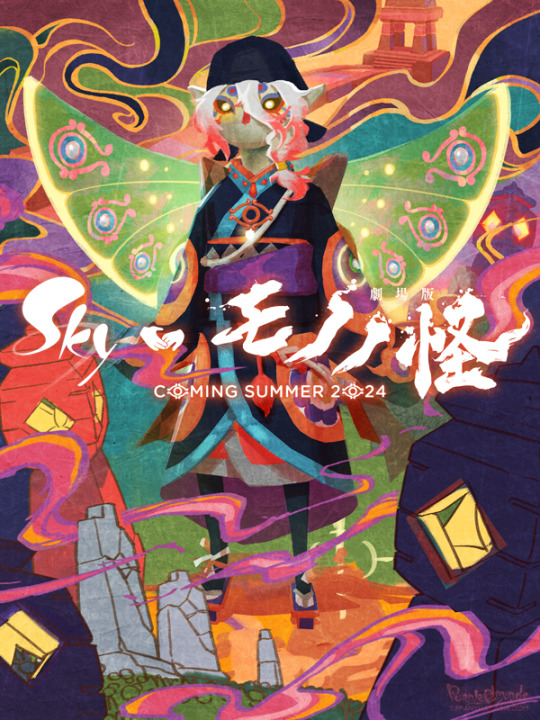
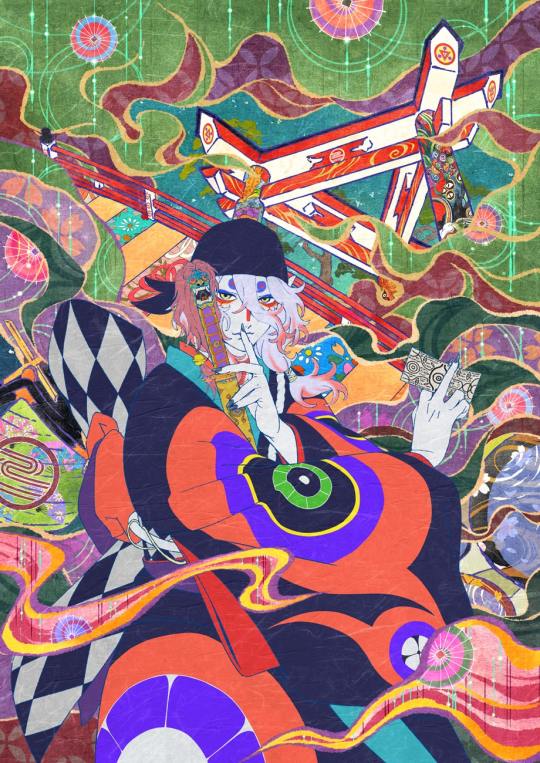
There are vestiges of the project's origins scattered throughout this piece - namely that a lot of the visuals were built upon screenshots from Sky. Since it was a costume design project, I didn't feel the need to draw from scratch. They were completely painted over in the final product, but using this technique sped up my process quite significantly!
I went to the Sky Wiki for references. I cobbled together some Season of Revival's kimono cosmetic as a starting point for the outfit. The eyeliner detail Days of Style mask looked similar to the Medicine Seller's face markings, so did a quick photoshoot in the Office to match the camera angle of the previous image.
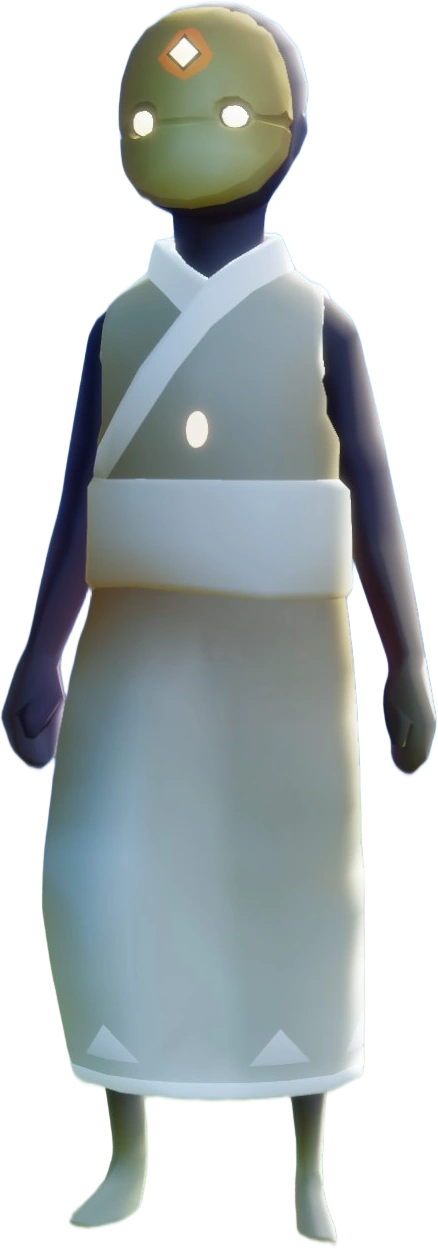
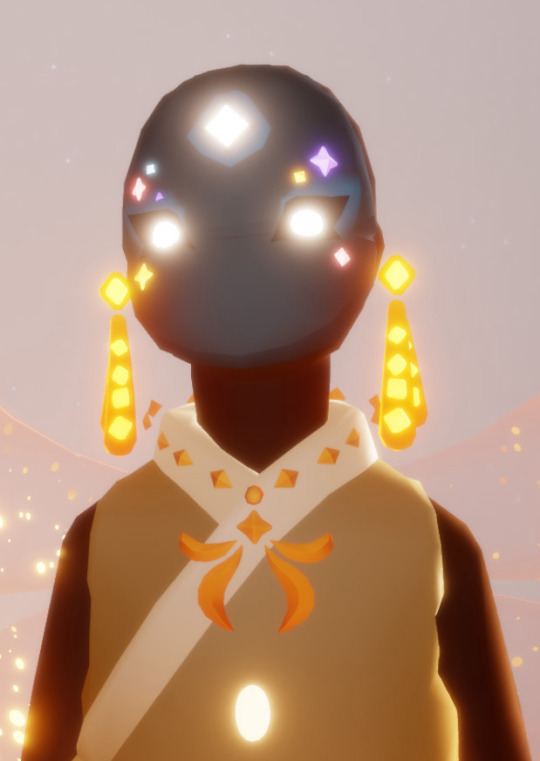
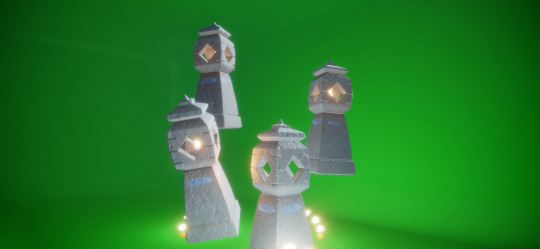
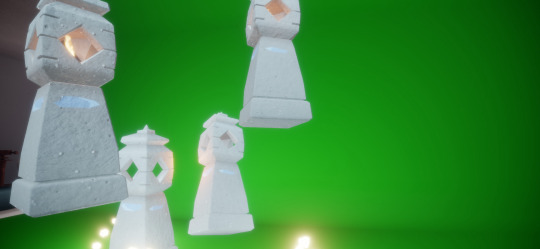
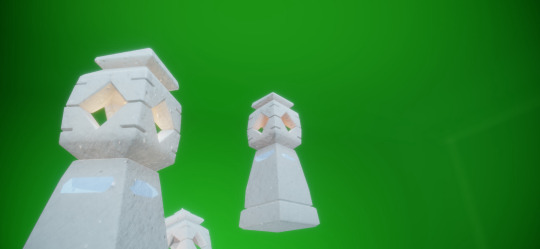
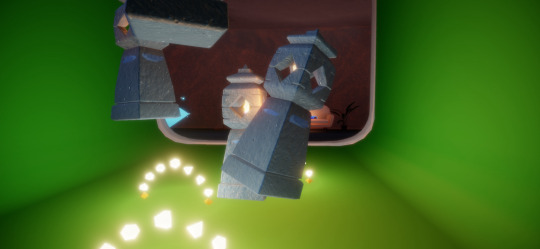
For the lantern, I made a shared memory in the green room to get the ideal camera angles for each of them:
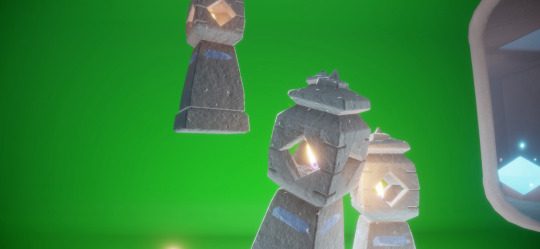
The grave markers I referenced from a photoshoot in the Hidden Forest's hub:
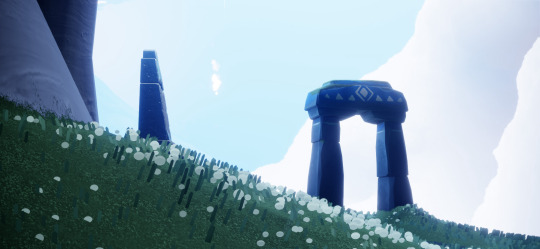
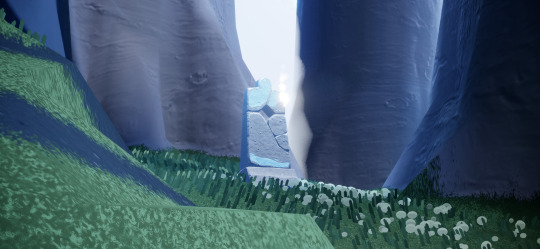

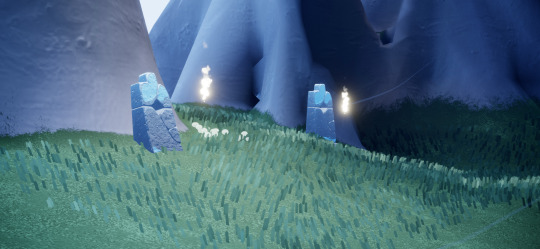
And the bridge I took from the Sunny Forest:

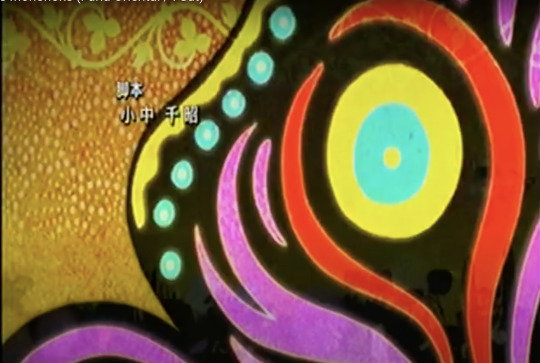
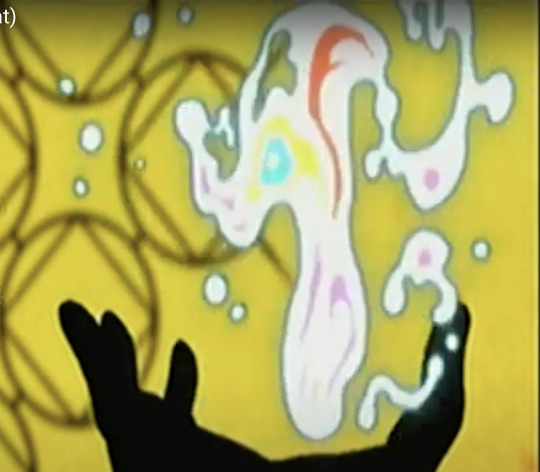
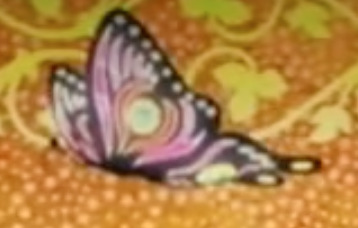
The butterflies were a last-minute addition - I wanted something to make the composition more sparkly! Then I remembered the end credits of Mononoke had a butterfly too! I figured since I went with the Medicine Seller's new design, this would be a nice homage to his classic look.
#モノノ怪#mononoke 2024#mononoke 2007#kusuriuri#medicine seller#thatskygame#sky cotl#sky children of the light#thatgamecompany#thatskygame fanart#sky cotl fanart#crossover#purplealmonds#2023#🔕
906 notes
·
View notes
Text
'There seemed no order in these latter visions': Give My Regards to Broad Street and A Christmas Carol
The 'Eleanor's Dream' sequence of Give My Regards to Broad Street has several phases, or scenes: the boating party; the recreation of Manet's Le Déjeuner sur l'herbe; the cemetery in winter, and so on, image after image. Toward the end, the sequence takes on a Dickensian flavour.

Screen capture of Give My Regards to Broad Street, as upscaled by Kitsu.
Instantly recognisable is the English bull terrier, a dead ringer for Bull's-eye, the dog owned by Bill Sikes in Oliver Twist.


Screen captures of Bill Sikes and Bull's-eye in Oliver! (1968)

A similar image as Harry appears from a barely-lit alley, complete with wet cobbles and English bull terrier, in Give My Regards to Broad Street.

Bill Sikes in Oliver Twist (1948) attempting to drown Bull's-eye. (Don't worry, the dog gets away!)
In Oliver Twist, Sikes brings what he has stolen to the fence, Fagin. Harry is carrying the missing tape box, also presumed to be stolen at this point in the film.
For a long time I thought that was the principal Dickens reference here, other than the general smutty, foggy, sinister look which conveys that ripe atmosphere of Victorian London (in literature, in painting, but especially in film). But there's something else that I believe is more significant.
At the very end of the 'Eleanor's Dream' sequence, Paul arrives to see Harry collapse on the stone steps, as the Victorian double for Rath, and his business associates, look down. Now, here's where it would have paid to be a Londoner: it all seemed familiar, but initially I took that neoclassical façade for the Bank of England. Of course I was wrong, it's meant to be the Royal Exchange.

A debtor waits to plead with Scrooge on the steps of the Royal Exchange, in Scrooge (1951). (Filmed on location at the building itself.)

The fluted columns and steps of another location, or a set, standing in for the monumental staircase of the Royal Exchange in Give My Regards to Broad Street.
Why do I think the series of visions ends at the Royal Exchange? In A Christmas Carol, the Ghost of Christmas Yet to Come brings Scrooge to this place, the ancestor of the London Stock Exchange, where he did business most days. In the time of Dickens it was abbreviated to simply 'Change.


Short extract from A Christmas Carol (1843), Charles Dickens; Harry on the steps
Rath and his partners are like the 'little knot of business men' whose unfeeling detachment is so appalling to Scrooge, and the reader. No spirit but rather Paul's mind shows him the vision, the ending of which he wants to reject or change, as Scrooge pleads for a way to change his fate:
Assure me that I yet may change these shadows you have shown me ... tell me I may sponge away the writing on this stone!
from A Christmas Carol (1843), Charles Dickens
If we accept this is repurposed imagery from A Christmas Carol, can we determine why it was chosen? The moment where Scrooge is forced to look at the businessmen at the Royal Exchange, and their indifference to grief? Is it a way to address Paul's feeling about the business practices around ATV's acquisition of Northern Songs, especially Dick James and Charles Silver selling all their ordinary shares in Northern to Lew Grade while Paul and John were each on honeymoon in March 1969?

Cashbox, 1969, quoted on the Paul McCartney Project website.
The group, or 'little knot' of nameless businessmen around Rath in Give My Regards to Broad Street, could suggest the Consortium, a group of London brokers that acquired 14% of the shares in Northern Songs. In May 1969, after protracted negotiation, they agreed to an alliance that essentially gave ATV control of Northern Songs. I think the Dickensian borrowing in 'Eleanor's Dream' encompasses not John's death alone, but also the irrevocable change in their friendship because of predatory business practice and the loss of control over their songs.
The redemptive close to A Christmas Carol is much of its appeal, offering that idea that we can still change the course of events to come, while there is the time to do so. Scrooge wakes and is reprieved, sends the boy for the turkey and raises Bob's salary: still-dreaming Paul finds Harry, calls Linda and brings him home. Then Paul wakes in the back of the car, and even better, finds that Harry and the music were never lost to begin with.
(Note: the quotation at the top of this post is from A Christmas Carol, as Dickens explains that the images shown to Scrooge by the spirit are disjointed and from different times. They are also unrelenting, as 'the Spirit did not stay for anything but went straight on'.)
25 notes
·
View notes
Text
Eddie's Envelopes
Some spoilers from the latest update included
We've had a lot of Eddie content in this update. His supply list in "commercials" reminds me of a prior theory that I had.
So, get this:

Here, Clown has helpfully provided us with a full example of a letter, including the envelopes.
Envelopes are on Eddie's shopping list.
W receives Welcome Home materials in brightly colored envelopes, recently expanded to include homemade boxes, paper, and yarn or string.
"To be honest, we were drawn in unexpectedly. All of the information found on this website was extracted from documents that had been uncovered in brightly colored envelopes. We are thankful to be the first to jump start this exciting journey! But it hurts."
I have suggested before that this is pretty clear evidence that Eddie is sending the materials to W. I think that is why we saw his freakout, and if you want more information, there is a post on my blog. I will try to find it and edit this post.
This full example of an envelope is from Frank, and the top flap is yellow, which is Frank's assigned color. My theory is that the color of the top fold of the envelope tells you who it is from.
The image below shows what the front of a letter would look like. However, it is an example, so I don't know that we could guess it is an actual letter from the neighborhood. It could have been sent on by Eddie, but it is just as likely that it was created for the exhibit.
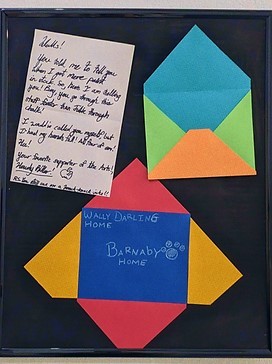
The second instance of a letter that we have is the letter below from Howdy, and the letter is probably addressed to Wally, as it mentions letting someone know about a paint shipment. The letter does not appear to match the envelope showing the front, but might match the back. If the flap is the same color on both sides, this is definitely matches the top flap showing who the letter is from. The front of the envelope could be considered to be indicative of the address system used, since they are coming from Eddie anyway. W has gotten some of these envelopes.
So it appears that the envelopes are addressed by name and location. In this example, The letter is from Wally (reflected in the red top flap) and to Barnaby. They both have "home" listed as their address, so either they are sending letters to each other in Home, they are referring to the neighborhood as home, or they are at their individual homes.
The letter from Wally to Barnaby had a blue field on the front of the envelope. So sender is the top and the front is the receiver maybe? The other two envelopes in these pictures are upside down, so they are no help.
I want to write about how I have been feeling too. I have no one to write to. If something happens to me, it will be like nothing had happened at all.
Included because of the reference of writing, and writing to someone. W says they don't have anyone to write to, and I am wondering if it is because W is very isolated, because the one person they tried to share it with went mad, or they are trying to explain that they also don't exist in our reality. There is the potential that W is some in-between entity. More on what we learn about W soon.
I think if this code system is correct, then it may provide us with useful information. If we accept that Eddie is passing things on in coded envelopes, motives and alliances might be ome clearer.
52 notes
·
View notes
Note
love love LOVE your The Sign gifsets. im still a newbie in giffing lmao and your gifs are like reaaally pretty so i was wondering how you do your gifs? i really like how it's sharp and the colors pop up beautifully (only if you don't mind sharing ofcc <333)
bun this is the kindest thing you could have said to me, thank you so much <3 i wanted to write down my giffing process for a while in case anyone would find anything in it helpful, so thanks for giving me a push!
guzhu-furen's photoshop gifmaking process (kinda oriented on saving up time)
from
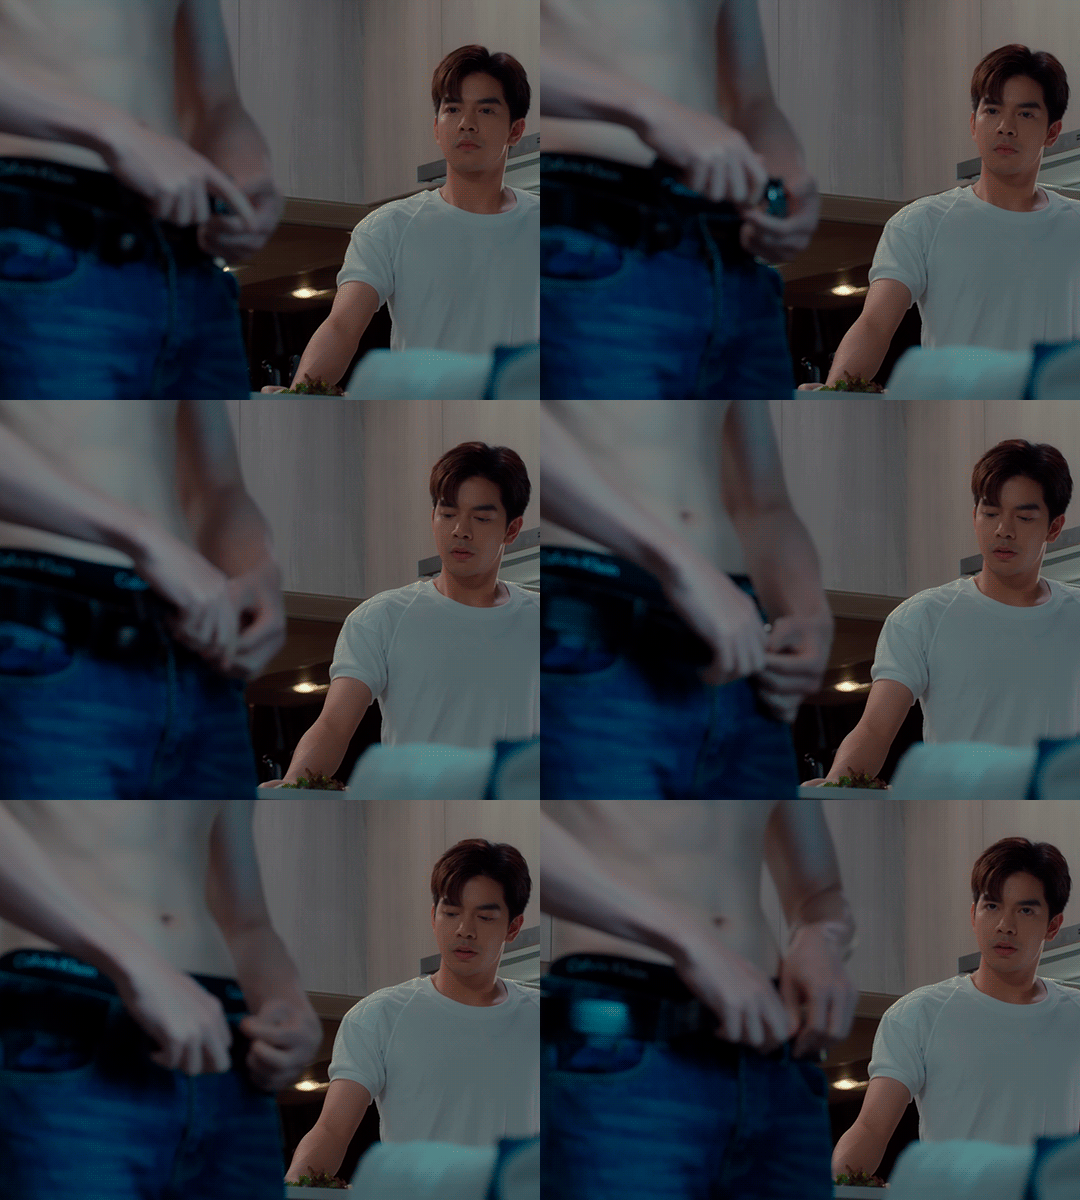
to
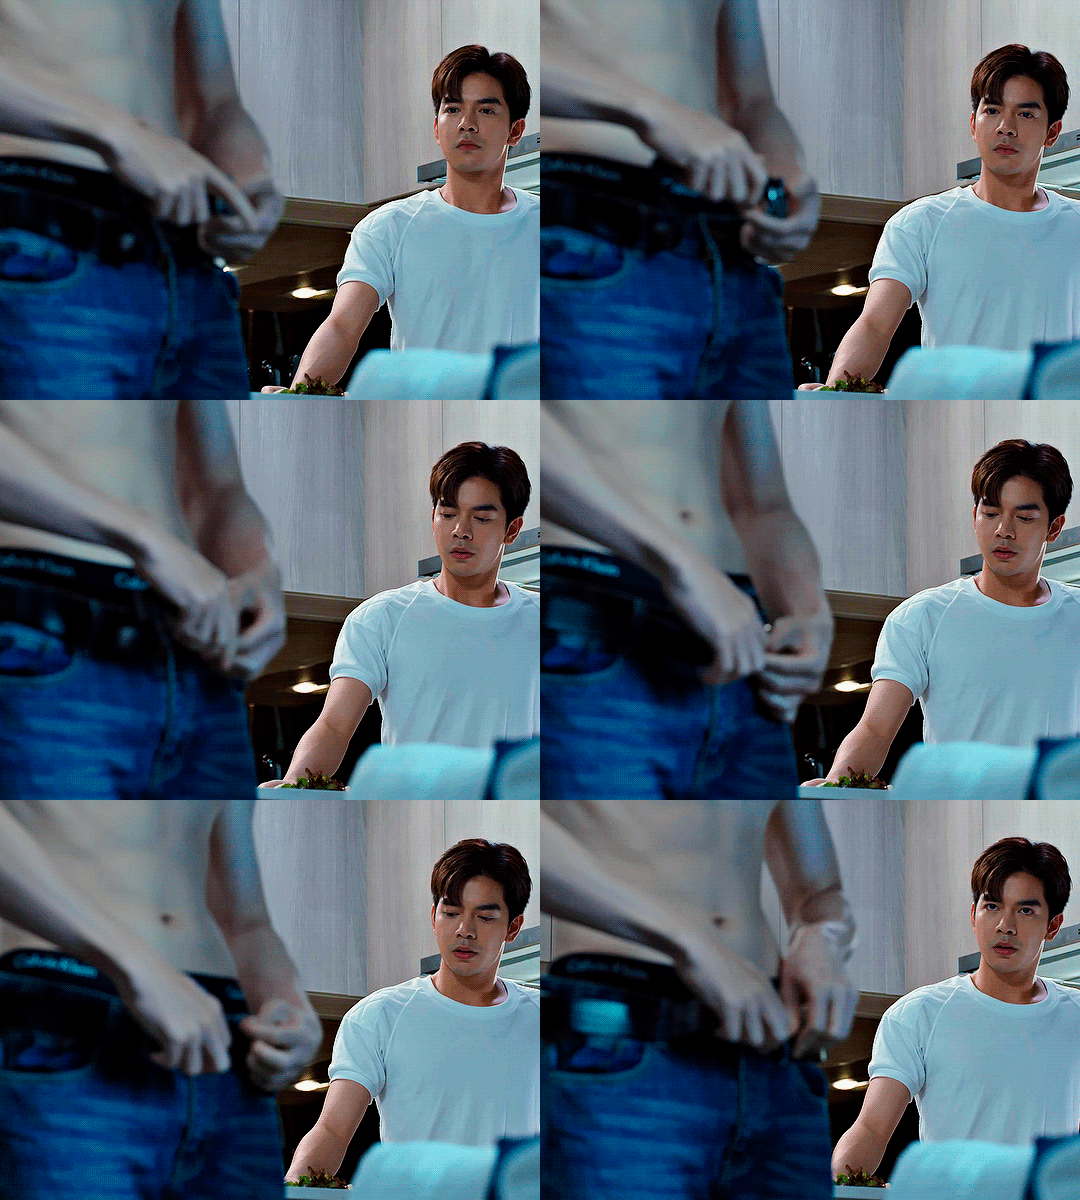
1. Downloading a video. i prefer to download video files instead of making screen recordings because the latter usually leaves watermarks/captions and makes image quality lower. i will not be linking the downloading websites themselves directly, but they are all easy to find through search engines if you know what to search for! i download ql dramas from:
youtube:
if the video you need is above 1080p quality, search for youtube4kdownloader
if the video is age restricted, search for 9xbuddy
both these websites work for normal videos too!
mkvdrama usually has 1080p episodes of most asian dramas.
dramacool also has downloading options in case the show is not available on other websites!
2. Screencapping (i learned it through this tutorial)
i screencap using KMPlayer. here is the installer i used, but you can find versions of this program on various websites and torrents too! install the program and proceed.
screencapping steps: open KMPlayer > press "CTRL + G" to summon the Frame Extraction window > set identical settings to these:
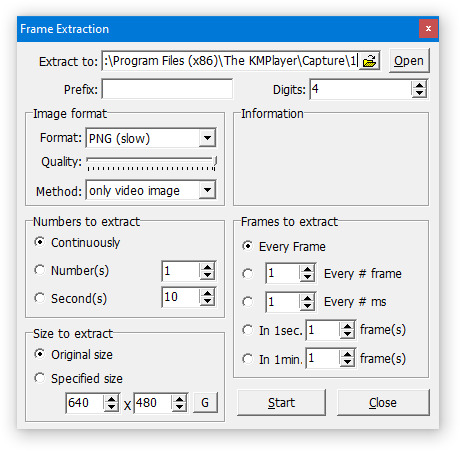
note which computer folder the screencaps will go to (it has a label "Extract to") > go to that folder on your computer and create a bunch of numbered folders there, for example ten folders named from 1 to 10, these would be our separate folders for ten gifs > write "1" or a name of another numbered folder after the backslash in "Extract to" bar in kmplayer > go the timestamp that will be the beginning of your gif in KMPlayer > press "Start" in the Frame Extraction window and press play on the video > when the moment you need to gif is over, press pause on the video and press "Stop" in the Frame Extraction window. great, you now have your folder of screencaps!
3. Importing screencaps to Photoshop
i use Adobe Photoshop 2023, but had used Adobe Photoshop CS5 for a long time before that, so you can use any version you have or find! it's available on various websites and torrents.
open Photoshop > Scripts > Load Files into Stack > press Browse in the "Load Layers" window that was opened
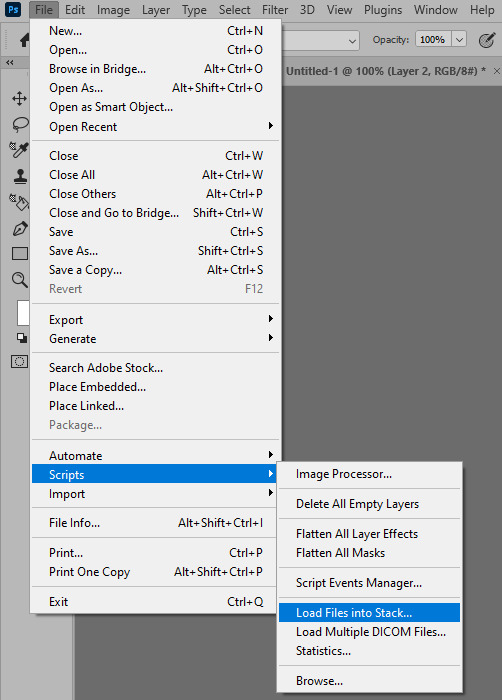
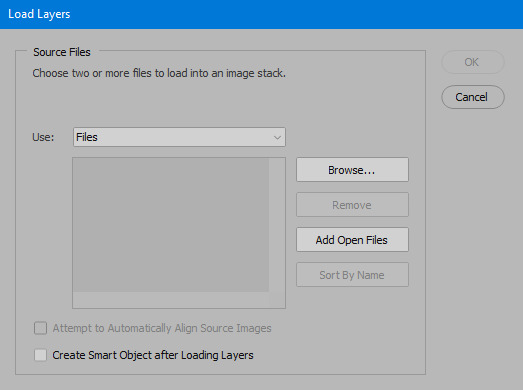
open your screencaps folder (and pin the KMPlayer Capture folder for faster future access) > pick the screencaps you want for your gif by clicking on the first one, and then clicking on the finishing one while pressing Shift on the keyboard > click OK and let them load for some time! i have 65 screencaps loading at the moment
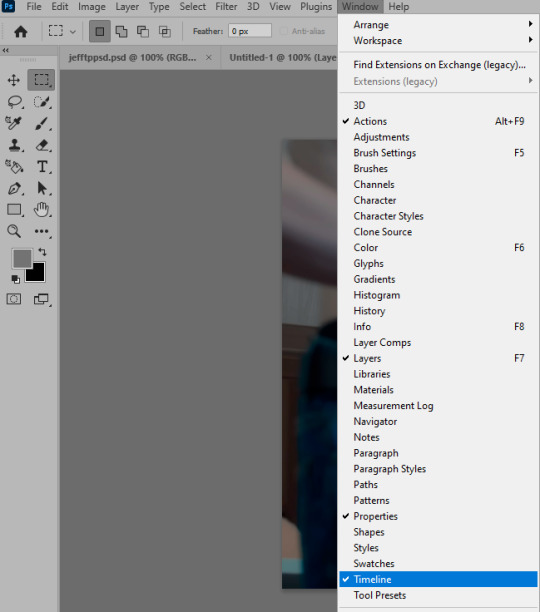
when the screencaps finish loading go to Window > press Timeline > press Create Video Timeline in the opened sidebar > press three dots that will say "Convert to frame animation"


4. Sizing & making the base of a gif
next part will be automatic. i use actions for almost everything from this moment. download the basic action pack here and my additional action pack that we will need here. load them in your photoshop actions window (Actions > Load Actions).
play the Script action to create frames.
now onto sizing your gif. these are tumblr's width dimensions for 3 types of gifs
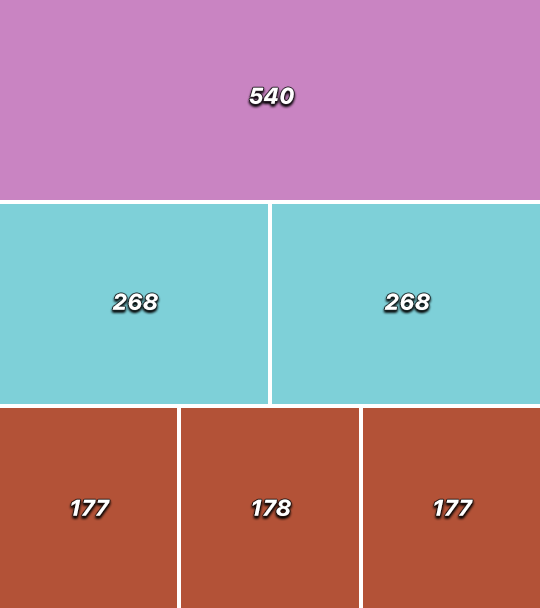
my gifs are usually 540 px in width and 640, 400 or 345 px in height. i added a 400 px action (Sizing 400) in the action pack, you can use it! or you can follow the steps by hand:
Image > Image Size > put in the height you want and add 4-6 pixels there (mine will be 406 for a 400 px high gif) > OK

now we need to crop the gif for it to fit tumblr's dimensions:
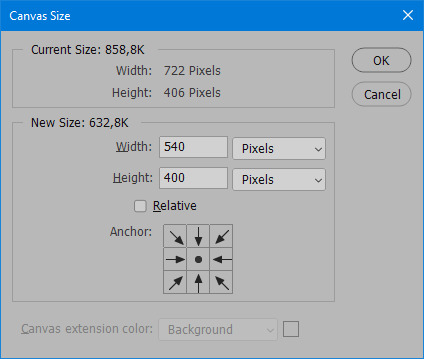
Image > Canvas Size > change Width to 540 (or 268 or 177) and take away the 4-6 pixels that we left in the previous step in Height
when you figure out which gif dimensions work best for you, record an action and use it to save up time!
after sizing use the action Smart Object. now we have the base of our gif!

you can move your gif left or right if you want! i will be doing this because i would like to show more hips in the gif.
press Ctrl + T > move the layer however you need (not in height though) > press Enter to save
i moved it to the right and my gif looks like this now:

5. Sharpening (i use Tan's sharpening settings explained here)
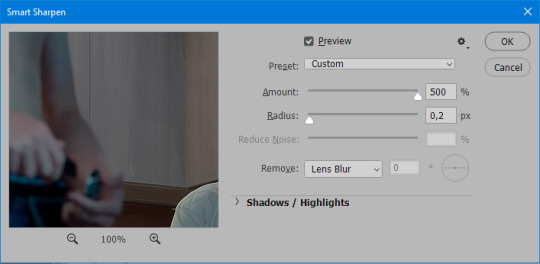
i added two sharpening actions in the pack, they are called Sharpen Spicy and Sharpen Spicy 12. you can use one of them or you can sharpen your gif by hand, i will explain how to do it below.
Filter > Sharpen > Smart Sharpen > 500% amount, 0,2 px radius > OK
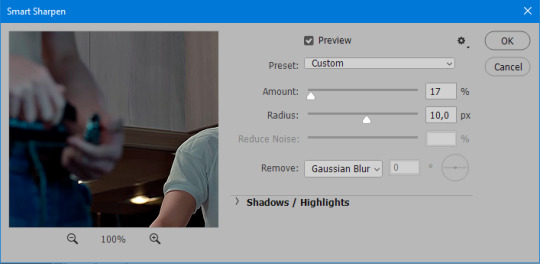
Filter > Sharpen > Smart Sharpen > 17% amount, 10,0 px radius > OK (you can change 17% to lesser or bigger, depending how intense you want your sharpening to look. i use 17% for 4k footage and 12% for 1080 px or less videos)
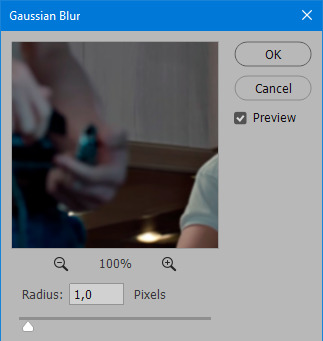
to smooth the sharpening a bit i use Gaussian Blur (this is optional, you can leave the sharpening as it is if you want your gif to be sharper).
Filter > Blur > Gaussian Blur > Radius 1,0 pixels > OK
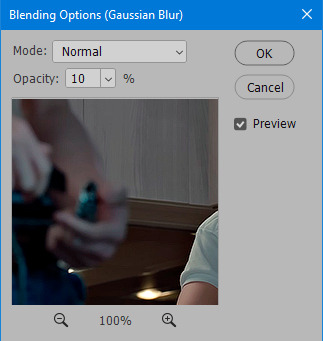
now change blending intensity to let only a bit of the blurring effect stay (you need to change this by hand if you used the sharpening action also).
press Blending Options (the highlighted place) twice > change Opacity to 10%

this is what my gifs looks like with sharpening now!

6. Colouring (i learned how to colour the way i do through this tutorial)
to make it easier for you to learn i will share my blank colouring file. i created it to save as much time while giffing as possible, so whenever i need to colour a gif i simply duplicate all the blank adjustment layers to the base of my every gif and start colouring! once you figure out which adjustment layers work for you best, i recommend creating a blank colouring file too to save time.
if you want to go the easy way, open my colouring file and duplicate selected layers to your gif file by Layer > Duplicate Layer > insert gif's document name

if you want to learn by hand, create the adjustment layers that i will be naming in the process on your own, you can find them all in Layer > New Adjustment Layer
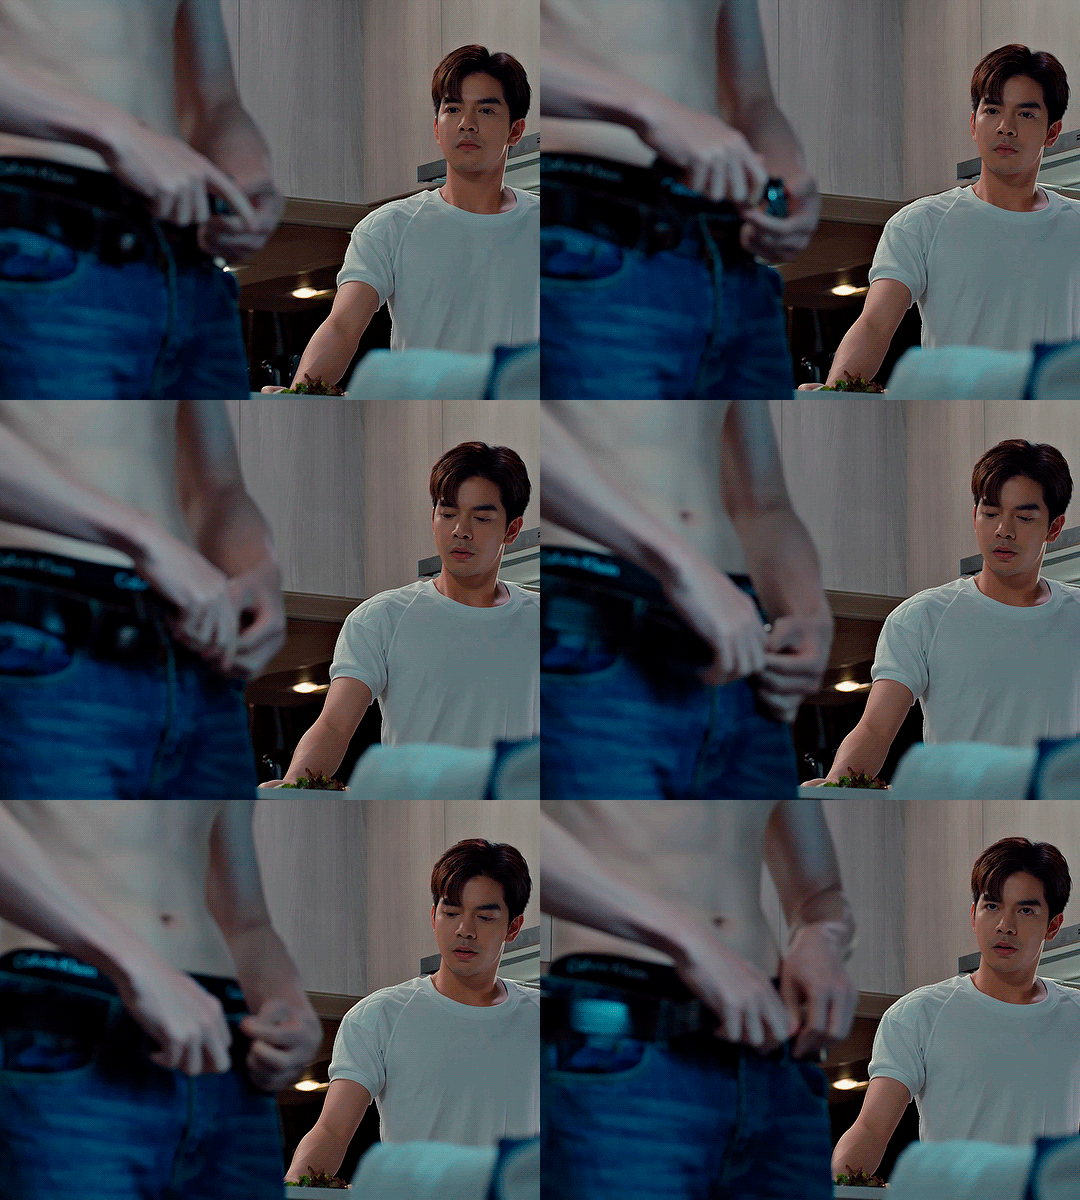
now we will use adjustment layers for our colouring from the bottom to the top! first, Exposure layer to add a bit of light to the gif. i don't always use Exposure because sometimes shots are bright enough on their own. i will, however, use it here. don't use it on your gif too much, because in the next few steps we will also be brightening the gif with other adjustment layers. i added +0,49:

next, Hue/Saturation layer. i use it in gifs with neon lighting to color correct overly bright colours. for example if your characters are standing in neon pink, you might want to lessen Saturation in Magentas and Reds to make the final gif less pixelated, and etc. i will not use Hue/Saturation on this gif, cause it doesn't need it.
proceed to the layer Levels. this layer usually does most of my colouring. click on the lowest white dropper in your Levels window:
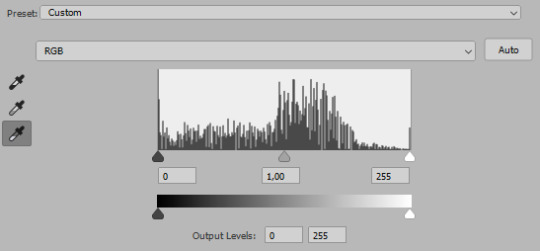
now choose a light place on your gif and click on it with the white dropper. it works especially well if you use the white dropper on the lightened parts of face skin. you can play around by choosing different bright spots and seeing what works best. here is the spot i chose and the resulting colouring:

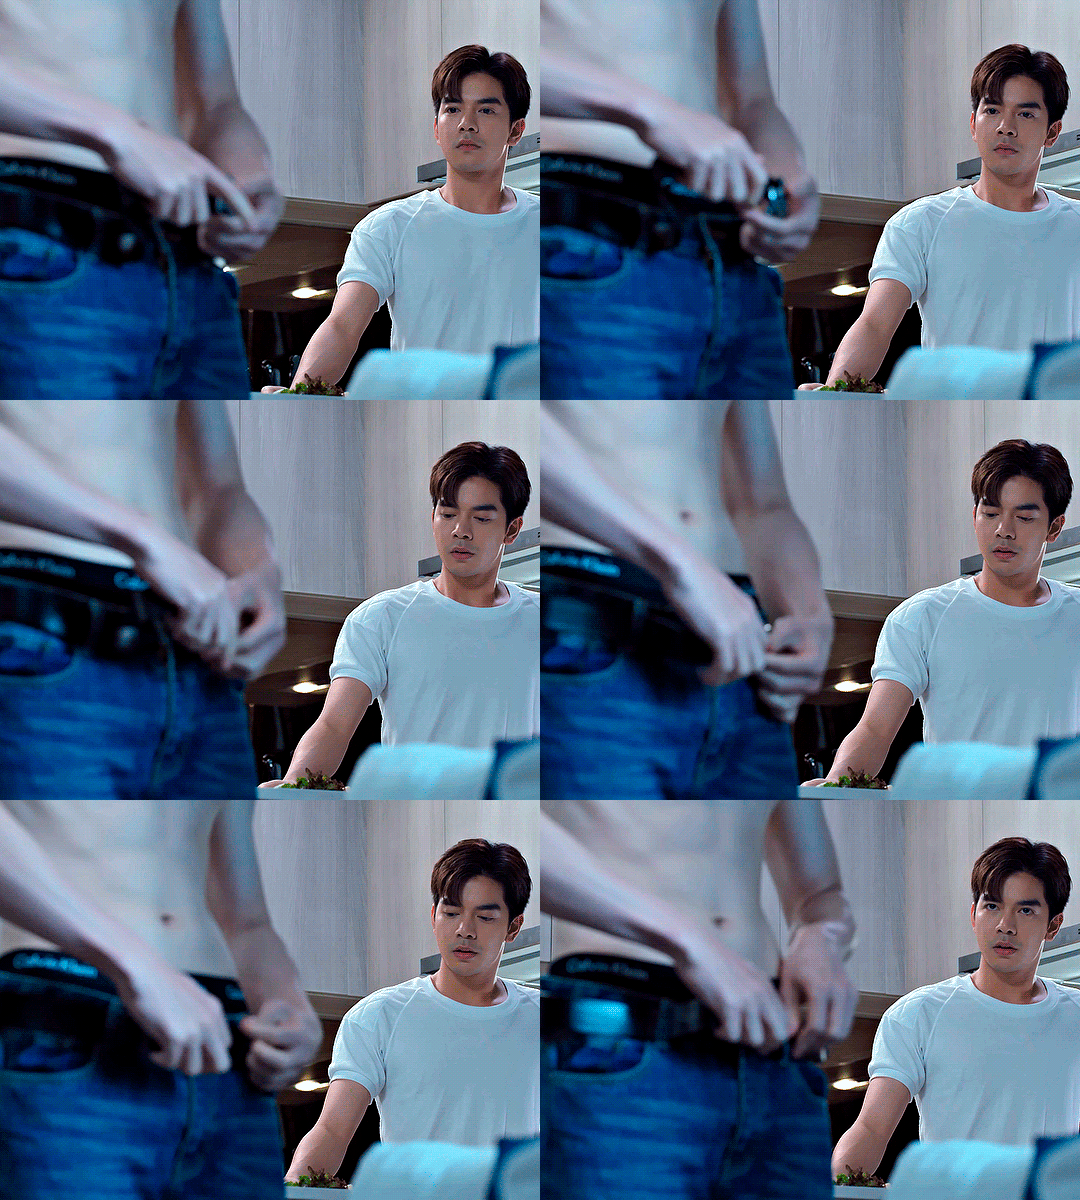
this is too light, so now we need to balance it out with the black dropper:

choose one of the darkest places this time and click it with black dropper! once again, you can play around and click different spot to see what works best. i will be clicking the highlighted spot and you can see what my gif will look like with this Levels settings
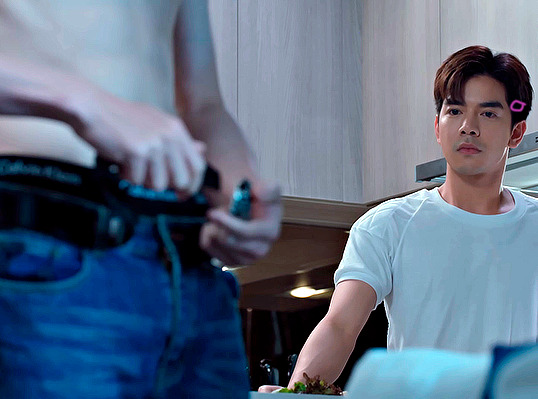

as you can see, darkest places became darker and other colours were corrected a bit! now, this is still too bright, so i will be decreasing the opacity of Levels layer from 100% to a smaller number:
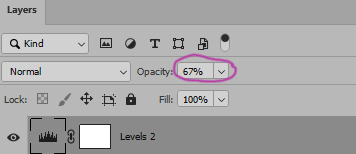
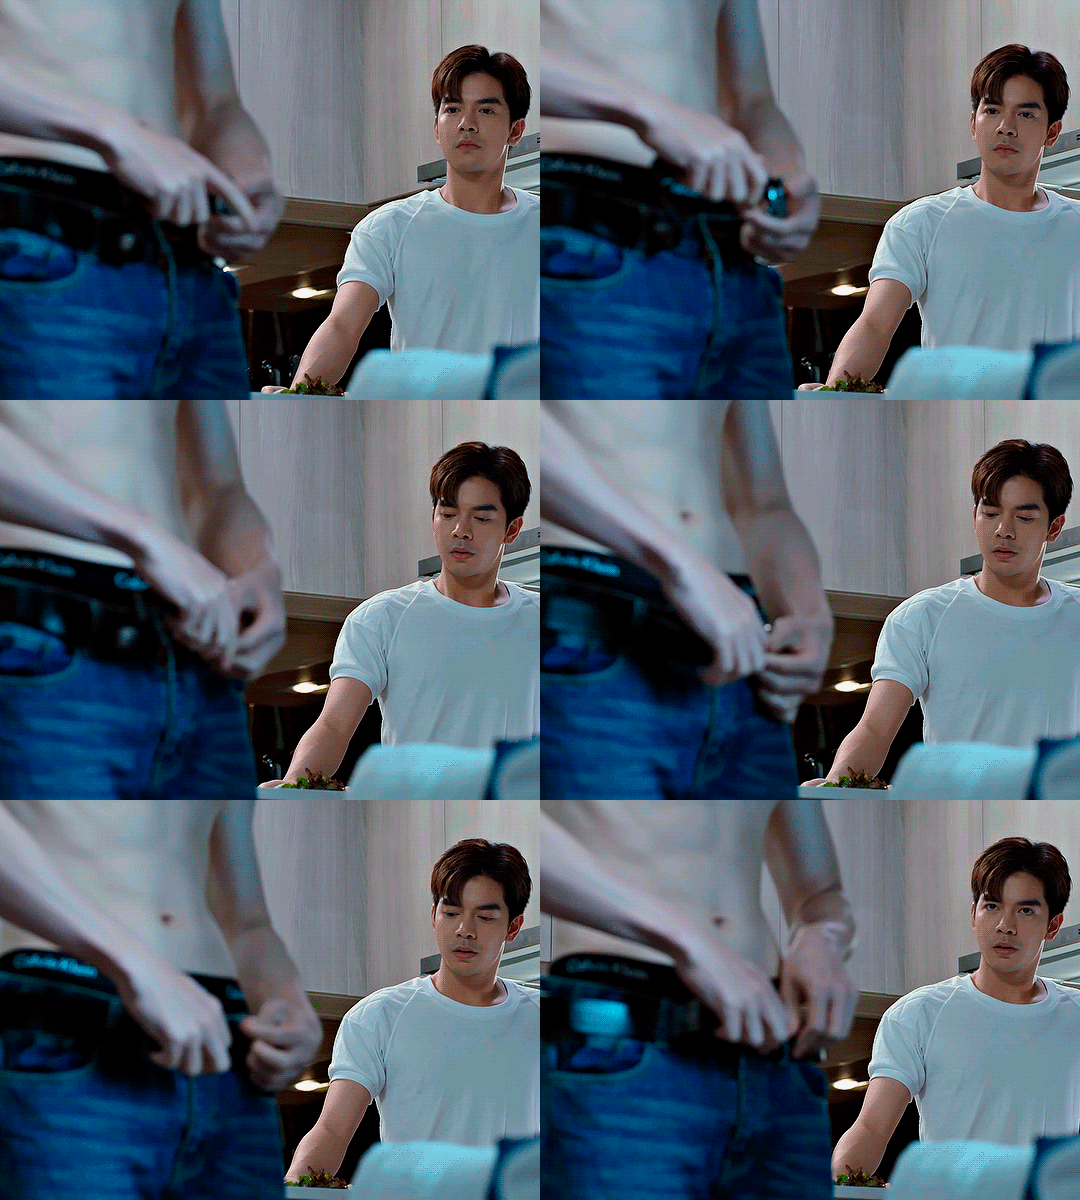
i will have to continue in another post because tumblr only allows 30 pictures per one post in the new editor now and i'd like to explain everything in visuals. click to continue
98 notes
·
View notes
Text
K-101 - K-303 - K-505 - NEWS - TECH & CO
So it has begun ... the K-303 is on its own road and the first objects ready to be downloaded :) Our databases seem fully repaired and we can now focus on our projects ;)
But let's talk at first about the silent update of the K-101 ... @yuroge ( thanks for the feedback ! ) noticed that after a recent patch of the Sims 4, when uploading something to the Gallery, it was claimed as cc content, even when it was cc-free, only because of the K-101 use.
We found the solution. So, better to share it :) We stripped all the translations, info files and so on from the K-101 and we kept only the DST images. This way, whatever you use, it doesn't affect your exports to the Gallery.
Now, all you have to do is to re-download the K-101 :D
DOWNLOAD HERE


As you may noticed, we added on our website a kinda sims 4 expansions fundraiser for all people who really wish the K-505 for expansions AFTER Cottage Living ... The Wedding Story is already funded at 80 % :) So, I have only one word. As soon as an expansion is funded, I work on it, before my own projects and deliver it to all. Thanks to all the volunteers. I love you for this !
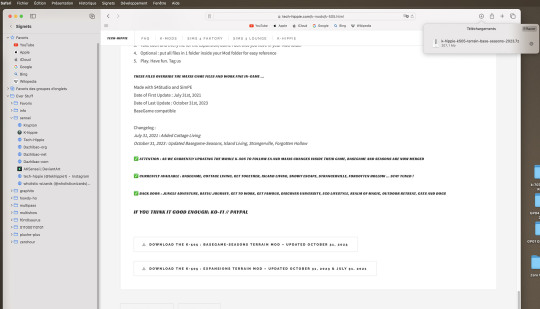
And now, as we receive messages about, let's make a bit of information for Simmers who have difficulties to download ... I made some pictures to show you that every K-Mod is fully downloadable :D
on PC :
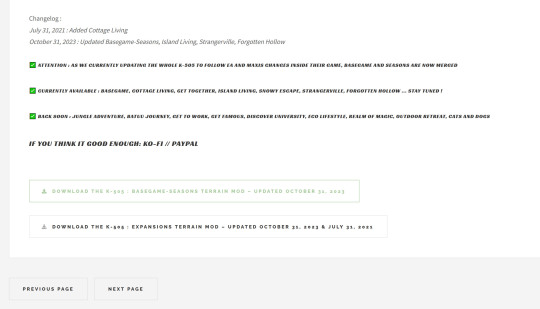
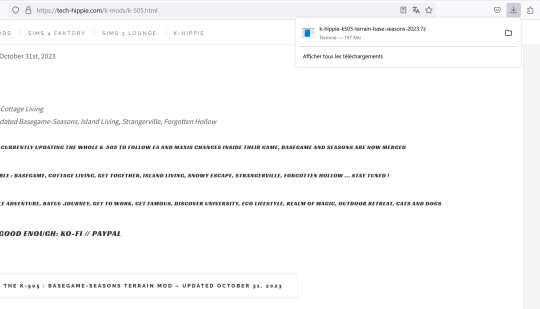

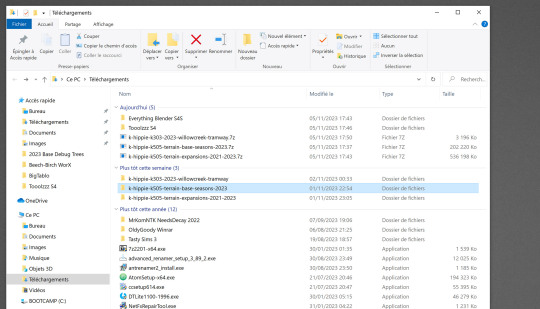
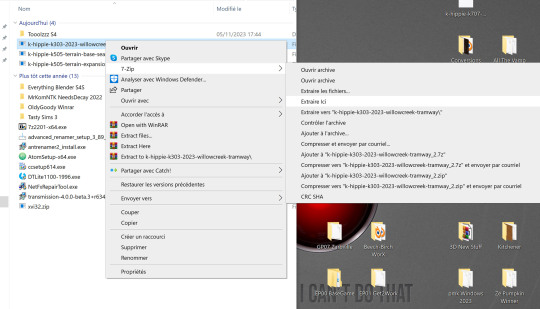
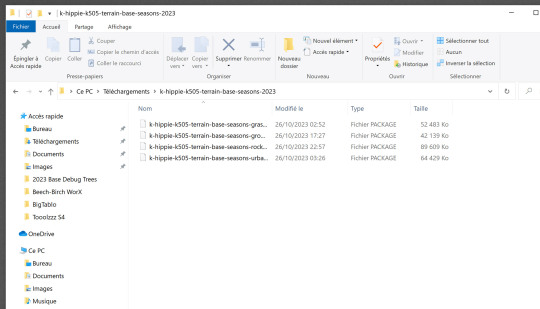
As you see, no problem at all. At first, my firewall is stated on the medium and I do not have Anti Virus except the Microsoft ones.
My browser on PC is Firefox. Then I use 7z.exe to extract : it is free, easy to use and very very safe. I extract all my files inside the download folder then I add them manually into my Mods folder.
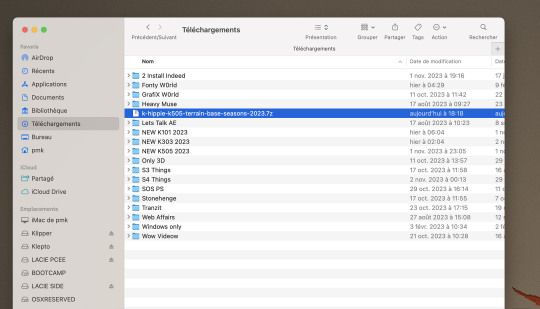
on Mac, it is even much more easy :
Downloaded with Safari, double-click the 7z files, extracted, done.

I'm not a PC guy but I'm pretty sure you may find some help and information among other Simmers.
Crinrict is an excellent website for many things Sims 4 related :) Courage to you ! I'm pretty sure you may do it ;)
That was a late Sunday afternoon post. See you soon !
#sims 4#sims 4 custom content#sims 4 download#sims 4 cc#k-hippie talk#ts4#sims 4 floors#sims 4 wysiwyg#k 101#k 303#k 505#k hippie#the sims 4#sims 4 expansions
93 notes
·
View notes
Text
I've been looking at all the MVs and decided to compile every explicit reference to the Milgram prison I could find in them, see if there's any pattern. Don't really know how meaningful it is but I find it interesting. Also, keep in mind it's very possible I'll miss some stuff, and I'll only point out visual references, not lyrics. (And also not the credits in all the videos, they all say Milgram obviously)
Undercover - Just the entire video, I don't think I need to add any examples. I'm not really going to take it into account for this, but it has all the references you could think of.
Weakness - Milgram logo on a perfume (?) bottle, at the beginning. Funnily enough, this is the only instance I could find of the logo itself beyond Undercover and the Es cameo in Backdraft. EDIT: Wrong, it’s also in Bring it On.
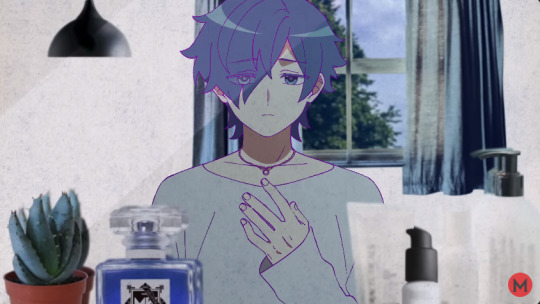
Umbilical - Song name + cover song (Sticky Bug) thumbnail in the background. The song name shows up in other scenes as well, but I won't put anything redundant here.

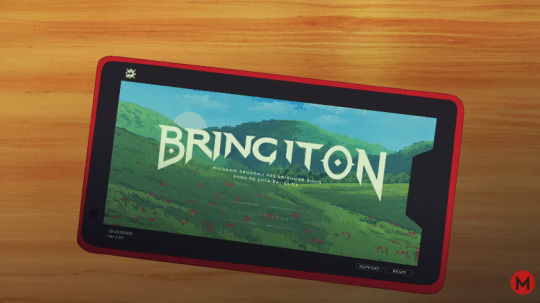
Bring it On - Song name, Milgram name drop, prisoner number. EDIT: And the logo on the upper left corner of the phone.

After Pain - N/A
Throw Down - N/A
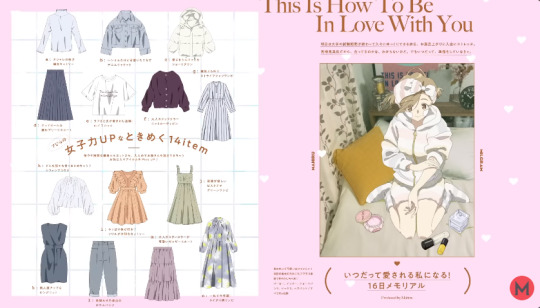
Ai Nan Desu Yo - Song + Milgram name drop on the magazine pages (in the image Milgram is name dropped to the right of Mahiru's picture)
half - N/A
Magic - "Produced by Milgram" in the credits (in Hiragana). This is the only time Milgram is written in Japanese.

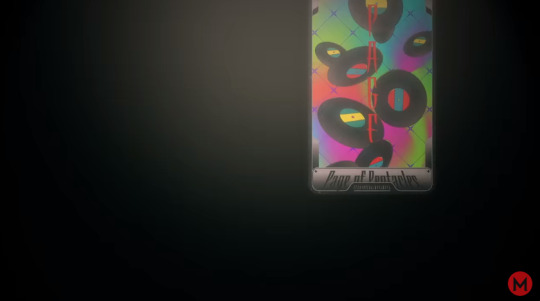
MeMe - "Milgram [...] card" is written in Milgram runes in the tarot cards. I don't know what the middle word is, but it's not tarot. This is the only time apart from Undercover where 'Milgram' is written in runes.
Harrow - N/A
AKAA - N/A
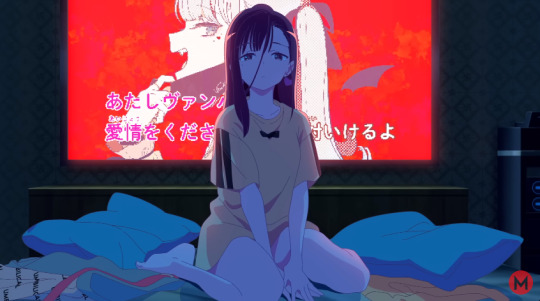
Tear Drop - Song name drop + cover (Vampire) thumbnail in the background. Also Umbilical name drop because of the 'umbilical' skirt, making it the only video to visually reference the previous song title. Yuno is the only character to have a reference to her cover songs in the main MVs, and she has it in both.

Backdraft - Prisoner + Es cameos, the latter implying the Milgram logo and runes also show up. The QR code in all the spray paint cans leads to the Judge website. There's also Milgram runes in the spray paint cans translating to "Pressure."
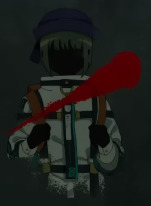

(Also noticing now the only prisoner whose entire prisoner tag can be seen in the graffiti, and therefore their prisoner number, is Amane. 0308 nation we stay winning)
It's Not my Fault - N/A
Triage - QR codes that I assume lead to the Judge website, but I can't easily check because there's no clear shot of them. Also Milgram runes in the graves.

I Love You - N/A
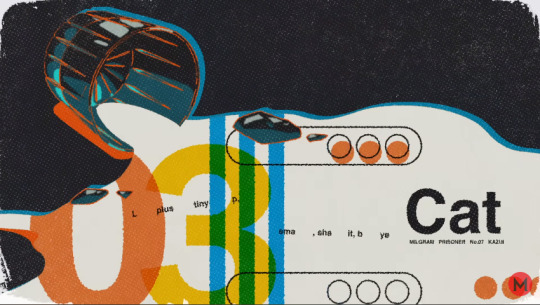
Cat - Milgram + song name drop + prisoner number in several spots.
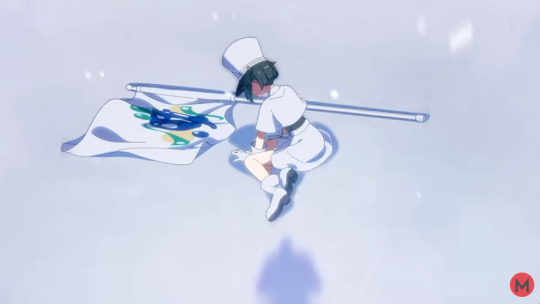
The Purge March - N/A, sort of, since at one point March Leader Amane's shadow is framed to sorta look like Es, but nothing else.

If you want me to come to any conclusions, I'd say anything branded "Milgram" shows a degree of separation with reality, implying Milgram is more involved in bringing it to light than more direct memories. Fuuta's videogame, Mahiru's magazine, Magic and Cat as a whole, Mikoto's highly abstract and symbolic tarot cards. This is what separates, for example, Bring it On's title screen from Tear Drop's; Yuno's perception of reality is a bit more grounded than Fuuta's was in the first Trial. Meanwhile, the name "Milgram" doesn't show up in Backdraft (apart from possibly in Amane's tag), because Fuuta is a bit more realistic there, for example representing Killcheroy more like childishly than in Bring it On.
As for the other stuff, it's quite interesting Yuno is the only one to reference her covers, which can be interpreted in a few different ways. She's shown to be quite intelligent when it comes to some of the more supernatural elements of Milgram (see: "Am I really alive?"), so maybe that's hinting at some sort of higher awareness? Kind of? Sort of? Who knows.
Backdraft is the only video to show the other prisoners (more explicitly than Triage's "extract that fang" line), as well as Es. This fits Fuuta being highly concerned with others' perceptions of him, making him quite prone to peer pressure.
Muu is the only prisoner to have no reference to Milgram in either of her MVs so far, though Kotoko might join her when Deep Cover releases. Take that as you will, I don't know enough about Muu to come to a definitive conclusion.
Don't really know what to do about the QR codes. I guess Fuuta and Shidou both have asked for specific verdicts, but they're not the only ones, so.
Also don't know what else to do with most of this, this was more to put the observation out there. Take care!
#milgram#amane momose#fuuta kajiyama#kotoko yuzuhira#mikoto kayano#kazui mukuhara#shidou kirisaki#haruka sakurai#yuno kashiki#muu kusunoki#milgram es#000#mahiru shiina
73 notes
·
View notes
Text
How to know if a USB cable is hiding malicious hacker hardware
Are your USB cables sending your data to hackers?
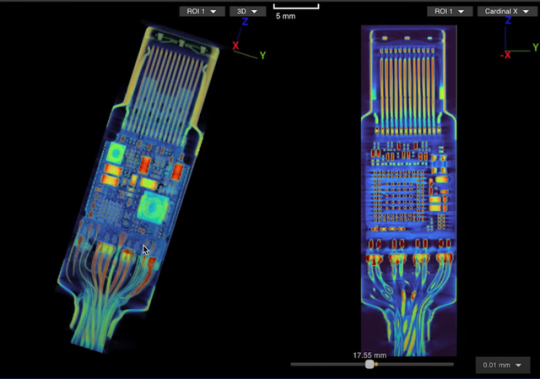
We expect USB-C cables to perform a specific task: transferring either data or files between devices. We give little more thought to the matter, but malicious USB-C cables can do much more than what we expect.
These cables hide malicious hardware that can intercept data, eavesdrop on phone calls and messages, or, in the worst cases, take complete control of your PC or cellphone. The first of these appeared in 2008, but back then they were very rare and expensive — which meant the average user was largely safeguarded.
Since then, their availability has increased 100-fold and now with both specialist spy retailers selling them as “spy cables” as well as unscrupulous sellers passing them off as legitimate products, it’s all too easy to buy one by accident and get hacked. So, how do you know if your USB-C cable is malicious?
Further reading: We tested 43 old USB-C to USB-A cables. 1 was great. 10 were dangerous
Identifying malicious USB-C cables
Identifying malicious USB-C cables is no easy task since they are designed to look just like regular cables. Scanning techniques have been largely thought of as the best way to sort the wheat from the chaff, which is what industrial scanning company, Lumafield of the Lumafield Neptune industrial scanner fame, recently set out to show.
The company employed both 2D and 3D scanning techniques on the O.MG USB-C cable — a well-known hacked cable built for covert field-use and research. It hides an embedded Wi-Fi server and a keylogger in its USB connector. PCWorld Executive Editor Gordon Ung covered it back in 2021, and it sounds scary as hell.
What Lumafield discovered is interesting to say the least. A 2D X-ray image could identify the cable’s antenna and microcontroller, but only the 3D CT scan could reveal another band of wires connected to a die stacked on top of the cable’s microcontroller. You can explore a 3D model of the scan yourself on Lumafield’s website.
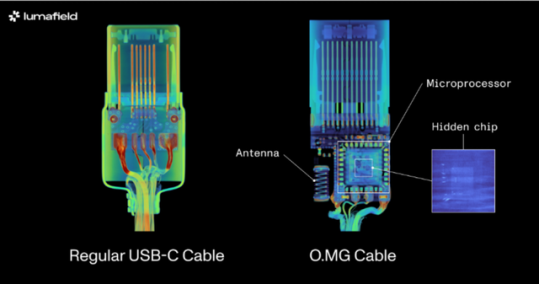
It confirms the worst — that you can only unequivocally confirm that a USB-C cable harbors malicious hardware with a 3D CT scanner, which unless you’re a medical radiographer or 3D industrial scientist is going to be impossible for you to do. That being so, here are some tips to avoid and identify suspicious USB-C cables without high-tech gear:
Buy from a reputable seller: If you don’t know and trust the brand, simply don’t buy. Manufacturers like Anker, Apple, Belkin, and Ugreen have rigorous quality-control processes that prevent malicious hardware parts from making it into cables. Of course, the other reason is simply that you’ll get a better product — 3D scans have similarly revealed how less reputable brands can lack normal USB-C componentry, which can result in substandard performance. If you’re in the market for a new cable right now, see our top picks for USB-C cables.
Look for the warning signs: Look for brand names or logos that don’t look right. Strange markings, cords that are inconsistent lengths or widths, and USB-C connectors with heat emanating from them when not plugged in can all be giveaways that a USB-C cable is malicious.
Use the O.MG malicious cable detector: This detector by O.MG claims to detect all malicious USB cables.
Use data blockers: If you’re just charging and not transferring data, a blocker will ensure no data is extracted. Apart from detecting malicious USB-C cables, the O.MG malicious cable detector functions as such a data blocker.
Use a detection service: If you’re dealing with extremely sensitive data for a business or governmental organization, you might want to employ the services of a company like Lumafield to detect malicious cables with 100 percent accuracy. Any such service will come with a fee, but it could be a small price to pay for security and peace of mind.
12 notes
·
View notes
Note
Hi PXL! I hope you are doing well! Firstly thank you for opening up wcif, secondly I am in absolute love with your work, when I’m rich, you are designing my real life home ! I would love to know where you got the wallpaper in your Principal Bathroom, Virginia Estate post. I’m assuming you did it yourself, if so where do look for inspiration for wallpapers and the images to create them. I’d love to know cause all your wallpapers you use are magnificent!

Hello Nonny,
Thank you so much, it would be my dream to make a career out of decorating and designing homes in real life! I did make this wallpaper myself. In this case shopping wallpaper for my home in real life inspired me to make some in game. I am so glad I've made it out of that millennial curse of believing wallpaper = bad and blank white walls = good. Haha. Go check out some wallpaper manufacturers, the options are endless and so fun! For me at least, I will see something and then design the room around using that wallpaper, not the other way around if that makes any sense. You can go to stock image websites and find pre-made seamless patterns, or with a bit of skill in photoshop, you can extract samples from websites, and make them seamless yourself, then convert into CC.
18 notes
·
View notes
Text
Fixlint: Your Hub for Free Online Services
In this digital age, the internet has become an integral part of our lives, providing us with a vast array of tools and resources. Among these, online services have gained immense popularity for their convenience and accessibility.
#a hub of free services#YouTube to mp3 converter online#get all links from a website#convert your text to audio#text to audio converter#alphabet counter#character count tool#character count online#qr code scanner online free#qr code reader online#extract images from website
0 notes
Text
HOW TO MAKE A COVER PART 1
PART 2
We all the saying “never judge a book by its cover”, but be honest without yourself. There has at least been one time when you did pick or didn’t pick a book because of its cover. Anne many people make fanfics these days, but sometimes when you scrolling on Wattpad, it isn’t a stories name or summary that usually stops you from scrolling down a list of fics, it’s the cover that makes it stand out.
“But how do I make my cover stand out? I don’t know how to make one?” Simple trick: make it look good. It is natural for humans to take a liking to looking at good things.
WARNING: I am no master at making covers, this is something simple I decided to do to help a few people. But today, I will tech you make covers like these (both covers are made by me for a friend, do not steal or edit my work):
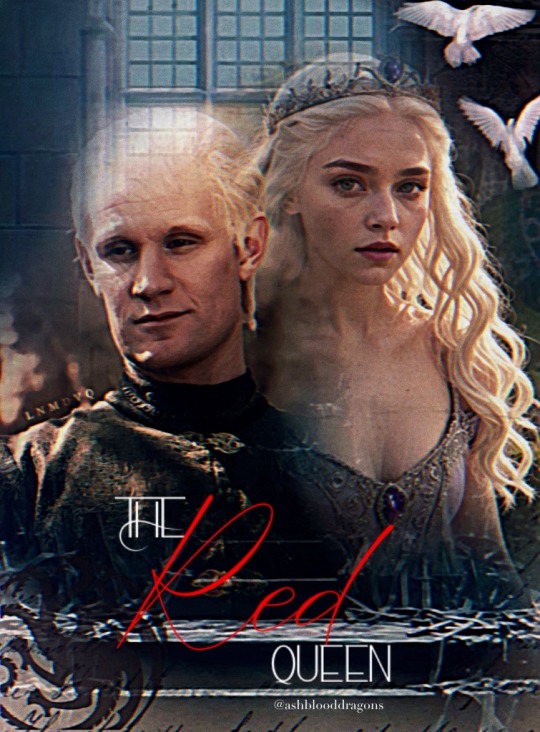
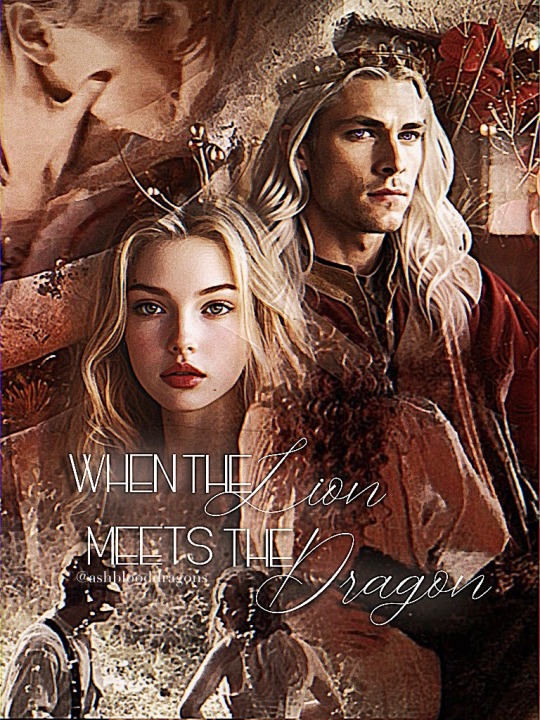
INTSTRUCTIONS:
Find a website obviously. Since I’m a broke bitch, I don’t spend my money on Photoshop or anything fancy. So lemme give you a free and easy app: IbisPaintX (it works on laptops, iPads, phones. But for this purpose, I recommend choosing an iPad).
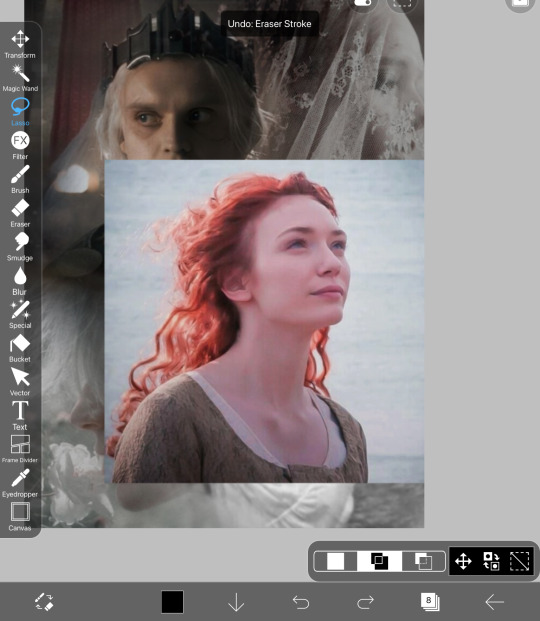
2. Find some pictures. In order to make a cover, you obviously need pictures. I recommend adding 2~ faces in the cover so you have space for adding additional photos for fun that fit the theme. Also make sure to have at least one background photo so when you add your pictures on top, they’re istn too much white space showing. I recommend going on Pinterest to find photos. Also, remember to pick a theme. Are you going for something romantic? Something tragic? Or thriller? For this tutorial, I’ll be making a romantic cover, but my theme is more grayish (always try to plan on an image mentally before actually making anything). These will be my images for this tutorial:
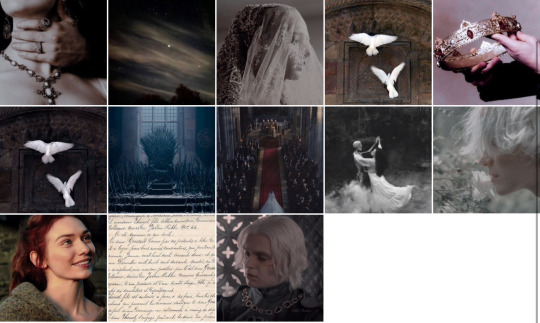
(Keep in mind, you probably won’t be using all of your images. It is simply better to have lots of photos, in case a certain one might not workout. Throughout the process of making the actual cover, you might go around and change photos up or even add new ones as I do).
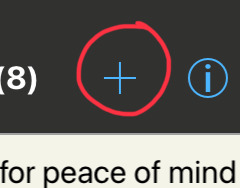
3. Once you get your photos, go to IbisPaintX and click on the plus sign.
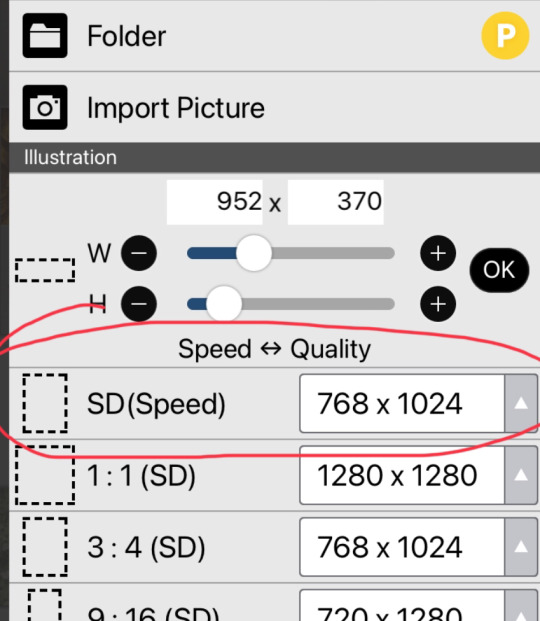
This should open a chart (the image on the right) for you, that allows you to pick the size of your cavas. You can either make your own size, or choose one of the premade ones. I recommend the 768 x 1024 size.
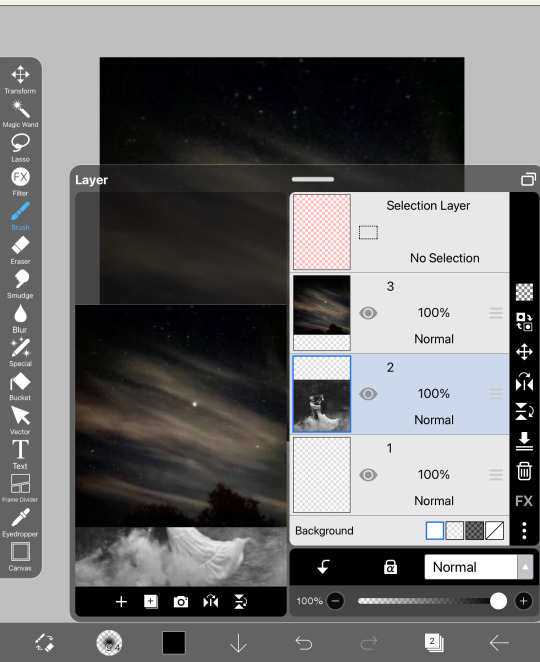
4. Now we have our canvas! Currently it should be blank, but see that little number 1 at the bottom? That is used for layers. When you press thag, you should open to the setting in the second image. Click on the little camera circled.
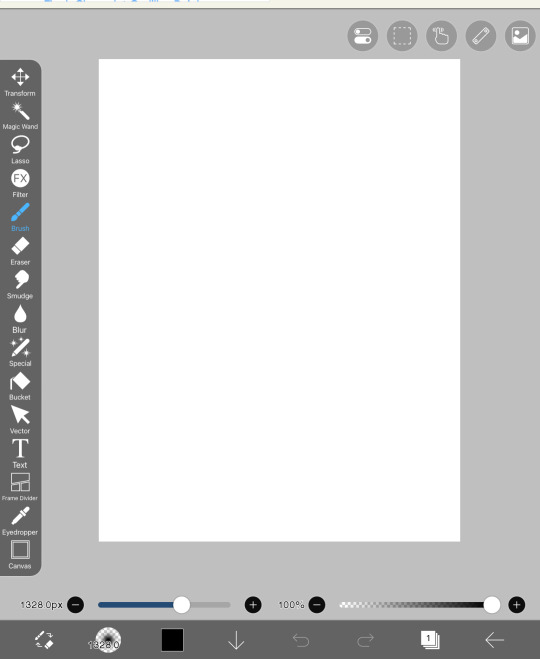
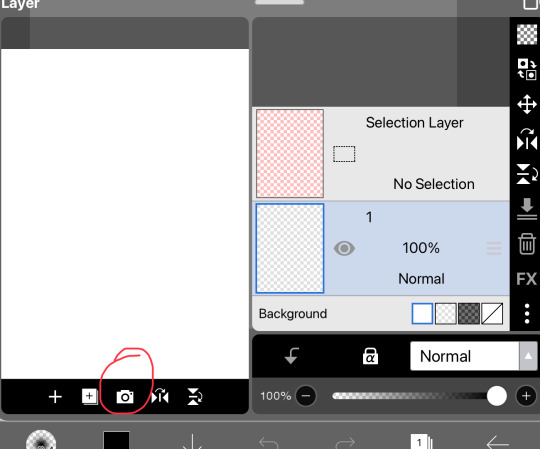
It should open to this and you should pick 1-2 photos. These photos should add as our backgrounds. Every time you open a photo, It will pop up something that asks if you want to extract or remove any backgrounds, press cancel for every image until I say so.
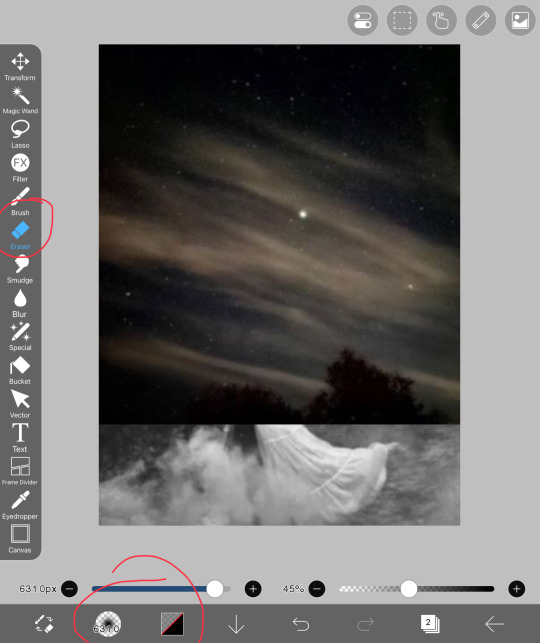
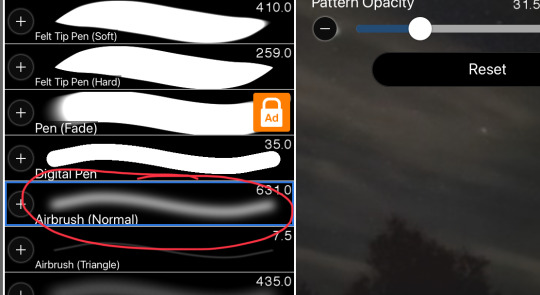
Currently, the two photos look stiffer than my back. Let’s try to blend them together! In order to do that, you should head over to the erasers. When you go there, press on airbrush and lower the opacity (I normally use 45% to blend most photos)


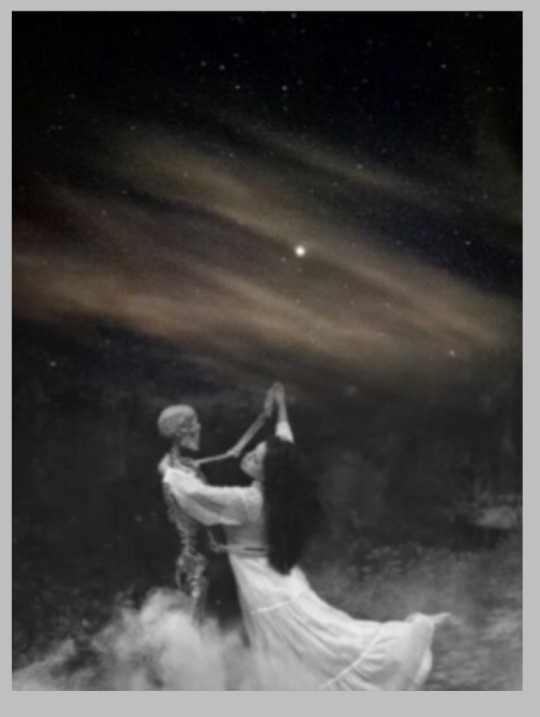
Softly blend the two images and try to prevent any sort of white spots from forming. This should be our finished results:
5. The next step is quite similar. Now that you know how to add on images, continue to add more images on top and blend them into one another. DO NOT OVERDO THIS
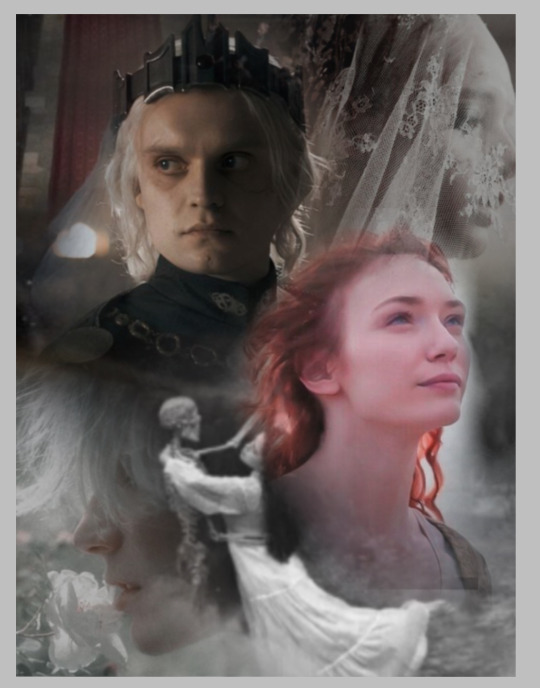
BOOM! Jusr have fun in this process, add on images and remove, blend around. If the colors don’t fit that well together, it’s ok, we will work on that in future steps. But now, it’s time to add our main characters on the cover. I usually add them in the middle, since that is where the attention is most drawn. Simply add them on and erase the edges of the sides to make it proper. Do not erase too much in this step. We are not trying to make the picture blend in, but rather soften the edges of remove the background. Here, this is what I mean:
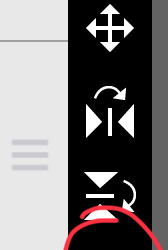
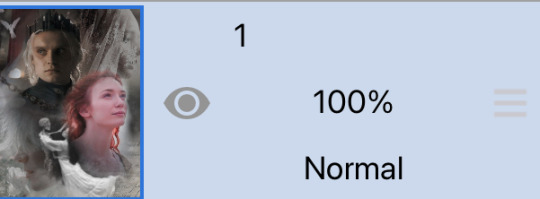
If there is any more photos at this point that you want to add, go ahead. The next step is merge all the layers. When you opened the layers, you would see how there are many. We are trying to merge them into one. When you open the layers button, there will be a merging button that I circled and simply press on it continuously until you have only one layer.
Our product should be this as of now:

OK YOU MUSF BE SAYING “THIS LOOKS PLAIN AND UGLY!”
I know it does. But because tumblr is a bitch and only allows a certain amount of photos, this will be split into part 1 and part 2. In this part, you learned how to ensemble a cover. In the next part, we will learn how to make it look good. This is PART 2
Thank you for staying this long! If you have any questions so far, please do ask me.
#sazh rambles#sazh covers#sazh writes#sazh helps#covers#book cover#fanfic#fanfic help#tips#art tips#art tutorial#guide
8 notes
·
View notes
Text
❄ All I want for christmas is these goddamn textures ❄
Ok I'm BEGGING y'all. Anyone who knows how to extract files.
I just want the cardboard cutout art, and like, maybe poster, wall decals etc. Anything with the art of the characters, y'know.
But mostly the cutouts.
That this one for example, which is apparently the best image the fandom wiki could find.

Not only is it just a screenshot, it's not even a good one!
Meanwhile, all of the smiling critters have had their art extracted and available for a long time, mostly due to them being used for other things but YOU GET THE POINT.
...
I mean we have these unused files from chapter 2, crisp and clean, right there to download off of the cutting room floor website.


But yet. Nothing for the ones actually used.
I'd go snooping in the files myself for something, if I had the steam version of chapter 3. I just have the xbox version though lol
Anyways please thanks that's. Yeagh
6 notes
·
View notes
Note
Do you have any tips or guides on how to make gifs?
I do! Firstly, this guide here is probably the best guide I've seen for gif making. It's concise and easy to follow, and it's what I used to learn myself. They have a lot of resources as far as programs go, but I'll list what I use below. As always, never download and install anything from unknown sources without doing your own due diligence. Run everything through your antivirus and/or virustotal before installing always always always!
This is kinda long, so imma put it under the cut lol. Also note that I use windows (Win10), so things may not work the same way for mac or linux
Before you can actually make the gifs, you need a way to download high quality videos! I like jdownloader 2 because I find the interface to be user friendly, it gives you the option to download multiple elements (like srt files), and it works with more websites than lots of other video downloaders (and their user support is leagues better as well). My second choice is yt-dlp, which isn't necessarily more complex but might look a little more intimidating. Both are great programs, but a quick note about jd2: DO NOT download it from anywhere else but the link above. The developers package adware in all their installers EXCEPT for that one (I hate it too, and I think it's fundamentally unethical, but at least they're up front about it and they have an adware free version). Both methods automatically download the highest quality video available in your source link, so you don't have to worry about fiddling with that.
Now on to extracting frames! My method of choice is ffmpeg. It looks more intimidating than it is, and it's honestly the best way to extract frames imo. Like yt-dlp, it uses your computer's command console, which means you'll need the relevant command lines to run it. This tutorial is great to get you started, and it includes a command line for if you only want to extract frames from a specific part of your video. If you want to extract every frame from the entire video, you can either input the start and end times of the video into that command line, or you can use this version (I use both depending on what I'm doing):
ffmpeg -i "file path" "out-%05d.png"
Always make sure you're working with png files. To make quality gifs you have to start with quality images, and png files, unlike jpg, are lightweight and lossless, meaning you won't end up with compression artifacts and fuzziness
To get the file path for your video, select the file, then in the upper left hand corner of your window select home > copy path. It will copy the path in quotes, so replace the entire section "file path" with the path you just copied. Then copy and paste the entire line into your command console. The tutorial above says this as well, but be sure to create a folder for your frames, go into that folder and click the file path bar at the top of the window, then type "cmd" to open the console. This will ensure your files are dumped in that folder
So now you need a way to actually MAKE the gif. This is... a little more tricky. You can use gimp, I think, though it's certainly not my program of choice. You could buy PS but like... ew. OR you could do what I did and arr it. I use a portable version of CS6 that I downloaded literally a decade ago, and unfortunately the website I got it from isn't up anymore. I did a quick search and found this on reddit, but again, do your due diligence before downloading and installing anything!
Now I'll talk a little bit about my actual process. The actual process of making frames into layers into a gif I got from that first tutorial I linked. I took that process and made an action on PS so that I never have to do it manually again because I'm lazy and my memory is dogshit and I didn't want to have to consult a guide every time I wanted to do something lol. Everything else I learned through experimenting and my own experience as a photographer, so I encourage you to play around with everything to see what you like and what works for you
For coloring, I fiddle with levels, brightness/contrast, and color balance adjustment layers until I'm happy with how it looks. You can use curves instead of levels if you want finer control (or if you want to produce effects like matte), but levels works just as well and has a histogram right there in the panel, which makes it easier to adjust the exposure based on the image's actual data
For sharpening, I have a couple of custom actions I use. Here's what they look like:

The first one (bound to the F2 key) gives a smoother appearance, and I like to use it for kpop gifs where the subjects are already airbrushed and smooth without much texture, or wide shots where detail isn't super important
The second one (bound to the F3 key) is the one I use when I want to preserve texture in the image. Closeups of people where you can see their skin texture, or busy images with lots of detail benefit most from this one
The basic gist of it is, the "sharpen" filter does exactly what it says on the tin and it's usually all the sharpening an image needs, and the "surface blur" filter erases or dampens artifacting created by the sharpening filter. Sometimes I'll run the action twice, or use them both in combination to get the effect I want. Here's what the difference looks like in practice, featuring two very cute dudes:
F2 sharpening action


F3 sharpening action


You'll notice in the first two gifs, there's not much in the way of texture to preserve. Yoongi's skin is smooth and airbrushed, and the scenery is all metal and concrete shot with a wide aperture, which makes the background nice and blurry and smooth. In the second set, Jesse has facial hair and stubbly texture on his throat that I wanted to preserve, so I used the action with the lighter surface blur
My advice on all of this though, again, is to play around with it and see what you like! And if you have any more questions, feel free to ask! I'm by no means an expert, but I'll do what I can to help!
edit: oh, a quick note about speed! The tutorial I linked above mentions changing the delay to 0.05, and that's great for full speed gifs! But if you want them slow like my gifs above, I set the delay to 0.08. Sometimes I'll slow them down even more by setting the delay to 0.09 or 0.1, but any higher and you start to lose some of that smoothness
14 notes
·
View notes
Note
downloaded the pearlo, for some reason my java isnt actually putting her on the screen. do you know why this is and how to get her to work
can't promise you a 100% fix without looking at ur files, but some fixes you could try:
reinstalling java. this version of shimeji needs specifically java 8 to run so it's possible your java needs an update
(^extra note about this: you have to install java directly from the java website. the version that you get with minecraft, for example, won't work.)
checking if the shimeji program is actually running in your tray, it should look something like the image attached below. if it's there, you could try clicking the "call shimeji" option if it doesn't spawn one when you first open the program for whatever reason (it's also possible that she is spawning and just spawning somewhere really weird like the edge of the screen where you can't see her)
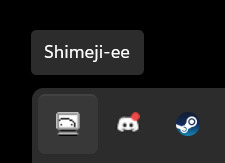
checking if your computer has enough power to run it - if you can open up an internet browser and type this ask I highly doubt your computer will have trouble with a shimeji, but it's possible you're low on RAM or have a bunch of stuff running in the background that are getting in the way.
it's possible your zip file isn't extracted correctly -- inside should look like this:
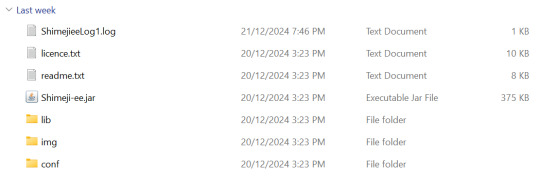
if it doesn't, try extracting the ZIP file again. try to avoid win-rar if possible, that seemed to muddy things up when I was testing the dl with a friend.
in the event that there's something horribly wrong with the pearlo download specifically, you can download another shimeji e.g. the default one from the dev's website and replace the 'img' folder with pearl's 'img' folder. the only code i messed with was letting her interact with more windows, so you shouldn't be losing out on anything especially if you just want to see her wander around your screen.
alternatively, you could use something like the shimeji browser extension's editor and have your pearl shimeji that way, although that's a bit different features-wise compared to having one on your desktop as a whole.
and finally, try turning your pc on and off again. it works sometimes. god knows why
hope at least one of these helped!!
4 notes
·
View notes