#embroidery tutorial
Explore tagged Tumblr posts
Text
I have recently received another ask about my canvas pulling and since I've been thinking about making a serious tutorial for a while now, I took the opportunity to take some pics and vids while finishing the tree. Do please enjoy :3
1. Why pulling out canvas at all?
Primarily, this is a fantastic technique to apply cross stitch patterns directly to the item you want OR to make patches from old jeans, like this one:
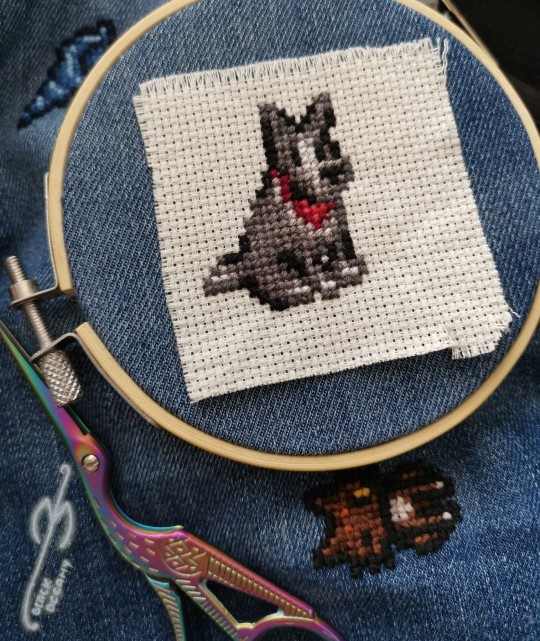
With small patterns I usually don't bother to sew the canvas prior to embroidering, like with the pupper above. In case of the bigger patterns, I usually sew it lightly on the edges just to keep the canvas in one place. The more stretchy the material type is, the more important it's going to be to keep it in place.
2. Why not use a soluble canvas?
I'm sure you can and that they'll be as successful as the regular one 😁 However, as I mentioned in my previous posts here and here, I prefer to err on the side of cheaper, hence the tutorial.
3. Okay. I'm convinced - I even have a pattern embroidered on! What's next?
With small patterns (like the doggo earlier) it's going to be pretty easy. You just pull the threads one by one - preferably starting on the thinnest part of the pattern - and you may not even need the pliers. The fun (?) is with the large pieces, because the canvas has on average quite fragile threads and they like to break. Note - the canvas I'm using and I suppose most of the existing canvas types, will have four threads per one embroidery row. It's usually easier to pull one first and then the other three, bit that may vary when, for example, you managed to pierce the thread during stitching phase earlier 😉
If you were already careful during the stitching, you paid extra attention to embroider EXACTLY between the canvas threads and avoid piercing them at all. There are two benefits to that being extra careful: one, it's easier to pull it out later; two, the stitching gains an extra precision to it (and it looks great!). I recently discover that the round tip needle is making it much easier and if you're interested, there's a separate post about it as well!
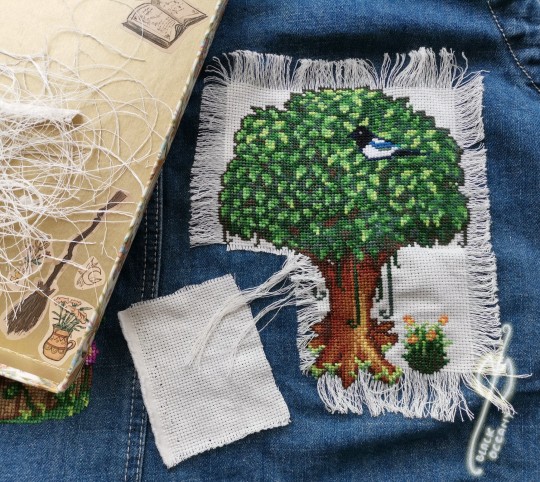
On to the process! You can see from the pictures how I started with cutting out a piece of canvas that I can later reuse for something small (recycling is my hobby 🤷🏻♀️). I also pulled loose threads from around the tree:
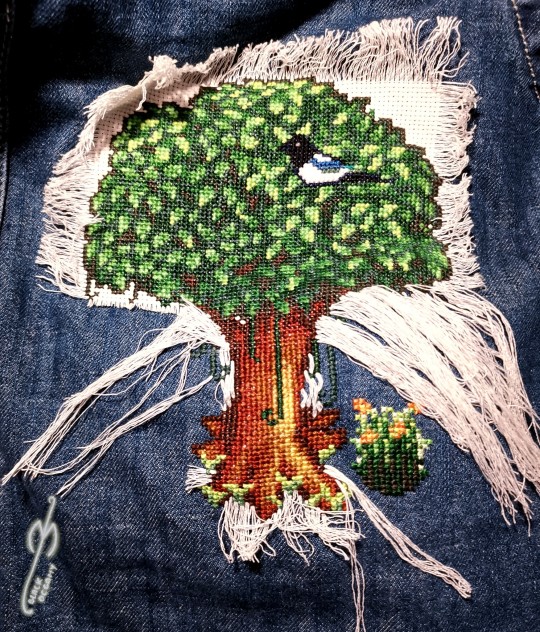
Next part was to clean up the trunk and the grass on the right:
I then cut off the excess to avoid the threads tangling and slowly moved to the sides of the leaves on right and left:
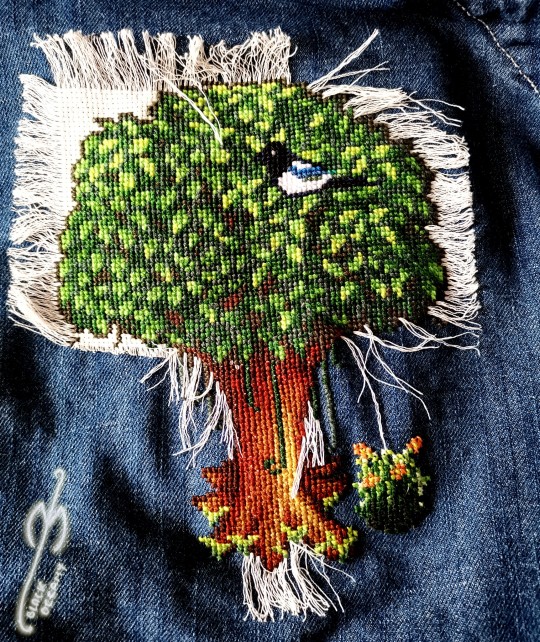
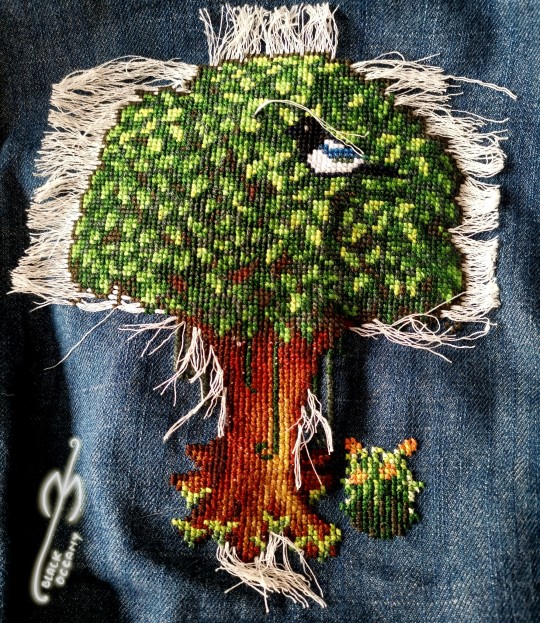
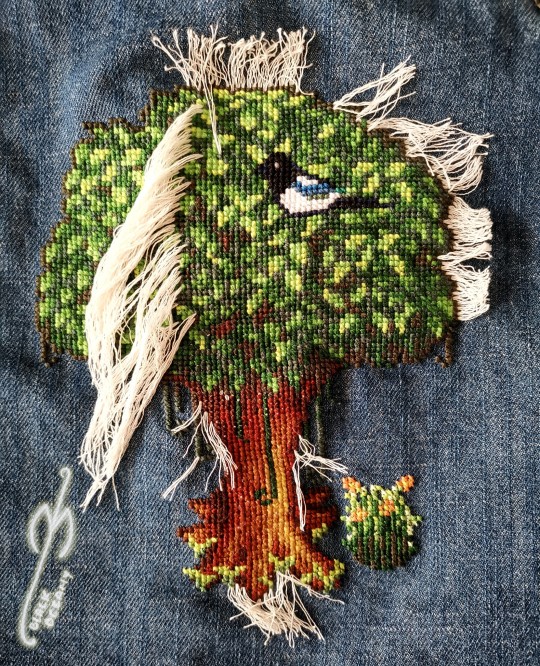
You'll notice that the last photo has the thread pulled halfway through the pattern. That's because on this stage it's usually impossible to simply pull the thread out - even with the pliers it is just going to break off. I use a needle to pluck it from between the embroidery like this:
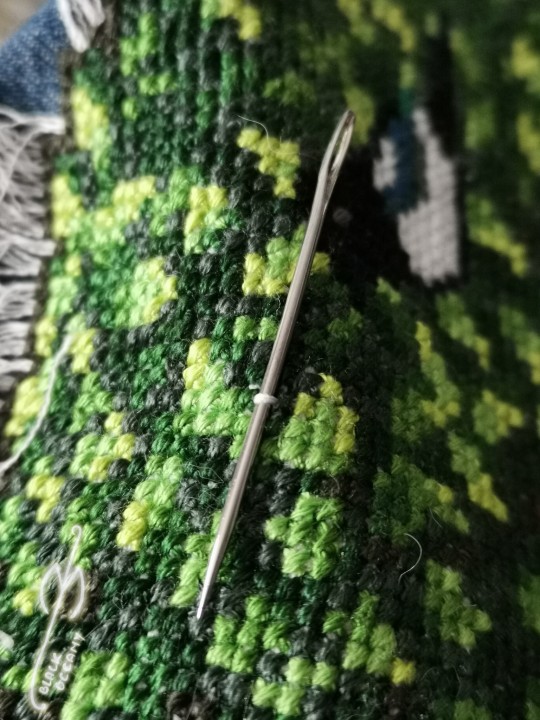
If you're more of the visual learner, I made this vid that I hope explains the process in more detail. You'll notice that I'm using my fingers and not the pliers here, because it's faster than to switch between tools.
And finally, when you're left with single direction threads like these, it's just a matter of pulling them out one by one.
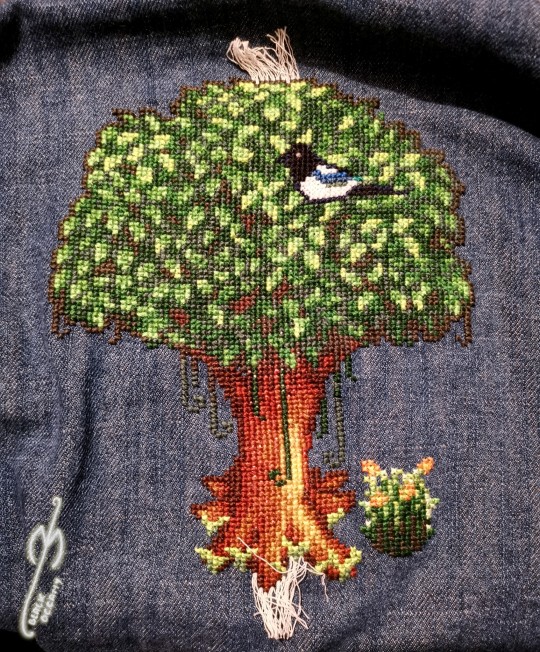
And that's it! The final product looks clean and neat, AND you will notice that without the canvas beneath it's also getting a bit of volume that looks cool (and helps even out small mistakes you may have made along the way).
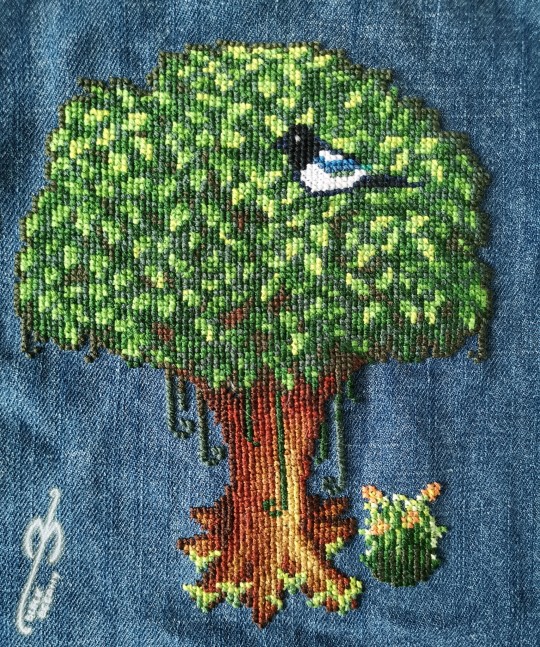
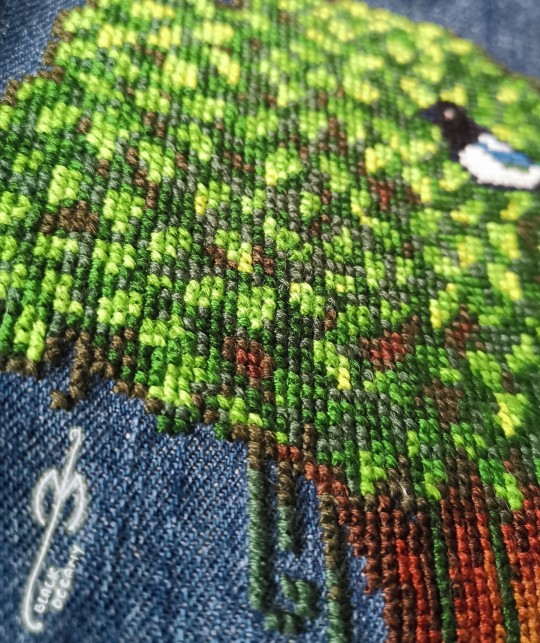
Thanks for reading this far! Let me know if there's something else I forgot to explain 😊
2K notes
·
View notes
Text
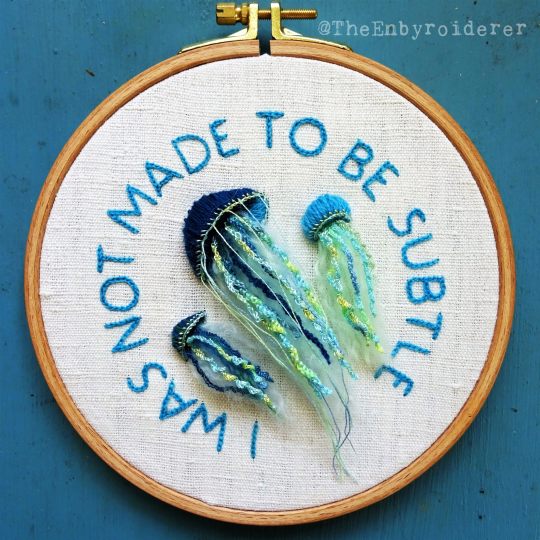
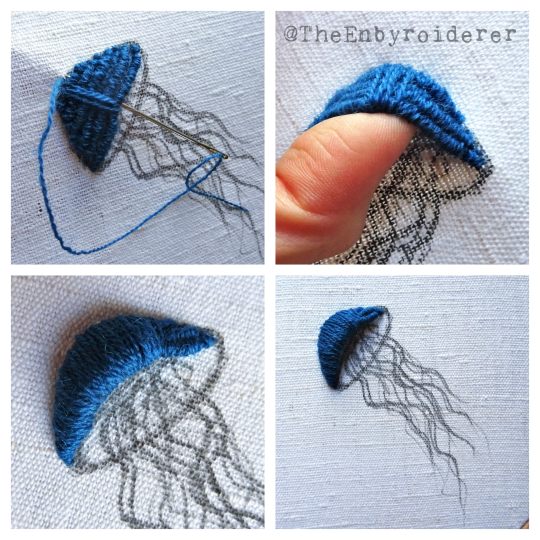
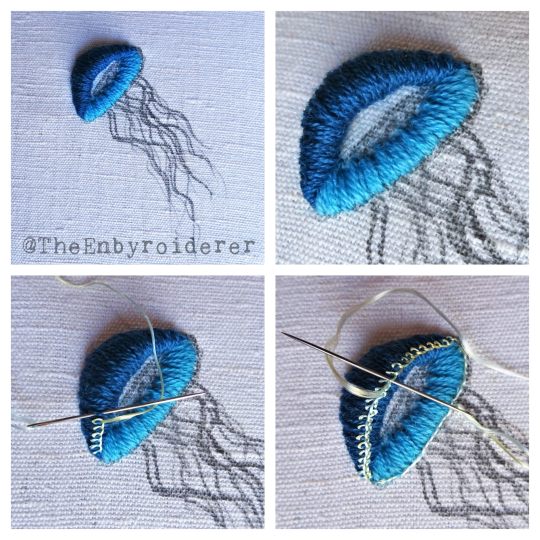
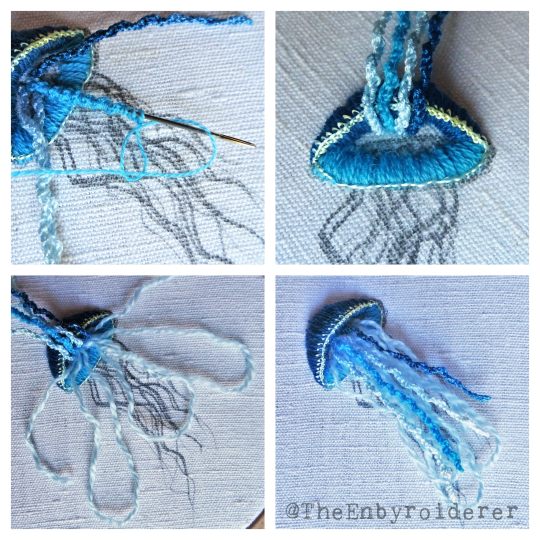
One more tutorial. I think this is the last one I have for now.
Here's how you stitch a 3D jellyfish. This is a more advanced tutorial. Prior experience with most of the stitches is recommended.
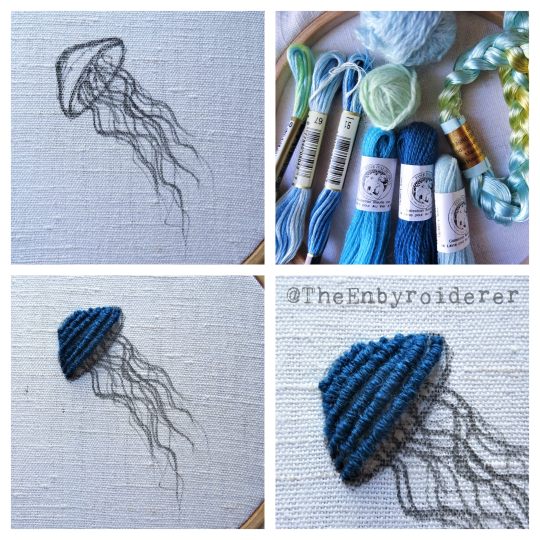
Materials: You'll need several needles, at least one shorter and one really long. I've used sashiko needles in three lengths, 4 cm, 5.5 cm and 8.5 cm. As for yarn, I think you can use whatever you have. Most of it can be done with six-stranded floss, but you'll need some thicker woolen yarn for the fluffy turkey stitch. I used fine d'aubusson (a fine wool embroidery yarn) for the body, six-stranded floss (2-3 strands) for most of the tentacles, a shiny silky embroidery floss for the edge of the body and a couple tentacles, and knitting yarn scraps for the turkey stitch.
Stitches: satin stitch, bullion stitch, padded satin stitch, buttonhole stitch, drizzle stitch and turkey stitch. Please look up stitch instructions on youtube, and do a bit of practice beforehand. This project is probably not a good practice run for these stitches.
Time: depends on the size of your jellyfish. I made quite a large one and it took me about 5 hours to complete.
1. Make a sketch of your jellyfish. At least of the body. Fill this body from edge to edge with bullion stitch, make them a bit longer than the body is wide so that they are somewhat loose. You should be able to get a finger underneath the bullion, depending on the size of your jellyfish.
2. Then it's time to satin stitch the body. For this part it's important that the needle goes through the fabric as close to where it came up as possible. The goal is not just to make a 3D body, but to make it a hollow 3D body. Don't just stitch over the bullion, stitch around it. It's also important to not pull too tight. Bullion stitch of this lenght is rather malleable, so it's a bit tricky to keep the satin stitch even. Hold a finger in the hollow underneath the bullion as you pull the thread tight. This will stop it from getting to tight, as well as make sure you keep the hollow. As the stitching gets thicker the hollow will get smaller, but that's ok.
3. When the top part of the body is fully stitched it's time to do normal flat satin stitch for the bottom part, the inside of the body of you will. Leave an opening in the middle though, you'll need some space for the drizzle and turkey stitch later.
4. This is a good time to give the edge some definition. Do buttonhole stitch around the top edge, then you go around and do another row of buttonhole stitch, kinda the other way around, through the loops from the first row. Hopefully you can see from the pictures what I've done. The bottom edge of the body doesn't need defining and won't be very visible anyway, so I just did some sloppy stitches along there and called it good enough.
5. Now it's time for the tentacles. Start with the drizzle stitch, because the turkey stitch will just get in the way if you start with that... but do remember to leave space for the turkey stitch underneath the drizzle stitch. This is where you need the loooong needle. Pack as much drizzle stitch on that needle as you can. You'll notice that the drizzle stitch wants to rotate around your needle as it gets longer, do let it, that will just help you fit more stitch on there, as well as give the finished stitch a nice curl.
6. When you think you have enough drizzle you can move on to the turkey stitch. You will not need to do a lot of it. You'll probably overestimate how much you need, but that's ok, you can always give the fluff a bit of a haircut later. Do a few looong loops of turkey stitch, a little bit longer than your drizzle stitch. Cut the loops to slightly different lengths, otherwise you'll get a very blocky bit of fluff... tapered is better. Untwist the yarn and separate the strands, draw a needle through the strands to fluff them up.
7. As a finishing touch you can add some long and thin strands around the edge of the body.
Edit: Tfw a post has been up for years before you notice that you forgot a whole-ass step. Apparently #4 has been missing all this time. Oh well.
#embroidery#3d embroidery#fiber art#needlework#embroidery tutorial#fiber art tutorial#3d embroidery tutorial#tutorial#jellyfish art#theenbyroiderer
793 notes
·
View notes
Text


Every stitch holds a story, every thread weaves a feeling—like the heart, mended and made beautiful with time. ❤️✨
youtube
#crafts#handmade#embroidery#arts and crafts#sewing#etsy#fiber arts#diy#embroidery tutorial#threadskalakari#Youtube
30 notes
·
View notes
Text
115 notes
·
View notes
Text
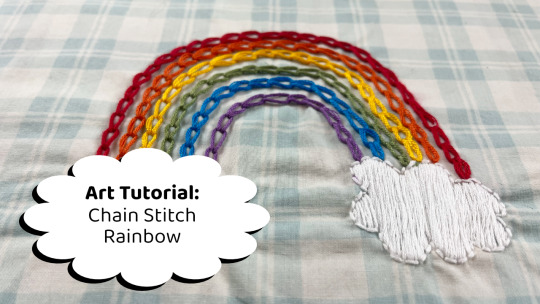
Looking for a gloomy day project? Try making a chain stitch rainbow!This project is beginner friendly and uses only 3 basic embroidery stitches.
Watch the tutorial
#design#sewing#fashion#handcrafted#handmade#slow fashion#textiles#textile art#one of a kind#embroidery#tutorial#yarn#youtube#my art#artwork#art#diy#crafts#video#hand stitching#rainbow#diy project#diy craft#diy tutorial#embroidery tutorial#beginner embroidery
5 notes
·
View notes
Text
Embroidery tutorial!
How to transfer your drawings onto paper:
Talking about pencils, pens, Paper Solvy, water soluble film and Magic Paper
31 notes
·
View notes
Text
youtube
A super easy embroidery project for beginners
#witch#fibercraft#crafts on tumblr#embroidery#youtube#vlogger#sewing#crafts#embroidery tutorial#sewing tutorial
2 notes
·
View notes
Text

5 (now 6) Ways for Floating Fabric for Embroidery by Aly of Sewing Machine Fun.
https://www.sewingmachinefun.com/how-to-float-fabric-machine-embroidery-tutorial/?utm_medium=social&utm_source=pinterest&utm_campaign=tailwind_smartloop&utm_content=smartloop&utm_term=60627024
#crafts#gifts#decor#sewing#quilting#briar rose quilts#bedding#shopping#quilters of tumblr#machine embroidery#embroidery#sewing machine fun#embroidery tutorial#machine embroidery tutorial#sewing tutorial#fabric#fabric hooping#fabric art#textiles#textile art#fiber art
4 notes
·
View notes
Text
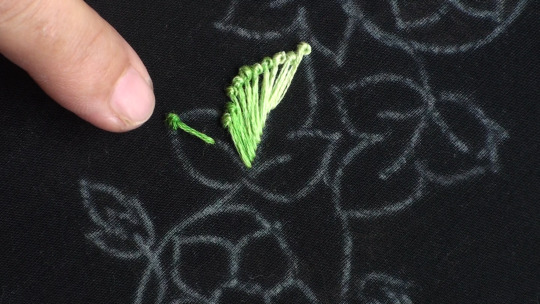
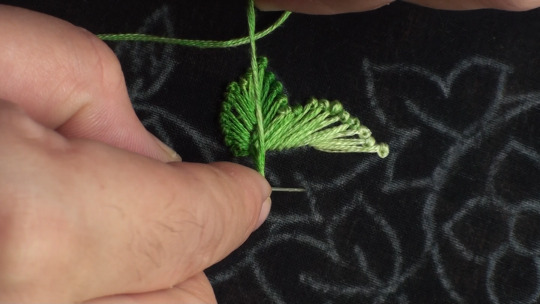
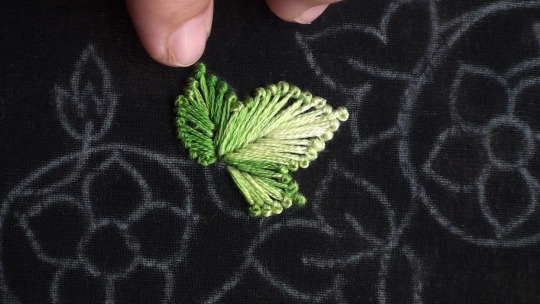

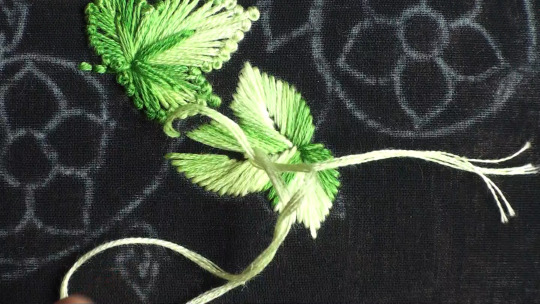
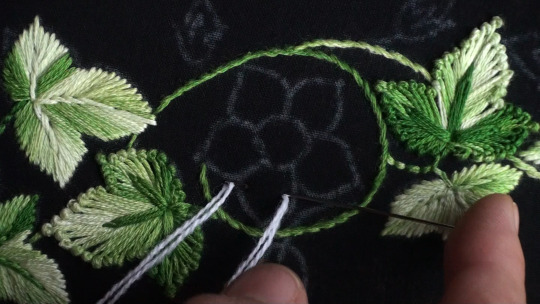
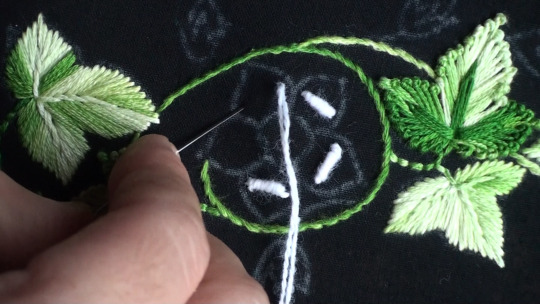
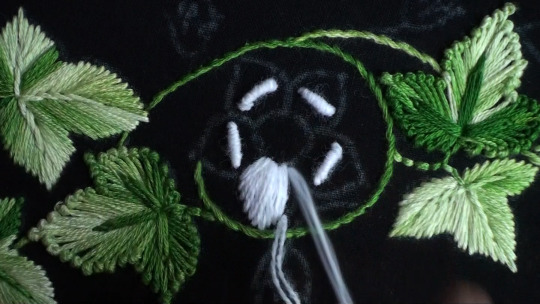

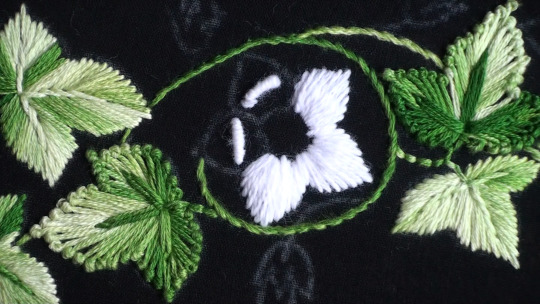


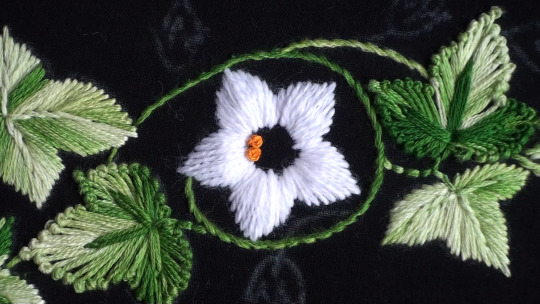
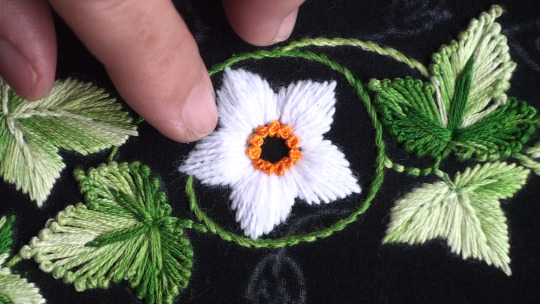
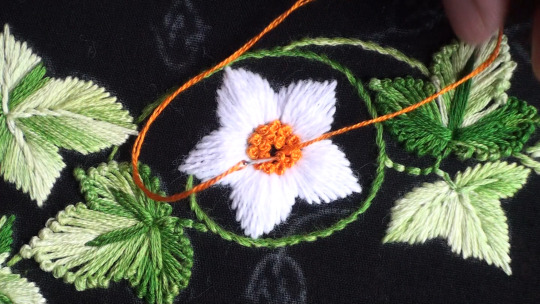
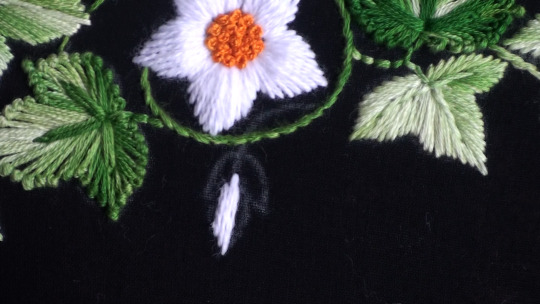

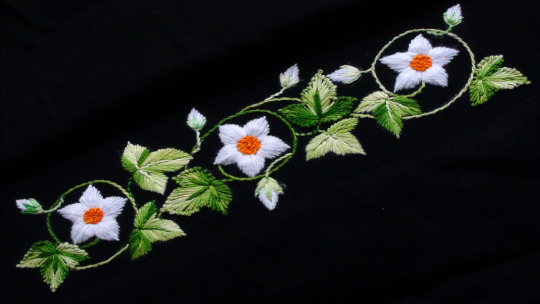
#youtube#embroidery#embroidery design#handembroidery#embroidery tutorial#needle work#flower embroidery#design#miss anjiara begum
27 notes
·
View notes
Video
youtube
How to do Cable Chain Stitch
3 notes
·
View notes
Text
The mighty french knot - or, as some folks from my neck of the woods call it, the colonial knot.
6 notes
·
View notes
Text
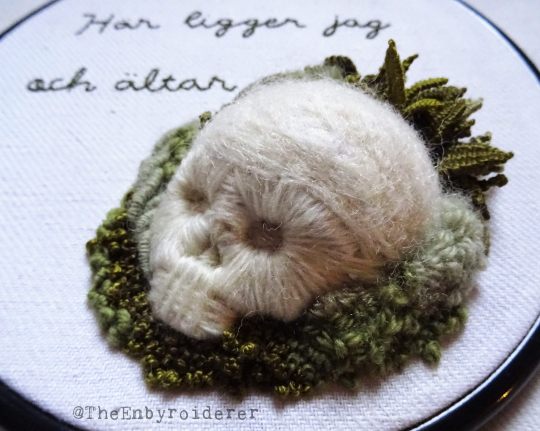
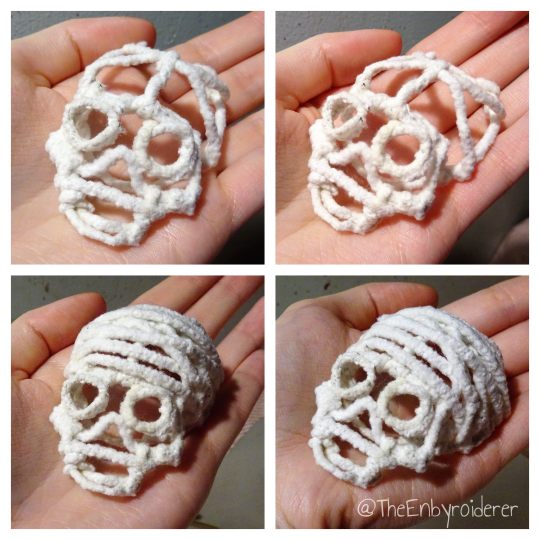
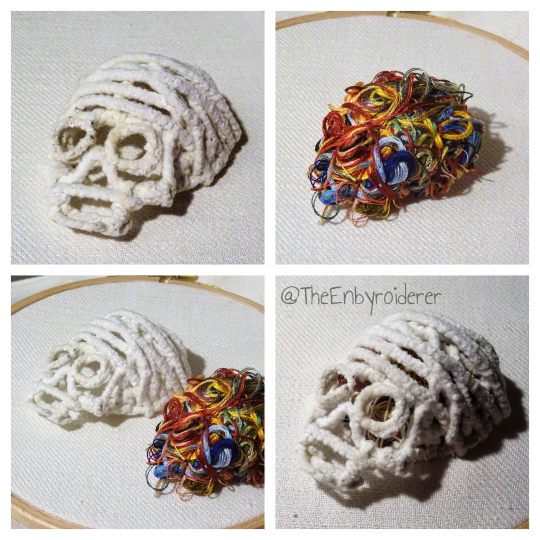
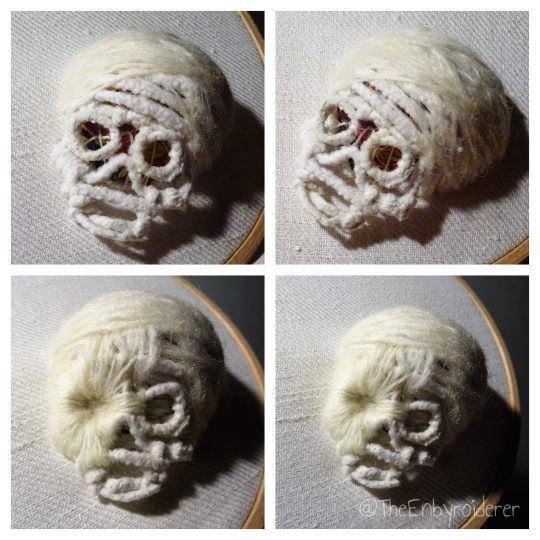
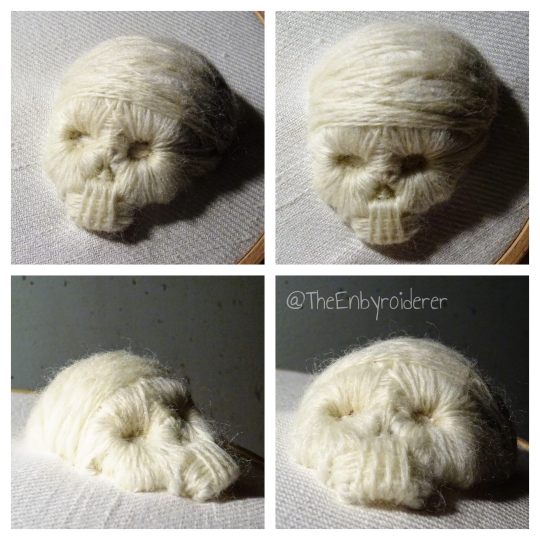
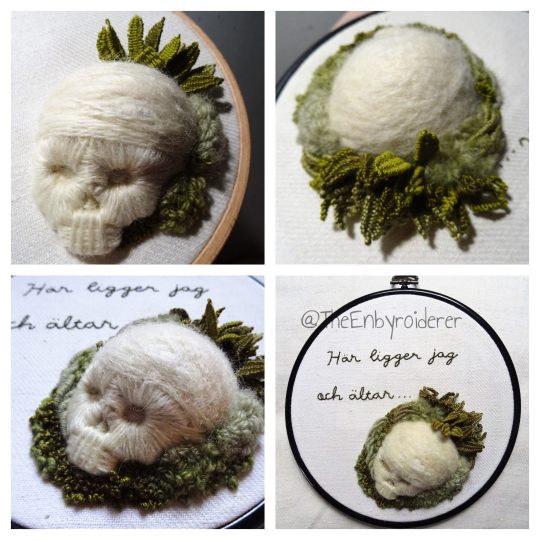
In the lull between fiber projects I'll just post another tutorial. Though this one is less a tutorial and more vague guidelines. There are parts that I can't really tell you how to do and I'm sure there are details that I don't have photos of... but I'll try to describe the process as best I can, and just hope that my words can fill in the gaps. Just ask if you have any questions and I'll try to answer them.
Materials: Cotton fabric, durable, not too thin. Pipe cleaners. Off white cotton thead. Off white wool yarn, a couple different thicknesses is preferable. One shorter and one longer needle, both sharp. (I used sashiko needles, one ~4cm and one ~6 cm.) Felting needles, for the top of the skull. Various green shades of wool yarn, perle, and other threads, for the foliage.
Step by step instructions:
1. Make a skull out of pipe cleaner. Just do it, I can't tell you how.
2. Find something to fill your skull with. I filled mine with a bundle of orts (thread scaps), so in my mind this skull will forever be known as Ort-For-Brains. I stitched around and through the bundle of orts a bit so that it was less a random tangle and more of a solid round shape. Then I tucked the orts into the skull and stitched the skull to the fabric with just a few stitches (using a durable cotton thread) around the edge. Make sure you fill the space inside the skull completely. Underneath the face of the skull the brains poked out a bit, so I did some stitches with the cotton thread there to hold the orts down. Another filler may be easier to work with, but I just couldn't resist the though of using colorful orts as brains...
3. Stitch over the pipe cleaner scaffold using wool yarn. I can't tell you exactly how to do this either, and depending on the shape of your scaffold you might encounter different challenges. Just be methodic, and don't overthink it. Use a thicker yarn, or more strands, on the top of the skull, and thinner/fewer strands when you are doing the face. When doing the face I'd say start with the eye sockets because they dominate the face. Stitch outwards from them, as if the sockets are suns and the thread sunbeams, if you get what I mean.
4. When you have stitched to your heart's content you may want to felt parts of the skull to make it smoother. I did anyway. I took bits of wool yarn and carded them a bit to make them less yarn-shaped and more like little sheets of wool, then I used felting needles to poke them into place on the top of the skull. If you have actual rowing wool, use that, it's probably better.
5.When you are satisfied with the skull you can do whatever you want with it of course. I added foliage. Techniques I used for that include: turkey stitch, drizzle stitch, woven picot stitch, bullion stitch and french knots.
#embroidery#3d embroidery#fiber art#3d embroidery tutorial#embroidery tutorial#fiber art tutorial#tutorial#kind of anyway#skull art#memento mori
425 notes
·
View notes
Text

youtube
✨Elevate your fabric with this stunning hand embroidery borderline design!🧵💖 Perfect for adding that extra charm to your projects!
#crafts#handmade#embroidery#arts and crafts#sewing#etsy#fiber arts#diy#embroidery tutorial#threadskalakari#youtube#Youtube
13 notes
·
View notes
Text
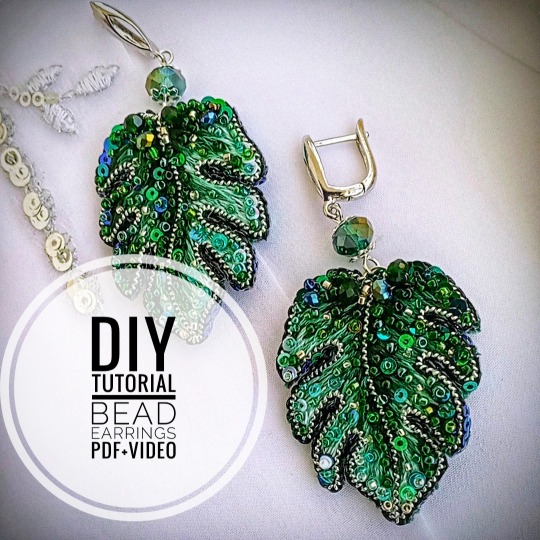
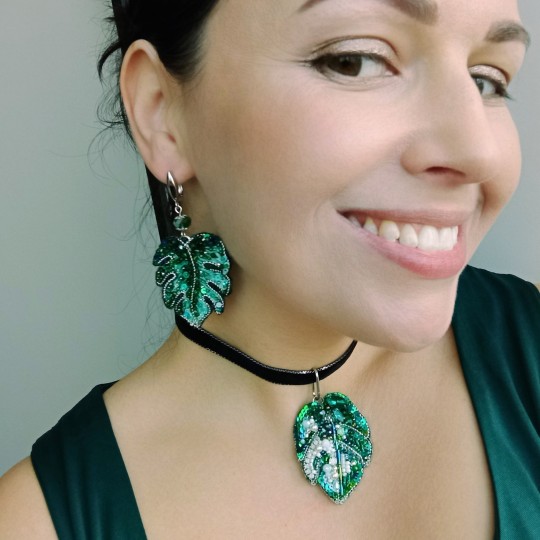
My first bead embroidery DIY tutorial 🥳 Delicate and light weight monstera leaf earrings or pendant💚 Step by step PDF tutorial (+video of most difficult moments) for beginners. I also made 2 kits (each contains materials for 3 leaves) . Welcome to my small store of handmade jewelry and .... tutorials now☺
#bead embroidery#diy#jewelry making#fashion#jewelry#handmadejewelry#earrings#embroidery pattern#embroidery tutorial#beading#monstera#diy jewelry#diy kit#embroidery kit#beading kit#tutorial for beginners#giftideas#patterns#plants
15 notes
·
View notes
Text
7 notes
·
View notes