#currently ‘legally downloading’ photoshop ;)
Explore tagged Tumblr posts
Text
Part 1: Overview
This is part of a school assignment on ethical dilemmas in business. It is for educational purposes only.
part 2 | part 3 | part 4 | part 5
Clip Studio Paint is an immensely popular software application used in the creation of digital art, illustrations, and 2D animation. Since being launched in 2012, CSP has garnered a user base of more than 25 million worldwide, partially thanks to its multiple language options including Japanese, Korean, Traditional Chinese, Simplified Chinese, French, Spanish, German, and English.

image from: clipstudio.net
The controversy surrounding this company exists in two parts: firstly, its plans to move to a subscription-based option and, secondly, the introduction of an AI feature.
The Subscription Issue
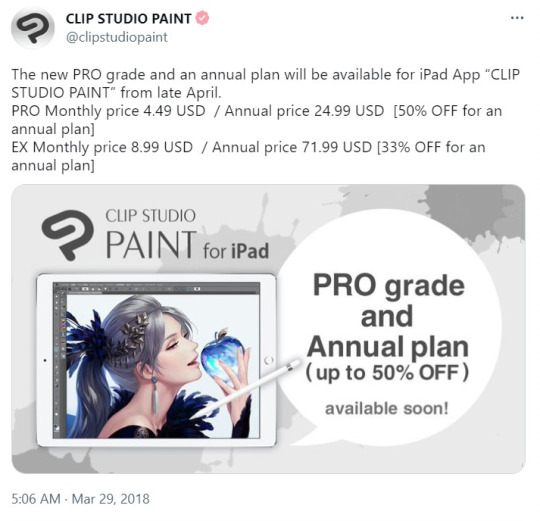
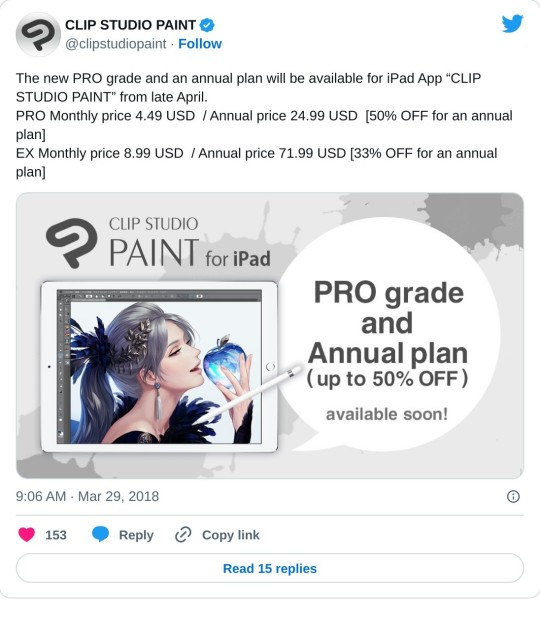
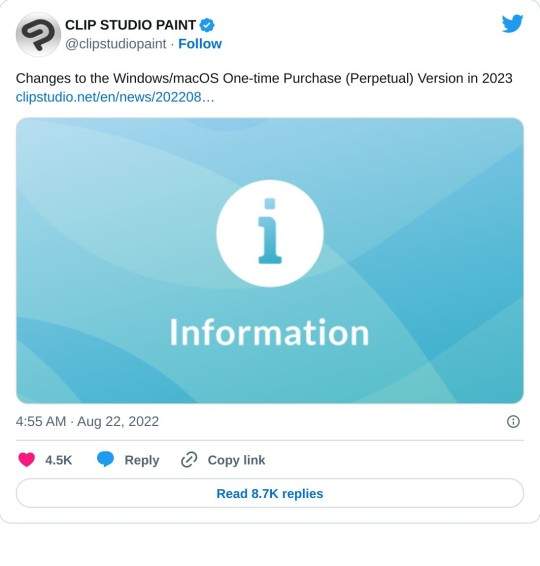
Previously, Clip Studio Paint offered its software for a one-time purchase of $49.99, making it stand out from subscription-based competitors such as Adobe Photoshop. The company began offering a "PRO" subscription option in 2018, but in August of 2022, CSP posted a statement clarifying that "from 2023 onwards, the current Version 1 (the one-time purchase, perpetual version for Windows/macOS, “Version 1.x” hereafter), offered as a download and physical version will no longer receive feature updates free of charge."
The update was generally received quite poorly.


The controversy stemmed in large part from the fact that CSP had leaned heavily on its one-time purchase feature as a main selling point for its software, and, many users who looked to CSP as a reliable, high-quality software had already invested large amounts of money in the existing subscription and one-time purchase options, only to be told that, in a matter of months, they would no longer be able to update their software without paying more. Consumer and public responses to this controversy will be explored in part 4.
Here, the dilemma faced by Clip Studio Paint is whether to risk losing some of their existing consumer base for the chance to generate higher profits, and, furthermore whether it was even worth it to ruin an otherwise well-maintained relationship with its dedicated consumer base.
AI Controversy

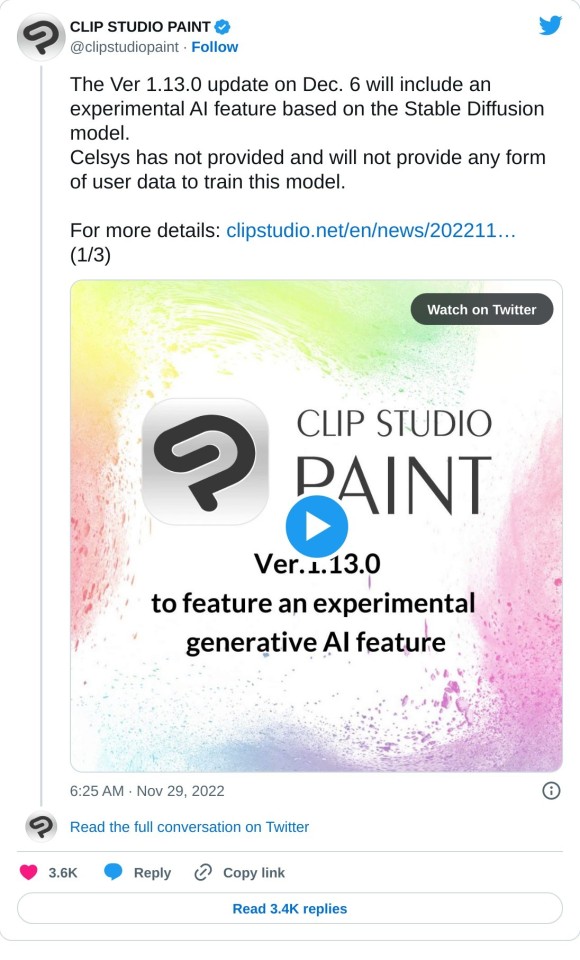
An update posted by Clip Studio Paint in November of 2022 claimed that an approaching update would include "an experimental AI feature based on the Stable Diffusion model." Stable Diffusion, for clarity, is an artificial intelligence software that generates art and photos based on text prompts, launched in 2022. According to a video posted on CSP's Twitter page, the primary intended purpose for this feature would be to generate backgrounds, references, and props for artists' use, which would be especially useful for comic and webtoon creators having to create content on tight schedules.
Here, the primary controversy stemmed from a note at the very bottom of CSP's press release discussing the matter: "We cannot guarantee that images generated by the current model will not infringe on the rights of others." This caused backlash due to the fact that artificial intelligence, particularly the sort used in AI art generators, trains itself on existing images online, and, since AI art as a whole is still in its infancy, there have been rampant issues regarding intellectual property infringement where artists have found their works being used to train AI art generators without credit or consent.
The dilemma faced by CSP here is how ethical the use of artificial intelligence in the generation of art is. The ethics of AI generated art continues to be a hotly debated topic, especially when issues like copyright become more muddled. Many artists are already underpaid and unrecognized, and many cannot afford to pursue legal action when discovering their art has been used to train AI art generators. Meanwhile, the mechanics of AI art generation are still gray, and the argument over whether AI-generated art can be counted as its own "thing" persists.
Sources
4 notes
·
View notes
Text
Fonts
For my book cover I am currently looking to make hand drawn text, I believe this would allow me to have more control of the text itself. However I do still want to play around with text and fonts to be safe because from previous works I did last year I wasn't able to create great looking text
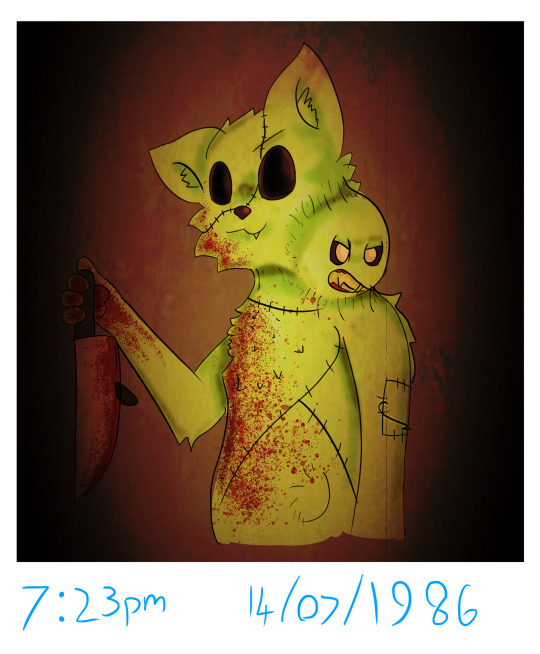
It was meant to look sloppy however I feel like it just looks bad, The text looks too bad to be formal and it looks to clean to be marker, I believe if I had just used the proper brush in photoshop. Another thing to note is that I do have a new program to work in with different tools that may be useful for creating text for my old work.
All I'm trying to state is that text might be a better choice for me if I either struggle with drawing text or feel like I'm running out of time, The link above is one of the font websites I could freely use to find useful fonts that I feel might work for my text.

This website didn't have what I wanted which was some kind of glass shard text to look similar to the shattered lens.
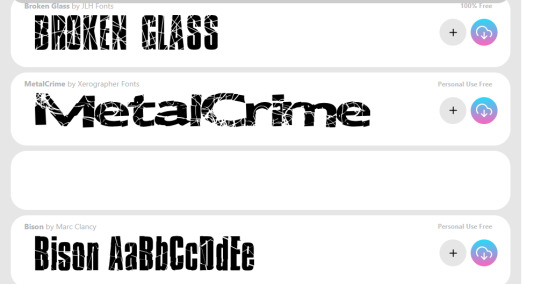
This was more of what I was looking for.
DaFont is the main one I use in college as we used it once for a previous project and I didn't really need to use another website as DaFont always had the fonts I was looking for.

DaFont seems to have less options than Fontspace, out of the two I think Fontspace has a larger category making it a lot more useful than DaFont.
I don't have very high hopes for this website, I don't have any particular reason as I've never heard of it however it is still a possible candidate to get different font styles from.
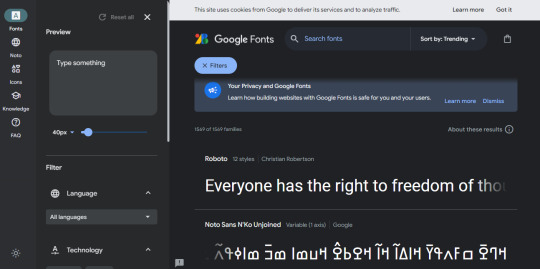
Immediately I consider this the most professional looking page.

I've run into an issue, it seems this website doesn't have any textured texts, It appears to offer a large verity of formal fonts however when it comes to fun and strange textures I don't believe this site is a contender.
0 notes
Note
Heya thank you so much for the art advice earlier! I was wondering if you had any specific suggestions for programs and/or brushes (you know specifically for someone whose only fine art experience has been in pencil and charcoal 😭) .
I’m currently using iArtbook because it’s free. I know Procreate is probably the most popular program but I’m literally -$300+ in my bank account right now, so that isn’t a current option 😅.
However I do believe you can upload brushes to the iArtBook app, honestly I’m not sure, I haven’t tried but you can edit the brushes in a very similar fashion to Adobe Photoshop. So I’m assuming you can also download and upload brushes. I actually really like this program because it has a similar feel to Adobe programs and as a Photographer I’m very experienced with Adobe (I have an Adobe Cloud Account).
In all honesty I’ve never been a good illustrator (since my main focus in my fine arts education was always photography) , but I find the activity meditative and I’m ALWAYS looking to improve.
(Also I was gonna DM you but cant so sorry for the long question 😅)
Yo, it's all good. No apology necessary.
I can only suggest what I know. I've never used Procreate, and I've never even heard of iArtbook. I'm also one of those that absolutely will torrent my art program of choice. And have.
A long, long time ago (like probably thirteen years), I got a copy of Corel (Coral? Idek anymore) free with the purchase of my Wacom bamboo tablet. I didn't know what I was doing yet and I hated it. My laptop hated it. It was very heavy and lagged big time.
I switch to Gimp, which is legally free and open source. I used Gimp for years with zero problems. You can import a lot of Photoshop brushes into Gimp without issue. Compared to Photoshop and Paint Studio, it's incredibly underpowered. Looking back at the art I made, however, I was not poorly off.
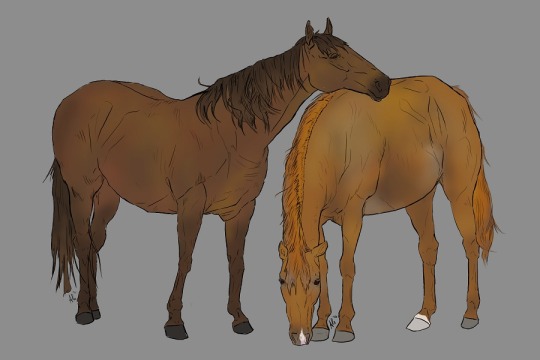
From Gimp, wanting more, I then switched to Photoshop CS5. It was incredibly easy to find and install. Personally, I say screw Adobe, since their current model is subscription based. I hate that. I used PS for yearsssssss, up until last year, I believe. It wasn't too heavy for my laptop to handle unless I used too big of a brush. It allowed me to expand my knowledge of digital art programs. It has way more to offer than I'll ever use. But as i mentioned before, the natural art brushes are ... okay, and the blending tool is awful. I learned to NOT ever use the blending tool because of PS.
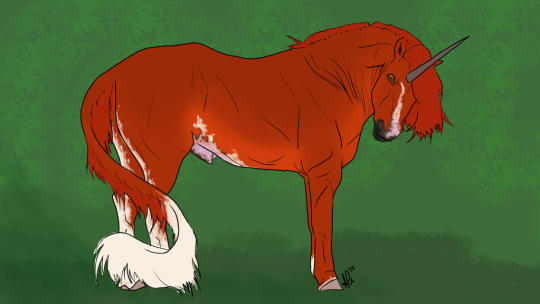
Throughout time in my PS years, I switched from a Wacom Bamboo tablet to a Huion pen tablet (three different ones) to a Huion Kamvas 16 Pro tablet. With my family's help, I put money towards improving my art by way of hardware, and each tablet became significantly better. A good tablet will help TREMENDOUSLY, but by no means does anyone *need* to splurge on a screen tablet like the Kamvas series. I recommend Huion. It's hard to go wrong with them. In case that ever tickles your fancy.

Like, I'm pulling examples of art I've done with these programs and tablets, specifically unshaded pieces, to show that the software and hardware doesn't necessarily make the piece.
Now, I'm using Clip Studio Paint because it comes with so many native traditional brushes. Again, the company switched or threatened to switch to a subscription pay, so I have no qualms in resorting to circumventing their purchase page.
I will say, I think I love Clip Studio more than I ever did Photoshop. The brushes are just ... perfect.
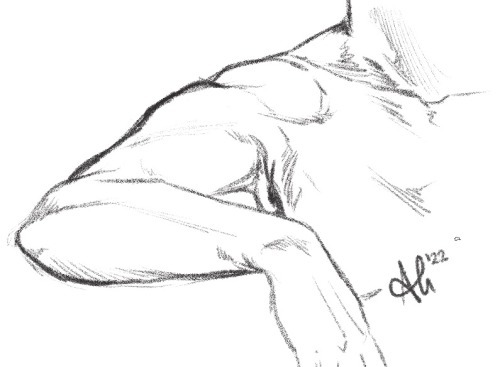
Like this. This isn't pencil and paper! It's the pencil brush that comes with Clip Studio. It draws JUST like a pencil and I feel like I'm in my natural element when I get to use it.
If you do decide to use PS, or a program that is PS brush compatible, I'll have to find that set of brushes that works similarly to these.

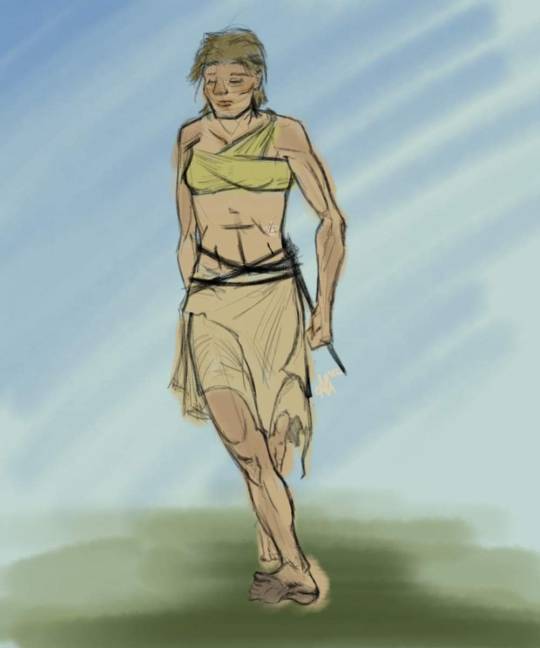
These pictures both used one of the pencil brushes from that set in PS. The horse was painted with a watercolor wash brush; the human with a chalk brush. It's nowhere near as versatile as what can be used in Clip, though.
But I'm sure you could find many brushes through dA and gumroad to use until you find the one that works for you, too!
4 notes
·
View notes
Note
What website/software do you use to create your gifs? They're always such good quality.
hello! I’m so sorry for only getting round to answering this now, it’s been sitting in my inbox for months and since you sent it I’ve completely changed the platform I make my gifs on. I’m now using photoshop cc 2018 but the gifs you must have been referring to were made using completely different, free and accessible software/websites. There’s a lot of photoshop tutorials out there but less so for other options so I’ve decided to just go through my previous process in the hopes that someone will find it useful!
To be honest, the differences between my gifs BP (before photoshop) and AP (after photoshop) aren’t that huge as long as the video quality is good. It’s easier to add subtitles, to colour and to play around with the gif size/quality, but there’s no need to give your soul away to adobe to create good gifs there’s obviously always the possibility of downloading ps less legally which i of course would never in a million years do. So, to create gifs as I did BP you will need three different things:
a screen recorder (I use QuickTime Player which is preinstalled on a mac but there are many others out there, and then VLC player if I had already downloaded the video which didn’t happen often as I mostly gif matches so I’d just screen record parts of the match if I couldn’t download it)
a video editor (I used iMovie which again is preinstalled on macs but there are other options out there if you have a poke around - if necessary this step can also be skipped but it’s useful and will improve gif quality)
the lord and saviour ezgif.com (a free website at everyone’s fingertips which provides many of the features you can get with ps)
1A. Screen recording: have the part of the video you want to record on your screen, open up QuickTime Player, right click on the image of the app in your dock, then click on “new screen recording”. You can then click on the arrow pointing down to change your sound settings, I usually have mine like this
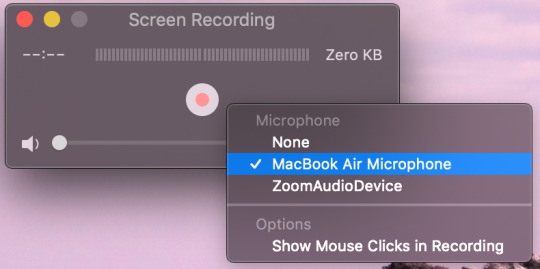
click on the circle with smaller red circle (play button) after which these instructions will appear across your screen: “click to record the full screen. Drag to record part of the screen. End recording by clicking the stop button in the bar menu”. So you can chose to record your full screen or just a part of it depending on whether you click or drag. If you drag you are then given the opportunity to adjust the area you want to record and then you press “start recording. Once you have finished recording the part you want to gif, click on the circle with a black square inside (stop button) in the menu bar at the top of your screen. Go to file > save and then save the video in whatever file and under whatever name you want. After this you will have finished step one!
1B. The alternative, if rather than screen recording a video you haven’t downloaded you want to record a certain part of an already downloaded video then you can use software such as VLC (you can also just upload the video directly to iMovie and crop it there but if it’s very long/you don’t want to go through the middle step then you may want to consider this as an option). Go to Finder for the video you’ve downloaded, right click on it then Open with > VLC. Find the part you wish to use for your gif, go to Playback > Record like so.

It will immediately start recording what’s playing, stopping when you click on Record again once the part you want to gif is over. Then step one method two is done!
2. iMovie: as ezgif isn’t the best for colouring, and anything that it does do is pretty slow and arduous, then I used iMovie to shorten, slow down and colour my videos before turning them into gifs. Here I go Create New > Movie > File > Import Media. I find the video(s) I want to use to make gifs, click import and then drag and drop them into the timeline.
Usually I try to make my gifs about 3 second long, so first thing I would do is change the speed from normal to about 70/80% (this is a completely individual choice though!) so these would be my current settings

Then I find the exact bits I want to gif and divide them into individual clips, as I said they’re usually 3 second long but it can vary. This is done by right clicking on the part of the video you want your gif to start and clicking on “Split Clip”, and again at the point you want your gif to end. Repeat for however many gifs you want. Simply delete the parts of the video(s) you don’t want to keep after this is done.
Now I attempt to add some colouring. First I go to “Colour Correction” which is in the same bar “Speed” is - it’s the little artist’s palette. I play around with the different toggles a little bit until I find something which I believe works. This honestly varies so much from gif to gif but usually I up the saturation just a lil bit, leave the temperature as it is and darken the video so that it ends up a bit like this but honestly it fluctuated a lot and it’s all about personal preference.

If I’m feeling funky I’ll also mess about with the “Colour Balance” which is under the first icon on the left which is a half white circle. I use the eye dropper to change the skin tone balance and sometimes the “White Balance” eye dropper which is a simplified version of ‘curves’ in photoshop.
Once you’re happy with how your video looks then save it by going to File > Share > File. Name it and, if possible save it in as high a quality as possible. My settings usually look something like this

click Next > Save and step two is finished!!
3. Actually making the gif using ezgif.com/video-to-gif. Go to “Choose Files” and select the video you want to gif, then click “Upload Video!”. Chose the time frame you want for your gif, the size (the x540 one which says for Tumblr is the one to use if you’re uploading them onto here), the frame rate (the more per second the better the quality but also the bigger the gif size). All of this is also very well explained by ezgif at the bottom of the page so I’d definitely recommend having a read through all that. Then click “Convert To GIF!”.
From here you can either ‘crop’ to make the gif a particular size or use other tools such as ‘effects’, ‘speed’ or ‘optimise’ if you didn’t use iMovie or want to make some further changes. I usually only use the ‘crop’ as iMovie won’t let you change the dimensions of the gif whilst here you can do that. However I mostly stay away from the other tools as I find them a bit clunky and annoying to use. Once you’re happy with the final product click “Save” and hey presto your gif has been downloaded and is ready to be used!!
I hope some/all of this helped and feel free to hmu with any questions you might have if anything isn't explained that well. It took me ages to write this because I'm never sure whether these explanations make sense outside of the realms of my brain :)))
#sleep who? i only know what making gif tutorials at ungodly hours is#genuinely hope this helps people!!#i developed this process bit by bit so thought id finally share :))#gif tutorials#tutorials#colouring tutorials#how to#og#ezgif tutorials#coloring tutorial
21 notes
·
View notes
Text
Jvcomm32 Key
Jvcomm32 Download
Jvcomm32 Windows 10
Jvcomm32 Keygen
Sample Results From Member Downloads
Jvcomm32 Download
Download NameDate AddedSpeedJvcomm32 2.0107-Dec-20202,467 KB/s[NEW] Jvcomm32 2.0107-Dec-20202,486 KB/sJvcomm32 2.01 Cracked06-Dec-20202,858 KB/sJvcomm32 2.01 Download04-Dec-20202,332 KB/sJvcomm32 2.01 [verified]04-Dec-20202,138 KB/sJvcomm32.2.01.Proper.rar29-Nov-20202,341 KB/s[FULL] Jvcomm32 2.0128-Nov-20202,867 KB/s
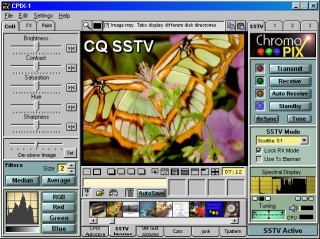
A new type of mode detection by evaluating the scan line frequencies of SSTV transmissions has been implemented in JVComm32. This enables for the automatic reception of pictures without having to decode the VIS code. Many downloads like Jvcomm 32 may also include a serial number, cd key or keygen. If this is the case then it's usually included in the full crack download archive itself. If you are still having trouble finding Jvcomm 32 after simplifying your search term then we highly recommend using the alternative full download sites (linked above).
To create more accurate search results for Jvcomm32 2.01 try to exclude using commonly used keywords such as: crack, download, serial, keygen, torrent, warez, etc. Simplifying your search should return more download results. Many downloads like Jvcomm32 2.01 may also include a crack, serial number, unlock code, cd key or keygen (key generator). If this is the case it is usually found in the full download archive itself.
Welcome To FileFixation.com
Download jvcomm32 serial number, crack and keygen Type your search in the box below. Add keygen at the end if you are looking for a serial key generator, add crack if you wanna find a crack, add serial is you are interested in viewing a serial number. Other possible words are: patch, license, regfile, keyile. JVComm32 decodes all Fax modes, FM for shortwave, AM for Geo- and Polar Satellites, also H 288/120 and Ham 288B. Also all 'Free Run' SSTV modes Martin M1 and M2, Scotti S1 and S2, Scotti DX. About JVComm32 The resource is currently listed in dxzone.com in 2 categories. The main category is Multi-mode software that is about Multimode software. This link is listed in our web site directory since Tuesday Sep 21 1999, and till today 'JVComm32.
Jvcomm32 Windows 10
FileFixation.com is a new file sharing web service which gives you access to literally hundreds of thousands of direct downloads including software, games, movies, tv shows, mp3 albums, ebooks and more! Our downloads database is updated daily to provide the latest download releases on offer. To celebrate our launch we are offering unlimited full download access for FREE! This is a limited offer and will soon expire and revert back to the normal member price. We now have 428,516 downloads in the member section. Take the FileFixation tour now for more detailed information!
What is a Crack?
The word 'crack' in this context means the action of removing the copy protection from commercial software. A crack is a set of instructions or patch used to remove copy protection from a piece of software or to unlock features from a demo or time-limited trial. There are crack groups who work together in order to crack software, games, etc. If you search for Jvcomm32 2.01 Crack, you will often see the word 'crack' amongst the results which means it is the full version of the product.
What is a Serial?
The word 'serial' means a unique number which identifies the license of the software as being valid. All retail software uses a serial number or key of some form. The installation often requires the user to enter a valid serial number to proceed. A serial can also be referred to as a 'CD Key'. When you search for Jvcomm32 2.01 Serial for example, you may find the word 'serial' amongst the results. This usually means your software download includes a serial number of some sort.
What is a Keygen?
The word 'keygen' means a small program that can generate a cd key, activation number, license code, serial number, or registration number for a piece of software. KeyGen is a shortened word for Key Generator. A keygen is made available through crack groups free to download. When writing a keygen, the author will identify the algorithm used in creating a valid cd key. Once the algorithm is identified they can then incorporate this into the keygen. If you search a download site for Jvcomm32 2.01 Keygen, this often means your download includes a keygen.
Jvcomm32 Keygen
Popular Download Searches
Jvcomm32 2.01, Krisztina Sereny, Sketchup Pro 6.4.112, Easypass Password Generator 2.0, Foxit Reader Pro V3.0.1301, Instagram Compchamakph3ad Php Tutorial, Cd Key Of Megaman X8, Clutch Clutch, Dap 8.1.3.8, Adobe Photoshop Cs4 Extended V11.0 Mac, Virtual Dj Pro 8.0.2073 Multilingual Portable, Sothink Web Video Downloader 1.3, Office Uprising 2018 1080p BluRay Yts Mx, Microsoft Office Xp Lithuanian, Heart On Eagles, Avanquest DVD2pod V1.0, Better Jpeg V1.7.1.3 Cff, Lost River 2014 1080p BluRay H264 AAC Rarbg, Poweriso 3.5,

[ Home | Signup | Take A Tour | FAQ | Testimonials | Support | Terms & Conditions | Legal & Content Removal ] Design and Layout © 2020 FileFixation. All rights reserved.

1 note
·
View note
Note
I love your mood boards so much omg they're 💞 What do you use to make them? I've been trying to make some and haven't been able to find anything that works for me 😔
AHHHHHHHHH, you’re too kind, I’m so glad you like them,💖💖💖💖 they’re really fun for me to do! Also, hope you don’t mind me answering this publicly, in case anyone else might be curious!
Also I would have had this answered a lot sooner but my internet takes after me, aka, it’s fucking useless. In terms of editing software, I use a less than legally acquired version of photoshop cs5, which I got from here; https://completeresources.tumblr.com/post/142196357299/psperfect-link-to-download-photoshop-cs5
*I checked and it doesn’t seem to work anymore; this is their tag with alternative downloads; https://completeresources.tumblr.com/tagged/photoshop-download I’ve had it downloaded on my current laptop for a while so I can’t guarantee it still works. One of my friends recently tried and said it didn’t work for him. So, be aware of that and as with any download on the internet be wary. If you don’t want to use that and take the chance or don’t already have photoshop, I’ve heard good things about gimp, that it can open psds and do clipping masks (so long as it’s not an older version of the software). But it’s not one I’ve fiddled with much personally. But here’s a link to that, if you’re wary of downloading less than legal files;https://www.gimp.org/downloads/
Beyond that, I use this template for all my moodboards, https://www.deviantart.com/anotherworldmp3/art/Moodboard-Template-755678573,
You can put the photos in the layers, above the square you want it and then do a clipping mask. From there it’s just shifting it around to fit it how you want, coloring, and of course working on composition for how you want it.
and you can even make your own template using tools to make solid colored shapes on different layers; not perfect but it’s how I made this graphic; https://trashcatsnark.tumblr.com/post/615668038389350400/i-was-tagged-by-shallow-gravy-to-do-this-like-oc I hope this helped and have fun creating! 💖
#asks#not writing#psd#moodboard#i'm not sure how to tag this cause i'm dip dang fool who's chugged a lot of dumb bitch juice#macademilk
5 notes
·
View notes
Text
10 Legit Ways To Make Money And Passive Income Online – How To Make Money Online
youtube
Did you know that you can actually make money online? Yes, that’s right, and all you need is Computer or phone with Internet access. So in this video, I’m going to show you 10 sites where you can actually get started Some side cash or if you are really serious, some good money! This is not amazing! On some of these sites you can actually make up to $ 100 a day or so More, the best part is, you don’t do that. You have to quit your job 9-5, you can do it Money, work at your spare time.
On the Internet, there are two distinct ways to make money. The first method is active income. With active income, such as normal 9-5 jobs. You only pay for the work you do. If you don’t work, you don’t make money, as simple as that. The second way is through passive income. This is his preferred method because, with active income, all you have to do is put it to work once, Theoretical money must continue to roll in, without having to do anything more Other than that, maybe reinforcing what you have done, or in some cases what others have done. Let’s go to the video. 1. upworks.com Upworks is a freelance website. With upworks you are making income. Companies and individuals publish services on upworks They want to outsource articles like writing articles, editing videos, developing an app, For coding, there are tons of jobs and outsourcing services in upworks … The beauty of all this is her low entry barrier, you just have to be good at something. If there is something you are good at maybe graphic design or coding or about Any skill, head over to the upworks and start making some money.
Here’s a tip if you’re considering working on upworks, you have a solid profile that looks like Hassan. This will greatly increase the likelihood of ever receiving job offers, from prospective Client. Showcase your best or showcase a specific experience that can and will help you stand out. 2. YouTube. Not many people know this, but you can Actually earn money with YouTube. If you’re thinking of logging into YouTube to earn money, make sure you understand The thing clearly. Thanks to the new rules, if you plan to start an entirely new channel from the start, You must first reach the YouTube Minimum Monetization Minimum. That is, you will need 4000 watch hours and 1,000 subscribers in the last 12 months. Once you get there, you can make money, how much can you make on YouTube? Be honest as much as you want! As long as you continue to download good content that people are willing to watch your golden, and The longest video for the more money you can expect to make …
You can make anywhere from $ 1 to Thousands even hundreds of thousands of dollars. The more views you get, the more money you can expect to do, and the more you get Participants! Using YouTube, you earn what income earns, make some videos and they must Keep making money constantly You can also make money with YouTube paid care, but with paid care You will need a large audience, usually a minimum of 10K subs to do this. You can also earn money through affiliate companies, but we’ll get to that later … 3. Amazon. Although Jeff Pazos, the company started Bookstore, Amazon now sells almost anything you can think of. It’s not just a site to buy your favorite toys though, you can actually make money with Amazon. Here are three ways for you how … The first way is Amazon Mturk – Mtruk is kind of like upworks, it’s a place Companies use very difficult external business for a computer program to do. Like the sound Editing, transcription, translation of audio and video from various languages, and testing Web pages, write reviews, and a host of other services.
You can make up to $ 20 or $ 30 an hour, by working on some different tasks. This is probably legitimate from making money, and they pay. This is an active income though. The second way is to publish the Amazon Kindle. Convert your ideas into an e-book and earn money Today. Every time you buy an e-book from Amazon, Amazon and the publisher earn money, and you can very. The thing with publishing the Kindle is … You first need a book to sell it. You can either write this book yourself or you can hire someone to write it for you. You don’t have to be a founding author, or find a publishing company to do this. You can do this from the comfort of your own home and start earning some downside Revenues.
It looks so cool? And the best part is, it’s completely free, so sign up and get started Earn some money. Amazon takes care of money handling … and you can sit back and relax on the sofa, While some good old income … If you are really interested in publishing the “Kindle” book, I highly recommend further research This subject. You can find free videos and tutorials here on YouTube that will teach you the basics. If you want expert advice, you may have to pay for the first time for the course. I will link a good one to the description, if you are interested. Some people produce more than $ 100,000 for publishing the Kindle e-books on Amazon. It is definitely a market to consider. The third way is the Amazon Partner Program. This is a very popular and easy way to earn passive income. All you have to do is register for Amazon Partners The program is free, so you can choose from Thousands of things amazon sell on their website and start promoting. Amazon will give you a special link, and all the time someone buys through your link, amazon It will give you a commission anywhere from 5-10% of the sale.
Amazon will pay you 60 days after purchase and you can choose to pay through Amazon gift cards, bank transfer to the bank account – despite this only currently Available in the USA but if you live abroad America you can pay by check or you It can be transfer money to your amazon account and start buying stuff with it. 4. clickbank. Clickbank is a marketplace for product creators Affiliates will make money online buying selling their courses or services to the world. Clickbank only sells digital products, but the beauty about Clickbank is that the commission Pay much higher than that of amazon. Some affiliates pay you up to 75%, to sell their services, while others pay As low as 5%, so keep this in mind.
But nevertheless, you can really make some really good money on clickbank, hundreds or even Thousands of dollars. Simply head over to Clickbank, choose something to sell and start making money. 5. flippa.com flippa is the number one marketplace to buy And sell companies online. It attracts a huge audience, and it offers great tools for increasing visibility An auction site is very similar to eBay those buying and selling digital assets, such as Such as websites, apps, domains, store stores, and Amazon FBA accounts. If you are good at creating apps or even websites … you can actually sell them online and make some Capital. Or better yet, if you have some money lying around and you’re interested in buying either Websites, applications or e-commerce stores … make money already, you can do it with flippa. What happens is that you place a bid very similar to eBay and if your bid is higher then Congratulations on purchasing your own online business. You can also make money by selling online business.
So this is flippa for you. 6. Stock shutter. Basically a stock shutter is a platform where You can buy or sell digital media. Like photos, music, and videos. Created mainly by freelancers and external actors, even if you might be particularly good at photography Take great photos and videos. Or really good at making sick beats, you can even monetize your talent on shutter arrows. The way you make money with stocks shutter every time you buy some pictures is one of your photos, You get a commission, usually a couple of cents to a few dollars, if you’re lucky. The trick in making a lot of money with stock shutter is to keep loading high High quality pictures. 7. Rover. Do you like pets? The dog in particular? If so, then Land Rover is best to check. Rover is dog seat service, but this is currently only available in the United States and Canada. So if you live in either of these two countries then you can register as a dog sitter, and Get paid for babysitting dogs. You can make between $ 80 – $ 100 a night, just by watching someone’s dog! You can literally make hundreds of dollars a week just by babysitting someone.
Now how about that for a deal? 8. Takelessons.com Taking Lessons is a website where you can teach Any skill. Everyone has a skill, he can teach it, be it, teach someone Language, how to cook, how to play instrument music, how to solve complex math equations … Any more than that. Anything you think someone else might not know, you can teach people on takelessons, And start making money. 9. Fiver. You probably heard of the mentioned fivver Often times, it’s simple and an easy site to start making money. But if not, it is basically an independent site where you can literally outsource Anything and I mean anything … as long as it is legal, for less than $ 5 There are many different ways to make money on fiverr, just to name a few. You can do animation, logo design, packaging design, web and mobile design, social media Design, Photoshop editing, Geometry and flooring planning, 3D models, Product design, T-shirt Promotion, SEO and much more. If there is anything to be outsourced, you can probably find it on fiver. Head over and check the fiverr guys, it’s a legit out of making money.
10. Drop shipping. With drop shipping, what you’re essentially He is selling someone else’s stuff for a small or big profit without having to deal with shipping. So you basically act like a mediator or an average guy. You can do this by opening the shopify store and then connecting it with oberlo. Oberlo is basically an app that integrates with shopify, and that is what a lot of people do Use a source of the things they want to sell in their store. The basic principle of drop shipping is, you are setting up a store or any channel where people are Things can be bought from you. Then once you buy something from you, you are paying the manufacturer, usually much less Then what you got, and then you have the manufacturer ship to the customer. All without seeing or touching the product. The best part of drop shipping is that you set your price for the product you want To sell, then take profits and pay the manufacturer the rest. So yes this drop shipping in short. If you are interested in drop shipping, there are tons of tutorial here on YouTube, that You will be shown a step-by-step guide to creating your store, finding products, ads, Find influencers, finally shipping and get paid.
It’s a bit complicated to start, especially at first, but you can make tons of Money … with drop shipping. With that, thank you for watching guys, please subscribe, and enable the notification I will see you in the next one.
Read More: Nichexploit – World’s only YouTube customised one click solution to discovering profitable niches!
from Smart Income System https://smarterincomesystem.com/10-legit-ways-to-make-money-and-passive-income-online-how-to-make-money-online/?utm_source=rss&utm_medium=rss&utm_campaign=10-legit-ways-to-make-money-and-passive-income-online-how-to-make-money-online
#email marketing tool#all-in-one video creator#earn money from home#legit way to make money from home
2 notes
·
View notes
Text
Studying/Planner Apps
Essential apps for studying, planning, health, etc. Who says everything has to be analog?
These are all the ones I’ve tried and downloaded (unless said otherwise). The ones with the * next to it are the ones I don’t use or have gotten rid of for personal reasons, but still highly recommend all of them.
I go through apps like a child goes through toys. I try them out, get rid of the ones I don’t like. Apps are toys.
There’s tons more, but these ones are the ones that I recommend to people with similar needs and schedules like mine. The ones I haven’t or don’t use anymore are ones I could definitely see being helpful to others or that I’d maybe use in the future if my needs change.
Note: these are things from the App Store, but I’m pretty sure most are available on the Play Store too.
Podomoro Time Trackers
Forrest* - Haven’t tried this because you have to pay for it on the App Store, but I’ve seen everyone go bonkers over this app and how they plant trees for studying, etc. etc.
Plantie - Best and only Podomoro app I still use. Gamified, but not TOO gamified. You just grow fruit, collect, coins, buy more fruit trees. It’s super simple, while still providing really good graphs and charts. Also, it allows you to turn off the feature where it stops your task as soon as you leave the app. Sometimes I need to use my phone for assignments, and I still want to track my time. It’s completely FREE, with GREAT charts as a visual. Other apps need a premium subscription to access the graphs and charts, which is why I love this app because even though the chart is quite simple, it does its job. Although, it doesn’t tell you when to take the longer break and it has to be adjusted manually. That’s fine for me, because I always get disturbed by something before I even get to 4 blocks, and if I waited until I had a big chunk, I’d never get anything done.
Block & Flow: Stay focused* - Podomoro but visualised with stacks of blocks for each day or week. And you can list out what tasks you have for that day and sort out sections for work, reading, school, etc. I didn’t need that feature, which is why I used Plantie instead.
Workflow Timer* - Another good option with options to make multiple tasks lists. One of the simpler and more user-friendly ones. It also looks really good!
Hours Time Tracking* - App for timeblocking, scheduling, and tracking the time while you’re working. It’s not helpful for me, because it’s practically impossible for me to strictly schedule something in my day after school, but could be useful for others. Really easy to makes tasks and separate by color.
Stay Focused* - Simplest Podomoro timer out there. No distractions, no graphs, no gamification, just pure focus.
Planners/Calendars/Tasks
Wunderlist - Great reminder system, intuitive (type in “essay next mon” and it will schedule the task to be due next Monday), syncs everywhere, attach documents, etc. I used this for my assignment list, books to read list, schedule etc. for a long time, until recently where things got hectic and I wanted to make a daily to do list rather than only a master list. I use a bullet journal for school stuff now, but still keep Wunderlist for that shopping/movies/books/apps/websites to check out list.
24me* - Personal assistant, lots and lots of features, with scheduling, to-do lists, notes, journaling, etc. Tracks weather and traffic to and from work/school. All in one.
Google Calendar - I don’t schedule on this, but use it to sync my school calendar with personal calendar. Easy scheduling and you can SHARE your calendar with a friend! All Google apps are made for collaboration basically.
Habitify* - Habit tracker on your phone and tracks progress every day, showing when you skip and reminding you of it. Don’t quite remember why I got rid of it because checking back it seems really good. Might redownload.
Trello* - Kanban boards, “cards” and lists, great reviews. I’ve heard people use it as a bullet journal sort of and project planner though that wasn’t it’s original purpose. I downloaded it for a club thing, but never really used it personally.
Notetaking/Planning/Journaling
OneNote - I use this ALL the time, even though I don’t use my Microsoft account much anymore. My notes are organized and have a hierarchy. Very customizable with headers, notebook sections, pages, subpages, etc. Easy to share with group mates and an okay collaboration space if you want to see each other’s progress on research or something during a group project. MUCH better than having tons of Google or Word docs of notes. Completely FREE for the full experience.
Notion* - One in all workspace for journaling, notes, scheduling, planning projects basically a mini-website for your life and work. Great guide for bullet journaling on Notion from studyblr Eintsein here. Another Notion bullet journaling guide on YouTube here and here. I highly recommend it, but don’t use it since I use an analog bujo, prefer OneNote for class notes, and don’t have much use for it other than that currently. You do have to pay for unlimited notes, but there’s a pretty good amount to start out, and if you really don’t want to pay, there are workarounds to it.
Milanote* - Like Notion, but more restrictions on the free version. I don’t use it anymore because I’ve realized I didn’t really have a good purpose for it and it cluttered up my phone. In a way, it’s more ~aesthetic~ than Notion, but there are less things you can do. It does have a better learning curve though.
Evernote - I don’t use it often, but I have it to take quick notes or other stuff. Evernote is like a god in the notetaking world, because it’s user friendly, quick, and syncs up really easily with everything.
Health
7 Minute Fitness - There’s a lot of these out there. Go find one or two. Don’t be sedentary.
30 Day Fitness Challenge - Same concept as above.
Simple Habit - FULL of free mostly 5 minute guided meditations (though there’s premium access). There’s no excuse now. Also, I used to try 10 minute meditations on Headspace which made me really sleepy. 5 minutes work best, because they’re quick, and if you want more time, just move on to the next part in the series or find another one. Lots of free series for basically any subject (school, women, mothers, grade anxiety, sleep) and SOS mode. Unfortunately, you can’t download any of them in the free version.
AloeBud* - Self-care pocket companion. Make reminders on your phone for every self-care thing you can think of. Schedule notifications multiple times a day with personalized messages.
TaoMix2 - Mixer for relaxing nature/white noise sounds. It’s pretty restricted in the free, but it’s enough for me.
Cove* - If you’re a music person, this app let’s you make quick music and tunes matching your mood. A sort of an easy music therapy if you’re not good with instruments or composition.
Reflecty* - Little journal buddy asking you fun/reflective questions about your day and tracking your mood. It’s short and sweet. Each entry is a “story”.
Oak* - Great for breathing and very simple guided meditations. Breathing practices for anxiety, freshening up, and calming nerves before a big performance. It just takes 15 seconds to breathe.
Grid Diary* - Journal prompts in grid fromat. Customizable daily prompts.
DayOne Journal* - Again, RAVING reviews. Everyone loves it. I haven’t used it because I prefer analog journals, but it’s a pretty good for travel journals with pictures, audio, video, etc.
UVLens - Reminds you to put sunscreen on throughout the day depending on your skin, activities that day, and type of sunscreen.
Flo - Period tracker. Need I say more?
Tasty - FOOOD (by Buzzfeed). New recipe ideas, includes shopping list, make your own cookbook.
KitchenStories - MORE FOOOOD. Includes Asian and international cuisine since it’s crowd-sourced.
Miscellaneous
Audiobooks - Audiobooks from the Gutenberg Project, but in app form. You can download classics for free, etc. There are some paid audiobooks, but they’re usually for better narrators/text corrections, so absolutely not necessary to get lost in an old book. Jane Austen, Charlotte Brönte, L. Frank Baum, all the good stuff.
Daylio - Tracks mood, activities, with intuitive charts. You can edit moods and activities shown per day. Free version is pretty good, and it replaces the need for making a habit tracker in my journal, because I don’t like making those.
Scannable - Very intuitive scanning app. I’ve used this for many legal/important documents and nobody had a clue it was “scanned” on a phone. It makes regular photos of documents easier to read and look like it came from a scanner. It can share as a PDF or jpg. Granted, you need good lighting for the best quality.
Google Docs, Spreadsheets, Slides - Everyone’s probably used this before, but to reiterate, this is the best collaboration app/website. Super easy to share with real-time tracking and updates.
BEAKER by THIX* - For chemistry people. Mix compounds/elements together, make new compounds, see their reactions. Don’t have much use for it since my chemistry class is moving at a glacial pace but I could see this being useful for others.
Chemtriz - Same as above, but gamified. You take elements and put them together in the right configuration to make compounds.
PictureThis - Plant Identifier - Weird addition to list, but it’s a cool app to get back in with nature. Now I know what a boxwood plant looks like.
IFTTT* - Hard to explain, but it enables different apps that don’t usually work together to work together. So if you input something in an email, you can make it go into a Google Spreadsheet(?). Just go check it out. It’s cool. Many shortcuts, track stuff in the Health App, get emails showing cool NASA pictures.
Canva - AMAZING graphic design app/website for those who can’t use Photoshop (ie. me). It’s better online, but there are hundreds of templates for magazines, book covers, planners, posters, flyers, and basically any graphic design needs. Many free graphics and photos ready to use. Premium version is NOT necessary to get full benefits from this program. I used it to create this calendar for my room.
#productivity#being productive#apps#productivity apps#self care#mental health#studyblr#studying#high school student#student#bujo#studyspo#studyinspo#og posts#google#study tips#study hacks#school#strategies & tips#fitness apps#note taking#notion#journaling#journal#planning#planner#schedule#block schedule#podomoro#time tracking
26 notes
·
View notes
Text
About the process of creating a book (the not-writing part)
I was asked recently about if making a book was easy or tedious or whatever, and I realized that was actually something I’d like to talk about. I’d never done it before (and still I only have a little experience), but I’ve been teaching myself and it’s been... fun? Behind the cut (that’s still a thing, right?), I ramble about formatting, PDFs, fonts, and some other stuff. (Also pictures, though most of them are the same as the ones I posted yesterday.)
First of all, I had to pick a Print-On-Demand (POD) website. That was easy for me, because finding the website was actually what made me want to make the book. I used Lulu.com, which has worked very well for me the two times I’ve used it. (It has a bunch of bad reviews, but honestly I got just what I paid for both times. They apparently offer editing and marketing services; I can’t vouch for those because I only used the POD service. But personally I wouldn’t trust anyone to edit or market my book, let alone some randos on some website. They’re a POD site. That’s what they’re good at, so that’s what I use.) It would have been almost too easy if they just let me copy-paste the text to them, but understandably they wanted a PDF. PDFs are kind of the bane of my existence, but I downloaded a template from them (for a 6x9 inch novel, with appropriate margins) and then copy-pasted my fic into it using LibreOffice. (I’m so-so about LibreOffice, but it does create PDFs reasonably well.) From there... well, then I had to go through the process of reformatting it. I’d copied the text from my AO3, and that meant that it had spaces between every paragraph and no indents, which is how AO3 fics are typically formatted. It was a lot of Tab-Left-Down-Down-Down-Backspace-Backspace-Enter-Repeat. For 140k words, it took a few casual days. After the bulk of that was done, I realized the indents/tabs looked... weird? They were too big. ^^; Luckily there was a setting in LibreOffice to change them all automatically. I almost cried at the thought of having to do it manually haha. Adding data to the headers and footers came next. I chose to only add the page number to the footer, and nothing to the header. Normally people will have the author’s name on one side, and the book’s title on the other, but I skipped that for the time being. Not sure if I’ll do it for the ‘official’ release. (Somehow my footer ended up being too small, so that’s something I need to look into.) Next I had to pick a font and a font size. I decided to do something a little gimmicky: I have alternating chapters that take place in modern and historical times, so I chose different fonts to represent those chapters. For the historical chapters I chose “Century”, which is a serif font (meaning that it has little embellishments, like “Times New Roman”), while for the modern chapters I chose “Verdana”, a sans-serif font (meaning that it is sans/without the embellishments, like whatever font Tumblr uses). It’s typically agreed that novels are best in serif fonts, because it’s easier to read them for a long session. The embellishments make the letters blend together into visually recognizable words, which is apparently how we read, as opposed to looking at every letter individually. However, because I wanted to be quirky, more than half of my book is in sans-serif, which I’m just hoping doesn’t annoy people. I used Verdana size 11 and Century size 12. Even so, the Verdana still looks too large to my eye, so I’ll probably change it again. After that was mostly aesthetic formatting, which was the actual fun part. I tabbed down I think about 10 spaces at the start of every chapter, then went back up a space or two, increased the font size and changed the font to something slightly fancier and wrote the chapter title (which for me were just “Chapter Five”, etc). (UPON FURTHER SCRUTINY, apparently not all of my first chapter pages are tabbed down the same amount. ugh. ^^; They’re close but not identical. How messy.) Under the chapter titles, I simulated “drop caps” on the first phrase of the chapter, because I didn’t have a good drop caps font. I just did this by retyping the whole phrase in caps, and then changing the first letter to a slightly larger font size. Next were a few easy things: a title page, a few silly “praise for” pages of reviews I got from online readers (these probably won’t be in the “official” version; they just make me smile), a mock-up copyright page (mock-up because I don’t actually have a copyright or anything yet), a short dedications page (mine was just one sentence), and then an empty page so that the story text starts on the right, which is standard. I have bought another self-published book which otherwise looks pretty good, but it starts the story on the left page and it’s just so jarring. At that point, the PDF was pretty much done. I added a few other little touches, like some little fancy dagger icons during in-chapter scene transitions. I ended up with the “the end” page being on the left, which, again, is really awkward, so I found a chapter that only had like two lines on the last page, and went back in and deleted a handful of words in the chapter so that it would end on the previous page instead. THEN came the fun but agonizing part, as I’m not as much of a graphic designer as I sometimes wish. I had to make a cover. The other self-published book I bought looks really nice with a beautiful illustration on the front, but the spine and back had just tiny white text, and didn’t even include a synopsis. So I downloaded a template for a 6x9inch wrap-around cover, tossed it up in Photoshop, paint-bucketed it black, and went to work. I pasted in my synopsis in off-white sans-serif font about the same as my internal font, and bolded some of the key words for... ease of skimming and/or funsies? At the top I added a short dialogue exchange from the first chapter that I thought represented the story as a whole, chose a different font that stood out, and gave it a red shadow so it would stand out more. For fun I added some faint red blood-splatters behind the text. For the front I chose a big bold block-letter font in off-white, then gave it a red and a yellow shadow so it would stand out. I rasterized the font (turning it into a picture), and then used the tool to highlight the letters, and splashed some red blood-splatters on them. I did the same for the spine. (Though really what I should have done was copy the logo from the front and resize it. Silly me. Now the two logos don’t match.) I used Unsplash.com for a few free photos that I quickly manipulated into a passable cover art. Ultimately, I would like to have something either professionally photographed, edited, or drawn, but what I found was vaguely similar enough to what I wanted that I figured it’d do for now. Maybe the last thing I had to do (besides uploading it all to Lulu) was decide on a pen-name! I ended up going with L.A.Rayborn, instead of my legal name. I used my legal first two initials, but chose my birth surname (which is twice removed from my legal name, since I was first adopted and then married). To be perfectly honest, the reason I chose not to use my legal name is mostly because I don’t want to associate my in-laws with possibly-sensitive content that they probably wouldn’t like. SO. Then it was done, and I uploaded it to Lulu, and chose a few options on the site, such as cream pages instead of white, and matte exterior finish instead of gloss. (I highly suggest the cream for novels, but the matte is really just personal preference.) I paid them (I ended up getting it printed and shipped to me for under $20), and then about 2 weeks later I had the 400 page darling in my hands, ready to be eviscerated with a set of neon hi-lighters! After this current round of edits, I already know there’s a ton of stuff I’m going to have to fix (and this is to say nothing of the story). 1. The font is slightly too large, but could probably use a 1.5 or maybe 1.2 spacing between lines. I’ll have to fiddle with it, and see what others do. 2. The back cover text is too close to the edges to really look good. 3. The page numbering just looks odd for some reason. 4. Figure out how to get the page numbers to stay off the copyright and dedications page, etc. 5. MORE THAN ANYTHING, I need to change the... I’m not even sure what to call it? I need to make the text space out evenly so that it creates a block on each page, rather than creating messy ridges on the right margins. I didn’t even think of this until I got the book and started comparing it to professional books I’ve read and enjoyed. It seems like a very rookie mistake.
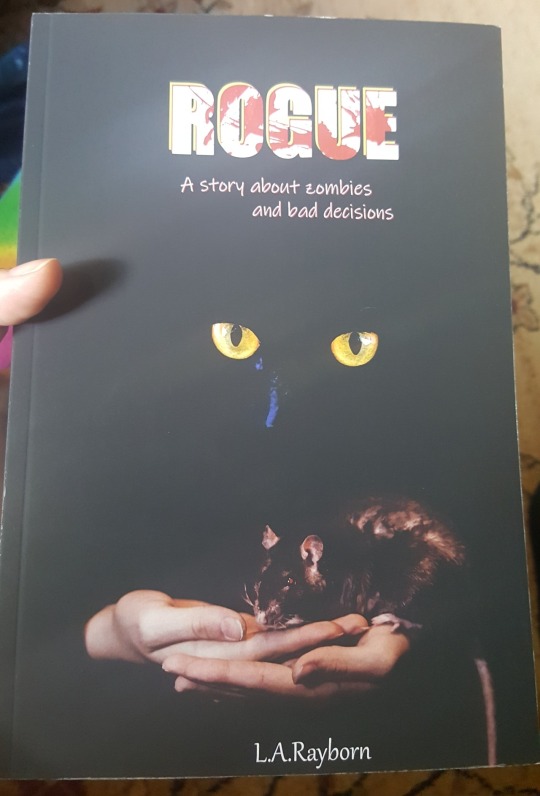
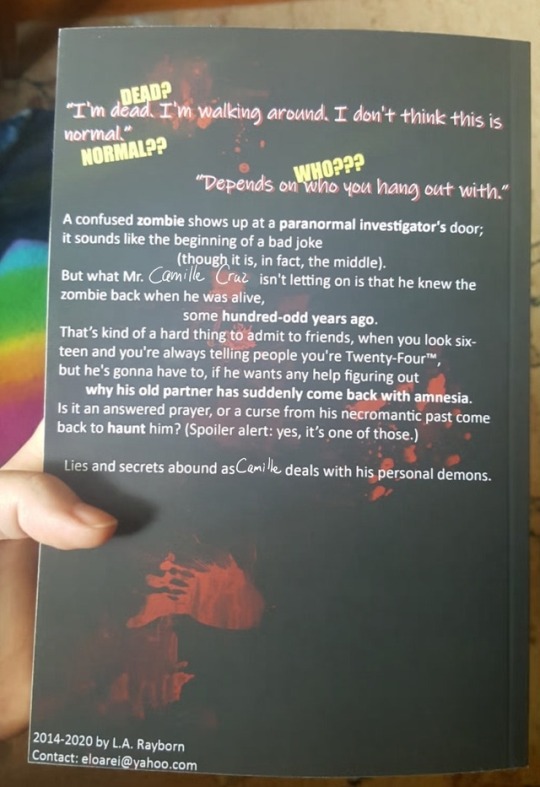
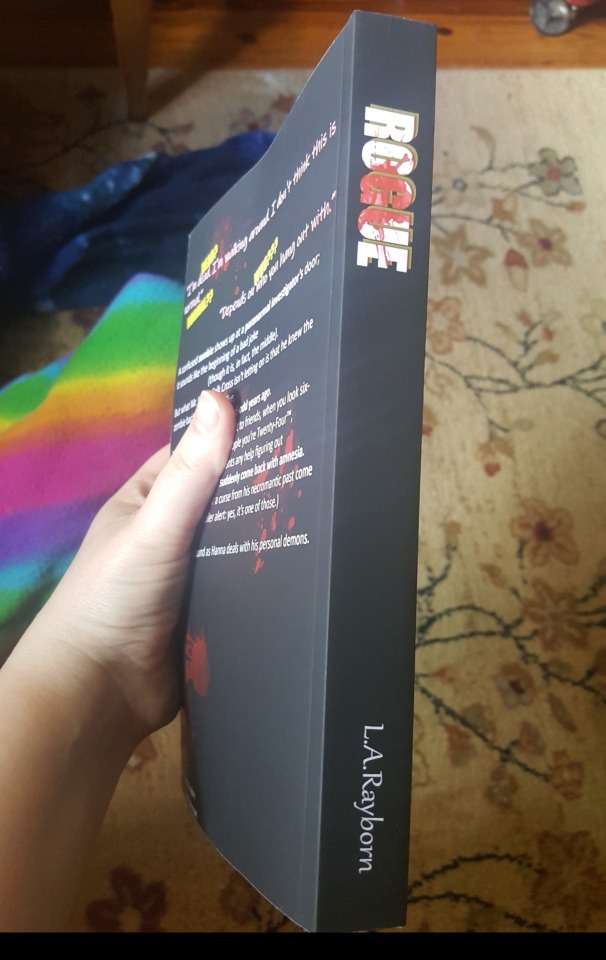
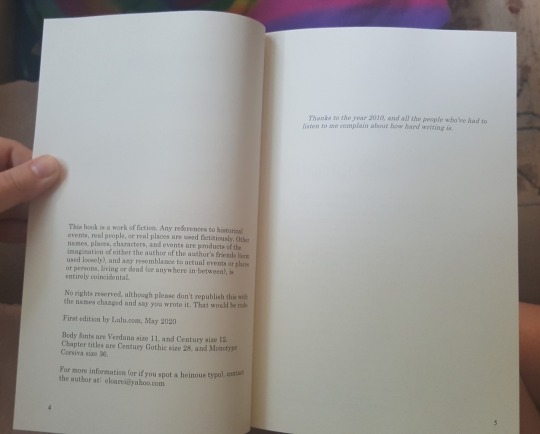
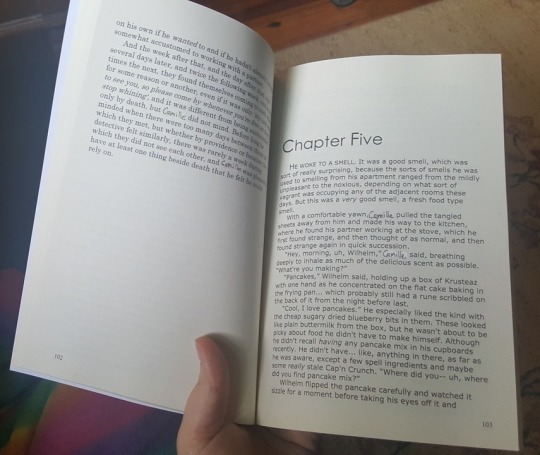
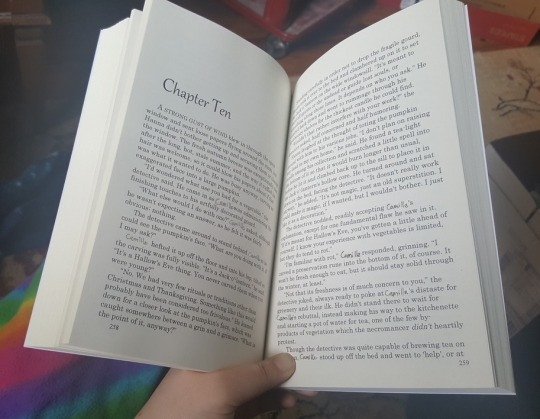
(lol I’m in the process of changing the main character’s name, which is why the crappy MS Paint edits.) PHEW, that was long. But hopefully my journey was at least a little insightful. Please do let me know if you have any thoughts, questions, or suggestions about how I could better format the book for the “real” printing!
2 notes
·
View notes
Text
Tutorial: Making Gifs with Animation Shop 3
This is text and picture heavy and is geared to working with free software available for Windows systems, as much as possible. I’ll cut once I reach the first screenshot.
For starters, make sure you have at least 10 gigabytes free in your hard drive space. The process I use to create gifs with and without text requires that I use uncompressed video (this simply means that the video I take source from is usually compressed in formats like MP4 and MKV). Uncompressed video takes a lot of space.
I do use a legally-bought software to make gifs with text. It's a low-cost alternative to Adobe Photoshop and I acquired it back in 2000 or so. It used to be called Jasc Paint Shop Pro and is now called Corel Paint Shop Pro. Animation Shop 3 was bundled with PSP 7, but ceased being bundled shortly thereafter. This tutorial will include making gifs with text, but the process is cumbersome, and does require purchasing PSP. (It's inexpensive, however. I highly recommend Corel products as good alternatives to Adobe. Currently PSP 7 is available for around $60 on Amazon.)
However, the executable file for Animation Shop 3 is freely available online, with no crack needed for use. If you're using it on a Windows 10 system, you will need to adjust the compatibility settings to Windows 8. This is done by right-clicking on it after install, selecting 'Properties' and then clicking on the 'Compatibility' tab. Adjust the version in the drop-down box.
Software needed: VirtualDubMod 1.5.4.1
Avisynth 2.5
ffdshow
Jasc Animation Shop 3
Install these by running them and following directions. Make shortcuts for VirtualDub and Animation Shop only and open them before using to continue assigning file types to them, especially for Animation Shop 3.
Now you'll need to install some filters for use with Avisynth. The first of these is a video enhancer to use for coloring your gif. The second is a pack that includes FFVideoSource, which is how you'll be able to open most formats in VirtualDub.
ColorMill
(Here’s a page with some more information about how to use Color Mill, but ignore the directions for installing because you won’t be using them here.)
Install this file by simply dropping it into the 'plugins' folder of where you've installed VirtualDub. For instance, mine is located at 'C:\Program Files\VirtualDubMod1.5.4.1\plugins'.
Avisynth Plugin Pack
(Here is information on what Avisynth does. It’s not necessary that you read it for this tutorial,but it does demystify it somewhat.)
To install these, unzip the contained files and then also drop them into the 'plugins' folder, but this time for your installation of Avisynth. I use 2.6, so this is slightly different, but to demonstrate again, it could be like 'C:\Program Files (x86)\AviSynth2.6\plugins'.
Now, you need video source. Nowadays, most video is available in MP4, MKV or AVI format. I use downloaded source to make my gifs because the process of saving individual frames as screenshots, while a viable process, is painstaking. This setup, while initially complicated, takes a lot of the pain out of the process, once fully set up.
So, if you have an MP4 or an MKV, create a simple .txt file. This will become an Avisynth script, by changing the extension of the file to .avs. Make sure you can see your file extensions on your system.
Into this file, you'll type the location of your source file as can be seen in this sample screenshot, which also includes some further source modifications. I've cropped two pixels off each side of the source, as well as resized it to the original size.
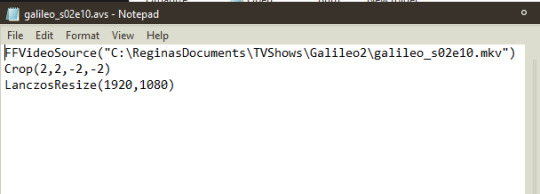
Stripped of the modifications specific to this file:
FFVideoSource("") Crop(0,0,-0,-0) LanczosResize([integer],[integer])
Once your Avisynth script has been created and saved, drop the file on top of the shortcut for VirtualDub, or open it, using 'File>Open video file...', which will open a window by which you can navigate to your script. If this is the first time doing this, and you've done everything correctly, there will be a slight delay in which it seems nothing is happening and then the file will open. You might encounter an error if you have not installed anything correctly or have typed your script incorrectly.
To open an AVI, open Virtualdub and open the video file by selecting 'File>Open video file...'. It should open without problems.
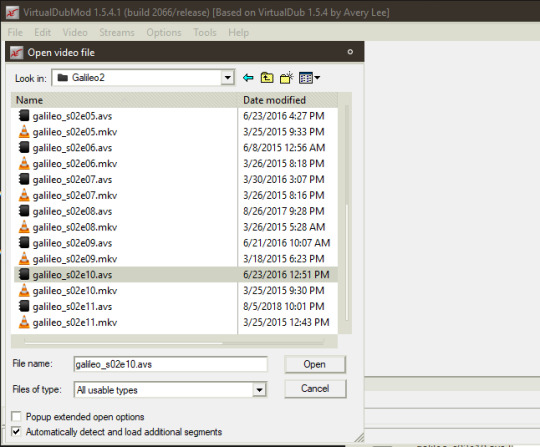
Once open in VirtualDub, you can navigate to the section you want to extract from your video by using the slider at the bottom of the screen. If the video resolution is large and you can't see all of it in the two boxes of video (one for input and one for output), right-click in the video frame and select one of the zoom options.
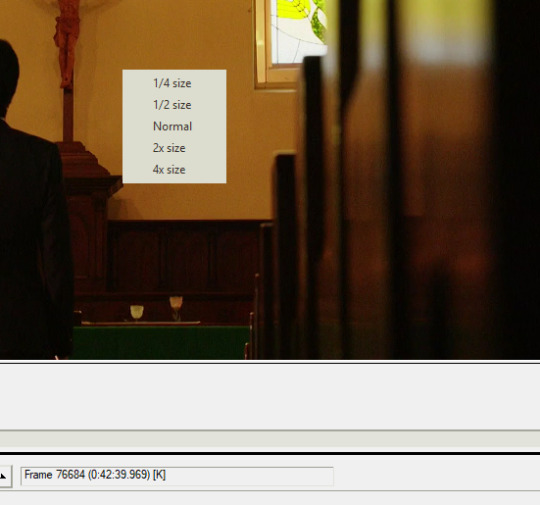
At the bottom of VirtualDub are the controls. In order they are: stop, play input, play output, move to first frame, back by one frame, forward by one frame, move to last frame, backward to last keyframe, forward to next keyframe, scan to last scene change, scan to next scene change, mark in, mark out.

Mark in and mark out are what you will be using to extract the section of video you need. Place your slider on the first frame of what you want to extract and press 'mark in' then move to the last frame and press 'mark out'. Doing so should show a change in the box below the controls.
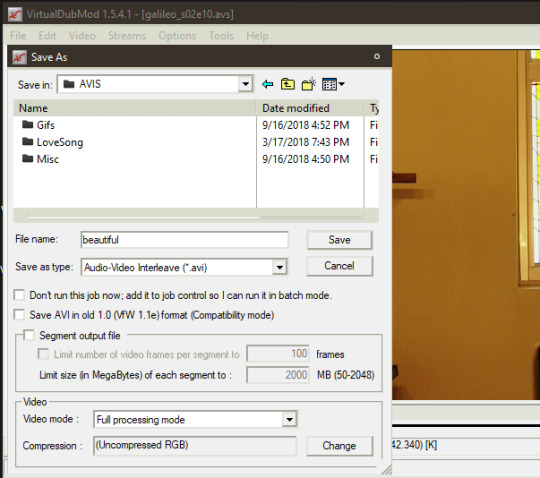
I've already done this with a section of video, so next you'll select 'File> Save As...'. Give it a name and make sure that under the section of Video, it says 'Full processing mode' and then '(Uncompressed RGB)'. Save it. This should show you progress, if you have 'Show input video' and 'Show output video' checked.
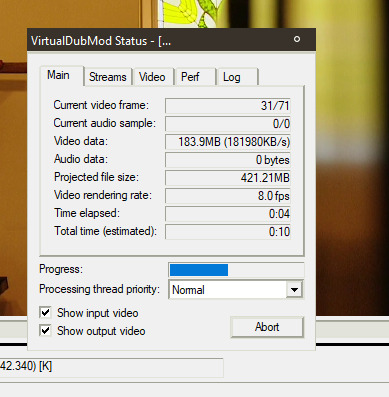
It is easier to do coloring when you've extracted your clip(s). Open your clip in VirtualDub. Go to 'Video>Filters...'. A box will open. Click 'Add...' on the right hand of the box. Select Color Mill(2.1) and press 'OK'. This will open a preview of your source (if not, the options have a button to press that says 'Show preview' in the left-hand corner). Adjust to your liking using the options.
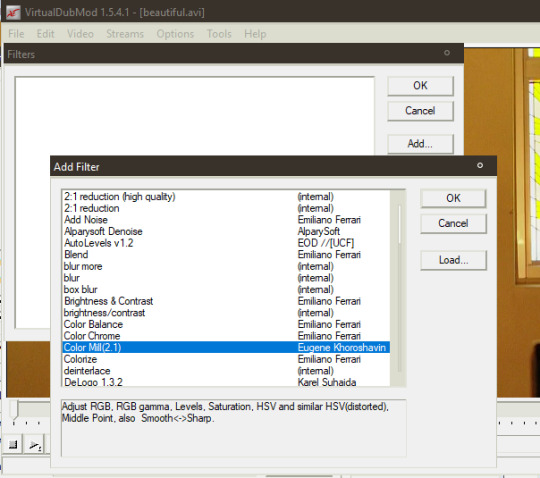
I desaturated mine, as you can compare in this screenshot:
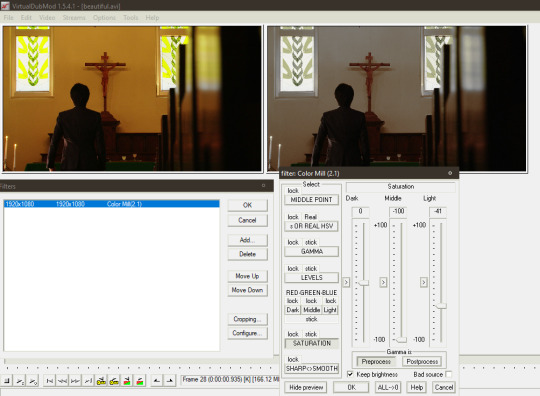
Save your recolor with a different name. I usually just append the abbreviation 'rc' to my recolors, so my file name here becomes 'beautifulrc.avi'.
Open your recolored file in Animation Shop 3 (File>Open...). If your file is a large resolution like mine and over a certain amount of frames long, you might get an error message. Press 'Yes' to continue opening the file.
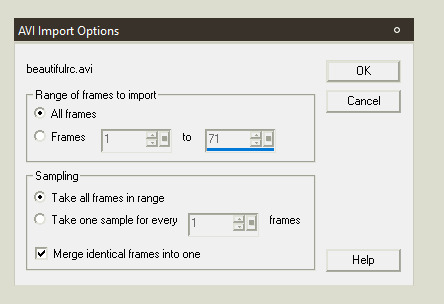
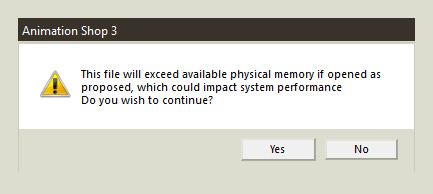
I have my Animation Shop set up to show the toolbars for everything but VCR Controls and have configured them in the manner you see here:
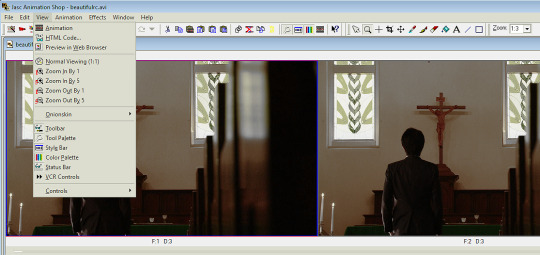
To make a single gif for Tumblr, you need to make sure that it doesn't exceed the specifications of: under 3 megabytes in size and 510 pixels in width. You'll find those criteria will constrain what you're able to do. For instance, my raw source for this gif is 1920x1080 pixels, width and height, and has 71 frames.
The less frames your gif has the more you can save on final file size. The less width your gif has the more frames you can have. A 320x210 gif can have up to sixty frames and still have great quality and stay under the megabyte limitation. The more color in your source, the less compression you'll get in your final gif, with the consequence of a larger file size. (This is why I desaturated my source.)
I will be putting text on this gif to show how this can be accomplished with Paint Shop Pro 7. I will also cull the frames down to less than 30 (aiming for 26 or 24). I'm going to crop my source as well, because it is currently in 1:85 perspective, which is rectangular and I want it to be square (at 500x500 pixels).
To crop your source, select the button that looks like two twisted ribbons and place your cursor in the source frame, right click and drag, enlarging the selection area. Your cursor will change to a four-pointed arrow mover cursor and you can move the selection around your source. If you move your cursor to one of the boundary lines of the selection, it will convert to a two-pointed arrow and you can click and drag this to adjust simply that side. Go back up to the toolbar and press the button for 'Crop' once you've adjusted your selection area to your satisfaction. If your source resolution is large you'll get this error message.
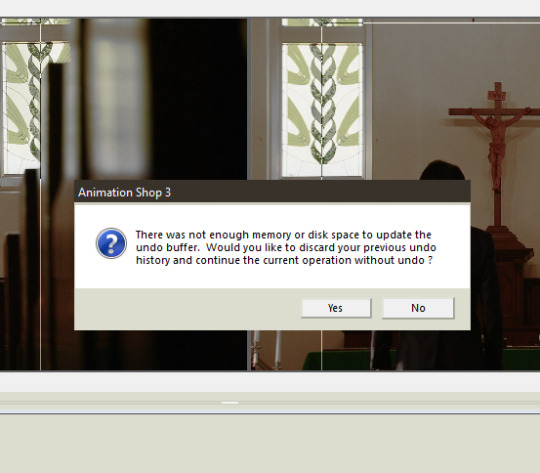
So be sure you're satisfied before continuing.
In the above screenshot, you can also see the selection lines for cropping, as thin lines.
To resize your source, select from the menu: 'Animation>Resize animation...'. This might shrink your animation down in zoom. To see it actual size, click the magnifying glass icon and click on your animation until you see the ratio change to '1:1'.
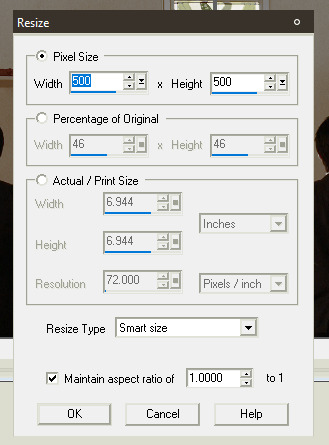

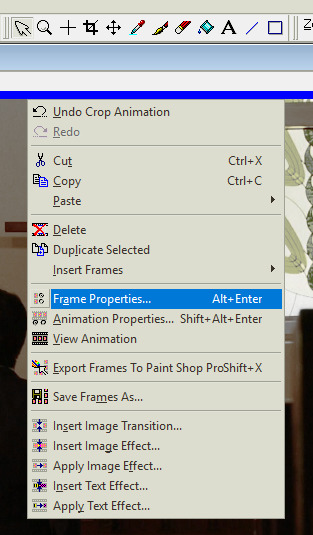
Now, you'll need to change the speed of your source. To do this, select all your frames by pressing 'Ctrl+A' or going to 'Edit>Select All'. Now select the pointer arrow from the toolbar and right-click on a frame of your source. Select 'Frame properties...'. In the tab that says 'Display Time' enter an integer. It's '3' by default, usually. Good times are 9, 10, and 12. I usually use 9 if I want close to real time and 12 if I want it to be slow. The more frames you remove the less smooth the motion of your gif will be. If you start out at 12 and then remove every second gif, you might end up at something close to real time. You'll need to adjust these parameters until you get something you like. To test them, use preview, which is accessed by selecting 'View>Animation'.
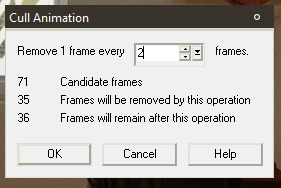
Move on to culling frames from your animation. Go to 'Animation>Cull animation'. As you can see here, removing 1 frame for every 2 frames, leaves me with 36 frames in my animation. My target was 24 or 26, so I have to do one of two things: remove frames by deleting them individually or culling again. Here's where I would preview my animation again, to see which option is best. In this case, I chose to cull again, but I adjusted how many frames were being removed to get close to my target, leaving me with 27 frames.
At this point I could choose to save.
Go to 'File>Save as...'. Since you've been working with uncompressed video, the program will automatically default to giving you the option to save as AVI. Change the selection in the box for 'Save as type:' to 'CompuServe Graphics Interchange (*.gif)' and click 'Save'. That will bring up this box:
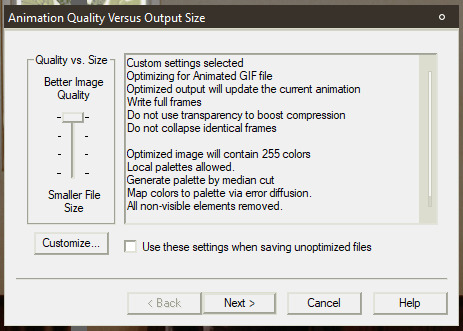
Click 'Customize...' and change the settings as follows:
[Under 'Colors' tab] 255 colors/ Optimized Median Cut / Error Diffusions
[Under 'Optimizations' tab] Uncheck everything except for 'Remove Non Visible Animation Elements'
Click 'Next>'. It will show progress of rendering and when finished prompt you to continue. Press 'Next>' again twice. The box will now show you Optimization Results, including the size of the file. Click 'Finish' if it falls beneath the limitation for file size.
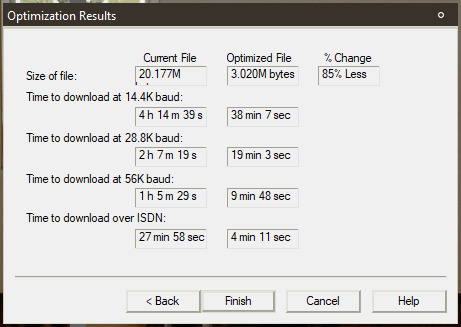
Mine has failed to fall beneath the 3MB limitation. Darn it. Now I have to go back and remove some frames to try for the target of 24 frames. If you have this same problem, you can try that solution or you can attempt to modify some of the above parameters for file rendering (I ended up using this route to keep 26 frames). I changed 'Optimized Median Cut' to 'Optimized Octree'. It gave me a final size of 2.5MB.
Congrats, for a gif without text, you're done.
Animation Shop 3 has the capability to save frames as individual images. If you wished to not purchase Paint Shop Pro 7, you could conceivably download a free photo editor like Gimp, add text to each individual frame, and then use Animation Shop to build the gif by opening each frame with the wizard provided in the software itself. That's straightforward process.
To create a gif with text by using Paint Shop Pro, what you need to do is open Paint Shop Pro 7. Leave it open and switch to Animation Shop 3, while it still has your animation open.
Make sure you have not yet rendered your animation into a gif. Also make sure you have all your frames selected. Right-click in a frame of your source and select 'Export to Paint Shop Pro'. Do not close either programs at any point during this process.
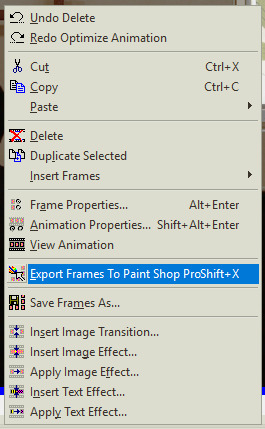
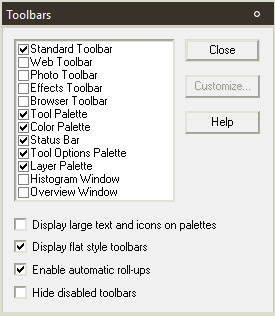
If the export goes correctly, PSP will open the gif as frames in layers. Make sure you have the toolbar for the Layer Palette open, as well as the Tool Options palette. To access click ‘View>Toolbars’, which will open this dialogue, if you didn’t already set this up.
Select a font you wish to use on your gif. Most gifs on Tumblrs use Corbel set as italicized for dialogue. I make use of akFontViewer to choose from the fonts I have.
Choose the text entry dialogue by selecting the small 'A' icon on the Tool Palette. Adjust parameters to your liking. Make sure the radio button in the section for 'Create as' is set to 'Floating' and 'Antialias' is checked. Press 'OK'. Now it will show a dotted line around your text, because it is a floating selection, so press 'Ctrl+Shift+P' to change it to a raster layer.
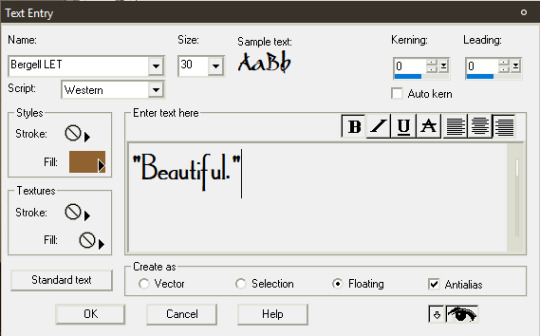
Adjust the placement of your text by using the mover tool (the four-pointed cursor icon). Use the grid tool to align it the way you wish. (View>Grid)
Make further adjustments to the look of your text, if you desire. On gifs, this may mean adding a drop shadow to the text, so that it stands out a little more. All image adjustments in PSP can be found under Effects or Colors, but I won't get into how I made the text look here in the final version, as that's not the focus of this tutorial.
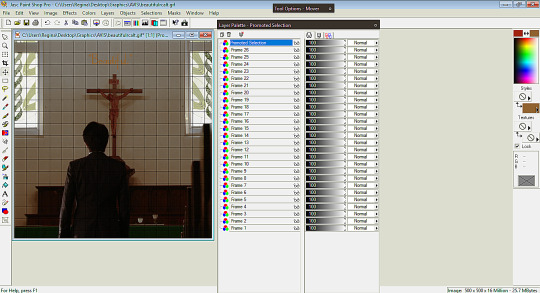
Next, select your image by pressing 'Ctrl+A'. This will put a dotted selection line around the entire image.
Here's where it gets painstaking in a series of repetitive actions. It's necessary to make sure you follow these in the right order and not to skip or make mistakes, as these will affect your individual frames. What you'll be doing is selecting a frame, then copying that frame with the text on it, then pasting into the same frame selection.
1. Place your cursor on your first frame. They go in reverse order. Make sure it is highlighted (in blue is how it shows in my program). 2. Click on the title-bar of your image. Now, right-click. Select 'Copy Merged'. 3. Right-click again. Select 'Paste Into Selection'. 4. Expand your Layer Palette. Click on the glasses icon next to the frame and toggle it to invisible. (It will indicate it is so by red slashes through the glasses.) 5. Click on the next frame layer below the one you've already changed. You can hover over the invisible layer to see the change if you wish. 6. Repeat for each frame layer. 7. Click on the layers that contain your text and turn them invisible. 8. Click on the frame layers starting from the bottom and turn them visible. The last layer should already be visible.
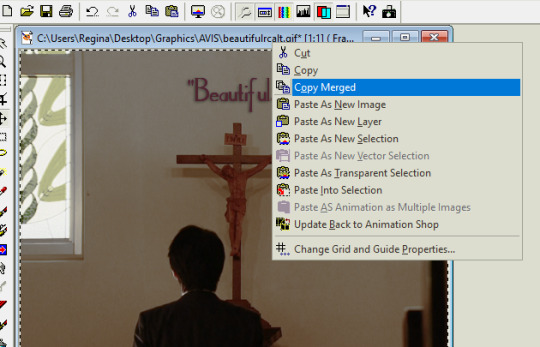
Now, right-click on your image title-bar and select 'Update Back to Animation Shop'. (You can see the option in the above screenshot, as well as the ‘Paste Into Selection’ option, even though they are not highlighted.)
Return to Animation Shop to see if the frames have updated correctly. Move through the frames by clicking on the slider below the frames and check to make sure each frame now has text.
Right-click on the title-bar of your animation (while still in Animation Shop) and select 'Break Link With Exported Frames'.
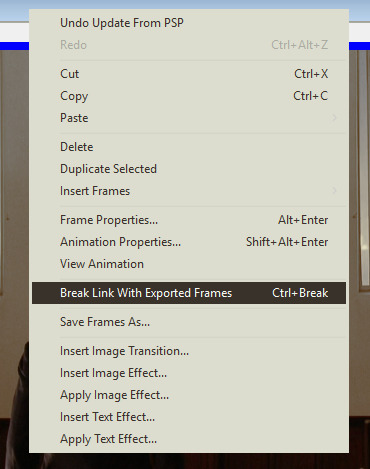
Proceed to save your gif as outlined above.
Close everything if you're sure you're done.
Congrats! Now you've made a gif with text, using Paint Shop Pro.
2 notes
·
View notes
Text
Adobe Acrobat Software Application
Adobe Acrobat software application is an effective software application that permits computer system individuals (from organization experts to house individuals) to transform any one of their Microsoft Office, Internet Explorer, or various other digital records to a legible Portable Document Format (PDF) documents. Adobe PDF submits preserve the aesthetic honesty of the papers to make sure that these documents can be seen as well as published on a selection of systems utilizing complementary Adobe's Acrobat Reader software program.
The password security function of Adobe Acrobat software program makes certain that your Adobe PDF data are safeguarded from unapproved customers from opening up as well as checking out delicate records. With electronic trademark assistance, Adobe Acrobat software program allows its customers to accept last files, confirm the credibility of the records, as well as develop a listing of relied on certifications. Adobe Acrobat software application uses plug-ins which assists you to produce Adobe PDF data without leaving the program you are collaborating with. The programs which sustain the plug-ins include currently consist of Microsoft Office, Project, Access, Internet Explorer, Visio, Publisher, as well as Autodesk AutoCAD. The most up to date variation of the Adobe Acrobat software program, Adobe Acrobat 7.0, flaunts a wide array of attributes which permits the customers to send PDF kinds made with fill-able type areas to applications like Adobe Form Designer as well as Adobe Acrobat 7.0 Professional. The current variation of the Adobe Acrobat software application likewise enables the customers to check out and also publish Adobe PDF submits on a range of equipment as well as os platforms. An additional included benefit is that the brand-new variation features the capacity to repeat various selection of ingrained multimedia material like MP3 and also QuickTime documents. Adobe Acrobat Reader Software Version 7.0 flaunts far better efficiency with prolonged tool compatibility, faster loading, much better zooming, and also boosted application assistance for files affixed to Adobe PDF data. The recently included function of Adobe Acrobat software program consists of brand-new file production, file safety, creates writing, uses legal rights, as well as administration and also print manufacturing alternatives. With Adobe Acrobat software program you can additionally develop digital cards as well as Adobe Photoshop Album slide programs. Whether you desire to make use of Adobe Acrobat to produce PDF documents or download and install the most recent Adobe Acrobat Reader (which is complimentary), you simply have to go to Adobe.com.
1 note
·
View note
Text
Pixillion plus tutorial

PIXILLION PLUS TUTORIAL HOW TO
PIXILLION PLUS TUTORIAL FOR MAC OS
PIXILLION PLUS TUTORIAL PDF
PIXILLION PLUS TUTORIAL SOFTWARE
PIXILLION PLUS TUTORIAL PROFESSIONAL
Operating System:Windows 10, XP, Vista, 7, 8, 8.
PIXILLION PLUS TUTORIAL SOFTWARE
Integrate with Express Burn Disc Burning Software to save your photos and images to CD or DVD.Ĭombine with PhotoStage Slideshow creator to produce slideshows.Įdit with PhotoPad Picture Editor to crop, resize, add effects and more. Pixillion Image Converter can convert or compress. Post images on the web, email to friends, or display on your mobile phone. Pixillion is an easy one-click process that makes this software perfect for converting your image files and digital photos. With Pixillions handy features, you are able to quickly convert vacation pictures to. Memory and important documents can be converted with just a click of a button.
PIXILLION PLUS TUTORIAL FOR MAC OS
View your images and format information before converting. Pixillion Plus Image Converter is an easy to use image converter for Mac OS X. Your computer can create any of the extensions that is found on one file type and customize it. Pixillion is a photo and image conversion software to convert image files. Load images directly from a CD, Windows folder or drag and drop them straight into the program. Popular Alternatives to Image Converter Plus for Windows, Mac, Linux, Web.
PIXILLION PLUS TUTORIAL PDF
Use your right click menu to convert from outside the program.Ĭonvert your PDF to A4, Letter or Legal size. to open Pixillion Image Converter bypassing limitations imposed by Apple in applications that come. Pixillion also lets you convert images directly from the right click menu.īatch converts thousands of files at once.Īdjust the quality of your jpeg and pdf files. 1.2.1 PDF Toolkit+ 1.2.2 Pixillion Image Converter. The easy one-click process makes it perfect for converting your image files for putting on the web, emailing to friends, or displaying on your mobile phone.īoasts powerful features including batch conversion, advanced image resizing, and conversion to PDF. You can preview images before you convert, as well as current file parameters including file format and dimensions. It can convert many different formats to gif, jpg, png, pdf and more. Optimize Photos for Web, Email or Print.Image converter for windows that can take your file and convert it to the format you need.
PIXILLION PLUS TUTORIAL PROFESSIONAL
Medico 2 44 – professional karaoke software windows 10. I recommend Bluestacks since it is very popular with lots of online tutorials.
PIXILLION PLUS TUTORIAL HOW TO
NCH Pixillion Plus 7.00 macOS 5.6 MB Pixillion is one of the most stable, easy-to-use, and comprehensive multi-format image file converters available. Learn how to download, install and use Pixillion Plus App For PC Windows. Pixillion Image Converter Software Plus can convert files from and to JPEG and other file formats like gif, tiff, png, pdf and more. Download Screenshot Pixillion is a JPEG and image file format conversion software for Mac. If you need to host a picture and you need it to be smaller, don't hesitate, run Pixillion which doesn't include lots of features, but the ones included are. Pixillion Plus Edition for Mac 2.89 NCH Software Multimedia. Both image formats JPEG and GIF are compression based. Select GIF format and specify other settings (such as image resize) if required. Select your JPG images in Windows Explorer, right-click on them, select Convert To, and then select Custom conversion. Pixillion shows you a preview of the result so you can choose if the size you are going to convert it is the right one or not. Download and install ImageConverter Plus. beginners to help you learn more and hone 21 - Pixillion Plus Edition for. دانلود نرم افزار تبدیل انواع فرمت عکس ـ NCH Pixillion Image Converter Plus 7.08. Adobe Illustrator & Photoshop tutorial: Create retro poster art by Nataly. These instructions and easy to follow along, these include both videos and pictures to give you the best experience. Also, With Pixillion Image Converter Plus, you’ll quickly and simply convert your image files into formats you would like to host on internet sites, reduce file size for sending via email, or storing on a CD also as quickly. Detailed step by step instruction on Plus-Plus builds. NCH Pixillion Image Converter Plus 7.12 Keygen: is a powerful and comprehensive multi-format image file converter available. NCH Pixillion Image Converter Plus Crack. about these options for that there is a tutorial video to understand about warping and morphing process. File size: 2.5 MB Pixillion is one of the most stable, easy-to-use, and comprehensive multi-format image file converters available. You don't have to have a Microsoft office which makes this software particularly perfect for at home use. It's just simply easy to access your media files. Deck set 2 0 4 – simple presentation creator free. Nch Pixillion Plus Crack For Windows Version 2020 freeload The user-friendly design of Pixillion is simple to use.

0 notes
Text
Latest adobe illustrator for mac

#Latest adobe illustrator for mac for free
#Latest adobe illustrator for mac how to
#Latest adobe illustrator for mac pdf
We are reader-supported when you buy through links on our site, we may earn an affiliate commission. Keep up with the latest on Adobe software - follow us on Facebook or Twitter, or subscribe to our RSS feed… You can also enter your email and have new articles sent directly to your Inbox.
#Latest adobe illustrator for mac how to
How to join Adobe’s Creative Cloud for freeĭo you have any questions about Illustrator? Just ask them below and we’ll get you answers fast!.freeload Adobe books (choose over 30 titles).Don’t need full Cloud? Get PS + LR for $9.99/month.Free! Watch 400+ new courses from Adobe MAX.How to save 60% with the Student & Teacher Editions.The 10 most common myths about Creative Cloud.Install now: Get all new Creative Cloud 2022 direct download links and free trials. – Creative Cloud was announced at Adobe MAX in Los Angeles, and dropped on June 17, 2013.In January 1987, Illustrator 1.0 was launched (Mac only).Adobe Illustrator was first developed for the Apple Macintosh as a commercialization of Adobe’s in-house font development software and PostScript file format.New Features: Taken primarily from, Adobe’s New Features documents and Adobe Press Releases. Feel free to share your comments, errors or how you use it:Ĭommunity Help: Thanks to Steve Werner for his help. Here’s the story on how this guidebook was put together:Ībout: This guide was created by James Wamser, an Adobe Certified Instructor, to use as a reference while teaching. If you don’t already have Adobe Illustrator installed on your machine yet, then you can just download a free trial to get started right away – and then run it for 7 days free. Special: Legally download dozens of free Adobe books for a limited time! This program helps graphic designers work faster, and has design presets, which allows you to create. Create illustrations, sketches, billboards, topography for packaging, business cards, and clothing designs. It offers a wide range of tools, filters, and effects. It’s also helpful to consult when you need to save back for previous versions of Illustrator (where the featuresets and file formats are older) – this way you’ll know which capabilities prior releases can support, and which they cannot. Adobe Illustrator is a vector graphics software designed for professional use. Just look for the “Download PDF” icon at the lower right of your browser, once you pull up the book. Wamser has carefully compiled with this work – and you can get it instantly here: It’s a great compilation of what many people want to know when they ask what’s different between versions… Typically you’ll find articles ( like this one) that give the primary differences between two single releases, but never before has there been coverage as thorough as Mr.
#Latest adobe illustrator for mac pdf
This PDF guidebook comprehensively reviews and compares what’s new in each successive revision of Illustrator going from CS6 in 2012 up to the current CC 2022 release – and covers the details of all the major new features and material improvements along the way.
#Latest adobe illustrator for mac for free
Here’s a very helpful resource out from James Wamser – a complete reference to all versions and features of Adobe Illustrator from CS6 to CC 2022… Similar to his InDesign and Photoshop handbooks, it’s called the Adobe Illustrator New Features Guide: From CS6 to CC – and this 50-page ebook is available for freeload now:

0 notes
Text
Download adobe acrobat reader for win 10

#DOWNLOAD ADOBE ACROBAT READER FOR WIN 10 FOR FREE#
#DOWNLOAD ADOBE ACROBAT READER FOR WIN 10 MAC OS#
#DOWNLOAD ADOBE ACROBAT READER FOR WIN 10 PDF#
#DOWNLOAD ADOBE ACROBAT READER FOR WIN 10 INSTALL#
#DOWNLOAD ADOBE ACROBAT READER FOR WIN 10 SERIAL#
If you encounter any difficulties, try Adobe Assistance.
#DOWNLOAD ADOBE ACROBAT READER FOR WIN 10 INSTALL#
Install with an account that has administrative privileges (not a Limited User Account if you are using Windows Vista).
For the easiest installation experience, exit any open programs, including virus protection software, prior to installing the product.
previous versions with a feature comparison.
#DOWNLOAD ADOBE ACROBAT READER FOR WIN 10 MAC OS#
Download Links for All Acrobat X (10) Updates: Mac OS.Download Links for All Acrobat X (10) Updates: Windows.Then just download and apply the correct update patch file from these collections: If you also want the direct download links for the Acrobat Pro/Standard product updates (i.e., all the included upgrades since the initial release above), here are complete sets for PC and Mac… These updates are cumulative and require that a previous version of Acrobat X already be installed on your system. See also the minimum system requirements for AAX Pro and AAX Suite, and the Reader. » English French & German for Windows (2.13 GB): File 1 (.exe) and File 2 (.7z) Free Adobe Reader X (Reader 10.1) – Direct Download Links
#DOWNLOAD ADOBE ACROBAT READER FOR WIN 10 SERIAL#
(Note: Not a free trial requires valid serial number) Adobe Acrobat X Suite – Direct Download Links » Windows – Acrobat X Standard in English, French & German (320 MB) » Mac OS – Free Acrobat X Pro trial in English, French & German (474 MB) Adobe Acrobat X Standard – Direct Download Link » Windows – Free Acrobat X Pro trial in English, French & German (465 MB) Special: Legally download dozens of free Adobe books for a limited time! Adobe Acrobat X Pro – Direct Download Links
Then follow the product installation instructions here.
Download the files either by clicking directly on the DDL links, or by right-clicking and choosing “ Save Link As…” on the popup menu – and save all files to the same place.
Just make sure you have enough disk space.
OK! Now you’re logged in at Adobe with the trials cookie set, you can instantly download any of the links below.
If asked, sign in with your Adobe ID or take a minute to create one for yourself ( free).
Click «HERE» to visit this page first, before clicking any of the links in the table below – this is critical!.
Adobe recommends temporarily turning off any browsing restrictions you might have running, like site or cookie blocking, filtering, firewalls or antivirus software.
So for Pro/Standard and Suite, please follow these instructions carefully. Otherwise, you will receive an “access denied” or “resume download” message preventing the connection. Note: Very Important Instructions More DirectĮxcept for the Reader, you must have a free Adobe account and be logged in to use the links below, as Adobe sets a session cookie on your browser that lets you to access the software. Install now: Get all new Creative Cloud 2022 direct download links and free trials.
#DOWNLOAD ADOBE ACROBAT READER FOR WIN 10 PDF#
Of course, the free Adobe Reader X for PDF is downloadable for both platforms – Windows (many flavors) and Mac OS (Intel). 7z file is fully downloaded and resides in the same folder. exe file will only work (and install) once the. The trial consists of two downloaded files: an. The new Acrobat X Suite (Acrobat X Pro, Photoshop CS5, Captivate 5, Presenter 7, LiveCycle Designer ES2, and Media Encoder CS5) is also currently available for Windows only. Languages offered here are English, French/Français and German/Deutsch.
#DOWNLOAD ADOBE ACROBAT READER FOR WIN 10 FOR FREE#
There is no actual trial version of Acrobat X Standard available for any platform, but Pro includes all Standard features – so you can try out Pro for free and then decide which version you want at the time of purchase. For Windows, the Acrobat X Pro download is in the form of a single. Here it’s open and you can just use your browser, or another download manager of your choice. They are especially useful when you are unable to download Adobe’s software via other means – often due to difficulties with the Akamai Download Manager (the Adobe DLM). The links given below go to the authentic and secure files residing on Adobe’s servers, are guaranteed genuine and will not change. Adobe Acrobat X has just been released! And continuing in our tradition of providing the direct download links for major Adobe products such as Creative Cloud, CS6, Captivate 11, and Elements 2022, below you’ll find the direct links for the brand new Acrobat X (10)… We also have added the direct links for the previous versions Acrobat 9 and Acrobat 8 as well, in case you also need them for any reason.

0 notes
Text
Download adobe photoshop touch

DOWNLOAD ADOBE PHOTOSHOP TOUCH HOW TO
DOWNLOAD ADOBE PHOTOSHOP TOUCH FULL VERSION
DOWNLOAD ADOBE PHOTOSHOP TOUCH APK
DOWNLOAD ADOBE PHOTOSHOP TOUCH ZIP FILE
DOWNLOAD ADOBE PHOTOSHOP TOUCH SOFTWARE
Adobe Photoshop Express 7.4.
DOWNLOAD ADOBE PHOTOSHOP TOUCH SOFTWARE
The software has many benefits over other programs. Use popular Photoshop features designed for the tablet such as layers, selection. Combine images, apply professional effects, share results with friends and family through Facebook and Twitter all from the convenience of your iPad. It is mainly used to manipulate images, make artworks, retouch photos, graphic products, and so on. Transform your images with core Adobe® Photoshop® features in an app designed for tablets. Photoshop is an advanced image editing software.
DOWNLOAD ADOBE PHOTOSHOP TOUCH APK
Other Adobe Photoshop Express APK versions (43): Looking for safe Adobe Photoshop Free For Windows 10 download links Learn more about free and legal ways to download the program in 2022.
DOWNLOAD ADOBE PHOTOSHOP TOUCH HOW TO
Bugs and Crash fixes for smooth experience.įor more information on downloading Adobe Photoshop Express to your phone, check out our guide: how to install APK files.
New content – New looks and Text styles has been added in the application.
Enhanced Vignette - Give your photo a dramatic vignette effect with precise control of roundness and feather.
A much requested functionality, humbly delivered!
Watermark resize – Have complete control over the size of the watermark on your images.
Use predefined filters to alter photos with one touch.
If you’re familiar with Photoshop, you won’t have any issues finding what you need. You get most of the features of the original, optimized for the small screen. Though smaller, it performs as well as its desktop counterpart. A large number of filters, along with the ability to post images directly to social networks, make this the perfect app for people that care about what they post online. This image editing suite is the mobile version of Adobe Photoshop. The app has simple functions such as crop, snap, or snap, but also a few more complex ones, such as noise reduction or powerful filters.Īdobe Photoshop Express has a powerful engine that also permits users to manage files with huge resolutions, like panoramic images for example. In fact, Adobe Photoshop Express is aimed at both beginners and professionals, which means that anyone can pick it up and use it. Unlike bigger platforms that provide more freedom, Adobe Photoshop Express focuses on small formats and comes with features that you can use. A dialog box appears for choosing options when saving in some image formats.As the name suggests, Adobe Photoshop Express is all about giving users the right tools to make changes to photos on mobile devices. PHOTO FUN FOR EVERYONE Tap into your creativity on the go with Photoshop Expressa fun, fast, and easy picture editor for one-touch transformations and. If you're looking for more free options, you can create graphics, collages, flyers, videos, and animations with Adobe Express.
DOWNLOAD ADOBE PHOTOSHOP TOUCH FULL VERSION
The free trial is the official, full version of the app it includes all the features and updates in the latest version of Photoshop.
In the Save As dialog box, select saving options. Yes, you can download a 7-day free trial of Photoshop.
Similarly, how do you save a project in Photoshop? … Adobe says that it’s currently working on mobile apps that focus on core tasks rather than attempting to pack all features together into a single app like what’s available on desktop. Copy this file to the appropriate Adobe Photoshop folder location: Windows 10: C:Program FilesAdobeAdobe Photoshop CC 2019. Adobe Photoshop Touch is the mobile version of Adobe Photoshop which is the best photo editing software ever created for computers. Click the appropriate 'Download Now' button and download your Windows file version. Likewise, why did Adobe remove Photoshop Touch? After a three year run, Adobe is retiring Photoshop Touch, its current horse in the mobile photo editing race. Download Adobe Photoshop Express for on-the-go photo editing. Locate your Windows operating system version in the list of below 'Download Photoshop.exe Files'.
Done! Once Photoshop is opened and running, the action should be installed.
DOWNLOAD ADOBE PHOTOSHOP TOUCH ZIP FILE
People ask also, how do I open a zip file in Photoshop? The Send menu includes the following selections: Upload to Creative Cloud – Share copies to your Creative Cloud online storage. Simply select the Send menu from along the top of the interface and choose the option you’re interested in. The most obvious solution is to download and install Adobe Photoshop or one to the listed programs: Adobe Photoshop Touch for iPad, Adobe Photoshop Touch for Android.Ĭorrespondingly, how do I save an image in Photoshop Touch? Photoshop Touch allows you to easily export copies of your projects as images. The main and most frequent cause precluding users form opening PSDX files is that no program that can handle PSDX files is installed on user’s system.

0 notes
Text
Restore bluebeam registration

Restore bluebeam registration cracked#
Restore bluebeam registration serial numbers#
Restore bluebeam registration serial key#
Restore bluebeam registration full version#
Restore bluebeam registration serial number#
Restore bluebeam registration serial numbers#
You can find almost the cracks and serial numbers of any kind of software. The home page of Keygens Pro looks like a product from the last century, but it did surprise us after browsing around this website. Keygens Pro – Full List of Serial Keys for Any Software Sometimes it will work and there is a probability that you will be able to find the genuine software’s crack keys. It is anyway a choice to give SerialReactor a try if you are unable to find the crack keys of desired applications. You can find the serial keys of small applications which requires very less subscription fees to access the premium access. SerialReactor is not so popular among the users because it is not capable of fetching the serial keys of major premium software like Windows 10, Adobe Photoshop premium, MS Office 2018 etc. The links will direct you to a third-party download site. It should be noted that the Best Results, which will appear on every search result, are not completely trustful. However, manual research often gets back blank result. SerialReactor doesn’t perform as a comprehensive serial keys site during our test, but a few hand-picked apps are listed on its home page with the latest serial keys, most of which are working and safe. SerialReactor – Source for the Newest Serials
Restore bluebeam registration serial key#
Moreover, in case you fail to find the serial key of a desired software, you can even submit a request on its forums. The better part of this free serial keys site is that you’ll get both crack file (signup needed for downloads on third-party site) and serial numbers. You need to search for wanted serial keys by brand names or keywords, or click any of the alphabet to explore more surprise. To get down to business, Smart Serials really does good job collecting working serial keys of a lot of useful software, and they continue adding items. Basing on the fact that they value copyright, we should rest assured for the safety issue while browsing this website. If the legal developer of the official software asks, they would possible remove related entries from this site. Though this site provides serials keys and crack files, it is compliant with Digital Millennium Act.
Restore bluebeam registration serial number#
Smart Serials is another serial number collection website. Smart Serials – Threat-Free Serial Keys Site
Restore bluebeam registration cracked#
Second, it does not provide download links, neither for the official packages or cracked copies, but just serial keys. First, there is no category for all the serial keys, so you must know clearly which serial key you need. If we have to pick out some flaws, then there two on this site. Based on the over 120,000 serials in the database, is the most possible sites to find free serial keys that you need. Update date and user rating are two important factors that help users judge whether the free serial keys would work or just a waste of time. In addition to the update frequency, also features with a precise yet informative web interface. It might not be true currently, because there is no much profit driving after all, but is still the most frequently updated option. If the only standard to rate free serial keys websites is the frequency of updating, then is definitely the best one, which claims to update daily. – Free Serial Keys Site for Most Software In case of data loss due to virus attack or any other reasons, make sure to download iReparo Data Recovery Software to get your lost files back as soon as possible.
Restore bluebeam registration full version#
You’re suggested to try your luck on giveaway sites to freeload full version software first. It is impossible for the website owners or anyone else to rule out every threat. Warning: There are potential risks to install cracked software on computer or mobile phone. We have tested dozens of websites and now present you the top 6 free serial keys sites for all kinds of software. What if you’re a student or suffering the down and out? Don’t worry. However, most of those programs only allow paid users to access advanced or even basic features. Nowadays, it is almost impossible to handle any task in work or study without the help of software, such as image processing, document editor, and speech-to-text. If you are urgently looking for the serial key of a paid software, then here might be the last stop before you give up. Top 6 Free Serial Keys Sites for Any Software in 2020

0 notes