#Download adobe photoshop touch
Explore tagged Tumblr posts
Text
10+ unique templates to enhance your The Sims story
An easy way to make your sim’s profile stand out in the sea of family trees and dynasty channels is to use a variety of visual templates. We think these are perfect for character diary entries, adding flair to descriptions, sim galleries, or even the entire family. Of course they’re also great for your sims-themed social media.
In most cases working with templates requires only basic Photoshop skills. We’ve put together a selection of character profile templates, chat and story layouts, passports, travel tickets, and much more! Download your favorite designs below, create something unique, and share your vibrant sim stories with us on the platform. By the way, all these templates are perfect for using in your Sim's diary on TheSimsTree.
Character/sim card template for Photoshop by @cosmicamos-archive
A basic character profile styled in the spirit of our favorite game. It’s super easy to use in-game icons to quickly fill out your sim’s profile, all while keeping it fresh and original.

"Character in 5 Minutes" Template for Adobe Photoshop by @nulevhroma
A quick and fun questionnaire to reveal your sim’s personality in new ways. The prompts are thoughtfully selected, but you can easily tweak them or add your own ideas.

Character Sheet Template for Canva by thesimbience
An incredibly cute profile template where you can even showcase your favorite outfits for your sim. It's also a great place to highlight hobbies, work, and favorite spots.

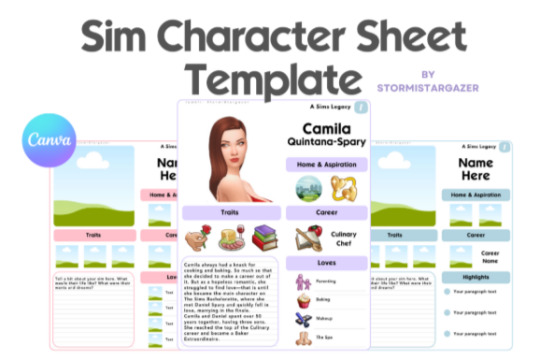
Sim Character Sheet for Canva by @stormistargazer
This template is perfect for capturing all the most important details about your sim. You’ll need to decide what truly defines their biography and personality.
Kids’ questionnaire template for Adobe Photoshop by Ephiemera
A nostalgic throwback to the fun of filling out friend questionnaires in school. Why not let your sims enjoy the same experience? Plus it’s a great way for you to get to know them better.

Of course this isn’t just for kids – see an example design by DiVet below.

Simstagram Story Overlay for Photoshop by @honeycombsims
As they say, “If it’s not on Simstagram, it didn’t happen”. This applies to your sims too! Don’t leave their journals without travel or event stories – your followers won’t forgive you!

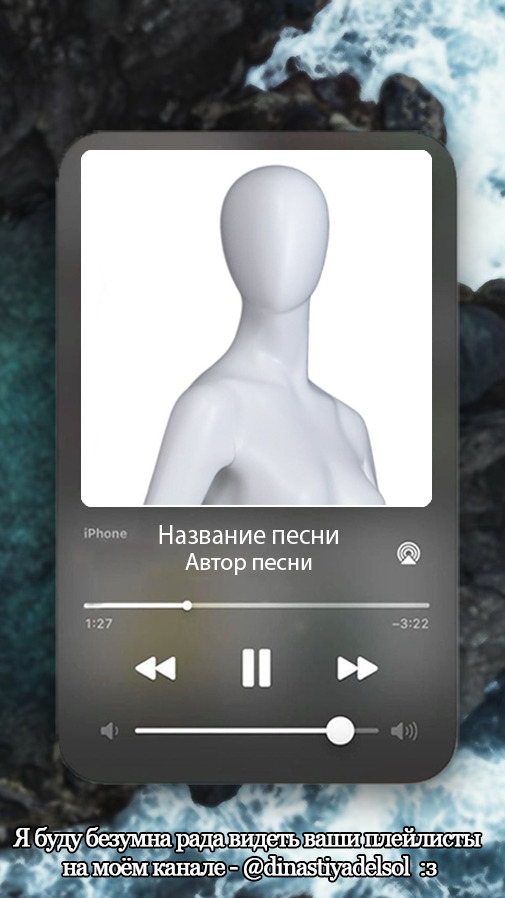
Playlist Template for Adobe Photoshop by DiVet
Perfect for those who love fleshing out their characters on every level. Your sim’s favorite music can add more depth and life to their personality.
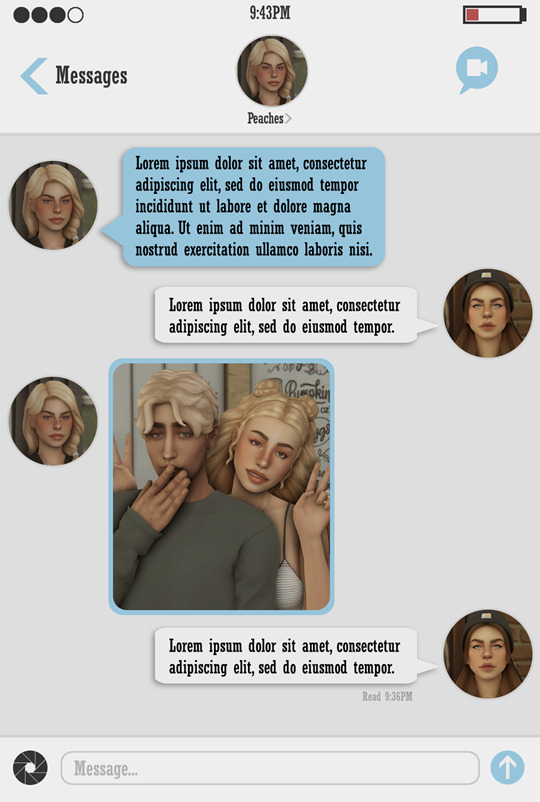
Text Messaging Template for Photoshop by @kouukie
An amazing way to tell a character’s story – just like forwarding texts to your friends for advice. After all, important decisions often happen in messages, and your sims are no exception.
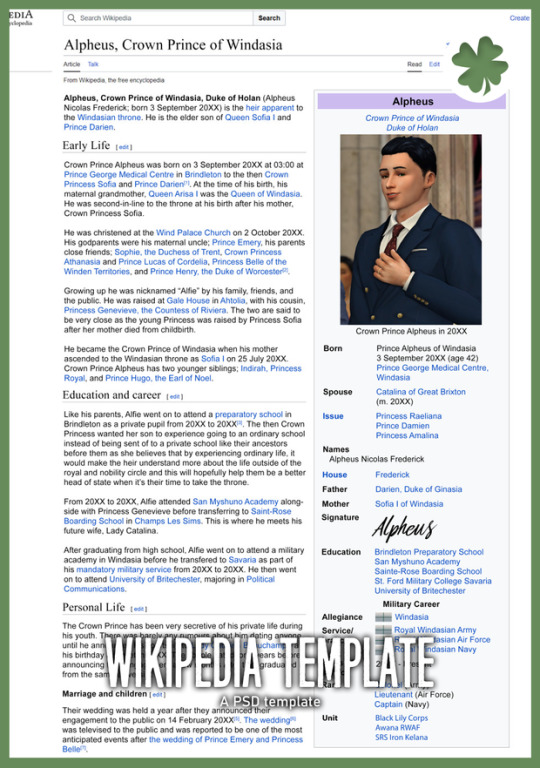
Wikipedia Template for Photoshop by @lucky-content
In our Sims worlds full of characters and events, some deserve their own Wikipedia page. Movie stars, legendary scientists, infamous criminals, city founders, or the heads of ancient families – this template highlights just how unique your sim or event is.
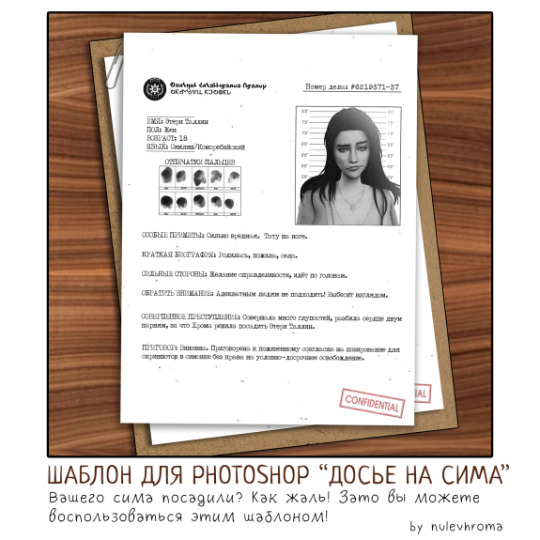
Criminal Case File Template for Photoshop by @nulevhroma
Not all dynasty members are peaceful, some love to party, cause chaos, or even commit crimes. A police dossier on your sim is a great way to enhance their story.
Let's Travel (Template Pack) by gingenr
If your family members travel often, this pack is for you! Create realistic tickets for planes, trains, or buses. Designing tickets for an upcoming trip is such a delightful touch.

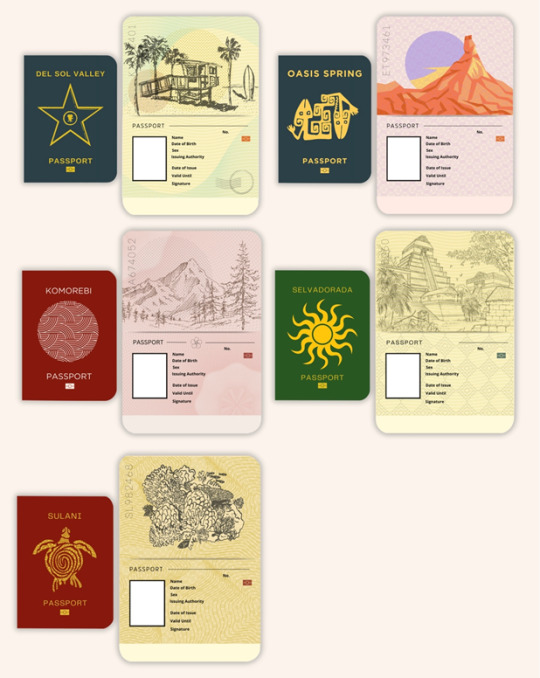
Passport - sims 4 worlds - emtpy PNG by gingenr
Where there’s travel, there are passports. This atmospheric pack includes passport templates for each Sims town. Passports aren’t just for travel, they can come in handy for jobs, weddings, or even police encounters…
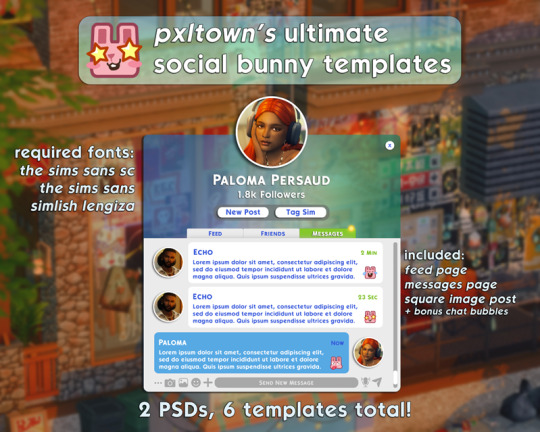
Ultimate social bunny templates for Photoshop by pxlverse
No Sim story is complete without posts from their in-game social networks. This beautiful template helps immerse your readers in your sim’s journey.
87 notes
·
View notes
Note
Hiya! Hope this message finds u well :3 I absolutely love your art; found you from insta! Quick question also; I’m not sure if you’ve answered this before, but which brushes do you use for ur digital art? I love the textures they’re so crunchy (endearing)!! Have a lovely day!! :D
hello!! here's a little brush tour ft. this half rendered martin.
also, a great app for ipad artists who really want to dig into texture is art set 4. i swear by it and i've been using it for about two years. none of my more recent art uses it, but that's just because i'm experimenting with my process rn
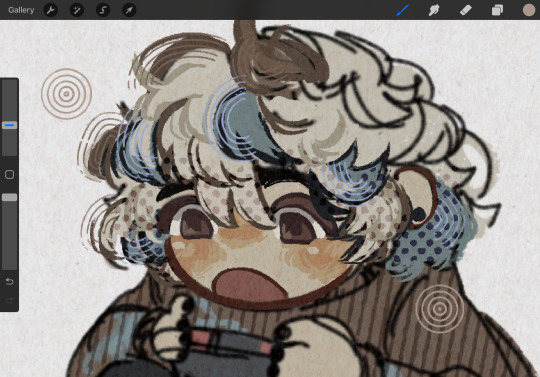
so here's a list of my most used brushes lately, and there will be links to all of them at the bottom of this post.
the two labeled "custom pencil" are both my own personal modified pencils (both sourced from the 6b pencil) but the narinder pencil and the vanilla 6b pencil are both very similar to them. i use these two for sketching and flat color specifically, and if you do specifically want these two brushes then i'd be happy to upload them somewhere for you to download, but they're not really necessary for texture
i also use G&B halftone brushes sometimes! but i greatly prefer the RSCO sample pack, and i cannot find the link to the G&B brushes no matter how hard i google, and pretty much any halftone brush set will do the same job
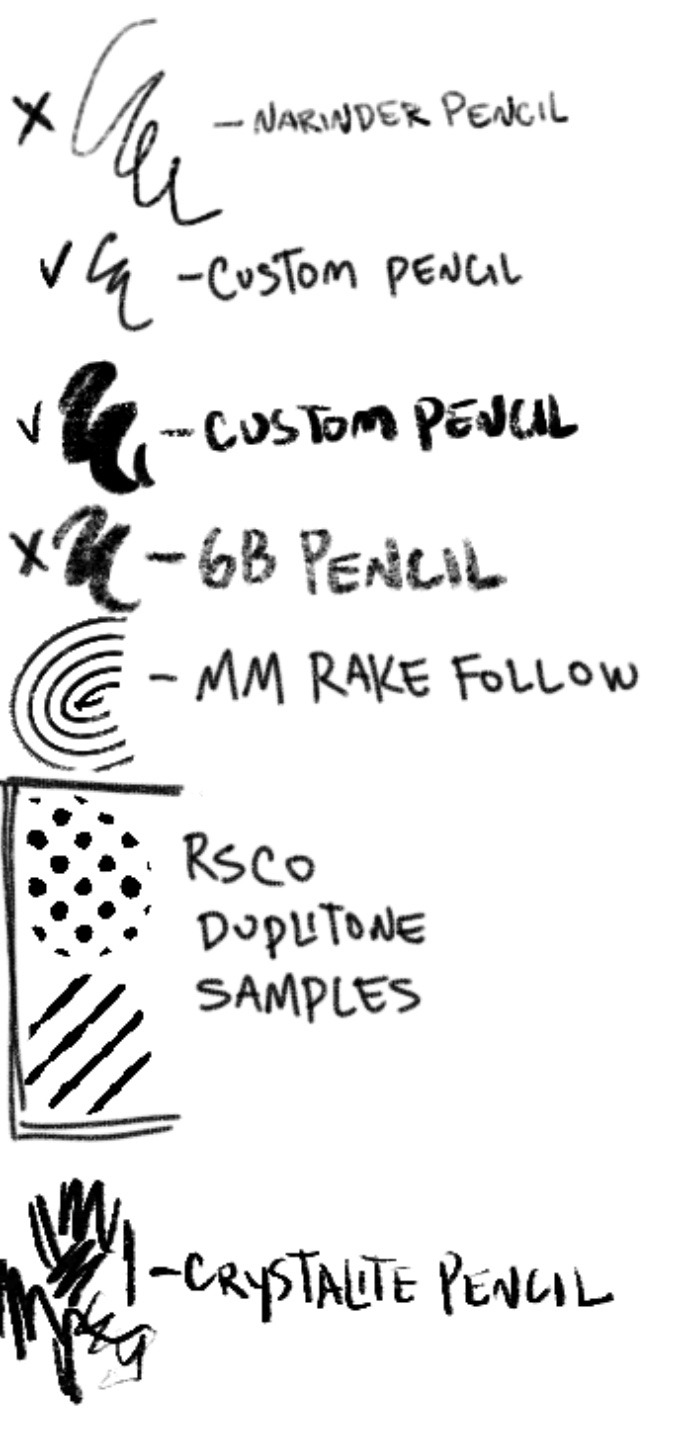
and here's what they look like in practice!
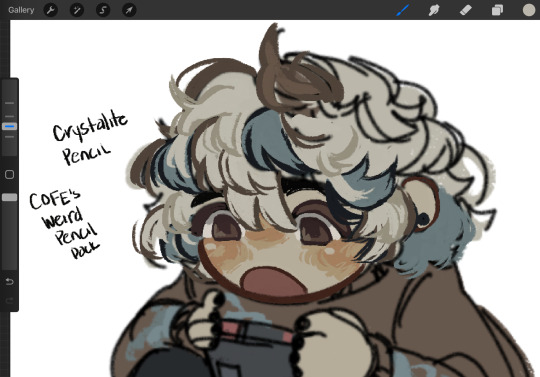
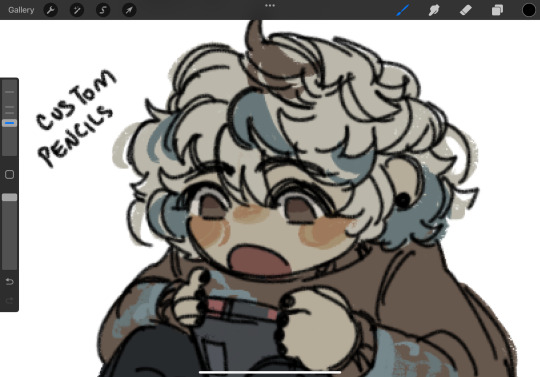
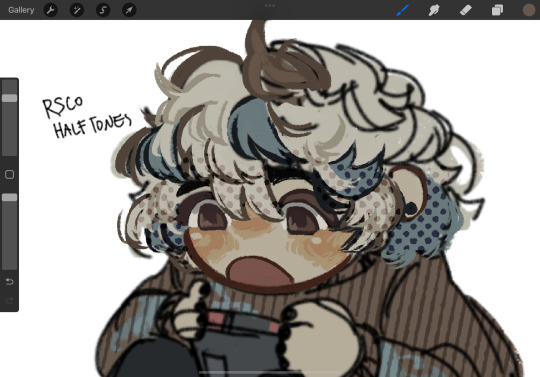
(i like to set these halftones to color burn. color burn is my most used blending mode, even for shading)
and then i hit "copy all," paste, and duplicate it. so you should have two layers of just your entire canvas. then import a paper texture
i'm partial to the set i'll link down below, my favorite is #5. you should absolutely check out the rest of the free texture packs on their website if you're wanting to diversify your texture process btw, all of their stuff is fantastic.
to use that texture, your layers should look like this!
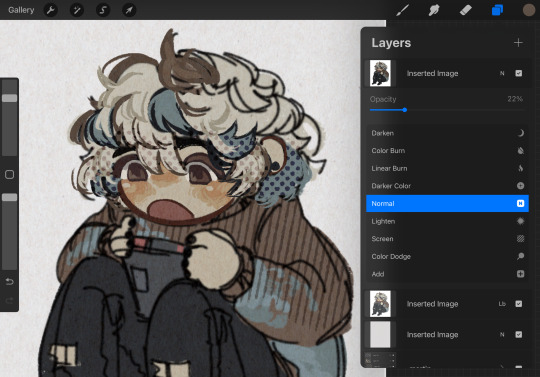
on the layer set to the linear burn, i also like to go into the adjustments menu and bump up the brightness until all of the colors are at similar values to what they were before. and the normal layer on top is just to control the intensity/opacity of the paper texture!
after all of that, sometimes i'll go in with brushes like MM rake follow, or more from COFE's weird pencils, on top of all of those layers for finishing touches.
definitely play around with it, try new free brushes all of the time (i heavily recommended subscribing to Manero. they have a lot of free stuff and it's all fantastic) and see what works for you <3
here are the links to the brushes in this post, as well as some extras! some of them are paid and some of them are completely free. + it wasn't mentioned here, but i use the tatyworks linen fabric brush for blending! for any of the paid brushes, i'll try to link some free alternatives
paid brushes:
alternatives to paid brushes:
free brushes:
extra goodies:
#procreate art#procreate brushes#art tutorial#artists on tumblr#digital art#digital artist#art recommendations#art resources
72 notes
·
View notes
Text
commissions update!!
hi guys!! thanks so much to everyone who's reached out and expressed interest in commissions once they reopen. i know the gift-giving season is on the horizon and i really want to be ready to bring a big smile to you, your friend, your partner, your guildmate, or whoever else you're buying for.
first off: commissions will reopen in about a week. finals are looming for me and are a couple weeks away, but the biggest hurdle-- a backbreaking round of huge projects and papers-- is largely past me, and classes are now meeting infrequently. i'll make another announcement and update my info page when they're open for real, but just know that's coming up soon!
secondly: i will no longer be offering animated commissions. this breaks my heart but my hand was forced! long story short, some adobe product i downloaded for school cross-contaminated my ancient copy of photoshop cs5, and now my photoshop knows it's a quasi-bootleg and won't accept the decade-old registration code anymore. i'm using an alternative program for the moment which does (almost) all the same art effects you and i have come to love, but animation is so unwieldy as to be out of the picture. i may come up with a new alternate gimmick for those who want to go the extra mile for their commission, but we'll see.
that's all for now; stay tuned for the reopening announcement proper, and remember you can check my slot status anytime by clicking the commission link in my bio (just scroll down a little past the pictures). you can also link your friends to my info by just telling them to check out tinyurl.com/t00thpasteface 💜 thanks and hopefully i'll be in touch with some of yall soon!
20 notes
·
View notes
Text
I keep seeing posts being like "omg. The kids don't know how to use computer! They don't know how to use a mouse! They don't know what a command line is! They can't even use a browser. The kids don't know anything about technology if not app on phone:("
And idk dude like. I'm not gonna accuse these people of lying but I am gonna accuse them of being completely biased with absolutely no self reflection at all. You sound like your parents. Like holy shit. First of all, LOTS of us [aged<20] have had computer classes. "Computer lab" was a class all throughout primary school for me, and in grade 8 I had a required course where I learned some Python, had to use Adobe Photoshop, that kind of stuff. I know so many people who go further than that (including myself) and take elective coding classes. Now, it would be incredibly fucking biased of me to conclude that, because almost everyone I know is at the very least functional with a computer and can use a mouse, this means everyone is. Of course not. But thats what these posts do. "I only interact with children who don't know this, therefore no one under 20 knows anything and they're all stupid with their little tik toks" you have a very incomplete sample of kids at this age, and you barely acknowledge it.
Secondly, more on the self reflection bit. This is absolutely a privilege issue. Not a "the kids are so dumbb omggg" issue. Kids don't have computer classes? It's a privilege I was able to get that education. Should we mock people who didn't have music classes growing up and don't know the difference between a rhythm and a beat? If your answer to that is no, then maybe we shouldn't mock kids for not knowing the difference between a search engine and a browser. I know plenty of people bring up the issue to try and get at this, but I cant shake the undertone that all of these posts have in common, which is essentially this air of superiority, like people who grew up with desktop computer access are somehow better than people who didn't, which is just kind of terrible?? Like no joke, I've seen people complaining about uni students who don't really know the ins and outs of programming yet in undergrad and its like,,, did you just not want them to go to school because they didn't know that prior to post secondary? Like, what do you think school is for? Being perfect all the time and telling the teacher that you know everything already? I was under the impression that school was for acquiring knowledge and skills that you previously didnt have.
I also know people who are much older than me, and could have been coding all of their life, but didn't so much as touch a computer until after college, and they learned how to use it, and how to code, and now it's their career! You don't need to learn how computers work when you are five! I grew up scribbling on ms paint and being confused how solitaire worked, and struggling to comprehend minesweeper strategy on a very old version of Windows. I could functionally operate a mouse at the age of one, and that's all privilege. I'm not smarter, or better or more refined or anything, I was literally just born into a family that had desktop computers. And again, to point out the bias, I know way more adults that fit the whole "don't understand it if it's not an app on my phone" than kids.
Finally, a minor nitpick but I feel like it's warranted since the people authouring these posts often present themselves as being more knowledgeable about computers than the average teen? Don't go just saying incorrect bullshit. If you mean PC, say pc. If you mean a desktop computer, or a laptop, say that. Phones are not "fake computers" they just ARE computers. They are computers that have been engineered to be tiny. Their size does not mean they are not computers, it just means they are small. Furthermore, an "app" isn't a "thing u use on a phone." It's literally just the word application shortened. Anytime you use an application that you download on a laptop, or a pc or whatever, you are using an app. Your browser application is an app. I hate to tell you, but it must be said.
Sorry if anything I said in this is straight up wrong, I am not immune to hypocrisy, yadda yadda you know the deal. I also AM NOT an expert on computers, I have (what I, a teenager consider to be) a relatively baseline understanding of computers. And I'm writing this exhausted because I can't sleep. Admittedly on the mobile app, (which explains any typos) but I swear to you that I have a laptop and I use it more than I use my phone most days. I doubt anyone will really see this post but thanks for reading if you got this far I guess. Maybe let's just not fearmonger about "the kids these days" when we should be trying to help kids become functioning adults. I didn't get past my struggles with reading as a kid by being told that I was stupid, or getting mocked. I got past them by finding a book that I loved, and by being encouraged to read by adults who genuinely cared about my education. I really don't see how computers are different, that's all I have to say.
7 notes
·
View notes
Text
How Can You Improve Your Website’s User Experience?
In today’s digital age, having a user-friendly website is essential for any business. A website that offers a great user experience (UX) not only attracts more visitors but also ensures their satisfaction and encourages them to stay longer, explore further, and convert into loyal customers. As a website Design Company in Pune, it is crucial to focus on improving your website’s user experience to stay ahead in the competitive online landscape. This blog will discuss various strategies and techniques to enhance your website’s user experience and ultimately drive more engagement and conversions. We’ll also touch upon the importance of hiring a reliable Best website development company in Pune, known for their expertise in creating exceptional websites.

Responsive Web Design/ Web Development Services in Pune
One of the primary factors affecting user experience is the responsiveness of a website. With the increasing usage of mobile devices, it’s crucial to ensure your website adapts seamlessly to various screen sizes but it is possible with the top web development companies in Pune, Responsive web design is an approach that allows your website to automatically adjust its layout and content based on the user’s device. By implementing a responsive design, you offer a consistent and user-friendly experience across different platforms, leading to higher user engagement and satisfaction.
When searching for a web developer company in Pune, ensure that they have experience in creating responsive websites. They should understand the importance of mobile optimization and implement it effectively to improve your website’s user experience.
Intuitive Navigation :
A well-designed website should have intuitive navigation that helps users find what they are looking for quickly and effortlessly. The navigation menu should be clear, visible, and easy to use, enabling visitors to explore different sections of your website without any confusion.
Consider organizing your content into logical categories and using descriptive labels for navigation menus. Implementing a search feature can also greatly enhance the user experience by allowing users to directly search for specific information or products and it is possibe with the help of top web devlopment company in pune.
Faster load times :
are a critical aspect of improving your website’s user experience. When a website takes too long to load, users can become frustrated and may abandon the site, resulting in a high bounce rate and lost potential conversions. To provide a seamless and efficient browsing experience for your visitors, here are some strategies to improve the load times of your website:
Optimize Images: Images often contribute to the majority of a website’s file size. By optimizing your images, you can significantly reduce the load times. Use image compression techniques to reduce the file size without compromising the quality. Tools like Adobe Photoshop, TinyPNG, or Squoosh can help you optimize your images.

Minify CSS and JavaScript: Minifying involves removing unnecessary characters, spaces, and line breaks from your CSS and JavaScript files. This process reduces the file size, allowing them to load faster. Several online tools and plugins are available that can automatically minify your code, such as UglifyJS and CSSNano.
Leverage Browser Caching: Browser caching allows you to store certain elements of your website, such as images, CSS, and JavaScript files, in a user’s browser cache. This way, when a user revisits your site, the browser doesn’t have to download those files again, resulting in faster load times. You can enable browser caching by setting appropriate HTTP headers or using caching plugins for your content management system (CMS).
Use Content Delivery Networks (CDNs): CDNs store copies of your website’s static files (such as images, CSS, and JavaScript) on servers distributed globally. When a user accesses your website, the CDN serves the content from the server closest to their location, reducing the latency and improving load times. Popular CDNs include Cloudflare, Amazon CloudFront, and Akamai.
Optimize Code and Database Queries: Well-optimized code and efficient database queries can significantly impact your website’s performance. Eliminate unnecessary code, reduce the number of HTTP requests, and optimize your database queries to ensure faster execution. Utilize tools like GTmetrix, Google PageSpeed Insights, or Pingdom to identify areas of improvement.
Choose a Reliable Web Hosting Provider: The quality and performance of your web hosting provider can influence your website’s load times. Select a reputable hosting provider that offers high-speed servers, solid-state drives (SSDs), and robust infrastructure to ensure faster data retrieval.
By implementing these strategies, you can enhance your website’s load times, providing users with a smoother browsing experience. Remember that continuous monitoring and optimization are essential to maintain optimal performance as your website grows and evolves in the sense you need to take web development services in Pune.
Engaging and Readable Content :
Engaging and readable content is a crucial aspect of improving your website’s user experience. It not only captures visitors’ attention but also provides them with valuable information and encourages them to stay longer on your site. When creating content, keep in mind the following strategies to enhance user experience, while also considering the expertise of a top web development company in Pune or a top development company.
Understand Your Target Audience: Before creating content, it’s important to have a deep understanding of your target audience. Research their preferences, needs, and pain points. This knowledge will help you tailor your content to their interests and make it more engaging and relevant.
Use Clear and Concise Headings: Headings play a crucial role in grabbing users’ attention and guiding them through your content. Use descriptive and concise headings to break up your content into easily scannable sections. This makes it easier for users to find the information they’re looking for and encourages them to continue reading.
Write in Plain Language: Avoid using jargon or complex language that may confuse or alienate your audience. Write in a clear and concise manner, using simple language that is easy to understand. This helps users grasp the key messages and concepts quickly, improving their overall experience on your website.
Utilize Visual Elements: Incorporating visual elements, such as images, videos, infographics, and charts, can significantly enhance the readability and engagement of your content. Visuals help break up the text, make it more visually appealing, and provide additional context or explanations. Ensure that the visual elements you use are relevant, high-quality, and properly optimized for web viewing.
Incorporate Calls-to-Action (CTAs): To encourage user engagement and guide visitors through your website, include clear and compelling calls-to-action. CTAs prompt users to take specific actions, such as signing up for a newsletter, downloading a resource, or making a purchase. Place CTAs strategically within your content to guide users toward the desired conversion points.
Provide Valuable and Relevant Information: Users visit your website seeking information, so it’s crucial to provide valuable and relevant content with the help of a top web development company in Pune. Conduct thorough research, offer unique insights, and present information in a well-structured manner. This builds trust and establishes your website as a credible source of information.
Optimize for Readability: Pay attention to the formatting and layout of your content to ensure readability. Use short paragraphs, bullet points, and subheadings to break up the text and make it easier to scan. Additionally, choose a legible font, appropriate font size, and contrast between text and background to improve readability.
Proofread and Edit: Poor grammar, spelling mistakes, and formatting errors can negatively impact user experience and undermine the credibility of your website. Take the time to proofread and edit your content before publishing it. Consider enlisting the help of professional editors or proofreaders to ensure accuracy and quality.
https://www.webtechnoz.com/wp-content/uploads/2023/05/wesite.jpg
Streamlined Conversion Process :
If your website involves any conversion actions, such as filling out a contact form or making a purchase, it’s crucial to streamline the process to maximize conversions. Minimize the number of form fields and make them easy to fill out. Provide clear instructions and error messages to guide users through the conversion process.
Implement trust elements, such as security badges, customer reviews, and testimonials, to instill confidence in your visitors and increase conversion rates. Professional web development services in Pune can help optimize your website’s conversion process and make it user-friendly.
Conclusion :
Enhancing your website’s user experience is a continuous process that requires attention to detail and a user-centric approach. By focusing on responsive design, intuitive navigation, faster load times, engaging content, and a streamlined conversion process, you can significantly improve your website’s user experience and achieve your business
#web development company in pune#website development#website design#webtechnoz#pune#website designer in pune
2 notes
·
View notes
Link
0 notes
Text
How to Create Jaw-Dropping Wall Mockups in Minutes (No Experience Needed!)
Creating stunning wall mockups may seem daunting, especially for beginners. However, with the right tools and guidance, you can craft professional-quality designs in no time. This step-by-step guide will simplify the process and make it accessible for everyone. The secret lies in using Wall PSD Templates and leveraging resources from a Mockup Generator Site to achieve polished results effortlessly.
Step 1: Gather Your Materials
To create a compelling wall mockup, you'll need the following:
Wall PSD Templates: These are pre-designed files that simplify the mockup process. They provide editable layers for easy customization.
High-quality images: Select artwork or photos you want to showcase on the wall.
Design software: Adobe Photoshop or any PSD-compatible tool.
Step 2: Choose the Right Mockup Generator Site
Start by selecting a Mockup Generator Site that offers a wide range of Wall PSD Templates. Look for platforms with intuitive interfaces and customizable options. Ensure the site provides templates compatible with your design needs, whether for home decor, gallery setups, or promotional visuals.
Step 3: Download Your Wall PSD Template
Once you’ve chosen your mockup resource, browse through the available Wall PSD Templates.
Select a template that matches your project’s theme or setting.
Download the file and save it to an easily accessible location.
Pro Tip: Always opt for high-resolution templates to ensure your mockup looks professional.
Step 4: Open and Edit the PSD Template
Open the downloaded Wall PSD Template in your design software.
Familiarize yourself with the layers panel; it typically contains separate layers for backgrounds, frames, and placeholders.
Replace the placeholder content with your desired artwork or photo by dragging and dropping your file into the designated layer.
Step 5: Adjust the Design Elements
Fine-tune your mockup to achieve the perfect look:
Resize and position your artwork to fit seamlessly into the template.
Modify colors or textures to match your branding or desired aesthetic.
Add additional elements such as text, logos, or decorative accents for a personalized touch.
Step 6: Preview and Save
Once satisfied with your mockup, preview it at full resolution to ensure everything looks sharp and professional. Save your design in both PSD format (for future edits) and as a high-quality image file (e.g., JPEG or PNG) for sharing or printing.
Why Use a Mockup Generator Site?
Using a Mockup Generator Site streamlines the process, offering convenience and a variety of premium-quality templates. With minimal effort, you can produce mockups that rival those created by seasoned professionals.
Final Thoughts
Creating eye-catching wall mockups doesn’t require extensive design experience. By using Wall PSD Templates and tools from a reliable Mockup Generator Site, you can produce designs that leave a lasting impression. Follow these simple steps to bring your creative visions to life and elevate your projects effortlessly.
Ready to start? Gather your resources, and let the magic of mockups transform your designs today!
0 notes
Video
youtube
How to Create a Stunning Sip and Paint Brunch Poster in Adobe Photoshop is the ultimate step-by-step guide for anyone looking to design a visually captivating event poster. In this tutorial, we will take you through the entire process, from setting up your canvas to applying the finishing touches that will make your poster stand out.
Whether you're promoting a local event or hosting a brunch and paint gathering, this guide will help you bring your creative vision to life using Adobe Photoshop. You'll learn how to choose the perfect fonts, colors, and visual elements that capture the fun and artistic spirit of a Sip and Paint Brunch.
By the end of this video, you'll be able to create a professional-looking poster that attracts attention and increases event attendance. Perfect for both beginner and advanced designers, this tutorial provides tips that can boost your design skills in no time!
Watch a Full Video: https://wartenweg.com/sip-and-paint-poster-design/ Download Files: https://wartenweg.com/product/sip-and-paint-brunch-poster-design/
0 notes
Text
Adobe Photoshop is the gold standard of image editing software
Photoshop Express is a streamlined, user-friendly version of Adobe Photoshop designed for those who want to enhance their photos quickly and efficiently. Whether you're a novice looking to dip your toes into photo editing or a seasoned pro seeking a lightweight tool for on-the-go adjustments, Photoshop Express offers an array of features that make photo editing a breeze. This guide will help you master Adobe Photoshop Express in just 2 hours, covering everything from the basics to advanced tips and tricks.
What is Adobe Photoshop Express?
Adobe Photoshop Express is a free photo editing app available for mobile devices and desktops. It combines a range of editing tools and filters to provide a simplified version of its more robust sibling, Adobe Photoshop. The app is designed for quick edits and adjustments, making it perfect for users who want to enhance their photos without diving into complex editing processes.
Getting Started with Photoshop Express
Step 1: Download and Install the App
The first step to mastering Photoshop Express is to download and install the app on your device. It is available on iOS, Android, and Windows devices. Simply search for "Adobe Photoshop Express" in your device's app store and follow the installation instructions.
Step 2: Set Up Your Account
Once installed, you'll need to set up an Adobe account or sign in with an existing one. An Adobe ID allows you to access additional features and sync your work across devices.
Step 3: Import Your Photos
After logging in, you can start importing your photos. Photoshop Express supports multiple file formats, including JPEG, PNG, and RAW. You can import photos directly from your device's gallery, cloud storage, or take a new photo using the app's built-in camera feature.
Core Features of Photoshop Express
1. Basic Adjustments
Photoshop Express offers several basic editing tools that can dramatically improve the quality of your photos:
Crop and Straighten: Adjust the composition of your photos by cropping them to different aspect ratios or by straightening them.
Exposure, Brightness, and Contrast: Modify the lighting and contrast to enhance the overall appearance of your images.
Saturation and Vibrance: Boost or reduce the intensity of colors to make your photos more vivid or muted.
2. Filters and Effects
One of the standout features of Photoshop Express is its extensive collection of filters and effects:
Looks: Apply pre-set filters with a single tap to quickly change the mood of your photo. These include options like "Black & White," "Vintage," "Portrait," and "Nature."
Blur: Create depth of field by blurring parts of your photo, giving it a professional look.
3. Advanced Editing Tools
For those looking to take their editing a step further, Photoshop Express offers several advanced tools:
Selective Editing: Make precise edits to specific areas of your photo without affecting the entire image. This is particularly useful for enhancing certain colors or correcting exposure in select areas.
Red Eye Removal: A quick fix for photos where subjects have red eyes due to flash photography.
Healing Brush: Remove blemishes, spots, or unwanted objects from your photos with this powerful tool.
4. Text and Borders
Add a personal touch to your photos by overlaying text or applying stylish borders. Photoshop Express provides a variety of fonts and styles, allowing you to customize your photos for social media, digital portfolios, or personal keepsakes.
Step-by-Step Guide: Mastering Photoshop Express in 2 Hours
Hour 1: Learning the Basics
Familiarize Yourself with the Interface: Spend the first 10 minutes exploring the app's layout and features. Understanding where tools are located will make the editing process smoother.
Import and Edit Your First Photo: Choose a photo to edit and start with basic adjustments like cropping, straightening, and tweaking the exposure, brightness, and contrast. This process should take about 15 minutes.
Experiment with Filters and Effects: Spend the next 15 minutes applying different filters and effects to your photo. Learn how each one alters the image and experiment with combining multiple effects.
Try Out Advanced Tools: Use the remaining 20 minutes of this hour to explore the advanced editing tools like selective editing, red-eye removal, and the healing brush. Start with easy edits and gradually try more complex adjustments.
Hour 2: Advanced Techniques and Creative Edits
Dive Deeper into Selective Editing: Spend 20 minutes learning how to use the selective editing tools to enhance specific areas of your photos. Focus on adjusting color, brightness, and detail selectively.
Add Text and Borders: Use the next 10 minutes to add text and borders to your images. Try different fonts, sizes, and colors to see what works best for your photo.
Save and Export: Spend 10 minutes learning how to save and export your photos. Photoshop Express allows you to save images in different formats and sizes, making it easy to share on social media or print.
Practice and Review: Use the final 20 minutes to practice what you’ve learned. Import new photos and apply all the techniques you’ve practiced. Experiment with different styles and looks to develop your unique editing style.
Tips for Mastering Photoshop Express
Use Shortcuts: Familiarize yourself with shortcuts and gestures that can speed up your editing process.
Experiment Regularly: The best way to learn is by doing. Regularly edit different types of photos to understand how various tools affect them.
Stay Updated: Adobe regularly updates Photoshop Express with new features and improvements. Make sure your app is always up-to-date to take advantage of the latest tools.
Conclusion
With its intuitive interface and powerful tools, Adobe Photoshop Express is an excellent choice for anyone looking to enhance their photos quickly and efficiently. By following this guide and dedicating just 2 hours, you can master Photoshop Express and start creating stunning photos that stand out. Happy editing!
0 notes
Text
Which is the best Apps for graphic design?
However, graphic design is one industry that has consistently benefited greatly from this constant software advancement.Selecting the top software for your Android or iOS device might be difficult, though, as many of graphic design applications are created every.
Fusion 360
Another Autodesk graphic design tool utilised by experts and enthusiasts in the manufacturing sector, especially engineers, is Fusion 360. Devices running Android and iOS can download the software. With Fusion 360, you may use your mobile device to create 3D graphics, in contrast to most free graphic design tools. This application can also be used for parametric, surface, and mesh modelling. The best part is that you can examine, upload, and share your designs with clients or coworkers with ease thanks to the app's compatibility for over 100 data types.
Adobe Illustrator Draw
Adobe Illustrator Draw is one of the best graphic design tools ever created and can be found on Google Play and the Apple AppStore. With the help of this software, you may produce excellent artwork on the fly.The app's vast array of vector drawing tools and features are incorporated within a simple, eye-catching interface. You can take artistic shapes with the Illustrator Draw app on your iOS or Android device, and then upload them to your Draw canvas to utilise as compositional outlines.
Autodesk Sketchbook
This programme is perfect for you if you wish to turn your ideas into reality: Sketchbook. It's available on Google Play and the Apple AppStore, just like other good apps. With the help of this software, you can quickly turn conceptual sketches into fully realised artwork.Simple selection tools, personalised perspective guides, an infinite number of brushes, completely adjustable rulers, French curves, and elliptical guides are all included in the programme for precise drawing.
Infinite Painter
One of the greatest graphic design applications for iOS and Android smartphones is Infinite Painter in mobile app development companies in bangalore. With the help of five distinct perspective guides, you may construct and produce 3D images with this vector graphics application.More than 160 excellent brushes that work flawlessly with paper textures are included in the programme. Additionally, you have the ability to manipulate four different kinds of symmetry and alter several levels at once.The transform tool, liquify tool, pattern tools, Photoshop blend modes, and selection tools are additional wonderful features. You'll also benefit from an efficient and well arranged interface for easy access to utilities.
MediBang Paint
The user-friendly graphic design application MediBang Paint (Android, iPhone, iPad) is designed to work across numerous platforms in mobile app development company in bangalore. Numerous brushes, textures, backgrounds, and comic art styles are included in this Japanese programme.The software has several functionality that you might anticipate finding in high-end graphic design programmes, like snap guides, layers, rulers, and tracing tools. Colour palettes, screen tones, comic creation tools, and more are examples of additional tools.Additionally, because the software is compatible with multiple platforms, users may save and access their projects on any computer or smartphone thanks to its convenient cloud feature.
Affinity Photo
When doing touch-up work on pre-existing photographs, Affinity Photo is a cost-effective substitute for Adobe Photoshop or Adobe Illustrator. It can be used with both vector and raster pictures, and it works with layers and filters to produce amazing effects. Similar to CorelDRAW, the program also accepts SVG file formats. Although you can make templates, the application doesn't come with any.
Affinity Photo's adaptability and practicality have won it numerous awards in the last few years. For the price, it has a lot of features.
Canva
Canva is a one-stop shop for making a range of products, including T-shirts, infographics, and site designs. It has an easy-to-use drag-and-drop interface, even for those without any prior graphic design knowledge. To get started, the application offers an enormous collection of backdrops, typefaces, photos, and layouts. Many of these items are available for free on Canva, however many of the photos and graphics call for in-app purchases.Canva excels because of its large template library, which enables it to operate with a wide range of sectors. The sample we saw looked professional and provided great ideas for brainstorming exercises. For individuals and small teams, there is a free plan among the three available pricing tiers.
Adobe InDesign
Adobe's response to a stand-alone desktop publishing application is Adobe InDesign in mobile app development companies in India. Although it speaks a different language from other Adobe apps, some users could find it difficult to operate. It works well for documents, presentations, and posters with lots of images. It's a great time saver because you can quickly construct a house style. Like most Adobe apps, the support documentation is useful, but it uses a lot of resources. A comprehensive range of features are available in InDesign, including color location, subject-aware text wrapping, and scaling. Even if the program has many helpful options, it can occasionally be challenging to select the ideal configuration.
Read Also : e-commerce app for android/iOS
0 notes
Text
How You Can Master Ghost Mannequin Photoshop Editing
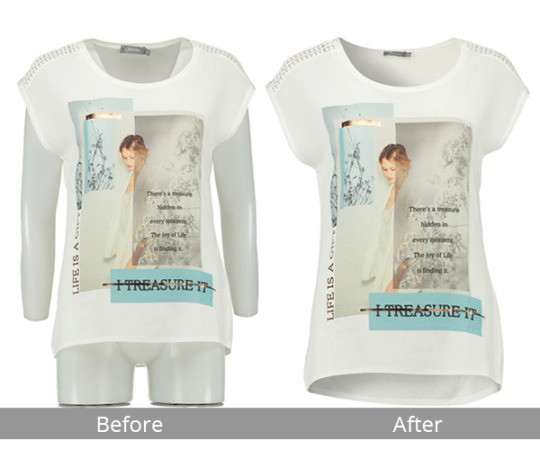
Professional photographers and owners of online stores can utilize ghost mannequin images to boost sales by making mannequins or models invisible in photos of products. Ghost Mannequin editing techniques use special software for photos that lets them achieve this goal effectively.
For a successful mastery of how to use the Photoshop effect, it’s important to master the fundamentals of editing images. Freelance photo editors are accessible online via platforms such as Upwork or Fiverr as well as dedicated photo editing companies like Visual Sparrow provide professional photo editors. How You Can Master Ghost Mannequin Photoshop Editing: A Step-by-Step Guide The world of online shopping is thriving on stunning product demonstrations. Images that are static and flat are a once common thing. Online shoppers today want an immersive and interactive experience. They want to “touch” and examine products before purchasing. Here’s the technique of ghost mannequin editing in Photoshop plays a role.
This comprehensive guide will allow you to charge and become proficient in the process of editing ghost mannequins using Adobe Photoshop. We’ll explain each step of the process, arm with the most effective techniques, and help you in creating amazing 3D images for your product that will enhance your brand and increase sales.
Gearing Up for Success: Essential Tools and Techniques Before you jump into editing, be sure to have the tools and methods at your disposal:
Software Adobe Photoshop is the industry standard for editing images. Learn about its essential tools, specifically the Pen Tool for creating precise paths, Layer Masks for selective editing as well as the Refine Edge Tool for smoothing selections. Hardware Invest in a top-quality tablet for graphics. This tool is pressure-sensitive and allows even more precise and natural-feeling manipulating images than the traditional mouse. Training is the key to perfecting your abilities before you tackle your products. Download free samples of products that can be used to edit ghost mannequins. Then apply the methods described in this tutorial. Many online resources include bundles of products designed specifically to help you practice editing. Images of high quality are crucial in the fashion industry to attract customers and boost sales. One method for doing this is to use the Ghost Mannequin Technique; this lets you capture clothing that is free of distracting elements like buttons or seams, providing your customers with a precise representation of the way it will appear when they wear it.
It is a process that requires the ability to use technology and creativity and also uniformity across images to avoid inconsistent lighting levels, compositions, or editing techniques which could make images look unprofessional.
The first step in creating seamless ghost mannequins is to capture high-quality images of your clothes with a white background with a model that is compatible with your brand’s image and size clothes (preferably the same size makes editing a lot easier) as well as reducing your the dress and tie hair back to reduce distractions. Taking the time and effort to create models as well as the studio setup will help save a lot of time and effort later on.
To create the ghostly mannequin effect using Photoshop Open your images and then select the Front layer within the Layers panel. Next, select the Rectangular Marquee tool and then click on the neck area of your garment using it, resulting in an area for selection. Use CTRL+C or Shift+COMMAND+C to copy this selection into a mask layer. Then, move it onto the front layer, where it will be re-selected – repeat the process for all other areas.
After you have a complete collection of ghost mannequins All unwanted elements should be removed. For example, when you show the back view of dresses with pockets that are exposed and holes in the arm these holes might need to be concealed using the Burn tool to dim highlights, mid-tones, or shadows. You can then apply the burn tool anywhere on clothing that may produce shadows naturally.
Read full article here: https://practiempresas.info/how-you-can-master-ghost-mannequin-photoshop-editing/
0 notes
Text
HAHAHAHA!! Font Free Download

HAHAHAHA!! Font Free Download Introducing to you a new fun font! called HAHAHAHA!! Font. This is a fancy cartoon typeface that is the perfect choice for fun projects. This unique font was designed and shared by MatNowRock. It comes in only one style that has a sweet and decent appearance. We are providing this fun display font free for download on anchor fonts. So this is a great tool to give any design a unique and wonderful touch. In modern times, it’s a great thing to create a unique design that looks proficient and great. And we believe that great fonts will surely create that kind of design. It not only looks great but also leaves a lot of designs behind. Because it is a great option for creating unusual and stylish designs. As we all know, the demand for stylish designs is very high. This not only adds value to the design but also enhances the designer’s goodwill. HAHAHAHA!! Font Font Name: HAHAHAHA!! Font Style: Fancy, Cartoon Typeface Font Designer: MatNowRock File Format: TTF License: Free For Personal Use Files: HAHAHAHA!! (Truetype) When you look at its structure, you will feel that a child has drawn all his characters. But in fact, the designer has designed this comic font in such a way that it looks unique. There are several places where this amazing font can easily use like tattoos, stickers, posters, kid’s books, painting books, fabric printing, game titling, game developing, app development, watermarks, or adobe photoshop as well. I think this information is enough for you to understand this beautiful font in every aspect. So, if you are satisfied with it, just leave a comment about it in the comments section below. For downloading the HAHAHAHA!! Font, you just click on a single button below. Later on, feel free to use this great font for personal use only. Read the full article
0 notes
Text
How to Remove Logo from Photo? 【Easy & Effective Methods】

Watermark is a way of protecting copyright. Sometimes you may want to use the original image for a different purpose, but you have added a watermark to it. Then it is necessary to remove watermarks in the photos. At present, the methods and complexity of removing photo watermarks are also different due to watermarks. Have you ever taken a perfect picture, only to find that an unnecessary logo or watermark ruined the beauty of the picture? Whether it is the company logo, a copyright symbol or any other unnecessary logo, removing it can significantly enhance the visual appeal and usability of the image. We will show you some common tools and online AI photo editors, application scenarios, and some suggestions on how to remove watermarks from photos.

There are several ways to cleanup picture and remove logos from photos, from manual retouching technology to using professional software and online tools.
Using Photoshop to Remove Logo from Image Step by Step
1. Open the Image • Launch Adobe Photoshop. • Open the image with the logo you wish to remove by going to File > Open and selecting the image.

2. Select the Logo • Use the Lasso Tool to draw a rough outline around the logo. • For a more precise selection, you can use the Pen Tool to create a path around the logo, then convert the path to a selection. 3. Remove the Logo • Once the logo is selected, you can remove it using several methods: • Content-Aware Fill: Go to Edit > Fill, choose Content-Aware in the Contents dropdown, and click OK. Photoshop will automatically fill in the selected area with surrounding content. Clone Stamp Tool • Select the Clone Stamp Tool (shortcut S), hold the Alt key to sample a nearby area of the image, and then paint over the logo to clone the sampled area. • Spot Healing Brush: Select the Spot Healing Brush Tool, make sure Content-Aware is selected in the options bar, and paint over the logo to remove it. 5. Refine the Edits • If there are any imperfections after removing the logo, you can use the Healing Brush Tool for touch-ups. • To blend the edited area seamlessly, you may need to adjust the color, brightness, or texture using Adjustment Layers. 6. Save the Image • Once you are satisfied with the result, save the edited image by going to File > Save As. • Choose the desired format and location to save your image without the logo.
Other Free Logo Removal Tools Online (Support Image & Video)
Online logo removal tools provides a convenient and user-friendly solution for removing logos from photos. These tools automatically detect and delete logos from images by using AI, and usually provide fast and satisfactory results. Here are more details for each of the watermark removal tools you deserved to own. iFoto Watermark Remover iFoto Watermark Remover is an intuitive online tool that efficiently removes watermarks from photos using advanced AI technology. It supports various image formats, and provides customizable settings to achieve accurate deletion. With its user-friendly interface and no need to download, iFoto can be accessed from any device.

Wondershare Filmora Wondershare Filmora watermark remover aims at removing watermarks and logos from videos. With its intuitive interface, users can select and delete watermarks easily and seamlessly. This tool provides customizable settings for precise deletion, and allows users to preview the edited contents before saving. Wondershare Filmora watermark remover is ideal choice for content creators and video lovers, which can ensure the professional appearance of video without distracting watermarks.

VideoProc Converter AI VideoProc Converter AI logo remover uses AI to remove logos from videos. It provides advanced algorithms to accurately detect and eliminate logos, thus ensuring professional results. Users can easily upload videos and start removing logo with minimal effort. With its intuitive interface and powerful AI capabilities, VideoProc Converter AI logo remover efficiently removes unwanted logos while preserving video quality.

EasePaint Watermark Remover Easepaint Watermark Remover uses advanced algorithms to detect and remove watermarks seamlessly, ensuring high-quality results. Users can easily upload images or videos and apply the deletion tools with only a few clicks. Easepaint Watermark Remover offers customizable settings for precise removal and gives users the option to preview their edits before saving. With its user-friendly interface and efficient watermark removal function, Easepaint Watermark Remover is ideal choice for anyone who wants to enhance images or videos by removing unnecessary watermarks.

inPixio Photo Studio Pro 12 inPixio Photo Studio Pro 12 is a multifunctional photo editing software, which is equipped with various tools and functions to enhance images. It provides comprehensive editing functions, from basic adjustments such as clipping to advanced functions such as noise reduction and object deletion. inPixio Photo Studio Pro 12 was chosen for its powerful features and intuitive design, making it suitable for both beginners and experienced photographers. inPixio Photo Studio Pro 12 can produce amazing effects and simplify the editing process, making it an excellent choice for anyone who wants to enhance photos easily and accurately.

SoftOrbis Watermark Remover What sets SoftOrbis apart is its intelligent algorithm, which not only detects and removes watermarks with precision but also minimizes any loss of image quality in the process. This is crucial for professionals and enthusiasts alike who demand pristine results without compromising on visual integrity. Furthermore, SoftOrbis offers a range of customization options, allowing users to fine-tune the watermark removal process to suit their specific needs. In addition to its technical prowess, SoftOrbis excels in terms of usability. Its intuitive interface makes it accessible to users of all skill levels, from beginners to seasoned professionals. This accessibility, combined with its powerful features, makes SoftOrbis Watermark Remover the go-to choice for anyone seeking to elevate their images or videos by removing unwanted watermarks.

HitPaw Watermark Remover HitPaw Watermark Remover emphasizes customization, allowing users to tailor the watermark removal process according to their own specific preferences and requirements. In addition, its intuitive interface is suitable for users of all proficiency levels, which is helpful for seamless navigation and maximum work efficiency. This combination of versatility, accuracy and user-friendliness makes paw watermark remover the first choice for those individuals seeking to enhance their creative projects through effective and seamless watermark removal.

Notes: These tools provide a series of functions ranging from basic watermark removal to advanced editing functions. It is very important to choose the tool that meet your specific needs and skill level. Please always make sure that you have the legal right to delete the watermarks from any content you process.
Step-by-step Guide: Removing Logos from Photos in iFoto (PC & iOS & Android)
Follow the step-by-step instructions of iFoto to effectively perform the logo removal process. 1. Upload Your Photo: Please visit the website of iFoto Watermark Remover. Look for the upload option, which may be a button or a drag-and-drop area. And then select a photo file from the device. The recognized formats usually include JPEG and PNG.

Once you are selected, your photo will be uploaded to the platform for editing. 2. Mark the Logo After uploading, the tool will show your photo. Highlight the logo with the provided marking tool. This may include simply clicking on the logo or drawing on it with your cursor. Then, the AI will use this marking to understand which part of the image to analyze and remove.

3. Remove the Logo With the logo marked, click the 'Remove 'button to start the process. iFoto will process the image, removing the marked logo and filling in the space with matching background details. This process is usually fast, but the time may vary according to the complexity of the logo and the background.

4. Download the Edited Photo without Logo You will be able to preview the results once the logo is removed. If you are satisfied with the edited photo, please find the download options. Click to download the photo, which will be saved to your device without logo. These steps are simple and clear, so that users without professional editing skills can easily delete the logos from photos. For the best results, make sure the logo is clear and use high-quality images where the logo is in sharp contrast with the background.
Conclusion
Removing logos from photos is not only for beauty, but also to enhance the universality and practicality of photos on different platforms. Whether it's social media marketing, product promotion, or personalization, logo-free images convey professionalism and authenticity. However, achieving seamless results requires appropriate tools and technology. Tools like iFoto provide users with the ability to remove logos seamlessly, ensuring that the final image maintains its integrity and is more suitable for various applications. This process is not just about removing an element; It's about turning an image into a multifunctional asset that effectively conveys its information and makes it stand out in a crowded digital environment.
People Also Ask
Can I remove logos from photos without compromising image quality? Yes, by using iFoto Watermark Remover, you can remove logos while preserving image quality. Is it legal to remove logos from photos? The legality of logo removal depends on the context and the rights associated with the logo. It's essential to consider copyright laws and permissions before removing logos from photos. Can I remove logos from photos on my smartphone? Yes, iFoto App available for both iOS and Android devices that allow users to remove logos from photos directly on their smartphones. Read the full article
0 notes
Text
Top Photo Editing Apps for Android and Mac: Enhance Your Creativity
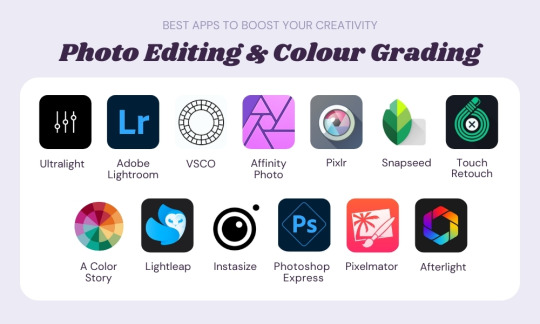
In today's digital age, photo editing has become an integral part of our lives. Whether you're a professional photographer or just an enthusiast capturing moments on your smartphone, having the right tools to enhance and manipulate your photos can take your creativity to new heights. With the plethora of photo editing apps available, it can be overwhelming to choose the best ones for your needs. Fear not, as we've curated a list of the top photo editing apps for both Android and Mac platforms, including the highly acclaimed Remini Pro APK.
1. Adobe Lightroom
Adobe Lightroom is a powerhouse when it comes to photo editing. Available on both Android and Mac platforms, Lightroom offers a wide range of editing tools and presets to enhance your photos. Its intuitive interface makes it easy to use, whether you're a beginner or a seasoned pro. With features like selective editing, HDR support, and cloud storage integration, Lightroom is a must-have for anyone serious about photo editing.
2. Snapseed
Developed by Google, Snapseed is a versatile photo editing app available for both Android and Mac. It offers a comprehensive set of editing tools, including selective editing, curves, and filters, allowing you to fine-tune your photos to perfection. Snapseed's non-destructive editing capabilities mean you can experiment with different edits without worrying about losing the original quality of your photos.
3. VSCO
VSCO is not just a photo editing app; it's also a vibrant community of photographers and creatives. Available on Android and Mac platforms, VSCO offers a range of preset filters inspired by film photography, giving your photos a unique aesthetic. With its advanced editing tools and social features, VSCO is perfect for those looking to elevate their photos and connect with like-minded individuals.
4. Adobe Photoshop Express
Adobe Photoshop Express brings the power of Photoshop to your Android and Mac devices in a simplified package. With features like one-touch adjustments, blemish removal, and collage creation, Photoshop Express is perfect for quick edits on the go. Its integration with Adobe Creative Cloud allows for seamless syncing of edits across devices, making it a convenient choice for busy photographers.
5. Remini Pro APK
Remini Pro APK has gained widespread popularity for its revolutionary AI-powered photo enhancement capabilities. Available exclusively for Android devices, Remini uses advanced algorithms to enhance old and low-quality photos, bringing them back to life with stunning clarity and detail. Whether you're restoring old family photos or improving selfies, Remini Pro APK is a game-changer in the world of photo editing.
Conclusion
With the abundance of photo editing apps available, finding the right ones for your needs can be challenging. Whether you're looking for professional-grade editing tools or simple yet effective filters, the apps mentioned above have you covered. From Adobe Lightroom's robust features to Remini Pro APK's groundbreaking AI technology, these apps will help you unleash your creativity and transform your photos into masterpieces. So why wait? Download these apps today and take your photography to the next level!
1 note
·
View note
Text
How Can You Edit a Jpeg Image Correctly
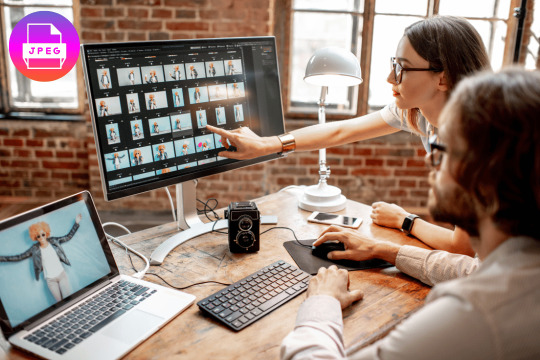
To edit a JPEG image, use photo editing software such as Adobe Photoshop, GIMP. Open the image, make the desired changes, and save your work.
Editing JPEG images can breathe new life into your visual content, enhancing the clarity, mood, and messaging of your pictures. Whether aiming to crop, adjust colours, apply filters, or insert text, the right tools make a world of difference. Simple applications like Microsoft Paint offer basic functionality, while advanced programs like Adobe Photoshop provide a comprehensive suite of editing features for more intricate tasks.
As JPEG is a widely accepted format, most image editing software supports it, ensuring compatibility and ease of use. With the prominence of visual media in digital marketing, mastering JPEG image editing stands as a valuable skill for creating engaging and SEO-friendly content. Remember, regular software updates can expand your editing possibilities, so keep an eye out for the latest versions.
Jpeg Image Fundamentals
JPEG images are everywhere, from social media to digital cameras. Understanding how JPEG files work is key to editing them effectively. This section dives into the basics of JPEG images and demystifies common editing myths.
The Nature Of Jpeg Files:
JPEG stands for Joint Photographic Experts Group, which is the team that developed this image standard. When a picture is saved as a JPEG, it undergoes compression to reduce file size. This is perfect for sharing online but can affect image quality.
The process of compression in JPEGs involves a balance between image quality and file size. A high level of compression leads to smaller files with lower quality. On the other hand, less compression keeps the quality higher but the file size larger.
Common Myths About Jpeg Editing
Quality Loss On Every Save: While JPEGs do lose some data during initial compression, re-saving the image without making changes does not notably degrade quality.
Cannot Be Edited Without Quality Loss: Though some data is lost during compression, editing a JPEG image, such as adjusting brightness or contrast, does not automatically mean a loss of image quality.
Editing Is Limited: With the right tools, much editing flexibility still remains for JPEG images. This includes cropping, color adjustments, and applying filters without affecting the overall structure.
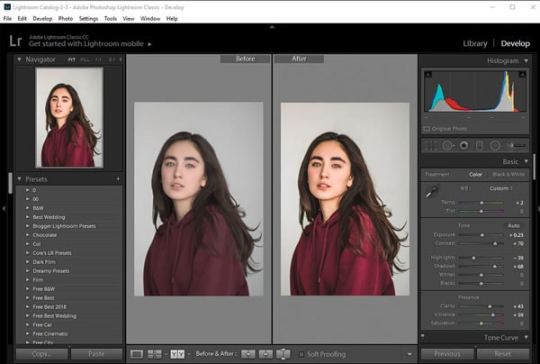
Credit: repairit.wondershare.com
Essential Tools For Jpeg Editing:
Editing a JPEG image unlocks endless possibilities for creativity and correction. With the right tool, users can easily adjust colors, crop unwanted sections, add effects, and much more.
Desktop Software Favorites:
When it comes to powerful editing, desktop software stands out. Programs like Adobe Photoshop and GIMP offer extensive features that cater to both professionals and hobbyists.
Adobe Photoshop: A top choice with myriad tools and filters.
GIMP: A free, open-source alternative with robust capabilities.
Corel PHOTO-PAINT: Part of CorelDRAW Graphics Suite, for skilled editors.
Paint.NET: Lightweight and user-friendly for quick tweaks.
Adobe Lightroom: Ideal for photo correction and management.
Online Editors Worth Trying
Web-based editors offer the convenience of editing without downloads or installations. Tools like Canva and Pixlr provide a wide range of functionalities that are accessible from any web browser.
Canva: Great for adding text and basic graphic elements.
Pixlr: Provides a Photoshop-like experience in your browser.
Fotor: Simple interface with essential editing options.
Photopea: Advanced features akin to desktop-class software.
iPiccy: User-friendly for quick edits and touch-ups.
Mobile Apps On The Go
For editing directly from your smartphone, several apps stand out for their convenience and functionality. Whether you're an Android or iOS user, these apps bring JPEG editing to your fingertips.
Adobe Photoshop Express: A mobile version of the desktop giant.
VSCO: Known for its stylish filters and presets.
Snapseed: Google's complete and professional photo editor.
PicsArt: Combines photo editing with social sharing.
Lightroom Mobile: Powerful editing and cloud syncing on the move.
Basic Editing Techniques
Entering the realm of Basic Editing Techniques for JPEG images opens up endless possibilities for creativity and enhancement. Editing a JPEG image is like giving it a new lease on life. The process isn’t just about changing how an image looks; it’s about ensuring it conveys the intended message and emotion. Here are some basics to start transforming your images.
Cropping And Resizing:
Cropping helps to focus on the main subject by cutting away the unnecessary parts. To crop, select the crop tool and drag the corners to get the desired frame. Resizing changes the image’s dimensions. Remember, smaller images load faster, crucial for web use. Always maintain the aspect ratio to prevent distortion.
Adjusting Brightness And Contrast:
The right balance of brightness and contrast can make an image pop. Increasing brightness can unveil hidden details. Contrast amplifies the difference between light and dark areas. Use the sliders in your editing software to adjust these settings and watch your image come to life.
Colour Correction Explained:
Color Correction is essential for creating a natural look. It fixes color issues and ensures the colors match the original scene. Tools like ‘Hue/Saturation’, ‘Color Balance’, and ‘Levels’ adjust the colors. Aim for a real-to-life balance or set a particular mood.
Understanding these basic techniques is the first step to mastering image editing. Practice with different tools and effects to discover the full potential of your images.
Advanced Jpeg Manipulations
Exploring advanced manipulations. Editing a JPEG image goes beyond basic tweaks. There are sophisticated techniques that turn a simple picture into a masterpiece. Advanced JPEG manipulations involve detailed editing methods. These are not limited to but include layer-based editing, application of filters and effects, and even removing or replacing elements within the image.
Layer-based Editing In Jpegs:
While JPEGs do not naturally support layers, editing software allows for temporary layer work. This technique is vital for non-destructive editing. Users can make changes without permanently altering the original image.
Create duplicates of the JPEG background layer.
Edit non-destructively with adjustment layers.
Apply multiple edits and merge layers as needed.
Using Filters And Effects
With filters and effects, transform a JPEG image's appearance dramatically. Choose from various options designed to enhance the visual appeal of an image.
Select the appropriate filter from the editing software.
Adjust the intensity and settings for a custom look.
Combine multiple effects for unique results.
Removing And Replacing Elements
Removing or replacing elements within a JPEG is intricate work. This process can range from simple object removal to complex compositional changes.
Remove objects - Clone Stamp/Healing Brush - Clean up distractions
Replace backgrounds - Selection Tools - Change contexts
Add elements - Copy/Paste & Transform - Enhance composition
youtube
Preserving Quality While Editing
When editing JPEG images, maintaining quality is a top priority. A JPEG image can lose clarity each time it undergoes editing and resaving. This guide outlines methods to edit JPEGs without sacrificing their quality.
Understanding Compression
JPEG images use lossy compression. This means data is lost each time the image is saved. Knowing how JPEG compression works is key to preserving quality. To reduce quality loss, edit the image as little as possible, and avoid frequent resaving.
Best Practices For Saving
Preserve the original JPEG file. Always save your edits as a new file. Utilize the highest quality settings when saving edited JPEGs to minimize compression artifacts.
Choose 'Maximum' or 'High' quality in save settings.
Limit edits and save cycles.
Work with copies, not the original.
Converting To Other Formats
Consider converting JPEGs to a lossless format like PNG or TIFF before editing. These formats do not lose data with each save. After editing, you can convert them back to JPEG with these steps:
Open the lossless file in your editor.
Make necessary edits.
Convert back to JPEG for distribution, using high quality settings.
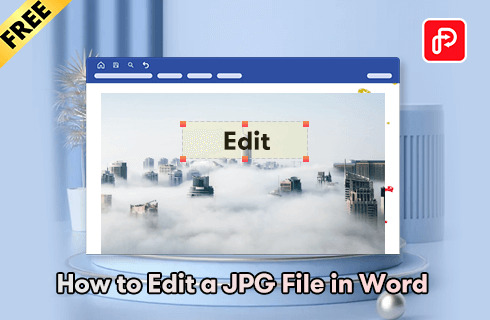
Credit: www.pdfgear.com
Common Jpeg Editing Challenges
Editing JPEG images seems straightforward, but it can be tricky. Even pros face obstacles. This guide dives into the common issues you might encounter. Discover tricks to enhance your JPEG editing skills.
Fixing Pixelation
Pictures can look blocky and blurred when too stretched. This problem is called pixelation. Before starting, have a crisp, high-resolution source file. You can:
Zoom out on the image to lessen noticeable pixelation.
Use editing tools like sharpen or blur sliders to refine image clarity.
Apply anti-aliasing to smooth out rough edges.
To prevent pixelation:
Avoid over-stretching images.
Maintain the original aspect ratio.
Choose advanced software with built-in anti-pixelation features.
Repairing Corrupted Files
Corrupted JPEGs won't open or look weird. Various signs indicate a damaged file:
Error messages - Software can't read the file.
Partial images - Some parts are missing or wrong.
Gray areas - Empty sections instead of content.
To fix these:
Try opening the JPEG with different programs.
Use a file repair tool specifically for JPEGs.
Reverts to backups if the file becomes too damaged.
Dealing With Large Images
Large JPEGs slow down websites and are hard to manage. Here's how to handle them:
Resize the image using a trusted editor.
Compress the file to a smaller size without losing quality.
Store large images on external platforms and embed them in your pages.
Remember:
Always keep a backup of the original file.
Test image quality after each edit.
Balance image size and quality for the best performance.
Frequently Asked Questions On How Can You Edit A Jpeg Image
Can Jpeg Images Be Edited Easily?
Yes, JPEG images can be easily edited using various graphic software. Popular programs like Adobe Photoshop, GIMP, and Adobe Illustrator offer JPEG modifications.
What Tools Are Needed To Edit A Jpeg?
To edit a JPEG, you'll need image editing software like Adobe Photoshop, GIMP, or online platforms like Pixlr. These tools provide features like cropping, resizing, color adjustments, and filtering for enhancing JPEG images.
How To Crop A Jpeg Image?
Cropping a JPEG is simple. Open the image in an editor, select the crop tool, drag to define the new boundaries, and apply the changes. This trims the image to your preferred size and focus area.
Is It Possible To Change Colors In A Jpeg?
Absolutely. Color adjustments in a JPEG image can be made through levels, hue/saturation, and other color-balancing features in most image editing software, allowing for a broad spectrum of visual changes.
Conclusion:
Wrapping up, and editing JPEG images is no longer a complex task. With the right tools and techniques, anyone can enhance their photos and use this process as a service provider. Remember, practice makes perfect. Keep experimenting and watch your image editing skills soar! Ready to get started? Your picture-perfect journey begins now!
1 note
·
View note
Text
Best Car Photo Editing App
Ever felt like pulling your hair out trying to find the best car photo editing app? Whether you’re a newbie or a pro, we’ve all been there. It’s a bit like tuning a car – the small touches can supercharge the final result.

Now, let me introduce you to Clipping Path Finder which offers the best services for car photo editing. Imagine them as the caped crusaders of photo editing, adding zing to your car snaps. They dive deep into your photos, making sure every pixel pops. Got a stash of car photos crying out for a glow-up? They’re on it. But hang on – there’s a cherry on top! Ready for a juicy tidbit? I’ve discovered not one or two but NINE best car photo editing apps for you. So, if you’re up for some DIY, any of these apps will change your car photo game!
Best Car Photo Editing Apps
Picking a cool app to make your car photos look awesome is like picking the perfect ice cream flavor – so many choices! Imagine, that some apps let you be the boss, tweaking every detail yourself. Others work their magic automatically. And guess what? There’s even a bunch of really great car photo apps that won’t cost you a dime. Ready to dive in?
We’ve divided these best Apps according to 3 criteria-
Manual Best Car Photo Editing Apps.
Automatic Best Car Photo Editing Apps.
Free Best Car Photo Editing Apps.
Let’s check out the best car photo editing apps and have a blast doing it!
Manual Best Car Photo Editing Apps
Think you’re the boss of all the cool stuff in your car photo. Make the engine roar, the shiny parts gleam, and even pick the perfect colors for every bit. That’s exactly what these manual car editor apps let you do.
Take your car pics and make them as awesome as painting on a canvas, editing every tiny part to perfection. Here, I will share the top 3 manual car photo editor apps. Let’s drive in!
Our three best-selected manual car photo editing apps are-
Adobe Photoshop
Car Photo Editor
Fotor Car Photo Editor
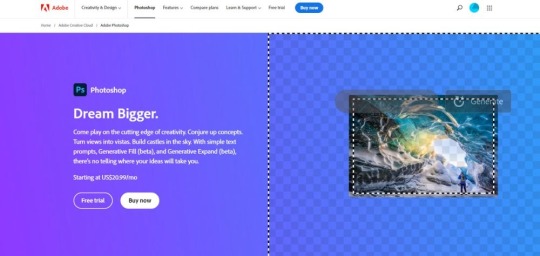
Adobe Photoshop
Download App:
Android- Adobe Photoshop
iOS- Adobe Photoshop
Step into Adobe Photoshop’s fast and captivating world. Use its tools to turn plain car photos into stunning ones. Get valuable tips for arranging car photoshoots from the linked source. For background adjustments, Adobe’s your best bet, though it comes with a higher price of $9.99 for the whole software, not services.
Remember, Adobe Photoshop is where the magic happens. This top-notch editing app comes with many features that provide super clear results. But, the cost is high and you need to learn some features to use it properly.
Car Photo Editor

Download App:
Android- Car Photo Editor
The Car Photo Editor app offers the best editing features that make car photos perfect. It comes with user-friendly tools that simplify the process of transforming car pictures into captivating artworks. Whether you’re a professional photographer or an editor, this editor makes your journey easier.
Adjusting colors, brightness, contrast, and saturation of car photos becomes a piece of cake. Customize your car photos with filters and stickers with this photo editor. Showcase your edited car images on different platforms such as Facebook, Twitter, Instagram, etc., and impress your followers and friends. Try this editing app today and produce some stunning car photos.
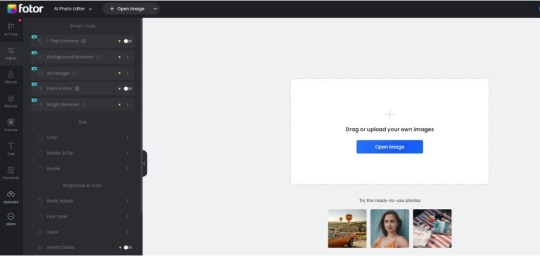
Fotor’s Car Photo Editor
Download App:
Android- Fotor’s Car Photo Editor
iOS- Fotor’s Car Photo Editor
Ready to showcase your cars like a pro? Dive into Fotor’s free online car photo editor! In just a few clicks, transform your car pics from ‘meh’ to ‘marvelous’. Just upload, and Fotor’s AI does the magic—boosting colors, dialing up the lights, and highlighting every sleek detail. Want more control? With the manual car photo editor, adjust the crop, resize, and even pop in logos or catchy texts. Making your cars look their absolute best and wooing potential buyers? It’s a breeze with Fotor! Anyone can easily turn their car photos into masterpieces with this app. It is very quick and easy to use.
Automatic Best Car Photo Editing Apps
Optifo
Slazzer
MotorCut
Imagine having a special photo tool that works like a professional editor, but without needing to be a tech expert. Automatic photo editing apps do the hard work for you, like removing backgrounds and improving colors. No advanced skills are required! It’s like having a pro editor who does everything for photo enthusiasts! Let’s learn about the 3 best automatic car photo editor apps here.
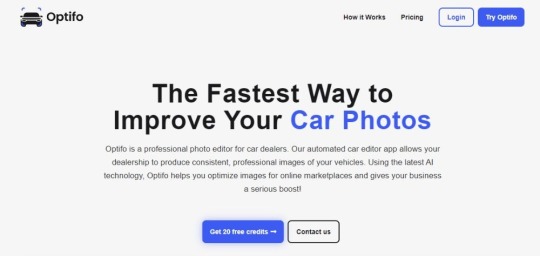
Optifo
Download App:
iOS- Optifo
Boost your car dealership’s performance using Optifo’s fantastic photo editing app made just for car dealers. Optifo’s automatic car editor app completely changes how you display your cars for sale. By using advanced AI technology, Optifo doesn’t just make your car photos better, it also makes them perfect for different online places where you advertise. It also makes your business more noticeable.
All you have to do is say yes, and then you can see the app work its magic: making the pictures the right size, making the colors look great, adding a special background, and even putting your logo on them in a nice way. Make more people interested in your brand and get more customers’ attention easily with Optifo.
Slazzer
Download App:
Android- Slazzer
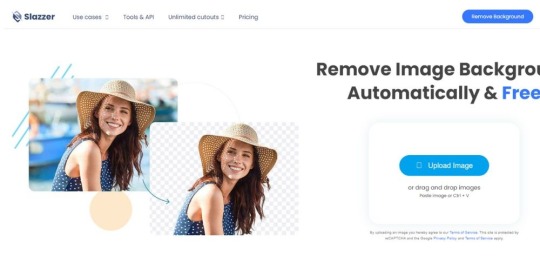
Introducing Slazzer, the ultimate answer to effortlessly removing image backgrounds with accuracy and cost-effectiveness. No more struggles with background removal – they’re here to assist designers in creating stunning art stress-free. Professionals and big businesses also benefit from achieving smooth, creative workflows.
Additionally, Slazzer empowers developers to shape the future with apps and systems. Forget manual editing costs – their automatic templates let you craft eye-catching car ads in seconds! Suitable for vehicles of all kinds. Upload, choose a background, add your logo, and voilà – crafting ads to boost your vehicle business has never been easier!
MotorCut
Download App:
Android- MotorCut
iOS- MotorCut
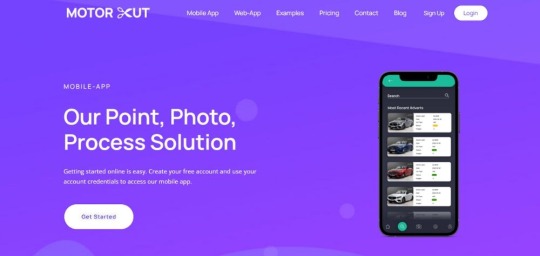
Enter MotorCut’s world, where editing vehicle ad photos is a breeze! Their AI tools transform backgrounds, crafting an engaging online experience. The charm lies in two services: MotorCut Web and Mobile apps, a dynamic duo of editing. No more editing struggles – MotorCut brings stunning ads, adding professionalism to your showcases. Consistency matters, with ads aligned across sites and social media. Advertisements that have a consistent look and vibe across both your website and social media platforms. They create a memorable impact on your customers. And guess what? Conveniently sync mobile and web apps with MotorCut, which makes ad downloads effortless. Embrace the future of car photo editing for fresh car presentations!
Free Best Car Photo Editing Apps
Showcase your creativity with the ultimate tool for car lovers and photographers – the Best Free Car Photo Editor! Turn your car photos into show-stopping masterpieces effortlessly! Whether it’s a speedy sports car or an old-school gem, our editor’s got the magic touch. Discover all the cool filters and tricks to make those car photos truly transformed! Let’s learn about the top 3 best free car photo editors.
Our three best-selected free car photo editing apps are-
Snapseed
Canva
Pixlr
Snapseed

Download App:
Android-Snapseed
iOS- Snapseed
A perfect free editing tool for professional and beginner-level editors is Snapseed. Snapseed makes photo editing a breeze! With just a few taps, you can transform your pics into total masterpieces. Explore a world of creativity with various filters, precise tools to adjust details, and cool effects.
Make every curve and gleam of your favorite vehicle stand out by tweaking brightness, contrast, and colors with just a few taps. Whether you’re capturing the smooth lines of a speedy car or the tough appeal of an off-road vehicle, Snapseed gives you the power to make your car photos truly impressive.
Canva
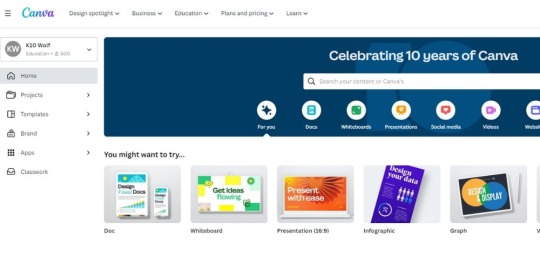
Download App:
Android- Canva
iOS- Canva
Transform your car pictures into captivating stories with Canva. This flexible app goes beyond basic editing, allowing you to create personalized designs that show off your love for cars. Pick from a wide range of templates, stickers, and fonts to add your touch to each image.
Whether you’re highlighting vintage car features or modern marvels, Canva’s easy drag-and-drop system makes arranging elements and crafting attention-grabbing designs a breeze. Elevate your car photos with the creative tools of Canva and share your automotive adventures in a style that’s all your own.
Pixlr
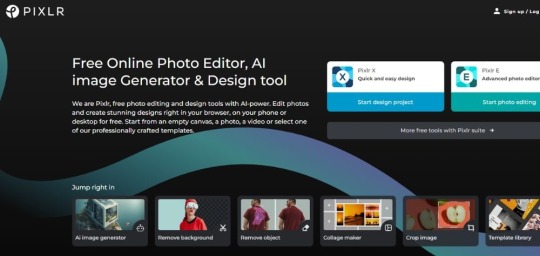
Download App:
Android- Pixlr
iOS- Pixlr
Set your inner artist free on your car photos with Pixlr. This app is a playground for creative editors who want endless options for editing. Turn your car shots into masterpieces using an assortment of brushes, overlays, and effects. Bring out the grace of classic cars or add an electrifying vibe to modern vehicles with the dynamic tools of Pixlr. Whether you’re an experienced editor or just starting, Pixlr’s user-friendly layout lets you experiment boldly. Infuse your car photos with your creative energy and let Pixlr be the fuel for crafting stunning automotive visual wonders.
Things You Should Remember While Editing Car Photos
Want your car pics to look super cool? It’s not just a button-press thing. Let’s check out some easy-peasy tricks that you should remember while editing car photos to make your car shine:
True Colors: Imagine your car looking as awesome in pics as it does in real life. To do that, play with colors a bit. Adjust the white balance and saturation so the colors match the real deal.
No More Glare Troubles: Ever clicked a pic and a pesky glare ruined it? Don’t sweat! We’ve got tools to zap those reflections. Say goodbye to shiny distractions on your car’s surface.
Background Magic: A plain background can be a yawn. Think about where your car is and jazz up the scene if needed. Blur out distractions or even swap the background for something cooler. Just make sure it vibes with your amazing car.
Tiny Details, Big Wow: Those little things like logos, textures, and curves? They matter! Add some sharpening magic to bring them out. Your car’s personality is all in those tiny deets.
Vibes All the Way: Editing a bunch of car pics? Keep them feeling like they’re part of the same gang. Consistency is key. When your pics have the same vibe, they become a super cool team.
Get The Best Car Photo Editor Services at Clipping Path Finder
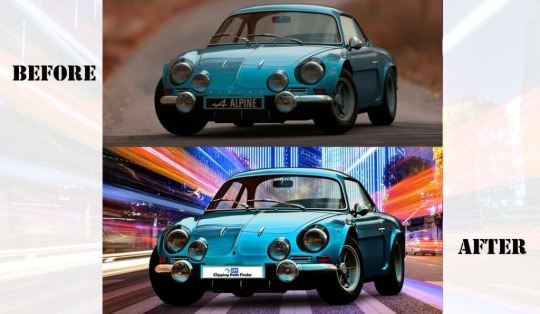
Are you looking for the best photo editing service provider? Then go for Clipping Path Finder to get the best deal ever. Clipping Path Finder stands as the ultimate destination for top-notch car photo editing services. Every car deserves its moment in the spotlight, and this company knows just how to make that happen.
With a team of skilled editors at the wheel, they skillfully navigate the realm of pixels, transforming ordinary car photos into extraordinary masterpieces. From background removal to color enhancement, their expertise covers the entire spectrum of photo editing tricks. They use the best car photo editing app to retouch car images for you.
Whether you’re a professional car photographer or an auto enthusiast, Clipping Path Finder understands your vision and turbocharges it into reality. With a commitment to detail and an eye for precision, they ensure that every curve and contour of your beloved car is showcased flawlessly.
So buckle up for a joyride through the universe of car photo editing with Clipping Path Finder – where your car’s charisma meets pixel-perfect pizzazz!
What Challenges You May Face with Car Photo Editing?
Editing car photos is like solving a fun puzzle with some tricky pieces. Fixing colors and backgrounds is just the beginning; there are hidden obstacles that photo editors face in this car adventure.
The first challenge that you may face is dealing with reflections. Imagine cars acting like mirrors, showing everything around them—even the photographer! To make the car shiny without unwanted reflections, editors need serious skills. Another sneaky problem is making the car fit nicely into a new background. Making sure the lighting matches can be a brain-teaser, sometimes needing special tricks with shadows and bright spots.
Hold on, there’s more! Dust and scratches on the car might not be obvious in a quick look, but they show up when editing. Erasing these marks while keeping the car looking real can be a bit like threading a needle. Also, the fancy parts of car designs, like detailed grilles and insides, can take a lot of time to make perfect.
Oh, and let’s not forget the tires, the heroes of the road! Finding the perfect shine without making them look fake is a real challenge. And speaking of finding balance, it’s tough to make the car look amazing without overdoing it and making it look fake.
So, while fixing car photos has its usual challenges, like adjusting light and changing backgrounds, don’t forget about the smaller challenges like reflections, making things fit, fixing marks, and keeping things real.
Being patient and practicing a lot is important when you’re dealing with these challenges. Getting good at editing car photos takes time. Don’t forget, every car is unique and has its style. The aim is to make it look even better while still keeping it real. If you use the best car photo editing app then your journey of editing becomes easier.
Further Reading: Top 12 Photo Background Remover Apps for Android
Final Words
In the end, the best car photo editing app makes your car pictures look awesome. With the right app, you can easily make the colors better, get rid of things that distract from the car, and show off how amazing each vehicle is. No matter if you’re a pro photographer or just really like taking car pictures, now you can make them super cool with just a tap. So, give it a try, have fun playing with different apps, and see your car photos become even more fantastic!
1 note
·
View note