#crochet jar lid covers
Explore tagged Tumblr posts
Text
Canning Jar Top Crochet Patterns
Canning Jar Top Crochet Patterns
Canning Jar Top Patterns Canning Jar Tops Most of our audience know that Diva Dan is a foodie. He prepares every meal and is adventurous when it comes to pulling recipes from magazines and the internet. Truthfully, most of the time I have no idea which vegetable or whatever is in the food. It just tastes yummy! Daniel loves to can. I know… where does he find the time! He loves the idea of either…

View On WordPress
#4 Yarn#canning#canning jars#Cover#Crochet#crochet jar lid covers#Daniel Zondervan#Free Crochet Pattern#Gifts#lid#lid covers#The Crochet Crowd#Top
18 notes
·
View notes
Text
Creative Ways of Storing Your Crystals and Tarot Decks
includes random reference pictures for ideas and so you can see what exactly is meant
- crochet a little basket, put e.g. a larger quartz point and a smaller deck in it flipping it every time you wake up for a card of the day
- miniature, artisan clay pots lined with some cloth, terracotta is best. you can also paint it to your heart’s delight
- most (vintage) saucers work for displaying tumbled stones, you’ll be surprised
- using large scallop and clam sea shells, sustainably collected
- repurposed and repainted fruit baskets from the grocery store, the flat ones
- mason jars: work especially well to store himalayan salt crystals
- i have one deck sandwiched between a cactus pot plant and a stable selenite tower, it couldn’t be more charged. if you use high frequency crystals it needs a grounding balance so a plant (=earth element) is great to have nearby
- if a spice container is large enough, a deck fits in comfortably and doesn’t bleach.
- keep any container you buy loose tea leaves in, who knows which tools you can store in it later
- save plastic or paper, put a deck in a gift bag
- it’s astounding what an old cassette shelf could be good for. placed horizontally, it’s literally waiting for you to arrange a spread in it, it’ll be very orderly and you can use several decks at once.
- the classic and a very safe/organized way for rough crystals: a chocolate box.
- even small metal buckets normally used for decoration work wonders and save space, look for elongated ones too
- did it occur to you that ceramic butter dishes with lids can accommodate a medium sized deck? now it did. comes in even more practical shapes.
- if you have one, lean two decks against the inside edges of your singing bowl, the cards are clearly displayed and you save space, it should have a high edge
try to work with what you have, most likely you already own what your crystals and decks prefer to be stored in. some of it only needs repurposing and DIY. tip: acrylic paint will get you a long way.
important reminder: do not store rough with tumbled crystals closely stacked. some crystals also lose color with time in sunlight so consider a proper cover, shadow spot, or lid. especially cover any transparent crystal spheres since those can bundle sun rays and burn up your belongings.
#tarot#witchblr#crystals#divination#tarot deck#tarot reading#DIY#crafts#sustainability#green witch#tarot reference#tarot basics
50 notes
·
View notes
Text
Happy Halloween
Title: Happy Halloween
Fandom: Kingsman
Pairing: Agent Whiskey x Reader
Author: @sheerfreesia007
Words: 981
Warnings: Fluff
Permanent Tag List: @paintballkid711, @fioccodineveautunnale, @phoenixhalliwell, @synystersilenceinblacknwhite
Author Notes: I loved writing this. Actually listened to a Halloween playlist to keep myself inspired. This was a fic request for Statesman Halloween party.
Gif Credit: Pinterest and Google



Setting the last bowl of Halloween themed snacks on the purple and black table clothed table you smiled as your hips swayed to the song Jump in the Line playing in the background. Your eyes surveyed the laid out tables of snacks and drinks. There were pumpkin rice krispie treats, Halloween themed chex mix in a large bowl, witch finger pretzel rods, bloody white chocolate apples, candy corn fruit cocktails, mummified hot dogs, pumpkin patch pudding, Halloween punch, witch’s brew punch, boonilla milkshakes, and other various treats. Not to mention the actual food that you had called Ginger in to help you make.
Your hands came up to smooth down your black and multicolored floral dress over your hips as you stood proudly looking at your work. Champ had given you the okay to go and coordinate a Halloween party for Statesman to be able to relax a tiny bit since it had been nothing but mission after mission for the past two months. With Halloween being your favorite holiday you had gone all out. Along with the food there was Halloween themed decorations all over.
Spider webs hung in corners and over the tops of windows, there were ghost lanterns hanging from the ceiling, you had managed to convince the storage clerks to let you use the fog machine and strobe lights that had been confiscated on an old mission and stored in the storage locker. You had also put out pumpkins and jack o’ lanterns that you had asked Tequila to help you carve out and there was an ode to Dia de los Muertos with the colorful banners that hung over the food tables.
A Halloween playlist played in the background and you felt the excitement grow inside of you as you waited for the rest to show up. You had hoped that Whiskey would make an appearance he had told you that he would love being at the party when you had told him what you were planning.
Just then Ginger walked into the room and you smiled brightly over at her as you spotted her dressed up in her black cat costume. She grinned over at you as she held her hands out.
“You’ve out done yourself! This place looks amazing and your costume is so hauntingly beautiful. You did a really good job.” She greeted you with a warm hug.
“I couldn’t have done it without your help, thank you so much for helping me.” You responded as the two of you stood close to each other near the food tables. Soon more and more agents and employees at Statesman began filing in.
“There you are. I was wondering when I was going to find you.” Tequila said as you turned from your conversation with one of the communications tech. He wrapped you up in a tight hug and swung you up into the air your costume swinging out in an arc. “You look fantastic. It’s a bit jarring to you see painted up like a skull but really well done.”
“Thanks. I’m dressed for more Dia de los Muertos but it’s fitting for Halloween too.” You said as you looked down at you black lace and crocheted multicolored floral dress. You had painted your face to look like a skull with colorful designs on it; there were large flowers in your hair and a head scarf that covered your loose hair.
“You look really good.” He says in appreciation and you smile at him with thanks. “Whiskey hasn’t shown has he?” he asked softly and you shook your head.
“It’s fine, I heard he was on a mission so he’s probably not back yet.” You say with a shrug of your shoulders. You look around the room and smile as you see everyone dancing, eating and enjoying themselves. Champ is dancing on the dancefloor with the other agents and there’s steady chatter that fills the room around you. You were happy that you were able to get this together for everyone to relax and enjoy themselves but there was a cowboy that you were surely missing.
It’s hours later and you’re finishing up cleaning up the space that you had kicked Tequila out of only an hour before. He had stayed and helped clean up the room with you saying that since he wasn’t around for the set up he’d be around for the clean-up. I’m tying up the last of the large black bags that I had filled with the trash that we had accumulated when I hear the soft thud of boots behind me.
Turning with furrowed I’m surprised to see Whiskey walking into the room and over to me with a sheepish look on his face. In his hands he’s holding a purple cake box and he looks a little ragged as he comes to stand in front of you.
“I’m sorry I late. The mission ran a little longer than expected.” He said softly as he held out the purple box for you. You shake your head and flip the box lid up to see a large chocolate cupcake with purple and white icing in a spider web design.
“When I heard you were still on mission I figured you wouldn’t be able to make it. It’s no big deal.” You said softly with a smile. “But this is a nice apology.”
“Wanna share it?” he asked with a smile and you nodded your head guiding him over to the table so the two of you could sit and eat it. Though he wasn’t here for the actual party you were quite happy with him being here now. You pulled the cupcake out and smiled as he produced a pair of plastic forks for the two of you with a grin.
“This is perfect.” You said softly as you took a bite of the cupcake grinning widely over to him.
17 notes
·
View notes
Text
Kitchen set with polka dot jar lid covers, butterfly pot holders, and crocheted coasters from Aydal Craft. Thank you!

https://sanatkardan.com/sanatkar/aydal-craft-7277
@aydal_craft Instagram
1 note
·
View note
Photo

Mexicali Rice Blend Goulash
Brown rice…red rice…green split peas…yellow split peas…amaranth…this mix is already bursting with nutrition and then you add in the carrots, leeks, and tomatoes - you’ve got a healthy side dish or meal for a hungry family that’s not much trouble for you to fix which sounds like win/win to me. Serve this with pork roast or meatloaf and a crunchy green salad made while the rice mix is cooking. I found this mix in the bulk section of my local grocery store or make your own from the recipe below. It works well as part of my healthy eating plan, too. Here’s how…
2 ½ c. water
1 c. rice blend*
salt/pepper to taste
2 carrots, coarse grated
1 lg. leek or onion tops, sliced into thin rings
1 - 14.5 oz. can crushed tomatoes
In a large sauce pan, add all ingredients and simmer covered 35 min. This mix is great the first time you serve it and excellent reheated.
*Make your own rice blend with some to use in the future. Here’s the recipe -
1 c. brown rice
1 c. red rice
1 c. green split peas
1 c. yellow split peas
1 c. amaranth
Mix together and store in a clean, dry jar with a tight fitting lid - easy just the way I like it.
Once I’ve got dinner simmering, I race downstairs to sew a few seams on waist tie mid-century aprons for my online shop - www.etsy.com/shop/topdrawerthreads and www.amamzon.com/handmade/topdrawerthreads .
Or I’m putting the finishing touches on hand knit scarves worked from upcycled yarns for my other shop - www.etsy.com/shop/topdraweryarns .
My daughter’s have an online shop - www.etsy.com/shop/yesdesigns - where they design and sew cotton pocket knickers very suitable for fun…frolic…feasting - whatever you get up to...
My older daughter has an online shop - www.etsy.com/shop/wildwovenwomen - where she knits upcycled yarns into warm winter scarves.
My younger daughter has an online shop - www.facebook.com/shroombloombags - where she crochets miniature mushroom inspired garlands from fine cotton thread in rainbow colors.
1 note
·
View note
Text
Hey everyone!
It’s the end of September! and you know what that means?! All those 11 year old witches and wizards have been back at Hogwarts for a whole month!!!
I saw someone post on a facebook group the other day that crochet is like magic, wave a stick, mumble words under your breath and hey presto! here’s a blanket! it made me laugh, so I thought I would share with you my Hogwarts themed crochet tool storage!
My wonderful mother-in-law-to-be got me this awesome crate for Christmas and I knew immediately that it would be brilliant for keeping all my quidditch supplies- I mean – crochet tools in.
So I set to work finding all sorts of odd jars to keep bits and bobs in, I have one for stray hooks and pens and scissors, one for jingly bells (Halloween is nearly here, and that means Christmas isn’t too far away!!) I have plenty of safety eyes and noses, because it’s useful to have those handy when creating lots of creatures! And I have a couple of jars that I have customised for various bits too!
The first one is this jar full of buttons! it was originally a curry jar, but the shape of it was pretty cool so I decided that so long as I put something over the lid I could make it look more magical :p So I added a needle cushion to it! I was forever getting told off for sticking my needles in the arm of the sofa, so I needed somewhere, within arms reach, for them to go! I used this pretty red and yellow checked fabric (GO! GO GRYFFINDOR!) and used a sharpie to colour in the rest of what could be seen on the lid!
The next fancy jar I have is my ends jar… essentially it’s a bin! but I love the way all the cut of bits of yarn look curled up in a jar, and again, having it in arms reach means those ends are much less likely to end up being trailed all around the house 😉 You might be wondering what it says on there… as I was making the cover for the jar lid I decided I needed some sort of potion ingredient or *something* magical to label it with. After looking through lists of potion ingredients I realised quite a few of them were in Latin, so I figured, why not translate “wool ends” into Latin. “Semina lana erunt” is pretty mystical sounding if you ask me!
So that’s what’s in my wonderful box of crochet magic! what would you put in your box? let me know in the comments!
My Hogwarts Crochet Toolbox Hey everyone! It's the end of September! and you know what that means?! All those 11 year old witches and wizards have been back at Hogwarts for a whole month!!!
4 notes
·
View notes
Text
Etsy listing available in my shop
Check out this item in my Etsy shop https://www.etsy.com/listing/1237556297/mason-jar-cozy-set-of-2-crochet-jar


1 note
·
View note
Note
I'm looking for audio sensory toys, got any?
Anon, I’m guessing that by “audio sensory toys” you’re meaning something more akin to “fidgets that make noise” as opposed to “toys that just make noise”. In other words, toys that have the stimminess of noise in addition to movement or tactile stimming, and are more engrossing than just your sitting there and listening to the noise.
(If my approach is incorrect, please let me know when I open up the askbox and I’ll try again for you.)
I do have several things you might wish to check out. I’ll try as best I can to give some indication of the type of noise, but some of these things I haven’t used personally. All the bolded links below go to the item’s tag, as we have many posts on these sorts of toys by now.
Bean Bags: the sound they make depends on the filler. The best filler for sound I’ve used is Mackenzie’s Italian Style Soup Mix, as the different sizes of the dried beans and lentils makes for great rattle. (There must be something similar in one’s local supermarket, just under a different brand; it’s a staple food item.) So this may be best as a DIY, but you could also try putting the same mix into a knotted sock or a drawstring cloth bag as a no-sew option (just leave lots of space for the filler to roll around). Rice and plastic pellets are less interesting, auditorily, as there’s less variation in the sound.
Crocheted Stress Balls: these are filled with plastic pellets and crinkle paper, so they sound crunchy and scrunchy, with added weight and texture. Like plastic bags, but louder. I’ve DIY’d something similar by filling a tiny fabric bag with plastic pellets and cut-up plastic shopping bags, but they’re not as loud as the crinkle paper. For US folks, Stimtastic is probably the cheapest option, but you might find them at game and toy stores, sold as “hackysacks”.
(Mesh Stress Balls are very similar but don’t have the crinkle paper. The pellet filling does scrunch, though, and it sounds great. Similarly, Disney Mini Tsum Tsum Plush, particularly the pellet envelope sewn at the base of the toy.)
Grape Stress Balls: these can make a slurping sound when squished as the slime filler moves through the ball. Not all do, though–I’ve got one higher-quality one that makes almost no sound at all. The others are so loud.
Cracking Squishies: these can be purchased or DIY’d (using part of a tape measure or a snap clip glued inside a sponge) and they’re great for folks after a bendable toy with a crack sound that’s easily repeated. Please check the tag, as we’ve got a few DIY tutorials now, and if you don’t care for them being painted or fancy, they’re very easy to make. Plus they’re squishy!
(You can also just click a cut-up tape measure or a snap clip on their own. A Slap Band Bracelet may also work for you for that same snapping/slapping noise, especially as it has the added texture in the silicone covering.)
Velcro: great for a ripping, tearing sound that’s easily repeated, with additional rough and soft textures. You may have a clothing item that already has velcro, but you can buy this in the sewing sections of dollar shops for only a couple of dollars. If you can sew a little, it’s easy to attach to a keychain or bag.
Bottle Caps or Jam Jar Lids: the metallic kind with a pop seal. They make a popping noise, although some can be a little loud. Easily repeated and pretty easy to source, and if you reuse the bottle, it’s extremely stealth (in the sense of nobody recognising it as a stim toy).
Electronic Bubble Wrap: I haven’t used one personally, so I can’t attest as to how close the sound is to the real thing. But for a repeated sound-making stim toy, I think these are well worth your checking out.
(You can buy real bubble wrap in rolls - online, post office, some dollar shops, office supply stores. It’s often not that expensive, either, especially when bought in bulk. Truly, there is absolutely no reason why stimmers shouldn’t go out and buy themselves a roll of bubble wrap to work through and replace when needed. Just cut off a smaller strip if you need to take it somewhere!)
Slime: a really stretchy, taffy-like slime will bubble when squished and pulled, and the bubbles snap just like bubble wrap. Just mould and stretch the slime again to repeat for hours. You need handmade slime (the kind made using PVA glue and some form of borax or boric acid) for this to work, since all the storebought slimes I’ve handed were just oozy and globby. Slime isn’t so great for on-the-go stimming, but for at home it’s fabulous.
Thinking Putty: like slime, it will bubble and crack, and is easily remoulded to form new bubbles. Putty is better for on-the-go-stimming as it doesn’t leave residue on your hands and doesn’t stick to your skin. Mine doesn’t bubble quite as much as my handmade slimes do, but it’s much easier for me to use outside the house.
DIY Clicking Toy: a toy made by gluing metal bottle caps to either side of a folded piece of cardboard. I haven’t made one myself yet, but I imagine it’s a metallic clicking-clacking sound.
Roller Bead Fidget: these become auditorily-stimmy when you push the beads up and down the string, causing them to clack and click against each other. Rolled in your hands, they’re silent, but I usually stim with them by clicking the beads. Metal and glass beads are loudest, but plastic pony beads still make good noise, too.
Bead Rings: these make the rattling sound of the bead spinning over the metal ring. Again, metal and glass beads are loudest (like these ones on Stimtastic) and best for noise-stimming, but plastic pony beads still make a soft rattle-like spin.
Metal Slinky: these make a lovely metallic ringing and swooshing sound. If you like lots of hand movements and metallic noises, these are so nice. Plus if you rest one end of the full-sized slinky around one ear and bat at the slinky with your other hand, it sounds like a lightsaber or SF-style spaceship laser weapons… I’d get the full-size ones for optimum sound and fidget fun, but I am biased by the fact that I own and love mine. If you like sound with your fidgets or fidgets with your sound, anon, metal slinky.
Spinners: most of these make a great, steady, white-noise-style rustle-like spinning sound that’s pretty regular and lasts for a minute or two. The cheaper ones tend to be more noisy, so this is a case where you don’t want the good Zuru spinners (which are almost silent) over a dollar shop spinner. If you want a consistent sound that lasts for a longer time, spinners are great. If you hold the spinner very close to your ear, you can hear and feel the vibrations as well as the ball bearings!
Klixx / Wacky Tracks / Snap and Click Toys: I haven’t used these myself, but I’m told they’re quite clicky and great for folks who want something more Tangle-like but with added noise.
Light Switches / Knock-Off Fidget Cubes: if you like the clicking sound of a flicked switch, you can get either an actual light switch plate or a fidget cube (or fidget shape). I will personally attest that the “Fidget Fingers Series 2” cube is incredibly loud and clicky, and folks who love the sound of a flicked switch and want it louder will adore this cube.
You also may want to check out our sound category tag for even more toys.
I hope this gives you some ideas, anon. There’s a great many fidget toys that have some kind of sound component, so there should be something that works for you!
- Mod K.A.
#stim toy#stim toys#Stimtastic#Woolworths#USA#Australia#ask#text#link#resource list#category: sound#review#informative#DIY components#anon#mod K.A.#long post#very long post
36 notes
·
View notes
Text
Have you been looking for DIY projects to decorate your home on a budget? Well, do I have some easy projects for you to try!!

These are those wonderful clipboards upcycled. You can paint 3/4 of the board with chalkboard paint, leaving a space on the bottom to add paint or washi tape. Or you can simply wrap with contact paper.
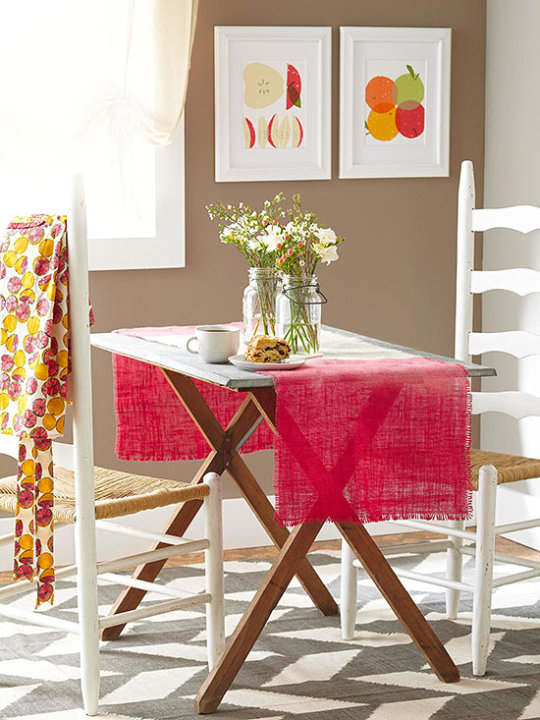
You can dress up your table with tie-dyed Burlap.Buy enough light-colored burlap yardage from the fabrics store so it hangs 1-2 feet off the ends of your table. Cut it lengthwise so it’s several inches narrower than the width of your table. We used RIT fabric dye in fuschia to dye one-third of the runner at each end. To create a slight ombre effect, we repeated the dye bath on one-sixth of the runner on each end to darken the color. Finish the runner by fringing the edges, if desired.
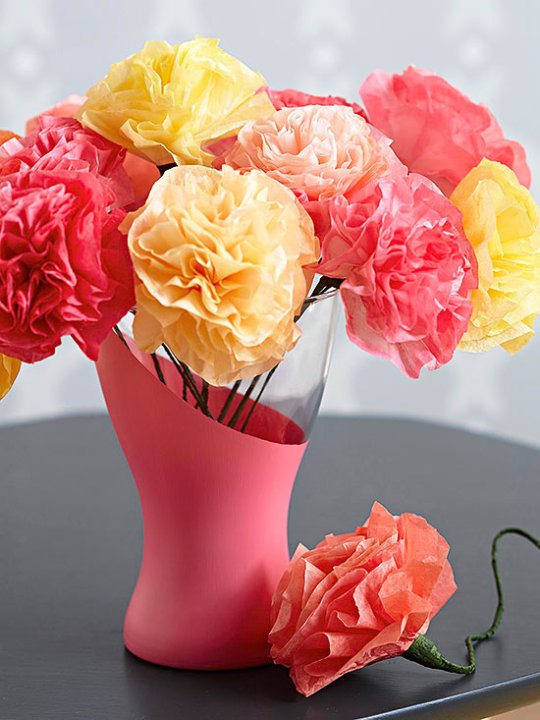
You can update a $1 store vase with acrylic paint. Hold the vase in your hands and tip it in different directions so the paint rolls around inside, creating a wave of color. Leave some of the vase clear. You can make these tissue paper flowers, twist then wrap the end of the flower with some wire. Cover the wire heavily at the top, then thinly the rest with green floral tape.
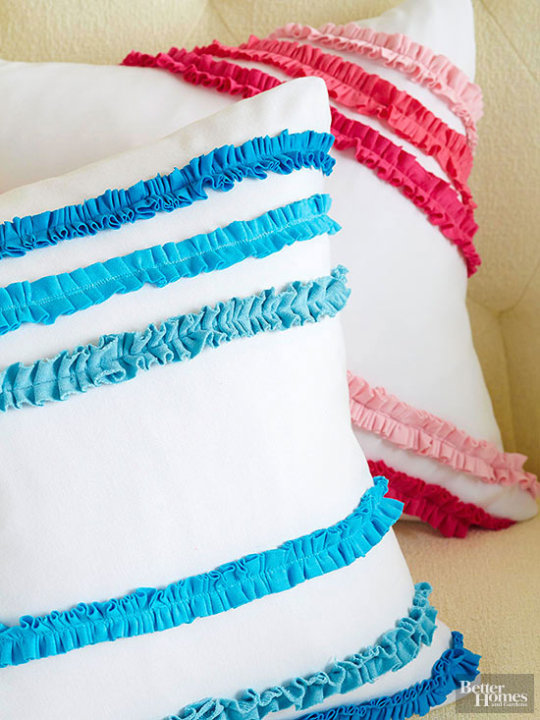
Use old t-shirts to update a plain pillow. You can also use jersey fabric. Either material is perfect for this project because they don’t unravel, so you won’t have to finish the edges. Cut fabric 1 to 1-1/2 inches wide. Use your fingers to scrunch the fabric into ruffles as you stitch down the middle with a sewing machine.
See more DIY pillow projects

Prevent water rings and add a style all at the same time with DIY cork coasters. Cut 4×4-inch squares from thin cork. You can find the cork at your local craft store. Cut a simple herringbone pattern from stencil acetate. Press the stencil onto a cork square and apply acrylic paint.
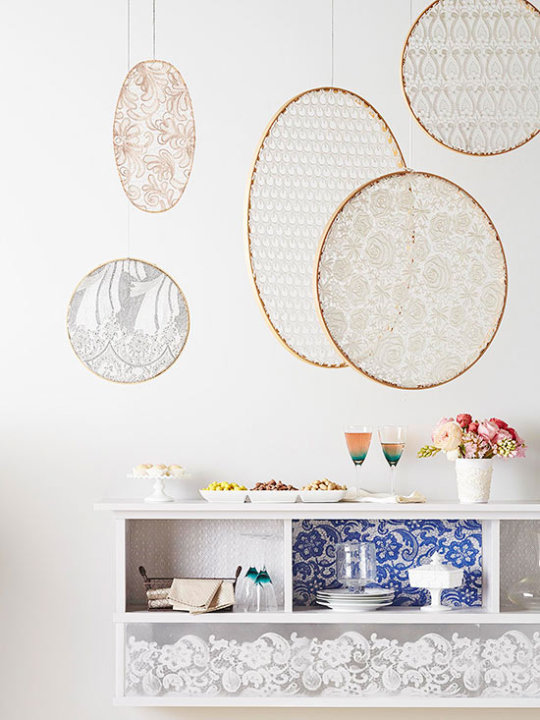
Create a whimsical mobile with lace and embroidery hoops. Stretch lace fabric in wood embroidery hoops. Trim excess lace. For a clean-lined look, drill two holes on either side of the embroidery hoop fastener and screw the two pieces of the hoop together, then pry off the original hardware. Hang from white cording and position at alternating levels.

All you need to create this funky string art is string, nails, and a board. Map out your design and hammer the nails into the board (don’t pound the nails in completely). Wrap string around the nailheads for the design. If you’re spelling a word, print out the letters and cut them out. Arrange the letters on the board and hammer a nail into each corner of the letters. Wrap string around the outlines of the letters first, then fill in the letters with woven designs.

http://kelleysdiy.com/2017/07/18/sea-shell-outdoor-table/
Outside I was playing with Garden Decor when I came up with these:
I love the light I made to hang in the Pergola https://kelleysdiy.com/2017/07/05/chandelier/. These Gazing Ball Stakes https://kelleysdiy.com/2017/04/08/gazing-ball-stakes-3/
Some of the best Crafts I have done, I think, are the ones I made with paint sticks. I did this wonderful post about some of the wonderful projects you can make, using paint sticks. You can find it here: https://kelleysdiy.com/2016/10/18/paint-stick-crafts/
I started by making this Rug Rag. You can see tutorial here: https://kelleysdiy.com/2017/02/01/rag-rug/ug/
Make labels from hardware store wood shims and institute order. They are so inexpensive! Cut a few shims to the desired size by either scoring with a crafts knife and snapping, or trimming with a rotary cutter. Sand each corner to round, and drill a hole in the middle of the thick end, about 1/2 inch from the edge. Use a small foam brush to paint the front and back of each tag with chalkboard paint. Let dry and write or stencil on labels with white charcoal pencil or chalk. Tie onto a bin or basket with a length of baker’s twine.

This is such a pretty idea for spring! Put your best foot forward with a unique flower vase. Arrange your flowers in a regular vase (make sure it will fit inside the boot first). Then simply tuck the vase inside the boot — the more colorful, the better!
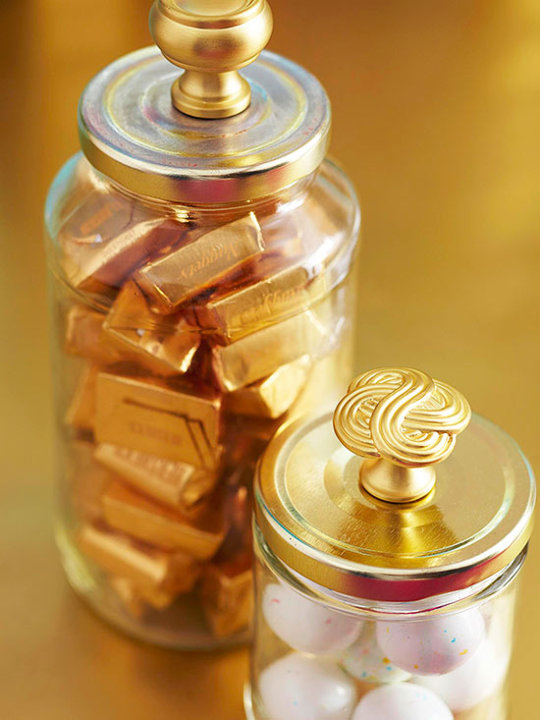
Rescue glass jars bound for the recycling bin for this upcycled project. Clean out the jars, poke a hole in the top of the lid, and screw a cabinet knob through the hole. We paired gold knobs with gold lids, but you can also paint the lids to match your hardware. Don’t you just love the metallic gold!
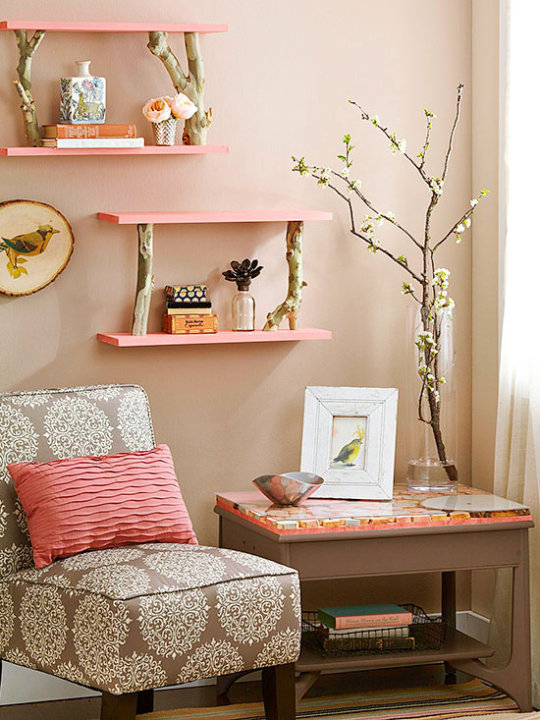
This one is easy. Create shelves with panache using birch logs as supports. Trim sturdy branches to equal lengths, keeping the cuts straight. Paint two 24-inch-long 1×6 boards in the desired color. Attach one board to the bottom of the branches using wood screws, and attach the second board to the top of the branches, again, with wood screws. Hang the shelves using picture-hanging hooks driven into wall studs.

Give a plain roller shade color and punch with a painted pattern. Using a ruler and T-square. Mask off straight stripes with blue painter’s tape. Apply latex paints in your desired colors using a foam roller. Let paint set, peel off the tape, and let the paint dry completely.

Give a mod twist to a wrought-iron chandelier with a string of wooden balls. Select several different-size balls from the woodworking aisle at the crafts store. Screw small metal eye hooks into opposite ends of each ball. Link the eye hooks to chain the balls together, then drape from the chandelier. DIY Tip: Use a pair of needle-nose pliers to grasp and twist the tiny eye hooks.
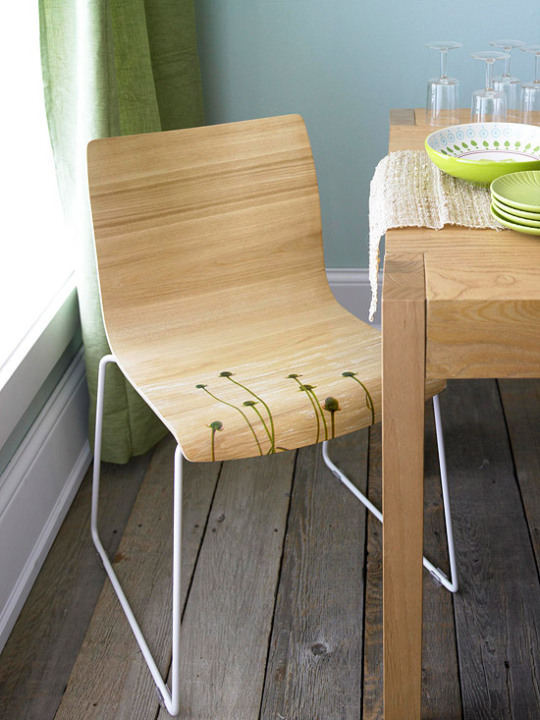
Put your touch on off-the-shelf furniture by transferring any favorite image — a photograph, a bit of a painting, or even a fabric pattern — to the plain surface. Scan the image into the computer and print it on transfer paper, which you can buy online and from office supply and crafts stores (about $20 for a package of ten 8×10-inch sheets). Follow the package instructions to transfer the image. These bentwood chairs have the perfect smooth surface for such a project.
If you are a budding artist, hand paint your own design!
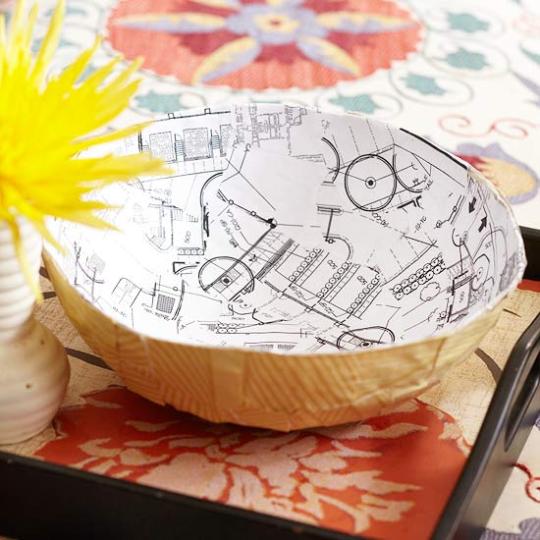
For virtually no cost at all, you can mold an attractive centerpiece. Employ the simple technique of paper-mache, which involves dipping strips of paper into a solution of equal parts white glue and water. Turn over a mixing bowl and cover it with plastic wrap. Tear strips of paper: book pages, magazines, sheet music, wrapping paper, or wallpaper will work. Here, the artistic look comes from copies of blueprints placed facedown with a layer of patterned scrapbook paper laid right side up. Apply at least three layers of paper to develop a sturdy vessel; let dry. Remove plastic wrap and bowl, and, if necessary, smooth any rough edges with fine-grit sandpaper.
Now, I am pretty sure all of you have seen this inexpensive idea.

Dress your windows quickly and smartly with tea towels turned into cafe curtains. Simply clip drapery rings to the top edges of the towels, and thread the rings onto a curtain rod. You’ll want the curtains to hang down to the windowsill, so mount the rod accordingly. If you have a double-hung window, position the rod so the top edge of the curtain lines up with the sash.
DIY Tip: If necessary, trim the towels to length and hem using a sewing machine — or iron on fusible webbing for a no-sew option.
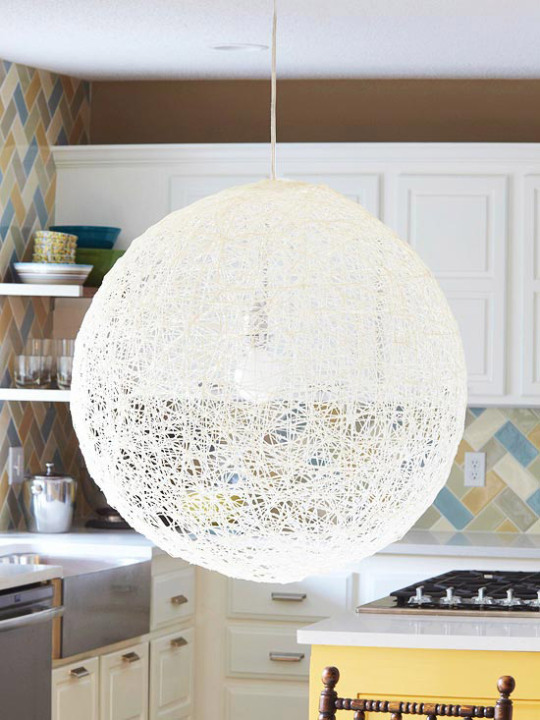
Create a chic, mid century pendant fixture using just string and a balloon. Purchase a 35-inch balloon from a party goods store, or if you can find it at the Dollar Tree, and blow it up to about 30 inches. Brush it with a thick coat of fabric stiffener, which you can find at fabrics and crafts stores. Wrap the balloon with white crochet string, brushing on more stiffener as you work to ensure a thick coating. Let dry for 24 hours, then pop the balloon.
DIY Steps: Illuminate the shade using an inexpensive light kit for hanging lanterns. First, tie a knot in the cord about 7 inches from the bulb. Thread the plug end through a slit in the center of a plastic butter-tub lid. Using kitchen shears, cut a hole in the top of the globe slightly smaller in diameter than the butter-tub lid. Insert the bulb and lid in the globe. Hang the cord from a hook in the ceiling. Use a low-watt light bulb.
Tin Art
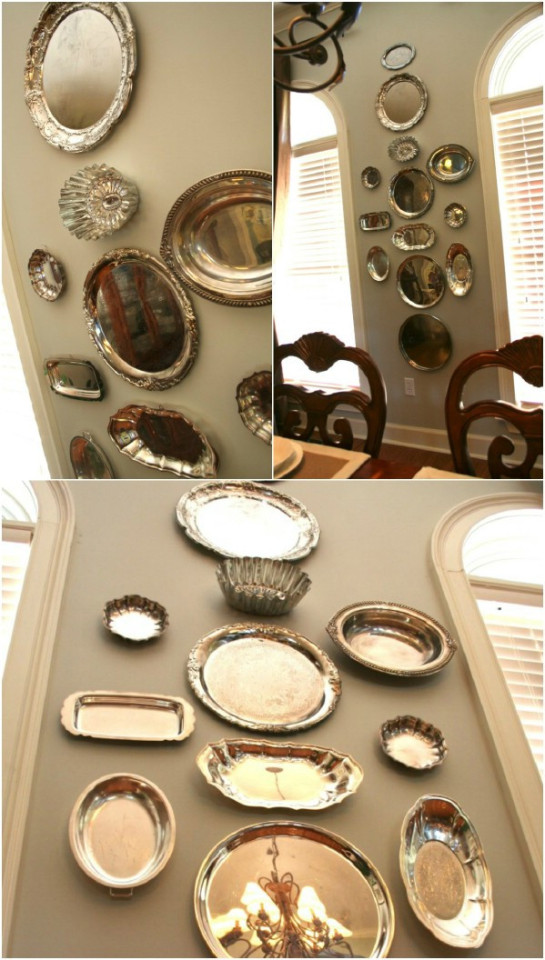
For this project you can get together all your old serving plates, etc and create a beautiful reflective wall. Dollar Tree, you can pick up beautiful serving plates and dishes in a bright silver that look expensive, but only $1.
So, did I get your creative juices flowing? Most of these are so inexpensive to make, and a lot of the items can be found at your Dollar Tree Store.
Have fun creating! If I inspired you to make your own home decoration, please send me a pic to [email protected]
Thank you so much for looking!


Inexpensive Home Decor DIY Projects Have you been looking for DIY projects to decorate your home on a budget? Well, do I have some easy projects for you to try!!
#chalkboard paint#cheap crafts#Crafts#decorating#diy#Easy crafts#Home#home crafts#Home Decor#home design#home hacks#recycles#Upcycles
0 notes
Photo


Official unveiling! Yarn jars! First size: cake. Includes cover to protect engraved lid that snaps into place and holds the end of the yarn. More themes to come! #cpunltd #lasercut #laserengraved #yarn #yarnjar #knit #crochet #knitting #nerd #geek #flower #flowers #container #jar #makersgonnamake #makersmakingtoolsformakers
1 note
·
View note
Text
Building Your Own Art Supplies Stash
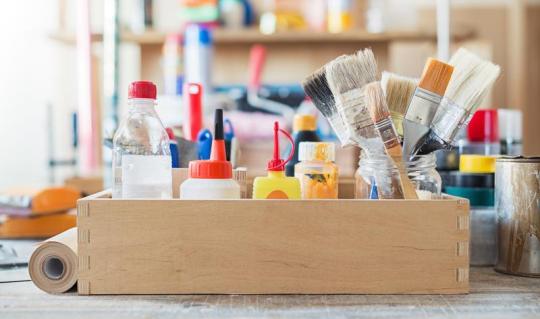
One of the greatest joys of being an artist is building your own art supplies stash. Whether you’re a seasoned fine artist expanding your collection or a beginner just learning where to start, the supplies you stock are a deeply personal choice that come from time, learning and experimentation.
As your skill grows, you will find that your stash builds organically and comes from testing different supplies, media and techniques, but we’ll help you get started with our ultimate guide to building your own stash of eco-friendly art materials.
Drawing and Painting Essentials

Drawing and painting supplies are some of the largest fine art and general craft categories with virtually limitless possibilities. No matter what particular medium you choose to work with, your best bet is to have as many of these items on hand for when you find your inspiration, including:
Crayons.
Markers.
Colored pencils.
Graphite pencils.
Charcoal.
Erasers.
Pencil sharpeners.
Pastels (oil, chalk).
Chalk.
Acrylic paint.
Tempera paint.
Oil paint.
Watercolor paint.
Pan watercolors.
Palettes for different paint types.
Gesso.
Gouache.
Impasto.
Pigments.
Acrylic paint remover/brush cleaner.
Paint thinner.
Decoupage glue.
Easel.
You’ll also need a variety of brushes suited to different mediums. Brushes typically come in handy sets designed for specific mediums, so try to get a set each of acrylic, watercolor, oil and all-purpose brushes and if you have kids, a set of children’s paintbrushes and foam brushes.
For drawing and painting surfaces, there’s plenty to choose from. Sketch/drawing pads come in a variety of sizes, weights and textures, so it will take a little experimentation to find the one that works best for you. Watercolor, acrylic and mixed media pads are available as well, which are specifically designed for these mediums. Otherwise, canvases are an option, which come in several sizes, thicknesses and wrap styles. Keep in mind that canvases are a little more expensive than pads, so it may be best to keep the experimentation to the more disposable pad paper.
Modeling and Sculpting Essentials
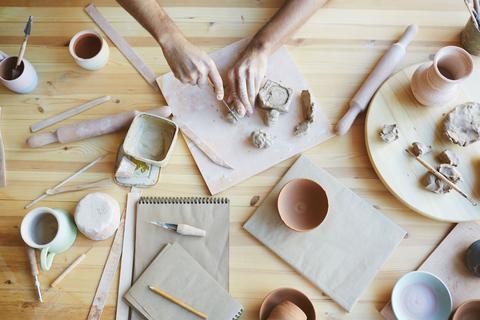
This is another broad category, ranging from artist’s modeling clay to children’s playdough. In either case, the supplies and tools you need remain the same, such as:
Homemade clay.
Homemade cold porcelain.
Modeling beeswax.
Molding and casting kit.
Basic sculpting tools.
Clay knife.
Armature wire.
Aluminum foil.
Wire cutters.
For three-dimensional crafting, you’ll need some additional materials, like:
Wood craft sticks.
Wood shapes.
Toothpicks.
Pipe cleaners.
Googly eyes.
White glue.
Wood glue.
Glue stick.
Feathers.
Cotton balls.
Pom poms.
Craft foam.
Craft scissors.
Jewelry Making Essentials
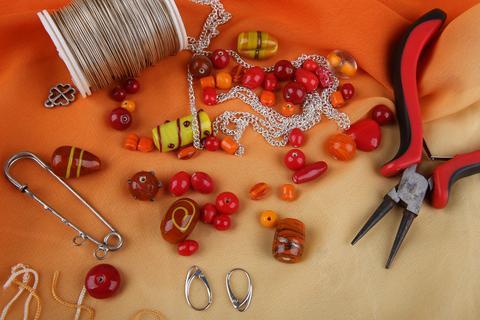
Jewelry making is a simple craft to learn and requires few materials to get started:
String.
Fishing line.
Pony beads.
Wood beads.
Glass beads.
Needle-nosed pliers.
Wire cutters.
Jewelry-making forms.
Jewelry glue.
Millions of options are available for jewelry beads and charms, so it’s best to collect supplies as you go. Getting a divided organizer to hold beads and charms is a helpful addition as well.
Sewing, Knitting and Crocheting Essentials
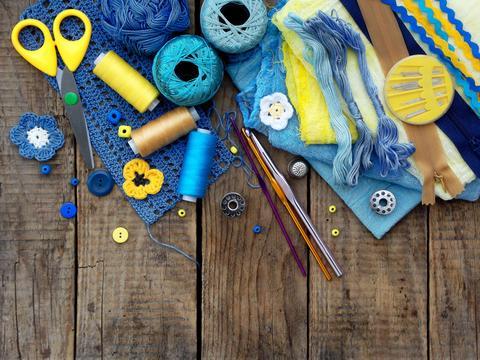
Sewing, knitting and crocheting are unique in that the supply list is the same for beginners or experts, and it only grows with time.
If you’re looking to sew actual clothing or elaborate costumes, a good sewing machine is in order, but a cheap machine and hand-sewing needles are suitable for light crafting.
You’ll also need:
Sewing scissors.
Seam ripper.
A cutting board, preferably with a grid.
Fabric pens and pencils.
Seamstress tape.
Thread in a variety of colors.
Pins.
Pincushion.
Fabric.
Stuffing and batting for plush projects.
Fabric glue.
Embroidery floss.
Embroidery needles.
Embroidery hoop.
Buttons.
Garment/wool dye.
No matter what type of sewing you intend to do, the biggest part of your sewing stash will eventually be your fabric. Go to the local fabric store and pick up remnants, shop sale fabrics and cut up any old clothing to use for future projects. Before you know it, you’ll have a huge stash of different fabrics at a fraction of the cost of buying fabric to prepare for a particular project.
For knitting, crocheting or rug making, you’ll need:
Yarn.
Ribbon.
Wool.
Wool roving.
Felt.
Locker hook.
Toothbrush needle.
Rug needle.
Crochet hook.
Knitting needles.
Felting needle.
Latch hook.
Latch rug canvas backing.
Looms.
Like sewing, the biggest part of your knitting, crocheting and felting stash will be a range of different wool and yarn colors, textures and types so that you will have the most options for your next project.
General Craft Supplies
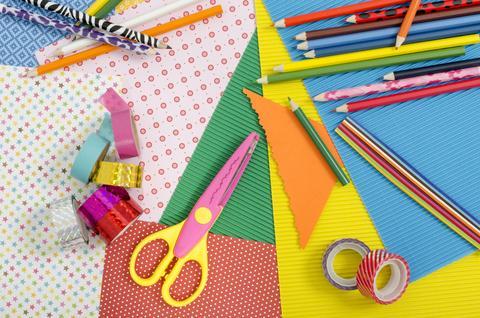
Here are some all-purpose craft supplies that you should always have on hand, especially:
Card stock.
Construction paper.
Tissue paper.
Wax paper.
Coffee filters.
Brown paper bags.
Newspaper.
All-purpose glue.
Craft tape.
Wax and varnish.
Extra scissors.
Craft vinyl.
Ruler.
Hole punch.
Floral wire.
Aprons.
Old sheets or tarp.
Small, reusable containers for water or mixing.
You can also collect supplies for future projects from the recycling bin, such as:
Cardboard boxes.
Magazines.
Junk mail.
Egg cartons.
Milk cartons.
Cans and jars.
Bottles.
Container lids.
Keep your arts and crafts stash in mind any time you’re in a thrift store or see a sale. You never know what you may use in the future, so this is a great way to collect unique odds and ends for upcycled craft projects.
This list of art supplies covers the basic, and the not-so-basic, supplies you need to get started with arts and crafts. Start small, gather a little bit at a time and experiment to find your niche, then continue to build your collection until you have all the supplies you need for whatever project inspires you on the next rainy day. Be sure to check out our collection of eco-friendly art materials and craft supplies as well, so your projects can always be green and sustainable!
What are the absolute essentials in your art supplies stash? Tag us on Instagram @ecofriendlycrafting and let us know!
The post Building Your Own Art Supplies Stash appeared first on Eco-Friendly Crafts.
1 note
·
View note
Text
Old Country Home
New Post has been published on https://netmaddy.com/old-country-home/
Old Country Home
When we were just tiny toddlers, my older brother and I hopped into our parent’s old Nash automobile so excited about visiting our grandparents in the country. The drive from Corpus Christi to San Antonio brings back some of the most yearned for memories of my life; a simpler, less complicated time in life that I can go back to and take refuge.
My dad, always thinking ahead, had prepared child-sized, home-made “facilities” for use on our road trip. Since gas stations were few and far between, he handed me a small red Folger’s coffee can with a lid and my brother a small glass coke bottle. This little accommodation became a family tradition for road trips back in those days.
Mom packed a large brown grocery bag full of sandwiches and cookies wrapped in waxed paper along with a gallon of iced tea in a clear glass milk jug. Ice chests were still a decade away and so was the technology for plastic baggies. There was no air conditioner in the old Nash so we traveled with the windows open, heads and hands flailing in the breeze (seatbelts hadn’t been invented yet). Dad filled up at a “full-service gas station” for twenty-two cents a gallon (which is sadly extinct now, along with glass gallon milk jugs.)
“San-An-Toni, An-Toni-Oh; She hopped upon a pony, and rode away with Tony; If you see her please let me know, And I’ll meet you in San-Antonio!”
Mom taught us all the road songs she knew; i.e., “You Are my Sunshine,” “Hush Little Baby,” “America the Beautiful,” “Texas Our Texas,” “The Yellow Rose of Texas,” “Home on the Range,” and “San-An-Toni-O,” come directly to my mind. We came from a musical family where everyone sang, played instruments, danced and played records. No more songs? No problem! We counted wooden telephone poles and read billboard signs until we fell asleep.
After driving about forty-five to fifty miles per hour, on a two lane road, for what seemed like more hours than telephone poles, dad put his left arm out of the window to signal a turn and then slowly pulled onto a bumpy dirt road named Rockport Road. About five miles away was my grandparent’s small dairy farm-turned-cattle ranch. Dad always referred to his childhood home as “The Ranch.”
Rockport Road (later F.M. 1518) was a busy artery in the early part of the twentieth century; connecting many productive little farming communities in the Oak Island Community area to the city of San Antonio. Today, this road is South Loop 1604 West and the old ranch house is right off the highway, about five miles from Somerset on the south side of San Antonio. Later in life, I was to discover that our family was one of the oldest Texas families to settle here as far back as 1825.
“Souvenirs”
“They’re here!” shouted Grandmother. Coming quickly down the old stone steps, I noticed that her dress was covered with many tiny flowers. There is nothing like the smell of a country grandma, for she smelled like cookies and love. We pulled up to their modest dairy farm house that was on the edge of a hundred and twenty-six acres spread. Dad parked in the sandy soil and red dirt clay since there was no driveway. Their entire front yard was their driveway.
The first thing I noticed was a beautiful, circular rock garden that sparkled in the sunlight. We felt the texture and shapes of the stones in the round structure that glittered with samples of their vacations. (There used to be a time when it was not illegal to take a sample or two of Montana or Yellowstone National Park home with you.)
Several layers of rocks were stacked about three feet high with nothing to hold them together but each other. We discovered petrified wood, iron stone, colored chunks of glass, flat oval stones, really soft, glittery sandstone, open geodes with white crystals, small round pebbles, grey flat slabs and blue geodes. This collection represented ten years worth of “souvenirs” from Texas all the way up to their Montana land.
The tiny purple Verbena and the green and white Chaparral were in full bloom with millions of new flowers. They smelled like musky cologne and lay draped like curtains over the fence in their front yard. Years before, Grandmother had planted an orange tree next to the house to protect it from the cold in winter. Everyone told her that orange trees don’t grow in San Antonio, but as long as she was alive that orange tree produced sweet oranges.
Two purple and two pink Crepe Myrtle trees grew in the front yard alongside the Pomegranate trees that were imported from out of state. Grandmother gave mom some jars of her home made mustang jelly that she had made from the wild mustang grapes that grew on the property. She found wild mulberry bushes and raspberry bushes out on the land, but the wildlife usually quenched their appetite on them first.
If it grew on a vine, a bush, or a tree, she could make it grow, preserve it in mason jars and pass it on to friends, family and the community. She even collected fresh eggs every morning from the chicken coop and Granddad milked his own personal Jersey cow twice daily.
Their old farmhouse kitchen was a slanted, add-on cook porch with a roof that was a full foot shorter than the rest of the house. The oven didn’t cook evenly because it sat on a slope, but cookies were still wonderful in Grandmother’s oven! She had a real “ice box” with a chunk of ice in it for refrigeration and an old timey washing machine; the kind that squeezes the clothes through two rollers. After we settled in comfortably, Grandmother called my brother and me into the kitchen for some home made cookies and store bought vanilla ice cream that she had purchased from Henry Edward Butt (H.E.B. grocery store).
That evening, we snuggled into a soft double bed in what used to be “the girl’s room.” I traced the thick raised pink roses on Grandmother’s hand crocheted blankets with my fingers, as if trying to remember them. The bed was big enough for little children but I couldn’t imagine how my three aunts slept together on it. Life was simple back in the day that my three aunts were young, and they were happy there, for farm life was all they knew.
The girl’s room had a conservative, black chiffarobe for their dresses and a matching black dresser for their clothes. They also had an old fashioned vanity table to sit at with a mirror. It was peaceful in my aunts’ old bedroom. I wondered how many times they must have sat there and combed their hair, looking into the long mirror. Now I am looking into the same mirror and feeling like a country girl myself.
When Dad was born in 1928, Granddad built a long, porch-room at the back of the house for him. It had a wooden floor and a slanted tin roof that, like the kitchen, was also a foot lower than the rest of the house. Dad lived in that porch-room all the way through college, at Trinity University. Frugality was the operative word back then. But they always had money for the children’s college education, the girl’s singing engagements, and dad’s football games.
When it rained upon that old tin roof, it sounded like little bee bees falling from heaven. The grown-ups didn’t seem bothered by it because they were caught up in a rousing game of Canasta; a card game that took two decks and at least four people. This was Granddad’s favorite pastime and he played it like a champion.
Later on, as the rain stopped and the night grew still, the boisterous voices coming from the dining room turned into soft, muffled conversations of family visiting family. Grandmother was teaching my mother how to crochet raised roses on a granny square blanket just like my aunts had on their old bed. Later, I was to learn the blanket would be for me! All was well at my grandparent’s home.
Rag Rugs, Button Boxes and Granddad’s Marbles
Grandmother had a gift of creating something out of nothing, or very little. She was very imaginative and always kept her crochet needles and a sewing box near her rocking chair. In her leisure time, like an artist with her pallet full of paints, she made from scratch several dozen beautiful rag rugs out of the family’s old, worn out clothing.
My bare feet were never cold at her house because she had covered all of her wooden floors with colorful, knotted, floppy tie rag rugs. When a work shirt or dress became unusable, she took her large pair of sewing scissors and ripped the garments into thousands of equally measured ribbons. Using her iron, she pressed them into biased tape, and using her crochet needle as a hook, she tied the cloth into limitless, colorful, hand-made floppy tie rag rugs.
My brother spent hours playing with Granddad’s boyhood marbles that he had toted around since his own childhood. I was fascinated with Grandmother’s fancy button box and all of the buttons which were placed in it when a garment needed to be turned into a rug. I organized and color-coded them, playing for hours with her large button box. She had the most interesting and unique buttons I’ve ever seen.
Grandmother Beatrice was ahead of her time with recycling. She gave her floppy tie rag rugs away to friends and those “in need of a rug.” Once, she made a long, narrow, white floppy tie rag rug that flowed down the hallway of her favorite niece, Jane McCabe’s hallway, in her lovely home on the north side of San Antonio. Jane was formerly a Parker, like Grandmother, and came from our wealthy Detroit, Michigan relatives who migrated to San Antonio in the early thirties.
Grandmother gracefully wove dark green ties to make the leaves, red ties to make the cherries into the white background. Jane McCabe proudly displayed her Aunt Beatrice’s long cherry rag rug in her large hallway for twenty-five years, until the old rug needed to reitre. It was quite the envy of all of her neighbors and a conversation piece at her bridge parties, too!
King Snakes and Doodle Bugs
My cousin Stevie, who was just a year and a half younger than me, knew all about the difference between rattle snakes and King snakes. “The rattle snake will kill you, but the King snake is harmless and kills the bad snakes” he said.
He also taught me, ever so gently, how to tap a tiny little grain of sand into a Doodle Bug funnel in the barn next to the chicken coop. A Doodle Bug is a black quarter-inch long hard shelled bug with about a hundred tiny legs at the base of its armor.
These little sand creatures dug their funnels with all those little feet in order to bury themselves beneath the cool sand during the day. We tapped one or two grains of sand in their “little tornadoes” in order to confirm if there really was a Doodle Bug inside the funnel or not. If he was home, the Doodle Bug would fast and furiously kick out the sand with his many legs. When in sight, we quickly scooped him up and let him walk on our hands. We meant no malice to nature’s little tornado diggers and always returned them back to the sand, wherein they would immediately begin to feverishly kick sand up in the air and disappear.
My brother and I returned to “The Ranch” several times. Our grandparent’s house even became a refuge during the evacuation of Corpus Christi when Hurricane Carla came ashore. Today, my brother lives about an eighth of a mile from the old homestead in his own “Ranch.”
In 2003, I was actually able to go back to “The Ranch” over fifty years later, to live with my eighty-eight year old aunt Bebe. She had inherited her parent’s old homestead and moved back there after her retirement from teaching. It was through coming back here that I was able to find my roots and remembered that uncomplicated, simple childhood that I had experienced so many years ago.
0 notes
Photo
Swiss Chard Dal
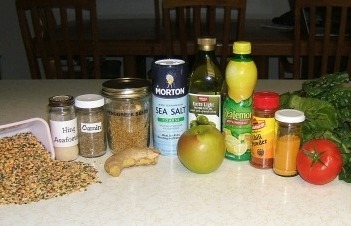
Dal/dahl - it’s an ingredient and the name of a type of Indian dish...always something new for me to learn daily. The dal mix (pulses) used in this dish are all the dried and split version to speed in the cooking - time saving in my cooking is always a plus. To make your own, mix together equal parts red lentils, yellow peas, green mung beans and black gram beans storing in a clean dry jar with a tight lid. My local Asian/Indian grocers had this mix on hand (hing and fenugreek seeds, too) or order the mix from Amazon as Pancharatna Dal. Use wiltable greens such as - Swiss chard, spinach, collard greens - mustard greens are too tart/strong flavored. Serve this on a bed of brown rice or on it’s own as a meal to eat on the go. Cold summer melon is a nice addition to this meal. My husband says my cooking is experimental, no truer words were ever spoken.
1/2 c. dal mix
2 c. water
2 c. wiltable greens, ribbon cut
1 med. tomato, diced small
2 T. oil
3/4 t. cumin
1/2 t. chili powder
1 t. ginger
slight dash hing - keep in a jar with a shaker top to control pouring
1/4 t. turmeric
1/2 t. salt
1/2 t. fenugreek seeds
1 T. lemon juice
1 med. Granny Smith apple, cored, coarsely grated
In a large soup pot, mix all ingredients together. Simmer covered 20 - 30 min. until the grains are tender, stirring often turning the beans and greens over one another.
While the dal is on to simmer, I’m sewing cotton pocket aprons in all cotton funky fabrics for my online shop - www.amazon.com/handmade/topdrawerthreads and www.etsy.com/shop/topdrawerthreads .
Or I’m merrily hand knitting stocking caps from upcycled yarns for my other shop - www.etsy.com/shop/topdraweryarns .
My daughter’s have an online shop - www.etsy.com/shop/yesdesigns - where they design and sew cotton pocket knickers...cool, comfortable yet figure flattering with a handy cell pocket.
My older daughter has an online shop - www.etsy.com/shop/wildwovenwomen - where she works upcycled yarns in bright stripes into cozy knit rainbow afghans.
My younger daughter has an online shop - www.facebook.com/shroombloombags - where she crochets fine cotton thread into miniature rainbow colors garland.
1 note
·
View note
Photo

Mexicali Rice Blend Goulash
Brown rice…red rice…green split peas…yellow split peas…amaranth…this mix is already bursting with nutrition and then you add in the carrots, leeks, and tomatoes - you’ve got a healthy side dish or meal for a hungry family that’s not much trouble for you to fix which sounds like win/win to me. Serve this with pork roast or meatloaf and a crunchy green salad made while the rice mix is cooking! I found this in the bulk section of my local grocery store or make your own from the recipe below. If not, find the ingredients for the mix in your local grocers bulk section or Asian grocery. It works well as part of my diabetic diet plan, too. Here’s how…
2 ½ c. water
1 c. rice blend*
salt/pepper to taste
2 carrots, coarse grated
1 lg. leek or onion tops, sliced into thin rings
1 - 14.5 oz. can crushed tomatoes
In a large sauce pan, add all ingredients and simmer covered 35 min. This mix is great the first time you serve it and excellent reheated.
*Make your own rice blend with some to use in the future. Here’s the recipe -
1 c. brown rice
1 c. red rice
1 c. green split peas
1 c. yellow split peas
1 c. amaranth
Mix together and store in a clean, dry jar with a tight fitting lid - easy just the way I like it.
Once I’ve got dinner simmering, I race downstairs to sew a few seams on waist tie mid-century aprons for my online shop - www.etsy.com/shop/topdrawerthreads .
Or I’m putting the finishing touches on hand knit scarves worked from upcycled yarns for my other shop - www.etsy.com/shop/topdraweryarns .
My daughter’s have an online shop - www.etsy.com/shop/yesdesigns - where they design and sew cotton pocket knickers very suitable for fun…frolic…feasting…whatever you get up to!
My older daughter has an online shop - www.etsy.com/shop/wildwovenwomen - where she knits upcycled yarns into warm winter scarves.
My younger daughter has an online shop - www.facebook.com/shroombloombags - where she crochets miniature mushroom inspired garlands from fine cotton thread in rainbow colors.
Looking for an amusing companion this evening? Check out my audio book review blog for some introductions - www.lendmeyourears2017.tumblr.com .
#vegan recipe#vegan cooking#vegan food#vegetarian#vegan#veganism#healthy vegan#healthy eating#healthy diabetic#healthy diabetic cooking#healthy diabetic living#healthy foodie#portland foodie#foodie find#foodie fun#vegan foodie#vegetarian foodie#apron#aprons#half apron#chef apron#pocket apron
2 notes
·
View notes
Text
Free Crochet Pattern: Wide Mouth Jar Lid Cover
http://www.crochetnmore.com/widemouthjarlidcover.html

0 notes
Text
Free Crochet Pattern: Wide Mouth Jar Lid Cover
http://www.crochetnmore.com/widemouthjarlidcover.html

0 notes