#conic gradients
Explore tagged Tumblr posts
Visit Tumblr Blog
Explore Tumblr blogs with no restrictions, modern design and the best experience.
Last Seen Tumblr Blogs


Fun Fact
Tumblr was acquired by Yahoo for $1.1B in 2013.
Text
8 CSS & JavaScript Snippets for Creating Complex Gradients
New Post has been published on https://thedigitalinsider.com/8-css-javascript-snippets-for-creating-complex-gradients/
8 CSS & JavaScript Snippets for Creating Complex Gradients

Gradients are a true staple of web design. Their beauty lies in their versatility. Use them to make a big, bold statement. Or use them as an accent piece to create a mood.
The possibilities have never been greater. Modern CSS and JavaScript allow us to do more than mimic print design. We can use them to add movement and interactivity to the mix. But it goes deeper.
Gradients are no longer limited to container backgrounds. They can also style text content. It’s an opportunity to enhance headlines and calls to action.
So, what kinds of things can you do with gradients? We scanned the archives of CodePen to find eight great examples.
Grainy & Gradients Text Using color-mix by LukyVJ
This snippet uses the recent CSS color-mix property. The property simplifies the process of darkening, lightening, and desaturating colors. The result is a beautiful text gradient that allows the page background to come through. We don’t often associate gradients with graininess. But it works to perfection here.
See the Pen Grainy & Gradients text by LukyVJ
Single Element Gradient Background Patterns by Ana Tudor
Conic gradients add a unique twist to the element. The color transitions rotate around a center point. You can see it on display in this example. Each card sports a unique and intricate pattern.
See the Pen 1 element card background patterns (see description) by Ana Tudor
Animated Radial Gradient Pattern by Loktar
Gradients still make great backgrounds. And this animated presentation demonstrates how far they’ve come. It looks amazing. The relatively few lines of code that powers it are equally impressive.
See the Pen Moving Radial Gradient Pattern by Loktar
Single DIV Radial Gradient Swirl by Adam Argyle
How can a single div element contain so many colors? The magic is in multiple radial gradients. Four gradients start at the edges and meet in the middle. The result is a colorful delight.
See the Pen 4 Corner Radial Gradient Swirl by Adam Argyle
AI Prompt UI with Subtle Gradient by Vincent Durand
Check out the subtle gradient on this artificial intelligence (AI) interface. It cleverly mixes with glassmorphism to produce a unique aesthetic. The effect brings life to the page.
See the Pen Imagica – AI prompt UI by Vincent Durand
Radial Gradient Cursor Trailer by Uzo Awili
Here’s an example of gradients shining a light on a background image. Move your cursor and watch as it casts a bright pink hue. A tiny bit of CSS and JavaScript makes it work.
See the Pen Radial Gradient Cursor Trailer – Using Gradient Positioning by Uzo Awili
Magical CSS Blossoming Flowers at Night Md Usman Ansari
Gradients play a sizeable role in this “magical” snippet. They add dimension and allow the virtual plant life to fade into black. The CSS repeating-linear-gradient function simplifies the effect’s usage.
See the Pen CSS Blossoming Flowers at Magical Night by Md Usman Ansari
Complex Gradient Examples by Drew McConville
Combining multiple gradients into a CSS background can produce compelling results. Scroll through this snippet to see four such examples. You’ll find a mix of colors and gradient types. It may even convince you to do some experimentation.
See the Pen Complex Gradient Examples by Drew McConville
A Fresh Look at a Design Staple
There was a time when designers shied away from gradients. The era of flat design encouraged the use of solid colors. But we rightfully came back to them.
The examples above show that gradients are still a valuable tool. They add flavor to all sorts of design elements. And it seems like designers are constantly finding creative uses.
That speaks to their flexibility. You can tweak gradients in endless ways. Make them as simple or complex as you like.
Want to see even more CSS and JavaScript gradient ideas? Be sure to check out our CodePen collection!
Related Topics
#ai#amazing#amp#artificial#Artificial Intelligence#background#code#Color#colors#conic gradients#container#CSS#CSS Snippets#Design#designers#display#flowers#gradients#how#Ideas#intelligence#interactivity#it#JavaScript#JavaScript Snippets#life#Light#linear-gradient#movement#patterns
1 note
·
View note
Text
Weird Game-Wide Firelight Glitches, Post-Patch 7

A bit belated to post this, since Patch 8 is imminent, but it's maybe worth publicizing in case anyone else is experiencing it. Shortly after upgrading to Patch 7 last fall I noticed that a strange firelight glitch seems to be imposing harsh light/dark differences on anything unlit by a given torch or brazier or campfire light source.
It seems that in Patch 7 fire-light, instead of making an ambient/gradient glow, makes a conical- or X-shaped glow that lights everything within the cone-shapes but imposes a harsh light/dark line on anything not within that shape/radius/whatever.
Since most of my playthroughs are, uh, Minthara-focused, that means the first time I saw this was during her love scene. I'm pretty sure this (and maybe any other scene in fire-light?) gets bugged.


This happens in both modded and vanilla MacOS playthroughs. I did update my MacOS between these two shots but the lighting thing was happening before said update (the graphic render looks better; compare her shoulder curve in both images), so I'm guessing that's not the reason why this is happening.
So the result is, for example, Minthara in this scene is seemingly bisected by torchlight. Her scene appears much darker in general, too; a mutual on Discord confirmed the darkness level but not the weird bisection. Anyway this is yet another bug that I hope Patch 8 fixes, but since it's Minthy content I'm guessing that may not happen. I'd love to be wrong, though!
6 notes
·
View notes
Text
Dev Log Feb 14 2025 - Space Dust Shader
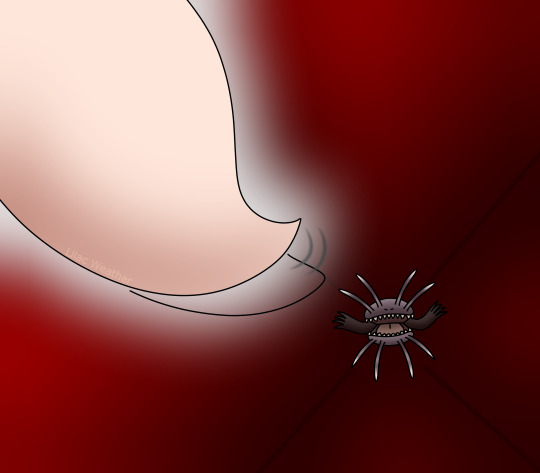
Two weeks left until release. And I almost forgot to post the dev blog post on the second Friday. Whoops. Since it's late, I'll be quick. Since I promised some shader stuff last week, I should probably deliver on that. For those unfamiliar, shaders are tiny programs written to be executed on the GPU for handling rendering of graphics for the game. It's a bit hand-wavy, but there's a bunch of different types that you can write for different stages in the rendering pipeline, which itself can be configured differently based on what the game is. Most modern games using OpenGL and similar pipelines have at bare minimum a Vertex Shader, meant to populate the shapes of the things, and a Fragment Shader, meant to draw the colors of the pixels. Usually it's just a texture on a plane for most 2D games, but you can get creative and make some neat stuff. Here's a still image (not a gif, sorry) of the attractor/repulsor objects as seen in the first trailer:

It's kind of a neat effect (not to pat myself on the back too much, but you know). There's little dust particles flying into/away from the little swirly hole in the middle. The best part is that it's not actually particle objects - there's no calculation for those individual dust particles at all. It's just one single texture that looks like this:
The image is a composite of a layer of pure Green and Black on the bottom in a conical gradient, a radial gradient of pure red to transparent from the middle on top of that, and then a circle of pure blue with a slight transparent blue tint inside. The trick is that there's a really simple little shader applied to it (code for those who want to commandeer, feel free to use for anything, but note that this is used in the Phaser WebGL pipline and will not just drag-and-drop into most projects) :
precision mediump float; uniform sampler2D uMainSampler; uniform float uTime; varying vec2 outTexCoord; void main() { vec4 c = texture2D(uMainSampler, outTexCoord); float t = fract(sin(c.g * 12.9898) * 43758.5453); float a = clamp(fract(c.r + uTime * 0.05 + t) * c.r * 2.0 + c.b, 0.0, 1.0); gl_FragColor = vec4(0.6 * a, 0.7*a, 0.8*a, a); }
The gist of it is that it takes the image, uses the amount of Green at a specific pixel to determine which 'column' of dust expanding from the center to the edge belongs there. Then, the 'closeness' of the dust is specified by the Red value of the pixel, and more visibility is granted to specific small range of Red values over a function of time with a little bit of pseudo-randomness to make it look nice. Mask it off with the Blue, and increment over time, and voilla - super cheap space dust particle thingy. Obviously, we use shaders quite heavily for a lot of the things that do weird little cyclical movements, including things like the stage shimmy and the wavy effect for the company logo. However, you'd probably be just as surprised how much isn't shaders, and is instead just standard compositing and masking, like the stage background and UI elements. Some clever design and a strong art direction do a ton more for a game's visuals than just throwing raw computational power at it.
2 notes
·
View notes
Text

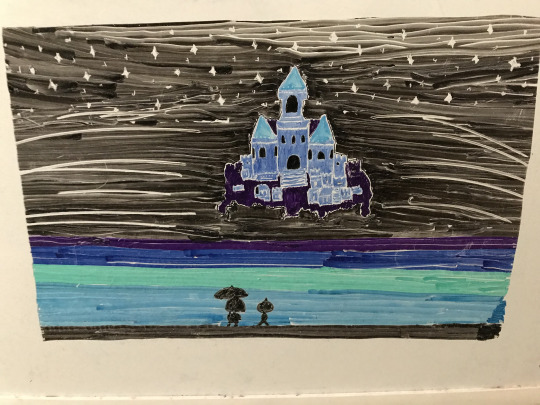
After the tight cloisters of the rest of Waterfall, this part of the cavern opens into a massive chamber, dwarfing you and the monster kid by your side. A subterranean lake stretches before you in a gradient of blues and greens and purples. Far beyond it, glowing faintly in the darkness, the city of New Home stretches toward the cavern roof, its smaller buildings clustered around a pale blue castle topped by conical spires and lined in stone parapets like a fairytale castle. Dozens of gems sparkle in the ceiling above like crown jewels, casting a soft light on the underground below. There it is. The end of your journey. It’s still a long way off, but for the first time you truly see, and comprehend, the magnitude of this kingdom. You and the monster kid stand silhouetted against the splendor of the view for a long time, keeping a reverent silence between you. Then, wordlessly, you both turn and continue along the path, the view remaining in your mind’s eye as you disappear into another enclosed tunnel.
#undertale#frisk the goat#waterfall#art#it's on a dry erase board#don't ask how long that took#one dried-out marker resurrected and died again in the span of making this
2 notes
·
View notes
Text
PVC Extruders: A Comprehensive Guide to Technology and Applications

Polyvinyl chloride (PVC) is one of the most versatile thermoplastics, used in everything from construction materials to medical devices. At the heart of PVC manufacturing lies the PVC extruder, a machine that melts, shapes, and forms PVC into profiles, sheets, pipes, and more. While consumers interact with PVC products daily—whether in plumbing pipes, window frames, or packaging—few understand the precision engineering behind their production.
Industries ranging from construction to automotive rely on PVC extrusion for its efficiency, durability, and customization capabilities. The right extruder can mean the difference between a high-performance product and one that fails under stress.
This guide explores how PVC extruders work, the different types available, key components, and their industrial applications. Whether you're a manufacturer selecting equipment or an engineer optimizing processes, understanding PVC extrusion is critical for quality production.
View Jieya PVC extrusion more to get into the details
What is the Extrusion Process for PVC?
The extrusion process for PVC is a controlled method used to produce high-quality, durable plastic components with consistent shapes and profiles. It involves feeding raw PVC material—usually in the form of pellets or powder—into an extrusion machine, where it undergoes heating, melting, and shaping. This process is widely utilized in industrial and commercial sectors to create products such as pipes, window frames, and electrical conduits.
How does the extrusion process work with PVC?
The PVC extrusion process begins with feeding raw material into the machine's hopper. The material is driven through a heated barrel by a rotating screw, where the friction and heaters gradually melt the PVC. Once melted, the material is pushed through a precisely shaped die, which determines the final profile of the product. Upon exiting the die, the extruded material is cooled using water or air to solidify its form. Additional processes, such as cutting or coiling, may follow depending on the product specifications.
PVC extrusion involves melting PVC resin (either rigid or flexible) and forcing it through a die to create continuous shapes. The process consists of several stages:
1. Feeding & Melting
1. PVC resin, often mixed with stabilizers, plasticizers, and fillers, is fed into the extruder’s hopper.
2. The material moves through the barrel, where heating elements and shear forces from the screw gradually melt it into a viscous fluid .
3. Compression & Homogenization
1. The screw design (typically conical or parallel twin-screw) compresses the material, ensuring uniform melting and eliminating air pockets.
2. For rigid PVC, low-shear screws prevent degradation, while flexible PVC may use higher shear for better mixing .
5. Extrusion Through the Die
1. The molten PVC is pushed through a shaped die, forming profiles, sheets, or pipes.
2. Temperature control is critical—too hot, and PVC degrades; too cold, and flow becomes uneven .
7. Cooling & Sizing
1. The extruded product passes through cooling tanks or calibrators to solidify its shape.
2. For foam PVC, controlled cooling ensures a stable cell structure .
Critical Components of a PVC Extruder
1. The Screw
· Design: Varies by material—gradient screws for rigid PVC, short compression zones for flexible PVC .
· Compression Ratio: Typically 2.5–4.0 for rigid PVC; higher for foam applications .
· L/D Ratio: A 25:1 ratio is common for uniform melting .
2. Barrel & Heating Zones
· Divided into feed, compression, and metering zones, each with precise temperature control.
· Overheating risks degradation (PVC breaks down at ~200°C) .
3. Die & Calibration
· Determines final product shape (e.g., pipe dies, sheet dies).
· Post-extrusion sizing ensures dimensional accuracy .
4. Downstream Equipment
· Cooling tanks, pullers, cutters – Essential for maintaining product integrity.
· Foam PVC lines require precise calibrators to stabilize cell structure .
Find more info now
What are the benefits of plastic extrusion?
Plastic extrusion offers several key benefits, including high efficiency, cost-effectiveness, and versatility. It allows for the production of continuous profiles, minimizing material waste and ensuring consistent output. Additionally, the process can accommodate complex shapes and provide flexibility in using different additives to enhance material properties such as UV resistance or impact strength. This makes plastic extrusion a preferred method for creating durable and customized products.
What materials can be extruded?
While PVC is one of the most commonly extruded materials due to its durability and versatility, a wide range of other materials can also undergo extrusion. These include polyethylene (PE), polypropylene (PP), polystyrene (PS), and thermoplastic elastomers (TPE). Each material offers unique properties, making extrusion adaptable to various applications, from industrial components to household items.
What Types of Extruders are Used in PVC Pipe Extrusion?
Extruders play a critical role in the PVC pipe extrusion process by shaping the raw material into desired profiles effectively and consistently. The two main types of extruders utilized in this application are single screw extruders and twin screw extruders. Each type has specific strengths, making them suitable for different processing requirements and production goals.
Types of PVC Extruders
Different extrusion processes require specialized machines. The main types include:
Extruder Type
Key Features
Applications
Single-Screw
Simple design, cost-effective, suitable for rigid PVC
Pipes, profiles, basic sheet extrusion
Twin-Screw (Parallel)
High mixing efficiency, better for compounding
PVC blends, foam sheets, complex profiles
Twin-Screw (Conical)
Gradual compression, lower shear stress
High-precision rigid PVC products
Co-Extrusion
Multiple layers for enhanced properties
Barrier films, multi-layer sheets
Specialized Extruders:
· Foam PVC Extruders – Use chemical blowing agents (e.g., AC/Na₂CO₃) to create lightweight, insulating panels .
· Desktop & Lab-Scale Extruders – For R&D or small-batch production (e.g., XH-432 series, 5 kg/h output) .
What is the Difference Between Single Screw and Twin Screw Extruders?
Single screw extruders are simpler in design, featuring a single helical screw that transports and melts PVC material within the barrel. They are cost-efficient, making them ideal for applications requiring straightforward processing with moderate output and less material mixing. Conversely, twin screw extruders consist of two intermeshing screws, which can rotate in the same or opposite directions, allowing for improved control over material mixing, feeding, and output. Twin screw extruders handle high-performance applications and complex formulations more effectively than single screw systems.
What are Twin-Screw Extruders and Their Advantages?
Twin-screw extruders are highly specialized machines designed to enhance the processing of PVC and other polymers through superior mixing, melting, and material homogenization. Their design enables better shear and temperature control, which is essential for processing rigid or highly filled PVC compounds. Advantages of twin screw extruders include enhanced efficiency in compounding, improved material consistency, and a higher throughput capacity. Additionally, these extruders excel at handling materials with additives, such as stabilizers or fillers, making them the go-to choice for demanding industrial pipe production.
How Does Screw Design Affect Extrusion Capabilities?
Screw design is a critical factor determining the performance, efficiency, and output quality of an extruder. Key design aspects, such as screw diameter, length-to-diameter ratio (L/D ratio), and flight geometry, impact the screw’s ability to feed, compress, melt, and discharge material effectively. For PVC extrusion, screws are often tailored to optimize shear stress and ensure uniform melting without degrading the polymer. For example, twin screw designs allow for customizable configurations, enabling precise control over mixing intensity and temperature distribution. Selecting the right screw design ensures consistent product quality, minimal material waste, and reliable production at an industrial scale.
Key Components of an Extrusion Machine
Extrusion machines are complex systems comprising various components that work together to process raw materials into finished products efficiently. Each part of the machine plays a specific role in ensuring optimal performance, precision, and reliability during the extrusion process.
What Roles Do the Hopper and Barrel Play in Plastic Extrusion?
The hopper and barrel are fundamental to the operation of an extrusion machine. The hopper serves as the entry point for the raw material, typically in the form of pellets, granules, or powder. It is designed to regulate the consistent feeding of material into the barrel, preventing issues such as uneven flow or material blockages.
The barrel, which encases the screw, is the primary component responsible for processing the material. It provides a controlled heating environment that enables the material to soften, melt, and reach the desired viscosity for shaping. The heating zones along the barrel can be precisely adjusted to meet the requirements of specific polymer types, ensuring uniform temperature and avoiding degradation.
How Does Energy Consumption Factor Into Extrusion Machinery?
Energy efficiency is a critical consideration in extrusion processes, as these machines require substantial power to operate. Modern extrusion systems incorporate advanced designs such as energy-efficient motors, insulated barrels, and optimized screw geometries to reduce energy loss. Additionally, smart controls and software can monitor energy usage in real time, allowing operators to identify inefficiencies and make necessary adjustments. Reducing energy consumption not only lowers operational costs but also minimizes the environmental impact of industrial production.
What Safety Features Are Included in Modern Extrusion Machines?
Safety is paramount in the operation of extrusion machinery due to the high temperatures, pressures, and moving parts involved. Modern extrusion machines are equipped with features such as emergency stop systems, safety guards, and interlock mechanisms to protect operators. Temperature sensors and pressure monitors help ensure the machinery operates within safe limits, reducing the risk of thermal runaway or mechanical failure. Furthermore, automated shutdown systems can activate if deviations from preset parameters occur, safeguarding both the equipment and personnel. These advancements reflect the industry’s commitment to creating safer and more efficient production environments.
Applications of PVC Pipe Extrusion
Polyvinyl chloride (PVC) pipe extrusion is widely utilized in various industries due to its versatility, durability, and cost-effectiveness. The extrusion process enables the production of pipes with consistent dimensions, tailored properties, and high performance, making PVC pipes suitable for numerous applications in construction, agriculture, and industrial sectors.
Where is PVC pipe commonly used?
PVC pipes are extensively used in water distribution systems, including both residential and municipal pipelines, due to their ability to resist corrosion and chemical degradation. Additionally, they play a key role in agricultural irrigation systems, ensuring reliable water supply to crops. Apart from water management, PVC pipes are employed in drainage systems, conduit installations for electrical wiring, and industrial fluid handling, illustrating their adaptability across varied environments.
What are the advantages of using rigid PVC in pipe production?
Rigid PVC offers several advantages for pipe production. It has high tensile strength and impact resistance, making it well-suited to withstand external pressures and mechanical stress. Its excellent thermal stability allows the pipes to maintain performance under varying temperature conditions, while the inherent chemical resistance ensures performance in contact with a variety of substances. Furthermore, rigid PVC is lightweight, simplifying transportation and installation, which can significantly reduce labor costs.
How does plastic processing impact the quality of PVC pipes?
The quality of PVC pipes is strongly influenced by the precision and control during the plastic processing phase. Consistent extrusion parameters such as temperature, pressure, and speed are essential to ensure uniform wall thickness and dimensionally accurate pipes. Additive selection during processing—such as stabilizers, lubricants, and UV inhibitors—affects the final product's mechanical properties, longevity, and resistance to environmental factors. Advanced processing technologies, such as computer-controlled extrusion, further enhance quality by minimizing defects and ensuring repeatable production results.
How to Choose the Right Extrusion Manufacturer?
Choosing the right extrusion manufacturer is critical to ensuring the quality, consistency, and performance of your finished products. A thorough evaluation of potential partners can help you identify a manufacturer that meets your technical requirements and provides reliable solutions.
What Should You Consider When Selecting an Extrusion Manufacturer?
When selecting an extrusion manufacturer, start by assessing their experience and expertise in your specific industry. Look for a company with a proven track record of delivering high-quality results, particularly for projects similar to yours. Additionally, evaluate their production capacity and equipment capabilities to ensure they can meet your volume and technical specifications. Other key factors include lead times, cost efficiency, and their ability to collaborate on custom solutions tailored to your design needs.
How Can You Evaluate the Extrusion Capabilities of a Manufacturer?
To accurately evaluate a manufacturer’s extrusion capabilities, request detailed information about their production processes, materials expertise, and quality control systems. The manufacturer should be able to handle a wide range of materials and offer advanced technologies, such as multi-layer extrusion, co-extrusion, or specialized profiles. Visiting their facility or reviewing samples of their work can also provide valuable insight into their technical proficiency and attention to detail.
What Certifications Should a Reputable Extrusion Manufacturer Have?
A reputable extrusion manufacturer should hold relevant industry certifications that demonstrate their commitment to quality and compliance. Look for certifications such as ISO 9001 for quality management systems, ISO 14001 for environmental management, and any application-specific certifications relevant to your industry (e.g., NSF for food and beverage applications or UL for safety compliance). These credentials indicate that the manufacturer adheres to stringent standards and consistently delivers high-quality, safe, and reliable products.
What Innovations are Changing the Plastic Extrusion Industry?
The plastic extrusion industry is undergoing significant transformation driven by technological advancements and a growing focus on sustainability. These innovations are not only improving production efficiency but also addressing environmental concerns and enabling greater customization to meet evolving market demands.
How is Custom Plastic Extrusion Evolving?
Custom plastic extrusion is evolving through the integration of advanced machinery and digital technologies. The use of computer-aided design (CAD) and simulation software allows manufacturers to create highly accurate and intricate profiles tailored to specific client needs. Additionally, advancements in materials science have introduced new polymer blends and composites that enhance performance characteristics such as heat resistance, UV stability, and mechanical strength. Automation, including real-time monitoring systems, is also enabling manufacturers to reduce waste, improve precision, and accelerate production timelines.
What is the Impact of Plastic Waste on Extrusion Processes?
Plastic waste has become a critical factor influencing extrusion processes as industries aim to adopt more sustainable practices. Recycling initiatives are integrating post-consumer and industrial plastic waste into extrusion feedstock to minimize the reliance on virgin materials. However, dealing with contaminated or inconsistent recycled materials presents challenges such as equipment wear, processing inefficiencies, and quality issues. Innovations such as filtration systems and advanced sorting technologies are being utilized to ensure higher-quality input materials, allowing for more reliable and eco-friendly extrusion outputs.
What Future Trends are Expected in Plastic Extrusion Technology?
The future of plastic extrusion technology lies in sustainability, automation, and smart manufacturing. Developments in biodegradable and compostable polymers are expected to open new opportunities for environmentally friendly product applications. Industry 4.0 technologies, including IoT-enabled machinery, predictive maintenance, and AI-driven analytics, are poised to optimize production lines and reduce downtime. Additionally, energy-efficient extrusion systems and renewable power integration will further align the industry with global sustainability goals. The push for lightweight, durable, and multifunctional materials will continue to drive innovation in design and production capabilities.
Frequently Asked Questions
Q: What is PVC extrusion and how does it work?
A: PVC extrusion is a manufacturing process that involves melting polyvinyl chloride (PVC) plastic and shaping it into specific profiles using plastic extruders. The molten plastic is forced through a die to create continuous shapes, which can then be cooled and cut to length.
Q: What are the common extrusion materials used in PVC extrusion?
A: Common extrusion materials for PVC extrusion include polyvinyl chloride (PVC) itself, as well as other thermoplastics such as polyethylene (hdpe) and polypropylene. These materials are selected based on the desired properties of the final product.
Q: What types of plastic extruders are used in the PVC extrusion process?
A: There are several types of plastic extruders used in PVC extrusion, including single screw extruders and parallel twin screw extruders. The parallel twin configuration is particularly effective for processing PVC due to its ability to mix and homogenize the material efficiently.
Q: How does the torque of the extruder affect the PVC extrusion process?
A: The torque of the extruder is crucial for ensuring that the molten plastic is adequately mixed and processed. Higher torque levels typically allow for better handling of high-viscosity materials and can enhance the efficiency of the extrusion process.
Q: What are the benefits of using modular extrusion lines for PVC profiles?
A: Modular extrusion lines offer flexibility and scalability, allowing manufacturers to easily adjust production setups for different PVC profiles. This adaptability can lead to improved efficiency and reduced downtime in the plastics industry.
Q: Can PVC extrusion be used for both standard and custom applications?
A: Yes, PVC extrusion can be tailored for both standard and custom applications. Manufacturers can create a wide range of PVC profiles and shapes to meet specific customer requirements, ensuring versatility in the production process.
Q: What role does the temperature of the barrel play in the PVC extrusion process?
A: The temperature of the barrel is critical during the PVC extrusion process as it affects the melting and flow characteristics of the polymer. Maintaining optimal temperature levels ensures consistent processing and high-quality output of PVC plastic products.
Q: What is the significance of high-volume manufacturing in PVC extrusion?
A: High-volume manufacturing in PVC extrusion allows for the production of large quantities of plastic profiles efficiently. This is essential for meeting market demands and maximizing cost-effectiveness in the production of PVC products.
Q: How can the extrusion process affect the thickness of PVC profiles?
A: The extrusion process can be finely tuned to achieve varying thicknesses of PVC profiles by adjusting the die and the extrusion speed. Precise control over these parameters is crucial for producing consistent and high-quality PVC products.
The Bottom Line
PVC extruders are the backbone of countless industries, transforming raw resin into functional products through precision engineering. From high-output twin-screw systems for construction materials to compact lab extruders for prototyping, the right machine ensures efficiency and quality.
For manufacturers, selecting the ideal extruder—whether for rigid pipes, foam panels, or multi-layer films—requires balancing material properties, screw design, and thermal control. Partnering with experienced suppliers ensures optimal performance, whether you’re mass-producing or innovating with new formulations.
Choose wisely, and your PVC extrusion process will deliver durable, high-performance products that meet the demands of modern industry.
References:
· [1] Study on extrusion technology of rigid low-foamed PVC sheet
· [4] Battenfeld-Cincinnati PVC sheet extrusion lines
· [5] Conical twin-screw extruder specifications
· [6] PVC extruder heating zones explained
· [7] Single vs. twin-screw extruders for PVC pipes
· [8][10] Desktop PVC extruders (XH-432 series)
1 note
·
View note
Text
I got my hands on something pretty cool when I first started learning magic bullshit.
>It's a photo of a very-pasty, kind of grubby hand, holding a dingy-looking doorknob. The hand is pudgy, with a handful of simple rings, mostly just metal bands, spread across her fingers, the dark-blue coat-sleeve stained with oil. The doorknob itself is an brown, unpolished thing, with a lever design and the kind of bend in the metal that you only really get from hitting it with a hammer.
>The next photo just chalk on a brick wall, the rough approximation of a door, with that handle somehow wedged into the mortar between bricks. The truly uncanny thing about this photo is contrasts, though. Magic doors? A dime a dozen, but the lines are wiggly messes, Bellamy's inability to draw a straight line made worse by the door being cracked open, just a hair. The slapdash execution is even more stark when comparing the outline of the "door" part of a magic door, to the runes drawn along the edge of the door. Even from a distance of a few feet, the arcane symbols are perfectly-straight lines whose bright glow is a testament to their quality.
>On the other side of the door is another plane. Truly a fantastical thing, well beyond Bellamy's scope to have ever made -or made full use of. This pocket dimension appears to truly go on forever, an endless forest of conical spires, so far distant from the much, much much smaller one that Bellamy herself has entered into, all fallen into disrepair like some lost city of long-dead giants. The sky is cast in a dark-green, stormy hue, making a dead plane look downright dreary, even without the perpetually-distant backdrop. Over the edge of the balcony Bellamy's taken the photo from is what looks like white sand, stretching on out to those giant spires.
>But the distance to the ground is false, just like the distance to the spires. Only the building ahead is true. Bellamy herself appears to have claimed this single splinter amid the forest for herself, inheriting by right of plunder the long-scavenged residence of some long-dead sorcerer, or something. Bellamy's little pocket-dimension house has been dealt a number of blows over time, and she's done her best to cover the walls with tarps and bits of plyboard, with one visible section of the spire looking somewhat livable from the outside. A piece of campy, tropical clipart is edited into the corner of the photo, with the words "Home Sweet Home!" written in a sunset-colored gradient.
1 note
·
View note
Text
@import url(https://fonts.bunny.net/css?family=ibm-plex-sans:400,600); #_form_3_font-size:14px;line-height:1.6;font-family:arial, helvetica, sans-serif;margin:0#_form_3_ *outline:0._form_hidedisplay:none;visibility:hidden._form_showdisplay:block;visibility:visible#_form_3_._form-toptop:0#_form_3_._form-bottombottom:0#_form_3_._form-leftleft:0#_form_3_._form-rightright:0#_form_3_ input[type="text"],#_form_3_ input[type="tel"],#_form_3_ input[type="date"],#_form_3_ textareapadding:6px;height:auto;border:#979797 1px solid;border-radius:4px;color:#000000 !important;font-size:14px;-webkit-box-sizing:border-box;-moz-box-sizing:border-box;box-sizing:border-box#_form_3_ textarearesize:none#_form_3_ ._submit-webkit-appearance:none;cursor:pointer;font-family:arial, sans-serif;font-size:14px;text-align:center;background:#004CFF !important;border:0 !important;-moz-border-radius:4px !important;-webkit-border-radius:4px !important;border-radius:4px !important;color:#FFFFFF !important;padding:10px !important#_form_3_ ._submit:disabledcursor:not-allowed;opacity:0.4#_form_3_ ._submit.processingposition:relative#_form_3_ ._submit.processing::beforecontent:"";width:1em;height:1em;position:absolute;z-index:1;top:50%;left:50%;border:double 3px transparent;border-radius:50%;background-image:linear-gradient(#004CFF, #004CFF), conic-gradient(#004CFF, #FFFFFF);background-origin:border-box;background-clip:content-box, border-box;animation:1200ms ease 0s infinite normal none running _spin#_form_3_ ._submit.processing::aftercontent:"";position:absolute;top:0;bottom:0;left:0;right:0;background:#004CFF !important;border:0 !important;-moz-border-radius:4px !important;-webkit-border-radius:4px !important;border-radius:4px !important;color:#FFFFFF !important;padding:10px !important@keyframes _spin0%transform:translate(-50%, -50%) rotate(90deg)100%transform:translate(-50%, -50%) rotate(450deg)#_form_3_ ._close-iconcursor:pointer;background-image:url("https://d226aj4ao1t61q.cloudfront.net/esfkyjh1u_forms-close-dark.png");background-repeat:no-repeat;background-size:14.2px 14.2px;position:absolute;display:block;top:11px;right:9px;overflow:hidden;width:16.2px;height:16.2px#_form_3_ ._close-icon:beforeposition:relative#_form_3_ ._form-bodymargin-bottom:30px#_form_3_ ._form-image-leftwidth:150px;float:left#_form_3_ ._form-content-rightmargin-left:164px#_form_3_ ._form-brandingcolor:#fff;font-size:10px;clear:both;text-align:left;margin-top:30px;font-weight:100#_form_3_ ._form-branding ._logodisplay:block;width:130px;height:14px;margin-top:6px;background-image:url("https://d226aj4ao1t61q.cloudfront.net/hh9ujqgv5_aclogo_li.png");background-size:130px auto;background-repeat:no-repeat#_form_3_ .form-sr-onlyposition:absolute;width:1px;height:1px;padding:0;margin:-1px;overflow:hidden;clip:rect(0, 0, 0, 0);border:0#_form_3_ ._form-label,#_form_3_ ._form_element ._form-labelfont-weight:bold;margin-bottom:5px;display:block#_form_3_._dark ._form-brandingcolor:#333#_form_3_._dark ._form-branding ._logobackground-image:url("https://d226aj4ao1t61q.cloudfront.net/jftq2c8s_aclogo_dk.png")#_form_3_ ._form_elementposition:relative;margin-bottom:10px;font-size:0;max-width:100%#_form_3_ ._form_element *font-size:14px#_form_3_ ._form_element._clearclear:both;width:100%;float:none#_form_3_ ._form_element._clear:afterclear:left#_form_3_ ._form_element input[type="text"],#_form_3_ ._form_element input[type="date"],#_form_3_ ._form_element select,#_form_3_ ._form_element textarea:not(.g-recaptcha-response)display:block;width:100%;-webkit-box-sizing:border-box;-moz-box-sizing:border-box;box-sizing:border-box;font-family:inherit#_form_3_ ._field-wrapperposition:relative#_form_3_ ._inline-stylefloat:left#_form_3_ ._inline-style input[type="text"]width:150px#_form_3_ ._inline-style:not(._clear)+._inline-style:not(._clear)margin-left:20px#_form_3_ ._form_element img._form-imagemax-width:100%#_form_3_ ._form_element ._form-fieldsetborder:0;padding:0.01em 0 0 0;margin:0;min-width:0#_form_3_ ._clear-elementclear:left#_form_3_ .
_full_widthwidth:100%#_form_3_ ._form_full_fielddisplay:block;width:100%;margin-bottom:10px#_form_3_ input[type="text"]._has_error,#_form_3_ textarea._has_errorborder:#F37C7B 1px solid#_form_3_ input[type="checkbox"]._has_erroroutline:#F37C7B 1px solid#_form_3_ ._errordisplay:block;position:absolute;font-size:14px;z-index:10000001#_form_3_ ._error._abovepadding-bottom:4px;bottom:39px;right:0#_form_3_ ._error._belowpadding-top:8px;top:100%;right:0#_form_3_ ._error._above ._error-arrowbottom:-4px;right:15px;border-left:8px solid transparent;border-right:8px solid transparent;border-top:8px solid #FFDDDD#_form_3_ ._error._below ._error-arrowtop:0;right:15px;border-left:8px solid transparent;border-right:8px solid transparent;border-bottom:8px solid #FFDDDD#_form_3_ ._error-innerpadding:12px 12px 12px 36px;background-color:#FFDDDD;background-image:url("data:image/svg+xml,%3Csvg width='16' height='16' viewBox='0 0 16 16' fill='none' xmlns='http://www.w3.org/2000/svg'%3E%3Cpath fill-rule='evenodd' clip-rule='evenodd' d='M16 8C16 12.4183 12.4183 16 8 16C3.58172 16 0 12.4183 0 8C0 3.58172 3.58172 0 8 0C12.4183 0 16 3.58172 16 8ZM9 3V9H7V3H9ZM9 13V11H7V13H9Z' fill='%23CA0000'/%3E%3C/svg%3E");background-repeat:no-repeat;background-position:12px center;font-size:14px;font-family:arial, sans-serif;font-weight:600;line-height:16px;color:#000;text-align:center;text-decoration:none;-webkit-border-radius:4px;-moz-border-radius:4px;border-radius:4px;box-shadow:0px 1px 4px rgba(31, 33, 41, 0.298295)@media only screen and (max-width:319px)#_form_3_ ._error-innerpadding:7px 7px 7px 25px;font-size:12px;line-height:12px;background-position:4px center;max-width:100px;white-space:nowrap;overflow:hidden;text-overflow:ellipsis#_form_3_ ._error-inner._form_errormargin-bottom:5px;text-align:left#_form_3_ ._button-wrapper ._error-inner._form_errorposition:static#_form_3_ ._error-inner._no_arrowmargin-bottom:10px#_form_3_ ._error-arrowposition:absolute;width:0;height:0#_form_3_ ._error-htmlmargin-bottom:10px.pika-singlez-index:10000001 !important#_form_3_ input[type="text"].datetime_datewidth:69%;display:inline#_form_3_ select.datetime_timewidth:29%;display:inline;height:32px#_form_3_ input[type="date"].datetime_datewidth:69%;display:inline-flex#_form_3_ input[type="time"].datetime_timewidth:29%;display:inline-flex@media (min-width:320px) and (max-width:667px)::-webkit-scrollbardisplay:none#_form_3_margin:0;width:100%;min-width:100%;max-width:100%;box-sizing:border-box#_form_3_ *-webkit-box-sizing:border-box;-moz-box-sizing:border-box;box-sizing:border-box;font-size:1em#_form_3_ ._form-contentmargin:0;width:100%#_form_3_ ._form-innerdisplay:block;min-width:100%#_form_3_ ._form-title,#_form_3_ ._inline-stylemargin-top:0;margin-right:0;margin-left:0#_form_3_ ._form-titlefont-size:1.2em#_form_3_ ._form_elementmargin:0 0 20px;padding:0;width:100%#_form_3_ ._form-element,#_form_3_ ._inline-style,#_form_3_ input[type="text"],#_form_3_ label,#_form_3_ p,#_form_3_ textarea:not(.g-recaptcha-response)float:none;display:block;width:100%#_form_3_ ._row._checkbox-radio labeldisplay:inline#_form_3_ ._row,#_form_3_ p,#_form_3_ labelmargin-bottom:0.7em;width:100%#_form_3_ ._row input[type="checkbox"],#_form_3_ ._row input[type="radio"]margin:0 !important;vertical-align:middle !important#_form_3_ ._row input[type="checkbox"]+span labeldisplay:inline#_form_3_ ._row span labelmargin:0 !important;width:initial !important;vertical-align:middle !important#_form_3_ ._form-imagemax-width:100%;height:auto !important#_form_3_ input[type="text"]padding-left:10px;padding-right:10px;font-size:16px;line-height:1.3em;-webkit-appearance:none#_form_3_ input[type="radio"],#_form_3_ input[type="checkbox"]display:inline-block;width:1.3em;height:1.3em;font-size:1em;margin:0 0.3em 0 0;vertical-align:baseline#_form_3_ button[type="submit"]padding:20px;font-size:1.5em#_form_3_ ._inline-stylemargin:20px 0 0 !important#_form_3_ .sms_consent_checkboxoverflow:auto#_form_3_ .sms_consent_checkbox input[type="checkbox"]float:left;margin:5px 10px 10px 0#_form_3_ .
sms_consent_checkbox .sms_consent_messagedisplay:inline;width:95%;float:left;text-align:left;margin-bottom:10px#_form_3_ .sms_consent_checkbox .sms_consent_message.sms_consent_miniwidth:90%#_form_3_position:relative;text-align:left;margin:25px auto 0;padding-top:20px;padding-right:20px;padding-bottom:20px;padding-left:20px;-webkit-box-sizing:border-box;-moz-box-sizing:border-box;box-sizing:border-box;background:#FFFFFF !important;border:0px solid #B0B0B0 !important;max-width:500px;-moz-border-radius:0px !important;-webkit-border-radius:0px !important;border-radius:0px !important;color:#000000#_form_3_._inline-form,#_form_3_._inline-form ._form-contentfont-family:"IBM Plex Sans", Helvetica, sans-serif#_form_3_._inline-form ._row span,#_form_3_._inline-form ._row labelfont-family:"IBM Plex Sans", Helvetica, sans-serif;font-size:14px;font-weight:400;line-height:1.6em#_form_3__inlineform input[type="text"],#_form_3__inlineform input[type="date"],#_form_3__inlineform input[type="tel"],#_form_3__inlineform select,#_form_3__inlineform textarea:not(.g-recaptcha-response)font-family:"IBM Plex Sans", Helvetica, sans-serif;font-size:14px;font-weight:400;font-color:#000000;line-height:1.6em#_form_3_._inline-form ._html-code *:not(h1, h2, h3, h4, h5, h6),#_form_3_._inline-form ._form-thank-youfont-family:"IBM Plex Sans", Helvetica, sans-serif#_form_3_._inline-form ._form-label,#_form_3_._inline-form ._form-emailidentifier,#_form_3_._inline-form ._form-checkbox-option-labelfont-family:"IBM Plex Sans", Helvetica, sans-serif;font-size:14px;font-weight:700;line-height:1.6em#_form_3_._inline-form ._submitmargin-top:12px;font-family:"IBM Plex Sans", Helvetica, sans-serif#_form_3_._inline-form ._html-code h1,#_form_3_._inline-form ._html-code h2,#_form_3_._inline-form ._html-code h3,#_form_3_._inline-form ._html-code h4,#_form_3_._inline-form ._html-code h5,#_form_3_._inline-form ._html-code h6,#_form_3_._inline-form ._form-titlefont-size:22px;line-height:normal;font-weight:600;margin-bottom:0#_form_3_._inline-form ._form-brandingfont-family:"IBM Plex Sans", Helvetica, sans-serif;font-size:13px;font-weight:100;font-style:normal;text-decoration:none#_form_3_:before,#_form_3_:aftercontent:" ";display:table#_form_3_:afterclear:both#_form_3_._inline-stylewidth:auto;display:inline-block#_form_3_._inline-style input[type="text"],#_form_3_._inline-style input[type="date"]padding:10px 12px#_form_3_._inline-style button._inline-styleposition:relative;top:27px#_form_3_._inline-style pmargin:0#_form_3_._inline-style ._button-wrapperposition:relative;margin:16px 12.5px 0 20px#_form_3_ ._form-thank-youposition:relative;left:0;right:0;text-align:center;font-size:18px#_form_3_ ._form-pc-confirmation ._submitmargin-top:16px@media (min-width:320px) and (max-width:667px)#_form_3_._inline-form._inline-style ._inline-style._button-wrappermargin-top:20px !important;margin-left:0 !important#_form_3_ .iti.iti--allow-dropdown.iti--separate-dial-codewidth:100%#_form_3_ .iti inputwidth:100%;height:32px;border:#979797 1px solid;border-radius:4px#_form_3_ .iti--separate-dial-code .iti__selected-flagbackground-color:#FFFFFF;border-radius:4px#_form_3_ .iti--separate-dial-code .iti__selected-flag:hoverbackground-color:rgba(0, 0, 0, 0.05)#_form_3_ .iti__country-listborder-radius:4px;margin-top:4px;min-width:460px#_form_3_ .iti__country-list--dropupmargin-bottom:4px#_form_3_ .phone-error-hiddendisplay:none#_form_3_ .phone-errorcolor:#E40E49#_form_3_ .phone-input-errorborder:1px solid #E40E49 !important#_form_3_._inline-form ._form-content ._form-list-subscriptions-field fieldsetmargin:0;margin-bottom:1.1428571429em;border:none;padding:0#_form_3_._inline-form ._form-content ._form-list-subscriptions-field fieldset:last-childmargin-bottom:0#_form_3_._inline-form ._form-content ._form-list-subscriptions-field legendmargin-bottom:1.1428571429em#_form_3_._inline-form ._form-content ._form-list-subscriptions-field labeldisplay:flex;align-items:flex-start;justify-content:flex-start;margin-bottom:0.
8571428571em#_form_3_._inline-form ._form-content ._form-list-subscriptions-field label:last-childmargin-bottom:0#_form_3_._inline-form ._form-content ._form-list-subscriptions-field inputmargin:0;margin-right:8px#_form_3_._inline-form ._form-content ._form-list-subscriptions-field ._form-checkbox-option-labeldisplay:block;font-weight:400;margin-top:-4px#_form_3_._inline-form ._form-content ._form-list-subscriptions-field ._form-checkbox-option-label-with-descriptiondisplay:block;font-weight:700;margin-top:-4px#_form_3_._inline-form ._form-content ._form-list-subscriptions-field ._form-checkbox-option-descriptionmargin:0;font-size:0.8571428571em#_form_3_._inline-form ._form-content ._form-list-subscriptions-field ._form-subscriptions-unsubscribe-all-descriptionline-height:normal;margin-top:-2px Cuenta* Correo electrónico* Número de empleados 45658 26 - 50 51 - 100 101 - 500 501 - 1000 Más de 1000 Ingresos anuales Menos de 100.000 100.000 - 500.000 501.000 - 1M 1M - 5M 6M - 10M Más de 10.000 Industrial/Vertical Contabilidad/Financiero Consultoría/Agencia Bloguero/Autor E-commerce/ventas al por menor Entretenimiento/Eventos Fitness/Nutrición Cuidado sanitario Medios/Publicidad Sin ánimo de lucro Formaciones online/Educación Mercado inmobiliario Software Viajes/Hospitalidad Otro ¿Cuál es tu nivel de ingresos? De 0 a 500 euros De 501 a 1.000 euros Más de 1.000 euros Enviar window.cfields = []; window._show_thank_you = function(id, message, trackcmp_url, email) var form = document.getElementById('_form_' + id + '_'), thank_you = form.querySelector('._form-thank-you'); form.querySelector('._form-content').style.display = 'none'; thank_you.innerHTML = message; thank_you.style.display = 'block'; const vgoAlias = typeof visitorGlobalObjectAlias === 'undefined' ? 'vgo' : visitorGlobalObjectAlias; var visitorObject = window[vgoAlias]; if (email && typeof visitorObject !== 'undefined') visitorObject('setEmail', email); visitorObject('update'); else if (typeof(trackcmp_url) != 'undefined' && trackcmp_url) // Site tracking URL to use after inline form submission. _load_script(trackcmp_url); if (typeof window._form_callback !== 'undefined') window._form_callback(id);
; window._show_unsubscribe = function(id, message, trackcmp_url, email) var form = document.getElementById('_form_' + id + '_'), unsub = form.querySelector('._form-thank-you'); var branding = form.querySelector('._form-branding'); if (branding) branding.style.display = 'none'; form.querySelector('._form-content').style.display = 'none'; unsub.style.display = 'block'; form.insertAdjacentHTML('afterend', message) const vgoAlias = typeof visitorGlobalObjectAlias === 'undefined' ? 'vgo' : visitorGlobalObjectAlias; var visitorObject = window[vgoAlias]; if (email && typeof visitorObject !== 'undefined') visitorObject('setEmail', email); visitorObject('update'); else if (typeof(trackcmp_url) != 'undefined' && trackcmp_url) // Site tracking URL to use after inline form submission. _load_script(trackcmp_url); if (typeof window._form_callback !== 'undefined') window._form_callback(id); ; window._show_error = function(id, message, html) var form = document.getElementById('_form_' + id + '_'), err = document.createElement('div'), button = form.querySelector('button'), old_error = form.querySelector('._form_error'); if (old_error) old_error.parentNode.removeChild(old_error); err.innerHTML = message; err.className = '_error-inner _form_error _no_arrow'; var wrapper = document.createElement('div'); wrapper.className = '_form-inner'; wrapper.appendChild(err); button.parentNode.insertBefore(wrapper, button); var submitButton = form.querySelector('[id^="_form"][id$="_submit"]'); submitButton.disabled = false; submitButton.classList.remove('processing'); if (html) var div = document.createElement('div'); div.className = '_error-html'; div.innerHTML = html; err.appendChild(div); ; window._show_pc_confirmation = function(id, header, detail, show, email) var form = document.getElementById('_form_' + id + '_'), pc_confirmation = form.querySelector('._form-pc-confirmation'); if (pc_confirmation.style.display === 'none') form.querySelector('._form-content').style.display = 'none'; pc_confirmation.innerHTML = "" + header + "" + "" + detail + "" + "Administrar preferencias"; pc_confirmation.style.display = 'block'; var mp = document.querySelector('input[name="mp"]'); mp.value = '0'; else form.querySelector('._form-content').style.display = 'inline'; pc_confirmation.style.display = 'none'; var hideButton = document.getElementById('hideButton'); // Add event listener to the button hideButton.addEventListener('click', function() var submitButton = document.querySelector('#_form_3_submit'); submitButton.disabled = false; submitButton.classList.remove('processing'); var mp = document.querySelector('input[name="mp"]'); mp.value = '1'; const cacheBuster = new URL(window.location.href); cacheBuster.searchParams.set('v', new Date().getTime()); window.location.href = cacheBuster.toString(); ); const vgoAlias = typeof visitorGlobalObjectAlias === 'undefined' ? 'vgo' : visitorGlobalObjectAlias; var visitorObject = window[vgoAlias]; if (email && typeof visitorObject !== 'undefined') visitorObject('setEmail', email); visitorObject('update'); else if (typeof(trackcmp_url) != 'undefined' && trackcmp_url) // Site tracking URL to use after inline form submission. _load_script(trackcmp_url); if (typeof window._form_callback !== 'undefined') window._form_callback(id); ; window._load_script = function(url, callback, isSubmit) var head = document.querySelector('head'), script = document.createElement('script'), r = false; var submitButton = document.querySelector('#_form_3_submit'); script.charset = 'utf-8'; script.src = url; if (callback)
script.onload = script.onreadystatechange = function() this.readyState == 'complete')) r = true; callback(); ; script.onerror = function() if (isSubmit) if (script.src.length > 10000) _show_error("3", "Lo sentimos, ocurrió un error con el envío. Acorta tus respuestas y vuelve a intentarlo."); else _show_error("3", "Lo sentimos, ocurrió un error con el envío. Vuelve a intentarlo."); submitButton.disabled = false; submitButton.classList.remove('processing'); head.appendChild(script); ; (function() if (window.location.search.search("excludeform") !== -1) return false; var getCookie = function(name) var match = document.cookie.match(new RegExp('(^ var setCookie = function(name, value) var now = new Date(); var time = now.getTime(); var expireTime = time + 1000 * 60 * 60 * 24 * 365; now.setTime(expireTime); document.cookie = name + '=' + value + '; expires=' + now + ';path=/; Secure; SameSite=Lax;'; var addEvent = function(element, event, func) if (element.addEventListener) element.addEventListener(event, func); else var oldFunc = element['on' + event]; element['on' + event] = function() oldFunc.apply(this, arguments); func.apply(this, arguments); ; var _removed = false; var form_to_submit = document.getElementById('_form_3_'); var allInputs = form_to_submit.querySelectorAll('input, select, textarea'), tooltips = [], submitted = false; var getUrlParam = function(name) if (name.toLowerCase() !== 'email') false; // email is a special case because a plus is valid in the email address var qString = window.location.search; if (!qString) return false; var parameters = qString.substr(1).split('&'); for (var i = 0; i < parameters.length; i++) var parameter = parameters[i].split('='); if (parameter[0].toLowerCase() === 'email') return parameter[1] === undefined ? true : decodeURIComponent(parameter[1]); return false; ; var acctDateFormat = "%m/%d/%Y"; var getNormalizedDate = function(date, acctFormat) %e).*%m/gi) !== null) return decodedDate.replace(/(\d2).*(\d2).*(\d4)/g, '$3-$2-$1'); else if (Date.parse(decodedDate)) var dateObj = new Date(decodedDate); var year = dateObj.getFullYear(); var month = dateObj.getMonth() + 1; var day = dateObj.getDate(); return `$year-$month < 10 ? `0$month` : month-$day < 10 ? `0$day` : day`; return false; ; var getNormalizedTime = function(time) var hour, minutes; var decodedTime = decodeURIComponent(time); var timeParts = Array.from(decodedTime.matchAll(/(\d1,2):(\d1,2)\W*([AaPp][Mm])?/gm))[0]; if (timeParts[3]) // 12 hour format var isPM = timeParts[3].toLowerCase() === 'pm'; if (isPM) hour = parseInt(timeParts[1]) === 12 ? '12' : `$parseInt(timeParts[1]) + 12`; else hour = parseInt(timeParts[1]) === 12 ? '0' : timeParts[1]; else // 24 hour format hour = timeParts[1]; var normalizedHour = parseInt(hour) < 10 ? `0$parseInt(hour)` : hour; var minutes = timeParts[2]; return `$normalizedHour:$minutes`; ; for (var i = 0; i < allInputs.length; i++) var regexStr = "field\\[(\\d+)\\]"; var results = new RegExp(regexStr).exec(allInputs[i].name); if (results != undefined) allInputs[i].dataset.name = allInputs[i].name.match(/\[time\]$/)
? `$window.cfields[results[1]]_time` : window.cfields[results[1]]; else allInputs[i].dataset.name = allInputs[i].name; var fieldVal = getUrlParam(allInputs[i].dataset.name); if (fieldVal) var remove_tooltips = function() for (var i = 0; i < tooltips.length; i++) tooltips[i].tip.parentNode.removeChild(tooltips[i].tip); tooltips = []; ; var remove_tooltip = function(elem) for (var i = 0; i < tooltips.length; i++) if (tooltips[i].elem === elem) tooltips[i].tip.parentNode.removeChild(tooltips[i].tip); tooltips.splice(i, 1); return; ; var create_tooltip = function(elem, text) var tooltip = document.createElement('div'), arrow = document.createElement('div'), inner = document.createElement('div'), new_tooltip = ; if (elem.type != 'radio' && elem.type != 'checkbox') tooltip.className = '_error'; arrow.className = '_error-arrow'; inner.className = '_error-inner'; inner.innerHTML = text; tooltip.appendChild(arrow); tooltip.appendChild(inner); elem.parentNode.appendChild(tooltip); else tooltip.className = '_error-inner _no_arrow'; tooltip.innerHTML = text; elem.parentNode.insertBefore(tooltip, elem); new_tooltip.no_arrow = true; new_tooltip.tip = tooltip; new_tooltip.elem = elem; tooltips.push(new_tooltip); return new_tooltip; ; var resize_tooltip = function(tooltip) ; var resize_tooltips = function() if (_removed) return; for (var i = 0; i < tooltips.length; i++) if (!tooltips[i].no_arrow) resize_tooltip(tooltips[i]); ; var validate_field = function(elem, remove) ; var needs_validate = function(el) if(el.getAttribute('required') !== null) return true if(el.name === 'email' && el.value !== "") return true if((el.id == 'field[]' ; var validate_form = function(e) var err = form_to_submit.querySelector('._form_error'), no_error = true; if (!submitted) submitted = true; for (var i = 0, len = allInputs.length; i < len; i++) var input = allInputs[i]; if (needs_validate(input)) input.type == 'time') addEvent(input, 'blur', function() this.value = this.value.trim(); validate_field(this, true); ); addEvent(input, 'input', function() validate_field(this, true); ); else if (input.type == 'radio' remove_tooltips(); for (var i = 0, len = allInputs.length; i < len; i++) var elem = allInputs[i]; if (needs_validate(elem)) if (elem.tagName.toLowerCase() !== "select") elem.value = elem.value.trim(); validate_field(elem) ? true : no_error = false; if (!no_error && e) e.preventDefault(); resize_tooltips(); return no_error; ; addEvent(window, 'resize', resize_tooltips); addEvent(window, 'scroll', resize_tooltips); var hidePhoneInputError = function(inputId) var errorMessage = document.getElementById("error-msg-" + inputId); var input = document.getElementById(inputId); errorMessage.classList.remove("phone-error"); errorMessage.classList.add("phone-error-hidden"); input.classList.remove("phone-input-error"); ; var initializePhoneInput = function(input, defaultCountry)
return window.intlTelInput(input, utilsScript: "https://unpkg.com/[email protected]/build/js/utils.js", autoHideDialCode: false, separateDialCode: true, initialCountry: defaultCountry, preferredCountries: [] ); var setPhoneInputEventListeners = function(inputId, input, iti) input.addEventListener('blur', function() var errorMessage = document.getElementById("error-msg-" + inputId); if (input.value.trim()) if (iti.isValidNumber()) iti.setNumber(iti.getNumber()); if (errorMessage.classList.contains("phone-error")) hidePhoneInputError(inputId); else showPhoneInputError(inputId) else if (errorMessage.classList.contains("phone-error")) hidePhoneInputError(inputId); ); input.addEventListener("countrychange", function() iti.setNumber(''); ); input.addEventListener("keydown", function(e) var charCode = (e.which) ? e.which : e.keyCode; if (charCode > 31 && (charCode < 48 ); ; var showPhoneInputError = function(inputId) var errorMessage = document.getElementById("error-msg-" + inputId); var input = document.getElementById(inputId); errorMessage.classList.add("phone-error"); errorMessage.classList.remove("phone-error-hidden"); input.classList.add("phone-input-error"); ; var _form_serialize = function(form); const formSupportsPost = false; var form_submit = function(e) e.preventDefault(); if (validate_form()) // use this trick to get the submit button & disable it using plain javascript var submitButton = e.target.querySelector('#_form_3_submit'); submitButton.disabled = true; submitButton.classList.add('processing'); var serialized = _form_serialize( document.getElementById('_form_3_') ).replace(/%0A/g, '\\n'); var err = form_to_submit.querySelector('._form_error'); err ? err.parentNode.removeChild(err) : false; async function submitForm() var formData = new FormData(); const searchParams = new URLSearchParams(serialized); searchParams.forEach((value, key) => if (key !== 'hideButton') formData.append(key, value); //formData.append(key, value); ); let request = headers: "Accept": "application/json" , body: formData, method: "POST" ; let pageUrlParams = new URLSearchParams(window.location.search); if (pageUrlParams.has('t')) request.headers.Authorization = 'Bearer ' + pageUrlParams.get('t'); const response = await fetch('https://kampa5569.activehosted.com/proc.php?jsonp=true', request); return response.json(); if (formSupportsPost) submitForm().then((data) => eval(data.js); ); else _load_script('https://kampa5569.activehosted.com/proc.php?' + serialized + '&jsonp=true', null, true); return false; ; addEvent(form_to_submit, 'submit', form_submit); )();
0 notes
Text
CSS 4 💻 colors and color properties
New Post has been published on https://tuts.kandz.me/css-4-%f0%9f%92%bb-colors-and-color-properties/
CSS 4 💻 colors and color properties

youtube
everything about colors and color properties in CSS color, background-color, filter, border-color, rgb, hsl, rgba and more Colors in CSS can be specified by predefined names → red, blue, green, yellow, orange, purple, black, white, gray and more by hexadecimal values → #00FF00, by rgb → rgb(0,0,0) and hsl → (0, 100%, 50%) rgb uses red, green, blue values from 0 to 255 hsl uses hue (around the color wheel), saturation(how vibrant is it) ... ...and lightness( how much white or black is in it) you can also use rgba and hsla to specify the opacity, 0 → fully transparent and 1 → fully opaque rgba(255, 0, 0, 0.5) and hsla(22, 55%, 64%, 0.7) color → sets the text color background-color → sets tje background color border-color → sets the border color text-shadow → adds shadow to a text and you can specify the color too box-shadow → adds shadow to an element and you can specify the color too opacity → specifies the element's opacity values can be from 0 to 1 caret-color → is used to set the color of the text input cursor CSS supports gradients backgrounds background-image → adds a background image, but you can also specify a color linear-gradient → defines a linear-falling gradient from left to right, top to bottom etc. radial-gradient → creates a radial gradient like a circle or an ellipse conic-gradient → creates a conical gradient from the centre towards a specific angle you can also have repeating gradients. For that exist the properties... repeating-linear-gradient, repeating-radial-gradient filter → applies graphical effects like blur , contrast and more hue-rotate → rotates the color wheel by a specified angle brightness → changes the brightness contrast → changes the brightness grayscale → convets an image to a grayscale saturate → changes the saturation invert → inverts the colors sepia → converts an image to sepia tones
0 notes
Text
Enhancing Cell Culture Efficiency: The Evolution of the 24 Well Cell Culture Plate
In the realm of biological research, cell culture is an indispensable tool for studying cellular behavior, disease mechanisms, drug screening, and tissue engineering. Central to this practice is the humble yet pivotal tool known as the 24 well cell culture plate. Over the years, this essential piece of laboratory equipment has undergone significant evolution, adapting to the changing needs and advancing technologies of modern research.
The 24 well cell culture plate, a standardized multi-well plate designed for culturing cells, plays a critical role in facilitating various experiments simultaneously within a single plate. Each plate typically consists of 24 individual wells, each capable of accommodating cell culture media and cells for experimentation. Initially, these plates were simple in design, constructed from polystyrene or similar materials, and featured flat, round wells.
As research demands grew more complex, so did the requirements for cell culture plates. Scientists sought improvements in cell adhesion, surface treatments, and the ability to support various cell types. In response, manufacturers began to innovate, introducing surface modifications to enhance cell attachment, proliferation, and differentiation.
One of the significant advancements in 24 well cell culture plates is the development of treated surfaces that mimic the extracellular matrix (ECM), providing cells with a more natural environment for growth. These surfaces may be coated with substances like collagen, fibronectin, or laminin, which promote cell adhesion and improve overall cell health. Such enhancements have revolutionized cell culture techniques, enabling researchers to mimic in vivo conditions more accurately.
Furthermore, the design of the wells themselves has evolved to better accommodate specific experimental needs. Some plates feature conical well bottoms, which facilitate cell pellet formation and ease of media aspiration. Others incorporate unique geometries or surface coatings tailored for specific cell types, such as neurons or endothelial cells, optimizing conditions for their growth and function.
In addition to surface modifications, advancements in material science have contributed to the evolution of 24 well cell culture plates. Researchers now have access to plates made from specialized polymers that offer advantages such as improved optical clarity, reduced autofluorescence, and enhanced gas permeability. These features are particularly beneficial for live-cell imaging, high-content screening, and long-term culture experiments.
Moreover, the incorporation of innovative features like microfluidic channels and compartmentalized wells has expanded the functionality of 24 well cell culture plates. Microfluidic channels allow for precise control of fluid flow and gradient generation, enabling studies of cell migration, chemotaxis, and drug diffusion. Compartmentalized wells, on the other hand, facilitate co-culture experiments and spatially controlled cell interactions, mimicking complex cellular microenvironments.
As the field of cell culture continues to evolve, so too does the demand for versatility, reproducibility, and scalability in laboratory equipment. Manufacturers of 24 well cell culture plates have responded by introducing modular designs that enable seamless integration with automated liquid handling systems, robotic platforms, and high-throughput screening workflows. These advancements streamline experimental processes, improve data quality, and enhance research productivity.
Furthermore, the advent of advanced imaging techniques and analytical tools has spurred innovation in the design of 24 well cell culture plates. Plates with optically clear bottoms enable high-resolution microscopy and real-time monitoring of cellular dynamics. Integrated sensors and electrodes facilitate electrical impedance measurements, providing insights into cell viability, proliferation, and barrier function.
In the realm of drug discovery and development, 24 well cell culture plates play a crucial role in screening compounds for potential therapeutic effects. High-throughput screening platforms utilizing these plates enable rapid assessment of drug candidates across various cell lines and conditions. By miniaturizing assays and increasing throughput, researchers can accelerate the drug discovery process and identify promising candidates more efficiently.
Beyond traditional biomedical research, 24 well cell culture plates have found applications in diverse fields such as regenerative medicine, tissue engineering, and personalized medicine. In tissue engineering, for instance, these plates serve as scaffolds for growing three-dimensional (3D) tissue constructs, mimicking the architecture and function of native tissues. Such advancements hold promise for applications ranging from organ-on-a-chip models to patient-specific drug screening platforms.
In conclusion, the 24 well cell culture plate has undergone remarkable evolution, driven by the ever-changing needs of the scientific community and advances in technology. From simple polystyrene plates to sophisticated multi-functional platforms, these essential tools have revolutionized cell culture techniques and enabled groundbreaking discoveries in biomedical research. As we look to the future, continued innovation in the design and functionality of 24 well cell culture plates will undoubtedly further enhance their utility and impact across various fields of science and medicine.
0 notes
Text
Rain World Art Month '24 Day 9: Filtration System
FireAlpaca really needs more gradient options besides just linear and radial, I need like a conic gradient that functions like a radial so I don't have to do several layers of gradient and blur them together
#rain world#rw art month#rain world art month#slugcat#rw lizard#rw black lizard#rw survivor#lilac draws
1 note
·
View note
Text
Revisiting CSS border-image
New Post has been published on https://thedigitalinsider.com/revisiting-css-border-image/
Revisiting CSS border-image
In my last article on “Revisiting CSS Multi-Column Layout”, I mentioned that almost twenty years have flown by since I wrote my first book, Transcending CSS. In it, I explained how and why to use what were, at the time, an emerging CSS property.
Ten years later, I wrote the Hardboiled Web Design Fifth Anniversary Edition, covering similar ground and introducing the new CSS border-image property.
Hint: I published an updated version, Transcending CSS Revisited which is free to read online. Hardboiled Web Design is available from my bookshop.
I was very excited about the possibilities this new property would offer. After all, we could now add images to the borders of any element, even table cells and rows (unless their borders had been set to collapse).
Since then, I’ve used border-image regularly. Yet, it remains one of the most underused CSS tools, and I can’t, for the life of me, figure out why. Is it possible that people steer clear of border-image because its syntax is awkward and unintuitive? Perhaps it’s because most explanations don’t solve the type of creative implementation problems that most people need to solve. Most likely, it’s both.
I’ve recently been working on a new website for Emmy-award-winning game composer Mike Worth. He hired me to create a highly graphical design that showcases his work, and I used border-image throughout.
Design by Andy Clarke, Stuff & Nonsense. Mike Worth’s website will launch in April 2025, but you can see examples from this article on CodePen.
A brief overview of properties and values
First, here’s a short refresher. Most border-image explanations begin with this highly illuminating code snippet:
border-image: [source] [slice]/[width]/[outset] [repeat]
This is shorthand for a set of border-image properties, but it’s best to deal with properties individually to grasp the concept more easily.
A border-image’s source
I’ll start with the source of the bitmap or vector format image or CSS gradient to be inserted into the border space:
border-image-source: url('/img/scroll.png');
When I insert SVG images into a border, I have several choices as to how. I could use an external SVG file:
border-image-source: url('/img/scroll.svg');
Or I might convert my SVG to data URI using a tool like Base64.Guru although, as both SVG and HTML are XML-based, this isn’t recommended:
border-image-source: url('data:image/svg+xml;base64,…');
Instead, I can add the SVG code directly into the source URL value and save one unnecessary HTTP request:
border-image-source: url('data:image/svg+xml;utf8,…');
Finally, I could insert an entirely CSS-generated conical, linear, or radial gradient into my border:
border-image-source: conical-gradient(…);
Tip: It’s useful to remember that a browser renders a border-image above an element’s background and box-shadow but below its content. More on that a little later.
Slicing up a border-image
Now that I’ve specified the source of a border image, I can apply it to a border by slicing it up and using the parts in different positions around an element. This can be the most baffling aspect for people new to border-image.
Most border-image explanations show an example where the pieces will simply be equally-sized, like this:
However, a border-image can be developed from any shape, no matter how complex or irregular.
Instead of simply inserting an image into a border and watching it repeat around an element, invisible cut-lines slice up a border-image into nine parts. These lines are similar to the slice guides found in graphics applications. The pieces are, in turn, inserted into the nine regions of an element’s border.
The border-image-slice property defines the size of each slice by specifying the distance from each edge of the image. I could use the same distance from every edge:
border-image-slice: 65
I can combine top/bottom and left/right values:
border-image-slice: 115 65;
Or, I can specify distance values for all four cut-lines, running clockwise: top, right, bottom, left:
border-image-slice: 65 65 115 125;
The top-left of an image will be used on the top-left corner of an element’s border. The bottom-right will be used on the bottom-right, and so on.
I don’t need to add units to border-image-slice values when using a bitmap image as the browser correctly assumes bitmaps use pixels. The SVG viewBox makes using them a little different, so I also prefer to specify their height and width:
<svg height="600px" width="600px">…</svg>
Don’t forget to set the widths of these borders, as without them, there will be nowhere for a border’s image to display:
border-image-width: 65px 65px 115px 125px;
Filling in the center
So far, I’ve used all four corners and sides of my image, but what about the center? By default, the browser will ignore the center of an image after it’s been sliced. But I can put it to use by adding the fill keyword to my border-image-slice value:
border-image-slice: 65px 65px 115px 125px fill;
Setting up repeats
With the corners of my border images in place, I can turn my attention to the edges between them. As you might imagine, the slice at the top of an image will be placed on the top edge. The same is true of the right, bottom, and left edges. In a flexible design, we never know how wide or tall these edges will be, so I can fine-tune how images will repeat or stretch when they fill an edge.
Stretch: When a sliced image is flat or smooth, it can stretch to fill any height or width. Even a tiny 65px slice can stretch to hundreds or thousands of pixels without degrading.
border-image-repeat: stretch;
Repeat: If an image has texture, stretching it isn’t an option, so it can repeat to fill any height or width.
border-image-repeat: repeat;
Round: If an image has a pattern or shape that can’t be stretched and I need to match the edges of the repeat, I can specify that the repeat be round. A browser will resize the image so that only whole pieces display inside an edge.
border-image-repeat: round;
Space: Similar to round, when using the space property, only whole pieces will display inside an edge. But instead of resizing the image, a browser will add spaces into the repeat.
border-image-repeat: space;
When I need to specify a separate stretch, repeat, round, or space value for each edge, I can use multiple keywords:
border-image-repeat: stretch round;
Outsetting a border-image
There can be times when I need an image to extend beyond an element’s border-box. Using the border-image-outset property, I can do just that. The simplest syntax extends the border image evenly on all sides by 10px:
border-image-outset: 10px;
Of course, there being four borders on every element, I could also specify each outset individually:
border-image-outset: 20px 10px; /* or */ border-image-outset: 20px 10px 0;
border-image in action
Mike Worth is a video game composer who’s won an Emmy for his work. He loves ’90s animation — especially Disney’s Duck Tales — and he asked me to create custom artwork and develop a bold, retro-style design.
My challenge when developing for Mike was implementing my highly graphical design without compromising performance, especially on mobile devices. While it’s normal in CSS to accomplish the same goal in several ways, here, border-image often proved to be the most efficient.
Decorative buttons
The easiest and most obvious place to start was creating buttons reminiscent of stone tablets with chipped and uneven edges.
I created an SVG of the tablet shape and added it to my buttons using border-image:
button border-image-repeat: stretch; border-image-slice: 10 10 10 10 fill; border-image-source: url('data:image/svg+xml;utf8,…'); border-image-width: 20px;
I set the border-image-repeat on all edges to stretch and the center slice to fill so these stone tablet-style buttons expand along with their content to any height or width.
Article scroll
I want every aspect of Mike’s website design to express his brand. That means continuing the ’90s cartoon theme in his long-form content by turning it into a paper scroll.
The markup is straightforward with just a single article element:
<article> <!-- ... --> </article>
But, I struggled to decide how to implement the paper effect. My first thought was to divide my scroll into three separate SVG files (top, middle, and bottom) and use pseudo-elements to add the rolled up top and bottom parts of the scroll. I started by applying a vertically repeating graphic to the middle of my article:
article padding: 10rem 8rem; box-sizing: border-box; /* Scroll middle */ background-image: url('data:image/svg+xml;utf8,…'); background-position: center; background-repeat: repeat-y; background-size: contain;
Then, I added two pseudo-elements, each containing its own SVG content:
article:before display: block; position: relative; top: -30px; /* Scroll top */ content: url('data:image/svg+xml;utf8,…'); article:after display: block; position: relative; top: 50px; /* Scroll bottom */ content: url('data:image/svg+xml;utf8,…');
While this implementation worked as expected, using two pseudo-elements and three separate SVG files felt clumsy. However, using border-image, one SVG, and no pseudo-elements feels more elegant and significantly reduces the amount of code needed to implement the effect.
I started by creating an SVG of the complete tablet shape:
And I worked out the position of the four cut-lines:
Then, I inserted this single SVG into my article’s border by first selecting the source, slicing the image, and setting the top and bottom edges to stretch and the left and right edges to round:
article border-image-slice: 150 95 150 95 fill; border-image-width: 150px 95px 150px 95px; border-image-repeat: stretch round; border-image-source: url('data:image/svg+xml;utf8,…');
The result is a flexible paper scroll effect which adapts to both the viewport width and any amount or type of content.
Home page overlay
My final challenge was implementing the action-packed graphic I’d designed for Mike Worth’s home page. This contains a foreground SVG featuring Mike’s orangutan mascot and a zooming background graphic:
<section> <!-- content --> <div>...</div> <!-- ape --> <div> <svg>…</svg> </div> </section>
I defined the section as a positioning context for its children:
section position: relative;
Then, I absolutely positioned a pseudo-element and added the zooming graphic to its background:
section:before content: ""; position: absolute; z-index: -1; background-image: url('data:image/svg+xml;utf8,…'); background-position: center center; background-repeat: no-repeat; background-size: 100%;
I wanted this graphic to spin and add subtle movement to the panel, so I applied a simple CSS animation to the pseudo-element:
@keyframes spin-bg from transform: rotate(0deg); to transform: rotate(360deg); section:before animation: spin-bg 240s linear infinite;
Next, I added a CSS mask to fade the edges of the zooming graphic into the background. The CSS mask-image property specifies a mask layer image, which can be a PNG image, an SVG image or mask, or a CSS gradient:
section:before mask-image: radial-gradient(circle, rgb(0 0 0) 0%, rgb(0 0 0 / 0) 60%); mask-repeat: no-repeat;
At this point, you might wonder where a border image could be used in this design. To add more interactivity to the graphic, I wanted to reduce its opacity and change its color — by adding a colored gradient overlay — when someone interacts with it. One of the simplest, but rarely-used, methods for applying an overlay to an element is using border-image. First, I added a default opacity and added a brief transition:
section:before opacity: 1; transition: opacity .25s ease-in-out;
Then, on hover, I reduced the opacity to .5 and added a border-image:
section:hover::before opacity: .5; border-image: fill 0 linear-gradient(rgba(0,0,255,.25),rgba(255,0,0,1));
You may ponder why I’ve not used the other border-image values I explained earlier, so I’ll dissect that declaration. First is the border-image-slice value, where zero pixels ensures that the eight corners and edges stay empty. The fill keyword ensures the middle section is filled with the linear gradient. Second, the border-image-source is a CSS linear gradient that blends blue into red. A browser renders this border-image above the background but behind the content.
Conclusion: You should take a fresh look at border-image
The border-image property is a powerful, yet often overlooked, CSS tool that offers incredible flexibility. By slicing, repeating, and outsetting images, you can create intricate borders, decorative elements, and even dynamic overlays with minimal code.
In my work for Mike Worth’s website, border-image proved invaluable, improving performance while maintaining a highly graphical aesthetic. Whether used for buttons, interactive overlays, or larger graphic elements, border-image can create visually striking designs without relying on extra markup or multiple assets.
If you’ve yet to experiment with border-image, now’s the time to revisit its potential and add it to your design toolkit.
Hint: Mike Worth’s website will launch in April 2025, but you can see examples from this article on CodePen.
About Andy Clarke
Often referred to as one of the pioneers of web design, Andy Clarke has been instrumental in pushing the boundaries of web design and is known for his creative and visually stunning designs. His work has inspired countless designers to explore the full potential of product and website design.
Andy’s written several industry-leading books, including Transcending CSS, Hardboiled Web Design, and Art Direction for the Web. He’s also worked with businesses of all sizes and industries to achieve their goals through design.
Visit Andy’s studio, Stuff & Nonsense, and check out his Contract Killer, the popular web design contract template trusted by thousands of web designers and developers.
#2025#ADD#amp#animation#anniversary#ape#applications#Art#Article#Articles#assets#attention#background#background-image#background-position#Blue#book#Books#border#borders#box#box-shadow#browser#buttons#Cells#challenge#change#Children#clockwise#code
1 note
·
View note
Text
Firefox Release 123.0.1 , For Linux, Windows, & macOS
版本號:123.0.1 官方下載: https://www.mozilla.org/zh-TW/firefox/all 更新項目: 修復 Fixed the Firefox Translation language indicator in the address bar displaying a colored square icon instead of the language code icon. (Bug 1879415) Fixed incorrect rendering of Canvas2D conic gradients colors on Windows. (Bug 1851963) Fixed a regression with the onChange event not firing when clearing the value of a…
View On WordPress
0 notes
Text
CSS Gradient Color generator , gradient generator , background gradient generator
Link: CSS Gradient Color Generator Now!
In the realm of web design, gradients add depth, dimension, and visual interest to websites, creating captivating visual effects and enhancing user experience. EditBoxPro’s CSS Gradient Color Generator offers a user-friendly solution for creating custom CSS gradients that elevate the aesthetics of your web projects. Let’s explore how EditBoxPro’s CSS Gradient Color Generator can empower web designers to unleash their creativity and bring their design visions to life.
Harnessing the Power of CSS Gradients
CSS gradients allow web designers to create smooth transitions between two or more colors, resulting in visually appealing backgrounds, buttons, overlays, and other design elements. Gradients add depth and texture to web interfaces, making them more engaging and immersive for users. With EditBoxPro’s CSS Gradient Color Generator, designers can easily experiment with different gradient styles, angles, and color combinations to achieve the desired visual effect for their websites.
Key Features of EditBoxPro’s CSS Gradient Color Generator
Intuitive Gradient Editor: EditBoxPro’s CSS Gradient Color Generator features an intuitive gradient editor that allows designers to create custom gradients with ease. Whether you prefer linear gradients, radial gradients, or conic gradients, our tool offers a range of options to suit your design needs.
Color Picker and Gradient Stops: Customize your gradients by selecting colors from a comprehensive color picker or entering hex codes manually. EditBoxPro’s Gradient Color Generator also allows you to add multiple gradient stops and adjust their positions and opacity levels for precise control over your gradient design.
Gradient Angle and Direction: Experiment with different gradient angles and directions to achieve the desired visual effect for your web design projects. EditBoxPro’s CSS Gradient Color Generator allows you to specify linear gradient angles, radial gradient shapes, and conic gradient starting points for endless design possibilities.
Preview and Code Export: Visualize your gradient designs in real time with EditBoxPro’s live preview feature. As you make changes to your gradient settings, our tool provides instant feedback, allowing you to see how your gradients will appear on the web. Once you’re satisfied with your design, you can easily export the CSS code and integrate it into your web projects.
Cross-Browser Compatibility: EditBoxPro’s CSS Gradient Color Generator ensures cross-browser compatibility by generating CSS code that works seamlessly across modern web browsers. Whether you’re targeting desktop or mobile users, our tool helps you create gradients that render consistently across different devices and platforms.
Advantages of Using EditBoxPro’s CSS Gradient Color Generator
Enhanced Visual Appeal: Elevate the visual appeal of your websites with stunning CSS gradients created using EditBoxPro’s Gradient Color Generator. Whether you’re designing headers, buttons, backgrounds, or overlays, gradients add depth, dimension, and sophistication to your web interfaces, making them more visually appealing and memorable for users.
Time-Saving Design Solution: Streamline your design process and save time with EditBoxPro’s CSS Gradient Color Generator, which offers a user-friendly interface and intuitive controls for creating custom gradients in minutes. Instead of manually coding gradients from scratch, designers can use our tool to experiment with different gradient styles and color combinations effortlessly.
Versatile Design Applications: Whether you’re designing personal websites, portfolio sites, e-commerce platforms, or corporate landing pages, EditBoxPro’s CSS Gradient Color Generator offers a versatile solution for integrating gradients into your web projects. From subtle color transitions to bold gradient effects, our tool empowers designers to create custom gradients that reflect their brand identity and design aesthetic.
Accessible Design Tool: EditBoxPro’s CSS Gradient Color Generator is accessible to designers of all skill levels, from beginners to experienced professionals. With its user-friendly interface and visual editor, our tool makes it easy for designers to experiment with gradients and create visually stunning web designs without the need for advanced coding knowledge.
Conclusion
Transform your web design projects with EditBoxPro’s CSS Gradient Color Generator. Whether you’re a seasoned web designer or just starting out, our tool provides the functionality, flexibility, and convenience you need to create custom gradients that enhance the visual appeal of your websites. Experience the power of CSS gradients, unleash your creativity, and elevate your web design game with EditBoxPro today!
Create Custom CSS Gradients with EditBoxPro’s CSS Gradient Color Generator Now!
gradient generator, gradient generator javascript, css gradient generator, background gradient generator, javascript gradient background generator, multiple color gradient generator, linear gradient generator, gradient color generator, gradient image generator, ultimate css gradient generator, background color generator, random color gradient generator, gradient, gradient color generator javascript, css gradient tutorial, linear gradient
1 note
·
View note
Text
Unleashing the RuPaul Fierceness: A Glamorous Makeover for Traffic Safety Cones
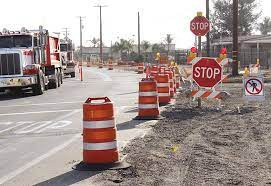
In the world of road safety, traffic cones are the unsung heroes, quietly directing traffic and ensuring order on our streets. But what if we could inject a bit of glamour, flair, and the unapologetic fierceness of RuPaul into these mundane objects? This article explores the creative journey of transforming ordinary traffic safety cones into fabulous, attention-grabbing icons that not only enhance road safety but do so with a touch of RuPaul's signature style.
1. A Colorful Makeover: Embrace the Rainbow
The first step in this fabulous transformation is to bid farewell to the traditional orange hue and embrace the vibrancy of the rainbow. RuPaul is synonymous with bold, expressive colors, and your traffic safety cones should be no exception. Consider painting each cone in a different color or go for a gradient effect that not only catches the eye but turns the road into a runway of color.
2. Glamorous Accessories: Bedazzle and Bling
To truly capture the essence of RuPaul's fierceness, bedazzle your cones with glamorous accessories. Think rhinestones, glitter, and sequins. Transform these otherwise utilitarian objects into dazzling showstoppers that not only catch the light but also the attention of drivers. After all, safety can be glamorous, darling!
3. Witty and Inspirational Quotes: Slay the Day
RuPaul is known for his inspiring quotes and mantras that encourage self-expression and confidence. Apply the same philosophy to your traffic safety cones. Paint them with witty and empowering phrases that not only grab attention but also promote safe driving. Imagine a cone boldly declaring, "Cones say, 'Slay the Day, Drive the Fierce Way!'" – a message that combines safety with sass.
4. Runway-Ready Shapes: Beyond the Conical Norm
Break away from the conventional conical shape and redefine the silhouette of your traffic safety cones to mirror runway-worthy shapes. Think exaggerated flair, curves, and angles that make a statement. Imagine these cones sashaying down the road with a shape that not only directs traffic but also serves as an artistic expression of creativity and style.
5. Interactive LED Lights: Illuminate the Runway
To bring a dynamic element to your fierce traffic safety cones, introduce interactive LED lights. Create a light show that not only enhances visibility during low-light conditions but turns the road into a runway of illumination. Sync the lights to a playlist of RuPaul's greatest hits for a showstopping effect that turns safety into a visual spectacle.
6. Drag Queen Decals: Add a Touch of Glam
Pay homage to the drag queen aesthetic by adding fabulous drag queen decals to your cones. Picture RuPaul's iconic silhouette or the glamorous faces of drag royalty adorning each cone. It's a touch of glam that transforms these safety essentials into works of art, celebrating the bold and empowering spirit of drag culture.
7. Lip Sync for Your Life: Choreographed Cones
Take inspiration from RuPaul's Drag Race and choreograph your traffic safety cones to "lip sync for their lives." Arrange them in playful formations that mimic dance routines. It's a fun and engaging way to capture attention and inject some entertainment into the serious business of road safety. Picture cones sashaying in formation, encouraging drivers to approach safety with a sense of joy and engagement.
Conclusion: Strutting into Safety with Fierceness
In conclusion, the transformation of traffic safety cones into fierce and fabulous road warriors is not just a whimsical exercise but an imaginative way to rethink the mundane. By infusing the RuPaul flair into these everyday objects, we elevate their presence from functional to fabulous. Remember, safety doesn't have to be dull – let your traffic safety cones sashay, shantay, and slay on the road, reminding everyone that even in the realm of road safety, a touch of fierceness can make all the difference.
0 notes
Text

ok I'm not done fidgeting with it yet but... what I said before is still true, technically all of this except the harpoon heads are done with css style - specifically, exploiting gradients
some folks have done frankly hilarious exploits using css gradients to make complex patterns and this is no different, the cogs are made with repeating conical gradients masked out with radial gradients, the screws n things are carefully plotted out radial gradients

you can see on the site that zooming in really close makes the harpoon heads blurry but nothing else. this is why!
it's a bit ridiculous, but it's fun. how can you not feel a little perverse sense of pride in stacking together absurd strings of code like this.


...... 3rd pass. you know what they say, third time's the charm
I still have to program back in the click function and all but now it's a lot more consistent in terms of structure, which means more flexibility and less chance the whole shebang is gonna fall apart due to layout shifts or things like that. just a lot tighter
6 notes
·
View notes
Link
7 notes
·
View notes