#cg mr compress
Explore tagged Tumblr posts
Visit Tumblr Blog
Explore Tumblr blogs with no restrictions, modern design and the best experience.
Last Seen Tumblr Blogs


Fun Fact
If you dial 1-866-584-6757, you can leave an audio post for your followers.
Note
I'm not sure if your requests are open, but if they are, can I get some caregiver Mr. Compress headcanons please?


☆ - Three post in one day, I’m on a roll! And as always thank you for the request!!
! Headcanons below !
(🎩) → preforms the silliest magic tricks for his little one. Does this thing where he says “Now for this trick, I’m going to need an assistant!” And he’ll look around the room at every stuffie/toy audience member before picking them to help.
(🎩) → If his little wants attention he’ll drop everything he’s doing. How can he say no to their precious face! He just loves spending time with them.
(🎩) → When out, Atsuhiro will always keep little gear compressed and in his pocket.
(🎩) → Atsuhiro is a very active cg, he likes taking his kiddo outside. Really anywhere, to the park, to the beach, wherever!
(🎩) → He makes the worst dad jokes that they’re funny.
(🎩) → He loves teaching his little how to dance. He has them stand on his feet to keep balance. Atsuhiro is probably really good at ballroom dancing.
(🎩) → Atsuhiro bought them a nightlight for nap/bedtime. He loves reading them stories and doing different voices for the characters. If not bedtime stories, then he’ll play them lullabies and Watch over them until they sleep.

#🪄 | spellbook#🪄 | my little academia#🪄 | headcanons#sfw agere#agere#agere community#age regressor#agere sfw#fandom agere#age regression#sfw regression#sfw little community#mha agere#bnha agere#my hero academia agere#my hero agere#safe agere#sfw interaction only#cg mr compress
35 notes
·
View notes
Text

league of villain agere headcanons
I hav a slight bias for tomura :( I wnna scoop him up and care for him so bad
caregiver!mr compress !!!!! he is so sweet and silly. jokes, games and fun all around. he loves peek-a-boo, especially w his quirk
compress is a limited energy person, tries to keep things minimal in terms of energy use, also chronic pain and phantom pain haver !
flip tomura shigaraki !!! (personal fav hc) pre-plf shigaraki regressed involuntarily when he became stressed, upset or even when he had trauma memories come back up.
baby tomura, Itty bitty baby. I'm talking loss of speech and babbling, paci's that keep him from trying to push out a curse word or two. soft mittens or padded gloves that help with his scratching. padded tomura !
tomura's his main cg was kurogiri. the doctor knew about this and informed afo and kurogiri but did nothing past that. leaving poor shigaraki to deal with this unfamiliar heads pace by himself (for a little while, till kurogiri came in and helped)
kiddo dabi, def an older regressor, anywhere from 6 to like 12 eldest of the lil villains. spinner is next oldest, v critter hearted kid.
if tomura regressed a bit older that usual he loves playing with big bro dabi n spinner !!!
toga is a regressor as well, most of the time she clings to big sis magne, kurogiri, mr compress too!
she loves going out for walks in nature, playing predator n prey. she likes playing dress up but very much imitates other people. she calls it spy/secret agent.
toga is very big on mirroring, she sees kurogiri do something, looks like she found a new hobby
twice is definitely a carer, his carerspace is so comforting to him and helps him from splitting as much. he loves looking after the tots in the league. giran is also a carer, but more a sitter. he'll help if needed. (he likes checking in on twice and the gang)
dabi's a very active regressor, loves going out and playing, he tends to drag toga, twice and possibly spinner out to a playground.
ddlg/abdl/nsfw/variants dni! add any of ur own headcanons in the comments or reblogs ! post belongs to me ☆
106 notes
·
View notes
Note
Hi I’m poking you for thoughts on little Twice - 🎧
♡ I bite your fingers I bite I bite- ♡ No, really, I love baby Jin and I am more than happy to give my thoughts on him! Did end up a little short, but I hope that's ok!

♡ Has an incredibly wide regression range, able to go anywhere from one to thirteen with no preference toward any particular age. It's easier to get him down smaller when he feels at his safest, but he generally doesn't go that small if he can help it.
♡ When around infant to toddler range he is a clingy, cuddly, needy little barnacle that latches onto his CG of the day (Usually Magne, Mr. Compress, or Giran, though sometimes Toga). He's a total lap baby and will make the most heartbreaking sounds when moved.
♡ Jin is also very tender with his plush toys and always has his pacifier clipped to one of them for safe keepies!
♡ When regressing around five to nine, he's an unintentional menace. Jin likes to explore and test theories when no one is looking, and sometimes these theories are as simple as: "How many frogs can I put in the kitchen sink before Kurogiri catches me?"
♡ And the answer is way too many. It was frog anarchy and Big Sis Ken said that if another frog enters this bar she is going to make a swear jar but for frog crimes.
♡ With how often his regression smears into unidentifiable mush, Jin tends to use things like pacifiers, sippy cups, bottles, and the like no matter how big he feels. It's better to have his teether when he's twelve than to bemoan its absence.
♡ An emotional crier! He just has so many Big emotions and it's the easiest way to just... Let it all out. He'll cry about anything from being moved out of prime nap area to getting to pet the scrappy alley cat behind the bar.
♡ He loves pitbulls so much! All dogs are good dogs to him, but he feels like pitbulls are just so misunderstood. Jin loves their big, square heads and kind smiles and will tell you that they were called "nanny dogs" once! It does not matter if he has told you this before, you will hear it again.
♡ Decisions are incredibly difficult when he's in his headspace and can sometimes pull him out of it. If there are more than two options for something he will get extremely upset! Big Sis can always help him figure out what he wants or needs with a little patience.
♡ In his older ages he hangs out with Shuichi and Tomura a lot! They always have the coolest games that Magne says he's too little for... The Forbidden Snack of activity.
♡ When he's smaller he still hangs out with Tomura pretty often, but not as much as he'd like since Tomura regresses very small. So, he will let Himiko decide what they're going to be doing that day or snoops around to see what Dabi is up to.
♡ His regression is very messy and has a lot of ups and downs, but he always knows one thing for certain: Being with his little hodgepodge family of misfits feels like one of the safest places in the world.
38 notes
·
View notes
Text
DABI • REGRESSOR DRABBLE [cg Hawks]

Dabi hit his blocks together, listening to the sound of the wood clashing together. The sound filled his tiny world with pure joy, how could it not? Everything was perfect right now! Hawks was in front of him stirring something in a bowl; occasionally glancing up at Dabi to make sure he was doing alright.
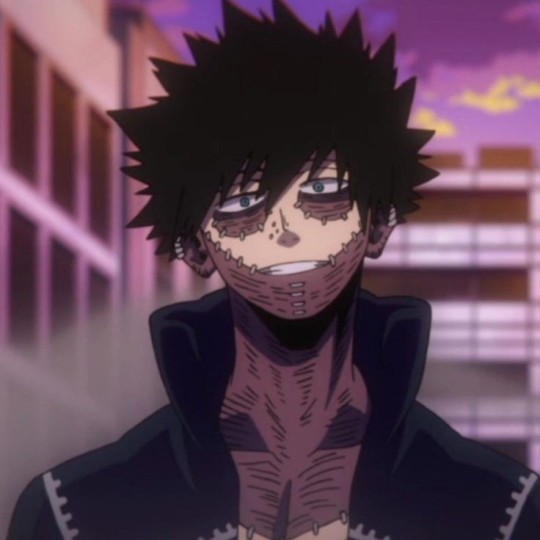
Hawks was Dabi's main caregiver, the one who typically got called during involuntary regression or the one who managed to help him slip on days when he struggled. Though Toga and Mr. Compress where his favorite babysitters — Shigaraki and the others tried but they didn't have the same instincts as those two did.
"Hey firefly, it's lunchtime." Hawks smiled as he sat down the bowl on the kitchen table, carefully lifting Dabi up from the floor. Two bright blue blocks gripped in his hands as he chewed on the elephant teething ring that Toga had given him.
Lunchtime was typically a nightmare when Dabi was older, always saying he didn't like what Hawks cooked or that he wasn't hungry. Though in his baby space it was easy, simply letting him hold on to his ghost stuffed animal got both of them through meal times with minor to no casualties.
That's how they say today at the table, Dabi gripping Ted the ghost as he ate the cinnamon applesauce and puffs that Hawks was able to find.
51 notes
·
View notes
Note
could you do baby regressors Hawks and/or CG Dabi headcanons please ? 🥺🥺🥺
i hope this is okay!! i just did CG! Dabi hcs, but you can totally request again if you want something with Hawks.
CG! Dabi
Dabi would probably be best with taking care of a regressor 2-6. He loves carrying you around, and will most definitely carry you around most of the time, if not all the time.
Since he spends a majority of his time with the league of villains or in their hideout, he'll have no choice but to bring you with him a lot. He makes it clear to each and every single one of them if they even look at you a wrong way, they'll regret it. He knows that they'd never hurt you anyway, he's just protective like that.
Most of the league used to make fun of him for always having you on his hip, but after a while they just grew used to it and treat you like one of their own, and you'll never grow bored with Toga, Mr. Compress, and Twice. Shigaraki doesn't admit it, but he sees you as family.
Dabi isn't strict most of the time, and usually the worst punishment you'll get for acting up is a semi-long talk on why you can't throw your toys or whatever it is you did. At most, he just gives you an early bedtime. If it's something dangerous you did though, he will be a little more emotional, but he'll never yell.
Since he's often busy, he'll make a day just for the two of you weekly. He'll usually spend these days inside with you, since he's a pretty well known villain. If you really want to go to the park or just take a simple walk, he'll cave in though.
He'll often speak to you in a much lighter and more gentle voice than anyone else. Most the time, he refers to himself in third person.
Always has some kind of regression gear with him ready. Such as pacifiers, sippy cups, bottles, stuffed animals, any of that. He likes to be prepared.
Often gets you cool stuff he finds that he's pretty sure you'll like. Chalk, cool toys/stuffies, or maybe even just food that he imagines you'll enjoy. As long as you can eat enough sugar and be able to be in bed by 9:00 or 10:00, he's usually very lenient on your sugar intake.
It's physically impossible to annoy him. Whether you're trying to or not, it will not phase him. If he's thinking to himself or working on something and you just crawl all over him like he's a jungle gym, he literally will not be phased. It's impossible.
Though he acts like he's not big on physical affection, as stated before, you're almost always on his hip. If he's sitting down, you're either right by his side, sitting on or close to his feet, or in his lap. He just likes to have you close.
He will not use his quirk around you, just in fear of him accidentally hurting you. He doesn't care how far or close you are, he won't use it. He knows how overly powerful his quirk is, and he just couldn't bear it if something happened to you. Will also make it clear to the rest of the league to not use their quirks around you either.
Usually either calls you kiddo or baby, or obviously your name. If he sees you like a certain nickname more than the other, he'll call you that more often.
This is more random, but if you made him something cute like a flower crown or a bracelet, he will not take it off for the next couple days unless he's out doing villain stuff, since he doesn't wanna burn it. Anything you make him is precious to him.
You probably call him Daddy or Dada, but Papa could work too. He thinks any kind of name you give him is the sweetest thing.
Lets you watch cartoons practically all day, but is afraid to give you free rein of the remote out of fear you'll see something about him on the news. One of his worst fears is you being scared of him.
Though he probably isn't the best at cooking, he will definitely learn to master your favorites. It might take him a few tries, but he'll get there. I can totally picture him making some of the best pancakes and/or waffles for breakfast.
#sfw age regression#agere sfw#sfw agere#dabi my hero academia#my hero academia#sfw smolspace#sfw littlespace
58 notes
·
View notes
Text
The World Ends with You

(Yeah, it’s the same screenshot I used for my post about ep. 1. I couldn’t get a new one so...)
Ah, first week without the TWEWY anime to look forward to. I’m actually kinda sad cause I’d miss waiting for the episode every Saturday night (Ani-One posts theirs on that day here). I have some stuff I wanna say about the anime so I thought I’d make one of these plus this is a good way to end the twewy anime blog post series I make every week. I’ll try not to spoil until the very bottom of this post which will have a spoiler warning.
Also, this will be very long and rambly as most of my fandom posts are haha.
Story:
A boy named Neku wakes up in the middle of Shibuya with no memory and finds himself as a player in the Reaper’s Game. For a week he must partner up with a girl named Shiki and both of them must complete missions, battle creatures called noise, and survive as failure meant erasure.
Characters:

Neku Sakuraba - our main protagonist who somehow lost his memories and is now playing the Reaper’s Game. He’s a loner who isn’t too keen on getting close to anyone let alone working alongside anybody - unfortunately for him, it’s a requirement if he wants to survive. As a player he has an assortment of abilities to fight off noise and other enemies (in the game this meant he can use a lot of different pins).

Shiki Misaki - the nice and friendly Shiki becomes Neku’s partner in the Reaper’s Game. Unlike Neku she has knowledge of the game and fills Neku in on things he doesn’t understand. Her ability is to control her stuffed toy called Nyantan/Mr. Mew which she uses in combat.

Beat - the tough skateboarding player, he’s somewhat more like the typical hot-blooded shounen protagonist when compared to Neku. He’s protective of those he care about especially his game partner, Rhyme. He uses his skateboard in battle.
Rhyme - Beat’s game partner who is a lot kinder and calmer than him. Rhyme tends to be the one to reason with Beat when needed and the two are always seen together.

Yoshiya Kiryu - a mysterious boy who seem to know more than he lets on and acts at times acts suspicious. He prefers to be called by the nickname Joshua.

Sanae Hanekoma - a cafe owner who helps out Neku and the others and would give them advice. His advice prove to be very helpful and Neku takes them to heart. Seem to have a lot of knowledge about the Reaper’s Game but doesn’t seem to be a reaper himself.
--
Thoughts:
(I tried my best to not be spoilery in the character descriptions so some names weren’t written in full)
The World Ends with You (or in the original Japanese “Subarashiki Kono Sekai”/It’s a Wonderful World) is an anime based on the video game of the same name. It had to compress an entire game’s worth of story within it’s 12 episode run which meant they cut out a lot of things and combined some scenes to quickly run through them. It’s theme song is the anime version of the game’s original OP “Twister” although this wasn’t what was originally planned but an incident involving the band who sang the original theme forced them to make changes. The original voice actors from the game also reprised their roles for the anime. The series is created to be watched before the release of the long-awaited sequel game.
The art style is made to be similar to it’s game version (with a bit of change to adapt it as an anime like when it comes to body proportions). They also retained the effect of the characters from the UG (players/reapers) being brightly colored while those from the RG having darker/muted colors. While the noise are obviously cg, I personally liked this since they’re said to be from a different plane anyways so it’s a nice contrast to those from the UG and RG. They had to update the setting though as years had passed since the original game’s creation and they had to model anime version of Shibuya to what it’s real life counterpart now looks. The characters are also given smartphones instead of the flip phones they had in the game (anime-only watchers who are gonna play the game would have to get used to them still using flip phones though lol).
Okay so story-wise... it’s rushed. Of course it is. They shortened it so that what’s left would mostly be important plot points from the main story but they cut out many scenes that consist of character interactions and several little things that could’ve fleshed out the characters more. The gameplay is also made simpler with some mechanics taken away and the mini games weren’t adapted (RIP to Reaper Creeper and Tin Pin Slammer, especially the latter as you’re severely missed). The game boast an assortment of characters and some NPCs have their own stories but due to the anime’s limited run time, they had to either be cut out (and are just given cameos) or given smaller roles (and their stories weren’t adapted). They did, however, give a few bits and pieces of information that weren’t in the game such as some details about certain characters and one supporting character was given a bit more screentime that they did in the game version.
Despite the rushed nature of the series (which may or may not affect how one views the story itself), the anime made sure to adapt several important scenes and the dramatic stuff is made worse... like, they really had to make some deaths harder to take. The battle scenes were nice as well although my biggest complaint about them is that the boss fights were over too quickly. There were scenes that were changed for the anime version and there are those that I liked and those I didn’t but there are many which I think was as good as the game’s version.
Do I recommend the anime? The game is better, the characters and story are more fleshed out and the way the character/relationship development happens is better paced so of course, me, biased already would tell you to play the game instead if you haven’t yet. Do I recommend those who played the game to watch the anime? Yes! Yes I do. I think the anime is better watched when you’ve played the game and know the stuff that they cut out cause it’ll make better sense that way. Plus I found it enjoyable seeing the scenes from the game animated and the characters are speaking whole dialogues and moving. It’s great!
Even if the anime wasn’t perfect, like I mentioned before, they did their best to condense the entire main story in a 12 episode series and it tried to be as faithful as it could to the original story so despite the deviations when it comes to how things got to the way they did, if you summarize important plot points, they would be the same (with some details changed). Overall, it was very enjoyable and it wasn’t as bad as I feared when I heard how many episodes the anime was going to have.
--
Some spoiler thoughts:
It would’ve been better if the anime had more episode count than just 12. Cramming a 3 week story of game into just 12 made the thing very rushed with Week 1 only getting three episodes, Week 2 getting four, and final Week getting five. They had to get to the good stuff so they cut off a lot of scenes where the characters are interacting with each other which means they suddenly get character developments and relationship developments too quickly. It might not be that obvious to anime-only watchers but to me, it felt kinda sudden and it feels like it doesn’t work out well story-wise since Neku had to learn how to trust other people and make friends and with how he started vs. how he came out of it contrasting each other.
By the way, they made the characters look good in the anime. Especially Joshua. Have you seen Joshua? He’s so pretty in the anime. I want a picture of him I could stare at anytime I want to (I do not own a phone, sadly).
I like how they gave Eri more scenes though and that they changed her outfit for the anime so she won’t look exactly like UG!Shiki. All of her scenes though made me feel like I wish the anime gave closure to Shiki’s own story by showing us her and Eri making up. Another scene I liked in the anime is Neku’s fanboying of CAT when he finds out the truth. It was adorable.
Some info was taken away from the anime. Beat and Rhyme leaving home had scene dialogue and unlike Beat just narrating it in-game but they didn’t mention specifically why he was angry and his trouble at home. Joshua wasn’t present when Sota and Nao gave Neku a pep-talk either which is a shame cause I think that helped Josh as well.
I mentioned before how the anime made things go too fast. They cut off chunks of not-main-plot story that let the characters interact with each other more which means each game day is shortened as well. I think it made sense that Neku wakes up at the scramble in the end and not stressed out because he didn’t go through as much as his game counterpart did. That said, game Neku learned a lot from more than just the main cast in the game compared to the anime so I like his character development in the game better.
They took away Tin Pin Slammer. I am sad and disappointed. I was hoping so bad for Another Day to be adapted even if it’s an OVA. That and the ramen incident are part of Josh’s week which meant some side of him wasn’t shown (I mean, anime fans don’t know he wasn’t there on week 3 since he’s busy playing a kid’s game elsewhere and how he could talk about food like he is from a cooking anime). Speaking of Josh, they made him very suspicious from the get-go in the anime. I understand as there’s a limited run-time and they can’t really afford to be subtle about it but it meant some of the fun interactions with Neku is gone and so are some scenes where they actually got along. At least they had ice cream together, I guess?
(I have more to say when it comes to Joshua cause he’s my fave character but this is long and my thoughts on it would make this way longer. I might make another post.)
In the end, it wasn’t perfect but the anime was fun and enjoyable enough that I found myself looking forward to it every week. Seeing scenes I recognize from the game in animated form (with voice acting!) felt exciting and awesome. I’ll miss this show and I still wish it was longer.
If you’ve read this far well, thank you. And also I’m confused why but still hopefully that was a good time-killer. I have so many other things I wanted to comment on but that’s for another time. Maybe.
6 notes
·
View notes
Text
Are You Sharpening Your Photos Enough?
I’ll own up to this and say that I’m guilty of being stuck in my ways. But age is no excuse for not being as adaptive as I should be to the changing times. But let me explain.
I’ve been shooting for many years now and nearly 20 years ago, when I started out, there were zero calls for digital copies of images. Sure, in the early 2000s I was shooting digitally commercially, but we always got requests for prints, not digital files for the web.
Back then I would export my file at the largest size we’d be requested for (usually 12×18 [A3]) and I’d sharpen it a little for print but that was it, I’d just sharpen it the once for that large print size. Of course, times have changed, but I’ve been guilty of not changing or adapting with them and me not sharpening my images enough has become one of those areas that I’ve overlooked for too long.
Before, my print sharpening version.
After, the version I upload to the Web.
It’s important to point out at this stage that there is no ‘correct’ level of sharpening. The purpose of this article is not about telling you that you’re doing it wrong, but really more about getting you to look at your own images and try a few different sharpening amounts on your own shots. You wouldn’t want to get ‘stuck in your ways’ now, would you?
The Rise of Ultra-Sharp Shots
Many of you who follow a large proportion of professional photographers online may have already noticed this emerging trend for overly sharp images. You have to remember that this look is something that simply could not exist 20 or even 10 years ago due to limits in technology.
In recent years we’ve seen the rise of Fuji and Sony stomping all over the market with eye-wateringly sharp images straight out of camera thanks to not only their lenses but their sensor technology too. With this has come the ability to then sharpen those shots even more in post. The reason I make this distinction of “even more in post” is because regardless of what Mr. Adobe tells you, you can’t refocus and ‘sharpen’ a soft focus shot, it simply doesn’t work.
You need a razor sharp image to begin with before you can even consider sharpening your shot in these incredibly tack-sharp ways. So like I said, we’re only now seeing these ultra sharp images because even though sharpening in post has been around for years, the technology to create a sharp image to begin with has never been so strong.
Remember: You can’t refocus an out-of-focus shot to make it sharper. The ‘sharpen’ tool in Photoshop doesn’t go back in time and retake your shot with a little more accuracy. It simply increases the contrast of adjacent pixels to present the illusion of your shot being ‘visually’ sharper at a distance.
Are You Sharpening Your Images Enough?
So, are you sharpening your images enough? Well, this is subjective, of course, and I think this trend of razor-sharp images will see an ebb and flow as time goes on. We see a lot of commercial advertising images online and a lot of these are pin-sharp right now. As a result, the aspiring photographers take note and we see a rise of pin-sharp images filter down.
But as with any new trend, there will always be those that purposefully steer clear of the mainstream, commercial look. There is even now a rise in photographers who purposefully only shoot with older lenses due to a dislike of the ultra-sharp more modern lenses.
There are other reasons to avoid these overly sharp images produced by modern cameras and lenses purely due to the aesthetics of it and we are seeing a lot of that from the world of cinematography right now. Many movies rely heavily on CG and 8K quality, but others believe that images with enough resolution and sharpness to see your DNA on screen is not what they want. For example a while ago I was at Panavision HQ here in London, whereupon I was told that Tom Cruise will not work on a film shot with the newest and sharpest lenses. He prefers the softer, slightly more flattering, older lenses. There’s nothing wrong with that, as like I said, sharpness is subjective, and it’s far from ‘the sharper the better’.
Location, Location, Location
In this section, I’ll explain the process of how to sharpen your shots, but in all honesty, you most likely already know ‘how’ to sharpen your shots, it’s the ‘how much’ we need to sharpen them we’ll address.
My post-pro process involves me importing my raws into Lightroom, adjusting exposure, white balance, etc, but NO sharpening whatsoever (beyond the very basic default amount already set on import). I then export my full size (12”x18”/4500x3000px) shots to Photoshop where I retouch the skin, do some local dodge and burn, etc, and then lastly I’ll sharpen them before saving.
Here is where I’ve been very lazy in the past. I simply sharpen the full-size file appropriately and then I re-save multiple versions out for the web from that one file. This results in that the original sharpen is completely unnoticeable when viewed on somebodies phone screen on Facebook. I literally may as well not have bothered sharpening it at all, because whatever I did to that huge A3 file is all but lost when downsized to the web.
We need to consider the location that these files will end up when sharpening our shots and unfortunately, one size will not fit all.
If you’re interested in my Photoshop sharpening process then you can view all the details here.
The Three Levels of Photoshop Sharpening: Detail, Global, Local
The Re-Size
My advice would be to do your retouch process as normal and even do your subtle large file sharpen as normal too. But at the end of all of that, be sure to add yet another step to the process and re-size and re-sharpen everything based on its intended final viewing location. So for example, if you’re going to post the shot on Facebook, resize it and re-sharpen it accordingly.
Cool, so I just resize my shot in Photoshop, sharpen it and then save it right?
To be fair, yes that is one option. But for me, I like to save out a few versions and I also like to add a little grain to my final images to trick some of the compression algorithms in social media sites.
Wait, what?
Thankfully I’ve already done a complete article on why and how I do this here. This is a trick I use to essentially fool the file compression engine into thinking there is more data in a shot than there really is. This can really help when it comes to reducing color banding in your shots too, so for me and my color work that’s incredibly useful.
So in short, no, I don’t just resize it once, sharpen it and then save it out. I use a slightly different method but please feel free to do what suits your workflow and requirements.
Back to Lightroom
This may seem a little counterintuitive, but when I’ve done all of my Photoshop work, I now save my image once, at its original full size and unflattened. Once all of the images from a set are completed, I fire up Lightroom, resize them all there via the export tool and then I lastly reimport them one last time and sharpen and add grain accordingly for their size before finally saving it out one last time.
Seems ridiculous right? Well you’re not wrong, but this is really only necessary if you a. want to add grain, b. want multiple versions of all different sizes, and c. want your images to look their best online.
Is All That Really Necessary?
One of the steps I really tried to skip was the resize. Unfortunately, this is very important and simply cannot be skipped. For example, I just tried to over-sharpen my large A3 file knowing that it would be viewed smaller. This really does very little and even with very high amounts of sharpening on the big file, the effect was almost unnoticeable when viewed online.
No supplemental sharpening
Lightroom +35 Sharpen
Lightroom +100 Sharpen
So by viewing the shots above, you should see that even though these shots all have drastically different amounts of sharpening applied, they visually look almost identical when seen online.
Note: When I say ‘sharpened in Lightroom’, I’m referring to the sharpen adjustment window halfway down in the Develop module.
What Size do you Recommend for the Web?
You’ll likely hear varying amounts for this one, but for me, I use 2048px on the longest side. I’ve found that this offers the best results on platforms like Facebook where this is the largest size you can get away with before some very heavy-handed resizing and compression kicks in on their end.
Step 1. Import your final Photoshop document into Lightroom.
Step 2. Go to export and then make the relevant size adjustments prior to actually exporting them.
Step 3. Resize to fit. Long Edge. 2048 pixels. 72 Pixels per inch
Step 4. Be sure not to check the ‘Sharpen For’ box.
How Much Sharpening is Too Much?
So now that we’ve resized our shots, import them back in and now we’re finally ready to start sharpening.
But how much sharpening is too much? Personally, I really believe you need to do your own tests, with your own camera, lenses, and workflow, but by all means, look at mine and see what I determined to be the best sharpening amount for me and my work online.
I tried a multitude of amounts and combinations, exported them and then uploaded them all to my site so that I could see what was looking best. Here’s a link to the results and my notes, but be warned, there are a lot of images here some of the tests may not make sense. But don’t worry as I’ve pulled out all the salient points and I’ll share them down below.
From these tests, I concluded that somewhere between 75-100 of Lightroom sharpening was a good amount on a 2048px file.
Take a look below at some of the varying amounts and see for yourself.
Final export at +25 sharpening
Final export at +100 sharpening
Final export at +150 sharpening
As I said, I found the sweet spot for me to be between +75 and +100 sharpening. For the other sliders, I leave them at the default amount which is Radius 1.0, Detail 25 and Masking 0.
I would again urge you to do your own tests as your camera brand and lens choice will play a significant role in your final decision. These images were all captured on the Nikon D850 with the 24-70 f2.8 zoom lens attached.
What About the Grain?
The eagle-eyed among you will likely have noticed the grain already being applied in the above shots. I was very concerned about applying the grain at the same time as sharpening due to sharpened grain looking horrendous in images. One test I did was to resize, add grain, export, import, sharpen, final export. I then compared this to simply applying grain and sharpening simultaneously before the final export. Take a look at the results below.
Resized and then sharpened +100 – No grain
Resized and then sharpened +100, exported, imported, grain applied, final export.
Resized and then sharpened +100 with grain applied simultaneously prior to export.
In a perfect world you’d do it properly by resizing, import, sharpen, export, import and then finally add grain. But to be fair, I was actually very happy with how Lightroom handled the final file when you do both the sharpen and grain at the same time. Take a look for yourselves and compare the shots above, but for me, doing them together is fine and cuts out another step.
How Much Grain?
This will vary from shoot to shoot but here are the settings I use. The Grain window can be found in the ‘Effects’ tab towards the bottom of the pane in the Lightroom Develop module.
Amount: 15
Size: 25
Roughness: 50
Again this is a situation where I would recommend you play with varying amounts and looks to see what works for you. I tend to stick between 15 and 25 but black and white contrasty shots will visually respond well to larger amounts of grain compared to softer color images that require less. But all of this is subjective and you may well hate the idea of adding grain to your shots altogether… which is also fine.
Simple as That
So I fully appreciate that some of you may think that this way too much info. After all, we want to eat the burger, not meet the damn cow, Jake. But for those interested in furthering their understanding of why and how certain things are achieved and arrived at, I’ve included all of my tests and thoughts above. For those with ADHD though, I’ve also included a quick-fire, step-by-step process below which outlines what to do, not why to do it.
Sharpening your Images for the Web
Step 1
Be sure to resize your images for the web prior to sharpening. I import my retouched files from Photoshop into Lightroom and then export them at the new size of 2048px on the longest side. Be sure to do no sharpening at this point.
Step 2
Reimport your resized files back into Lightroom. Now apply the adequate amount of sharpening for your taste. I personally go for a sharpen amount of around 75-100 with a Radius of 1, Detail 25 and Masking 0.
Step 3
Add a small amount of grain to your image via the ‘Effects’ window in the ‘Develop’ module in Lightroom. I tend to keep the amount low, but enough so that it will reduce any color banding that may appear under the heavy compression algorithms of sites like Facebook. For most of my images, I tend to stick to around 15-20 grain amount, 25 size, and 50 roughness.
Step 4
The final export and again, I just use exactly the same settings as in the original export earlier. 2048px on the longest side at 72dpi.
Closing Comments
Once again, I apologize that this article was so long for a topic that simply could have stated ‘be sure to resize your shots before sharpening them’. But as with all of my teachings, I do believe that understanding the reasons you do things is just as important as doing them… this isn’t a 10:01 YouTube video after all ;)
One of the biggest takeaways from this, though, is to reiterate once again how subjective sharpening is. I shared my thoughts on this with a before and after shot on social media the other day and several people mentioned that they preferred the original. That’s totally fine and I may find that I get tired of overly sharp shots too in the future. The point I’m making here is that you may have looked at this article and not agreed with what I’m saying and felt confused. If you prefer the softer version shot, that’s totally okay and there’s nothing wrong with that.
Wherever you sit on this, I will just say that I thought the same thing until recently. I felt that I was sharpening my shots enough and it wasn’t until I did these tests that I actually decided to swallow the humble pie and decide to change my workflow to reflect a shift in the industry.
Resizing and sharpening your shots may already be basic practice to you. In fact, if you started shooting in the last ten years this is basic, common sense to you and the fact that somebody made an article about it is laughable to you. But for those that come from print *cough* old people *cough*, we may not be doing this and, myself included, needed to get with the times.
About the author: Jake Hicks is an editorial and fashion photographer based in Reading, UK. He specializes in keeping the skill in the camera and not just on the screen. If you’d like to learn more about his incredibly popular gelled lighting and post-pro techniques, visit this link for more info. You can find more of his work and writing on his website, Facebook, 500px, Instagram, Twitter, and Flickr. This article was also published here.
source https://petapixel.com/2019/04/10/are-you-sharpening-your-images-enough/
0 notes
Text
Are You Sharpening Your Photos Enough?
I’ll own up to this and say that I’m guilty of being stuck in my ways. But age is no excuse for not being as adaptive as I should be to the changing times. But let me explain.
I’ve been shooting for many years now and nearly 20 years ago, when I started out, there were zero calls for digital copies of images. Sure, in the early 2000s I was shooting digitally commercially, but we always got requests for prints, not digital files for the web.
Back then I would export my file at the largest size we’d be requested for (usually 12×18 [A3]) and I’d sharpen it a little for print but that was it, I’d just sharpen it the once for that large print size. Of course, times have changed, but I’ve been guilty of not changing or adapting with them and me not sharpening my images enough has become one of those areas that I’ve overlooked for too long.
Before, my print sharpening version.
After, the version I upload to the Web.
It’s important to point out at this stage that there is no ‘correct’ level of sharpening. The purpose of this article is not about telling you that you’re doing it wrong, but really more about getting you to look at your own images and try a few different sharpening amounts on your own shots. You wouldn’t want to get ‘stuck in your ways’ now, would you?
The Rise of Ultra-Sharp Shots
Many of you who follow a large proportion of professional photographers online may have already noticed this emerging trend for overly sharp images. You have to remember that this look is something that simply could not exist 20 or even 10 years ago due to limits in technology.
In recent years we’ve seen the rise of Fuji and Sony stomping all over the market with eye-wateringly sharp images straight out of camera thanks to not only their lenses but their sensor technology too. With this has come the ability to then sharpen those shots even more in post. The reason I make this distinction of “even more in post” is because regardless of what Mr. Adobe tells you, you can’t refocus and ‘sharpen’ a soft focus shot, it simply doesn’t work.
You need a razor sharp image to begin with before you can even consider sharpening your shot in these incredibly tack-sharp ways. So like I said, we’re only now seeing these ultra sharp images because even though sharpening in post has been around for years, the technology to create a sharp image to begin with has never been so strong.
Remember: You can’t refocus an out-of-focus shot to make it sharper. The ‘sharpen’ tool in Photoshop doesn’t go back in time and retake your shot with a little more accuracy. It simply increases the contrast of adjacent pixels to present the illusion of your shot being ‘visually’ sharper at a distance.
Are You Sharpening Your Images Enough?
So, are you sharpening your images enough? Well, this is subjective, of course, and I think this trend of razor-sharp images will see an ebb and flow as time goes on. We see a lot of commercial advertising images online and a lot of these are pin-sharp right now. As a result, the aspiring photographers take note and we see a rise of pin-sharp images filter down.
But as with any new trend, there will always be those that purposefully steer clear of the mainstream, commercial look. There is even now a rise in photographers who purposefully only shoot with older lenses due to a dislike of the ultra-sharp more modern lenses.
There are other reasons to avoid these overly sharp images produced by modern cameras and lenses purely due to the aesthetics of it and we are seeing a lot of that from the world of cinematography right now. Many movies rely heavily on CG and 8K quality, but others believe that images with enough resolution and sharpness to see your DNA on screen is not what they want. For example a while ago I was at Panavision HQ here in London, whereupon I was told that Tom Cruise will not work on a film shot with the newest and sharpest lenses. He prefers the softer, slightly more flattering, older lenses. There’s nothing wrong with that, as like I said, sharpness is subjective, and it’s far from ‘the sharper the better’.
Location, Location, Location
In this section, I’ll explain the process of how to sharpen your shots, but in all honesty, you most likely already know ‘how’ to sharpen your shots, it’s the ‘how much’ we need to sharpen them we’ll address.
My post-pro process involves me importing my raws into Lightroom, adjusting exposure, white balance, etc, but NO sharpening whatsoever (beyond the very basic default amount already set on import). I then export my full size (12”x18”/4500x3000px) shots to Photoshop where I retouch the skin, do some local dodge and burn, etc, and then lastly I’ll sharpen them before saving.
Here is where I’ve been very lazy in the past. I simply sharpen the full-size file appropriately and then I re-save multiple versions out for the web from that one file. This results in that the original sharpen is completely unnoticeable when viewed on somebodies phone screen on Facebook. I literally may as well not have bothered sharpening it at all, because whatever I did to that huge A3 file is all but lost when downsized to the web.
We need to consider the location that these files will end up when sharpening our shots and unfortunately, one size will not fit all.
If you’re interested in my Photoshop sharpening process then you can view all the details here.
The Three Levels of Photoshop Sharpening: Detail, Global, Local
The Re-Size
My advice would be to do your retouch process as normal and even do your subtle large file sharpen as normal too. But at the end of all of that, be sure to add yet another step to the process and re-size and re-sharpen everything based on its intended final viewing location. So for example, if you’re going to post the shot on Facebook, resize it and re-sharpen it accordingly.
Cool, so I just resize my shot in Photoshop, sharpen it and then save it right?
To be fair, yes that is one option. But for me, I like to save out a few versions and I also like to add a little grain to my final images to trick some of the compression algorithms in social media sites.
Wait, what?
Thankfully I’ve already done a complete article on why and how I do this here. This is a trick I use to essentially fool the file compression engine into thinking there is more data in a shot than there really is. This can really help when it comes to reducing color banding in your shots too, so for me and my color work that’s incredibly useful.
So in short, no, I don’t just resize it once, sharpen it and then save it out. I use a slightly different method but please feel free to do what suits your workflow and requirements.
Back to Lightroom
This may seem a little counterintuitive, but when I’ve done all of my Photoshop work, I now save my image once, at its original full size and unflattened. Once all of the images from a set are completed, I fire up Lightroom, resize them all there via the export tool and then I lastly reimport them one last time and sharpen and add grain accordingly for their size before finally saving it out one last time.
Seems ridiculous right? Well you’re not wrong, but this is really only necessary if you a. want to add grain, b. want multiple versions of all different sizes, and c. want your images to look their best online.
Is All That Really Necessary?
One of the steps I really tried to skip was the resize. Unfortunately, this is very important and simply cannot be skipped. For example, I just tried to over-sharpen my large A3 file knowing that it would be viewed smaller. This really does very little and even with very high amounts of sharpening on the big file, the effect was almost unnoticeable when viewed online.
No supplemental sharpening
Lightroom +35 Sharpen
Lightroom +100 Sharpen
So by viewing the shots above, you should see that even though these shots all have drastically different amounts of sharpening applied, they visually look almost identical when seen online.
Note: When I say ‘sharpened in Lightroom’, I’m referring to the sharpen adjustment window halfway down in the Develop module.
What Size do you Recommend for the Web?
You’ll likely hear varying amounts for this one, but for me, I use 2048px on the longest side. I’ve found that this offers the best results on platforms like Facebook where this is the largest size you can get away with before some very heavy-handed resizing and compression kicks in on their end.
Step 1. Import your final Photoshop document into Lightroom.
Step 2. Go to export and then make the relevant size adjustments prior to actually exporting them.
Step 3. Resize to fit. Long Edge. 2048 pixels. 72 Pixels per inch
Step 4. Be sure not to check the ‘Sharpen For’ box.
How Much Sharpening is Too Much?
So now that we’ve resized our shots, import them back in and now we’re finally ready to start sharpening.
But how much sharpening is too much? Personally, I really believe you need to do your own tests, with your own camera, lenses, and workflow, but by all means, look at mine and see what I determined to be the best sharpening amount for me and my work online.
I tried a multitude of amounts and combinations, exported them and then uploaded them all to my site so that I could see what was looking best. Here’s a link to the results and my notes, but be warned, there are a lot of images here some of the tests may not make sense. But don’t worry as I’ve pulled out all the salient points and I’ll share them down below.
From these tests, I concluded that somewhere between 75-100 of Lightroom sharpening was a good amount on a 2048px file.
Take a look below at some of the varying amounts and see for yourself.
Final export at +25 sharpening
Final export at +100 sharpening
Final export at +150 sharpening
As I said, I found the sweet spot for me to be between +75 and +100 sharpening. For the other sliders, I leave them at the default amount which is Radius 1.0, Detail 25 and Masking 0.
I would again urge you to do your own tests as your camera brand and lens choice will play a significant role in your final decision. These images were all captured on the Nikon D850 with the 24-70 f2.8 zoom lens attached.
What About the Grain?
The eagle-eyed among you will likely have noticed the grain already being applied in the above shots. I was very concerned about applying the grain at the same time as sharpening due to sharpened grain looking horrendous in images. One test I did was to resize, add grain, export, import, sharpen, final export. I then compared this to simply applying grain and sharpening simultaneously before the final export. Take a look at the results below.
Resized and then sharpened +100 – No grain
Resized and then sharpened +100, exported, imported, grain applied, final export.
Resized and then sharpened +100 with grain applied simultaneously prior to export.
In a perfect world you’d do it properly by resizing, import, sharpen, export, import and then finally add grain. But to be fair, I was actually very happy with how Lightroom handled the final file when you do both the sharpen and grain at the same time. Take a look for yourselves and compare the shots above, but for me, doing them together is fine and cuts out another step.
How Much Grain?
This will vary from shoot to shoot but here are the settings I use. The Grain window can be found in the ‘Effects’ tab towards the bottom of the pane in the Lightroom Develop module.
Amount: 15
Size: 25
Roughness: 50
Again this is a situation where I would recommend you play with varying amounts and looks to see what works for you. I tend to stick between 15 and 25 but black and white contrasty shots will visually respond well to larger amounts of grain compared to softer color images that require less. But all of this is subjective and you may well hate the idea of adding grain to your shots altogether… which is also fine.
Simple as That
So I fully appreciate that some of you may think that this way too much info. After all, we want to eat the burger, not meet the damn cow, Jake. But for those interested in furthering their understanding of why and how certain things are achieved and arrived at, I’ve included all of my tests and thoughts above. For those with ADHD though, I’ve also included a quick-fire, step-by-step process below which outlines what to do, not why to do it.
Sharpening your Images for the Web
Step 1
Be sure to resize your images for the web prior to sharpening. I import my retouched files from Photoshop into Lightroom and then export them at the new size of 2048px on the longest side. Be sure to do no sharpening at this point.
Step 2
Reimport your resized files back into Lightroom. Now apply the adequate amount of sharpening for your taste. I personally go for a sharpen amount of around 75-100 with a Radius of 1, Detail 25 and Masking 0.
Step 3
Add a small amount of grain to your image via the ‘Effects’ window in the ‘Develop’ module in Lightroom. I tend to keep the amount low, but enough so that it will reduce any color banding that may appear under the heavy compression algorithms of sites like Facebook. For most of my images, I tend to stick to around 15-20 grain amount, 25 size, and 50 roughness.
Step 4
The final export and again, I just use exactly the same settings as in the original export earlier. 2048px on the longest side at 72dpi.
Closing Comments
Once again, I apologize that this article was so long for a topic that simply could have stated ‘be sure to resize your shots before sharpening them’. But as with all of my teachings, I do believe that understanding the reasons you do things is just as important as doing them… this isn’t a 10:01 YouTube video after all ;)
One of the biggest takeaways from this, though, is to reiterate once again how subjective sharpening is. I shared my thoughts on this with a before and after shot on social media the other day and several people mentioned that they preferred the original. That’s totally fine and I may find that I get tired of overly sharp shots too in the future. The point I’m making here is that you may have looked at this article and not agreed with what I’m saying and felt confused. If you prefer the softer version shot, that’s totally okay and there’s nothing wrong with that.
Wherever you sit on this, I will just say that I thought the same thing until recently. I felt that I was sharpening my shots enough and it wasn’t until I did these tests that I actually decided to swallow the humble pie and decide to change my workflow to reflect a shift in the industry.
Resizing and sharpening your shots may already be basic practice to you. In fact, if you started shooting in the last ten years this is basic, common sense to you and the fact that somebody made an article about it is laughable to you. But for those that come from print * cough * old people * cough *, we may not be doing this and, myself included, needed to get with the times.
About the author: Jake Hicks is an editorial and fashion photographer based in Reading, UK. He specializes in keeping the skill in the camera and not just on the screen. If you’d like to learn more about his incredibly popular gelled lighting and post-pro techniques, visit this link for more info. You can find more of his work and writing on his website, Facebook, 500px, Instagram, Twitter, and Flickr. This article was also published here.
from Photography News https://petapixel.com/2019/04/10/are-you-sharpening-your-images-enough/
0 notes
Text
MASTERLIST
If someone isn't listed, you can ask for them to be added but if I say no that's final. I don't owe you a reason either. This is subject to change!!
Pro Heros
Aizawa
Present Mic
Nezu (does he count as a hero?)
Ectoplasm
Mirko
Hawks
Regression Headcannons
Regression Drabble
In-Training
Midoriya
Bakugou (only as regressor)
Todoroki (only as regressor)
Ochaco
Tsuyu (only as CG)
Tokoyami
Sero
Kaminari (only as regressor or babysitter)
Regression Drabble
Mina
Kirishima (only as regressor)
Regression Headcannons
Shoji
Monoma
Kendo
TetsuTetsu
Amajiki
Nejiri
Mirio (only as CG)
Villains
Shigaraki
Regression Headcannons
Dabi
Regression Drabble
Toga
Twice (only as CG)
Mr. Compress
Magne (only as CG)
Skeptic
Trumpet
17 notes
·
View notes
Text

(Via: @raynaadventures)
♡ I assume this is meant for me so, let's go!
♡ Ask game!

📈Age range?
♡ Anywhere between three and twelve. It's never really set in stone! Just a fuzzy smear of feeling smaller and lighter.
💕Do they have a caregiver?
♡ Big sis Magne! But, sometimes Mr. Compress fills in. Toga likes to consider herself a honorary CG, but she's a human espresso shot.
🧸What’s their favourite toy?
♡ Piccolo the Pittie! A stuffed pitbull that became a recent addition to his regression time from big sis! He has a heart shaped patch on his eye from a fight with the dryer, but he's a tough puppy!
🎮What’s their favourite thing to do when they’re small?
♡ Nap. It's hard to get a good night's sleep when he's big, so when all the stress and anxiety seeps out of his bones, he's Gone. And when he wakes up, it's time for chaos!
❤️Who knows about their regression?
♡ The whole league. It's hard to hide something like that when you're as emotionally charged as Twice, but they took it better than anyone could have expected! They're family!!!
🃏Random headcanon about their regression!
♡ On the older end of his regression, he's SO good at video games. To a point that it agitates Shigaraki. Not because he's better than him- no, that's actually fun! It agitates him because Twice is absolutely one of those 12 y/o X-Box live kids. You know the ones.
22 notes
·
View notes