#bc i could only download 720p files :(((((
Note
hi! I just saw your reblog on the rarbg post with the magnet links, and I'm kinda new to this and I was wondering if you could explain what I would copy and paste from that mass of text the links lead me to, as well as what torrent downloader you'd recommend. Thank you if you can help!
yeah, no problem! so the links I put, as labeled, are either for movies or tv shows depending on what you want to download, and they're all sorted alphabetically (with numbers only on the very top!)
A magnet link is basically a link tracing each torrent's metadata which has the links to the files you want to download from that specific torrent, and when you load it up it'll connect to other people (seeds/peers) with that file to download from.
Each link for a torrent begins with magnet:?xt=urn:btih: followed by its info hash code made of random numbers and letters (each torrent file has a different randomized hash - it's what helps set them apart) and then the file's name (eg the movie in this case) and it's quality (720p, 1080p, etc. and H264 or x265, etc.) - you can find the specific torrent with a link bc it has that torrent's unique hash code, and so it traces the files connected to that code.
So for example, I'll download the torrent for Dune 2021 here, starting from the part that begins with magnet:

I select and copy the magnet link for Dune 2021 - in this case I'm going for the 1080p and H264 one - now remember, the better (higher) the resolution, the larger the file will be - and also, for the H264 and x265, those are video compression codecs - x265 compresses better than H264, meaning it takes up less storage overall, but uses more processing power and can have some compatibility issues compared to H264 which it will need a special application/program for depending on your software.
So I paste the link into my torrenter - all torrent software usually has something like "upload torrent file" and "paste torrent magnet link" icons - in my case I'm using qbittorent, here's a screenshot of the icon for link paste and how it looks:

You can put multiple links at a time as long as each is in its own line after (no two links in the same line) - then just click download and the torrenter will begin tracing from the torrent hash to load its associated metadata and files for you to download from other peers. This might take from a few seconds to several minutes to load, but just give it time if it does take a while. Or close and open it another time if it's taking too long.
Now this is very important - when you finish retrieving the metadata from the link I know you're just itching to click the "Ok" button and start downloading, but right before that see the button that says "save as .torrent file"? I want you to click that and save the torrent file to your computer (anywhere's fine, but you should save it in the same place you download the torrent files to - in my case, I save it to my downloads (lol))

You should save the torrent file so that it has all the file metadata so that a) you don't have to recopy and paste the magnet link to redownload the metadata all over again, b) have the metadata saved for access at any time - if you want to redownload the files, share it with another person more easily, etc, and c) so you can automatically re-seed its files afterwards if you want (i'll explain this in a second)
After that you can click "ok" and download the torrent normally, which again might take time depending on how many seeds there are and the strength of either end of the internet connection.
If you manage to fully download everything from a torrent and reach 100% please don't be a leech and remove the torrent from your downloader, instead keep it open so you can seed it back out to other people who want to download it afterwards. This is how we keep the whole torrent web alive!!! And if you do have to remove it later, for storage or whatever reason, I would recommend you keep the files and torrent file saved somewhere else like an external disk so that when you have space again, you can move the files back and re-seed it to others by reopening it with the torrent file (if you open a torrent file for something you already have on your computer, it'll check and see you already have it and automatically start seeding!)
Also, if you want to save the page of magnet links, you can right-click on it and have it saved as a text file offline in case anything happens to the web link - I've already done that just to make sure I can keep it off-hand even if something happens to it online (if the link goes offline for whatever reason and you don't have it saved, you can message me and i'll send you the text files with all the magnet links)


As for torrent downloaders, I personally use qbittorrent downloaded to my disk/applications - in my case it's been pretty reliable downloading and seeding wise, out of all the torrenters I've used so far - I would recommend that.
Oh this turned out to be a lot longer than I expected lol, well I hope it was helpful at least tho! If you have any more questions don't hesitate to message me~! And good luck!
1 note
·
View note
Photo


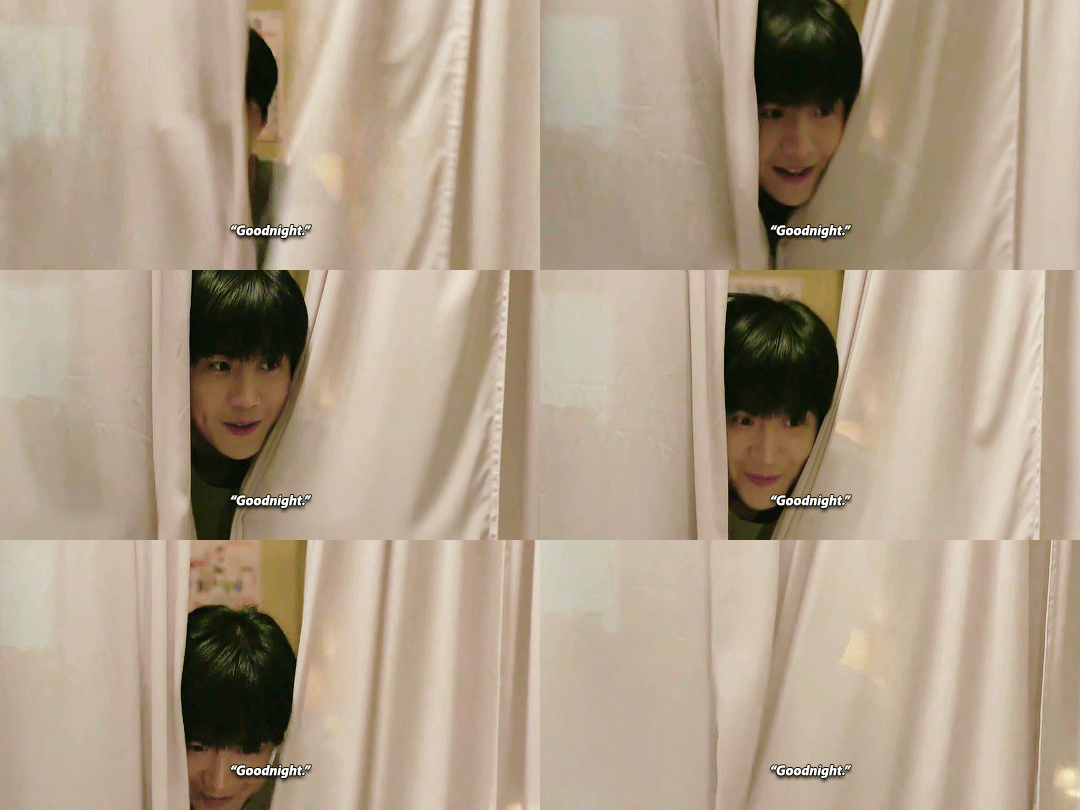
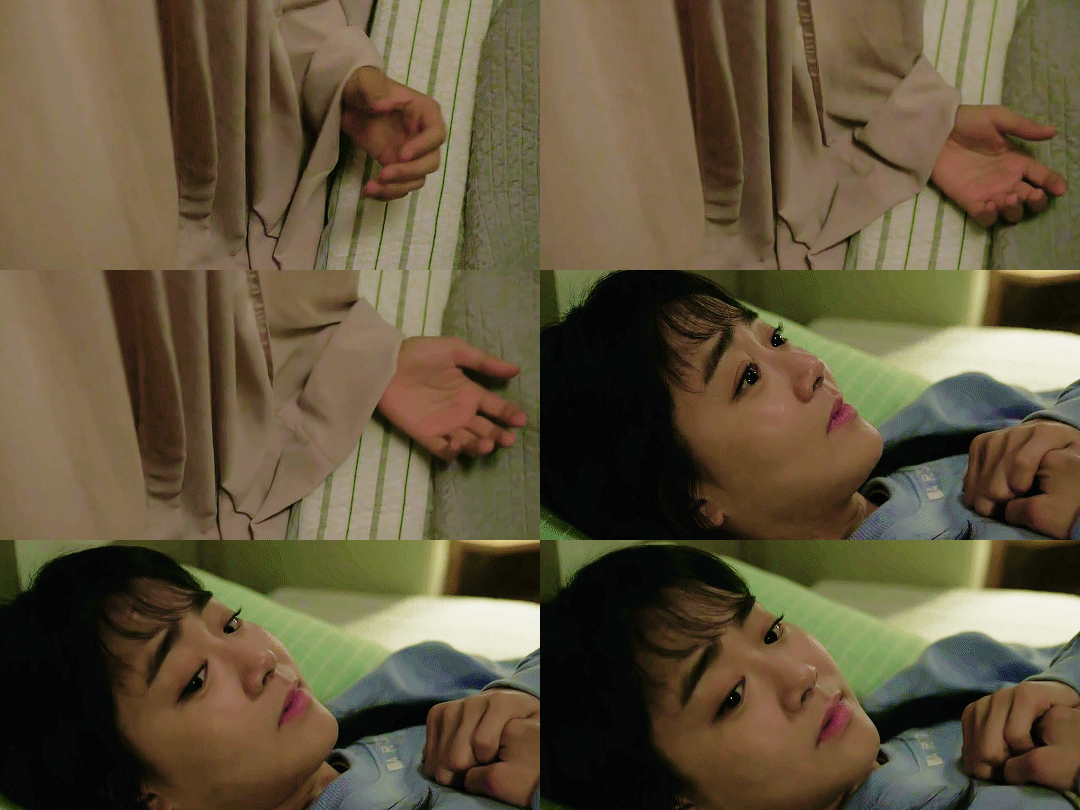

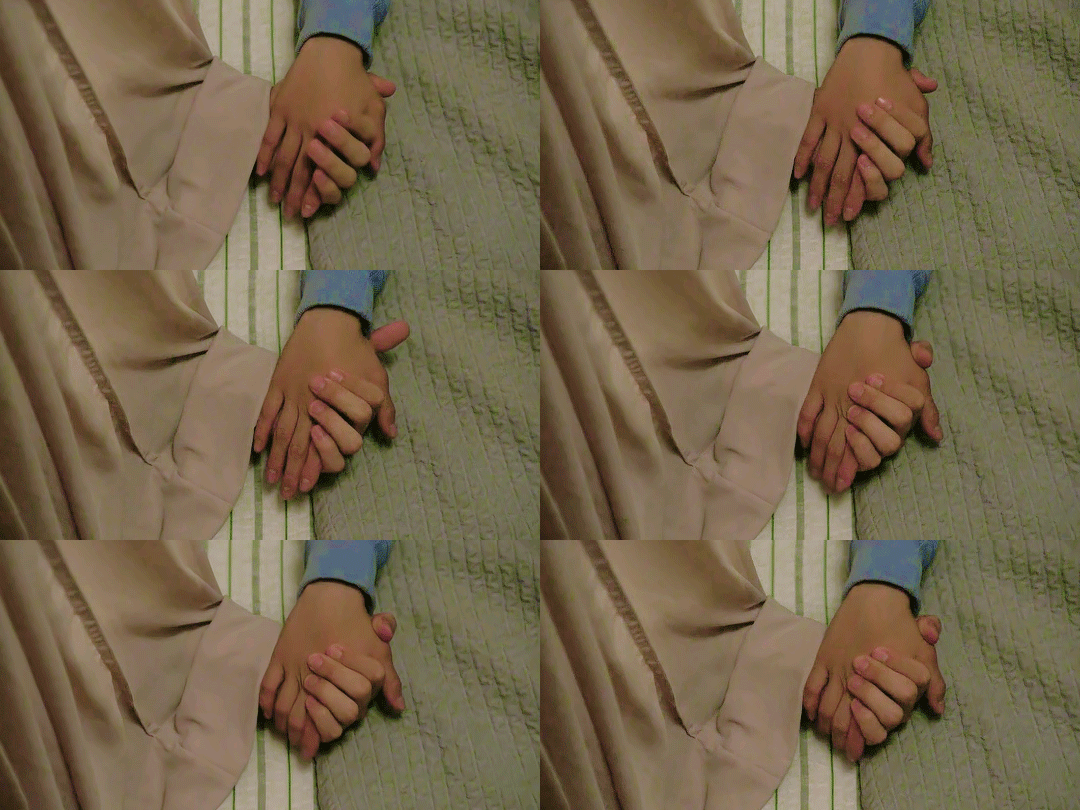
#catch the ghost#kim seon ho#moon geun young#kdramanetwork#kdramaedit#ko ji seok#yoo ryung#moon attempts ps#these are ugly#bc i could only download 720p files :(((((#and also i cant colour dark scenes to save my life#bUT THEY!!!!!!! THEM!!!!!!!#THEY'RE SO CUTE!!!!!!!!#I'M SQUEALING!!!!!!!
294 notes
·
View notes
Note
hello! i wanted to ask how do you manage to make your gifs high quality because i've followed a bunch of tutorials to get that result but my gifs always come out grainy in the end
hi !! thank you for saying so about my gifs💗💗 i dont really know its hard to tell without seeing your whole process, but some things that might help are making sure youre using highest quality file you can find of whatever youre trying to gif, using vapoursynths denoise filter, when you color try to create contrast and darken the shadows/blacks with adjustment layers like levels, curves, brightness & contrast, and exposure (lately ive been always starting out my coloring with those in that order) that will help get rid of any sort of gray cast on the gifs which is where grain comes from a lot of the time,, also try to get rid of any unnecessary colors with a hue & saturation layer bc gifs can only have 256 colors so the fewer you have in your gifs the clearer theyll look because ps wont have to compensate by putting different colors together to create the illusion of the color thats actually supposed to be there,, so like in this set there was originally color in the captions in the first and fourth gif but i removed it so they wouldnt take up any of the 256 colors and they could be replaced by more colors that make up his skin color for example. also this might seem counterintuitive but if nothing else is working you could try actually adding noise, which is what i did in my recent butter concept clip set, the videos were already lq (720p) because i had to download them from twitter and so they looked very pixelated but adding grain helped cover that up, of course that doesnt always fit the vibe of what your giffing and not everyone likes the look of grain but personally i really liked how it turned out in that case🥰
#sorry if i said anything that seems obvious or you already know i just wanted to make sure :)#if you have any more specific questions def send them or if you maybe wanna dm me id be happy to help if i can although im definitely not#an expert!!!#but yea i hope that all made sense and that it helps!!🥺#mail
2 notes
·
View notes
Text
linnéa’s gif tutorialé
how to make this!

⁽ᵗʰᵉ ᵍⁱᶠ ⁿᵒᵗ ᵗʰᵉ ᵍᵘʸ⁾
what you’ll need :
photoshop (cc)
vapoursynth
( basic skills in gif making )
let’s go!
𝕠𝕟𝕖 : download the video
you want to use a video with high quality, 720p - 1080p, anything lower than that is gonna look like SHT. i use this and this site to download youtube videos most of the time
𝕥𝕨𝕠 : vapoursynth
this program is an absolute life saver! what it does is that it converts your video file to be smaller, but keeps its quality (i’m not gonna go into how to install it and everything bc i honestly don’t remember and there are tons of tutorials out there)
after you’ve imported your video into vapoursynth, you’re gonna crop it. if you give it a quick google you can find out what dimensions tumblr recommend you use for the type of gif you’re making. in my case i’m making a big 1x1 gif, so it should be 540px wide (either drag the box how you want it to crop or/and write the size you want in the boxes to the left)

now you’re gonna copy the whole text that’s in the box up right, the text i have highlighted
open up “vapoursynth editor” that should have opened when you imported your video into the program

okay one step at a time! 1 - the text you just copied will be pasted over the text that was originally where the pink highlighted text was! so, the text that were on row 24-27 should be erased and the text you copied before will go over it. i ringed in row 23 to pay attention that the text goes UNDER that row! 2 - we’re now gonna preview the video frames, and for things to go smoother and easier for your laptop you’re gonna add “#” infront of “video” on row 21, that i also ringed in

next you’re gonna click on “script” in the navigation at the top, then you’ll click “preview”. with the preview window that pops up you only have to worry about the timeline thingy. now you’re gonna navigate what frames you want to have in the gif. for example i chose my ending frame to be 134. now it’s time to give vapoursynth these facts. the ring to the left with numbers in it, that’s where you’ll put your start frame and end frame. it should say ( 0, 1360) right? the 0 is start frame and 1360 is end frame. you just have to replace your numbers with those! so for me my numbers are ( 40, 134 )

almost done with the mess part of the tutorial! now you’re gonna erase the “#” that we added earlier on row 21. (honestly idk why just do it aight) now click on “script” again in the navigation, but this time go to “encode video”. here you should change the setting so it says “y4m”. and the last step is to click “start”!
𝕥𝕙𝕣𝕖𝕖 : import frames into photoshop
now it’s photoshop time! open your program and click “file - import - video frames to layers...” and depending on where you installed your output for where your vapoursynth files go, you open that video

𝕗𝕠𝕦𝕣 : convert to timeline and make smart object
i choose to do things with timeline and smart objects bc i find it easier so i’ll show what i do!

click the three box thingies at the very bottom left to create a timeline of your frames. next, select all your layers that you find to the right, and double finger click (or right click on pc) so that a new menu comes up where you select “convert to smart object”
𝕗𝕠𝕦𝕣.𝕗𝕚𝕧𝕖 : crop
this is where i crop my gifs if i don’t do it in vapoursynth but since i’ve already done that let’s move on!
𝕗𝕚𝕧𝕖 : color
time to make our gif pretty!! i use a base psd for my gifs but frankenstein it around every single time for every single gif. the coloring depends on the lightning, the colors on the frames... the mood... the reason why i choose to color before sharpening is bc i sometimes find that the coloring alone can make the gif more crisp, and based on that i sharpen

(yes all my folders are named after red velvet it do be like that)
𝕤𝕚𝕩 : sharpening
my sharpening settings also change all the time so it’s probably no use telling everything i do. but in a nutshell : smart sharpen 0,3-4 at 500%, duplicate layer, gaussian blur, lower opacity of second layer. but YEA there’s tons of pretty actions all over the net
𝕤𝕖𝕧𝕖𝕟 : watermark!!!
since the demon infestation started where ppl steal works bc of the pure darkness in their hearts, it’s a good idea to watermark. making it noticeable but not to the point where it takes away from your work! heck do what you want!
𝕖𝕚𝕘𝕙𝕥 : save
time to save it! click “file - export - save for web”

these are my settings, i hate to say it i hope i don’t sound ridiculous but i don’t know what any of this means. it could be walking down the streets... i wouldn’t know a thing. sorry to anyone wanting to know. what i DO know is that you need to put the looping option to “forever” and the gif limit is 8mb (or is it 10???) mine is pushing it and i would normally make the gif shorter to make it smaller but this is a tutorial so fock it hoshi on the fridge
𝕟𝕚𝕟𝕖 : fix the frame delay smart objects fvcks up
smart objects has one job and it does it well, BUT it messes with the delay of the frames in the gif. to fix that you need to open your gif file that you just made...

... and set the frame delay (i usually go with 0,05-6 seconds) then you just save it for web again and you’re DONE
𝕥𝕖𝕟 : contemplate whether it was worth it

hope this helped anyone! have a good day and stream Y O U R S ;;;;
7 notes
·
View notes
Note
Helloo is it possible you could upload a tutorial of how u make your gifs 🤭❤ also I'm in love with your content(You actually got me to stan got7 haha)
hii!! and thank you omg thats so sweet of you to say 😭 (also what!!!!! i’m honored omg!!!)
so to make my gifs i use photoshop cc and vapoursynth, i don’t know how familiar you are of gif making but my steps are usually
download video
choose which part of the video to gif
import the chosen clip to vapoursynth in order to denoise and sharpen
use photoshop to make the gif/s (import video frames to layers)
coloring
(sharpening)
export and save
there’s a great tutorial here that basically explains how to make gifs in detail i rly recommend following or just reading it to get a basic understanding of how to make gifs using photoshop, vapoursynth, downloading videos and coloring!!
okay so this tutorial really explains It All but i’ll try to explain what i do that might not be in the tutorial so please don’t just follow mine, read through this if u really wanna know it all in detail!!
step 1: downloading videos
to get the the highest quality for your gifs you should download videos with the highest quality you can find. i usually download 1080p videos, but in some cases 720p videos works as well!! for performances .ts-files usually have the highest quality
for performances i download the videos from kpopexciting (bc i don’t have an acc for kpop24hrs 😓). for youtube videos i use 4kdownloader or y2mate mostly, for vlive videos i usually use savieo and sometimes i screen record a part in a video using quicktime player if i’m really lazy
if you wanna find videos for specifically got7 i recommend looking through this archive here (jytrain), they have archived most videos from got7’s debut until lullaby era (i love love love loooveee!!!) and for newer videos p922p on twitter usually uploads ts.files, bless<3
step 2: choosing which part to gif
kinda self-explanatory but u choose which part to gif basically hbvndnf if it’s a mp4-video then i usually trim the video into smaller clips using quicktime player (edit > trim...) and if it’s a ts-file i trim the videos using vlc (playback (i think.. idk mine is in swedish...😩) > record, and then play the video at the time you want it to start recording, and then press playback > record again to stop. there should be a check mark in the second “record” when u want to stop it)
step 3: import clips to vapoursynth
denoise and sharpening time!! they really explain it so well here so i recommend reading how to do this there. you could also skip this step if you don’t want to use vapoursynth, not everyone does! i didn’t use vapoursynth until like january this year
my vapoursynth settings are usually denoise: KNML at around 1.5-1.7 and then i use sharpening: finesharp at 0.7-1
step 4: use photoshop to make the gif/s
time to gif!! and honestly they explain it well here so i’ll just link this again
step 5: coloring
coloring a gif is the most fun for me bc this it the time you can really play around with the colors. i usually go for a vibrant look in my gifs, but this is just a personal preference. it’s totally up to you how you want your gifs to look like! if it’s your first time making a gif and trying to color, i would recommend downloading psds (like pre-made colorings that creators have been nice to share with everyone) to see how each adjustment layer plays a role in coloring. some good resources blogs: itsphotoshop, completeresources, chaoticresources
i did upload a psd pack waaaay back which u can find here but i don’t really use any of them anymore hbnfhdn (the eoy tourgraph one is a personal fave tho...<3) (also disclaimer: the base psd in this pack is actually Not a base psd it kinda only works with that particular scene, i just needed one more to fill out the pack hbdhfnvhbnf)
so to actual tips: when it comes to coloring i firstly just color correct (or try to make the gif a blueish tone bc i like how that looks) using curves layers. there’s an amazing tutorial explaining and showing more how to color correct using curves layers here (100% recommend!!!! its SO easy once you get the hang of it). i use the white point and the black point the most, but sometimes i use the gray point too. when u use the white point, try to find the lightest part in your gif. and when using the black point you should try finding the darkest point in your gif. i like to mess around with the opacity of these layers too
after color correcting i usually mess around with color balance, selective color, vibrance and brightness/contrast
step 6: sharpening
i put this in a bracket bc i never rly sharpen gifs in ps anymore since using vapoursynth, but if you want to you can add even more sharpening here if you would like
step 7. export & save
when you feel satisfied and done, go to export > save for web and save your gif!! dooone!!! 💫
i also uploaded a gif making process video here if you want to check out how i personally do it, but i basically just follow the steps given in the tutorial that i linked several times hbbdfhn
i hope this helped!!! lmk if u have any questions and i’ll try my best to help 🥰
#okay this got long i didnt think i was gonna write this much but uhm yeah .....😩#hope this helps tho!!! lmk if u need any more help i'll gladly try to help as much as i can!!#resources#<- just so i can find it again hbfsdbbsnv#anonymous#answered
3 notes
·
View notes
Text
gif tutorial for anon!
hi everyone! an anon asked me about how i sharpen my gifs and i got a bit carried away in my answer so i decided to just turn it into a tutorial oop.
disclaimer: i’m still a beginner, so some of the stuff i do might be a bit weird! also, two of the “tricks” i use i did not come up with/figure out on my own, i linked to the posts of the original creator’s in the step.
so my settings do vary for each gif, but in this tutorial i just go through all the general steps i use for each gif i make, so hopefully it’s at least a bit helpful to someone!!! there’s a lot of images bc i’m a visual leaner so sorry if you’re not!!!🥺
for this tutorial you will need:
- photoshop + basic photoshop understanding.
- a way to download videos.
- patience with my ramblings.
- i think that’s it?
ok here we go!!! so.
step one: the first thing you do is find the video you want to gif. i’m gonna do this one:

i use clipgrab to download videos of the youtube, which i downloaded for free from right here. i haven’t gotten a virus yet, so it seems safe. it works for youtube videos and instagram videos, but not twitter videos or vlives.
there’s also Y2Mate which is online and does the same thing, but i think for only youtube videos - i also can’t completely vouch for it because i’ve never used it, but i think it should work just fine! you can find it right here.
IMPORTANT - make sure that your video is as high quality as possible. you can either change that on youtube by clicking on the gear in the play bar (right next to cc box). usually videos are automatically set to 720p, which is pretty good, but i like to bump it up to 1080p when there’s the option to! note: clipgrab usually does this automatically for you, i’m not positive about Y2Mate and other online converters.
step two: copy the link into your converter. make sure that the quality is where you want it, then hit “grab this clip” or “convert” or whatever the prompt is and it will download onto your computer. save it wherever you want to that you’ll find it, i usually just save it to my desktop so that it’s right there for me.
step three (optional): i like to crop the video down and do a primary editing on imovie just so it’s easier to manage when making the gifs. this step isn’t necessary, but if you have imovie or another video editing app, i would suggest it!! (you can also slow down the video here if it’s too fast to make a good gif!)
here’s a before and after shot!

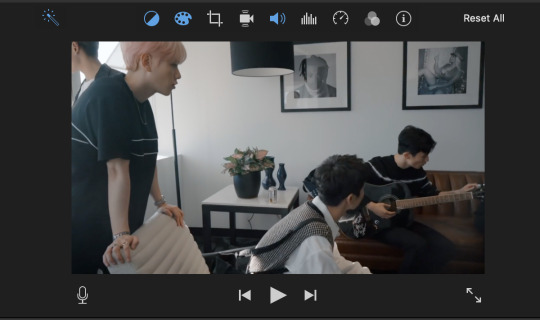
for me, i literally just click the “magic wand” or “auto-adjust” tool. but you can already see it makes a big difference!
so now i also use iMovie to crop down to the gifs i think i want to use. it makes things easier to be precise when using photoshop.
step three and a half: export your new mph. once again, make sure the quality and resolution is bumped up to your liking!

step four: so now it is time to use photoshop! open up a new document. you can set it to whatever dimensions you like, i typically prefer 500x281, but it doesn’t actually matter because it will automatically resize to the size of your video lol. anyways, once you have your canvas open, go to file -> import -> video frames to layers.
depending on if you have more than one gif in the movie file, you can either crop it down or just import the whole thing. since i have to gifs in this file, i’m going to crop it.

step five: okay, full credit to this life saving post for the next step!!!! i was stumped on how to edit all layers of a gif at once for quite a bit of time, which is why some of my earlier gifs are a much crustier looking. anyways, op explains it much better than i ever could, so i would suggest just reading their tutorial for this step!!!
step six: so now that you’ve combined all your gif layers into a smart object, it’s time to edit them!! the adjustments i typically mess around with are image -> adjustments. i almost always adjust the brightness/contrast, vibrance, hue/saturation, and selective color. i don’t have specific settings for these (sorry if that’s not helpful!) because it really does depend on each individual gif! sometimes my adjustments are drastically different for gifs from the same video!! i’m perfectly happy to help troubleshoot for specific issues if you need help, but it’s hard for me to give a blanket tutorial for this part :)
also remember to not whitewash poc when adjusting the settings. please don’t do this!!!! it’s also possible to correct whitewash w/photoshop, so just fool around on the settings until the subject’s skin tone is what it should be.
step seven: after adjusting your gif to your liking, now it’s time to actually sharpen. for steps 7 through 10, i use a trick from this amazing post to sharpen! so now that you’ve adjusted all your layers, do control/command click on the layer and choose duplicate layer. this will make a copy of the edited gif.
step eight: on the original layer, go to filter -> sharpen -> smart sharpen. once again, every gif is different so depending on the size and quality of your gif, the sharpen settings will be different. the larger the gif is, the more you can sharpen it, which is why i like to wait until the end to resize it!

step nine: on the copied layer go to filter -> blur -> gaussian blur. again, the amount of blur will depend on your gif. this step just smooths it out. don’t worry if it looks blurry, because it’s supposed to! after this, still on the copied layer, go to filter -> sharpers -> smart sharpen once more.

step ten: cool! now you’re going to lower the opacity of the copied layer! i usually put it at about 30 percent!
step eleven: go to file -> export -> safe for web (legacy). this is were the resizing goes! so for this particular gif, i didn’t have to crop it or anything. so the only think i do to resize it is make it 500x281. this size usually ensures it will be small enough to upload to tumblr, and it is a ratio of most standard sized videos so it works perfectly!!
and voila!

i’m so sorry if that was very long and/or hard to understand!!! please feel free to ask any clarifying questions!!
4 notes
·
View notes
Note
henlo! can u post a gif tutorial cause your gifs are so pretty and look amazing, even on mobile which messes up with everythjng 😆
ahh anon u flatter me!! thank you for your kind words!!! i honestly have ways to go, but it means a lot that u say this thank you
so for starters i have a mac + photoshop cs5 so a lot of this tutorial will be based on what you do for that, but i’m sure u could do the same thing on pcs (actually pcs have more programs available so i highly recommend, if u have a pc, finding a tutorial that is based around pcs) and other photoshop versions too! but i think the general process is still the same, a different tutorial might just be more nuanced^^
1. Finding/downloading your video~so for normal mp4 videos on youtube i use this website. it’s pretty useful it can download from actually a wide variety of sites like naver (up till 1080p!) ~for v app videos i use this site~ts files i find on kpopexciting or kpop24hrs (u need an account for kpop24hrs i think to download video but! signing up isnt difficult and its nothing fishy. i use it a lot esp for older ts files it has a good archive, kpopexciting tends to be faster though.)~the higher quality files you find the better! i find that it tends to go mp4~honestly finding the right high quality video is a HUGE part of making gifs look nice2. Extracting your video~there are many many many ways to extract your video but I highly recommend downloading avisynth! There are ways to download it for pc! avisynth is beautiful because it doesn’t really reduce the quality of your video to the extent that photoshop does, plus it can extract 60fps from ts files. some gifs ive made through avisynth ( x x x ) if you’re interested in avisynth further, tumblr user @/brandinator is a good place to start! if you want to know more regarding how to use it and a different tutorial through that, let me know! ~now i’m not sure if there is an avisynth tutorial for mac anymore, BUT theres another great program, vapoursynth, that mac users can look into. here’s a tutorial that i’ve found~Before I got avisynth I used VLC player for ts files but I had to basically screenshot each frame individually. Some gifs I’ve made through this method ( x x x ). these gifs are 60fps only bc i found a user who uploaded the ts file in 60fps. usually you cant get 60fps w/o avisynth. but this is also me saying that if you cant get avisynth or vapoursynth, there are still ways to work around it i think! one of my fav giffers for the longest time didnt use either!! and sharpening and coloring were always on point.~I think pcs can use kmplayer? id look into that if you have a pc~for normal mp4 videos I just use photoshops ‘import video frames to layers’ option (under file in the menubar)! you can use avisynth as well, but for me it takes forever to extract what i want in avisynth (minimum like a minute ish), whereas ps can get the part of the video i want to gif in a couple of seconds. I think it’s self explanatory but basically you find the video you want to extract, find where u want ur gif to start, and for photoshop cs5, you hit the ‘shift’ key and let the part u want giffed in the video play. when youre done u lift the shift key and hit ‘ok’ (idk if it differs for different versions of ps). i extract all!!! frames!! it makes it look smoother too :)
3. Coloring/Sharpening/Cropping/Etc~now this is the step that I can’t really give a tutorial on because honestly it varies for everyone! but i feel that this is the step that a lot of ppl need guidance with (me included) because it is the hardest step, probably because it is so ‘up in the air’ for lack of a better word? there is no one right way of doing it the possibilities are literally endless but here are some tips~Coloring: ~most important rule: don’t whitewash ur gifs!! ~other than that, the world is yours. ~honestly have fun with this part! coloring is something that i haven’t fully learned yet ~i tend to play around mainly with the curves, selective color, hue/saturation, and color balance layers ~you can also download psds other ppl have made (i dont do this myself) and use those! ~also i feel that a lot of the times, the right coloring can make ur gif seem higher quality. coloring can also play a role in reducing gif size if u do it correctly. ~honestly this part is just a lot of experimentation, over the course of a gifset and over the course of time in general. some people find their coloring style easily, but i was not one of those people. ive spent a lot of time trying to figure out how to adjust what layers to get the colors that i want and i think only as of this era ive been able to execute the coloring i had pictured in my mind. so patience is a virtue!!! ~Sharpening: ~ah yes my biggest enemy: sharpening ~first things first, i sharpen my gifs using smart sharpen + topaz ~settings for my smart sharpen are 500%; 0.4 ~check the box that says ‘more accurate’ and i personally remove ‘gaussian blur’ ~some people also use topaz denoise, and/or topaz clean ~ honestly topaz is a lifesaver for me bc it smoothes out a lot of grain that can be introduced via coloring! also!!! it can reduce gif size by a lot!!!!!!!!!!! ~on topaz denoise i hit the ‘light’ setting on the side and adjust the settings accordingly ~idk how to use topaz clean even though I have it, because it refuses to work ~to apply topaz you have to hit ‘flatten frames into layers’ ~some gifs i’ve made with just topaz and no avisynth ( x x x x) ~there are ways to make it look nice without topaz but i’ve forgotten how after i got it ~id duplicate the frame then use smart sharpen and ‘gaussian blur’ under ‘blur’ ~then adjust the opacity levels in some way. ~my settings for the opacity levels aren’t good so i’ll refrain from sharing ~some gifs ive made through this method ( x x ) ~last but not least i’ll bring up avisynth again. avisynth is nice at preserving video quality ~a lot of ppl i know say they don’t even sharpen gifs out of avisynth ~here are some gifs i have made with avisynth + topaz ( x x x x x x x ) ~honestly when it comes to sharpening, im still floundering with it. my sharpening needs a lot of work but, amongst the people who i consider good sharpners, most of them use avisynth, topaz denoise and/or clean, and smart sharpen! so all the resources are here !
~Cropping: ~it’s super important to follow tumblr dimensions otherwise gifs come out looking grainy! even when they’re not ! (case in point: x in which i used 168 instead of 178 for the dimensions)~Timing: ~Timing is so important!!! I almost forgot!! Always make sure u dont have duplicate frames for starters! for 60fps source videos i use .03, for mp4s i typically use .04 but sometimes the frame rate is kinda funky so you may have to go slower accordingly! and the important thing about timing is that if u use smart object, when u save ur gif, it’ll be in a different timing? like .04 gets changed to .07 but in order to fix that, u can simply just save ur gif in the wrong timing, and then reopen the gif in ps, simply change the timing to what u want on all ur frames, and then save it again!! idk if that made any sense but laskdjf this was the biggest mystery for me for so long omg4. Saving the gif~personally the save settings I use are “Selective/Adaptive” ; “Diffusive”; Dither: 100%; 256 colors. sometimes this makes the gif super grainy so i use “pattern” instead of “diffusive” in those instances5. Pray Perseverance ~a lot of the time when you’re giffing, gifs won’t come out the way you want it (i’m sure for every gifset i’ve uploaded on tumblr, there’s a gifset that i started making and never finished because it looked really bad). idk sometimes it feels like photoshop has its own will, sharpenings wont always work the same way each time, video quality won’t be the way you want it, i’m honestly still very experimental right now I don’t have ps figured out at all. so yeah…sometimes all u can do is that when u hit that save for web button (that ruins everything alskf), pray that ps doesnt mess it up too bad ahahaha but also that even when it does, its okay and you can try again! or try something new!
this is a super generic guide! let me know if you need more information!
10 notes
·
View notes
Note
hey how do you create your gifs? because im thinking about making a blog soon one I get a laptop also what programs do yo use and video download
(sorry this is kinda long so putting it under read more)
hey anon, im not sure if u wanted a tutorial or just a general answer but heres a list of what i use to make gifs:
the comp i use is a macbook pro (which i rly shouldn't be making gifs on bc it's too old and one day it's just going to...give up on me but at this point im too attached to it :( if i could get new comp in the future though, i'd get a windows one since apple purposely slows down their products as it ages... the lag that comes w it is a real goddamn btch of an unsatisfactory situation when making gifs)
firstly i use avisynth to start the gifmaking process
brandinator, god of avisynth has a tutorial [here] on how to install for windows
unfortunately for the mac tutorial that i used to install avisynth, the op blindkpop (bless them i hope they are doing well) deactivated their blog and i can't remember the steps on how to install it (but if i find smth in the future ill let u know)
i recommend learning how to make a gif on photoshop first before learning avisynth
after avisynth, i use photoshop cs6 and topaz
i'll link u to some recent-ish tutorials on how to install and download photoshop but im sorry i can't confirm that these work and install alright bc the photoshop i hav rn was from a few years ago (and my university gave it to me)
photoshop cs6 windows: fatenumberfor's [tutorial]
photoshop cs6 mac: [this tutorial] might be helpful. the ps trial link might not work so [here]
for the topaz plugin: [this link] for both windows and mac
yeahps has more photoshop dl resources so if none of these work, try another on [this] tag
i recommend these vids [this for windows] and [this for mac] to learn how to make a gif on photoshop
for downloading vids:
i always download from the most original source at greater than or at least 720p resolution (youtube, v live, naver etc) or i get them from mx dvds
for youtube: i use [4k video downloader] which is available for both mac and windows
here are some useful vids on how to use 4k video downloader: [windows here] and [mac here]
for vlive (non-channel+): i use [soshistagram]'s online downloader. a helpful tutorial on how to use this as well as other ways to download vlive vids can be found [here]
apparently [videograbber] also works for downloading vlive
for naver: [2getflv] online downloader works well even if it's blocked in your region [this] tutorial explains how to download from this website
i try to avoid using .ts files for performance gifs bc it lags my computer but if i do use them, they are either from [monsta_x_mas], [kpopexciting] or [kpop24hours]
if u wanted a tutorial on how i actually make gifs, pls let me know and ill try my best to make one for u but it would be for a mac (my free time is limited atm so it'll take some time for me to write it up though) pretty much all of the things i know abt making gifs are from others' tutorials on how they make gifs..i know nothing and im only able to make gifs thanks to them :( [yeahps] has a lot of tutorials for making gifs which helped me a lot !
i hope there was smth helpful within this mess :( sorry if it's not as detailed as what u were looking for but if u ever need help, u can always send me a msg and though im still mediocre at this stuff, ill try my best to help u out w things i do know how to do
when u do start making gifs, i hope u hav a fun doing so !! dont be too harsh on yourself if it doesnt turn out the way u like the first time around. as with all things we practice in life, with time u will surely get better at it. good luck w making your blog !! id like to see ur blog when its made if ur comfy w sharing it w me !! hope u had a lovely day !!!
p.s. i forgot to link the dashboard sizes for gifs whoops: [here]
#i triple checked but i hope all the links to the links work ok !#hope this is what u were asking for im sorry i took so long to reply :(#also soshistagram online vlive downloader is currently down atm i hope its back up soon :(#sorry this is the only ask i hav time to answer today :(((#ask#Anonymous
25 notes
·
View notes
Note
I love your gifs. I love your blog and you are so nice. I was just wondering if you could help me. I want to start gifing and I was wondering where you get your scenes? Like do you download all the episodes? And what program do you use to capture and then import them to photoshop? Any advice would be great. Thank you and keep being amazing. :)
WHAT A THING TO WAKE UP TO thank you so much, nonny ;v;/// I’m really glad you’re enjoying this blog and thank you for your support 💖💖
Of course, I’d love to help you get started with giffing! There are tons of really great tutorials out there but I’m a particular fan of this one (which definitely isn’t the one I used to get started, but is a lot more helpful and accurate to the process I use now).
For Shadowhunters, I download all my episodes from @movealecsgay who uploads them and provides links on a private sideblog. You’ll have to ask permission for access - information can be found on this post! I think you can torrent Shadowhunters somewhere, but I have a world of trouble finding new episodes in anything that isn’t 720p HDTV / WEB. It’s a lot easier to work with 1080p and the results are generally nicer.
Like in the tutorial, to extract frames from scenes, I use KMP Player - it’s probably one of the easier programs to use, and it’s very versatile. I know VLC Player can also extract frames, but it’s a lot more annoying use imo. Definitely don’t extract your scenes in Photoshop itself bc it uses all the processes on your computer and makes everything soooooo slow, and has nearly zero accuracy. Trust me: not worth the effort and headache. 😂😂
Once you get your frames, dump them into one folder for each gif you plan on making and load them into Photoshop. Go to File > Scripts and you’ll find several options, but the one for importing would be the “Load Files into Stack” or “Load Multiple DICOM Files” - you can use either but I pick DICOM because for some odd reason you don’t need to reverse the frames when you pick that.
Uhmm some general advice:
Don’t be afraid of the darkness/black - I get really intimidated trying to retain every single detail of a scene and most of the time, it’s really not worth it/the results actually look better with a lot more black to them. This is actually something I’m still struggling with lkjqwr
On a related note, don’t be too afraid of brightness either! I find good gifs have a pretty good balance of both darkness and light, and colour
I have no real advice on colouring other than “good luck” and “it’s a bitch and a half” but it’s rewarding when you make something you like in the end. There are a ton of tutorials out there but I don’t have the patience to sit with them 90% of the time
Be confident! I’ve definitely made a few sets that I hated so much that I’ve never posted them. As it is, I post things I’m not 100% satisfied with but people seem to like them so it’s hard to predict what will make people scream and what’ll get swept under the rug
When you’re posting something new, only the first five tags count, so make them count! Get all the edit tags and people will definitely see them. Be a little obnoxious (but like. not too obnoxious lkqjr)
Anyways, this got really long and rambly, I’m sorry! I hope there’s something useful in this frankly obnoxious wall of text I am so sorryqwlqwr here, and let me know if there’s anything else you’d like advice with :D
6 notes
·
View notes
Note
HI sorry to bother you but I saw that you learned how to create to files and I was wondering if you could tell me what program you use or what to look up bc when I look for how to make them I don't seem to be coming up with anything. Maybe I'm just searching wrong ???
okay sorry this is a late reply, but I use a desktop programme download found here that converts MP4 files to TS files (and tons of other formats too, I particularly am fond of it’s HD settings) but it does only go up to 720p at free level (which I use).
I hope this is useful! Happy giffing!! (I presume that’s what you want it for! )
1 note
·
View note
Note
1) hey man, i admire what youre doing w uploading the b99 eps, but you might want to get them from better sources. i highly recommend psarips, they encode everything in hevc, which means their files retain great quality while taking up a lot less space. for example, their encode of s06e01 in 1080p from a webrip (no watermarks) is only 231mb, while the killers 720p hdtv rip is 483mb. by switching, you could save space on your drive and make the download times shorter for the ppl getting them from
2) you. the only downside i see with psa is that their encodes take a little bit longer to become available; whereas the hdtv rips can be available like 20m after its done airing, the psa webrips may take a few hours. what i do if i dont wanna wait and have time to watch it immediately is grab the hdtv at first, just bc its whats available, and then download the psa rip for posterity when it becomes available. you might want to look into that. link: psarips. com/tv-show/brooklyn-nine-nine/
3) with love, someone with over a terabyte of movies and tv shows. (ps: psarips is also great for movies! basically everything they do is great! they dont always have the smallest file size among all the hevc release groups, but they are definitely the ones with the best tradeoff between quality and file size)
I don’t know if this anon is going to read this, but thank you so much! I’ve checked out the website and I’ll be replacing the current upload of episode 1 I have with an HD version from psarips! Basically, I’ll upload anything with legible quality that is available before replacing it with the ultra HD version thanks to your link.
0 notes
Text
i prepared a video a couple of weeks ago that i was gonna publish on The Big Day (tomorrow) but i had to make it in windows movie maker since my pos computer won't run vegas..... anyway it's been hell bc it didn't even work and after a while i had to change to using my school laptop, which is a tiny ass acer with almost no space or capability to run heavy hardware, and because wmm wasn't able to work with most video formats and converting the file didn't work i had to download another file from the web, then upload it to my youtube channel (unlisted) and then download it from there (because wmm could only work with 720p mp4 videos and not 1080p ts formatted videos, idk). finally i finished the whole thing but even though i'd rendered the video literally 9 times before it wouldn't work this time, and since wmm automatically increases the saturation of the clips while rendering i couldn't use any of the old saves since rendering a video twice made it look like a fuckin circus lmao. so now, a day before i need to publish the video, i'm re-making the entire thing on an old trial of vegas i managed to download to my school laptop, desperately hoping it will be able to render it without my $30 laptop crashing for good
#chatter#ya my school laptop literally was that cheap#and the video i'm making is really not anything advanced#it's clip heavy but that's it#and only 4 minutes long???? like.... what computer can't manage to render a 4min video in wmm???#MINE APPARENTLY#sigh
0 notes