#all home service
Text

Dealing with a malfunctioning oven is usually a simple task, whether you're a cooking enthusiast or someone who avoids the kitchen. Ovens and stovetops are used extensively day in and day out, so encountering malfunctions and breakdowns is quite common. However, if you find yourself frequently footing the repair bills, it can be frustrating. The soaring repair costs can significantly impact your finances, leaving you with a considerable dent in your wallet. Fortunately, there's a way to avoid this inconvenience – consider home warranty plans.
When shopping for everyday home appliances like an oven, it's both fun and essential. Don't shy away from using your oven for fear that it might suddenly fail. Simply not using it won't prevent malfunctions. Embracing a home warranty plan makes perfect sense. However, be cautious and don't invest in just any random company. Take the time to check reviews, assess the services offered, and compare prices. ServicePlus Home Warranty, for example, offers multiple plans at varying prices, so you can choose the one that best suits your needs and budget.
Being able to maintain and repair your oven when it seizes can be incredibly beneficial. Understanding DIY techniques to fix minor malfunctions will ensure you can continue cooking your favorite dishes without disruptions.
Let's address one common issue: an oven that's not reaching the correct temperature for baking or cooking. Consuming undercooked food is undesirable, so knowing how to address this problem is crucial.
One possible cause could be a faulty temperature sensor. Locate the sensor, which is typically positioned at the upper backside of the oven. Ensure it isn't too close to the oven walls to avoid damage during operation or when cleaning. Try gently adjusting the sensor. If the issue persists, it's advisable to call in technicians to inspect and potentially replace the sensor.
You might wonder why you should pay technicians' fees. However, leaving a faulty oven unattended is not a viable option, and the costs of replacing the appliance would be even higher. By utilizing home warranty plans, you can cover the repair expenses without spending a penny from your own pocket.
Is the Oven Light Not Working?
If you find the tiny light inside your oven acting up, there's no need to panic—it's usually not a major issue. You can continue cooking without much trouble. However, knowing how to change the light bulb yourself could be beneficial. Sometimes, the problem might be more serious, such as snapped wires or a faulty switch. In such cases, attempting self-assistance is not recommended. It's best to leave the responsibility of fixing the fault to a qualified technician.
Worried about the potential cost? Don't be. Home warranty plans cover the expenses, ensuring that any inconveniences with your oven will be taken care of without putting a strain on your pocket.
0 notes
Photo

probably a good thing i don’t live in london because i might be inclined to hunt this man down and kill him with my bare hands xox
#i am so sick of this island lmao#PEOPLE CAN'T AFFORD TO EAT OR HEAT THEIR HOMES#CAN'T AFFORD TO PUT SHOES ON THEIR CHILDREN'S FEET#'we all have to do our bit' while our gov passes multmillion £ contracts to their rich pals#ruining our public services while someone lines their pockets#large corporations consistently dodging tax and getting away with it#this IS the bad place honestly#fuck the tories
7K notes
·
View notes
Text
DP x DC AU: Danny desperately wants to find the explosion guy. Tim is really good at covering his tracks... he didn't account for ghosts.
The explosions make it onto TV as purported terror activity and most people haven't heard of that part of the world much less ever given a second thought to care about it. The only real reason it gets reported on has something to do with the Justice League and... Danny knows too much.
He's been in training for Clockwork's court (which he's suspicious of- feels like kingly duty bullshit- but Danny is playing along out of curiosity for now) and he's learned a lot about how the living and non-living worlds collide. That means learning about CW's usual suspects- one of which just happened to have a ton of bases around the area Danny was seeing on the news.
It didn't take long for Danny to try to piece together that whoever blew up Nanda Parbat was trying to fuck with the League of Shadows, and was doing it successfully. Less green portals in the world the better, same goes for assassins. But it gets Danny thinking... Maybe he can employ similar tactics on the GIW Bases that keep spawning on the edges of Amity Park. It would at least set them back while he and his friends navigated the help line desk to request Justice League intervention. None of them can leave Amity Park, so outreach is going to have to be creative.
So Danny figures he'll just find the guy. Call up some ghosts who were there, or er, came from there and get a profile and track him down. But the ghosts keep saying it was The Detective. Annoying!
Danny goes full conspiracy theory, gets Tucker and Sam involved, and begrudgingly asks Wes Weston his thoughts.
He hadn't expected Wes to garble out a thirty minute presentation (that had 100 more slides left to go before he cut it off) about how Batman totally trained with a cult and so did his kids. Danny kind of rolled his eyes but... hey, new avenue of searching in the Infinite Realms at least.
The ghosts confirm that Bombs is for sure not Batman's MO- But maybe his second kid would know? The second kid was already brought back to life though, so no way to easily reach him... Danny starts to realize that this might be the work of a Robin now. Wasn't the red one known for solving cold cases? (Sam provides this information- its a social faux pas to not know hero gossip at Gotham Galas- everything she's learned is against her will).
It all comes to a head when Danny goes about the hard task of opening a portal for the guy to come through at just the right time, explain the infinite realms so he doesn't panic and then describe what the fuck was going on with the GIW. It takes months, just over a full year, of random (educated guesses) portal generating- Finally, Red Robin drops into the land of the dead.
"So, you're the guy I've got to talk to about explosions right?" Danny enthusiastically asks.
Tim thinks he's died and landed in the after life following 56 hours of being awake and plummeting off the side of a building into a Lazarus pool. Nothing makes sense about the kid in front of him.
"Yeah, I got a guy for munitions." Tim answers cooly.
"How do you feel about secretly sanctioned government operations that violate protected rights?"
"Gotta get rid of 'em some how. Need me to point you in the right direction?" This might as well be happening.
#dcxdp#dpxdc#dp x dc#dc x dp#danny phantom#long post#tim drake#red robin#tim and danny team up to blow up the GIW au#Tim being known as the explosion guy is my favorite and i will not let this part of his lore go ignored#Jason is the munitions guy obviously and the ghosts go crazy over the gossip it enlights when he helps in amity park#Danny one hundred percent is living for this working relationship- what a weirdo -danny hasn't met someone stranger than himself in a min#tim bartering his services for a few more years of life and danny just pikachu facing him#Tim wants to improve his relations in the afterlife be he still completely thinks hes dead#danny: dude ur still alive#Tim: yeah thats the goal but i'll help you meet your goals first and then we can negotiate#Danny decides to make the guy super ghost rich (thinking big Haunt real estate) and send him home#Tim blows up the GIW with no remorse and with all the data back up for proper justice to be served court side#tim returns from the dead and this is how the bats learn that he's the one who blew up nanda parbat all those years ago#it takes danny so long to find tim bc tim was spiralling and only after bruce got back did he get into a normal routine enough to get got
665 notes
·
View notes
Text

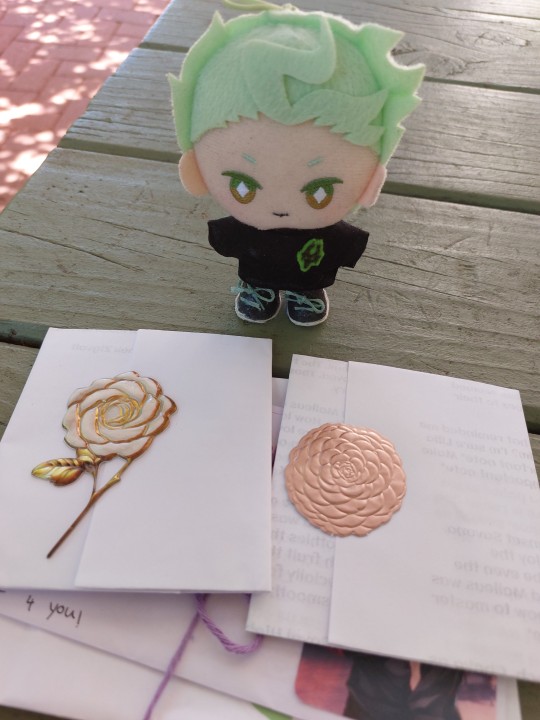

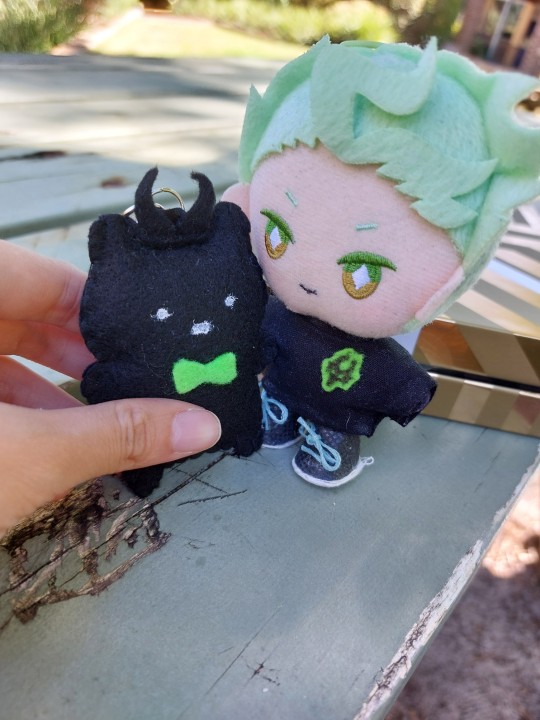
Look what came through the mail today!
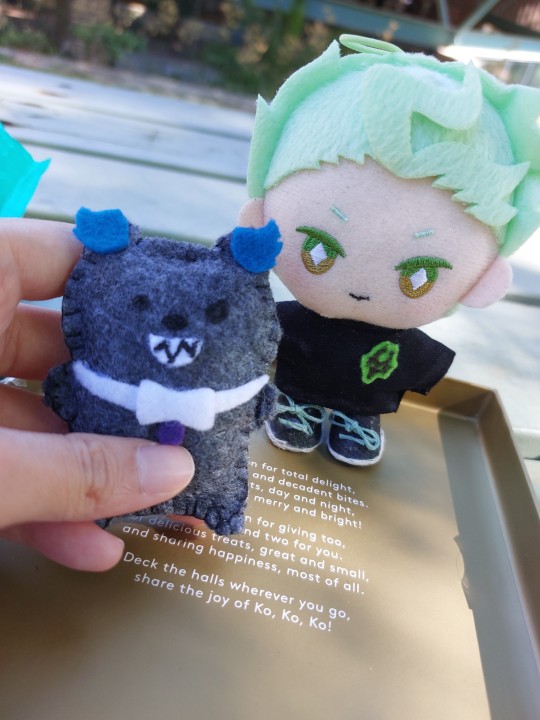
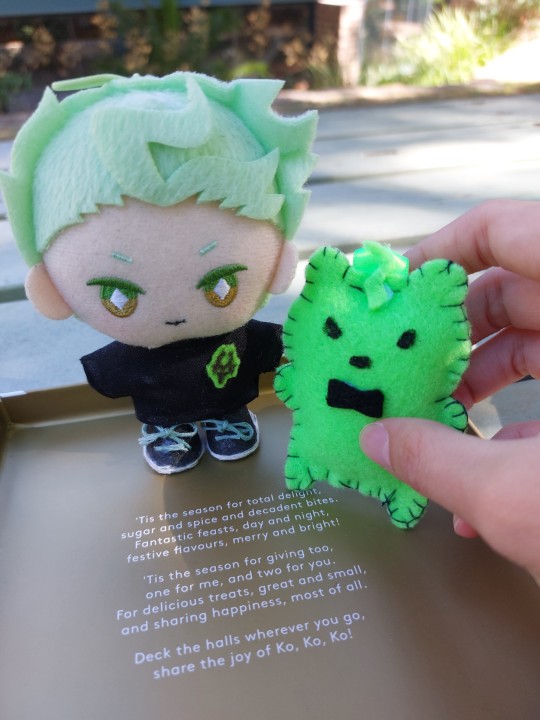
The letters & ( •̀ω•́ )σ 3 little gremlins from letterstoear.
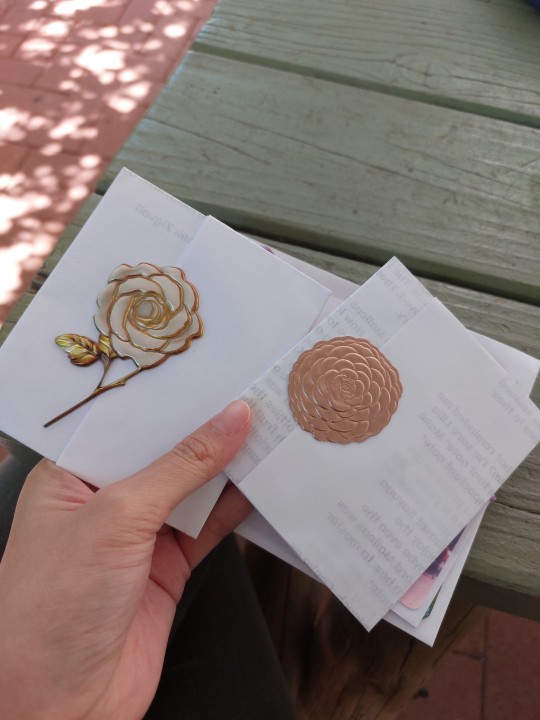
Just wanna say i adore the flower stickers on the letters too much,
they are that much worth mentioning.
#letterstoear#nui#twst#twisted wonderland#sebek zigvolt#malleus draconia#twst grim#mod posting#okay but i love squishing the bears with my thumb; they just have the right thickness to be pressed on#i really like the flower stickers; they look like romantically artistic wax seal#the letters are pleasantly nice#i love the part where cheka personally request for an audience with yuu thru sebek 🥺🥺🥹🥹 too cute hnggh .......#sebek becoming our little mailman for our little invitation aw 🥹 for those who wanna know the context of the letter;#i requested a letter from sebek that he sent home while he was away accompanying malleus on other country duty#my other favorite part is just him simply opening the letter with 'My love'#i'm sealed 🥹 the first paragraph is written so sweetly#i enjoy reading the letter slowly outside in peaceful afternoon today; i ran it through together with sebek nui#this will be my treasured keepsake from now on 🥹; it seriously made me miss letters and wish i have someone to send this kind of letter to#it was a bit funny how the envelope sebek's letter came from is sticked with the guys from free! sticker fhsdsh 🤣😂#and me with the white haired guy like WHo are u?? fsjdsdjsd (´つヮ⊂); but it's a really nice service#the thank you letter came with such a cute and yummy folding paper; thank you for the stickers too#i feel like there's a bit whoopsie on grim's winky eye fshfh like i think the sharpie just blurs the separating space '<' supposed to have#and just combine it all together into one angry eye; and sebek bear's eyes are just a little bigger than i expected it to be#but the more i look at them i think they are just having a little individuality & still cute#i embraced it all together while knowing the fact none of handmade thing would always be the same one with the other; hehe sebek nui has fr#i kinda forget that there's this kind of clip earring fshd; because i always get the ones that work like screw from aliexpress#i know that the literal clip one would just be literal meaning of pain fsh; just like the magnet one my father once got me when i was a kid#it was painful but pretty; tho i lost it quickly bcs magnet easily get loosed once one part of it moves around when u touch ur hair or face#anyhow i had a pleasant day because of this; thank you very much ! sebek nui said 'thank you' too! ‧₊˚❀༉‧₊˚. ❀ ✿ 𖤣…
235 notes
·
View notes
Text
the fucking iron grip that KHR has on my ass is insane bc its such an EPITOME of found family - bc its not even the side effect of like a shared goal or mission the way found families tend to be - but because FOUND FAMILY IS THE ENTIRE POINT
its the end goal, its the journey, its the whole story
theres a wholeass emphasis on tsuna's big empty house getting more crowded and more noisy
and not only that, its found family and a found purpose - each of the vongola find an achor in tsuna and vice versa - like fuck everybody else, im with them type a way
its that bone gnawing loyalty where not even the hounds of hell could keep these assholes from having each other's back
not just their relation to tsuna - which is the primary focus of the story but their relation to each other - how they must learn to be together bc again
Found Family Is The Mission
#khr#katekyo hitman reborn#bonds bonds bonds#this emphasis also on tsuna growing as a leader#their hearthfire and lighthouse#their home and final resting place#and how this shounen ass protags whole character arc#its not about being hokage#its not about becoming the greatest hero#its not about becoming pirate king#its not a goal to strive for#its a service that tsuna must learn to give#its a role that tsuna must learn to play#there is so much emphasis on how tsuna learns to take care of the people around him#because thats his job and their job and they all must work together to take care of each other#its so good?#also bc lbr the final boss is tsuna's own inheritance#which he is slowly being raised to have#and yet must violently reject in order to make that true and final transformation#to be the best of himself and the best of himself for others#tsuna is at his best when hes protecting someone#likewise tsuna shines the most because he is protected and loved and adored in return
407 notes
·
View notes
Text
how to transfer your old pokemon to pokemon home before it's too late!!!
the wi-fi services for the nintendo 3DS and WiiU are shutting down in early april 2024, and while it specifically lists pokemon bank and poke transporter as being available post-shutdown, there is no guarantee of how long that may be for. there will likely come a time when these services shut down, and it could be in the relatively near future.
it is also pretty much impossible now to transfer pokemon to the switch's Home service with alternative methods such as PKHeX (popular pokemon save editor for the uninformed) due to the implementation of server-side Home IDs tracking pokemon at all times - the details of that aren't super important for this post, but point is, whenever bank shuts down, unless nintendo makes an offline way to transfer to home, it will be impossible to move pokemon from the old gens to the new, even with alternative/hack-y methods.
i write this guide with the intention of making this process easier for people since transferring pokemon has changed so much over the past two decades that it's a bit of a mess, and in a timely manner to give people time to finish the process. i'll be organizing by generation so feel free to skip to any part of the guide you need. (keep in mind that transferring is permanent, your pokemon cannot go back afterwards!!)
(by the way it would mean a lot to me if you weren't overwhelmingly negative of pokemon in the tags/reblogs. i get that pokemon transferring being an online service sucks but reading that stuff in my notifications constantly is really tiring </3 make ur own post to talk about that)
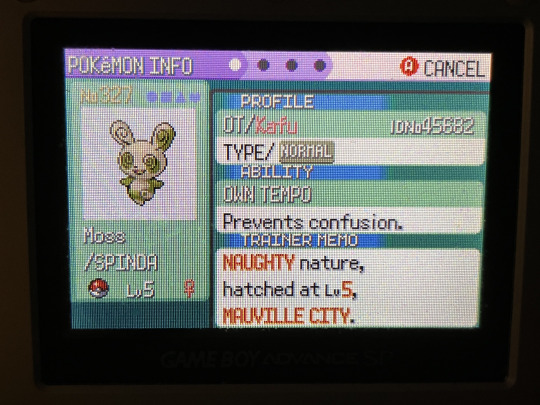
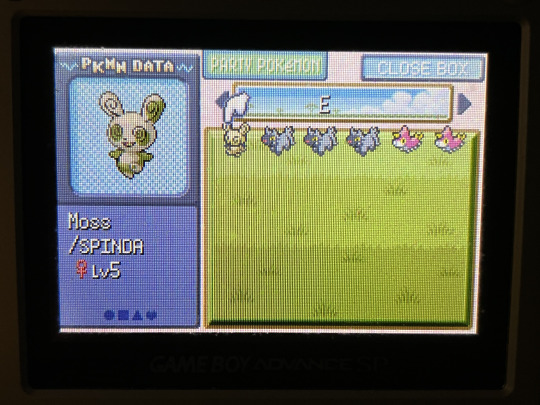
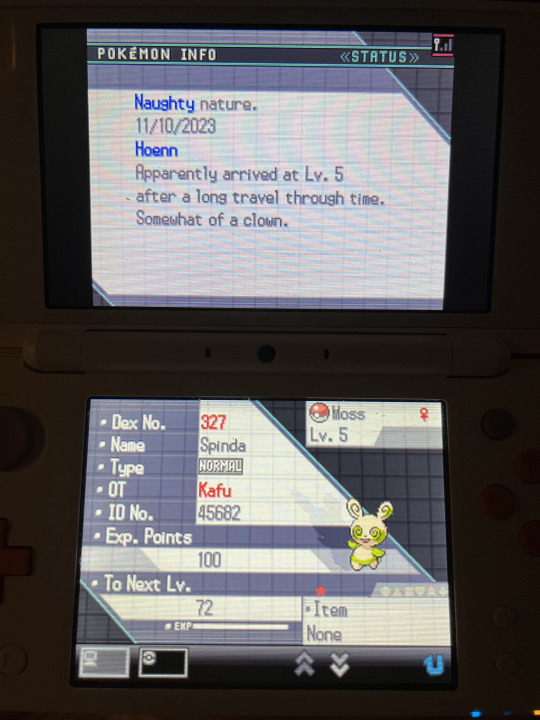
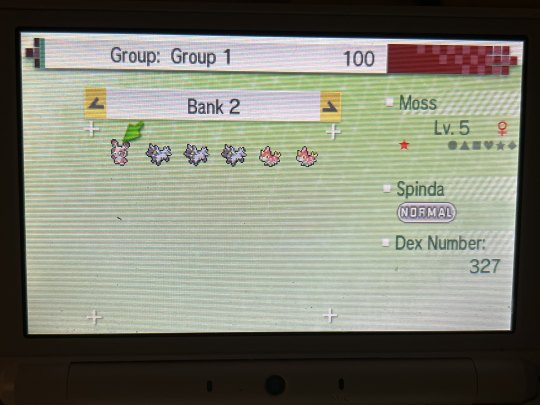
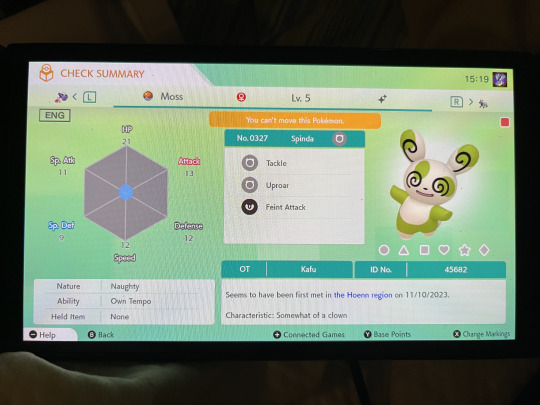
to walk you through, i'll be transferring this random shiny spinda i hatched in emerald version all the way up to pokemon home. her name is Moss :]
below the cut since this is long as fuck sorry LOL
GEN 1/2 -> 3 (aka RBY/GSC -> RSE/FRLG)
this is impossible! as for the Virtual Console releases of the gen 1/2 games on 3DS, more on that later in the gen 5 -> 6/7 section.
GEN 3 -> 4 (aka RSE/FRLG -> DPPT/HGSS)
what you need:
a copy of RSE or FRLG
a copy of DPPT or HGSS in the same language as the RSE/FRLG copy that has beaten the champion and has access to post-game areas, preferably HGSS because it lets you transfer unlimited times as opposed to DPPT's once-per-24-hours limit (unless you happen to have korean DPPT/HGSS, which is not language locked in terms of transferring)
either an original DS or a DS lite, the old ones with the GBA slot at the bottom
the steps:
#1. you can only transfer 6 pokemon at a time, so get whatever 6 pokemon you want to transfer up together in gen 3. if you're intending to transfer less than 6 pokemon, you'll need to catch some extras since you have to transfer the full 6 every time (i usually just catch a bunch of extra mons on the first route, which is what i've done here with the poochyenas/wurmples)
#2. put the gen 3 game into the GBA slot of the DS, and the gen 4 game into the DS slot. both games should appear on the home menu after turning on the DS.
#3. load the DS game and spam A past the title screen. before loading your save, scroll down. you should see a "MIGRATE FROM (GAME NAME HERE)" option. if you don't, either the GBA game isn't reading properly, or you have not visited Pal Park in your gen 4 game of choice. in HGSS, the Pal Park is located in Fuchsia City, and in DPPT, the Pal Park is located at the end of Route 221 below Sandgem Town.

#4. select the aforementioned migration option and pick the pokemon you want to transfer.
#5. navigate to the Pal Park and complete the Catching Show, where you re-catch your transferred pokemon in the wild. this does not overwrite what pokeballs they were originally caught in! you will need to bring a pokemon with Surf if you have any Pokemon that spawn in the water areas. you can check what location the pokemon you transferred will be in on bulbapedia.

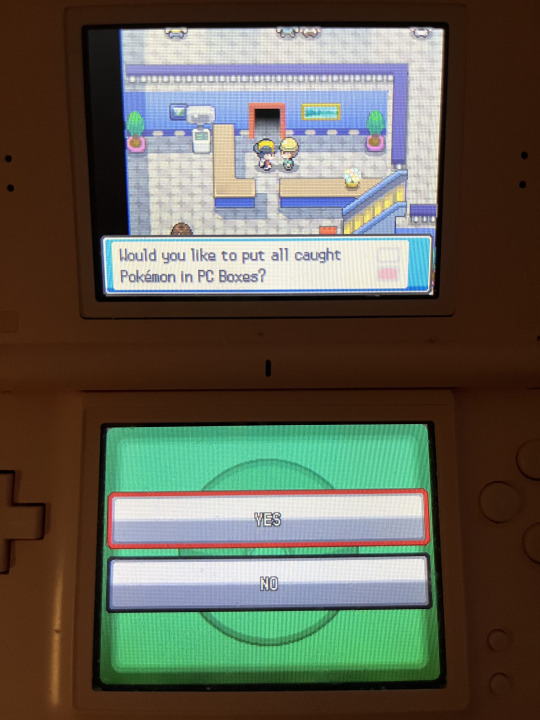
#6. say yes to storing the caught pokemon in your PC boxes and they'll be there!

important things to note:
pokemon with HM moves will be blocked from transfer, so make sure to use the Move Deleter to remove HM moves from any pokemon you're transferring in gen 3 before trying to transfer. in RSE, the Move Deleter is in Lilycove City, and in FRLG they are in Fuchsia City.
gen 3 -> 4 is the only step in the transfer process where held items transfer up as well, meaning that if you attach a valuable item such as a rare candy, master ball, or TM to a transferred pokemon, you can take it off that pokemon and put it in your bag in the gen 4 game.
an aside about colosseum/XD gale of darkness on gamecube:
you can transfer pokemon from colo/XD as well! unfortunately you'll need to have beaten colo/XD, and then you will also need to beat the gen 3 game... in FRLG, you even have to complete the postgame ruby/sapphire quest on the sevii islands to unlock trading with the gamecube games. once you do all that though, you can navigate to the pokemon center basement in Phenac City to trade with your gen 3 GBA title. to do this, you'll need a gamecube or wii with gamecube compatibility, a GBA (or GBA SP), and a GCN -> GBA link cable to connect the two consoles.
GEN 4 -> 5 (aka DPPT/HGSS -> BW/BW2)
what you need:
a copy of DPPT/HGSS
a copy of BW or BW2 in the same language as DPPT/HGSS copy that has beaten the champion (or N in the original BW) and has access to post-game areas.
two DS consoles of any kind (3DS is also fine!)
the steps:
#1. get the pokemon you want to transfer together in your gen 4 game's PC boxes. you can only transfer 6 pokemon at a time. if you have less than 6, catch some extra pokemon, since you need to transfer the full 6 every time. save it and turn off the DS with the gen 4 game.
#2. turn on your gen 5 game and navigate to the Poke Transfer Lab. personally i just fly to Black City/White Forest and head west.
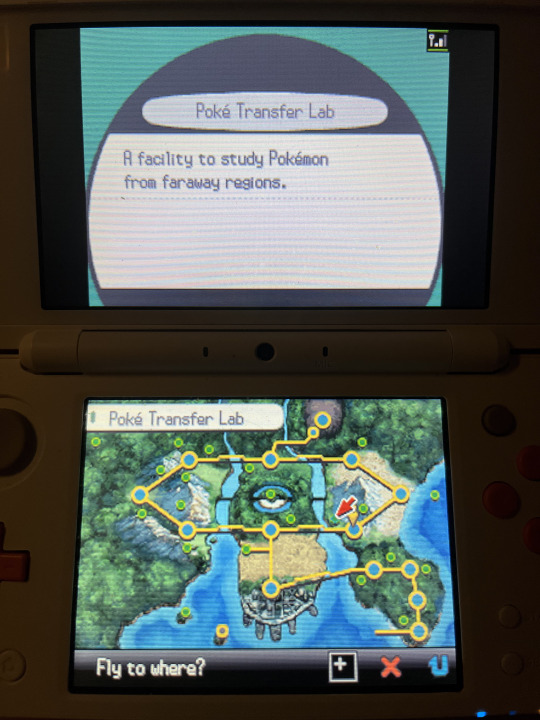
#3. talk to the NPC in the lab to start the transfer process. you will be prompted to turn on your other DS again and open DS Download Play with your gen 4 game inserted. do that and download the Poke Transfer app that comes up.


#4. select the 6 Pokemon you want to transfer when prompted.
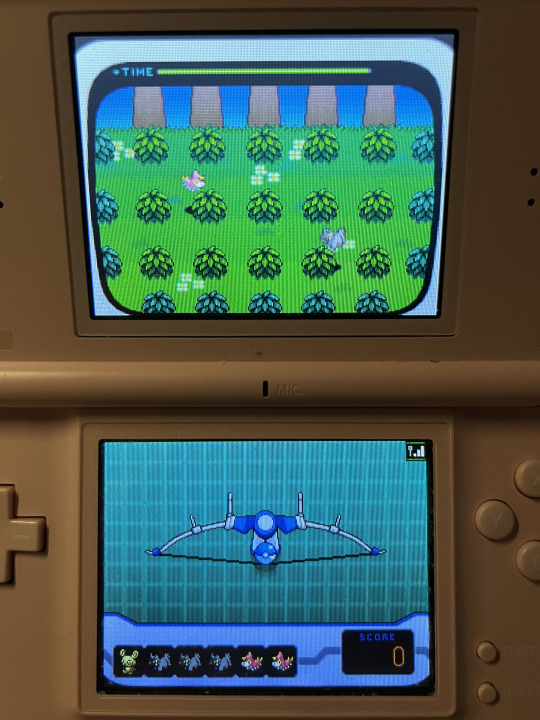
#5. play the transfer minigame! just drag the... bow? (lol) on the bottom screen to aim your pokeballs. there's technically a time limit, but it's very generous, and your final score doesn't matter.
#6. say yes to transferring the pokemon once you're done and they'll be placed in your PC boxes!
important things to note:
pokemon with HM moves will be blocked from transfer, so make sure to use the Move Deleter to remove HM moves from any pokemon you're transferring in gen 4 before trying to transfer. in DPPT they're in Canalave City, and in HGSS they're in Blackthorn City.
the level the pokemon was obtained at and the date it was obtained is changed upon transfer to gen 5 - it will have the met date of your DS clock and the met level of the level it was at the time of transfer. if you'd like to preserve a pokemon's met date, make sure to change the DS clock to the proper date.
GEN 5 -> 6/7 (aka BW/BW2 -> 3DS TITLES/BANK)
what you need:
a copy of BW/BW2
a copy of any 3DS pokemon game (XY/ORAS/SUMO/USUM)
a 3DS (or 2DS, i'll just be referring to them all as 3DSes here) with the poke transporter and pokemon bank apps installed. these were free apps that were once downloadable from the 3DS eShop, but the 3DS eShop is no longer available, so if you don't already have them installed you will need to explore alternate methods, AKA hacking your 3DS and injecting them in. that's outside the scope of this guide but you can find more information here on 3ds.hacks.guide. (do not attempt to follow any 3DS hacking guide not on this website, they could be outdated and harm your 3DS!)
a nintendo network ID that your 3DS is logged into (also outside the scope of this guide but if you don't already have one, it will prompt you during the process to make one)
internet connection
the steps:
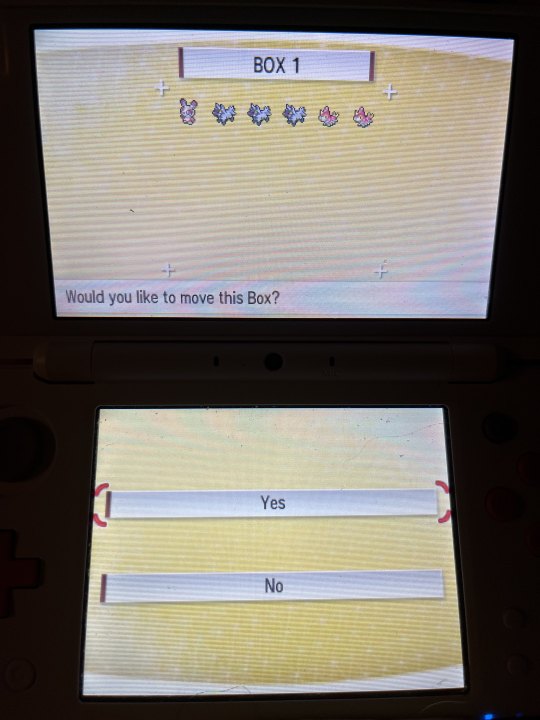
#1. poke transporter defaults to trying to transfer every pokemon located in Box 1 of your PC, so go into your gen 5 game and put every pokemon you want to transfer into Box 1, and take anything you don't want to transfer out. if you want to transfer more pokemon than you can fit in one box, you'll have to transfer multiple times.

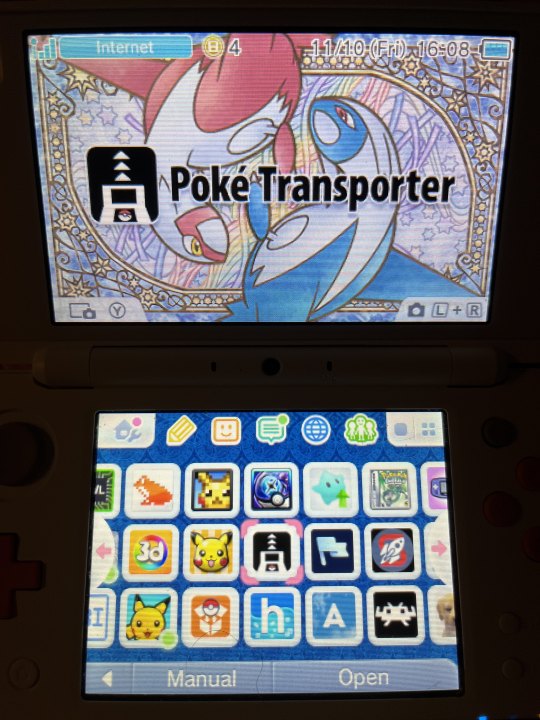
#2. open poke transporter with your gen 5 game inserted into the 3DS' cartridge slot. after pressing A through some menus and selecting the gen 5 game when prompted, it should ask if you want to transfer the pokemon in Box 1, with a preview of the pokemon inside. confirm and let it do its thing. after poke transporter is finished, the pokemon you transferred will be in the special Transport Box in bank.
#3. make sure you either have a 3DS pokemon title downloaded onto your 3DS, or swap out your gen 5 cart for one, it doesn't matter which.
#4. close out of poke transporter and navigate to pokemon bank. at the time of writing this guide, bank is still online and is free for everyone without a subscription - the main menu has an infinite "free trial" period number.
#5. select "use pokemon bank" and pick a 3DS game to connect with when prompted. it doesn't matter which one, but if you're looking to see your pokemon in a gen 6/7 game right now, pick the one you want to move it into. viewing a pokemon in a gen 6/7 game isn't required to move to home later, though!
#6. the Transport Box is located one box to the left of Box 1 - navigate to it and drag your pokemon out into a normal bank box. now you can move them to any gen 6/7 pokemon game you want, or home later!


important things to note:
even though bank connects with both gen 6 and gen 7 games, once you place a pokemon into a gen 7 game (SUMO/USUM), you cannot transfer that pokemon back to a gen 6 game (XY/ORAS), so be careful!
an aside about the VC releases of RBY/GSC:
poke transporter can also be used to transfer pokemon out of the VC releases of RBY/GSC. these pokemon are changed pretty heavily, converting all their old gen data into pokemon's modern data structure. you can find more information about all the changes/conversions made on bulbapedia. these pokemon are considered gen 7 pokemon afterwards, and cannot be moved into XY/ORAS. pokemon with held items also cannot be transferred from VC titles and will fail to transfer.
if you want to transfer pokemon from cartridge RBY/GSC and have a save dumping device, it is possible to inject the cartridge's save file into the VC versions with Checkpoint on a hacked 3DS and then transfer that way. for GSC specifically, you'll need to edit your save slightly to make it compatible with VC GSC's save format. i personally made a converter for that here that you're free to use in-browser.
GEN 6/7 -> GEN 8+ (aka BANK -> HOME)
what you need:
a 3DS (or 2DS, i'll just be referring to them all as 3DSes here) with the pokemon bank app installed. this was a free app that was once downloadable from the 3DS eShop, but the 3DS eShop is no longer available, so if you don't already have it installed you will need to explore alternate methods, AKA hacking your 3DS and injecting it in. that's outside the scope of this guide but you can find more information here on 3ds.hacks.guide. (do not attempt to follow any 3DS hacking guide not on this website, they could be outdated and harm your 3DS!)
a nintendo network ID that your 3DS is logged into (also outside the scope of this guide but if you don't already have one, it will prompt you during the process to make one)
a switch with Pokemon Home installed, which can be downloaded for free from the switch's eShop. a nintendo switch online subscription is not required.
unfortunately, you WILL need a subscription to home's premium plan to do bank -> home transfers.
internet connection
the steps:
#1. open pokemon bank and make sure all the pokemon you want to transfer are in their own boxes, and any you don't want to transfer are not in the same boxes as the to-be-transferred pokemon.
#2. go back to the bank home menu and select the "move pokemon to pokemon home" option. when you get the notice about the transfer being one-way, you'll need to scroll down to hit "Begin".

#3. you will be prompted to select what boxes of pokemon you'd like to transfer, so pick all the applicable ones.

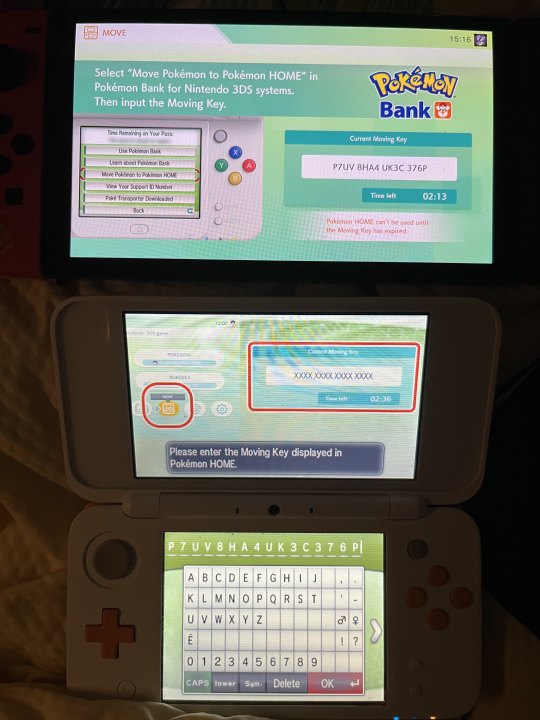
#4. you will then be prompted to put in the moving key from home, so turn on your switch, open pokemon home, and select the icon that looks like a 3DS on the main menu. when prompted, choose "Ready!" to get the moving key.
#5. input the moving key on the 3DS, submit it, and wait for both apps to do their thing. once bank goes back to its title screen, you can turn off the 3DS.
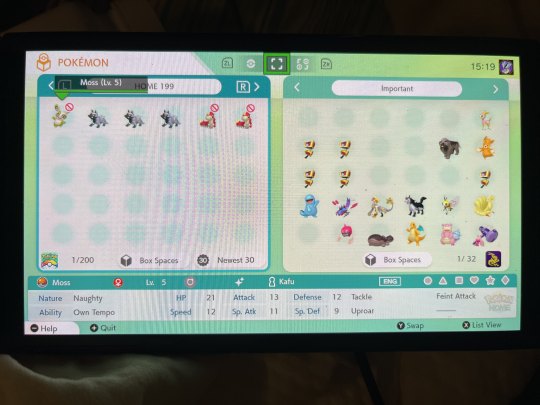
#6. home will go back to its title screen as well, and depending on how many pokemon you moved, you may have to wait a few minutes to get back into the app. once it's done, the next time you open home, it'll prompt you to choose how to organize your transferred pokemon into home. pick whatever you see fit.
#7. congratulations, your pokemon are safe in home!!

important things to note:
unlike all pokemon games before the switch, pokemon can actually go backwards in generation on switch, so don't worry about transferring a pokemon into scarlet/violet locking you out of moving it to sword/shield, for example. (the exception to this is LGPE - nothing can be moved into LGPE and once a pokemon is moved out of LGPE, it can't go back.)
pokemon home actually has decent hack checks, so be careful when transferring hacked/glitched/otherwise illegitimate pokemon around.
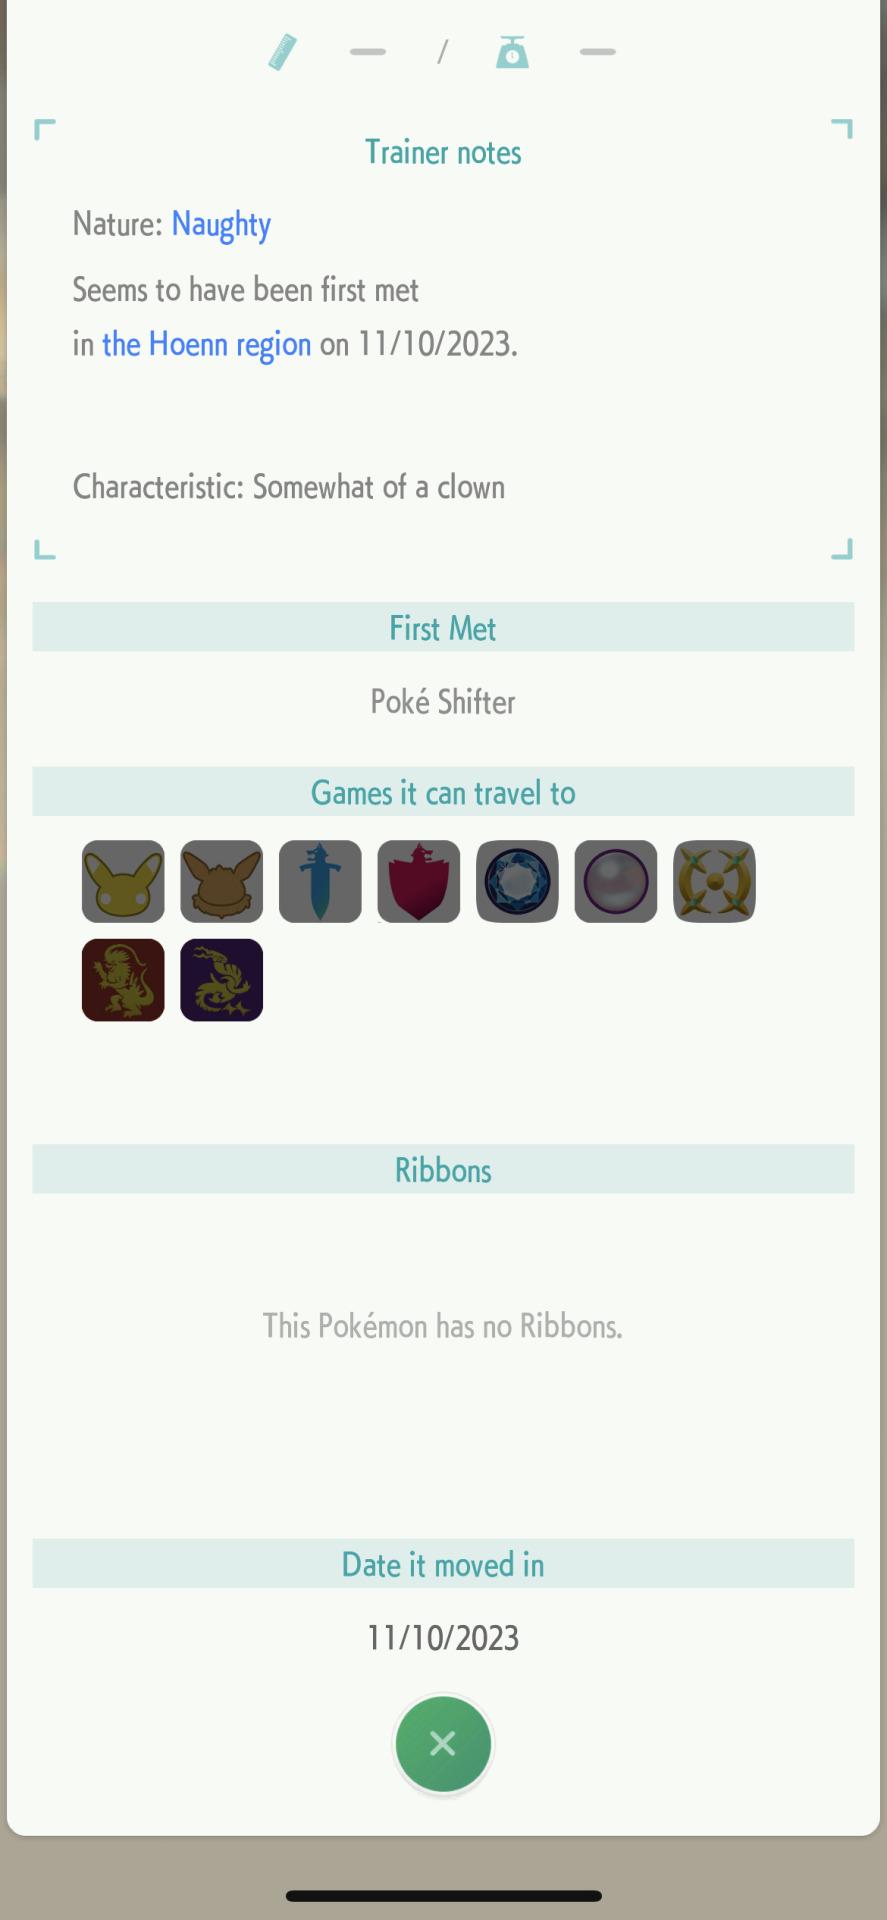
pokemon from a gen 3/4 game will have their met location set to "Poke Shifter" - this is an alternative translation of the japanese name for the Poke Transporter.
pokemon on switch can only transfer into games that contain that pokemon in its dex, so not everything transferred can go into scarlet/violet, for example.
and that's it!!
there's a lot of other quirks to the pokemon transferring process at pretty much all steps, so if you run into an unusual issue or have specific questions about how pokemon data is changed in minute ways across the franchise, i would encourage you to do your own research, all of this stuff is pretty heavily documented by the fanbase. this is just meant to be a guide for casual users, and a quick reference.
this guide of course does not cover options for transferring in alternative ways, but it's worth mentioning that if you have a hacked 3DS and the ability to back up save files at any point from gens 3 -> 5, you can use PKHeX to transfer pokemon into the 3DS titles, then move them to bank and transfer to home normally from there. that's outside the scope of this guide and i'd also encourage you to do your own research for that.
happy transferring!
#pokemon#pokemon bank#pokemon home#long post#nintendo#of course it really sucks that we have to do this at all#ive been opposed to bank/home being online services since p much day one#but that's just how the cookie crumbles i guess#Sighhhh i have so much stuff to transfer myself lol#kiki was here#kiki.txt
210 notes
·
View notes
Text

Assorted Howdys (Howdies? Howdys.) with expressions. I like his face :)c
#my art#digital art#fanart#welcome home#welcome home fanart#sketch#welcome home arg#howdy pillar#hard to find him mad. he seems like the kind to be loud and expressive even when angry#but at the same time he could be the more patient type as one would need to be in a customer service setting#I would know#find a solution and think things through before exploding type of guy#he’s a business owner after all#I like the idea of his antennae getting sharp#scared? poofy#happy?wiggly#sad? droopy#and so on
83 notes
·
View notes
Text
Me: *financially independent and uncomfortable accepting monetary help*
Also me: *fiercely anti-captalist and anti-rich people*
Still me: *staring wistfully at @theidiotwhowritesthings's sugar daddy!Joel Miller AU* I want one
#Joel Miller x reader#sugar daddy!joel miller#🎶guess who had car problems again 🎶#i guess tcoy!joel is specifically my anti-car anxiety blorbo#for real though he'd have a whole team of mechanics on call just for his family/friends#no phone tag with the towing company#no hold music everytime you call#regular updates so you're not left wondering all day#drop off service so you don't have to wait for your roommate to get home just so you can drive five minutes away to the shop#anyways it's been a bit of a week and i have my car back but i also have ✨ anxiety✨#and that bitch keeps poking me and asking if my car's rEaLlY fixed or if it's going to refuse to start and leave me stranded at work#missing tcoy!joel hours#time to reread!
225 notes
·
View notes
Text
maki telling yuuji he could've gotten some gloves at home depot was the highlight of this chapter for me

#turning jujutsu into a subscription service and getting all the equipment at home depot... gege why are you giving us such fun#worldbulding developments NOW THAT THE MANGA ENDS???#I want nobara to drag her boys to home depot cause she wants to buy a new hammer plus she ran out of nails#jjk 269#itadori yuuji#zenin maki
26 notes
·
View notes
Text

thinking about pre-virus friendships..
dragging each other to parts&service after smacking around intruders a little too good
#my art#fnaf chica#fnaf moon#daycare attendant fnaf#fnaf glamrock chica#security breach fanart#security breach chica#do Not Come into my house and tell ME Moon wouldnt have been soft with the other animatronics too.#impish. silly. pulling pranks sure.#more than once hes probably asked Chica “bad pizza?” when her arms been ripped off and very clearly been in a fight.#she'd answer “no pinapple”. and slump directly on him.#chica has watched. all of her friends. including herself surcome to the virus.#none of them tell on each other. they sure AF gonna bury that shit down.#moon being the theater animatronic. actor by day. he loves his role. he loves loves preforming.#and one day#hes just straight up not anymore. and he *knows* they tried to delete his code. out of convenience.#chica being the first to coax him out of hiding when the guests are all long gone home. sitting with him in the dark with no words.#she'd watched at least two of her friends disappear. and she'd almost lost Moon too. what a helpless feeling.#neither of them carry each other to parts and service anymore.#srryyyy ignore any typos.#.. also shoving them both into the microwave to spin around together- adjkaka.#doombop!
127 notes
·
View notes
Text
the thing about the terror is the same thing would happen if they were all just working at a grocery store literally anywhere ? like john franklin is the shitty general manager that is providing 0 oversight. hickey is someone who is a shit employee that is only held on to bc he's attached himself to some middle management. the stewards are cashiers bc the front end is where you know everyone, interact w bigger bosses more frequently and have a weird interpersonal dynamics that are akin to a chicken coop. the lieutenants are like supervisors for depts of the store. it hasn't been going well. they ran out of plastic bags like a month ago,,,
#i have visions#the terror#the terror amc#THE MASTERS R LIKE CART GUYS OH IT ALL MAKES SENSE#IT ALL MAKES SENSE#the stewards are either customer service or cashiers actually#like i could see jopson cashiering sometimes in dire straits but he is at customer service#re: basing this on my stint as a cashier at walmart#the thing about the terror is that ik these guys. like oh yeah ofc. they are all perfectly written coworkers#like you see i think hickey was probably in grocery (hodgson is his supervisor in the produce dept) he gets close with gibson#who is either at front end or like if it is a smaller store#like at flowers or something#and that gets him noticed by ppl#devoux works at like the meat section#irving is the health and beauty supervisor#the doctors r the pharmacy#i could go on#collins is exactly like my coworker who gave me rides home that would always rip her bong at lunch break#and before the aforementioned driving me home#anyways thank you for listening
31 notes
·
View notes
Text


Kotoko's breakdown right before her boss fight honestly breaks my heart
She wanted to be saved. She wanted to be saved but she wasn't and thats at least half of why she hates the adults so much because she COULD'VE been saved she COULD'VE escaped the situation but no one helped her so she just had to take it all and just :(((((
#i have so many feelings about kotoko like she makes me so sad :(((#and also like. unlike the other WoH whos mistreatment all happened in their homes#(which probably made it harder for them to ever consider the fact they couldve ever been saved)#kotokos suffering mostly happened OUTSIDE of her home#she was BROUGHT there#if someone just shut down the 'market' she was taken to#or the ones paying for her 'service' where found and locked up#then she wouldve been saved#but that didnt happen#so she continued to suffer#kotoko man :(((((((((#kotoko utsugi#danganronpa another episode ultra despair girls#udg#art#my art#xanders art#xanders haunting art#digital art#fan art
425 notes
·
View notes
Text
Waiting out the rain, serenaded by a sax man practicing under the bridge
#then i had a very strange experience on the way home trying to help a foreigner with low english and no chinese#who claimed to be lost in the alley with no phone service because he'd just arrived#and i used to get lost there all the time my first week#plus locals were ignoring him so i felt inclined to help#but then it started to get weird and when his phone rang in his pocket i decided the gig was up and peaced out#I've noticed ‘are you a sister or a brother’ seems to be the new ‘are you a man or a woman’#sigh
30 notes
·
View notes
Text
sometimes looking at like Self Help Strategies lists for the symptoms I'm having is always just like:
thing that I already do
thing I have tried 10 times
thing I already do
thing that I don't have the money to do
thing I already do
thing I've been doing since I was 10yrs old to no avail
thing that is impossible given my situation
thing that doesn't apply to me
thing that I already do
thing I have already tried
hrmm, oh wait, maybe finally- OH, yeah.. okay. thing that I already do but it was just phrased slightly differently
thing I have already done
#I think maybe productivity tips help less if the reason you're unproductive is partially like.. physcial health and other extenral things#out of your control. rather than just like having trouble paying attention or spending too much time on tiktok or whatever#all the strategic to do lists in the world are not going to somehow prevent me from waking up with a debilitating migraine or whatever#or having external stressors or lacking resources and connections or other Productivity Essentials etc.#especially many tips involve stuff like 'cut off from social media' since thats the modern day time waster for so many poeple#and it's like.. lol.. i can hardly even maintain a blog even thuogh i actively WANT TO DO SO. 'shut off your smart phone!' already#done babey i fucking hate smart phones i shall never use an app unless i am forced to. 'delete tiktok' yep. already covered. tiktok and#all of those thinsg are my enemies. 'save money by cancelling some of your services' cool. already ahead of you.#who the fuck is out here paying for like 10 different subscription services. pirated videos uploaded to google drive and youtube to mp3#my beloved. etc. etc. and so on. 'socialize less' .........LOL.. if only you knew.. mr.writer of the article. i can barely muster#talking to friends more than once a month and even less if I'm actively sick (often occurence) etc. etc. ... hewoo#I think maybe instead of generic productivity tips I need more like.. how to refocus and be productive anyway even if you have a headache#or are nauseous or etc. Not that those are always things to ignore. and of course you should let your body rest and etc. But plenty of peop#e have mild physical symptoms and just work through them. Ithink something about the way my body/mind is SOO hyper attuned to all#sensory information just makes it like... constantly 'GRR well I cant focus on WRITING right now because my lef#t ear feels weird and my socks are too itchy and my back has a strange pressure and I'm vaguely warm and my eye feels some ssort of#way it doesnt normally feel and I'm hyperaware of my breathing and also nauseous for no reason' and like half of those things I#think '''normal''' people wouldnt even notice or at least would be able to just live through. but for me it's like.. nealry impossible to i#gnore and soooo distracting always. like 'wahh.. nooo we can't draw or get anything done.. my legs feel slightly heavy or something!!'#like............. ok......... who cares. thats not even a PAIN sensation it's just something weird. but it's just like.. NO. constant#mental alerts about the 'heaviness' of your legs be upon ye. Though Imean like.. yes.. 70% of the time I am in genuine pain#or having some sort of actual ailment with trackable physical symptoms. but sometimes it's just like... we could totally be working right#now and ignoring this silly thing but my brain is fixated on it for no reason uncontrollably. etc. etc. I guess it's the same way that like#most people can go to a grocery store without the whole experience being so overwhelming and so much stuff going on at once#that they have to rest afterwards but like.. in my own HOME doing NOTHING i feel like I should be able to not get overwhelmed lol. ANYWAY#Rolling my bastard little rock up a dumbass hill and so on and so forth
22 notes
·
View notes
Text
I say this having lived in florida through many hurricanes for most of my childhood but helene is a terrifying storm actually
#i barely slept all night stressing about my family in savannah#they’re all okay thank god but a giant live oak fell through one of my cousins’ house#it’s completely crushed. it’s done#and another cousin just got service back to tell me she’s okay and update me on her brother’s house#and my visiting cousin from florida is supposed to drive home tomorrow??#genuinely want to cry lmao#the life and times
10 notes
·
View notes
Text
I can't believe my dad is retired. I feel too young for this. I feel he's too young for this. I feel like I'm still 15 sometimes. I feel surprised every time I go home and he looks older. I feel surprised when I finally FaceTime home instead of call and see he's grown a beard for the first time in my life. I feel like time should really just... freeze
#I will say that I really hope he woodworks more#I'm thinking about proposing a project to him when I go home in the summer... I wanna build a TV/media console w him#all the ones I like are either a gajillion dollars or look like they're made of plywood (...sometimes both)#so I think we can make something serviceable. only downside is I'll have to drive it back to me#OOOO maybe he can drive it back with me#o m g maybe he can come over for a hockey game next year.... yeah...#okay maybe there are upsides to retirement
20 notes
·
View notes
Last Seen Blogs


san-sebastienne
soft goth, softer tits

ms-ss
Don’t Touch Me.

filthfactor10
FILTH FACTOR

heartyheartbeatybeats
Thumpin' Heart