#again i am an art beginner
Explore tagged Tumblr posts
Text
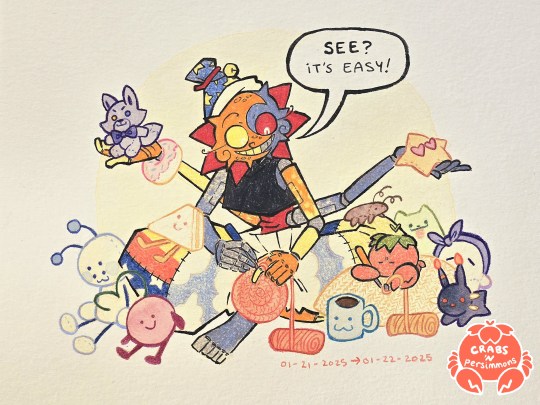
Clip: well maybe it would be easier if you didn't have big meaty claws! crabs: well these claws are only good for attracting mates* *cute robots
so while i was struggling with my creative block, i was trying out new hobbies to fill the void and i decided to try out crochet
i
have not yet learned to enjoy crochet
but hey, Clip's here to be a... support? (show off?) at least he's surrounded me with amigurumi plushies of dear friends. see if you can recognize them all!
i'll put the tags under the cut
from the left to right, top to bottom:
@linafoxoficial - purple fox sona plushie
@inkydoughnut - crochet donut
@itsmuffiiee - sona plushie
@cacaocheri - cherry sona plushie
@eggcromancer - egg sandwich sona plushie
@normal-about-the-dca - beetle sona plushie
@scarredlove - blue mug plushie
@starriegalaxy - star sona plushie
@divinit3a - Pomeranian plushie
@enduu115 - sona plushie
@random-tail - kie kie plushie
#fnaf eclipse#fnaf dca#dca fandom#Clip New Do Same You AU#crab art#traditional art#bright colours#i am#so thankful i have drawing as a hobby#even writing#i just have not reached the stage where crocheting is fun or rewarding yet#i bought a beginner set that walks you through crocheting a little pouch#and i am still at the stage of learning all the basic knots#thankfully my creative block is easing off#i'm able to draw and write again#so maybe i will return to crochet some other time
386 notes
·
View notes
Text


Okay um. Here’s mine for day 1 (even tho it’s the second when I’m posting this bc it’s almost 2am😭) and I’m honestly pretty proud of it ! I haven’t done an actual drawing like this in MONTHS so I think I did okay!
yeeeeah I gotta work on anatomy and hands but ‼️ I’m posting this anyway cuz I worked really hard on this and I think I’m gonna have freaking arthritis in my fingers after this
@deadbeatbug made the prompts ! 🎃
#mcsm#minecraft story mode#mcsm jesse#mcsm fanart#minecraft#fanart#art#my art#beginner artist#Halloween#mcsmtober#my fingers actually hurt so fucking bad#like i am never going to draw on my phone again.
11 notes
·
View notes
Text
what in the. see this is why it's a good thing that multiplayer videogames especially are about having fun & being yourself like what do you mean disguised spies automatically had the speed of the disguise's class & everyone's like yea if i wasn't always going for the scout disguise i'd kill myself right now. i'd be like haha can't catch Me out supposedly the extra slow or extra fast class >:) i am a harmless engineer
#something something like ah as scout you move fast & can be allll the way over there & your line of sight is above your Visible head#devastating. sure i Always could've looked these things up but i just like figured. don't disguise as heavy or scout; a plausible limitatio#i mean i guess i always did okay as spy b/c like in random lobbies there's just more chaos factor so like. no Your Je Ne Sais Quoi is off#even in terms of like ''why would xyz class being doing abc rn'' like who can say....i sure can't like#never knew the maps much less their Strategic Points for Whatevering. rarely tried being a Real Engineer like where do i put shit#or real demo like i don't want a team to think that role is covered. it is basically not. or a soldier even when i think that was like#recommended basic / beginner role. well i never figured out how to rocket jump reliably so jot that down#heavy pretty straightforward. medic i figured out soon enough you're Mostly supposed to support a heavy lol like okay if we need one#go figure i never seemed to do well as pyro; an alright scout probably like you really can have fun & be yourself zooming around like that;#sniper i was okayish too like yeah perhaps i can lurk & take out a heavy. or get into an intractible [the snipers are fightinnnng]#spy also okayish like again w/chaos on my side sure maybe i can sabotage turrets backstab a sniper heavy medic & cloak away....#but also all this like No special abilities or weapons. i don't even have the basics down lol. what is this link talking abt trickstabbing#are they not all trickstabs lol....apparently not exactly. i am discerning it is the art of [spy backstab] plus Juking#so i guess anything but the theoretical standard Surprise Approach. ''that know they are a spy'' ''in difficult situations''#ppl listing off a bunch of Named Trickstab Maneuvers lmfao talk about kill me. good thing videogames are about having fun & being yourself#also that i couldn't play tf2 now if i wanted to. which eh i kinda do b/c the whole time it Was like yeah this'll be a mess but haha whee#again good thing that ppl theoretically can now though? vs whatever peak ''so matches are overrun w/bot players'' times#why was that a thing at all. something something Items okay. alright back at things i Can do after another Looking Stuff Up tangent#prior geological eras into Big Events on that scale into Large Insects into lol giant water bug i.e. weird but in charge of the nighttime#i'm just still arm slung around tf2 like a smissmas miracle despite it all for sure#& it really even is that rare Games I've Actually Played Myself Ever....it really is....#hey what in the disguised enemy spies can be healed too? & like for real not just Appearing to be? what a menace lmao
3 notes
·
View notes
Text
First flipaclip animation (real)
#welll technically not the FIRST first#I downloaded flipaclip a few years ago and made that bouncy ball animation everyone makes the first time#but I gave up#deleted it#and uninstalled flipaclip#but here I am again today!#with newfound wisdom and determination!#lil guy slightly off center#what will he do??#(I zoomed in so much I didn't realize how small he was)#animation#flipaclip#art#my art#beginner artist
9 notes
·
View notes
Photo
This.

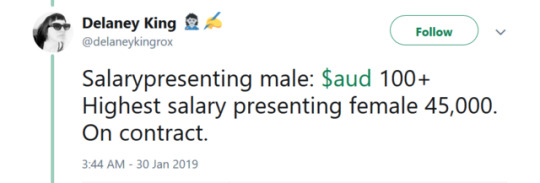


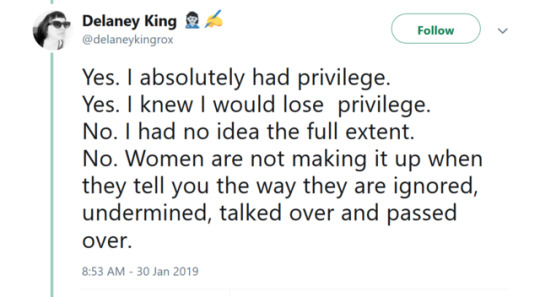

https://twitter.com/delaneykingrox/status/1090402436995473408
#my whole life i wished i was born a male#i could have started out so many things that i love way sooner#no one took me seriously when i was one of the 2% of females in a 98% male school#they literally didn't even have women's bathrooms there when i came#and many of the other women left after 1 year because they just couldn't handle it#being singled out and treated as either token 'eye candy' or just being treated in a really sexist manner#(this was a tech/electronics highschool for context)#online in most spaces i present as male#and it REALLY shows how people are openly sexist#for example i was in a random server for beginner artists because i thought art was cool and wanted to learn more about it#and the entire server was just openly saying that women artists aren't real artists and can only get a job in basic colouring or some shit#because 'women artists never want to improve'#and the entire server agreed with them (this was a larger public server)#made me never want to seek out any advice. ever.#or the time i got told by my networking teacher that i should have gone to cullinary school (never showed any interest in cooking#or talked about how i went there to 'easily find myself a boyfriend' (i don't date nor do i have the time for that.)#and im not even in the workplace yet#to any woman that managed to get through this and then has to deal with this at work at a daily basis#i applaud you#because in my case i am so fucking done with all of this shit and just going to study by myself without help instead or relying on schools#and institutions#my uni is also quite sexist#but luckily its not *as* bad (comp sci)#i did get screamed at by a man working at the school because i didn't announce myself because they thought that i was visiting someone#made me want to cry and throw up and never leave the house and ever go back there again#fun#fuuun..#(also for the 'i wish i was born male' thing well i am a very stereotypically feminine person that likes feminine things)#(aka not BE a male but BORN a male.)#but i fucked up even before i was born yey
179K notes
·
View notes
Text
Its interesting thinking about my art progress since 2019 in retrospect
#its really strange seeing my early 2019 art#because i was truly not skilled#but in a very… whimsical way?#you can tell im in a quote on quote beginner state#but after october that shit just got exponentially better and better and better#and then my wrist exploded in july 2021 and i was in a really bad middle stage where my art was consistently looking good#but i had many problems with it#theres… a missing sense of depth i feel#then late 2023 we finally approach the modern era of my style#got really really good and happy with my art in early 2024#and finally started to feel like all of my drawings including my sketches were just consistently good#aaaaaand now i think my style is stagnating again.#i got a great grasp on anatomy and am getting better about colors but my style needs more work#as always. thats how being an artist goe#i need to push the extremes of my style i think. just to see.#what will happen
0 notes
Text
always a sign of High Quality (/s) when an art kit's instructions immediately tell you to use a colour that wasn't included in the several colours they supplied
#alpaca.txt#this kit sucks. i am so glad i am not the person who bought it#the paints... theyre good enough for beginners i guess#the brushes tho. why. even my mum who has never touched a quality brush in her life thinks they suck#and the instructions are. totally unrelated to the kit really. like this is supposed to tell u how to use the stuff and its just#an entirely seperate instructional booklet#LITERALLY THO. the first project: u should use these colours- and then half the colours arent even in the kit#this was a terrible present and i am not looking forward to seeing the person who gave it to me again bc. i know how well meaning itwas#and theyll ask about it and i dont want to lie to them but. it sucks. i hate it.#art kit makers put any effort at all into making an ok product challenge (impossible)
1 note
·
View note
Text
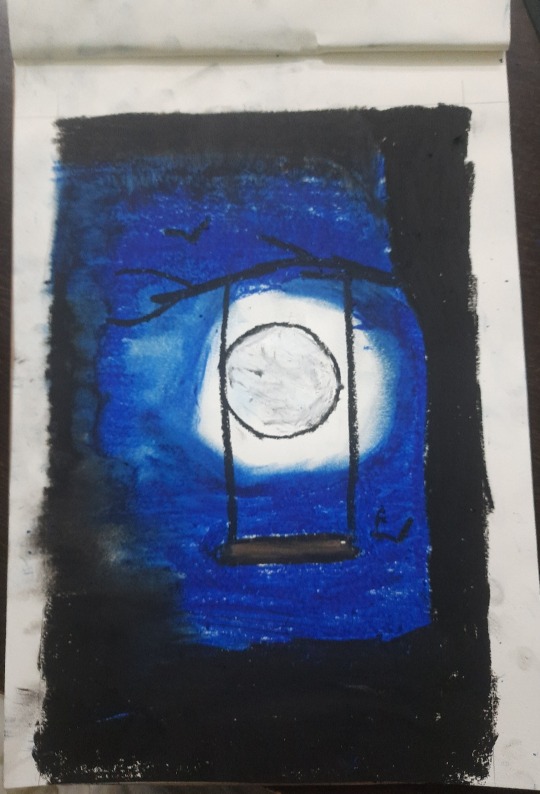
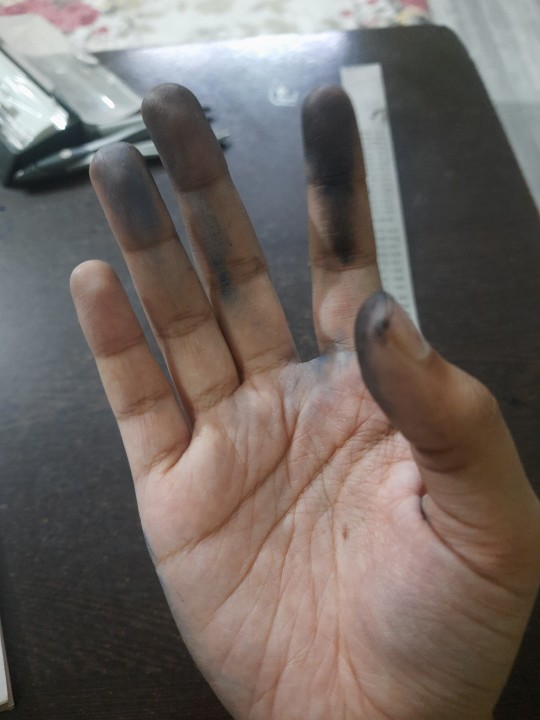
So... my brother challenged me to an art contest and I had done some oil pastel art back in middle school. This abomination was the result...... I gave it my best but now I know art is not one of my stronger feats.
1 note
·
View note
Text

trying to be cool
#i posted a different drawing with the same caption earlier#but i thought it was too saucy after looking at it again#so here i am overcorrecting#furry#furry art#furry oc#oc: steph#anthro#adventures of a beginner artist in their mid to late 20s
1 note
·
View note
Text
How to OC post without being an artist (or spending money)!

As much as I yelled about OC-posting, some people said that they struggled to know what exactly they should be posting. Obviously the answer is whatever you feel like but if you’re already aimless, that answer isn’t very helpful. Additionally, not everyone knows how to draw (which I think is an obvious method of OC-posting) so I wanted to give some ideas for what people could post for their OC! This will be split up into different sections.
Creating visual representations of your OC
Disclaimer: I will not suggest nor support the usage of generative AI. OCs are about creating something yourself, not allowing a computer to do it for you.
Outside of commissioning someone else for art, it can be disappointing and frustrating to not have any visual representation for your character. An easy way to get a representation of your character is to use Picrew, Meiker and other similar sites. There’s a large number of art styles, types of fashion, species, that can all be used to make your OC and that amount only grows by the day. Many of these websites can be accessed on PC and mobile and take very little processing power.
However, this can be limiting at times since you might not find exactly what you’re looking for, especially if your OC has a unique combination of features. For something with more customisation, you can use video games with character creation to make a version of your character. I personally would recommend games like The Sims or Skyrim as both have very active modding communities. This way, if a certain type of clothing or facial feature isn’t present in the base game then you can often find someone who has created a mod that adds it in instead. This does require you to have access to a computer that can run not only the game but the mods as well.
Another option would be using a program like Vroid Studio to make your character from a base model. This has both a mobile and PC version, although I will primarily be speaking from a PC perspective. The mobile app, while able to create a character from scratch, is a lot more limited than the PC version. The great thing about Vroid is that there’s a lot of user-made content that you can often get for free through websites like Booth, as well as many tutorials for beginners to follow along with. Again, this requires a computer that is able to run it. I would recommend against using Vroid on a laptop as it will likely be too intensive for it.
My final suggestion for character visuals is to take a character from anime or cartoons and simply edit them. This was actually how I first got into making original characters! You can recolour their hair or outfits with an editing program (with some free examples being FireAlpaca, Krita or GIMP) and even edit different images together to create something more unique. Please only do this with characters from existing media and avoid using fanart for this.
Other OC visuals
Other than just what your OC looks like, there are other ways to visually put together your OC. Moodboards are the most obvious example of this, but you can also edit other things such as putting together outfits for them or finding pictures of items they would keep in their bag.
If you have multiple OCs, you can create fake text conversations between them using a number of websites. These can be as silly or as serious as you like!
Finally, you can always build them a pinterest board. I am a massive pinterest enjoyer and not only can you use pins that others have posted to pinterest, you can add your own from off the site.
Writing
Beyond writing out your characters’ story, there are numerous other things you can write. Keeping in line with what you’ve already written, you can re-write scenes from alternative perspectives. These can add context to what is seen in the main story, as well as flesh out background or side characters and their relationship to your other OCs.
Another fun thing to write is non-canon scenes. Write a beach episode! Write about a character getting sick and someone else having to take care of them! There are countless ways to draw your OCs interacting with their world or other characters that wouldn’t necessarily ever fit into the “main” story.
Next is genre changes. If you had to categorise the genre of your OCs’ current story, what would it be? Now image what if the genre was something completely different? Romance to mystery… Slice of life to horror… Part of the challenge is figuring out what story beats remain the same and what gets changed, including character dynamics! And of course… Alternate Universes. There are too many types of AUs to list but some of my favourites are superpowers, mafia, zombies, time loops and time-travel-fix-its. These are similar to genre-changes but often include a number of AU specific tropes. If you’re struggling to figure out the staples of a certain AU or what kind of AUs exist, there’s a really good page about alternate universes on Fanlore.org!
Other ideas
These are ideas that didn’t quite fit into the other categories.
First is music playlists! There are two types of these. The first is a playlist of songs that describe a character and their story while the second is a playlist of songs that the character would listen to. Some people like to combine the two as well! There are no rules to this, simply have fun listening to music and picking out songs that remind you of your OCs.
Second is incorrect quotes. I remember these used to be beloved by fandom and now they can be beloved by you and your OCs! The concept of incorrect quotes is that well-known and funny quotes from pop culture (such as memes or movies) get written out and your characters are assigned a line of dialogue. While there’s a website that’ll generate these incorrect quotes for you, I personally find more fun in coming across quotes organically while scrolling social media and realising that they fit my OCs almost perfectly.
Finally, ask games. These typically take the form of lists of questions or prompts with emojis or numbers next to them. People can send in the relevant emoji or number and you then answer the corresponding prompt. There used to be a kind of “ask game etiquette” where if you reblogged an ask game from someone, you sent an ask from the list to them as well. This way, it allows the game to continue circulating and you can spread the joy of OC-posting with others! It can also lead you to making friends within the community.
And that’s it for my post! If you have other suggestions for kinds of OC-posting then I would love to see them!
#oc posting#oc#original character#unrelated to this post but when looking for a gif to go with this post#i nearly yelled AZUNYAAAAAAAAAN when i saw azusa. i used to be a big k-on girlie. it was the first manga i purchased!#it's 3am and i should have posted this earlier but i watched more re:zero with my partner today#he is loving rem so far.... he doesn't know what happens to her...... he might cry.......
607 notes
·
View notes
Text
So JJK is over and my LMK brainrot is back , added with the fact i am playing a MOBA game and am being blessed with delicious illustrations it prompted me to make this


Now i am going to ramble about this because this is the first time in forever where i kinda pushed myself to make a FULL art piece-
I will be standing for this-
Let me tell you, i had no confidence in this and the composition was supposed to be way different, but this still happened. This took two days because i kept procrastinating , walking around my room dreading drawing the background BIG ADVICE FOR BEGINNER ARTISTS Watch speedpaints. You will learn so much by watching the process and that was this for me I have the tendency to kinda burn myself out and finish everything in a day and then never actually finishing. Tried something different for this and made a cheap silhouette of a sketch, then drew over that and used greys and whites fort the shadows. Then i think i colored everything in a base color (and i finally used a palette) and then i tried to find the lighting and shadow colours. It was weird. And what im saying is that i planned most of it instead of diving head in withour a plan. Crazy i know-
I also just learned about dpi PROPERLY and unfortunately made my piece so big that it kept stalling paint tool sai-
let me just post the progress shots
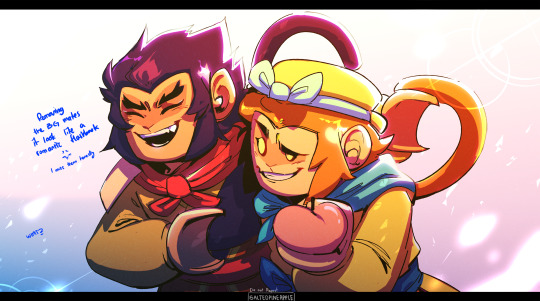


I also fucked up macaques reference and fixed it in a whim somewhere. You can see it here. I honestly wasn't planning to follow the lmk at style but that kinda happens when you're starring too much at the references.
There's still a mess and i wanted to render it a bit better ,the way i normally do but i didn't. Anyways i did enjoy the process and i actually miss them so much and i might watch LMK all over again Especially Wukong and MK
Btw this was supposed to be a moving illustration and i just didn't
I have Live2D but no
(Btw please check out my profile if you have the chance and thank you for reading this! Love you-)
#lmk art#lmk sun wukong#lmk fanart#lmk macaque#lego monkey kid fanart#lego monkie kid#lmk monkey king#lmk shadowpeach#shadowpeach#six eared macaque#lego monkie king#OK BUT I FOUND OUT HOW TO DO THE EFFECT IN THE FIRST AND I FELT LIKE A KID ON CHRISTMAS#btw im sorry i dont ever post anything for any holidays#it will be the same for the chinese new year and valentines day
2K notes
·
View notes
Text
Ok! I've finally decided to put together a (somewhat) comprehensive tutorial on my latest art~
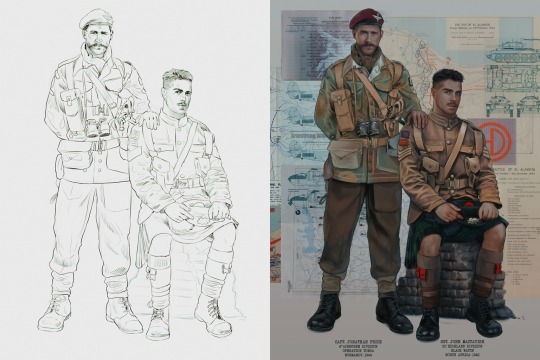
Please enjoy this little step-by-step 💁♀️
First things first--references!
Now I'm not saying you have to go overboard, but I always find that this is a crucial starting point in any art piece I intend on making. Especially if you're a detail freak like me and want to make it as realistic as possible 🙃
As such, your web browser should look like this at any given point:

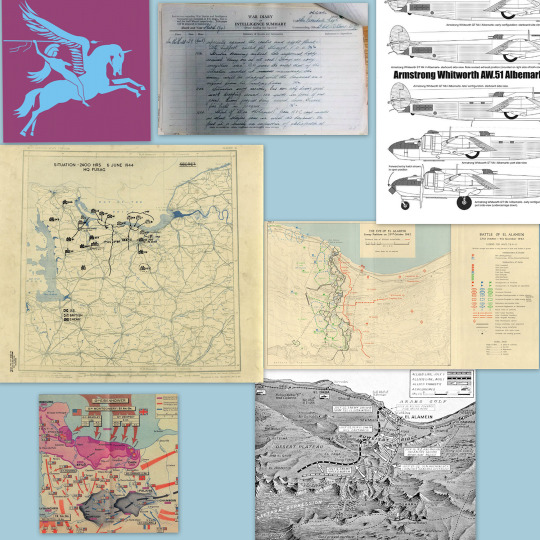
Since this is a historical piece, it means hours upon hours of meaningless research just to see what color the socks are, but...again. that isn't, strictly, necessary 😅
Once I've compiled all my lovely ref pics, I usually dump them into a big-ass collage ⬇️
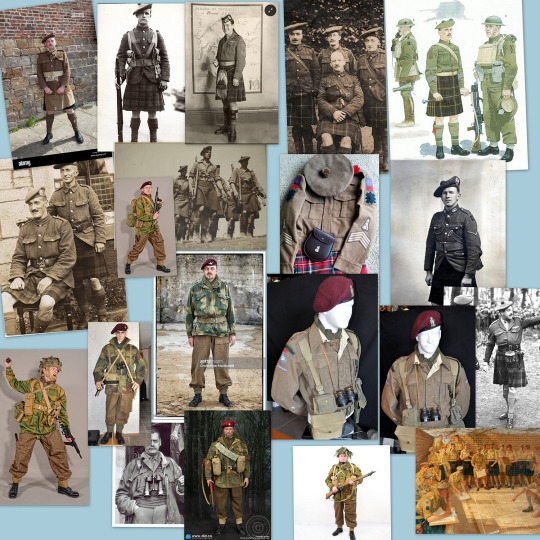
(I will end up not using half of these, alas :'D)
Another reference search for background material, and getting to showcase our models of choice for this occasion~
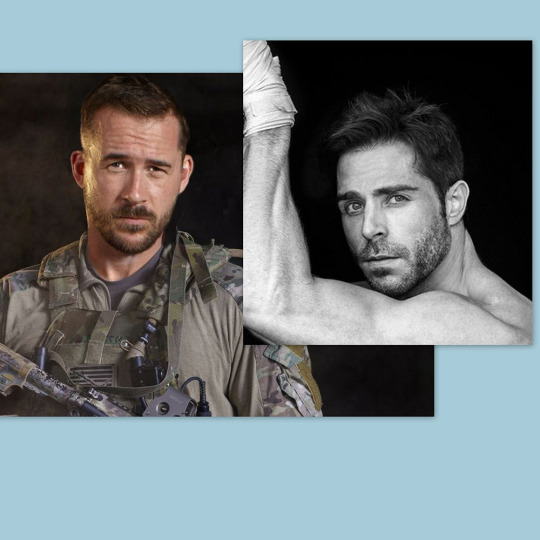
When picking a reference for an actor or model, the main thing I keep in mind (besides prettiness 🤭) is lighting and orientation. Because I already kinda know what pose I'm gonna go with for this piece, I can look for specific angles that might fit the criteria. I should mention that I am a reference hound, and my current COD actor ref folder looks like this:

Also keep in mind, if you're using a ref that you need to flip, make sure you adjust accordingly. This especially applies to clothing, as certain things like pants zippers and belt buckles can be quite specific ☝️
Now that we've spent countless hours googling, it's time to start with a rough sketch:
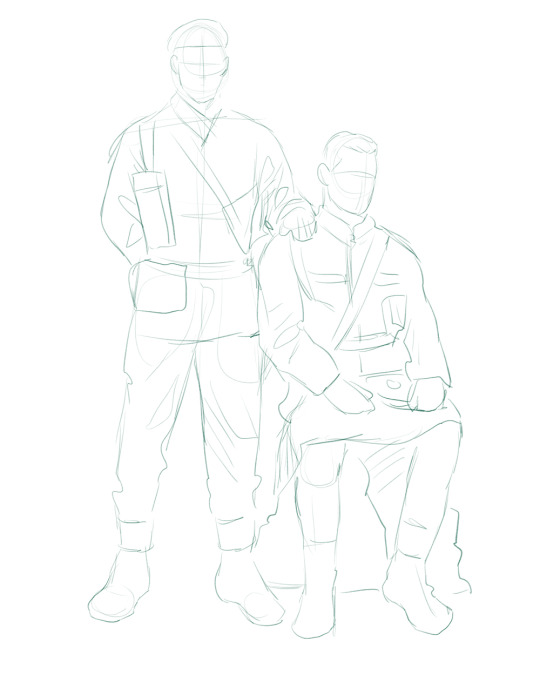
It doesn't have to be pretty, folks, just a basic guideline of where you want the figures to be.
The next step is to define it more, and I know this looks like that 'how to draw an owl' meme, but I promise--getting from the loose sketch above to below is not that difficult.
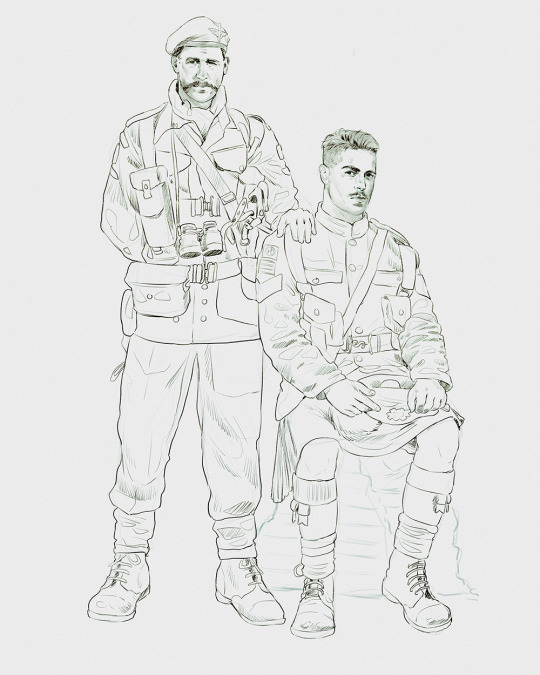
Things to keep in mind are--don't go too in-depth with the details, because things are still subject to change at this point. In terms of making a suitable anatomically-correct sketch, I would suggest lots of studying. This doesn't even have to be things like figure drawing, I genuinely look at people around me for inspiration all the time. Familiarize yourself with the human form, and things like weight, proportions, posing will seem a little more feasible.
It's also important at this stage to consider your composition. Remember to flip the canvas frequently to make sure you're not leaning to one side too often. I'm sure something can be said for the spiral fibonacci stuff, which I don't really try to do on purpose, but I think keeping things like symmetry and balance in mind is a good start ✌️
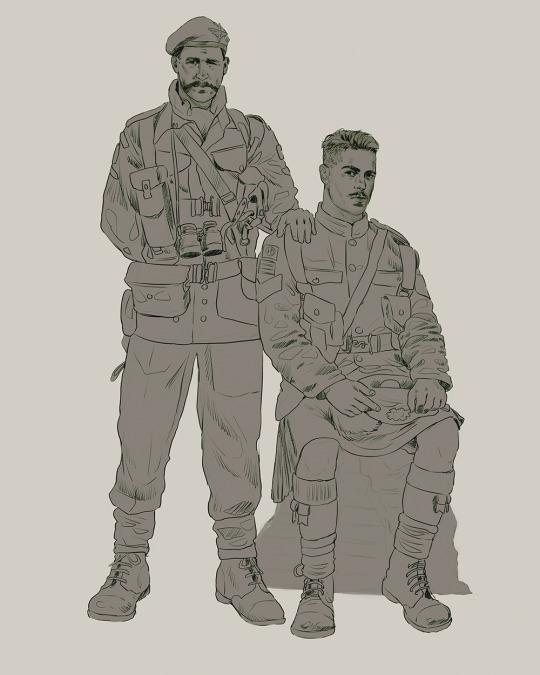
Next step is just blocking in the figures. Standard. No fuss 👍
Now onto the background!
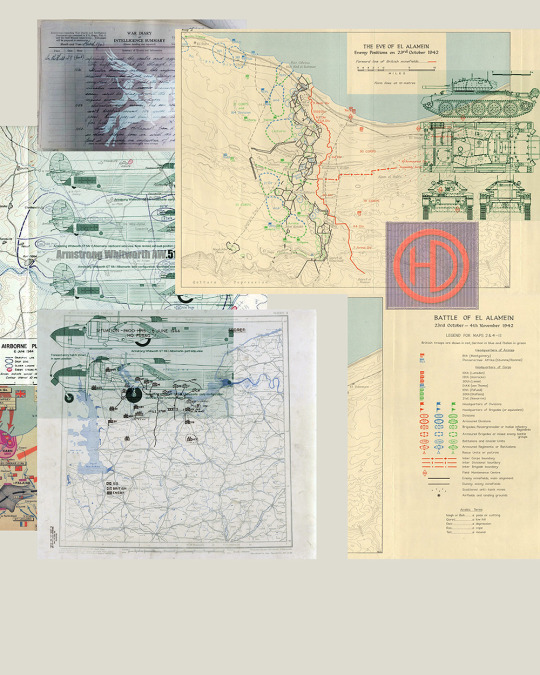
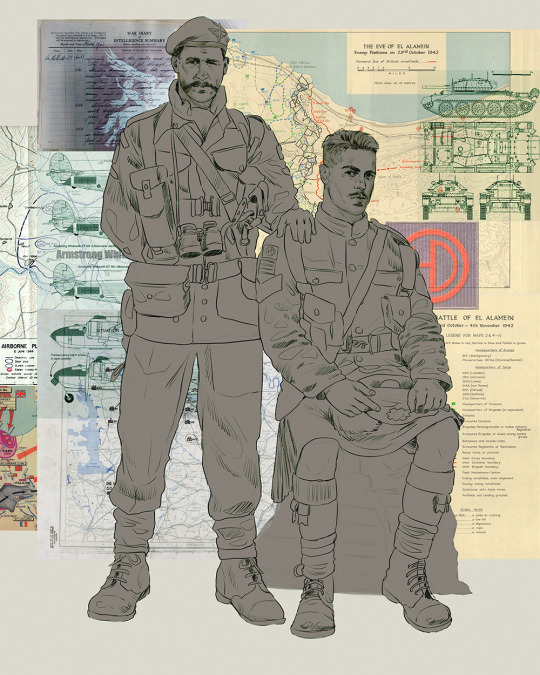
It's frankly hilarious how many people thought I was *hand-drawing* these maps and stuff 😂😂 I cannot even begin to comprehend how insanely difficult that would be. So yeah, we're just taking the lazy copy and paste way out 🤙
I almost always prepare my backgrounds first, and this is mostly to get a general color scheme off the bat. For collage work, it's really just a matter of trial and error, sticking this here, slapping this there, etc. I like to futz around with different overlay options until I've found a nice arrangement. Advice for this is just--go nuts 🤷♀️
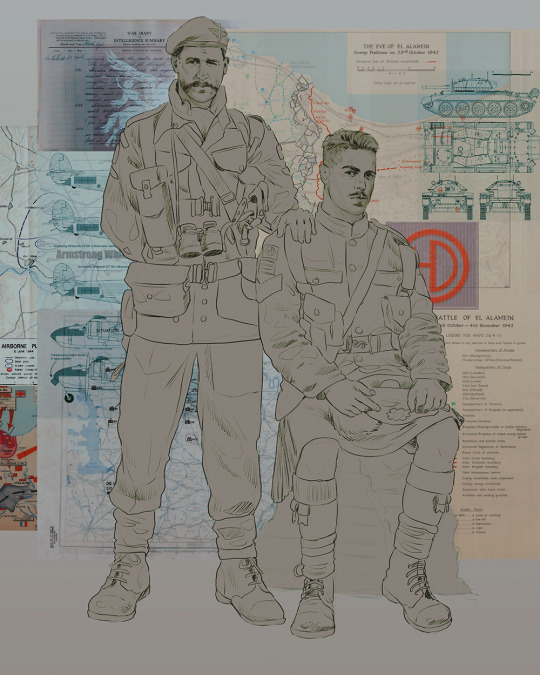
Next, I add a few color adjustments. I tend to make at least 2 colors pop in an art piece, and low and behold, they usually tend to be red and blue ❤️💙There's something about warm/cool vibes, idk man..
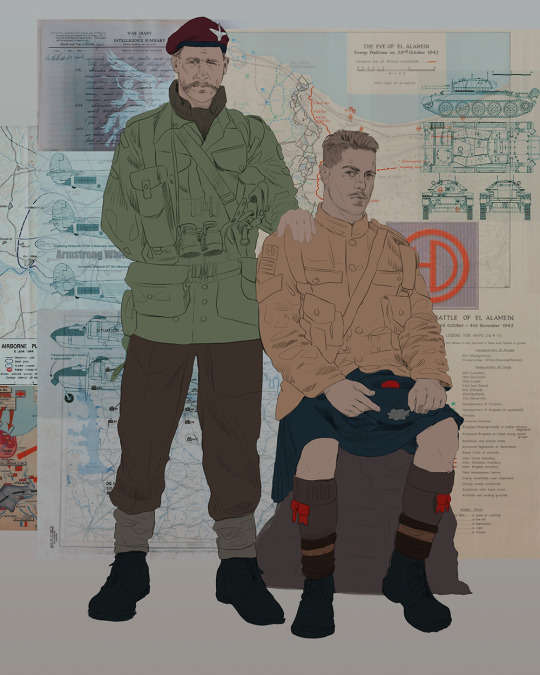
Now we move on to coloring the figures. This is just a basic block and fill, not really defining any of the details yet.
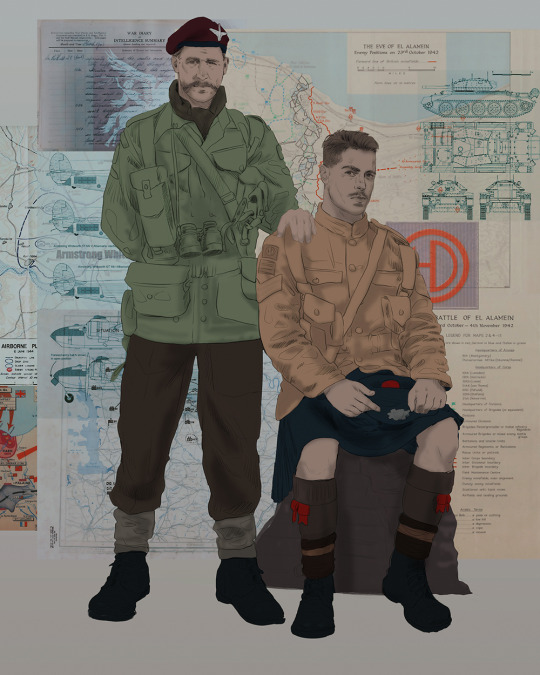
Next, we add some cursory values. Sloppy airbrush works fine, it'll look better soon I promise 🙏
And now--rendering!
I know a lot of beginner artists are intimidated by rendering, and I can totally understand why. It's just one of those things you have to commit to 💪
I've decided to show a brief process of rendering our dear Johnny's face here:
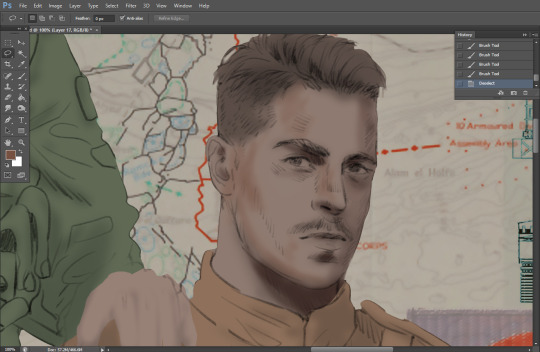
Starting off, I usually rely on the trusty airbrush just to get some color values going. Note--I've kept my sketch layer on top, but feel free to turn it on and off as you work, so as to not be too bound to the sketch. For now, it's just a guideline.
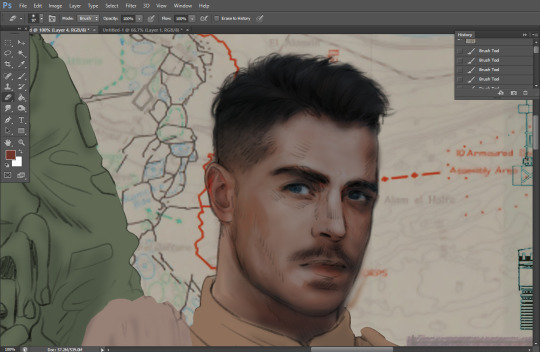
This next stage may look like a huge jump, but it's really just adding more to the foundation. I try to think of it like putting on make-up in a way~ Adding contours, accentuating highlights. This is also where I start adding in more saturation, especially around areas such as ears, nose and lips. Still a bit fuzzy at this point, but that's why we keep adding to it 💪
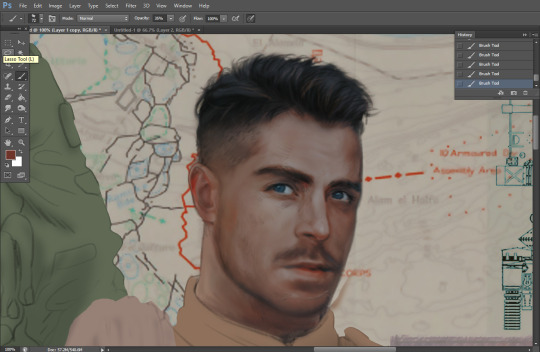
A boy has appeared! See--now I've removed most of the line layer, and it holds up on its own. I'll admit that in order to achieve this realistic style, you'll need lots and lots of practice and skill, which shouldn't be discouraging! Just motivate yourself with the prospect of getting to look at pretty men for countless hours 🙆♀️
I'll probably do a more in-depth explanation about rendering at some point, but let's keep this rolling~
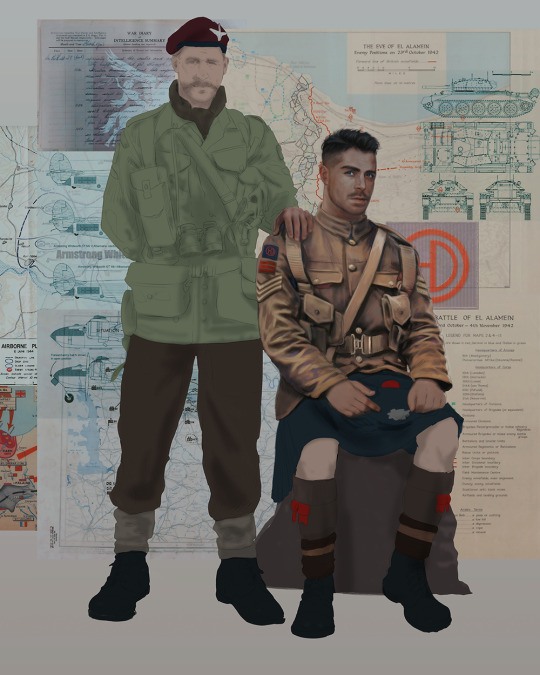
Moving forward is just a process of adding to the figures bit by bit. I do lean towards filling in each section from top to bottom, but you can feel free to pop around to certain parts that appeal to you more. I almost always do the faces first though, because if they end up sucking, I feel less guilty about scrapping it 😂 But no--I think he's pretty enough to proceed 😚
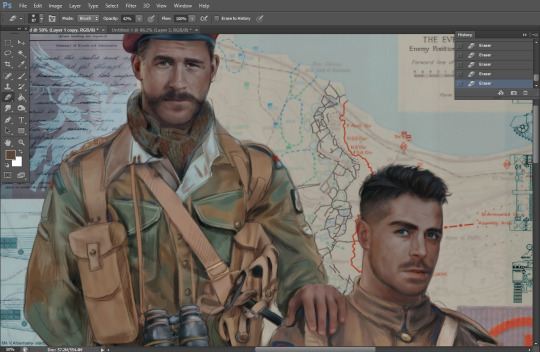
They're coming together now 🙆♀️ Another helpful tip--make sure you reuse color. By that, I mean--try to incorporate various colors throughout your piece, using the eyedropper tool to keep a consistent palette. I try to put in bits of red and blue where I can
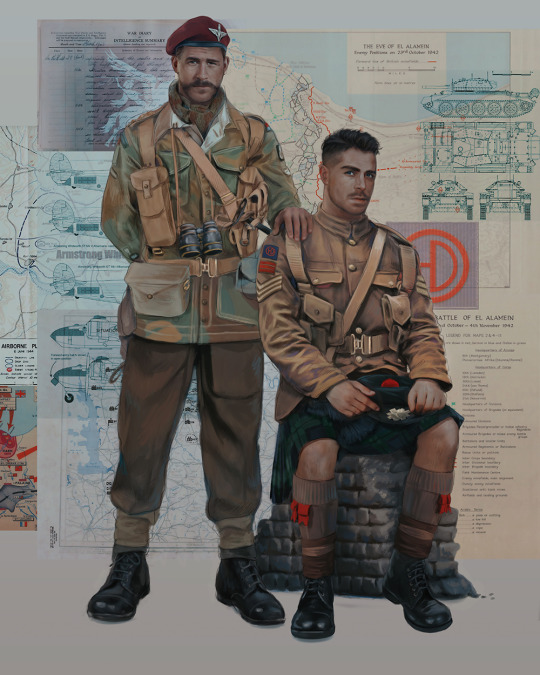
Here they are fully rendered! Notice I've made a few subtle changes from the sketch, like adjusting the belt buckles because I made a mistake 😬 Hence why you shouldn't put too much stock in your initial sketch~
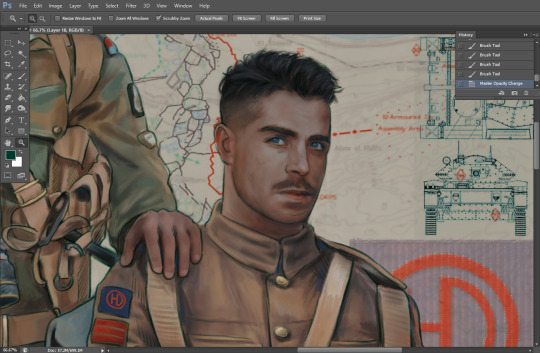
The next step is more of a stylistic choice, but I usually go over everything with an outline, typically in a bright color like green. Occasionally, I can just use my initial line layer, but for this, I've made a brand new, cleaner line 👍
And the final step is adjusting the color and adding some text:
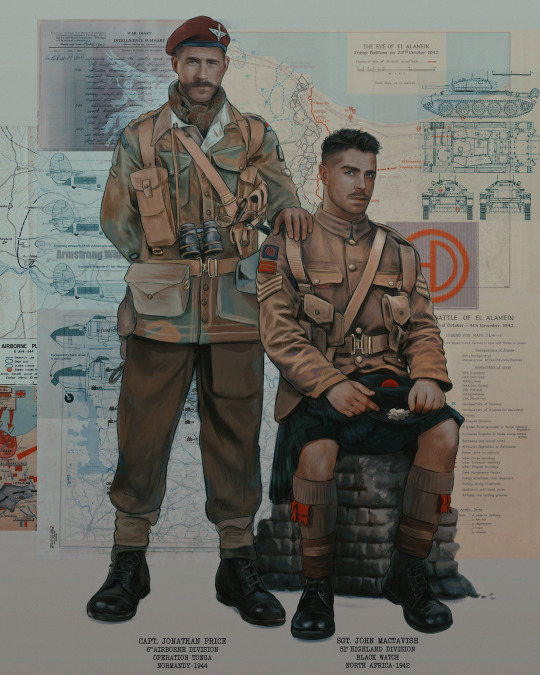
Tada!! It's done!
All in all, this took me the better part of a week, but I have a lot of free time, so yeah ✌️
I hope you appreciated that little walkthrough~ I know people have been asking me how I do my art, but the truth is--I usually have no clue how to explain myself 😅 So have this half-assed tutorial~
As a bonus, here is a cute (cursed) image of Johnny without his mustache:
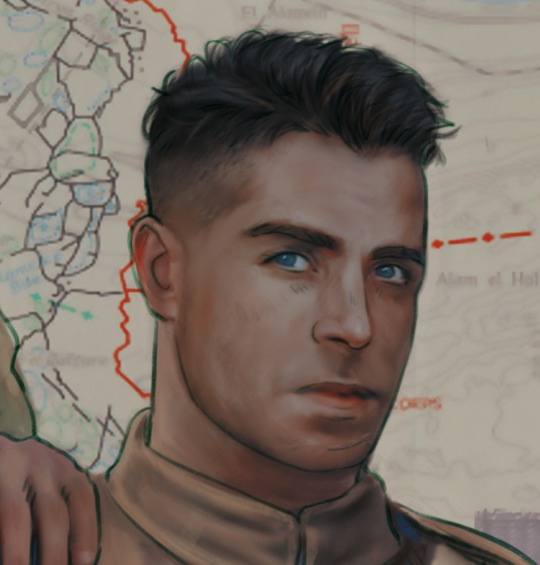
A baby, a literal infant child !!! who put this wee bairn on the front lines ??! 😭
Anyway! peace out ✌️
#tutorial#my art#art tutorial#since people have been asking#I remembered to save my process from this latest work~#enjoy 🙆♀️
1K notes
·
View notes
Text
Small astrology observation pt2 くコ:彡
Hi yall, THANKS YALLLL SOOOOOO MUCH OF YALL SUPPORT ON MY FIRST RECENT POST.IM VERY APPRECIATE IT.(❁´◡`❁)
This observation is base on my experience and I am a beginner on my astrology journey so if there some thing wrong plss correct me and English is not my first language so again if there something wrong plss correct me. Thank you. o(≧∀≦)o

NATAL CHART:
Aquarius moon i feel like they storage 1TB of information inside their brain, they reserve alot of knowledge, literally a walking google irl.( also need to check other placement to know what they interesting in) also a super honest placement.
Sag mercury pp are the most funniest people Ive have ever know but DONT YOU DARE share your deepest secrets to them. Also a very honest pp like "you hear what you get".
Scorpio mars AHHHHHH pp always try to control them or something, best xes joke maker( in my experience )(◕ᴗ◕✿)
2h Venus either pp naturally want to spoil you ,like to spend money on you or you know how to naturally make people want to spend money on you.(✷‿✷)
Pisces placement I have met a lot of pp have pisces placement are artists or just have a very good taste for art.
Mercury taurus have DEEPEEST VOICE I've ever heard.
Jupiter in pisces are so lucky fr.
Stellium in 9th could mean you not gonna stay in one place for so long you have to move or force to move or need to move.

SOLAR RETURN CHART:
Stellium in 5/7th you could enter a relationship.
Juno conjuct Venus /Juno/Venus in 7th I was so obsess with love i always need love to live bro. ALWAYS FIND SOMEONE TO HAVE A CRUSH ON 💩
It could indicate that you gonna have a HUGE CRUSH on some one
I think Ive met my FS in the year I have that placement tho.
Moon in 2th you gonna want a proper job and a more stable financial.

THANKKKKKK YOUUUUU SOOO MUCH SPENDING TIME WITH MY POST.
HOPE YALL HAVE A WONDERFUL DAY (*˘︶˘*).。*♡

260 notes
·
View notes
Note
Hi! I absolutely adore your dragon art (and am quietly hoping for a book wyrm at some point, it’s my favourite nerd pun). Your calligraphy is super impressive too! I used to take Mandarin Chinese at school and was hoping to start learning it again. I think you mentioned you were learning too, and was hoping you might have some suggestions for good ways or apps/websites that are good for people just starting out? Thank you! And I’m looking forward to more wonderful noodles.
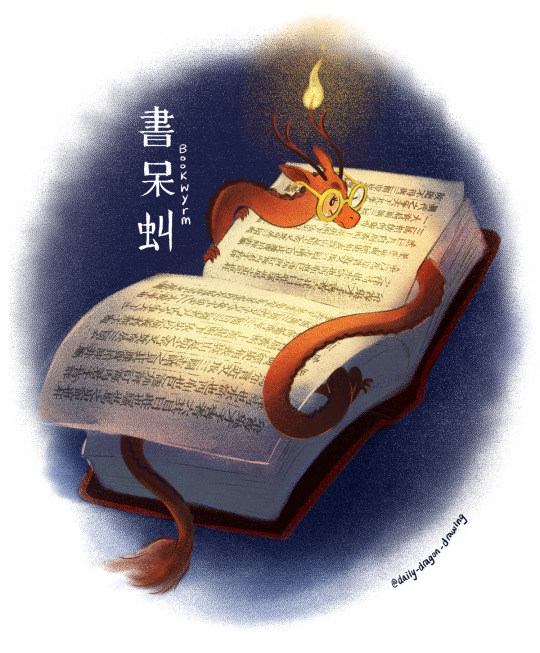
#32 - 書呆虯 (shū dāi qiú / bookwyrm) - Shh! They've snuck into the library to read all night! 📚🕯️✨
This is the resource I'm using to learn writing/stroke order, they have practice sets in both traditional and simplified Chinese:
I am already pretty fluent in spoken Mandarin and can recognize common written words, so I'm not sure how helpful this would be for a complete beginner, but it does include phonetics in pinyin and zhuyin as well as definitions. And it's free!
Here is a longer list of resources I found while looking for Chinese learning tools.
If anyone is also learning Chinese/Mandarin please feel free to reply with suggestions too :)
#ask and you shall receive :3#daily dragon drawing#art#art challenge#artists on tumblr#chinese artist#dragon#dragon a day#dragon art#dragon oc#dragons#daily drawing#daily dragon#chinese dragon#drawing challenge#drawing every day#drawing#illustration#year of the dragon#fantasy creature#creature design#zodiac#book dragon#bookwyrm#book wyrm#bookworm#chinese#chinese language#language learning
515 notes
·
View notes
Text
okay you know what here's the wip . still lots to do but I've pretty much got the shapes and base colors there

honestly shocked I did this after writing 1000 words in like, an hour and a half. this took me about 2.5 hours. not sure why my creativity juices were so high but i'll take it
I'm trying digital painting because there's ANOTHER layendecker trend and holy shit this is coming SO much more naturally than sketching + lineart
#ALSO once again: since I am a beginner at digital art constructive criticism is not only welcome but encouraged if u see something#mostly with regards to perspective/positioning/proportions because that's what I struggle with most#hannah's rambles#Hannah draws
84 notes
·
View notes
Text
What is this man!? Or: Me Overthinking Reigen's Fighting Ability, lol
Reigen Arataka. 28 years old. Used to be a normal salaryman. Runs Spirits and Such Consultations and is the self-proclaimed "Greatest Psychic of the Twenty-First Century.
Where did he learn to dropkick a bitch?
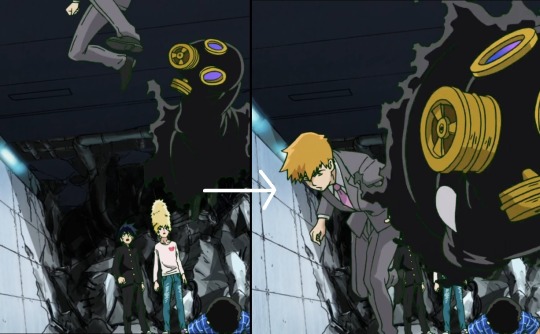
No, seriously. Where did he learn half the shit he does. Sure, you can explain his punches as something he can learn with his green belt, but not the fact that not only did he dropkick someone, he rebounded and landed on his feet. That is almost some Dimple level acrobatics for someone without any supernatural abilities or enhancements.
Sure, we can chalk it up to anime logic all we want, but that's not as fun, so I'm going to ramble and overthink instead. (As I do.)
Disclaimer: Some spoilers for later events in the show.
Okay, so. Reigen has a surprisingly large repertoire of skills. Some of this I can chalk up to his family life.
His father is apparently a local politician/civil servant, his mother a housewife, and his sister a bank employee.
Clearly Reigen gets his speech skills from his father, and maybe some of his other tricks, like using rice as glue, may even be from his mother. Granted I'm probably stretching that a bit. He could have just as easily learned that from trying to save money, lol.
We also know he didn't fit in while in school, which, as we all know, can lead to instances of bullying. Whether that bullying is physical or not, who knows. All I've seen looking around is that he apparently got skipped over when it came to games and stuff, but there could have been more to it.
Where am I going with this? You'll see.
So, the green belt. We know from season one that Reigen specifically says he has a green belt in shorinji kenpo. Now, I will be the first to admit I don't know much of anything about martial arts on a deep level. I can, however, do some quick research *cough* google *cough* (Do you think Reigen would be proud of me, lol).
According to what I've found, a green belt in a number of martial arts can be anywhere from beginner to a beginner-intermediate or even intermediate level. It depends on the martial art of course, but I think also the school. The same seems to apply to what I could find on shorinji kenpo. Or Kempo, because that's what I keep finding, someone please correct me if need be. I think people have also called it Xiaolin Martial Arts, which I also took a brief look at, but the concept appears similar there as well. Now, let's give Reigen the benefit of the doubt considering what we've seen him actually do, and assume the man went to a pretty decent school. A green belt is clearly not a master level or even a high level belt. If anything, though, this means the man can handle a regular petty thug just fine, and we've seen that. The seance scene in season 1 by itself proves that easily.
However, it's the other stuff that makes me wonder.
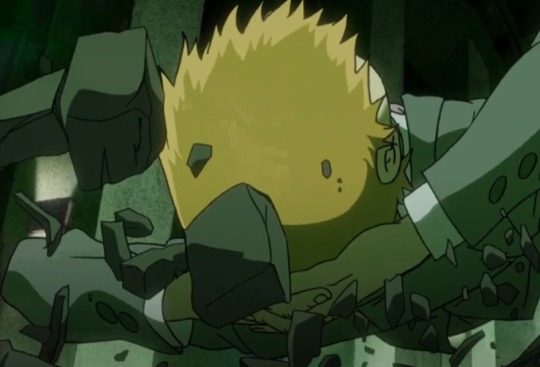
Again, this man drop kicked a dude, an esper that was currently using his power by the way, then rebounded off him to land on his feet. Beyond the dropkick itself, which from what I understand is impractical in a fight, he also rebounded. Rebounding can be hard to do off a stationary object, let alone a person. Yet here Reigen is, doing it causally off an esper that controls gravity.
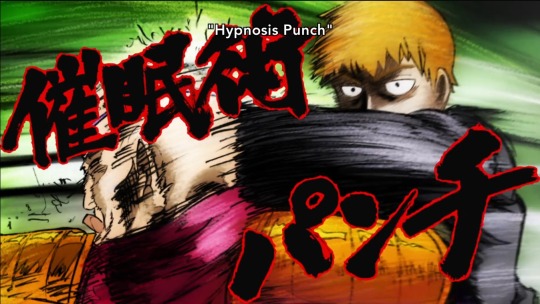
His punches are also pretty damn devastating. Again, he can knock people out. He did this during the seance, but then tried it on Muraki. While he didn't knock him out, he definitely did some damage.
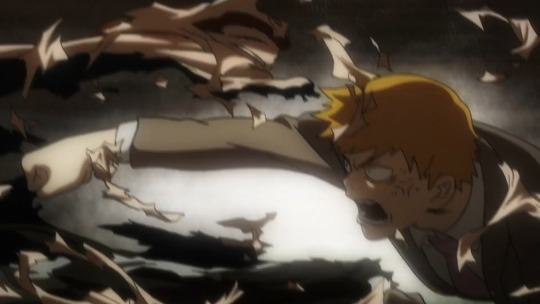
Not only would he need to be strong to do this, he'd also need to be fast. He's also fast enough that someone like Suzuki had to make a clone of himself to dodge Reigen's fist, rather than block or just dodge it normally. Either Suzuki was feeling extra that day (much to Sho's chagrin) or Reigen caught him off guard enough he actually had to use his powers.
This brings me to the next point.
Reigen knows how to hold a gun.
No, no. Wait, hear me out. Yes, I know it's a toy gun, but it is still a toy gun supped up on psychic energy. Not only does Reigen hold it nice and steady, he's got some damn good aim. That shot went for Suzuki's face or at least his throat.
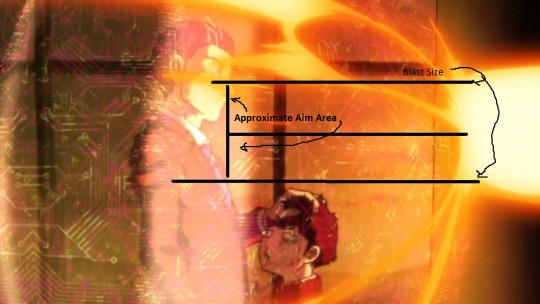
Now, granted, I hear airsoft is a popular past time in Japan, so maybe that's where some of it comes from, which is still pretty neat.
He also didn't hesitate to shoot. One look at Mob and he pulled the trigger. Suzuki got one warning before that, and he didn't even get the chance to defy it before Reigen shot. Now, Reigen is a smart man, he probably figured the gun wouldn't work, but damn if he didn't try. Honestly, he was probably panicking and kicking himself on the inside, but he certainly didn't show it.
There's also the fact that, when you look, Reigen almost always instinctively knows to protect his head and neck when he gets thrown around. It's probably the most obvious in the Mogami fight when he gets picked up and slammed, but you can see it in the final episode as well when getting flung around by ???'s tornado.
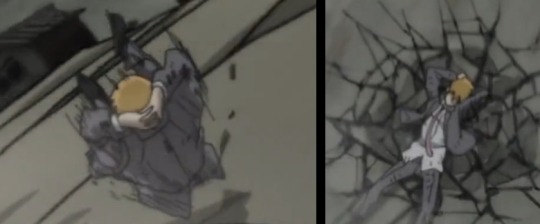
This man has either gotten enough sparring that he knows to do this on instinct, or he's been in enough scraps that he's had no choice but to learn or get concussed. Also, in the Mogami arc, Reigen tries to stop Mogami (in Minor's body) by kicking him in the head. Mogami was moving very fast, but Reigen's kick did land.
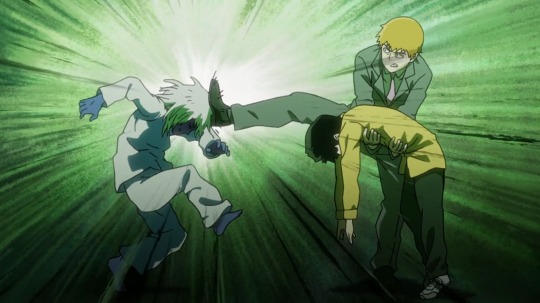
Too bad it was Mogami and not any one else because it might have worked.
He also knows a couple knee strikes, which again was used on a moving target.
Now, let's step back and bring up Reigen's family again. There's always the possibility that Reigen got his green belt young due to his father's occupation. Now, that might only apply if his father was a rather important one, but still something to consider. It could have also been in self-defense if the bullying he faced in school got physical. I personally think Reigen got his green belt at an older age, earliest highschool, but obviously there's nothing to back that up. It also makes me wonder just how many of his clients have gotten violent, because while he did flinch at the knife during the seance, he also didn't hesitate to deck the dude.
This doesn't even bring up the fact that Reigen knows all kinds of massage techniques (I heard that his family wanted him to be a massage therapist, but I don't know if it was said where that information came from), psychology, his ability to cold read people, and everything else this man does.
Granted, a lot of his effectiveness comes from him being smart and charismatic. This man is a manipulator and thank god he's got morals because holy hell the damage he could do being able to manipulate Mob.
Or the damage Mob could do if anything serious happened to Reigen. >.>;
All in all, I think Reigen has gotten into way more scraps than is suggested. I feel as if he might have had a rougher life at school than what little hints we've gotten. That whole thing with the Separation Arc felt kind of like him projecting onto Mob, but I could be wrong. Personally, I headcanon Reigen as being something of a truant and/or delinquent (or at least a gremlin) when he was younger, but that's just me, lol. I do think he's had a rougher go of it than he likes to tell, though.
I know I didn't cover absolutely everything here, like Shimazaki, and that there's probably more context or something in the manga, but this post was already long enough and I haven't read the manga in full yet so apologies if there is missing context.. If you made it to the end of this post, I want to both thank you, but also apologize for my long winded rambling, lol. I just - Have no idea what to make of Reigen and all that he does. It doesn't help that a lot of his backstory is fairly non-existent. We only know tidbits about this conman, but I guess that's part of what makes him interesting.
Well, hopefully you had fun reading this post as much as I had making it. I know most of this can probably be just anime logic, but I had looking into it at least! If this wasn't a world of espers, Reigen would probably fairly formidable in a fight, on a physical level anyway. He's already like that on several others already, lol. This sweaty rat just always seems to grab my attention. . .
#mob psycho 100#mp100#reigen arataka#anime#meta#is this meta?#i'll call this meta#overanalyzing#animanga#i love and hate this man lol#why does he do this to me?
43 notes
·
View notes