#a piece of rectanglous cloth essentially that i can pin to the inside of my jackets
Explore tagged Tumblr posts
Text
sometimes you try really hard and finally get all the stuff you need and are actually half a step from figuring it out. and then. the fucking picture text thingy (i forget words) explaining how it works are different from the actual thing, it's not really translateable to the actual thing, nothing makes sense and somehow the fucking metal needle Broke
#ik the needle breaking is smth commonly warned against BUT STILL#HOW#THAT THING IS METAL AND NOT THAT THIN#also the FUCKING explainy pictures are DIFFERENT what the fuckkkkk#i was SO. CLOSE. but noooooo#bloody sewing machines#im really wondering if its worth it#i sewed my book bag by hand now like that does work#alas. for anything bigger than a book-sized piece of cloth hand sewing would be A Pain and also an ordeal of Hours......#urgh ill figure it out eventually#anyway the book bag is still pretty neat#a piece of rectanglous cloth essentially that i can pin to the inside of my jackets#bc the due to biking everywhere having books in my pockets is no longer sustainable with this weather#and now i can carry even more books around! including hardcover!#as long as it holds and isnt too annoying#so that super neat#i just need a motive to make it more interestnig lmao#a biscuit's rambles
1 note
·
View note
Note
I have a very dumb question about quilts; so once you have all the squares planned and laid out, do you just like sew them together? And is there a special quilt stitch or something? And then what do you do about the back bc I assume you don't want all the messy stitching and flaps and stuff just out for all to see, and would it be the same process for the more complex quilts that have pictures on them?
Hey! Not a dumb question at all, I tend to skip a lot of steps in my progress pictures. This is going to be a long explanation, so I’ll put it behind a read more.
Everyone probably has their own version of quilt making techniques, but I personally stack up each row, left to right, and use a clothes pin to clip a piece of paper with the number of each row to each stack. Then I take a stack to my sewing machine, and sew the top two squares together, unfold them, put the next square in the stack on one edge, sew it, and continue like that through the whole stack until I have a row complete. Then I repeat it with the rest of the stacks to make all the rows. Once I have all the rows complete, I put one row on top of another, pin it in place, and sew along one edge. Then I unfold, add another row, and repeat until the entire quilt top is done.* A quilt top is not a finished quilt, even though it has all the squares sewn together. The next step is making a quilt sandwich (for real that’s what it’s called): you lay out the backing fabric (which is what’s visible on the side of the quilt that won’t be the side you just sewed together) right side down, then the batting (the fluffy-ish stuff inside a quilt), and then put the quilt top on top, right side up. You awkwardly crawl around on the floor (if you’re me, anyway) trying to make sure there are no wrinkles or folds anywhere in the bottom layers of fabric. Then you pin all three layers together. I use safety pins but I think there’s some sort of specialized pin that exists? From there, you take the completed quilt sandwich to your sewing machine. I think there might be a few different schools of thought on where to start actually quilting a quilt, but I like to start in the middle and work outwards from there. You’ll have to fold or roll up the edges of the quilt and put some muscle into maneuvering it around because quilts are a lot bigger than sewing machines. You can do decorative stitches, or freehand swirls, or draw hearts with stitches, or pretty much whatever you want.** I personally have only done what is called “stitch in the ditch” which is where you sew the quilt sandwich along the seam lines from sewing the squares together to make the quilt top so that the quilting isn’t visible on the quilt top, but you can make really pretty art with that. You can also hand quilt (aka hand sew the quilt sandwich together) or use yarn ties instead of sewing, but I haven’t tried either of those yet. The last step(s) are taking your quilted quilt sandwich and trimming the backing fabric and the quilt batting and adding a binding around the edges. You’ll either trim them exactly to match the top or a bit bigger depending on which binding method you want to use; I’ve only made self-binding quilts, where you leave the backing fabric a bit bigger than the quilt top, fold it up over the edges and sew it down to cover the edges of the quilt sandwich. The main other method (as far as I know) is sewing bias tape/contrast fabric around the edges, but I’m fuzzier about how to do that. All these instructions are about making a basic patchwork quilt with just squares sewn together for the quilt top, but as far as I know it’s pretty much the same method for other quilts. There’s just more steps because you have to make the blocks first instead of using premade squares, which can involve sewing together triangles or rectangles or all kinds of stuff. There’s a different method called paper piecing that’s more complex, but I think it's pretty much the same just more intricate? There are also quilt patterns that are essentially just one giant “block” instead of blocks sewn into rows and rows sewn together. Quilting can be as complex or as simple as you want it to be, and I gotta admit I like making the simple ones lol *this description leaves out, like, a LOT of ironing. There is so much ironing in quilting. Gotta iron at like every single step ** As far as I know, there’s no specialized quilting stitch. I just use a straight stitch for the entire quilt. By decorative stitch I meant like those stitch patterns on sewing machines that can make a row of cats or hearts or zigzags or whatever, but for sewing the quilt top together I’d just use the straight stitch.
#ask away!#long post#an explanation of quilting#quilting#to quilters: yes I know this is very much not a comprehensive explanation#to non quilters: there's a LOT more information on techniques like paper pieces and jelly rolls and seam allowances#and interfacing and batting materials and and and....#but like I think this explanation works for people who aren't looking to make quilts and just want to understand the process a bit#if you want to learn to actually quilt I can make another post with links and tag one of my mutuals#who is an amazing artist with quilting#I make like cozy basic quilts with fabrics I like that are like as simple as quilts can be#(I take advantage of the fact that pretty enough fabric can mean no one is looking at the pattern of the quilt lol)#but she makes quilts that are works of art#(I am not dissing my own creations she is just in an entirely different league of quilt making than I am and idk how else to word it)#(she's also been quilting a lot longer than I have and seems to enjoy those really complex patterns)
41 notes
·
View notes
Text
Doctor Strange Cosplay Tutorial (PART 3)
Part 3: (outer) Robes
***Important Note: this is the only part of the entire tutorial that I enthusiastically suggest you sew, and learn some basic pleating/stitching!***
The first thing we’re going to need for this part is a big rectangle of dark blue fabric. To figure out approximately what size we need, we’re gonna take some measurements of ourselves, so grab a flexible measuring tape or whatever you’ve got on hand.
The length of the rectangle: First thing you wanna measure is the length from your shoulder to the tops of your knees; this is how long we’re going to make the robe. Write the length down in inches (or centimeters, if that’s your measurement system), and double it. This is how long the piece of cloth we’re going to need is. (Example: if your shoulder-to-knee measurement is 36 inches, I’m going to need a piece of fabric that’s 72 inches in length)
The width of the rectangle: Next, LOOSELY (we don’t want the robe to sit too tight, it’s a pretty loose article of clothing) measure the around the largest part of your waist. Write down that measurement and divide by half to get the width of fabric you want. (Example: if your waist size is loosely 40 inches around, you’re going to want the width of your fabric to be 20 inches across).
One last thing you’re going to measure is the width of one shoulder (from your neck to the tip of your shoulder). This is how wide we’re going to make the sleeves. Write that down and keep it for later; we won’t be needing it to measure our fabric. (We’ll use 8 inches for an example width).
Now grab your fabric. Measure out the length and width to form one large, long rectangle. To use some random example measurements, somethin like this:
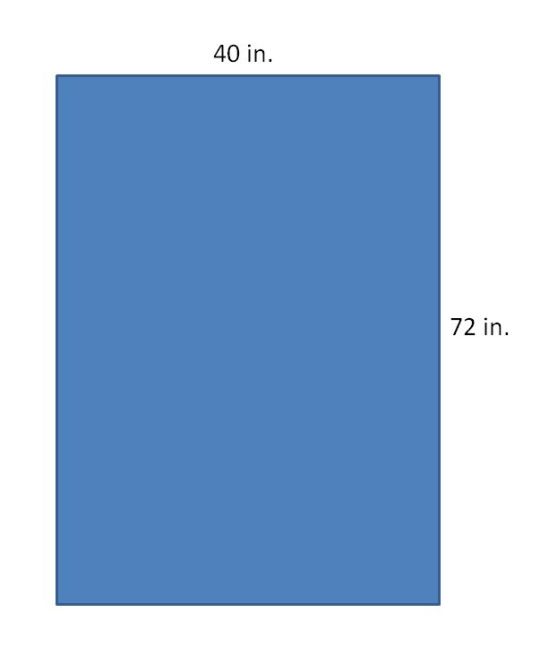
Cut it out when you’re ready, and grab a fabric pencil/chalk/etc.
Trace down the exact center of each side to form a T shape, like this:
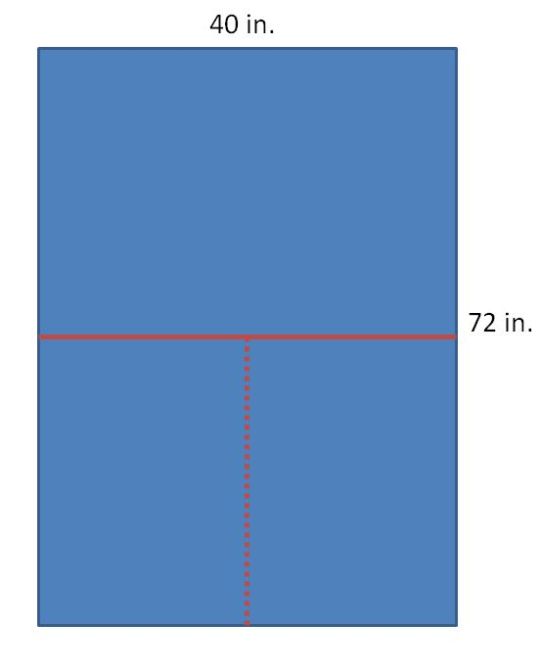
Cut your fabric along the dotted line. JUST THE DOTTED LINE. NOT THE SOLID LINE. JUST. THE DOTTED.
Alright! You’ve got the basic shape of the robe down, nice! Now we’re going to work on the pleats. This part isn’t really an exact science; it’s more of a guess-and-check kind of thing.
Start off by drawing five equally spaced lines on each side of your fabric. You should have ten in total. These are the rough markers for where you want your pleats to go.
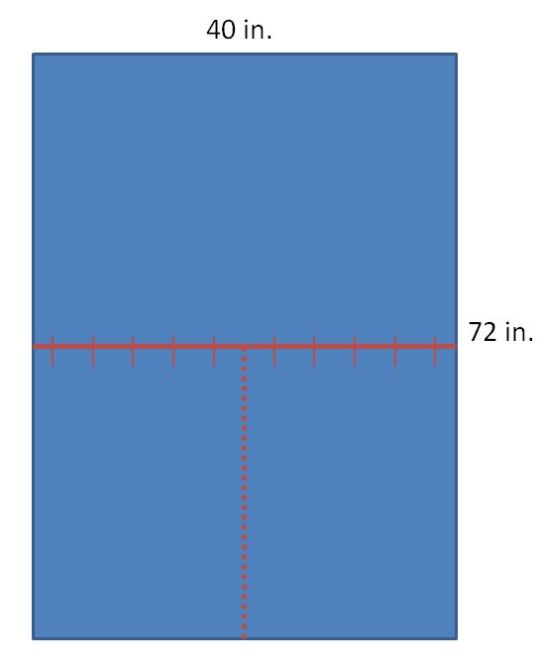
Pleat along each line. You can google how to pleat, but essentially for now all you want to do is pinch the fabric along each line, forming a small fold, and pin it like so:
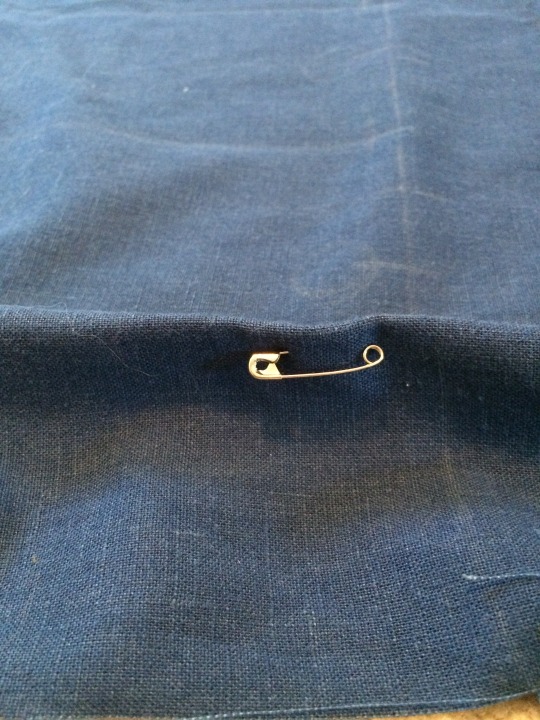
Do that with each pleat line you traced onto your fabric, and ignore my other scribbles:
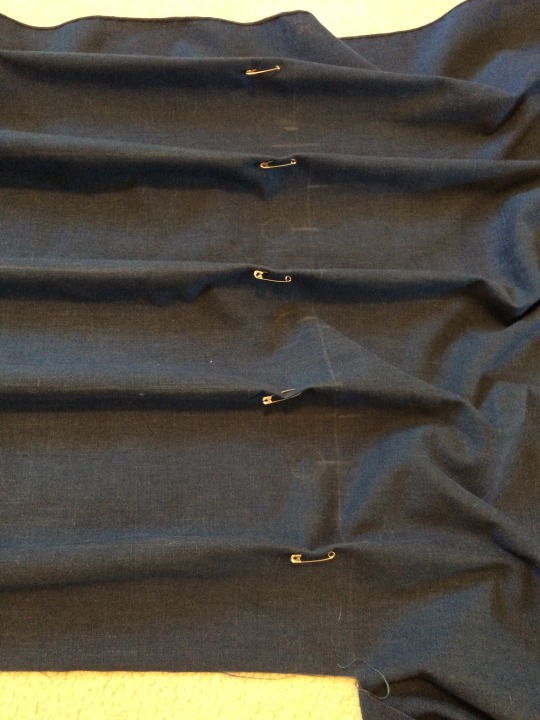
When each pleat has been pinned, you’re going to start folding each one outwardly, away from the center cut line, one over the other, to form five roughly similar pleats. Each side should shrink in length as you pleat. This is where our last measurement comes in; make sure each side of the fabric is the same length as your shoulder width when you’ve finished all the pleats.
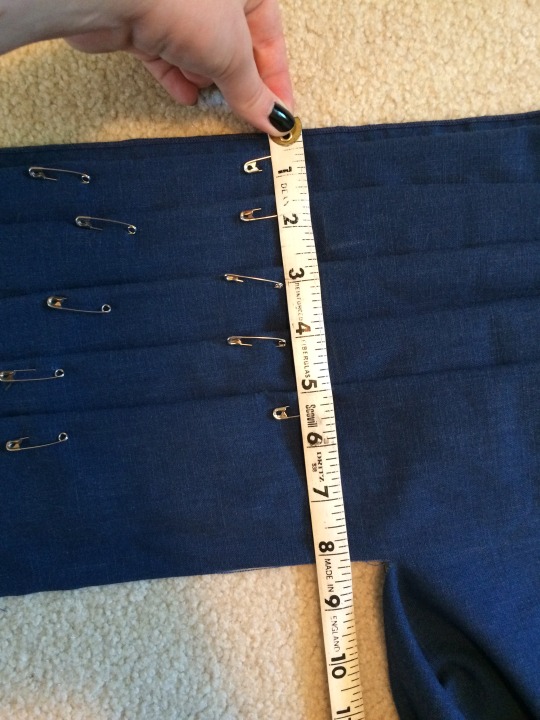
Measure, adjust, and fiddle with the fabric until it looks like the image above. Make sure you have both sides of the fabric pleated, and that they mirror each other. Pin the pleats firmly in place once you’re happy.
This is where I highly suggest you sew; you can stitch each pleat in place individually, or run one long seam along the center line. Either way, just make sure to stitch each pleat down firmly so that they won’t move anywhere. This part of the costume is going to be flexing and shifting and under stress as the wearer moves about, so you want this to really hold together.
Once the pleats have been sewn in place, shake the robe out and try it on to make sure no last adjustments are necessary. Slip each front flap over your shoulders, with center seam resting on the tops of your shoulders and the end of the center cut positioned at the nape of your neck. It should look a bit like a wonky poncho with a slit down the middle:
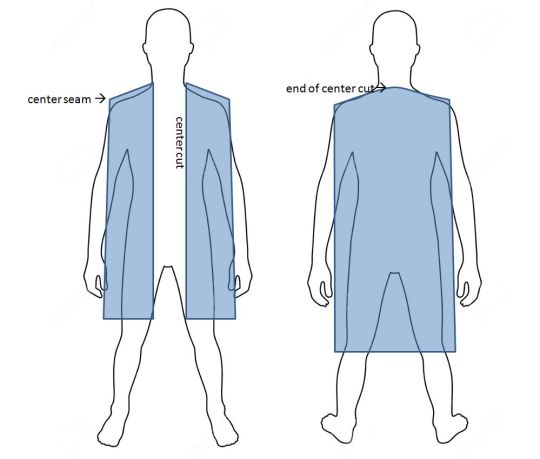
Adjust the length or anything else necessary, if you need to.
Last thing we’re going to do is cover all the raw cut edges! Do this with blanket or quilt binding (it may also be called bias tape, etc) and hot glue. I’m using pink here for an example but use a similarly colored blue, please:
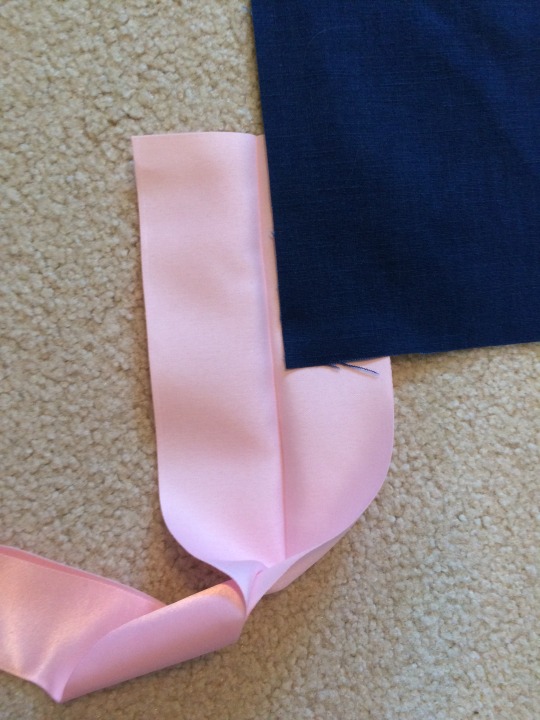
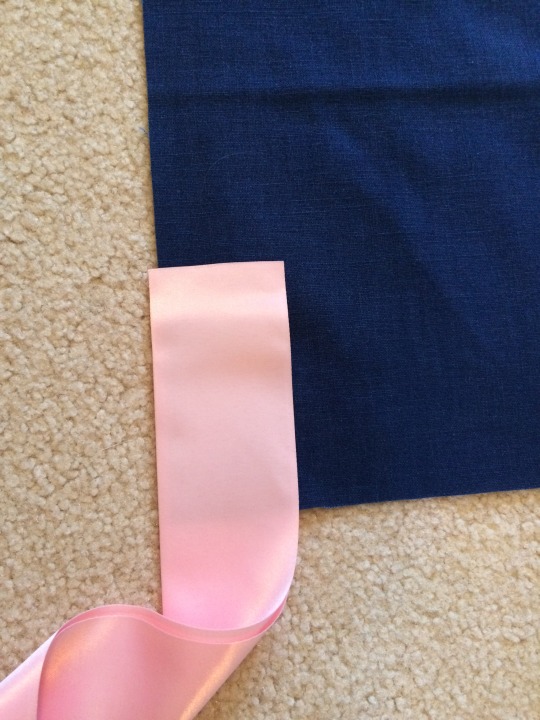
Unfold your binding and sandwich the raw edge inside. Hot glue in place. Bam! Covered!
Do this with every raw edge you have until you end up with something like this:
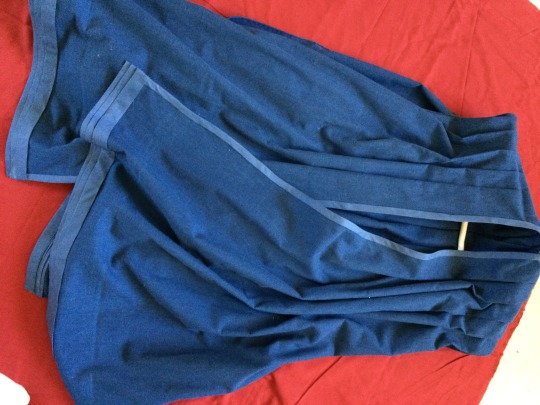
Stephen’s robes appear to be layered, so if you have some spare binding, you can fake this look by adding multiple layers of fabric/binding underneath each other for the bottom hem:
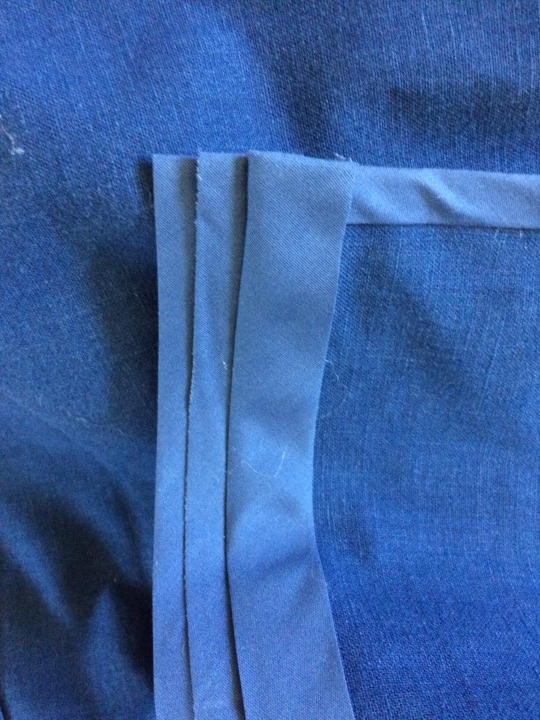
That’s all for this part, stay tuned for the next!
#stephen strange#doctor strange#dr strange#doctor strange cosplay#ironstrange#cosplay#costume#marvel#marvel costumes#marvel cosplay#mischief manages
344 notes
·
View notes
Text
How Can Women Save the World With Reusable Pads? And how can you make them in 2021?
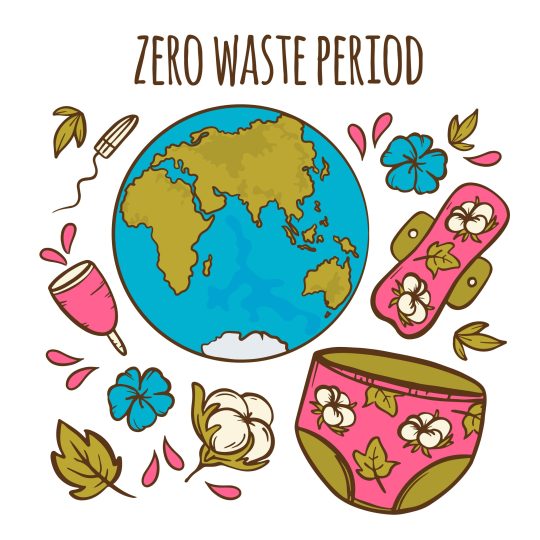
The number of times women shop for pads during their period should not be watered down the drain. The reality here is that women must shop monthly for toiletries in bulk to last them the whole menstrual period However, the perplexing issue about how harmful these menstrual cycle toiletries are to the atmosphere persists. Some argue that they are biodegradable because they are made of cotton. And if it isn't that bad, what about the long-term consequences? Women will use menstrual pads for the rest of their lives starting at adolescence. Disposable pads, on the other hand, are only used once and then discarded. A lifetime's worth of pads and tampons adds up quickly. As history has demonstrated, they do not end up where they should, but rather in landfills, destroying environmental channels and paths. This is also another example of why women should use reusable pads.
Reusable Pads
I was quickly drawn to reusable pads after seeing them advertised in a focused ad. They looked aesthetically millennial, eco-friendly, and came in a variety of pretty designs which attracted them to me. I choose pads over tampons unless I'm busy so I can wear them outside and my menstrual is not heavy enough to saturate a whole tampon. The thought of washable cotton pads that I could reuse made the bargain even sweeter.
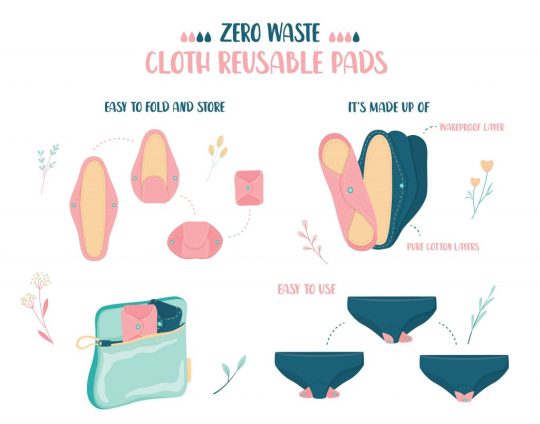
There are a large number of women out there who are hoping for a better option than disposable menstrual pads. Many women have already begun to use tampons, while others have dared to use menstrual cups. If none of these options appeal to you, the safest choice for me is to use menstrual reusable cotton pads. For those that are accustomed to disposable sanitary napkins, it can seem difficult. Your tastes will shift after reading this article on menstrual reusable pads.
What is a Menstrual Reusable Pad?
Menstrual pads that can be used multiple times are known as reusable menstrual pads. They collect menstrual fluid and depending on your menstrual flow, the pad can last for around 4-5 hours. Since using the pad, wash it thoroughly and clear any bloodstains before reusing it. These fabric pads are normally made up of several layers of cotton or hemp, but not plastic. It can seem intimidating at first, but once you get the hang of it, you'll be using reusable pads in no time. It also saves you money so you don't have to throw out this pad to buy new ones.
How to Make Reusable Pads?
Step 1: Create the Pad BaseCreate a template - Start with creating a diamond shape with rounded corners. It should be about 9 inches tall (22.86 centimeters) and 8 inches deep (20.32 centimeters). When you're done, cut out the template. Increase the width of the top and bottom corners. They can have a width of around 2.5 inches (6.35 centimeters). Make use of the template to cut out two pieces from your cotton flannel - This is going to be the outside of your fabric pad, so choose anything you want. You may use a patterned or solid color fabric. You may also do one hand with a pattern and the other with a solid hue. Instead of flannel, you should use cotton thread. Lots of fun options can be found in the quilting and calico sections of the favorite fabric shop. Sew the two pieces together - Starting with the right sides facing in, pin the two bits together. Sew a 0.64-centimeter seam allowance around the piece. Since you'll be carving a slit through it, there's no reason to leave a void for turnover. Cut a vertical slit in the middle of the piece - Be sure you're just cutting one sheet of cloth at a time, not both. Place the slit exactly in the center. It just has to be a few inches/centimeters tall to be effective. Turn the piece right-side out through the slit - Push the pad's corners into the slit you made with your fingertips. If the edges/corners aren't coming out well, use a pencil or a knitting needle to force them out. Then make use of hot iron to press the pad base. Step 2: Create the Pad LinerCreate a template - Begin by drawing a vertical rectangle with rounded top and bottom edges. Make sure the rectangle has a height of 8 inches (20.32 centimeters) and a width of 2.5 inches (6.5 centimeters). When you're done, cut out the template. Use the template to trace the liner pieces - 3–4 pieces of soft toweling are needed. Trace two more pieces from the flannel using the pattern, adding a 0.64-centimeter seam allowance. The toweling would be used to build the liner. The flannel would be used to protect the liner. The flannel should be the same color as the base pad. Stack and sew the toweling pieces together - Use a seam allowance of 0.32 to 0.64 centimeters. Using a zigzag stitch, go around the edge of the piece. When you're done, set the stack aside. This stack does not contain the two flannel bits. It makes no difference what color the thread is. This will be placed inside the liner shell. Sew the flannel pieces together to make the liner cover - This is where you get to join the flannel pieces together using a pin with the right sides facing in. Sew a 0.64-centimeter seam allowance through them. Leave no room for turning around. Instead, prepare to cut a slit into the object. Cut a vertical slit into the liner cover, then turn it right-side-out - Use the same method you used to make the pad base. Make the slit about 4 inches (10.16 centimeters) tall this time. So you'll have ample space to tuck the towel covering. Cut notches into the pad's angled corners. This will aid in the reduction of bulk. Tuck the towel liner into the flannel liner - Simply insert the towel liner into the flannel cover through the slit. Any spikes or buckles should be smoothed out. Step 3: Join the Pad Base and Liner TogetherPin the pad liner on top of the pad base - Turn the pad base until the longer axis is vertical and the slit-facing side is facing up. With the slit facing down, place the pad liner on top. Make sure it's balanced and visually focused. When you're done, pin altogether. Topstitch around the liner to secure it to the pad base - Sew a 0.32 to 0.64-centimeter seam allowance across the pad liner. Backstitch at the beginning and end of each stitch, then snip the thread as close to the fabric as possible. When you sew, remove the buttons. This can be done with a similar or contrasting thread tone. Sew another 0.5 inch (1.27 centimeters) inside the liner - Be sure you're stitching 0.5 inches (1.27 centimeters) away from the topstitch rather than the liner's side. Use the same color of thread as before. This would assist in securing the liner to the foundation and preventing buckling. Add some snaps or Velcro to the wings - You may use sew-on snaps or snaps that require a tool to set. Velcro may also be used instead. However, self-adhesive Velcro can be avoided. While it is simple to submit, it does not last long and will inevitably fall off. Plan ahead of time so the wings will close on the outside of your panties. https://www.youtube.com/watch?v=cZtPLyj_EiA
How to Use Reusable Menstrual Pads?
A reusable cotton pad works in the same way as a single-use plastic pad. They're made to fit inside your underwear, snap shut, and capture your menstrual cycle. Reusable pads nowadays have a coating that prevents the clothes from staining. It also has a holder that allows you to securely put your pad on your panties. There is an added provision where you wrap an elastic belt around the waist to keep the pad in place for longer periods.
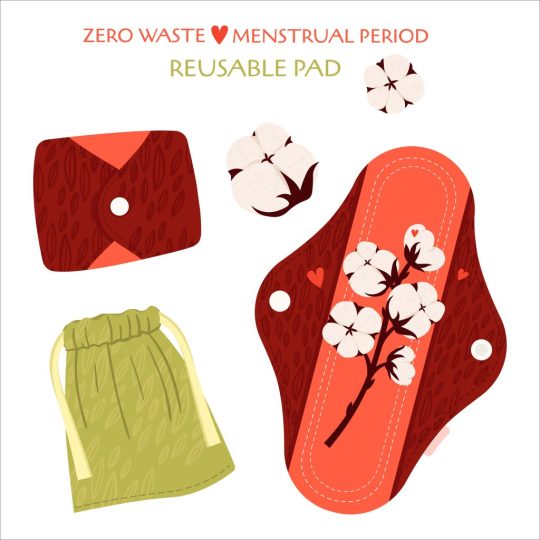
However, a reusable pad is both cost-effective and environmentally safe. It's easy to use and comes with a band and lining which is just everything you need to make it awesome. A single pad will last nearly 12 hours. It varies depending on the individual's menstrual cycle. All you have to do is put it on your underwear and wrap the band around it. It's that easy.
How to Clean Reusable Period Pads
1. Rinse and soak After removing your pad, rinse it and place it in a wet bag before you're ready to do the laundry. You may even soak the pads in water until you're able to wash them to help prevent staining. Put them in a leak-proof garbage can or bucket with some water, Castile soap, and antibacterial essential oils like peppermint or tea tree oil. 2. Wash We recommend using a simple, environmentally friendly detergent that is free of chemicals and fragrances. To avoid staining, wash with cold water. If your pads have been immersed in sweat, first run them through a rinse and spin cycle in the washer. Then, along with your pads, you can add towels or something else you like to wash. Fabric softeners can never be used on recycled menstrual pads since the conditioners will grease the tissues and minimize absorbency. If your pads get less absorbent with time, you may need to "strip" them of any detergent residue. 3. Dry To avoid shrinkage, we firmly advise hanging to dry. You can tumble dry them in a low-heat environment if you're short on time. That concludes it! Your pads will be ready to use after they have dried.
How Many Reusable Pads Do You Need?
The length of a woman's menstrual cycle varies greatly among individuals. You'll need to consider how much you refresh your period utilities during the day to estimate how often you'll need to span your cycle. We recommend using 6 to 12-day pads, 1 to 3-night pads and 3 to 6 pantyliners in total, but it all depends on your flow and how often you do laundry.
How Do I get Reusable Pads?
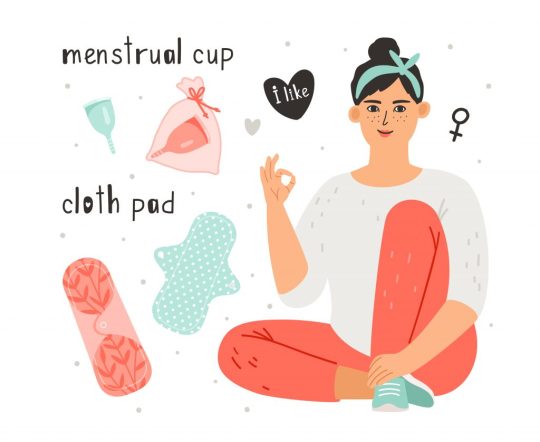
Well, there are several choices to pick from, but they can be costly and something you must continually replenish at the supermarket. Most reusable menstrual products, on the other hand, will not only save you money but also benefit the environment. If you like to use pads, adding reusable pads to your period arsenal will change the game. You can always check for reusable menstrual pads online. Amazon is a fantastic place to purchase them. Finally, I believe it has reached a point where every woman needs to consider switching to reusable pads. Nondisposable is usually a safer option when you consider helping yourself and keeping the world safe. Also, since reusable pads save you money, you can begin purchasing them for your flows. Reusable pads will last for years, and assuming most women menstruate for around 40 years and spend $8 every other month on single-use pads, she would have spent $1,920 in her lifetime. If she uses one pack every month, the total is $3,840. Consider what you could do for that sum of money.
Read the full article
0 notes
Text
Make A Purse Tutorial
First of all, you will need access to a sewing machine, and a knowledge of the basics. Know what a running stitch is, for example. How to wind a bobbin, how to thread the sewing machine. Some chain sewing stores offer classes; look into it.
Detailed instructions below the cut.
Second; if you make it the way I do, you’re going to be sewing through a lot of layers, and some really thick fabric. So, make sure you’ve got a needle for the sewing machine designed for that. If you don’t know how, make a note of what model machine you have, go to the sewing store, and ask for help. Explain the situation, show them the note you made of what machine you have, and get help getting the right needle.
The next part is gonna depend on what size purse you want. I want a pretty big purse, so I know that I’m gonna want something 20 inches x 30 inches. Up to you, though. .75-1 yard should be plenty. Select whatever fabric you want for the exterior of the purse. Then, go find the canvas. In my local sewing store, I use something they call “duck cloth”. That’s going to be the interior lining of the purse. It’s very thick and very sturdy. Get about a yard of each. Then get the right thread. Again, if you don’t know how, ask for help.
Next thing you need to buy is a zipper. You need a separating zipper, and that’s essential. What that means is, when you totally unzip it, it’s in two pieces. It’s extremely difficult to sew onto the purse if it won’t separate into two pieces. Again, ask for help if you need it. You want a zipper 18 inches long.
Don’t forget to pick out something for the purse strap. I recommend about 45 inches, but wrap it around your shoulders or whatever to make sure it’s about where you want it to be. Keep in mind, the only way that I know to make the purse strap shorter is to cut it in the middle (after you sew it onto the purse), and tie it in a knot.
Another note; there is, to my amateur knowledge, two things you can do to reduce your chances that the fabric will fray. One; use scissors called “pinking shears”. They’re scissors with teeth, and for some reason cutting the fabric jagged like that reduces fraying. I use them for everything except cutting thread. Two, when you’re using a sewing machine, use a stitch that goes back and forth when you’re sewing the edges of anything. You’ll have to be more careful not to go over the edge, but again, it’s supposed to reduce the chances of fraying. Both these things are optional.
Take all the fabric you just bought, and put it in the washing machine AND the dryer. This is called “pre-shrinking” the fabric. By drying it before you cut anything out, this means that if the finished product gets dirty, you can just throw it in the washer and dryer without messing it up.
Iron the fabric, if at all possible. The duck cloth is weird and likes to contort into shapes that make it hard to cut out evenly, so it’ll make a big difference.
CAREFULLY, on the duck cloth and the fabric for the exterior of the purse, measure and cut a 20x30 inch rectangle.
You now have two 20x30 inch rectangles. Sew them together. Then hem them (for all 4 exterior edges, and fold in about a quarter of an inch and sew that down. Makes the exterior edges look more pretty and finished). MAKE SURE that when you hem, you fold the edges into the duck cloth side, so they don’t show on the outside.
Next, on your rectangle, sew a loose grid pattern. Can be a simple running stitch. Doesn’t have to be straight or pretty. The reason you’re doing this, is when you sew the pockets onto the purse, you don’t want the two layers to move around weirdly. This is going to hold them still so your straight lines can stay straight.
Next, go back to your scraps of fabric that you made the rectangles from, and measure and cut whatever pockets you want. If you want to reinforce them with multiple layers of fabric, remember to follow the same process you used to sew your large rectangle together, minus the grid pattern to hold the layers in place.
Place and sew on your pockets.
Next, the zipper. Unzip it, and carefully place each piece, on the 20 inch sides. I don’t pin, but you can if you want to. Make sure the pieces are on the correct side of the fabric, and are facing the same way (so you can zip it up when it’s completed). Sew them on, CAREFULLY. REMEMBER; if the needle hits the teeth of the zipper, depending on what zipper you got, it may break the needle. You want to get close to the teeth of the zipper, but the needle should never tough the teeth. Do this to both sides of the zipper.
Fold the rectangle in half, inside out, with the zipper pieces at the top. Sew up each side.
Turn it right side out.
Now, it’s time to move on to the strap. If you’re going to fold it, or sew multiple layers of fabric together, now’s the time to do it.
This next part is the part the sewing machine will have the most trouble with. Place each end of the strap wherever you want it to attach. I put it on each side, a couple inches below the zipper. Then, sew a line across the edge of the strap. GO BACK AND FORTH A BUNCH OF TIMES. This strap may be holding a great deal of weight, so make a few lines and keep going back and forth. Just hold the “reverse” button on your machine. Do it for both ends.
Voila! Finished purse.
21 notes
·
View notes
Text
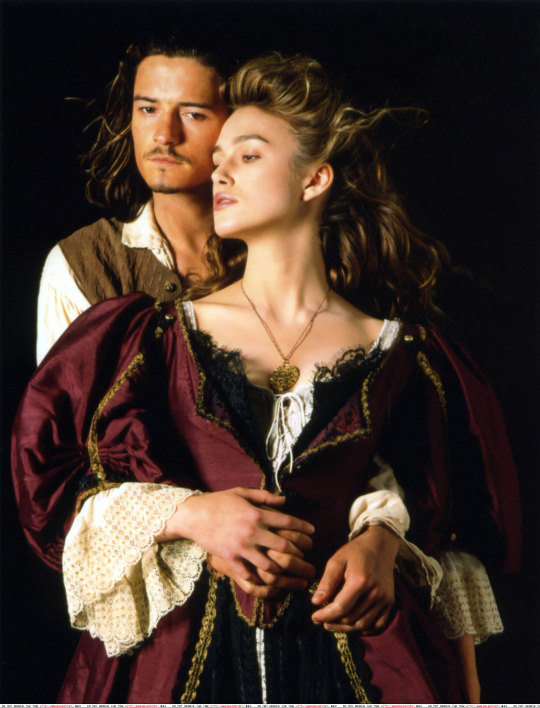
Time for an Elizabeth Swann WIP post
It has been way too long since I made a post like this! Granted though, in the entire year of 2017 I only made this costume, so there was little to write, This year was crazy, so many things of life happened, I just had no energy to make anything. Anyways, I had been a sleeping member of the Dutch Pirate Crew for a year, and with no pirate dresses to fit the group, I really needed that to change. And so project number five was born!
Overdress
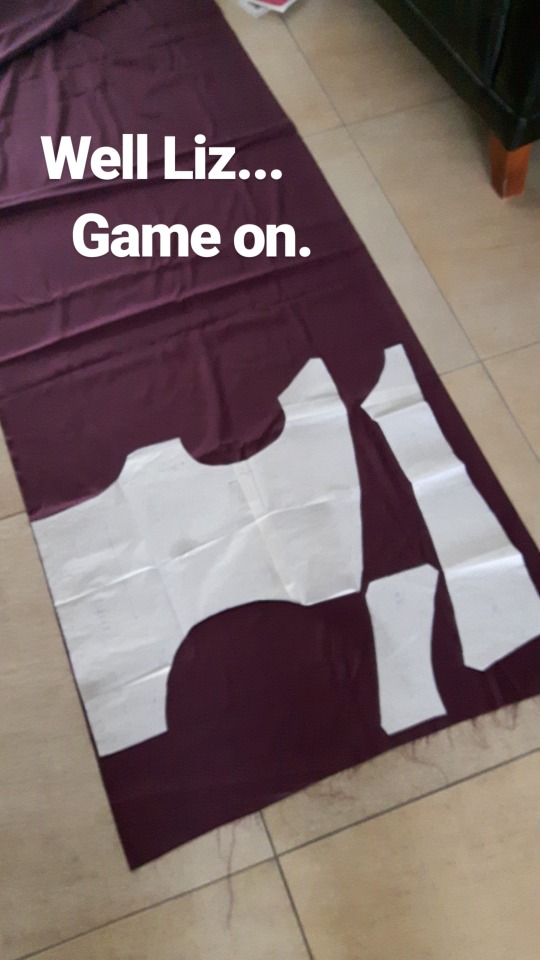
What a wild ride this pattern was. Maggie’s write-up from thecostumersguide.com (here) was the best help I could have found. I did not go with the suggested Butterick pattern, I grabbed a historically accurate pattern for a Robe á l’Anglaise by J.P. Ryan. This dress is zipperless, and closes in the front with hooks and eyes. The actual dress has an additional diagonal seam in the front panel, and the back seams are princess seams instead of the back seams the pattern came with, but other than that, it’s a really close match! I went with 6,5 metres of this gorgeous burgundy silk that appears red in artifical light and reddish purple in natural light. (as you can see, I use Instagram a lot these days, pictured here is my lining)
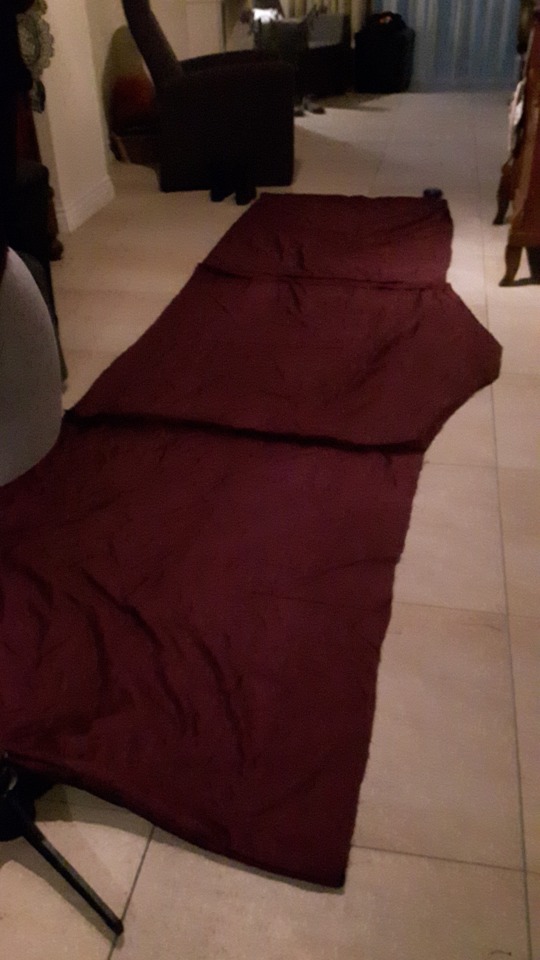
My skirt is essentially a rectangle of three times the fabric width. I realised too late I wanted a short train on the dress so the middle panel is a bit bumpy. I would recommend a more gradual curve. The straight line was attached to the bodice lining by hand. First attach the burgundy layer, as this is the outer layer. Just pleat the hell out of it until the entire width fits your bodice waist.
Do note that historically, this dress should be worn with a bum roll, bum pad or panniers. Adjust the waist seam according to your undergarments. For the cosplay, I don’t wear a bum pad, but for a historical costuming event I will definitely wear the dress with both stays and a bum pad.
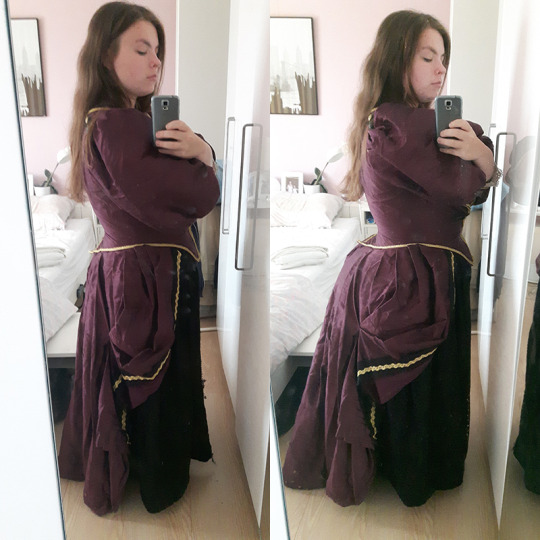
But I’m drifting off topic. The bodice and the skirt shape are the easiest parts of this dress. The sleeves are an absolute pain and the literal definition of hell. The pair of sleeves that ended up in my dress are the third pair. First, I went with a pleated rectangle. Didn’t work out, because the rectangle doesn’t fit in the dress. Eventually I went with a massively stretched bishop sleeve, which seemed to do the trick. I still think I could have stretched it even more, with more fabric the sleeves become even more lush and piratey.
After assembling the sleeve, there are three pleats in the sleeve under the golden trim. I don’t know if it actually serves a purpose, but my pleats fell out after my first event and I haven’t gotten around to fix them.
Another pleat / gathering is to be done in the skirt. I had no access to my mannequin when making this gather, so I roughly measured where my skirt was at kneeslength and pulled that up to mid-thigh, where the side seam would have been if you had one. I would have measured it if I would have done this carefully. Check the undergarments photo for a clear side view of the overskirt.
Next, the overdress has a black underlayer. I used cotton and a swirly lace overlay, the original has a texture that looks like many ribbons are applied to the fabric, but honestly I think every black fabric is fine as long as it isn’t shiny.
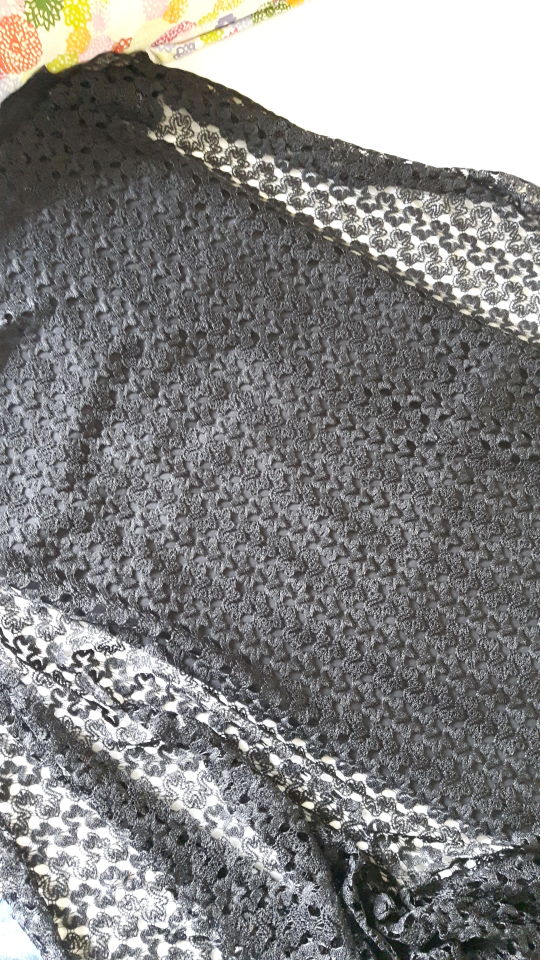
I took two fabric widths for the underlayer of the skirt, with the lace overlay only on the front side of the skirt. The black skirt also attaches to the lining of the bodice, however, this skirt ends at the opening of the bodice (in the middle), whereas the burgundy skirt opens at the hips, where your princess seam would have been if you had one.
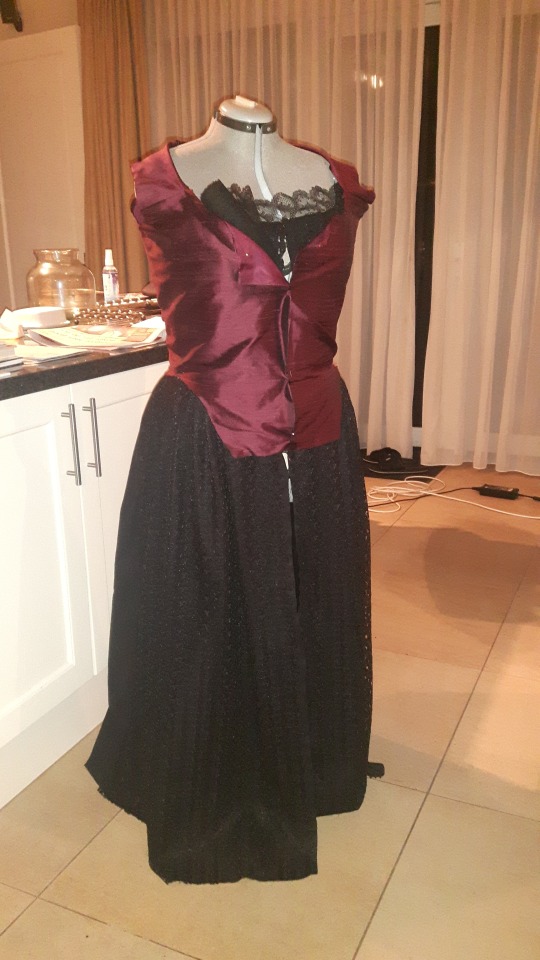
As you can see, the black part of the dress also extends to the top of the bodice. I did not make an entire second bodice, but made a rectangular inlay of the layered fabrics, finished with fine black lace. I also inserted a bone in the seam allowance of the closure to add strength to the hooks and eyes that would be added on in the middle and to prevent the wrinkling that is already happening in this photo. You can also choose to make a full black dress, with a burgundy overlay. It’s unclear in the film how this dress is shaped, so I went with a heat-friendly version of a silk lined bodice with a cotton inlay.
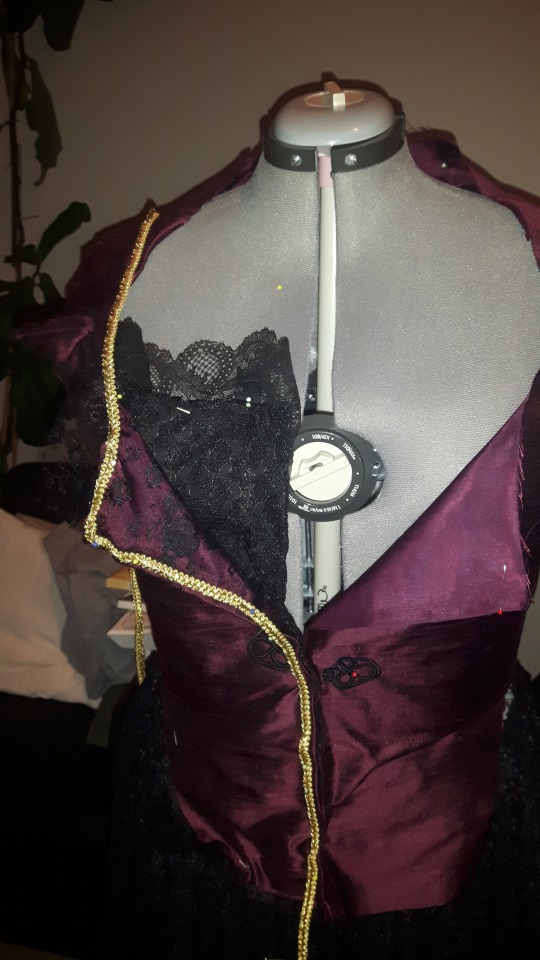
The inside of the burgundy panel was both lined with silk lining and with fine black lace. This is also the moment where you cry about the amount of trims that need to go on this dress: the major part goes around the neckline, the front closure and the bottom of the bodice, a part around the armpits, a part on the bottom of the sleeves and two short pieces on the back seams. Then the burgundy skirt is finished with black lace with another, broader golden trim on top. I also added a trim on the black skirt for a rich finish.
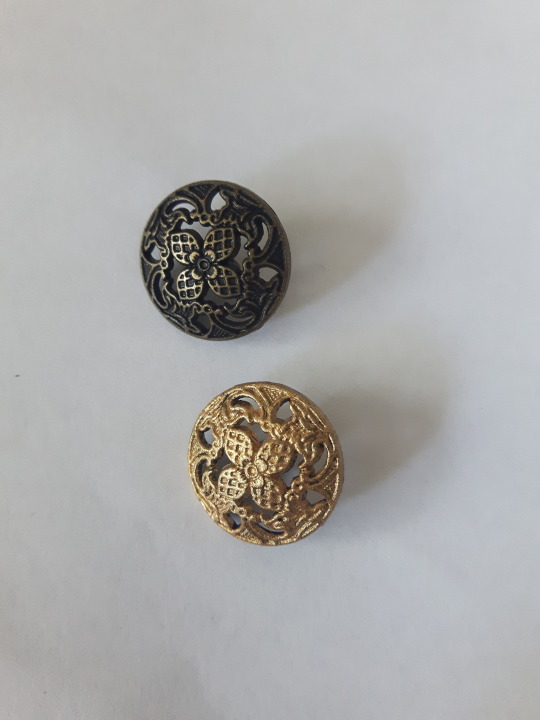
Then there are a total of ten decorative frogs, involving seven golden buttons (I handpainted them). I was unable to find a picture of my finished frogs, because I hurried them the night before the con (I have zero planning skills). The gold button is in the middle. Extending from there is a piece of black elastic, ending in a point. the flat side is decorated with a chinese frog (that’s what I got, you can also make your own, but it takes an endless amount of time for ten pieces). The pointy side of the elastic is then decorated with two black mini buttons. I placed the four on my bodice over my shoulder seams, two more at the top of my hooks and eyes, and there should go two per sleeve right under the horizontal pleating. The sleeve is then finished with some beige lace. (mine was done too hastily, I need to get it redone, because my lace is super tiny).
Underdress
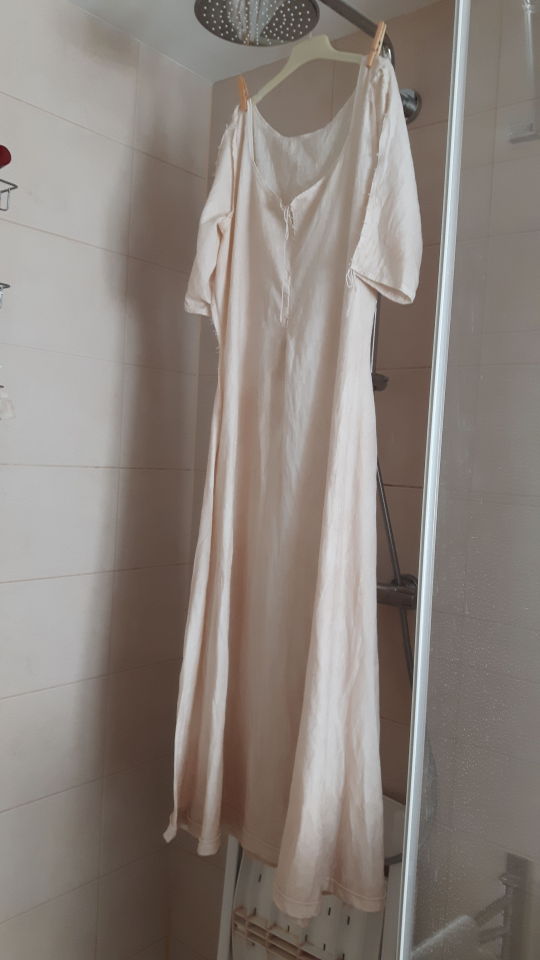
If you thought you were done, you are wrong! You do have an overdress, but what’s the use if you have no rum shift?
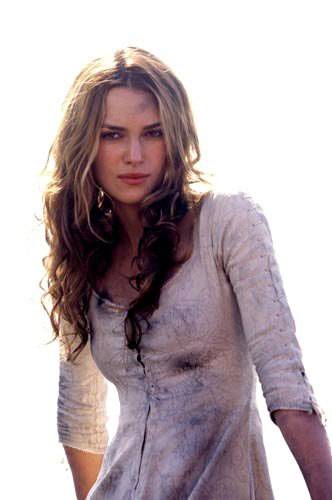
You can obviously dirty it all the much you want if you are wearing it without the plum dress.
I made the mistake of making this monster without a pattern, so the fit is horrible and my skirt is nowhere near as wide as I would like it to be. I just did two panels with two godets (because Keira has that too and I didn’t want to overspend on my shift, unfortunately I am not a little stick like Keira is, so I would definitely recommend using a pattern. I would have gone with magic pattern Simplicity 1551). The sleeves have an obvious seam on top, so you could either make a two piece sleeve, or a one piece sleeve with the seam on top instead of out of sight, which is what I did for mine.
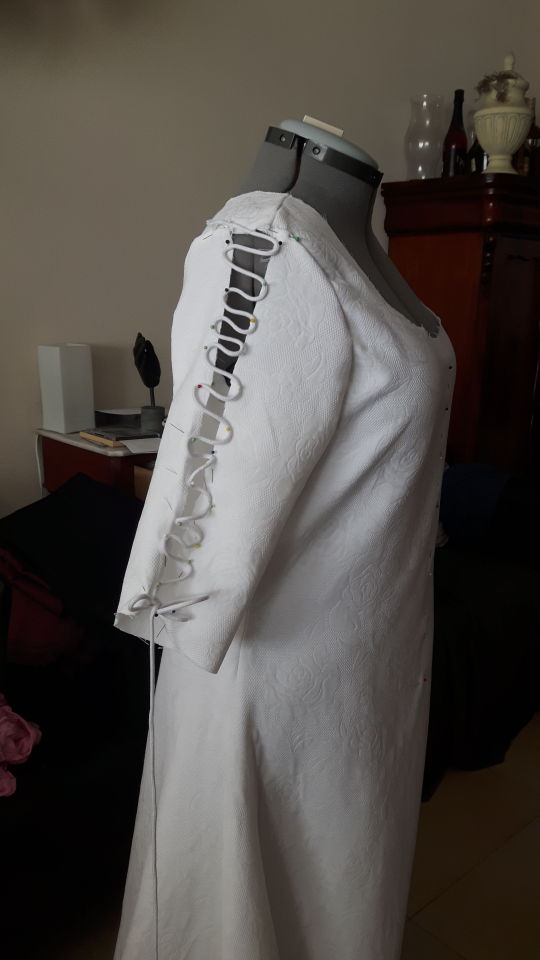
I still think my first rope was a little bit too thick, so I got some other cotton thread. The one in this picture is 3mm, whereas my newer one is just 1mm. I think 2mm is the perfect width of the thread needed. Mine was thin enough not to sew any eyelets, but the wider the thread, the more you actually need eyelets. For the front, I just made a cut and closed it with the thread. Basic shift, horrible fit (I need to shimmy in and out if I wear it)
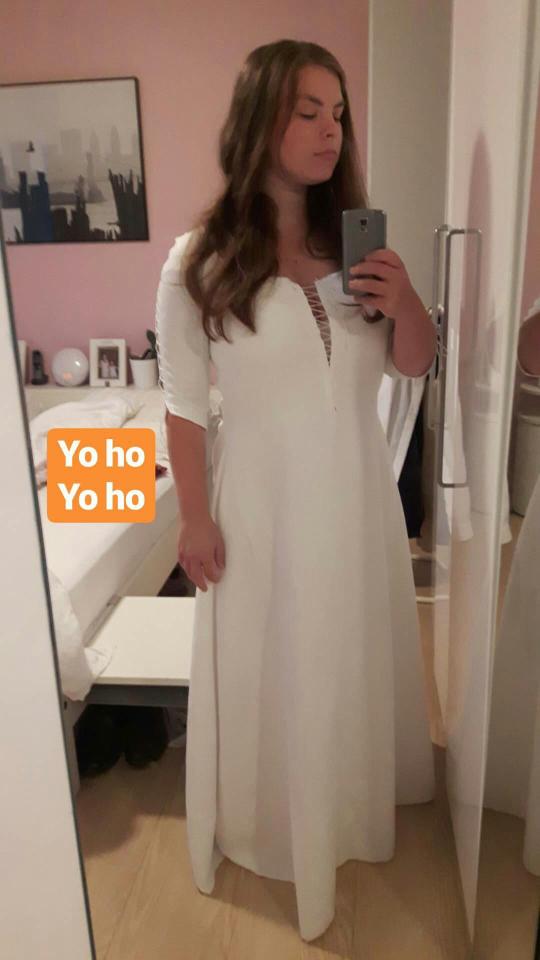
I wear the shift and I use the plum overdress as a coat (that’s how I put it on anyways). Don’t forget to dirty the shift, as this was the one piece of clothing people almost never took off, and also the Caribbean were warm as hell, so you generally sweated a lot in the shift. Plus off-white looks better in photos anyways. So I threw mine in a tea bath! It needs a new bath, because it can be dirtier. If you make a pirate attire, you are never dirty enough!
Wig
For the longest time I thought I was going to use my own hair for Elizabeth, but eventually it occurred to me my own hair is too brown in comparison to Keira, so I went wig hunting. After a month, I came across a girl who resold a Royal Enchantments wig, styled like Elizabeth’s English gowns. It was half priced, so I bought it.
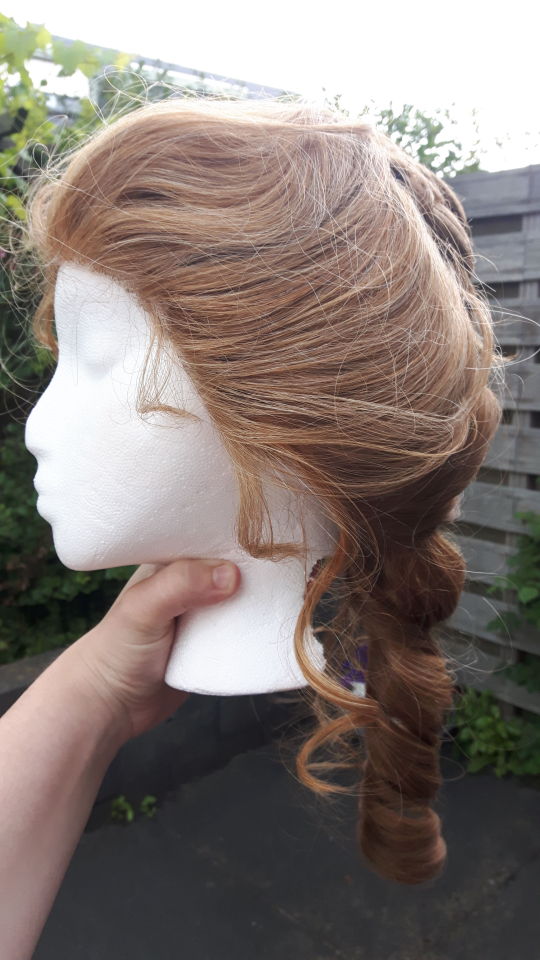
I then did what I now think of as the stupidest cosplay move ever: I took out all the pins to create Elizabeth’s nightgown and dinner-with-Barbossa look. This ended up like this:
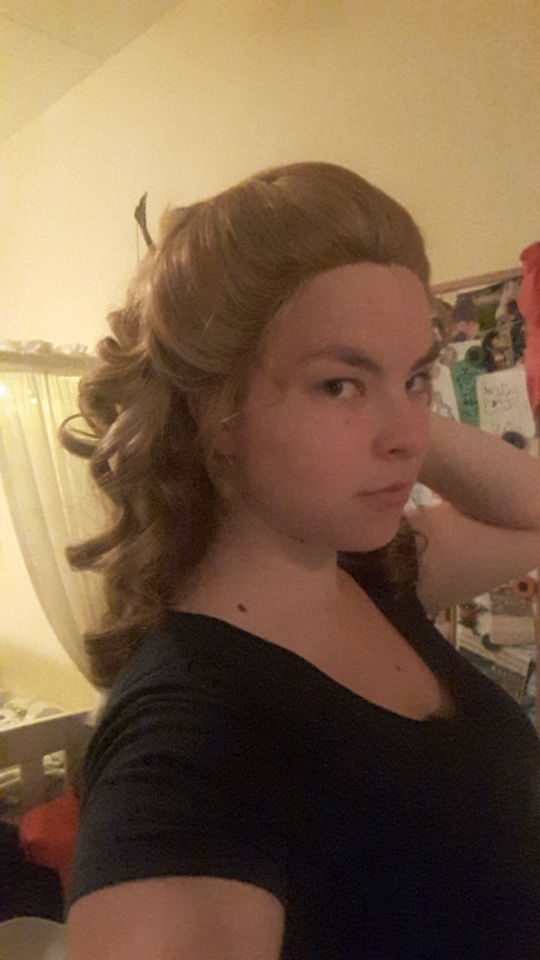
Which I obviously found more fitting than the English hair at the pirate ship. The next con, I decided the wig was too curly, so I straightened all the curls out in hopes to create the messy beach look (I have never seen that in wigs). I am now considering a new wig, since this one also turned out to be too blonde for Elizabeth anyways. New adventure: actually curling a wig to get it back to the English style it was when I bought it.
The final result
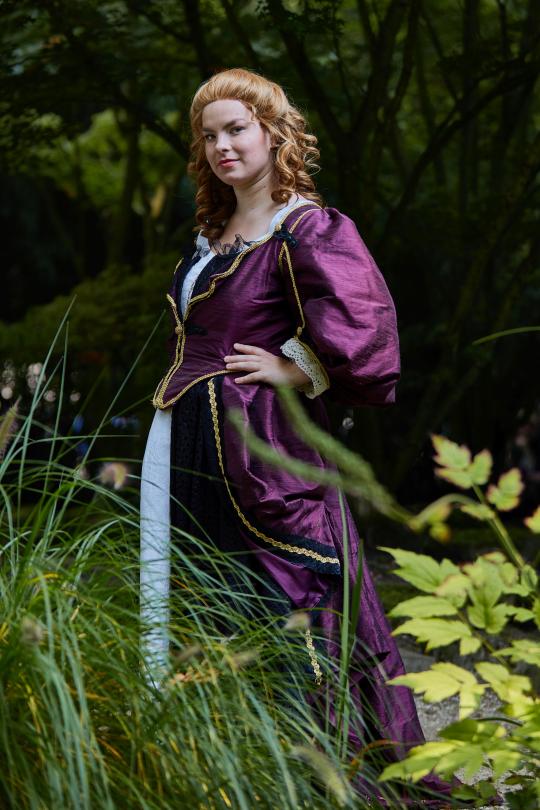
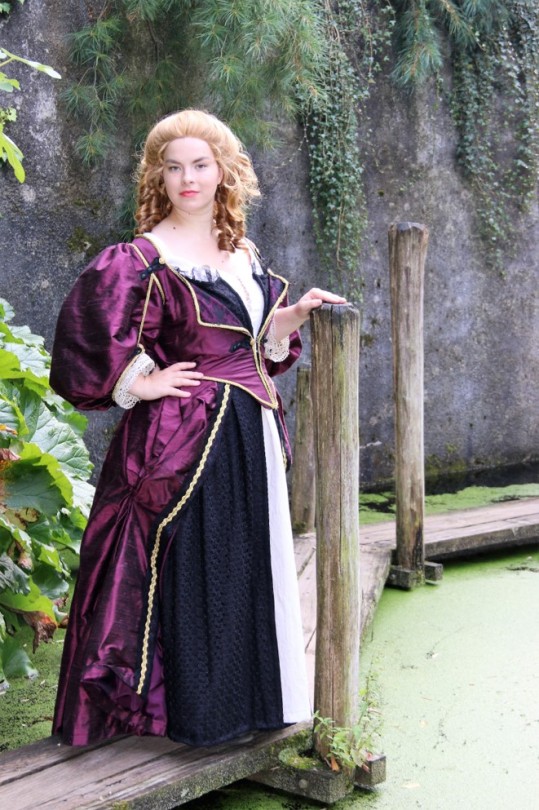
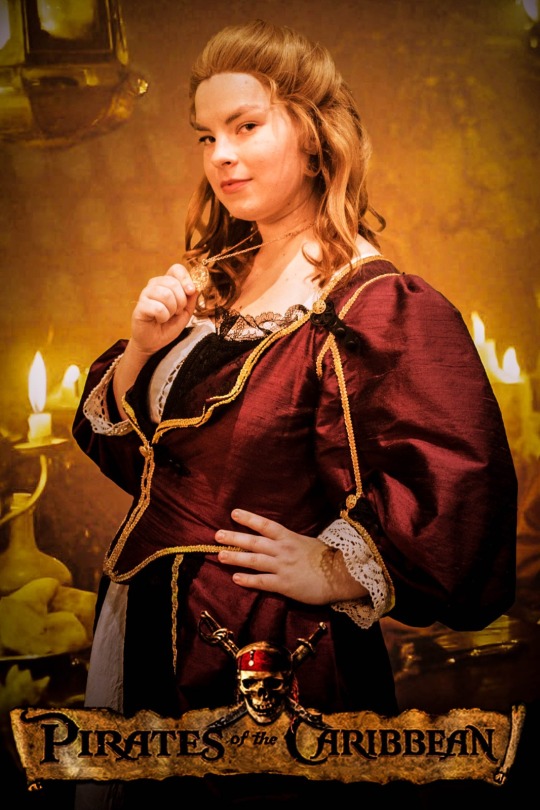
The bottom picture shows my ‘beach’ wig. There are so many things I would like to change about this cosplay, but I am so happy I managed to complete this project!
#disney cosplay#elizabeth swann cosplay#progress post#wip#dcc#elizabeth swann#elfia#disney#cosplay#cosplay help
0 notes