#Zoom H1 Sound Recorder
Explore tagged Tumblr posts
Text
ZOOM H5 Review
Overall, H5 appears to be a popular among Zoom Audio Recorders with many positive features, but there are also some areas for improvement based on user experiences. Here’s a summary of the feedback provided:
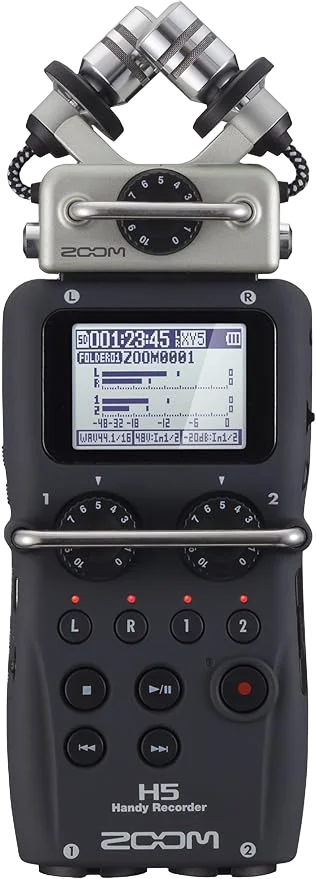
The standard X/Y mic that comes with the recorder is very wind and pop sensitive. And the included foam windscreen doesn’t help much. If you decide on this unit, get a fuzzy windscreen. My friend bought the Zoom Audio Recorder model, it fits nicely and makes the recorder look like a smurf. Or Don King. But it does the job, and is a must for pretty much any recording, inside or out.
Positive Points
Ease of Use: Users appreciate the device’s ease of use, especially the large card slot for SD cards, bright and readable readout, and simple operation.
Audio Quality: The device offers excellent dynamic range and sensitivity, producing high-quality recordings compared to its predecessor, the Zoom H1.
Versatility: I personally find the Zoom H5 versatile due to its various attachment options, such as XLR jacks and shotgun mic, making it suitable for different recording needs.
Portability: It is praised for being a portable and durable recording device, suitable for various recording environments.
Value for Money: Many users find it to be a good value for the features it offers, especially considering its affordability compared to other options in the market.
Voice activated recording with a retroactive feature so you don’t lose the couple of seconds before the recording started.
Can look like a USB storage device when connected to a computer, so compatible with any operating system. No special drivers needed.
Threaded mount on the back of the unit works with a standard camera tripod.
Lots of customization settings, if you need them, but sensible defaults allow you to be productive right away and learn the details later.
Ruggedly built, with a solid and professional feel. I have taken it on about a dozen business trips by train, car, and plane, and have even stuffed it into checked luggage. It comes with a protective plastic shell case, which is nicely sized to the device and not overly bulky.
Areas for Improvement
Tripod Socket: Some users from amazon complain about the shallow tripod socket, which causes stability issues when attached to tripods. They suggest making the socket deeper or adding a socket nut to improve stability.
Audio Monitoring: People desire for better control over audio monitoring, such as the ability to toggle monitoring only when recording to avoid confusion.
Microphone Quality: While the device comes with built-in microphones, The quality is adequate but not stellar, especially in comparison to higher-end microphones.
Battery Life: It has a good battery life, but some people mention concerns about battery drain, especially when using phantom power or external microphones.
Menu System: Some users find the menu system a bit cumbersome due to the multitude of options, suggesting improvements in organization or user interface design.
Despite these drawbacks, the Zoom H5 Handy Recorder generally receives positive reviews for its performance, versatility, and value for money.
Who Should Buy the Zoom H5
Podcasters and Content Creators – Good for capturing high-quality audio, even on the go.
Interviewers and Journalists – Great for on-site interviews with its portable and flexible setup.
Musicians and Sound Designers – Zoom H5 will Offer multi-track recording and high fidelity, making it perfect for music production and soundscapes.
Filmmakers – Zoom H5 Can be a reliable tool for capturing professional-grade audio on location.
Who Should Not Buy the Zoom H5
Casual Users – Overkill for basic voice recording; simpler devices would suffice.
Budget-Conscious Beginners – If you’re just starting out, more affordable options may meet your needs without the steep learning curve.
People Needing Simplified Operation – The H5’s advanced features and settings can be overwhelming if you prefer a plug and play experience.
Smartphone Users – If you primarily use your smartphone for recording, investing in external smartphone mics will be a better choice
I have discussed about Zoom H6 and Zoom H4N too in my full blog. Click Here to Read the full Article
0 notes
Text
146 LostTrailRunner Podcast
https://www.podbean.com/media/share/pb-qc27p-14dec48 A way late update on Paynes Creek Trail Race and the 2023 Peachtree Road Race, but here they finally are for your enjoyment or whatever. Recorded on various devices including an iPhone 14 and a Zoom H1 Handy Recorder. Edited and produced on Hindenburg Lite. All music was from Epidemic Sound. LostTrailRunner Podcast by Ron Trail is licensed…

View On WordPress
0 notes
Photo
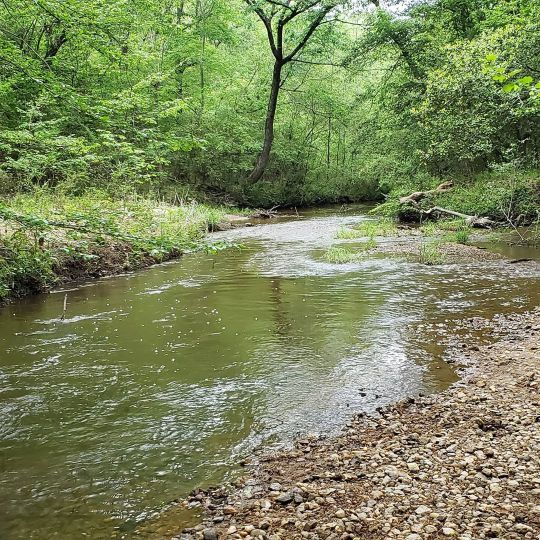
I stopped here and recorded the sound of the creek. I also recorded birdsong, away from the creek sounds. #photography #recording #creek #woods #swamp #green #leaves #beautiful #microphone #Zoom #H1 #sounds #birds #birdsong #fantasy #fiction #web #novel #story #Grendhill #traveling #quest https://www.instagram.com/p/B-7TTebhuh5/?igshid=1d0sy35q1p0kv
#photography#recording#creek#woods#swamp#green#leaves#beautiful#microphone#zoom#h1#sounds#birds#birdsong#fantasy#fiction#web#novel#story#grendhill#traveling#quest
0 notes
Text
The Countdown (2018)
14 October 2018
8 Minute 30 Seconds
U
Synopsis
The Countdown (2018) is English Science Fiction Thriller Short Film by MSN Karthik, which is made in under Rs.5500.
Plot
“The Countdown” can best be described as a tale of hope or the story of survival of humanity. It’s an experimental film, in which an astronaut stuck on an unknown…
View On WordPress
#Adwhyta#Canon 70D + 18-135mm Lens#D. Chaitanhya Sharma#D. Chanakya Sharma#Davinci Resolve 12.5#DJI Mavic Air#international movie database#Kevin Macleod#M.S.N Karthik#MSN Karthik#Purple planet music#sequex movies#sequexmovies#The Countdown (2018)#Zoom H1 Sound Recorder
0 notes
Text
“Fun with Field Recording and Sound Design – Part 3” is online now:
youtube
It´s about the importance of rabbits, about making DIY windshields and about a hurricane in the studio, as well as about the Zoom H5 and the Zoom H1.
Timeline / Content:
00:00 Introduction
00:43 Looking for Suitable Material for Windshields
02:49 Preparing the Found Material
04:35 Sound Tests With Rabbit
06:06 Wind in the Studio And a Rabbit Windshield
12:42 Extreme Rabbit Testing
13:43 The Advantage of Using a Rabbit as a Windshield
15:31 Let´s Get Serious About Windshields
16:38 Testing a DIY Windshield From Fur in a Hurricane in the Studio
18:48 Sound Tests With a DIY Windshield (Zoom H5 and Zoom H1)
20:01 Overall Results
#windshield#DIY#DIYwindshield#furwindshield#deadcat#DIYdeadcat#inexpensivewindshields#inexpensivedeadcats#cheapdeadcats#cheapwindshields#sound#sounddesign#fieldrecording#recordingambient#materialforwindshields#materialfordeadcats#testingwindshields#testingdeadcats#zoomh5#zoomh1#audiorecorder#recordingwithwind#windrecording#Youtube
1 note
·
View note
Note
Hi! I'm a high schooler with a passion for film who hasn't actually filmed anything yet. I'm planning to get started by just filming stuff and gaining experience over time. I want to buy gear (camera, lights, etc) so I can get started but it's an expensive investment and I'm unsure what I should get. Do you have any ways to figure out which gear is good for me?
Hello @jeffreydahmerofficial
There are lots of options when it comes to gear and it can be a bit of an investment. So I have put together a starter kit with some gear breakdowns, recommendations, and prices. The prices listed are if you are purchasing brand new equipment. You can most likely find used equipment or older models that work just as well for a lower price. In addition, some miscellaneous gear you can make yourself (dollies, steadicams, light bars…), if you are willing and able to put in the time and effort.
Film Gear Starter Kit
Cameras
DSLR - digital cameras are great starter cameras because they are cheaper, small, maneuverable, and produce good quality videos. You can even buy older models to reduce the price and still get good quality (You can also buy used.) Canon and Nikon are good cameras as are some Sonys, but I am partial to Canons. When purchasing, pay special attention to if you are purchasing the camera with or without a lens and what type of lens (I recommend a zoom to start out.)
Some good DSLRs:
Nikon D3300 ($350-500) - great quality image for a relatively low price. A lens is included, so you don’t have to worry about finding one separately.
Canon EOS Rebel T5 ($350-450) - any of the rebel cameras are good, but being newer (but not the newest model) the T5 is a great choice. It has decent low-light capabilities and comes with a zoom lens.
Nikon D5300 ($400-500) - with a better sensor, and a bit more customization opions, this Nikon is a step up from the D3300 with very little change in price.
Canon EOS 6D ($1,200-1,600) - a good substitute for the more expensive 5D Mark III. For the price jump, you get much higher image processing quality and great low-light capabilities.
Canon EOS 80D ($750-1,000) - much like the 6D, it has great low-light capabilities and great image quality, plus a maneuverable viewscreen
Camcorder - In terms of video quality, DSLRs can offer the same image quality as a camcorder at a much lower price. However, camcorders have a lot to offer as well. They have much longer recording time andare built for video, so it is much easier to hold one for long periods of time, despite DSLRs being lighter. They also have built in XLR inputs and neutral density filters, which means camcorder will automatically properly expose your footage without changing the frame rate. (Bonus: They look professional, which is helpful when working freelance.)
Some good camcorders:
Canon XA30 ($1,300-2,000) - a professional/semi-professional camcorder that is easy to use, has good low-light capabilities, a touch screen, and is relatively inexpensive for a camcorder.
Sony HXR NX100 ($1,500-2,000) - an entry-level professional camcorder that has HD quality video, good low-light capabilities, 2 XLR inputs, and 3 focus rings. It’s comparable to the more expensive Canon XF200.
Canon VIXIA GX10 ($2,500-3,000) - a “consumer” camera with professional video quality, this camcorder shoots in 4K. While it lacks some pro features, such as the XLR port, it is very portable and has optical zoom, a touch screen, (You can also get a nice kit that includes a mic, cables, backpack case, LED lights, memory card, and more for under $2,700.)
Canon XF300 ($3,000-4,000) - a professional camcorder great for run-and-gun as well as on a shoulder mount. It has a slightly larger, rotating viewscreen, 2 XLR ports, full manual and full auto modes, built in ND filters, and more.
Misc. Camera Gear
Tripod ($20-200) - a staple for any filmmaker. You can get cheap, lightweight ones for about $20. I recommend investing in something sturdier, so you don’t risk having your camera fall over because of a flimsy tripod.
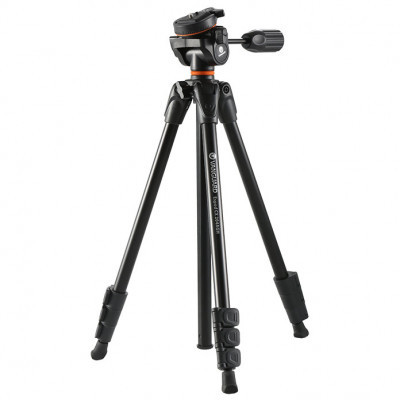
This a vanguard tripod that is good for DSLRs. It’s lightweight and small, which is great for traveling, but it also can’t support heavier cameras, so when purchasing, look at the load to see if it can support the weight of your camera. You can find Vanguard tripods and similar brands for under $50, but some run a little higher.
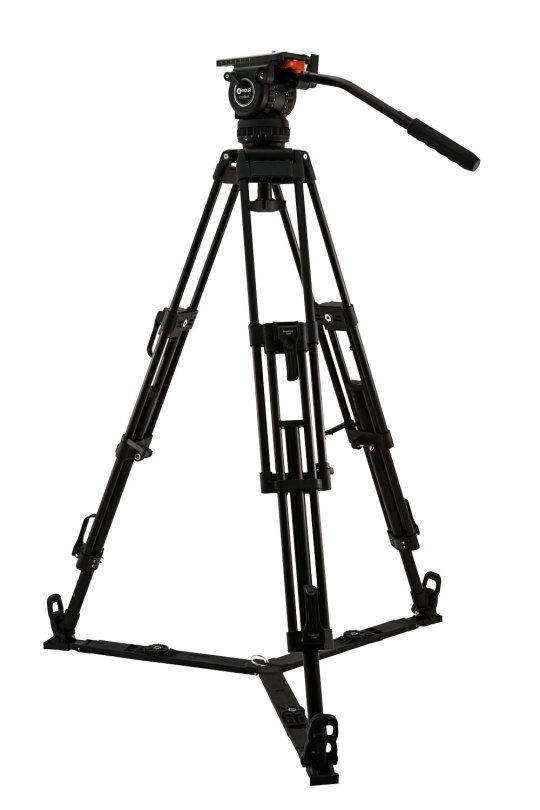
This is an example of a heavy duty tripod with a fluid head for easy maneuvering. These tripods are extremely sturdy and can easily support the weight of camcorders and higher-end cameras. You can get a good one of these for around $150-$200.
Cases/Bags ($30-60) - get cases for everything: cameras, microphones, lighting, tripods, etc. You invested a lot into your gear. It is worth it to spend a little more to protect it and keep everything in good condition.
SD cards ($25-50) - I recommend 32GB or higher and make sure they are higher class cards. Otherwise, some cards may stop recording automatically with DSLRs because they can’t keep up with the writing speed.
Steadicam ($30-150) - professional steadicams are much more expensive, but you can find cheap and effective ones for DSLRs relatively easily. They give a cleaner handheld look that improves the look of your film immensely. They even have steadicams for smartphones!
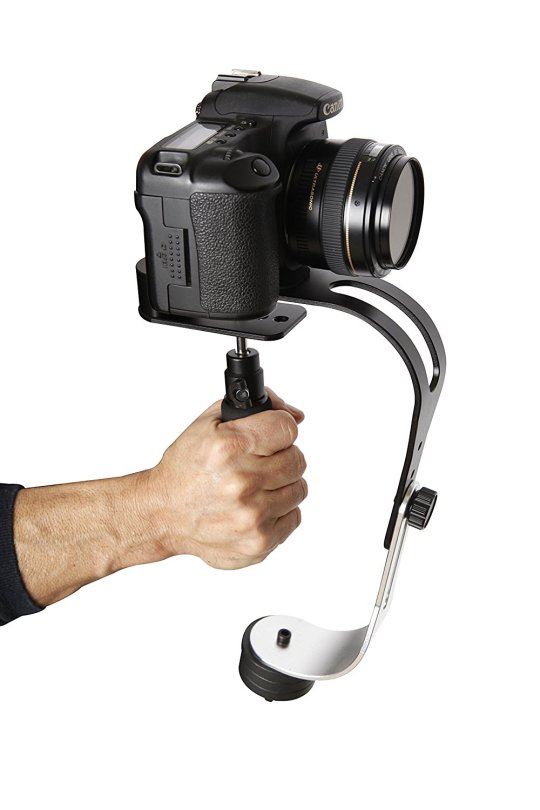
Pictured Above: Roxant Pro Steadicam
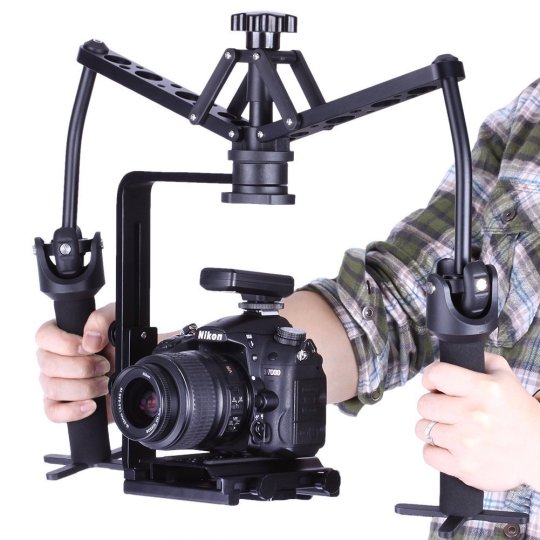
Pictured Above: Ceari VILTROX WD-Z Steadicam
Microphones
Shotgun mic - a staple of you want good (or even decent) sound for your film. Unfortunately, a good mic is easily as expensive as a DSLR and requires more gear. With a shotgun mic, you need to also purchase an XLR cable, shockmount, and windscreen. Often it’s cheaper to purchase a kit rather than buy these separately.
Some recommended shotgun mics:
Rode VideoMic ($100-200) - A lower-end shotgun mic meant to be mounted directly onto a DSLR. It has decent quality sound, doesn’t need an XLR cable, has a built in shockmount, and is relatively cheap.
Audio-Technica AT875R ($150-200) - a cheaper semi-pro microphone that requires an XLR cable and phantom power. It’s smaller and has a wider pickup range, making it a good on-camera solution. It can also be mounted on a boom pole or stand. It is better for studio and indoor recording. Although it’s much cheaper, it holds its own against the Sennheiser MKE 600.
Sennheiser MKE 600 ($300-400) - powered by battery or phantom power, this is a good, well-rounded mic.
Rode NTG3 or NTG4 ($350-550) - the NTG series is very popular in the filmmaking world. While NTG3 is arguably better, the NTG4 is cheaper and still produces very good quality sound.
Lav mics - great for wide shots, interviews, outdoor audio and as second audio source. You can hide these guys relatively easily when booming is not an option. The great thing about lavalier microphones is they are relatively inexpensive and you can get good sound with a really cheap lav.
Some recommended lav mics:
Neewer 3.5mm ($5-10) - a super cheap lav that’s great for buying in bulk. It’s a bit harder to hide, but works great for interview videos.
Sony ECMCS3 ($15-30) - this is a sensitive, durable, and inexpensive lav that picks up sound from both sides.
Rode Smartlav+ ($50-70) - this practical, high quality lav hooks up directly to your smartphone, external recorder, or camera.
Sennheiser EW 100 ENG G3 ($700-800) - if you are willing to spend more, these are some of the best wireless lavaliers. They have great quality and can be easily hidden.
External Sound Recorders - crucial if you plan on moving your microphone far away from the camera. Booming is usually done using external sound, meaning the mic is hooked up to an external recorder rather than the actual camera. The sound is synced in post. (That’s why we have a clapper!)
Some recommended Sound Recorders:
Zoom H1 ($50-100) - One of the first Zoom recorders, this is one of the cheapest and most basic options. It’s compatible with micro SD cards, battery operated and has a built-in omni-directional mic.
Zoom H4N Pro ($150-200) - one of the most popular and highest rated external recorders, it’s well worth the investment. It has 4-channel recording, a larger screen, easy navigation, 4 hour battery life, and a built-in omni-directional mic. (I personally recommend this one.)
Tascam DR-40 ($150-200) - with a 15 hour battery life, this 4-channel recorder is a good rival to the Zoom H4N, but it’s extra features make it slightly more expensive.
Misc. Sound Gear
Boom pole ($100-300)- sound quality improves immensely when you are able to put the mic closer to the subject rather than mounting in on the camera. You can get a pole with the cord built in or without, which is slightly cheaper. (Full disclosure: I’ve used a monopod as a mini boom pole before. Not great, but it got the job done. This guy even turned a light stand into a boom pole.)
Headphones ($100-200) - specialized or noise-cancelling headphones so you can clearly hear the audio you are capturing on set and while editing. Earbuds work, but they are far from ideal.
Deadcat ($20-30) - minimizes wind noise, very helpful for outdoor shoots. Available for both shotgun mics and lavs. You can easily get this used for under $15, but new ones are more expensive.
Lighting
Lighting is necessary on bigger shoots, but for freelance and beginners, you rarely have your own lighting outside of a studio. Lights are expensive and most of the time, you won’t be able to use them without a crew (especially outdoors). When you do use them, you will most likely be much more experienced and either working for a company with lighting equipment, or running your own company.
I recommend purchasing a cheap photography lighting set to have some lights, but wait to invest in higher end lighting. A cheap lighting + green screen kit can cost around $100-200(I personally have 2 cheap umbrella lights and while I like them, I rarely use them.) That being said, below are some common types of lights and their general price ranges. Professional brands include: Arri, Lowel, KinoFlo, Limelite, and Ikan.
Softbox/Umbrella Lights ($200-550) - used mostly in studios and photography, they give off, you guessed it, soft light and have florescent bulbs. These are great when you need a quick light source, they are lightweight, and don’t easily overheat.
Can Lights ($500-1,000) - these are the classic lights you see on film sets. They can get very hot, but they are small, lightweight, bright, easy to assemble, and you can use diffusers, filters, and gels to customize the light.
LEDs ($1,000-2,000) - LED lights are the most expensive but also the most useful. They allow you to easily dim the light and change the temperature and they don’t overheat or use as much power.
Misc. Lighting Gear
Gloves ($30-40) - lights get hot and when you need to maneuver them up close, it’s safe to have heat-resistant gloves. Set-specific gloves are more expensive, but you can find cheaper options elsewhere that work just as well.
Bounce board ($5-10) - these can replace a fill light and help add a little more light to your scene without purchasing an expensive and bulky light. You can get collapsible reflector disc with white, silver, and/or gold for the price listed. Poster-board is another cheap alternative.
Gels, diffusers, and dimmers ($20-30) - If you don’t have an LED light, you can modify the color of a light source with gels. They work on any light source from industrial lights to household lamps and are very handy and inexpensive. (The price listed is for a kit of all of these products, but you can buy sheets of any of these for just a few dollars.)
Gaffers Tape ($5-10) - heat resistant and doesn’t leave residue. Gaff tape is used for just about everything on set from lighting, to setting marks, to taping down cords, to labeling.
I hope this helped and didn’t overwhelm you too much! Just a reminder: these are just some options based on what I see used in the industry. There is plenty of gear out there and plenty of cheaper solutions and substitutes for some gear. As always, it’s the filmmaker, not the gear that makes a good movie (but getting good gear is always nice!)
Best,
Jules
#ask box#my filmmaking tips#film gear#film equipment#cameras#microphones#lighting#lights#production#camera department#sound department#g&e
678 notes
·
View notes
Text
Beginning Ideas
A 10-minute investigation of the life of the pond in Queens Park. Emphasizing the detail and drama in ‘the small’ even in this park, there is a whole world that we don’t know about (David Attenborough films are an influence, without the narration)
I will try to create something transcendent from the mundane – what could be quainter than a duck pond?!
I wanted to work with a location which would allow 100% original visuals and 100% original audio – it is time and space limited and does not need third party stock footage. But the selection, juxtaposition and manipulation of the footage will aim to transcend these humble and mundane limits.
There is a website for the park at: http://www.fqpbrighton.net/
Importance of City Farms and Public Parks for me when I grew up in London without a garden, and I loved going to parks when young. It was odd getting used to living in Brighton, somewhere near the sea, but going to parks made it feel like my original home
Parks can bring people together, me spending time with friends when younger, and no doubt other people celebrating there or walking with family But parks nowadays are areas for delinquency and drug-use such as Queen’s Park, no longer suitable for all ages like when I was young and first moved here, being my most frequent place to hang out at.
Outside public space is central to me personally, but it is also a very political issue. It is relaxing but also stimulating. It gives people contact with wildlife and access to fresh air. Parks are important for climate change and loss of trees – providing oxygen.
The park is at once both ordinary, local and extra-ordinary. Within its small area, it provides a transcendental experience way beyond its actual dimensions. It is full of colour, nature, seasons, change, mystery and drama. There are benches for reflection and relaxation. It all plays out everyday and we don’t even notice half the time
Over its duration, my film will gradually move into subjectivity, imagination and transcendence.
Unlike my other films that had narration, it will have overlaid text.
Key words
Shining & Sparkling
Magical
Transcendent
Surreal
Hallucinogenic
Mystical
Impressionistic
Cyclical
Inverted
Reversed, mirrored and inverted
Styled like a painting
Visuals will feature:
Water, shade and light patterns
Bird flying towards water
Birds swimming and ducking their heads under the water
The birds interacting with each other such as mothers with chicks
The waterbirds on land
People interacting with birds
Shots ofthe sky and flying birds
Other animals around the park- squirrels, dogs, songbirds e.g.
Hints at pollution
Evidence of modernity and drug use
What remains of the park’s first incarnation when first built, what was its original purpose?
Comparing the present park to how it was first built
Inspiration from Fantasia- music and imagery combined but in live-action – ‘ballet’ of swans and ducks, sky-dance of seagulls and pigeons. Using Premiere effects to create colours, symmetries, patterns, beauty.
I will set up a tripod so that I can obtain more stable footage.
Use camera to film directly into the sun
Me looking into the sun with the sound of aeroplane/helicopter going over head
Clouds and sunsets
Morning until night
Soundtrack will be layered and consist of:
Water bird sounds
Songbird calls
Seagulls in stereo space
Atmospheric sounds including drones
Sounds of adults but particularly children
Natural sounds – water, ambient bird sounds, buzzing bees and flies, crickets
Insects buzzing in stereo space
Emotional music
Grass being mowed
Dogs barking
Undergrowth such as dead leaves being rustled
Grass and leaves moving in the wind
People, particularly children, spending time in the park
Interviews of people’s experiences of the park
I will use the Zoom H1 digital recorder, which is portable and high quality to record original, on-location sound. It will be recorded in real time.
A film which starts as an almost straight ‘tourist’ documentary on the park pond but then transitions into an investigation into the impressions that the pond creates. This will mean confusion of time and space, sound – moving from the reality to experience.
Transitions from:
Social to transcendental
Mundane to beautiful
Objectivity to Subjectivity
Nostalgia to reality
Big to small, from the perspective of toy-sized beings to people that are giants in comparison
Busyness to peacefulness/solitude
Comparisons to age- old and young, taking inspiration from A Time And A Place For Imagination
It will use reverb, echo, spatial effects, treated and backward/slowed voices, poems (on title cards), etc
It will use recolouring, blurs, etc to recolour original footage from the park
More information:
I will visit the park for many times as this will make sure I am able to use wholly original film footage. I will use a tripod to provide stable and consistent viewpoint.
I will take a digital sound recorder to mix in original sounds directly from the environment.
I will use Nuendo to mix all of the sound aspects.
I will research what the park was like in the past
Influenced by Brian Eno – ‘On Land’, ‘Thursday Afternoon; etc – audio and visual story over time from definition to impressionistic
Emphasising daily cycles, seasonal cycles, migration cycles
Environmental themes – filming the rubbish and bread in the water and contrast them with shots of nature
Events that went on in the park, and whether or not they affect the environment, how people were affected
https://brightonjournal.co.uk/10-things-you-probably-didnt-know-about-
Cameras and sound recorders posed around the pond, could be installation where audiences can choose different perspectives and different filters.
0 notes
Text
Julian: Silver Award Unit 1 Part B -Deliver your Arts Challenge
My arts challenge:
Developing skills in sound recording and editing
Reflection 1 Tuesday 27th July
The Summer Film Project is about developing skills with young people in filmmaking, and we are working with the London Transport Museum. The film we are making is about a girl who doesn’t know she is prime minister and there is a man that is chasing her through a carriage, each time she goes through the carriage the time period changes. The man is trying to assasinate her.
Today on shoot week, I've used to be boom microphone on two scenes which is going particularly well as I have developed how to keep the microphone still without having any vibrations or the wire touching the microphone which interrupts to the audio audio. The thing I find challenging in most is when I need to hold a microphone in a very specific area where I can't move it anymore up or down which can sometimes hurt your arms especially when you have to do it for a long time, this may change my action plan as I need to practice keeping my arm in a fixed position and find what I'm comfortable with without interrupting the running the final product of the video due to the audio being bad. A good example of this was shown in the scene in the future where I do hold a microphone above the actors whilst keeping it out of short and having a clear audio, this was repeated in the suffragettes scene where I had to hold it it over the top of them what they were talking about women's rights and how they were going to have the good fight where everyone is equal.
There were a few issues on set, when actors can't keep a straight face we have to retake the scene over and over and it can get tiring.
Learning about the boom from our tutor Jack
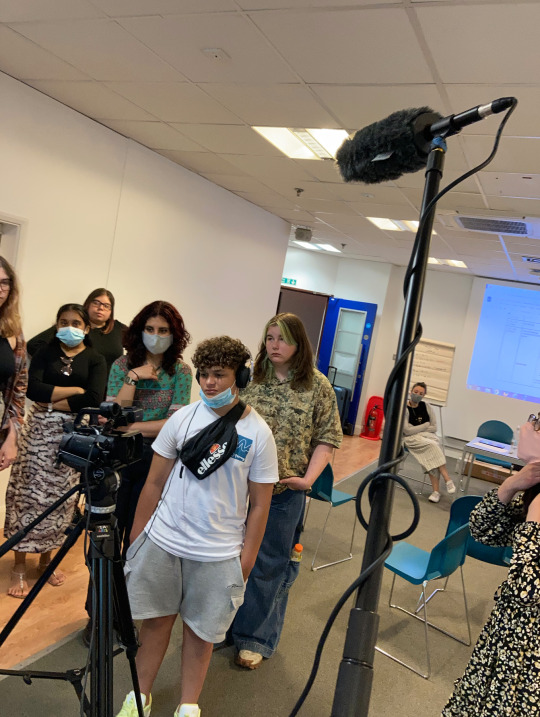
Recording using the boom on shoot week
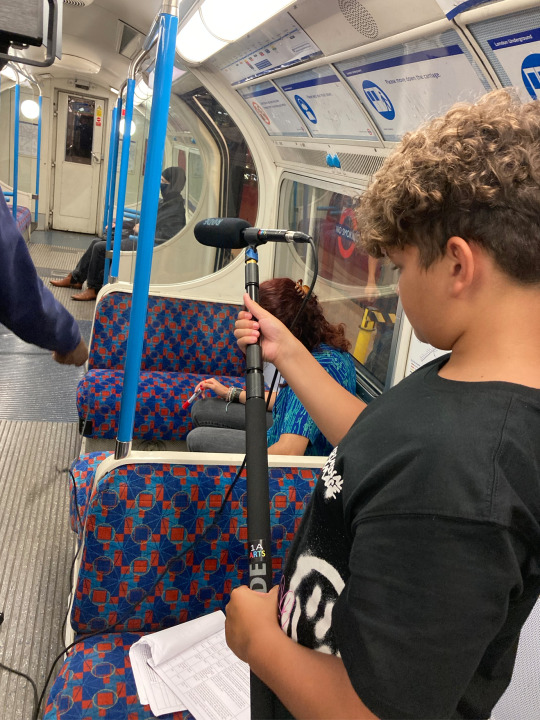
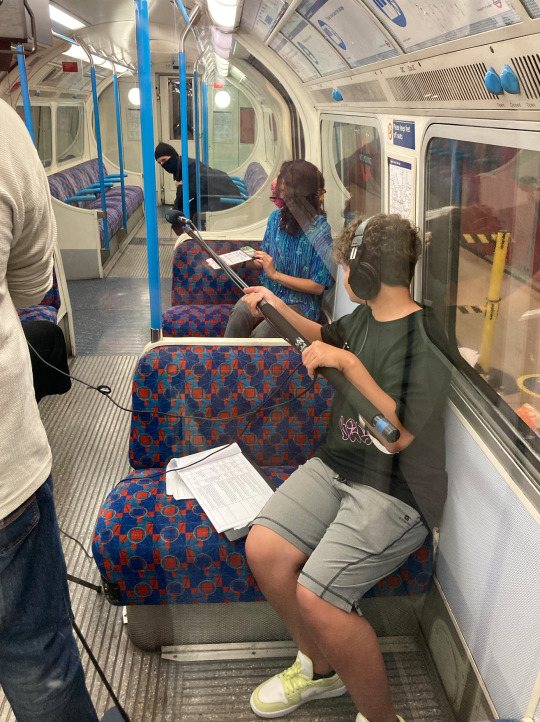
------------
Reflection 2 Saturday 17th July
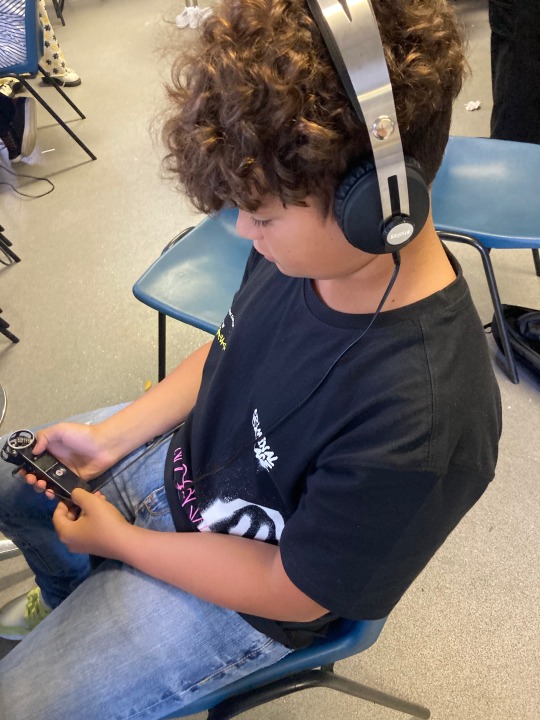
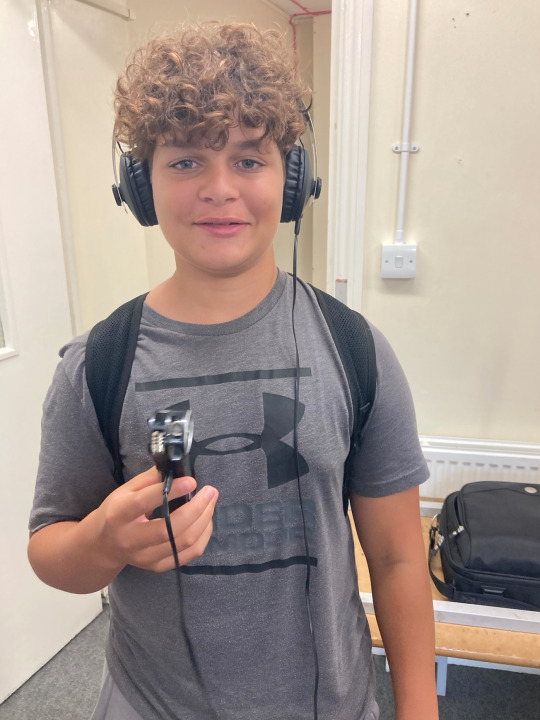
Because we were filming on static trains that weren’t moving, I needed to collect sounds separately to create a realistic atmosphere. I have developed my skills in using the audio recorder by keeping and wind or unpleasant sounds interfered in the audio. I have learnt how to use the audio recorder Zoom H1 to record sounds for example when I'm on the train I can capture sounds off the train which can be added into the video during post-editing which gives it a very genuine sound making the video realistic as if you were on a train.
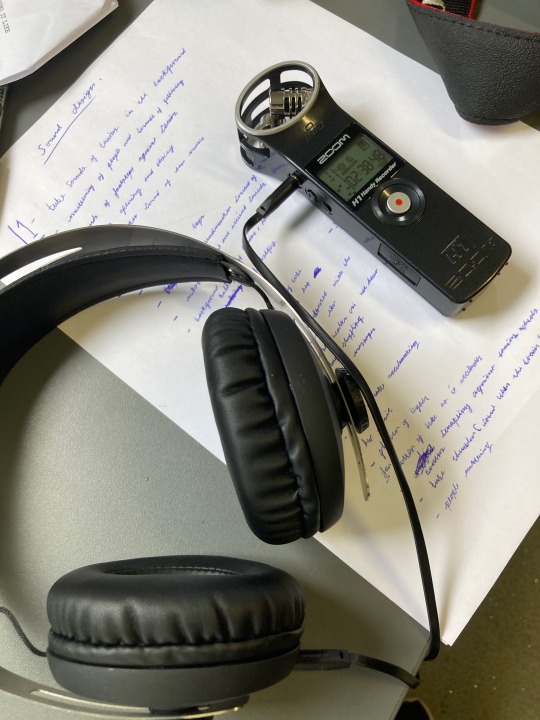
The thing that is going well with using the microphone is keeping any wind out of the microphone or vibrations from my hand touching it it can be challenging sometimes so when there is wind and on the Tube which is annoying when I have a very good sound piece which can be used in the video. Something I will need to change in my action plan is maybe getting a wind shield which can be put on microphones preventing any wind being heard.
The sounds I collected were the sounds of the tube, doors opening and closing, train accelerating and slowing down, people talking on a busy train and rattling of the carriage.
Writing notes on sound
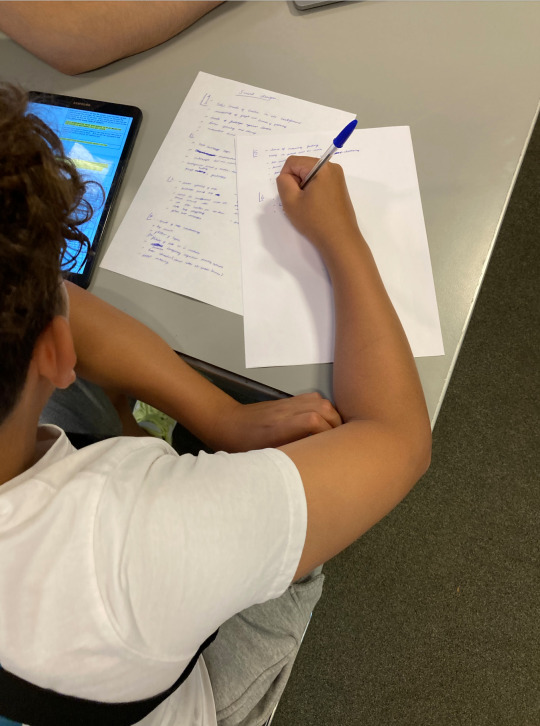
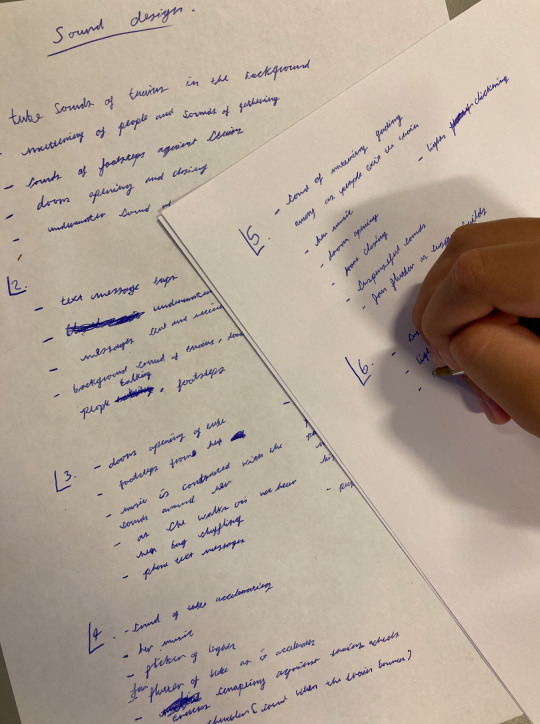
Learning how to use the audio recorder
---------
Reflection 3 - Tuesday 7th August
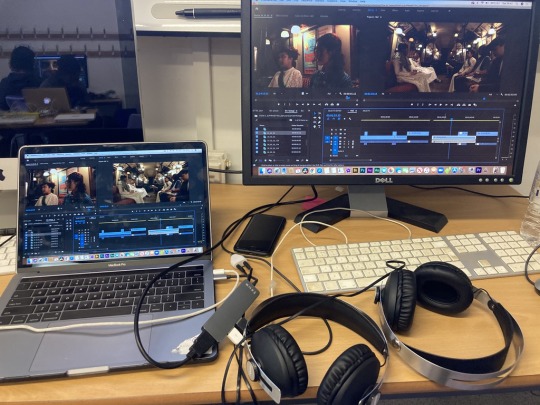
In edit week I learnt skills experimenting with the sound on scene 4. In this scene, the main woman comes into the carriage and its the 1970s. She overhears a couple having an argument, and the man storms off. She goes and sits with the woman and comforts her. I experimented with the use of db levels and used keyframes by using the pen tool to add points which control the time it takes for the sound to increase or decrease.
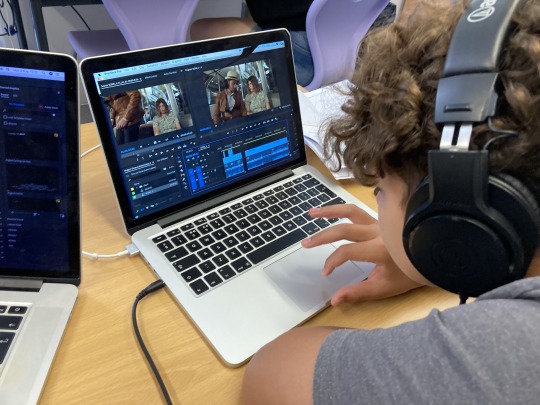
In editing I added sounds to scene 4 and I did that by collecting sounds from free websites such as freesound.org, or recording it myself with the audio recorder, the purpose of it was to add the atmosphere of the scene being set on a moving train. I also added transitions between audio clips to make it sound smooth, but wasn’t sure what shortcut I needed to do it.
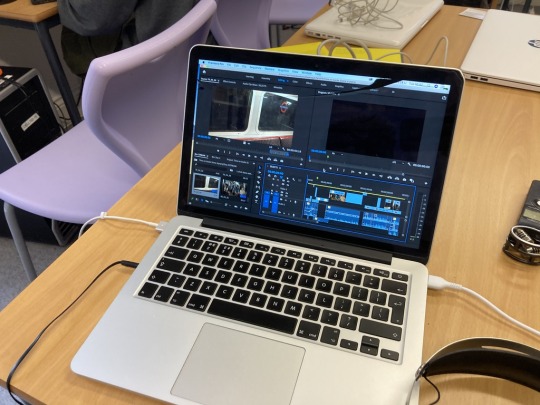
The one thing I found challenging was when there was a clip that didn’t contain the clapperboard, and there was no sign of what shot it was, so it was really hard to find the right take.
0 notes
Photo
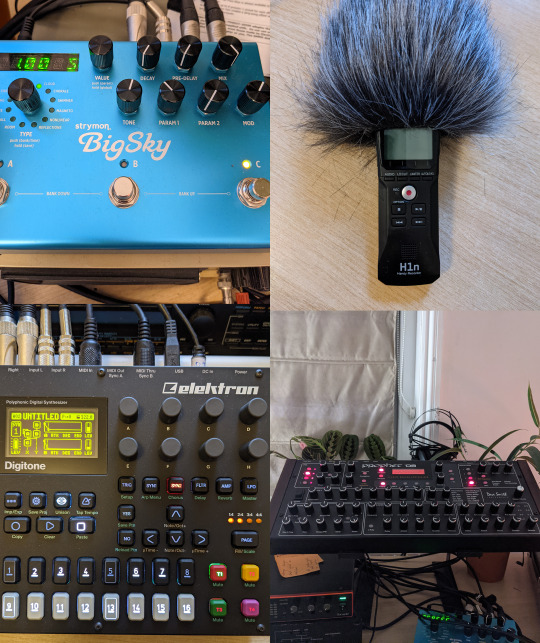
*Documentation*
Hardware equipment used for sound experimentations
- Strymon Big Sky Reverb unit
- Zoom H1 Sound Recorder
- Elektron Digitone digital FM Synth
- Dave Smith instruments Prophet ‘08 Analog synthesizer
1 note
·
View note
Text
AirPods Max vs. AirPods Pro: What's Apple's Best Pair of Noise-Cancelling Headphones?
Chances are you've come to this story because you want a pair of AirPods, and you're deciding between the AirPods Max and the AirPods Pro. Yes, there are plenty of other excellent headphones and true wireless earphones with strong ANC (active noise cancellation) out there that aren't made by Apple, but let's set those aside and assume you definitely want a pair of AirPods. The standard AirPods aren't in the same league as the AirPods Max or AirPods Pro in terms of sound quality or noise cancellation capabilities, so we've left them out of this comparison.
It's not often we compare earphones and headphones as they tend to be quite different, but the $549 AirPods Max and the $249 AirPods Pro present a unique case in that they both offer many similar features, like high-quality ANC, spatial audio, hands-free Siri access, and Apple's H1 chip for a seamless pairing process with iOS devices. So it makes sense that iPhone and iPad users, in particular, would be drawn to headphones that are designed to work specifically with their devices. Considering the $300 different in price, however, choosing between the AirPods Max and AirPods Pro isn't a decision to be made lightly, and we're here to help you figure out which pair you should get.
First, Who Shouldn't Get AirPods?
We'll be blunt here: The prices for both of these models are high, so if you're looking for a bargain, that's not going to happen with either the AirPods Max or Pro. Check out our roundups of the best noise-cancelling headphones and the best noise-cancelling true wireless earphones for a list of more affordable alternatives.
The AirPods are made to work with iOS/iPad OS, so if you don't use an Apple phone or tablet, you'll be missing out on a lot of the wow factor. That isn't to say the AirPods don't shine on their own, you just won't be getting the full experience.
Finally, audiophiles and purists seeking a super-accurate listening experience should steer clear of AirPods. These are audio signatures designed for listeners who don't mind plenty of boosting and sculpting. Don't expect much control over the sonics, either—neither pair has adjustable EQ. Yes, Apple Music has built-in EQ, but there's no graphic EQ in the settings menu for either pair of AirPods.
Active Noise Cancellation
At their best, the AirPods Max have the most powerful ANC for low frequencies we've tested to date. At their worst, they're still pretty solid, but mysteriously inconsistent. The ANC here is adaptive, and while that's mostly a good thing, it can result in some inconsistent noise cancellation. It's capable of completely eliminating powerful low-frequency rumble like you'd hear on an airplane, but if you adjust the fit of the headphones even slightly, that noise cancellation can change. Sometimes a sound being cancelled out will actually be louder in one ear, even though the sound is pretty much equal in both ears when you hear it with the headphones off. But if you get a result you don't think is great, all you have to do is turn your head a bit or shift the earcups and, generally, the ANC will recalculate and (usually) improve.
Highs are a bit problematic for the AirPods Max. Tested against a recording of a crowded restaurant, they have no problem with the lows and mids, but the highs would seemingly pass through the ANC at times undetected, almost as if they were being highlighted or the headphones were in ambient mode. This, too, wasn't an entirely consistent issue in testing, but generally speaking, the headphones fare better with lows and mids.
The in-ear Pros, meanwhile, are far more consistent in their noise cancellation. They don't hit the same highs, and they don't hit the same lows (both figuratively and literally). They can't dial back bass rumble like the Max can, and while they do a great job with lows and mids, they too can struggle a bit eliminating the highest frequencies. But they also don't tend to shift as wildly when you move them around.
So we'll say that the AirPods Max are capable of the most powerful ANC, but their adaptive approach often leads to inconsistencies, while the in-ear AirPods Pro are far more consistent, if less powerful against deep bass drones and rumble. Ultimately, both are top-notch ANC options.
Winner: Tie
Audio Performance
Apple probably tried really hard to match the sound signatures of the AirPods Max and Pro, which is no easy feat because your ears will naturally hear things differently when listening through headphones versus earphones. Typically, the differences can be drastic, but here the differences between the two sound signatures here are subtle. Both boost the lows to a degree, but not too much, and both offer crisp high-mids and highs.
I'd say that, between the two, the in-ear AirPods Pro sound a little more sculpted—they're both a bit more bass-forward and brighter, but we're talking just a smidge. The over-ear Max headphones sound a little more natural and less sculpted, but again, not wildly so. Listening for drastic differences while playing our test suite, the bass drum on a particular track might have a little more low-end push through the AirPods Pro, but just barely. And that can have more to do with the in-canal seal than the drivers themselves.
So, sonically, it's a bit of a toss-up. One note of interest: Both models only support AAC and SBC Bluetooth streaming (there's no AptX support). That's no real surprise for an Apple product, but you should still expect more from your typical high-fidelity, expensive headphones or earphones. Regardless, they both sound great—exaggerated, sure, but more subtly sculpted than plenty of competing models we test.
Winner: Tie
Hands-Free Siri, iOS Integration, and Spatial Audio
The experience for all of the above-mentioned features is nearly identical with the AirPods Max and AirPods Pro. Neither has a notable advantage when it comes to Siri, spatial audio, or how the headphones work with your iPhone or iPad. That said, these features are either completely or mostly unique to AirPods, so it's worth going into a little more detail.
For starters, both models work quite well with hands-free Siri commands. Built-in mics pick your voice up, and Siri can give you weather reports or play your Apple Music requests within seconds, among many other possibilities. You can also disable this feature if you don't want the mic to always be on.
iOS integration is another way these models stand out. They both automatically trigger an on-screen pairing process with your iPhone or iPad when used for the first time. This really only saves you a small step of manual pairing, but it's a cool way to start things off, and it adds a sense of luxury to the user experience, with the feeling that the products are tailor-made for one another. If you own both pairs and they're both connected to your iPhone, your phone will detect which pair you're wearing and switch to that one. It's impressively quick, and saves a lot of extra Bluetooth menu work. Each model also has its own settings menus in your device's Bluetooth menu to make some basic adjustments.
Spatial audio is another cool feature, but ultimately, it's still more or less a gimmick. It takes 5.1, 7.1, and Dolby Atmos film audio and applies an effect that makes it seem as though it's happening inside a room or theater. It isn't surround sound, but a bit of magic that creates a somewhat more realistic sense of space. It sounds great on both pairs of headphones, perhaps a little more so on the Max, but not enough to tip the scales one way or the other.
Winner: Tie
Fit
Earphones fit everyone differently. My own extensive use of the AirPods Pro tells me that people with ears like mine will mostly enjoy them, but might find that the fit tends to get less and less secure as the day goes on. For short-term listening scenarios, this isn't a big concern, but if your day is filled with several long Zoom meetings, you might feel them start to wiggle and loosen. This would be less noteworthy if Apple included more eartip fit options, but in its true minimalist fashion, you get three white eartip pairs to work with, and no stabilizer fins or hooks.
If there's one thing you learn quickly wearing the AirPods Pro for a long period, it's that you should never adjust them by casually grabbing the stems, unless you want to accidentally trigger the touch controls and play or pause music playback. It's unfortunate, because adjusting the fit by trying to secure the slippery rounded top part of the earpiece is less effective. Carefully grabbing the stems is definitely the best way to quickly adjust the fit, and with some practice, it can be done without misfiring on the control panel.
With the AirPods Max, these concerns more or less go out the window. The fit is very secure and unlikely to require much adjustment over long listening periods. That said, when you do adjust the fit, you don't want to pull down from the top of the earcups—this is where the controls are, and it's very easy to accidentally bump the Digital Crown control and play music or suddenly blast the volume.
If we're talking about which pair is likely to retain its ideal fit over the course of an hour or more, the AirPods Max have the clear advantage. Even though fit is subjective, the Max's headband is more adaptable to different head shapes than the three pairs of AirPods Pro eartips are to different ear canals.
Winner: AirPods Max
Major Design Differences and Battery Life
The AirPods Max and AirPods Pro couldn't look or feel more different, but that's obvious. Past the form factors, though, there are still plenty of notable design differences to highlight. For instance, the AirPods Pro have an IPX4 rating, meaning they can withstand light splashes and should be fine to wipe down with a damp cloth. The AirPods Max have no IP rating, and therefore you shouldn't get them wet.
Controls on the AirPods Pro are handled with pressing or holding on the stems of each earpiece—they're easy to operate and fairly intuitively laid out. We'll give the edge to the AirPods Max here, though, which simply have more real estate to work with. The Digital Crown is a dial/button combo that handles most of the basic functions gracefully, and there's a dedicated ANC button that can switch between three modes.
Charging is another basic functional design difference. The AirPods Max use a Lightning-to-USB-C cable for charging, and don't ship with a power adapter for outlets. This means if you don't have a way to charge them via USB-C, you'll need to buy an adapter. The AirPods Pro, on the other hand, also charge (inside their included battery case) via a Lightning-to-USB-C cable, but the case is also compatible with Qi wireless charging pads. There's nothing comparable with the AirPods Max—their included Smart Case merely puts the headphones into sleep mode.
And speaking of the Smart Case, while it looks kind of cool, its surface is a dust magnet and it hardly protects the headphones at all. What looks like the most vulnerable part of the AirPods Max—the knit mesh canopy—sits out of the case in the open with zero protection.
When it comes to battery life, the AirPods Max have roughly 20 hours of battery life, while the AirPods Pro have around 5 hours of battery life, with another 20 hours in the charging case. Comparing battery life between bulky over-ear headphones and tiny true wireless earphones is like comparing apples with oranges, but ultimately, both are pretty average in their respective categories.
Winner: Tie
Price
Simply put, you can buy two pairs of AirPods Pro for the price of a pair of AirPods Max—and still have $50 to spare. There's no question which model wins the price war. The AirPods Pro offer some of the best in-ear ANC we've tested, and are among the most affordable of the top true wireless models, making them a relative bargain.
Nothing about the $550 AirPods Max can be described as a bargain. The headphones are fantastic, yes, but their closest competition, the $399.95 Bose Noise Cancelling Headphones 700 and the $349.99 Sony WH-1000XM4, both cost significantly less. Bundle that with the reality that the AirPods Max aren't likely to get a markdown anytime soon, and what we you have is a pair of beautiful, highly effective ANC headphones that, even with all of their positives taken into account, are overpriced.
Winner: AirPods Pro
It Comes Down to Value
Do I think you'll regret spending $550 on the AirPods Max? No—if you can afford them, I think you'll really enjoy just about everything they bring to the table. I do have to admit that, for the most part, the AirPods Max are slightly better than the AirPods Pro in the ANC realm, and more visually pleasing. You'll just have spend twice as much as you will for a pair of AirPods Pro.
But I'm not sure the difference is enough to warrant the price gulf between them. In my reviews of both models, only the AirPods Pro earned our Editors' Choice award, and you can bet that pricing has a lot to do with it. Dollar for the dollar, you simply can't deny that the AirPods Pro offer much greater value, making them the better choice for most people.
0 notes
Photo
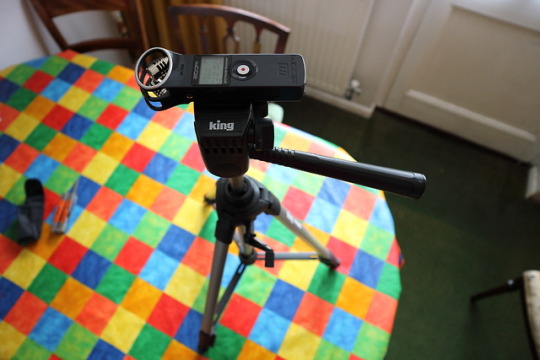
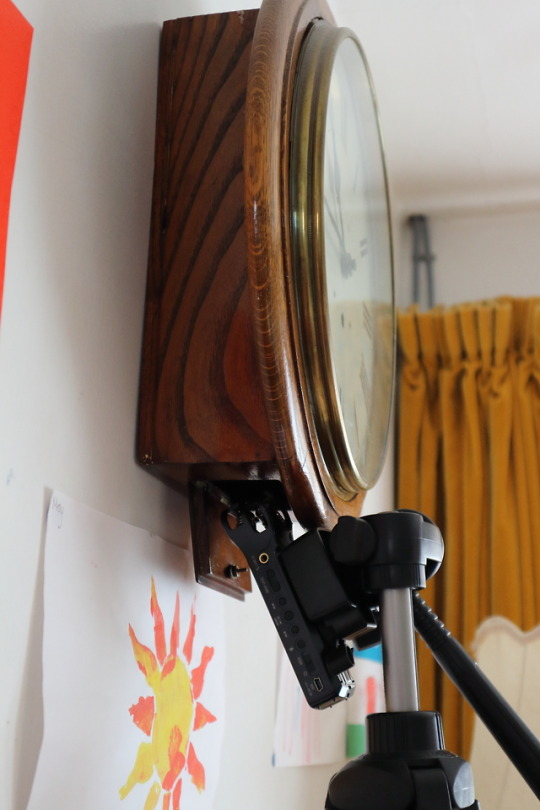
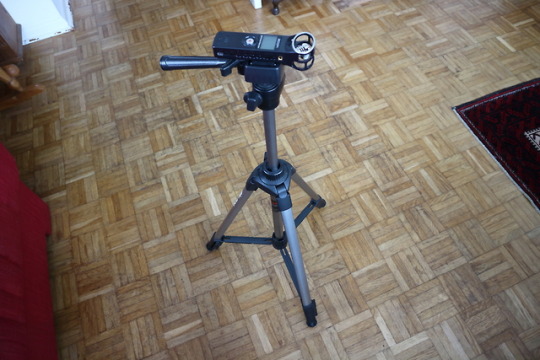
Recording clock sounds to add to a friends song. Zoom H1 Handy Recorder.
2 notes
·
View notes
Text
Podcasting 101: 5 Simple Steps To Start a Successful Podcast

Podcasting 101: 5 Simple Steps To Start a Successful Podcast
Today’s world is going through a strange and vulnerable period. The economic downfall caused by the COVID-19 hit really gets on nerves. But despite all this, we still have plenty of opportunities in terms of careers. Since not so many of us were born with a silver spoon in mouth, we have to work hard to make our lives better. Lots of people make a decent income nowadays with Youtube blogs, Instagram accounts, online educational platforms, or while doing podcasts.
Is it worth it to start a podcast?
Let’s talk about what it takes to create successful podcasts and launch this business. Why did we decide to tell you about podcasts? Because this is one of the fast-growing industries that remains extremely popular. Edison Research stated that a volume of people who like podcasts grew by about 175% by 2020. Each month over 90 million people listen to podcasts regularly. And this is just a rough estimate only for the US. Each month over 90 million people listen to podcasts regularly.
What do you need to start a podcast?
There is no need to be an experienced technician or invest tons of money. However, we suggest paying good attention to content marketing because it's important for expanding a circle of dedicated followers. Okay, so let’s get down to the nitty-gritty on how to start a podcast and get paid. In this blog post, we’ll cover the actual process of building audio podcasting. Can anybody start a podcast? To get an answer to this question, look at an outline of some essentials that are good to know before you even start messing around with podcasts: Hating the sound of your own voice will make a wrong impression on people and definitely won’t help;Being uncertain about the level of tech knowledge you have for the moment and thinking that your skills are too far out of your wheelhouse is not good either. With time you’ll get a good hang of it and will be doing good recordings and easily manipulating with audio files;Every time you speak in public, you feel so nervous that your voice shakes? Do something about this problem and get rid of it with special training for overcoming fear of public speaking. Your voice needs to sound with confidence.
Step 1. What basics types of podcasts are out there
Let’s go over some info about the basic types of podcasts. A podcast is basically an audio recording created in a digital format. Experienced podcasters make such audio recordings regularly calling it “new episodes” and posting them on various online resources. Are podcasts useful and help to grow business? Podcasts provide an effective way of building and expanding an audience. It is also great for promoting a business website. After mentioning and referring to a website during a show, your chances of driving more visitors to your online store or online business become much greater. Statistics show clearly that over 60% of people would go on the site to make a purchase of something that they’ve just heard about while listening to a podcast. However, despite new technology heavily involved in this process, podcasts are still just like its predecessors – radio shows or broadcasts. Today’s technology allows us to download and access podcasts on the Internet, as well as on mobile devices. Three other types of podcasts: Video podcasts or "vidcasts" – unlike regular podcasts, this type consists of visual components like slideshows or actual videos.Vlog – a type of blog offered in a video format on YouTube.Webcast – a video broadcast offered live on the Internet.
Step 2. Decide what format you want to use for podcasts

Why are people so attracted to podcasts? There are 2 major reasons for that. First, this is a convenient informational source to get a hold of. Since people can listen to it almost anywhere anytime even on the go, it makes it easy to access and deal with. Now you can access content platforms and listen to podcasts on any gadget available nowadays. Smartphones, tablets, notebooks, computers – anything will work. A second good reason why people like podcasts is that this is something they can access and enjoy without paying money for it. So, you want to start a podcast. Before diving into the process of creating podcasts, determine which particular format you want to use. Some popular formats used by podcasters: Interview – used for featuring a host who interviews multiple guests and is one of the most common formats.Multiple hosts – usually have several different hosts or co-hosts.Monologue – most commonly built and centered around a single person and revolves around a single point of view with the commentary-style of a podcast.Narrative – mostly concentrates on how the content was delivered with a storytelling approach.Mixed or Hybrid – mixes various features of content types that we’ve already mentioned, in most cases takes content from radio or TV shows and uses it for repurposing.Scripted non-fiction – a series of podcasts that talk about one particular theme for the whole season.News recap – talks about specific industries summarizing news about them.Educational podcasts – teach and deliver lectures with scripted non-fiction podcasts. Before deciding on a particular format to structure your podcast, make sure you have enough content. It doesn’t really matter how long in time your podcasts are going to be – either ten minutes or ten hours. However, the optimal length is 20 minutes to half an hour. The best way to select content is to talk about topics that are inspiring or about anything within the area of your expertise.
Step 3. What equipment and hardware are needed to start creating podcasts
How much does it cost to start a podcast? What equipment do you need to start a podcast? These are important questions to ask. Before dipping the feet in the process, review some info on what equipment and hardware will be necessary to have. Here comes a surprising twist. Now, it is easy to create podcasts with just an iPhone on hand. Sounds great? Absolutely! How to start a podcast on iPhone? Just keep on reading the post and you’ll get some tips on that. Let’s get down to our “how to start a podcast” checklist. Some basic equipment needed to start a podcast: Microphones and special applications – turn an iPhone into the audio recorder that will sound professional by downloading special applications – Spreaker, iRig Recorder, Anchor. Get microphone attachments like Zoom iQ6/iQ7 for having even greater sound quality, which will let you control and monitor sound levels. Microphones for your PC or notebook – a couple of nice models that worth to look into: Blue Yeti – reasonably priced and good for beginners. It is equipped with an excellent quality condenser mic, which makes recordings that are as good as studio-quality.Audio-Technica AT2020USB+ – not cheap but has built-in volume control for monitoring a signal coming from a microphone without a delay.Samson Go Mic – this mic is supplied with a special clip that makes it attachable to any PC. Software for making recordings – you’ll need to use special programs designed for converting completed recordings into MP3 files. Useful programs that we recommend: Audacity – easy to use and has premium quality. Find tutorials online and educate yourself on getting the best out of it.GarageBand – designed for MacBooks and will let you convert audio recording from a mic into MP3 files.Adobe Audition – considered the most powerful software out there. Software for recording calls – think that there will be interviews included in podcasts? Then you’ll probably need to download a special software used for managing call recordings. Look at some programs that we recommend: Callnote – with this program you’ll be recording conversations held through GoToMeeting, FaceTime, Google Hangouts, WebEx, etc.UberConference – for joining calls from any desktop or even a phone. Headphones and pop filters are needed – don’t get overwhelmed by the vast array of headphones and other gear out there offered on the market. Just take a peek at some models that we recommend: Sony ZX Series headphones – used while interviewing guests because their speech won’t go through speakers and won’t cause an echo that might occur during the process.Sony MDR-7506 – meets all standards and requirements set by the industry.Neewer Broadcast Studio Mic Boom Arm – levels a mic and keeps it straight in front of your face. With having this tool, you’ll be moving around easily while doing your podcasting show.Pop filter – if you sit too close to the mic and speak right into it, you can make some sort of clicking sounds with your mouth. This tool keeps these kinds of noises from being heard on recordings.Zoom H1 Handy Recorder – can keep all your data from disappearing after your computer broke. Since a device is portable, there is no need for a computer while traveling or being away from the studio. When the time comes for making your recordings, just get all your equipment to start a podcast together, grab a mic and plug it in. Of course, go ahead and click on the “Record” to start your podcast adventure. After you're finished, turn your recording into an MP3 file, because this format is widely used for playing on nearly all devices.
Step 4. How to start creating and editing podcasts
While recording your very first podcast, start it by sending a welcome message. This is the best way to start a podcast. Let everybody know about your channel. Make an overview of the topics you’re going to cover during your show. Also, don’t be nervous and try to speak naturally. Don’t read everything off the script. You don’t have to sound like an experienced broadcaster to catch the attention. However, try not to sound like an audiobook either. Create an intro and outro (also called “bumpers”) for your podcast episodes. It will let you add a more distinct personality with some catchy music and nice slogans. Good music can work as a “hook”, so pick music that will establish your slogan. Find some good music online in such places as Incompetech, Audioblocks, and Music Radio Creative. Just remember that resources like such sometimes ask for monthly subscriptions and your music loops won’t be unique. Good music can work as a “hook”, so pick music that will establish your slogan. If you feel like your voice sounds weird, don’t freak out. Remember, it takes lots of practice before you get it all right. Rarely somebody likes an actual sound of their voice, so just be patient and remember – it will improve with time and practice. Besides, you can improve your recording with editing, so if something went wrong with having too many gaps or mistakes, it’s no big deal. Use software for editing that will do the job for you – GarageBand, Audacity, Adobe Audition. These programs let you add intros and outros, get the volume stabilization right, get rid of gaps or dead air, or any mistakes that might've happened during the recording of the podcast. Don’t have enough time to mess around with editing? Go to Fiverr or Upwork platforms and search for a freelancer. Once you find an editor, be specific about your style and specify editing requirements.
Step 5. How to find hosting for audio recordings and right channels for promoting podcasts

Once a large number of audio recordings created, from now on start searching for the right host to store your MP3 files online. A web host provides safe storage for keeping MP3 files. Use such popular hosts like Libsyn, which has unlimited bandwidth or go to Blubrry. Now, let's say a couple of words in regards to promotion. To promote podcasts, go ahead and submit them to all popular channels, such as Stitcher, Google Play Store, SoundCloud, etc. These are the best places to start a podcast. Of course, don’t forget about such popular and widely used online platforms like YouTube and Spotify. Actually, you can consider as many channels and platforms as you possibly want and use them for distributing. Before contacting and submitting, make sure you got the podcast's title (always a must), description for your show, all artwork you have created, and added to your channel, anything like that handy for the right promotion. Go online to learn more about how to start a podcast on Youtube and other popular platforms. Take a look at some online courses offered on the educational platforms that will teach you all tips and hints on how to start a podcast business.

Read the full article
#basictypesofpodcasts#bestwaytostartapodcast#covid-2019#createsuccessfulpodcast#creatingpodcasts#equipmentyouneedtostartapodcast#howtostartapodcast#startapodcast
0 notes
Photo

Audio Recorders for Filmmaking 2019: Choosing a Sound Recorder for Your Video Projects http://ehelpdesk.tk/wp-content/uploads/2020/02/logo-header.png [ad_1] In this episode, I explain my op... #adobelightroom #adobepremiere #affinityphoto #audio #centrance #colorgrading #controlsurface #digitalphotography #dr-05 #dr-10l #dr-60dmkii #dr-701d #dslr #f1 #f4 #f8 #f8n #film #filmmaking #finalcutpro #h1 #h1n #h4npro #h5 #h6 #imageediting #iphonephotography #midicontrolsurface #midicontroller #mixer #mixerfacer4 #mixerfacer4r #mixpre #nightphotography #photography #photoshop #photoshopretouching #portraitphotography #recorder #sound #sounddevices #sounddevices633 #sounddevices664 #sounddevices688 #soundforfilm #soundforvideo #tascam #video #videoediting #videoproduction #videography #zaxcomdeva #zaxcommaxx #zaxcomnomad #zoom
0 notes
Link
For just $14.00 Microphone Muff Fur Windscreen For Sony D50 Zoom H1 H2N H4N Q3 Q3HD Recorder Feature: -Microphone wind plush sleeve for H1 H2N H4N Q3 Q3HD Sony D50 Recorder Zoom.-Using high-quality materials, solid wool used a lint-free look nice.-Natural science in line with sound design, product design with a rear end lock, elastic or rubber ring.-Durable recording clear, good windbreak effect.-It is the first choice for outdoor film shooting wild micro-film recording large outdoor folk songs recorded program. Specifications: Product name: Microphone coverColor: GreySize: Approx. 120x130mm/4.72x5.11Weight: 25g Package Included: 1x Microphone anti-wind cover
0 notes
Text
RECORDER CAMERA KBVISION KX-8108H1 PRICE
- Camera ip wifi Hải Nam What You Do Not Know About Kbvision Kx-8108h1 Recorder Might Surprise You
youtube
In daylight isn't easy to observe the red light indicating whether you're recording. You cannot power on your device, or it's not functioning in any way. A dead battery ought to be the very first thing checked for. The AA battery will supply you with juice for as much as ten hours of recording time. Since so many people these days are shooting with small HD cameras or HDSLRs, this is a significant tool to have to raise the grade of your sound. This lens is likely to permit the shooter to remain in the rear of the ceremony but make the viewer feel as though they're right facing the couple when they're getting married.
There are various strategies to establish podcasts. As soon as you have uploaded your Podcast to your Podcast host you must share that on as many on-line platforms as you're able to. As most card readers and computers don't arrive with a microSD reader there's an SD adapter included. Tell the listener what you are going to be presenting.
In the event the terminals appear to get a green crust on them, consider cleaning off the terminals and employing the fresh batteries an additional time. Device will not permit you to record employing an external microphone. It's no larger than many modern smartphones, in reality. In this instance, you should quit utilizing this device immediately as there's a possibility that data will be overwritten. In case the device won't connect despite a new USB cord, try out a working device on the exact same USB port. In addition, it has an external mike socket so that you can plug a better quality mic in at a subsequent date if you choose you require the sound quality improved. It's possible to also use the headphone jack for a line-out to record your audio right to your camera's SD card if you would like.
- camera wifi giá rẻ Hải Nam In the event the recorder isn't turning on, you should alter the battery. So always get rid of the battery from the recorder when you aren't using it. It's a really versatile recorder. Read here in order to know, what's zoom H1 recorder and the way you're able to recover sound files from it. In case the recording isn't in stereo, this usually means that one of the 2 microphones is malfunctioning.
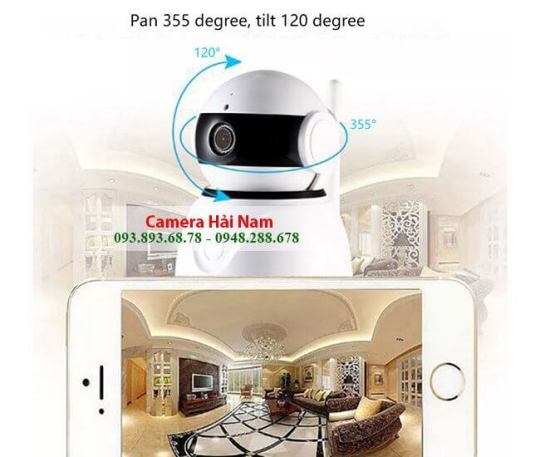
What to Expect From Kbvision Kx-8108h1 Recorder?
Among the other main features is the capacity to switch from Mp3 to WAV formats, which will provide you opposing bit rates in addition to different formats to manipulate. If you wish to have the choice to use external mics (or a blend of both!) Another terrific alternative is to start looking into a book or two. If you're wondering about the very best external microphone choices for plugging into your recorder, make sure to have a look at our very best podcast microphones roundup too. Even though there are lots of buttons and switches, the layout is reasonable.
Get a notion of the sort of sound you are searching for, then download what's ideal for you. Decreasing it will permit you to fit more audio into the 2 GB limit, but might decrease the caliber of the recording. Do so and you may record some impressive-sounding audio. As you're recording, you are getting a distorted audio that's ruining your record. If you're getting a distorted audio camera quan sát qua điện thoại 3g in quieter settings, you might not be using the lo cut characteristic of the Zoom H1 Handy Recorder. WAV files with the integrated XY Stereo microphone. Based on what it is that you're recording, you can choose anything between MP3 and WAV format.
In the event the file is present but there's no sound, then both microphones are malfunctioning and ought to be replaced. You must transfer files to the computer thinking of the reasons. So, irrespective of how you have deleted your precious sound files, this program will retrieve them in virtually no time. Don't expect perfection the very first time, you will receive better the more you use this program. It is quite a common platform. The sound design has the power to either make or break a film and thus it is extremely crucial to have good superior audio recordings, outside the camera, because most of today's DSLRs provide you crappy audio.
There are plenty of recording apps it is possible to download to your cell phone. Also, acquiring a lot of batteries wasn't manageable. It's well worth spending more than the minimum on a recording device having this sort of kit the quality is quite determined by price. Just make sure you keep the volume levels nominal or maybe you get plenty of interference when recording on the camera. A fair audio limiter, which lowers the signal level in actual time to prevent clipping. - Camera quan sát Hải Nam
0 notes
Note
I'm starting my undergrad for music ed next year and I just got an email saying that my school requires all music ed majors to have a digital video recording device - does anyone have a camera that they like for recording music that's inexpensive or maybe higher quality and worth its price tag? Thank you!
Hey Cleffs, if your case I would high recommend going for an affordable digital camcorder (usually in the 50-200 price range, even cheaper if used) and purchasing a separate digital audio recorder such as the Zoom H4 or any other high quality portable audio recorder that has a build in mic as well as pre-amps.
A majority of digital video recorders have mediocre at best audio quality, and is that aspect not as important as your visual performance and technique?
There are hundreds of camcorder models I am sure you can find one that fits your needs and budget. Just be weary that many off-brand camcorder you may find for cheap (50-100 range) may not last you as long as you’d like.
As for Digital Audio recorder, here are my recommendations
If you’re looking for extra budget, the Zoom h1 is your boi.
It has a pretty decent quality and range, be warned though, there are no inputs other than an 8th inch, so if you ever wanted to upgrade microphones, you would have to buy an entirely different device. Similarly Tascam’s DR05 does the same thing but might also be a bit newer, I’m not entirely sure
Next on the list would be the zoom h2n.
This is similar to the h1 in the sense that it doesn’t have any inputs other than the 1/8th inch meaning upgrades are impossible. That being said this microphone has a much bigger diaphragm and is much more suitable for recording in performance settings.
This next one hits the sweet spot for me.
The zoom h4n. This is what I personally use for sound design and recording my performances. It has two channel stereo inputs and supports all microphones you might want to upgrade to (assuming they use quarter inch,XLR, or phantom powered XLR, which means no USB microphones)
Similarly, tascams DR-40 is the direct competitor to this microphone, and also 20 or so dollars cheaper!
Anyways! It’s hard to go wrong with the camcorders, especially since usually they will be mounted to a tripod to record your performances, practice, and auditions. Equally as important, if not more, is the audio capture.
Hope I was able to help!
-DRamos
15 notes
·
View notes