#Vinyl flooring dry back manufacturer
Text
How slip-resistant is vinyl flooring?
Vinyl flooring can offer good slip resistance, though the level of slip resistance can vary depending on the specific product and surface texture.
Here are some key points about the slip resistance of vinyl flooring:
Smooth vinyl floors tend to have lower slip resistance than textured or embossed vinyl floors. Textured or patterned surfaces provide more grip and traction.
Many modern vinyl flooring products are designed with enhanced slip-resistant surfaces. These may use a specialized topcoat or embossed patterns to improve traction.
Vinyl floors with a matte or satin finish generally provide better slip resistance than high-gloss vinyl floors, which can be more slippery when wet.
The slip resistance of vinyl flooring is often rated using a standardized test method like the ASTM 1028 test for static coefficient of friction. Quality vinyl floors may have a static COF of 0.5 or higher, which is considered good slip resistance.
Proper installation, maintenance, and cleanliness also impact the slip resistance of vinyl floors. Buildup of dirt, oils, or spills can reduce traction.
Overall, vinyl is generally a slip-resistant flooring option, especially when textured or matte surfaces are selected. But the specific slip resistance can vary by product, so it's important to consider the intended use and look for ratings or test data when choosing vinyl flooring.
Tag:
Vinyl flooring dry back factory in china
Vinyl flooring dry back manufacturer
Chinese PVC flooring factory

0 notes
Text
Built a new tank the other day. Full of tannins.


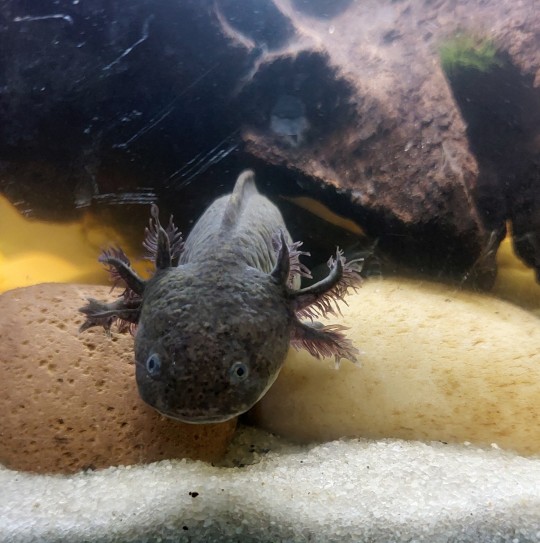

I love you axolotl who I haven't named yet bc I'm incredibly indecisive and also bad at naming!
This little guy, in the short time I've had em, has already grown back the missing stump to almost the same size as the other one!
I had a TON of fun building this tank. I used some rock tiles I found for super cheap at the home depot that I really liked, gonna go back for more, simply bc it's so good. I built this tank out of loose stuff and plants that I had hanging around. Fun thrifted pillowcase turned table cloth, clear vinyl, atop of cinderblocks atop some old leftover wooden flooring planks and scrap wood on top of the blocks. Had to use a couple of shims to level it, but I got it there in the end! Rocks are the last of a bag of rocks I had for a different project, as well as the last of my 50lb bag of silica sand. Wood, decor, plants, lights, filter, all are either leftover scraps or clippings from other tanks. The tank itself I got off the classifieds, simply bc it was such a unique color! Not painted plastic, that color is straight from the manufacturer! No idea who makes them, though. Used filter media from their old tank to help kickstart that nitrate cycle.
I had to put this fella in there after my other one, Fermi, confirmed himself to be male and began trying to sex up this one, who is half his size. I only have the two axolotls, and the small one was a rescue I got at an auction (long story). Had em both in there (after a two week quarantine), to observe their interactions and learn more about em, but I don't want a million babies, so it's seperate tanks now. I had to nuke their old tank due to excessive black hair algae, and they shared the new one. Wanna see what it looks like?

This is Fermi, in there, and you can see where the freshly added nerite snail has been! I've been slowly growing out the plants in there. Fun axolotl tip: they love hides! My favorite hide method, and one I've always wanted to try, is terracotta pots that I've smashed in half. Available in a variety of sizes, they make for great naturalistic feeling, easy to decorate, cute, and durable, hides! They're great temperature sinks, leopard geckos, bearded dragons, skinks, it makes for great basking or hiding or cooling off, great moist hide, or dry if you need that.


Unnamed (already growing back their gill stubs) (left), and Fermi (glowing green eyes and vacant mind)


Unnamed (left). Fermi (right). Both are side eying the camera. Neither knows what taxes are.

Unnamed, showing off their regrown arm (the one on the viewers right), with fully functional fingers and all! The little missing bites from their tail have filled in. You can even see where the gills have started growing back (the sharply tapered, thin, and narrow part of the tips). The whole time that arm was growing back, they swam lopsided. Unnamed is a wild type morph, no GFP (green florescent protein) and adorable as all get out!
#cute#nature#aww#reptiblr#adorable#animals#nature photography#reptile#amphibian#axolotlblr#axolotl#axolotes mexicanos#fish tank#tank build#aquarium#full tank shots#pets#my beloved#petblr#not a cat#not a dog#aquascape#aquarium build
78 notes
·
View notes
Text
How to Remove Wallpaper from Drywall
Removing wallpaper from drywall can seem like a daunting task, but with the right approach and tools, it can be done efficiently and effectively. Whether you're renovating your home or simply updating the look of a room, properly removing wallpaper is crucial for achieving a smooth, clean surface. In this comprehensive guide, we'll walk you through the step-by-step process of removing wallpaper from drywall like a pro.
Understanding Your Wallpaper
Before diving into the removal process, it's important to understand the type of wallpaper you're dealing with. There are several types of wallpaper, including vinyl, fabric, and paper-backed varieties. Each type may require a slightly different approach for removal.
Types of Wallpaper:
Vinyl Wallpaper: Known for its durability, vinyl wallpaper is resistant to moisture and is often used in kitchens and bathrooms.
Fabric Wallpaper: Typically made from natural fibers like cotton or linen, fabric wallpaper adds texture and depth to a room's décor.
Paper-Backed Wallpaper: This type of wallpaper features a paper backing and is commonly used in residential settings.
Identifying the type of wallpaper will help determine the best removal method for your specific situation.
Tools and Materials You'll Need
Before starting the removal process, gather the following tools and materials:
Wallpaper Scorer: Used to perforate the wallpaper, allowing the removal solution to penetrate more effectively.
Wallpaper Removal Solution: Available at hardware stores, this solution helps dissolve the wallpaper adhesive for easier removal.
Spray Bottle or Garden Sprayer: To apply the removal solution evenly to the wallpaper.
Putty Knife or Scraper: Used to gently lift and remove the wallpaper from the drywall.
Drop Cloths or Tarps: To protect the floors and furniture from moisture and debris.
Safety Gear: Including gloves, safety glasses, and a dust mask to protect yourself during the removal process.
Step-by-Step Removal Process
Step 1: Prepare the Room
Begin by removing any furniture from the room or covering it with drop cloths to protect it from damage. Lay down drop cloths or tarps to protect the floors as well.
Step 2: Score the Wallpaper
Use a wallpaper scorer to create small perforations in the wallpaper. This will allow the removal solution to penetrate the wallpaper more effectively, making the removal process easier.
Step 3: Apply the Removal Solution
Fill a spray bottle or garden sprayer with the wallpaper removal solution and apply it evenly to the wallpaper. Allow the solution to penetrate the wallpaper according to the manufacturer's instructions.
Step 4: Remove the Wallpaper
Once the removal solution has had time to work, use a putty knife or scraper to gently lift and remove the wallpaper from the drywall. Start at a corner or seam and work your way across the wall, taking care not to damage the underlying drywall.
Step 5: Clean and Repair
After removing the wallpaper, use a damp sponge or cloth to clean any remaining adhesive residue from the drywall. Allow the wall to dry completely, then inspect it for any damage or imperfections. Repair any holes or gouges with spackling compound, sanding smooth once dry.
Step 6: Prime and Paint
Once the wall is clean and dry, apply a coat of primer to seal the surface and ensure proper adhesion of the paint. Once the primer is dry, you're ready to paint the wall with your desired color.
Frequently asked questions (FAQ) about removing wallpaper from drywall:
Q: How do I know if my wallpaper is removable? A: Removable wallpaper typically peels off easily without leaving behind residue. If you're unsure, you can test a small corner or seam to see if it lifts away cleanly.
Q: Can I paint over the wallpaper instead of removing it? A: While it's possible to paint over wallpaper, it's generally not recommended as the adhesive can cause the wallpaper to bubble or peel over time. Removing the wallpaper before painting will result in a smoother, longer-lasting finish.
Q: What if my wallpaper is stuck to the drywall? A: If the wallpaper is firmly adhered to the drywall, you may need to use a wallpaper steamer to loosen the adhesive before attempting removal. Be sure to follow the manufacturer's instructions and take precautions to avoid damaging the drywall.
Q: How long does it take to remove wallpaper from drywall? A: The time it takes to remove wallpaper depends on various factors, including the type of wallpaper, the size of the room, and the condition of the drywall. Generally, it can take several hours to a full day to remove wallpaper from an average-sized room.
Q: Can I hire a professional to remove the wallpaper for me? A: Yes, hiring a professional wallpaper removal service can save you time and effort, especially if you have multiple rooms or difficult-to-remove wallpaper. Be sure to research and choose a reputable contractor with experience in wallpaper removal.
Q: Will removing wallpaper damage my drywall? A: When done properly, removing wallpaper should not damage the drywall underneath. However, if the wallpaper is old or has been improperly installed, there is a risk of damaging the drywall surface. Take care to use gentle techniques and tools to minimize the risk of damage.
Q: Can I reuse wallpaper after removing it? A: In most cases, wallpaper cannot be reused once it has been removed from the wall. The adhesive backing may become damaged or lose its stickiness, making it difficult to reapply the wallpaper without wrinkles or bubbles.
Q: Do I need to prime the wall after removing the wallpaper? A: It's generally recommended to prime the wall after removing wallpaper to seal the surface and ensure proper adhesion of the paint. Primer also helps to hide any imperfections in the drywall and provides a smooth base for painting.
Conclusion
Removing wallpaper from drywall may require some time and effort, but with the right tools and techniques, it can be done with ease. By following this comprehensive guide, you can achieve a smooth, clean surface and transform the look of any room in your home. Remember to take your time and work carefully to avoid damaging the drywall underneath the wallpaper.
0 notes
Text
5 ideas to change kitchen tiles without work
Are the walls and floors in your kitchen old and outdated, but you don't want to do renovation work? Look at these easy and effective alternatives to change the kitchen tiles without work and give the space a new look.
Few wall and floor coverings are more resistant and durable than tiles, quartz, especially when it comes to spaces with water areas such as the kitchen or bathroom. However, no matter how long they last, there comes a time when they lose their luster and take on an old and antique look, with little (or no) decorative.
If you see yourself in this situation and don't know how to update the kitchen coverings, keep reading because we are going to give some guidelines to modernize them without having to do expensive and annoying works.
Paint the tiles
When a good change is needed, but one that does not involve work, painting the tiles can be the best alternative, especially for the walls. It is true that they will continue to be there, but the kitchen will not look the same. If you decide to start this DIY project, you should know that it is quite easy to do, affordable for everyone and not just for handymen.
The work process is clear and simple . You will have to start by properly preparing the wall you want to paint, cleaning it thoroughly and applying an appropriate primer. Then you can start painting, applying the enamel with a roller . It is a specific paint for tiles , which is easy to use. Follow the manufacturer's instructions regarding the number of coats, drying time, and the period it takes for the paint to reach its maximum hardness.
Install new tiles without removing old ones
If what is really deteriorated in your kitchen is the floor, there are several options to renew it. You can even install new tiles without removing the old ones. To do this you will have to choose the right materials, such as dry ceramic. This is a type of tile in which the tiles are placed without adhesives, in a very simple way. The back of each piece is cork, which also helps improve insulation. With this type of material, installation costs are reduced and works are avoided. In addition, it has another important advantage: it can be stepped on immediately, as soon as it is installed.
Laying vinyl tiles :
An idea for changing the wall and floor tiles is to install vinyl covering , a resistant and decorative material that is also very easy to install and requires no work. It is available in different designs and formats: tiles for walls and floors, slat-shaped for floors that imitate wooden boards, or in rolls. You also find it with different installation and fixing methods: self-adhesive or with a click system. As it is a thin material, it is not necessary to remove old tiles from the floor or walls.
Cover the tiles with microcement :
This idea may seem too complicated to put into practice, but in reality it is not. Microcement is a very suitable material for covering old tiles and its installation is quite simple. It provides a modern and decorative air, both in industrial-style spaces and in kitchens of other styles. There are several ways to cover tiles with this material. You can use a microcement kit that includes the product in question, a mixture of resin and cement, and an additive that gives said mixture the chosen color. Once prepared, the product is easy to apply and can be put on tiled walls and floors. Once dry, the resulting surface is washable and easy to maintain.
In addition to the alternative of using microcement, there is the option of covering the tiles with a special plaster to cover ceramics , a product similar to Aguaplast. This work is more laborious and requires some experience to achieve optimal results.
Install a dashboard :
If covering the entire wall of tiles in your kitchen seems like too much of a task, you have the option of installing a backsplash in the countertop area. You can cover the tiles in this area in different ways: covering them with microcement, placing a vinyl coating, installing a stainless steel sheet or an aluminum panel , for example.
Simple ideas that make big changes :
Any of the ideas that we have proposed above will help you change the kitchen tiles without work. They are simple methods that achieve big changes, without having to invest too much time, effort and budget. Choose the one you like the most and embark on this transformative adventure. At Stone Depot you will find everything you need to turn your project into reality.
FAQ
What can you put in the kitchen instead of tiles?
There are many options for covering kitchen walls or floors instead of tiles. On the walls you can choose paint, vinyl coating, microcement (this option is also suitable for the floor), cardboard panels, plaster that are then decorated with paint, etc.
What type of tile to put in the kitchen?
In addition to ceramic tiles (porcelain is, without a doubt, a very interesting option), vinyl tiles are suitable. The former are non-porous and do not deteriorate with water or dirt. Vinyl, although less resistant, also withstands humidity.
What tiles to put in a small kitchen?
If your kitchen is small and you want to install tiles, it is best to choose large-format pieces. In this way, joints are minimized and a feeling of greater spaciousness is achieved.
0 notes
Text
How to Remove Paint from LVP Flooring: Quick and Easy Methods

To remove paint from LVP flooring, apply a paint remover product and scrub gently with a soft cloth or sponge until the paint is lifted off.
Method 1: Using Paint Remover
If you've accidentally spilled paint on your luxury vinyl plank (LVP) flooring, don't worry! Removing paint from LVP flooring is not as difficult as it may seem. Method 1 involves using a paint remover to effectively get rid of the paint without damaging your flooring. Follow these simple steps to restore the beauty of your LVP flooring.
Step 1: Prepare The Area
Before you begin the paint removal process, it's essential to prepare the area to ensure a smooth and hassle-free experience. Here's what you need to do:
- Clear the room of furniture and other obstructions that may hinder your movement.
- Ensure proper ventilation by opening windows or using fans.
- Put on safety goggles, gloves, and a face mask to protect yourself from any fumes or chemicals.
Step 2: Apply The Paint Remover
Once you've prepared the area, it's time to apply the paint remover. Follow these instructions to do it correctly:
- Choose a suitable paint remover specifically designed for use on LVP flooring. Look for a product that is safe to use on your particular flooring type.
- Read the manufacturer's instructions carefully before applying the paint remover.
- Use a brush or sponge to apply the paint remover directly onto the affected area. Ensure that you cover the paint completely.
Step 3: Let It Sit
Now that you've applied the paint remover, it's time to let it work its magic. Follow these guidelines:
- Allow the paint remover to sit on the paint for the recommended duration mentioned in the product instructions. This will give the remover enough time to loosen the paint.
- Do not rush this process; letting the remover sit for the appropriate time will ensure maximum effectiveness.
- Avoid stepping on the treated area to prevent accidental smearing of the paint remover.
Step 4: Scrub And Remove The Paint
After the paint remover has had enough time to break down the paint, it's time to scrub and remove the remaining residue:
- Using a soft-bristle brush or sponge, gently scrub the painted area in a circular motion. Apply moderate pressure to ensure thorough cleaning without damaging the flooring.
- Continue scrubbing until all the paint has been lifted from the LVP flooring. Depending on the amount and type of paint, this may take some time.
- If necessary, repeat this step with a fresh layer of paint remover until all the paint has been successfully removed.

Step 5: Clean And Rinse The Floor
Now that you've successfully removed the paint, it's essential to clean and rinse the LVP flooring to restore its original appearance:
- Using a damp cloth or mop, wipe down the entire floor to remove any remaining paint remover or residue.
- Rinse the floor thoroughly with clean water to remove any traces of the paint remover.
- Finally, dry the LVP flooring completely before walking or placing any objects back on it.
By following these steps, you can effectively and safely remove paint from your LVP flooring using a paint remover. Remember to always follow the manufacturer's instructions and take necessary precautions to protect yourself and your flooring throughout the process.
Method 2: Using Heat Gun
Method 2: Using a heat gun is an effective way to remove paint from Lvp flooring. Simply apply heat to the painted surface and carefully scrape the paint away, revealing clean and pristine flooring underneath.
Using a heat gun can be an effective method to remove paint from LVP (luxury vinyl plank) flooring. This technique utilizes heat to soften the paint, making it easier to scrape off. Follow these steps to safely and efficiently remove paint from your LVP flooring using a heat gun.
Step 1: Prepare The Area
Before you begin, it's essential to prepare the area to avoid any potential damage or accidents. Here's what you need to do:
1. Clear the room: Remove any furniture, rugs, or obstacles from the area to create a clear workspace.
2. Ventilate the room: Open windows or use fans to ensure proper ventilation throughout the process.
3. Wear protective gear: Put on safety goggles, gloves, and a mask to protect yourself from any fumes or debris.
Step 2: Heat The Paint
Once the area is prepared, it's time to heat the paint using a heat gun. Here's how to do it correctly:
1. Adjust the heat gun settings: Set the heat gun to a low or medium temperature. It's crucial not to use high heat as it can damage the LVP flooring.
2. Keep a safe distance: Hold the heat gun about 6 to 8 inches away from the painted surface. Maintain a steady motion to evenly distribute the heat.
3. Heat small sections at a time: Work in small sections, heating the paint for approximately 1-2 minutes. Avoid overheating the area to prevent any damage.
Step 3: Scrape Off The Paint
After heating the paint, it should be softened and easier to scrape off. Follow these steps to remove the paint effectively:
1. Use a plastic scraper: Carefully scrape off the softened paint with a plastic scraper. Avoid using metal scrapers as they can scratch the LVP flooring.
2. Work in a gentle motion: Apply light pressure and scrape in the direction of the LVP planks to prevent any damage.
3. Remove any residue: If there are any stubborn paint remnants, you can use a cloth or sponge dampened with warm water to wipe them away.
Step 4: Finish With A Cleaner
To complete the process and ensure any remaining paint is completely removed, finish with a cleaner. Here's what you need to do:
1. Select an appropriate cleaner: Choose a cleaner specifically designed for LVP flooring. Avoid using harsh chemicals that can damage or discolor the flooring.
2. Follow the manufacturer's instructions: Dilute the cleaner as instructed and apply it to the affected area. Use a sponge or cloth to gently scrub and remove any residue.
3. Rinse and dry the floor: Once the paint is completely removed, rinse the area with clean water to remove any cleaner residue. Dry the floor thoroughly to prevent slipping and to maintain its integrity.
By following these steps, you can effectively remove paint from your LVP flooring using a heat gun. Remember to always prioritize safety and take necessary precautions throughout the process.
https://www.youtube.com/watch?v=obCtLgxAkW8
Method 3: Using Vinegar And Baking Soda
Method 3: Using vinegar and baking soda is an effective way to remove paint from LVP flooring. By combining these two household ingredients, you can create a powerful solution that will break down the paint and make it easier to remove without damaging the flooring.
In this method, we will be using a mixture of vinegar and baking soda to tackle those stubborn paint stains on your LVP flooring. Vinegar and baking soda are both effective natural cleaners that can help break down the paint without causing any damage to your floors. Follow these simple steps to remove the paint using this method:
Step 1: Prepare The Mixture
Start by preparing the vinegar and baking soda mixture. In a small bowl or container, combine equal parts vinegar and baking soda. For example, you can use one cup of vinegar and one cup of baking soda. Mix them together until you get a paste-like consistency.
Step 2: Apply The Mixture
Using a clean cloth or sponge, apply the vinegar and baking soda mixture directly onto the paint stains on your LVP flooring. Make sure to cover the entire paint stain with the mixture. Let it sit for about 10-15 minutes. This will give the mixture enough time to penetrate the paint and loosen it from the floor.
Step 3: Scrub And Remove The Paint
Once the mixture has had enough time to work its magic, take a scrub brush or a soft-bristle brush and gently scrub the paint stain in a circular motion. Apply a bit of pressure to remove the paint, but be careful not to scrub too hard as it may damage the LVP flooring. Continue scrubbing until the paint starts to lift off the floor.
Step 4: Clean And Rinse The Floor
After successfully removing the paint, it's important to clean and rinse the floor to remove any residue. Use a damp cloth or mop to wipe away the leftover vinegar and baking soda mixture from the floor. Make sure to rinse the cloth or mop frequently to avoid spreading the paint residue. Finally, dry the floor thoroughly with a clean towel.

Frequently Asked Questions Of How To Remove Paint From Lvp Flooring
How Do You Remove Dried Paint From Lvp Flooring?
To remove dried paint from LVP flooring, gently scrape away the paint using a plastic scraper or credit card. Then, apply a mixture of warm water and mild soap to the area and scrub with a soft cloth or sponge.
Rinse thoroughly and dry with a soft towel.
Is Paint Thinner Safe On Lvp?
Paint thinner is not safe to use on Luxury Vinyl Plank (LVP) flooring. It can cause damage and discoloration to the surface. It is recommended to use mild soap and water for cleaning LVP floors instead.
Will Acetone Hurt Vinyl Plank Flooring?
No, acetone will not harm vinyl plank flooring.
How Do You Get Paint Off Vinyl Seats?
To remove paint from vinyl seats, gently scrape off the excess paint with a plastic scraper. Then, apply a small amount of rubbing alcohol or nail polish remover on a clean cloth and dab it onto the paint stain. Gently rub in a circular motion until the paint is gone.
Conclusion
To conclude, removing paint from LVP flooring may seem like a daunting task, but with the right tools and techniques, it can be achieved successfully. By following the step-by-step process outlined in this blog post, you can restore the beauty of your LVP flooring without causing any damage.
Remember to always test any cleaning solution on a small, inconspicuous area first, and proceed with caution. With a little patience and effort, your LVP flooring will look as good as new!
Read the full article
0 notes
Text
How to Achieve a Spotless Home: Mastering the Art of Floor Cleaning with Liquid Solutions
Keeping your home clean and spotless is not just about aesthetics; it's about creating a healthy and pleasant environment for you and your family. One of the crucial elements in maintaining a clean home is proper floor cleaning. And to master the art of floor cleaning, the choice of floor cleaner liquid is paramount. In this guide, we'll delve into the essential steps and tips to achieve a spotless home by utilizing the right liquid solutions for your floors.
Step 1: Assess Your Flooring Material
Different types of flooring materials require specific cleaning approaches. Whether you have hardwood, laminate, tile, vinyl, or carpeted floors, understanding the material is the first step in selecting the appropriate floor cleaner liquid. Using the wrong cleaner can damage the finish or color of your flooring.
Step 2: Choose the Right Floor Cleaner Liquid
Once you've identified your flooring material, research and choose a floor cleaner liquid designed for that specific type of flooring. For example:
Hardwood Floors: Look for pH-neutral, non-abrasive cleaners specifically made for hardwood.
Tile Floors: Choose a cleaner that can dissolve grime and dirt without harming the grout or tile surface.
Carpet Floors: Opt for carpet cleaners that are suitable for your carpet fiber type to effectively remove stains and odors.
Step 3: Read and Follow Instructions
Always read and follow the instructions provided on the floor cleaner liquid's packaging. Proper dilution ratios and usage guidelines are essential to ensure effective cleaning without causing any harm to your floors.
Step 4: Clear and Prepare the Area
Before applying the floor cleaner liquid, clear the area of any furniture or obstacles. This ensures that you can clean the entire surface thoroughly and evenly.
Step 5: Apply the Cleaner and Clean
Apply the floor cleaner liquid as instructed. Use a mop, microfiber cloth, or any recommended cleaning tool to clean the floor, ensuring even coverage. Work in sections, moving systematically across the room.
Step 6: Address Stubborn Stains
For stubborn stains, consider spot-cleaning with the floor cleaner liquid or using an appropriate stain remover. Make sure to follow the manufacturer's guidelines and test in an inconspicuous area first.
Step 7: Rinse and Dry
After cleaning, rinse the floor thoroughly with clean water to remove any residual cleaner. Allow the floor to dry completely before moving furniture back or walking on it.
Tips for Success:
Regular Maintenance: Establish a regular floor cleaning routine to maintain a consistently spotless home. The frequency of cleaning will vary based on foot traffic and lifestyle.
Preventive Measures: Use mats at entryways to reduce the amount of dirt and debris brought into your home. Encourage family members and guests to remove shoes before entering.
Professional Cleaning: Consider professional floor cleaning services, especially for deep cleans or challenging stains. Professionals have the expertise and equipment to provide a thorough clean.
Mastering the art of floor cleaning with the right liquid solutions can make a significant difference in the cleanliness and appearance of your home. By following these steps and tips, you'll achieve a spotless home that you can be proud of, all while maintaining a healthy living space for you and your loved ones.
0 notes
Text
Get the Durability and Style of Hybrid Flooring for Your Home
When choosing a flooring option for your home, you want to make sure you choose something durable and stylish. It can be hard to find options combining these features, but hybrid flooring can make an excellent choice for those looking for a combination of practicality and beauty. Hybrid flooring is the new trend in home design, and its popularity is growing fast.
Hybrid flooring is a type of flooring that combines the best features of laminate and vinyl. It comprises multiple layers, including a wear layer, an inner core, and a backing. The wear layer is typically made of aluminium oxide or urethane, which makes it resistant to scratches, stains, and fading. The inner core is usually high-density fibreboard, making it more stable than laminate. The backing is usually made of PVC or felt, which provides cushioning and sound absorption.
Benefits of Hybrid Flooring
· Hybrid flooring is extremely durable with a lot of wear and tear, making it ideal for high-traffic areas in your home. Hybrid flooring is resistant to water damage, making it a great option for bathrooms and kitchens.
· Hybrid flooring is easy to maintain unlike hardwood floors, which require regular polishing and refinishing, hybrid floors only need to be swept or mopped regularly. Hybrid floors are scratch-resistant, so you won't have to worry about them being damaged by pets or children.
· Hybrid flooring combines laminate and luxury vinyl, providing a durable and stylish flooring solution. It is also much warmer underfoot than other flooring, making it the perfect choice for bedrooms and living areas. It is also much quieter than other hard flooring options, which makes it ideal for apartments and other living spaces.
Durability and Style Options
Hybrid flooring is one of the market's most durable and stylish options. Hybrid flooring combines laminate and vinyl, making it extremely strong and resistant to wear and tear. Hybrid flooring is water-resistant, making it ideal for high-traffic areas or homes with pets. There are various styles with hybrid flooring to find the perfect look for your home. You can choose various colours and patterns, including wood grain, stone, or tile. Hybrid flooring is also available in various thicknesses so that you can choose the perfect level of durability for your needs.
Maintenance of Hybrid Flooring
· Sweep or vacuum regularly, at least once a week, to pick up dirt, dust and debris. If you have pets, you may need to do this more often.
Use a damp mop or cloth to clean up spills as soon as they happen. Don't let them sit and dry on your floor.
For tougher stains, you can use a mild detergent or cleaning solution. Just read the manufacturer's instructions first, so you don't damage your floors.
Avoid harsh chemicals, abrasive cleaners or anything that could scratch or damage the surface of your hybrid flooring.
Conclusion
Hybrid flooring is a great choice for anyone looking to achieve the appearance and style of hardwood with improved durability. It's perfect for areas that receive heavy foot traffic and can help protect your floors from wear, tear, and scratches. Hybrid flooring by Clever Choice is easy to install and maintain, so you don't have to worry about extra work on your hands after installation. Consider Clever Choice hybrid flooring in your home if you want the classic look of hardwood while also enjoying the added protection of this robust material.
0 notes
Text
The Importance of Good Quality Floor Mats in Your Vehicle
Basically, what we all are wanting our floor mats to do for us is to keep the muck that collects on the floor of our vehicles contained and away from our feet and clothes. Secondly, we want it to protect the stock floor of our ride so that it keeps looking new and improves our resale value, when the time comes.
Car mats or liners should ideally be high quality mats that can contain the water, sand, dirt, and whatever else we drag into the vehicle. They are available in various styles and materials: all-weather, carpeted, vinyl, and rubber. They also vary in quality of material, thickness, edging or trim, and design. Virtually all mats today are designed to custom fit your particular make and model vehicle - which is great news for you!
When you're out shopping through the lists of aftermarket auto accessories vendors out there, and custom fit car floor mats the various manufacturers, it's important to focus on a few important points:
Choose a liner made of high-quality or patented rubber or other durable materials that are guaranteed not to crack or break for the life of the product.
Make sure you pick a floor mat that is made to custom fit YOUR vehicle - to insure complete coverage, and to insure that your mats don't slide around and get caught up under your pedals.
Pick floor mats with solid edges or raised lips so that spills and muck stay contained within the mat or liner.
Find car liners that have a molded tread surface and deep grooves to keep all of the mud, water, sand, or snow that you drag in under control, and away from your shoes and pants.
If you're driving a pickup truck, van, SUV, Jeep, or other 4x4, it's equally important to pick a solid, heavy duty liner with grooves and tall side walls that will contain the mess and muck you drag in from the jobsite, the off-road, or the lake.
Insure that your floor mats or floor liners are easy to install, remove, and clean. You will want to have mats that you can get out easily and quickly to brush or hose off - and put back in just as easily.
Whether you're hauling kids, pets, lumber, plants, or sporting gear, good floor mats and liners will help keep all of them organized, dry, and clean. And if you're off-roading, 4-wheeling, fishing, hunting, camping, or boating, you are certain to get dirty and wet. With a quality set of floor mats, you can keep it all under control!
0 notes
Text
Material research:
Anti skid materials:
Choosing a non-slip bathroom floor makes sense. With the water and moisture present in the bathroom, falls here are common. When choosing a bathroom flooring material, safety should be one of several factors you consider. Safety is also an important consideration for other standing areas in the bathroom such as the shower base floor. Of course, safety isn’t the only issue – you’ll also want to consider your style preference and your budget.
The good news is, you have a number of options to consider for the floor in your bathroom. Let’s take a closer look at some of the best options in anti-slip floors for bathrooms.
Safe Flooring for Who?
It is essential to have the right type of floor for your situation. Some people should pay a bit more attention to the importance of slip resistance. For example, an elderly person is more likely to suffer significant injury if he or she slips on a wet floor. A person who is disabled also benefits from a non-slip floor. To minimize risks, simply focus on the options available.
But, others can benefit from this type of safe flooring as well. For example, families with children will see benefits. Children, who are less likely to dry off before running across the bathroom floor or who are more prone to creating a wet floor just by brushing their teeth, can benefit from this type of flooring. All family members do.
Ceramic/Porcelain Tile
One of the best overall options is the use of tile. Both ceramic and porcelain tile can be a good option. This type of flooring has limitations, though. Ceramic and porcelain tile create a very smooth and durable surface. You are unlikely to trip on it. But, it is also one of the more slippery options available.
If you want the look and feel of these types of tile, but you want to reduce the risk of falls, there is a solution. Several manufacturers offer a slip-resistant option. Some feature certification from the ADA for this specific purpose. If you want to choose this type of flooring and you want to increase the slip resistance of your bathroom floor, be sure the product you buy meets this standard.
Another option is to add a mat or a carpet to the flooring. Some will have enough of a backing on them to adhere very lightly to the tile. This can help to give you less risk of a fall on a wet surface. It may not be the perfect solution, but it is one that works for those who want to stick with porcelain or ceramic tile in the bathroom.
Glass Flooring
A trendy and upscale option for your home’s bathroom floors is the use of glass. Glass offers some nice benefits. It is durable and beautiful. You can create a variety of designs using it to really capture your tastes. And, there’s almost no limit to colors, patterns, and textures.
When it comes to slip resistance, glass is not the route to take. It tends to be one of the worst options for this when the floor gets wet. Additionally, water is not always necessary. A simple pair of cotton socks on a glass floor can create a dangerous situation for someone who is disabled or elderly. Some inferior products can also shatter, creating a risk of injury.
Like with tile, if you really want to have glass tile, consider adding a mat or carpet over the top of it. This gives you enough protection if it allows you to avoid walking on the glass or tripping on it.
Non-Slip Vinyl Flooring
Perhaps one of the best options for slip resistance is vinyl flooring. Some products are specifically designed to provide slip resistance. Vinyl flooring is also very easy to maintain. It does not stain and does not damage from water (if the product is designed to be waterproof.) It is also very durable, meaning you are unlikely to damage it using a wheelchair.
No floor is perfectly slip resistant. However, some vinyl flooring products are less likely to cause you to slip. But, if you do slide or fall, vinyl has built-in padding. This helps to minimize the amount of shock to your body if you take a tumble. When having it installed, be sure to pick a product with a bit more underlayment to offer this type of padding.
Vinyl offers other benefits, too. It is a more affordable option in bathroom flooring options. While it is not necessarily an eco-friendly choice, newer products are less damaging. And, it is also versatile. You can choose vinyl flooring that looks like wood, ceramic tile, or other types of floors. This will give you more options for matching the space and creating a trendy look in your bathroom.
Cork or Bamboo Flooring
A cork or bamboo flooring product can work well in some bathroom settings. Both products offer some nice features in terms of looks and trendy designs. They are a good option for those who want to minimize sound traveling through the space. And, they tend to be a warmer option than using any type of tile. When choosing bamboo or cork flooring, really learn about the product details. Manufacturer options range widely.
Cork and bamboo flooring can absorb moisture. This is both good and bad. First, it will reduce the risk of a slip or fall. The water is absorbed more into the material, leaving less water on the surface. Again, this varies by product. Some are designed to be more waterproof than others. However, the drawback here is they can build up mildew and even mold if the moisture cannot dry properly and quickly. In a humid area, especially during the hot summer, this can pose a risk.
If you invest in cork or bamboo because of the extra padding it offers, be sure there is proper ventilation in the space. You want to ensure it can dry out the space quickly to avoid this type of build up of moisture.
Carpet Flooring
Carpeting is an option for the bathroom. In the 1960s and 1970s, it was more common to find carpeting extending from the bedroom into the bathroom. Of course, it offers a few key benefits. You can choose from a wide range of colors, material types, and patterns. You also get to choose a product that offers the piling you enjoy. And, carpets absorb moisture. This creates one of the best barriers to falling. You are less likely to fall when carpet is present.
There are a few drawbacks to consider as well. Carpet flooring will absorb moisture. And, like bamboo or cork, needs to fully dry out in order to prevent the buildup of mold or mildew in the space. Carpet can also be a bit harder to clean for some. You will need to ensure it is properly cleaned to remove any type of debris, dust, or dander that builds in the piling.
Rubber Flooring
A less commonly thought of product is rubber flooring. It may not be the most ideal in terms of the way it looks or feels under your feet. However, it can be a good option for seniors and those who need slip resistance. When wet, this type of flooring does not become slick. You can count on it being a better option overall for this reason. If you do fall in the bathroom, rubber has a nice cushion to it. This can help to absorb some of the shock and protect your body from injury.
There are a few limitations, though. New products are becoming available today, but rubber tends to be a very expensive type of flooring investment. It is not one of the most common options for bathrooms. You’ll need to compare it carefully to other products with more design features and benefits.
Flooring Accessories for Additional Safety
Sometimes, the best option to minimize the slip risks of any of these surfaces is a few accessories. The best are designed to be slip resistant themselves. Anti-fatigue mats, which are typically used in a commercial setting, can create a non-slip area for you to stand in front of the mirror or next to the shower. You can also invest in anti-slip strips, which adhere to the surface and help to minimize slips and falls. Any anti-slip product is only as good as its construction, material, and installation, though.
If you are considering other types of flooring, such as concrete, hardwood, or natural stone, it becomes nearly essential to invest in some type of anti-slip floor accessory to improve safety. A simple mat or carpet addition can help to reduce at least some of the slipperiness of these floors.
Source: The Safest Non-Slip Bathroom Flooring Options - Legal Eagle Contractors
Chosen material:rubber flooring
PEBBLES:
Where to apply pebble
There are a wide variety of places where the pebble can be applied, both indoors and outdoors. But it’s important to pay attention to some details. See below.
Pinterest
Floor
River stones have been used for a short time as a flooring option, giving a rustic and elegant look to the environment.
However, the pebble is a smooth and slippery stone, so it should preferably be used in dry places. The pebble stone floor can also be a little uneven and uneven due to the natural shape of the stones. For this reason, it is recommended to use the pebble stones in small areas, just as a differential or highlight on the floor.
Coating
The pebble stones won the walls too! The screened pebble facilitated and popularized this type of coverage that can change the face of any room in the house.
The pebble flooring can be used in any space, but the tip is to bet on only one of the walls so as not to visually overload the environment.
Gardens and outdoor areas
The gardens and other areas outside the house, such as gourmet spaces and aedicules, for example, are the natural habitat of pebbles. It was in these environments that the stone became popular and remains firm to this day. The most common is to use pebbles to cover gardens to create paths and rest areas.
In barbecue areas, gourmet spaces, or aedicules, pebbles can be used as an option for covering the walls, including covering countertops, countertops, and islands.
Pools
The pools are also highlighted with pebble stones. In this space, the stones can be inserted around the pool or even in walls, making the environment even closer to nature.
Kitchen
Have you ever thought about using pebbles in the kitchen? Stone has proved to be a great differential in these environments and can be used as a wall covering or in-floor details. The kitchen counter is another space that can and deserves to have pebble stones.
Bathroom
Whoever loves a bathroom with a rustic and cozy look, then you can bet without fear on the pebble stone. The inner wall of the box is a good place to apply the pebble. Another highlight is the sink wall. You can still bet on the use of stone in decorative details on the floor and countertop, for example.
Other areas of the house
Bedrooms, living rooms, dining rooms, home offices, entrance halls, among other residential spaces also have much to gain from pebble stones. In these spaces, they look great adding to the walls, such as a headboard wall or a TV wall.
Cleaning and maintenance
Cleaning pebble stones is simple and does not require specific products. In general, all you need is water, mild detergent, and a soft sponge to clean. The use of aggressive chemical products, such as chlorine and soap, for example, can damage the stones and also remove the grout used to fix the plates.
Source:
Types Of Pebble And Where To Apply For Best Result (architectureartdesigns.com)
Decided materials:
Loose pebbles,anti skid pebble-crete flooring and rubber
0 notes
Text
# 3,532
It’s been five years since I put my Panasonic turntable to use, a 1972 RD-7033 given to me before the turn of the millennium by a former friend of mine who took the easy way out. The only issues it has is a belt that lags and an insignificantly chipped wood body. Other than that, it’s here to stay. It’s given me license to collect vinyl. Seventies jazz / fusion and soul, hardcore and punk 7” and 45’s, UK electronics, DHR, Italians Do It Better, AFX’ Analord series 1-11 (sans the binder...you can’t win them all), gifts from friends, curbside salvages, dollar records here, dollar records there. The library is as random and wide-reaching as I am. It has to be on my never-ending life’s quest to get my hands on everything. But the turntable is nothing without a receiver.
Our family had two 1968 Lafayette LR-1000T’s. Ma’ and gramma’ each had one. Lafayette had headquarters in Syosset with a warehouse in Hauppauge, contributing their prominence on the island before going national against Radio Shack and by1981 they were gone. Gramma’s was presumed missing when she passed, but we always had ma’s in the living room wired up to our living-room CD players and two huge wood-panel speakers. Those speakers were begging for mercy when my Nine Inch Nails’ Broken and Fixed discs were played at even half-volume. When my family split to South Carolina, I inherited the Lafayette for my final stay in Brentwood and even for the entire year in Lindenhurst. The right-channel and antenna components were no more and so went the Lafayette. So did the warm internal glow of the display, the tiny level gauges, the chunky black spring-loaded buttons, and how smooth that radio gauge flew when the dial did. Ultimately I abandoned the receiver when I left Lindenhurst for Ronkonkoma and never looked back.
I haven’t used the Panasonic since moving in and with all the vinyl I been buying up, it’s about time to replace it. There’s records I bought that haven’t been reviewed and Ω+ needs some new ideas. I didn’t have time to wait to find another Lafayette in the wild. By July, most of our record stores opened up again, save for High Fidelity who stuck it out and stayed open during the entire pandemic (and still going). Mr. Cheapo’s didn’t have ‘em. Record Stop or Looney Tunes didn’t have ‘em either. Of course, where you find things is the last place you look: High Fidelity’s the winner. Marc, a former co-worker’s son who owns the place, said he had plenty. There was nothing else to do on a hot blinding white-sky day. Why not make the trip to Amityville?
Two years ago he moved two blocks west on Rt. 27A. The original locale was an old, musty, cramped-to-the-gills store where I literally almost ruined my back leaning forward to reach the back of the bins.
The “original pressing” was the most disorganized thing where boxes upon boxes were stacked three high on the floor and record shelves were three-high to the ceiling. Well, he’s solved that problem: the new High Fidelity re-opened featurnig an entire downstairs of bins and bins of records. Crate-diggers went hysterical. I haven’t been there since my record-store victory tour, but when I visited High Fidelity (“re-mastered”), downstairs was closed off as storage. But the store was neater, cleaner, and just as deep in depth and inventory. Knowing me, it takes me three hours on average to remove me from a music store. Get the receiver and get the fuck out of there before I start spending.
The receivers were scattershot around the store, piled up in corners and on the floor. I finally found what I was looking for: a Yamaha A-1000 manufactured in 1983. It came equipped with the headphone jack, an essential component because I don’t have space for huge speakers just yet. This motherfucker weighed at least 20 pounds dry and it was a serious heave. Of course, before getting to Marc’s register, someone had to dash their way to the counter first, because not wanting to wait five minutes to have their stack of 100 records be rung out and have me stand there holding a hefty piece of metal? Oh, no. Too good for that!
Ten minutes (!) and $75.00 later, that Yamaha was all mine. Carried it out of the back entrance, placed it on the back seat, and I’m on my way home...not before seeing if either Flaming Grill or Supreme Grill were open. They were not. But it was a comfortable ride home with five years’ worth of personal summer playlists and d.i.y. / post-punk to simmer over inside an air-conditioned Chrysler riding east on Rt. 27A, up Brentwood Rd. and east on Suffolk Av. Home.
The Yamaha gets placed on my bamboo nightstand. The Panasonic’s components gets plugged in to the back of the Yamaha. Power on. Flip the switch on the record player. Put my Skullcandy headphones on (my dad’s Mura SP-206 headphones are destroyed beyond repair). Raise the arm and place Herb Alpert’s “Rise” on the platter. Needle goes down and BOOM. The disintegrating sound almost blasts my hearing alive and blows out my Skullcrusher. I overestimated the native volume of the Yamaha and found out that -25 dB is even more than a generous heap of loudness. But “Rise” is coming out loud and clear. Then Harold Faltermeyer’s “Axel F” 12”. Wow. I always have heard it on the radio flat and but what an amazing dynamic on vinyl. We have a winner.
The bad news is that the metal finish of the Yamaha mismatches the wood finish of the Panasonic, something the Lafayette complimented. But the Yamaha had some nice touches on its console. Two push-buttons control turnover frequency anywhere from 500Hz to 8kHz, and another two to adjust subsonic and high filters for 15Hz and 100kHz or none at all. There’s a ‘direct’ button to flatten all sounds out and a ‘high class A’ button that improves sound by limiting distortion at the expense of total output power. And there’s the adjustable bass switch on my Skullcrusher, which turned down should give my vinyl records a more pure, cleaner sound.
When I started vinyl playback and noticed that the outer edges were skipping, I was concerned. I thought it was missteps on the climate control in my room. Not the air conditioning during the summer which keeps things chill, but maybe the central heating during the winter that could’ve warped the vinyl in the slightest way. Thankfully, it was an old needle that had to be switched out and everything’s back to normal. Eric Gale’s Multiplication passes the test, and now any time I want to I can reach for a revisit to get back in touch with my Atari Brooklyn youth through any jazz / fusion means necessary.
#omega#music#Long Island#personal#reviews#playlists#equipment#vinyl#Skullcandy#Mura#Yamaha#Lafayette#Radio Shack#Panasonic#herb alpert#harold faltermeyer#Eric Gale
7 notes
·
View notes
Text
How To Choose Wall Cladding Installation Accessories Siding Installation

help you cover up flaws, and also serve as thermal insulation. Know the accessories you will side installation for its installation, which can be by means of strips or with adhesive depending on the type you have chosen. Click here to Know about sliding installation.
What accessories do you need to place wooden frieze, MDF?
Insulation, battens, and staples are the main materials you will need to install the frieze. Keep in mind that you will also need a hammer, a punch, and a jigsaw or miter saw to cut the wood.
It is advisable to apply a layer of insulation between the frieze made of wood or wood fibers (MDF) and the wall. The insulation, siding installation which reduces heat losses and offers energy savings of up to 20%, can be:
Wood fiber. Acoustic thermal insulation indicated only for MDF cladding. It is placed embedded between the battens.
Styrofoam plates. Indicated for all types of the frieze. In addition to providing thermal insulation, it prevents moisture from condensation and the appearance of mold. It is cut to size with a utility knife and glued directly to the wall, between batten and batten, with a specific adhesive for polystyrene.
Aluminum. Flexible and thin insulating sheet, only 3 mm thick, suitable for paneling on wood and MDF. It is stapled directly on the wall or on the battens.
Rails
All wood and MDF friezes are installed with a system of battens that allows ventilation of the wall. The battens are raw wood slats screwed to the wall siding installation perpendicular to the direction of the frieze.
To fix the battens it is necessary to drill the wall, place the plug and the screw; one screw every 50 cm approximately. Help yourself with a level for the installation of the slats.
The wood and MDF frieze is made up of tongue and groove slats. The staples are fitted into the groove of each piece and hammered onto the battens.
Prepare the surface
The wall on which you are going to place the frieze must be free of humidity and as level as possible.
Accessories for PVC frieze installation
PVC cladding is glued to a batten structure, or it is glued directly to the wall. Among the advantages of PVC with respect to wood and MDF cladding, it is worth highlighting that it is suitable for wet areas, such as the bathroom, as well as its insulating properties.
Rails
If you choose to glue the covering to a batten structure. Screw the slats to the wall -clean and dry- with a plug and screw perpendicular to the slats with the help of a level.
Gun and mounting adhesive are two essential elements for the installation of the PVC coating. Apply the adhesive every 20 cm. If you prefer, you can also use double-sided tape.
Cutter or drill with crown
Cut out the plugs or taps with a utility knife or drill and a hole saw.
Materials for installing vinyl siding
Vinyl planks and tiles are self-adhesive and stick directly to the surface. Simply remove the protective paper from the back and apply them to the floor or wall. However, we advise you to reinforce your grip with some glue points. Vinyl siding is insulating and moisture resistant.
You should use a spray gun and the adhesive the manufacturer recommends, usually one specifically for vinyl. Put adhesive in each of the holes that cover the back of the siding.
youtube
1 note
·
View note
Text
The Ultimate Floor Makeover: How This Floor Cleaner Liquid Will Revive Your Space
Have your floors lost their luster? Over time, dirt, grime, and everyday wear and tear can take a toll on the appearance of your floors, leaving them dull and lackluster. But fret not! The ultimate solution to revive your space is here: a powerful floor cleaner liquid. This remarkable cleaner is specifically designed to rejuvenate a variety of floor surfaces, bringing back their natural shine and transforming your space with an ultimate floor makeover. Get ready to witness the magic and experience the remarkable transformation of your floors.
The Power of a Floor Cleaner Liquid
A high-quality floor cleaner liquid is the secret weapon for reviving your floors. It combines powerful cleaning agents and advanced formulations to tackle stubborn dirt, grime, and stains effectively. This cleaner penetrates deep into the surface, lifting away dirt and restoring the natural beauty of your floors.
The specialized formulation of a floor cleaner liquid ensures that it is safe for various floor types, including hardwood, laminate, tile, vinyl, and more. It is carefully crafted to provide optimal cleaning performance without causing any damage or leaving behind residue. With its powerful cleaning action, this floor cleaner liquid will breathe new life into your floors.
The Ultimate Floor Makeover
Using a floor cleaner liquid will give your space the ultimate floor makeover. Here's how this transformative process unfolds:
1. Preparation: Begin by removing any loose dirt and debris from your floors. Sweep or vacuum the surface thoroughly to ensure a clean starting point.
2. Dilution: Follow the instructions provided by the manufacturer to determine the appropriate dilution ratio for the floor cleaner liquid. Dilute the cleaner accordingly, using warm water as recommended.
3. Application: Using a mop or microfiber cloth, apply the diluted floor cleaner liquid to the floor. Work in small sections, ensuring even coverage. Pay extra attention to high-traffic areas and any visible stains or marks.
4. Agitation: Gently scrub the floor with a mop or scrub brush to agitate the cleaner and loosen any embedded dirt or grime. This step helps to lift away stains and revive the appearance of your floors.
5. Dwell Time: Allow the floor cleaner liquid to dwell on the surface for a few minutes. This gives the cleaning agents time to break down dirt and stains, maximizing the effectiveness of the cleaner.
6. Rinse and Dry: Rinse the floor thoroughly with clean water to remove any residue or leftover cleaner. Use a mop or clean cloth to dry the floor, ensuring no excess moisture remains.
Transforming Your Space
The benefits of using a floor cleaner liquid extend far beyond a clean surface. Witness the transformation of your space as your floors regain their natural shine and vibrancy:
1. Restored Beauty: The floor cleaner liquid works wonders in bringing out the true beauty of your floors. It effectively removes dirt, grime, and stains, revealing the original colors and patterns of your flooring.
2. Enhanced Ambiance: Clean and vibrant floors have a significant impact on the overall ambiance of your space. Reviving your floors with a floor cleaner liquid can instantly uplift the mood and make your space feel brighter and more welcoming.
3. Prolonged Lifespan: Regularly cleaning and maintaining your floors with a floor cleaner liquid can help extend their lifespan. By removing dirt and preventing the buildup of residue, you can preserve the integrity of your floors and enjoy their beauty for years to come.
Embracing Sustainability
When choosing a floor cleaner liquid, consider eco-friendly options that prioritize sustainability. Look for cleaners that are biodegradable, use natural ingredients, and come in recyclable packaging. By opting for an eco-friendly floor cleaner liquid, you contribute to a greener and more sustainable future.
Conclusion
Experience the ultimate floor makeover with the power of a floor cleaner liquid. Witness the remarkable transformation of your floors as they regain their natural shine and beauty. Whether you have hardwood, tile, laminate, or vinyl floors, this powerful cleaner is your go-to solution for a floor revival.
Embrace the magic of a floor cleaner liquid and create a space that radiates cleanliness and beauty. Say goodbye to dull and lackluster floors, and welcome the ultimate floor makeover that will leave you with a space that feels fresh, vibrant, and rejuvenated.
0 notes
Text
The Benefits of Wooden Desk Chairs
Regardless of whether you are searching for an approach to tidy up your business furniture or basically hoping to cause your home office to show up increasingly exquisite, the expansion of wooden furniture consistently is by all accounts an extraordinary answer for both. Wood furniture has for some time been a staple of home stylistic theme for a huge number of years, going back to the start of mankind's history and all things considered. The present wood furniture can add class and refinement to any home or office. From desks to cupboards to shelves, wooden furniture can be discovered pretty much anyplace in a wide range of styles and wraps up. Wooden desk seats are among the incalculable decisions accessible that you can get as an office outfitting. Wooden desk seats have various advantages that settle on them a functional decision for any home or office condition including contemporary styling, customizability, solidness, low support, and their capacity to mix in.
youtube
Contemporary Styling
Ostensibly, what draws in individuals most to wooden seats is their rich and oversimplified structure. One of the most famous wooden seat styles accessible is the investors seat, which offers an exemplary ageless plan. Most come totally developed of wood, with a not many that offer a cushioned seat for included solace, and have a brace back plan with bended wooden armrests. Other well known renditions of wood seats come exclusively with a wood outline wrap up, the situate and back are completely upholstered in cowhide, vinyl, or texture while the arms and base arrive in a wood finish. Most wood seats arrive in an assortment of hues and completes the process of, enabling you to effectively coordinate your seat with your previous furniture.
Customizability
While an appealing plan is a looked for after element for any household item, usefulness is another key part too. Something can look extraordinary however on the off chance that it doesn't work appropriately, it is eventually a poor venture. Luckily, throughout the years the plan and movability of wooden seats has improved fundamentally. While wood seats once used to accompany seat stature change, numerous presently additionally accompany the capacity to diminish or build the strain expected to recline in the seat just as you would prefer. Alongside strain control, some different seats accompany an ergonomic knee tilt control which enables you to recline in the seat while keeping your feet immovably planted on the floor which thusly prompts less weight on the thighs. For an increasingly comfortable sitting experience, other wooden seats offer a froth cushioned seat which can be particularly gainful when sitting for different hours one after another.
Toughness
Another advantage wooden seats have is their toughness and capacity to keep going for quite a long time to accompany legitimate consideration and upkeep. Not at all like conventional office seats that come upholstered in texture or cowhide, wood isn't exposed to the standard mileage or cushioning pressure that is regularly experienced. It will keep its equivalent shape from the very first moment until the finish of its utilization.
Low Maintenance
Wood desk seats require little support and are a lot simpler to keep up than conventional office seats. While spills and stains will undoubtedly occur on manufactured seats, wooden seats can be effectively cleaned should a mishap happen. So as to guarantee a long lifetime for your wooden seat there are a couple of tips to remember. Make certain to abstain from setting your seat in places close to warm sources as it will dry out the wood and cause it to be weak. Additionally, don't leave your seat in direct daylight for a really long time or the sun will harm the wood's completion. To protect its completion, make certain to tidy your seat with a delicate fabric once in-for a moment. Once in a while, wax or clean your seat. Before doing this, be sure to know the kind of wood used to make your seat, since it isn't fitting to finish wood with a urethane finish.
Capacity to Blend In
Wood seats have the intrinsic capacity to mix in pleasantly with many home and business inside structures. The common shading shades of wooden seats can without much of a stretch mix in with different settings, for example, the family room, the kitchen, the office, or even rooms. They likewise mix very well with different household items, for example, wooden desks or wooden tables making them a decent extra piece. So as to have a totally bound together look in your home or office, make certain to initially figure out which room or setting you might want your wood seat to go in. When this has been chosen, the subsequent stage is to discover a seat that will coordinate your previous furniture. On the off chance that you presently have a desk with mahogany finish, make certain to search for a wooden seat that likewise has a mahogany finish or you may chance having a room that looks shabby and meretricious.
When you have established that you are keen on buying a wooden seat for your home or workplace, it is essential to do your examination and comprehend the advantages of owning one of these seats. Comprehend what to search for and what is going to glance best in your condition. A few inquiries to consider might be, to what extent will you spend sitting in this seat ordinary? What furniture will you have to coordinate this with? How adjustable would you like the seat to be? When you answer these inquiries you will be headed to finding the ideal wooden desk seat for your home or office.
1 note
·
View note
Text

Limes
Masterlist
( By sharksofwrath on Reddit)
When I was sixteen I had a summer job delivering groceries for the local Mom and Pop market. It was 1994, and the AC in my old mustard yellow station wagon was not keeping up with the blistering July heat. After my fifth delivery of the day, I sat in the break room of the store putting my hair up and laying some wet paper towels on my neck. As much I begged my manager not to, he insisted I wear the polyester brown pants and orange polo shirt that was the standard uniform. I tried to tell him that the inevitable pit stains I would suffer at the hands of my sauna of a car would be off-putting to customers, but he wouldn't hear it.
I was just starting to cool off when the boss man barreled in the swinging door.
"Hey Steph, we got another delivery for you," he waved a receipt in front of my face.
I groaned and put my head on the table.
"C'mon kiddo, you could be out chasing carts all day like Robbie. Plus, it's only one item, and it isn't too far."
"Too far" ended up being about 15 miles out of town. The drive only took about twenty minutes, but that's a road trip in small-town time. Sticky beads of sweat were running down both sides of my face, and my throat was burning from the smell of my engine protesting the heat.
I glared at the box of limes in my back seat through my rearview mirror. That was all the customer ordered. A single, goddamn, twenty-pound box of limes. What could possibly prompt someone to order an entire box of limes on the hottest day of the year? They weren't on sale, so that ruled out obsessive "couponers", those housewives who spent their lives trying to save a penny on a gallon of hand soap. And, considering we were a dry county, I doubted it was some sort of last-minute margarita emergency.
After passing mile after mile of cornfields and turnip patches, I turned my car onto a dirt road leading up to what looked like an old ranch that had been out of commission for a long time. It was lined with broken wooden fences, overgrown weeds baked by the sun, and bails of rusting chicken wire were scattered to either side. My car was creating a massive dust cloud, but through the haze, I made out a two-story farmhouse about a hundred yards away. That was when I realized it wasn't just dust I was trying to see through, steam and smoke billowed out of the hood. My engine had finally had it. I turned off my car, glaring at the house.
I hoped the owners could spare a cup of coolant when I got to the door, or at least their phone so I could call my dad. Peeling myself off the vinyl seats and into the dusty heat, I grabbed my citrusy cargo and headed off.
The distance hadn't seemed so bad when I was driving, but now it just looked further with every step. The box just kept getting heavier. The heat was bringing out the oil in the lime's skin, their perfume-like smell hit me in the face, stinging my eyes like they were mocking me. Doesn't everything feel so personal when you're a teenager?
When I finally got to the porch of the old house, sweat was running into my eyes, I dramatically dropped the box and banged on the screen door. A scraggly man, who looked to be in his late 20s opened the interior door. He stared at me with a confused look on his face.
"Y-you're not Robbie," he wrung his hands together.
"Um, no, I'm Stephanie. I brought your box of limes, and I was hoping I could--"
"I thought they would send Robbie," he was agitated.
"No, Robbie backed his car into Mrs. Adjimi's mailbox last week, so they took him off deliveries. Also, I was really wondering if I could use your phone."
"My what?" he looked at me wildly.
Looking back, it was definitely stupid to insist that the irate and unkempt man, who clearly did not want me to be there, let me inside his house.
"Your phone, it's just, my car died and I need to call my dad to pick me up," I pleaded.
"You see," he said through clenched teeth, "I ordered this heavy box thinking they would send him for sure. What are they thinking sending a girl out to the middle of nowhere with a twenty-pound box?" His eyes darted around the yard behind me.
"I mean, he gets off work at six, if you wanted to hang with him. Are you a friend his older brother or something?"
That seemed to make him chill out. He held the screen door open, "come on in, you can use the phone."
The house felt too still and unlived in. It was hotter inside than out, and it didn't have that "house" smell. You know, the smell of cooking and cleaning supplies or the general smell people leave when they occupy a space. It was just the dry smell of the dirt and dust that coated every surface in the house.
The man led me to the kitchen and gestured for me to sit at a table that was nestled between the counter and the back door. He picked up the lemon yellow phone off the base on the wall and listened, like he wasn't sure if it was going to have a dial tone or not, then handed the receiver to me.
"What's the number?" he turned his back, his finger poised to dial for me.
"Oh, I can just do it myself," I had known since kindergarten not to give my phone number to strangers.
He didn't move, just stood there, silent. After 30 seconds or so of this awkward standoff, I practically screamed out the number. I was so annoyed. My teenage brain was more embarrassed and irritated than scared. I was obviously bothering this guy. Plus, he was letting me call my dad. The killers on 20/20 never let their victims just call for help.
"I-it's ringing," I looked up and said sheepishly to him.
"Roberts' Manufacturing, this is Joyce, how may I help you," an overly cheerful voice answered.
"Mrs. Bergman, it's Steph, is my Dad there? It's really important," the man was now seating himself across the table from me, watching me.
"Oh sure, honey. Let me get him for you," her voice was muffled as she covered the receiver, "Trey, your daughter is on the phone, she says it's important."
I heard my dad's deep voice, though I couldn't make out what he was saying, just knowing he was there made me feel much better. I realized I was a lot more nervous than I thought I had been. "Hold on honeybunch, he's on a call, it'll be just a minute," Mrs. Bergman's chirpy tone annoyed me; and, before I could argue that my call was more important, she had put me on hold.
The man started to drum his fingers on the filthy table.
"I'm sorry, my dad is on a call, his secretary put me on hold," I tried to smile at him. He just stared at me with his pale blue eyes. They seemed to bore a hole in me. I felt like he was watching me make sure I didn't reveal something to my dad, what that was I didn't know. I couldn't help but feeling like I needed to lie though, I just didn't know what to lie about.
A minute turned to two, or at least it felt that way. I could tell the man felt the same way. He got up suddenly and began pacing the small kitchen. I focused my attention on the table in front of me. Just pick up, Dad, come on, please...
After five minutes had passed I knew my dad had forgotten that I had called, he was probably in the shop and didn't see the little red light blinking on the phone. Mrs. Bergman had to leave early every Thursday and had most likely taken off right after she put me on hold. I was frozen through, I couldn't bring myself to put the phone down. It was like I could see through that little red light blinking in my dad's office. I could see all that was safe. Did that mean that I wasn't safe?
Just as that thought crossed my mind I was suddenly ripped from my chair. The man's bony fingers dug into my arm. I yelled and tried to pull away, but his grasp was too strong. I tried desperately to grab onto anything in the kitchen. I finally turned my head and bit him on the hand as hard as I could. He let go and I fell to the floor. I crawled toward the back door, on the way I grabbed for the cord of the telephone. I maniacally started screaming for my dad, hoping to God that he would pick up and hear me. The man grabbed me by the ankle and pulled, I was on all fours so that caused me to come crashing straight down on my chin. He dragged me across the floor, I was dazed and couldn't even think to kick to free myself.
He stood me up and shoved me in a closet. My forehead banged hard into the coat rack, my ears rang and I slunk down to the ground as he slammed the door shut. I was in complete darkness. I heard the sound of heavy furniture being dragged across the floor, then being forced up against the door. I was trapped. After a few minutes, I heard a truck start up and drive away. I tried with all my might to make that door budge, I thrust my shoulder into the door as hard as I could, over and over again until I heard a loud pop followed by the worst pain I had ever felt. Despite the pain, somehow I fell asleep. I awoke to sirens and men's voices.
I screamed as loud as I could, which wasn't very. My throat was coated with dust, and I was incredibly dehydrated. Thankfully though, an officer heard me.
"Over here!" was followed by the furniture in front of the door being moved.
My parents were waiting outside by the ambulance. When they saw me, my mother broke down in tears and my father began yelling about finding whoever did this. After all, that time had passed, my face had turned into a horror show. I was bleeding from my chin and forehead, and everything was swollen and bruised.
I was laying in my hospital bed when Robbie's mom came rushing in. She had red hair like Robbie did. In my morphine haze, I could only make out every other thing she said to me. She grabbed my hand and begged me to tell her where Robbie was. He had disappeared without a trace. Well, both of us had. We were both off at six, neither of us had come home. When both our parents contacted the store, my manager told them I had gone out to the country to make a delivery. He suggested that Robbie must have met up with me and we were probably off "being teenagers" out on a ditch bank somewhere.
When they saw my car at the end of the dirt road, they thought they would find us both. When they saw no trace of either of us, they came back to town and called the police so they could search the house.
I told them everything I could about the man, about how he had asked about Robbie and was expecting him when I arrived. Everyone was confused. His parents had no idea who this man could be, or why he would have wanted Robbie.
I didn't know why the man hadn't killed me, or maybe he thought he had. Maybe he thought I would die out there, in that hot and dusty house, alone in the dark.
A week later I received my first lime. It was sitting on the front porch when I got home after a much needed day of watching bad movies and eating junk food at a friend's house. I tossed it into the yard, not thinking much of it.
The next one came only a few days after that. It was on the desk in my room. I ran downstairs and told my parents. They contacted the police. The police had already searched the old house, but they searched again. I told them that the man had to have gone back for the box. I knew there was no way he would have risked going into our one and only grocery store just to buy limes to mess with me.
They searched the house and again found nothing. Less than nothing, because I was right, the box of limes was gone.
For months after that, I was tormented. There never seemed to be any rhyme or reason for why he was doing this. I would find them on the hood of my car, in our mailbox, once in a coat pocket. They began showing up rotted and soft. I was able to smell them before I saw them, that overly sweet smell of decaying fruit. Every time I told my parents, they told the police, and nothing was found. Not even a shoe print outside my window.
I tried going to Robbie's parents, but my ramblings about finding fruit everywhere just upset his mother, and his father asked me to leave.
After senior year I attended college in Alaska. I wanted to get as far away as I possibly could from my stalker. One day, during my first Alaskan winter, I received a package from home. Well, from my home address anyway. It wasn't from home. It was from him. Inside, nestled in a bed of fake cotton snow was a black and shriveled lime.
Did you know that there are approximately one hundred limes in a twenty pound box? During the previous year and a half I had probably received about ninety-something. I finally understood his message.
I walked down the hallway of my dorm to the shared phone. My stomach turned sour and I felt bile burn the back of my throat. Luckily, it was late on a Friday and most of my floor was out partying, so I didn't have to wait my turn. I dialed my parent's number.
"Hello," my mother answered, nothing in her voice indicated anything was amiss, but she has a great phone voice.
"Mom, did they find Robbie," my voice was shaky. I knew the answer.
"Oh--oh God, Stephanie, how did you hear about that so fast? Your father just got off the phone with one of his friends down at the precinct. They thought we should know. You're so far away though, honey, you have nothing to--" "It was the limes, Mom. They were counting down. He was letting me know that Robbie was still alive. I could have done something, I could have helped him somehow!"
"No, honey, this is in no way your fault," her soothing voice was just too far away to work.
"I told him when Robbie was off work. I made him let me inside. I could have just left, I could have hitchhiked back to the store and told him some creep was asking about him. I should have called the police instead of Dad--" I was hyperventilating. All I wanted was my mom to hold me, but I had selfishly run away. I ran away instead of trying to find him.
I hung up the phone and ran down the hallway to my room. I curled up in bed and stayed there for days.
It took me twenty-three years to look up what had happened to Robbie. I couldn't bring myself to know what sort of state his body had been found in. What the man had done to him.
Robbie Jensen was found propped up against the door of the grocery store we had worked at. He was wrapped in plastic sheeting. Our old manager found him around 4am when he arrived to work the opening shift. He was missing several teeth. Some had been removed, some were broken. The tips of both his index fingers were gone, one of them was almost healed, the other was fresh. He had been sexually assaulted with foreign objects, likely one of them was a broken bottle. Robbie had also been castrated postmortem. He died from a gunshot to the head.
I never wanted to know all that. Even without all that knowledge rattling around in my brain, I've had to attend years of therapy. They say I have an extreme case of survivor's guilt, as well as the paranoia the stalking left behind.
I never wanted to know. I have to know. Today, my son came home from school and handed me a letter. He said it was in his locker, but it had been addressed to me; probably something from his counselor about his English grade.
Before it reached my hand, I could smell it, that citrusy perfume. The envelope was doused in it. Inside was a receipt for a twenty-pound box of limes. At the top in slanted handwriting was my son's name.
2 notes
·
View notes
Text
Installing Tile for Shower Surround
For setting wall tile in a shower, you will certainly require a quick set mortar. The advantage of quick set mortar is the ceramic tile will certainly stick to the wall much better as well as not droop. Use sanded mortar thin set when putting on seal. Use a latex-modified mortar slim collection if you're applying to vinyl or wood substrates. Do not utilize mastic for setting shower the shower! Mastic will certainly weaken with time from the wetness of the shower.
To blend the mud base, you will certainly require a 5-gallon pail and a water system in addition to your drill as well as mixing little bit. Mix the mortar according to the manufacturer's referral and mix in small batches, as it will certainly dry quickly. When blending the mortar in small sets, plan on mixing a number of sets of mortar to make it through setting the shower tile. With fast set mortar, you do not need to establish a row of ceramic tile, wait 1 day for the mortar to heal, set another row of tile, wait another 1 day, and more as you would certainly with regular thin collection mortar. Hope Wichita Empire Flooring can help for installing tile in your house.
I motivate you to open up various boxes of the ceramic tile you are using for the shower. As you are establishing the tile, usage floor tile from a selection of boxes to aid eliminate any shade variations in the tile from box to box.
Intent on making cuts when setting floor tile. You can lease a ceramic tile attended help with these cuts. If you are setting the tile on your own, I recommend installing the complete items of ceramic tile initially. When you need to mix extra mortar is a good time to gauge as well as reduce the needed items of ceramic tile. In this manner you do not have to fret about the thin set drying as you are measuring as well as cutting floor tile one at a time.

To begin establishing the floor tile, spread the combined mortar on the tile. Utilize a square scratched trowel 1/4 of an inch to 3/8 of an inch to spread the mortar on the tile. Refer to the supplier's instructions for the mortar and also utilize an appropriately sized trowel based on their requirements.
Press the tile onto the wall. Firmly press each ceramic tile in place as well as offer it a minor twisting activity to make sure it makes great contact with the adhesive. As you function your way along the shower wall surface, area ceramic tile spacers on all four sides of each ceramic tile to aid maintain your grout lines regular with the other floor tiles that are established. Do not slide the tile more than a 1/2 of an inch to set in place. Remove your initial pair pieces of ceramic tile to check and also make sure the thin collection is evenly applied over the tile.
When spreading out the thin collection, maintain the thin collection away from the side of the ceramic tile. Wipe away any thin set that presses onto the surface of the tile. Ensure your very first item of tile is established square to your markings. If the very first tile is off the remainder of the floor tile will certainly be off. You might require to tap on the tile with a rubber mallet to make the floor tile flush with the various other floor tiles. Make sure to check on the ceramic tile regularly to make certain the tile has actually not shifted. Stand back from the shower surround as well as take a look at the floor tile from a range for any type of imperfections.
Repeat this procedure working your way down and up the wall up until the entire area ceramic tile is set. Make certain to double check the floor tile as you move along the wall to be specific that the ceramic tile you set does not shift as well as to make sure your cement lines are consistent. Allow the tile completely dry for 24 hours. Then, eliminate the journal board as well as install the remaining area tile. You likewise set up the trim tile at this point.
After the floor tile is set and you permitted it time to dry, it is time to grout the installed tile. If you are additionally setting up ceramic tile on the bathroom floor, it is a good concept to set up the floor tile for the entire bathroom and afterwards grout the entire shower room at the same time.
In the next post we will talk about establishing floor tile. After the flooring ceramic tile collection, we will certainly discuss grouting the mounted tile.
Excel Builders concentrates their service on customized remodels; restrooms, cooking areas, residence additions, and also residence remodeling’s to name a few.
The success of Excel Builders is based upon extraordinary customer support! The majority of professionals are able to complete makeover and also structure jobs to abide by building codes. Nevertheless, couple of contractors have the ability to complete renovation and also building projects and also give the interest to information as well as exceptional client service needed to ensure a successful renovation task.
We look after our consumers' remodeling jobs as if they are our own personal remodeling tasks. We pay attention to your needs and wants for your makeover task and with each other, we make the remodel that functions finest for you as well as meets your requirements. We are all part of a group to make your remodel job a success!
1 note
·
View note
Text
Luxury Vinyl Tile (LVT), Versus Laminate Flooring
It is no easy task to install flooring in a new home or renovation. Although carpet can be replaced every few decades, wood, tile and laminate flooring are likely to last for at least ten years.
Although engineered wood flooring, hardwood flooring, and tiles are all available, they can be costly and have challenges in terms of durability, cost, heat, as well as safety, so it is not recommended for every family.
Laminate has been a popular choice for flooring over the past few decades. It's durable, looks great, and can be fitted by DIY-savvy individuals.
Luxury Vinyl Tile (LVT) is a different type of flooring, which many people are familiar with thanks to Karndean and Amtico. Luxury Vinyl Tile (LVT) was a dry-back product that was adhered with adhesive to top-quality plywood or smooth concrete sub-floors. LVT can now be clicked by using a set-up such as most laminates. This makes it easier to match. The glue lower product is still recommended by most flooring experts, as it is more durable and in many cases costs less than the click version.
Luxury Vinyl Tile is more expensive than herringbone laminating, but this is a guide. There are many other brands and manufacturers that offer a range of finishes.
Laminate flooring may be cold below ft. Luxury Vinyl Tile, however, is warmer and can provide excellent texture. It is not limited by wood planks, but also provides durable and more practical stone, marble, and tile effects. LVT flooring is known for its waterproof properties. Laminate is made up of layers of wood or particle board. LVT has layers of PVC, giving it a high-definition print. It is structurally stronger and will not swell or warp from water ingress. This makes LVT ideal for spills and can be used in bathrooms and kitchens. The technology behind Luxury Vinyl Tiles is available to emboss and texture luxury vinyl tiles to reveal natural grooves, waves, and knots which could be found in tile, stone, or hardwood. While laminate boards are thicker, they have thinner layers. LVT boards and tiles can have domestic and commercial guarantees for five to twenty years.
Laminate and LVT can be fitted by a competent DIYer, but laminate is more flexible. Luxury Vinyl requires a subfloor that is flat and smooth. If there are any imperfections or bumps around the Luxury Vinyl flooring, subfloor preparation can be more costly.
Laminate and LVT both have advantages over tile, stone, and wood flooring.
Laminate is:
Flooring that is generally cheaper
It's easy and inexpensive to set up
Resistant to stain
It is relatively difficult to wear
It is easy to clean (although you must take care not to get it too wet).
But there are some drawbacks.
It might be cold below ft
It is not able to handle moisture or water well
It is fixed to wood effect
Layers with a lower placement
Luxury Vinyl Tiles are:
Warm under ft
Excellent texture, very realistic
Stone, tile and wood effects available
You can modify the borders and fashoins to make chevrons, basket weaves, herringbone, and more
Layers that are thicker make them more powerful
It is easy to clean
Waterproof
However, there are some drawbacks:
Fitting costs can be more involved and expensive
Laminate is generally more expensive than laminate, although there are cheaper options.
It does not address the connection to flame.
0 notes
Last Seen Blogs

samwalker-cvg-finalyear
Final Year Project

redasslover
Untitled

sowhatifiliveinfukuoka
Untitled

misterfrench79
The Life Erotic

toryengland
Artist Portfolio: Tory England