#Tokina 12-24mm f/4
Explore tagged Tumblr posts
Photo
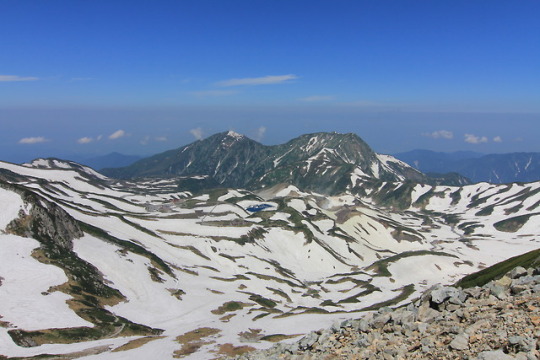
立山散策
立山雄山登山中の一コマです。
2017.07.14
3 notes
·
View notes
Video
© 2007 Érico Salutti por Érico Salutti Via Flickr: Radio City Music Hall, New York City, NY, USA. Fujifilm Fujichrome Sensia 100
#Development H&K Foto#File 6#Fujifilm Fujichrome Sensia 100#Madison Square Garden#Manhattan#New York City#Novembro 2007#Sigma 70-200mm f/2.8#Tokina AT-X 12-24mm f/4#Van Halen#XPro#elan 7e
4 notes
·
View notes
Text
Hướng dẫn chụp ảnh phong cảnh cơ bản
1. Thân máy
Độ phân giải cao đặc biệt hữu ích trong ảnh chụp phong cảnh. Bởi chúng giúp ta dễ dàng thực hiện 2 việc sau đây:
– In ảnh với kích thước lớn: Rất nhiều người chụp ảnh phong cảnh có nhu cầu in chúng với kích thước lớn để trưng bày. Đặc điểm của ảnh chụp phong cảnh nói chung là “rõ nét đến từng chi tiết”, bởi vậy một thân máy với độ phân giải cao – kết hợp cùng kỹ năng lấy nét chính xác – khi in ảnh ở kích thước lớn sẽ cho ra kết quả vô cùng mãn nhãn.
– Cắt (cúp / crop) ảnh: Vì nhiều lý do, trong đó có sự hạn chế của trang thiết bị, mà đôi khi ảnh chụp cần phải được crop lại để loại bỏ những chi tiết thừa thãi, tạo cái nhìn tập trung vào chủ thể hoặc điểm nhấn mong muốn. Lúc này, độ phân giải cao sẽ giúp ta vẫn giữ được chất lượng ảnh đủ tốt để in ấn hoặc chia sẻ với kích thước lớn.
Người ta vẫn thường cho rằng thân máy fullframe chụp ảnh phong cảnh (và nói chung là với mọi thể loại ảnh) tốt hơn thân máy crop. Xét về mặt lý thuyết, điều này là đúng vì cảm biến trên thân máy fullframe cho độ chi tiết hình ảnh, độ bão hòa màu và dải tương phản động (dynamic range) rộng hơn so với thân máy crop. Có điều, khoảng cách này đang ngày được các hãng máy ảnh gắng sức thu hẹp. Và thực tế thì thân máy crop có giá thành rẻ hơn rất nhiều so với thân máy fullframe. Chưa kể sự lựa chọn về ống kính dành cho thân máy crop cũng đa dạng và có chi phí thấp hơn khá nhiều so với số lượng ống kính sử dụng được trên thân máy fullframe.
Với ảnh chụp phong cảnh thì những tiêu chí như tốc độ lấy nét nhanh, tốc độ chụp liên tiếp nhanh, v…v.. đã không còn quan trọng nữa. Ngay cả những tính năng được các hãng sản xuất đưa vào trong nhiều thân máy tối tân hiện nay như tích hợp khả năng chụp HDR, khả năng chụp panorama, giả lập hiệu ứng màu, v..v.. cũng chỉ nhằm lôi kéo những đối tượng khách hàng muốn “nghịch ngợm” với ảnh chụp nhưng thiếu kiên nhẫn, thích “ăn sẵn”. Tới đây, xin bật mí luôn với bạn đọc rằng trong phần cuối của loạt bài Hướng dẫn chụp ảnh phong cảnh này, tác giả sẽ hướng dẫn các bạn thật chi tiết cách chụp ảnh panorama và HDR mà không sử dụng tính năng “mỳ ăn liền” trong máy!
Một tính năng khác thường được người sử dụng quan tâm là khả năng khử nhiễu (noise) của máy ảnh. Điều này cũng không thật sự quan trọng trong ảnh chụp phong cảnh. Bởi vì đã là ảnh chụp phong cảnh nghĩa là chụp ngoài trời, như vậy trong điều kiện ánh sáng ban ngày, ta chỉ cần tối đa đến ISO 800 là đủ. Với ảnh chụp ban đêm, ta chuyển về chụp phơi sáng hoặc tốc độ chậm (khoảng 1/4s hoặc trên 1s). Khi đó, khả năng khử noise sẽ không còn quan trọng nữa. Một lý do khác là thuật toán khử noise trong đại đa số máy ảnh hiện nay đều để lại hậu quả là đánh mất chi tiết của hình chụp, và thật sự đó là thảm họa đối với ảnh phong cảnh, khi yếu tốt “nét căng đến từng milimet” thường được đặt lên hàng đầu.
Như vậy, có thể thấy rằng thân máy sử dụng trong ảnh chụp phong cảnh không yêu cầu những tính năng quá cao cấp (mà lại thừa thãi). Một thân máy đời cũ như Canon 30D hay Nikon D70s cũng đã dư sức cho ra những tấm hình phong cảnh “coi được”. Phần ngân quỹ còn lại, bạn hãy đầu tư vào ống kính. Bởi đó mới chính là yếu tố (ngoại trừ con người) làm nâng cao chất lượng hình chụp một cách rõ rệt.
2. Ống kính
Ống kính góc rộng là thứ không thể thiếu đối với ảnh chụp phong cảnh. Ống kính góc rộng cho một cái nhìn bao quát hơn, giúp thu lại được nhiều hơn chi tiết vào trong khuôn hình, và cũng dễ dàng để crop hình hơn sau khi chụp.
Một ống kính được coi là góc rộng trong ảnh chụp phong cảnh nên có tiêu cự (quy đổi trên cảm biến fullframe) từ 28mm trở xuống. Như thế có thể thấy, ống kính kit 18-55mm thường được bán kèm với các thân máy đời thấp, với tiêu cự quy đổi từ 27mm (18mm x 1.6 hoặc 18mm x 1.5) đã phần nào đáp ứng được điều này.
Với tiêu cự nhỏ hơn, có thể kể đến các ống kính 17-40mm, 16-35mm, 10-22mm, 16-50mm, v..v.. của các hãng Canon, Nikon và Sony. Ngoài ra, các hãng thứ ba chuyên sản xuất ống kính cũng có những sản phẩm được rất nhiều người ưa chuộng như Tamron 17-50mm, Sigma 17-70mm, Tokina 12-24mm, Tokia 11-16mm, v..v..
Ngoài ra, đóng góp không nhỏ vào thể loại ảnh chụp phong cảnh còn có các loại ống kính tạo hiệu ứng mắt cá như Nikon Fisheyes 10mm, hay ống kính chuyên chụp kiến trúc như Canon Tilt-shift 24mm.
Ống kính tiêu cự tele thậm chí cũng có thể sử dụng trong ảnh phong cảnh. Đó là khi bạn muốn cô lập một chủ thể ở rất xa trong một không gian rất rộng như tấm hình dưới đây:
3. Kính lọc
Kính lọc (filter) là một hoặc nhiều thấu kính, thường được lắp đặt phía trước ống kính nhằm bảo vệ ống kính hoặc tăng chất lượng ảnh. Một số lớp tráng (coating) sẽ được thêm vào bên trên các tấm kính đó tùy theo loại kính lọc và mục đích sử dụng của nó. Các lớp tráng này còn có công dụng chống trầy cho kính lọc.. Các loại kính lọc thường dùng bao gồm:
Trong đó với ảnh chụp phong cảnh, 2 loại kính lọc quan trọng nhất là:
Kính phân cực:
Kính lọc phân cực có tác dụng làm giảm cường độ ánh sáng chiếu vào cảm biến. Với k��nh lọc phân cực, trời sẽ trở nên xanh đậm hơn, độ tương phản giữa trời và mặt đất sẽ giảm đi, đồng thời loại bỏ hiện tượng loá và ảnh phản chiếu dưới nước, trong các tấm kính. Hiệu ứng do kính lọc mang lại có thể thay đổi khác nhau nếu bạn xoay nhẹ kính lọc ở các góc khác nhau. Bạn có thể nhìn trực tiếp vào ống ngắm hay màn hình LCD đã nhận thấy sự thay đổi đó. Ngoài ra, hiệu ứng còn tăng hay giảm phụ thuộc vào vị trí của máy ảnh và vị trí của mặt trời. Hiệu ứng mạnh mẽ nhất khi máy ảnh được được đặt vuông góc với hướng ánh sáng tới của mặt trời. Điều này có nghĩa là nếu mặt trời ở đỉnh đầu của chúng ta thì hiệu ứng sẽ đạt cực đại nếu ta chụp một đối tượng nào đó theo phương ngang.
Có hai loại kính lọc phân cực là loại tuyến tính (Linear) và loại vòng (Circular – CPL). Loại kính lọc phân cực vòng được thiết kế để hệ thống tự động lấy nét của máy ảnh vẫn có thể hoạt động được. Loại tuyến tính có giá thành rẻ hơn nhiều, tuy nhiên máy ảnh có hệ thống đo sáng TTL (Through-The-Lens) và lấy nét tự động sẽ không hoạt động được, đồng nghĩa với hầu hết máy DSLR hiện nay sẽ trở nên vô dụng. Khi đó, người dùng buộc phải tự lấy nét và đo sáng bằng tay.
Kính ND (Neutral Density):
Kính lọc ND có tác dụng giống như kính mát, làm giảm cường độ sáng đến cảm biến của máy ảnh, thông qua đó ta có thể kéo dài thời gian phơi sáng ngay cả trong môi trường chụp nhiều ánh sáng. Kính lọc ND được sử dụng khi ta cần:
– Chụp chuyển động mượt mà của thác nước, dòng sông, biển, v..v..
– Tạo trường lấy nét sâu hơn dưới cường độ sáng rất mạnh.
– Giảm việc mờ ảnh do ta có thể sử dụng khẩu độ nhỏ hơn nhiều.
4. Chân máy (tripod)
Ảnh chụp phong cảnh không thể thiếu chân máy. Nó giúp ta dễ dàng thực hiện những tấm hình HDR hay phơi sáng. Nhà sản xuất luôn đưa ra con số về tải trọng tối đa với mỗi sản phẩm của họ. Bởi vậy bạn nên lựa chọn một chiếc chân máy đủ dùng với số cân nặng từ thân máy và ống kính mà bạn thường sử dụng.
5. Thiết lập máy trước khi chụp
Độ phân giải, định dạng và chất lượng ảnh
Với ảnh phong cảnh, bạn đừng ngại ngần thiết lập ảnh ở độ phân giải cao nhất và chất lượng ảnh tối ưu. Nếu có một thẻ nhớ với dung lượng đủ lớn và những tấm hình sắp sửa chụp là rất quan trọng (ví dụ bạn làm cho một công ty du lịch và được giao nhiệm vụ chụp hình minh hoạ để làm quảng cáo tour trên website chẳng hạn), hãy chọn chế độ lưu ảnh ở cả 2 định dạng JPEG và RAW. Thông thường với người chụp ảnh không chuyên, ảnh JPEG nhìn sẽ nịnh mắt hơn do nó đã qua một lần xử lý ngay trong quá trình chụp. Trong khi đó ảnh RAW nhìn có vẻ xấu hơn, nhưng sẽ dễ dàng hơn cho bạn trong việc chỉnh sửa hậu kỳ.
Picture Style
Picture Style sẽ thiết lập độ tương phản, độ bão hoà màu và độ sắc nét của hình chụp phù hợp với từng thể loại ảnh chụp. Ví dụ với ảnh chân dung, độ sắc nét có thể nhẹ hơn ảnh phong cảnh, hoặc độ bão hoà màu của ảnh phong cảnh có thể cao hơn (ảnh rực rỡ và có tone nóng hơn) so với ảnh chân dung. Để thiết lập Picture Style, thông thường bạn sẽ tìm thấy nó trong Menu / Camera Settings / Picture Styles / một loạt tuỳ chọn bao gồm Standard (tiêu chuẩn, sử dụng chung chung trong mọi trường hợp), Portrait (chân dung), Landscape (phong cảnh), Neutral (trung tính), v..v.. Chọn Landscape.
Chế độ chụp
Với người chụp ảnh chuyên nghiệp, có thể sử dụng chế độ chỉnh tay hoàn toàn (Manual). Tuy nhiên cá nhân người viết khuyên các bạn nên lựa chọn linh hoạt giữa hai chế độ chụp Ưu tiên độ mở ống kính (Av) và Ưu tiên tốc độ chụp (Tv). Nguyên nhân là vì:
– Chế độ chụp Av cho phép bạn kiểm soát hoàn toàn độ mở ống kính, qua đó kiểm soát độ sâu trường ảnh (DOF), giúp bạn chụp được những tấm hình sắc nét tại mọi điểm, điều mà nhiếp ảnh phong cảnh thường rất quan tâm. Khi sử dụng chế độ này, độ mở ống kính nên thiết lập ở mức từ f/5.6 – f/11. Cá biệt với ảnh chụp phơi sáng, có thể khép khẩu ở mức tối đa như f/22 – f/32.
– Chế độ chụp Tv ít sử dụng hơn trong ảnh phong cảnh, nhưng sẽ hữu ích khi bạn muốn miêu tả một chuyển động nào đó, ví dụ như thác nước đang chảy, hoặc sự di chuyển không ngừng của dòng người trên phố. Khi lựa chọn chế độ chụp Tv, cần lưu ý tới khả năng giữ máy của bạn, vì nếu sử dụng tốc độ chụp chậm quá thì ảnh sẽ bị rung nhoè. Trên lý thuyết, tốc độ chụp “an toàn” phải tối thiểu bằng với 1/(giá trị tiêu cự ống kính). Ví dụ bạn sử dụng ống kính 24mm để chụp thì tốc độ chụp tối thiểu phải là 1/24s. Với ống 85mm, tốc độ chụp tối thiểu là 1/85s, v..v.. Trên thực tế, tốc độ chụp “an toàn” phụ thuộc vào số lần bạn hít đất mỗi ngày (just kidding).
6. Những điều cần lưu ý khi chụp ảnh phong cảnh
Ánh sáng
Rất khó để có thể nói chính xác được đâu là điểm quan trọng nhất trong ảnh chụp phong cảnh, bởi vì bản thân thể loại này đã bao gồm rất nhiều những “tập con” khác. Ảnh phong cảnh nhân tạo, ảnh phong cảnh thiên nhiên,… sẽ có những tính chất khác nhau và do đó cách diễn tả cũng sẽ khác nhau. Tuy nhiên, có một yếu tố luôn tồn tại trong ảnh chụp phong cảnh, đó là ánh sáng. Sử dụng ánh sáng đúng cách, bạn sẽ có được những tấm hình phong cảnh đẹp.
Phương hướng của ánh sáng có thể chia làm ba loại: từ sau lưng người chụp hướng về chủ thể (ánh sáng xuôi chiều), từ phía sau chủ thể hướng về máy ảnh (ngược chiều), và ánh sáng xiên. Chúng ta chụp ảnh dễ nhất với ánh sáng xuôi chiều, tuy nhiên về mặt hình khối, loại ảnh sáng này lại thường triệt tiêu mất tính chất 3D, không thể hiện được độ sâu hay “thứ tự lớp lang” của các chủ thể trong ảnh.
Với ánh sáng ngược chiều, việc nhấn mạnh vào hình khối thay vì chi tiết của chủ thể sẽ tạo ấn tượng mạnh cho người xem. Tuy nhiên đây là một thể loại ảnh khó (được đặt tên silhoutte) và cần nhiều kinh nghiệm cũng như con mắt tinh tế khi sắp đặt góc chụp, vị trí chủ thể để đạt được một tấm hình đẹp.
"QC" Dịch vụ quay video chuyên nghiệp, quay phim sự kiện, quay video clip, quay phim HD, tất cả các dịch vụ về quay phim…
Hotline + Viber + Zalo: 0972.123.018 (Cameraman)
Mẫu tham khảo : www.heytv.vn
Facebook : https://vi-vn.facebook.com/rophistudio/
Trang Chủ : https://seotukhoa.com.vn/
Là đơn vị cung cấp các dịch vụ quay phim tự giới thiệu doanh nghiệp, Quay video clip viral, Quay video quảng cáo – TVC, quay phóng sự… Chuyên Quay Phim Chụp Hình Full HD – Giá Cạnh Tranh – Uy Tín, Chất Lượng Cao. Cam Kết Chất Lượng Cao – Tư Vấn Hỗ Trợ 24/7. Dịch Vụ Hoàn Hảo. Đội Ngũ Kinh Nghiệm Cao. Thiết Bị Hiện Đại. Giàu Kinh Nghiệm. Ưu Đãi Tốt Về Giá.
Rô Phi Studio
“RÔ PHI STUDIO – Nhận làm clip, quay clip, Slideshow ảnh, Chụp ngoại cảnh, Quay ngoại cảnh, làm theo yêu cầu Tp.HCM. Dịch vụ làm clip sinh nhật, Clip tặng người yêu, Quay video cưới hỏi, liên hoan, hội nghị…
Dịch vụ làm video, nhận làm video quảng cáo doanh nghiệp, chụp ảnh sản phẩm, chụp anh xoay 360, dịch vụ video Tp.HCM, ảnh quảng cáo …”
Hotline ☎️: 0972.123.018 – 0931.436.637
Dịch Vụ Sản Xuất, Quay Video, Phim & Hội Nghị, Chụp Ảnh HD
Dịch vụ quay phim quảng cáo spa, tmv, giới thiệu công ty, phóng sự… 0972 123 018 Dịch Vụ Quay Phim, Quay Video Clip, MV, Làm Viral Cho Nhãn Hàng Độc Đáo Sáng Tạo. Đảm Bảo Uy Tín Chất Lượng. Đội Ngũ Chuyên Nghiệp. Thiết Bị Quay Hiện Đại. Cam Kết Giá Trị Cho KH./…
– DỊCH VỤ QUAY PHIM CHUYÊN NGHIỆP TẠI TP.HCM
– DỊCH VỤ QUAY PHIM SỰ KIỆN
– DỊCH VỤ QUAY PHIM HỘI NGHỊ, HỘI THẢO
– DỊCH VỤ QUAY PHIM VIRAL VIDEO
– DỊCH VỤ QUAY PHIM REVIEW SẢN PHẨM
– DỊCH VỤ QUAY PHIM CƯỚI HỎI
– DỊCH VỤ QUAY PHIM SINH NHẬT
– DỊCH VỤ QUAY PHIM BÀI GIẢNG
– DỊCH VỤ QUAY PHIM TEAM BUILDING
– DỊCH VỤ QUAY PHIM GIỚI THIỆU DOANH NGHIỆP
– DỊCH VỤ QUAY PHIM CA NHẠC
Hotline: 0972.123.018 Cameraman
Website: RO PHI STUDIO & VIDEO Review – Viral – Animation 2D 3D
https://vi-vn.facebook.com/rophistudio/
1 note
·
View note
Photo
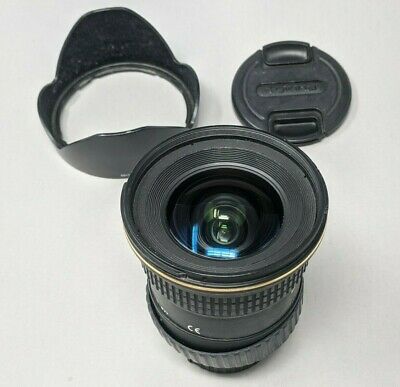
Used Tokina Zoom Super Wide Angle AF 12-24mm f/4 AT-X 124AF Pro DX Autofocus Lens for Canon Digital Cameras (EX) (625289854)

Used Tokina Zoom Super Wide Angle AF 12-24mm f/4 AT-X 124AF Pro DX Autofocus Lens for Canon Digital Cameras
0 notes
Photo
%^ Tokina AT-X PRO 12-24mm f/4 DX AF Lens For Nikon https://ift.tt/3dYoxQ9
0 notes
Text
レンズの選び方まとめ
我流ですがレンズの選び方を整理してみた。
★レンズ選択のトレードオフ
レンズを選択するには、以下のトレードオフがあることを知る必要がある。 ザックリと以下のような感じ。 (1) 単焦点か?ズームか? ピント面がシャープピント面が甘い ちなみに単焦点だからといっても、工作精度が悪いレンズは必ずしもシャープな画が撮れるとも限らない点に注意。 もちろんズームだからと言って甘めのレンズばかりではなく、キレッキレに写るズームレンズもある。 (2) F値の小ささ F値が小さいほうが、より暗い場所でブレにくくなる。 F値が小さいほうが、絞り開放の時のボケ量が大きい。 暗い場所での撮影が多いなら、よりF値が小さいものがよい。 主題を際立たせるために背景のボケ量が必要なら、F値が小さいものがよい。 傾向としてはF値が小さいほど、よりシャープな画が撮れると思ってよい。 F値が小さいものがよいが、おおよそF2.8より小さいものを指して「明るいレンズ」と言ったりする。 明るいレンズは正義! (3) 本体の重さ 明るく高画質なものがいいが、重すぎると持ち歩きたくなくなり箪笥の肥やしになる。 ほどほどの重さで妥協する必要がある。 (4) レンズの値段 高コストな方がいろいろお金をかけているので、高画質になる傾向にある。 レンズの材質や材料の加工がよければ値段も高くなり、より高画質になる。
★高画質って何?
主なレンズの評価軸は以下の3つだが、これらを高次元にバランスをとるのがレンズメーカーの腕の見せ所。 ・シャープネス ピント面がよりシャープな方が、フォーカスアウトした部分との対比でより表現力が高い ・歪みのなさ(湾曲収差) レンズの筒の中にはたくさんのガラス玉が重なっていて、そのために直線で表現したいのに周辺にいくにしたがって湾曲する。 そのため補正のレンズを入れて直線になるように設計されている。 設計が甘ければ周辺に行くにしたがって歪むようになる。 魚眼レンズは湾曲する性質を逆手にとって表現できるレンズだが、それ以外のレンズは直線は直線として表現できる方がよいレンズである。 ・解像度 ここでいう解像度は「細い線がどこまで描画できるか?」というものです。 透明なガラス玉といっても必ずしも解像度が高いとは言えない。 レンズの組み合わせで劣化したり、工作精度が悪くて劣化することもある。 その際、細い線が描画しきれずにグレーに塗りつぶされた状態になる。 もちろんカメラのセンサー解像度が低くてこのような現��も起きえるが、レンズの解像度が不足してこの状態になることもある。 レンズの解像度が低いと、センサーの高解像度が生かせない現象になるので、できるだけ解像度の高いレンズを使うべきである。 (正確にはセンサー解像度を生かせるだけの解像度をレンズにも求めるべき) ・周辺画質 レンズは中央部分が最も高画質、周辺に行くにしたがって画質は落ちる。 もちろんそれはレンズの工作精度によるが、高いレンズの方が工作精度も高い傾向にある。 超広角レンズは、その性質上レンズ周辺の画質の維持が設計上難しい。 iPhonenにクリップオンする広角レンズにありがちだが、周辺にいくにしたがって画像が流れる現象が出る。 絞り込めば解消されるが、可能なら絞り開放で像が流れにくいレンズが良しとされる。 ・周辺減光 レンズの周辺が暗くなる現象。 だいたい絞りを深くすれば消えるし、超広角レンズは絞り込んで使うことが多いから気にしなくてもいいかもしれない。 ポートレート用のレンズだと絞り開放付近で使うことが多いので気になるかも。 (しかし現像ソフトで周辺減光補正機能があれば一発で消えるけどね) ・フレアやゴーストの出やすさ レンズのガラス玉にはコーティングがされていて、逆光で撮影したときにフレアが出にくいように加工されている。 レンズの組み合わせ方や、コーティングの性能によってレンズフレアが補正されにくいものもあるので注意。 太陽に向かって撮影することが多いなら、フレア耐性の高いレンズ(=高性能なコーティングがされているもの)を選んだ方がよい。 しかし、これも撮影時に気を付けていれば回避できる場合がある。 なかなか全部がそろったものはない。 逆にそれらを全部高めると、大きく重たく、超高価なレンズになって庶民には買えなくなるので、バランスの良い設計のものが高画質といえる。
その他の観点
カメラボディーに搭載されたセンサーサイズによって選ぶレンズが変わる。 ・APS-C専用レンズ 将来フルサイズに移行したときは使えなくなる(その代わりフルサイズ用レンズに比べて小型で軽め。 ・フルサイズ用レンズ フルサイズ用はAPS-C用レンズとしても使える。(大は小を兼ねる) ただしでかいセンサーサイズに合わせてるので、レンズが重くて大きい(APS-C用レンズと比べて)
★レンズの性能を数値で表現できないの?
dxomarkというサイトでレンズの性能評価が公開されているのでそれを参考にするといい。 ボディとの組み合わせでスコアも変わるので、自分の持ってるカメラに合わせてね。 EOS 7D Mark2との組み合わせによるスコアは以下の通り。 Tokinaの��がより高画質なようです。 Sigma 12-24mm f4.5-5.6 EX DG Canon DXOMARK Score : 9 Tokina AT-X 12-24 AF PRO DX Canon DXOMARK Score : 16
0 notes
Text
Real Estate Photography Equipment Guide | Cameras, Lenses, Accessories, & Editing Software
This is the third article in our series about real estate photography; how to shoot the photos, process them, and how to be successful in business.
In this article, we will go over all of the equipment you’ll need to achieve professional results, including cameras, lenses, tripods, flash, and other accessories. Of equal importance, indeed, we will discuss the editing software required for professional real estate photography.
The good news is, you just don’t need a lot of expensive gear! Real estate photography isn’t a fast-action sport or another highly demanding genre, therefore, the equipment is rather straightforward. Even a modest budget can get you started and deliver professional results.
Similarly, you don’t need to master complicated processing techniques, although a basic understanding of exposure, raw processing, bracketing, and layer masking will be helpful in many situations. We’ll cover the final post-production in a future article.
First and foremost, focus on practicing your craft. Focus on creativity, and working efficiently, and of course, making sure your customers are happy. Get to know each piece of equipment, so that there are no surprises or frustrations whenever you’re with a client.
A big thank you to HDRsoft, creators of Photomatix, for sponsoring this education and helping our community of photographers.
The Right Tripod for Real Estate Photography
A good, sturdy tripod will make it easy to capture sharp, clean images inside dimly lit rooms, where your shutter speeds are often measured in seconds.
Whenever photographers ask for tripod recommendations, they usually ask which tripod is cheap, lightweight, and portable, most likely to be used for travel and casual landscape photography.
However, for real estate photography, a flimsy, lightweight tripod is not the best idea! Your camera’s support system is going to be your companion for many of the jobs you do. Therefore, the absolute best tripod for real estate and architectural photography is a big, tall, sturdy one.
Furthermore, having a solid, heavy tripod will really help to keep your images framed perfectly from one shot to the next, which will minimize your need for using alignment functions in post-production, whenever you need to create an HDR or other composite images.
Here’s the good news: big and heavy tripods can still be affordable! Name brands such as Manfrotto and Slik offer decades of experience making dependable quality tripods, at a relatively affordable price. Our top recommendations are the Manfrotto 190X series or 055X series, or the Slik 500DX or 700DX series. These tripods can all be found for around $100-200 new, or even less if you shop used.
Of course, if you travel a lot, or walk very far with your gear a lot, then it might be helpful to have a lightweight travel tripod, too. There are numerous options in the $200-300 range that weigh just ~2 lbs; one favorite being the Slik Lite series. (Either way, just avoid cheap/generic brands!)
Tripod Heads: Ballhead Versus 3-Way Head
Many tripods do come with both legs and a head, however it is also not uncommon to buy them separately.
If you do get a ball head separately, the question becomes, what type should you buy? Ball heads can be quick to set up at first, however, precision is difficult. A 3-way leveling head, or even a geared head, offers the highest precision, and is actually faster to achieve perfection once you get familiar with it.
Unfortunately, high-tech geared heads are a bit more pricey, whereas ordinary ballheads abound in all price ranges, and are often included together with legs. At the high end, a geared head such as an Arca Swiss C1 Cube, D-4 Monoball, or L60 Leveler are precision professional tools. As an affordable alternative, a Slik Leveling Unit, or any tripod with a leveling center column, can be a good way to quicken the pace of your workflow.
If you happen to buy tripod legs without a head, there are plenty of ordinary ballheads on the market, from name brands such as Slik, Manfrotto, Gitzo, and Really Right Stuff, to affordable alternatives such as Oben and Benro.
The Best Lens for Real Estate & Architectural Photography
While having a solid foundation to shoot from is essential, having the right focal length lens is equally important. Real estate photography involves shooting a range of subjects, from vast exteriors to cramped interiors, therefore, one job could require medium, ultra-wide, and telephoto focal lengths.
Exteriors of a home or commercial property are often easy to photograph with a normal (mid-range) zoom such as a 24-70mm f/2.8 or 24-105mm f/4. On APS-C crop sensors, the common mid-range zoom lenses are 18-55mm or 16-50mm.
However, for interiors or anything where space is tight, you’ll likely need a lens that goes even wider. On full-frame, the two most common focal ranges are 14-24mm and 16-35mm, or on an APS-C crop sensor, 10-20mm and 10-24mm are common.
Here is the good news: the lens’ aperture doesn’t need to be very fast, because you’ll be shooting with your aperture stopped down to f/8 or so for depth of field almost anyways. Therefore, affordable ultra-wide lenses such as f/4 zooms or even variable aperture zooms are great choices, saving you hundreds or even thousands of dollars. Similarly, both name-brand and third-party lenses are great, especially when stopped down just one or two stops.
The ultimate “exotic” ultra-wide lenses for real estate interiors are currently the Canon 11-24mm f/4 L, Nikon 14-24mm f/2.8, Sony 12-24mm f/4 GM, and Sigma 12-24mm f/4 Art.
(Approximately 14mm)
On the affordable end, there are plenty of ultra-wide lenses that are almost as good as the exotic options, when their aperture is stopped down: Consider a Rokinon 14mm f/2.8, or the Tamron 15-30mm f/2 VC, Irix 11mm, Laowa 12mm f/2.8, …or a 16-35 mm f/4 from any brand. One of the most affordable full-frame ultra-wide lenses for DSLR shooters is the Tokina 17-35mm f/4. 17mm may not sound like it is that much wider than 24mm, however it can make a huge difference when photographing indoors!
Great crop-sensor lenses include any of Tokina’s DX lenses that go as wide as 11mm or 12mm, or other lenses that get to 10mm even. (Canon, Nikon, and Sony all make multiple options which are extremely affordable; Nikon’s 10-20mm AF-P is just $250 when it’s on sale!)
Tilt-Shift Lenses for Real Estate Photography
(Note how all vertical lines in the image are actually vertical)
Any ultra-wide lens will get the job done, but there are also specialty lenses which are made primarily for architecture and real estate work: tilt-shift lenses. The question is, do you need one?
(Un-corrected, vertical lines may appear to “slant” even though they should not)
A tilt-shift lens is an incredibly useful tool that allows you to shoot images of buildings/rooms and have all the vertical lines (walls, doors, pillars, etc) stay vertical, instead of “leaning” up or down whenever you angle your camera up or down.
The most common architectural tilt-shift lens is usually a 24mm focal length; Canon, Nikon and Rokinon all make a 24mm tilt-shift lens. Canon also makes a 17mm TSE, and Nikon makes a 19mm PCE, and both also make mid-range and telephoto lenses if your job has a particular need.
So, how badly do you need a tilt-shift lens? The honest truth is that it’s not critical. There are ways to work around the problem of your vertical lines leaning. You can of course try to correct this in Photoshop or Lightroom, however, you can also achieve a similar result in-camera by shooting the image perfectly level at an extremely wide focal length, and then in post-production just crop the final composition.
If your lens goes as wide as 11mm, 12mm, or 14mm, (on full-frame) then you can heavily crop your images and get roughly the same perspective as a ~24mm tilt-shift lens. If your camera has 30-50 megapixels, and especially if your client is only doing low-resolution online listings or small printed ads, then you’ll have plenty of image resolution left after a severe crop.
In short, getting a tilt-shift lens is mostly a matter of in-the-field convenience and perfection, and although it’s a fantastic tool, in our opinion it’s not truly necessary unless you’re shooting a lot of very high-end work. (Consider it a reward that you treat yourself to once you’ve achieved much success in business, and not a tool that you absolutely need for your very first job.)
The Right Camera Body For Real Estate Photography
We’re going to be totally honest here- as far as camera bodies are concerned, you just don’t need an “exotic” camera body. Why? Because real estate photography doesn’t require features like extremely high frames-per-second, (FPS) or advanced subject tracking autofocus. Your main priorities are simple: a camera that provides great image quality from its raw files, plus good bracketing features and a flash hotshoe.
Thankfully, even beginner cameras these days have great image quality at their lower ISOs, as well as basic bracketing features and of course a flash hotshoe. Higher-end, professional cameras do offer more resolution, greater dynamic range, and more advanced bracketing functions, of course, but using proper shooting technique (and the right lens) will be the most important factor when it comes to the final image. Also, many wireless camera control apps offer remote control for exposure and image preview.
In fact, you should probably pick your camera based on the other types of photography you do, such as portraits, action sports, or landscape photography.
Crop-Sensor Versus Full-Frame Cameras for Real Estate Photography
In many genres of photography, owning a full-frame camera and lenses can offer significant, game-changing advantages.
However, with real estate photography, we’ve already made the shooting method very clear: you’re going to be using a tripod a lot, and shooting at a relatively low ISO such as 100-400 whenever possible. You’re also going to want everything in focus, instead of having a blurry background or foreground.
Because of these shooting conditions, an APS-C or even Micro Four Thirds camera system will adequately get the job done, as long as you have the right focal length for the job, and practice correct technique. So, nail your exposures and bracket for more dynamic range whenever necessary!
Whatever sensor format you choose, the important thing is the lenses! Be sure to pick a camera body that has enough wide-angle lens options for real estate photography, and are within your budget.
Wireless Flash for Real Estate Photography
This piece of equipment may be the most intimidating for a photographer who has not photographed portraits or similar subjects, but it is still quite simple! When working with flash in real estate photography, the professional results that you can achieve are worth it, specifically when using wireless flash off-camera to either bounce off a ceiling or directly illuminate subjects in a room with a diffuser such as an umbrella.
Our basic, beginner recommendation is both affordable and simple to use: one or two Yongnuo 560III or 560IV hotshoe flashes, and a Yongnuo 560TX radio transmitter/controller. It’s an all-manual flash system that lets you wirelessly control the power (brightness) of the light output. This flash isn’t built very tough, but it still makes a great starter flash for the money. if you ever upgrade to something else, it can stay in your bag as an emergency backup. Paid professionals should always have a backup!
If you do also shoot things like portraits or weddings, then of course you might want to consider a hotshoe flash that offers features such as HSS and TTL. In this realm, there are both name-brand wireless flashes, and more affordable models from Yongnuo and others.
Our medium budget recommendation is still relatively affordable: A Godox AD-series flash, such as the AD200, AD400, or AD600. Each of these offers a lot more flash power in a single flash, without breaking the bank. The AD200 is a more portable sized strobe, almost the size of a hotshoe flash, while the AD400 and AD600 are true strobe flashes which offer even more power.
Our high-end recommendation is, of course, the best in the business: Profoto strobes offer extreme reliability and durability, and significantly more power than any hotshoe flashes. They’re pricey, but they will absolutely last far longer, and will be far more reliable, whether you get one of the more affordable models such as the Profoto B2, or the cadillac of strobes, the Profoto B1.
Other lighting equipment you may need: a light stand, either heavy-duty or lightweight, is really helpful, especially if you ever work alone. You may also want a simple shoot-through umbrella for illuminating a room or specific subjects with soft, diffused light.
Is Wireless Flash Too Complicated For a Real Estate Job?
Bounced flash is the easiest way to begin adding illumination to a room (The flash is pointed at an area behind the camera that is not in the image)
If you’re afraid of even trying wireless flash, the easiest thing to do is to just dive in and play with it! With manual power (brightness) flash, it’s as easy as setting your camera’s exposure: just start shooting, and if the flash is too dark, or too bright, dial the flash power up or down and see how the lighting improves.
The hardest part is simply getting to know the interface of the flash itself, but this is one of those times when the only thing to do is get out the user manual and go through it.
Keep in mind that if you go down the path of using wireless flash in your photos, it will add time to both shooting and post-production. Some jobs are super quick, with only a few minutes to shoot, and require rapid turnaround time.
Often times, you may discover that you can perfectly illuminate the room with a single light, but there is a window or mirror which betrays the flash’s presence and brightness. Or, you may realize that you need to illuminate two or more different parts of a room separately. Sometimes, you may even have to stand in the photo in order to perfectly illuminate something.
So, what many photographers do is capture multiple photos with the various parts of the image lit perfectly, and then layer them all together in Photoshop. Using layer masks, you can “erase” any flashes, light stands, bright reflections, or people from the final image.
However if you’re not careful, you can wind up spending an hour or more on a single image! So, try and keep the use of wireless flash and composite frames as minimal and simple as possible.
Wireless Image Review & Camera Control Tools For Shooting Remotely
If you’re shooting from a tripod and walking around a room to trigger a flash or change the ambient light, (getting images with lights switched on and off) it can be extremely frustrating to have to walk back and forth to your camera repeatedly for just one final image. It can also be rather frustrating if your lens isn’t wide enough, and you realize that to get the shot you need to put your camera right up against a wall, or even in a corner where you simply can’t see the viewfinder or rear LCD at all. (Unless you have a fully articulated LCD!)
What some real estate photographers do is, use a wireless camera control tool such as a Camranger, or if the camera has it, the built-in wireless functionality that pairs with an app on your phone. Some apps even allow you to change your exposure or focus wirelessly, in addition to clicking the shutter and reviewing photos. No more walking back and forth across a room five times just to get one photo!
Aerial Real Estate Photography Equipment | Drones & Camera Poles
Drones have become incredibly popular lately, and almost every genre of photography has realized the benefits of being able to put a camera up in the air. Real estate photography is definitely one of those types of photography that can greatly benefit from aerial photo and video.
Thankfully, all of the latest popular drones from brands like DJI, such as the Phantom 4 Pro, Mavic Pro, and Mavic Air, include both raw image capture and auto-bracketing, for epic aerial photos of a property even in tough light, resulting in beautiful images if processed correctly.
The Right Processing Tools for Real Estate Photography
Of course, even if you have a solid tripod, a great camera, and the perfect lens for the job, you still need to know how to edit the images you take, and what tools to work with.
A raw processing program is a must-have for all professional work, and real estate work is no exception. In many scenes, indoors and outdoors, dynamic range can be extremely wide, requiring heavy edits to your shadows and highlights, or bracketing and merging of an HDR image.
You may also need to process HDR images in large batches for certain jobs that require multiple, similar images of a room or property.
Adobe Lightroom and Photoshop can get a lot done with raw files by themselves, as well as a basic interface for bracketing exposures and panoramic stitching, but they’re not always enough, and batch processing is not practical.
Click Here To Learn More About Adobe Lightroom
HDR software such as Photomatix Pro offers professional control for managing the dynamic range in both single and bracketed images, as well as full batch processing for jobs that require numerous bracketed HDR images.
Click Here to Learn More About Photomatix
Real Estate Photography Gear | Recap & Conclusion
You need a solid tripod. Heavier is a not a bad thing, because any photo shoot could involve slow shutter speeds, and likely bracketing or composite blending.
Almost any camera will do. Remember, the body is only part of the equation; the right lens is just as important, if not more so!
The right ultra-wide angle lens for the job. On full-frame: 16-35mm, 14-24mm, or similar ultra-wide lenses are extremely useful. On APS-C crop: 10-20mm, 10-24mm, or similar lenses are great. On Micro Four-Thirds: look for 7-14mm or similar range lens.
Camera settings: Shoot at a lower ISO such as 100-400, with the aperture stopped down for sharpness and depth. Then, vary your shutter speed to achieve the correct exposure, or if bracketing multiple exposures is required.
A remote trigger or wireless app is very useful. You can use self-timer too, but the remote operation is really worth it, and sometimes free!
Use wireless flash for illuminating interiors or exteriors, but only if you like the look it gives compared to bracketing natural light, and if your job schedule allows the extra time for shooting and processing.
Bracket multiple exposures when necessary to ensure detail in highlights and shadows. Most cameras offer bracketing of 3-7 frames, in 1-2 EV increments.
Post-processing software: Lightroom, Photoshop, and HDR software offer a seamless workflow for preparing raw files, merging bracketed exposures, or creating composite images in tricky situations.
In our next article, we’ll actually get on-location, shoot some photos, and post-produce them, covering all the important details to ensure great quality, a quick shooting workflow, a rapid turnaround time, and last but likely most importantly, a satisfied client!
Click Here to Read A Complete Overview of Real Estate Photography
Click Here to Read About The Business & Pricing of Real Estate Photography
Be sure to read our previous articles that give a brief introduction, and help you to get started with the pricing and business side of real estate photography. Also, stay tuned for more tutorials in the future!
from SLR Lounge https://ift.tt/2OkkqCQ via IFTTT
0 notes
Photo
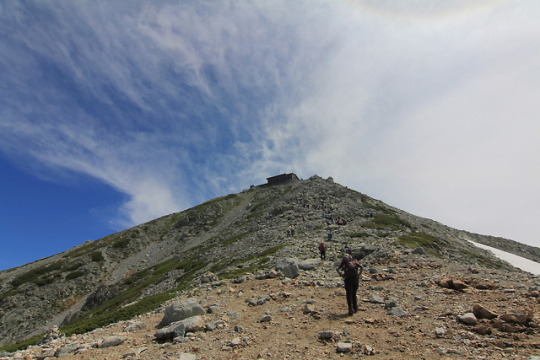
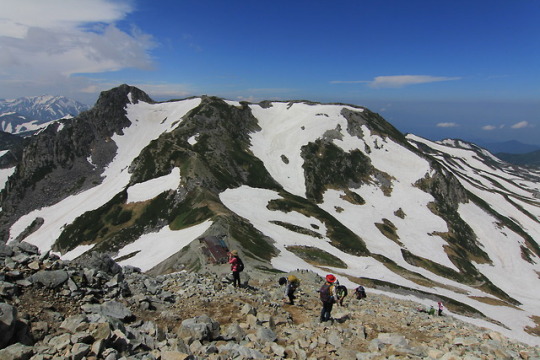
雄山に向かって
雄山山頂までもう少しです。
後ろはこんな感じで、一の越山荘が小さくなってきました。
2017.07.14
2 notes
·
View notes
Text
Tokina 12-24mm F/4 wide angle for Nikon like new $275
Selling my Tokina 12-24mm F4 Lens like new,comes with the box.Bring your body to test the lens.Cash and pickup only. No scam,shipping or anything like that. Leave name and number if interested.Thank you from Craigslist http://newyork.craigslist.org/que/pho/6265042542.html Fraud Bloggs made possible by: http://circuitgenie.wix.com/techsupport
0 notes
Photo
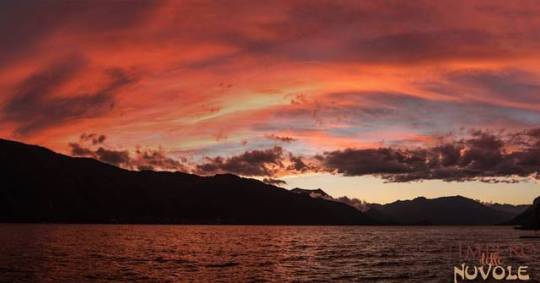
Tutto questo sbattimento per far foto al tramonto -------------------------------------------------------- Mandello del Lario (LC), Italia, 6 giugno 2017 Canon EOS 750D Tokina AT-X 124 PRO DX (IF) 12-24mm F4 @ 18mm - F 4 - 1/13 s - ISO 100 - Hoya PL-CIR - edited with PS -------------------------------------------------------- #imperodellenuvole #clouds #cloudscape #sky #skyrama #skyart #skyporn #sunset #tramonto #colours #fire #lake #lakecomo #home #canon #canonphoto #landscape #landscapephotography #italy #whatitalyis #vscocam #vscobest #igerslecco #igersitaly (presso Camping Continental Mandello)
#tramonto#clouds#lake#sunset#landscapephotography#igersitaly#landscape#imperodellenuvole#italy#vscocam#canon#canonphoto#fire#colours#vscobest#skyrama#igerslecco#lakecomo#whatitalyis#skyart#home#sky#skyporn#cloudscape
0 notes
Text
Красивые фото со всего мира
Красивые фото со всего мира
I thought that this infrared picture taken straight towards the sun looked like a wood lit by a full moon, hence the title. —– Photo taken using an infrared sensitive film and filter: camera & lens: Nikon F80 & Tokina 12-24mm f/4 film: Efke IR820 Aura filter: R72 exposure: 1/15 at f/4 development: Ilfotec DD-X 1+4 for 14 mins at 19C conditions: bright sun, no cloud
Posted by Kate Tettmar on…
View On WordPress
#35mm film#amazing#analogue#beautiful#beauty#best photo#black and white#bounty#brilliant#bwfp#DD-X#Efke IR820 Aura#Home Processed#Ilfotec DD-X#infrared#jewelry#lucky man#nature#Nikon F80#perfect body#perfect world#pretty woman#St Albans#sun#Tokina 12-24mm f/4#tree#Watercress Association#Wood
0 notes
Photo
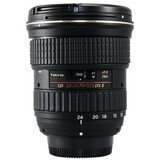
Used Tokina 12-24mm f/4 AT-X 124 AF Pro DX II Lens for Nikon (EX) (625268092)

Used Tokina 12-24mm f/4 AT-X 124 AF Pro DX II Lens for Nikon
The Nikon mount Tokina 12-24mm f/4 AT-X 124AF Pro DX II Lens..
Price: $149.99
https://ift.tt/2KmNVpt December 14, 2020 at 06:18AM
0 notes
Text
New Post has been published on http://review27.xyz/tokina-tokina-12-24mm-f4-pro-dx-autofocus-zoom-lens-for-nikon-digital-slr-cameras/
Tokina Tokina 12-24mm F/4 PRO DX Autofocus Zoom Lens for Nikon Digital SLR Cameras
0 notes
Photo
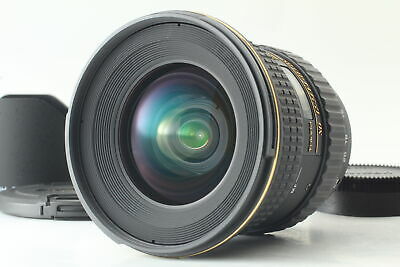
%^ [Top MINT FedEx] TOKINA AT-X SD 12-24mm f/4 (IF) DX PRO Lens For Nikon JAPAN https://ift.tt/2AxvA4G
0 notes
Photo
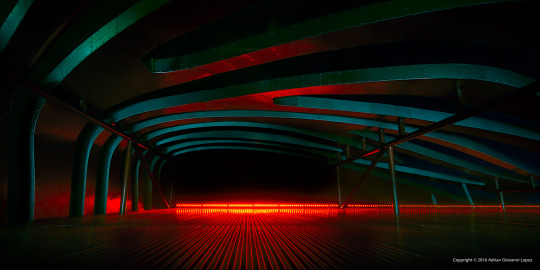
Week 3: RED (Petersen Automotive Museum)
Nikon D7000, Tokina 12-24mm f/4 @ 12mm, ISO 100, 1/8 sec
#nikon d7000#tokina 12-24mm f/4#los angeles#petersen automotive museum#red#lights#glow#dark#photography#challenge
2 notes
·
View notes
Text
Real Estate Photography Equipment Guide | Cameras, Lenses, Accessories, & Editing Software
This is the third article in our series about real estate photography; how to shoot the photos, process them, and how to be successful in business.
In this article, we will go over all of the equipment you’ll need to achieve professional results, including cameras, lenses, tripods, flash, and other accessories. Of equal importance, indeed, we will discuss the editing software required for professional real estate photography.
The good news is, you just don’t need a lot of expensive gear! Real estate photography isn’t a fast-action sport or another highly demanding genre, therefore, the equipment is rather straightforward. Even a modest budget can get you started and deliver professional results.
Similarly, you don’t need to master complicated processing techniques, although a basic understanding of exposure, raw processing, bracketing, and layer masking will be helpful in many situations. We’ll cover the final post-production in a future article.
First and foremost, focus on practicing your craft. Focus on creativity, and working efficiently, and of course, making sure your customers are happy. Get to know each piece of equipment, so that there are no surprises or frustrations whenever you’re with a client.
A big thank you to HDRsoft, creators of Photomatix, for sponsoring this education and helping our community of photographers.
The Right Tripod for Real Estate Photography
A good, sturdy tripod will make it easy to capture sharp, clean images inside dimly lit rooms, where your shutter speeds are often measured in seconds.
Whenever photographers ask for tripod recommendations, they usually ask which tripod is cheap, lightweight, and portable, most likely to be used for travel and casual landscape photography.
However, for real estate photography, a flimsy, lightweight tripod is not the best idea! Your camera’s support system is going to be your companion for many of the jobs you do. Therefore, the absolute best tripod for real estate and architectural photography is a big, tall, sturdy one.
Furthermore, having a solid, heavy tripod will really help to keep your images framed perfectly from one shot to the next, which will minimize your need for using alignment functions in post-production, whenever you need to create an HDR or other composite images.
Here’s the good news: big and heavy tripods can still be affordable! Name brands such as Manfrotto and Slik offer decades of experience making dependable quality tripods, at a relatively affordable price. Our top recommendations are the Manfrotto 190X series or 055X series, or the Slik 500DX or 700DX series. These tripods can all be found for around $100-200 new, or even less if you shop used.
Of course, if you travel a lot, or walk very far with your gear a lot, then it might be helpful to have a lightweight travel tripod, too. There are numerous options in the $200-300 range that weigh just ~2 lbs; one favorite being the Slik Lite series. (Either way, just avoid cheap/generic brands!)
Tripod Heads: Ballhead Versus 3-Way Head
Many tripods do come with both legs and a head, however it is also not uncommon to buy them separately.
If you do get a ball head separately, the question becomes, what type should you buy? Ball heads can be quick to set up at first, however, precision is difficult. A 3-way leveling head, or even a geared head, offers the highest precision, and is actually faster to achieve perfection once you get familiar with it.
Unfortunately, high-tech geared heads are a bit more pricey, whereas ordinary ballheads abound in all price ranges, and are often included together with legs. At the high end, a geared head such as an Arca Swiss C1 Cube, D-4 Monoball, or L60 Leveler are precision professional tools. As an affordable alternative, a Slik Leveling Unit, or any tripod with a leveling center column, can be a good way to quicken the pace of your workflow.
If you happen to buy tripod legs without a head, there are plenty of ordinary ballheads on the market, from name brands such as Slik, Manfrotto, Gitzo, and Really Right Stuff, to affordable alternatives such as Oben and Benro.
The Best Lens for Real Estate & Architectural Photography
While having a solid foundation to shoot from is essential, having the right focal length lens is equally important. Real estate photography involves shooting a range of subjects, from vast exteriors to cramped interiors, therefore, one job could require medium, ultra-wide, and telephoto focal lengths.
Exteriors of a home or commercial property are often easy to photograph with a normal (mid-range) zoom such as a 24-70mm f/2.8 or 24-105mm f/4. On APS-C crop sensors, the common mid-range zoom lenses are 18-55mm or 16-50mm.
However, for interiors or anything where space is tight, you’ll likely need a lens that goes even wider. On full-frame, the two most common focal ranges are 14-24mm and 16-35mm, or on an APS-C crop sensor, 10-20mm and 10-24mm are common.
Here is the good news: the lens’ aperture doesn’t need to be very fast, because you’ll be shooting with your aperture stopped down to f/8 or so for depth of field almost anyways. Therefore, affordable ultra-wide lenses such as f/4 zooms or even variable aperture zooms are great choices, saving you hundreds or even thousands of dollars. Similarly, both name-brand and third-party lenses are great, especially when stopped down just one or two stops.
The ultimate “exotic” ultra-wide lenses for real estate interiors are currently the Canon 11-24mm f/4 L, Nikon 14-24mm f/2.8, Sony 12-24mm f/4 GM, and Sigma 12-24mm f/4 Art.
(Approximately 14mm)
On the affordable end, there are plenty of ultra-wide lenses that are almost as good as the exotic options, when their aperture is stopped down: Consider a Rokinon 14mm f/2.8, or the Tamron 15-30mm f/2 VC, Irix 11mm, Laowa 12mm f/2.8, …or a 16-35 mm f/4 from any brand. One of the most affordable full-frame ultra-wide lenses for DSLR shooters is the Tokina 17-35mm f/4. 17mm may not sound like it is that much wider than 24mm, however it can make a huge difference when photographing indoors!
Great crop-sensor lenses include any of Tokina’s DX lenses that go as wide as 11mm or 12mm, or other lenses that get to 10mm even. (Canon, Nikon, and Sony all make multiple options which are extremely affordable; Nikon’s 10-20mm AF-P is just $250 when it’s on sale!)
Tilt-Shift Lenses for Real Estate Photography
(Note how all vertical lines in the image are actually vertical)
Any ultra-wide lens will get the job done, but there are also specialty lenses which are made primarily for architecture and real estate work: tilt-shift lenses. The question is, do you need one?
(Un-corrected, vertical lines may appear to “slant” even though they should not)
A tilt-shift lens is an incredibly useful tool that allows you to shoot images of buildings/rooms and have all the vertical lines (walls, doors, pillars, etc) stay vertical, instead of “leaning” up or down whenever you angle your camera up or down.
The most common architectural tilt-shift lens is usually a 24mm focal length; Canon, Nikon and Rokinon all make a 24mm tilt-shift lens. Canon also makes a 17mm TSE, and Nikon makes a 19mm PCE, and both also make mid-range and telephoto lenses if your job has a particular need.
So, how badly do you need a tilt-shift lens? The honest truth is that it’s not critical. There are ways to work around the problem of your vertical lines leaning. You can of course try to correct this in Photoshop or Lightroom, however, you can also achieve a similar result in-camera by shooting the image perfectly level at an extremely wide focal length, and then in post-production just crop the final composition.
If your lens goes as wide as 11mm, 12mm, or 14mm, (on full-frame) then you can heavily crop your images and get roughly the same perspective as a ~24mm tilt-shift lens. If your camera has 30-50 megapixels, and especially if your client is only doing low-resolution online listings or small printed ads, then you’ll have plenty of image resolution left after a severe crop.
In short, getting a tilt-shift lens is mostly a matter of in-the-field convenience and perfection, and although it’s a fantastic tool, in our opinion it’s not truly necessary unless you’re shooting a lot of very high-end work. (Consider it a reward that you treat yourself to once you’ve achieved much success in business, and not a tool that you absolutely need for your very first job.)
The Right Camera Body For Real Estate Photography
We’re going to be totally honest here- as far as camera bodies are concerned, you just don’t need an “exotic” camera body. Why? Because real estate photography doesn’t require features like extremely high frames-per-second, (FPS) or advanced subject tracking autofocus. Your main priorities are simple: a camera that provides great image quality from its raw files, plus good bracketing features and a flash hotshoe.
Thankfully, even beginner cameras these days have great image quality at their lower ISOs, as well as basic bracketing features and of course a flash hotshoe. Higher-end, professional cameras do offer more resolution, greater dynamic range, and more advanced bracketing functions, of course, but using proper shooting technique (and the right lens) will be the most important factor when it comes to the final image. Also, many wireless camera control apps offer remote control for exposure and image preview.
In fact, you should probably pick your camera based on the other types of photography you do, such as portraits, action sports, or landscape photography.
Crop-Sensor Versus Full-Frame Cameras for Real Estate Photography
In many genres of photography, owning a full-frame camera and lenses can offer significant, game-changing advantages.
However, with real estate photography, we’ve already made the shooting method very clear: you’re going to be using a tripod a lot, and shooting at a relatively low ISO such as 100-400 whenever possible. You’re also going to want everything in focus, instead of having a blurry background or foreground.
Because of these shooting conditions, an APS-C or even Micro Four Thirds camera system will adequately get the job done, as long as you have the right focal length for the job, and practice correct technique. So, nail your exposures and bracket for more dynamic range whenever necessary!
Whatever sensor format you choose, the important thing is the lenses! Be sure to pick a camera body that has enough wide-angle lens options for real estate photography, and are within your budget.
Wireless Flash for Real Estate Photography
This piece of equipment may be the most intimidating for a photographer who has not photographed portraits or similar subjects, but it is still quite simple! When working with flash in real estate photography, the professional results that you can achieve are worth it, specifically when using wireless flash off-camera to either bounce off a ceiling or directly illuminate subjects in a room with a diffuser such as an umbrella.
Our basic, beginner recommendation is both affordable and simple to use: one or two Yongnuo 560III or 560IV hotshoe flashes, and a Yongnuo 560TX radio transmitter/controller. It’s an all-manual flash system that lets you wirelessly control the power (brightness) of the light output. This flash isn’t built very tough, but it still makes a great starter flash for the money. if you ever upgrade to something else, it can stay in your bag as an emergency backup. Paid professionals should always have a backup!
If you do also shoot things like portraits or weddings, then of course you might want to consider a hotshoe flash that offers features such as HSS and TTL. In this realm, there are both name-brand wireless flashes, and more affordable models from Yongnuo and others.
Our medium budget recommendation is still relatively affordable: A Godox AD-series flash, such as the AD200, AD400, or AD600. Each of these offers a lot more flash power in a single flash, without breaking the bank. The AD200 is a more portable sized strobe, almost the size of a hotshoe flash, while the AD400 and AD600 are true strobe flashes which offer even more power.
Our high-end recommendation is, of course, the best in the business: Profoto strobes offer extreme reliability and durability, and significantly more power than any hotshoe flashes. They’re pricey, but they will absolutely last far longer, and will be far more reliable, whether you get one of the more affordable models such as the Profoto B2, or the cadillac of strobes, the Profoto B1.
Other lighting equipment you may need: a light stand, either heavy-duty or lightweight, is really helpful, especially if you ever work alone. You may also want a simple shoot-through umbrella for illuminating a room or specific subjects with soft, diffused light.
Is Wireless Flash Too Complicated For a Real Estate Job?
Bounced flash is the easiest way to begin adding illumination to a room (The flash is pointed at an area behind the camera that is not in the image)
If you’re afraid of even trying wireless flash, the easiest thing to do is to just dive in and play with it! With manual power (brightness) flash, it’s as easy as setting your camera’s exposure: just start shooting, and if the flash is too dark, or too bright, dial the flash power up or down and see how the lighting improves.
The hardest part is simply getting to know the interface of the flash itself, but this is one of those times when the only thing to do is get out the user manual and go through it.
Keep in mind that if you go down the path of using wireless flash in your photos, it will add time to both shooting and post-production. Some jobs are super quick, with only a few minutes to shoot, and require rapid turnaround time.
Often times, you may discover that you can perfectly illuminate the room with a single light, but there is a window or mirror which betrays the flash’s presence and brightness. Or, you may realize that you need to illuminate two or more different parts of a room separately. Sometimes, you may even have to stand in the photo in order to perfectly illuminate something.
So, what many photographers do is capture multiple photos with the various parts of the image lit perfectly, and then layer them all together in Photoshop. Using layer masks, you can “erase” any flashes, light stands, bright reflections, or people from the final image.
However if you’re not careful, you can wind up spending an hour or more on a single image! So, try and keep the use of wireless flash and composite frames as minimal and simple as possible.
Wireless Image Review & Camera Control Tools For Shooting Remotely
If you’re shooting from a tripod and walking around a room to trigger a flash or change the ambient light, (getting images with lights switched on and off) it can be extremely frustrating to have to walk back and forth to your camera repeatedly for just one final image. It can also be rather frustrating if your lens isn’t wide enough, and you realize that to get the shot you need to put your camera right up against a wall, or even in a corner where you simply can’t see the viewfinder or rear LCD at all. (Unless you have a fully articulated LCD!)
What some real estate photographers do is, use a wireless camera control tool such as a Camranger, or if the camera has it, the built-in wireless functionality that pairs with an app on your phone. Some apps even allow you to change your exposure or focus wirelessly, in addition to clicking the shutter and reviewing photos. No more walking back and forth across a room five times just to get one photo!
Aerial Real Estate Photography Equipment | Drones & Camera Poles
Drones have become incredibly popular lately, and almost every genre of photography has realized the benefits of being able to put a camera up in the air. Real estate photography is definitely one of those types of photography that can greatly benefit from aerial photo and video.
Thankfully, all of the latest popular drones from brands like DJI, such as the Phantom 4 Pro, Mavic Pro, and Mavic Air, include both raw image capture and auto-bracketing, for epic aerial photos of a property even in tough light, resulting in beautiful images if processed correctly.
The Right Processing Tools for Real Estate Photography
Of course, even if you have a solid tripod, a great camera, and the perfect lens for the job, you still need to know how to edit the images you take, and what tools to work with.
A raw processing program is a must-have for all professional work, and real estate work is no exception. In many scenes, indoors and outdoors, dynamic range can be extremely wide, requiring heavy edits to your shadows and highlights, or bracketing and merging of an HDR image.
You may also need to process HDR images in large batches for certain jobs that require multiple, similar images of a room or property.
Adobe Lightroom and Photoshop can get a lot done with raw files by themselves, as well as a basic interface for bracketing exposures and panoramic stitching, but they’re not always enough, and batch processing is not practical.
Click Here To Learn More About Adobe Lightroom
HDR software such as Photomatix Pro offers professional control for managing the dynamic range in both single and bracketed images, as well as full batch processing for jobs that require numerous bracketed HDR images.
Click Here to Learn More About Photomatix
Real Estate Photography Gear | Recap & Conclusion
You need a solid tripod. Heavier is a not a bad thing, because any photo shoot could involve slow shutter speeds, and likely bracketing or composite blending.
Almost any camera will do. Remember, the body is only part of the equation; the right lens is just as important, if not more so!
The right ultra-wide angle lens for the job. On full-frame: 16-35mm, 14-24mm, or similar ultra-wide lenses are extremely useful. On APS-C crop: 10-20mm, 10-24mm, or similar lenses are great. On Micro Four-Thirds: look for 7-14mm or similar range lens.
Camera settings: Shoot at a lower ISO such as 100-400, with the aperture stopped down for sharpness and depth. Then, vary your shutter speed to achieve the correct exposure, or if bracketing multiple exposures is required.
A remote trigger or wireless app is very useful. You can use self-timer too, but the remote operation is really worth it, and sometimes free!
Use wireless flash for illuminating interiors or exteriors, but only if you like the look it gives compared to bracketing natural light, and if your job schedule allows the extra time for shooting and processing.
Bracket multiple exposures when necessary to ensure detail in highlights and shadows. Most cameras offer bracketing of 3-7 frames, in 1-2 EV increments.
Post-processing software: Lightroom, Photoshop, and HDR software offer a seamless workflow for preparing raw files, merging bracketed exposures, or creating composite images in tricky situations.
In our next article, we’ll actually get on-location, shoot some photos, and post-produce them, covering all the important details to ensure great quality, a quick shooting workflow, a rapid turnaround time, and last but likely most importantly, a satisfied client!
Click Here to Read A Complete Overview of Real Estate Photography
Click Here to Read About The Business & Pricing of Real Estate Photography
Be sure to read our previous articles that give a brief introduction, and help you to get started with the pricing and business side of real estate photography. Also, stay tuned for more tutorials in the future!
from SLR Lounge https://www.slrlounge.com/real-estate-photography-equipment-guide-cameras-lenses-accessories-editing-software/ via IFTTT
0 notes