#Refresher Courses
Explore tagged Tumblr posts
Text
Best Refresher Courses in Leeds – Boost Your Driving Skills | Driving Aim
Looking for professional refresher courses in Leeds?🚗 Driving Aim offers expert training to help you regain confidence on the road. Book your refresher course today and drive safely! ✅

#Refresher Driving Courses in Leeds#refresher driving lessons leeds#refresher courses leeds#refresher courses in leeds#refresher courses
0 notes
Text
My GIF Making process: Screen capturing using MPV player, Organizing files, 3 Sharpening settings, Basic Coloring PSD + Actions set

This is a very long post so heads up.
I’ll try to be as thorough and true as much as possible to the way I make my gifs (I already use Photoshop Actions which I’ve long since set up but now for this tutorial I’m reviewing them to show you the exact steps I’ve learned to create my gifs 😃) and present them to you in a semi-coherent way. Also, please bear with me since English is my second language.
First things first. Below are the things and tools we need to do this:
Downloaded 4K or 1080p quality videos (let’s all assume we know where to get these—especially for high definition movies and tv series—so this post doesn’t get removed, okay? 😛)
Adobe Photoshop CC or the CS versions can work as well, but full disclosure I haven’t created gifs using the CS versions since 2020. I’m currently using Adobe Photoshop 2024.
mpv player. Use mpv player to get those frames/screenshots or any other video player that has a screen grabber feature. I’ve used adapter for the longest time but I’ve switched to mpv because the press to screenshot feature while the video is playing has been a game changer not to mention ultimate time saver for me. For adapter you need to play it in another video player (like VLC player), to get the start and end timestamps of the scene you want to gif which takes me ages before I can even open Photoshop.
Anyway! Please stop reading this post for a moment and head over to this amazing tutorial by kylos. She perfectly tells you how to install and use mpv player, both for Mac and Windows users.
One thing I have to share though, I had a tough time when I updated my MacOS to Sonoma since MPV is suddenly either duplicating frames or when I delete the duplicates the player seems to be skipping frames :/ I searched and found a solution here, though it didn’t work for me lol. My workaround for this in the meantime is decreasing the speed down to 0.70 then start screenshotting—it’s not the same pre Sonoma update but it works so I’ll have to accept it rather than have jumpy looking gifs.
Now, after this part of kylos’ tutorial:

you can continue reading the following sections of my gif tutorial below.
I want to share this little tip (sorry, this will only cater to Mac users) that I hope will be helpful for organizing the screenshots that MPV saved to the folder you have selected. Because believe me you don’t want to go through 1k+ of screenshots to select just 42-50 frames for your gif.
The Control + Command + N shortcut
This shortcut allows you to create a new folder from files you have pre-selected. As you can see below I have already created a couple of folders, and inside each folder I have selected screenshots that I want to include in one single gif. It's up to you how you want to divide yours, assuming you intend to create and post a Tumblr gifset rather than just one gif.

Another tip is making use of tags. Most of, if not all the time, I make supercorp gifs so I tag blue for Kara and red (or green) for Lena—just being ridiculously on brand and all that.
Before we finally open Photoshop, there's one more thing I want to say—I know, please bear with me for the third? fourth? time 😅
It's helpful to organize everything into their respective folders so you know the total number of items/frames you have. This way, you can add or delete excess or unnecessary shots before uploading them in Photoshop.
For example below there are 80 screenshots of Kara inside this folder and for a 1:1 (540 x 540 px) Tumblr gif, Photoshop can just work around with 42-50 max number of frames with color adjustments applied before it exceeds the 10 MB file size limit of Tumblr.

Sometimes I skip this step because it can be exhausting (haha) and include everything so I can decide visually which frames to keep later on. You'll understand what I mean later on. But it's important to keep the Tumblr 10 MB file size limit in mind. Fewer frames, or just the right amount of frames, is better.
So, with the screenshot organization out of the way, let's finally head over to Photoshop.
Giffing in Photoshop, yay!
Let’s begin by navigating to File > Scripts > Load Files into Stack…

The Load Layers window will appear. Click the Browse button next.
Find your chosen screenshots folder, press Command + A to select all files from that folder then click Open. Then click OK.
After importing and stacking your files, Photoshop should display the following view:

By the way, I'll be providing the clip I've used in this tutorial so if want to use them to follow along be my guest :)
If you haven't already opened your Timeline panel, navigate to Windows > Timeline.
Now, let's focus on the Timeline panel for the next couple of steps.
Click Create Video Timeline, then you’ll have this:

Now click the menu icon on the top right corner then go to Convert Frames > Make Frames from Clips

Still working on the Timeline panel, click the bottom left icon this time—the icon with the three tiny boxes—to Convert to Frame Animation
Select Make Frames From Layers from the top right corner menu button.
So now you have this:

Go and click the top right menu icon again to Select All Frames
Then click the small dropdown icon to set another value for Frame Delay. Select Other…

The best for me and for most is 0.05 but you can always play around and see what you think works for you.
Click the top right menu icon again to Reverse Frames.
I think Photoshop has long since fixed this issue but usually the first animation frame is empty so I just delete it but now going through all these steps there seems to be none of that but anyways, the delete icon is the last one among the line of feature buttons at the bottom part of the Timeline panel.
Yay, now we can have our first proper GIF preview of a thirsty Lena 😜

Press spacebar to watch your gif play for the very first time! After an hour and half of selecting and cutting off screenshots! 😛 Play it some more. No really, I’m serious. I do this so even as early (lol) as this part in the gif making process, I can see which frames I can/should delete to be within the 10 MB file size limit. You can also do it at the end of course 🙂
Now, let’s go to the next important steps of this tutorial post which I’ve numbered below.
Crop and resize to meet Tumblr's required dimensions. The width value should be either 540px, 268px, or 177px.
Convert the gif to a Smart Object for sharpening.
Apply lighting and basic color adjustments before the heavy coloring. I will be sharing the base adjustments layers I use for my gifs 😃.
1. Crop and Resize
Click on the Crop tool (shortcut: the C key)

I like my GIFs big so I always set this to 1:1 ratio if the scene allows it. Press the Enter key after selecting the area of the frame that you want to keep.
Side note: If you find that after cropping, you want to adjust the image to the left or another direction, simply unselect the Delete Cropped Pixels option. This way, you will still have the whole frame area available to crop again as needed and as you prefer.
Now we need to resize our gif and the shortcut for that is Command + Opt + I. Type in 540 as the width measurement, then the height will automatically change to follow the ratio you’ve set while cropping.
540 x 540 px for 1:1
540 x 405 px for 4:3
540 x 304 px for 16:9
For the Resample value I prefer Bilinear—but you can always select the other options to see what you like best.
Click OK. Then Command + 0 and Command + - to properly view the those 540 pixels.

Now we get to the exciting part :) the sharpen settings!
2. Sharpen
First we need to have all these layers “compressed” intro a single smart object from which we can apply filters to.
Select this little button on the the bottom left corner of the Timeline panel.


Select > All Layers
Then go to Filter > Convert for Smart Filters
Just click OK when a pop-up shows up.
Now you should have this view on the Layers panel:

Now I have 3 sharpen settings to share but I’ll have download links to the Action packs at the end of this long ass tutorial so if you want to skip ahead, feel free to do so.
Sharpen v1
Go to Filter > Sharpen > Smart Sharpen…
Below are my settings. I don’t adjust anything under Shadows/Highlights.
Amount: 500
Radius: 0.4
Click OK then do another Smart Sharpen but this time with the below adjustments.
Amount: 12
Radius: 10.0

As you can see Lena’s beautiful eyes are “popping out” now with these filters applied. Click OK.
Now we need to Convert to Frame Animation. Follow the steps below.
Click on the menu icon at the top right corner of the Timeline panel, then click Convert Frames > Flatten Frames into Clips
Then Convert Frames > Convert to Frame Animation
One more click to Make Frames From Layers
Delete the first frame then Select All then Set Frame Delay to 0.05

and there you have it! Play your GIF and make sure it’s just around 42-50 frames. This is the time to select and delete.
To preview and save your GIF go to File > Export > Save for Web (Legacy)…
Below are my Export settings. Make sure to have the file size around 9.2 MB to 9.4 MB max and not exactly 10 MB.

This time I got away with 55 frames but this is because I haven’t applied lighting and color adjustments yet and not to mention the smart sharpen settings aren't to heavy so let’s take that into consideration.
Sharpen v1 preview:

Sharpen v2
Go back to this part of the tutorial and apply the v2 settings.

Smart Sharpen 1:
Amount: 500
Radius: 0.3
Smart Sharpen 2:
Amount: 20
Radius: 0.5
We’re adding a new type of Filter which is Reduce Noise (Filter > Noise > Reduce Noise...) with the below settings.

Then one last Smart Sharpen:
Amount: 500
Radius: 0.3
Your Layers panel should look like this:

Then do the Convert to Frames Animation section again and see below preview.
Sharpen v2 preview:

Sharpen v3:
Smart Sharpen 1:
Amount: 500
Radius: 0.4
Smart Sharpen 2:
Amount: 12
Radius: 10.0
Reduce Noise:
Strength: 5
Preserve Details: 50%
Reduce Color Noise: 0%
Sharpen Details: 50%
Sharpen v3 preview:

And here they are next to each other with coloring applied:
v1

v2

v3

Congratulations, you've made it to the end of the post 😂
As promised, here is the download link to all the files I used in this tutorial which include:
supercorp 2.05 Crossfire clip
3 PSD files with sharpen settings and basic coloring PSD
Actions set
As always, if you're feeling generous here's my Ko-fi link :) Thank you guys and I hope this tutorial will help you and make you love gif making.
P.S. In the next post I'll be sharing more references I found helpful especially with coloring. I just have to search and gather them all.
-Jill
#tutorial#gif tutorial#photoshop tutorial#gif making#sharpening#sharpening tutorial#photoshop#photoshop resources#psd#psd coloring#gif coloring#supercorp#supercorpedit#lena luthor#supergirl#my tutorial#this has been a long time coming#guys. i'm BEGGING you. use the actions set - it was a pain doing all this manually again ngl LMAO#i've been so used to just playing the actions#so this has been a wild refresher course for me too 😆
494 notes
·
View notes
Text


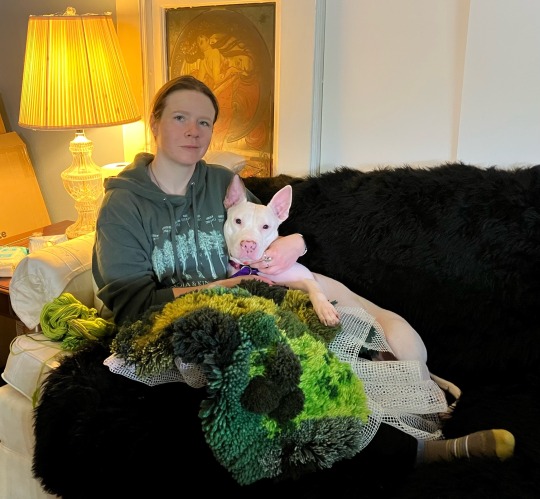

Wake up, new cryptid just dropped!
It’s true that I’ve had to reimagine my day to day life since we got her, but I can’t imagine how we got this lucky. We thought we would have to work to earn her love, but from the moment she entered our house it’s been a cuddlefest, one I couldn’t possibly deny. There are hurdles she will be facing to be sure (and she will still need to meet the cats face to face) but I’m so happy to see this happy lil cheese every day. Welcome home Raclette!
(The couches will always be hers, even if it means she does try to smush whatever I’m working on at the time!)
#Raclette#I have returned to dog after the longest of absences#despite being surrendered twice she is still so eager to love#and so ridiculously gentle and behaved#her animal manners will need work but it was noted she did live with cats#she’s starting to ignore when they make noises in the other room which is great!#seeing as she’s a pit bull mix I will need to train her as best I can since people will not forgive#she has separation anxiety of course and is anxious on car rides and needs a refresher on basic training#but she has been such a gentle house guest#and she was wonderful when we had visitors#I wanna do right by her she deserves it#poor girl had pneumonia and has allergies#she’s doing well currently#she’s my dog but J loves her just as much as I do#she’s taught me so much in just one week#sorry I’m rambling I just love her so much
314 notes
·
View notes
Text
sure it was a perfect storm of a pressure cooker but i promise destiel was about destiel
#like 2020 was all building towards something. the isolation the pandemic the general uncertainty of day to day life#toss in the heated election and counting process. sure it *couldve* been anything else. but it *wasnt*.#it was destiel. that night there were even other rumours circulating about other shows. another show even had a huge reveal!#but the most widespread and known was destiel because of course it was! because thats what everyone was losing their mind over!#look at the statistics chart of a history of destiel interest over time! i promise the destiel interest is about destiel!#were people all equally invested? no! were some people memeing? yes! but by and large nov 5th became a juggernaut bc of destiel#as someone who literally was refreshing for election news and developed mania from seeing destiel go canon. it was about destiel#sure the intersection of destiel and election results was fun. but i posted way more destiel than election stuff. cause it was about destie#anyway. idk why im on a soapbox#char speaks#destielputinelection#destiel
1K notes
·
View notes
Text
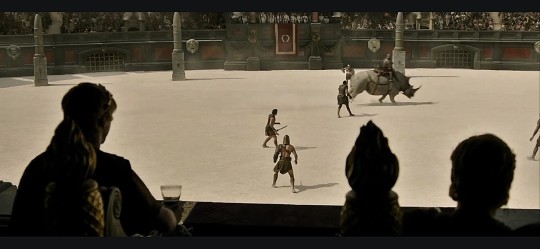
the emperors watching their big 4K UHD TV
62 notes
·
View notes
Text
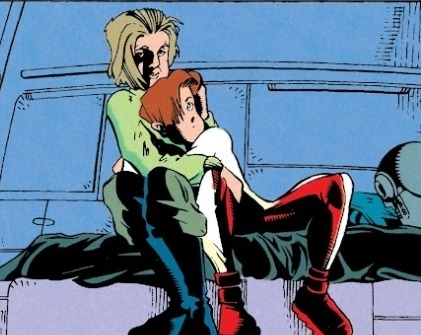
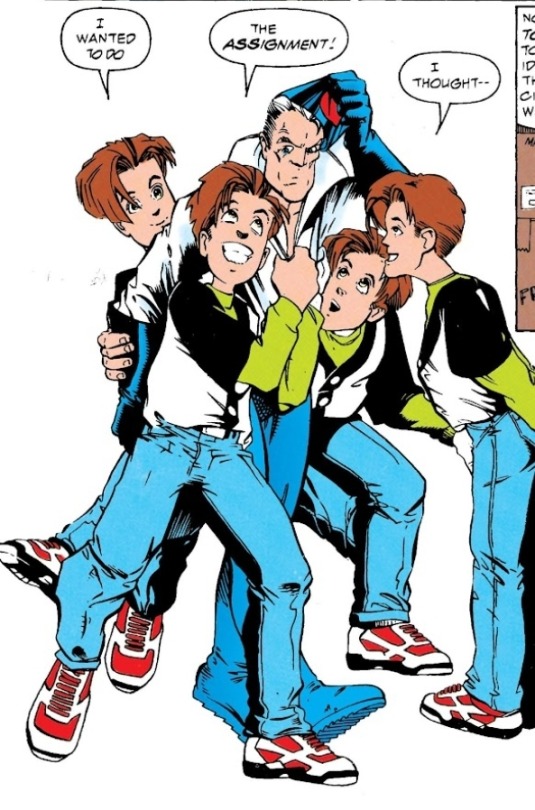
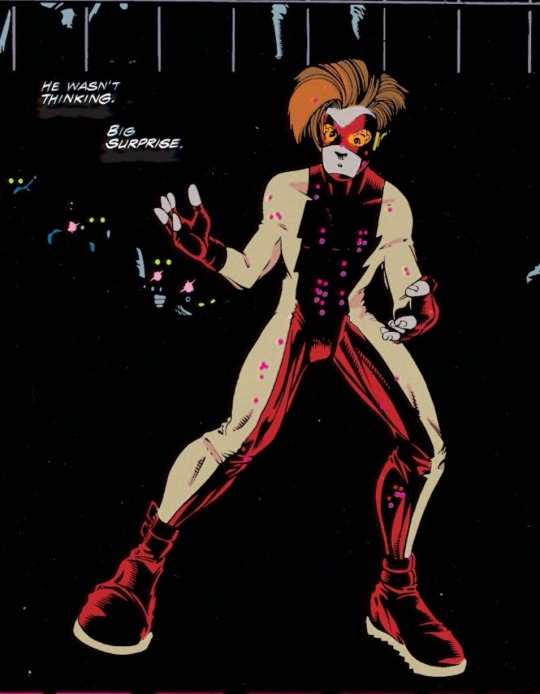
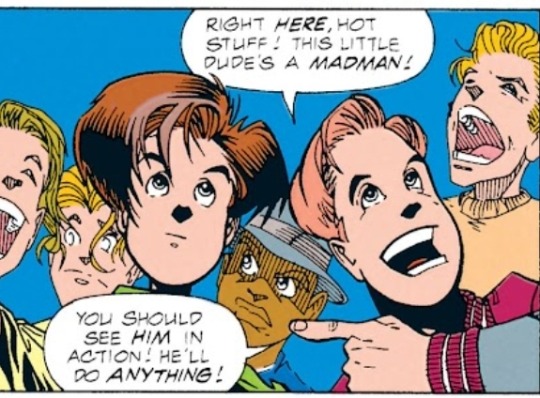
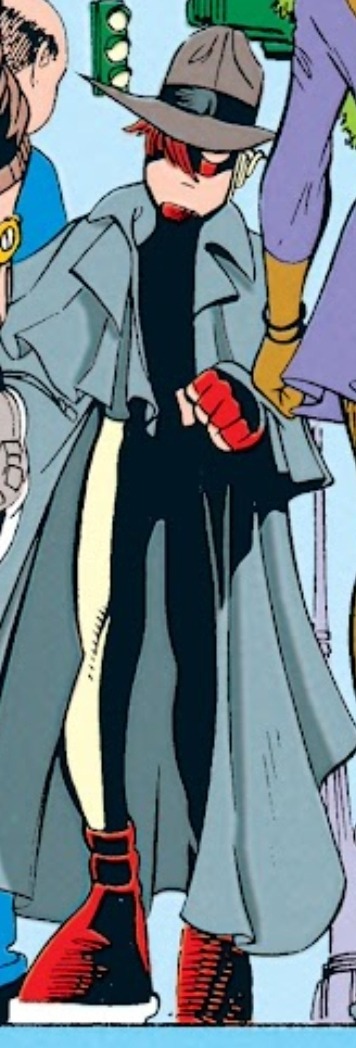
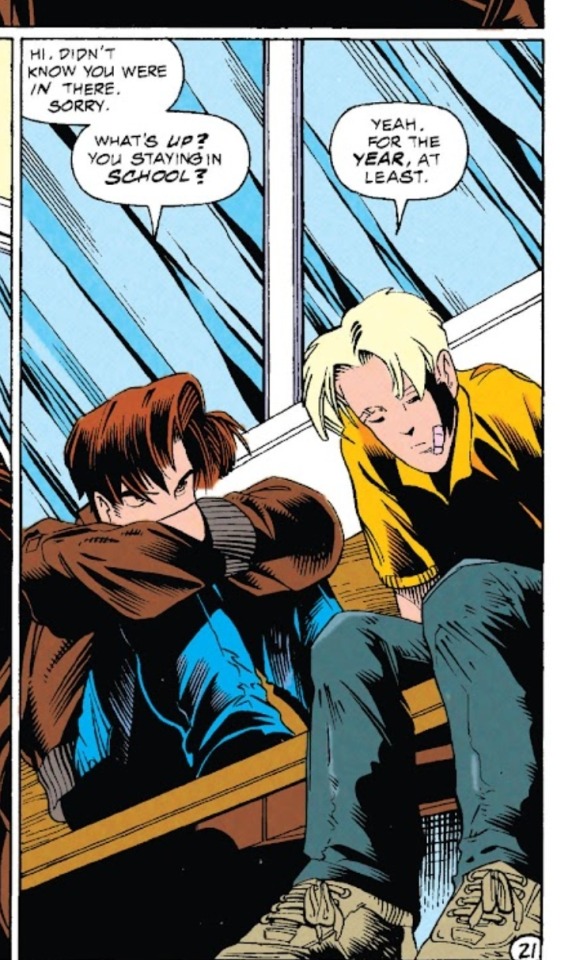
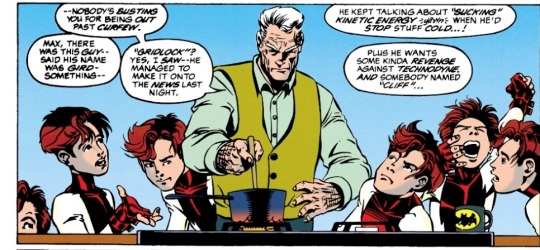
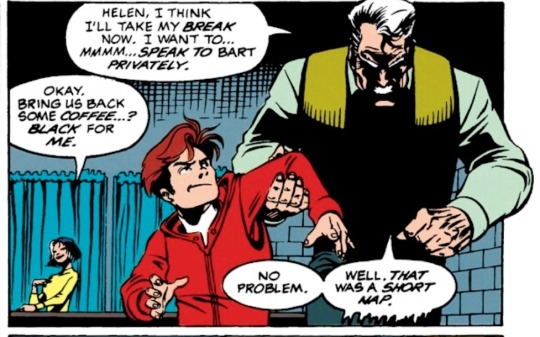
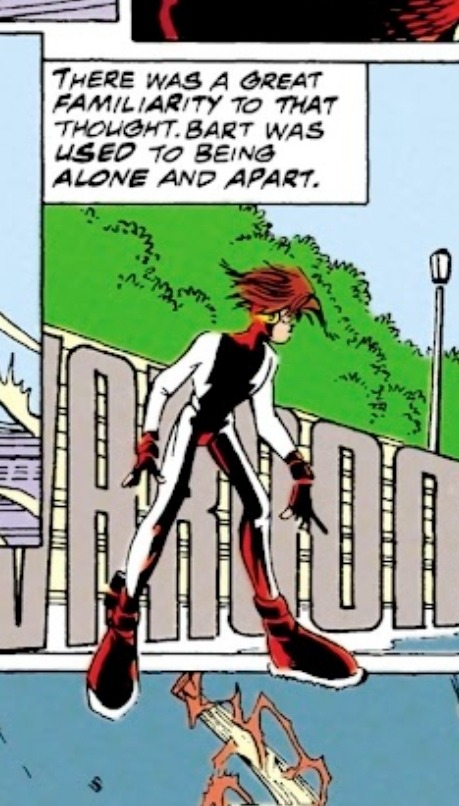
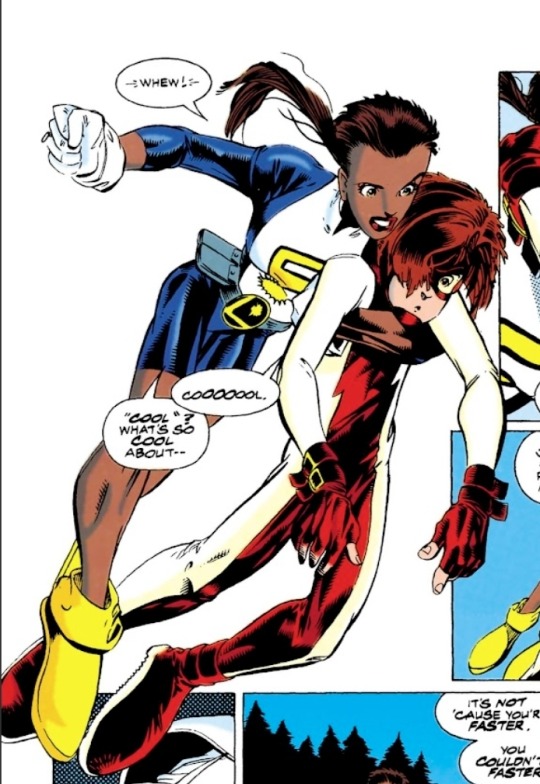
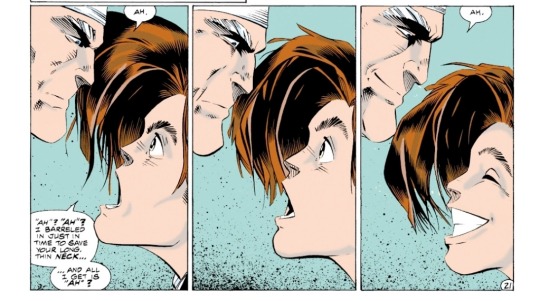
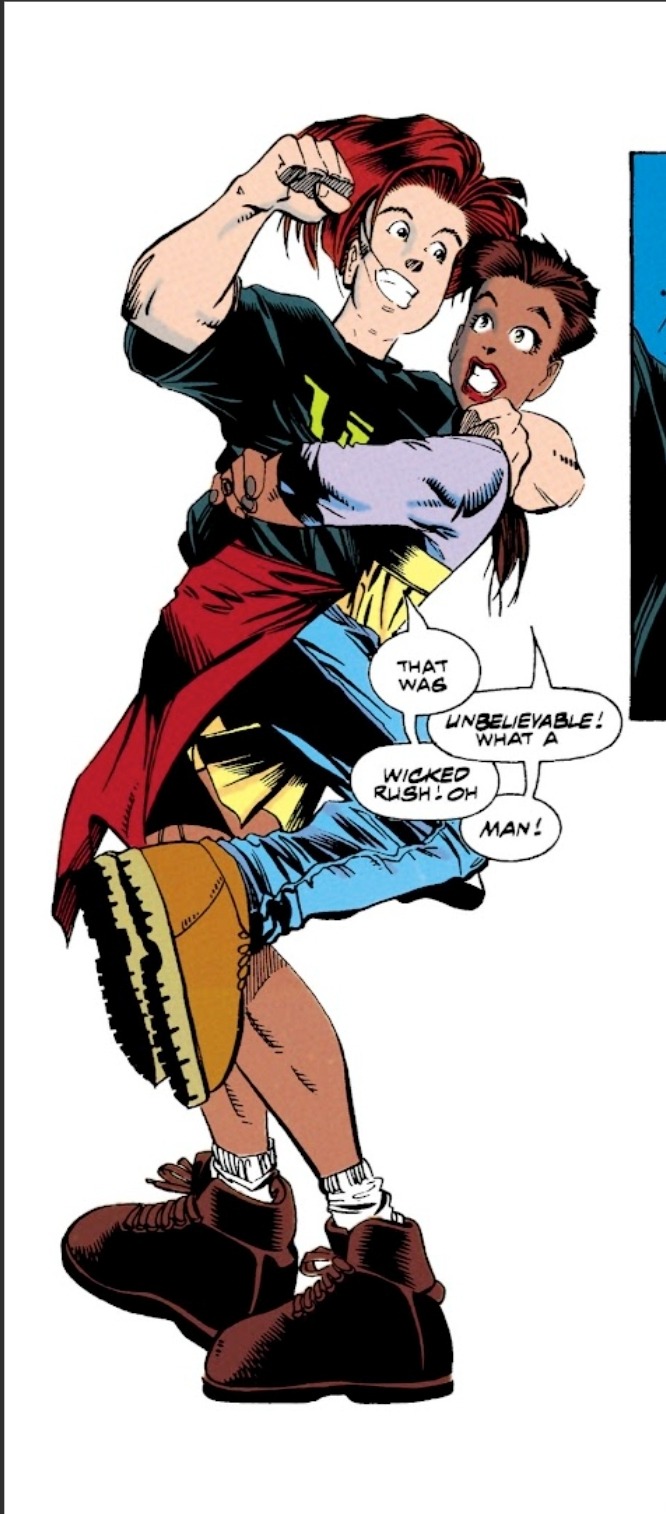
I've been reading Impulse (1995) and man. Man. Man. I'll share a few of my smaller screenshots like I did with Superboy but honestly I've been saving like entire issues it's so good. I wish I could write essays but all I can articulate is that sad little speedy boy is autistic
#Dc#Dcu#Bart allen#Impulse#Impulse is actually SO refreshing after Superboy who i of course love forever but man were his comics sometimes. WHEW!!#Mine#Mds greatest hits#Dude nothing gives me bigger imposter syndrome than trying to get into comic books#Hey if anybody who knows stuff stumbles across this post. Feel free to recommend me something. I'm deep in the Young Justice and related#comics rn but I'll take anything
78 notes
·
View notes
Text
this is a largely meaningless observation but, based on the fleki uniform demonstration comic, mithrun seems to wear the default style of the canary uniform, probably because he has no desire to personalize it or preference for how to do so, etc. when he does seem to pick his own clothes, though, they don’t look super in-line with what we’re shown of elven clothing styles in his region: high collars look like they’re fairly popular with elves in general, but out of uniform he tends to be a lot more covered up than everyone else—long sleeves, long pants, boots rather than sandals, and he dresses that way both prior to getting eaten and after the events of the series. anyway it’s kind of cute that after everything that happened to him, someone cared enough to remember what his clothing preferences used to be.
#sorry my head is full of him#dungeon meshi spoilers#just mentioned. just a bit#dungeon meshi#mithrun#he’s like a case study in the problems that would Of Course arise in a society with the standards and values we frequently see in elves#in fantasy which is very refreshing because again What is with fantasy writers writing their elven societies Like That and going no they can#be weird elitists they’re hot and they’re kind of right. and leaving it at that. i mean i know why that happens but. anyway#if elves are going to be elfing in that way it’s so much more interesting to see how that manifests and affects individuals within that#culture. this was a large part of essek’s appeal to me also lmfaondns and it is why i can’t stop giving my dnd characters elf ancestry. if#you’re going to make them be fucked up let me think about the consequences !!!! but anyway yeah no mithrun gets to be on my mind 24/7#because he Is the consequences. and it’s very good but also i am so so sad
153 notes
·
View notes
Text
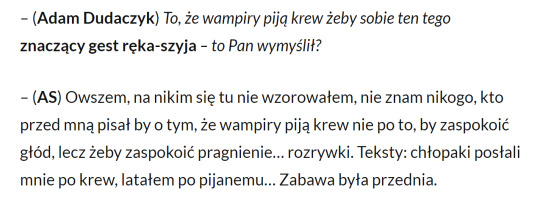
(Adam Dudaczyk) The fact that vampires drink blood to get that *meaningful hand-neck gesture* - you made that up? (Andrzej Sapkowski) Yes, I didn't model myself on anyone here, I don't know anyone who wrote before me about the fact that vampires drink blood not to satisfy their hunger, but to satisfy their thirst for… entertainment. Texts: the guys sent me to get blood, I was flying drunk… The fun was great.
as i reread this i couldn't stop thinking of this meme

#EDIT: see replies and asks right after this - hitting the side of the neck means drunk :D#i think the 'gesture' here must have been tilting your head back and lifting your hand to your lips mimicking throwing back a shot#but i don't know because nothing more is described in the writeup of the interview anyways#official translation of above texts: 'the boys sent me to the village to fetch some blood' 'i flew under the influence'#if those ring more bells#the witcher books#c: regis#because i wish to eat a third donut#interviews#andrzej sapkowski#this is why the regis enjoyment does not really extend to other vampires for me. well except wwdits vampires#i guess my rule is that: 'they have to be funny'#the thing is... yes regis can disappear into thin air and turn into a bat and bewitch with a gaze#but... his struggle... is mundane :p#he's... very normal. he sleeps in a bedroll and eats breakfast just with everyone else... idk regis with porridge is so funny to me#fantasy genre: so what is your idea for vampires? unholy demons? walking corpses? humanity in crisis of undeath? sexy aristocrats????#sapkowski: Alcoholism.#i will say though SOOOOO refreshing to have a vampire that's around humans and not struggling with the urge to 'feed' on them jfc#regis' urge to drink not being some inhuman clawing or some lustful thirst nonsense#but the desire to have a drink that comes from being socially awkward at a party...#and of course later... the kind of desire to have a drink that comes from when your life and everything in it has gone to shit#'... all fears linked to my vampiric nature are groundless. I won’t attack anybody...#... nor will I creep around at night trying to sink my teeth into somebody’s neck.'#that milva and cahir (and likely also dandelion though he wouldn't admit to it in writing) checked their necks when they woke up LOL !#one for my fellow geregis enjoyers:#regis: don't worry i wont press my lips to your neck | dandelion milva cahir: wheeewww! | geralt: ... aw :T
45 notes
·
View notes
Text
Something I really appreciate about QSMP is the communication, and I'm not just referring to it breaking down language barriers
When streamers run into problems in or out of character, they talk it out. Instead of getting mad or not saying anything and letting things fester, they talk about it and listen to one another, and today is a perfect example of that.
In lore today, Forever and Foolish fought and Leonarda was hit. Foolish was understandably furious, but he talked it out with Leonarda and Richarlyson (who came to check on them) and he was able to calm down a bit and decide what they wanted to do. When Forever asked to talk with him, Foolish heard him out and it ended with Leonarda and Foolish forgiving him. Something that could've easily spiraled into a war motivated by hurt feelings and anger and revenge was prevented solely because Forever was willing to apologize and try to make things right, and Foolish was willing to listen. And regardless of whether or not it's a good idea, the fact that Forever wants to tell Vegetta about what happened says a lot about him. He's under a lot of stress and pressure, but he still wants to be honest and not hide from whatever consequences that might come. He makes mistakes, just like everyone else on the server, but he still has a good heart.
Out of lore, we saw some conflict between Cellbit and Forever, who set up the commercial song and hid it all over Cellbit's castle. Cellbit didn't care much about the song itself, but it was too loud and overlapping and he couldn't stop it because he couldn't find where Forever hid the videos. Cellbit messaged him and asked him to get rid of the videos since he couldn't stream like that and he wanted to work on the castle, so Forever ran over and placed the videos in areas where Cellbit COULD destroy them if he wanted to, and they had a nice little conversation before hopping back in character and shouting at each other.
I dunno -- it just felt really nice to see. As someone who likes the streamers and who likes the lore, it's really refreshing to see people who are willing to talk things out. Communication and community are what QSMP is about, and I feel like we really got to see that in action today.
#i talk#qsmp talk#idk man it's just really refreshing to see.#Chat was a nightmare but that's par for the course
459 notes
·
View notes
Text
how do you make friends again?
#just completed my first day of public high school#i would like a refresher course on that#can someone like send me a powerpoint or something#this is desperate cry for help#i dont know how to talk to these people without seeming weird or invasive#three pigeons in a trench coat
50 notes
·
View notes
Text
I've been reading a lot of science fiction and fantasy stories lately, by a lot of different authors, and I've noticed an interesting trend. Not something that happens all the time by any means, but something that's more likely to happen in one over the other.
Magic fixes problems while science causes problems.
And it makes sense that it would be that way, because magic is something that we don't really have, and we can only imagine what we would do with it if we did. Magic is just altering reality in ways that logically shouldn't happen, given our current understanding of physics. If we could change reality with a snap of our fingers, oh man we would do so much good with it.
But science. We've seen what science can do. And before it can achieve the lofty goals that it sets out to do, it goes through any number of failures and setbacks. We've seen the mistakes. We've suffered through them. Then in fiction, we extrapolate what could happen with advancements that we haven't quite reached yet.
With science fiction, we tell cautionary tales of a that future could be. With fantasy, we tell fairy tales of a past that never was.
Not every time. But often enough to notice.
#and yes of course there are plenty of stories about magic gone wrong#and of scientific advancements gone right#and plenty of both kinds that are about neither#but I am seeing a trend#we are disillusioned with science but still idealistic about magic#which just makes it all the more refreshing when someone writes about a magician who does ask the important questions#stories that take their worldbuilding in clever directions#that the stereotypes don't touch#I do love a good story that thinks things through#writer life
61 notes
·
View notes
Text
i saw a iida x reader smau and it was very cute but near the end the reader got put on dorm arrest for punching someone. then when they were freed, it was revealed iida is the one who asked aizawa to let them out early because he wants to spend time with them etc.
and may i just say that soooo not true , as class rep tenya would keep you on dorm arrest through and through. in fact, he'd tell aizawa to extend your bitchin sentence. keep that scoundrel away from us civilised folk! ☝
#out of love of course#i'm jesting btw#but yeah when i saw that smau i was like#nah 😤#no joke it was super cute tho#i love it when people characterise iida accurately#obviously can interpret him however they want etc etc#but it's refreshing when i see him portrayed in a way close to canon#ya know?
39 notes
·
View notes
Text
absolutely NOT over carla’s little “awh :( yeah :(“ about lisa missing the tickets. as if she didn’t spend her entire day making sure they’d get them. daydreaming about telling her. rehearsing the exact way she’d say it. getting caught up in what lisa’s response might be. this woman is (love)SICK !!!
#when carla was like ‘but imagine betsy’s face when she gets them’#so of course she thought about LISA’S face too hard#and she just wants to make her happy at every juncture#so she sits on the computer all day waiting/refreshing/daydreaming#and for all that she gets a thanks mate#like. love you girl! suffer more#swarla#carla x lisa
35 notes
·
View notes
Text
As I reach hour 100 of replaying Dragon Age: Inquisition, only now do I discover that The Veilguard will in fact not be using imports from Keep.
An unrelated announcement, I will be dedicating my time to furiously tearing down the Veil myself piece by piece with my own bare hands and consuming unconscionable masses of the Fade in an unhinged and unstoppable eating frenzy before Solas can even blink an eye. Thank you for understanding.
#dragon age#inquisition#dragon age inquisition#the veilguard#dragon age the veilguard#i am of course posting this jokingly#i did need a refresher on the happenings of thedas#but my inquisitor could have shoved all those crystal shards straight up her butt#and that would have been just as helpful to the future protagonist
32 notes
·
View notes
Text


good morning sheith nation💜
#sheith#keith kogane#takashi shirogane#shiro#voltron#my babies#ive been listening to my sheith playlists on loop#so of course i had to draw them#ive been mostly doing character studies and warm-ups#since I've been so out of practice#and its been really refreshing getting to draw my faves#♡♡♡♡♡♡♡#shitty#(< that's my art tag)
80 notes
·
View notes
Text
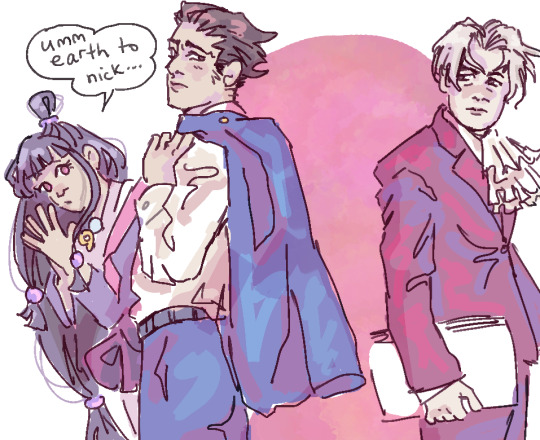

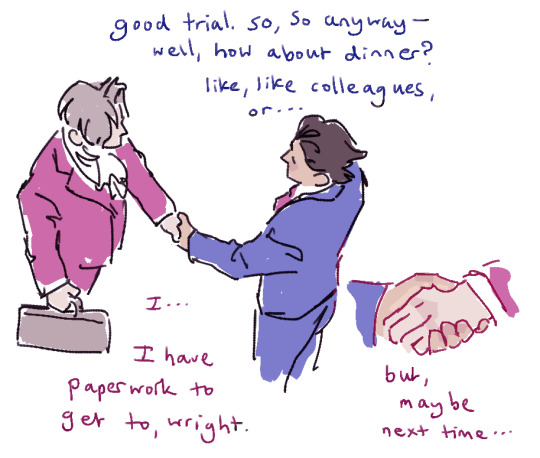
juuust working out how i wanna draw them hehe
#Oh my god. instantly was about to type witch hat tag and orufrey it's just muscle memory now. Can't believe other gay people exist..#so refreshing...and yet i can only think of qifrey being on trial for his actions & having a breakdown but then we call iguin to the stand#ace attorney tag#i'm playing the first game for a bit..been several years now..The nostalgia and power of it..#i have drawn takarazuka edgeworth before of course. Of course. Butch edgeworth you are with me.
114 notes
·
View notes