#Multimedia elements
Explore tagged Tumblr posts
Visit Tumblr Blog
Explore Tumblr blogs with no restrictions, modern design and the best experience.
Last Seen Tumblr Blogs


Fun Fact
Celebrities use Tumblr as well.
Text

Energybender
"Love is a form of energy and it swirls all around us. The Air Nomads' love for you has not left this world. It is still inside of your heart and is reborn in the form of new love."
"The glow is the combination of all your past lives focusing their energy through your body."
"In the era before the Avatar, we bent not the elements, but the energy within ourselves."
#aang#atla#going from frozen (& dead) to moving not only his body but all the elements the lightning which killed him AND energy itself#my art#multimedia#please dont repost w/o credit#shepherdden#shepherdden8#guru pathik#avatar roku#lion turtle#avatar state#beadwork#diamond painting#paint pens#colored pencil#oil crayon#i bedazzled him
10 notes
·
View notes
Text
this shit is so insanely good wtf


this style is so pretty im eating it literally shoveling it into my mouth
#bdth#op#i was past here on my first read but i forgor everything so im rereading#forgot how much i liked the multimedia elements of this
13 notes
·
View notes
Text
[screams] I AM HAVING SO MUCH FUN!!!!!!!!! THIS IS WHAT IT'S ALL ABOUT!!!!!!!!!!!
#scoring a trailer i made of art i drew about characters i invented and a story i wrote#i am feeling something not unlike gender euphoria#i have never been able to specialize i cannot just be One Type Of Artist#but now that it is all coming together. as one multimedia clusterfuck. i am in my FUCKING ELEMENT#IM HAVING A BLAST#THIS IS WHAT IT IS ALL ABOUT BABY
7 notes
·
View notes
Text
Best Multimedia Iinstitute in Rohini
#Advanced Diploma in Multimedia Training institute in Rohini#The Power of Multimedia: A Transformative Tool in Communication#In the modern world#multimedia has become an integral part of our daily lives. From social media platforms to educational tools and entertainment#multimedia engages us in ways that text alone simply cannot. But what exactly is multimedia#and why has it become so essential in communication today?#Defining Multimedia#At its core#multimedia is the integration of different forms of content#including text#audio#video#graphics#and animations. The key to multimedia is its ability to combine these diverse elements to create more engaging#interactive#and impactful experiences. Whether it’s a YouTube video#a podcast#an infographic#or a dynamic website#multimedia enriches the way we consume information#making it more accessible and memorable.#The Evolution of Communication#Historically#communication was confined to the written word or spoken language. But with the advent of technology#multimedia has revolutionized how we interact with information. For example#in education#multimedia has been used to create immersive learning experiences#offering students the opportunity to interact with content through videos#virtual simulations#and interactive quizzes. This helps cater to different learning styles
0 notes
Text

Legal Compliance For Video Accessibility
ADA Site Compliance ensures legal compliance for video accessibility through our audio description services, meeting all required standards and regulations!
#audio description#video accessibility#visually impaired viewers#enhancing video accessibility#standard audio description#extended audio description#live audio description#inclusive viewing experience#spoken narration for visual elements#accessible content#accessibility standards#visual media accessibility#section 508 compliance#audio description benefits#visual impairment#accessible storytelling#narration of visual elements#legal compliance for video accessibility#creating audio descriptions#accessible multimedia content#audio description technology#audio description services#website accessibility solutions#ADA site compliance#ADASiteCompliance#adasitecompliance.com
0 notes
Text
the most struggling part being a multimedia person for my uni's esports club is when i need to include the elements of gaming in every posters....i mean the posters for festives celebration like christmas for this month
#yup i'm currently trying to design for the christmas poster#and yet the only thing matters the most is how i need to include any elements related to esports and gaming into the poster#well i already put a winter scenery from genshin as a background#and do some coloring on it to fit on our official color code for this session#which is shocking blue and black also white as well#and yeah since that shade of blue is too bright to become a backgroud color#so that's why i toned down a bit into a darker version of that shade#and yeah....that's the only thing that i can design for today#and now i need to figure out what kinds of gaming related elements that i can include to my design rn 🫠🫠#iz and her maroon uni life#iz and her multimedia shit#<< yup new tag alert....for me dumping all the stuffs about my multimedia work rn lmaooooooo#iz being too random
1 note
·
View note
Text
Elevate Your Website 's Visual Appeal with these Effective Techniques for Centering Elements Using CSS
In today’s fast-paced digital world, having a visually appealing website is essential to stand out from the crowd. One effective way to achieve this is by centering elements using CSS. Not only does it make your website look more professional, but it also enhances user experience.

In this blog post, we will introduce you to 11 effective techniques for centering elements using CSS that will elevate the visual appeal of your website and take it to the next level! So get ready to enhance your design skills with these simple yet powerful techniques.
WHAT IS CENTERING ELEMENTS IN CSS?
Centering elements in CSS is a technique for positioning HTML elements on a web page. There are several ways to center elements in CSS, and the most common method is to use the “margin: 0 auto” property.
Other methods of centering elements in CSS include using the “text-align: center” property, or setting the element’s position to “absolute” and using the “left: 50%” and “transform: translate(-50%)” properties.
The method you choose will depend on the type of element you’re trying to center, and whether or not you want that element to be responsive.
WHY IS IT IMPORTANT TO CENTERING ELEMENTS IN CSS?
It’s important to center elements in CSS because it helps create a more balanced and symmetrical look for your web page. When elements are properly centered, they can add visual appeal and help direct a user’s eye toward the most important information on the page.
There are a number of different techniques that can be used to center elements in CSS. The most common method is to use the text-align property with a value of “center.” This will align all the text within an element to the center of that element.
Another popular technique is to use the margin property with auto values for both the left and right margins. This will cause the browser to automatically calculate equal margins on both sides of an element, effectively centering it within its containing element.
One can also use absolute positioning to center an element within its containing element. This involves setting the position property to “absolute” and then using either top or bottom and left or right properties to adjust the position of the element until it is perfectly centered.
HOW TO CENTER DIV OR TEXT IN DIV USING CSS?
If you’re working on a web design project and want to center either a div or text within a div, there are a couple of ways you can do it using CSS.
If you want to center a block level element like a div, you can use the CSS property “margin: 0 auto”. This will set the margins on the left and right sides of the element to be equal, thereby centering it.
If you want to center text or inline elements within a div, you can use the “text-align: center” property. This will align all the text within the div to be centered.

8 EFFECTIVE TECHNIQUES FOR CENTERING ELEMENTS USING CSS
In order to center elements using CSS, there are a few different techniques that can be employed. One popular technique is to use the “text-align” property with a value of “center.” This can be applied to any block level element, such as a paragraph, and will cause the contents of that element to be centered within the overall width of the containing element.
Another common technique is to set the width of the element to be centered to a specific value, then use the “margin” property with a value of “auto.” This will cause the element to be horizontally centered within its containing element, regardless of the width of that container.
It’s also possible to center elements vertically within their containing elements using CSS. This can be accomplished by setting the height of the container to a specific value, then using the “line-height” property with a value that is equal to or greater than the height of the container. The element will then be vertically centered within its containing element.
These are just a few of the many techniques that can be used for centering elements using CSS. By employing one or more of these techniques, you can easily improve the visual appeal of your website.
– FLEXBOX
When it comes to centering elements using CSS, there is no better option than flexbox. Flexbox provides a simple way to center elements horizontally and vertically within their container. In addition, flexbox can be used to create responsive layouts that automatically adjust to the size of the screen.
To use flexbox for centering, you must first set the display property of the container to flex. Then, you can use the justify-content property to center the elements horizontally, and the align-items property to center them vertically. For example, if you want to center an element horizontally and vertically within its container, you would use the following code:
container { display: flex; justify-content: center; align-items: center; }
– GRID LAYOUT
When it comes to CSS, there are a few different techniques that can be used to center elements on a page. The most common technique is known as the grid layout. This technique involves using a series of nested dives to create a grid of boxes that can then be used to position elements within that grid.
The first step in using the grid layout is to create a series of divs that will act as the columns of your grid. These divs should be given a class name so that they can be easily targeted with CSS. Once you have your column divs in place, you’ll need to add some content to them. This can be done by adding more divs or by using other HTML elements such as paragraphs or headings.
Once you have your columns and content in place, you can start positioning elements within the grid. To do this, you’ll need to use the CSS properties “float” and “clear”. The float property allows you to specify how an element should float within its parent container. By default, elements float to the left side of their container. However, if you want an element to be centered within its container, you’ll need to set the float property to “none”.
The clear property specifies what side of an element’s container other elements are not allowed to float on. So, if you want all subsequent elements after a centered element to also be centered, you would set the clear property to “both”.
App lying the grid layout technique is a great way to create a visually appealing design that is easy to understand and maintain. It also allows you to easily define how elements should be positioned within the grid, making it simple to adjust as needed.
– ABSOLUTE POSITIONING
When it comes to CSS, there are a few different methods that can be used to center elements on a web page. The most common method is to use the text-align property, which can be applied to both block-level and inline elements. However, this method only works if the width of the element is explicitly set.
Another method that can be used is the margin: auto; technique. This can be applied to block-level elements that have a set width, and will cause the element to be centered within its containing element.
If you want to center an element that is not a block-level element, or if you don’t want to set a width, then you can use the absolute positioning technique. With absolute positioning, you can specify exactly where you want an element to appear on the page using the left and top properties. You also need to set the position property to “absolute” for this technique to work.
– RELATIVE POSITIONING
When it comes to CSS, there are a few different ways to center elements on a web page. The most common method is to use the “text-align” property. This can be applied to either the entire page or to individual elements. For example, to center all of the text on your page, you would add the following CSS rule to your stylesheet:
body { text-align: center; }
You can also use the “text-align” property to center specific elements on your page, like images, blockquote, etc. For example, if you want to center an image that’s inside a div element, you would add the following CSS rule:
div { text-align: center; } img { /* this is for centering images */ display: block; margin: 0 auto; /* important */ /* top and bottom margins are 0 */ width: 50%; /* image width can be anything less than or equal to container width */ }
Another way to center elements is by using the “margin” property. You can set the left and right margins to “auto”, which will evenly distribute them within the containing element. This works for both block level and inline elements. For example, if you want to center a div element on your page, you would add the following CSS rule:
div { margin-left: auto; /* important */ margin-right: auto; /* important */ width: 50%; /* div width can be anything less than or equal to its parent container width */ }
Finally, you can use the “position” property with the “relative” value. This will set an element’s position relative to its containing element and then center it using margins. For example, if you want to center a div element on your page, you would add the following CSS rule:
div { position: relative; /* important */ left: 50%; /* important */ top: 50%; /* important */ margin-left: -25%; /* important */ margin-top: -25%; /* important */ width: 50%; /* div width can be anything less than or equal to its parent container width */ }
– TRANSLATE METHOD
When it comes to centering elements using CSS, there are a few different methods you can use. The ‘translate’ method is one of the more popular and effective techniques.
With the translate method, you can essentially move an element around on the page until it’s perfectly centered. To do this, you’ll need to set the element’s ‘transform’ property to ‘translate(X, Y)’. X and Y represent the amount of pixels you want to move the element horizontally and vertically, respectively.
For example, if you wanted to center an element horizontally on a page, you would set the X value to ‘50%’ and leave the Y value at ‘0px’. This would cause the element to be positioned 50% from the left side of the page (the exact center).
You can also use negative values for X and Y if you want to move an element up or left from its current position. So, if you wanted to move an element 10px to the left and 5px up from its current position, you would set the X value to ‘-10px’ and the Y value to ‘-5px’.
Once you have your desired position set, all that’s left is to add some vendor prefixes (-webkit-, -moz-, etc.) so that your CSS will work across all browsers.
– MARGIN AUTO METHOD
When it comes to CSS, there are a number of different methods that can be used to center elements on a web page. One popular method is known as the margin auto technique. This approach is relatively simple and only requires a few lines of code.
Here’s how the margin auto method works:
First, you need to set the width of the element that you want to center. This can be done using the width property in CSS. Next, you need to set the left and right margins to auto. This will cause the browser to automatically calculate equal margins for the element, effectively centering it on the page.
And that’s all there is to it! The margin auto method is a quick and easy way to center elements using CSS. Give it a try next time you’re working on a web project.
– TEXT ALIGN PROPERTY METHOD
The text-align property is a CSS method for centering elements on a web page. This can be done horizontally, vertically, or both.
To center horizontally, you would use the text-align: center; property. This is probably the most common way to center elements on a web page.
To center vertically, you need to use a different method. One way to do this is by setting the element’s height and width properties to 100%. Then, set the top and bottom margins to auto. This will make the element centered vertically on the page.
You can also use the flexbox model to center elements vertically. The flexbox model is powerful and has many other applications beyond centering elements. If you’re not familiar with flexbox, there are plenty of tutorials online that can help you get started.
– TRANSFORM PROPERTY METHOD
When it comes to centering elements using CSS, the transform property method is one of the most effective. This is because it allows you to center an element horizontally and vertically at the same time.
To use this method, you first need to add the following CSS code to your element:
transform: translate(-50%, -50%);
This will cause your element to be positioned 50% from the top and 50% from the bottom of its containing element. As a result, it will be horizontally and vertically centered.
CONCLUSION
CSS centering elements is a simple but effective way to improve the visual appeal of your website. By implementing these techniques, you can create attractive and well-balanced designs that are both eye-catching and easy to read. With the help of CSS, you can add custom styles to your webpages in no time at all.
So don’t wait any longer – get started with centering elements using CSS and elevate your website’s visual appeal today!
#Elevate Your Website 's Visual Appeal with these Effective Techniques for Centering Elements Using CSS#software development#digital marketing#web development#web design#web design agency in toronto canada#app development#digital marketing agency canada#graphic design#multimedia / flash animation services#web devlopment#web design company in mississauga
0 notes
Text
on a similar note: it is possible to be a fan of eight while also not engaging with/disliking the EDAs, please let me breathe
listening to scherzo for the first time makes me understand all the aggressive reactions to skinamarink
#this won’t go to the tags because it’s a reblog so I can say it:#holy absolute god I am tired of people acting like a book series that hasn’t been publicly acknowledged by the franchise in 30 years#is word of law#for one the bbc has repeatedly said who has no actual canon#because of the amount of contradictory pieces and multimedia elements of it#and two: those books are cruel as fuck and it’s fine to not want to engage with that!#not to mention almost all of them I’ve read are terribly written (including the popular ones)#let people engage with fandom the way they want to engage with it!#maggie.txt
16 notes
·
View notes
Text
Savings/Mental Health Recovery Coms

Hello, as some of you may know we recently lost our beloved dog. While some of the process of healing from that has started to settle in I thought it could be nice to try and keep my hands busy with some commissions that would also help recover some of the savings we lost from the last vet visit we had to do. I plan to keep this post circulating for a little bit, and I'd be very grateful for anything that comes my way. Sale prices are still applicable, thank you to anyone who takes me up on one.
Pricing and examples:

Flat colour piece w. basic detailing: $50+ $40
(Piece includes a single character and BG element in flat pixel art, $15 for another character)

Multimedia Y2K Stylized Piece: $50 $35
(Piece includes a custom 3D background created in Bryce 3D and stylized poster/card format) NOTE: Background complexity is limited, please temper expectations

Flat/Pixel art only Y2K Stylized Piece: $50+ $40
(Piece includes a single character/design element in a poster/card format, $15 for another character)

Pixel Chibi: $20 $15
(Piece includes a single character and BG, no additions)


Emote Suite: $35 $25
(Price covers up to 9 custom emotes sized for usage in Discord and other messaging use cases)

Doodle:$25 $15
(A flat simple piece with a simple concept done on a small canvas. Includes one character and simple background, no additions)
Please DM me and we'll discuss things further. Thanks for reading.
294 notes
·
View notes
Note
Did u go to university? I’m curious what your major was/would be :3
Yuppers, I did a uni course but the classes themselves were actually in a college building and format. It was a new experimental thing at the time where Nottingham Trent Uni were accrediting it and instead of really informal lecture structures, it was taught like a usual 30 class, multi module academic year.
The real charm of the course was just about every tutor was still an active freelancer or owner of a business relating to radio, web design, graphic design etc. - the course was simply named Multimedia ha
Year 1, we did a module on each topic. Year 2 we trim those down, then Year 3 we focused solely on one (or two if they complemented one another well). I zero'ed in on Radio Presenting and web design. I'd already been doing online radio on Habbo fansites then towards the end of my first year I finally joined Trent Uni's student station Fly FM. I somehow nabbed Best Newcomer at the national Student Radio Awards with only one term under my belt. That really elevated my passion for that industry and I went on to get nominated for Best Male Presenter in subsequent years.
Then I graduated, knew I wasn't passionate about web design but had to be an adult and 'get a real job', self sabotaged or ghosted some interviews in protest looking back on it LOL then I landed a gig in radio quite quickly doing evenings Mon - Thurs. Met yogs some time later and they offered me a room in the office. I was undecided, but when I got home from Bristol, the literal next day the station told me they were making cuts and I was axed in that. Threw all my energies in to it and still going to this day
Bit of a sporadic journey but each branch of media I studied and honed means I'm so self sufficient as a creator (sometimes to a fault, I know I should delegate more)
Before uni I did join a course which promised game design elements alongside web design etc. and it was super disappointing. We used Visual Basic *shudder* to make Guess Who and that was the extent of it lol - I did toy with the idea of going to Demontfort uni because that had a legit full fledged game course which was very unique at the time, but radio took a hold of my interest in that period keeping me closer to home
317 notes
·
View notes
Text
on one hand, spending last week drawing more talk sprites for Amadeus instead of working on the mechanics that I got a lot of constructive feedback on was absolutely 100% procrastination.
on the other.... putting in the new expressions is making the game come to life!!!! and motivating me to actually work on the mechanics now that i have More Fluff To Put In There
#this is why game dev is simultaneously harder and easier for me than a non multimedia project#sometimes i can procrastinate on the project by... working on the project#sometimes hitting a wall with one element can get circumvented by work on another element#however sometimes it means i have to do stuff i dont want to do. alas
2 notes
·
View notes
Text
Best Multimedia Iinstitute in Rohini
#The Power of Multimedia: A Transformative Tool in Communication#In the modern world#multimedia has become an integral part of our daily lives. From social media platforms to educational tools and entertainment#multimedia engages us in ways that text alone simply cannot. But what exactly is multimedia#and why has it become so essential in communication today?#Defining Multimedia#At its core#multimedia is the integration of different forms of content#including text#audio#video#graphics#and animations. The key to multimedia is its ability to combine these diverse elements to create more engaging#interactive#and impactful experiences. Whether it’s a YouTube video#a podcast#an infographic#or a dynamic website#multimedia enriches the way we consume information#making it more accessible and memorable.#The Evolution of Communication#Historically#communication was confined to the written word or spoken language. But with the advent of technology#multimedia has revolutionized how we interact with information. For example#in education#multimedia has been used to create immersive learning experiences#offering students the opportunity to interact with content through videos#virtual simulations#and interactive quizzes. This helps cater to different learning styles#ensuring that visual learners
0 notes
Text
Enhancing Video Accessibility
The Impact Of Audio Description: Enhancing Video Accessibility For Visually Impaired Viewers
How do people with visual impairments experience the world of movies and television? Have you ever considered what it’s like to watch a film without seeing the vibrant colors, intricate expressions, or stunning landscapes that make up the visual narrative? In this article, you will learn about the impact of audio description, and how enhancing video accessibility helps to people with visual impairment.
For many with visual impairments, this can lead to disconnection as they miss out on the crucial visual elements that bring a story to their life.
This is where the power of audio description steps in.
Audio description is a groundbreaking technology that provides a spoken narration of the visual elements in movies and TV shows.
It transforms the viewing experience, offering a rich, detailed verbal depiction for those with visual impairments to engage with the story.
It creates an inclusive experience about genuinely participating in the narrative, which is why it is necessary in today’s digital age. Ensuring content is accessible through audio description is a commitment to inclusivity and equality.
At ADA Site Compliance, we understand the critical importance of accessible content. Our team of experts is ready to help you ensure your videos meet the highest accessibility standards, including optimized audio descriptions. Let us work together to ensure your content reaches and resonates with all audiences.
What Is an Audio Description?
Audio description provides a spoken narration of visual elements in media, including movies, television shows, and live performances. This service helps blind or visually impaired individuals better understand and enjoy the content, enhancing their overall experience.
It vividly portrays actions, images, gestures, and settings, enabling visually impaired viewers to follow the flow of events, grasp the emotional character undertones, and appreciate the storyline nuances.
Besides, adding audio descriptions also benefits distracted viewers or viewers who find it difficult to focus on the film’s visual aspects. The additional narrative context and richness enhance the viewing experience for a broader audience, making it an indispensable tool for truly inclusive media.
Understanding the Types of Audio Description for Visual Media
Audio description comes in various forms, each tailored to different types of content and specific viewing needs.
1. Standard Audio Description
This is the most widely used format. It delivers concise narrations of key visual elements during natural pauses in dialogue. It ensures a seamless and uninterrupted viewing experience, allowing the narrative to flow smoothly without disrupting the content’s rhythm.
2. Extended Audio Description
Extended audio descriptions offer a more detailed description and narration for intricate visuals or fast-paced action. It goes beyond the basics, providing in-depth explanations of the setting, characters, and actions to give viewers a fuller understanding of the visual subtleties crucial to the storyline.
3. Internet and Interactive Media Audio Description
These descriptions make web pages and multimedia content accessible by covering visual elements such as images and graphics. They thus make digital content more inclusive for users who are blind or use screen readers or other assistive technologies.
They ensure fully accessible pre-recorded multimedia content by meeting essential accessibility standards like the W3C WCAG, Section 508, and EU regulations.
4. Live Audio Description
These descriptions are more in real-time settings like theater performances or live sports events, offering detailed costumes and scene changes or field actions. Like sports commentators, trained narrators describe actions on stage or the field, focusing more on visual details.
The live audio description brings immediacy and engagement to live events for those who might otherwise miss out on the visual aspects.
Each audio description type plays a vital role in making content accessible and enhancing the viewing experience for visually impaired audiences.
Six Advantages of Audio Description Services
By providing detailed explanations of visual elements, audio description ensures that everyone can fully engage with and appreciate the content. Accessibility for visually impaired individuals prevents their exclusion from films, television, and other visual media.
Here are some critical advantages of audio description accessibility:
Enhanced Accessibility: Audio description significantly expands the reach of your content, making it accessible to a large audience of visually impaired individuals.
Increased Versatility: Audio descriptions add flexibility to how your content is consumed. Audiences can enjoy your material by listening while multitasking.
Improved Language Acquisition: Audio description helps with language development in individuals with autism. Linking words with visual elements enhances vocabulary, comprehension, and overall language skills.
Better Understanding of Social Cues: Audio description helps individuals with autism better understand the emotional and social cues conveyed through facial expressions and body language.
Enhanced Auditory Learning: For many, auditory learning helps absorb the essential visual elements that may be unknowingly missed. Audio description enhances the auditory learning experience, making it easier to retain information and grasp complex topics.
Legal Compliance: In many cases, audio description is legally needed to ensure content accessibility for individuals with disabilities. Failing to comply with these accessibility standards can lead to costly legal repercussions.
By incorporating audio description into your web content accessibility guidelines, you improve accessibility and affirm your commitment to diversity and equal opportunity for all.
How to Create Audio Description?
Creating audio descriptions is a meticulous process, and following these five essential steps helps truly enhance accessibility:
Step 1: Conduct a Comprehensive Content Analysis of All Visual Elements
Begin by thoroughly reviewing your video and identifying all significant visual elements that require explanation. This includes actions, facial expressions, scene transitions, on-screen text, sound effects, and other components contributing to the story or understanding.
Step 2: Draft a Clear and Concise Script
The next step is to craft an easy-to-understand script with a video description of important visual elements. It should seamlessly blend with the existing audio track without technical jargon. Use the present tense to create audio descriptions while maintaining a sense of immediacy. Break down complex scenes into smaller, digestible segments, and keep the script engaging and informative.
Step 3: Record the Audio with the Help of a Professional Voice Artist
Engage a skilled voice artist experienced in audio description to record your script. Their clear and articulate delivery and descriptive narration in the desired pace, tone, and style enhance the listening experience.
Step 4: Edit and Synchronize the Audio Description As Appropriate
Carefully edit the recorded audio description to align with the video timing and fit into the pauses in dialogue and background sounds. Review the extended description script for inconsistencies, errors, or unclear sections and make necessary adjustments for a smooth and coherent flow.
Step 5: Conduct Rigorous Quality Assurance
Evaluate the final audio description to ensure clarity, accuracy, and effectiveness in conveying information. Seek feedback from visually impaired individuals or consult accessibility experts to identify potential issues or missing essential visual audio elements. Revise as needed to guarantee that the audio description meets the highest standards of quality and accessibility.
The Evolution of Audio Description Technology
With the rapid advancement of technology, audio description has seen significant progress, enhancing its effectiveness and reach. Modern tools, innovative software, and refined methods have revolutionized how audio descriptions are created and delivered.
These technological advancements are not just about convenience—they enable individuals with visual impairments to engage with and participate in society.
Essential Tools for Creating High-Quality Audio Descriptions
A meticulously crafted script is the foundation of effective audio description. Some tools offer robust scriptwriting capabilities, including automatic formatting, collaboration features, and version control. These capabilities are indispensable for creating precise and accurate scripts and critical for delivering a seamless and engaging audio description experience.
Once the script is ready, record and refine the audio using tools to capture audio recording, editing, and mastering audio. These applications ensure the final audio description is clear, professional, and fully immersive, enhancing the viewer’s experience.
Accurate transcription is another crucial component of high-quality audio description, and some tools offer fast and reliable transcription services. This allows creators to focus on producing high-quality audio descriptions without wasting time on manual transcription, ensuring that every detail of entertainment audio description is captured accurately.
Future of Audio Description and Accessibility
The future of audio description is promising and evolving rapidly. As technology advances, the quality and accessibility of audio-described content are set to reach new heights. Innovations in AI and machine learning are paving the way for more efficient and accurate creation of audio descriptions, making it easier than ever to ensure that content is accessible to all.
These advancements mean that audio description will become an even more integral part of media creation. However, technology alone is not enough to achieve true accessibility. Collaboration is key. For audio description to reach its full potential, content creators, accessibility experts, and the visually impaired community must work together.
By sharing knowledge, expertise, and experiences, we can drive innovation and make media more inclusive for everyone. This collaborative effort is essential in ensuring that the audio description meets the technical requirements and resonates with the audience it serves.
Audio description is vital to inclusivity, making video content accessible to everyone. It allows visually impaired individuals to engage fully with films and television, fostering a sense of belonging and participation.
At ADA Site Compliance, we are dedicated to helping you create accessible content that meets the highest standards. Our team of experts is ready to assist you in integrating audio descriptions and other essential accessibility features into your videos. Together, we can build a more inclusive future where everyone can enjoy the magic of storytelling!
youtube
#audio description#video accessibility#visually impaired viewers#enhancing video accessibility#standard audio description#extended audio description#live audio description#inclusive viewing experience#spoken narration for visual elements#accessible content#accessibility standards#visual media accessibility#section 508 compliance#audio description benefits#visual impairment#accessible storytelling#narration of visual elements#legal compliance for video accessibility#creating audio descriptions#accessible multimedia content#audio description technology#audio description services#website accessibility solutions#ADA site compliance#ADASiteCompliance#adasitecompliance.com#Youtube
0 notes
Text
Hazbin Masterpost
Heavenbound Masterpost
Vox, the noisy video box
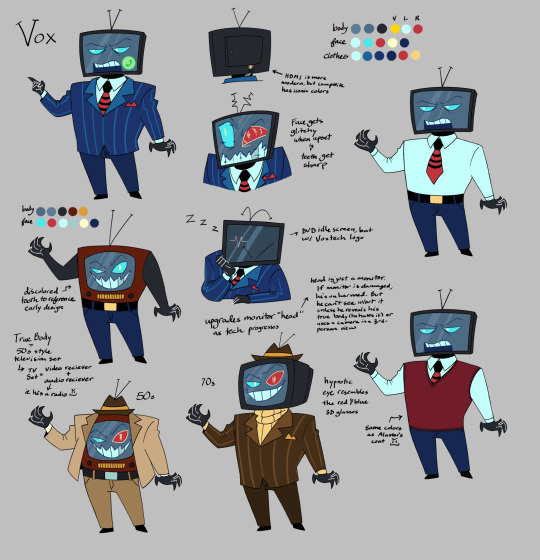

So Vox may not be my favorite character, but he is probably my favorite redesign. I laugh every time I look at him now. He looks like a weird mix of Spongebob, Kraang(TMNT), and Mr. Electric(Sharkboy and Lavagirl). He absolutely hates it.
Notes under the cut
There's too many twinks in this show. So when I was trying to decide which characters I could change, for body diversity, Vox was an obvious one. He needed more bulk so his body could conceivably support the old TV models. Those things could get heavy. The change also had the side effect of making him shorter, which just worked better proportionately.

I liked the idea that Vox could never get rid of his original bulky 50s TV, but also wanted him to be able to upgrade. So I decided his true body is the 50s TV, and he adds an upgraded monitor for a head as technology improves. He's hates that he's stuck as an old fashioned TV, so he hides that under his suit. Since the monitor is just an addition, it can be swapped out easily. It can be damaged and he's technically unharmed. But he can't see through his suit without the monitor, unless he wants to use a security camera and direct himself 3rd person style.
I didn't like that basically everyone has sharp teeth. It reduces the impact for characters like Alastor or Rosie. So I've been having the default be just sharp canines. But with Vox being a TV, there are so many possibilities. I gave Vox "regular" teeth, which helps him look more trustworthy. It fits the corrupt businessman vibe. But the appearance can change with his mood too.
Color TV became available in the 50s, so Vox always had color vision. But I think it'd be funny if, early on, he had a tendency to glitch out by going into black and white vision when he gets worked up. He's mostly grown out of that glitch, but he can't seem to shake the static or TV color bars, and developed new ones as he integrated computer and internet tech into himself as well. Now he gets the Blue Screen of Death, system errors, and city wide power surges.
Messing around with his face is so fun. When he's bored or tired a Voxtech logo will bounce around like the DVD logo, or display a screensaver. His face can get too big for the screen when he's excited, or be small when he's feeling embarrassed. I need to put a troll face on him at some point. It may be an old meme, but man, it feels right.
His left eye turns red when it's hypnotic, to reference those blue and red 3D glasses.
Of the three Vees, he is absolutely the most powerful. Val and Vel are the content creators, but Vox is the platform. The other two, while still powerful in their own right, would never have gotten to the level they're at if it weren't for Vox. He controls the mainstream media.
--TV set--
So we've got some interesting implications with how he functions. He's a TV, but he blue screens like a computer, and he shorts out the power grid. I think it's safe to say he is more than just a TV, he's a multimedia entertainment center. That, and TVs are starting to really blend with computers these days. He's mainstream media.
At some point, I realized that a TV set was a "set" because it wasn't just a single device. A television set was a collection of components, which boils down to a radio hooked up and synchronized to a visual display. I bring this up mostly because I am a sucker for one-sided radiostatic. It's so funny to me. Vox is obsessed.
But I'm going to refrain from too much theorizing about their relationship. Alastor is absolutely not interested in romance. Nor a QPR. He's not even interested in friendship. Alastor is too invested in power dynamics to really consider anyone a friend. Mimzy is probably the closest he has to a friend, and even that has manipulative elements on both sides. But I'm supposed to be talking about Vox!
--Human Vox!--
He is not tall, haha. But his proportions are a bit taller than his demon form. I wanted to go for square glasses, but I didn't see many examples of that in the 50s photos I found. Oh well! My goal was a sleazy business man. He probably had a variety of jobs, but they primarily involved TV. Commercials, PR, interviews, news, game shows, talk shows, screenwriting, etc. Whatever he could do to get more influence. He found himself favoring the business end of things. Making deals and pulling strings. He decided what would go on the air. He's one of those network executive types.
I see lots of people give him heterochromia, but I don't really see a point to that. He hypnotizes people with his left eye, sure, but it's not a different color. It's not disfigured in any way either. Maybe he just had a tendency to wink at people, I dunno.
I think his death involved some sort of severe skull fracture focused around his left eye. Maybe a car accident, maybe he was shot, idk. Maybe seizures were involved. But he was somewhere in his mid 40s to early 50s. I ended up writing 45, but I'm not super committed to that or anything.
For a human name, I see lots of people calling him Vincent and that's sorta grown on me. So I might go with "Vincent Cox".
And because I fell into another research rabbit hole...
--TV evolution--
(below) 50s-60s CRT TV: TV sets were treated as furniture and there could be some very interesting cabinet designs. Color TV was introduced in the 50s, but wasn't quite profitable until the late 60s.


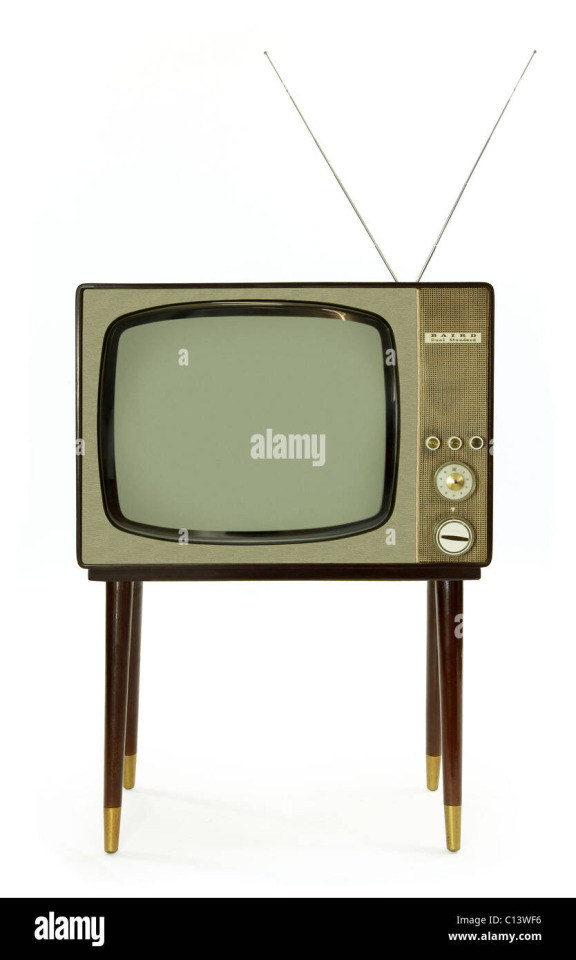
(below) 70s-80s CRT TV: Color TV became more affordable and commonplace.


(below) 90s CRT TV


(below) 2000s CRT to Plasma and LCD TVs: The three display technologies competed, but LCD won out in the end. Plasma and early LCD didn't look substantially different. Plasma was a little bulkier, but was still slimmer than CRT.


2010s and on: LCD improved with LED backlighting. But then OLED removed the need for backlighting entirely, which mixed the benefits of plasma and LCD. (Didn't bother to find a picture example. It's so close to modern at this point)
--Display technology-- (These overviews are very simplified)
CRT(Cathode Ray Tube)--Used through the 1900s to approx 2010. Monochromatic until Color TV developed aroung the 1950s. Worked via vacuum tubes and electron gun that lit up the pixels. They were bulky, heavy, and used a whole lot of power. Widely considered obsolete and no longer made. Video games made while these were in use tend to look better in CRT, since the graphics accounted for the image quality.
Flat screens-
PDP (Plasma Display Panel): Used from early 2000s to approx 2015. Used gas cells that light up pixels when electrically charged. Good image quality and good contrast, but expensive, heavy, and used a lot of power. Considered obsolete and no longer made, despite still having a desirable image quality.
Plasma and LCD competed in the 2000s to early 2010s as CRT popularity waned. LCD eventually won out due to weight and overall cost(including market price and energy efficiency).
LCD (Liquid Crystal Display): Introduced for TV around the same time as Plasma. Works via a liquid crystal layer with a backlight. Slim, decent image quality, energy efficient. Viewing angle matters because image colors are warped at wide angles. Cheaper than plasma. There are two main backlighting types:
--CCFL(Cold Cathode Fluorescent Light): Used fluorescent lighting for the backlight. Image quality was decent, but didn't have good contrast. (the blacks were never truly dark because of the backlight)
--LED(Light Emitting Diode): An LCD that uses LEDs instead of CCFL for the backlighting. Better contrast and efficiency than using CCFL.
OLED(Organic LED): Mixes strengths of plasma and LCD. Self emitting LEDs. No backlight or LCD panel needed, which improves contrast(about as good as plasma was, which is why plasma is basically obsolete now).
--QD-OLED(Quantum Dot- OLED) Adds a layer of Quantum dots to an OLED to improve color gamut. I think. I can't let myself fall too far into this rabbit hole, so I'm not double checking anymore.
((Feb 12, 2025-updated tags)
#hazbin hotel#hellaverse#hazbin hotel redesign#hazbin vox#vox#human vox#the vees#heavenbound au#a3 art#fanart#digital art#character sheet
158 notes
·
View notes
Text
.。*♡゚ A/n: totally not trying to learn html (which technically isn't a programming language, for what I had read), and well, if Idia was teaching me I would learn everything so quickly tbh. Or not. He would start explaining and I would have the sudden urge to kiss him, oh well it happens ig

"Uh... I think I have an error in my code." You break the silence, tone soft as the computer screen lights up your eyes just the right way for Idia to lost himself in the reflex. He love your eyes, your concentrated face, the way you stick out your tongue without realizing.
And he loves the way you timidly look to him, as if he has all the answers to your questions - which, about this subject, he have, by the way.
"Ah~ your closing array is missing a closing slash. Here, Yuu-shi." He pointed your error with a soft tone, blue nail hitting the screen, and a surprised pout grew on your lips.
He wanted to smother you in his arms, to pick you up and hold you till his arms fell off and his corpse rot - that was how bad he yearned for you, your skin, you smell. He breathes really hard to refrain from doing it, though. You wouldn't want that. He was just a mere R card, a lonely gamer, a-
"Thank you, Idia. You're the best." You giggle to yourself, feeling yourself warm under his eyes and lousy smile. Unbeknownst to you, the only things that were going through his head were about you.
Your smile, the way your eyes lightened up, your laughters and giggles, the messages you passed each other in class (when he was there in person), your secret handshake. Idia loved you. He loved your very dearly.
He loved you so much that he could cry.
"Uh... it's no big deal," yet his hair was getting hotter, rosey tone starting to burn brightly. "Don't forget the closing stash, and everything should work properly. This programming language is not that used anymore, but most can learn useful things learning it anyway. I think."
Idia had half of his mind to know that he was rambling again, talking so fast that he could make Eminem cry. But he couldn't stop when you looked at him with such big eyes filled with curiosity and wonder, taking notes of everything he was saying.
He noted then that you had hello kitty stickers on your page. A few drawings that Ortho made of him, Idia and you; that almost killed him right then and there.
"Ah... HTML uses elements, tags, and attributes to organize text, images, links, and other multimedia elements. It can be combined with CSS for styling and JavaScript for interactivity."
#twst idia shroud#yandere idia shroud x reader#idia shroud x reader#idia shroud#idia x reader#idia x mc#yandere idia#twst idia#twisted wonderland idia#yandere idia x mc#yandere idia x reader#idia x yuu#idia x you#yandere idia x yuu#yandere idia shroud x yuu#yandere idia shroud x mc#yandere idia shroud
97 notes
·
View notes
Text
Elevate Your Website's Visual Appeal With These Effective Techniques For Centering Elements Using CSS
In today’s fast-paced digital world, having a visually appealing website is essential to stand out from the crowd. One effective way to achieve this is by centering elements using CSS. Not only does it make your website look more professional, but it also enhances user experience.
In this blog post, we will introduce you to 11 effective techniques for centering elements using CSS that will elevate the visual appeal of your website and take it to the next level! So get ready to enhance your design skills with these simple yet powerful techniques.
WHAT IS CENTERING ELEMENTS IN CSS?
Centering elements in CSS is a technique for positioning HTML elements on a web page. There are several ways to center elements in CSS, and the most common method is to use the “margin: 0 auto” property.
Other methods of centering elements in CSS include using the “text-align: center” property, or setting the element’s position to “absolute” and using the “left: 50%” and “transform: translateX(-50%)” properties.
The method you choose will depend on the type of element you’re trying to center, and whether or not you want that element to be responsive.
WHY IS IT IMPORTANT TO CENTERING ELEMENTS IN CSS?
It’s important to center elements in CSS because it helps create a more balanced and symmetrical look for your web page. When elements are properly centered, they can add visual appeal and help direct a user’s eye toward the most important information on the page.
There are a number of different techniques that can be used to center elements in CSS. The most common method is to use the text-align property with a value of “center.” This will align all the text within an element to the center of that element.
Another popular technique is to use the margin property with auto values for both the left and right margins. This will cause the browser to automatically calculate equal margins on both sides of an element, effectively centering it within its containing element.
One can also use absolute positioning to center an element within its containing element. This involves setting the position property to “absolute” and then using either top or bottom and left or right properties to adjust the position of the element until it is perfectly centered.
HOW TO CENTER DIV OR TEXT IN DIV USING CSS?
If you’re working on a web design project and want to center either a div or text within a div, there are a couple of ways you can do it using CSS.
If you want to center a block level element like a div, you can use the CSS property “margin: 0 auto”. This will set the margins on the left and right sides of the element to be equal, thereby centering it.
If you want to center text or inline elements within a div, you can use the “text-align: center” property. This will align all the text within the div to be centered.
8 EFFECTIVE TECHNIQUES FOR CENTERING ELEMENTS USING CSS
In order to center elements using CSS, there are a few different techniques that can be employed. One popular technique is to use the “text-align” property with a value of “center.” This can be applied to any block level element, such as a paragraph, and will cause the contents of that element to be centered within the overall width of the containing element.
Another common technique is to set the width of the element to be centered to a specific value, then use the “margin” property with a value of “auto.” This will cause the element to be horizontally centered within its containing element, regardless of the width of that container.
It’s also possible to center elements vertically within their containing elements using CSS. This can be accomplished by setting the height of the container to a specific value, then using the “line-height” property with a value that is equal to or greater than the height of the container. The element will then be vertically centered within its containing element.
These are just a few of the many techniques that can be used for centering elements using CSS. By employing one or more of these techniques, you can easily improve the visual appeal of your website.
– FLEXBOX
When it comes to centering elements using CSS, there is no better option than flexbox. Flexbox provides a simple way to center elements horizontally and vertically within their container. In addition, flexbox can be used to create responsive layouts that automatically adjust to the size of the screen.
To use flexbox for centering, you must first set the display property of the container to flex. Then, you can use the justify-content property to center the elements horizontally, and the align-items property to center them vertically. For example, if you want to center an element horizontally and vertically within its container, you would use the following code:
container { display: flex; justify-content: center; align-items: center; }
– GRID LAYOUT
When it comes to CSS, there are a few different techniques that can be used to center elements on a page. The most common technique is known as the grid layout. This technique involves using a series of nested divs to create a grid of boxes that can then be used to position elements within that grid.
The first step in using the grid layout is to create a series of divs that will act as the columns of your grid. These divs should be given a class name so that they can be easily targeted with CSS. Once you have your column divs in place, you’ll need to add some content to them. This can be done by adding more divs or by using other HTML elements such as paragraphs or headings.
Once you have your columns and content in place, you can start positioning elements within the grid. To do this, you’ll need to use the CSS properties “float” and “clear”. The float property allows you to specify how an element should float within its parent container. By default, elements float to the left side of their container. However, if you want an element to be centered within its container, you’ll need to set the float property to “none”.
The clear property specifies what side of an element’s container other elements are not allowed to float on. So, if you want all subsequent elements after a centered element to also be centered, you would set the clear property to “both”.
App lying the grid layout technique is a great way to create a visually appealing design that is easy to understand and maintain. It also allows you to easily define how elements should be positioned within the grid, making it simple to adjust as needed.
– ABSOLUTE POSITIONING
When it comes to CSS, there are a few different methods that can be used to center elements on a web page. The most common method is to use the text-align property, which can be applied to both block-level and inline elements. However, this method only works if the width of the element is explicitly set.
Another method that can be used is the margin: auto; technique. This can be applied to block-level elements that have a set width, and will cause the element to be centered within its containing element.
If you want to center an element that is not a block-level element, or if you don’t want to set a width, then you can use the absolute positioning technique. With absolute positioning, you can specify exactly where you want an element to appear on the page using the left and top properties. You also need to set the position property to “absolute” for this technique to work.
– RELATIVE POSITIONING
When it comes to CSS, there are a few different ways to center elements on a web page. The most common method is to use the “text-align” property. This can be applied to either the entire page or to individual elements. For example, to center all of the text on your page, you would add the following CSS rule to your stylesheet:
body { text-align: center; }
You can also use the “text-align” property to center specific elements on your page, like images, blockquote, etc. For example, if you want to center an image that’s inside a div element, you would add the following CSS rule:
div { text-align: center; } img { /* this is for centering images */ display: block; margin: 0 auto; /* important */ /* top and bottom margins are 0 */ width: 50%; /* image width can be anything less than or equal to container width */ }
Another way to center elements is by using the “margin” property. You can set the left and right margins to “auto”, which will evenly distribute them within the containing element. This works for both block level and inline elements. For example, if you want to center a div element on your page, you would add the following CSS rule:
div { margin-left: auto; /* important */ margin-right: auto; /* important */ width: 50%; /* div width can be anything less than or equal to its parent container width */ }
Finally, you can use the “position” property with the “relative” value. This will set an element’s position relative to its containing element and then center it using margins. For example, if you want to center a div element on your page, you would add the following CSS rule:
div { position: relative; /* important */ left: 50%; /* important */ top: 50%; /* important */ margin-left: -25%; /* important */ margin-top: -25%; /* important */ width: 50%; /* div width can be anything less than or equal to its parent container width */ }
– TRANSLATE METHOD
When it comes to centering elements using CSS, there are a few different methods you can use. The ‘translate’ method is one of the more popular and effective techniques.
With the translate method, you can essentially move an element around on the page until it’s perfectly centered. To do this, you’ll need to set the element’s ‘transform’ property to ‘translate(X, Y)’. X and Y represent the amount of pixels you want to move the element horizontally and vertically, respectively.
For example, if you wanted to center an element horizontally on a page, you would set the X value to ‘50%’ and leave the Y value at ‘0px’. This would cause the element to be positioned 50% from the left side of the page (the exact center).
You can also use negative values for X and Y if you want to move an element up or left from its current position. So, if you wanted to move an element 10px to the left and 5px up from its current position, you would set the X value to ‘-10px’ and the Y value to ‘-5px’.
Once you have your desired position set, all that’s left is to add some vendor prefixes (-webkit-, -moz-, etc.) so that your CSS will work across all browsers.
– MARGIN AUTO METHOD
When it comes to CSS, there are a number of different methods that can be used to center elements on a web page. One popular method is known as the margin auto technique. This approach is relatively simple and only requires a few lines of code.
Here’s how the margin auto method works:
First, you need to set the width of the element that you want to center. This can be done using the width property in CSS. Next, you need to set the left and right margins to auto. This will cause the browser to automatically calculate equal margins for the element, effectively centering it on the page.
And that’s all there is to it! The margin auto method is a quick and easy way to center elements using CSS. Give it a try next time you’re working on a web project.
– TEXT ALIGN PROPERTY METHOD
The text-align property is a CSS method for centering elements on a web page. This can be done horizontally, vertically, or both.
To center horizontally, you would use the text-align:center; property. This is probably the most common way to center elements on a web page.
To center vertically, you need to use a different method. One way to do this is by setting the element’s height and width properties to 100%. Then, set the top and bottom margins to auto. This will make the element centered vertically on the page.
You can also use the flexbox model to center elements vertically. The flexbox model is powerful and has many other applications beyond centering elements. If you’re not familiar with flexbox, there are plenty of tutorials online that can help you get started.
– TRANSFORM PROPERTY METHOD
When it comes to centering elements using CSS, the transform property method is one of the most effective. This is because it allows you to center an element horizontally and vertically at the same time.
To use this method, you first need to add the following CSS code to your element:
transform: translate(-50%, -50%);
This will cause your element to be positioned 50% from the top and 50% from the bottom of its containing element. As a result, it will be horizontally and vertically centered.
CONCLUSION
CSS centering elements is a simple but effective way to improve the visual appeal of your website. By implementing these techniques, you can create attractive and well-balanced designs that are both eye-catching and easy to read. With the help of CSS, you can add custom styles to your webpages in no time at all.
So don’t wait any longer – get started with centering elements using CSS and elevate your website’s visual appeal today!
#Elevate Your Website's Visual Appeal With These Effective Techniques For Centering Elements Using CSS#Multimedia / Flash Animation Services#Reliable seo consultant#Best Web Design Company In Toronto
0 notes