Photo
summer binder picture tutorial
this is the third binder ive made for myself recently and the first one i’m writing up. it’s designed to do a few things: 1) allow me to put it on by myself without dislocating my shoulders 2) allow me to breathe well enough to partake in normal activity 3) be cool enough to wear throughout a muggy 90-100F summer 4) not constrict my ribs in a way that aggravates my lack of connective tissue and causes intense pain.
this has become necessary even though i had top surgery many years ago, because when i had it i was extremely skinny and since then i’ve increased in size by about 50%. this has been really fucking good for my health in every single way* except that when my chest is squishy or moves at all it’s So Goddamn Triggering for me. but also since ive had top surgery ive developed and/or been made away of a plethora of chronic conditions that make every single commercially available binding option medically impossible. unbound, my chest is pretty much what you’d expect for a chubby cis guy but venturing out into the world in just a tshirt no longer works for me
*anyone who badmouths weight gain or fat bodies in the notes WILL be blocked
under the cut are a bunch of process pictures and explanations of what they all mean:
first i’ll give you a look at the pieces and measurements:
most of the seams are sewn in this picture and one half is turned inside out, allowing you to see both the finished dimensions (right) and the placement of the fusible horsehair canvas that gives this lil scrap of linen any structure at all (left)
to get your chest measurement, you’re gonna have to do some math:
first measure above and below what you want to bind. average these numbers. mine are something like 32 and 34, which average to 33. subtract a few inches--this is to allow the air movement between the laces at center front and back, critical in the summertime. i deleted 3 inches bc i like that number but you can go bigger if you want. the more inches you subtract here, the more youll be able to ratchet all your chest material down later, but at the same time you need to leave enough fabric for a sturdy garment. let’s say a range of 2-6 inches/5-15cm. by taking your measurements this way, you’re essentially measuring the chest you would like to have. that + the horsehair canvas work together to compress any squishy tissue/force anything that doesnt compress up and to the outside (basically into the armpit/lower shoulder--the chest might stick out but it will give a very puffed chest captain america pectoral silhouette)
you can also see how ive clipped my curves and pre-drilled my lacing holes. i used the marlin spike on my knife to open up the holes on the interfacing side, mainly as a way of marking them. this worked well bc the interfacing’s glue kept the linen from raveling
this is the same stage but looking at the non-interfaced grey linen/cotton blend (the black is some 100% linen from my cabbage stash). you can see ive broken the solar-plexus-to-back measurement up into a bunch of pieces to save on fabric but that’s not necessary. my original pattern was just two pieces (front and back) and chopping the straps into thirds on both sides was aesthetic
in the following picture you can really see how this is really just overgrown regency stays:
i thought about doing side lacing but didn’t think that would be comfortable for me. on the front, the side seam allowance was pressed inwards before turning to create a finished looking slot. on the back the side seam is left unfinished with an extra wide seam allowance, and is inserted into that slot.
here’s a closeup on it pinned in place (you can adjust the angle of the side seam and the fit during this pinning stage):
that side seam was just topstitched in place once i had the fit how i liked it, and the armhole was reinforced with more topstitching
alright, time for eyelets: first, you can see how well the marking worked:
next, two rows of basted eyelets (left), one row of eyelets sewn with a doubled and waxed cotton thread (center right), and one row of eyelets opened and stainless steel rings placed (right).
next time i’m going to mark the eyelets same as i did above, but do this step differently--i’ll mark and baste the steel rings in place BEFORE widening the eyelets. this is bc i had a lot of problems keeping the eyelets on center
eyelets half done on this one! on the left are eyelets sewn with doubled and waxed cotton thread and on the right eyelets sewn with quadrupled and waxed thread. the center is basting again. i was able to force the holes back in line while sewing the eyelets but it was kinda annoying. adding a second picture that doesnt have great focus but hopefully shows how that process worked and shows the spike clearly
i ended up using this white cotton thread because it’s stronger than my black cotton thread (which the rest of it is sewn with). [eta: after this was first posted, i pressed the whole thing heavily, which effectively de-waxed the thread, and i dyed the whole thing a medium charcoal grey, the thread blends in perfectly on the lighter side and isn’t such a sore thumb on the darker side]
bonus: the piecing layout for that little piece of strap. the whole light gray half of the binder was made from 1/2 of one of the legs i cut off some linen suit pants to make slutty camping shorts last year and i really really didn’t want to break into any of the other three halves for this garment--i have Plans for it
overall the fit of this is incredible. it DOESNT hurt my ribs which every zip-up garment ive been able to find (and it is difficult) does due to really thick elastic at the base. it doesnt aggravate my sensory issues with the synthetic fibers that every commercial option is made of. i can walk up a hill or stairs, or go to pt, without getting too out of breath. i can eat with it tight, or loosen the front easily and without taking it off to make eating easier and less nausea-inducing. it is reversible!
best of all the lacing at the back gives the garment enough movement for me to get it on without dislocating, and the interfacing and steel rings give it structure once it’s on. the shaping comes only from fusible horsehair linen canvas and stainless steel rings like youd use for chainmail, there’s no boning at all, which makes it very quick to sew (except the eyelets, but metal grommets would be sturdy and quick provided theyre of good quality)
there’s a small amount of gaping on the outside of the shoulder strap, which i plan on fixing with a tiny tiny dart in the armpit, i want to add pockets to tuck the laces into, and i need a better lace for the back, but it’s completely wearable in time for the 90 weather next week which is all i wanted. i’ll do a reblog when it’s perfectly finished with an update on the fit but for now it is done enough
the little ridge where it doesnt lay flat against the shoulder is most visible with just a single t shirt over it. with a flannel or a sweater, it disappears, and by itself, it’s hidden in movement
eta: after dyeing this, i relaced it a bit looser in the back and that gape mainly disappeared. ive decided to leave it in instead of smoothing it with a dart because the loose fabric gives space for my chest to expand when breathing and shapes my silhouette in a way that emphasizes my shoulders
#sewing#trans#trans man#binding#body shaping#cotton#disability accommodations#physical#sensory#eyelets#fusible interfacing#historical fashion#regency#horsehair canvas#lacing#linen#lining#new build#drafted pattern#picture tutorial#piecing is contemporary too#stainless steel#stashbusting#stays#structured garment#treadle machine
1K notes
·
View notes
Text
whatever is the opposite of a pro tip: fun lining fabric hides a multitude of sins.
this looked much cuter before the last-minute decision to add gores to the bust but it should make the end result better (it fucking better I had to add them to all three layers, one of which was pleated with an overlay).
the fabric is by Tula Pink, it has pink tyrannosaurus rexes all over it, and each one is encircled in foliage with polka dots behind them. I bought one yard with zero plan in mind but it was so cute I simply needed it.
124 notes
·
View notes
Photo
Unusual houmongi kimono, with soaring crane and swirling water pattern entirely done with open work and sagara embroidery.
On last picture, you can see the singular hakkake (lining). The style (heavily patterned and not matching the main kimono) and tailoring (non matching motifs between panels) of this lining make me think the cream kimono has been altered by reusing the fabric of a blue kimono.
Such details showing how garments were used and loved by past owners are always so cool!
#japan#fashion#kimono#obi#crane#tsuru#embroidery#sagara#hakkake#lining#tailoring#kimono tailoring#着物#帯
198 notes
·
View notes
Text
Lining SS24 shot at Paris Fashionweek
#lining#paris fashion week#summer outfits#sketchonista#fashion photography#styledujour#minimalstyle#minimalstreetstyle#street style#street fashion#hypebaestyle#neutralstyle#beige outfit#parisiennestyle#ootd#outfit
13 notes
·
View notes
Text
Well, the lining is nearly done anyway. I didn't order enough of my wool for this one (dumb) but luckily there was still some left at the place I got it, so I'll just have to wait for the shipment to get here and hope for the best.
If you see me working on a completely different project next week you'll know what happened haha
#sewing#my sewing#handmade clothing#myclothes#fashion#dresses#clothes#lining#fabric#vintage fashion#30s fashion
9 notes
·
View notes
Photo
blumarine pre-fall 2022
6 notes
·
View notes
Photo
Burberry Prorsum Tartan
67 notes
·
View notes
Text
Lining F/W 2020 Menswear Paris Fashion Week
11 notes
·
View notes
Text
Happy 9th Fazbear birthday!!
Day 14 of drawing fnaf doodles till the fnaf movie comes out
#doodles#five nights at freddy's#fnaf#fnaf doodles#fnaf 1#freddy fazbear doodle#focy the pirate doodle#chica the chicken doodle#bonnie the bunny doodle#freddy Fazbear#bonnie fnaf#chica fnaf#foxy fnaf#freddy fnaf#fnaf 9th anniversary#happy fazbear birthday#traditional art#lining
22 notes
·
View notes
Text
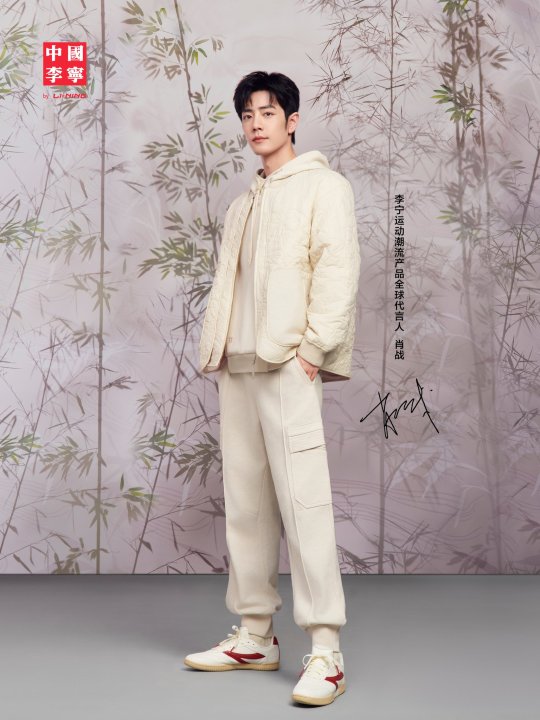
Li-Ning China Weibo Updated!
Kung Fu is achieved by cultivating both the inner and outer aspects; it is round and boundless, and it is accessible and free.
Drawing on Chinese philosophy from the oriental charm and traditional culture, and incorporating trendy design inspiration.
Li-Ning's global spokesperson for trendy sports products Xiao Zhan incorporates the traditional Kung Fu spirit into the attitude of daily life, and seeks a piece of spiritual pure land in the bustling world.
2 notes
·
View notes
Text
Basic Sewing Terms
#crafts#gifts#decor#sewing#quilting#briar rose quilts#bedding#shopping#quilters of tumblr#basic sewing terms#darts#hem#seam#stitch#quilts#lining#pedal#needles#bobbin#sewing.com
5 notes
·
View notes
Text
Lining SS24 shot at Paris Fashionweek
#lining#paris fashion week#minimalstyle#street style#hypebaestyle#minimalstreetstyle#styledujour#fashion photography#sketchonista#dailystyle#street fashion#paris fashion show#hypebeast#menstyle#menswear#mensfashion#swag style#mens street fashion#mens street wear#mens style#mens street style#streetstyle#ootdinspiration#ootdfashion#ootd#ootdstyle#ootdshare#outfit#fit check#styling
9 notes
·
View notes
Text
Just wanted to say... the lining for the top of the coat is ready! And there is a cool drippy pattern in the back, my artistic license. In general, I'm having such a hellish time, still. But! I also made another cuff that turned out right, so with that method I can redo the first. The shirt has half a zipper installed. Tonight, hopefully, I'll give it some ruffles. Baby steps.
The other thing giving me grief though is the pants. I would have made my own pants but there isn't time, and now I'm having such trouble finding the right cut in my size. By American sizes, I'm not considered an adult.
In fact, this coat I'm making is like a very mini replica, roughly a boys size L. 😆
10 notes
·
View notes