#I'm so lazy to clean up the sketches LOL
Explore tagged Tumblr posts
Visit Tumblr Blog
Explore Tumblr blogs with no restrictions, modern design and the best experience.
Last Seen Tumblr Blogs


Fun Fact
In 2020, Tumblr had 29.4 million users in the US.
Text
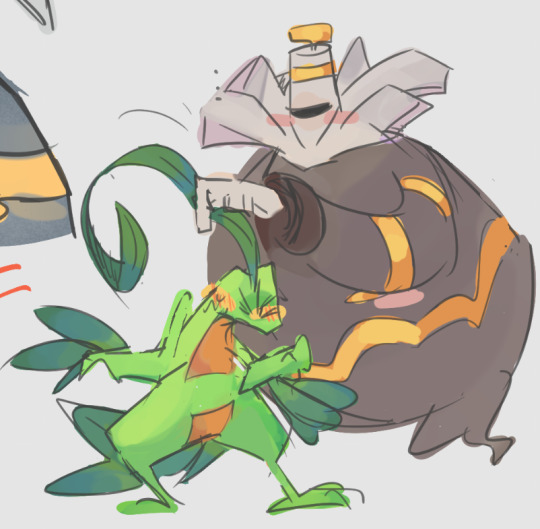
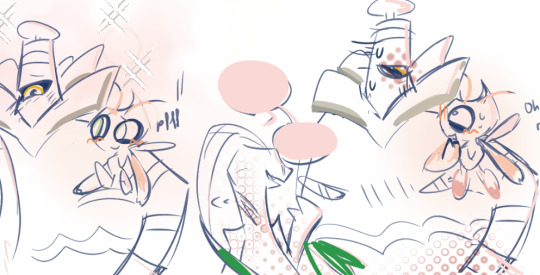
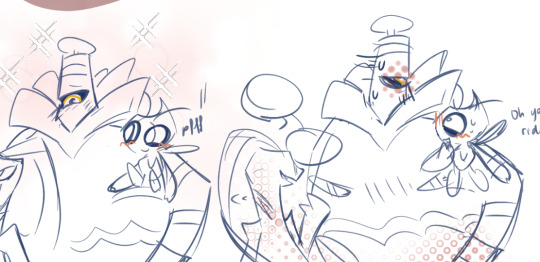
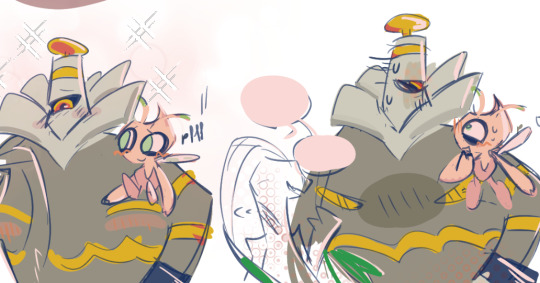
Chlodrien ft. a very supportive Felix
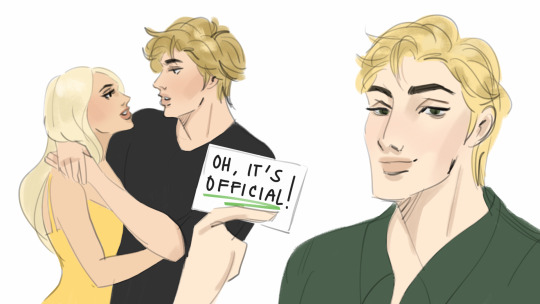
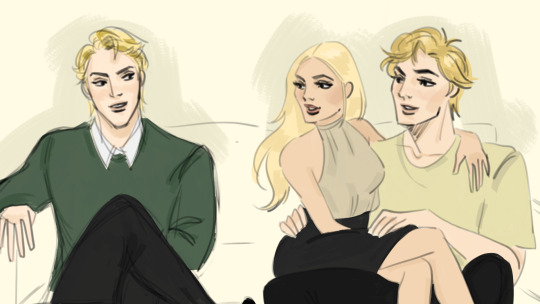

#chlodrien#my art#adrien agreste#chloe bourgeois#chloe x adrien#miraculous au#felix fathom#I'm so lazy to clean up the sketches LOL#I love this trio so much#I have this headcanon that Felix and Chloe used to bicker a lot as kids with Adrien being the mediator#Then it turns into a loving bro-sis thing when they grow up to the point where he even threatens Adrien not to screw things up with Chloe
108 notes
·
View notes
Text

God I love women I wish they were real
#art#digital art#the arcana#the arcana fanart#nadia satrinava#nadia x mc#Wishing all my fellow Nadia likers a pleasant 5am#I actually drew this back in March as a direct sequel to that StP redraw and never thought I'd end up posting it lol#The original idea was drawing one of the moments in her Epilogue with the garden background and everything I swear thats why its so horn-#Shes down cataclysmic for MC like the entire tale but it ain't like the feelings weren't mutual am I right fellas#My headcanon is that Nadia is uh#Hold on let me look something up#okay it looks like my Nadia is 6'5"#I was considering drawing over MC and making them anon but decided I was too lazy vdsbfvjhd#I'm not gonna sugarcoat it I don't make OCs for games like this so my MC is literally just me#This is the closest y'all will ever get to a face reveal and I didn't even bother cleaning up the sketch cause this ain't about me vsdfhvbd#This is still probably one of my favorites I'm not gonna lie#Okay that's all the yapping I can come up with have a good one
94 notes
·
View notes
Text
.
#another major downside of going through artblock for so long is that you accumulate a massive backlog#of things you wanna draw that it becomes genuinely overwhelming lol#and it's difficult not to like freak out that you won't have enough time to get around to it all#even though that would be completely ok like i'm not required to draw every idea i have and if i even only draw one of those things#thats already a win considering how little i drew these past two years#it's just hard to shake of the feeling of needing to make up for that? but that's not necessary idk why i feel pressured like that#i have a lot of weird expectations and perfectionism towards my art that made engaging with this hobby extremely difficult#honestly the reason why i made the artblog is to just deliberately dump unfinished and “bad” art on there#so i can hopefully get over my unproductive expectations and just focus on having fun with art again#i can already kinda feel it working bc when i think of drawing now my problem is not knowing where to start bc there is so much i wanna make#instead of like this dread that it won't be good enough#and that once i pick up my pen and get started i'll just spiral into having an existential crisis again lol#i moved from 'if i can't draw well i'm not worth anything as like a person :(' to#'i have a billion fanart and oc ideas and if I cant draw them all at once i will explode So instead i'm just gonna sit here and do fuck all'#that's progress in my book!!!!!#i'll go check if i have any more old sketches to post and then i'll just work on whatever i feel like rn#i keep overthinking this shit. i need to go with the flow and just draw. I don't need perfectly polished finished pieces#I'm just gonna work on stuff until i get bored with it and then that's the 'finished' piece no matter what it looks like idc!!!#that may seem counterproductive and perhaps a bit lazy? but that's gonna be my mentality going forward#bc i think ironically that's gonna be more productive for me all things considered#sry for the ramble ever since seeing that one post about old vs new art comparisons and polished/clean artstyles#that are uninteresting to look at i've been doing a lot of thinking and reconsidering what i'm doing with my art#many thoughts head full. just needed to get it out of my system
1 note
·
View note
Text
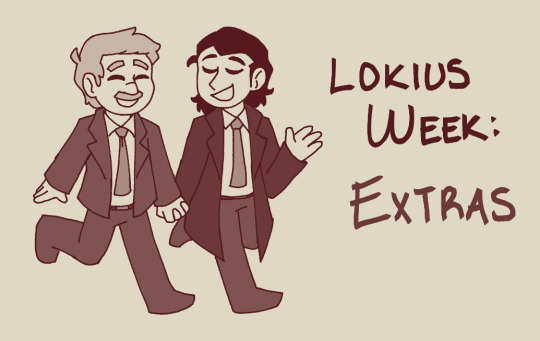
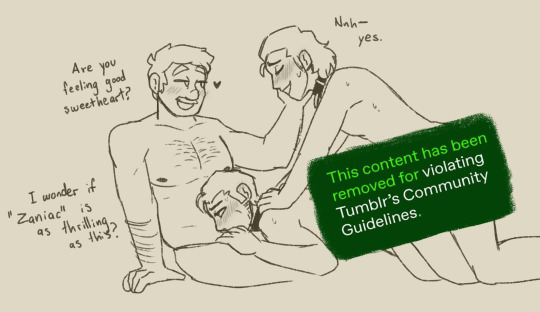
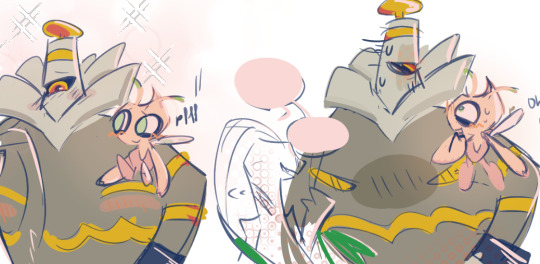
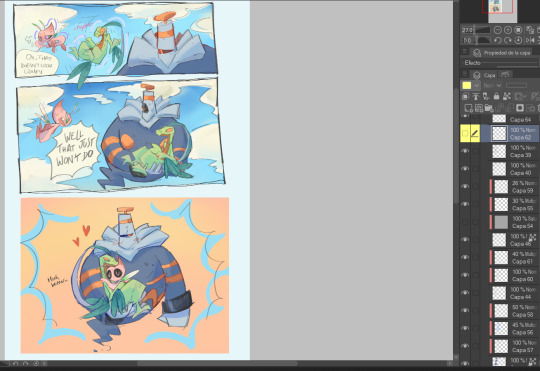
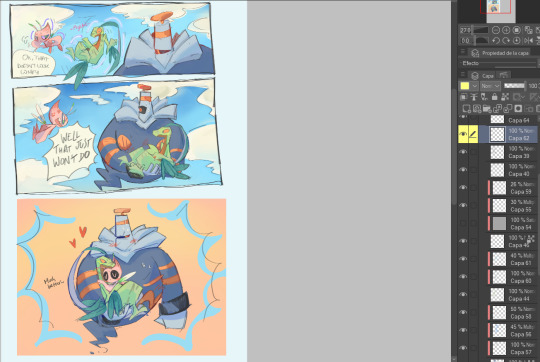
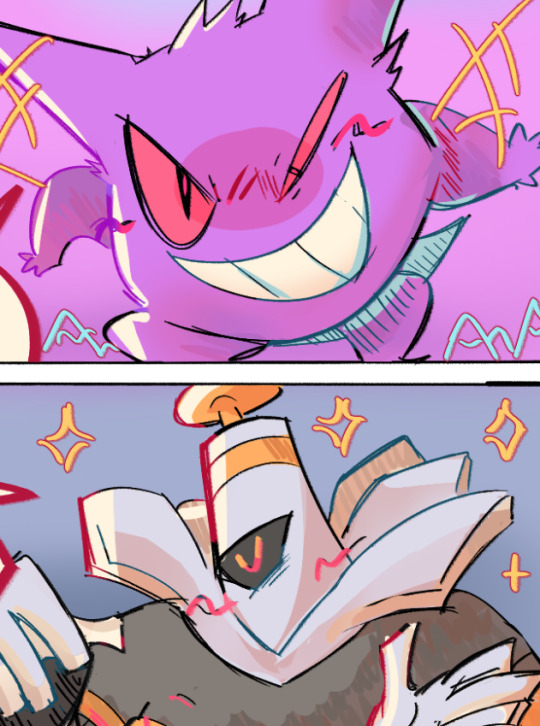
Lokius Week 2025 - Extras
Not an official prompt, but I had a bunch of unused and unfinished drawings that didn't make it to an official post, so here's an entire compilation!
The Lokius Week has ended, but it was such a fun experience!! Trying out new things while drawing, seeing everyone's works and creativity, I can't thank you all enough as a community! 💚🧡
(I owe all the writers an apology, because I've always been a lurker, but I promise I will do an effort to comment more in the future!!)
Anyways, this gets a bit long, bear in mind that the quality varies but you can get a glimpse on how things look before I clean them up (sorry if my writing is bad orz)
Also. some are super self indulgent... Whatever. I'm cringe but I'm free!
This was the first concept for Day 1, originally i was gonna draw most of the Lokis from the Void LOL but i got lazy...

Not done for the Lokius Week but I already had a sketch for a Reunion! I thought about using it...

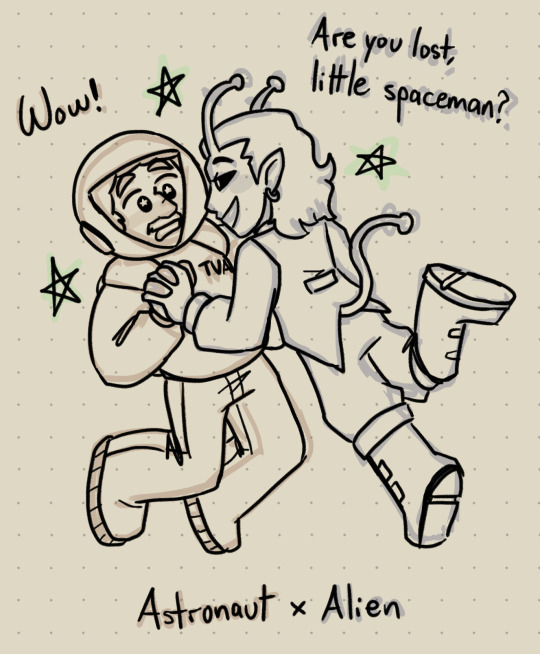
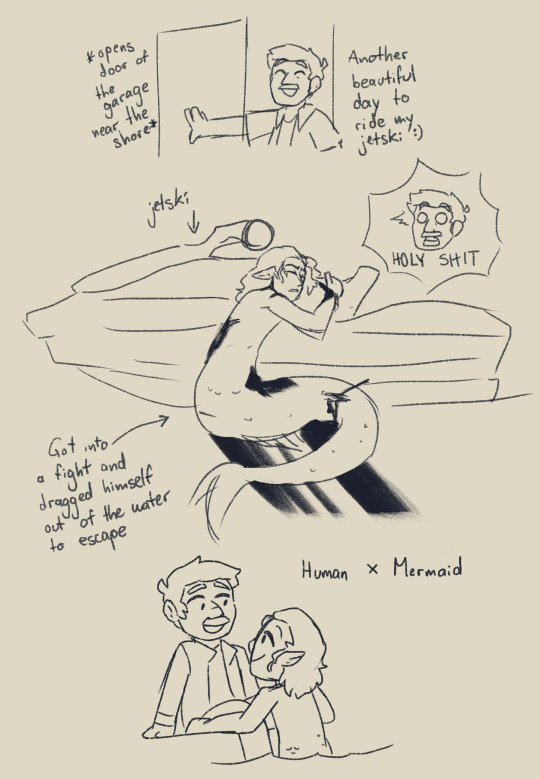
Unused for Day 7, I wanted to draw some AU's but... IDK. I didn't like them that much :T the mermaid one was re-worked from an old doodle as well!

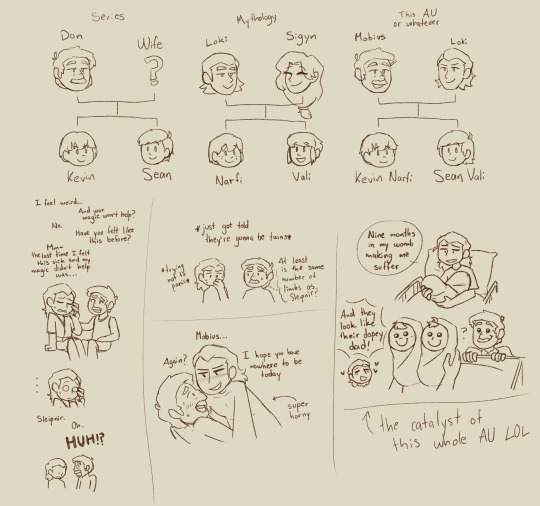
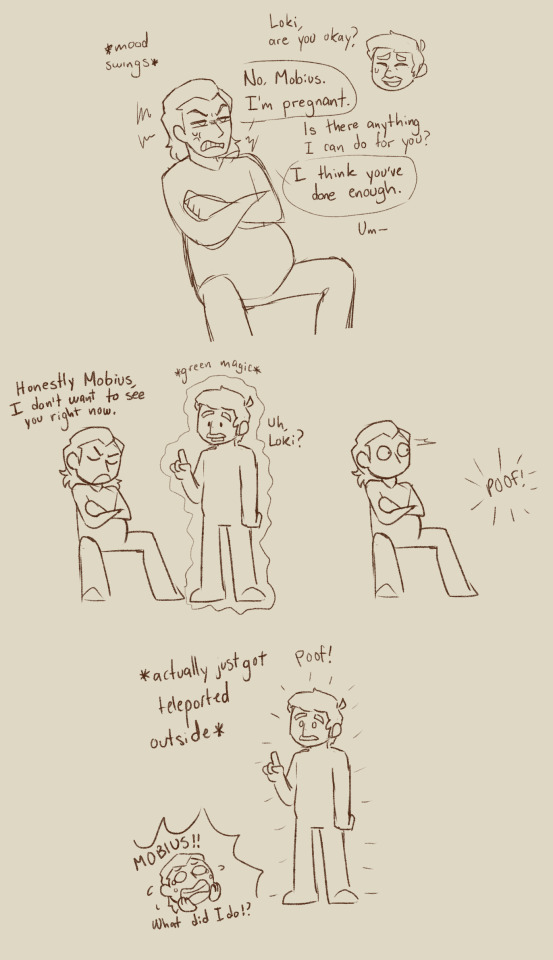
Silly doodles of Lokius family AU?? or something LOL as always, a meme was the inspiration... ⚠️ (cw: pregnancy, but nothing graphic)
Finally, I had something for the prompt "Control your little pet, Mobius" but I lost the drive to finish it properly </3
⚠️⚠️⚠️CW: Exp|icit! Lokius + Brad
Also, this is so they get information out of Brad (he's already captured) buuuut he's very much into it, but y'know. Might not be someone's cup of tea!

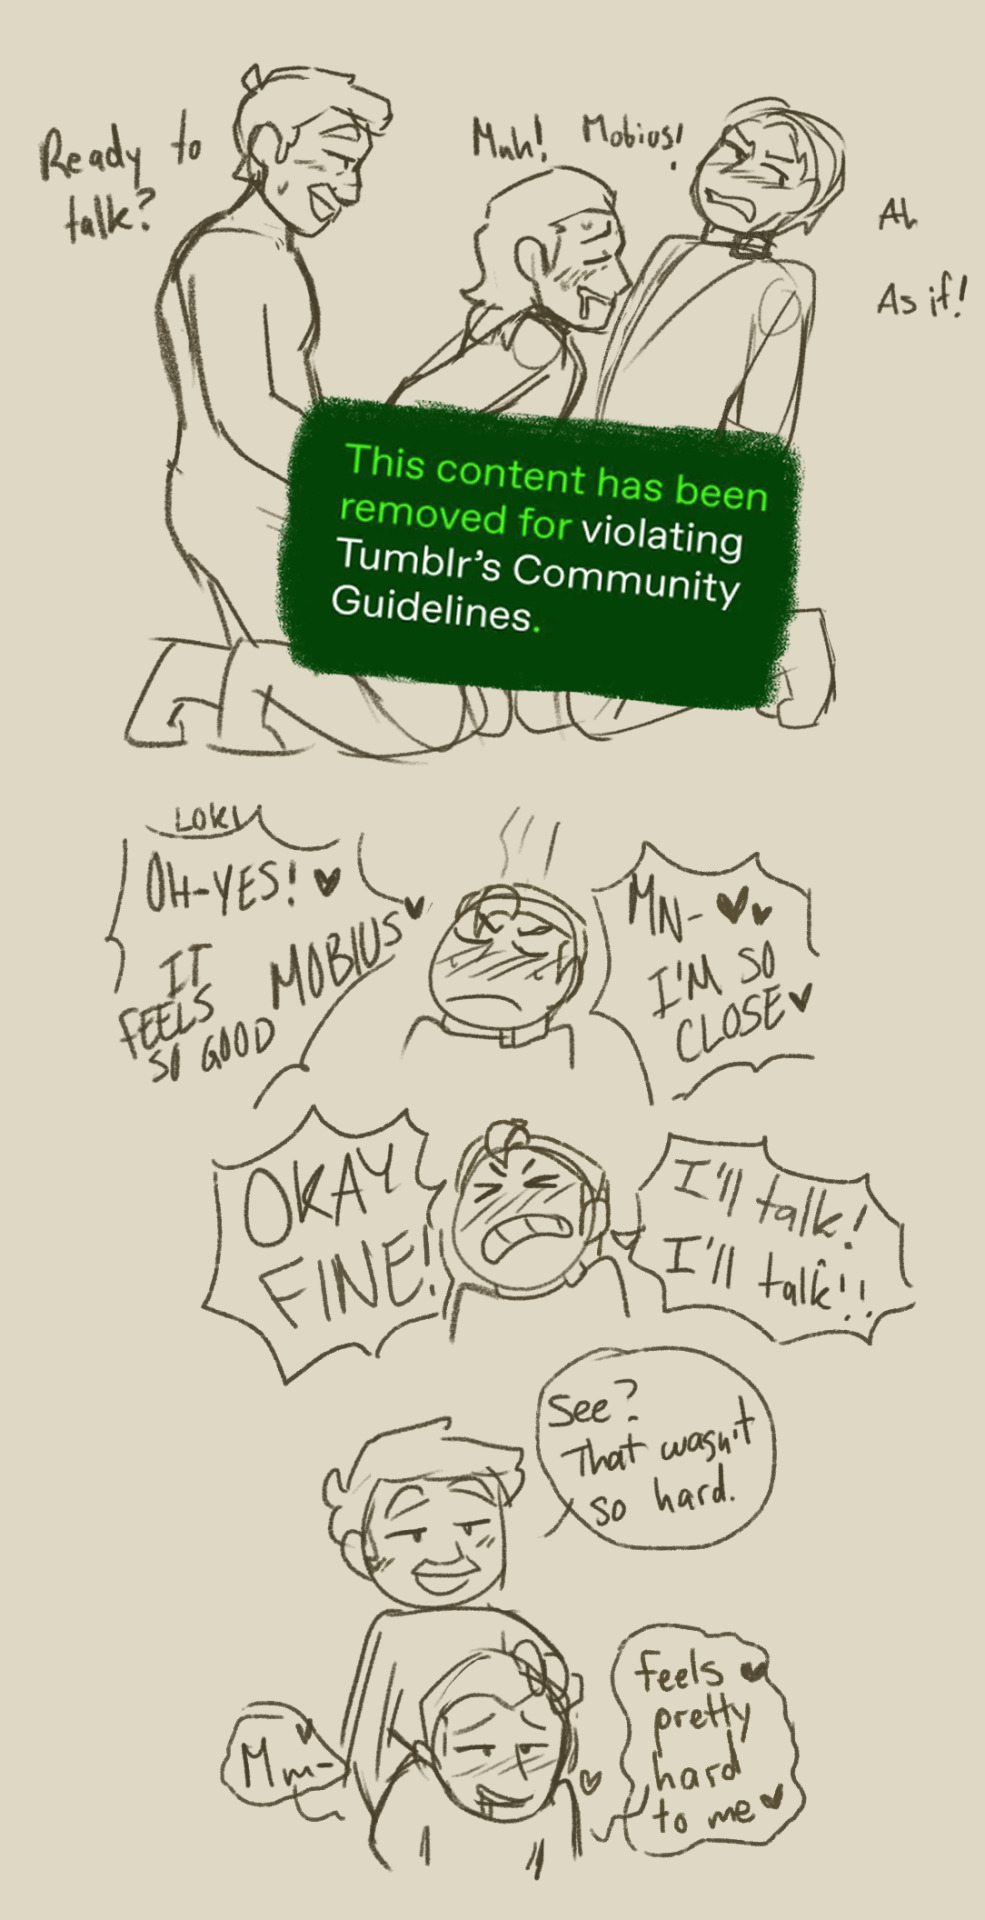
Mobius, even in these circumstances, has only eyes for Loki <3

If you got this far, thank you for your time and attention! 💚🧡
@lokiusweek
#LokiusWeek2025#Lokius#Loki#Mobius#cw ns/fw in the read more#at the very end so you can skip it if you want!#anddd that's all folks!#i still have some lokius ideas but for now!! i retreat...#TUMBLR FLAGGED THE POST... i hope you can see it now...
55 notes
·
View notes
Text

These are a bunch of Jayvik sketches I did during these days that were just sitting there, so I decided to clean up them a little and put everything together. I wanted to slap some color on them but I'm too busy (and lazy) so yeah, take them as they are lol
okay, I'm gonna disappear again, see you round Easter (maybe ✌🏻✨)
leaving them a little bit bigger below because they are too small to be post singularly without the quality going south


#art#fanart#sketch#jayvik#arcane#jayce talis#jayce arcane#viktor arcane#arcane herald#btwn I also want a giant arcane insect wife who likes to pet me#where I need to sign to get one#mangywayway
118 notes
·
View notes
Text
My art process, more or less
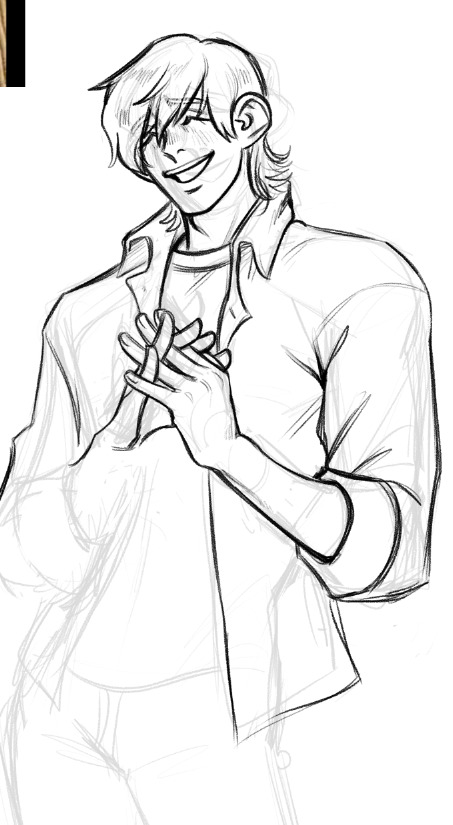
Hey, so a lot of people have asked me before to share some of my art process. So when drawing a recent quick personal piece I decided to finally take screenshots as I went to make a write-up. This is the artwork:
And below the cut is all the steps as I drew this. I wasn't counting the time but I think it was something like ~5 hours between two sessions.
This is less a tutorial and more just showcasing how I draw. You know how writers sometimes call themselves a planner or a pantser? I'm a pantser with art. When I try to plan stuff out too thoroughly I get stuck in the mindset of like, it HAS to be one way and I can't improvise. Improvisation and pivot is kind of essential in how I draw, and I recommend everyone trying to not be so rigid when drawing if you can help it. I'm kind of all over the place and winging it through most drawings so I hesitate to call it a tutorial as I feel it would be hard to follow for beginners. I can only manage to draw this way because I already have some classroom training, thousands of hours and artworks under my belt, and a pretty strong sense of visual recall that gives me a good sense of how to eyeball proportions and the like. Okay, disclaimer done, let's jump in I guess
I had an idea to draw my OC wearing a layered shirt combo that I saw in a cat video and I thought suited him. You'll see the snippet I took of it in the corner of the canvas throughout, but that's where the idea spawned. I began with just trying to get the basic gesture and flow of the pose. I was constructing it from my head, as I most often do (I don't recommend this, but I am usually too lazy for finding pose refs)

I flip the canvas and use the lasso tool all throughout and just continue to push and pull on the body shape and gradually add more substance to it until I'm satisfied with the undersketch
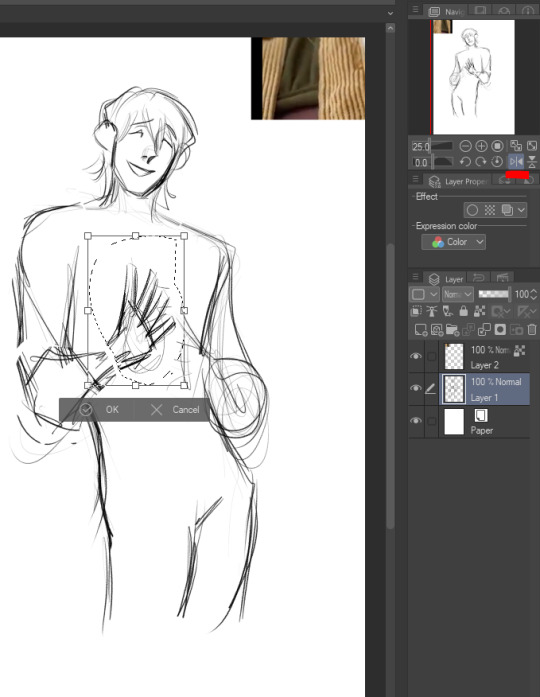

Once I feel like the undersketch is what I want it to be, I lock the transparency and reduce the opacity to 15%. You could also just change the colors on it if you'd prefer, but I've done that and then drawn on the wrong layer too many times lol so I prefer to just lower opacity. Then I make a new layer at 100% opacity and start to draw the clean sketch on top.

I'm making changes to the pose and expression as I go, as you can see I ended up shifting his head away from where it's positioned in the undersketch

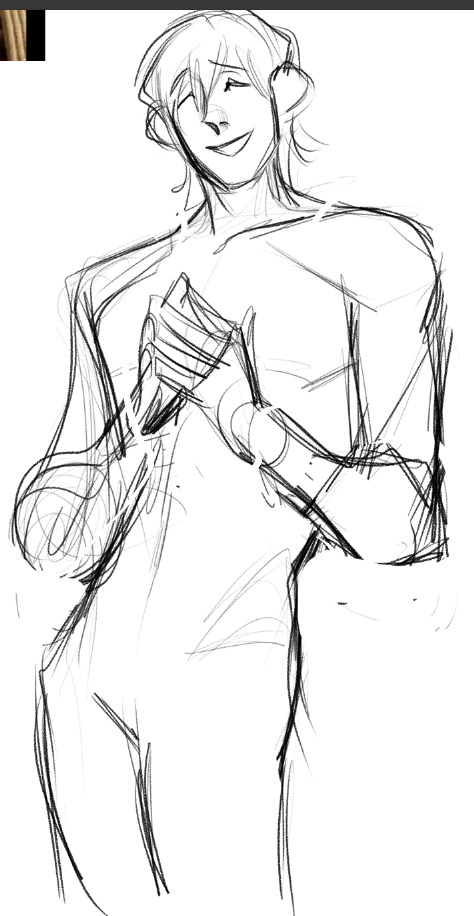
I achieve some of the effects in my art, especially the line weight, through setting the colors to transparent and continuing to use my sketch/line brush so that it now acts as an eraser but maintains the same texture and size as my brush strokes. I use it to cut away excess lines, and also add transparency to stuff like having the eyebrows be a suggestion beneath the bangs

I redrew parts of his face, neck, and hair several times and questioned what I was doing with my evening (normal part of the process) and eventually ended up with this:

I realized the hands were way too vague in my undersketch so I went back to it to try and figure out the hand pose better

And here's the finished hands. Well not really finished, I continue to mess with line weight later, but this is basically their final form
And this was basically the finished "lines" (it's still a sketch to me because I use this rougher brush, but people always refer to it as line art. So I guess it's line art), with the undersketch on and with it off


Of course I took one look at the art above and said "something's wrong" lol but I was in a bad mood and it was late so I went to bed. I came back the next day and began tweaking it, using my beloved lasso tool to adjust his face somewhat which helped a lot

I then proceeded to add some more line weighting, adjusted proportions further, and toned down the folds on his jeans because there was WAY too much focus on them lol. Side by side to show the differences:

Okay now we can start colors. And I know this is the thing you're all here for, the skin rendering. Well, sorry to burst your bubble, but it's mostly just magic with textures and layer modes! I make a flat color layer for the skin base, and three layers clipped above it (clipped meaning, they lock to the alphas of the base layer). The first layer clipped above is set to 100% opacity with a normal layer mode. This is for color variations on the skin like blemishes, freckles, lips, tattoos, hickeys, and in nude works, nipples and genitals. In this artwork though, it's just his lips.

The top-most skin layer (three above the base) I set to 40% opacity and hard light mode. This is important, but can be adjusted. You can use multiply or soft light if you want, or adjust the opacity, really mess with it. But this is fore the texture on the skin. I use a custom airbrush that simulates skin pores, and I use a saturated orange color and dust it all over his skin
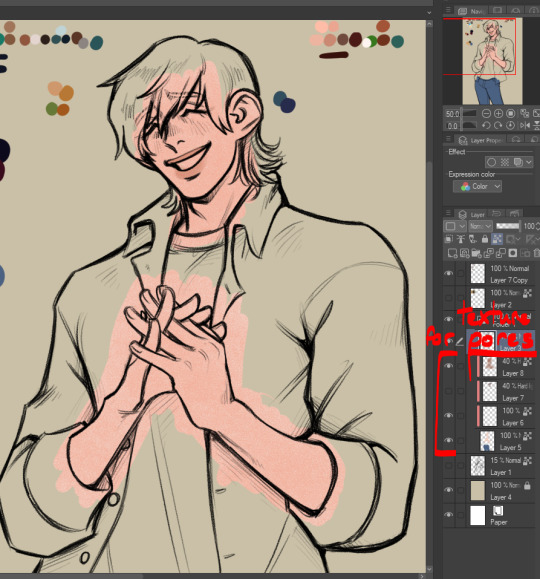
Next is what I normally like to call blush but it's all over, so it's really like. Definition? People call it rendering and I suppose it's kind of like that but in my head I'm just being lazy to make my flat colors look better and not have to actually do proper shading on the piece! But this is below the pores layer (so it's two layers above the skin base) and it's also set to 40% opacity, hard light. Again, use your discretion and play with it. I use a dark red color for this, it leans slightly pink but it's still fully red I'd say. Like a wine red I guess? And I just start defining shapes of the body, and deepening it in areas that actually would have a lot of blood flow (like the cheeks or ears)

I basically do it like this: I use the same brush that I use for blending when I am doing actual rendering (it's just an oil brush with a chisel tip that I got off the assets store, though it is currently unavailable last I looked) and I block out the area darkly. Then, I swap my color to transparent once again and I use that to carve out the midtones. I use a light touch so I can blend it out really nicely but I do leave some hard edges where it feels appropriate.


So satisfying, so beauteous (★ ω ★) Then I just add in the rest of the colors, putting them in their own layer so I can easily edit them later.

And edit them I did. What is this color scheme?? Whack lol I color picked the shirts from the video I was referencing.. and realized I didn't like it. So I tweaked the colors to better match Mal's earthy color scheme. I also colored the lines by locking transparency on the line layer and coloring over it in a deep red.
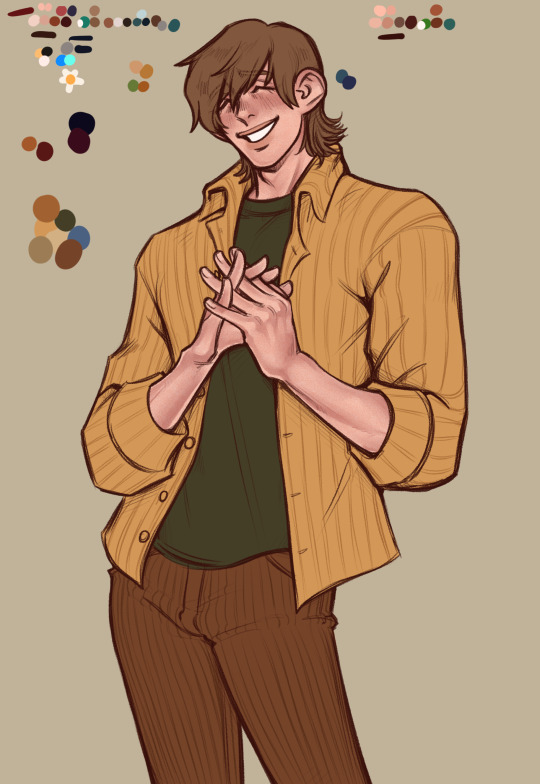
Lastly, I made some little edits to line weight, gave him his fuzzy arms (essential, and also? Charm point) and used a deco brush from the clip studio assets store for the background. Here's the finished artwork:

And here's the deco brush, if you wanted to download it:

#art process#art tutorial#art stuff#art resources#art tips#idk man idk how to tag this#long post#cass art
33 notes
·
View notes
Note
How do you draw so freely? Its beautiful
Thank you very much!!
Assuming you're referring to how loose my sketches are, I think it boils down to mileage. Alongside the classic recommendation of reference + study, usually when I get really into a piece of media I'll draw characters I like a whole lot and it builds muscle memory, and the ones that end up in my posts usually have already been through that process to some extent.
Studying references + going through a couple dozens rounds of extra wonky proportions and nonsensical physics (definitely visible on my own posts lmao) will help with both your brain and muscle and once you've stacked up enough of that it'll become easier to intuit certain things and keep stuff looser.
(hey this got really long, so just scroll to the bottom to see my current sketch process if you'd prefer that)
In my personal experience as a hobbyist, I spent roughly 3 years butchering the loomis method until things looked even remotely to my liking. And by that I mean "layering bullshit guidelines so thick and heavy that by the time I'm done lightening it via eraser there was barely any paper left." Drawing has been and still is really frustrating sometimes but for most of it I have a lot of fun and honestly as long as you have that it doesn't really matter whatever else (again, hobbyist here. my stakes are low). Switching up medium every once in a while if you can helps keep things interesting, and drawing with a pen is good for building both line confidence and tolerance for your own mistakes.
Honestly for all of that this stuff is still RNG to me lol. Every once in a while things just Will Not Work Out, but the rates definitely gets better the more experience you have. I only post about, say, 20% of what I draw probably. The rest includes but is not limited to practice sketches, personal art, stuff too nonsensical for even tumblr, or sketches I just plain don't like.
Uhhhhh now for what you actually asked. I've grown really lax, if not a little lazy, regarding guidelines (when you've drawn a specific thing often enough it just kinda gets tedious) so now i just do these very thin and light lines vaguely hinting at a character's pose and position. The only thing I consistently do is probably the little circle to indicate the head. For more heavily stylised proportions I'll go into more details at the outline stage, mostly aiming for the feeling of it (usually how goofy it looks since thats what I use them for). For more complex poses/ones I'm not familiar with I'll do multiple iterations.
Unearthed some stuff that I probably wouldn't post otherwise (the proportions are a bit off from what i'd prefer and the lineart isn't that confident). Here i am redrawing this for demonstration purposes


gonna go in order of the photos. everything shown was done with a 0.5 mechanical pencil.
usually i start with these very thin, light lines, just getting a very rough ideas of where everything is - head, torso, pose (spine, arms, legs). i sketch largely with approximations and landmarks, keeping in mind some bullet points for the relative distance among certain body parts (e.g. make sure the elbow is always a little past the rib cage. i'll write more out at the end) rather than any precise guidelines. i often don't even clean these up - at the end the main lineart is harsh enough that they override these, and though they're visible they do not interfere with the image as a whole. you can look at any of my sketches prior to this and find them.
then i go in with hard, dark lines, once again noting the respective distance among facial features (i'm using the loomis proportions, thinking about the face in thirds)
this is so unhelpful when i just say it, but genuinely at this stage i rely on muscle memory and mileage. if you've drawn the same anime girl for a bajillion times you can probably intuit the proportions. remember that 3d things have volume and interact. ("yes, see, her bangs and eyes round out like this, two locks of hair (they're thick and well kept, so they should have a solid cylinder shape...) against the side plane of her face - split that plane of the skull in half, and the ear should be somewhere around there...")
ok for the parts where a lot of things happen (clothes, tie, the pose interfering with them etc) i just go ham. make a mess! draw everything out even if they overlap each other. so you can keep track of them. here i also bring in some light shading to make out the form of her torso.
i lighten the whole thing with eraser, but the previous lines are harsh enough that the residue can act as a new base of sorts. i think this is comparable to having a sketch layer with lowered opacity in a digital piece
i go over the whole thing again now that i've got a better idea of the form
rinse and repeat. go all in, adjust, blow the whole thing up if it looks off and then build on the remains
for the last photo, you can see that I've adjusted the right leg, since now im taking into account perspective. I uhhhhh still am not particularly confident in drawing her shoes (or any other shoes for that matter) in 3d space so once again I'm bullshitting the form with trying to wrap around its shape and to visualize the shadows. usually for these I pull up references and pray
a side note for the hands: against an earlier ask, I've mostly switched to using silhouettes and then sectioning the fingers after. here the slight shading approach also help in blocking out and making them readable without you having to stress over the minutiae of what joint should bend where.
...I've hit the upload limit for photos, so I'll reblog with additions, but in essence:
• very thin lines to map out the pose and mark where certain body parts may go
• i draw everything in approximation, keeping a few bullet points in mind and adjust as i go (which does keep the sketches loose and make it easier to vary proportions for different characters, but also make floating features more likely (evident in some of my more recent posts as well):
loomis for the head and neck
rib cage (+collarbone), then elbow slightly below it
pelvis, crotch halfway point of the whole body
legs, knees their halfway point
feet are about as long as the forearm usually
(Disclaimer: i must stress again that I'm not a professional, and cannot guarantee that these bullet points are entirely correct. This is just how i draw at the time of writing - stylized with little regard for the intricacies of human anatomy)
• with the exception of the first stage, my lines are dark enough that the mistakes get reused as base for correction after they've been lightened with eraser a little bit.
• I also bring in some shading while doing lineart to make sense of form if I'm having trouble. I use this most often for noses, hands, legs, and breasts.
• if you encounter a sketch that Refuses To Work Out, leave it. No, listen to me, Leave It. Revisit it sometimes later, if you want (for mine they range from a week to 5 months, but my sketchbooks disorganization is another matter entirely). just leave it for a bit.
• do a bunch of pen sketches if you wanna get comfortable with mistakes/build muscle memory
• once more, all-time classic: reference the hell out of anything you don't know. 100000 google images. look up a human anatomy 3d model to see what muscles attach to which bone. practice copying 1:1 things that look good to you (practice!! don't post/claim anything as your own if it isn't - this applies to my own stuff btw, feel free to trace for practice at your own risk). note again that the only reason i can only bullshit my way out of these is because i've drawn them dozens of times - the moment you throw me more complex perspectives i'll need to start the learning process all over again
#anon ask#asks#hey sorry this got So long. if u dont wanna send me asks again i understand#remember when i said my last ask was long... haha... good times...#this thing has been in my drafts for what... a year now? sorry. i'm just not sure how to articulate all this#DoNT make bets on how long until im done writing the reblog also...#junko enoshima#danganronpa#sketch#traditional stuff
23 notes
·
View notes
Text
I'm quite a selective person. I enjoy writing stories, but I almost exclusively do so within the Final Fantasy VII fandom. Not every character or plot from the comics, anime, video games, films, or TV series I follow inspires me. So you could say my inspiration is even pickier than I am. And I both love and hate it for that.
Baldur's Gate 3 hit me like a freight train; it’s been such a looooong time since I felt this kind of overwhelming obsession for something (or someone, considering Astarion in particular). It’s amazing how it’s reignited my creativity in so many ways. Unfortunately, I can’t draw—at least not as well as I’d like—but who knows? Maybe I’ll attempt some messy sketches. For now, I’ve started writing a fanfic, just on a whim and without any particular plan. I don’t know where it will take me, but I’ve put Astarion in an unusual situation just to see what might happen. Alongside him, I’ve paired two characters who, in my opinion, provide the perfect contrast to him: Karlach and Halsin.
The premise is this: Halsin asks Astarion and Karlach to help escort a caravan of refugees to the nearest safe haven in the former Shadow-Cursed lands. The caravan is attacked by a group of bandits, and Astarion ends up reacting in a way he never expected: like a hero. Lol. With all the disastrous consequences that implies.
It’s not an adventure story, far from it. It might fall into the comedy genre, perhaps, with a touch of introspection and romance—who knows? Maybe even a little angst, but just a tiny bit. As I mentioned, I don’t know where all of this will lead me… or if I’ll manage to see it through! Because, of course, I’ve hit a roadblock just as things were getting interesting, alas. How do I get that lazy, stubborn cow that is my inspiration moving again?!?!
In the meantime, here’s an excerpt from "The Day Astarion Found Himself Saddled with Parenthood." ***
As if it had read his mind, the little one’s body suddenly tensed for an impossibly long moment before relaxing again. Its tiny lips curled into a satisfied smile. Then, the stench of excrement tickled Astarion’s finely tuned senses. He couldn’t believe it. He wouldn’t believe it!
“Oh, come on! This thing crapped itself… correction, it crapped on me! For all the gods above and below, what do I do now?! Oh gods, I’m going to vomit. This… this… I don’t even know what this is, but I’m going to vomit! It’s disgusting, I think… I think… I am going to vomit!”
“Stop yelling, or you’ll wake it up,” Karlach snapped from the other side. “What’s a little steaming dung anyway? For starters, when we trudged through the Illithid colony, our boots stepped in way worse. And then—”
“Gods, grant me patience because if you give me strength, I’ll massacre someone,” Astarion growled in return, torn between several equally unappealing options: drop the baby and claw his way out of the rubble; rummage through his pack for something—anything—that might serve to clean the little terror’s bottom; or, alternatively, solve the problem at its root by biting into the brat.
Damn it, Halsin was the expert in snot-nosed, piss-soaked orphans!
The chaos abated slightly when Astarion noticed his personal plague had opened its eyes and was staring up at him intently, its tiny fists clutched to its chest and its little mouth sadly turned downward. He froze. Oh, no.
And yet, yes. After a brief pause, the whelp scrunched up its face, opened its mouth wide, and let out a scream with all the force its tiny lungs could muster—and Astarion couldn’t comprehend how something so small could make such an earth-shattering noise.
“There, I knew it,” Karlach muttered.
“You’re not helping,” Astarion retorted, clutching the now howling, flailing infant against his chest as he shuffled toward his pack. ***
Will I ever manage to finish writing this little madness of mine? How do you guys unlock the keyboard? I need support!
#astarion#astarion ancunin#karlach#karlach cliffgate#halsin#baldur’s gate 3#baldurs gate 3#astarion bg3#karlach bg3#bg3 astarion#bg3#baldurs gate astarion#baldurs gate 3 astarion#bg3 fanfiction
20 notes
·
View notes
Text
lazy yentlman sketch, i fucking love these two so I had to draw them at some point. (i can not draw men to save my life so I'm so sorry if cartman looks off lol.) I also love drawing curls so I got pretty carried away with yentl 😹😹😹

In my senior-year/college AU they're still together (because i refuse to accept what return of covid did to them). i can kinda see cartman mellowing out and cleaning up his act somewhat when he and yentl start dating-he cuts back on the jew + poor jokes, stops walking over liane a bit more, becomes frenemies with wendy and becomes a little more caring to the guys (he even acts as their confidant from time to time), but it's gonna take him a little while longer to officially quit inconveniencing others.
#south park#sp#south park fanart#eric cartman#sp cartman#sp yentl#yentlman#yentl x cartman#sp fanart#cartman#sp fandom#south park fandom
39 notes
·
View notes
Text
Again with my favorite crosover prompt, finally finished!!!
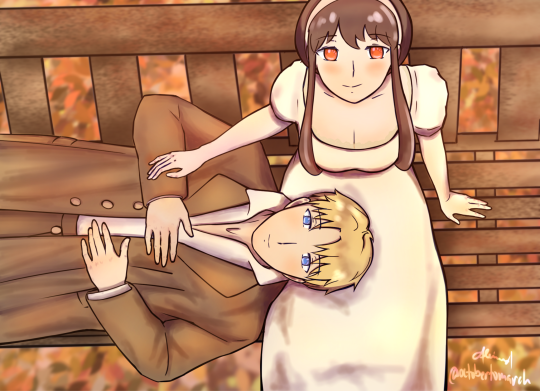
I certainly should not stick to doing clean lineart and brave myself into doing rough sketches. Because my coloring style seem to fight with my lineart 😅😅 and my laziness with shading and background definitely shows 😂🤣
I originally started this on vellum but eventually gave up (laziness and because watercolor will surely ruin the whole thing) so i converted it to digital 😂🤣
Reference below (don't be shocked lol)
Tadaaaaaaaaa!!!!! 2005 Pride and Prejudice starring Matthew Macfadyen and Keira Knightley
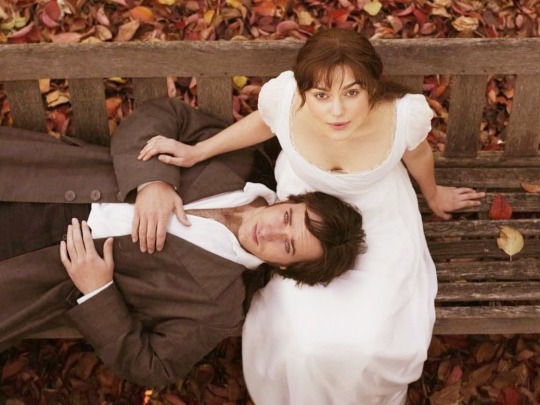
I just loooove doing Pride and Prejudice with Loiyor
And trust me when i say I'm not done making more
#fanart#spy x family#spy x family fanart#loid forger#yor forger#loiyor#twiyor#crossover fanart#pride and prejudice#pride and predjudice 2005#mr. darcy#elizabeth bennet#ohhh don't deny that macfadyen here looks gorgeous#loiyor fanart#twiyor fanart
122 notes
·
View notes
Note
I love your lineart, how clean and expressive it is! And your little Riebeck comics, they always make me so happy to see
Do you think you could talk a little about your process? I’m working on my own style right now, so I’m asking some of my favorite artists how they create, and how they learned how to create the way they do! Practice, but what kinds? How do you get such lovely doodles and art with such simple shapes?
WOW AAAAHHH thanks for the sweet ask!! I can absolutely do that!
The big overarching answer is exactly what you said & the answer no one wants to hear (I get it lmao): practice, straight up, preferably in a way you can sustain interest in so you can keep it up because inefficient is better than nothing.
I've been drawing since I could smear toddler fingerpaint on a page, so more than 25 years, and I took art classes all through highschool plus a few college level art classes. The things I think I'd recommend specifically over anything else are 1) exploring different mediums and methods (like charcoal on large paper & acrylics on actual canvas, and realism & abstract), even if you use dollar-store tier stuff (nothing wrong with that babey, that's what my fiance and I use for therapy painting!!) and 2) making sure you practice life drawing from photos at the very least, or live models if you can get yourself into a situation where that's an option.
To not just give you what is really common advice that almost feels canned at this point; the reasons I recommend these things specifically! Under a cut so this post isn't 300 years long. lol.
Even if you don't stick with charcoals or paints, trying them out a few times will give you the physical knowledge of how those mediums feel in action. Then, going back to mediums you prefer (maybe pencil and paper or digital like me), you'll understand better how to use the tip of the pencil at different angles, or the weird painterly brushes in your toolbar, and what things they can achieve for you re: sharp lines, gradients, gestural effects, blending, etc.
And again, even if you don't do abstract or realism or whatever style very often or at all, you'll know how it feels to slap shapes and colours down quickly and emotionally (nothing like capturing a raw feeling in colour), or the process of studying a photo so thoroughly you see and draw details you never noticed before (the way shadows are tinted by light bouncing around, for example), and you can apply that to something you find more engaging, like maybe character art (that's my MO I love drawing little guys lol).
Finally, life drawing, literally the most important way to practice and also quite possibly the most booooring. You have to find a way to apply it that makes you interested. I love making fast, sharp, innacurate lines, and I love taking my time drawing a perfect shape. I combine those by getting the essence of a pose down from a photo or my fucked up lil brain with gestural lines, then erasing and redrawing with more careful strokes until it looks right.
THAT specifically, is bad advice. Just erasing and redoing until something "looks right", but that's what I do and it's why it takes me 6 hours to sketch a comic page. But I'm not doing this for money and I probably never will, so it works for me. If it works for you, too, that's sick!! It's the lazy way to do it lol. You're SUPPOSED to do studies until you KNOW how things are shaped and how the lines should fall, so you can get it in a couple tries. More work for more payoff, right? That's how comic artists spit out like 2 or 3 pages a day.
A couple more things I found really helpful while I was learning (i say as if im not still learning and will be until i die): youtube tutorials (not joking) and blind-trace-reference-blind studies (I'll explain).
I don't have any reccs for you with the youtube tutorials because I did all that when I was younger and I cannot for the life of me remember who the hell I was watching, but it was a lot of different artists from professional to amateur to beginner sharing tips and tricks they found helpful. Top ten tips for artists kind of stuff. It's why I draw lightning bolt limbs and other sketch skeleton stuff like ball heads and guidelines to orient facial features. I hated that shit before I realized how much it actually genuinely helps.
Blind-trace-reference-blind studies are not called that but I don't know what they're actually called so whatever lol. It's really simple: you pick some specific thing (like a great white shark) and draw it 4 times: First blind, without a reference, purely from memory. Then, directly tracing a reference image (if you can). Then drawing normally from a reference. Last, drawing blind again without a reference. Then compare the first and last drawings for fun :3c
It's a good way to reassure yourself that you can improve and the studying and practice isn't useless, and it's also a good way to actually learn very specific stuff. The process can also be simplified down to blind-reference-stylize, where the last step isn't blind but instead drawing the subject in your style/simplified for speed and ease. I did this recently with hearthian mouths because they were pissing me off lol.
Very last advice: DRAW SHIT BAD AND OFTEN
Draw your favourite characters, draw your prescription bottles, draw your friends, draw your breakfast, draw them all really bad but try to capture the details even if it looks like shit, especially if it looks like shit. Fill a fancy sketchbook you got for your holiday of choice with garbage-tier doodles and never let it see the light of day. Scribble in your art program and then delete it!! Art isn't sacred, it's human, and you have to do it the way you do other human things like cooking and socializing; badly, often, and eventually well enough you can enjoy the results :D
Thanks again for the ask, hopefully I answered in a way that helps you figure things out and improve :] This was fun to answer <3333
10 notes
·
View notes
Note
I found you by total accident…
Meet my OC Luna! This is the only good drawing I have of her, and I forgot the ink splotch on her cheek.. but I’m to lazy to fix it lol
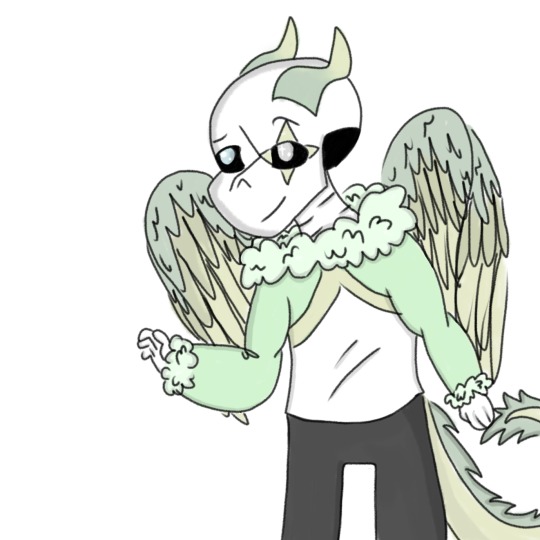
I’m still learning how to draw skeletons, so if you have any tips I’d love to hear them TvT
Your art is very edible btw :D
WHAT'S UP POOKIE? DID YOU THINK I FORGOT ABOUT YOUR CHILD? NUH-HUH
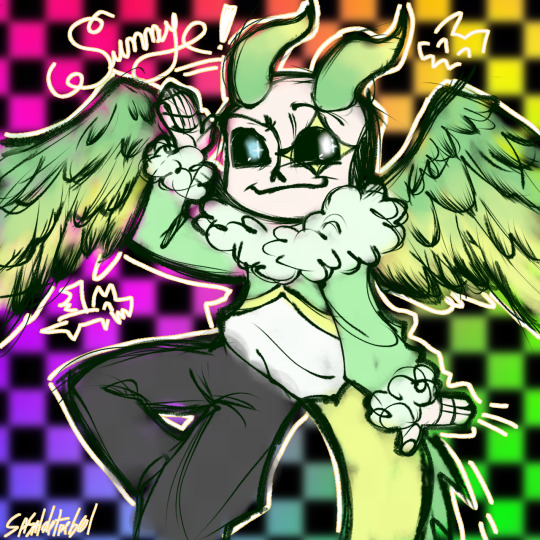
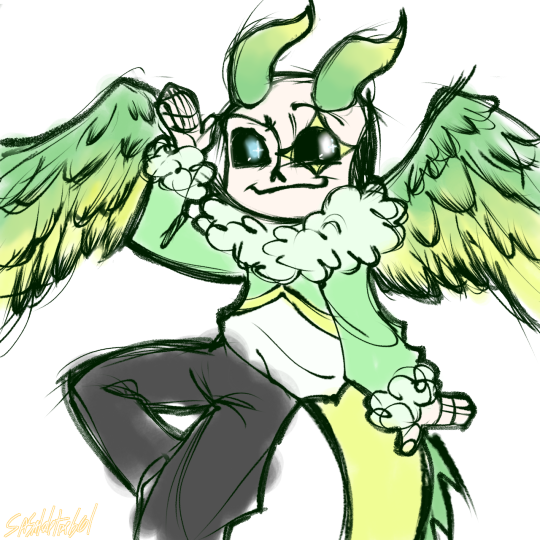
Two versions because I didn't know what to do for the background lol
So... you discover I can't draw wings... you... why
Nah, nvm. It was a lot of fun and also I really like dragons but can't draw them lololololololololol
So... Tips???? Man I wish I knew how to draw skeletons too. But ahí te va some stuff that help me be a little good at it:
Ok, I'm not the biggest expert on this. But I'll try my best!
I'll devide it in sections
Study: If possible try to understand the basics of the real thing. Ya know, so your brain have a more clear vision of what your hands are going to draw.
Studying is (for me) an important part of the creative process. It's the "why are things the way they are?". Once it's explained, you'll have more confidence in what you're going to do.
Big Shapes: Now, obviously you're not going to remember all those bones by heart to draw a silly skeleton. That's what big shapes are for.
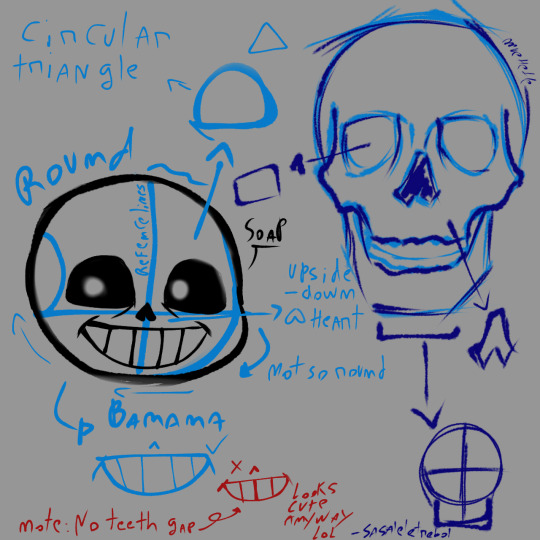
Try to look at them not as lines, but as objects. Objects have perspective. It doesn't have to be exaggerated or perfect. But knowing it can greatly improve your drawing skills.
I'll recomend watching some tutorials or drawing practices for this.
Details: this it's the fun part! Now our skeleton has a face! Yipie!.
Here I want you to remember to FLIP THE CANVAS NOW OR LAMENT IN THE COLORING. Now we are working with finer lines (depending on your style) for the smaller but not less important part of your work.
Technically it's the "lineart", but I don't know what that is *proceeds to whistle at just cleaning the sketch (but that's personal taste)*.
Style: Here's where personal taste comes into place. It's the pencils that you use, the lines you work with, what's best looking aesthetically to you.
I'll add and extra tip here... it's... STEALING!!! MUAHAHAHAJ. Ok no. Don't do that. What I mean by "stealing" is to see references of styles that you really like and try to implement elements of them in your work!
For example my biggest Inspirations are Jakei, x_nzlian and fanarts I really like!. I study really deep what I most like about those styles and use it to improve my own!
Like, how they draw the noses, the eyes, the shapes of the mouth they use, how they draw clothes interacting with the bones.
Take care and have fun. Don't compare yourself to others. Don't be sad if it doesn't work at the first try. Just keep going, keep learning, keep looking, learn from your mistakes and take care of your hand omg please. Do some wirst warm ups (that you can look up on YouTube and stuff) before grabbing a pencil. And your eyes, if you're a digital artist. DON'T DRAW ON A PURE WHITE CANVAS FOR THE LOVE OF GOD.
And also you can do whatever the heck you want! Don't follow all of this at the point of the letter. What I mean it's have fun and do whatever suits best for you. I'm just some silly clover in the internet who thinks that they know what they're doing.
That's it. Sorry if it is too long uuuhhh. Here, you got a cookie as a reward for reading all of that rambling→🍪. Thank you, and take care of yourself💕
#my drawings#utmv#cool moots#utmv oc#sans undertale#undertale#art tips#trebol rambling#ask#drawing request
18 notes
·
View notes
Note
Okay so for the artist ask game you reblogged, I'm curious about 4, 11, 12, and 30 :DD (Also sorry this is somewhat late, I meant to send an ask when I saw your reblog but then I totally forgot about it lmao)
omg no need to be sorry at all!!! you could’ve asked these questions 20 years from now and i’d still be so appreciative :DD
4. piece you wish got more love?
a few came to mind! i wish this (& this!) oc piece did better. i rly like how the face turned out :DD i also wish this viper sketch got just a bit more love only bcuz its my fav viper drawing ive done!! i don’t think i’ll ever be able to draw her face so perfectly again GAH!
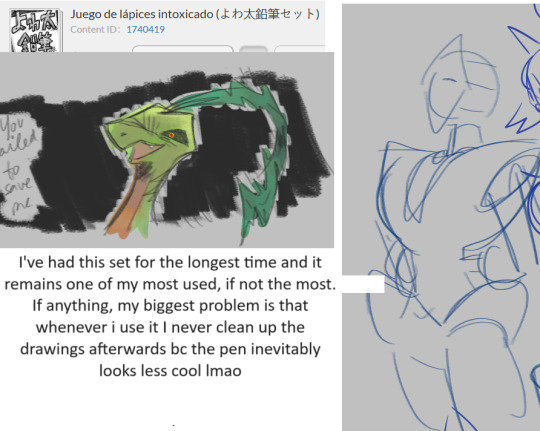
11. do you listen to anything while drawing?
yea absolutely!! i can’t even imagine drawing in silence LOL. i used to mainly listen to music while drawing (id just loop whatever song was stuck in my head at the moment). thennnn i started listening to video essays more or id put my fav youtubers on in the background while i drew. nowadays i mainly put on twitch streams in the background while i draw but sometimes i’ll still listen to music or youtube :D in fact i’ll even bounce back and forth between twitch and youtube or twitch and music
12. describe your process while drawing
my process is 90% scrolling through pinterest and 10% actually drawing LMAO. i really will spend an hour minimum scrolling through pinterest before i actually draw 😭 i’ll find several pics i wna reference and then i get straight to drawing! im terribly lazy as an artist so i don’t wna spend energy warming up (though i probably should OOPS)… if im attempting to do a fully rendered piece the process is: pinterest for 50 million hours —> sketch —> flat colors —> paint over sketch and flats —> get lazy and never finish
i HATEEEEEE doing lineart GRRR sometimes i’ll clean up my sketches and that’s basically the lineart step for me. very rarely do i actually attempt to do proper lineart its just SOOO TEDIOUSSSS and a lot of times i like the messiness and texture of my sketches way better! i feel like whenever i do lineart it just looks so bland and lifeless <//3 that being said i actually do wanna practice doing lineart bcuz there are so many artists i like that do wonderful line work (alex raymond, takehiko inoue, and hirohiko araki just to name a few of my favs :DDD) and i wna be able to do cool line work too!!! i just get very frustrated with it a lot of times LOL
sorry that ended up turning into a ramble about lineart i hope you don’t mind 😭
30. whats something youre proud of about your artstyle?
this one is actually a tough question! i’m not even the biggest fan of my own art style but if i had to choose something im proud of how i draw faces :]] faces are my fav things to draw and i think im okayyyy at diversifying the features i give to characters though that’s something i def gotta work on more :D
does that even count as an answer….i didn’t rly single out a particular feature of my style…in fact im not even sure i know how to idk what the hell defines my style i wont lie 😭 i hope the answer satisfies you though :]]
thank you so very much for the questions i rly enjoyed answering them!!!! :DDD i hope you don’t mind the ramble-y answers LOL
4 notes
·
View notes
Note
if it's okay, would you mind sharing your art process? your style is SO gorgeous dude. keep it up spardacest nation!!!
Thank you so much anon, and of course! I kinda posted about it on twitter a while ago, but for anyone not also on there, here's a paraphrasing of what I said there! (under a cut bc it's gonna get a bit long)
(speedpaint video from procreate mostly bc like I also said in that post, it's one of the few pieces I've done entirely on procreate and thus entirely recorded kdfjhdk I usually don't do the sketching + painting parts on there but every now and then I get lazy and want to get it all done quick in one program lol! It's not as good as it would look if I were using krita to render (which is what I normally use) but it gets the idea across decently of what it is that I do)
The short version of my process is: sketch, clean up sketch for lineart, then flat colors, then paint over the flats (i make the flats my shadows and paint on the light), then a multiply layer for skin details (like lips, eyebags, etc), then an overlay layer for skin transparency details (red over the ears/nose/fingertips etc), then i do hair over the lineart, then a multiply layer with the contact shadows in a light beige/grey/neutral tone on top of everything else, and then i unify layers, paint over the details, and color correct the HELL out of it The longer version is: SO, first of all, I will say, my entire process for a finished/fully redered piece is pretty scattered and uses a lot of different apps, because after many years of trying out different drawing apps I found that I just worked better when I could incorporate the parts I liked best from each individual one rather than having to adapt to another app entirely! In total, what I use is: autodesk sketchbook and procreate for the first half I do on my ipad, then krita and photoshop on my computer when I'm actually rendering (but any photo editing app instead of ps will do, I'm just used to photoshop bc that's what I learned as my first drawing app WAAAY back in the day lol), and then meitu on my phone for color filters (also any phone editing app with filters in it will do), AND also optional just for references: blender and daz3d on computer + magicposer on my phone The actual step by step of what I do: First of all, if I want to do a detailed, well rendered piece I will start by getting my references ready. That means either just grabbing a screenshot from the game if it's like, a simple portrait, or a photo reference, taking a picture of myself in the right pose/lighting, and if it's something more complex I will recreate the scene in Daz3D to simulate a realistic lighting, OR even just blender (i have the game models for the dmc characters downloaded, so I can just pop them in, pose them and change the lighting to get a realistic idea of what shadows their faces will cast in that specific angle/lighting.) Note: references are pretty essential to me, and there's nothing to be ashamed about for using them! Personally I don't struggle a lot with the drawing/sketching part of art, but my tiny little pea brain cannot fathom how to make an object 3D in my mind, and how to visualize shadows realistically... thus the reliance on 3D programs to do that for me, and then all I have to do is draw what I'm seeing lol. My art improved significantly ever since I started making 3D refs so I could get /exactly/ what I needed - there's still a lot of leeway you need to learn though, because as realistic as the lighting will be in a rendering program, you'll never really get a fully natural looking image, as far as stuff like the body stretching/squishing/pulling when it's in movement, facial expressions, folds in clothing/fabric, etc... so really it's more a guide than something meant to be followed 1:1.
Then, once I'm confident I know exactly what I'm gonna draw/have the idea in my head, I start sketching it in sketchbook. Not really getting very in depth, just blocking out rough shapes - I like sketchbook and to be on my ipad for that because it feels very reminiscent of traditional sketching on paper to me, which while I'm not super confident on my traditional art abilities, I do get the most natural/fluid/non-stiff figures out that way. Then when I think I have the general idea ready, I export the sketch layer as a png and import it into procreate - which is where I kinda start picking at the sketch and polishing it like i'm carving it out haha. Lots of liquify tool, flipping the canvas to check if it's even, blending out some of the lineart to help out with the rendering later, and then polishing up what was once the sketch into serviceable lineart. I usually reimport it back into sketchbook at this stage - while I like procreate for drawing I don't love the brushes I can use for lineart there, and so I usually only draw the "base" naked figure in there - when I'm in sketchbook I use a hard pencil to refine the details, then on a separate layer add all the things "on top" like hair, clothing, etc - usually I can get it pretty easily in one go, and once I'm satisfied I erase the naked body under the clothes and unify the lineart layers. Then I will just do the flats with a hard brush, turning the lineart layer into an overlay layer and coloring things in with the shadow colors. At this point, I export the file as a psd and import it on my computer - I give it a once over in photoshop first to see if there needs to be any adjusting (like whether any layer that has an effect needs to have a different effect, if all the colors look right since the ipad screen isn't the most faithful, if i wanna change the background color, etc), and once I think it's ready enough, I open it up in krita, where I do the actual bulk of the painting/rendering (as to why specifically krita: it's because I've gotten very comfortable with the brush/painting brush dynamics there and cannot seem to get as good results anywhere else, it's just the goldilocks spot of a brush for me haha.) If anyone's curious, here's the brushes I usually use for painting:
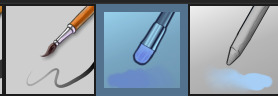
The one in the middle is my go to painting brush, left one for tinier/more refined details, right one for blending out soft shadows (though I learned the hard way to not overuse it, or it will look like I went ham with an airbrush tool lol). (I don't change any of the settings on these brushes, so if you wanna try out the exact ones I use! Just fresh off how they come out the app haha) I paint on the lights on top of the shadows, and just focus on that for the time being - once I'm done with the basic painting, I'll make a separate multiply layer for details like lip color, eye waterlines, makeup if there is any, eyebags, etc, and then adjust the opacity until it feels right - then I'll make an overlay layer with skin translucency details (like, when you hold your hands in front of a light and see the tips of your fingers become bright orange - many parts of your body are always a bit translucent to the blood underneath, specifically parts where the skin is thin like noses, cheeks, joints, knuckles, etc, and I found it makes the character look a lot more alive to add that subtle coloring in) - then usually I do hair on a separate layer on top of the lineart (because that way I can add small flyaways, more details, etc, and just use the lineart as a guide) After that, I'll usually make a multiply layer on top of everything where I'll add contact shadows in a neutral color (usually pretty pale, it'll be darker anyway since it's multiply), and once I feel like I've rendered everything out properly, I save the psd and re-open it on photoshop.
In photoshop, I'll mess around with the layers a little bit more (changing hue/saturation, opacity, etc), fuck around with the background to make it look pleasing, and once I'm happy with it, I'll unify the layers and start color correcting - usually by duplicating the unified layer and messing with the curve/hsl of the image and then changing the opacity of that edited layer until it's as strong or muted as I want it to be - then I also edit the RGB curves individually and adjust the opacity of that also (because I just really like how it ends up looking if I give a bit of a red/warm tint to the shadows lol), and at that point often I will reimport the finished image into procreate for some finalizing touches! Like, blending out shadows that came out too harshly, painting over anything that came out not the way I wanted it, redefining the lineart if it got messy during painting, and adding any extra small detail that might have gotten lost like catchlights, hair shines, hair flyaways, tears, etc. I also do one last round of flipping the canvas and liquify if needed! At this point, I export the finished image both to my computer and my phone - on my phone I open it up on the photo editing app, and add a bunch of different color filters - I don't hesitate from going completely balls to the walls here, and just kinda applying as many filters as will make an image look pleasing to my eye. Once I think it looks good, I'll export the edited image to my computer - and then open both the version without filters and the one with them on photoshop, and use the filtered version as an opacity layer, and adjust it until it doesn't look as crazy anymore lol. One last step I recently started incorporating was also changing the image to grayscale after I'm done, and doing one last round of curves in greyscale to make sure the values look right, and nothing is getting too lost because the values are too similar (because i know i get a bit swept up in getting repulsed by harsh contrasting lighting and can end up washing out all of rendering if I don't check myself kjdfgk) AND that's it! Yes it's a pretty long and chaotic process, but it's coming from years of trial and error and realizing I can just let myself fo whatever makes me happier with the results, and I don't have to stay constrained to one program if I don't like every tool it has to offer/don't have to accept the final image fresh off the painting app as the "finished" image with no adjustments allowed after, lol. I don't find it takes a lot more time than if I didn't do it this way, but YMMV. Hope this was helpful and sorry for taking so long to explain! I just wanted to give a thorough explanation dfhdkhkx
#asks#sorry i know its a bit chaos hfdgd#but i hope its helpful anon! thanks for asking#also for anyone wondering#no i am not paying for ps lmao#fuck adobe#it is always morally correct to pirate adobe products people#if you have an alternative photo editing app you like best youre welcome to use it#but if youre too used to photoshop. everything is free on the internet if you know where to look#i also wouldnt recommend meitu bc it feels like a pretty sketchy app all things considered#im just too lazy to care to change my go to app but i would look for a different phone app#p sure theres billions that let you add funky color filters instead#actually i think you could use photoshop camera raw filters for that too#its just way too intensive of a process for my tiny potato computer and it feels a lot faster + seamless on phone
14 notes
·
View notes
Note
Do you have a set process for coloring and rendering / adding texture to your art? If so, would it be alright for me to ask what goes into that process? I'd love to learn how an artist I admire goes about their work!
Omg I'm so flattered, I'll try my best to explain it!! ^^
Tho, okayyy, I apologize beforehand for how incoherent this might be, since I don't really have a set process at all and mostly I fake it 'til i make it haha. I'm the first to admit that I don't have a ver consistent method and that shows in how irregular in quality my art can look, even inside the general sketchy look.
(Btw sorry if some of the fanart i use for example doesn't make you comfortable but I've tried to find the best examples for each type of coloring haha)
I'll start with the brushes I rely on the most, tho I admit i made the mistake of downloading too many brushes and textures so I might use others on rare occassions xddd
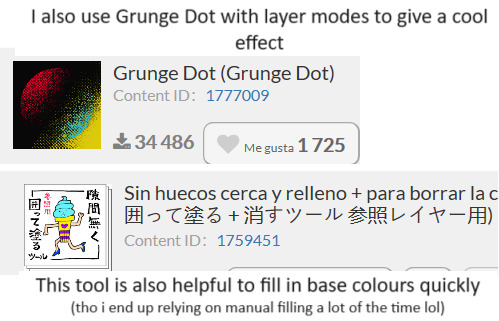
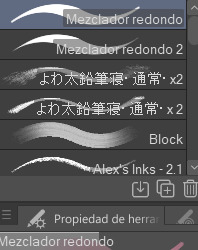
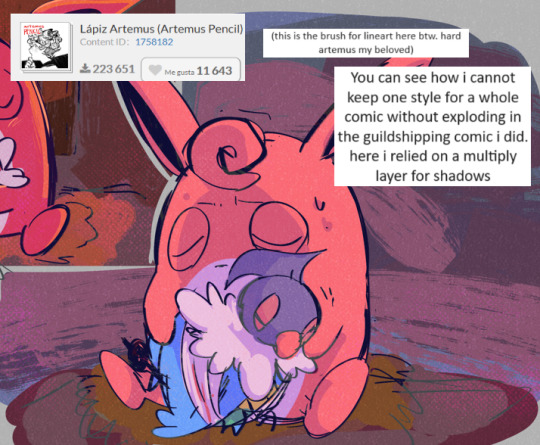
These are basically the brushes I use the most. The "mezclador redondo" is just CSP's default paintbrush and I only tweaked it to find sth I liked and felt comfortable with for both lining and painting
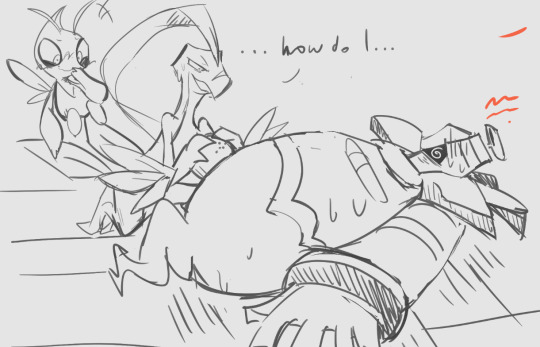
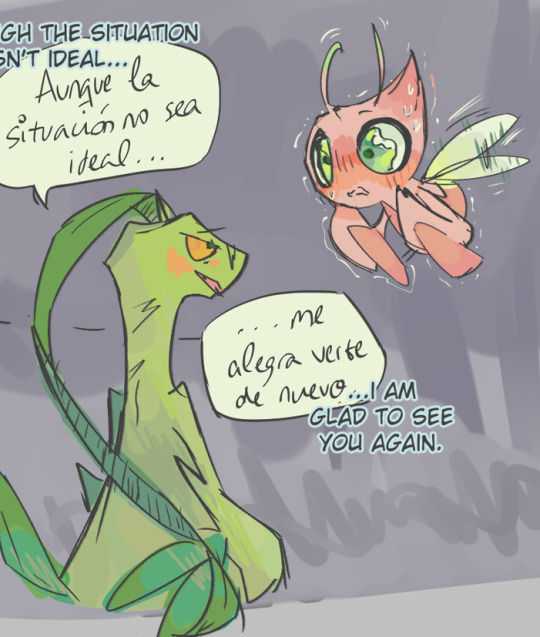
As you can see here I only used one layer for lines and other three for each of the guys' colors. I colored it all with the default brush (tho unfortunately I lost the settings I used for this drawing in particular and haven't found them again rip). In drawings like this I just do a sketch, clean the lines (no lineart) and then paint it. After the base color I start laying out different hues to make the coloring more interesting.
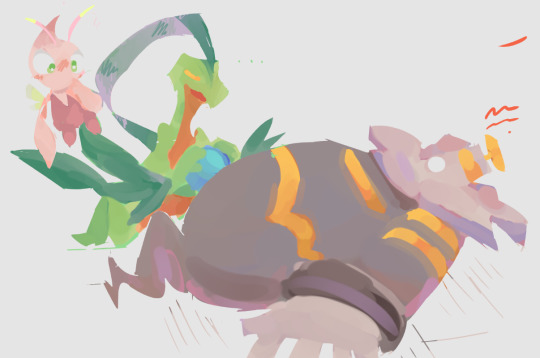
This one was the same. One layer for coloring, manually adding lighter hues (see the more light and yellowish color on grovyle's left leg compared to the shadow) or darker tones. I try to add color to the shadows as well to make them feel less flat, and an airbrush in overlay tends to help with that (tho here I just used a brush).
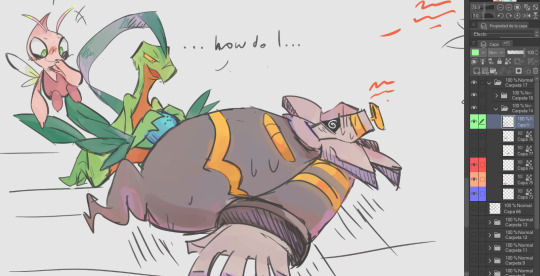
Here you can see that I often paint over the lines on another layer to correct mistakes in the "lineart" lol. I also applied an airbrush (layer mode overlay) over celebi to make her more bright. I wanted to put this one to show that coloring doesn't have to be detailed to look nice enough. Here Celebi basically has no shadows at all but the tone of the drawing makes her look cute anyways imo ^^
In these two you can see adjustements over the full image again (yellow layer), but I also wanted to show that I don't have a set number of layers either, it depends on how many I feel like using. Again, sorry for the lack of consistency but im too lazy to have a proper method lmao
I will also use harder brushes and tone changes sometimes, instead of blending them with less dense brushes. I am also fond of adding hard lighting in some drawings. You can experiments with it on a top layer and delete it if it doesn't fit, so it's always worth a try.
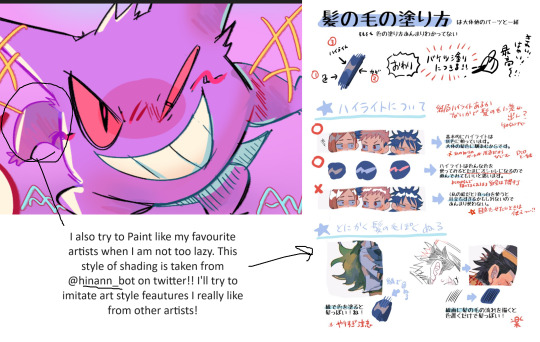
Another thing I recommend is studying and copying artists you admire or like. Add things from their styles into yours, see how they work with proportions and try to use that in your own art. It has helped me a lot and, without looking to fully copy anyone's style, it does give you some ideas of how you wish your drawing would look, which motivates me (when it doesn't depress me lol)
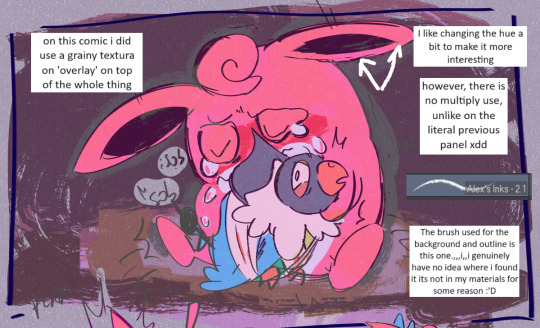
Finally, the texturing isn't consistent either. I use one of CSP's/Downloaded texture packs, put a grainy texture on the canvas, set it to overlay and adjust the opacity until I'm satisfied. In these two images you can see I am not consistent in coloring even in the same comic lmao. But we are doing this for fun, so I think experimentation is always sth worth exploring ^^
And I think that's all I have to say. I don't control color theory at all, so I can't really explain how I choose colors. I look up some tutorials on youtube and pretend I understand lol. Ig the one thing I tend to do a lot is changing hues in a base color to make it look less flat, the same as with shadows.
Anyways I hope this was helpful or that it at least waas what you asked for haha. Thank you for the interest!! :DD
#ask#art process#i guess???#anyways thank you for the ask sofie i hope this was helpful <333#I am KIND OF A BIG MESS IN ORGANIZATION#but hey we have fun hahaha
10 notes
·
View notes
Note
Thank you everyday for your art!! Your lineart work is absolutely gorgeous, and especially on calligraphy pens?? 😭 It's amazing!!
I used to do calligraphy, but I 'm now trying to practice a calligraphy pen with lineart, and I'm hoping to get lines as clean as yours. What type of nibs do you use? Do you switch them for different line thicknesses? Any tips you can offer? 🥹
I hope you have a great day 🌟
omg thank you so much!! as much of a struggle it can be, i do enjoy doing lineart a lot when i draw (mainly digitally but i’ve been having fun with these lil traditional drawings too) so it makes me happy to hear you say that 🥹
also im still super new to drawing w the gpen/calligraphy pen as i’ve only just gotten one for the first time about a month ago so i’m still slowly experimenting with them (and i’m also partially winging it to be really honest) but this is the pen/nibs i got! It came with a set of five different nibs, two each. Since this is my first time getting and using this kind of pen, i don’t really have anything to compare it to in terms of quality and such but it’s doing what i expected it to do for the most part LOL (also the bottle of ink that i got if anyone was interested)
(the rest is under the cut since it's kinda long haha)
My first initial drawings were drawn with the 004 nib from the set, whereas my more recent drawings were drawn with the 003 nib. (For filling in the solid black areas, i just used a micron brush pen)
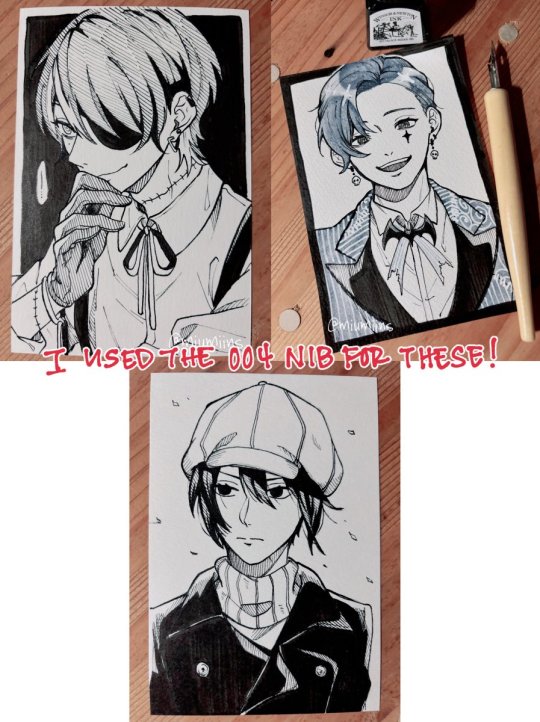
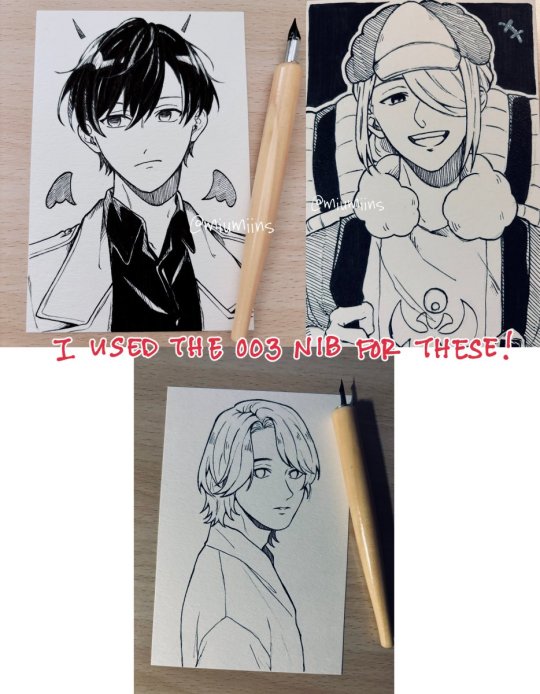
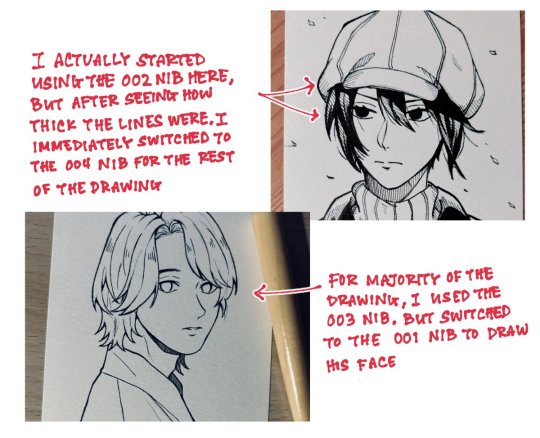
For the most part, i pretty much used the same nib throughout the entire drawing for each one. Part of it is just me being lazy about changing it, but also, because these are postcard sized (about 6” x 4” / 148mm x 100mm) and not very big drawings in the first place, i didn’t really feel the need to switch nibs too much. If i was working on a larger canvas/paper, i might switch between nibs more often for more variety in line thickness, and if anything, i definitely would use one of the smaller nibs (like 001) for finer details
(also here's the paper i got that i drew all of these on. keep in mind that i ordered it off amazon jp but it was a set of five packs so now i have plenty to practice on LOL)
As far as tips for clean linework, a lot of this is stuff i do for digital art but i’ve been more or less applying the same logic to the stuff i’ve drawn traditionally recently (some of these might be really fundamental/obvious and you might know this already but it is kind of what helps me a bit):
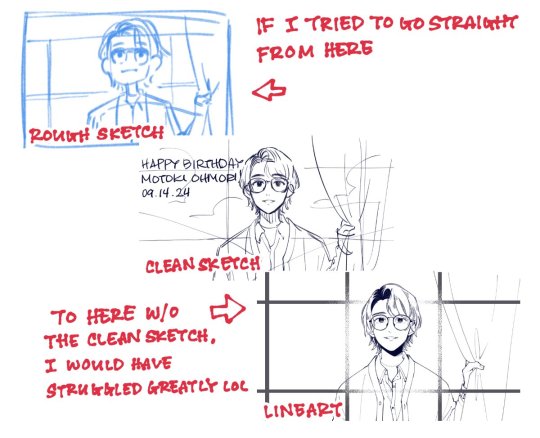
▷Having a clear sketch of what you want to draw and where you want to place your lines is really helpful, both for digital and traditional art, but probably especially so for traditional art.
As someone who honestly avoided doing traditional drawings for so long, my biggest struggle was honestly getting a clean rough sketch down on paper and getting past the sketch stage to do anything more with the drawing. Part of it is, again, laziness on my part, as it’s a lot easier for me to do sketches and clean them up digitally since i heavily rely on undo as well as the lasso and transform tools to fix proportions and whatnot (plus, not being able to undo once you start inking also held me back, because i know that my hands aren’t the steadiest and will occasionally move unexpectedly when inking sdlkfg). That said, using my ipad as a light table and tracing my digital sketches onto paper is what got me past that hurdle so that i could experiment with more traditional art (though i know i should eventually work on just starting from scratch on paper too haha).
But having a clean sketch gives you a clear guide of where and how you want your lines to be, rather than just having a vague idea of how you want it to look and having to think on the spot about the placement of your lines at the same time as inking your drawing.
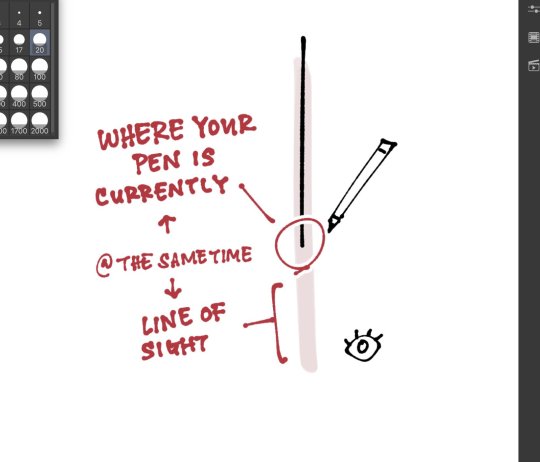
▷This is something i saw someone else point out in their tutorial once and i never really took notice of it until i saw it, but as you line over your sketch, keeping your line of sight on the path slightly ahead of where your pen is currently at kind of gives your brain a heads up of where your pen needs to go and your hand will naturally follow. It’s probably something that the more you draw, the more it comes to you subconsciously, like i kind of do this but i’m not super conscious of it, so you probably don’t need to get too hung up about keeping this in mind.
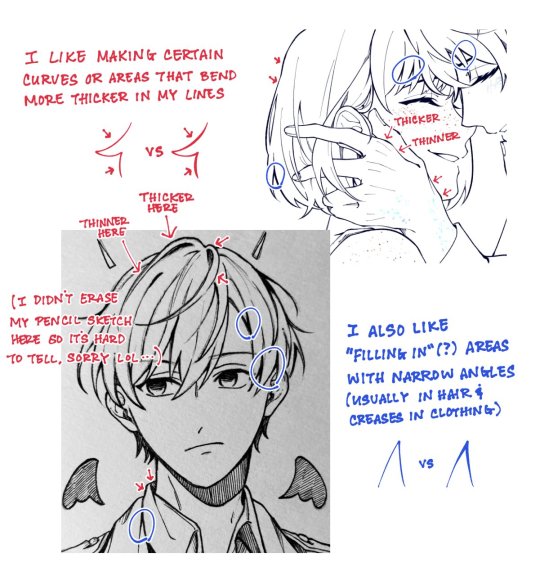
▷this is moreso a tip on line thickness rather than clean linework, but even without changing the nib or brush size, i like to manually vary the line thickness in various areas! This can be achieved by applying more or less pen pressure, and even if you can’t do it in one stroke, you can draw the initial line and go over the areas you want to thicken.
▷rotate your paper or canvas as necessary! When i draw digitally, i rotate my canvas a lot, as well as heavily rely on the flip canvas function. Obviously you can’t flip your canvas and continue to do lineart with traditional art, but rotating your paper can help with how you draw your lines. Sometimes it’s hard/uncomfortable for me to draw lines that go inward towards my drawing hand, so rotating the canvas so that the line flows outward makes it a little easier and more comfortable for me to draw.
▷draw with quick(ish) strokes! The slower your hand moves when you draw each stroke, the more wobbly your lines might become. Of course, if you draw each stroke too quickly, your lines will end up in a direction that doesn’t follow your initial sketch. This comes with time, and the more you draw, the more confidence you’ll gain in your lines once you have a grasp of how you draw them and you can adjust accordingly.
▷if watching natsume-sanchi’s videos has taught me anything, when you ink your traditional drawings, always start from the top-left (or top-right if you’re left handed) and work your way down and right so you don’t risk accidentally smudging the ink with your hand before it dries (i still somehow end up smudging the ink one way or another though LOL)
I’m not the best at putting how i do things into words since a lot of it is just based on feeling/in the moment but i hope any of this is helpful!
#anon#ask box#sorry for my handwriting it's hard for me to write nice digitally i've had to rewrite some of it multiple times sldkfjg#also it's cool that u used to do calligraphy!!#that's smth i wanna try out eventually but ohh my shaky and unreliable hands
4 notes
·
View notes