#Fodmapliving
Photo
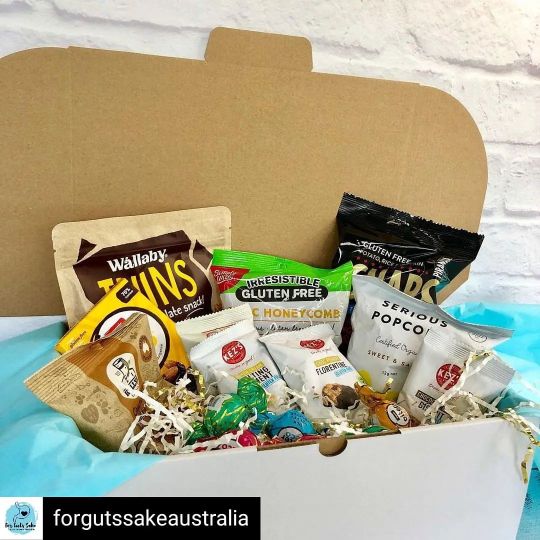
Reposted from @forgutssakeaustralia Love (verb) : the friend who remembers to buy you delicious gut friendly & gluten free snacks for Christmas parties 🎄🍫🍿🍪🍩 #forgutssakeaustralia#snackfluencer#ladystartuplove#ladystartup#newcastleaustralia#australianbusiness#femalefounder#subscriptionboxes#giftbox#giftideas#giftsforher #fodmap #lowfodmap #fodmapfriendly #ibs #fodmapdiet #glutenfree #lowfodmapdiet #ibsdiet #fodmapliving #guthealth #ibsfriendly #lactosefree #healthy #fodmapsafe #fodmapfree #ibsawareness #fodmaps #fodmapfood #lowfodmapliving Shop this box and more on our website! Link in bio @subscriptionboxaustralia https://www.instagram.com/p/CXP5xdNFBNF/?utm_medium=tumblr
#forgutssakeaustralia#snackfluencer#ladystartuplove#ladystartup#newcastleaustralia#australianbusiness#femalefounder#subscriptionboxes#giftbox#giftideas#giftsforher#fodmap#lowfodmap#fodmapfriendly#ibs#fodmapdiet#glutenfree#lowfodmapdiet#ibsdiet#fodmapliving#guthealth#ibsfriendly#lactosefree#healthy#fodmapsafe#fodmapfree#ibsawareness#fodmaps#fodmapfood#lowfodmapliving
0 notes
Photo

My office today, time management and organic fruit and veggies #winning #fodmap #lowfodmap #fodmapfriendly #fodmapdiet #fodmapliving #healthy #coffeeshop #fruit #veggies #market #ibs #authorpreneur #selfcare #inspiration #motivation (at The Small Crop) https://www.instagram.com/p/BxdeiIMl6ra/?utm_source=ig_tumblr_share&igshid=1fc3zl9rutszo
#winning#fodmap#lowfodmap#fodmapfriendly#fodmapdiet#fodmapliving#healthy#coffeeshop#fruit#veggies#market#ibs#authorpreneur#selfcare#inspiration#motivation
0 notes
Photo

So after completely letting go and eating a chilli burger yesterday, I’m back at it again with this stupid low FODMAP cooking... today we have; quinoa served with haddock, carrot, chive, butternut squash, aubergine and peppers sautéed in a garlic oil with ginger, lemon, black pepper, Chinese 5 spice and salt for seasoning #fodmapsnacks #fodmapdiet #fodmap #fodmaps #FODMAPFriendlyCertified #fodmapfriendly #fodmapliving
0 notes
Text
Ode to Gluten Free Baking
Over the last 15 years I have really gotten into cooking and baking. Hence this blog;) Unfortunately, I had to change my diet a couple years ago due to some health issues. For almost 2 years now I have been following the FODMAP diet – some days more strictly than others. This diet was a life saver for me, and I’ve learned a lot about digestion. I’ve also learned a lot about foods that my body doesn’t digest well, and can now avoid them instead of being sick all the time. If any of this speaks to you, I would recommend picking up IBS: Free at Last by Patsy Catsos. I would credit her for fixing/healing my gut when the doctors threw up their hands and said it was all in my head. Okay, in all fairness, first they took out my gall bladder – but that only worked for a few months.
So hooray for me, not only was I able to eat without getting sick – I was losing weight. But it’s really not as glamorous as it sounds. Yes, I was dropping clothing sizes and bra sizes – but a lot of it was due to giving up wheat, lactose, sugar, caffeine, salsa, most fruits, lots of veggies, and legumes…to name a few. If you still think it sounds glamorous, then consider Friday night pizza. Or anytime a pizza presents itself into your life. Think about the chewy gluten-filled, doughy crust; and the gooey, stretchy cheese; and the spicy, tangy sauce.There isn’t a whole lot about pizza that jives with the FODMAP diet. Good thing I love a challenge!
I found work-arounds to just about every favorite recipe in my life – except pizza crust. Finding a GOOD gluten-free (not that I have problem with gluten, but it’s the easiest way to know something is “wheat free”) pizza crust is pretty damned impossible. Truly. I have tried all the store-bought crusts AND mixes. I have tried everything the frozen gluten-free pizza world has to offer. And from that research I can share that if you want to spend a cool $60, you can get Amazon to ship you about a dozen frozen pizza crusts from the Smart Flour company. They also sell their ready-made frozen pizzas at Fred Meyer. Pretty good in a pinch. Still, I missed tossing my pizza dough – the ritual of making my Friday night pizza. I missed the smell and flavor and texture.
And then it all changed. Pinterest FODMAP recipes were becoming increasingly common for me, and I discovered the Gluten Free on a Shoestring blog, by Nicole Hunn. She was advertising some bread recipes as her new Gluten Free on a Shoestring Bakes Bread cookbook was coming out. Her recipe for gluten-free Sweet Hawaiian Rolls was on Pinterest and I tried it. Because, who doesn’t like sweet Hawaiian rolls? First, being able to make a bread dough – A REAL BREAD DOUGH – one that is soft, smooth, and elastic, and feels alive in your hands. The smell of this dough…and the way my house smelled when the rolls were baking. Tears in my eyes, people. I have always been a self-proclaimed bread girl. I love my bread. I grew up on quality sourdough from the local French bakery. If bread was my life, being from the Bay Area made sourdough my religion.

Enter Hunn’s book, and the chapter on “wild yeast” breads, starting with sourdough. And since I had two weeks off, and making TRUE sourdough bread is a sort of culinary bucket list item of mine, I threw caution to the wind and went for it. I trust this cookbook, and follow it to the letter. Yes, Nicole, there is flour and butter stains on the pages, and I have sticky notes and bookmarks flagging pages. In fact, with the amount of baking I have been doing in the past few months, I would like to nominate Ms Hunn for the Nobel Prize in Gluten Free Baking. She is the real deal, and did ALL the research and trial and error for us – so all we have to do is follow her recipes.
One thing I have learned is that gluten free bread doesn’t freeze well – and you lose texture and flavor. To solve this, when I make a dough (bread, cookie, pastry, etc) I only bake-off what I am going to eat in the next couple days. The rest of the dough goes into the freezer. So far (knock on wood) this has been working; I just switch the dough from freezer to fridge a day or two before I want to bake it, and it’s ready to go. Most of the recipes call for working with chilled or cold dough anyway.
So here we go! The Sourdough Bread Adventure!!

The first step was to make the wild yeast starter. This involved mixing sorghum flour, teff flour and water in various amounts, over 4 days. This picture represents a volume of about 1c of liquid yeast slurry, however it has risen to the 3c marker on these mason jars. CRAZY!!

Here’s the deal with gluten-free baking, and Hunn’s cookbook in general. Weighing and mixing flour becomes your life. At first the idea of weighing ingredients went against the nature of my Western culture -- but you get the hang of it. And it eventually becomes second-nature and goes pretty fast.

This is late on Day 4, when the liquid yeast slurry became more of a dough. Again, more mixing of flour. I’m not sure I would do this again - as it involved a lot of waste. Part of getting to this point means discarding most of the liquid slurry each day, as you add more fresh flour and water.

This was Day 7, as the yeast starter and Mother Dough have to also sit and rise for a while. All in all, I started this project on a Tuesday and finally ate the bread the following Monday. I did this during the week between Christmas and New Years, and let me tell you - you don’t want to get stuck running to town for more Whey Protein Isolate on New Years Day. After a snow storm. This proved to be a pipe dream, and after 3 grocery stores we went home with Whey Protein Powder. Best we could do on a national holiday, in a town where we are lucky to have gluten-free sections in the aisles.
But I had to move on to the next step. Not really - but I had already been patient for a week. I wanted to eat my bread!! So I researched the difference between Whey Protein Powder and Whey Protein Isolate. Coincidentally, Catsos’ book on the Fodmap Diet lists the isolate as “allowable” while the protein powder is “not allowed.” Turns out this is because the powder is loaded with lactose and some other stuff, and the isolate is mostly just whey protein. Next, I re-read the part in Hunn’s book about why she uses the Whey Protein Isolate, and it turns out she found it to be the best substitute for gluten. Typical gluten-free breads have that gummy thing going on because of all the “gum protein” that is taking place of the gluten protein. In the end, for 75 grams of Whey Protein Isolate, I subbed 70g of the Whey Protein Powder, and 5g of Xanthan Gum to increase the protein content. I consider myself an “advanced gluten free baker” for doing this. It worked!
Or, at least, my bread wasn’t ruined;)

So that’s it! No recipe posted here, but you can go to glutenfreeonashoestring.com and try some of Hunn’s recipes. If you like them, and the whole “mixing and weighing flour” deal doesn’t scare you off (I promise it’s not hard), then I urge you to order her book about baking bread. You may find yourself back in the world of baking bread on a stormy day...rolling your hands through the soft and stretchy dough while the soup simmers away on the stove. Can you smell it?? Go to her website - FAST!
0 notes
Text
Chile Verde
I love Mexican food. I grew up near the border and absorbed the culture and flavors during my formative years. As an adult, each summer I fill my garden with tomatoes, chiles, cilantro and oregano -- because making and eating fresh salsa from the garden can be a religious experience. But times have changed, and my body has since decided that tomatoes are actually the enemy. Being that chips and salsa qualifies for a meal in my house, this presented some issues. How could I get my Mexican fix without slathering something in salsa or hot sauce?

About a year ago, I started the FODMAP diet. This is not a fad diet, like Paleo, Atkins or other weight-loss/healthy living diets. In fact, I hate referring to it as a “diet” because I’m not withholding rich foods in the name of slimming down for the summer. I follow the FODMAP diet because it works for me -- keeps me healthy and my digestive system functioning. Believe me, if it were just about slimming down for the summer, there would still be bread in my house. And pizza on Fridays! But I digress, you all want to know about Chile Verde. Turns out, tomatillos don’t burn my guts up the way tomatoes do. And I can still sit down with a bowl of tortilla chips and make a meal out of the sauce. #winning.
The rule for this sauce is “everything green” -- hence the verde. I start by preheating the oven to convection roast 325, then start prepping my veggies. I like to prepare everything for the blending stage at the outset. My husband will tell you to just cook it all first, and de-seed and such later. I am lazy, and would rather deal with the veg when they are cold and hard - not hot and slimy.

I toss in a few pounds of tomatillas, husked and quartered. Then I de-seed several each of poblanos, aneheims, hatch (if I can get ‘em), serrano (only a couple - they carry some heat) and some jalapenos. Now, garlic and onions are no-no’s on the FODMAP diet - BUT, for me, I can tolerate in small doses without issue. I broke it down like this: 1/4 onion and 2 cloves of garlic, which get roasted and blended into the sauce. And since the sauce only portions out to about 1/4c - 1/2c per person - and this recipe makes about 8+ servings -- well, I decided I really wasn’t getting that many fructans from the garlic/onion addition. You be the boss of you. In real life, this sauce has WAY more onion. I drizzle some garlic olive oil, salt and pepper, then roast! I usually let them go for about an hour, stirring every 20 minutes or so. You will end up with a liquidy, mushy mess of charred edges and good smells:)
After the veg has cooled slightly, dump it all into a blender (this is where the prepping ahead of time comes in handy) with a TON of cilantro and the juice from a lime. Puree until smooth. Now, this is where you can stop, and call it “Roasted Salsa Verde” -- or skip the whole roasting part, go raw into the blender, and just call it “Salsa Verde.” I get too excited about pork enchiladas to stop there, but someday I will. A bag of tortilla chips and a blender of green goodness?? Okay!

For the sauce, I pour the blender mix into a saucepan on medium heat and add some chicken stock. Just a couple cups or so, to thin it out and give all that rich, concentrated flavor somewhere to go. I let that simmer down for an hour or so -- until it cooks down enough to get thick again. Add salt as needed, and use on enchiladas, sliced meats, rice, as a pizza sauce -- OR, do what my husband does, and take your seared meat, and cook it IN the sauce. Which adds a whole other dimension of flavor. DELISH!!

1 note
·
View note
Last Seen Blogs

three-of-crows
it's always darkest before the dawn ✨️

hotyogateachertraining
Tanpa judul

luna-melon
The Dog Days Are Over

iusedtobeatimetraveller
Happiness by the kilowatt

healifywithlongrich-blog
healifywithlongrich