#Fine-Tip Glue Pen
Explore tagged Tumblr posts
Text
Listen to your elders
So last week I posted abut the importance of downloading your fic. And then three days later AO3 went down for 24 hours. No one was more weirded out by this than I was. But while y’all were acting like the library at Alexandria was on fire I was reading my download fic and editing chapter eight of Buck, Rogers, and the 21st Century. And also thinking about what I could do to be helpful when the crisis was actually over.
So first off, I’m going to repeat that if you’re going to bookmark a fic, you really need to also download the fic and back it up in a safe place. I just do it automatically now and it’s a good habit to get into.
But let’s talk about some other scenarios. Last October I lost power for over a week after hurricane Ian. Apart from not having internet or A/C I did find plenty to do, I collect books so I had plenty to read, but maybe, unlike me, your favorite comfort reads aren’t sitting on a bookshelf. So let’s do something about that, shall we?
In olden times many long years ago around 1995 we printed off a lot of fic. It was mostly SOP to print a fic you planned to reread and stick it in a three ring binder. And that’s totally valid today too, but you can also make a very nice paperback with a minimum amount of skill and materials.
Let’s start with the download; Go to Ao3 and select your fic, we’ll be working with one of mine. This method works best with one shots, long fic tends to need a more complicated approach. Get yourself an HTML download

Open up the HTML download and select all then copy paste into any word processor. Set the page to landscape and two columns, then change the font to something you find easy to read, this is your book, no judgement. This is all you have to do for layout but I like to play a little bit. I move all the meta, summary, notes to the end and pick out a fun font for the title:
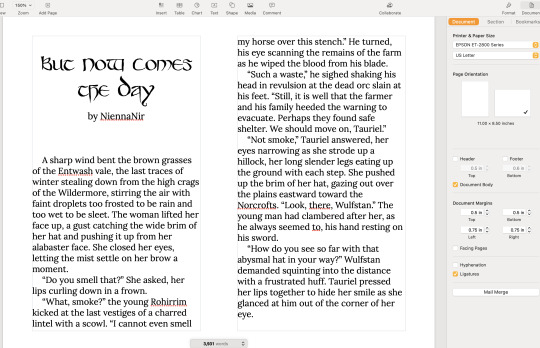
No time like the present to do a quick proofread. Congratulations, you’ve just created your first typeset. On to the fun part.
Now you’re going to need some materials: 8.5x11in paper ruler one sheet of 12x12 medium card stock (60-80lb) scissors pencil pen or fine tip marker sheet of wax paper white glue two binder clips 2 heavy books or 1 brick butter knife
You’ll also need a printer, if you’re in the US there is almost a 100% chance your local library has a printer you can use if you don’t have your own. None of these materials are expensive and you can literally use cheap copy paper and Elmers glue.
Print your text block, one page per side. Fold the first page in half so that the blank side is inside and the printed side out:
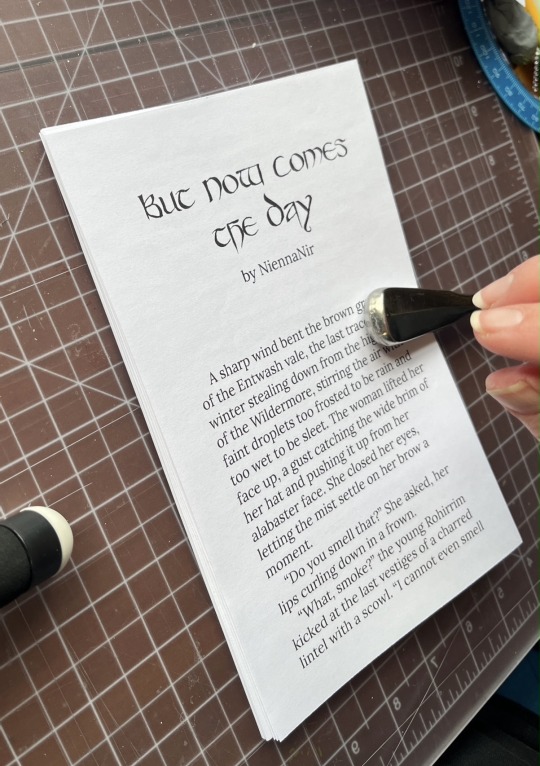
use the butter knife to crease the edge. Repeat on all the sheets. When you’ve finished, stack them up with the raw edge on the left and the folded edge on the right. I used standard copy paper, because you’re only printing on one side there’s no bleed to worry about. Take the text block and line everything up. Use the binder clips to hold the raw edge in place.
Wrap the text block in the wax paper so that the raw edge and binder clips are facing out. I’m going to use my home built book press but you don’t need one, a brick or a couple of books or anything else heavy will work fine.
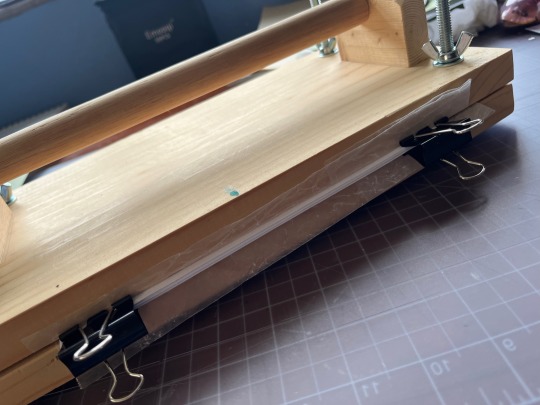
Once the text block is anchored down, take off he binder clips and get out the glue.
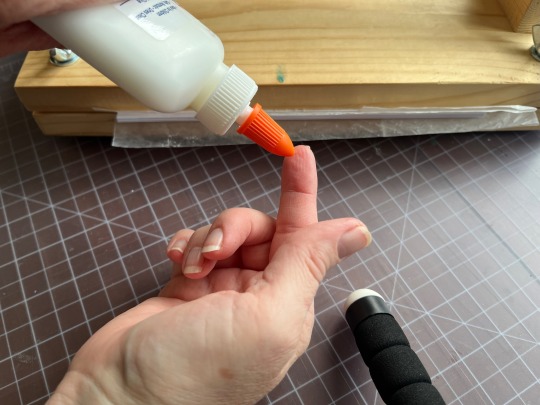
You can use a brush but you don’t need one, smear some glue on that raw edge.
Go make a margarita, watch The Mandalorian, call your mother. Don’t come back for at least an hour
In an hour smear some more glue on there and shift your brick forward so that the whole book is covered. This keeps the paper from warping. While glue part 2 is drying we’ll do the cover. Get out your 12x12 cardstock
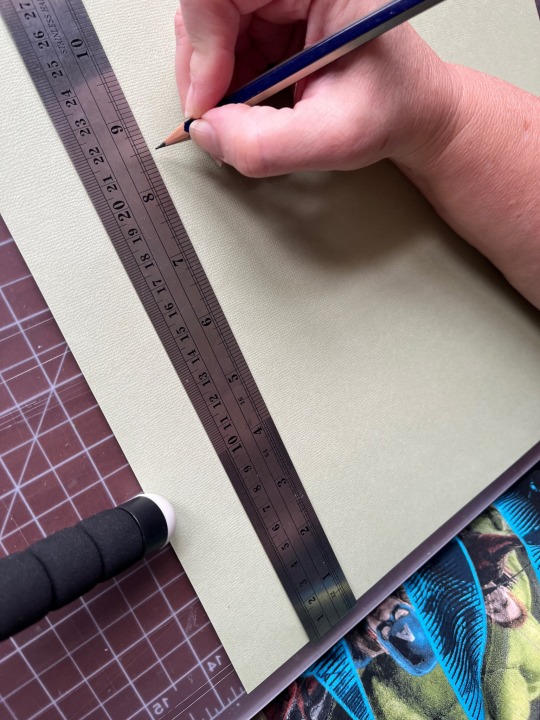
Mark the cardstock off at 8.5 inches and cut it. Measure in 5.5 inches from the left and put in a score line with the butter knife (the back edge not the sharp edge)
Carefully fold the score line, this is your front cover. You have some options for the cover title, you can use a cutting machine like a cricut if you have one, you can print out a title on the computer and use carbon paper to transfer the text to the cardstock. I was in a mood so I just freehanded that beoch. Pencil first then in pen.
Take your text block out from under your brick. Line it up against the score mark and mark the second score on the other side of the spine
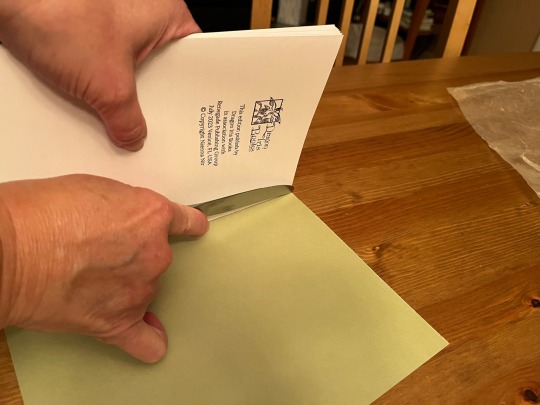
Fold the score and glue the textblock into the cover at the spine. Once the glue dries up mark the back cover with the pencil and then trim the back cover to fit with your scissors.
Voila:
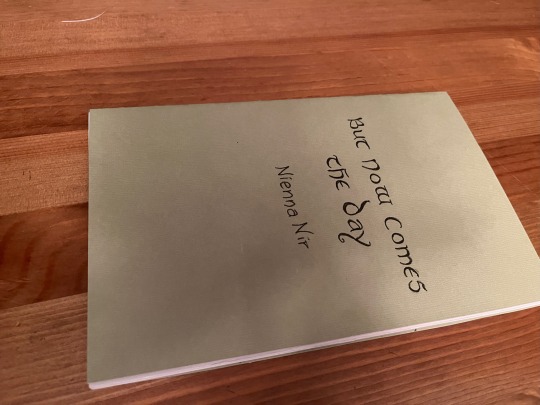
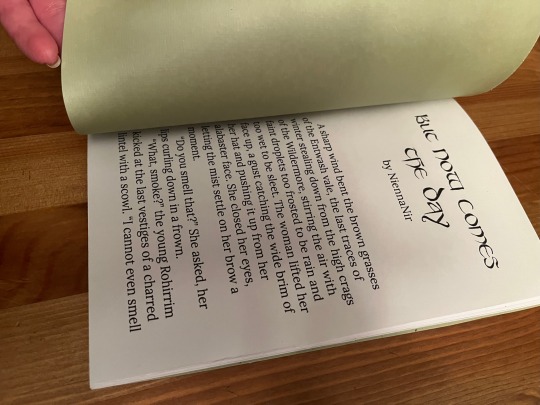
I’m going to put this baby on the shelf next to the Silmarillion.
The whole process, not counting drying time, took less than an hour.
If you want to make a book of a longer fic, I recommend Renegade Publishing, they have a ton of resources for fan-binders.
22K notes
·
View notes
Text
Book Decoration: AKA All The Ways I Don't Use a Cricut
(this post is for people who don't want to buy an expensive cutting tool, or for those that do have an expensive cutting tool that would like to mix things up a little)
1. Print That Shit
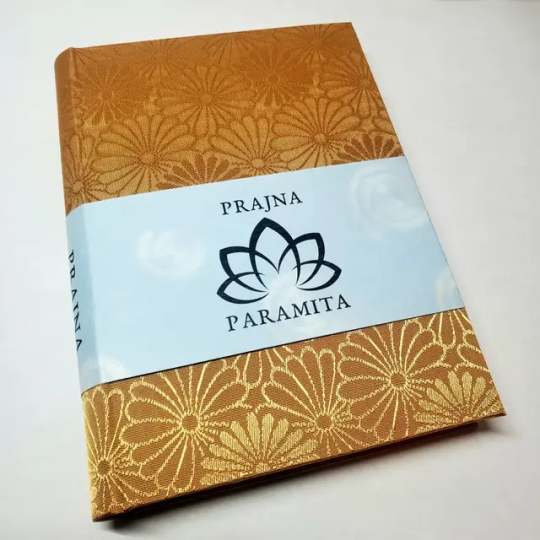
If you're already printing your own textblocks, an easy step for titles is to print them. Above is a title printed onto an "obi" of decorative paper. I measured out where I wanted things on the finished book and laid it out in Affinity, then printed it on a full sheet & trimmed it down to wrap around the book. A more simple method is to print & glue on the label into a slight indent in the cover (to protect it). A third option is to do the spine in bookcloth, while you print on paper for the cover and then glue that paper onto the boards (this usually looks even better when it is a three-piece bradel bind).
2. Foil Quill / Heat Pens
The heat pen is one of my go-to tools, but it can be a bit touchy about materials. The most popular version is the We R Memory Keepers' Foil Quill (which is one of the most ergonomic), but other pens exist that can get you to a higher heat temp, finer lines, or more consistent foil. For example, I have a pen created by a local Japanese bookbinding studio that fares way better on leathers than the WRMK quill & with a finer tip, but it's hell to control. Best results in general are on paper or smooth bookcloth (starched linen, arrestox, colibri - even duo will work but its less solid). The fuzzier a bookcloth is, the less your foil quill wants to deal with it. This means the heat n bond method of making bookcloth does not play nice with a heat pen usually, but there are two solutions: 1) use this tutorial on paste + acrylic medium coated bookcloth instead that will get you a perfect surface for the heat pen, or 2) use the pen on paper & then glue onto the cloth. I did a video tutorial for both foil quill use and this type of homemade bookcloth for @renegadeguild Binderary in 2023.
You get the most consistent results by tracing through a printed template that is taped in place, as I do in the video above.
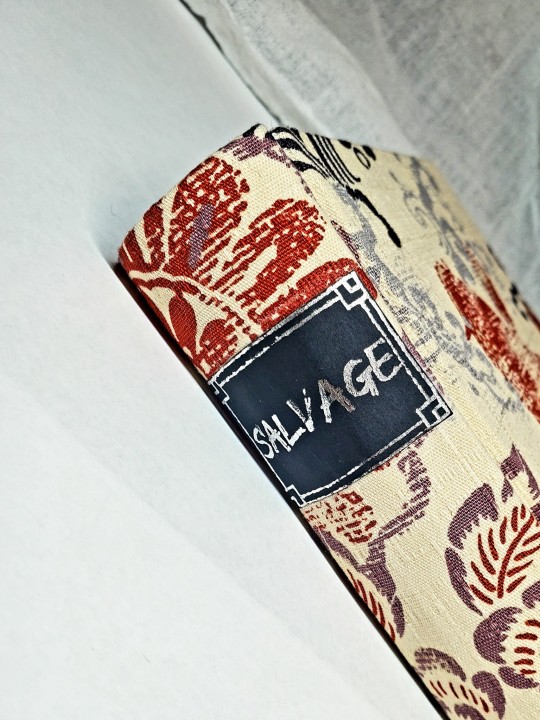
3. Paint That Shit
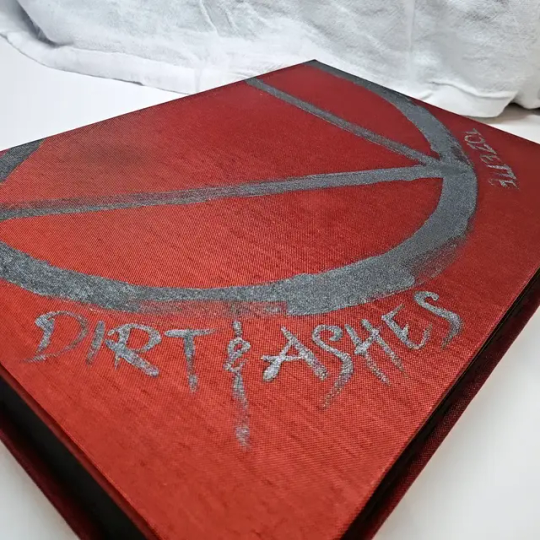
Acrylic paints will do you fine! The above is free-handed with a circle template, because I wanted that vibe. If you need straight lines that won't seep, lay them down with tape first & then paint over it first with a clear Acrylic medium, then your color. Same goes for stencils. Two more examples of painted bookcloth:
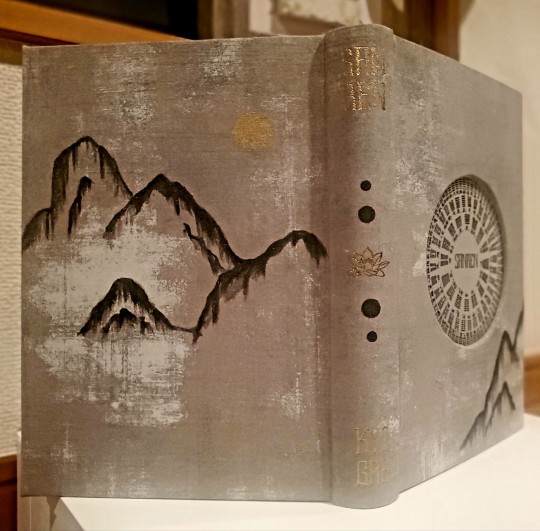
4. IT'S GOT LAYERS
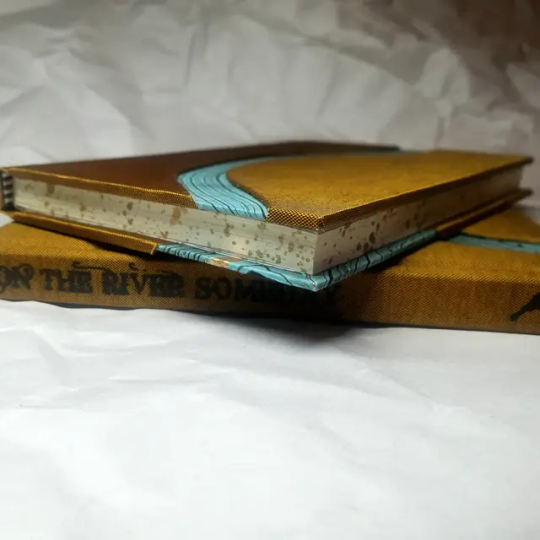
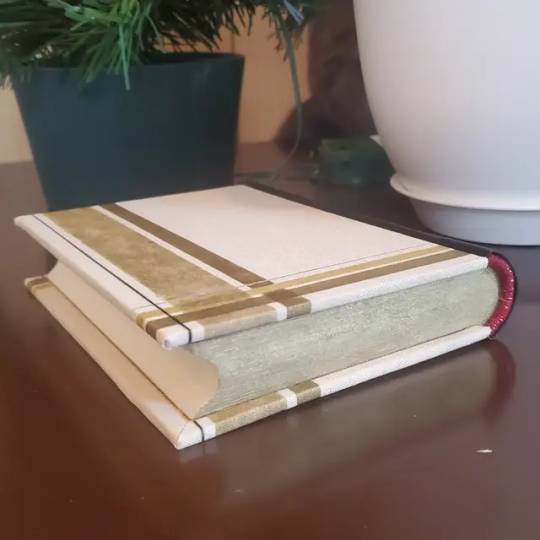
By using layers of thinner boards, you can create interesting depths & contrasts on your cover. You can also make cutouts that peep through to the decorative paper behind. The most important part to this technique is the order in which each edge is wrapped. To get a good wrapped inside edge, you will split the turn in into tabs to get them to conform to a curve. You can also layer multiple colors of bookcloth without multiple layers of board, as seen below left, so long as you mind your cut edges for fraying.
5. Inlaid... anything
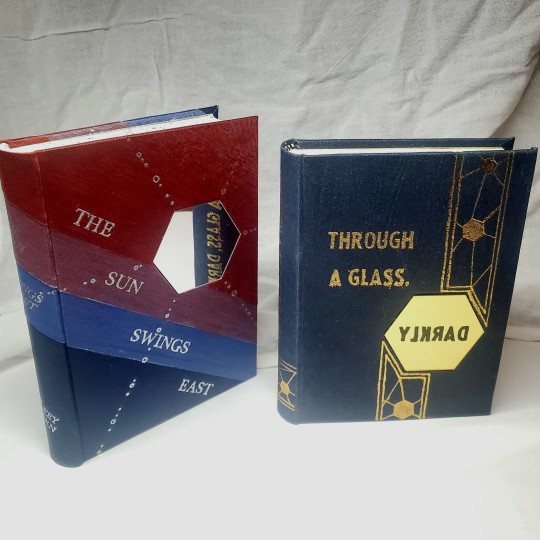
Mirrors! Marbled paper! I saw someone do a pretty metal bookmark once! The key is creating a little home for it to live in, which is pretty similar to the above layering method. On one layer you cut the shape, & glue that layer onto the bottom solid board before covering. You can do the top layer as an entire 1 mm board (like I did for the mirrors) or a sheet of cardstock, like I would use for inlaid paper.
6. Decorative Paper
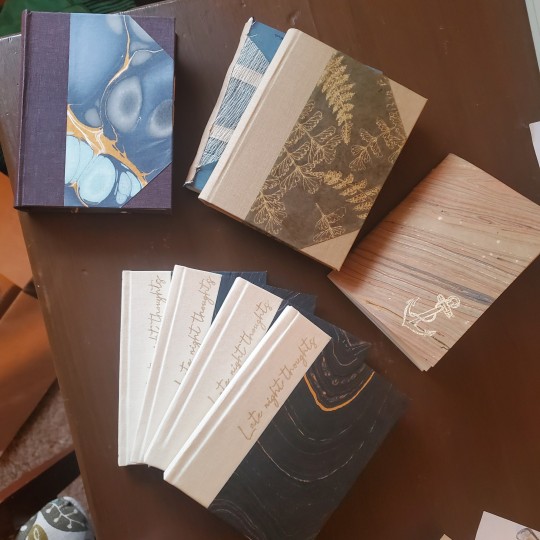
Decorative paper is always helpful & adds to the paper hoard... & its effects can be layers with other techniques, as below. Marbles, chiyogami, momi, or prints & maps of all kinds can be great additions. Some papers may need a protective coating (such as wax or a sealer).
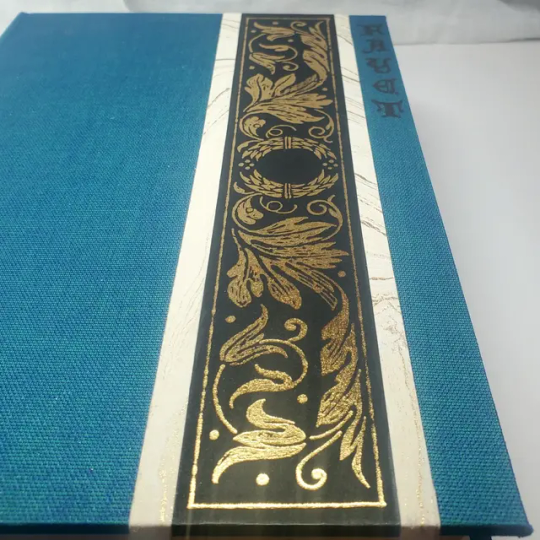
7. Stamps (with optional linocut)
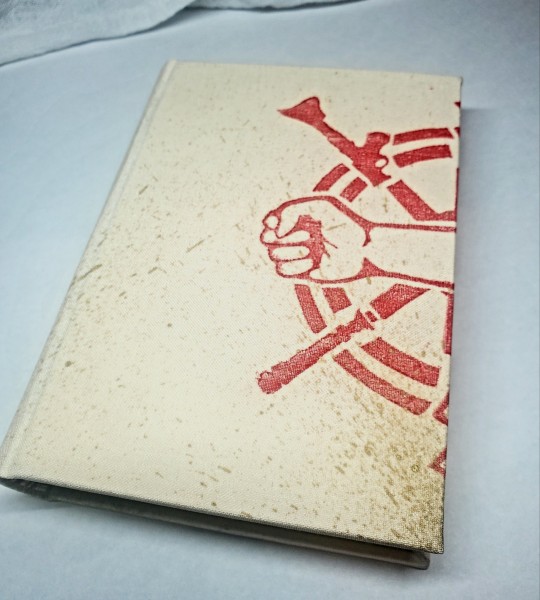
While I've not used many more regular rubber stamps, I do know some who have, successfully! And I've used one once or twice with embossing powder (see photo 3 up, the gold anchor on the little pamphlet bind). What also works is to carve your own linocut or stamp, & then use block printing ink to ink it onto your fabric (as i did above). A bit time intensive, but it was nice how easily reproducible it was, and I liked the effect I got for this particular bind.
These methods are not exhaustive, just ones I've used, and there are of course many others. I haven't gone too into detail on any of these for the sake of length (& post photo limits) but feel free to ask about more specifics. Usually I'm using them in combination with other options.
#fanbinding#bookbinding#celestial sphere press#ficbinding#in progress review#bookbinding how to#i am not particularly anti-cricut or anything#it's just a very expensive tool#and its prevalence sometimes makes new binders think they HAVE to get one#when they absolutely do not#you can make pretty books without it
1K notes
·
View notes
Note
Hi Jade, Ive been waiting to send in a kbd request! What about if it’s one of the girls’ first day back to school and they go back to school shopping? Xxx
KBD —back to school shopping is fraught with distraction.
Steve reads the school list three or four times with a frown. “Hey, Ave?”
“Yeah?”
“What’s a glue spreader?”
“You spread glue with it.”
“What’s wrong with a stick of Elmer’s?”
Avery tips her head back. She’s crouched on the floor looking at pencil cases slowly, and Steve’s question is interrupting her serious task. “Dad, you can’t make papier mache with a glue stick. It’s not wet.”
“Oh, gotcha.” Still, Steve doesn’t know what a glue spreader is nor what it looks like, putting him at the beginning of the conversation. “Alright, come on, trooper. Pick a case.”
He robbed her of some choices —he had to get Ticonderoga pencils and Bic pens, as per her schools specification— but didn’t deny her any extras. She has erasers shaped like cows, extra pencils with flowers around them, and a pink ruler. What she needs a ruler for, Steve doesn’t know.
“I can’t pick.”
“What are you thinking of?”
Avery shows two options. The first is rainbow with a teddy bear texture, and the second is PVC plastic with daisies. He checks the prices.
“Why don’t you get both? You can put your crayons in the daisy one.”
“Really?” she asks with a smile.
“Really.” He hopes he isn’t setting a precedent. “Come on, I gotta size you up, you know it takes ages the first time.”
Avery drops the pencil cases over the side of the grocery kart and offers her hand. It’s a big kart to steer one handed, but needs must. They slide by the clothes section and there you are, Wren strapped to your chest in the carrier, Beth standing on a sizing stool as you compare cardigans.
(Lovely Dove lays spoiled and preened in her Aunt Robin’s house. She will wail when they pick her up, but she’s having a great time.)
“That’s cute,” Steve says.
“Girl or the cardigan?”
“Both!” Steve says, moseying over to check over the smallest baby. “She’s sleeping?” he asks, reaching out to stroke her short hair.
“Mm-hm.”
“Dad,” Beth says, smiling, “should I have blue or green?”
The cardigans you’re deciding between are a soft baby blue and a sage green. He likes both colours, but he thinks the blue looks best. “What about that blue one, sweetheart? It’s nice and bright.”
“I got her some dresses. Can you look if they’re, like, fine? You know what tends to fall apart in the washer,” you say.
Steve could kiss your cheek, but he’s trying to be less ‘smuthocating’ as Robin puts it. It’s really not his fault that you get prettier every day. That’s your doing.
He looks through the dresses, can’t wait to see Beth in all of them, and he sort of knows that the last one you’ve chosen together won’t get worn because of the tighter neckline, but he doesn’t bring it up. What’s the point? It’s seven dollars, and Beth seemingly likes it, and he’s not interested in knocking your confidence. You’re making great choices —you’re a great mom, even if you don’t always feel that way.
“You want me to have her for a bit?” he asks, gesturing to the baby.
“It’s okay. She’s not heavy. We might as well stick together, anyways,” you say, pressing yourself into his side. “What are we thinking about this year, Avery? More pants to grow out of?”
“Of course.”
You laugh at her and Steve turns his head to look at you solely. He traces the line of your nose, your pinked lips, lip gloss still tacky. He can’t remember anymore what he fell in love with first about you, but your laugh has to be at the top of the list, the way it changes your entire face, the way it echoes in his head long after you’ve closed your mouth.
“Steve?” you ask, confused.
He saves himself with a pretend eyelash on your cheek.
#kisses before dinner universe#stranger things x reader#stranger things fic#stranger things#steve harrington x y/n#steve harrington x reader#steve harrington#steve harrington imagine#steve harrington x you#steve harrington x fem!reader#dad!steve harrington#dad!steve harrington x reader#dad!steve harrington x mom!reader#steve harrington x afab!reader#afab!reader#mom!reader#steve harrington fanfiction#steve harrington fandom#steve harrington fanfic#steve harrington fic#stranger things fanfic#stranger things fanfiction#steve harrington fluff
305 notes
·
View notes
Text


☆ colours - c.bg
synopsis - despite everything you two have been through, all good things must come to an end right?
-> beomgyu x reader
-> listen to colors by halsey for an experience 🤍
-> friends to potential lovers to acquintances, highschool au
-> warnings! beomgyu pushes reader away, angst, talks on mental illness and eating disorders, yn becomes an insomniac, beomgyu's a year older than you
-> notes! i've gotten back into jjk for the 7th time, and i saw like 3 edits abt stsg to the song colors, so i just wanted to LET IT OUT. GEGE AKUTAMI WATCH OUT

love is the most twisted curse of them all
tired eyes scanning through the folder of memories on your phone, your head dipping into the fluffy cushions underneath you. you didn't want to go through it again, but you couldn't stop your fingers from moving. your eyes watered, tears dripping from the corner. this was at least your 50th time rereading past messages, past folders, and old voicemails you had with choi beomgyu
choi beomgyu, the man that he was. talented, charming, and pretty. he was constantly bombarded with the squeels from your schoolmates along the hallways. however, he would always stick to you like glue, to him, you were everything he wanted. what a trope, maybe opposites do attract.
he was the light to your darkness, even if he stuck onto you like a emotionally attached puppy, you appreciated his presence. as much as you wanted to ignore his pestering, you enjoyed it, too much, to the point where your heart starts beating rapidly whenever he's around.
"ynn, let's go to the arcade after school. you don't have anything after right? let's go." the way he drags his words to persuade you into doing something he wants to do with you, and how your name rolling off his tongue perfectly, has an effect on you. his arms leaned on your desk, giving you puppy dog eyes.
"beomgyu, we have a test next week, i can't just waste my time playing games with you." you closed your textbook, placing your pen back into your pencilcase, making eye contact with beomgyu.
"come onn, you've been studying so much this entire week, you've barely hung out with me." beomgyu whined, using the tip of his shoes to kick your shins.
"beomgyu. this test is important for my final grade." you firmly stated your point, hoping that it'll get through beomgyu's thick skull. you sigh when beomgyu continues to look at you with the same puppy eyes, your words going deaf to his ears.
"fine.." you muttered out, you could have sworn that you saw beomgyu's eyes sparkle when you said that. he jumped out of the random chair he stole from the person who sat infront of you.
"i'll wait for you outside your class! see you!" beomgyu beamed, messing your hair before skipping out of the class like a lunatic. you watched as he left your class, smiling to yourself.
"are you giggling over choi beomgyu like everyone else?" your tablemate, natty, commented. knowing the teasing glint she had in her eyes, you glared at her.
"shut up."
ᶻ 𝗓 𐰁
"i'm graduating in a month, will you miss me?" beomgyu smirked, biting on the straw of his drink. you took small bites out of the bread beomgyu got for you, giving him a disgusted glare.
"what's with that look." beomgyu gasped, swinging his arm around your shoulder, pulling you closer to him. the side of your body was completely squished against him, you could feel your heart about to jump out of your throat. he was too close, too close for your liking.
"i'm going to miss my favourite junior ever, you know that right? you're my favourite junior, no one can ever compare to you." beomgyu reminded you, your lips pursed into a line, pushing his body away from yours.
"don't you have other juniors to care about? why me?" you asked, your eyes not leaving his own round ones.
"isn't it obvious.." he mumbled, not loud enough for you to hear.
"huh? speak up."
"it's nothing! come on hurry, i have a new song to play for you on the guitar." beomgyu grabbed your hand, running towards the direction of his house. you screeched as he pulled you at a speed you were not ready for. you felt like you were running a track competition at this point, just how much stamina does choi beomgyu have?
your head was dizzy, you haven't ran in such a long time at a distance you don't even want to remember. the click of beomgyu's door caused your head to look up from your phone.
"sorry for making you run, i was just excited." beomgyu apologised, placing a plate of fruits and a cup of water on the floor, finding himself on the floor beside you.
"it's fine." you shook your head, poking the fruits on the plate, not having an appetite for them. beomgyu noticed your odd behaviour throughout your entire conversation with him, from the way you just took small bites of the fruits and taking huge gulps of water.
"have you been eating these days?" the sudden question had you panicking, is he always this observant? your eyes darted around his room.
"i ate the bread earlier, doesn't that answer your question?" you replied non-chalantly.
"i meant like proper meals, when was the last time you have eaten an actual meal?" his face has gotten serious, you thought to yourself, your nails dug into the flesh of your thigh, trying to think of a plausible answer.
"i can read you like a book yn, you can't lie to me." beomgyu sighs, his hands reaching out for yours, pulling them away from your thighs.
"i know i'm always not serious around you, but this has to stop soon okay? don't starve yourself, it's unhealthy, and i'm worried for you okay?" beomgyu carressed the knuckles of your fingers. slowly, you calmed yourself down from the unsettling thoughts that were eating you alive, smiling at beomgyu,
"i'm sorry, i'll stop. i don't like seeing you all worried because of me."
beomgyu's lipped tugged up into a smile, standing up, "i'll make something for you to eat, wait here."
from that day on, you knew you could rely on beomgyu with whatever problems you had. he's your best friend either way, opening up to him was easy. he was your solution to everything.
that was until a week before beomgyu's graduation, you've noticed that his radiant aura was turning dull, his eyes slowly getting more tired by the time. despite that, he has been wearing a fake smile around his batchmates, smiling whenever he was with them, returning the same energy they were giving him. your eyes squinted at his odd behaviour, you too, could read him like a book.
"you're not actually that optimistic right?" you stated, trailing behind beomgyu. beomgyu paused in his tracks, turning to face you.
"what are you talking about yn?"
"you know what i'm talking about. if you need it, i'm here to help you." you inched closer to beomgyu.
"please, if you're hurting let me help you too. let me return that favour. isn't that what friends are for?" you gagged at your words, friends? of course. you two were just friends, nothing more.
"aren't you cute? don't worry about it yn, i'll tell you everything soon." beomgyu patted your cheeks, waving a quick goodbye to you before disappearing into his classroom. you stared at the empty spot infront of you, why isn't he telling you anything after everything? didn't he tell you that he trusted you with all his life, if not, why isn't he opening up to you?
you bit your lips, trying to suppress the tears that were about to flow out. you groaned, walking back to your class as if nothing happened, but your mind was overthinking, again.
what you failed to notice was that beomgyu was watching you from the window of his class, his heart ached seeing your pained expression. he then felt a tug on his sleeve.
"when are you going to tell her?" seungmin whispered, his eyes watching beomgyu's actions carefully.
"soon enough."
ᶻ 𝗓 𐰁
it was finally the day every senior had been dreading or anticipating. you stayed back after school to watch the ceremony, in hopes of seeing your seniors for one last time before they leave, including choi beomgyu.
you felt so proud for him, he's finally done with this hell, and now he can follow his dreams. however, you couldn't escape the feeling of emptiness, without him, what were you? ever since he started distancing himself from you, you felt horrible, you felt like shit.
before you knew it, the ceremony was over, the crowd screamed in joy, running to find their best friends in the crowd. you did the same, dashing to where beomgyu might be at. you hated running, but in order to talk to him in school one last time, you ran as fast as you could.
finally, you found him, your eyes watched as he took multiple pictures with the girls from his batch and yours. your face fell as you realise that the crowd practically engulfed him, you probably wouldn't have enough time to have a decent conversation with him.
however, your eyes met his, your body tensed up, he looked exhausted, yet he was still able to flash you a cute smile that you reciprocated. he signalled you to go towards him, telling the crowd that he needed to leave soon, and that was when you walked towards him.
"congrats on graduating." you hugged him, feeling his body slowly soften under your touch.
"lovebirds, wanna take a picture together?" seungmin shouted, his hand stretched out, asking for your phones. both you and beomgyu handed him your phones. seungmin smirked, snapping numerous shots for the two of you.
when he returned your phones, he whispered something in beomgyu's ear, causing him to blush and yell at him to shut up.
"don't mind him. come with me, i have something to tell you." beomgyu shoved his phone back into his pocket, dragging to towards a familiar direction.
the walk was comforting, you talked about everything that came to mind. beomgyu stared as you rambled, watching you as if you hung the stars in the sky, you were stunning.
"sorry, was i saying too much?" you mumbled, sitting beside beomgyu on a bench at the park where you first met. beomgyu shook his head.
"i like hearing you talk don't worry." reassuring you.
"what did you want to tell me anyways?"
"before that, take this, i want you to cherish this forever, as if your life depends on it okay?" beomgyu pulled out a ring, placing it on your pinky. your heart raced, the butterflies in your stomach turned into a whole zoo, your face felt warm.
"what for..?"
"i'm leaving daegu to pursue my dreams, i may not be able to see any of you again, so i just want you to have this as a reminder of me." beomgyu suddenly announced. your eyes widened, a lump formed in your throat, leaving your mouth dry.
"what are you saying? can't you at least keep in contact with me? that's stupid, you can't just cut everyone out of your life like that." you argued, biting back the tears that were watering your eyes.
"you're making this harder for me." beomgyu laughed, "you'll distract me from achieving what i want, my priority isn't you."
you were smacked with the hard truth, beomgyu was more determined to pursue his lifelong dream, and in order to do this, he has to let go of one of his dreams, and that dream was to be with you forever. your goals were completely different, you would only hinder his progress towards success. your eyes stung with tears, it hurts.
"gyu, you can't do this, maybe we can figure something out?" you pleaded, you couldn't live without him by your side. beomgyu wiped your tears with his thumb, making you look at him.
"you know i love you right? if you love me back, promise me that you'll let me go." beomgyu forced a smile, trying to calm you down.
"you? what? why didn't you tell me this earlier? we could have spent more time together as a couple." your voice was shaky, you wanted to leave, but you wanted to stay by his side till the end.
"yea i could have, but i guess i was too scared, so were you though." beomgyu shrugged, laughing dryly to himself. he hated this, he hated the fact that you were crying because of him, he hated that he can't do anything to stop you from crying. beomgyu watched you sobbed, his eyes beginning to sting, but he blinked the tears away.
"this is just a bad dream right?" you looked at beomgyu. beomgyu held your hand, shaking his head slowly, your eyes tearing up once more.
"sometimes love can be the most twisted curse of them all." beomgyu chuckled, looking off to the side.
"then at least curse me a little at the end." you hiccupped. beomgyu's eyes widened, softening once he made eye contact with you. he pulled you into a kiss filled with longing and desperation. you were quick to kiss him back, you didn't want this to end, you wanted him to stay by your side forever. you slowly pulled away from him, wiping off the dried up tears from your face. beomgyu took your pinky, intertwining them with his,
"i'll go now, take care of yourself for me okay? please eat well." beomgyu kissed your lips once before walking away from you. leaving you to cry by yourself on the bench, at the park where you first met, and now you've ended it at the same spot.
ᶻ 𝗓 𐰁
bonus!
beomgyu started sobbing when he walked away from you. you must have endured so much pain when he left you in the dark for so long. his first love, a love where it could have blossomed into something more than friends, crumbling down like that. he hated himself for that, he hated seeing you hurt, but you would still suffer the same fate if you stayed by his side. thus he made his decision that week prior to his graduation.
perm taglist! (send an ask to be added) @mrsyawnzzn @tinyelfperson @woncheecks @boba-beom @naveries @be-argyu @defnotleee
#bgomtori ✰#txt scenarios#beomgyu#txt imagines#txt beomgyu#txt fanfic#beomgyu x reader#beomgyu fluff#beomgyu scenarios#beomgyu angst#beomgyu imagines#txt imagine#txt
196 notes
·
View notes
Text
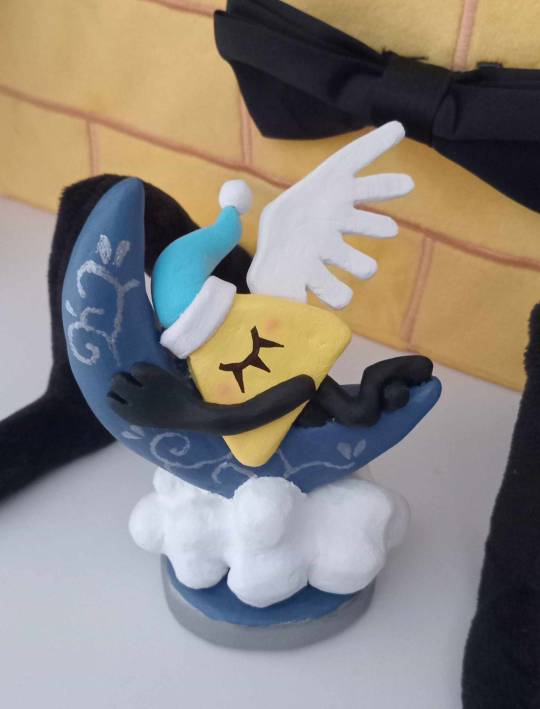
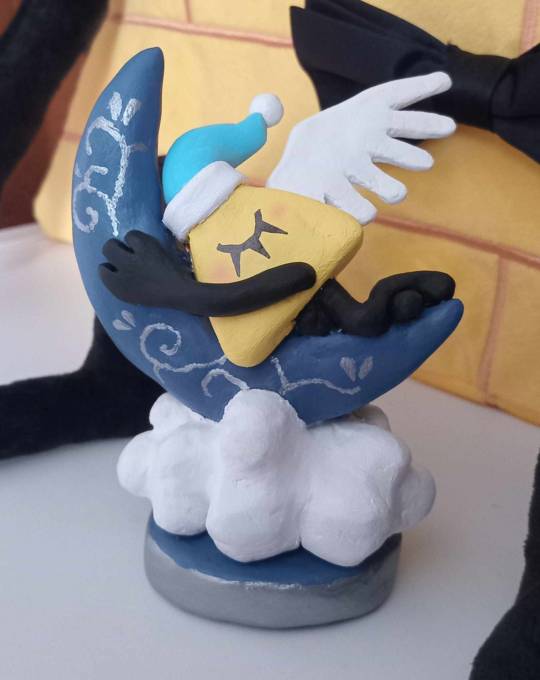
The Sweet Dreams Bill Cipher Figure from The Book of Bill is complete!
Made with
Air Dry Clay
Toothpicks
Tin Foil
Acrylic Paint
Fine Tip Sharpie Pen (Tip Size 0.5)
Pink Eyeshadow
Tools used
Hands
Plastic Ruler (Measuring Ruler)
Toothpick
Paint Brush (a line brush)
Water (Too smooth it out)
Fabric Glue
Sandpaper (Grit 220)
Time it took to make? Can't remember, a few days at least. Want to make your own and need help? You can message me!
All previous WIP posts regarding this creation will now be deleted to keep my blog clean, so reblog this and like!
88 notes
·
View notes
Note
What else is going on in Kid Alastor au? I'm craving the little chaos deer
The hotel was uncharacteristically quiet, given that the princess and her spear-wielding love were not around to reign in the rather boisterous collection of characters they'd gathered under their roof. When Charlie had solidified her plan to meet with Heaven's leadership, Alastor had fully expected to find the parlor in flames and everyone passed out drunk or temporarily dead at the bar. Instead what he found was a note left on the coffee table penned in glittery pink elegant script that read:
|
'Hey short stack. An old buddy of mine swung by and Charlie paid for everyone to have a night on the town. The place we're headed to ain't really for kids (yeah I know you're fucking old but I don't think the bouncers give a shit) plus Husk says it ain't your scene anyway. We left some cash so you can do whatever. I don't know what you do. <3 A.D.'
|
Well. How thoughtful of them.
In a burst of green flame, the letter dissolved into ash, and then even the ashes dissipated into a fine mist. The short stack of bills he left untouched on the table. As though he couldn't provide for himself, hah!
There was nothing these loathsome souls had that he needed.
Still... There were few things as dreadfully dull as a large, empty building. Perhaps he could pay a visit to Rosie in Cannibal Town. Though it was a tad late to show up unannounced. No, there was no need to go out. There were plenty of other ways one could occupy oneself in a large, empty building…
-
The pig grunted in contentment as it lapped up yet another treat. Alastor dropped another treat, lead the pig another few feet, then another few, then another.
The moment Fat Nuggets was fully inside the unused room Alastor tipped the bag and sent chocolate and peanut butter cereal pieces scattering all across the floor. With a delighted squeal, Fat Nuggets scrambled all across the room, snapping up cereal bits as fast as his little piggy feet would allow. Newspapers in one corner of the room, water and food bowl in the other, a bunch of cushions piled on the carpet. Plenty to keep the pig content – and most importantly, quiet – for a good long while.
Alastor shut the door quietly, leaving Fat Nuggets to his feast.
-
It was a small thing, but knowing how high-strung dear Vaggie was, it would be plenty enough to whip her into a storming frenzy.
Shadow men were busy rearranging the furniture. Nothing drastic, simply shifting each piece of furniture a biiiit to the left. The bed four inches, the dresser two, the vase three. Tilting every single painting, unscrewing a few choice light bulbs just enough to flicker. Nothing was glaringly out of place at a first glance, but over time…
Alastor chuckled, pleased with himself.
He was snapped from his daydreams of a frothing, red-faced sinner by a low growl. Alastor turned to find Razzle and Dazzle glaring up at him, the red baphomet flicking its tongue in displeasure while the pink one merely hissed. He raised his finger to his lips, offering the cuddly little monsters a close-mouthed smile.
“Let this pass,” he said, “and I’ll make you beignets.”
Instantly those reptilian eyes went lipid, tails wagging and growls replaced with happy chirps. A thought crossed Alastor’s mind. His lips peeled back to bare his teeth in a wicked grin.
“In fact, lend me your hooves, and I’ll make you all the beignets you can eat!”
-
Repeating the same little stunt he’d pulled with Fat Nugget on the Egg Boiz felt rather lazy. But using those little monsters was most certainly the correct method of targeting Pentious. As he entered the airship docked against the hotel building, Alastor found them all arranged in a circle on their fronts, scrawling all over pieces of construction paper with crayons and glitter glue.
“Hey, Little Boss!” the singular egg creature with a name chirped as it noticed him. “We’re making new evil plans for the Big Boss while he’s taking a break from being evil!”
“Hmm,” Alastor hummed thoughtfully. “Tell me, would you little monsters like to help me with a surprise for your boss?”
“A surprise?” Frank echoed.
The sweet smile on Alastor’s lips was at odd with the devious glint in his eye.
“Why yes! Our dear princess thought we might throw him a party in celebration of the great strides he’s made towards self betterment!” Hah. “And of course, who better to surprise that slippery serpent than his most beloved minions?”
The little egg creatures began chattering amongst themselves before they, in near unison, hopped to their feet and saluted.
“Surprise Party Division reporting for duty, Little Boss!”
“And of course, you’ll need supplies!”
With the snap of his fingers, five bursts of green light materialized five prop guns into the Egg Boiz’ hands. The Egg Boiz immediately started ooh-ing and ah-ing over the toys, one saying something about ray guns and another turning his prop over in his hand to peer straight down the barrel. That one jolted as he accidentally squeezed the trigger, letting off a burst of light and noise right in front of his face.
“Now remember!” Alastor said. “It’s a surprise. So you must hide, and when Sir Pentious arrives, jump out and fire off those party poppers!”
A little egg hand shot in the air.
“Why do the party poppers look like guns?”
“I thought it matched the aesthetic,” Alastor replied, gesturing about the metal airship and the various dismantled weapons scattered around. This seemed to satisfy the Egg Boiz. “Now off you go. Hide, and when Sir Pentious comes, jump out and fire off those party poppers! I’m sure he will be quite amused!”
With a final salute, the Egg Boiz took their new toys and scattered, disappearing into vents, canisters, crates and wherever else. An impish grin on his face, Alastor faded into the shadows.
-
The clinking of glass greeted Alastor as he reappeared in the common area. He found Razzle and Dazzle at the bar, right where he’d left them, rifling through the colorful bottles on the shelves. Dazzle placed a bottle up on the shelf, inching it around so that the label was facing outward before turning to Alastor.
“Last one?” he asked.
Razzle and Dazzle nodded.
“And the original bottles?”
The pink one lifted up a bulging garbage bag from behind the counter, the contents rattling together with each subtle movement. Alastor nodded in approval.
“Ought to put that somewhere dear Husker won’t come across it,” he said. “And I suppose I ought to get started on those beignets while you do.”
The plush demons bleated in joy. Before they could fly off with their stash of expensive alcohol, Alastor called out to them.
“Wait. Leave out a bottle of rye. Just set it on the coffee table, next to the radio.”
Alastor didn’t wait to see if they listened. With the snap of his fingers the radio blared to life, playing a lively jazz tune whilst he made his way to the kitchen to prepare a doughy, sugary feast for the adorable little beasts.
His shadows rose and solidified, pulling open cupboards and setting out the utensils and ingredients. One placed a stool in front of the sink so he could step up and wash his hands, another retrieved his apron and slipped it over his head while a third tied the apron for him.
Alastor was stirring the brown sugar into the mixture of milk and butter when the goats reappeared, hovering right over his shoulder. Alastor waved them off, then reached for the cinnamon.
“No hovering, if you please.” They backed up, but he could still hear their wings flapping, just behind him. Alastor sighed. “Well, I don’t really need help with this part, but you can help clean the kitchen while the dough is rising.”
A questioning bleat.
“Yes, it will take about an hour for the dough to rise before it’s ready to fry.”
Distressed, impatient bleats.
“Well too bad, that’s how long it takes. If you wanted cheap, mass produced styrofoam coated in icing, go beg the king for some lousy carnival crap. I’m making real food.”
More bleats.
“Then you have to wait. Shoo. I’ll call you in when I need you.”
With a final huffy bleat, Razzle and Dazzle flew across the counter, though their reptilian eyes remained locked on Alastor as he poured the mixture into the flour.
#ask#anonymous#I have been sitting on this so long I am so sorry#I don't even know if the person who sent this is still here XD#but I do have a second part in mind involving Lucifer hopefully it doesn't take me three thousand years to post that#Hazbin Hotel#Kid Alastor AU#the Devil's Bastard AU#Alastor#Razzle#Dazzle#Fat Nuggets#Egg Bois#can kid Alastor actually understand Razzle and Dazzle?#who knows. not me
41 notes
·
View notes
Text
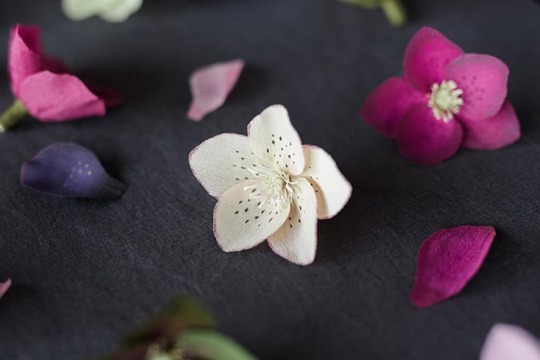
DIY Paper Hellebore
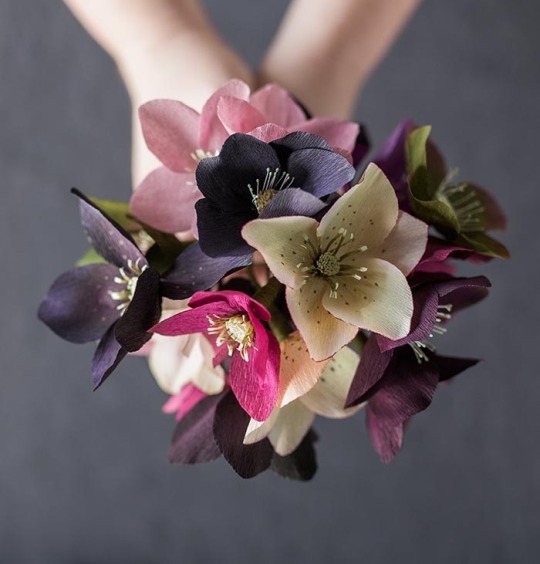
Project by Kate Alarcón:
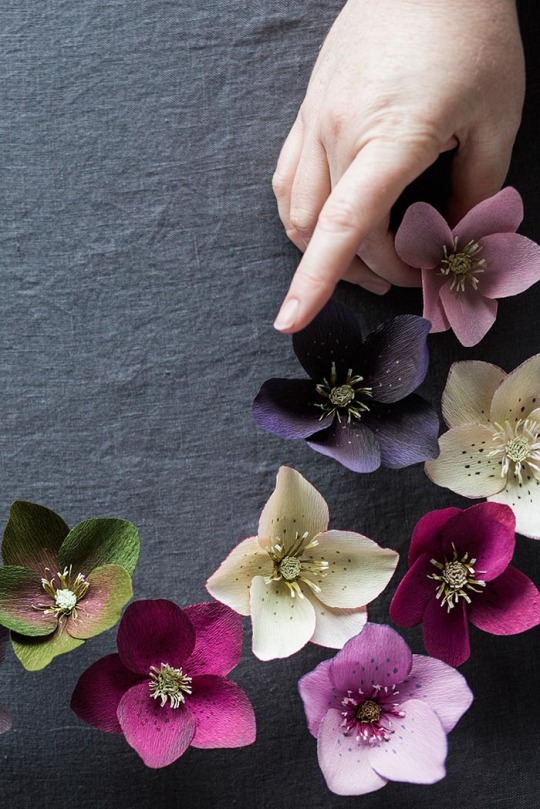
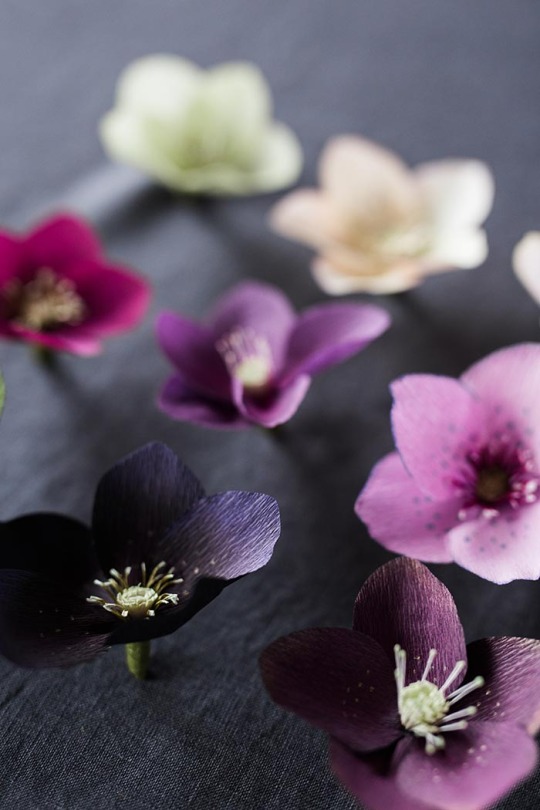
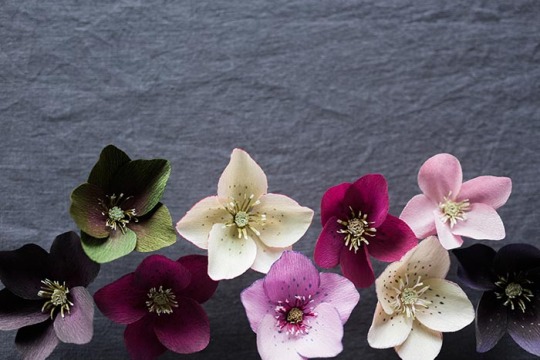
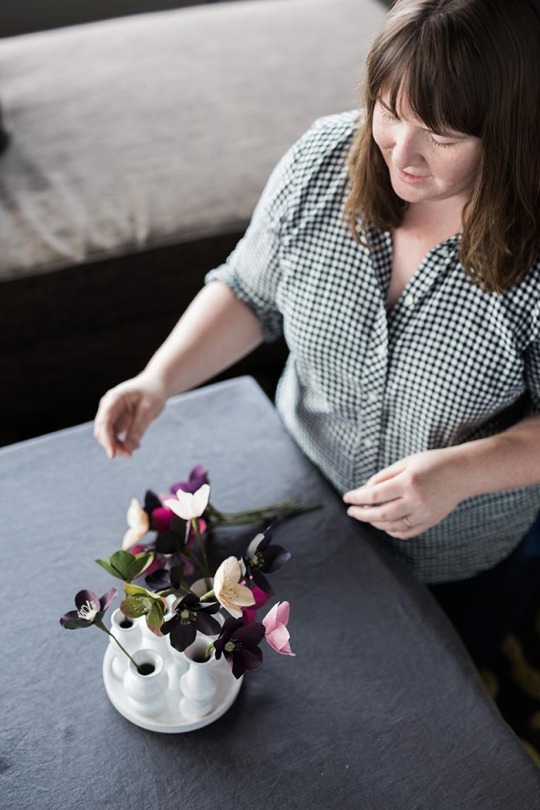
When I had the opportunity to prepare a flower-making workshop for a Carpe Diem Collective event in Seattle, I knew the hellebore would be perfect. It grows beautifully in the Pacific Northwest, but still feels a little bit exotic and unexpected. Its subtle yet rich colors seem sophisticated in a way that struck me as ideal for the design-savvy makers whom I knew would be attending. But what was most exciting to me were the opportunities the hellebore presented to play with color and pattern. Rather than prescribing one specific variety for everyone to make, I taught several techniques, and everyone played with variations. As the new flower-makers worked, I found myself continually surprised and delighted by the varieties that sprung to life around the table.
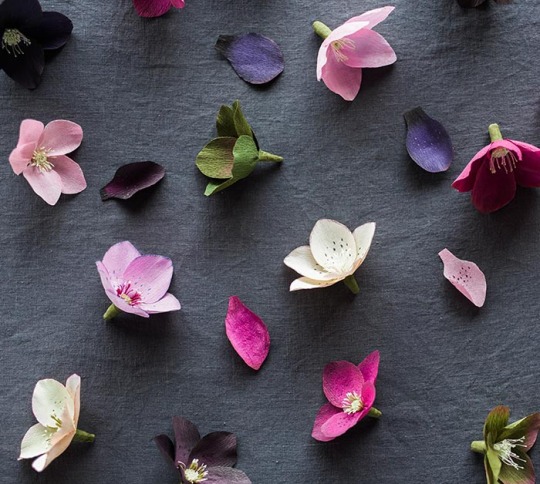
In that spirit, the instructions that follow demonstrate techniques for construction and for adding color and detail. I hope you’ll spend some time observing the hellebores blooming around you right now (or on Pinterest!) and combine these techniques to please your own artist’s eye. And special thanks to the women who attended the hellebore workshop and whose creativity inspired the hellebores I’ve made here. —Kate
Photos and styling by Grace Kim
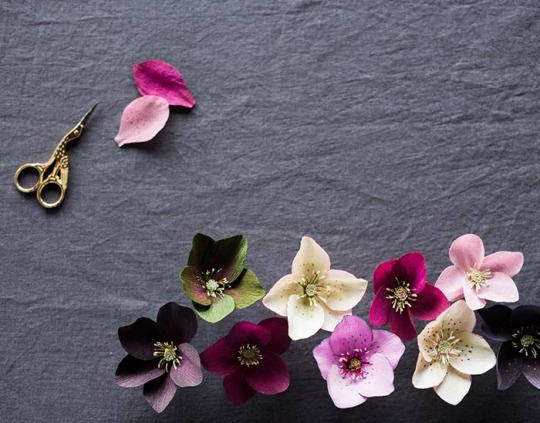
About Kate: Kate Alarcón makes delicate and unusual paper plants and flowers just outside Seattle. Kate chose the cobra lily — a carnivorous plant native to the West Coast — as her business name and spirit “animal” because she finds so much inspiration in its eccentric, otherworldly beauty. She takes custom orders via her website, and teaches flower-making workshops in the Pacific Northwest. You can see her newest work on Instagram @cobralilyshop.
About Grace: Grace Kim is dedicated to capturing and creating beauty and helping people live life to the fullest. You can find her work at GH Kim Photography and Carpe Diem Collective. Follow her on Instagram @graceperdiem.
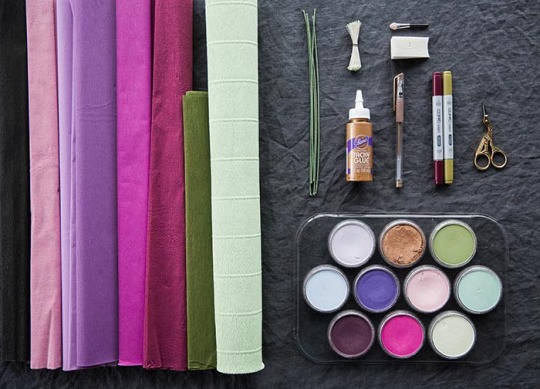
Supplies
For flower construction:
• hellebore templates (download here) • Aleene’s Original Tacky Glue • fine or doublette crepe paper (black, white, dark red, pinks, violets, and greens are all suitable) plus olive green to wrap the stem • pale green or yellow florist crepe for the flower center • 1 10-inch length of 18-gauge, cloth-covered stem wire • paper scissors • optional: small green or yellow millinery stamens
For adding color and detail:
• Copic Sketch or Ciao Markers. I find the following colors especially nice for hellebores: RV69, V15, V12, V91, YG95, and YG03, G20, 0. • PanPastels. If I were to buy just one color for this project, it would be 430.5 Magenta, which creates a very rich, deep pink when swiped over black crepe paper. Other nice additions would be: 470.5 Violet, 930.5 Bronze, 430.1 Magenta Extra Dark, 680.3 Bright Yellow Green Shade, 640.8 Permanent Green Tint, , 340.8 Permanent Red Tint, 220.8 Hansa Yellow Tint, 520.8 Ultramarine Blue Tint, 470.8 Violet Tint • cosmetic wedge sponge • eye-shadow brush with a sponge-tip applicator or cotton swab • gold gel pen
Creating the center:
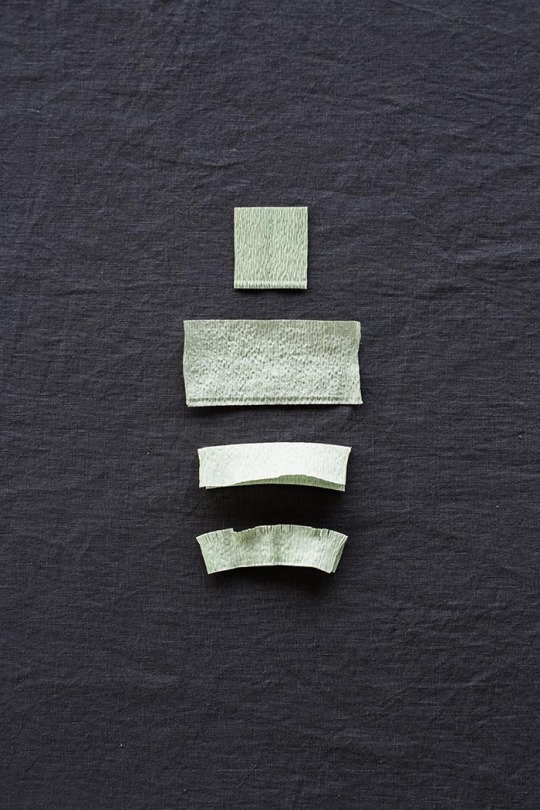
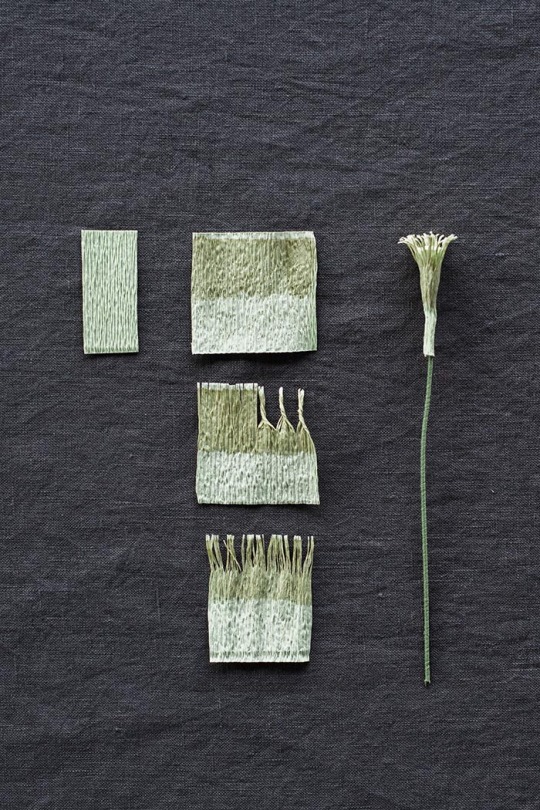
Image above: Each piece represents one step in the process of making the hellebore center.
Using template A, cut out a rectangle from the pale green crepe.
Stretch this piece against the grain, pulling out all the tiny folds so that you have a long rectangle. Fold the rectangle in half lengthwise.
Create a short fringe along the fold by making a row of small cuts very close together (roughly 1/16th of an inch apart).
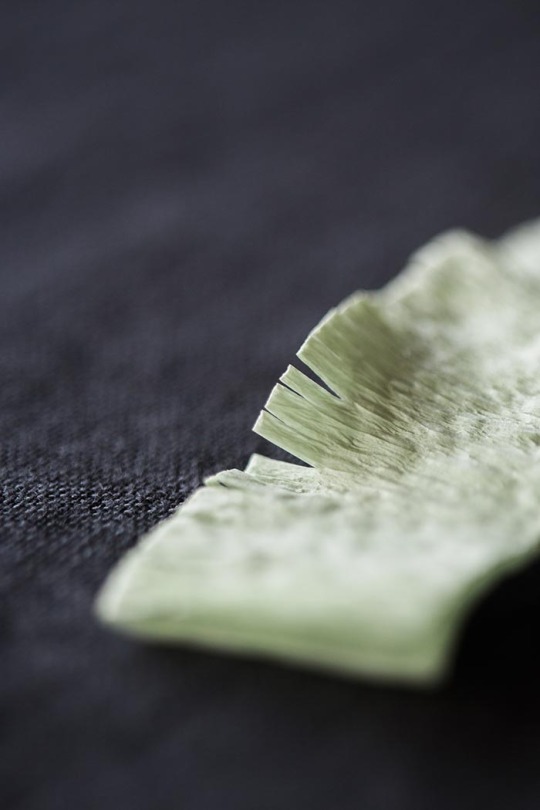
Image above: The short fringe along the fold of the rectangle.
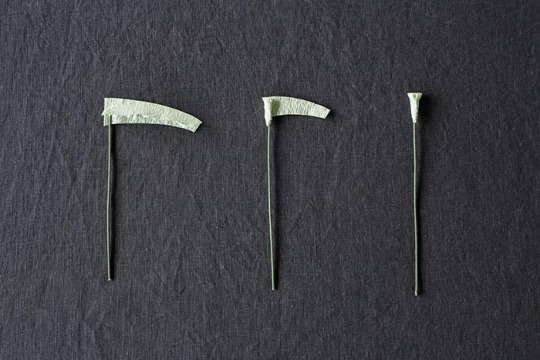
Image above: Rolling the center around the stem.
Using template B as a guide, cut the folded rectangle so that it tapers toward one end of the rectangle. (This will help create a smooth transition between the flower center and the stem.) Dot glue inside the fold along the whole length of the rectangle, just below the fringe. Insert the tip of your stem wire into the fold on the wider end of the rectangle just below the fringe, and use your finger to press the fold closed. Let this dry for a minute.
Then dot glue along one side of the rectangle beneath the fringe, and roll the rectangle up around the wire. The fringes should be even, creating a flat, circular plane at the top of your center.
Adding stamens:
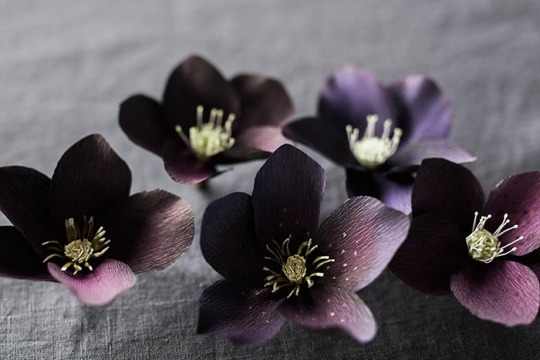
Image above: The flower on the right has millinery stamens; the middle and left, DIY paper stamens.
You can purchase double-headed millinery stamens from Castle in the Air or Rose Mille (see suppliers below). To attach, you just fold or cut them in half and glue them around your center, so that the stamen tip extends about a half inch beyond the top of your fringed center. You don’t need to be too precise about the number of stamens you add to each flower — some variation will look more natural.
To make your own paper stamens, use template C to cut a small rectangle from the pale green crepe. Stretch this rectangle all the way out across the grain. Use a green marker (Copic YG 95 is perfect, but almost any type of marker is suitable for this step) to color in a very wide stripe about 1/8th inch from the top to about an inch from the bottom. If you find that the uncolored strip across the top is too wide, just trim it with your scissors.
Create a fringe across the grain by making a series of ¾ inch cuts very close together. Then, working in small sections, gently but firmly twist these stamens together in one direction and then in the other.
Untwist all the stamens and use your fingers to straighten them. If they resist finger-straightening, use your scissors to very gently scrape the length of the stamens on one side and then the other.
Finally, scrape the tips of the stamens between your thumb and scissor blade to curl them slightly.
Dot glue in a zigzag along the lower half of this strip of stamens, and then wrap it around the green center, so that the tips of the stamens extend about ½ inch past the top of the center. (If you’d like a fuller set of stamens, use the whole strip, which should wrap around twice. For a wispier set, snip the strip of stamens after you’ve wrapped the center once, and save the other half for another flower.)
Insert your finger into the middle of the stamens and very gently press them outward so that they slightly lean away from the center. Gently separate any stamens that are sticking together, and touch up your curled ends if necessary. Let this center dry while you cut and color your petals.
For the petals:
A note about grain:
The grain of the crepe paper runs parallel to the roll or fold. Crepe paper stretches horizontally, but not vertically, so you will almost always cut petals with the grain, placing the template so that the tiny wrinkles in the paper run up and down the template, not across.
Use any of the petal templates to cut out five petals for each flower. I’ve included three templates so you have the option to create some variation among your hellebores, but you’ll only use one template to cut all five of the petals for each flower.
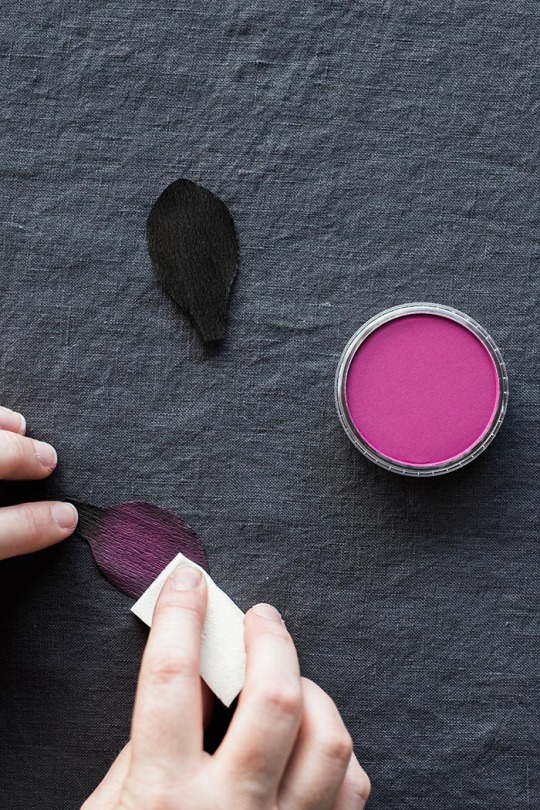
Image above: Applying a “wash” of PanPastel.
The PanPastels can add details like darkened petal edges or gradient color, but I like them best for adding a “wash” of color to the whole petal, which helps to recreate the hellebore’s subtle, complex coloring. I find that an inexpensive cosmetic wedge sponge works fine for this. A cotton swab or eye shadow brush is also suitable for finer detail, like a colored edge.
To create the very dark hellebores, use black crepe for the petals and then gently swipe on a layer of any of the darker, richer colors. My favorite is the 430.5 Magenta.
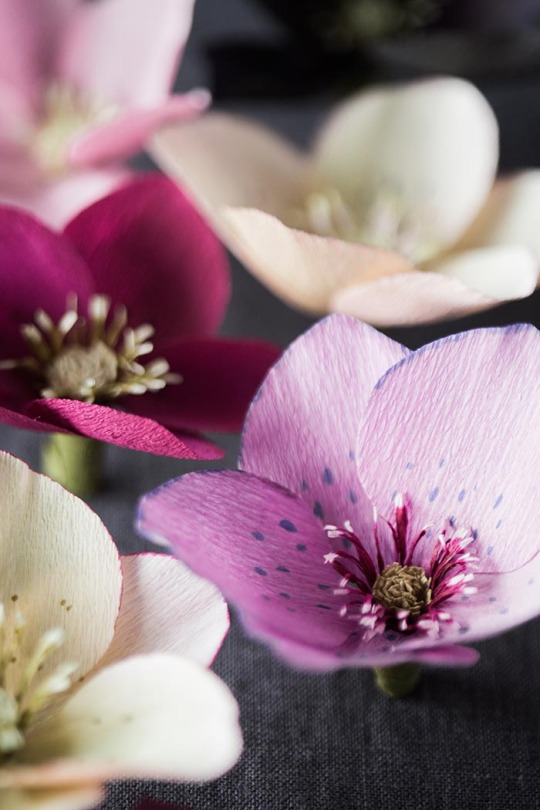
Image above: The PanPastels can add some subtlety to crepe paper colors that are a little too pure and bright to be suitable for a hellebore. Here, I’ve used a soft pink to tone down a bright violet.
The Copic markers can be used to add color to an entire petal, to create speckles near the petal’s base, or to darken its outer edge. You can also use multiple markers that are the same hue but different intensities to create a gradient effect, beginning with the darkest color at the base of the petal and ending with the lightest at the top edge. The colorless blender can help to blend any hard lines between the different colors.
For dots, just barely touch the fine tip of the marker to the petal, lifting immediately. If the dots look too stark, a very light layer of PanPastel over the top can help them “sink in” to the petal and look more natural.
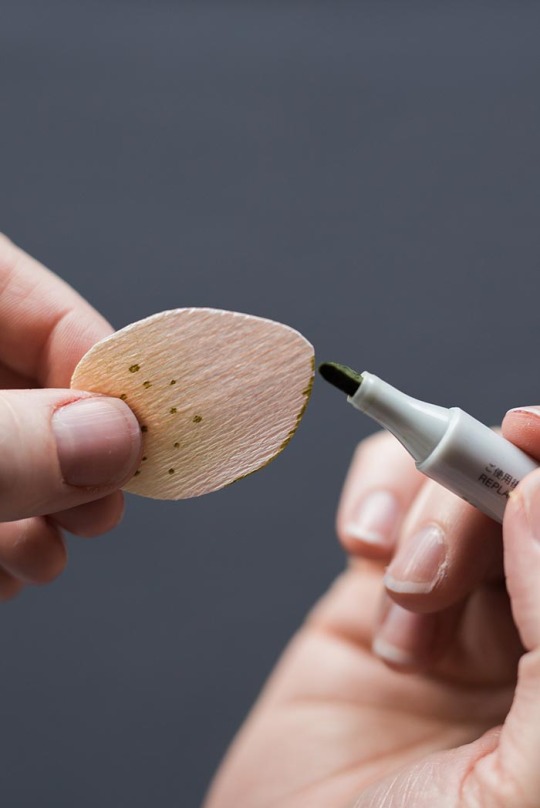
To color the edges, barely touch the broad tip of the marker to the very edge of the petal, rather than trying to draw a very thin line on the front of the petal.
Gel pens: I use a gold gel pen to add speckles to my black hellebores — I like how they add a subtle twinkle.
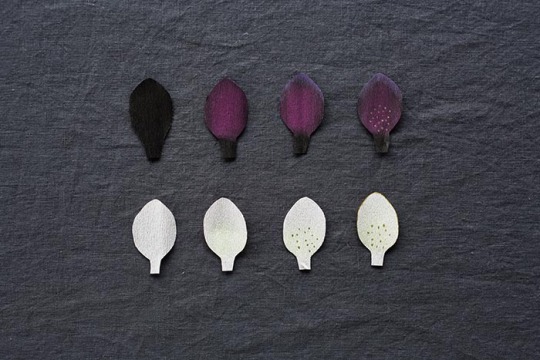
Image above: Steps for two sample petal variations.
For the deep magenta petal, first swipe the 430.5 Magenta PanPastel over the entire black petal. Next, use a small makeup brush or cotton swab to apply 470.5 Violet PanPastel just along the edge of the petal. Then, use the gold gel pen to add dots on the bottom third of the petal.
For the pink petal, swipe 220.8 Hansa Yellow Tint PanPastel over the bottom third of the petal. Next, use the fine tip of Copic YG95 to add dots along the bottom of the petal. Then, use the square tip of this same marker to add color to the edge of the petal.
I’ve included nine other hellebore petal “recipes” at the end of the tutorial.
Shaping the petals:
To make the petals more lifelike, you can gently cup them near the base, curl them slightly by scraping them gently between your thumb and the edge of a pair of scissors, and stretch the petal edge gently to create a slight frill. Before you accidentally tear your beautifully decorated petals, practice on some blank petals to get a feel for the point at which the paper rips. It doesn’t take much shaping to mimic a hellebore petal, so you can afford to be gentle.
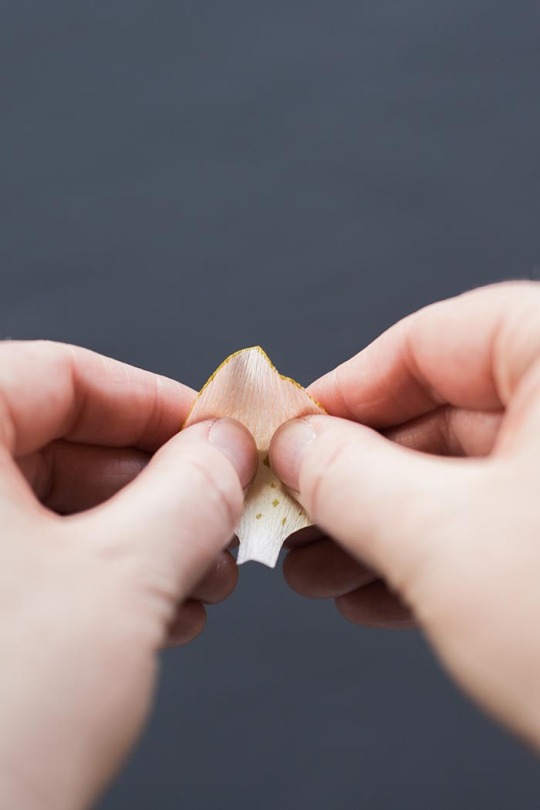
To cup the base of the hellebore petal, hold it gently with two hands, thumbs in front, and gently stretch by pushing your thumbs slightly forward and pulling back and outward with your index fingers. Hellebore petals don’t require very deep cups.
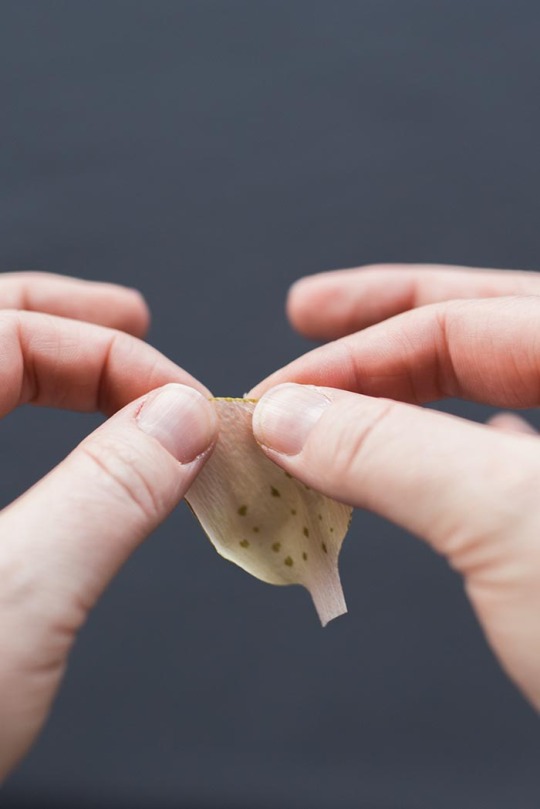
Frill your edge slightly by gently stretching it.
Building the flower:
Place the base of the petal between your thumb and the blade of your scissors, and gently scrape the underside of the bottom of the petal, so that it curls slightly. This will help the petals to lie flat, rather than standing up and covering your center.
Dot a small amount of glue on the base of a petal and press it against the edge of your stamen-covered center. Then do the same with the next petal, placing it to the left of and slightly behind the first petal.
Directly across from the point where the first two petals overlap, place your third petal.
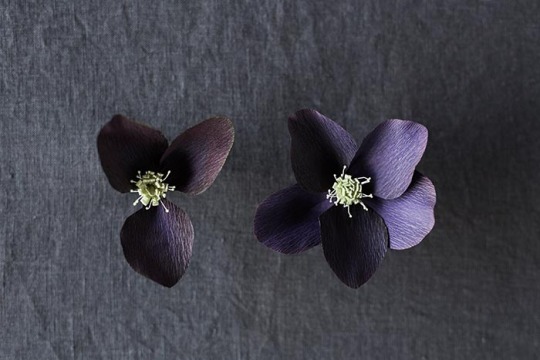
Image above: The flower on the left shows placement of the first three petals. The gaps on either side are where you’ll place your remaining two petals.
Now you’ll have a space on either side of this last petal. In the space between this petal and your first petal, place your fourth petal. In the remaining space, place your final petal.
Let the glue dry completely.
Finishing the flower:
Cut an 8-inch-long and 1/3” wide strip of olive green fine crepe across the grain. Apply very small dots of glue along the length of this strip and attach it to the part of the wire that is covered by the base of your petals. With your left hand, hold the strip at a 45-degree angle to the wire and gently stretch as you twirl the wire with your right hand.
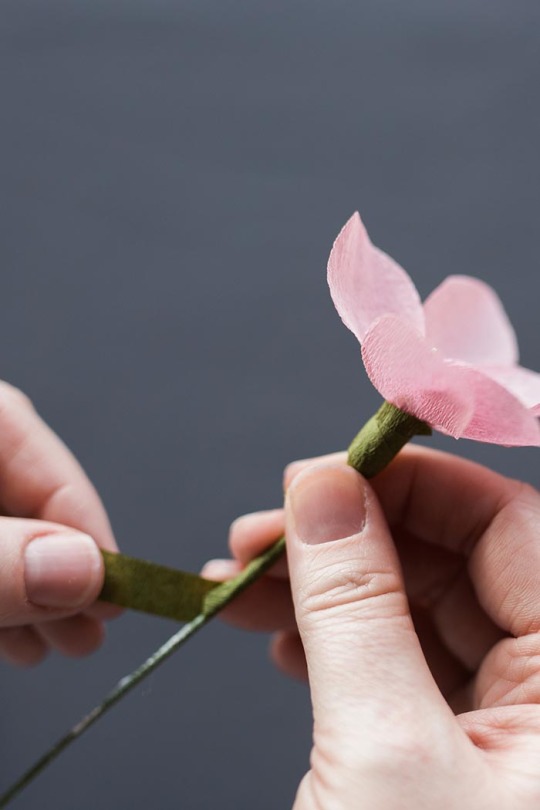
Wrap to the bottom of the wire, and snip the excess strip. Gently adjust the petals and stamens if needed. But there’s no need to be too fussy — paper hellebores are at their most charming when they’re allowed to be a little bit quirky.
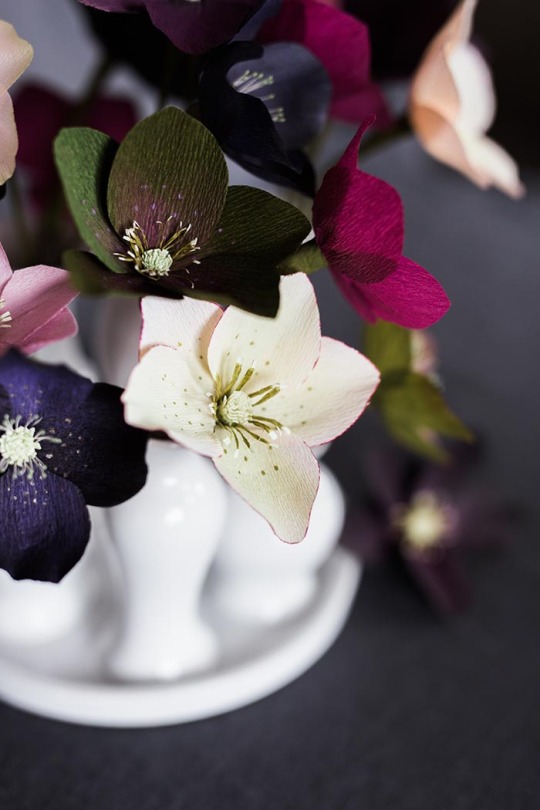
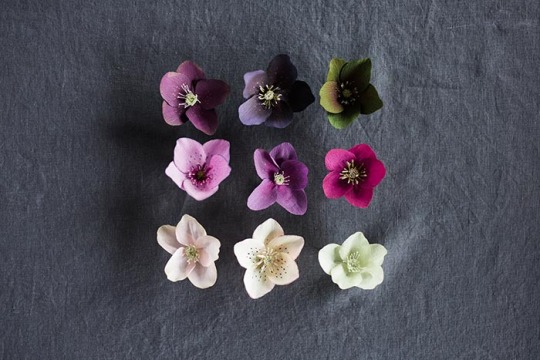
Additional hellebore recipes:
Row 1: 1. Black fine crepe, a wash of 430.5 Magenta PanPastel, 930.5 Bronze PanPastel edges, gold dots, and millinery stamens. 2. Black fine crepe, a wash of 430.1 Magenta Extra Dark PanPastel, a 470.5 Violet PanPastel edge, gold dots, and paper stamens 3. Deep olive doublette crepe, 430.5 Magenta PanPastel on the bottom third of the petal, and paper stamens
Row 2: 1. Lavender doublette crepe, Copic BV01 dots and petal edging, and paper stamens (for these I used Copic RV69 to make the stamens maroon instead of green.) 2. Sangria fine crepe, 430.5 Magenta PanPastel on the bottom third of the petals, gold dots, and millinery stamens 3. Cherry fine crepe, 430.5 Magenta PanPastel on the bottom third of the petals, gold dots, and paper stamens.
Row 3: 1. Pink fine crepe, a wash of 340.8 Permanent Red Tint PanPastel, and millinery stamens 2. Pink doublette crepe, 220.8 Hansa Yellow Tint PanPastel, Copic RV69 dots, dark maroon PanPastel on the edges, and paper stamens (for these stamens, I just colored the tips with a pale yellow.) 3. White fine crape, a wash of 680.3 Bright Yellow Green Shade PanPastel, and millinery stamens.
Sources for supplies:
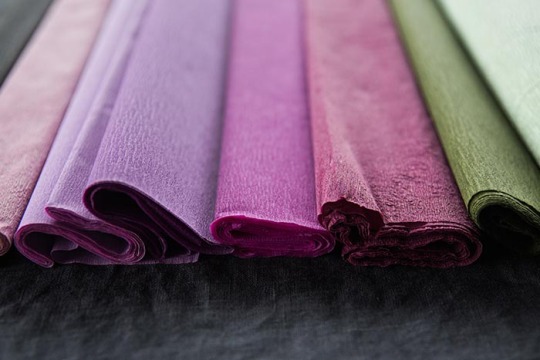
Castle in the Air: crepe paper, stem wire, stamens
Rose Mille: crepe paper, stamens
Dick Blick Art Materials: PanPastels
Aaron Brothers: PanPastels
Michaels Craft Stores: 18 gauge floral wire
Impress Cards and Crafts: If you live in the Seattle area, Impress has crepe paper in three different weights, Aleene’s glue, and a great selection of Copic Markers and gel pens.
17 notes
·
View notes
Text
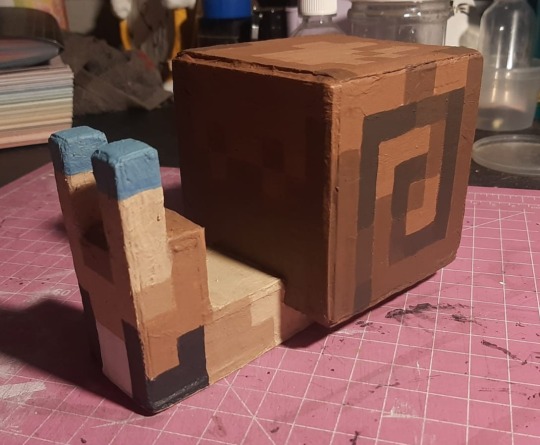
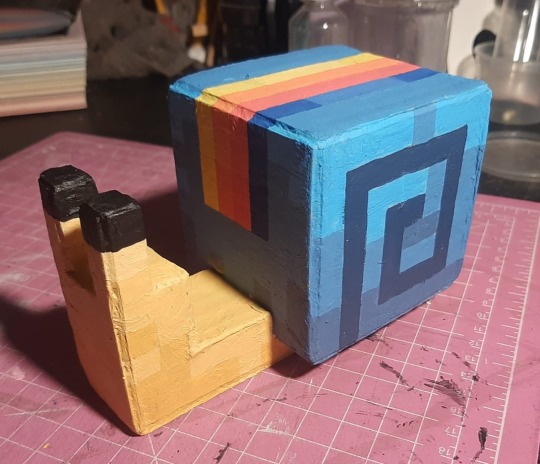
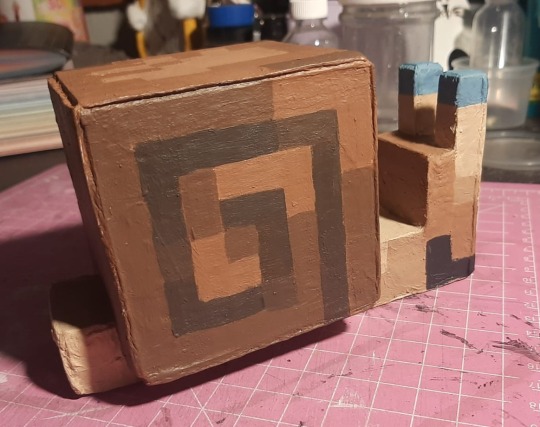
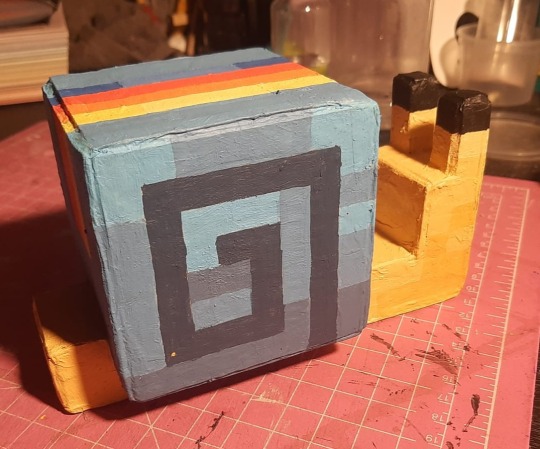
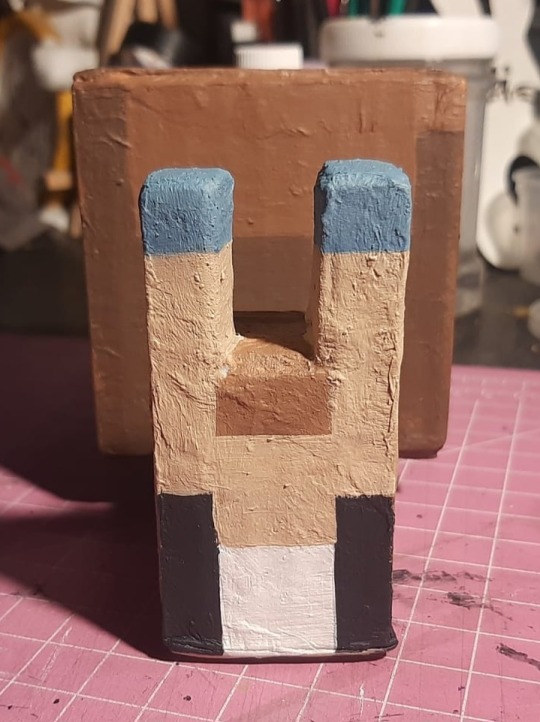
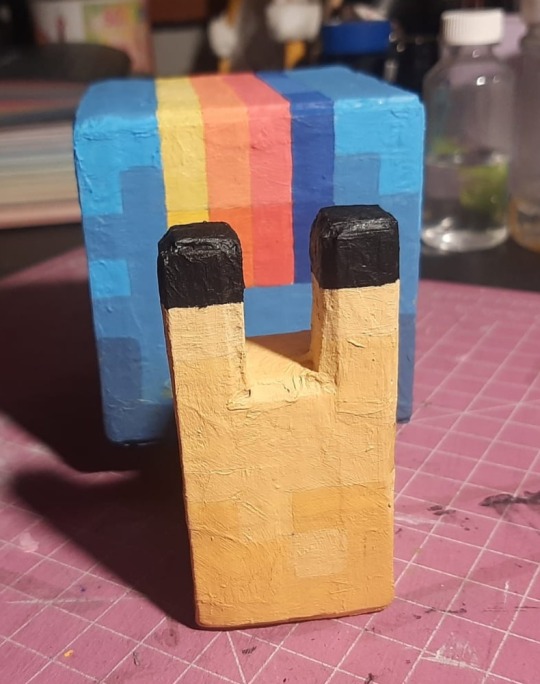
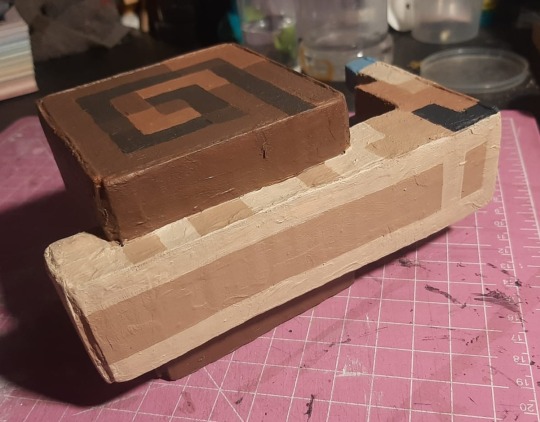
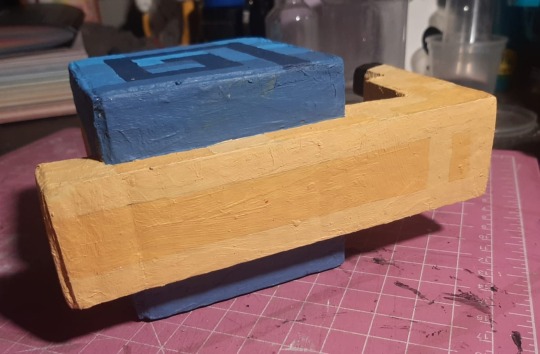
Here's a lil' rundown on how I made these guys!
⋘ ──── ∗ ⋅◈⋅ ∗ ──── ⋙
Materials Used:
- Cardboard - Serviettes - Paint
⋘ ──── ∗ ⋅◈⋅ ∗ ──── ⋙
Tools used:
- Pen - Ruler - Box Cutter - Paintbrushes - Glue Gun and Glue Sticks - Podge
⋘ ──── ∗ ⋅◈⋅ ∗ ──── ⋙
Process:
✨️ Tip: Painting your cardboard with a white base coat before doing your measurements will allow you to see your grid a lot better and save time having to add it to each individual piece after you've cut it out!
Step 1: Measure all your different pieces out onto cardboard in your desired size. I used 1×1 cm blocks to ensure the project didn't get too big, making my snail 16 cm in length, 8 cm wide, and 9 cm tall.
Step 2: Once you've measured out and marked all your pieces, you'll want to take your box cutter and metal ruler and neatly cut each section out.
Step 3: Assembly! Start by gluing the body of your snail together, then assemble and glue the shell before attaching the shell to the body.
Step 4: Using torn up serviettes, an old paintbrush you don't mind destroying and podge, carefully cover the edges where the inside of the cardboard can be seen. This step isn't necessary, but I found it adds a cleaner finish as the snail looks whole.
Step 5: Time for paint! Using a fine ripped brush, you'll want to paint the inner edges of the squares in the right color, then use a slightly bigger brush (or a decent one if you have bigger squares), to fill the squares in. Depending on the paint you use, you may want to do several layers. Repeat this process for all the squares until your entire snail is painted.
⋘ ──── ∗ ⋅◈⋅ ∗ ──── ⋙
Pearlo and Scott's color grids:


"If not friend, why friend-shaped?"
Yes, I'm a crafter too, and when I saw these guys in Wild Life SMP, I had to make Pearlo's snail! Meanwhile, Scott's snail was made as a Christmas present for my friend 💫
@pearlescentmoo @defonotsmajor
#pearlescentmoon#pearlescentsnail#smajor#smajor1995#dangthatsalongname#smollusk#wild life#wild life smp#life smp#snails#craft#diy craft#diy#do it yourself#cardboard craft#painting#traditional painting#art#tutorial
2K notes
·
View notes
Text
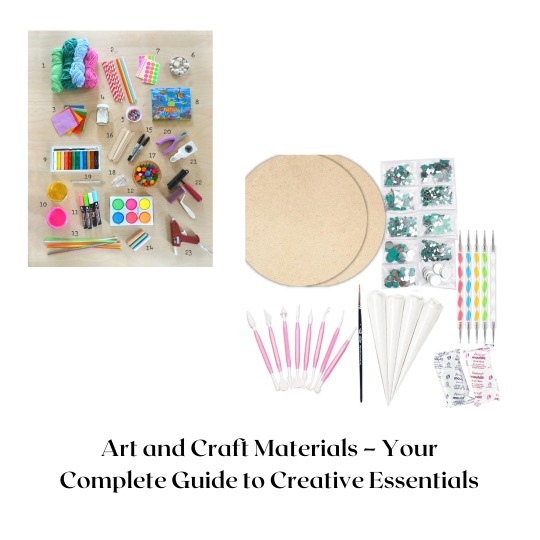
Art and Craft Materials – Your Complete Guide to Creative Essentials
Introduction to Art and Craft Materials
Art and craft materials are the backbone of every creative project. Whether you're a professional artist, a hobbyist, or a parent looking to engage your child in fun activities, having the right art and craft supplies is essential. From paints and brushes to clay, paper, and embellishments, each item plays a role in bringing your imagination to life.
In this blog, we’ll explore the most essential art and craft materials, how to choose them, and where to buy them online or offline. If you’re looking for quality materials for school projects, DIY crafts, Lippan art, or Mandala art, this guide has everything you need!
Why Art and Craft Materials Are Important
Art and craft supplies are more than just tools—they are a gateway to self-expression, creativity, and learning. High-quality materials can:
Improve the final outcome of your artwork
Enhance the durability of craft projects
Make crafting easier and more enjoyable
Help children develop motor skills and creativity
Must-Have Art and Craft Materials
Whether you’re creating traditional Indian artwork like Lippan art or modern DIY crafts, here are the must-have art and craft materials:
1. Acrylic Paints
Acrylic paints are vibrant, fast-drying, and perfect for a wide range of surfaces including canvas, wood, MDF boards, and more.
2. Brushes
Invest in a variety of brushes—flat, round, fan, and liner—for different painting techniques.
3. Canvas and Paper
Choose from a variety of textured paper, drawing sheets, and canvas boards depending on your project type.
4. MDF Boards
Ideal for projects like Lippan art and Mandala art. Available in various shapes like Jharokha, Lotus, Peacock, Elephant, Kalash, etc.
5. Air-Dry Clay / Mouldit Clay
Perfect for creating 3D textures in Lippan art and other sculpting projects.
6. Fevicryl Colors and Glue
Trusted by artists, Fevicryl offers a wide range of colors and adhesives that are perfect for crafting.
7.Craft Mirrors
Used widely in Lippan art and home decor projects. Available in various shapes like circles, squares, lotus, peacock, and more.
8. Decorative Items
Includes glitter, beads, sequins, ribbons, stickers, and embellishments for creative flair.
9. Cutting Tools and Stationery
A basic kit should include scissors, paper cutters, glue gun, rulers, pencils, and markers.
Best Art and Craft Materials for Kids
If you’re looking for safe and easy-to-use materials for children, consider these options:
Non-toxic acrylic paints
DIY drawing kits (e.g., Astronaut, Hanumanji, Motu-Patlu, Doremon kits)
Color papers and craft foam
Washable markers and crayons
Pre-cut MDF shapes for coloring
Specialized Craft Materials
Explore specialized supplies tailored for specific art forms:
1. Lippan Art Materials
MDF boards
Mouldit clay
Decorative mirrors
White base paint
2. Mandala Art Kits
Pre-marked MDF boards
Fine-tip pens or dotting tools
Fevicryl acrylic colors
3. Festival Decoration Materials
Rangoli MDF shapes
Colorful beads
Ethnic mirrors
LED lights
Tips for Buying Art and Craft Materials
Check reviews and ratings before buying online.
Compare prices across platforms.
Look for combo kits or bulk packs to save money.
Ensure quality, especially for paints and brushes.
Choose child-safe materials if buying for kids.
Final Thoughts
Having the right art and craft materials can significantly enhance your creative journey. Whether you're into painting, sculpture, Lippan art, or festive decor, investing in quality supplies makes a huge difference. Explore different textures, tools, and surfaces to discover what brings your creativity to life.
Shop Now!
Check out our wide selection of DIY kits, Lippan art supplies, MDF boards, Fevicryl colors, and decorative mirrors perfect for all your art and craft needs.
0 notes
Text
The Prodigious Elegance of Crane Christmas Cards: Timeless Holiday Greetings
Introduction
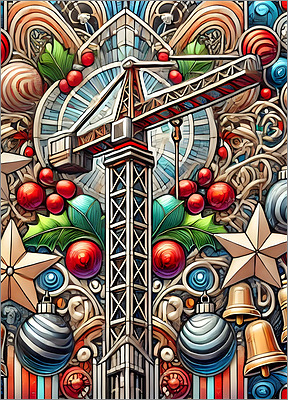
In a world increasingly dominated by digital communications, the art of sending Christmas cards has found a new niche. Enter the rising trend of construction-themed holiday cards—where creativity meets craftsmanship. At the heart of this movement is Crane Christmas Card Prodigious, a beacon of timeless elegance and artistic finesse.
This feature piece dives into the intricate world of these cards, exploring their appeal to professionals in construction and architecture, holiday card enthusiasts, and DIY hobbyists alike.
The History of Crane Christmas Cards
Crane Christmas Card Prodigious have a rich heritage that dates back to the 19th century. Known for their exquisite craftsmanship and attention to detail, these cards were first popularized by the Crane family, who are synonymous with fine paper products. The transition from cotton paper manufacturing to holiday card production marked a significant turning point in their legacy. Over the years, Crane Christmas Cards have retained their reputation for quality, gaining a loyal following among those who appreciate traditional methods combined with contemporary design. Their cards frequently feature embossed motifs, subtle color palettes, and elegant typography, which set them apart as timeless keepsakes.
Appeal to the Construction and Architecture Industry
The Crane Christmas Card Prodigious captures a unique intersection between construction artistry and seasonal greetings. For professionals in the construction and architecture sectors, these cards offer a way to blend personal passions with festive cheer. Designs often incorporate blueprints, architectural landmarks, and classic construction elements, allowing recipients to connect with the card on a deeper level. The tangible nature of these artfully crafted cards provides a heartfelt alternative to impersonal digital messages, making them a cherished addition to any festive correspondence.

The Artistry of Crane Christmas Cards
Crane Christmas cards are renowned for their unique designs, quality materials, and unparalleled craftsmanship. These cards don't just convey holiday wishes; they embody an artistic narrative that celebrates both the elegance and intricacy of construction-themed motifs.
Each card is a canvas of creativity, featuring architectural blueprints, construction tools, and iconic structures – all crafted with meticulous detail. The use of premium paper stock and vibrant inks ensures that each card is not only visually striking but also a tactile delight, making Crane Christmas Card Prodigious a true masterpiece of holiday greetings.
Personal Experiences and Stories
To truly appreciate the impact of these cards, one must hear the stories from those who have received or created them. Meet Lisa, an architect from New York, who cherishes the thoughtful gesture of a construction-themed card she received from a colleague. "It wasn't just a card; it was a reflection of our shared passion for building and design," she said.
Then there's Tom, a DIY enthusiast who took inspiration from Crane's designs to craft his own cards. "I wanted to share something personal and meaningful with my friends in the industry. The joy on their faces when they opened my handmade cards was priceless," he recounted.
These stories highlight the personal touch and thoughtfulness behind each Crane Christmas Card Prodigious, making them not just greetings but cherished mementos.
DIY Guide for Making Construction-Themed Cards
Ready to channel your inner artist? Here's a step-by-step guide to creating your very own construction-themed Christmas cards at home:
Gather Your Materials:
Heavyweight cardstock
Ruler and pencil
Construction-themed rubber stamps or stencils
Ink pads in assorted colors
Fine-tip markers or pens
Craft glue and embellishments (like small gears or nuts)
Design Your Card:
Start by sketching your design lightly with a pencil.
Use stamps or stencils to add construction elements, such as cranes or blueprints.
Add Color and Details:
Select ink colors that contrast well with your cardstock.
Use markers to add fine details, like crisscross patterns or tool labels.
Final Touches:
Adorn your card with embellishments for added texture.
Write a heartfelt message inside to complete your unique creation.
Seal and Send:
Place your card in an envelope, ready to spread holiday joy within your community.
The Significance Within Communities
In the construction and architecture communities, these cards go beyond mere holiday greetings. They serve as symbols of camaraderie and recognition of shared experiences and passions. Sending or receiving a Crane Christmas Card Prodigious is a way to strengthen professional ties and foster a sense of unity.
Call to Action
This holiday season, we urge you to rediscover the joy of sending Christmas cards. Whether it's a Crane masterpiece or your own handcrafted creation, take the time to connect with colleagues and friends in your professional network. These gestures, though simple, build lasting bonds and celebrate the spirit of the season.
Conclusion
In closing, Crane Christmas Card Prodigious embodies the elegance and artistry that elevate holiday greetings to a form of art. With their timeless appeal, these cards are more than just paper—they are tokens of appreciation, creativity, and community. Make this tradition yours, and let the joy of giving resonate this holiday season.
0 notes
Text
Can someone recommend a decent affordable tablet sized device (that preferably uses a touch screen and has like screen pens NOT THE RUBBER STUFF like something with a somewhat fine point) that I can buy for digital art? Preferably exclusively for digital art?
I prefer having a pen similar to a pencil and not a rubber tip bc rubber tips are difficult to move across the screen and I can't see there I'm drawing and the tipped pens allow me to accurately see where it's touching and glue smoothly across the screen, idc if I can buy it at like best buy or like an apple store or only online (I'd need to wait a while in the case of online) I just need SOMETHING and I can't use a mouse to draw its too inaccurate
0 notes
Link
Check out this listing I just added to my Poshmark closet: Lash Glue Pen eyeliner glue.
0 notes
Text

I really should get in the habit of mentioning what I used huh.
• B5 Etcher cold press 100% cotton sketchbook - I like to have the option to paint in it and this one doesn't warp much when I do. it is on the more pricey side because it's specifically aimed at watercolour paint.
• magic pencil by koh-i-noor. Very chunky and very fun . It takes a little bit of getting used to but rainbow sketches and good colour payoff. They don't just come in red blue and yellow leads (though that is my fav one to use). They do lead holders as well but I prefer the pencil for I feel you can get a sharper point on it. Note you will need a chunky shaper for them as they are not a standard size if you go for the pencil.
• Prismacolor col-erase colour pencil. Charmaine red in this case. I have tried the faber-castell ones as well cause I wanted a none American import so it would be cheaper for me as but alas they don't erase as well and feel harder when using them so I think the extra for the Prismacolor ones is worth it in this case.
• Turner acrylic gouache for the blue section. I have holbien too. I like both of them.
• Pentel brush pens - one old one to mistreat and do textured sections with, one newer one that you look after for nice lines with
• Paint pens - fine and brush tips. Fine tips are posca brush tips are arrtx. I usually prefer the arrtx cause I don't like having to pup the poscas and the arrtx ones I have are just uncap and go and tend to only use the fine poscas out that brand because of that.
• Kuretake mangaka flexible drawing pen fine tip. The tip isn't like a 0.5 etc tip it's more like a very short flexible brush pen. I like it cause you can do different widths with one pen. I got mine from cult pens. They are ridiculously priced on Amazon so I recommend trying to get them elsewhere for cheaper if you can. There's a medium version of the pen too.
• Sakura pigma bb pen - I am not fond of this and will try a different pen next time. It was from a art subscription box a while back and was using what I had available.
• Hahnemuhle pastellfix pad - dark grey sheet cut out and stuck in using a dot glue tape dispenser for less mess. It's pretty light weight so it doesn't add too much bulk. It's not really aimed at pen. It works fine with the drawing pens not sure about the rental brush pen though as that's more a cartridge ink pen and much more juicy. I bought it for pastel pencils, charcoal and coloured pencils but don't use those mediums much and often use off cuts in my sketchbook to not waste it.
Anyway
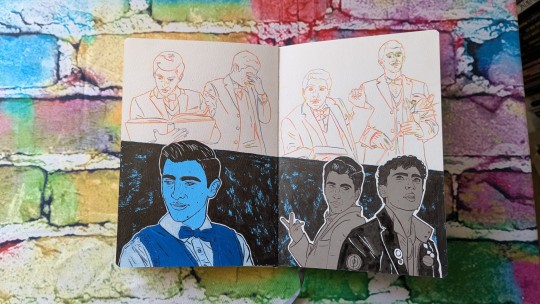
Sharing another speed from my sketch book. Messed up Edwin's face in one of them and sadly my rainbow pencils are hard to go back and erase if I mess up. Trying not to let it bother me too much as it's a sketchbook not succeeded. May eventually fix it. I do like the rest of the sketches though.
for now working on filling up the rest of the sketchbook. I want to try and get it filled in the next couple of months so I can put together a sketchbook to sell at my table at em-con. Need to get moving on stuff for that actually.
219 notes
·
View notes
Text
Calligraphy on Wood Projects: Rustic Art Charm
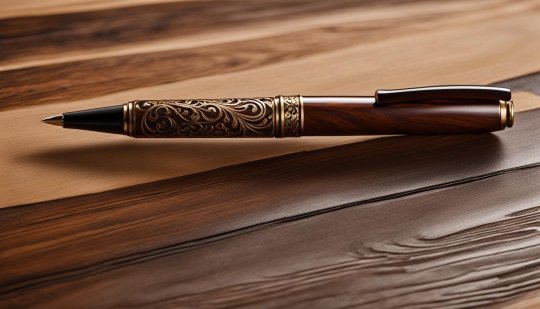
Calligraphy on Wood Projects: Unleash Your Inner Artist with Rustic Charm!
Calligraphy on wood projects adds a rustic charm to any space. With the right techniques and materials, you can easily create your own farmhouse-inspired signs and decorations. In this article, we will explore various methods of transferring calligraphy onto wood and provide inspiration for your next woodworking project. Key Takeaways: - Calligraphy on wood projects brings a touch of rustic art charm to any space. - There are various techniques and methods you can use, such as stenciling and wood burning. - Rustic wood signs and reclaimed wood are popular choices for calligraphy projects. - Embellishments and proper sealing can enhance the visual appeal and durability of your wood calligraphy projects. - Start your calligraphy on wood project today and embrace the rustic charm it brings to your home or gift-giving.
DIY Faux Calligraphy Stencil Tutorial
If you're looking to incorporate calligraphy onto wood in a simple and affordable way, the DIY Faux Calligraphy Stencil Tutorial is the perfect method for you. This technique allows you to transfer your hand-lettered designs onto wood using everyday materials. Let's dive into the step-by-step process: Materials Needed: - Regular white printer paper - A printed design or phrase in calligraphy style - A ball-point pen - A chalk or graphite pencil - A fine-tipped paint marker Step-by-Step Instructions: - Print your chosen calligraphy design onto regular white printer paper. - On the back of the printed design, cover the entire surface with chalk or graphite using a pencil. - Place the printed design onto the wood surface, with the chalk or graphite side facing down. - Use a ball-point pen to trace over the design, applying pressure to transfer the chalk or graphite onto the wood. - Remove the printed design and you will see the outline of the calligraphy on the wood. - Fill in the outline with a fine-tipped paint marker, following the design's strokes. This tutorial also provides tips for adding embellishments and sealing the finished piece. With this DIY Faux Calligraphy Stencil Tutorial, you can easily create stunning calligraphy on wood projects that will impress everyone with your artistic skills.
Rustic Wood Sign Ideas
When it comes to calligraphy on wood projects, rustic wood signs are a popular choice for adding a touch of charm to your space. Whether you're looking to create custom signs for your home decor or personalized gifts for loved ones, there are endless inspiration and ideas to explore. One idea for rustic wood signs is to incorporate calligraphy onto slatted boards. This design creates a farmhouse-inspired look and allows for the wood grain to show through, adding a natural and organic element to the sign. You can choose to paint the boards in a neutral color or leave them unfinished for a more rustic feel. Another idea is to combine calligraphy with floral motifs on reclaimed wood. This creates a beautiful contrast between the elegant lettering and the weathered texture of the wood. You can add painted flowers, leaves, or vines to enhance the overall design and create a unique and eye-catching piece of art. Table: Rustic Wood Sign Ideas Design Materials Inspiration Slatted Summer Sign Wooden slats, paint, calligraphy markers Create a sign with summer-themed quotes and phrases Paper Flower Sign Reclaimed wood, paper flowers, glue, calligraphy pens Add a whimsical touch with handcrafted paper flowers Seasonal Welcome Sign Wooden plank, stain, letter stencils, paint Design a sign to welcome each new season Remember, the beauty of rustic wood signs lies in their simplicity and authenticity. Let your creativity guide you as you explore different design ideas and experiment with various techniques. Whether you're a beginner or an experienced calligrapher, embracing the rustic charm of wood can add a unique and personal touch to your calligraphy projects.
Step-by-Step Guide to Making a DIY Farmhouse Sign
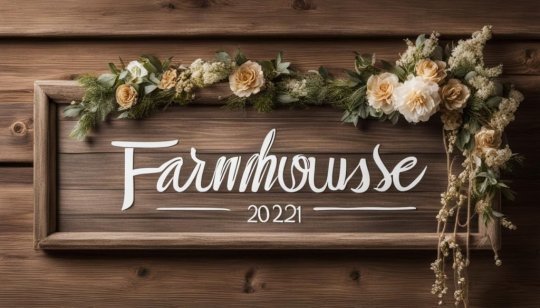
Creating a DIY farmhouse sign is a fun and rewarding project that allows you to showcase your creativity while adding a rustic touch to your home decor. Follow this step-by-step guide to learn how to make your own farmhouse sign using chippy paint and reclaimed wood. Gather Materials Before getting started, gather the following materials: - Cabinet-grade plywood - Wood glue - Miter saw - Reclaimed wood - Brad nails Measure and Cut Begin by measuring and cutting the plywood to your desired sign size. Use a miter saw to achieve clean and precise cuts. Sand the edges of the plywood to ensure a smooth finish. Arrange and Nail the Reclaimed Wood Arrange the reclaimed wood pieces on top of the plywood in a pattern or design of your choice. Once you are satisfied with the arrangement, apply wood glue to the back of each piece and press them onto the plywood. Secure the pieces in place by nailing them with brad nails. Apply Chippy Paint Finish For a distressed farmhouse look, apply a chippy paint finish to the sign. Start by painting a base coat using a latex paint color of your choice. Once the base coat is dry, apply a layer of petroleum jelly or a specialized crackle medium to areas where you want the paint to crackle. Finally, paint a top coat in a contrasting color. As the paint dries, it will crackle and create a weathered appearance. Your DIY farmhouse sign is now complete! Hang it on your wall or use it as a centerpiece to add a touch of rustic charm to your home. Materials Tools Cabinet-grade plywood Miter saw Wood glue Brad nailer Reclaimed wood Sandpaper Paintbrush Latex paint Petroleum jelly or crackle medium "Making your own DIY farmhouse sign is a great way to add personalized charm to your home. With a few simple materials and some creativity, you can create a unique piece of rustic decor that reflects your style." - DIY Home Decor Enthusiast
Tips and Tricks for Wood Burning Calligraphy

Wood burning calligraphy is a unique and artistic technique for incorporating calligraphy onto wood projects. It allows you to create beautiful lettering and designs that have a rustic and natural look. Whether you're a beginner or have some experience with wood burning, these tips and tricks will help you achieve stunning results. Choosing the Right Type of Wood Not all types of wood are suitable for wood burning calligraphy. Softer woods like pine and basswood are easier to work with and provide a smoother surface for burning. Hardwoods like oak and birch can be more challenging to burn but offer a rich and distinct effect. Consider the grain and texture of the wood as well, as it can add depth and character to your calligraphy. Preparing the Surface Before you begin the wood burning process, it's important to prepare the surface properly. Sand the wood to ensure it's smooth and free from any bumps or imperfections. This will give you a clean canvas for your calligraphy and prevent any unwanted marks or disruptions in the burn lines. Selecting the Appropriate Wood Burning Tips Wood burning tools come with a variety of interchangeable tips, each designed for different effects. When doing calligraphy, a fine point or rounded tip is ideal for achieving thin, delicate lines. Experiment with different tip shapes and sizes to find the one that best suits your style and the intricacy of your design. Remember to always practice on a scrap piece of wood before working on your final project. This will allow you to get a feel for the heat and how the wood burns, ensuring you have better control over the final result. Benefits of Wood Burning Calligraphy Challenges of Wood Burning Calligraphy - Creates a unique and rustic look - Allows for precise and intricate designs - Provides a long-lasting and durable finish - Can be done on various wood surfaces - Offers a personalized touch to your projects - Requires practice to master the technique - Can be time-consuming for complex designs - May produce a smoky odor during the burning process - Requires proper ventilation and safety precautions Wood burning calligraphy is a rewarding and satisfying art form that allows you to combine the beauty of calligraphy with the natural warmth of wood. With the right techniques and practice, you can create stunning pieces that will be admired for years to come.
Creating Calligraphy Crafts on Reclaimed Wood
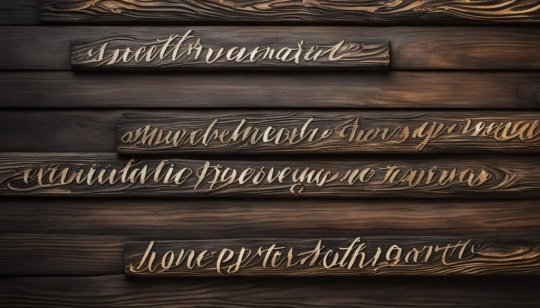
When it comes to incorporating calligraphy into your woodworking projects, there's nothing quite like the rustic charm of creating calligraphy crafts on reclaimed wood. Not only does it add a unique and nostalgic touch to your creations, but it also helps to repurpose materials and promote sustainability. In this section, we'll explore different ways you can use reclaimed wood to bring your calligraphy projects to life. Inspiration from Nature One of the best things about working with reclaimed wood is its natural beauty and character. You can enhance this aspect by incorporating elements of nature into your calligraphy crafts. Consider adding hand-painted floral motifs, leaf patterns, or even small branches to complement your calligraphy. These natural embellishments will not only add visual interest but also create a harmonious blend of organic elements. Transferring Calligraphy onto Reclaimed Wood Transferring your calligraphy design onto reclaimed wood requires careful preparation of the surface. Start by sanding the wood to remove any rough edges or imperfections. Next, you can use transfer paper or pencil tracing techniques to outline your calligraphy onto the wood. Once the outline is transferred, you can use a fine-tip paint marker or wood burning tool to fill in the letters. The rough texture of reclaimed wood adds an extra level of character to your calligraphy, making it truly stand out. Enhance your calligraphy crafts by incorporating elements of nature and repurposing reclaimed wood. The combination of rustic charm and artistic creativity will result in unique and captivating pieces that showcase your love for both woodworking and calligraphy. Materials Needed for Creating Calligraphy Crafts on Reclaimed Wood Description Reclaimed wood Choose wood with interesting textures and grains for added character. Sanding tools Smooth out rough edges and create a clean surface for your calligraphy. Transfer paper or pencil Use these tools to transfer your calligraphy design onto the wood surface. Fine-tip paint marker Fill in the letters of your calligraphy design with a paint marker for bold and defined lines. Wood burning tool (optional) If you prefer a more rustic and textured look, you can use a wood burning tool to etch your calligraphy into the wood. With these techniques and materials, you can create stunning calligraphy crafts on reclaimed wood that capture the essence of rustic charm and environmental consciousness. Let your creativity flow and explore the endless possibilities of combining calligraphy with reclaimed wood to make truly one-of-a-kind pieces.
Tips for Calligraphy Design on Woodworking
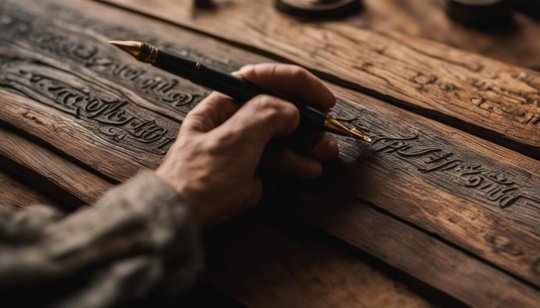
Incorporating calligraphy into your woodworking projects requires careful consideration of design elements. By paying attention to the right calligraphy style, lettering size, and placement, you can create visually appealing and professional-looking pieces. Here are some tips to help you achieve the best results: - Choose the right calligraphy style: Consider the overall theme of your project and select a calligraphy style that complements it. Whether you prefer a traditional or modern look, there are various calligraphy styles to choose from, such as brush lettering, script, or gothic. - Select appropriate lettering size: Consider the size of your wood piece and the visibility of the calligraphy. Larger pieces may require bigger lettering to ensure readability, while smaller pieces can accommodate more intricate and delicate lettering. - Plan your layout: Before starting the calligraphy, experiment with different layouts by sketching on paper or using digital design tools. This will help you find the best placement for your calligraphy, ensuring it fits harmoniously with other design elements. - Use the right tools and materials: Depending on the calligraphy style and the type of wood you're working with, different tools may be required. Experiment with different pens, brushes, or wood burning tools to achieve the desired effect. - Practice and refine: Calligraphy on wood requires practice to achieve clean and consistent lettering. Before working directly on your wood piece, practice on scraps or practice boards to refine your technique. By following these tips, you can create visually stunning calligraphy designs on your woodworking projects. Remember that practice makes perfect, so don't be afraid to experiment and refine your skills. With time and dedication, you'll be able to create beautiful and personalized calligraphy on wood. Example of Calligraphy Design on Woodworking "The beauty of calligraphy on wood is in the artful fusion of lettering and the natural textures and grains of the wood itself. By carefully incorporating calligraphy into your woodworking projects, you can create unique and personalized pieces that showcase both craftsmanship and creativity." - Woodworking enthusiast Comparison Table: Different Calligraphy Styles on Wood Calligraphy Style Characteristics Best Suited For Brush Lettering Fluid and dynamic strokes, suitable for larger-scale projects Signage, wall art Script Elegant and flowing, adds a touch of sophistication Wedding decor, personalized gifts Gothic Bold and intricate, creates a strong visual impact Framed artwork, statement pieces
Inspirational Ideas for Wooden Signs with Calligraphy
Wooden signs with calligraphy offer a charming and personal touch to any space. Whether you're decorating your home or looking for a unique gift idea, incorporating calligraphy onto wooden signs is a wonderful way to infuse rustic art charm into your surroundings. Here are some inspirational ideas to spark your creativity: Creative Quotes and Sayings Add a touch of inspiration to your space with wooden signs featuring meaningful quotes and sayings. From motivational words to sentimental messages, there's a wide range of calligraphy styles and fonts to choose from. Whether you opt for a classic handwritten cursive or a bold and modern lettering, let your chosen quote shine on a beautifully crafted wooden sign. Personalized Names and Monograms Customize your wooden sign by incorporating personalized names and monograms. Whether it's a family name, a special date, or initials, calligraphy adds an elegant and personalized touch to your sign. Consider combining different calligraphy styles, such as a decorative script for the names and a classic serif font for the monogram, to create a visually appealing design. Themed Signs for Special Occasions Wooden signs with calligraphy are a perfect way to celebrate special occasions such as weddings, birthdays, or holidays. Consider creating signs that feature festive greetings, seasonal quotes, or personalized messages for your loved ones. Incorporate decorative elements like flowers, wreaths, or other symbols to enhance the theme of your sign. "Wooden signs with calligraphy offer a charming and personal touch to any space." No matter what type of wooden sign with calligraphy you choose to create, remember to select high-quality wood and use the appropriate tools and materials. Experiment with different color schemes, textures, and finishes to achieve the desired rustic and artistic look. Let your imagination run wild and have fun bringing your vision to life!
Enhancing Wood Calligraphy Projects with Embellishments
https://www.youtube.com/watch?v=onZaSlTONpg Adding embellishments to your wood calligraphy projects can take them to the next level, adding visual interest and capturing attention. Whether you're creating a rustic farmhouse sign or a delicate wall art piece, incorporating embellishments can elevate the overall design and make it truly unique. There are various ways you can enhance your wood calligraphy projects with embellishments. One popular option is to incorporate floral motifs. You can use dried or artificial flowers and attach them to your wood piece using hot glue or wire. This adds a touch of natural beauty and brings a whimsical element to your calligraphy. "Incorporating flowers into my wood calligraphy projects has been a game-changer. It adds a pop of color and makes the design more eye-catching." - Sarah Another option is to add painted accents. This can be done by using acrylic paints to create small details or to add a splash of color to your calligraphy. For example, you can paint delicate leaves or swirls around your lettering to give it a more artistic and dimensional look. Embellishment How to Add Floral motifs Attach dried or artificial flowers using glue or wire Painted accents Use acrylic paints to add details or color Ribbons and bows Tie ribbons or bows around the edges of your wood piece Lastly, you can incorporate ribbons and bows to add a touch of elegance and sweetness. Simply tie ribbons or bows around the edges or corners of your wood piece, creating a charming and decorative accent. Remember, the key is to choose embellishments that complement your calligraphy and overall design. Whether you prefer a minimalist or a more ornate look, adding embellishments can make your wood calligraphy projects truly captivating.
Preserving and Sealing Calligraphy on Wood
Preserving and sealing calligraphy on wood is crucial for ensuring its longevity and durability. By taking the necessary steps to protect your calligraphy on wood projects, you can enjoy their beauty for years to come. Here are some methods and products that you can use to seal your calligraphy on wood: Acrylic Spray Sealers Acrylic spray sealers are commonly used to protect calligraphy on wood. Read the full article
0 notes
Text
Introduction Plushies, those cuddly and adorable stuffed toys, often have intricate details that enhance their appeal. While embroidery machines are commonly used to achieve these details, not everyone can access one. In this tutorial, we'll explore various techniques for adding intricate detail to plushies without relying on an embroidery machine. Whether you're a seasoned plushie maker or just starting out, these methods can help you elevate your plushie game. https://www.youtube.com/watch?v=3QyjSwN32sY Drawing on Cotton Fabric The simplest way to add detail to a plushie is by drawing directly on fabric. For this method, 100% cotton fabric is the most suitable choice. Here's how to do it: Prepare Your Work Surface: To avoid marking your work surface, place a folded piece of paper under the fabric. Use the Right Pen: While a fabric pen is ideal, a fine-tip permanent marker can also work. Ensure the marker's color is darker than the fabric. Draw Your Design: On cotton fabric, drawing your design is straightforward. You may experience some minor bleeding, but it's manageable. This technique allows you to create various details, and you can get creative with your designs. However, keep in mind that drawings may fade over time, making it better suited for personal projects rather than those intended for sale. Exploring Alternative Fabrics Cotton isn't the only fabric you can use for adding detail. Let's explore how drawing works on different materials: 1. Minky Fabric: Permanent Marker on 2mm pile Minky, a synthetic fabric often used in plushie making, can be a bit trickier to draw on. Its texture may require you to use small strokes and dabs of the pen. Additionally, the direction of the fur can affect the appearance of your design. While the marker didn't smudge on minky, it's worth noting that some transfer to the skin might occur due to its synthetic nature. 2. Felt: Permanent Marker on Felt. Felt poses its own challenges because of its texture. Similar to minky, you may need to use short strokes and gentle dabs to draw your design. While felt doesn't smudge either, the texture and fibers can affect how smoothly you can draw. These alternative fabrics offer unique textures and appearances for your plushie details. Experimenting with different materials can lead to interesting visual effects. Sewing Techniques for Applique Drawing isn't the only way to add detail to plushies. Applique, a sewing technique involving layered fabrics, can yield professional-looking results. Here's how to do it: Prepare the Materials: You'll need the main fabric (e.g., minky), cutaway stabilizer, and the fabrics for your detail (e.g., felt). Glue the Fabrics: Use craft glue sticks to temporarily attach the minky to the cutaway stabilizer. Allow it to dry with some weight on top for about five minutes. Sewing the Details: Create your design by sewing the felt pieces onto the minky. You can use a straight stitch to secure the layers. Using the same color thread for the entire design creates a cleaner and more professional look. Satin Stitch Finish: To achieve a polished appearance, switch to a wide but short zig-zag stitch (e.g., 3mm wide and 0.8 stitch length) to create a satin stitch around the edges of the detail. This technique mimics the effect of an embroidery machine. By applying applique techniques, you can achieve intricate and professional-looking details on your plushies. The key is to choose complementary fabrics and take your time with the stitching. Conclusion Adding intricate details to plushies without an embroidery machine is not only possible but also an opportunity to showcase your creativity and craftsmanship. Whether you prefer drawing on fabric or using applique techniques, these methods can help you create unique and visually appealing plushies. So, go ahead and elevate your plushie-making skills while making adorable and personalized stuffed toys.
0 notes
Text
DIY Paper Tiger Lilies
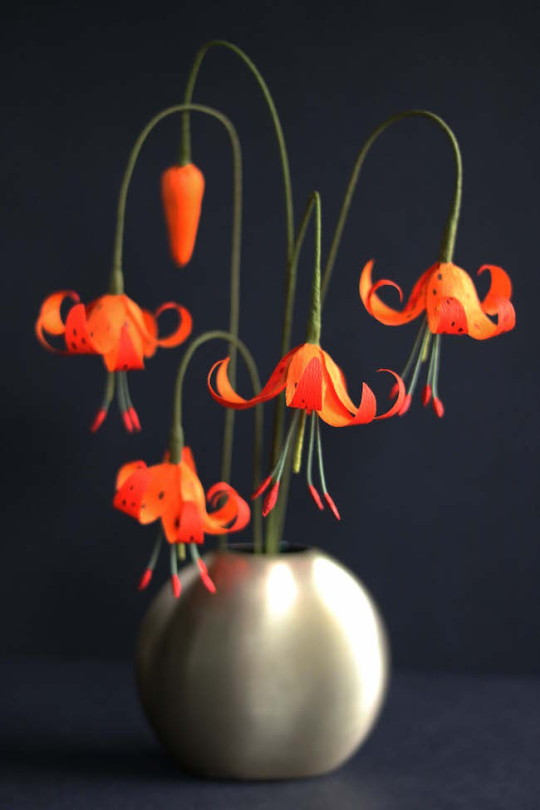
Project by Kate Alarcon:
This speckled wildflower isn’t the large, showy tiger lily grown from a bulb as an annual, but rather lilium columbiana, a Pacific Northwest native with small flowers that face downward. I’ve never actually seen a live one in person before, but this is one of my favorite paper flowers to add to a bouquet. It’s bright and eye-catching but still has a delicate, woodland vibe. The arched stems give an arrangement height that isn’t too visually distracting, and the curled petals show off the color on both sides of the doublette crepe paper.
But the best argument for paper tiger lilies is the fun of speckling and curling those petals. Enjoy! —Kate
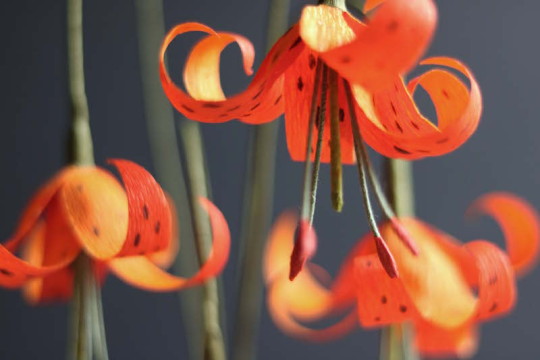
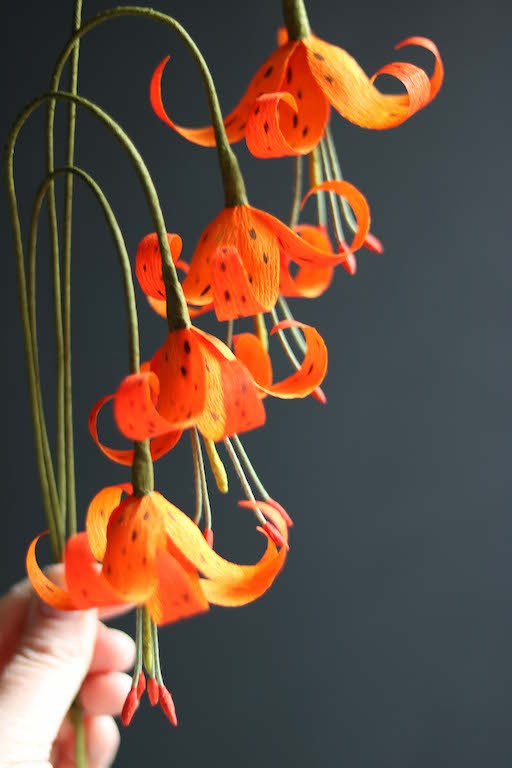
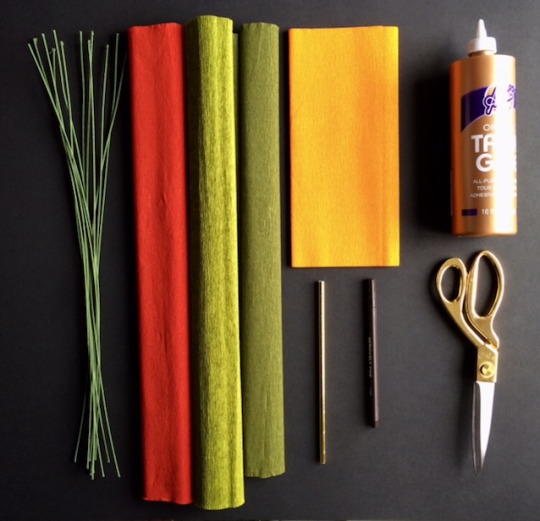
Supplies:
-Lily petal template (here) -Orange doublette crepe from here -Yellow, orange, or green heavy or fine crepe for the pistil (I’ve used Bright Olive heavy crepe from here.) -Fine crepe in orange or brown (I’ve used Vermillion fine crepe from here.) -Fine crepe in Cypress from here -Aleene’s Original Tacky glue -Cloth-covered stem wire in 18 gauge and 22 gauge -Dark brown or burgundy pen or marker. Any kind should work, but test it on a scrap of doublette crepe first to be safe. -A rod approximately the diameter of a straw (I used a gold paper straw from Target, but a pen, knitting needle, or wooden dowel would also work.)
A note about crepe paper grain:
The grain of the crepe paper runs parallel to the roll or fold. Crepe paper stretches horizontally, but not vertically, so you will almost always cut petals with the grain, placing the template so that the tiny wrinkles in the paper run up and down the template, not across. Cutting with the grain means that you cut in the same direction the crinkles are running; cutting across the grain means that you cut perpendicular to these crinkles.
Stamens:
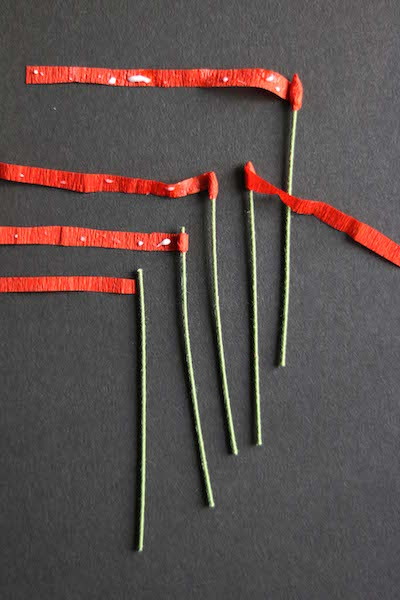
Cut four 3” pieces of the 22 gauge wire for each flower. (Lilies technically have 6 stamens, but I like the more streamlined appearance of 4. Use as many as you like!)
Cut out a 5”x 5” rectangle of fine crepe in whatever color you prefer for your stamen tips.
Cut the square across the grain to create 1/8” wide strips. Each strip will cover at least one stamen tip, so you only need four strips for each lily. Dot a very small amount of glue along one of the strips. Attach the end of the strip to the wire about 1/16” below the tip of one of your short lengths of wire. The strip should be perpendicular to the wire.
Roll the strip around the wire to create a little barrel, which will plump up your stamen tip. (I always just eyeball this, but I’ve found that a typical barrel takes about 1.5” of the strip.) Once you’ve rolled up your barrel, hold the strip at a 45-degree angle to the tip of the wire, and start wrapping toward the tip. When you get to the end of the wire, reverse directions and wrap toward the bottom of the stamen. Snip off any excess.
While the paper is still wet, mold the stamen tip a little bit, smoothing any bumps in the tip. Then pinch it flat between your thumb and index finger.
Pistil:
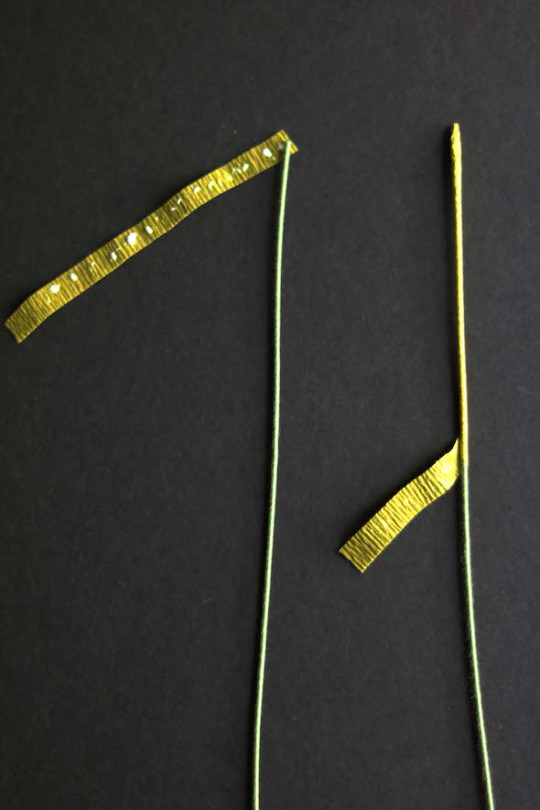
Cut two ¼” x 3.5” strips of Bright Olive heavy crepe across the grain. Dot glue down the length of the strip. Starting at the tip of one of your 18 gauge wires, wrap at least the top 2” of the wire, stretching the strip and spiraling down at a 45-degree angle.
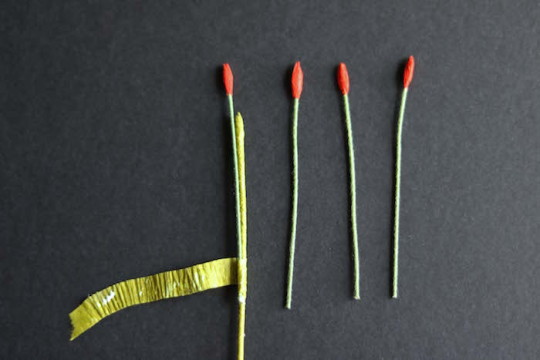
Dot your second strip of heavy crepe with glue. Position a stamen against the pistil so that the bottom of the stamen hits the pistil two inches below the pistil tip. Repeat with the remaining 3 stamens. The second should be placed opposite the first. The remaining two stamens go in the spaces between the first two. Snip any excess strip.
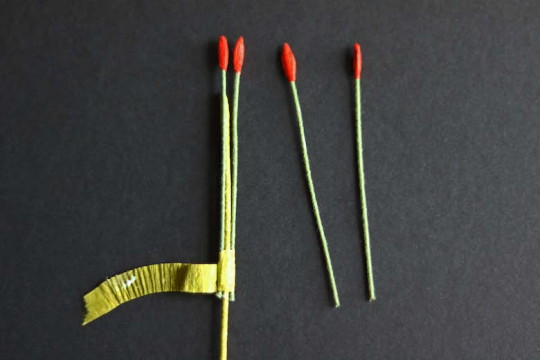
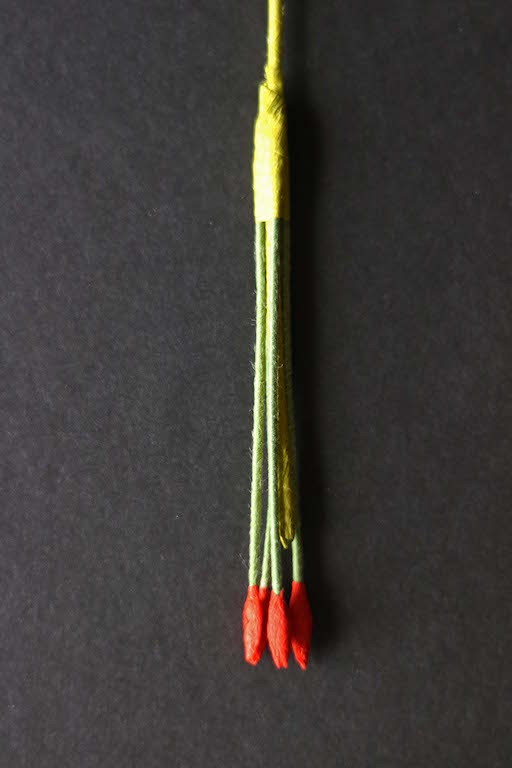
The finished center
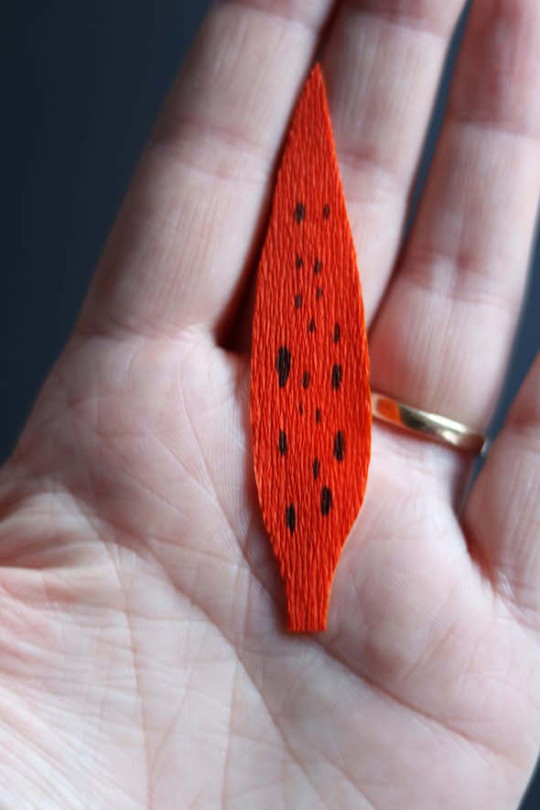
Petals:
Using the petal template, cut six petals from the orange doublette. (Make sure the grain runs up and down the petal from tip to base.)
Decide whether you’d like the darker or lighter orange side of the petals to face the center. I’ve chosen the darker orange, so that’s the side I speckled.
Use your pen to apply dots to the petal. I’ve drawn larger and smaller elongated ovals somewhat at random. I threw away about fifty lovingly speckled petals after changing my mind about the speckle pattern. Don’t be me: spend some time practicing on scraps before tackling the petals.
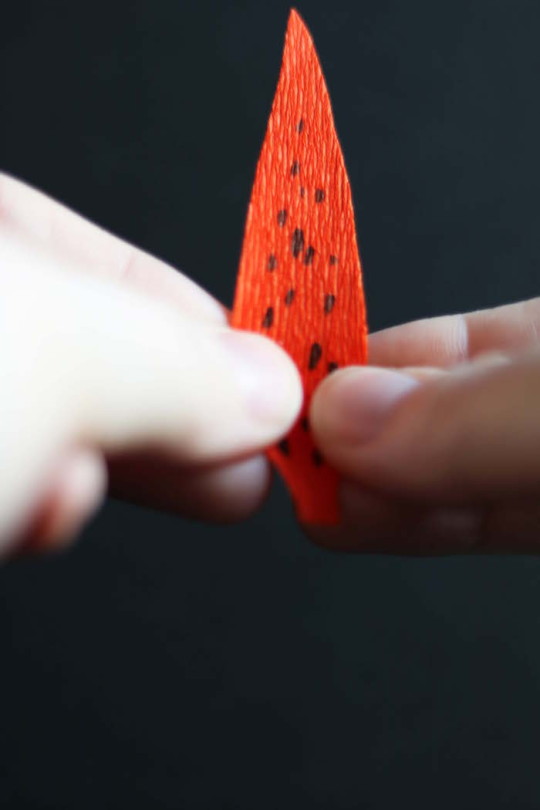
Find the circle near the bottom of the petal template, and gently stretch this area to create a little bowl.
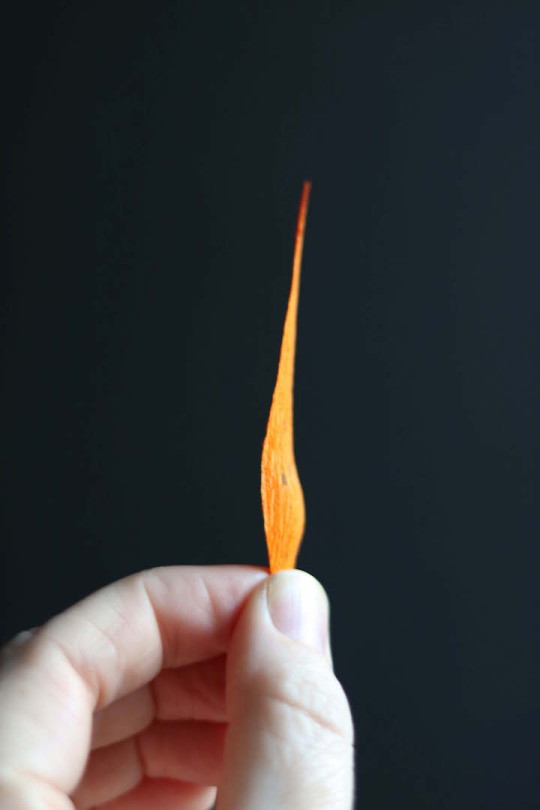
Starting at the tip of your petal, curl your petal around the rod. The “right” side of the petal — in other words, the side on which you drew your speckles — should face toward the rod, while the back side of the petal is what you’ll see when the petal is almost completely wrapped around the rod.
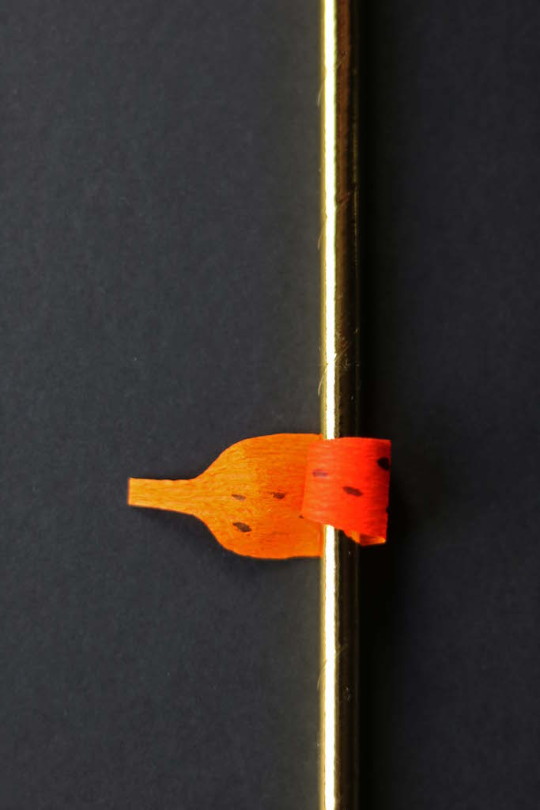
Without uncurling the petal, remove the rod. For a lily in full bloom, leave the curls tight. To create different stages of bloom, adjust the curl of the petals by gently smoothing them between your fingers.
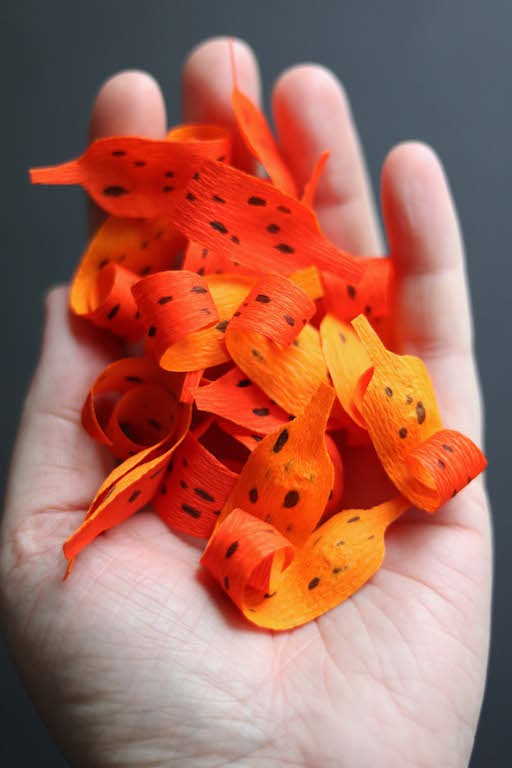
Applying the petals:
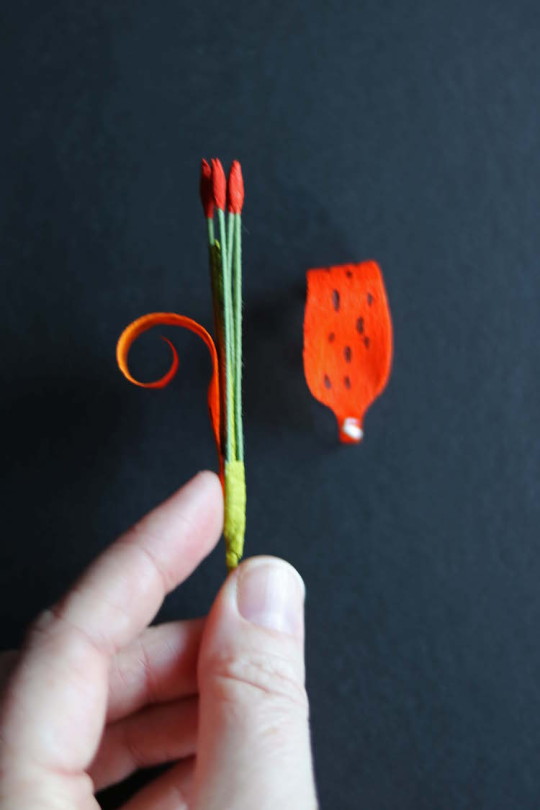
The petals are attached in two rounds of three.
Apply a small amount of glue to the little tab at the bottom of the petal. Attach one of the petals to your center, placing it so that the top of the little tab falls just above the top of the olive strip that you used to attach the stamens to the pistil.

Attach two more petals, spacing them evenly to form a triangle around the center.
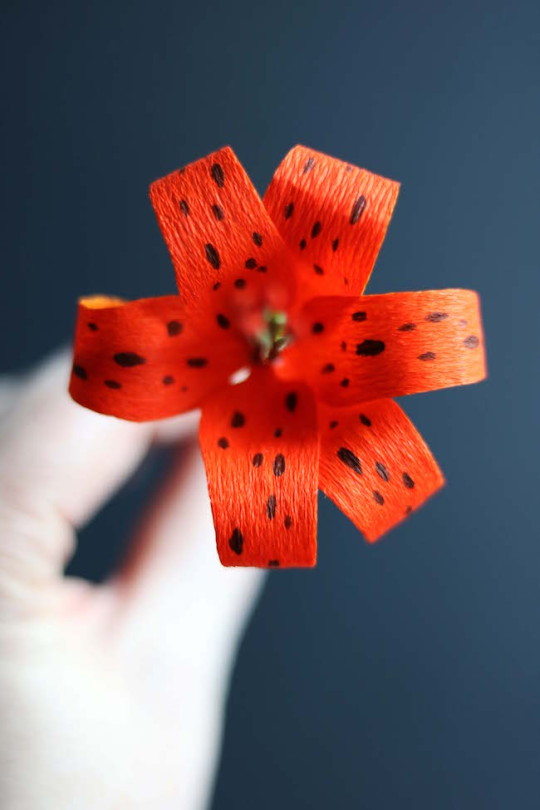
For the next round, apply the petals in the spaces between your first set of three. Make sure not to drift down the stem with this second round.
Gently bend the stamens so that they curve outward away from the pistil.
Wrapping the stem:
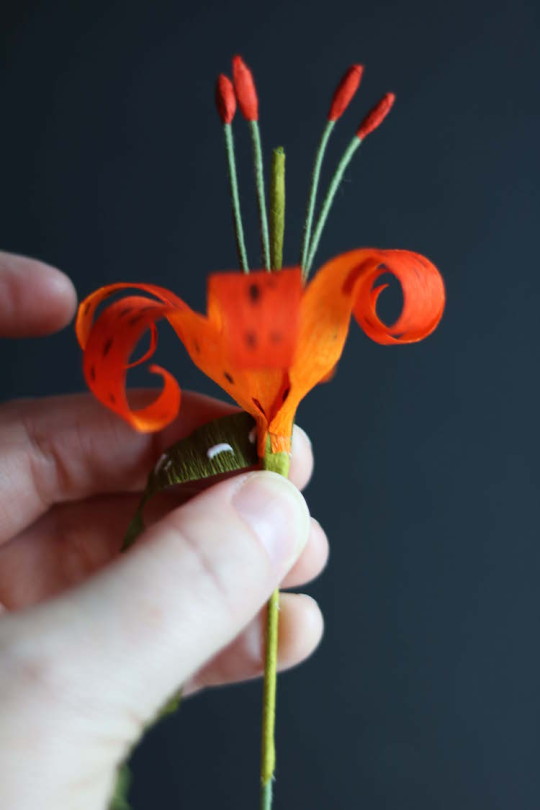
After you’ve attached all six petals, cut two ¼” x 10″ strips of Cypress fine crepe across the grain. Dot the first two inches of the strip with glue and wrap the stem where it meets the back of the flower, covering the tabs where the lily petals attach to the pistil. Stretch as you wrap to create a smoother stem.
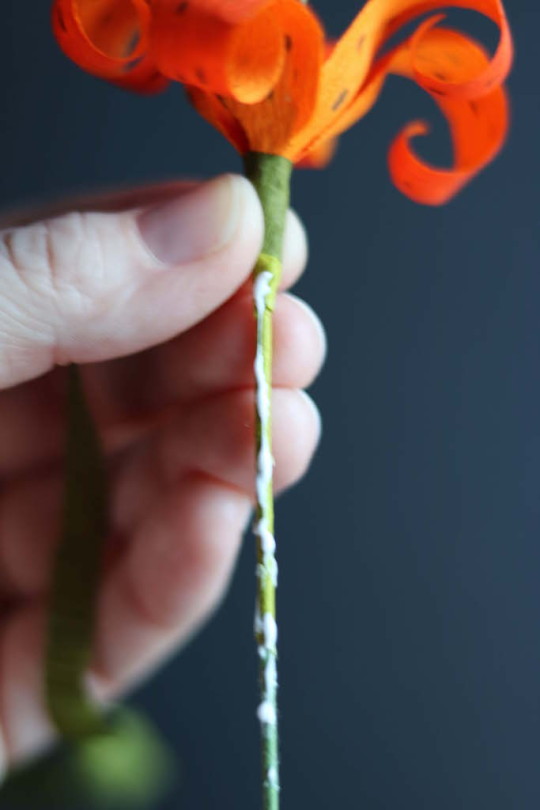
Dot glue on the next three or four inches of the stem and continue wrapping with your fine crepe strip. When you’ve covered all the glue, apply glue to the next three or four inches and wrap. Continue until the whole stem is covered. If you have a bump where the bottom of the stamens meet the stem, you can use additional strips to build up the area just below the stamen bottoms to create a smoother transition.
Finishing:
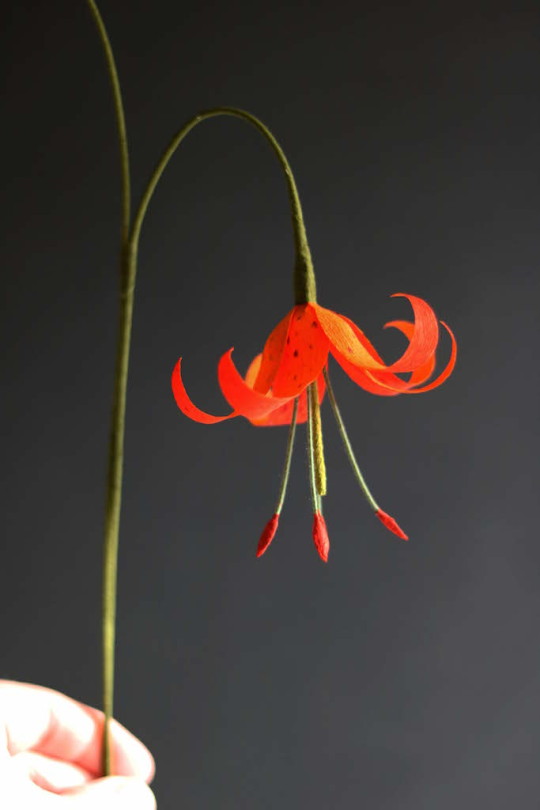
The petals often become mussed during wrapping, so gently adjust them and recurl if necessary.
Carefully bend the stem below the bloom to create an arc. I like for my lilies to be facing straight down.
To protect your flower from fading, you can spray it with Krylon matte UV protectant spray (in a well-ventilated place, while wearing a mask).
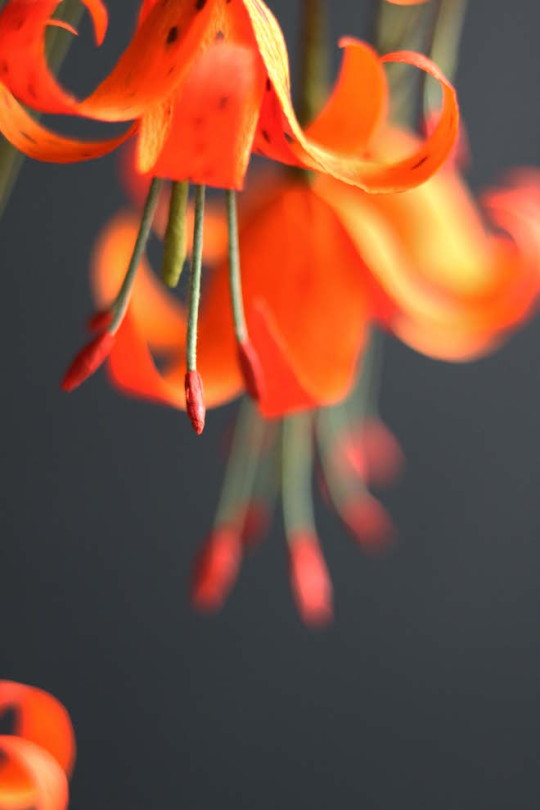
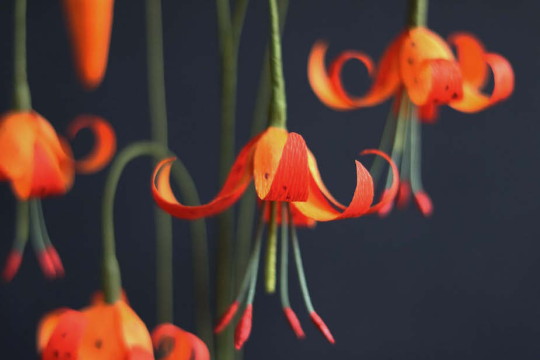
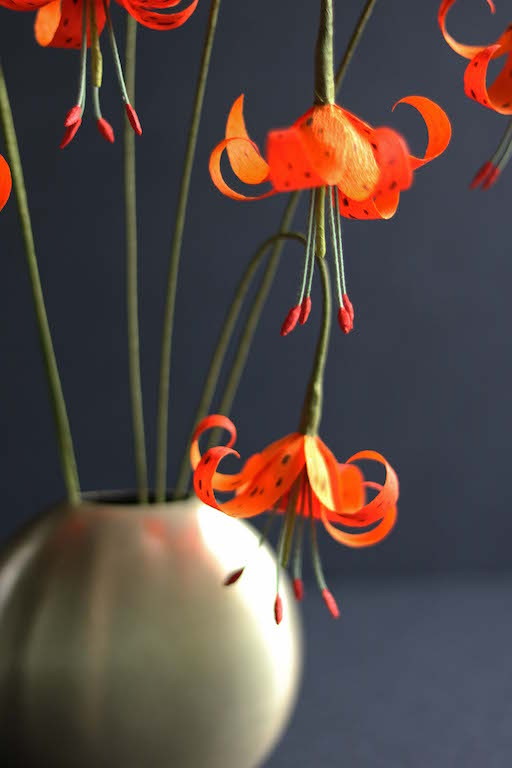
16 notes
·
View notes