#DIY Christmas
Explore tagged Tumblr posts
Visit Tumblr Blog
Explore Tumblr blogs with no restrictions, modern design and the best experience.
Last Seen Tumblr Blogs


Fun Fact
Tumblr is available in 18 languages.
Text
Nuovo video su YouTube ma progetto dell'anno scorso 🤣🎄
#pensieri per la testa#persa tra i miei pensieri#ghirlanda#natale#Christmas#noel#diy#diy projects#creatività#diy Christmas#handmade#fai da te#YouTube#canale YouTube#lavoretto
6 notes
·
View notes
Text
youtube
🎄 Create a Stunning DIY Advent Calendar on a Budget! 🎁 In this festive tutorial, I'll show you how to craft a unique advent calendar using upcycled materials like a cereal box and toilet rolls, plus thrifted holiday treasures!
#refashionista sheri#refashionista#sustainable#thrift style#advent calendar#diy advent calendar#upcycle#christmas crafts#diy christmas#Youtube
4 notes
·
View notes
Text

#ornaments in making#diy#diy christmas#countryside#cottagecore#nature#slowlife#home#homestead#winter#december
23 notes
·
View notes
Text
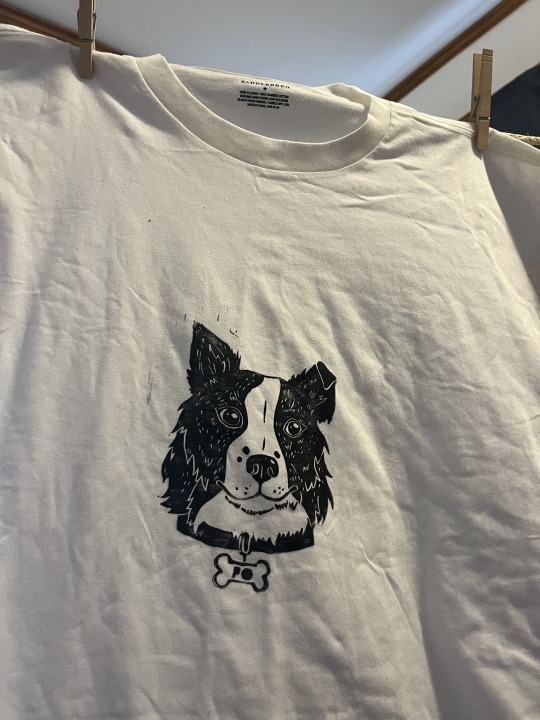

For christmas this year, I made my dad this T-shirt with a print of our dog because he loves this dog more than either of his children
I also just stole a t-shirt he already had to print on because a) anti-consumerism and b) cheapskate.
Anyway shout out to the people who do custom pet portraits and stuff this bastard was hard to draw.
#dog#printmaking#anti consumerism#diy christmas#dog portrait#linocut#blockprinting#artists on etsy#solarpunk#my art
13 notes
·
View notes
Text
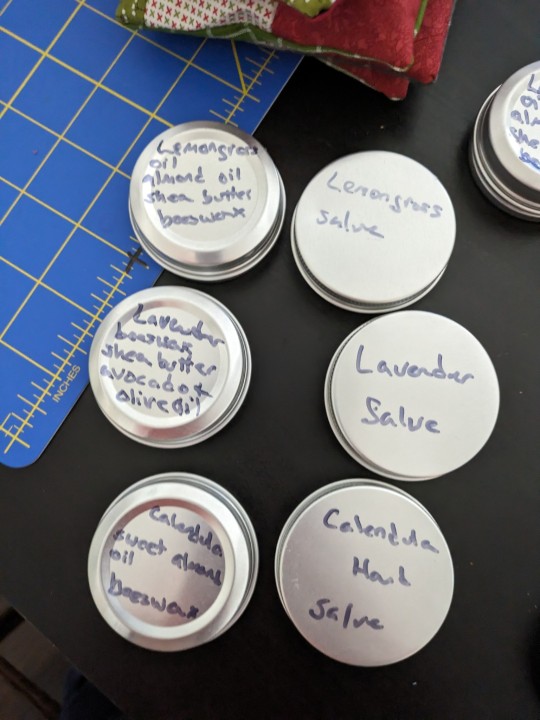


It's been a Christmas gift factory around here. I've been making lavender sachets, bookmarks, and hand salve for all the people in my life who I want to give a little gift (but not a big gift, or in addition to a big gift.
7 notes
·
View notes
Text


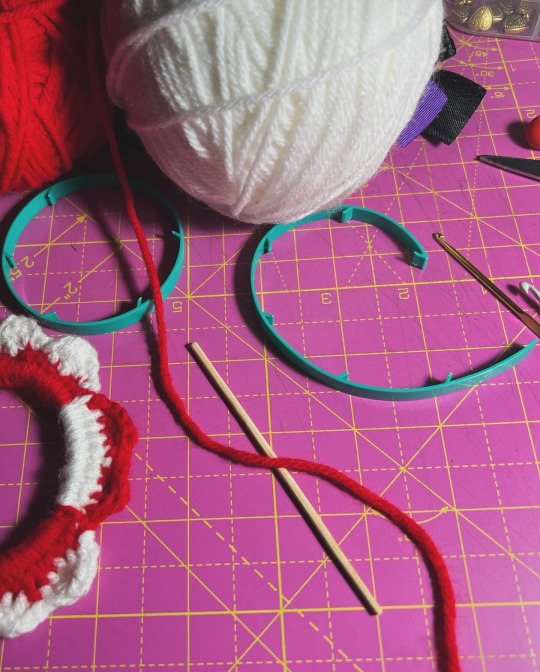
Crochet Candy Canes
3 notes
·
View notes
Text

#highland cow#christmas#christmas clipart#diy christmas#seasonal#festive#merry xmas#etsyfinds#etsy#etsyshop
2 notes
·
View notes
Text
Christmas Panic
Ah yes, the slow burn of panic as Christmas approaches, my pockets are empty thanks to some YouTube merch impulse buys over Cyber Weekend, and I am yet again forced to make all of my gifts.
Wish me luck 😅
and if anyone has homemade gift ideas, please bless me with your ideas because I’m at a loss and I have 8 people to make for.
#christmas#diy christmas#nothing like the holiday season#christmas madness#help lol#why am i like this
2 notes
·
View notes
Text
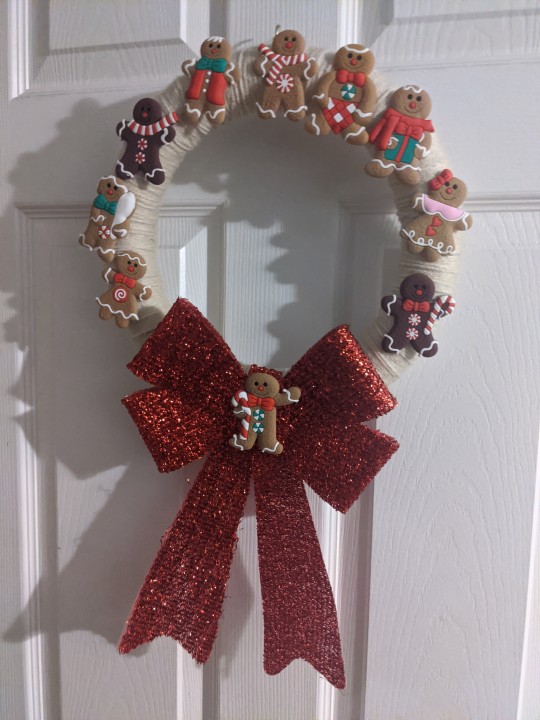
My Christmas wreath- gingerbread ornaments from Amazon, yarn- wrapped wreath form, dollar tree bow
4 notes
·
View notes
Text

Yoooo, the extra Lego piece collection came in hot ❄️
0 notes
Text
How to Start a Christmas Ornament-Making Tradition
Creating handmade Christmas ornaments is a heartwarming tradition that adds a personal touch to your holiday celebrations. It’s a delightful way to bond with loved ones, unleash creativity, and build cherished memories that last a lifetime. If you’ve ever wanted to start your own Christmas ornament-making tradition, this guide will help you get started step-by-step. Why Start an Ornament-Making…
#Christmas ornaments#ChristmasTradition#DIY Christmas#DIYOrnaments#Family Traditions#Festive Activities#holiday crafts
0 notes
Text
⭐ Stella natalizia Yin e Yang ⭐


#pensieri per la testa#persa tra i miei pensieri#lavoretto#creatività#oro#argento#stella#star#natale#Christmas#christmas diy#DIY#handmade#decorazione natalizia#yin yang#campanella#christmas vibes#fai da te#diy christmas decorations#diy Christmas#creativity
6 notes
·
View notes
Text
How I Make Homemade Christmas Cards (Crafting Ideas)
Hello everyone! I just want to share a quick and easy Christmas craft idea. If you enjoy making crafts or you want to save a bit of money this Holiday season, one thing I love to do is make my own Christmas cards. You will need: -Card stock and envelopes or Pre-made cards with envelopes -Water colors -Water color brush -One piece of paper to cut out a Christmas tree outline and…
#crafting ideas#DIY Christmas#homemade cards#homemade christmas#Homemade gifts#how to make#papercraft
1 note
·
View note
Text
youtube
#The Great Christmas T-Shirt Design Disaster#Christmas#Great Christmas T-Shirt Design#Great Christmas T-Shirt Design Disaster#Shirt Design#Christmas T-Shirt Design#Christmas Merch#Holiday Apparel#Christmas Gifts#Unique Christmas Gifts#Graphic Tees#Holiday Spirit#DIY Christmas#Festive Clothing#Holiday Style#Holiday Fashion#T-Shirt Design#Creative T-Shirts#Design Disaster#Christmas Trends#christmas#top christmas songs of all time#relaxing christmas ambience#Youtube
0 notes
Text

Our DIY Make Your Own Ornament Kit called Nostalgic Peppermint is available at https://www.holidayslane.com/kits Each kit is for beginners to experienced ornament makers and includes everything you need to make this retro sequin and beaded ornament [except a few drops of glue].
#ornament making#christmas ornament#diy#diy christmas#crafts for adults#diy craft#crafting#christmas#retro aesthetic
0 notes