#Customizing
Explore tagged Tumblr posts
Visit Tumblr Blog
Explore Tumblr blogs with no restrictions, modern design and the best experience.
Last Seen Tumblr Blogs


Fun Fact
China blocked Tumblr because of pornography and censorship problems in 2013.
Note
mostra sua perso atual plis 🫶🫶
no momento ela está assim, personalizei recentemente. ❤️🩹

#locksscreen#kpop lockscreen#wallpapers#angelicalitas#lockscreens#kpop icons#icons kpop#personalização#samsung#customizing#customizing cell phone#cell phone#samsung galaxy#samsung a32#kpop wallpapers#kpop wallpaper#rose blackpink#blackpink rose#kpop girls#kpop moodboard#kpop personalização#personalização kpop#kpop gg#kpop layouts#blackpink icons#rose icons#icons rose#rose icon#icon rose#kpop icons lq
81 notes
·
View notes
Text


I gave Aardbie some blush ♡
#plushies#comfort#plush#plushie#stuffed animals#stuffed animal#playing pretend#plushblr#jellycat#jellycat london#aardbie#customizing
35 notes
·
View notes
Text


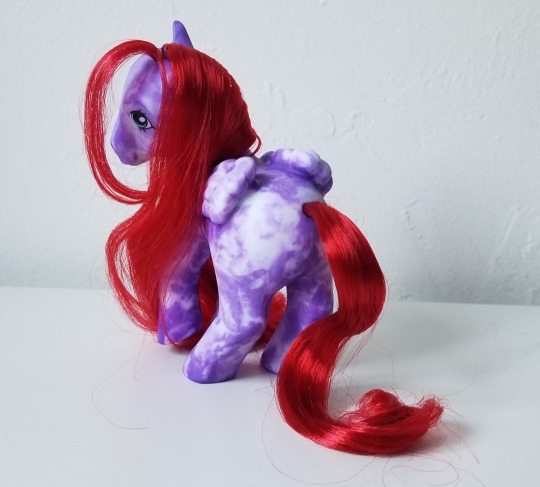
Custom Twinkle Eye pony Minty
#g1#my little pony#customs#customizing#Minty#Collector ponies#Twinkle Eye ponies#there will be a lot more pics of her when I'm able to take pictures in natural light
371 notes
·
View notes
Text
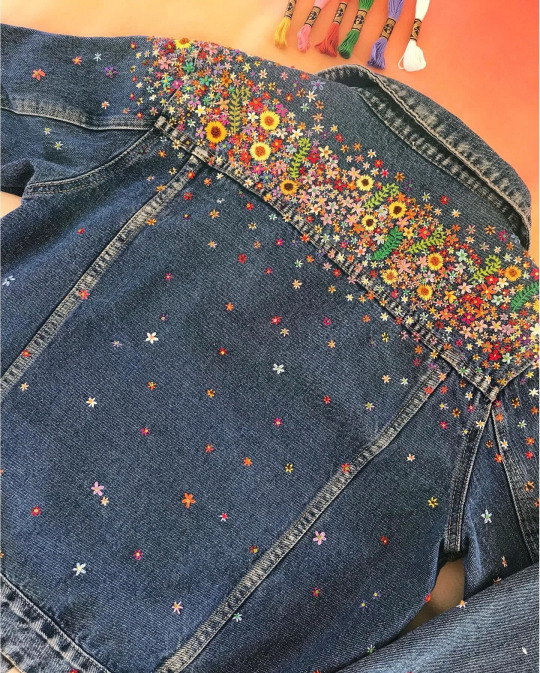
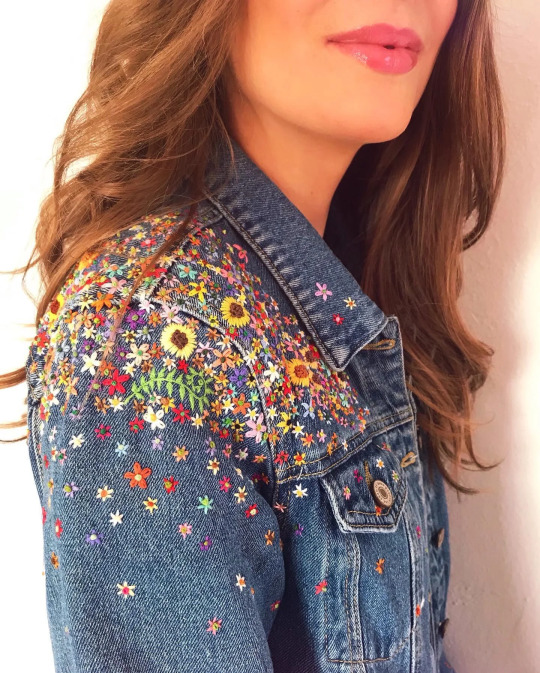
A store-bought denim jacket customized by DIY. The burst of hand-embroidered small flowers on the shoulders / yoke is so eye-grabbing, it took me a while to realize they continued making flowers all the way to the waist. Nice! By ExperienceMotor1694 via Reddit.
#DIY#embellishing#custom#customizing#unique#embroidery#hand embroidery#flowers#floral#jeans jacket#denim jacket#wearables#materials#multicolor#multicolour
18 notes
·
View notes
Text


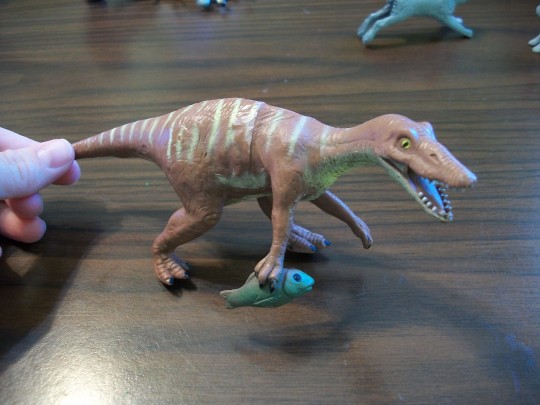
Bought this lil plastic baryonyx toy at a junk store for fifty cents a while back and gave him and his fish dinner friend a new paint job. Also gave him some Komodo dragon-esque slobber and added some blood drips to the fish. Here's what they looked like before:
#dinosaurs#baryonyx#art#paintings#toy dinosaur#customizing#far from perfect but a fun lil side project <3#I have a drawer full of other toys/models I want to repaint lol
57 notes
·
View notes
Text

A little WIP shot of the Dollhouse I've been painting. I still need to touch things up like the windows, but other than that, I'm tickled pink by how it's coming out so far. There are a few more design elements I want to add to the outside of it, but for now, it looked nice enough to show X3 I had to bring it upstairs though as the basement was getting way too cold down there and I wasn't wanting to risk damage to it. Soon, I can get to work on the dolls to go inside of it :')
#WIP#My art#Dollhouse#painting#customizing#cherry#I couldn't resist giving a cherry motif for the exterior of it#Still don't know why the brown looks like that it's actually a tone darker than that in person#I have the inks done for the doll concepts#just needs some colors before I can scan it up amongst other things
6 notes
·
View notes
Text


WiP - Howard Link, Scars, Glove & Tattoo
As some little fun inbetween all this sewing... and I noticed it would be smart to add everything before I put him into clothing.


I started to cheat with gloves with Mana back then as sorry nope, not making doll sized gloves and they look weird in most of cases anyways.


I actually enjoyed making the scar and painting everything it was really nice for a change. I really need to do more different media work again.


The results are so pleasing I'm glad I decided to go with one hand without glove C:
.... but that means back to sewing again.
15 notes
·
View notes
Note
Hi, how do you remove the head from an ldd doll? Also is it possible to reroot one? Thank you!
Depends a bit on which of the two body styles you work with. The earlier doll bodies before Series 9 are 100% vinyl with one-point swivels for articulation, so they can pop apart even at normal temperature, but I'd strongly recommend heating with a hairdryer first to soften the vinyl, and heating is all but required for popping them back together. Swivel LDDs' necks are hollow and open, making it pretty easy to scrape the hair roots out, and the heads are just as rerootable as any vinyl dolls', though the material is firmer at neutral temperature than a fashion doll's head.

Ball-joint LDDs from Series 9 onward have the same vinyl material for the body parts, but have plastic ball pegs glued into the torsos that their limbs and heads attach to, increasing the articulation at the same five points. The arms typically pop on and off easily without heating (in some cases, too easily), but the legs and head must be heated extensively and the pieces have to carefully be pulled off the joint pegs to make sure the pegs aren't being pulled out or broken instead. LDD ball-joint hips are problematic with their higher-friction ball pegs getting legs stuck and causing pegs to break if a stuck leg is pushed rather than heated to get it moving. It's easier to pop a ball-joint LDD head back on than off, but do heat it both times. The ball joint cup molded on the head is mostly enclosed, making it less advisable to reroot a ball-joint LDD just because you aren't going to as easily remove the roots of the original hair. If heated, you could shove a tool in there, or pull more out from the outside instead, but it would be less fun. LDDs with updos or ponytails are only rooted on the perimeter of the hairstyle, so those would have less to remove, but you'd also need to make more of your own rooting holes on such a head.

4 notes
·
View notes
Text

G!sans 커스터마이징
#g!sans#g sans#sans undertale#sans#sans au#undertale au#undertale#gaster!sans#gaster sans#gaster#decorate#customizing
56 notes
·
View notes
Text

DIY PHONE CASE
Drew my oc and brand M4LUQU3T3
#queer artist#art#artists on tumblr#small artist#artwork#my art#original art#phone case#diy ideas#diy#original character#oc artist#oc artwork#oc#oc art#my ocs#do it yourself#custom made#customized#customizing#custom#customize#customization
2 notes
·
View notes
Text
Enhancing Doll Brows
This is my guide to either enhancing or completely redoing an AG doll’s eyebrows. Several people have asked about this, and I hope it will be useful.
You will need: a doll, watercolor pencils in black, brown and white, cotton swabs (preferably the pointy makeup ones), a small amount of water, and setting spray. If you are removing the original brows, you’ll also need nail polish remover and a paper towel to wipe the color off.
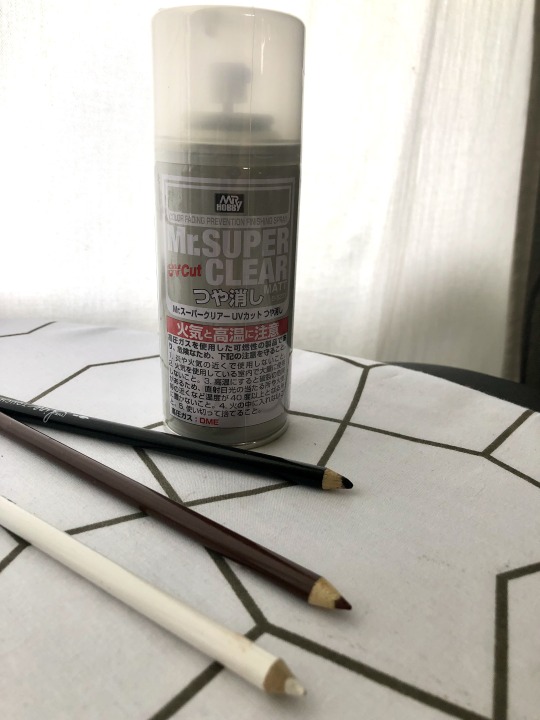
I use Mr. Super Clear from Amazon, specifically the matte UV Cut version, so it doesn’t dry shiny and protects the doll’s vinyl and paint from fading in sunlight. The watercolor pencils were from a cheap set I got at the craft store. Almost any brand will do, but make sure your pencils are sharp! (I had to sharpen my white and black after I took this photo.)

Next, you will need to prep your doll for her treatment. You can easily overspray and get the setting spray in the doll’s eyes and hair, and it makes the eyes cloudy and the hair dry and crunchy. To prevent this, I used a couple of long scraps to tie back and cover my subjects’ hair, and half a cotton ball taped down to protect their eyes. You want to make sure there is plenty of space to work around their brows, so you might notice that you can see the top of Lydia’s (known as Subject A for this post) eyelids. This is fine as long as the eyelashes are covered.
Once ready, go outside and spray their faces with the setting spray, concentrating on the forehead. Be careful not to totally soak the face. All you want is a light dusting. Once it dries, you can always spray another layer if you don’t think the first one is sufficient. This preliminary spray makes a better surface for your pencils to grip. If you skip it, you may not be able to get any pigment on your doll’s face. Let dry for 20-30 minutes between layers.

Next, you will want to start filling in the brows with short, light strokes, from root to tip, in the direction of hair growth. You will likely want to practice with a pencil on paper first, if you haven’t done this before.

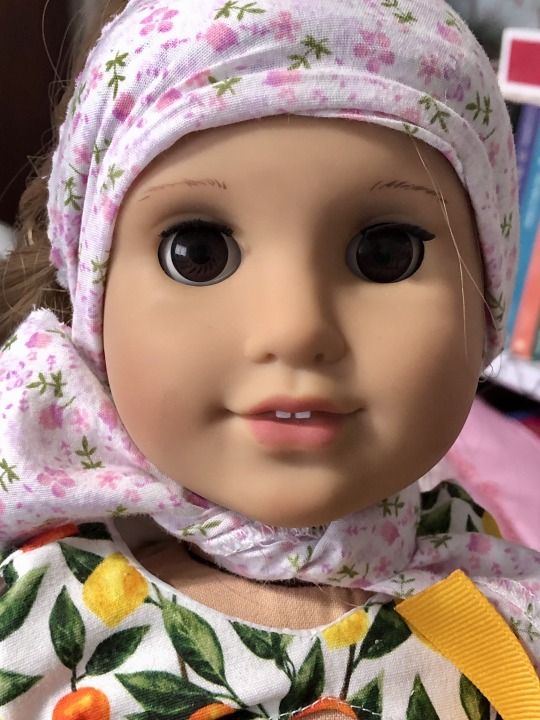
This is after a handful of strokes on each brow. I usually begin with black, but I did Subject A’s left brow in brown first for illustration purposes. It doesn’t really matter which you start with. For me, brown is primarily a filler, unless I’m working on a doll I want to have paler brows.

This is after some more lines in both black and brown, with a few (4-5) strokes of white to provide depth.
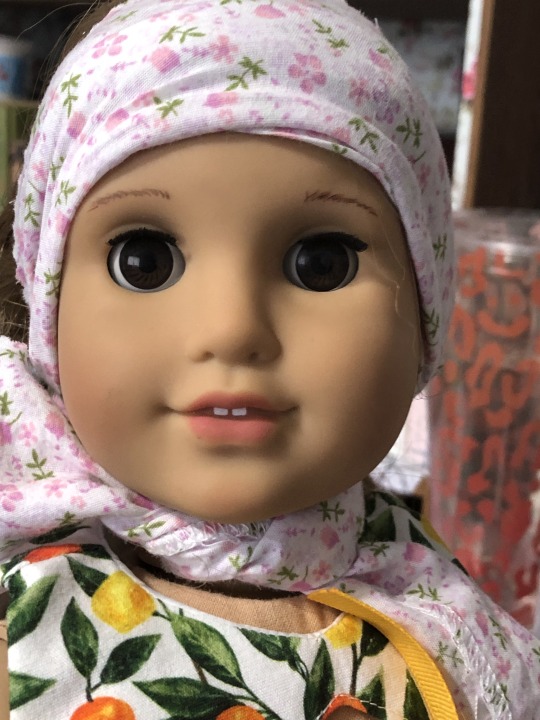
If you make a mistake, use the water and a cotton swab/Q-tip to remove the errant mark and continue. You may have to remove everything you have done and start over. That’s okay. In this case, I didn’t like the white line at the bottom of her left eyebrow, so I wiped it off and re-drew the black and brown lines that were removed.
Keep working until you are satisfied with the result, then set with another layer of setting spray. Your doll will look amazing!
It helps if you don’t immediately go to set the paint after you finish. Give it a few minutes, then go back and look to make sure it’s the look you want. I did this several times with mine, and I kept adding a few lines here and there until I was happy. If you spray it and then decide you don’t like it, you will have to use nail polish remover and it will wipe out the original paint along with your watercolor work.

New brows: These are much more difficult than simply filling in because you have no good indication of their shape and position.
Once you have removed the original ones with nail polish remover and done the preliminary spray, you can start sketching a guiding line.
This image shows a couple of layers of short strokes, following the brow ridge.
This was so, so hard for me in the beginning, one eyebrow would be perfect and the other would...not. At all. If you aren’t sure of your skills, you may want to get a practice head from eBay or somewhere to practice on until you feel ready to work on a “real” doll.
More lines, going over the original work. As you can see, they aren’t quite the same, so I kept going, setting Subject B aside for awhile several times. I used black, then brown, and then a few white strokes.
Set the paint afterwards with the setting spray.

Et voila! I’m not 100% happy with that right eyebrow, but I can go back and redo it some other time.
32 notes
·
View notes
Note
mostra sua perso atual diva 🤍
no momento ela está assim, meubem. ♡🫶🏻


#asks open#ask#kpop asks#ask kpop#customizing#customization#customization phone#cellphone#personalização#personalization#personalización#personalizado#celular#samsung#samsung galaxy#samsung a55#locksscreen#kpop lockscreen#angelicalitas#wallpapers#lockscreens#kpop icons#icons kpop#kpop girls#kpop gg#wallpaper kpop#kpop wallpapers#kpop wallpaper#wallpaper#uzzlang icon
17 notes
·
View notes
Text
#animal#make an animal#animals#animal customization#customizing#animal maker#animal feature poll#poll
7 notes
·
View notes
Text
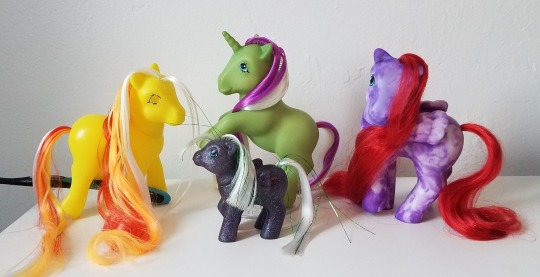


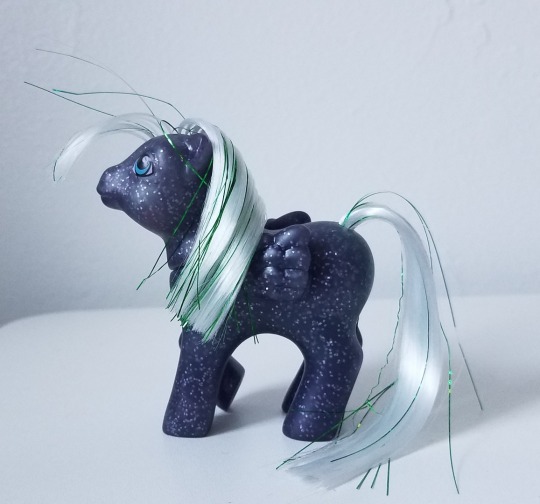
I was trying to finish this set of ponies by Halloween, but it was not to be. That gives me more time to think of their symbols, though! Suggestions welcome! :)
Green pony will be a Precious Pocket pony, yellow pony will be a Twinkle Eye, but I haven't put in her eyes yet.
160 notes
·
View notes
Text
Credit in video
#doll#dollblr#dolls#barbie#dollblogger#barbieblogger#barbie doll#barbie dolls#made to move#barbie made to move#Barbie core#barbie movie#barbie 2023#customizing
30 notes
·
View notes