#Celestial Tools
Explore tagged Tumblr posts
Visit Tumblr Blog
Explore Tumblr blogs with no restrictions, modern design and the best experience.
Last Seen Tumblr Blogs


Fun Fact
130K people were victims of a chain letter scam that affected Tumblr in May 2011.
Text
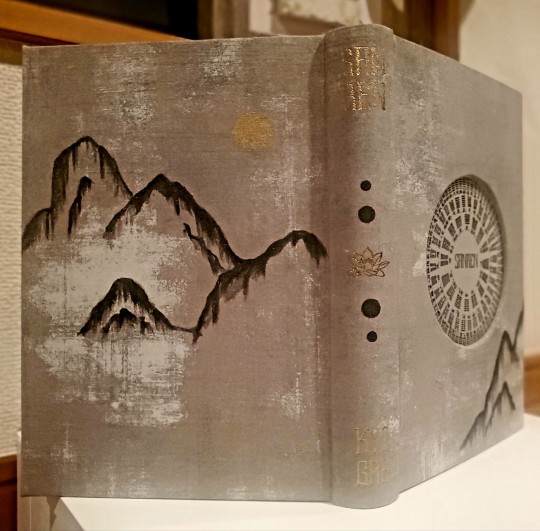
Book Decoration: AKA All The Ways I Don't Use a Cricut
(this post is for people who don't want to buy an expensive cutting tool, or for those that do have an expensive cutting tool that would like to mix things up a little)
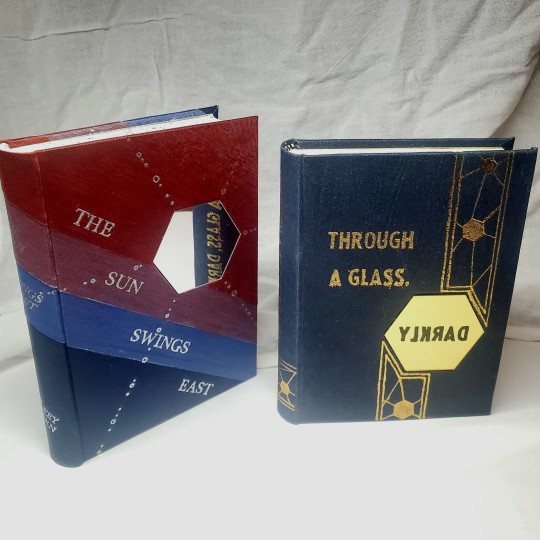
1. Print That Shit
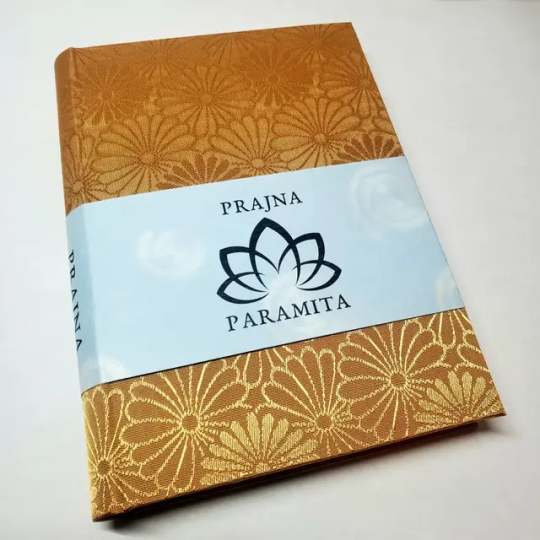
If you're already printing your own textblocks, an easy step for titles is to print them. Above is a title printed onto an "obi" of decorative paper. I measured out where I wanted things on the finished book and laid it out in Affinity, then printed it on a full sheet & trimmed it down to wrap around the book. A more simple method is to print & glue on the label into a slight indent in the cover (to protect it). A third option is to do the spine in bookcloth, while you print on paper for the cover and then glue that paper onto the boards (this usually looks even better when it is a three-piece bradel bind).
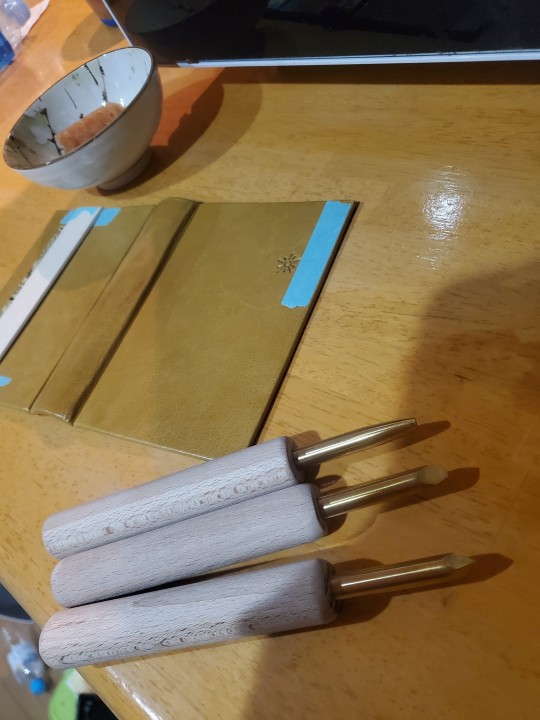
2. Foil Quill / Heat Pens
The heat pen is one of my go-to tools, but it can be a bit touchy about materials. The most popular version is the We R Memory Keepers' Foil Quill (which is one of the most ergonomic), but other pens exist that can get you to a higher heat temp, finer lines, or more consistent foil. For example, I have a pen created by a local Japanese bookbinding studio that fares way better on leathers than the WRMK quill & with a finer tip, but it's hell to control. Best results in general are on paper or smooth bookcloth (starched linen, arrestox, colibri - even duo will work but its less solid). The fuzzier a bookcloth is, the less your foil quill wants to deal with it. This means the heat n bond method of making bookcloth does not play nice with a heat pen usually, but there are two solutions: 1) use this tutorial on paste + acrylic medium coated bookcloth instead that will get you a perfect surface for the heat pen, or 2) use the pen on paper & then glue onto the cloth. I did a video tutorial for both foil quill use and this type of homemade bookcloth for @renegadeguild Binderary in 2023.
You get the most consistent results by tracing through a printed template that is taped in place, as I do in the video above.
3. Paint That Shit
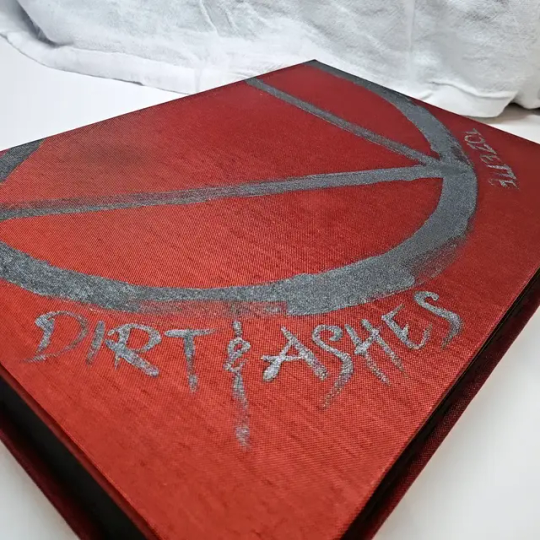
Acrylic paints will do you fine! The above is free-handed with a circle template, because I wanted that vibe. If you need straight lines that won't seep, lay them down with tape first & then paint over it first with a clear Acrylic medium, then your color. Same goes for stencils. Two more examples of painted bookcloth:
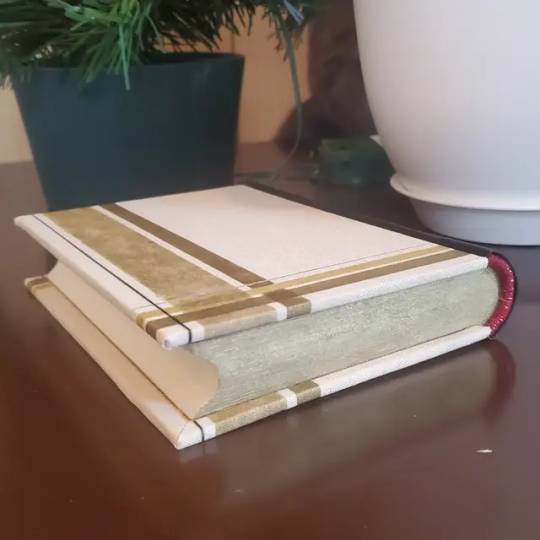
4. IT'S GOT LAYERS

By using layers of thinner boards, you can create interesting depths & contrasts on your cover. You can also make cutouts that peep through to the decorative paper behind. The most important part to this technique is the order in which each edge is wrapped. To get a good wrapped inside edge, you will split the turn in into tabs to get them to conform to a curve. You can also layer multiple colors of bookcloth without multiple layers of board, as seen below left, so long as you mind your cut edges for fraying.
5. Inlaid... anything
Mirrors! Marbled paper! I saw someone do a pretty metal bookmark once! The key is creating a little home for it to live in, which is pretty similar to the above layering method. On one layer you cut the shape, & glue that layer onto the bottom solid board before covering. You can do the top layer as an entire 1 mm board (like I did for the mirrors) or a sheet of cardstock, like I would use for inlaid paper.
6. Decorative Paper
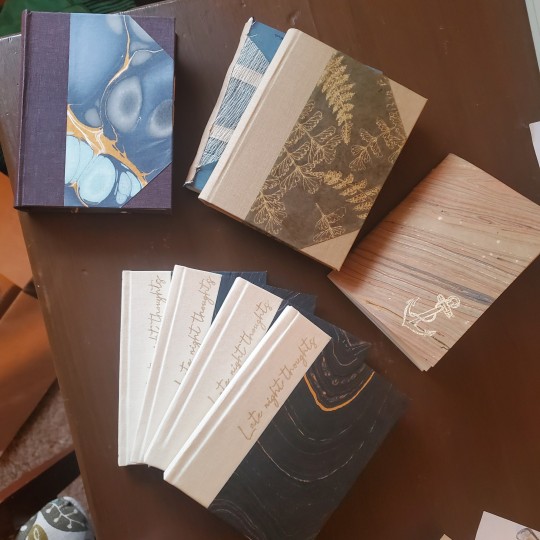
Decorative paper is always helpful & adds to the paper hoard... & its effects can be layers with other techniques, as below. Marbles, chiyogami, momi, or prints & maps of all kinds can be great additions. Some papers may need a protective coating (such as wax or a sealer).
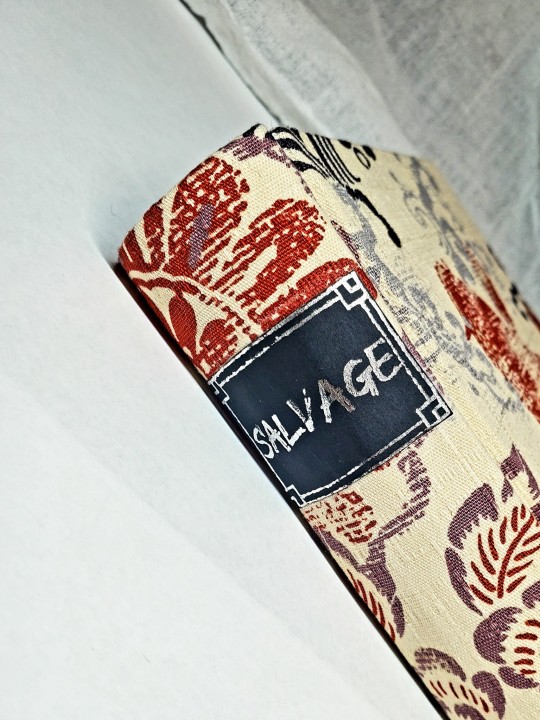
7. Stamps (with optional linocut)
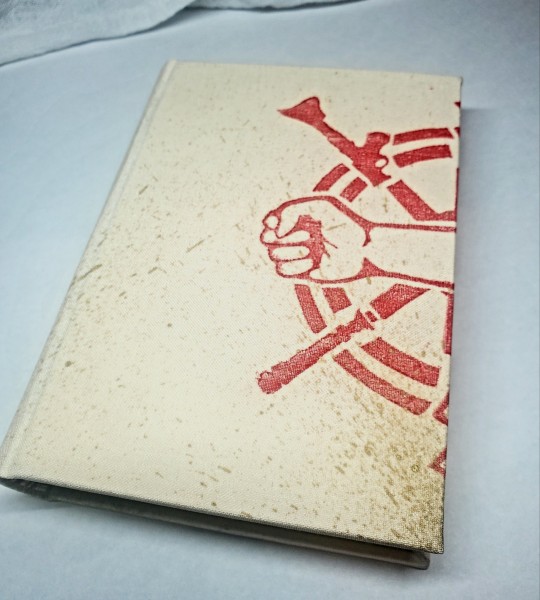
While I've not used many more regular rubber stamps, I do know some who have, successfully! And I've used one once or twice with embossing powder (see photo 3 up, the gold anchor on the little pamphlet bind). What also works is to carve your own linocut or stamp, & then use block printing ink to ink it onto your fabric (as i did above). A bit time intensive, but it was nice how easily reproducible it was, and I liked the effect I got for this particular bind.
These methods are not exhaustive, just ones I've used, and there are of course many others. I haven't gone too into detail on any of these for the sake of length (& post photo limits) but feel free to ask about more specifics. Usually I'm using them in combination with other options.
#fanbinding#bookbinding#celestial sphere press#ficbinding#in progress review#bookbinding how to#i am not particularly anti-cricut or anything#it's just a very expensive tool#and its prevalence sometimes makes new binders think they HAVE to get one#when they absolutely do not#you can make pretty books without it
1K notes
·
View notes
Text

I put him in my game
#I'm happy i was able to line up his eye line with his nose#i did obviously photoshop his head in post but like he looks kinda jacked up in game#i did my best with the tools at my disposal#my oc Ceres#suncore#angelcore#celestial demons
65 notes
·
View notes
Text

immortal jolt
#my art#digital art#msm#msm fanart#msm celestials#galvana#adult galvana#adult celestials#this took me ages#no symmetry tool aswell#finally a rendered drawing of it.#a whole month bro.#ibis says 13 hours but still#i just realised i posted this just in time for july#monsterpiece#ik my last post lioks weirdly similar. thats a coincidence
32 notes
·
View notes
Text
Babyvigg redraw but with lasso tool

OG below↓↓

#my singing monsters#msm#celestial msm#loodvigg#loodvigg msm#babuvigg#baby#baby loodvigg#lasso tool#lasso tool drawing#fanart#is this thing cute or something
23 notes
·
View notes
Text

Clear Quartz Moon Gold Starry Celestial Incense Holder 🌙
Featuring a wooden incense burner that is adorned with tiny brass stars and a Clear Quartz crescent moon
It measures 10.25 inches and the width is 1.5 inches
Buy it here
#rabbitpaws#incense#incense holder#incense burner#witchcraft#spiritual tools#moon witch#celestial witch#animal skull#mabon#samhain#autumn equinox#altar decor#witch altar#crescent moon#pagan#clear quartz#crystal moon#stars#spirit quartz#palmistry#crystals#witch aesthetic#witchcore#altar#faery#witchblr#paganism
50 notes
·
View notes
Text

I'm honestly so tempted to make CS Moon work in construction just to make this meme canon.
#it's so cute#i love it#moon's physical strength and endurance would serve him well in construction#(as would being multilingual but that's a bonus for a lot of jobs)#and he knows how to use some basic tools from watching pizzaplex employees#but i don't know if he would like it#or how much construction work there is in a small town like hurricane#hey chat i may need to do more research on construction in utah to see if it's a viable job for my former-robot guy#celestial shift au#human dca au#fnaf moon#fnaf dca#meme
16 notes
·
View notes
Text
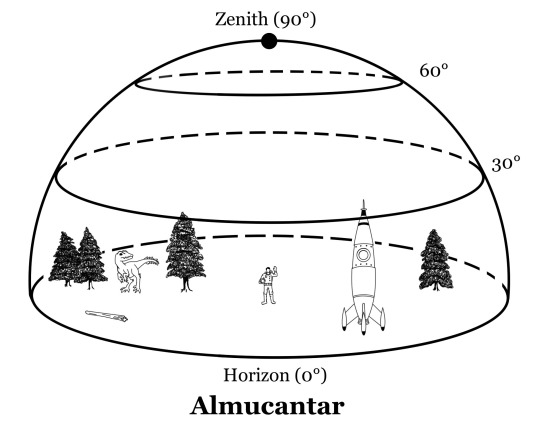
So, How to Build an Astrolabe: Part Three
Plate to represent the Horizon, Almucantar, and Twilight Arcs

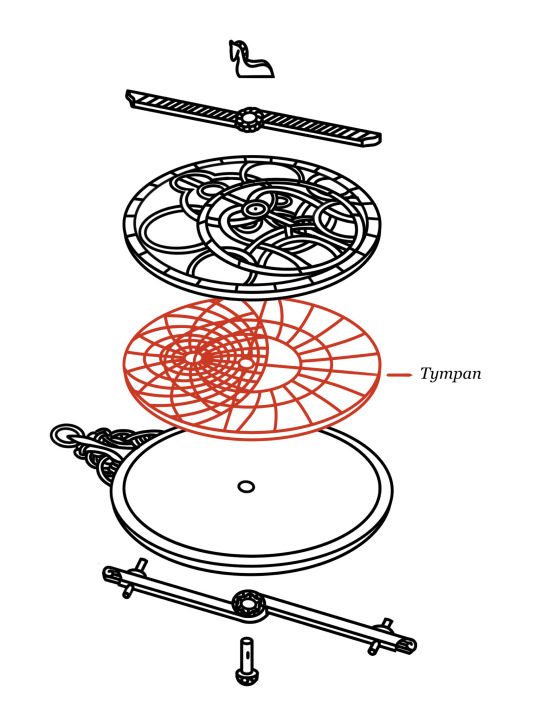
The plate currently shows three concentric circles for the Tropic of Cancer, Tropic of Capricorn, and the equator. This next part builds off the base plate and adds more arcs and circles
The middle plate--known as the Tympan--is perhaps the most complex piece of the entire astrolabe, so this is part three of constructing the plate and only part two of specifically constructing the tympan plate


The circles on the face of the plate represent “almucantar” and twilight arcs.
This is a step-by-step guide to the complete construction of an astrolabe that I think might exist. At least, in any accessible form.
My goal is for this to be as accessible as possible for any kind of reader, so if there are any question, free free to reach out
🚀 Enjoy! Stay safe and keep learning, fellow chrononauts 🚀
#how to build an astrolabe#astronomy tools#astrolabe#astrolabium#stellar navigation#celestial navigation#learn astronomy#history survival guide#historysurvivalguide#how to#diy#spherical trigonometry#history of science#guidebook page#science history#science art
25 notes
·
View notes
Note
um?? Hey crow what does this mean?????????????


13 notes
·
View notes
Text


Celestial All Might ✨️
Something for a Fantasy AU roleplay, showing Toshi in his prime and his current state where he's slowly fading like a dying star.
#bnha#mha#bnha toshinori yagi#bnha all might#bnha fantasy au#mha toshinori#toshinori yagi#fantasy#my art#fanart#digital art#paint tool sai#boku no hero academia#celestial
46 notes
·
View notes
Text

I created a world of my own. I wish I could visit it more often.
#celestial#dreamcore#surreal#alternate title: iron deficiency is kicking my ass#haven’t done something all artsy fartsy like this in a while so it’s pretty nice I think#mostly just me fucking around with the airbrush tool#my art
5 notes
·
View notes
Text
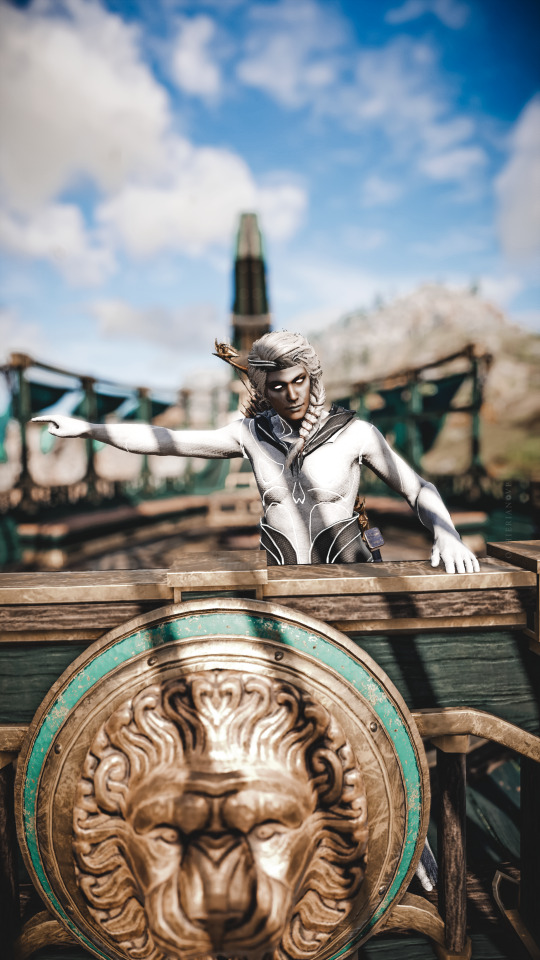
#acodyssey#assassin's creed#assassin's creed odyssey#kassandra#celestial suit set#ubisoft#photomode#virtual photography#gamingedit#gaming photography#get out!#pc gaming#pc share#in game photography#camera tools
10 notes
·
View notes
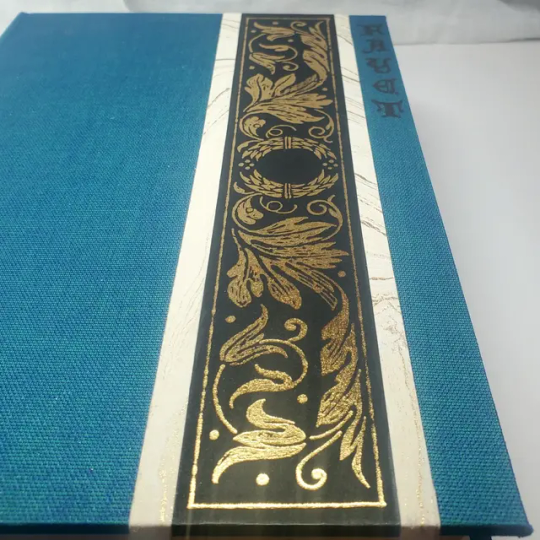
Text

tooling time from last night. got a few more things to do. definitely more confident in blind tooling than in using foil with the tools.
25 notes
·
View notes
Text
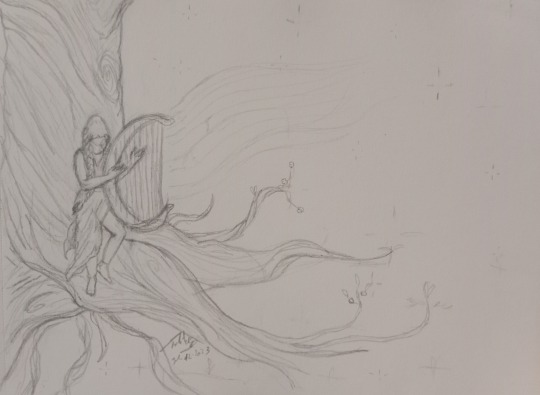
✨Happy New Year ✨
#arbre céleste non colorié#uncolored celestial tree#i don’t have the right tools...#happy new year anyway !#perlelasart
5 notes
·
View notes
Text
if you like this sort of thing i strongly recommend getting Space Engine off steam, loading up the solar system, and watching it all warble around at the same time. everything is very tenuously held together and is by no means permanent and if you're feeling adventurous, trying to make your *own* (relatively) stable system highlights this amazingly well
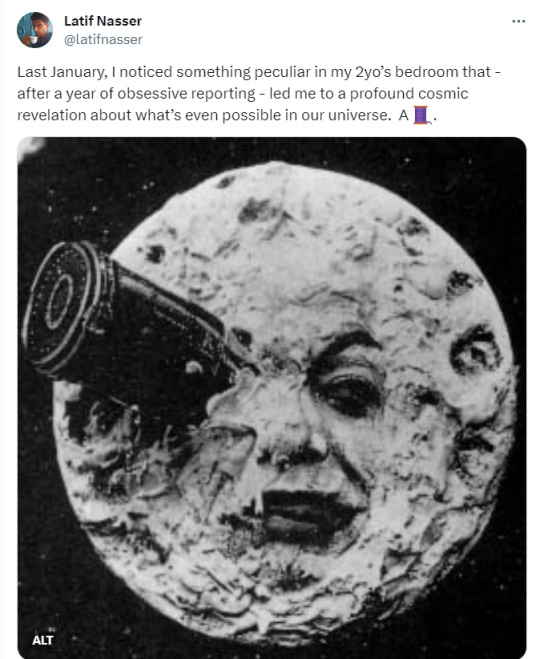
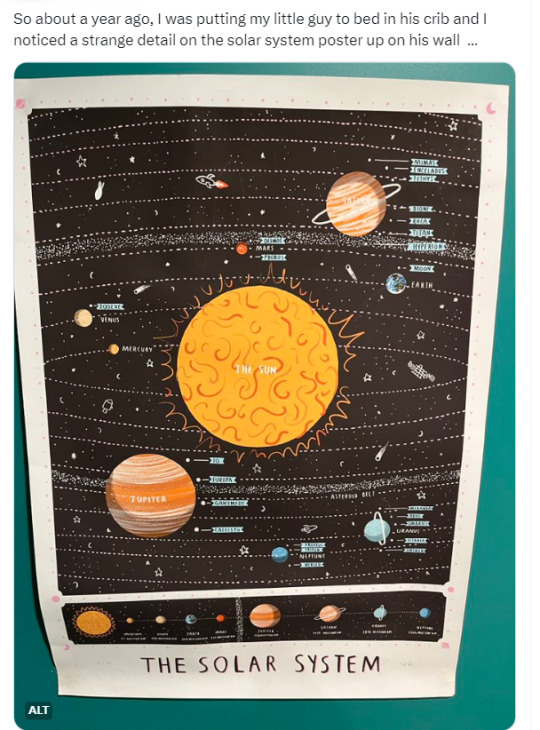
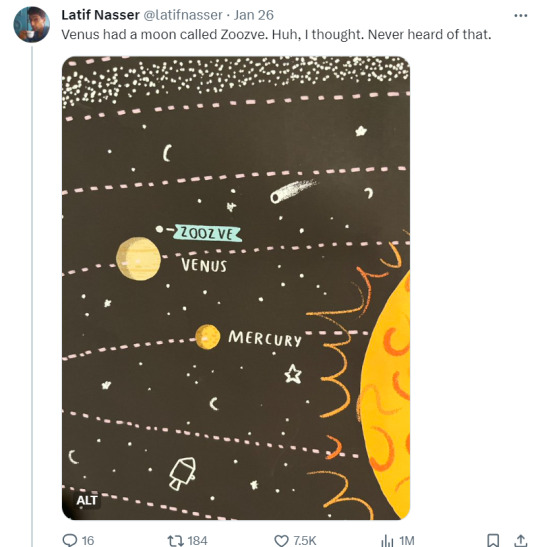


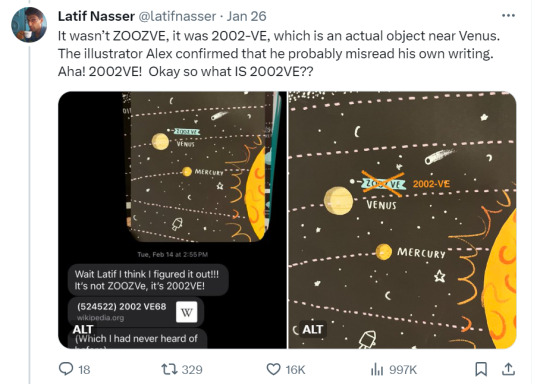

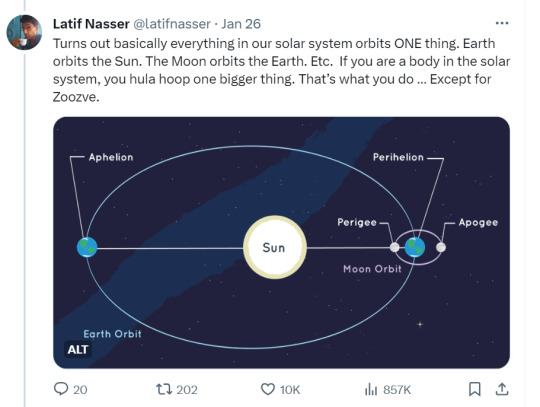


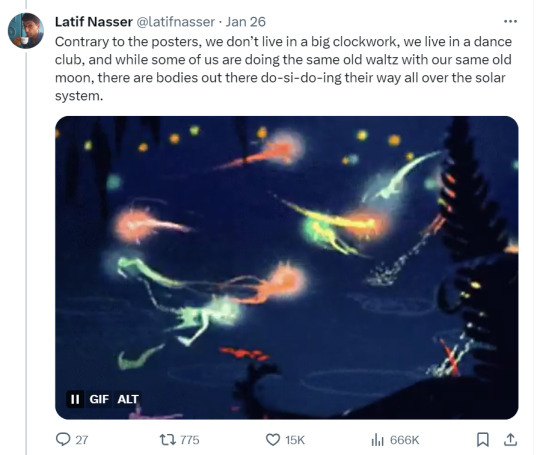

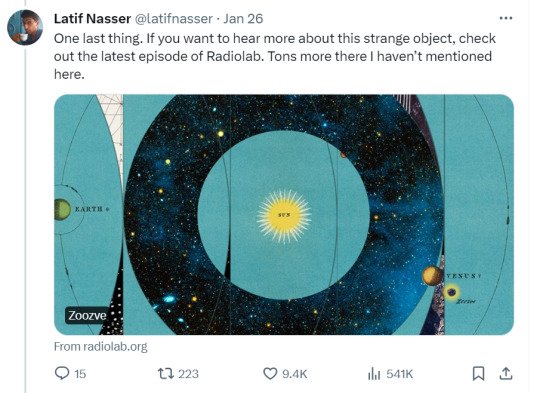
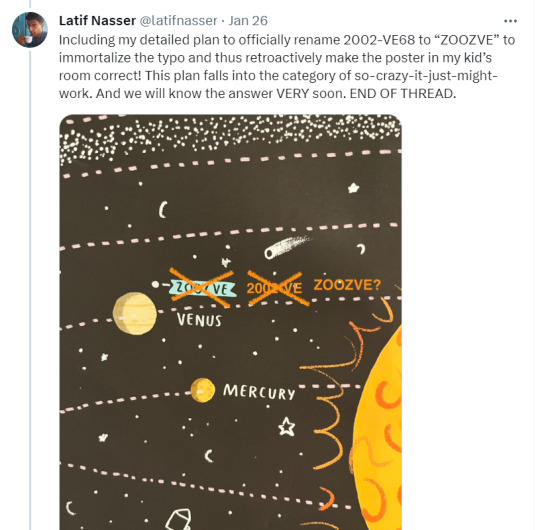
Zoozve, my beloved
#i didnt want to bury this in the tags bc space engine is a very helpful worldbuilding tool#but it also opens your eyes to just how wild celestial systems are and that alone is worth it#much much much different from the very “clean” idea of everything going around in nearly a perfect circle on a perfectly flat plabe#which just doesnt happen
165K notes
·
View notes
Text
Celestial Flooring Tools Depot
When it comes to exceptional flooring solutions, flooring contractors are your go-to partners. Whether it’s about laying elegant tile to refinishing worn surfaces, their craftsmanship delivers stunning results. With a trusted contractor, your property gains the perfect foundation for any design. Specialists in flooring focus on offering customized solutions that fit any flooring requirement. Whether you’re seeking luxurious hardwood, they provide top-tier materials to match your style perfectly. With years of expertise, you can trust in results that last knowing every detail meets the highest standards. Affordable Flooring Options Perth Expert flooring specialists resolve a variety of challenges involving flooring. From cracked tiles to poor-quality materials, these experts deliver smooth, flawless finishes that transform the comfort of any room. Whether you need damage repairs, their knowledge delivers solutions that improve quality of life. A second issue flooring contractors resolve is lack of durability. With their help, they ensure a longer lifespan while improving the structure of your flooring. Through top-tier materials and skillful installation, they solve the common household flooring issues with ease. Skilled flooring specialists deliver customized solutions to address a variety of home improvement needs. From floor installations to renovations, their expertise ensures long-lasting quality that enhances your living space. Whether it’s about luxury vinyl, these specialists provide functional solutions built for durability. More than just basic repairs, flooring contractors also offer upgrades that maximize floor durability. By implementing the right solutions, they maintain the pristine condition of your floors. Whether you’re seeking sealant applications, they deliver customized services to preserve the elegance for years to come. Invigorating Flooring Store Near Me In need of revamping your home’s interior? Contact experienced flooring specialists today! With quality installations, they deliver tailored designs to fit your budget. Whether it’s about luxury vinyl, they’ll collaborate with you to find the ideal fit for your space. Don’t wait—revitalize your space today! Why wait for skilled contractors who specialize in precision flooring work. Contact your local contractor to get the project underway. Upgrades and refinishing, they’ll guarantee a smooth, beautiful result that completes your office. Reach out now toward a polished space! Celestial Flooring Tools Depot
0 notes
Text
So, How to Build an Astrolabe: Part Two
Plate to represent the Tropics and the Equator


The construction continues into part two!
The middle plate--known as the Tympan--is perhaps the most complex piece of the entire astrolabe, so I am going to be breaking it into a few parts to make it more readable
The first part starts with just three concentric circles for the Tropic of Cancer, Tropic of Capricorn, and the Equator.
No math needed!
This is a step-by-step guide to the complete construction of an astrolabe that I think might exist. At least, in any accessible form.
My goal is for this to be as accessible as possible for any kind of reader, so if there are any question, free free to reach out
🚀 Enjoy! Stay safe and keep learning, fellow chrononauts 🚀
#how to build an astrolabe#astrolabium#astronomy tools#astronomy#learn astronomy#stellar navigation#celestial navigation#history survival guide#historysurvivalguide#how to#diy#spherical trigonometry#history of science#astrolabe#guidebook page#science history
50 notes
·
View notes