#But the file size on this is huge so open it up and zoom in
Explore tagged Tumblr posts
Photo
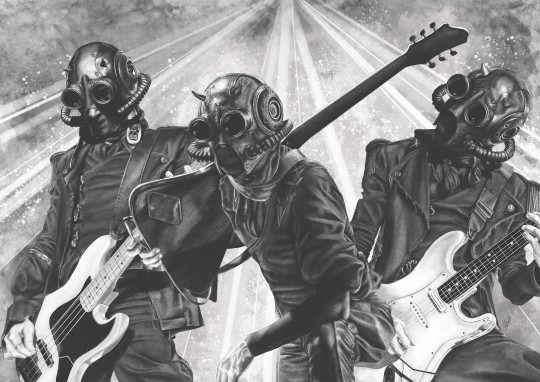
Nameless Ghouls // Rain, Phantom and Dewdrop
It’s finally finished!! Nearly 40 hours later and it’s done! Make sure to zoom in as the canvas size for this is huge
{More Artwork | Socials and Prints}
#I'M SOBBING! It's finally done!!#Total drawing time was 39 hours and 52 minutes D:#But the file size on this is huge so open it up and zoom in#I spent so much time on the details on this#rain ghoul#phantom ghoul#dewdrop ghoul#nameless ghouls#sodo ghoul#ghost#the band ghost#ghost art#ghost fanart#my artwork#artists on tumblr#digital art
1K notes
·
View notes
Text
Oh hi. I heard it's gifs tips'n'tricks time.
View this as a little addition to this post I made a while back.
This time I thought I'd take you through my gif making process. It'll be very specific to Photoshop CS6 but maybe some of you will find parts of it helpful regardless.
And since our biggest nemesis appears to be ~The Tumblr 10MB File Size Limit~ I decided to go for the absolute worst premise for a gif: Lots of stupid wobbly particles and gw2 bloom and transparency effects. Because huge gifs love these.
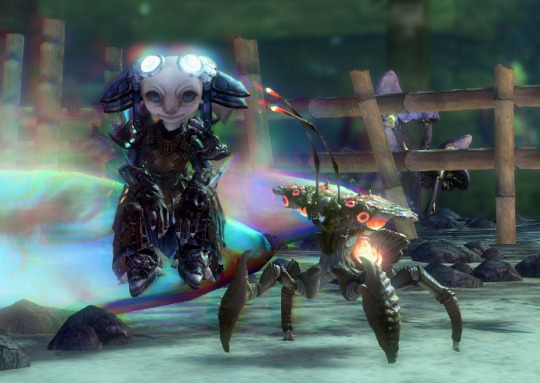
Aah, a horrifying amount of those in this single scene. Perfect!
Let's start with a little timelapse video, and I'll get into the details with screenshots below then.
So this actually went smoother than expected? Not super much fiddling needed in the end, but here's how it went in detail:
Load the raw footage into photoshop.
You can do this in two different ways: What I do is simply drag & drop the video file into the program and it'll open with a video timeline and some rudimentary video editing options.
What you can also do is File -> Import -> Videoframes to Layers and select your source video, which will give you a timeline of separate still image frames instead.
It comes down to preference, I used both methods in the past but nowadays I find the video timeline more intuitive.
Cut the footage to roughly the right length.

From experience I know that most of my gifs are around 3-4 seconds long. This can of course vary depending on different factors. Don't get too attached to the exact seconds you selected, you might have to shave off a bit depending on how evil the file size decides to act.
Optional: Change footage speed

Depending on the gif and its purpose, I slow the footage down. I usually do this for the visual effect (especially nice for showing off animation details) but it also has the practical side effect that it can help with file size. Say you want a gif that loops after 4 seconds. At 100% speed your gif will move at your original framerate (in my case 60 fps); if you slow it down but keep the same length in seconds it'll logically use less frames. That's less data to blow up the size! Yey.
Crop the image.
Now this is probably one of the most crucial parts when it comes to your final file size, and your gif looking nice on tumblr. Since the tumblr dashboard displays images at a width of 540px, you want this to be your absolute minimum image width to ensure a crisp image. If I can, I'll make the gifs larger (I like starting at a minimum of 600px and then reduce the image dimensions if needed).
With that in mind.... choose your image crop wisely.
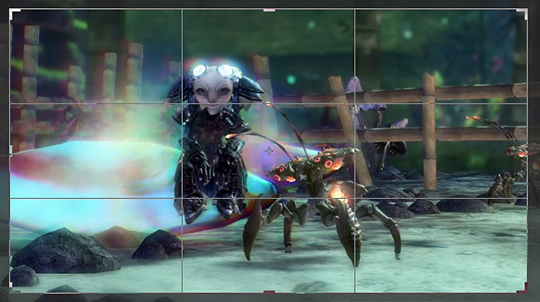
A "widescreen" image like this will be the most merciful in terms of file size, but might not always be what you want in terms of composition.

Given tumblr's very vertical nature, this kind of approach will look great in posts (if it fits your image composition of course), but at 540px minimum width tends to be a file size monster.
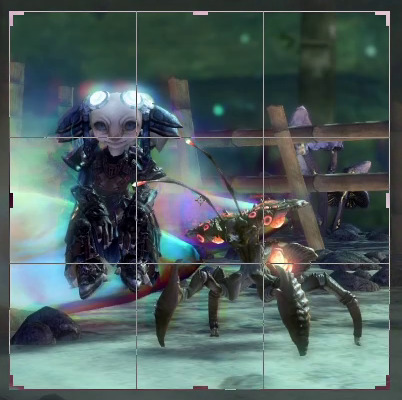
For the gif I'm attempting to make here I opted for a more square approach. The subjects of the scene fill out the image's space nicely, and it's still a nice size for tumblr posts overall. Let's see what the file size will say about this.
Replay your footage after cropping to make sure you didn't accidentally cut off any motion you didn't mean to cut.
Next up: optional colour corrections
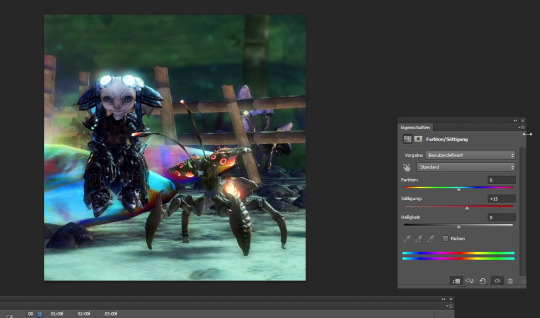
I tend to crank up the saturation for gifs way, way more than I ever would for regular screenshots since I find that often the limited web palette can make them look fairly dull. But like everything else so far, this greatly varies depending on the scene you're showing.
Note that colour correction can increase or decrease file size depending on what exactly you're doing. The more different colours you have, the larger your file size will be.
Reduce image dimensions

Since my original video footage was fairly zoomed out, the cropped area only left me 575px of width to begin with. In an earlier attempt (that I absolutely did not fail to capture and therefore had to record the whole thing a second time) I tried to leave it at these dimensions, but the 10MB size limit did not like that so now I knew better and immediately reduced the width to 560px.
Note: After you've changed the video's dimensions it won't let you edit the speed anymore (for some reason), so make sure you've got that settled.
After all the adjustments are done it's time for the moment of truth...
File > Save for Web...
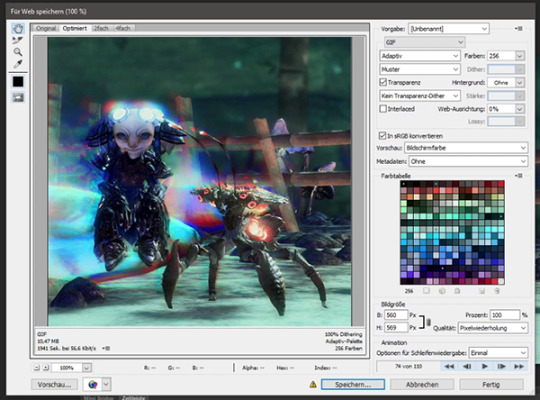
This beautiful window will open and...

Aww almost.
But honestly? That's not bad at all. I've had completely different disasters to deal with in the past (starting somewhere in the mid 20MB, good luck trying to make use of every size-reducing trick you've got up your sleeve).
Before I do any adjustments to shave off the last few KB though, I preview the gif to make sure it loops correctly. I want the Chak to sway seemlessly. Turns out it didn't, so I back out of the window to remove a few frames from the footage. And when I open the "Save for Web" window again....

Well that's anticlimatic. Apparently those few frames were enough to get the file size where I need it. (Note: Sometimes Tumblr likes to be a little b* and pretends your file is too big when you're this close to the 10MB limit. It be like that.)
While my gif journey theoretically ends here, I want to at least show you a few more things that could have helped if I had needed to get the file even smaller.
So this dithering thing I keep making a big deal of...
It can make or break a gif. In my experience this is so, so crucial to the final file size and quality of the gif.
In my own very amateurish words, dithering is a way to emulate colours that aren't actually part of the images colour palette. This is especially needed for in-game transparency effects like fog, glowy stuff, or smooth gradients. And that is part of why I chose this hell scene of all the ley line glow and the typical gw2 bloom that's particularly bad in this area.
PS CS6 offers you three different kinds of dithering techniques: Diffusion, pattern and noise.
My go-to is diffusion dithering, which has adjustable quality levels.


In my opinion it's generally the type of dithering that's often the least noticeable and creates the smoothest looking images. Unfortunately, it's also the one that creates by far the largest file sizes. Another downside is that it doesn't work super well with heavy DoF/fog etc. effects and is prone to really ugly banding, especially visible the more you decrease the quality. It looks awful for this particular scene. (Look at the glow around my asura's headpiece if you don't know what I'm talking about. Or... just the entire background.)
Both noise and pattern dithering will get you smaller file sizes, luckily.
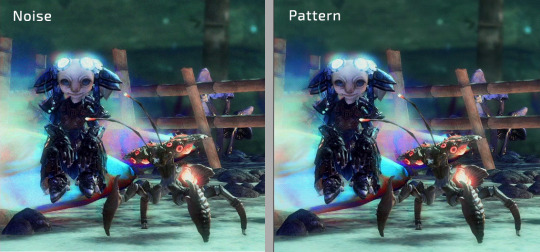
I've never used noise so far (it tends to look messy in my opinion), but pattern gets the job done! Especially for gradient heavy gifs it's a lifesaver. It's definitely more noticeable than the diffusion dithering on static parts of the gif, but it absolutely makes up for it by not having any ugly banding effects. This is also what gave me the neat little 9.99MB file size in comparison to the diffusion dithering's 15.31MB.
Last but not least, if fiddling with the dithering or image dimensions doesn't help you get below that magic 10MB mark...
Limit the colour palette
You can either manually colour edit your image to use less colours for a more artistic approach, or you can let Photoshop limit the palette to its best abilities.
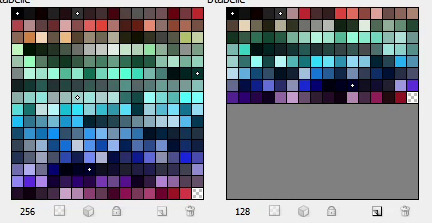
Additionally you can double click each individual colour to replace it how you see fit. (I've done that in the past when Petthri's yellow eye colour got erased and I had to bring it back manually.)
In this gif's example, reducing the palette from 256 to 128 colours has brought the file size down from 9.9 MB to about 8 MB. It can have a big effect, but doesn't always in my experience.
SHOW US THE GODDAMN GIF ALREADY!!!
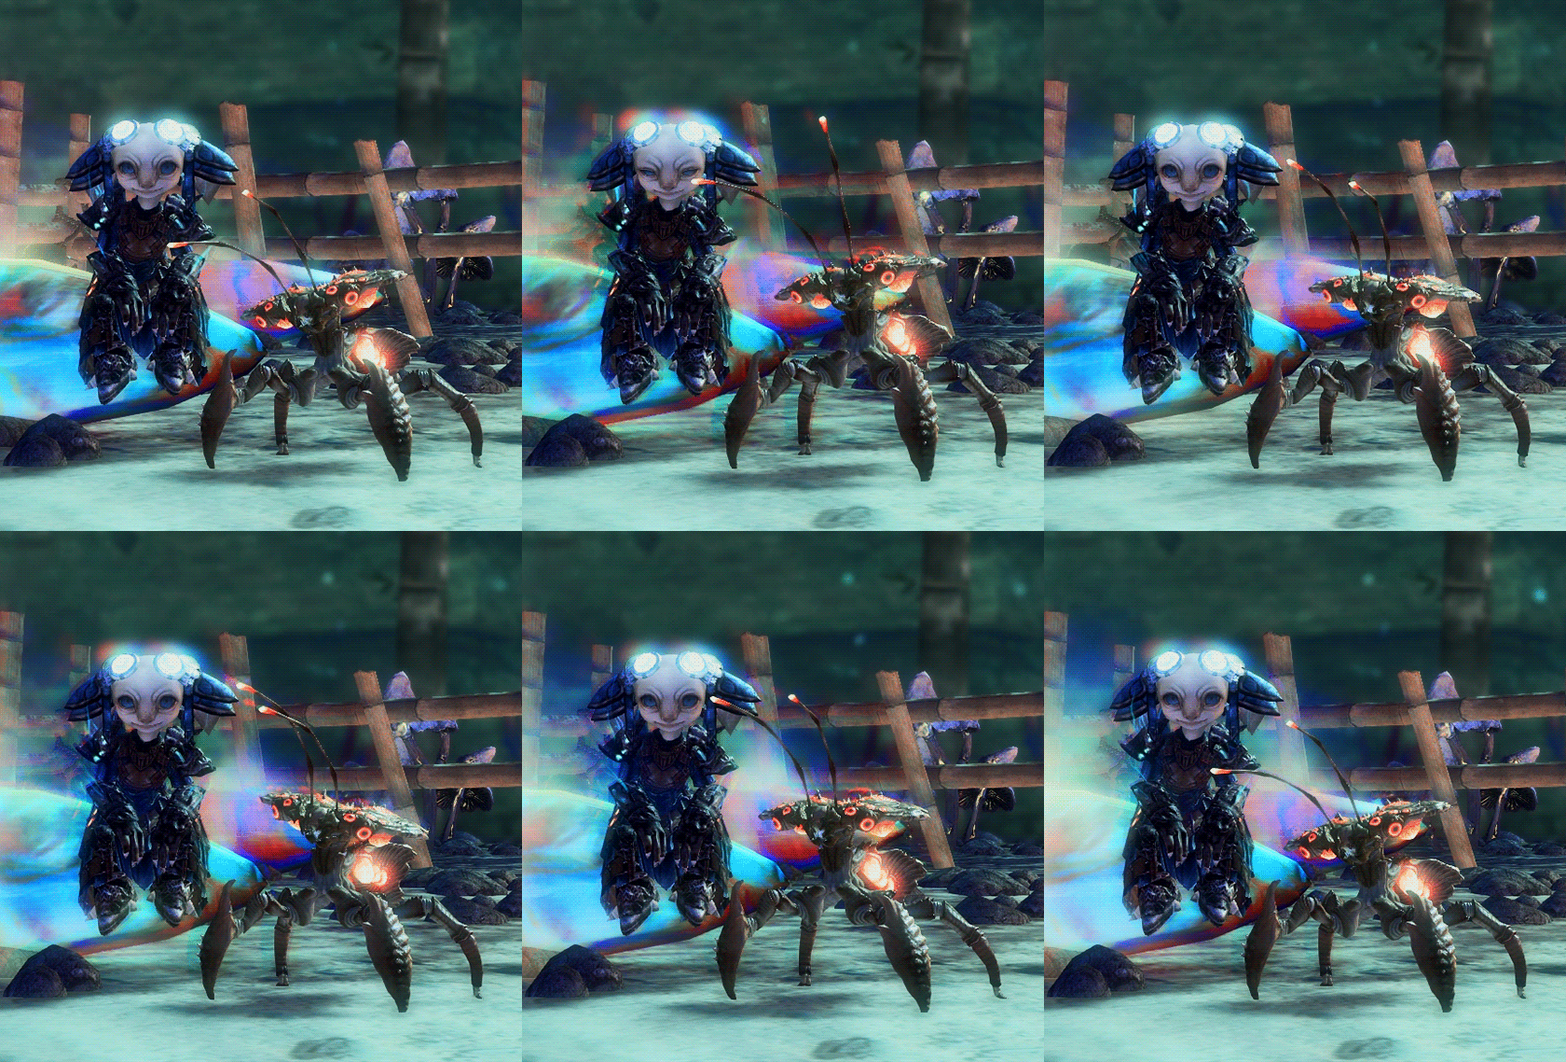
Not the best quality gif we've ever seen on tumblr, but given the extremely unfavourable source material I think it turned out alright. I have to admit I'm actually surprised it worked at all.
Oh well! This got long (once again). I hope this was at least a little bit helpful to someone out there. Happy gif making!
70 notes
·
View notes
Note
Would you mind teaching me how to create gifs? ♥️ Like what program do you use, how to adjust their sharpness or things like that because your gifts are both beautiful and high-quality! I am still an amateur when it comes to editing. 😭
Hellloooo, sweet anon! Of course I can give a mini tutorial on that for you! :3 PHEW, honestly I haven't made GIFs in a fucking hot minute (since early May!). I put that on the back burner to focus on crunching away that writer's block. 🥲🙄 BUT... Making GIFs is like second nature to me because I've been at it for 2 years now, so allow me to tell you all I know! ❤️
I use Adobe Photoshop 2023! My GIFs are started, edited, cooked and finished all up in there. I know there's plenty of cheaper/free alternatives, but I've literally only ever used Photoshop so I have zero experience with those alternatives. 🥲
Remember, a huge part of how smooth and high quality your GIFs are gonna be is 95% where your GIF source is coming from. Stay away from 720p quality files! You want your GIF screencaps to be pulled from the most HD, crisp source material. At least 1080p unless you absolutely can't get your hands on anything else.
Once you pop open Photoshop, you want to follow...
Click "File"
Click "Scripts"
Click "Load files into stack..."
Now select all of your GIF screencaps. I would recommend a maximum of 85 screencaps otherwise your GIF will be longer/beefier and Tumblr for some reason hates GIFs over 10mb.
Wait for it to load! If your computer is older/slower, this might be a pain in the ass and will be 2x a pain in the ass if you have a high screencap amount.
CROPPING YOUR GIF: Select W x H x Resolution on the top bar.

It's honestly best to crop out as close to the edges as possible for the sharpest gifs. A general rule of thumb I like to follow for cropping/GIF sizing is:
One gif: 540 px x 400 px.
2 gifs side by side: 268 px each.
3 gifs side by side: 177 px, 178 px, 177 px.
Hit enter twice to crop!
Once your GIF screencaps are loaded in, click on "Create Video Timeline" on the "Timeline" option. If you can’t see the Timeline > Window > Timeline.
Click on the stack of 3 small lines on the far right of your Timeline and click "Convert to Video Timeline".
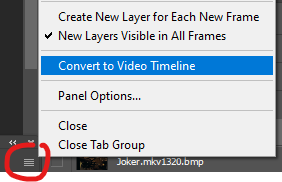
8. Click on those 3 lines again and click on "Make Frames From Layers".
9. Click on those 3 lines again and click "Select All Frames".
10. Click on the 3 lines again and click "Reverse Frames" otherwise your GIF will play backwards!!
11. Then you'll notice all your frames like this showing 0 seconds.

Now you get to decide how fast or slow you want your GIF to play, but we're not using whole numbers like 1 2 3 4. Those will make your GIFS incredibly choppy and slow. Instead, we use numbers like 0.01. I would recommend sticking to 0.05 or 0.06. The higher the number, the slower it is. 0.06 feels just right to me, but 0.05 is more like watching the clip live from the movie. I also use 0.07 and 0.08 when I try to GIF a screencap that's very short so unfortunately you have to slow it down otherwise your GIF zoom replays and if you're making a GIF set it'll look horrible next to the other ones going at normal speed LMAO. 0.08 is a good, sensual slow motion type of GIF. Definitely play around with the speeds until you feel comfortable with how your GIF plays out. Not all GIFs are made with equal speed!
For my example, I'm choosing 0.06.
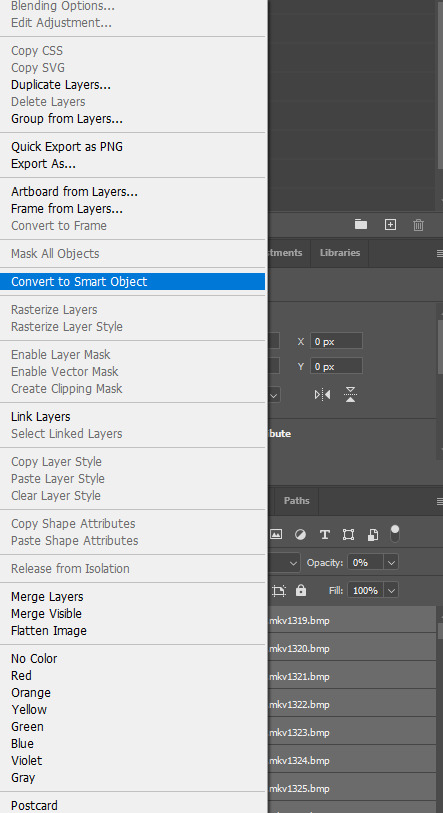
12. Next, go to the far right where your screencaps are all layered and select every single one of them from top to bottom. Then, right click on any random layer until this menu pops up. Click "Convert to Smart Object".
13. On your Timeline, you'll get your smushed chunky little GIF looking like this.

Now with my extensive experience in navigating Tumblr's hellish rules for GIF size and keeping my GIFS clean, smooth and not too long or not too short, I can easily eyeball this every time but I can see why a beginner with Photoshop GIFs might struggle. You see how big that purple block, AKA your GIF, is? It basically needs to be half of that. The bigger that block, the longer/beefier the GIF.
Slowly drag your mouse over that purple block from start to finish to watch your GIF essentially manually play out in front of you. Then you can decide what parts to trim out using the scissors option.

You can then click anywhere on the Timeline to unselect those now 2 chunks of purple. Then you can select just the one piece you want to delete and either hit the backspace key on your keyboard (Like I do) or right click it and click delete.
14. Next, make sure you drag that little blue arrow thing that lets you comb through the GIF all the way back to the beginning. We're going to edit the actual GIF now and we want to edit the whole thing from start to finish, not have effects randomly playing right before the GIF ends or in the middle of it.

15. Time to sharpen up that GIF as the first part of our editing and make it pretty!!

Click on lower left convert button to Convert from Frame Animation to Video Timeline.
Select > All Layers.
CTRL + click on any Layer > Select Convert to Smart Object.
16. Filter > Sharpen > Smart Sharpen.
A little menu will pop up and you can select/input these defaults I use for my crispy GIFs:
Preset: CUSTOM.
Amount: 500%.
Radius: 0.4 PX.
Remove: GAUSSIAN BLUR.
Once more...
Filter > Sharpen > Smart Sharpen again only this time for the second Smart Sharpening, make the attributes:
Amount: 10%.
Radius: 10 PX.
17. Colouring the GIFs!
If you don’t have Adjustments tab > Window > Adjustments.
Adjustments > Exposure.
Another little menu will pop up, and you can use my defaults:
Preset: CUSTOM.
Exposure: 0.99
Offset: 0.0000
Gamma Correction: 1.00
Adjustments > Brightness/Contrast.
Brightness: *anything you want* Drag your mouse around to play with how you want this to look, there are no set numbers however you might want to note down the amount of brightness you put or took away if you want all of your GIFs to match this one!
Contrast: *anything you want*
18. Colouring GIFs when skintones or scenes are too orange/red:
Adjustments > Selective Color.
Colors: REDS.
Cyan: +6.
Magenta, Yellow, Black: 0.
The reds result in the orange color to begin with, but remember each color has its own counterpart. To decrease red tones, increase the cyans!
Example: Making a blue dress more vibrantly blue à Adjustments > Selective Color.
19. Adding text.

Remember, text layers should be on top of the rest of your layers, even if you have several pieces of text on the GIF. It doesn't matter in which order you stack text layers on top, they just have to be up there.

Click Text Tool on the lefthand bar and then click wherever you want to add the text.
To change text settings on a panel > Window > Character.
18-20 pt font is suitable for 540 px gifs! It's to use Calibri font in italics for text talking or Myriad Pro. Those are GIF text classics.
Right click on Text Layer > Blending Options > Stroke > + Stroke.
Size: 1 px.
Position: OUTSIDE.
Blend Mode: NORMAL.
Then hit OK.
Right click on Text Layer > Blending Options > Drop Shadow > Drop Shadow +.
Once again, right click on Text Layer > Blending Options > Stroke > + Stroke.
Blend Mode: NORMAL.
Angle: 30 > Use Global Light.
Distance: 1 px.
Spread: 17%.
Size: 3 px.
Noise: 0.
Layer Knocks Out Drop Shadow > OK.
To center and move the text, just press Y on your keyboard to use the move tool.
20. Finishing up the GIF!
File > Export > Save for Web (Legacy). Check bottom left corner of save screen for GIF size.
Do not go over 10MB EXACTLY! Otherwise Tumblr won't let you post it. You'll have to go back and shorten your GIF as a result, even if that means just splitting the clip off at the very end or very beginning.
Happy GIF making!! :3 ❤️❤️❤️
7 notes
·
View notes
Link
0 notes
Text
GIF Tutorial for Beginners
People keep asking me to teach them how to make gifs and I end up writing them long confusing messages, so I figured maybe it’s time to just write up an actual clean tutorial instead! This is supposed to be for total beginners! (Or people who want to switch to a new process that I’ve curated and streamlined over 8 years of making gifs.) I’ll try to keep this as barebones as possible, and won’t include all the advanced stuff I usually add. I hope it’s easy enough to follow, and I’ll include some links at the end for more stuff. I really do think it’s better to make a few simple gifs before doing more complicated stuff though, just to get used to it!
There will be three sections in this tutorial: #1 Basics - How to make a gif in PS at all #2 Sharpen - How to use sharpen/denoise filters in an easy way #3 Colouring - Just a few very basic adjustment layers
What you need:
A video (most common formats should work, although .mkv doesn’t always)
Photoshop (I use PS CC 2018 - this one because I'm morally opposed to Adobe’s subscription model - but versions aren’t super different from each other)
In the end, you should hopefully be able to make something like this:
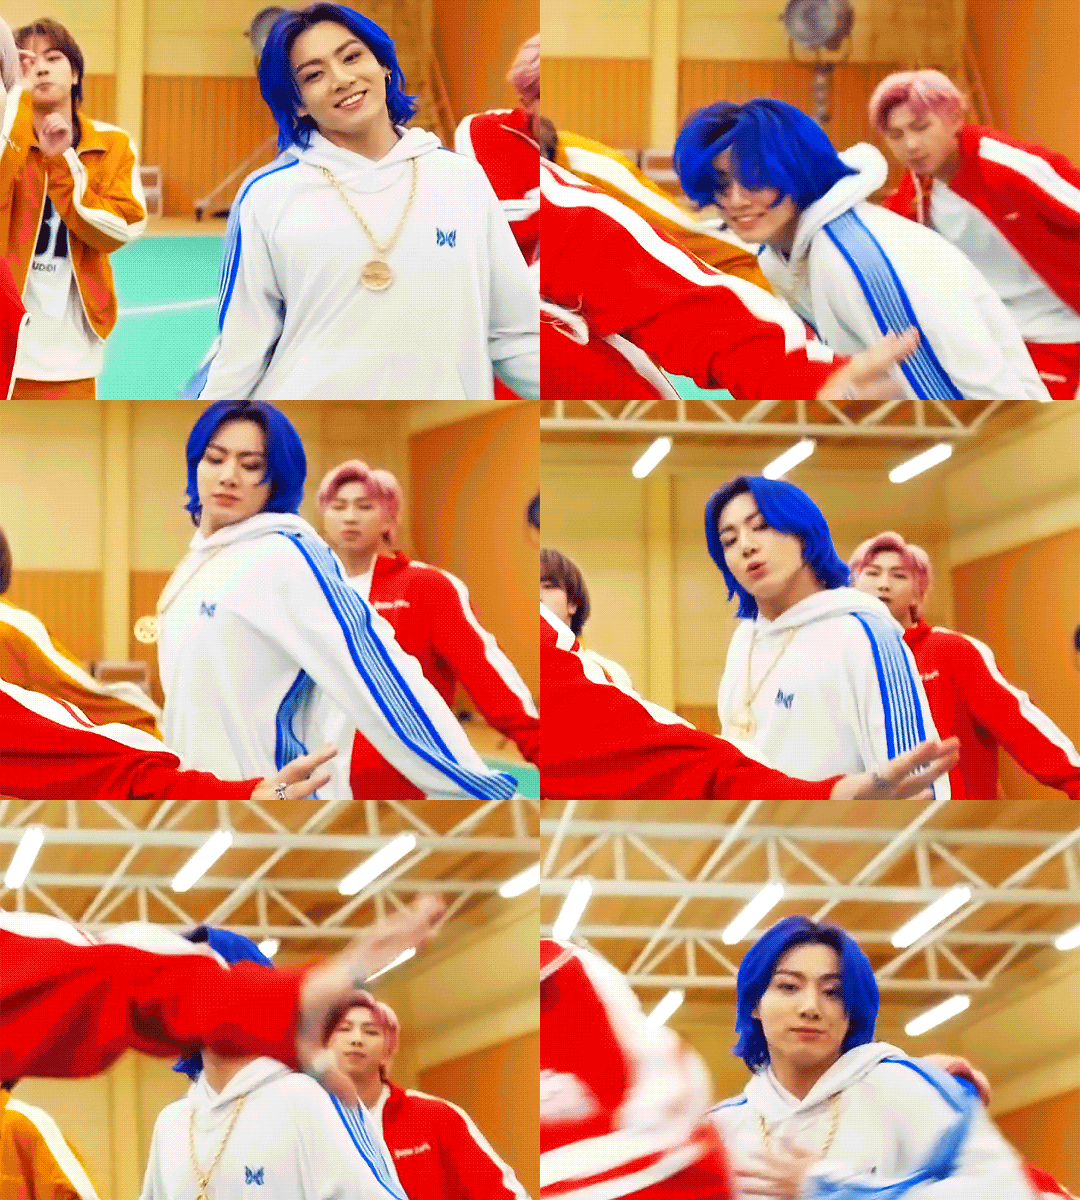
This is gonna be so long. Sorry. You can make a gif with just part #1! The rest is just to make it look better.
#1 Basics
If any of the tools/functions aren’t where they should be for you, your best bet is googling it, you might need to change something in your preferences!
Make sure to save your PS file... often. PS has a tendency to crash, especially on laptops.
First, you need to get the video file. I recommend a shorter video, a few minutes long, if it’s longer you might want to cut it into shorter parts beforehand. This is just because PS’s video import tool sucks.
I chose the Butter MV, specifically Jungkook’s body roll at 1:24 because that’s what I want to look at for the duration of this tutorial. No further questions, thanks.
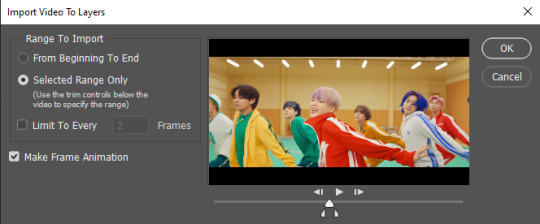
1. Open PS, go to File > Import > Video Frames to Layers

2. In the little pop-up, choose the part of the video that you want to gif. This will import every frame of the video into PS as a layer, so it has to be a relatively short part, or it’ll take ages (and gifs can’t be that big anyway). Now you can also see why it’s almost impossible to select the correct part if the video is too long.
The little controls at the bottom are for trimming, the one in the middle just for the preview. Make sure “Make Frame Animation” is selected! Then click OK.
3. Now you have your layers, and you have a frame animation! On the right are your layers, that’s where we’ll apply the colouring etc. later on. On the bottom, that’s your timeline or frame animation - that’s what the gif will be in the end! So if you delete frames, the layers will still be there, but they won’t show up in the gif. If you click on a frame, you can see the little eye checkmark on the layer that’s currently visible.
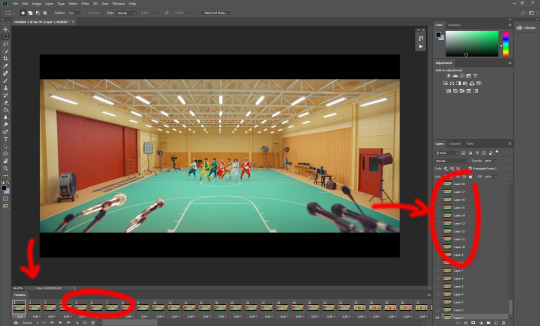
4. The timeline controls at the bottom that are relevant right now: set to “forever” so the gif will loop, you can play the animation with the play button, and you can delete the selected frame(s). The number on each frame is the speed of the gif, depending on the video I usually set it to 0.05 or 0.06 (photoshop lies to you when you play the animation, the only way to test this is to open the finished gif, preferably on tumblr or wherever you want to upload it).

5. As you can see, the animation starts a bit before the actual part that I want, so go ahead and delete all the frames in the animation that you don’t want! You can delete the corresponding layers too if you want, to make the PS file smaller, but it has no influence on the gif. (Hold Shift to select multiple frames as usual)
6. Next, we’re gonna crop the gif however we want! You can do this with the crop tool in the left sidebar, but with gifs like this where there’s a lot of moving parts, I sometimes just use the selection tool in the left sidebar, like so:
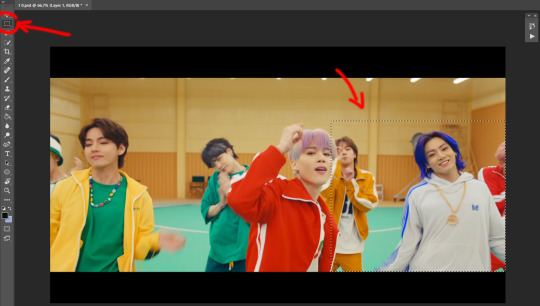
When you click on different frames, the selection stays, and you can check to make sure Jungkook doesn’t suddenly go out of frame if you crop it like that!
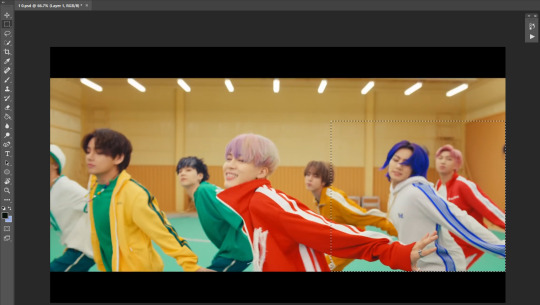
At this point, make sure the selection/crop isn’t smaller than you want the gif to be! For tumblr, what matters is the width (in pixels) of gifs. In the end, the width dimensions on tumblr should be 540px (1 gif per row), 268px (2 gifs per row), or 177/178px (3 gifs per row). Anything else will lead to very shitty resizing!
For this gif I’m going full sized, meaning 540px wide, so I made sure my selection isn’t smaller than that.
Then just go to Image > Crop, and it’s done!
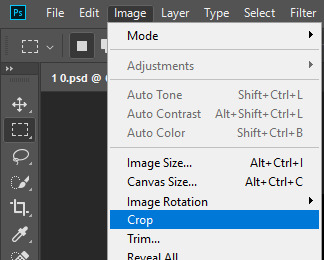
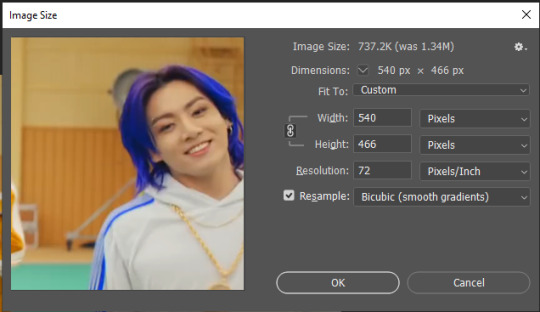
7. Check to see if this is what you want, then resize: go to Image > Image Size to resize the picture. Make sure the little “link” between Width and Height is active (to keep the same aspect ratio), then set the width to 540px or whatever you chose. I always set the resample option to Bicubic.
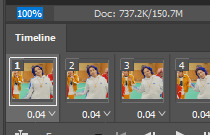
Once that’s done, set the zoom to 100% right above the timeline, to see what it really looks like.
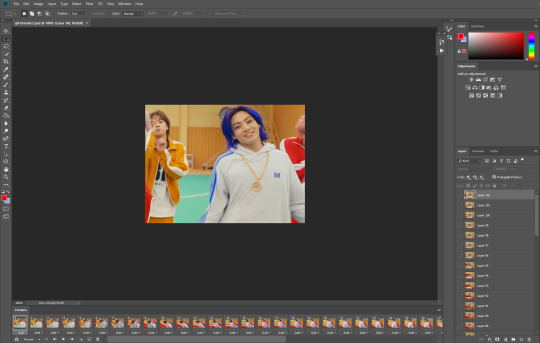
Almost done! A little note about the sizing: width is the important part for tumblr, but if you want to make a whole gif set (especially with more than 1 gif per row!!!) make sure to make all the gifs the same height, otherwise they won’t line up and tumblr will do whatever it wants.
I ended up making mine 540 x 400 and ended up with this:
8. Time to save the gif!! Go to File > Export > Save for Web (OR just use the shortcut Ctrl + Shift + Alt + S) (or whatever it is on Mac).
In the pop-up, you can change things about the gif, but most things should already be the way you want it (Image size, Looping option forever). Selective should be the default, just like the rest.
You can choose between Pattern and Diffusion, some gif makers swear on one or the other, I go back and forth.
On the bottom left, you can see the size of your gif. Keep an eye on that! I believe Tumblr allows every single gif to be up to 10mb, but I try to keep mine under 5mb or close to it, because I think tumblr adds compression if it gets closer to 10mb?? Anyway back in my day you couldn’t upload anything over 1mb. You’ll never know our struggles.
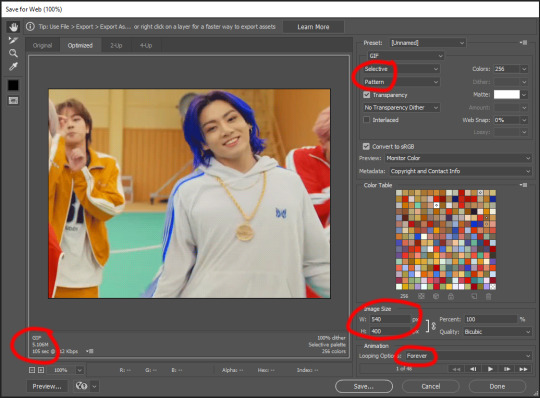
Then just save it, and that’s it, you made a gif! Well done!! Here’s the end result:
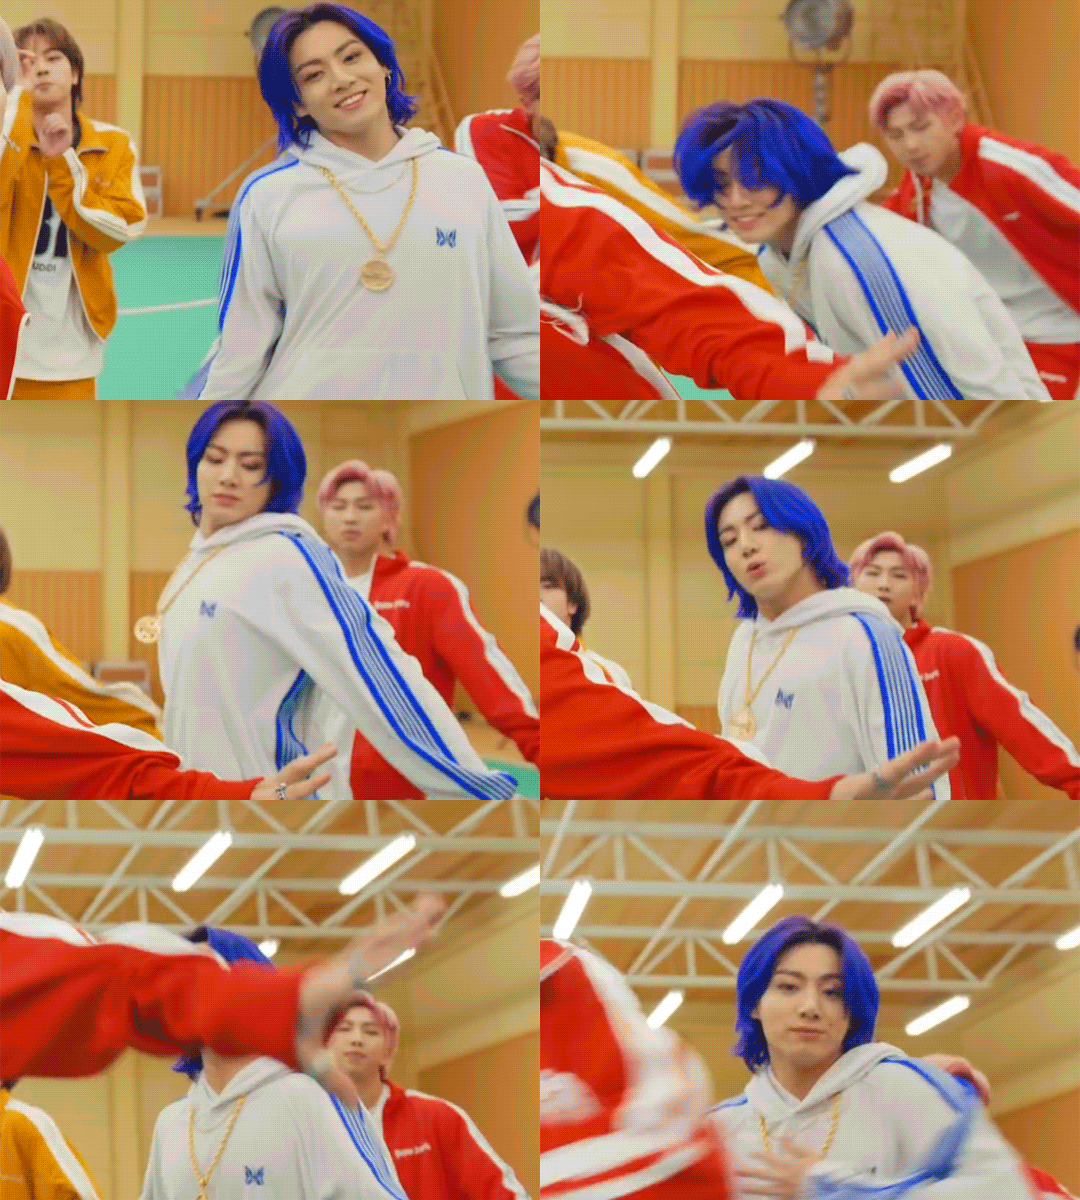
:)
#2 Sharpen
There are countless ways out there to make gifs as smooth and clean as possible! Here I’ll show you the easiest way, but it also provides a good basis for other methods. The main difficulty is that you you need to sharpen the layers, but you don’t want to 100 layers one by one. So what we’re gonna do is convert the layers into a Smart Object, which functions as one layer!
1. Convert the frame animation timeline to a video timeline with the little button right underneath on the left:
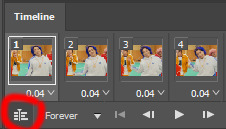
It should look like this, and I’m sorry but I can’t explain this one because I’m not an expert here, but you can just ignore it:

2. Select all layers: Select > All Layers, or just manually.
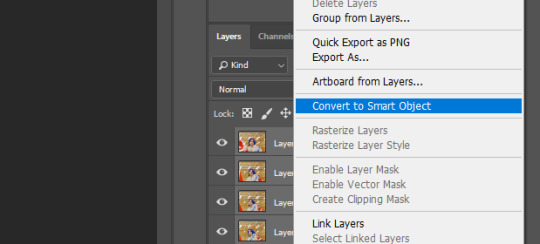
Then right click on the layers > Convert to Smart Object. Now there’s only one layer left, but don’t worry, the frames are still there!
3. De-noise! It reduces noise, takes away some of that grain. More necessary in some videos. It also makes it less sharp, so I do this one first. Filter > Noise > Reduce Noise

My default settings are, Strength: 6, Preserve Details: 60, Reduce Color Noise: 45, Sharpen Details: 25, Remove JPEG Artifact: No. But you can play around, especially with the strength, and see how the little preview looks. Don’t apply too much of it! Or it will look weirdly smooth with no details in the end.
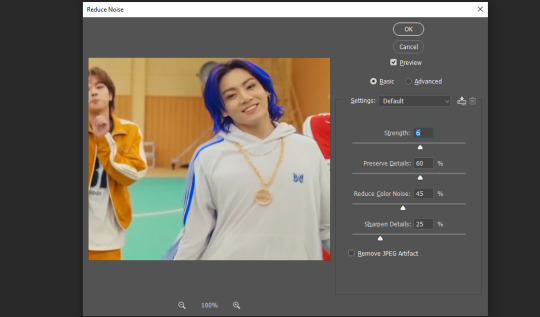
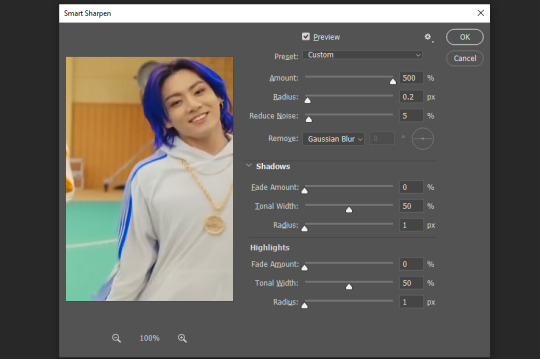
4. File > Sharpen > Smart Sharpen.
Settings: I usually have mine at Amount: 500, Reduce Noise: 5, and Radius at either 0.2 or 0.3, depending on the video. I’ll actually do 0.3 here, because I find it a bit blurry otherwise. If you sharpen more, it can quickly get grainy.
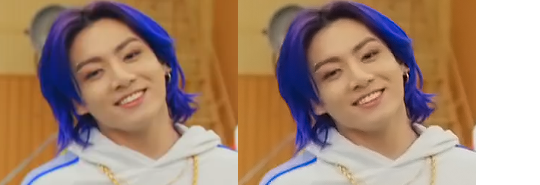
The difference isn’t huge, but here’s a little before and after denoise & sharpen:
5. Technically you can just save it as a gif (save for web) as shown above now, or you can convert it back to a frame animation, which I’d recommend especially if you use certain other sharpening methods (I’ll show you how to convert it back at the end of the colouring part), but for now, let’s go straight to the next part:
#3 Colouring
Now, you CAN do this part right after part #1, still in frame animation, without a smart object. I prefer it like this because sometimes PS acts weird, but if you want to skip the smart object stuff: select all frames, and add the adjustment layers at the very top, above all the other layers. (It only affects selected frames; and it only affects the layers under it.)
The adjustment layers should be above the layer tray, and these are the ones we’ll use today: Brightness/Contrast, Curves, Vibrance, Color Balance, Selective Color.
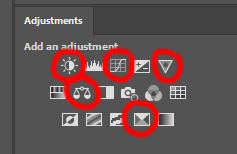
All of these are optional! You can do one, or all, or any combination. This is just the very most basic for me to get a gif to a point that I like. I’d recommend sticking to these for a start, but once you get the hang of it, definitely feel free to play around! It’s fun! Every gif maker has different preferences here, too, so there’s tutorials for everything.
1. Curves: Just click Auto, tbh. You can play around, but Auto works fine for me as a start, just to brighten or darken some parts as a base.
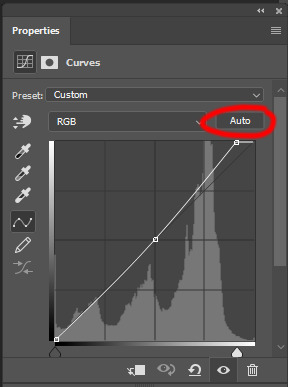
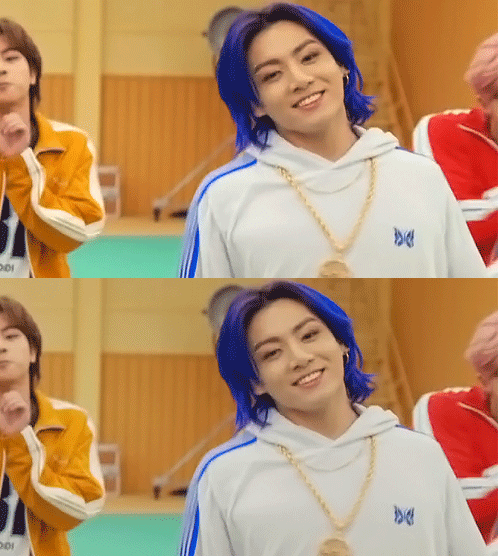
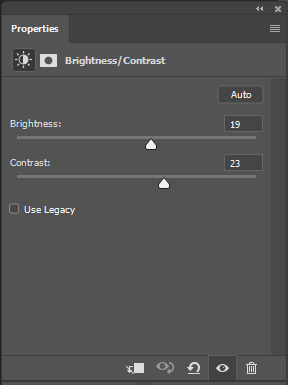
2. Brightness/Contrast: Usually videos are a bit dark, and contrast can help to make it seem sharper AND cut down on gif size, so I usually just up both of them a bit (but not too much! Or it’ll look cheap). Here I put them at B: 19, C: 23

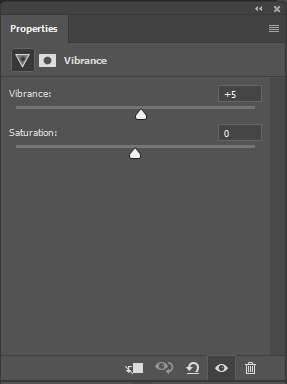
3. Vibrance: I love very vibrant and colourful gifs, so I usually up the vibrance (and sometimes the saturation). This one is already very vibrant, so I only put +5, but if you try to colour, say, a very moody tv show, this can help wonders, especially if you want to work with the colours more later.
If you prefer less vibrant gifs, you can also lower the values here!
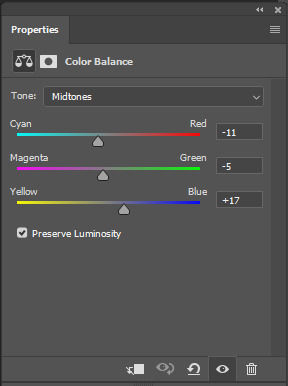
4. Color Balance: getting a bit more complicated now. Often, videos will have a slight yellow or green or blue tint, and this is where you can correct that. This video is a bit yellow, so I added +17 Blue. It was still too warm, so i added -11 Cyan as well. This neutralized the yellow tint, but I wanted some of the reddish tone back, so I added -5 Magenta. I usually do a similar process like that, depending on the tone.
Instead of Midtones, you can also do this for Shadows and Highlights individually.

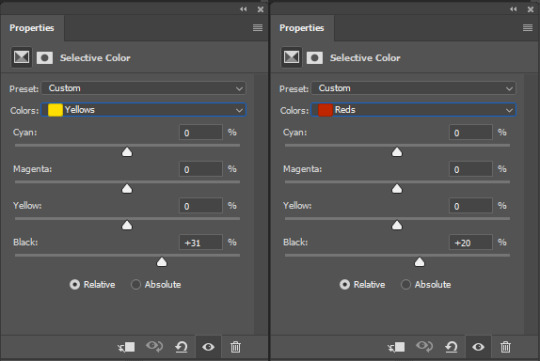
5. Selective Color: now this is the most complicated, but also the most fun to play around in my opinion! Be careful here, if you do something too extreme it’ll look like shit or make the gif super grainy. I some rough goals in mind here: make the blue hair as blue as possible, make their skin tone a bit less pale, and enhance the black and white (which I always do).
You choose a colour at the top, and then add or subtract cyan/magenta/yellow/black values for that colour.
Skin tone: yellow and red. For this gif, I just added black to both, making them darker. Sometimes, if you change one or both those colours for a different part of the gif (for example, if I wanted to make the background less yellow, I’d subtract yellow from the yellows - but then I’d add yellow to the reds, to make the skin tone natural again.)
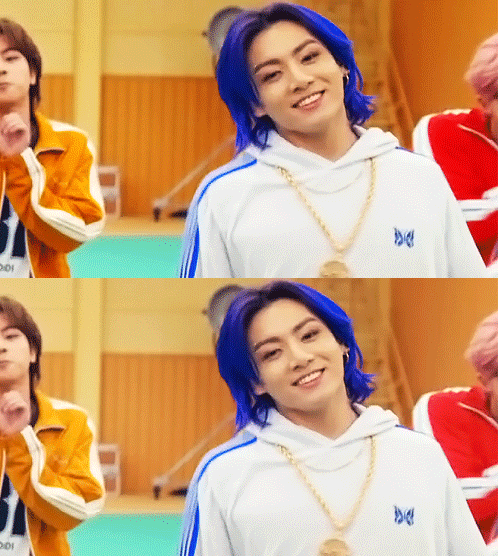
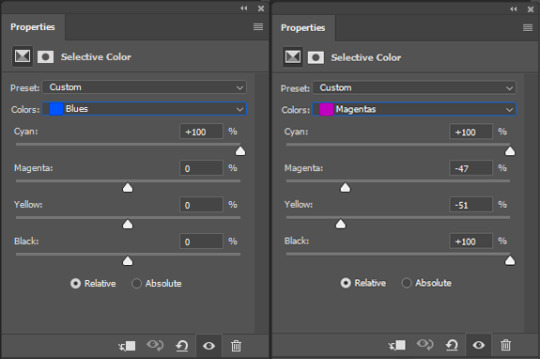
Blue hair: Just ramp up the cyan for the blues. Be careful with putting anything to +100, but here it’s already so bright that it should be fine. His roots are more purple, so I changed the magentas by adding cyan and black, and subtracting magenta and yellow. It’s not super clean, but fine for our purposes.
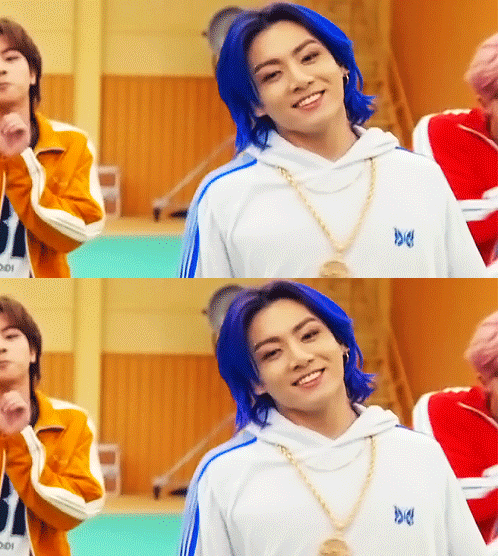
Black/white: depending on the gif, I often either add or subtract black to the whites. Adding makes the highlights less blinding, a bit darker, and flatter (I like to do that if one side of the face is bright white in the sunlight, for example). Subtracting creates contrast, makes it brighter, can wash it out. It can also lessen the gif size, and here it’s mostly just the tracksuit instead of important details, so I subtracted black. For the blacks, I almost always just add a bit of black, to make it more intense. Just like adding contrast, this can make the gif seem sharper and less grainy.
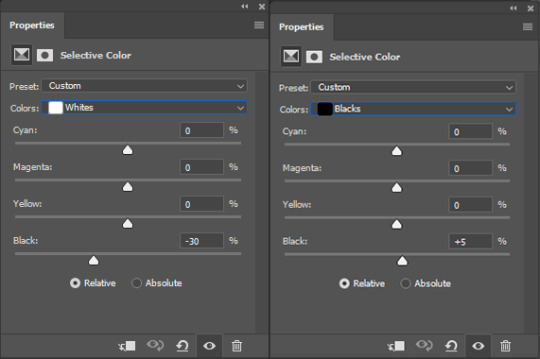

And done!
6. You could just save it as gif now, but as I said, I prefer to convert it back to frame animation timeline first, if only because I like to let it play through before I save it, and it works better for me there than in the video timeline.
Select all frames, then click the little menu on the top right of the video timeline > Convert Frames > Flatten Frames into Clips
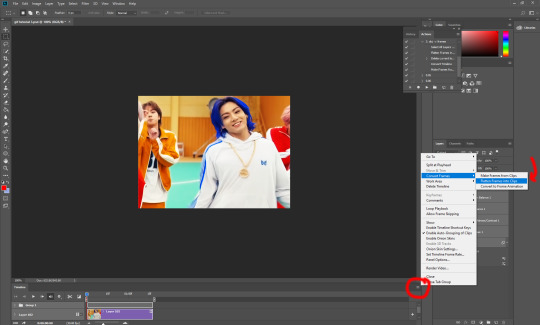
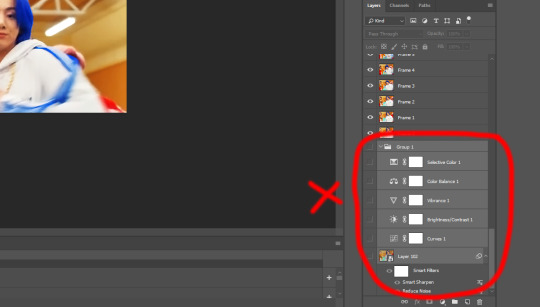
7. When you scroll down to the bottom of the layers now, the old smart object + adjustment layers should be at the bottom, under all the new layers. Delete the old ones, we don’t need them anymore.
8. Convert the timeline back to frame animation, by clicking the little button at the bottom left of the video timeline:

9. Click on the menu top right of the timeline again > Make Frames from Layers
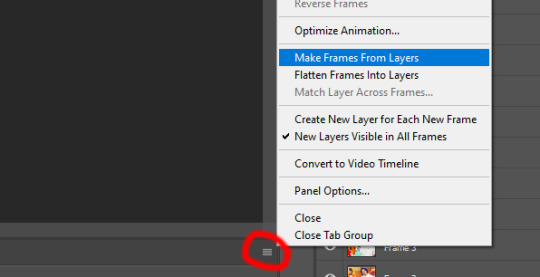
10. Now, just some potential cleaning left to do. Sometimes, there’s a doubled or empty frame or layer at the beginning or end, just delete those as necessary. The timing of the frames is probably off, too, just select all frames and set the delay time to 0.05 (or whatever).
Now your done! Save as gif, and you should get this:

I included some bonus links and tips after this but tumblr ate that whole part so I guess it’s going into a separate post. (Here is is)
Anyway, I tried to make this as easy to follow as possible for beginners, but feel free to send me an ask for clarification anytime. Hope this helps, now go make gifs and have fun!!
#photoshop#tutorial#gif tutorial#ps tutorial#btsgif#*#*tutorial#this took so much longer than i expected i'm not giffing for at least a week now
240 notes
·
View notes
Text
hq boys as the crimes they’d commit
warnings: CRIMES, crackfic, probably many typos idk i’m so tired lmaooo, cursing, drinking ??? idfk 😩💦
an: and i did this for what?? inspired by hq hcs royalty @sugardaddykenma @hina-wit-da-glock (AJSKSJ SORRY FOR TAGGING Y’ALL IF YOU SEE THIS, IT IS DEF NOT UP TO PAR W Y’ALLS WORKS ILY)

karasuno
sawamura daichi- insurance fraud!! somehow this is such a dad crime to commit?? dadchi didn’t try (dumb excuse, how do you accidentally commit insurance fraud smh) to commit insurance fraud but at one point in his late-thirties, he was very very broke and was already working as much as possible so, he decided to fake an ankle injury, as you do, and filed a bunch of claims which made him bank. daichi kept doing it until he was able to quit one of his jobs and buy himself a really nice suit and a rolex (uhhh 🥵). he somehow never got caught tho and to this day, none of his friends know how he was able to afford a tesla on a cop’s salary (sorry daichi but acab 😔✨)
sugawara kōshi- child abandonment!! ok you can try and fight me on this but i feel in my bones that suga absolutely despises children. he can tolerate ages 10+ but anything younger than that, he will punt them into the next dimension. the thing is, people just assume he likes kids because of how good he is with his team which is why his aunt begged him to babysit his nephew taro. taro was being an absolute brat when suga took him out for the day and he was 👉👈 this close to snapping. he put taro down for like 3 seconds to pay for their ice cream and when he turned back, the demon spawn was gone. he panicked, running around the park looking for taro when it turns out, taro was just bent down behind the bench. some random karen called the police and suga has never craved murder more.
nishinoya yuu- arson!! you CANNOT tell me nishinoya doesn’t have a ~murder~ playlist that he listens to to get himself hype (me too noya, me too). one night, he got a lil too hype listening to start a riot by duckwrth and watching demolition videos on youtube. he snuck out of his house to an empty shed like 30 minutes away and maybe... lit it on fire while genocide by lil darkie played on a speaker nearby. what he did NOT anticipate was the absolute size of the fire so he freaked out and called the firefighters who promptly called the police. he didn’t want to get grounded so he called daichi to bail him out. daichi still told noya’s parents 😔.
tanaka ryūnosuke- vandalism!! tanaka had been on alt tiktok and saw a group of cool friends spray painting an abandoned building. he thought “that’s cool, lemme do that!” but then he realized he had no friends (AHDGS JK I LOVE TANAKA). he asked nishinoya who was grounded from the arson incident and he knew he definitely couldn’t ask daichi, suga, asahi, or enoshita so he decided to go it alone. that proved to be a MASSIVE mistake. he got the supplies, arrived to the building of his choice (thanks saeko :3), and decided to spray paint a huge p3ni5 in bright red paint. he finished “successfully” and zoomed back home. what he didn’t realize with his two-and-a-half braincells is that he signed his glorious piece with his full name. the cops were at his house the next morning...🧍
hinata shoyō- forgery!! hinata did NOT think that forgery was even a crime. how was he supposed to know that he wasn’t allowed to copy his mom’s signature on a permission form! all he wanted was to go to an overnight training camp 😿
kageyama tobio- attempted murder!! kageyama swears it sounds worse than was and he is absolutely incorrect. what happened was so much worse. he and hinata were having a competition to see who could hold their breath the longest underwater (you can’t tell me they haven’t done some dumbass shit like this) and kageyma lost almost instantly (he has the tiny lungs of an asthmatic). he didn’t want hinata to notice so he held hinata’s head under the water for like 10 seconds. suga walked in though, saw hinata thrashing around in the water and immediately called the police. kageyama never forgave him.
tsukishima kei- cyberbullying!! first of all, i had no idea you could get arrested for cyber bullying!? that being said, neither did tsukishima who spent 80% of his time making fun of people online (and on his real account!! bold). eventually one of the people he bullied (hinata) reported him on instagram and his very lame account was deleted (pls don’t bully people online 😤).
yamaguchi tadashi- shoplifting!! andjksh this is so funny because this scenario has happened to me and i can just SEE this happening to poor tadashi. yamaguchi gets super late night cravings (and usually tsukki will walk with him at like 3 am 🥺 nEWAYS) so he’ll sneak out and walk to the mini-mart near his house. one night, he was so tired but also super hungry so he went onto his nightly routine and basically sleepwalked into the store. he picked out his favorite chips and candy bar (which are sour cream&onion lays and milky ways in case you were wondering 😌✨) and just... walked out the store without paying. the store clerk was mysteriously missing so yamaguchi made it all the way home, ate half the bag of chips and passed out without realizing what he’d done. once he did, he cried for 2 hours straight.
nekoma
kuroo tetsurō- telemarketing fraud!! kuroo originally did telemarketing fraud as a joke?? like he was trying to prank call someone pretending that they had lost their information and they actually gave it to him??? he was mildly concerned but even more excited. he did it over and over again but he never used the info for anything. to this day, kuroo literally has a notebook full of credit card numbers and bank account passwords but he refuses to use it because he believes it’s ✨wrong✨(but it isn’t wrong to take all that information in the first place under false pretenses, not realizing that once people find out, they are forced to close credit cards and accounts but go off self righteous king). once he brought the book up to kenma and he offered to sell it on the dark web. now kuroo feels less bad about what he’s done! :D
kozume kenma- computer crime!! pfttt this one seems kinda obvious but what do you expect from kenma :). he spends so much time on the internet, he’s definitely picked up some less than legal skills that still help him now 👀. kenma did little mini crimes like getting into other people’s wifi but his crowning achievement was when he hacked into the minneapolis pd website and had it so when you opened the page, a black lives matter screen came up. he never told anyone that it was him who did it but he thinks it’s the best he’s ever done.
yaku morisuke- racketeering!! yaku, the feral king, ran an underground gambling ring in the basement of nekoma (do they have basements?? who knows! i don’t!) during his third year. the only reason it didn’t get shut down was because coach nekomata took a portion of yaku’s profits whenever he won (which was literally all the time). everyone on the team has lost money to him which is why they never play with him anymore. they won’t even let yaku play monopoly 😔.
haiba lev- indecent exposure!! poor lev’s head is so empty, he tends to fall for whatever pranks his senpai’s do to him. this time kuroo had somehow convinced him that in order to grow his schlong, he had to run outside naked for 10 minutes because the moonlight had special growing properties. lev was a lil scared ngl because he was already superrr tall and didn’t need to grow his height (or his dick ((boy is hung)) but poor lev is insecure) but he did it anyway. long story short, an old woman saw him parading around the neighborhood naked and called el policia. 0/10 dick did NOT grow and had to spend a night in jail naked 😿
aoba johsai
oikawa tōru- prostitution!! KAKKAKA iwazumi made fun of oikawa for being so shitty and said that he couldn’t pick up anyone if he tried. flattykawa took this as a personal challenge and went out onto the street, asking people if they’d have sex with him. with the way he was asking (and the way he was dressed), people assumed he was a paid w h o r e and someone eventually reported him. iwazumi had to pick oikawa up from the station- he never let him live this one down.
iwaizumi hajime- battery!! it wasn’t technically battery but oikawa is a lil bitch and overreacts (at least in his words -_-). the amount of times iwa-chan has beat the absolute shit out of oikawa is uNREAL. he just can’t handle the stupidity sometimes so he just smacks the crap outta him. not for real for real but the way oikawa reacts, you’d think a murder was occurring. one time, shittykawa screeched so loud, they got a noise complaint -_- hajime hates it in these streets.
matsukawa issei & hanamaki takahiro- conspiracy!! issei and hiro have a secret blog where they discuss conspiracy theories and such but one day, hiro found an article that explained how jfk’s death was an inside job. he sent it to issei who began to theorize how HE’D do it. that devolved into a massive thread on their blog of how’d they murder a president which blew up and caught the attention of the cia who sent the a letter telling them to quietly delete the blog. they did because they were terrified but they kept the letter and now it’s framed in issei’s apartment.
kyōtani kentarō- assault!! baby is an angry little boy but for all the right reasons. he was at a bar (when he’s all grown up, duh) and he spotted an absolute drunk creep hitting on a girl who clearlyyyy did not reciprocate his feelings. kyōtani, being the respectful king that he is, went over to the guy, pulled him by the jacket and beat. the. shit. out of him. while the bartender was happy with the fact that the creep was out, he was not impressed with the damage to his bar. he just sent kyōtani out who casually adjusted his leather jacket and rings, and hopped on his motorcycle to ride away into the night. i am the FATTEST simp for this man ONG 🥴
shiratorizawa
ushijima wakatoshi- stalking!! poor ushijima has no idea how intimidating he can be. he was on a train late at night after practice and the woman sitting across from him left her purse sitting on the seat. being the gentleman that he is, he took the purse and followed her to return it. the only problem is that the closer he got, the faster she ran and when he tried to speak (yknow with his scary, deep, baritone voice), the woman screeched and called the cops on him because he was a “strange, big man who was following her home.” when the police showed up, ushijima was painfully confused and just held up this tiny ass purse in his massive hands. the cops laughed.
tendō satori- ???!! no one knows what crimes (or how many 😳) tendō has committed but each of his teammates have different ideas- ushijima: “i don’t believe tendou is capable of committing any sort of felony. well, maybe murder”; semi: “of COURSE he’s capable of crimes??! do you know how many times i’ve seen him come into the dorm with a suspicious stain of red on his sweater?? *shudders* if i end up dead, tendō did it...” in actuality, the only crime tendō has committed is ~drugs~ but he’s not bouta tell his friends that.
goshiki tsutomu- would be a VICTIM!! my baby tsutomu would NEVER commit a crime!!! i love this man with my everything and the only crime he’s committed is being too damn cute 😤🥺
#haikyuu!!#haikyuu headcanons#haikyuu!! headcanons#hq hcs#hq headcanons#crack fic#tsukishima kei#daichi sawamura#sugawara kōshi#ushijima headcanons#tendou satori#goshiki tsutomu#kyotani kentaro#matsukawa issei#hanamaki takahiro#iwazumi hajime#oikawa torū#haiba lev#yaku morisuke#kenma kozume#kuroo tetsurou#yamaguchi tadashi#hinata shōyō#haikyuu kageyama#nishinoya yuu#haikyuu tanaka#shiritorizawa#karasuno#aoba johsai#nekoma
463 notes
·
View notes
Text
My GIF making process!

I’ve been asked many times for a tutorial, but because I get really detailed, I always get overwhelmed by the idea. But I finally decided to buckle down!
Just so you know: I don’t use PSDs in this, and I don’t import layers to frames or anything like that. I like the hard way—at least in gif making, I believe you get higher quality gifs. Join me as I show you how to make gifs by loading videos directly into the Photoshop timeline and my coloring and sharpening techniques.
Tools used:
Mac OS X (only necessary for the first step, and there are other ways around it with a PC)
Adobe Photoshop
YouTube Purchases (any streaming service will work)
Topics covered:
Obtaining the Source Material
Loading the video file into Photoshop
Prepping, Cropping, and Resizing the Media
Adjustment Layers
Sharpening
Exporting
Obtaining the Source Material
There are a few different methods for obtaining video to work with. Proper YouTube videos are nice, but finding any major motion picture in that format is difficult, if not illegal.
Once I realized I could get really great quality video by doing screen recordings from streaming services, I stopped worrying about finding (and pirating) high resolution video files. So now, I just go to whichever streaming service I need to, pick out the movie or show, find the spot, and record small snippets.
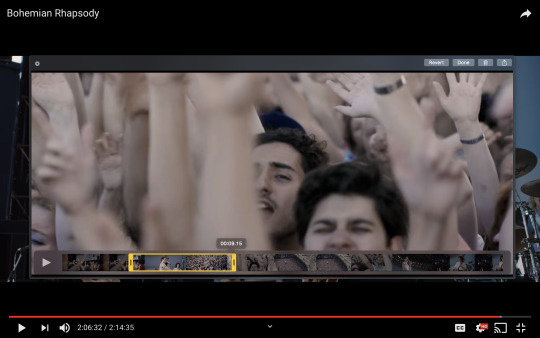
Mac screen recording instructions:
On a Mac, Command+Shift+5 will bring up the screen recording dialogue.
Resize the frame of what you want to record within the browser.
Go to a second or two before, press the “record” button, and then begin playing the video, remembering to keep your cursor out of the recording box.
Use the Space bar to pause your video when you’ve gotten the snippet you need. Stop the screen recording by clicking the ⏹ button that is in your menu bar at the top of the screen.
Important: when the recording appears in the bottom right of your screen, click on it, and then trim the video on either end. This will help your computer convert the video file to the type that can be opened by Photoshop.
Click “done” and it will appear on your desktop, ready to be used!
PC Users: ??? Here’s a Google search I did for you
Loading the video file into Photoshop
Lots of people use this process for making gifs (a great tutorial!). I didn’t even know it existed until last summer, when I’d already been giffing for years. I wish I could still do something like that with these screen recordings, but the files are absolutely HUGE, especially on Macs with double retina displays, which actually increase the dpi by a lot. Making screencaps of them fills up my hard drive, almost immediately—even when I’ve got 20 gigs of free space to work with. So what do we do? We just. Open the file. In Photoshop. Et voila!
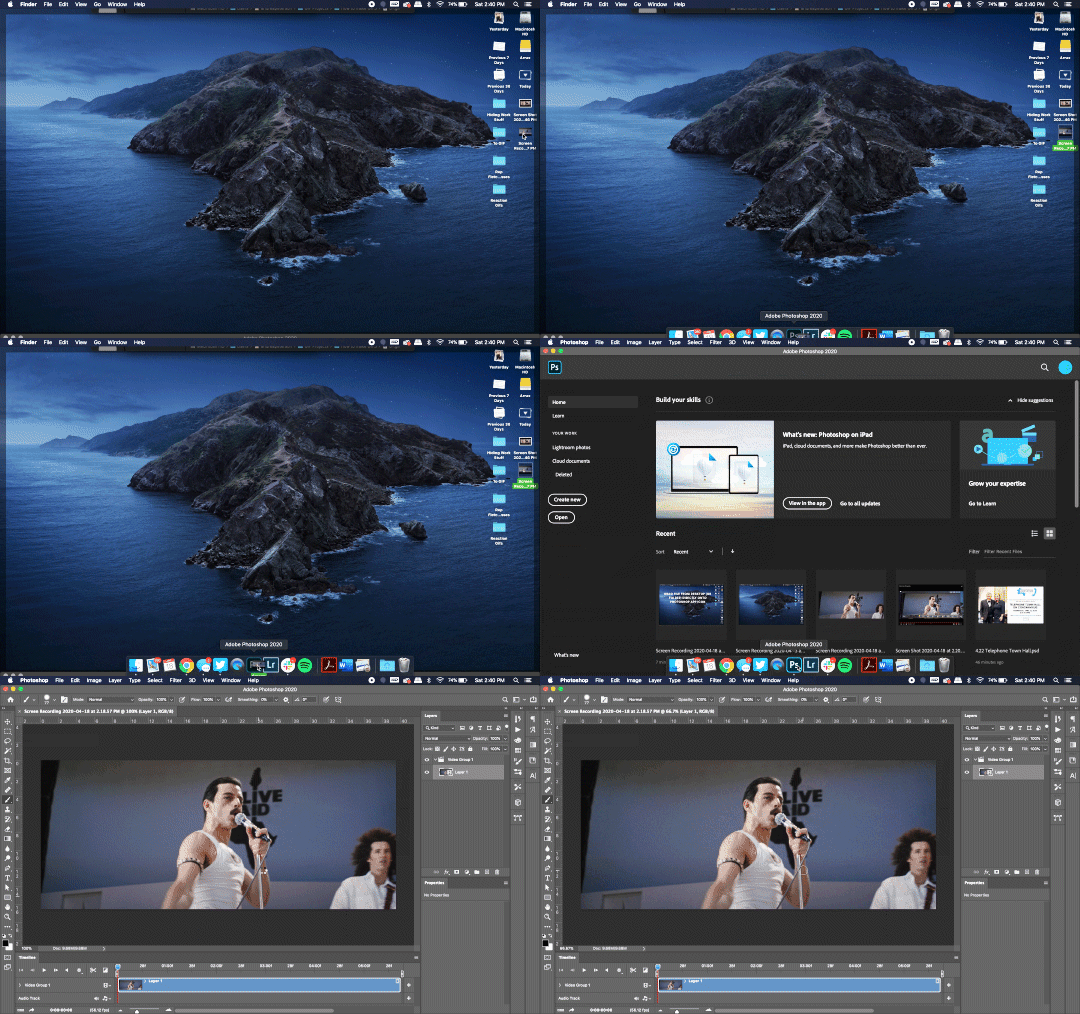
You can do this with any type of video, not just screen recordings.
Prepping, Cropping, and Resizing the Media
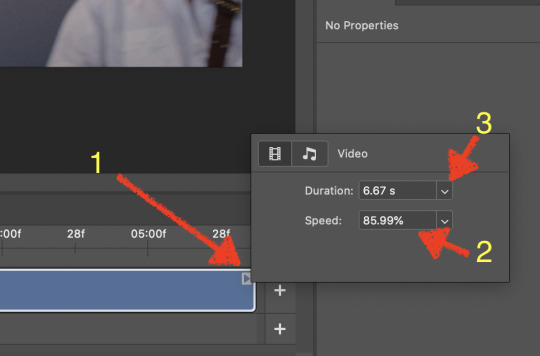
When Photoshop loads your videos up, it makes the video hilariously fast (something about frame conversion). You must slow it down for it to look natural. THIS MUST BE DONE BEFORE YOU RESZE. Your Photoshop timeline window should be at the bottom of the screen. See that little triangle in the top right of the video?
Click on it, and a menu will appear to change speed and duration.
Change the speed first- usually between 80-85% will seem realistic. (I actually went a little faster than I usually would on this at almost 86%—I don’t recommend this)
Press the button next to duration and pull the toggle all the way to the far right (if you don’t do this, full length of the video will be cut off).
Now you’ll want to crop it. Ever since Tumblr upped its GIF size limit, I have been playing around with 7:5 ratios, but let’s go with 3:2 for now. Use the Crop tool, pick out 3:2 in the top left (it may say 2:3, but you can switch that) and then find the most suitable spot in your gif for that. Hit enter on your keyboard.
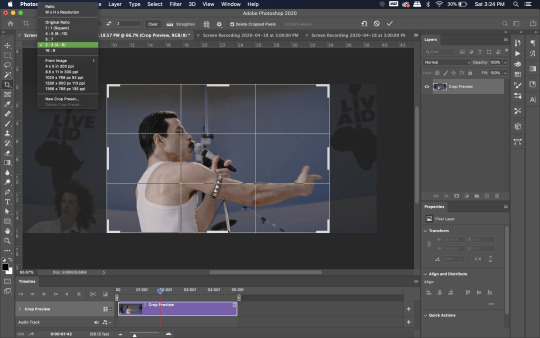
Some things to keep in mind when cropping:
Most videos come in 16:9 ratio (BoRhap is even wider). If it’s a wide shot, you’ll need to do the full 16:9 to not lose anything. Of course, experiment and find what’s right for you!
As you can see above, I moved forward in the timeline and made the crop to a point in the video when the broadest movement was happening.
Certain videos WILL have a black or red bar that may be imperceptible until you’ve already exported the gif. Just crop in a little tighter on top and bottom to avoid them.
Now you’ll need to resize your gif to be the correct size for Tumblr. If you don’t use Tumblr’s exact dimensions, your gifs (as uploaded) will appear blurry or pixellated. We’re doing a full-width gif here, which is 540px. On a Mac, I use Command+Option+I (for “Image Size) to open the resize dialogue. You can also find it under Image->Image size...
Make sure to also have “Resample” checked. Lately I’ve been playing around to see if different options are better. Most GIF makers use “Bicubic Sharper (Reduction)” and they are not wrong to do so. I’ve just been unhappy with it lately, so I have been trying this other setting out, “Bicubic (smooth gradients)”.
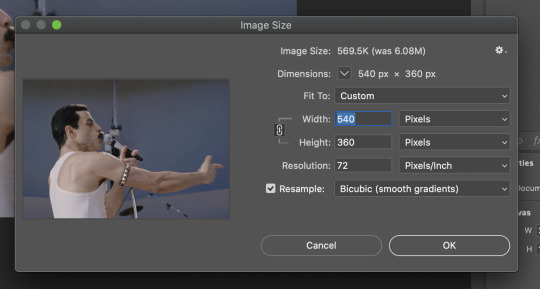
Click OK. A dialogue may come up that asks if you want to convert to a Smart Object. The answer is yes, okay, do it. The only major caveat is that you can’t go back and change the timeline speed. That’s why we did it first. But you can preview the speed now that it’s smaller, and if you don’t like it, use Command+Z (or “Undo”) and go back a couple steps to get the speed you like.
You may find, especially on a Mac screen (and possibly other displays), that at 100% your gif looks too small to be 540px. That is the curse and blessing of working with super-high resolution hardware. Zoom in to 200% and proceed about your business. This is what it will look like on Tumblr.
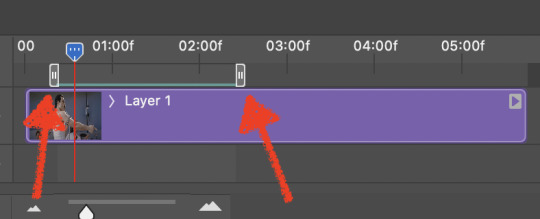
You may find it helpful at this point to begin by defining the beginning and end of your gif by moving around these bumpers. It’s safe to keep gifs under 02:00f in length. Under half of 01:00f will be way too short. (I tend to overshoot in length and then trim the beginning and the end once I see how big the gifs are upon exporting.)
Adjustment Layers
Now the creativity and fun begin!
There are a LOT of ways to get creative here. I’m going to keep it simple, very simple, but I strongly recommend opening up a new adjustment layer of each type and trying to figure out what each does!
You’ll find the adjustment layer menu at the bottom of the Layers window.

Curves
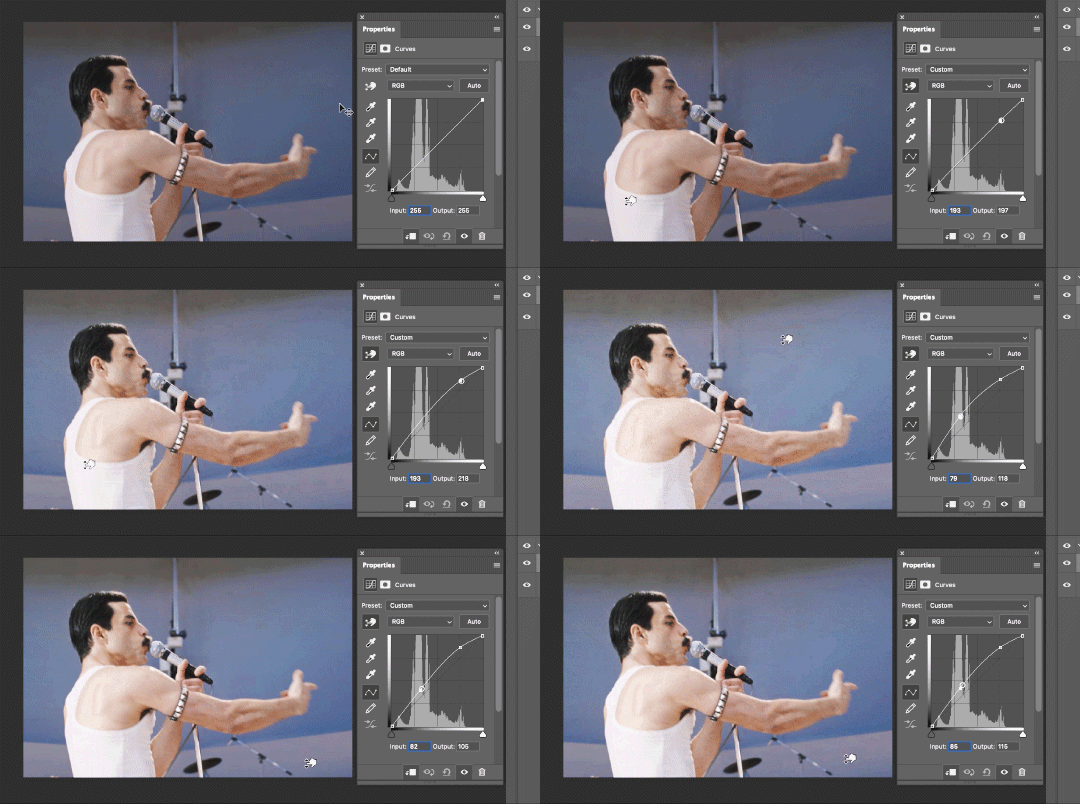
There are a lot of ways to make Curves work for you! It can do the job of Brightness/Contrast, it can do Levels, it can do Color Balance! We’re going to use it mainly to help with brightness here, but also to level out some of the tones. One of the quick tricks you can do is use the droppers on the left side of the Properties window. There are three- one with a white tip, one gray, one black. These can help define what your white tones are (and whether they need to be more of one color or another), and so on with your blacks. Sometimes it works, sometimes it doesn’t; in this case, I think it doesn’t:
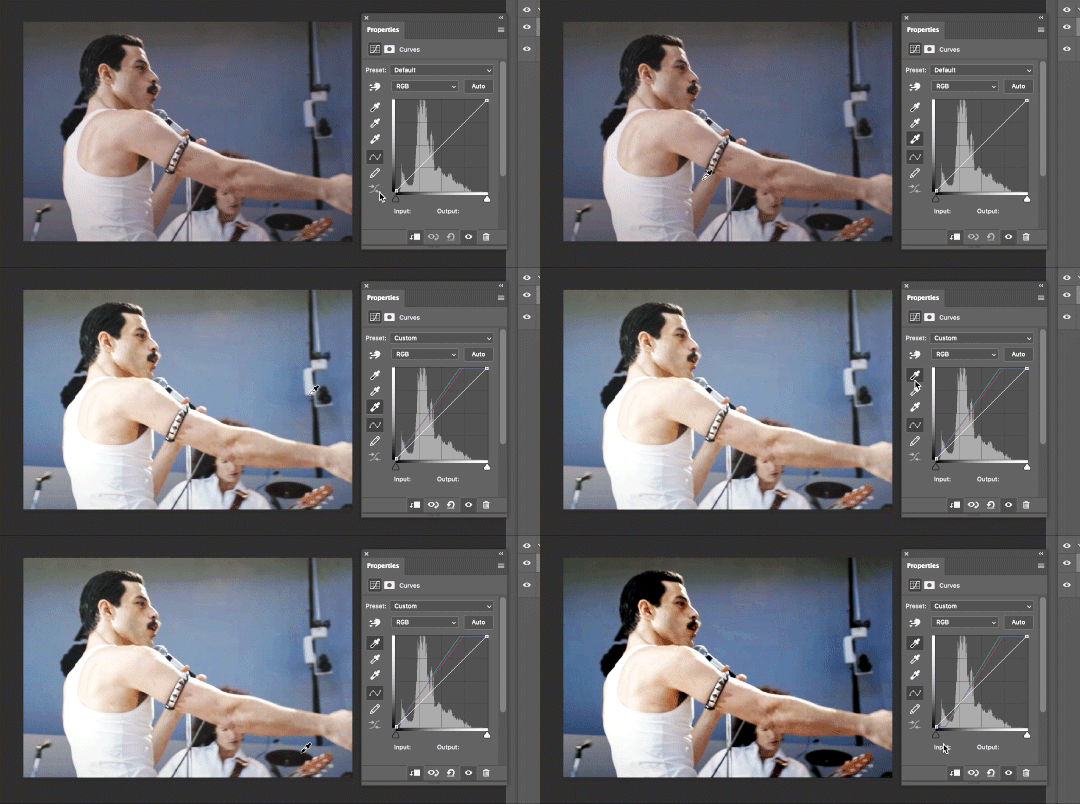
That looks totally blown out and somehow also too dark!
So instead, we’re going to use that little hand with the finger pointing out and some arrows pointing up and down. This lets you define which sections you want to get brighter or darker, and how much. It doesn’t do color correction. In the example below, you can see I dragged up on a white spot and down on a dark spot. Then, I moved points around on the curve itself to refine (which the gif here doesn’t show...).
Vibrance/Saturation x2
Next, I’ve been using @gwil-lee‘s Vibrance/Saturation trick (I know you said you learned it from someone else, but I learned it from you!).
Create a Vibrance Adjustment layer, bump the values up a bunch, and then change its Fill to somewhere between 2-9%. Change the Blend Mode to Color Burn. Then make a copy of that layer keeping everything the same, but make it Color Dodge. I can’t quite define what these do, but it makes it punchier!

Color Balance
Most people are familiar with this. For this gif, I’m going to make the shadows more Cyan/Blue and the highlights more Red/Yellow. Just a few points each.
Exposure
I brought the Exposure up a bit, but not enough for you to need to read about, haha.
Selective Color
Here’s where you make fine adjustments to colors. This particular scene is extremely simple, color-wise, so keep it simple. I’m going to bump up the cyans/blues, take up the black by just a point or two, and maybe bump up the yellows and reds a tiny bit. (And as always, remember, the “opposite” of cyan is red, the opposite of magenta is green, and the opposite of yellow is blue. CMY/RGB!)

I think at this point I’m going to call it with the adjustment layers. You can go absolutely hogwild with more of them! But at this point, I’m ready to start sharpening!
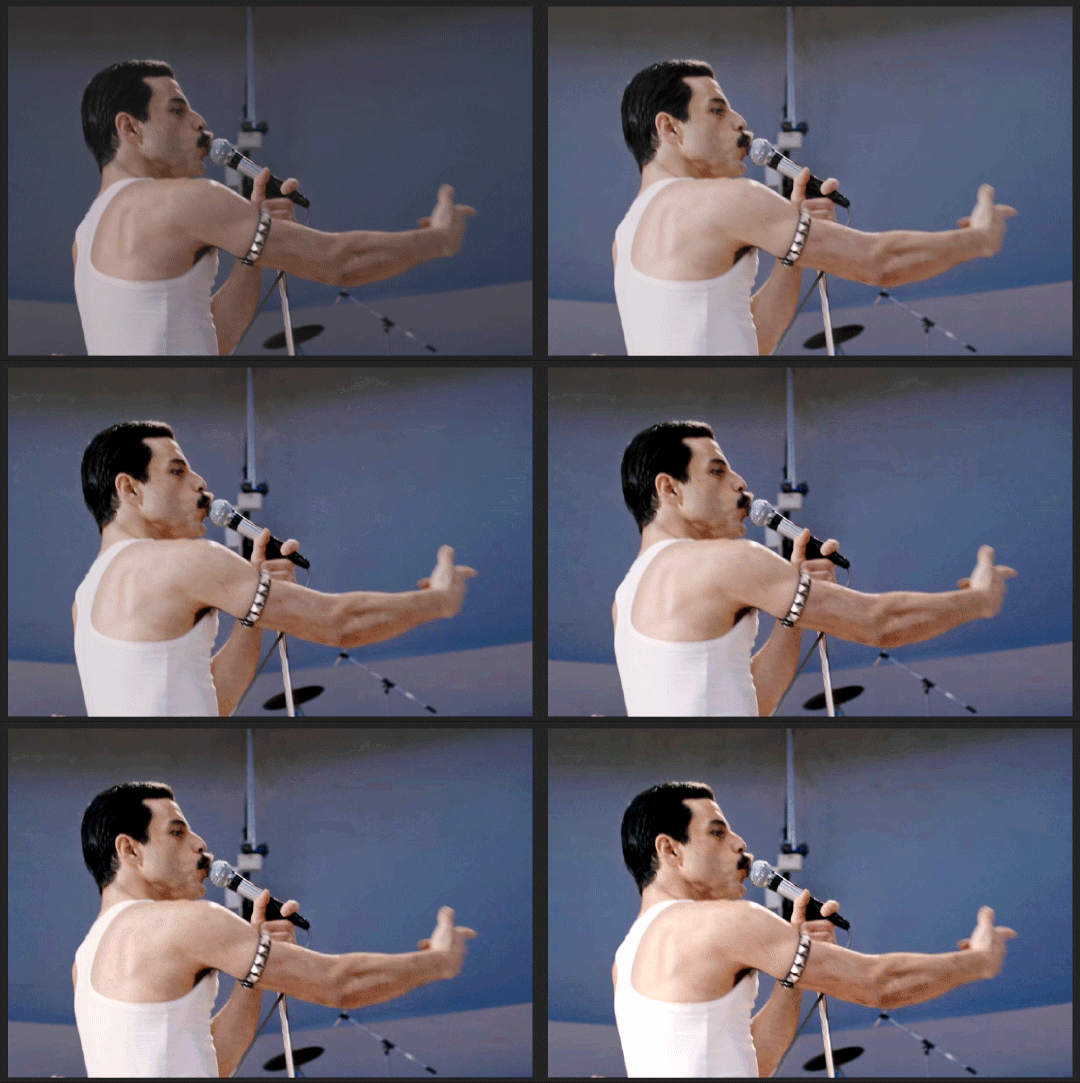
Sharpening
I do three sharpening filters these days. These are all under Filter->Sharpen. Make sure your media layer (default called Layer 1) is selected as we go through this! (Also, this can really take a toll on your processor, so don’t say I didn’t warn you.)
Sharpen- This layer does the basic job
Smart Sharpen (Amount: 10%, Radius: 10, Reduce Noise: 4% Gaussian Blur)- This layer gives texture
Smart Sharpen (Amount: 500, Radius: 0.3, Reduce Noise: 12% Gaussian Blur)- This layer gives refined sharpening and smoothing
Fiddle with these as needed! Let your gif play all the way through- this may go slowly as your processor works on it. Make sure the beginning and end points make sense.
Exporting
After You’re going to have to use File->Export->Save For Web (Legacy)... or use the shortcut of Shift+Option+Command+S. This could take some time for the dialogue to pop up! Be patient.
In my opinion, these are the best gif export settings for crisp edges and no noise:
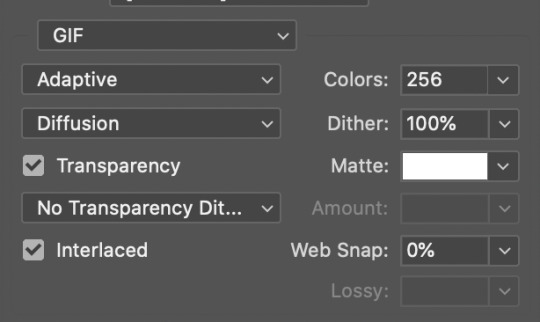
Now you see how big the file is in the bottom left. Tumblr won’t let you upload anything bigger than 10MB and it’s safer to stay under 9MB, in my experience. When your gif is too big, you have a couple options. You can close the dialogue and change the length of your gif.
OR, you can uncheck “Interlaced” and bump up the lossy to 1 or or more. This will create noise. Sometimes, that’s a good thing!
Here’s without lossy:
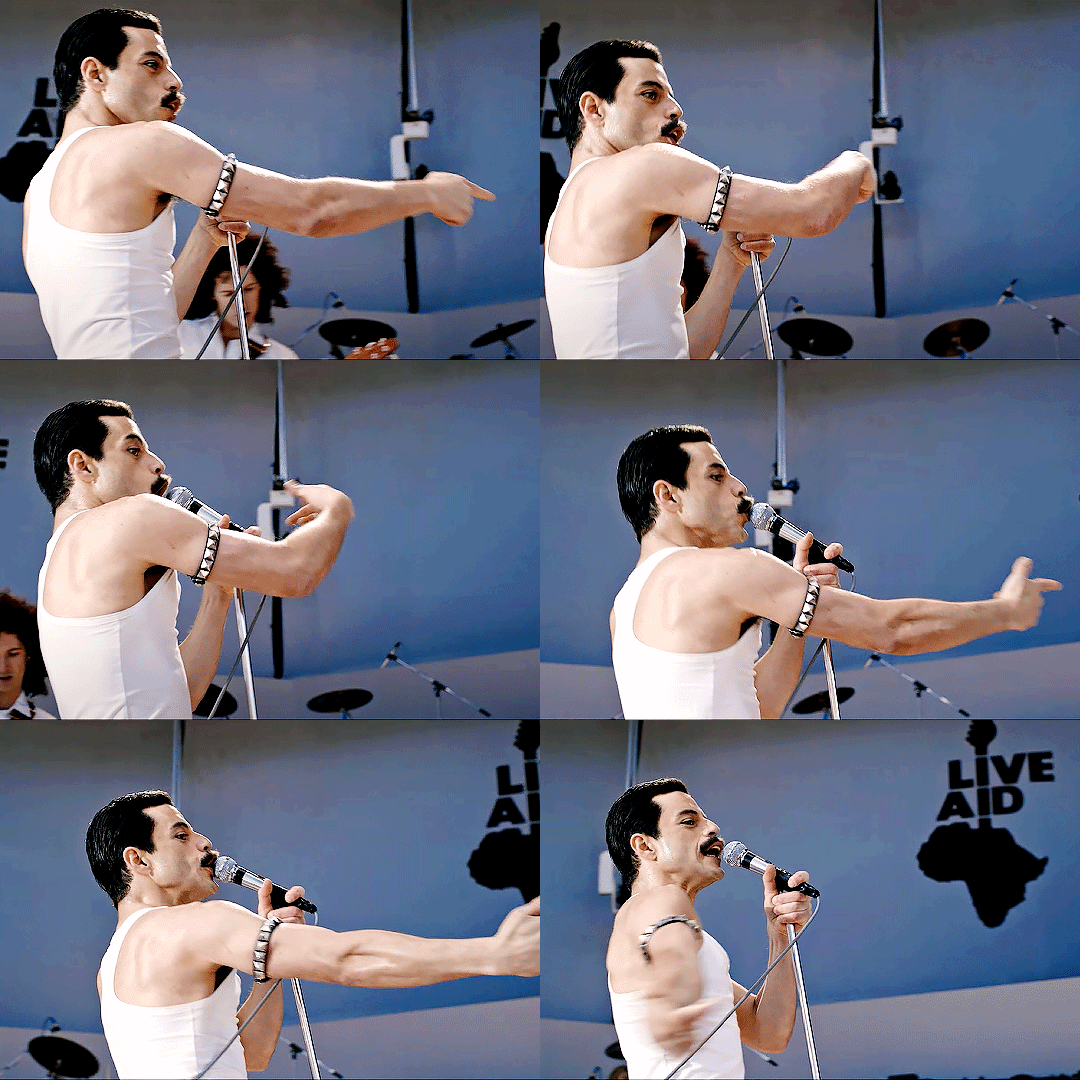
Here’s WITH lossy: (Honestly in a fast moving gif like this, it’s almost imperceptible, but I can see it!)
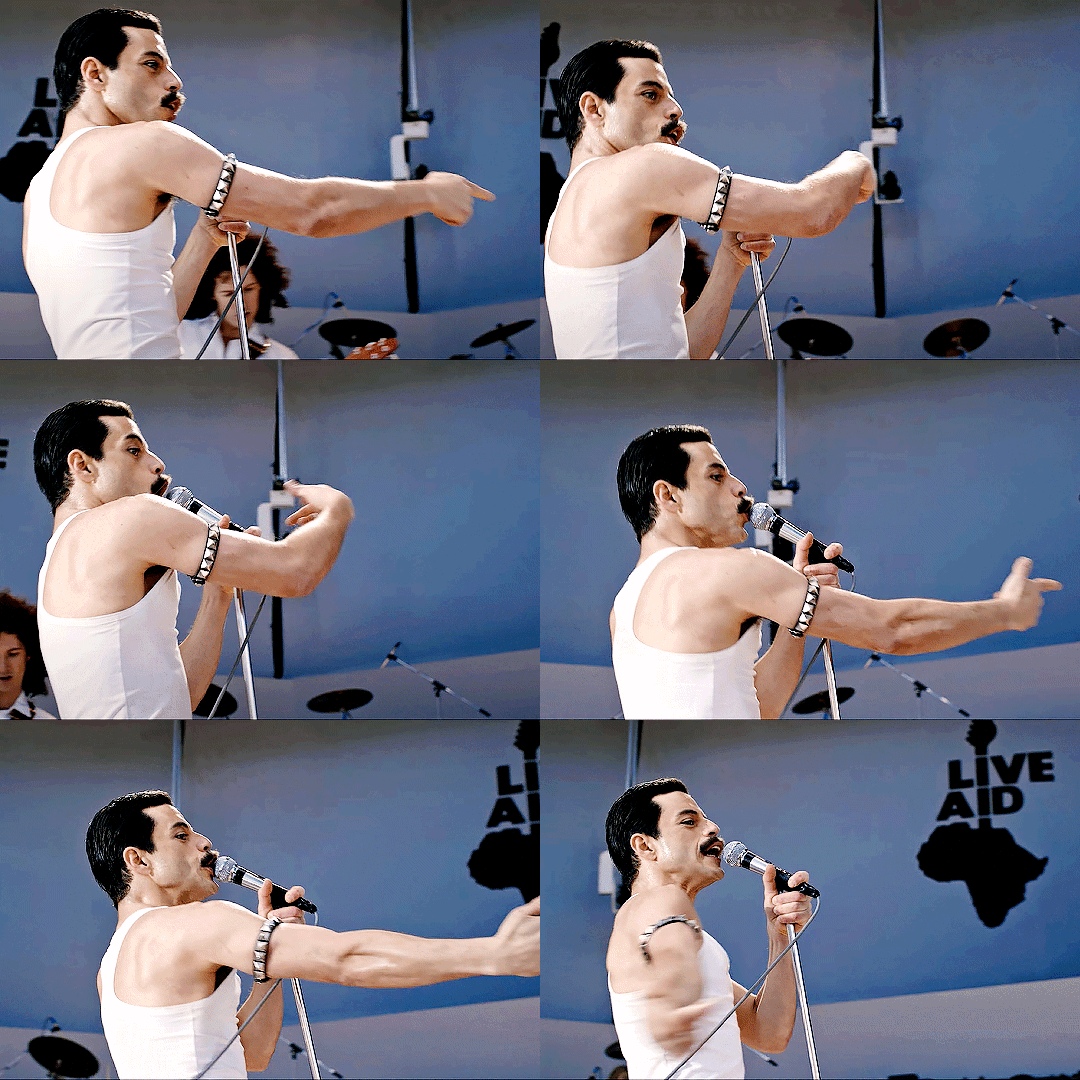
And now that I’ve exported, I can see what there’s a little black line on the bottom! So I’m going to trim that off and call it good! You can see the full gifset here.
Hope you enjoyed! Reblog if you try this out or learned anything. Feel free to reach out with questions any time!
410 notes
·
View notes
Text
David Byrne’s interview in NME magazine
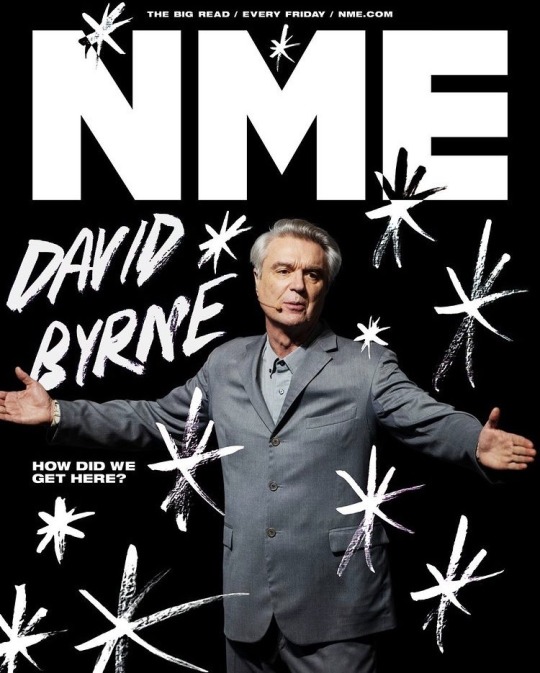
In 1979, David Byrne predicted Netflix. “It’ll be as easy to hook your computer up to a central television bank as it is to get the week’s groceries,” he told NME’s Max Bell, sitting in a Paris hotel considering the implications of Talking Heads’ dystopian single ‘Life During Wartime’.
He predicted the Apple Watch in that interview too: “[People will] be surrounded by computers the size of wrist watches.” And he foresaw surveillance culture and data harvesting: “Government surveillance becomes inevitable because there’s this dilemma when you have an increase in information storage. A lot of it is for your convenience, but as more information gets on file, it’s bound to be misused.”
In fact, over 40 years ago, he predicted the entire modern-day experience, as if he instinctively knew what was coming. “We’ll be cushioned by amazing technological development,” he said, “but sitting on Salvation Army furniture.”
The 68-year-old Byrne says today, “You can’t say that you know,” chuckling down a Zoom link from his home in New York and belying his reputation for awkwardness by seeming giddily relieved to be talking to someone. “It’s crazy to set yourself up as some sort of prophet. But there’s plenty of people who have done well with books where they claim to predict what’s going on. I suppose sometimes it’s possible to let yourself imagine, ‘Okay – what if?’ This can evolve into something that exists, can evolve into something more substantial, cheaper – these kinds of things.”
It’s been a lifelong gift. Byrne turned up at CBGBs in 1975 with his art school band Talking Heads touting ‘Psycho Killer’, as if predicting the punk scene’s angular melodic evolution, new wave, before punk was even called punk. In 1980, Talking Heads assimilated African beats and textures into their seminal ‘Remain In Light’ album, foreshadowing ‘world music’ and modern music’s globalist melting pot, then used it to warn America of the dangers of consumerism, selfishness and the collapse of civilisation. Pioneering or propheteering, Byrne has been on the front-line of musical evolution for 45 years, collaborating with fellow visionaries from Brian Eno to St Vincent’s Annie Clark, constantly imagining, ‘What if?’

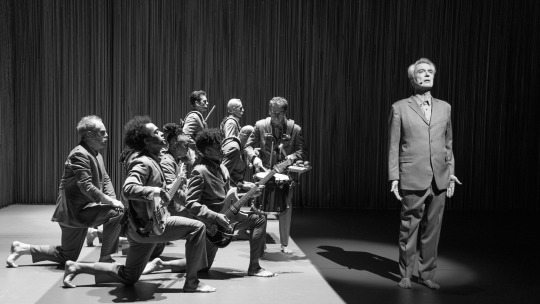
The live music lockdown has been a frustrating freeze frame, but Byrne was already leading the way into music’s new normal. Launched in 2018, the tour to support his 10th solo album, ‘American Utopia’, has now turned into a cinematic marvel courtesy of Spike Lee – the concert film was released in the UK this week. The original tour was acclaimed as a live music revolution. Using remote technology, Byrne was able to remove all of the traditional equipment clutter from the stage and allow his musicians and dancers, in uniform grey suits and barefoot, to roam around a stage lined with curtains of metal chains with their instruments strapped to them. A Marshally distanced gig, if you will.
“As the show was conceptually coming together, I realised that once we had a completely empty stage the rulebook has now been thrown out,” Byrne says. “Now we can go anywhere and do anything. This is completely liberating. It means that people like drummers, for example, who are usually relegated to the back shadows, can now come to the front – all those kinds of things – which changes the whole dynamic.”
With six performers making up an entire drum kit and Byrne meandering through the choreography trying to navigate a nonsensical world, the show was his most striking and original since he jerked and jived around a constructed-mid-gig band set-up in Jonathan Demme’s legendary 1984 Talking Heads live film Stop Making Sense.
The American Utopia show embarked on a Broadway run last year, where Byrne super-fan Spike Lee saw it twice and leapt at the chance of turning the spectacle into Byrne’s second revolutionary live film, dotted with his musings on the human condition to illuminate the crux of the songs: institutional racism, our lack of modern connection, the erosion of democracy and, on opener ‘Here’, a lecture-like tour of the human brain, Byrne holding aloft a scale model, trying to fathom, ‘How do I work this?’
“I didn’t know how much of a fan Spike was!” Byrne laughs today. “He’d even go, ‘Why don’t you do this song? Why don’t you add this song in’. We knew one another casually so I could text him and say, ‘I want you to come and see our show; I think that you might be interested in making a film of it’.”
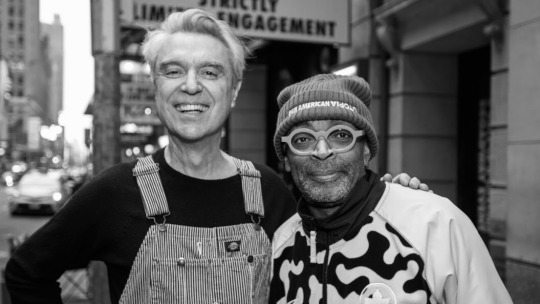
Are the days of the traditional stage set-up numbered? “Yes, I think so,” he replies. “At least in theatres and concert halls the size that I would normally play, yes. The fact that we can get the music digitally [means] a performance has to be really of value. It has to be really something special, because that’s where the performers are getting their money and that’s what the audience is paying for. They’re not paying very much for streaming music, but they are paying quite a bit to go and see a performance, so the performance has to give them value for money… It has to be really something to see.”
How does David Byrne envisage the future possibilities of live performance?
“I’ve seen a lot of things that hip-hop artists have done – like the Kanye West show where he emerges on a platform that floats above the stage,” he says. “I’d seen one with Kendrick Lamar where it was pretty much just him on stage, an empty stage with just him on stage and a DJ, somebody with a laptop – that was it. I thought, ‘Wow’. Then he started doing things with huge projections behind. There are lots of ways to do this. I love the idea of working with a band, with live musicians. ‘How can I innovate in this kind of way?’ It’s maybe easier for a hip-hop musician who doesn’t have a band to figure out. The pressure is on to come up with new ways of doing this.”
In liberating his musicians from fixed, immovable positions, American Utopia also acts as a metaphor for freeing our minds from our own ingrained ways of thinking. As Byrne intersperses Talking Heads classics such as ‘Once In A Lifetime’, ‘I Zimbra’ and ‘Road To Nowhere’ with choice solo cuts and tracks from ‘American Utopia’, he also dots the show with musings on an array of post-millennial questions: the health of democracy; the rise of xenophobia and fascism; our increasing reliance on materialism and online communication; the climate change threat; the existential nightmare of the dating app; and, crucially, the distances all of these things put between us.
“The ‘likes’ and friends and connections and everything that the internet enables,” he argues, “even Zoom calls like this, they’re no substitute for really being with other people. Calling social networks ‘social’ is a bit of an exaggeration.”
Byrne closes the show with the suggestion that, rather than isolate behind our LCD barriers, we should try to reconnect with each other. In an age when social media has descended into all-out thought war and anyone can find concocted ‘facts’ to support anything they want to believe, is that realistic?
“I have a little bit of hope,” he says. “Not every day, but some days. I have hope that people will abandon a lot of social media, that they’ll realise how intentionally addictive it is, and they’re actually being used, and that they might enjoy actually being with other people rather than just constantly scrolling through their phone. So, I’m a little bit optimistic that people will, in some ways, use this technology a little bit less than they have.”
A key moment in American Utopia comes with Byrne’s cover of Janelle Monae’s ‘Hell You Talmbout’, a confrontational track shouting the names of African-Americans who have been killed by police or in racially motivated attacks – Eric Garner, Trayvon Martin, George Floyd and far, far too many more. Does Byrne think the civil unrest in the wake of Floyd’s death and the rise of the Black Lives Matter movement make a serious impact?
“We’ll see how long this continues,” he says, “but in projects that I’m working on – there’s a theatre project I’m working on in Denver, there’s the idea of bringing this show back to Broadway, there’s other projects – those issues came to the fore. Issues of diversity and inclusion and things like that, which were always there. Now they’re being taken more seriously. The producers and theatre owners realise that they can’t push those things aside, that they have to be included in the whole structure of how a show gets put together.”
“At least for now, that seems to be a big change. I see it in TV shows and other areas too. There’s a lot of tokenism, but there’s a lot of real opportunity and changed thinking as well.”
Elsewhere, he encourages his audience to register to vote, and had registration booths at the shows. He must have been pleased about the record turnout in the recent US election? “Yeah, the turnout was great. Now you just got to keep doing that. Gotta keep doing it at all the local elections, too. It was important for me not to endorse a political party or anything in the show but to say, ‘Listen, we can’t have a democracy if you don’t vote. You have to get out there and let your voice be heard and there’s lots of people trying to block it.’ We have to at least try.”
Will Trump’s loss help bring people together after four years with such a divisive influence in charge?
“Yes. I think for me Trump was not so much a shock; we knew who he is. He was around New York before that, in the reality show [The Apprentice], we knew what kind of character he was. What shocked me was how quickly the Republican party all fell into line behind him, behind this guy who’s obviously a racist, misogynist liar and everything else. But it’s kind of encouraging – although it’s taken four years and with some it’s only with the prospect of him being gone – that quite a few have been breaking ranks. There are some possibilities of bridge building being held out.”
But, he says, “It’s too early to celebrate,” concerned that Senate Majority Leader and fairweather Trump loyalist Mitch McConnell will use any Republican control of the Senate to block many of Biden’s policies from coming into effect. “[This] is what happened with Obama… I want to see real change happen. [Climate change] absolutely needs to be a priority. The clock had turned back over the last four years, so there’s a lot to be done. Whether there’s the willpower to do everything that needs to be done, it remains to be seen, but at least now it’s pointing in the right direction.”
How will he look back on the last four years? Byrne ponders. “I’m hoping that I look back at it as a near-miss.”
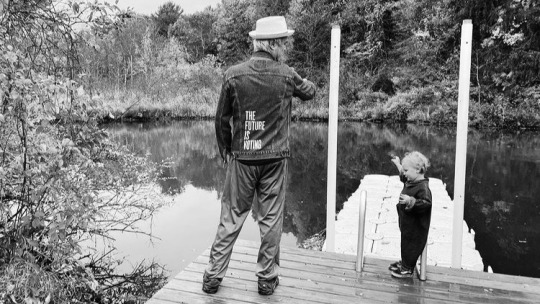
American Utopia is as much a personal journey as a dissection of modern ills. Ahead of ‘Everybody’s Coming To My House’, Byrne admits to being a rather socially awkward type. He claims that a choir of Detroit teenagers, when singing the song for the accompanying video, had imbued the song with a far more welcoming message than his own rendition, which found him wracked with the fear that his visitors might never leave. How does someone like that deal with celebrity?
“In a certain way it’s a blessing,” Byrne grins, “because I don’t have to go up to people to talk to them – they sometimes come up to me. In other ways it’s a little bit awkward. Celebrity itself seems very superficial and I have to constantly remind myself that your character, your behaviour and the work that you do is what’s important – not how well known you are, not this thing of celebrity. I learned early on it’s pretty easy to get carried away. But it does have its advantages. I had Spike Lee’s phone number, so I could text him.”
Talking Heads drummer Chris Frantz’s recent book Remain In Love suggests that the more successful Byrne got early on, the more distant he became.
Byrne nods. “I haven’t read the book, but I know that as we became more successful I definitely used some of that to be able to work on other projects. I worked on a dance score with [American choreographer] Twyla Tharp and I worked on a theatre piece with [director] Robert Wilson – other kinds of things – [and] I started working on directing some of the band’s music videos. So I guess I spent less time just hanging out. As often happens with bands, you start off being all best friends and doing everything together and after a while that gets to be a bit much. Everybody develops their own friends and it’s like, ‘I have my own friends too’. Everybody starts to have their own lives.”
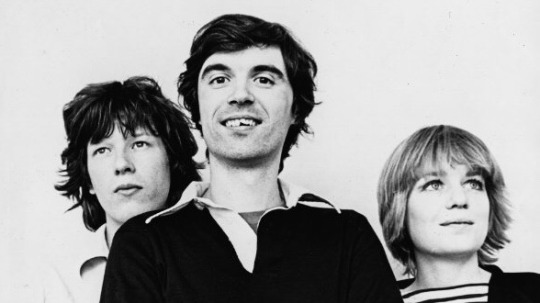
The future is far too enticing for David Byrne to consider revisiting the past. “I do live alone so sometimes it would get lonely”, he says of lockdown, but he’s been using his Covid downtime to cycle around undiscovered areas of New York and remain philosophical about the aftermath.
“We’ll see how long before the vaccine is in, before we return to being able to socialise,” he says, “but I’m also wondering, ‘How am I going to look at this year? Am I going to look at it as, “Oh yes, that’s the year that was to some extent taken away from our lives; our lives were put on pause?”’ We kept growing; we kept ageing; we keep eating, but it was almost like this barrier had been put up. It has been a period where, in a good way, it’s led us to question a lot of what we do. You get up in the morning and go, ‘Why am I doing this? What am I doing this for? What’s this about?’ Everything is questioned.”
Post-vaccine, he hopes to “travel a little bit” before looking into plans to bring the ‘American Utopia’ show back to Broadway, and possibly even to London if the financial aspects can be worked out. “Often when a show like that travels, the lead actors might travel,” Byrne explains, “but in this case it’s the entire cast that has to travel. So you’ve got a lot of hotel bills and all that kind of stuff. We wanted to do it. There might be a way, if we can figure that out.”
Once we all get our jab, will everyone come to recognise that, as Byrne sings on ‘American Utopia’s most inspiring track, ‘Every Day Is A Miracle’? “Optimistically, maybe,” he says. “There will be a lot of people who will just go, ‘Let’s get back to normal – get out to the bars, the clubs and discos’. That’s already been happening in New York; there’s been these underground parties where people just can’t help themselves. But after all this it’d be nice to think that people might reassess things a little bit.”
And with the algorithm as the new gatekeeper and technology beginning to subsume the sounds and consumption of music, what does the new wave Nostradamus foresee for rock in the coming decades? Will AIs soon be writing songs for other AIs to consume to inflate the numbers, cutting humanity out of the equation altogether?
“It seems like there’ll be a kind of factory,” Byrne predicts, “an AI factory of things like that, and of newspaper articles and all of this kind of stuff, and it will just exaggerate and duplicate human biases and weaknesses and stupidity. On the other hand, I was part of a panel a while back, and a guy told a story about how his listening habits were Afrofuturism and ambient music – those were his two favourite ways to go. The algorithm tried to find commonalities between the two so it could recommend things to him and he said it was hopeless. Everything it recommended was just horrible because it tried to find commonalities between these two very separate things. This just shows that we’re a little more eclectic than these machines would like to think.”
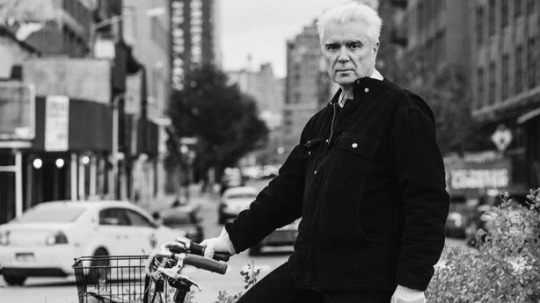
And in the distant future? Best prepare to welcome your new gloop overlords. Byrne isn’t concerned about The Singularity – the point at which machine intelligence supersedes ours and AI becomes God – but instead believes that future technologies will emulate microbial forms.
“I watched a documentary on slime moulds [a simple slimy organism] the other day,” he says, warming to his sticky theme. “Slime moulds are actually extremely intelligent for being a single-celled organism. They can build networks and bunches of them can communicate. They can learn, they have memories, they can do all these kinds of things that you wouldn’t expect a single-celled organism to be able to do.”
“I started thinking, ‘Well, is there a lesson there for AI and machine learning, of how all these emerging properties could be done with something as simple as a single cell?’ It’s all in there… when things interact, they become greater than the sum of their parts. I thought, okay, maybe the future of AI is not in imitating human brains, but imitating these other kinds of networks, these other kinds of intelligences. Forget about imitating human intelligence – there’s other kinds of intelligence out there, and that might be more fruitful. But I don’t know where that leads.”
His grin says he does know, that he has a vision of our icky soup-world future, but maybe the rest of the species isn’t yet advanced enough to handle it. But if we’re evolving towards disaster rather than utopia, we can trust David Byrne to give us plenty of warning.
December 18, 2020
#david byrne#talking heads#music#new wave#post-punk#art pop#avant funk#worldbeat#interview#nme magazine#2020
51 notes
·
View notes
Text
Camtasia Loop Video

I’m in the process of creating DVD videos from Camtasia Videos. I ran into a pretty hefty obstacle, though. My converted DVD’s looked blurry and low-quality. Using the software and settings below, I was able to create a sharp and well-focused DVD that played perfectly in my DVD player and allowed me to read rather fine text on my LCD TV.
The Software I Used
Zoom your video Select Animations in the tools panel and switch to the Animations tab. Click and drag the Scale Up animation to the clip you want to zoom. This adds an animation to the clip, with a default zoom already applied. To preview the animation, click and drag the playhead. I have a Camtasia project named aaa.camrec and want to capture an image in the middle of the video. How can I do it with highest possible original recording resolution? In Camtasia 2020, there is a new icon that looks like a camera in the timeline tools. The Loop: Our Community & Public Platform Roadmap for Q2 2021.
The video cutter in Camtasia allows you to trim the video and audio files separately. Cropping, zooming, and splitting are great techniques to have in your video editing tool belt! What is scaling? Scaling an image will change the overall size of that image. It is always best to display media at 100% scale in Camtasia.
Camtasia Studio 6 (for capturing the video and creating easy pan and zooms)
Sony Vegas Pro 8.0c (critical for getting a crisp AVI file)
Sony DVD Architect 4.5 (critical for creating the crisp, DVD ready folder structure)
Believe it or not, I’m using all the above on Windows 7 (64 bit) successfully.
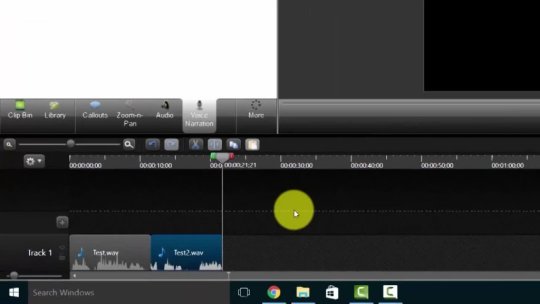
Export Settings for Camtasia Studio
In my case, I’m using an AVI video that was already created. It’s 640×480 in size. If you’re recording your own Camtasia videos, shoot the originals in 1280 x 720 for 16:9 video according to John’s instructions. This will allow you the maximum potential for leveraging your video in various mediums (YouTube, DVD, BluRay, etc).
Go ahead and edit your video in Camtasia to your liking. You’ll need to use Pan ‘n Zoom quite a bit to show detail on the DVD. Once you’re done editing and saving your project, it’s time to export the video.
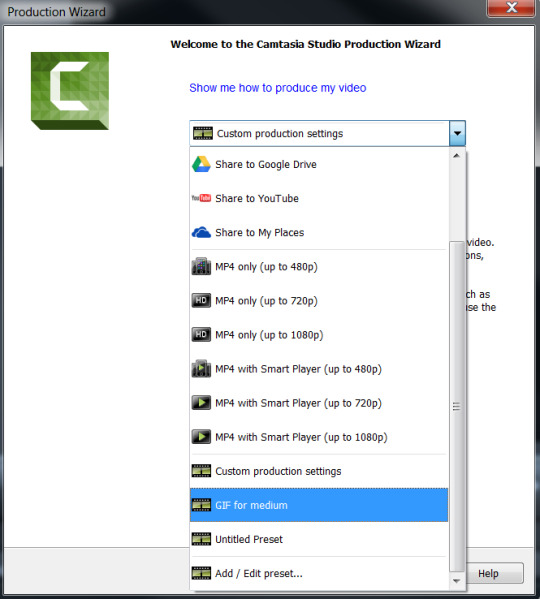
In Camtasia Studio, go to File > Produce Video As…
Select DVD Ready, then click the drop-down again and select Add/Edit Preset.
Make sure DVD-Ready is selected on the top drop-down and click Edit right below it.
Give the Preset a New Name. I used DVD-Ready AVI (NTSC). In hindsight, I should have named it “Sony DVD Architect Ready“.
Below are the settings I used.
Go ahead and export the file. This could take a while depending on the size of your video. Once it’s done, it’s time to load up Sony Vegas Pro.
How to Create a Crisp, DVD-Ready Video File in Sony Vegas Pro
Ok, we have the AVI file exported out of Camtasia Studio. You’re probably asking, “why don’t I just burn that file”? Firstly, we need to convert the AVI file into a DVD compliant structure.Secondly, most software the converts AVI’s to DVD structures compress the video into blurry, unreadable messes. AVS4You Video Editor, for example, did a terrible job rendering sharp files.
I got the best results using Sony Vegas Pro 8.0c and Sony DVD Architect 4.5. Basically, I’m using Sony Vegas Pro to create a crisp, new AVI file with minor tweaks that will make a huge difference on a DVD. Then I’m creating the DVD folder with Sony DVD Architect.
Here are the steps to Export the Detailed DVD AVI from Sony Vegas Pro:
Open Sony Vegas Pro. Go to File > Import > Media… and locate the AVI that Camtasia exported.
Right click the video in the Project Media window and select Properties.
Change the Pixel Aspect Ratio to 0.9091 (NTSC DV). Click OK.
Drag it into the Main timeline on the bottom.
Go to File > Render As… and use the settings below:
Then click “Custom…”
You’ll notice there are Tabs on the bottom of this window. Use the following settings on the tabs indicated below:
On the Project Tab, select “Best”.
On the Audio Tab, check “Include Audio Stream”.
Optionally, type in a new name for the template and press the “Save” icon. This makes it easy to select later.
Click OK.
Click Save to Render the MP2 (.mpg) file.
How to Create the DVD File in Sony Architect 4.5
Now you have a DVD Architect Compliant MP2 file that’s ready for DVD folder creation. If you didn’t do the step above, DVD Architect would insist on re-compressing the video file again to make it DVD compliant. By using the settings above, DVD architect will simply create the necessary DVD folders and “package everything up” for a Burning program like Nero, AVS Disc Creator, etc.
Camtasia Loop Video Editor
Open Sony DVD Architect.
On the bottom left panel there’s a tab called Explorer. Click it and find the previously created AVI file.
Once you find the file, it will appear in the right window. Right click it and select Insert Media.
It will be added to your DVD Menu.
Now go to File > Make DVD.
Click Prepare and in the next window, find a folder to save the DVD folder to. Click Next.
You should only see 1 Warning message about Audio being compressed. If you see a warning about video being compressed, you messed up somewhere.
Click Next. There should be “No Messages to Display” again.
Click Finish to create the DVD Folder. Warning: this will create an UGLY DVD disc menu. Creating pretty menus is outside the scope of this article.
Burn Your DVD
For the last step, you simply need to burn your DVD folder to a DVD. You can use Nero, AVS4You Disc Creator, CDBurnerXP or whatever else you wish. However, make sure you burn it as slow as possible to be sure it will play on all DVD players. Car DVD’s are especially sensitive and need to be burned at a max of 4x.

That’s it, enjoy your new, crisp DVD on your TV.
P.S. There’s also a really good course on converting Camtasia to DVD by John Rofrano. It goes into much greater detail.
Need to change the focus of your video clip but you don’t want to re-shoot your footage? The crop tool can help!
Cropping is the process of moving or adjusting the edges of an image or video clip.
Often used for photo editing, it is also helpful when editing video. With cropping, you can remove unnecessary or distracting portions of a video clip or change its dimensions to fit within a certain area.
Whether you’re working with footage from a camera or screen video, you will likely run into times when you need to crop these clips. Camera footage is often cropped to change the emphasis of a shot or remove unwanted and distracting portions.
Whether you’re working with footage from a camera or screen video, you will likely run into times when you need to crop these clips. Camera footage is often cropped to change the emphasis of a shot or remove unwanted and distracting portions.
Camtasia Video Editor
How to crop a video
Here are step-by-step instructions to crop a video using Camtasia.
Start cropping your own videos with Camtasia!
Download a free trial and get started today!
Step 1:
With a video clip or image selected on the canvas, you can select the crop tool button.
Step 2:
With the crop button selected, select the video clip or image that you want to crop.
Step 3:
A thin blue line and handles will appear on your media, signifying that crop mode is enabled.
Click and hold the handles to drag the edges of the clip or image until the desired shot is achieved.
Step 4:
When you’re finished, toggle back to the cursor by clicking the pointer option above the canvas.
After a clip is cropped, you can move it wherever you need on the canvas.
How to un-crop a clip
Using Camtasia to crop a clip is particularly convenient because it’s “non-destructive.” This means that when a clip is cropped, the original clip remains intact.
Camtasia Free Download Windows 10
So, if you’re working later on and realize you need to change how the clip has been cropped, you can!
Simply use the steps earlier in this post to toggle crop mode and make the necessary changes by adjusting the edges.
How is cropping different from zooming and trimming?
As we discussed above, cropping is the process of moving or adjusting the edges of an image. Of course, there are other ways to edit your video that don’t involve cropping images or parts of your video. Splitting and trimming are two common techniques.
Zooming is perfect for software tutorials and demonstrations when you need to display a detailed view of a user interface. Camtasia lets you zoom in or out in your videos by changing the size or scale of clips and images.
Trimming usually refers to removing part of the beginning or end of a video clip. Sometimes, this is referred to as trimming the top or tail (beginning or end). Trimming is critical to making sure that your video starts quickly and you don’t lose your audience’s attention. The video cutter in Camtasia allows you to trim the video and audio files separately.
Cropping, zooming, and splitting are great techniques to have in your video editing tool belt!
What is scaling?
Scaling an image will change the overall size of that image. It is always best to display media at 100% scale in Camtasia. Camera footage can sometimes be scaled down without losing as much clarity.
In either case, stretching a video or image larger than its natural size can cause pixelation. The scale of a clip or image in Camtasia can be viewed and edited in the Properties panel.

When you should crop a video
Here are a few ways that cropping can be a helpful technique to have in your toolbox:
Fitting footage in a specific space or frame – like a device frame
Patching a mistake or irregularity in a screen recording
Removing black bars from mobile video
Showing simultaneous actions happening in separate areas of your screen
Displaying multiple clips on screen simultaneously
Isolating part of a user interface
Camtasia Video Editor Download Free
Now that you have learned how to crop a video in Camtasia, get out there and work some video magic!
Related Posts:

1 note
·
View note
Text
Chinese Social Media: The Basics
Chinese Social Media: The Basics
We, as a global society, are at the forefront of technologies’ unique ability to bridge countries like China and North America.
By simply creating social media accounts, artists can immediately connect with the 3.5 billion people that are currently active on these platforms. Of those 3.5 billion users, almost one-third are located in China, where western social media platforms are banned. It’s no secret that China is a strict Communist country, imposing fierce internet regulation laws where, according to a story on South China Morning Post, social media users can’t even discuss politics without being banned for “politically harmful information”.
So if China can’t use Instagram or Facebook, what do they use?
Despite these regulations, and even with completely different platforms, China added the greatest number of new social media users over the past 12 months, with the country’s total rising by close to 100 million new users since this time last year.
If you haven’t realized by now, establishing your brand across western social media platforms still leaves out a huge chunk of eastern social media users.
WeChat
WeChat is China’s most popular, chronological social media platform, serving the purpose of Instant Messenger combined Photo/Video sharing. With over 1 billion active users, WeChat is widely used for business promotion, as it allows you to create business accounts in the form of a live blog and aggregate followers. Middle-aged and elderly users on WeChat are increasing more than any other app as younger audiences move to Weibo as businesses become the primary users. Brands can launch apps directly within WeChat and market the app directly to users who may be interested.
WeChat also includes a number of mini-apps that create an all-in-one format. Users can call a taxi, book appointments in hospitals, play games, order food, pay bills – it’s all possible on WeChat. WeChat Pay is also China’s easy payment system, by scanning a WeChat QR code you can pay via your WeChat wallet (attached bank account).
Weibo
Originally considered to be China’s equivalent to Twitter, Weibo is now migrating to become more like Facebook with various types of native adverting, semi-targeted boosts and even a live stream option. Of it’s 400 million users, Weibo is used for real-time communication, discussion of world topics, building a fan base, following hashtags, private messaging and more. More than 80% of active Weibo users are under the age of 30, making this platform extremely popular for musicians, young brands and millennials.
Brands can gain traction and recognition by harnessing methods like Weibo Influencer campaigns, Weibo advertising, and Weibo lottery (giveaways). These methods work best on Weibo due to their integration with Taobao and Tmall, two popular e-commerce websites, and are usually significantly cheaper than these campaigns on WeChat. Weibo ads are preferred by many users due to cheaper CPM, the unique ability to target users following other accounts (including competitors), and retargeting users – all things that WeChat doesn’t offer.
Douyin
Unknown to most U.S. users, Douyin is the original TikTok. Created in China, Douyin has moved to the U.S. in replacement of previous short video app, Vine. It’s no surprise that the majority of Douyin users are young people under the age of 35, and although created by the same company, Douyin and TikTok have some differences.
China’s Douyin is just like the entertainment-based TikTok we know and love but is way more e-commerce focused.
For instance, after watching someone dancing on Douyin, you can follow a link to purchase the shoes they’re wearing.
Douyin features some real 21st features like in-video search, where you can select a face from within the video and search for more videos their face is in.
While these apps may seem fairly easy to understand, their layouts and obvious language barrier can be confusing. Due to the complicated nature of these apps, music industry professionals like the East Goes Global team have harnessed their wide knowledge of China’s social media industry to help U.S. artists develop brands in the east. An important part of U.S. artists understanding Chinese social media is understanding the huge amount of potential fans and revenue they’re missing out on without Chinese brand recognition.
Don’t get left behind. Start thinking globally.
//
Check out:
How to Become a Social Media Influencer
5 Ways to Improve Your Social Media Game
5 Courses to Level Up Your Social Media
Chinese Social Media: The Basics Music Marketing Blogs
Chinese Social Media: The Basics
from WordPress https://ift.tt/36ybjb4 via IFTTT
3 notes
·
View notes
Text
21 Dollar Foot long
It’s been a hot minute, but I have a new fic for youse guise.
Angus receives a new app from his buddy which claims to allow him to host his very own growth drive! Angus could use the money, and it’s not like the app can really grow his cock. It’s just trick photography and photo manipulation, right?
Angus was sitting at his desk when he heard the familiar chime of a file being sent coming from his desktop computer. Having nothing better to do, he quickly opened up the chat window to see who had sent the file and what the nature of the file was. Angus was not at all surprised to see the message had come from his best bud, Donald.
“Check out this latest program I made” read Donald’s message.
“What does it do?” Angus asked.
“Oh. You’re gonna love this. You know those growth drive things that have been going around on Twitter?” Donald asked.
“Yeah?” Angus replied.
“Well, I got to thinking. Why don’t we try making one of our own!” Donald said.
“You know as well as I do that neither of us can draw for shit.” Angus replied.
“That’s the beauty of it. We won’t have to! Just fire up this program, pop in a few parameters, and let the magic of modern technology do the rest!” Donald said.
The whole conversation was carried out via text so it’s not like Angus could really hear the tone of Donald’s voice, but the speed at which he was firing back responses as well as the various typos made it pretty obvious that Donald was beyond excited by his latest pet project.
“If this is such a great idea, why haven’t you done it already?” Angus asked.
“Well…. I was kind of hoping that you’d be the one to try it out.” Donald replied.
“Me?” Angus asked.
“Yeah. I mean… You’ve already got the looks. I bet you’d have people lining up to see what you can do.” Donald replied.
“If you wanted to see me naked there are much easier ways to go about it.” Angus teased.
It was obvious by the ellipsis on the bottom of the chat program that Donald was typing something, but the long pause in between Angus’s comment and Donald’s actual reply made it clear that Donald was having a hard time picking his words.
After what seemed like ages, Donald finally replied, “Just try it out. You said so yourself you were strapped on cash. This could be a great way to make a few bucks.”
Angus couldn’t argue with that… well, he could argue with that, but he didn’t see the point in it. Truth be told, he was curious about what Donald’s program could actually do, and it’s not like there was any harm in firing it up.
Angus shrugged and clicked the file. Once it had finished downloading, he fired it up and easily coasted through the installation options and eventually got the app up and running on his computer. He was amazed at how clean and easy to use the app was. All it took was a few clicks and a few permissions and the program was fully booted up and ready to go. It had even gained access to Angus’s webcams. The cameras had already fired up and were fixated on him. One feed was zoomed out to show his whole body, and the other was zoomed in on his crotch, although since he was currently wearing boxers, the second feed only got a good glimpse of plaid.
Angus took a moment to look through all the options. It didn’t take him long to get a feel for how this app worked. There were some basic parameters he could choose. First, he had to link it to an account that he would receive pledges from viewers, and then he got to choose how much he would grow per pledge. There were tons of options he could choose from as far as how much to grow for each dollar value, but most of them seemed too unrealistic. He could do something ridiculous like 1cm per $20, but that would take forever to see any growth, and he doubted anyone would pay money to see something like that, especially since it was all just going to be on the fly footage editing. Angus could just imagine how he would look during his cam show with a comically stretched out ten-inch-long dong that seemed to curve and distort every time it moved as if it was being viewed through a convex mirror.
Eventually he decided to just click one inch per each $3 donation. This seemed like a safe enough bet. People did Ko-Fis all the time for growth drives so there were obviously people who would pay that much to see some trick photography do its thing. With the parameters set and his account linked, all that was left to do was to fire up the stream, and fortunately Angus had a site already in mind to host his little cam show. All it took was a few keystrokes, and he was logging and ready to go.
“Hey guys,” Angus said awkwardly and waved to his webcam. He could see the footage displaying on his computer screen of himself waving back at him as well as a second window of just a close-up of his still plaid-clad junk.
At the moment there was no one to reply back to his welcome, but that didn’t take long to change. Once his stream was live there was a steady trickle of viewers who popped in to check out what was up. The icon of the stream just showed an old photo of Angus flexing for the cam so a few people were there to see the hot, beefy stud wearing even less than he was in his avatar pic, but there were a few who had stumbled in because they were bored and looking for a few whack and a few who had stumbled in out of pure curiosity. His stream header promised dick growth, and that’s not something you saw every day.
There were only a few people in the stream by the time Angus got his first comment. “Now eventually you might have dicks on your dick stream, yes?” the comment read.
“Oh right. I suppose I ought to get right on into it,” Angus said. He got up from his chair and took a step back, all the while keeping an eye on his cam feeds to make sure that the cameras were still staying focused on him. Sure, enough one camera remained focused on his body and the other remained zoomed in on his crotch. Angus took just a moment to steel his nerves before hooking his thumbs into the waistband of his boxers and shimmying them down. It didn’t take long for his perfectly modest five inches to spill into view.
Angus was just about to sit down on the foot of his bed and get to wanking when he saw another comment pop up on his stream, but he quickly realized a small flaw in his master plan. It was tough to keep an eye on the comments on his computer while he was seated at his bed. He quickly scooped up his phone which he had left beside his PC and logged into his own stream so he could read the comments. While he was scanning the newest comment a few more popped up, but they all said roughly the same thing.
“Nice.”
“Great cock, bro.”
The real comment that caught his attention though wasn’t even part of his actual stream. Angus phone buzzed twice alerting him to two new messages: One text message and one email. Angus checked the text first since he doesn’t normally worry too much about emails, but the nature of the text made him keen to check his email immediately after.
The message had come from his pal, Donald. “Looks like you could use something to get the ball rolling there,” the message read. It didn’t take Angus long at all to figure out what Donald meant. Angus almost immediately felt a strange sensation across his cock and balls. It was a slight warmth almost as if his junk was pulsing with energy. Angus instinctively glanced down at his cock and what he saw made his jaw drop. His bait and tackle were actually growing! It wasn’t just the fact that he was getting hard either. He was always more of a shower than a grower, but even ignoring that fact, getting a boner wouldn’t make his nuts swell up too.
Angus quickly checked his email to confirm his suspicions. Sure enough, the recent email was from PayPal alerting him to a new donation of $3 from his pal, Donald, but that was just the start. Even while he was checking his new message his phone buzzed a couple more times, but rather than having a new email show up in his email list numbers appeared next to the PayPal alert email. First x2… then x3… then x4…
Angus checked the comments on his stream. He was too dumbfounded to do much modeling for his new fans, but his cock was more than happy to put on a show. He solid six inches was rock hard at this point and steadily creeping up in size as he read the recent comments.
“Woah! Did his dick just grow!?”
“No way!”
“I gotta try this out.”
“Same. I got three bucks to throw at this.”
“Me too. I got three bucks in my couch cushion.”
Sure enough, those commenters made good on their goal and tossed another $9 Angus’s way for a combined total of three more inches. Angus stared on in awe as his cock went from six inches… to seven… to eight… to nine… He couldn’t believe his eyes. He had gone from a perfectly average five inches to a porn star nine incher in the span of a few minutes! This wasn’t trick photography. This was real! Donald’s app actually worked! Angus was too stunned to think too hard on it. All he could do was stare at his cock. He had to be sure what he was seeing was real. He had to feel it with his own hands, and his audience was only all too happy to watch him do just that.
Angus plopped down at the foot of his bed and wrapped a hand around his fat cock. He could barely fathom how huge his dick was now. It was like gripping a water bottle. His cock used to only just barely poke out past his palm when he gave his rod a good tug, but now he had room to spare. He could almost get his whole other hand around his shaft, and judging by the buzz of his phone, he got the impression that would soon be possible.
Sure enough, Angus felt a familiar warmth pulse through his penis while he had his hand around his crank. He could actually feel his dick getting thicker in his hand. His had to loosen his grip as his cock grew fatter in the palm of his hand, but that wasn’t all that changed. His dick not only got thicker but longer as well, and his balls were growing right alongside the rest of his junk. His nuts had grown from the size of cherries to the size of cherry tomatoes and were showing no signs of slowing down just yet.
Angus continued to stroke his swelling cock with one hand while he held his phone in the other and glanced at the comments in his stream. The comments were really blowing up. His did a double take as he saw that his follower count had quickly climber through the double digits and were rapidly approaching triples, and it didn’t take him long to find out why. A few of the comments said it all.
“Oh man. He’s huge! I know a site that’s gonna love him!”
“Is his dick growing!? No way! I gotta show this to my server!”
“I gotta share this on Twitter. They’re gonna go nut for this guy!”
“God. They gotta see this on discord.”
Angus had gone viral, and more viewers meant more potential donators, which explained a lot about why his phone felt more like a vibrator than a minicomputer. Angus could scarcely fathom how fast his cock had reached porn star status, and it didn’t seem like his growth was going to slow down any time soon. Judging by all the new arrivals, he might reach absurd sizes in the very near future.
Angus stared at his cock as it continued to grow and swell. He was so shocked at what he was seeing that his mind was lagging. As his cock grew past a full foot of fat dong, he started to wonder if maybe he ought to pull the plug on this little pet project or at the very least turn off the donations. He was more than happy to spend a little bit of time exploring his newly enlarged cock and he was sure his audience would love to watch him do so.
Angus was just about to get up from his seat at the foot of his bed and put a cap on donations, but something was stopping him from doing so. It was like his body refused to cooperate. He knew he should stop this before it got out of hand, he really did, but at the same time this thought in the back of his mind wouldn’t shut up. His cock was already hot as hell at a full foot. How great would it look like when it got even bigger? It had just gotten hotter and huger and sexier with each added inch. Just the thought of packing on a few more points on his pecker had his dick drooling pre. He could soon have a world record shattering schlong! Angus didn’t know what the current record actually was, but he was sure he rivaled it already. Even as he sat there staring at his schlong, he could feel his phone buzzing and see his dick swelling. It had surpassed a solid foot, that was for sure, but how huge was it really? He could always do the math, sure. He had a list of all the donors and knew how much dick he had started with. It would be a simple matter of tallying to donations to see how huge his cock was now, but where’s the fun in that? It had no punch. No pizazz.
Angus quickly got up from his seat and scrambled for his desk, but he didn’t touch his computer. Instead he opened the drawer and fumbled through the various items inside. At first, he pulled out his trusty ruler, but after a quick glance at his computer screen he quickly changed his mind. The camera feeds now both showed a close-up of his cock and balls, and it was plain to see the foot-long standard ruler would no longer suffice. The tip of Angus’s rock-hard cock now poked well past his belly button. Just seeing how huge his cock looked on cam made Angus even more excited, and his excitement led to a great show for his adoring public. His dick dribbled pre for all to see. He was so hot and bothered that his hands trembled as he dug deeper into his drawer for something that would do the job better than his now too small ruler, and soon he found what he needed. A tape measurer.
Angus plopped back down at the foot of his bed and hurriedly unfurled a segment of the tape measurer and held it up to his humongous cock. His dick was already sixteen inches long and growing by the second! He had to have hands down the largest cock of any dude on the planet! Surely this would be big enough, right? But even as he thought that he could hear his phone buzzing on the bed beside him. The donations were still flowing in!
Angus once again argued over whether or not to call it then and there. He could pull the plug on the stream right now and cap donations. He already had a cock that was seventeen inches long and growing by the second! His dick was beyond huge! His dick was already so thick that he couldn’t even hope to wrap a hand all the way around it. His cock was about as fat as a two-liter bottle of Coke. He had balls the size of large, ripe grapefruit, but even as he debated, he couldn’t help but wonder what it would be like to be even bigger. His cock already looked so amazing, and it was just getting hotter as it grew and grew. Surely it couldn’t hurt to add a few more inches to his already amazing cock.
Angus watched the twin video feeds as he reached down and cupped his balls in how hands and gawked at what he saw. The tip of his cock now reached up to his pecs. His nuts were now so huge that either enlarged orb filled an entire palm and then some. At the rate he was going he was soon to have nuts the size of his head! The mere thought of it caused his nearly two feet of fat cock to buck and lurch excitedly. Pre flowed freely down his humongous cock and his massive nuts and dripped onto the floor below.
Angus knew he needed to dial things back a bit if for no other reason than he was close to cumming, and the stream had barely even begun. He wanted to give his audience a good show and maybe squeeze a few more inches out of his donors before he blew his load.
Angus reached over for his phone which he had dropped on his bed when he had decided to be a bit more hands-on with his cock. He quickly unlocked the screen and skimmed over the chat to see what he had missed. The answer to that was not much. Most of the comments seemed to be more of the same.
“He’s so hot.”
“That cock is fantastic!”
“He’s almost big enough!”
Angus had to smirk at these comments. Was he almost big enough or was he just beginning? That was for his fans to decide – and decide they did! For no sooner had Angus had that thought than the conversation took a drastic turn.
“Nothing says we have to donate in increments of $3, right?” Someone asked.
“Not that I know of, why?” came a reply.
“Well, I think this is going a little too slowly.”
“I can put down some money for a BIG spurt.”
“I’ll match it!”
“Me too!”
“Let’s see him get YUGE!”
Angus gasped at what he saw. Just how much were they talking about chipping in? He had already packed on nearly twenty inches. His once average cock was now full two feet long! His dick reached past his nips and was as thick as his beefy bicep! His nuts were now the size of cantaloupes!
Even as Angus pondered just what his donors had in mind his phone buzzed to alert him that he had a new email. His hand trembled as he opened the email to see just what it was. He was not surprised to see it was another PayPal notice, but what did surprise him was the amount.
“I just chipped in 30 bucks.” One commenter said.
Angus read it again to be sure. Thirty dollars! That’s ten whole inches! That’s almost half what he already has!
“I said I’d match it and I will!” came the respond.
Sure enough, his phone buzzed again to alert him to yet another email, but he didn’t need to read this one to see what it meant. The previous email alerting him to a thirty-dollar donor now had an x2 next to it to indicate a duplicate. Sixty dollars… That was twenty whole inches coming at him fast!
Angus stared in awe as his cock began to grow with renewed vigor. Soon the tip of his dick was at his collar bone, and then his chin, and soon it was eye level! It wasn’t long before his dick poked up above his head. Angus stared in awe at the behemoth as it towered over him. His dick was almost as thick as he was, and Angus was no slouch at the gym! He had to feel it with his own hands to be sure it was real. He ran his hands up and down along the length of his newly enhanced rod. His hands looked and felt so tiny against his nearly four feet of fat cock. It was hard to believe that just this morning he could easily wrap a hand around his dick. Now he could wrap both ARMS around his cock.
Angus peeked around his humongous cock to get a glimpse at the camera feeds. Both feeds were now basically showing the exact same footage – a giant cock with some arms and legs poking out from behind it. Angus could scarcely fathom how huge his cock had become. His nuts had swelled up right alongside his dick as well. His nuts were now as large as prize pumpkins! They hung off the edge of his bed and drooped almost down to the floor below!
Angus’s phone began to buzz once more. He couldn’t believe it. He was already so huge, and people were STILL tossing money at him? He quickly scooped up his phone, unlocked the screen, and perused chat once more.
“FUCK He’s huge!”
“That’s so fucking hot!”
“He’s almost more cock than man now!”
“Almost”
“Are you thinking what I’m thinking?”
Angus gasped at what he saw. They couldn’t possibly be thinking what he thought they were thinking. Growing his cock even more so that he was more cock than man? That’s ridiculous! Yet even as the thought crossed his mind his massive schlong lurched with glee. Pre oozed down his four feet of cock, and his phone buzzed again and again.
Angus watched in shock and awe as his cock climbed higher and higher. It was coming dangerously close to hitting the light fixture above his bed and showing no signs of slowing down, and even without looking he could tell his nuts were growing too. He could feel the cool, faux-hardwood laminate of his dorm room floor against the underside of his swollen nuts.
Angus craned his neck around his monstrous cock and stole a glance at the video feeds. His cock now touched his ceiling. His nuts now rested solidly on the floor like a pair of massive, fleshy bean bag chairs. Angus knew for a fact he needed to stop this, and soon! His cock was thicker than full-sized punching bag! When he wrapped his arms around it his fingers only just barely touched on the opposite side.
Angus unlocked his phone once more and quickly typed a message into the chat. “Ok, guys. That’s enough for one day.” But his message was met with an automated message from the server. “Guests may not comment on this video. Please log in.”
Angus’s eyes fell upon the follower count in the corner of the screen. His cock was now so huge that it hit the ceiling! He had to angle it back to keep it from mashing against the light fixture above him, and he was still gaining followers and fast! He couldn’t believe there were so many people pouring in even this late into the stream, but it didn’t take him long to figure out why.
“I shared the link to this vid with some forums I lurk. I know for a fact they’ll love him there.”
“He’s almost a little small for some of the forums I linked him to.”
“We’ll soon fix that.”
Angus cursed under his breath and hurriedly typed in his username and password. Even as he did this, he could feel his phone buzzing and his cock growing even larger. Angus couldn’t believe how huge he had gotten nor that he was still getting bigger. He thought for sure his watchers were done with him, but even as he typed in his log-in credentials he could see the chat still going.
“Fuuuuuck he’s huge!”
“Hell yeah! So hot!”
“Bigger! Bigger!”
Angus finished typing in his password and groaned at what he saw. Invalid password. It must have been because his hands were shaking that he botched the password, but whatever the case may be he had to try again and stop this mess. He typed his name and password in again, this time being extra careful not to make a typo and hit enter.
Angus flopped back in his bed and waited with bated breath while the loading circle spun in the middle of his screen. His cock was now so huge that he had to angle it towards the wall at the head of his bed. His cock was already as wide as his twin sized dorm bed and quite a bit longer. His dick was so long that it angled from the foot of his bed all the way to the ceiling against the wall behind him. “come on, come on…” he groaned under his breath as he watched the circle continuing to spin. He was running out of room for his enormous cock. If he got much bigger, he wouldn’t even fit in his own dorm room! All he needed was for the stream to load in once more and he could finally dial things back, but it was not to be. A new error message soon popped up.
“That user is currently logged in in another device.”
Angus one again cursed under his breath. There was no helping it. If he wanted to stop this he’d have to get up and head towards the PC sitting on his desk, but that was easier said than done. For starters, his desk sat on the opposite side of a solid wall of cock and balls that kept him pinned to his bed! Angus slowly shimmied his way sideways off his bed. With each inch he moved he was amazed at just how incredibly heavy his cock and balls had become. His nuts alone weighed him to the ground like a ship’s anchor, and he couldn’t even imagine how heavy his dick would be if it wasn’t currently propped against the wall at the head of his bed. It took some finesse, but once Angus was off his bed, he was slowly able to crawl shift around his massive cock until he was now over top of it and crawl his way backwards over his massive nuts.
Angus stared in awe as he stood there with his back to his desk. His cock was now so huge that it filled almost his entire room. He was nearly pinned to his desk beneath the behemoth that was his cock and balls which presented yet another problem. He couldn’t get the drawer which housed his keyboard and mouse out from underneath his desk! He was pinned so tightly against his own desk by his gargantuan cock and balls that his own thighs were pinning the drawer shut!
Angus glanced over his shoulder at his desktop screen and gasped at what he saw. The audience was still cheering for him to get even bigger! Wasn’t he big enough already!? Sure, he couldn’t deny how staggeringly hot his massive cock and balls were, but how was he going to get through life attached to a schlong the size of a subway car?
Even as Angus pondered this another message caught his eye.
“Don’t worry, guys. I just sent him a BIG one.”
Angus could feel his phone buzzing in his hand. He had kept a death grip on his phone this entire time even without really realizing he had done it. He was almost afraid to look, but he unlocked the screen anyway. Sure enough, he had a new email from PayPal, but unlike the others this wasn’t a duplicate. This was a donation with a brand-new value on it. Angus was afraid to click the email and see what the amount was. Part of him wished that it was just another $3 donation… after all, he could see the $3 at the tail end of the email preview, but the … after the 3 worried him greatly.
Angus nervously clicked the email icon. It didn’t do him any good to hide from it. After all, he was going to be growing one way or the other. It was like ripping off a band-aid. Best to just get it over with.
Angus’s eyes nearly bugged out of his head when he saw the final value. Three… HUNDRED!? Who has that kind of money to throw at something like this!? But there was no denying what he was reading. Someone had thrown enough money at him to nearly double his already colossal cock. With the added eight plus feet of fat cock he was soon going to be at nearly twenty full feet of schlong!
“Oh, fuck…” Angus murmured under his breath. The sound of his own words sent shivers down his spine. It wasn’t a cry of shock or anguish. It was a moan of almost orgasmic delight! Even as he shuddered, he could feel his nuts tense up as if bracing for the largest load of his – or anyone else’s – life!
With his cock rapidly expanding once more, Angus soon found himself more than mashed against his desk. He was being pushed up and onto it by his own swelling cock and balls. Soon his ass knocked his monitor off the desktop. Seconds after that he was pinning against the far wall with his cock pressed against the wall on the opposite side of the room, and he still had several feet left to grow!
Angus wasn’t sure what he was going to do now. There was nothing he could do. All he could do was stand there and gawk as his cock outgrew his dorm room. Even now he could feel the wall begin to buckle under the onslaught of his swelling schlong. He could hear the plaster crumbling. He could see the lines spreading across the far wall as it cracked and crumpled. And then, as if a dam breaking, sunlight poured into his room as his cock spilled out into the open courtyard between dorm rooms.
Angus’s cock was free to extend to its heart’s content, but he soon found himself with another problem. His nuts had grown so much that he was now resting atop them. They were so massive that they almost pinned him to his own ceiling! His massive nuts filled up every inch of space in his room from floor to ceiling and from wall to wall! His entire dorm room was flooded with his own nut sack!
Angus groaned as he felt himself be pinned between his ceiling and his own swelling balls. For a moment he was sure that he was going to be crushed to death by his own package. He was just about to close his eyes and accept the end when he felt something quite peculiar. He wasn’t sure how and he wasn’t sure why, but he was sliding forward. The rough texture of the ceiling scratched against his back, but soon he felt the fresh air on his bare skin. It took a moment for his eyes to adjust to the sunlight, but when they did, he took stock of his surroundings and started to figure out what had happened. His cock had grown so huge and so hefty that the sheer weight of it was enough to pull his nuts right out of his room like the cork being popped off a wine bottle. He had fallen from his room on the second floor and landed with a thud on the grass below, but his cock and balls were just so damn huge that the single-story drop had felt like nothing more than an inch.
Angus was pleased as punch to no longer be in any mortal danger, but now he had a new problem to deal with. The arrival of a twenty plus foot schlong in the middle of campus had attracted a lot of onlookers, and there was nothing he could do to try and hide from their scrutinizing eyes. Fortunately, his phone had stopped buzzing, and so it seemed that he had finally reached his new, maximum size.
In part because he had nothing better to do while trapped atop his own package and in part because he wanted something to distract himself from the crowd that had gathered around him, Angus unlocked his phone once more and peeked in at the stream chat. It didn’t take long for him to notice that things had quieted down, and it was immediately clear why. The stream had been cut short. No doubt his PC had been knocked offline due to his growth spurt which had crushed his desk. Angus breathed a sigh of relief. At least this meant things would calm down now… or so he thought. No sooner had he breathed a sigh of relief than he saw a new comment in the chat.
“Dudes… you’re not gonna believe this, but I think this was real…”
“What? How?”
“Check the news!”
“This is on the new at my college! It’s real!”
Angus saw the previous poster link to a local news network that he recognized. He almost didn’t dare to click the link, but he knew he wouldn’t be satisfied until he saw the truth. Sure enough, as soon as the live feed loaded, he was greeted by the sight of his own gargantuan package splayed out across the lawn. While he gawked at the surreal view of his own cock from a third person perspective, he was soon alerted to something else. The viewer count was rising rapidly! It didn’t take long for him to figure out what was going on either.
“Looks like the growth stream is still on!” Said one of the new arrivals.
“Now that I know this is real, I can really crack open the wallet!”
“God, I wish that was me…”
“Fuck yes. Can you imagine being that fuckin huge!?”
“Huge! Huge! Huge!”
“Let’s make him even bigger boys!”
Angus didn’t know what to say or do. They couldn’t still grow him, could they? The PC was offline. The app was closed down! But even as he thought this, he could feel his phone buzzing and his cock pulsing.
“Oh fuck…” Angus moaned, but once again the tone of his voice betrayed his true feelings. Instead of being a groan of disgust his voice came out as a low, horny moan of carnal glee. His colossal cock gave a lurch of glee. Pre oozed from his person-sized slit. He couldn’t believe he was so turned on by this. He couldn’t move with a cock this big. There was no way he could walk around. His cock was bigger than a city bus and his balls were the size of bungalows. He had a cock that would make a blue whale weep with shame, and it was still growing! Angus was so hot and bothered by his swelling member that he could barely even focus on his phone, but he could see the alerts piling up. His missed emails now numbered in the dozens, and it wasn’t all just duplicates either! With each new email alert he received, the dollars being donated varied widely. Some people were chipping in the old fashioned three-dollar inch, but some people were really cracking open the ol’ check book. Some of the donations were in the triple digits! Some generous donors were adding entire feet to Angus’s already ginormous schlong!
“fuck, fuck, fuck…” Angus whined as he continued to try to dry hump the grass beneath him, but at this point his cock was so huge that his whole body could barely even budge it. Even if he rocked with all his might, his dick would barely even shift under his weight.
As he continued to grow the crowd around him grew and grew as well. Somehow all these viewers just made Angus even hornier. It was one thing to pose for a faceless crowd on a webcam, but it was another to have a huge crowd gathered around his dick as if it was some impromptu music festival in the middle of campus. With all the people turning out to ogle his growing member, it was shaping up to be a regular Woodscock on the dorm lawn. Soon it wasn’t just the local campus new team reporting on his swelling schlong. Soon he had the major new outlets from all over reporting on what some people were calling the story of the century. Some guy with a cock the size of ship was lying buck naked in the public park.
Some part of Agnus’s mind was still fighting against his own arousal. Some part of him still wanted to keep a level head despite his growing desire to paint the town white in one massive tidal wave of cum, but that part was quickly losing out to his growing libido. About the only thing keeping him even vaguely rooted in sanity was the phone which he clasped in his hand. He kept glancing at the newsfeed to try and take his mind out of the moment. Somehow seeing his cock in third person like this seemed to distance him from the truth at hand, but soon even this proved to just fuel the fire. As the chat continued to explode with chants of “Huge! Huge! Huge!” and “Grow him some more!” more and more links began to flood the chat. Some were to other news outlets filming Angus’s colossal cock from other angles, but others were from personal feeds from people who had gathered to explore Angus’s cock.
“Oh my god! They're actually going to do it!” said one of the posters as they linked someone’s livestream.
“the absolute madlads!” came a reply.
“I wanted to be the first to go in!” came another reply.
Do it? Go in? What were they talking about? Angus wondered. His curiosity got the better of him and actually managed to stave off his hormonal need to cream, but only for a moment. The view he was greeted to upon opening up the new livestream was enough to send his libido into hyperdrive all over again.
When the stream fired up, Angus was greeted to the sight of another student he was vaguely familiar with waving at the camera. The guy was clad in a damp, white t-shirt and a hardhat with a huge headlight attached to it. He looked ready to go spelunking but judging by the lighting the guy appeared to be out in the daylight instead of heading into a cave, but that soon changed. The guy lifted his phone further up to give a wider view of his surroundings. Behind the guy stood a large ladder which was propped against a large, fleshy looking wall. It didn’t take Angus long to figure out what said wall was, though. It was his own cockhead! The guy was actually about to climb into Angus’s dick and record the whole thing for all the watch.
Angus let out another horny whine. The flow of pre from the tip of his cock really began to ramp up, and after a few second delay he could see the flow of pre on the livestream begin to increase as well.
“I think he feels me.” The spelunker said in a corny accent as if announcing his actions in a comical parody of the Crocodile Hunter. The truth was, Angus COULD feel him, but only just barely. The guy crawling into his exposed cock head felt like little more than a tickle. The dude may as well have been a gnat compared to Angus’s whale-sized schlong. At this point Angus’s cock was so huge that his back and balls were pressed against the dorm building he had fallen out of and the tip of his dick nearly reached the campus admin complex across the large, open park. The park was nearly the size of a football field, and Angus’s dick damn near filled the whole thing! Just thinking about how huge he had become made Angus once again struggle to stifle a moan.
“Oi. This bronco’s really buckin’ now,” Said the spelunker a moment later.
Just the thought of having someone crawling around inside of his cock was driving Angus wild. He desperately wanted to cum, and yet at the same time he fought the urge with every fiber of his being. He couldn’t even say why he was doing it. It was almost as if some part of him was afraid this was all a dream and the moment he blew he would wake up and find himself back in his dorm with his old five-inch rod.
Angus watched the video stream and tried to make sense of what he was seeing through his hormone-fogged senses. At first glance it looked much like any other chasm some guy might go spelunking through, but the sides were soft to the touch and glistened pink. It was hard for Angus to comprehend that these chasm walls he was watching in the video were the insides of his own cock. As angus watched the video it almost seemed like the guy’s point of view was shrinking. The walls grew further apart and reached higher and higher, but it wasn’t the guy who was shrinking. It was Angus’s cock that was growing! Even now, Angus could feel the constant buzzing of his phone and feel the constant pulsing in his cock. He couldn’t even fathom how huge he had become. His cock was so huge that he nuts pressed hard against the side of the dorms. He was so high off the ground that his nuts now crested far above the torn-out hole that was his second-floor dorm room. His balls filled much of the courtyard that spanned from the dorm hall to the campus administration office. His cock was now so huge that had it not been for the curvature of his rock-hard cock, his cock would have long since crushed the multi-story admin complex. His cock now stretched so far that the head of it loomed over the science building halfway across campus. The puffy head alone of his massive cock now dwarfed the main lecture hall AND the connected labs. The pre leaking from his cock splashed down on the street below in giant, SUV-sized gobs.
Angus’s life as he knew it was effectively over. He had a city block sized cock, and still it was creeping up in size. He was so massive that even that large donations that had been pouring in barely made a dent in his colossal size, and yet, even if this was a dream he never wanted to wake up. He wanted to remain like this forever. He couldn’t get over how amazing having a cock you could land a 747 on felt. He couldn’t get over how amazingly hot it was to have such a massive cock and balls that no matter which direction he looked, all he saw was more and more cock and balls stretching off into the horizon. Even as his nuts got so massive that they crested at over roof of his dorm he wanted to get bigger and bigger. Even as he watched the video of the dude spelunking inside his cock and watched the light of the guy’s headlamp fade to nothing as it shone down the impossible depths of his colossal cock, Angus reveled in his own hugeness. If his fans never ran out of cash to throw at his constantly growing cock, he would be OK with that, but already he could feel the constant buzzing of his phone slowing down. His donors had nearly reached their limit, and Angus too was reaching his limit in a very different sense.
Angus moaned and writhed. His monolithic schlong shuddered. His mountainous balls tensed up. He was going to blow soon, and everyone could tell. In the throes of ecstasy, Angus’s phone fell from his hand and landed with a plap on the soft flesh of his colossal nuts. Somehow the impact knocked web browser back a page. It was no longer focused on the spelunker’s livestream and was back to the newscast. The newscaster was eyeing the teleprompter intently and let out a gasp.
“This just in. Apparently, this situation is the result of what has been called a “growth stream.” If my understanding is correct. People have been paying money to see this guy grow. Is that a thing?” The newscaster asked. Then something happened that made even Angus, in his addled state that he was, gasp with shock. The URL for his stream was displayed underneath the reporter. His cock was now an international news story. His humongous cock was being displayed to people all over the globe, and now those people knew of his stream!?
As if to answer his unspoken question, his phone began to buzz even more intensely than before. He had just gone international. Now even people who don’t lurk the specific parts of the internet that had wanted to see him grow knew of his story and how to make him even larger. Whether it was out of genuine horny desire to see him grow, some kind of morbid fascination, or just the good old internet troll wanting to cash in on an already absurd situation, the donations were rolling in faster than ever before.
The video feed on the newscast changed. It was now no longer focused on the reporter who stood in the shadow of his colossal cock. The view was now zoomed out from up high. No doubt this new video was taken from some news helicopter circling far, far above. The helicopter was so far above that Angus could neither see nor hear it, but he couldn’t deny what he saw. He recognized the area shown in the feed. It was his campus! … or what was left of it. His cock and balls now eclipsed the entire region. A solid square mile of academia had been completely eclipsed by cock. His cock was so massive that he couldn’t even see himself atop it. He may as well have been an ant atop an ambulance, the size difference was so severe, and he could still see his cock growing and growing on the news feed. At the rate he was going he would no longer just eclipse the campus. He could cover the entire town surrounding it!
Angus almost chuckled at the thought, but he didn’t get the chance. The imagery was too much for him to take in. He gritted his teeth and let out a loud, low moan. His cock shuddered with enough force to shake the ground surrounding it. Car alarms went off for miles around, and then the dam broke. Gigantic spurts of cum, each jet with enough jizz to fill a reservoir, arced through the air, and everything went white for Angus.
It wasn’t just the streams of cum that caused his vision to fade though. Truth be told, Angus was relatively unscathed from his perch atop his mountain-sized stones, but the sheer intensity of the pleasure that coursed through his miles of cock caused his mind to short circuit. He couldn’t think. He couldn’t see. All he could do was moan and writhe in ecstasy as he came and came again. There was no telling how long he was cumming for. It could have been seconds. It could have been hour. Time had no meaning to Angus while he was in the throes of ecstasy. All he knew was that by the time he finally started to come down from the high, it felt like it was all over far too soon.
As the fog slowly started to lift from his mind, Angus looked out over his surroundings. All he could see was flesh spread out as far as the eye could see. His cock and balls filled the entire landscape. It was impossible for him to grasp the sheer size and scale of his package from his current position. Fortunately, he had a way to get a different perspective on the situation.
Angus strained with all his might to reach his phone which had slid away from him during his climax. He was only just barely able to get his fingertips onto the edge of the phone, but it was enough to awkwardly fish the phone back into range. Once he had his phone back in his hands, he opened up the newscast from earlier. He watched in bemused fascination as the newscaster stood in front of his cock and balls and described the scene for the audiences at home, but what Angus really wanted wasn’t words. What he really wanted was video. Fortunately, it only took a moment for the feed to shift back to the bird’s eye view of the city. Angus marveled at how massive his cock had become. His cock and balls had completely eclipsed the entire campus and had spilled out into the surrounding city. His junk covered several city blocks. His dick had to measure in miles at this point. It may have just been the afterglow still in effect, but Angus couldn’t really consider what this meant for the long run. All he could think about for the moment was how amazing his colossal cock looked and felt, but there was someone out there thinking about the future…
Meanwhile in the suburbs, Donald gave a whistle of approval as he watched the aftermath of his new app. The size his buddy Angus had reached exceeded even Donald’s extreme expectations.
Donald tabbed over from the local news website over to the master copy of the growth app. He waited for a moment for the most recent donations to be processed before finally pulling the plug on this little experiment. Now that he knew what kind of market there was for a growth drive of this sort, Donald figured it was time to make some adjustments to the programming before his next test run.
Looking for more stories?
Check the [Series List] to browse series and check out synopsis and kink list for each
Or check the [Kink Compendium] to browse all stories and series based on fetish.
Browse art for all series over in the [Art Gallery]
Take your favorite stories with you on the go with ebooks available at [Ziel’s Book Shop]
If you like what you have read, consider [Buying me a Ko-Fi] or supporting me on [Patreon] Even just $1 goes a long way and there's even some perks for donating.
Follow me on [Twitter] for story updates.
#hyper#hyperphallic#hyper cock#cock growth#growth#story tag#Hyper (Search Tag)#Cock Growth (Search Tag)
138 notes
·
View notes
Note
How do you make a gif?
What a fantastic question.
This will be a full-blown tutorial, and I’m going to do my best to keep this as beginner-friendly as possible, but if anyone has any questions, feel free to ask via inbox or DMs or whichever way suits you.
You will need Photoshop to be able to follow this tutorial. I will be using this particular gif as an example:
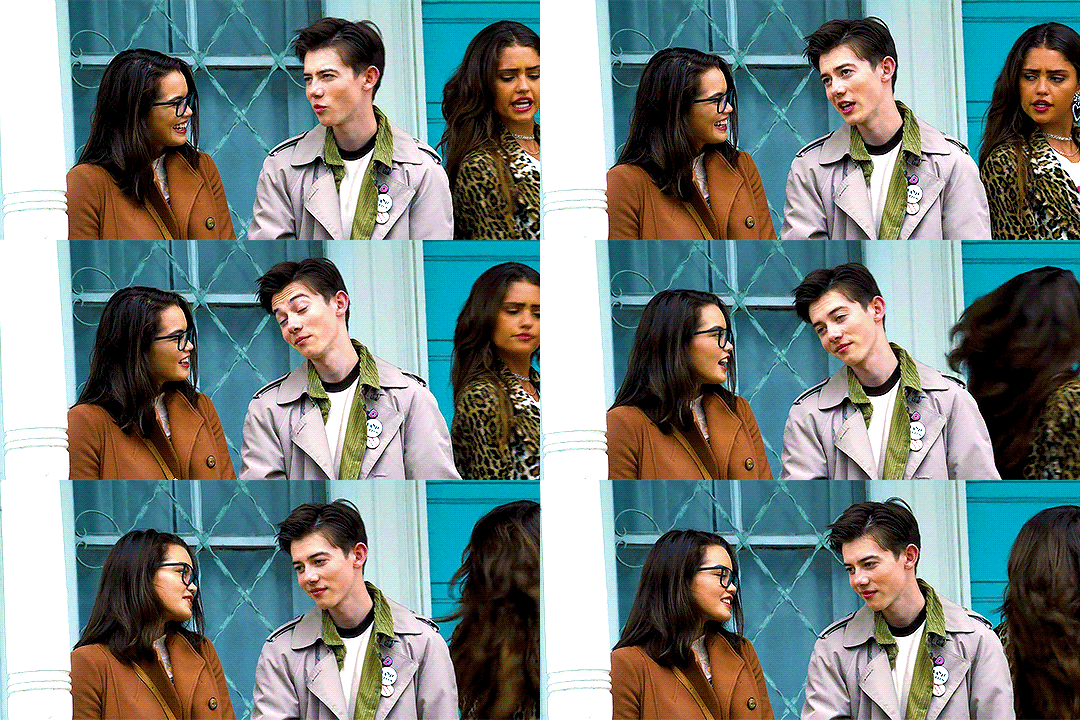
The rest of the tutorial is under the cut.
Step 1. Download
First we download the video we’re going to gif. It always has to be in HD quality, preferably 1080, but sometimes 720 can work too, but no less. Gifs will not look good if the video you’re giffing is in bad quality.
The idea is to use torrent as little as possible because of the consequences, so, depending on what I want to gif, my method of download will vary. If it’s a relatively recent and well-known movie/tv show, then I usually check out this website for movies, and this one for tv shows.
If it’s something more obscure than that - say an old movie - you’ll have to use torrent, unfortunately.
For youtube videos, I use this app.
Step 2. Screencaps
Now that you’ve downloaded your video, you’ll need to make screencaps. The app I use is MPlayer OSX Extended - it works only for Mac. For both Mac and Windows, you can use MPEG Streamclip, but I prefer the former because it can be used for any format, whereas MPEG Streamclip only works with mp4.
I actually don’t have MPEG Streamclip anymore, so this tutorial will only show how I personally make screencaps, so with MPlayer.
The steps are simple:
Open the video
Find the scene you want to capture
Pause the video
Hold ‘command + shift + S’ until the scene ends
Make sure you choose a folder in which you want your screencaps to save (before you start capturing). To do this, while your video is open, go:
Mplayer OSX Extended > Preferences

This window will open:
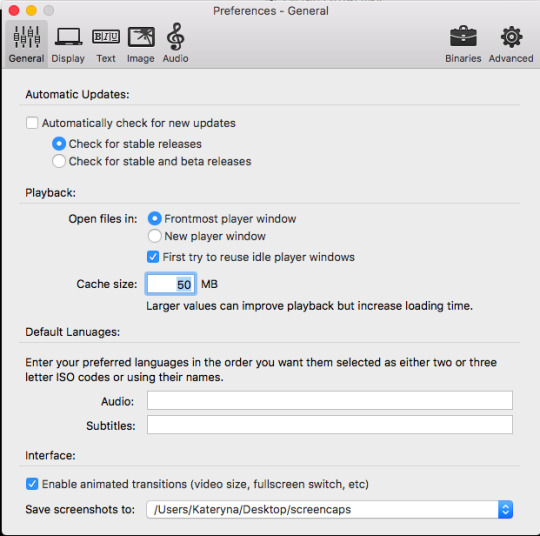
At the bottom, where it says “Save screenshots to”, you can choose your location.
Step 3. Importing Screencaps
Once the screencaps are done, we open Photoshop and go: File > Scripts > Load Files into Stack

Next it’ll open a browsing window, and you find the folder in which you saved your screencaps. At this stage I like to make sure I only upload the shots that will be on my gif, leaving out the extra ones I may have captured (like the beginning of the next scene, for example).
Use Shift to choose a lot of shots at the same time:
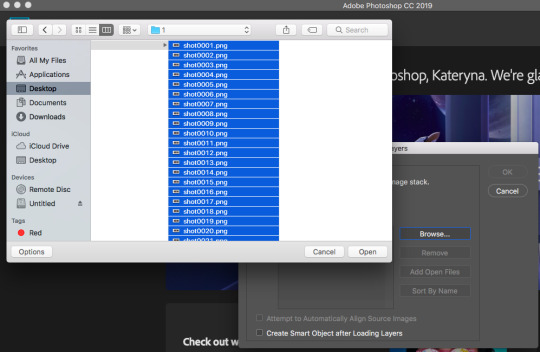
Then click OK.
While they’re uploading to photoshop, make sure you don’t click anywhere until the process is finished because otherwise it might not upload all the shots.
Step 4. Editing
Once your screenshots are in, the first thing you need to do is decide on the size of the gif. There are specific sizes which tumblr supports so that your gifs don’t appear blurred. I’m going to make a list of all possible combinations that I know. This will go from largest possible size a gif can be to the smallest and will show how it will look in gifsets (all the gifsets will be mine, sometimes from sideblogs).
Any number of gifs, one in a row:
540x540 (example)
540x450 (example)
540x320 (example)
540x240 (example)
An even number of gifs, two gifs in a row, side by side:
268x404 (example)
268x350 (example)
268x300 (example)
268x268 (example)
268x220 (example)
268x192 (example)
268x150 (example)
9 gifs:
177x177 for side gifs and 178x177 for the middle gif in each row (example)
In this case, I will be making a standard 540x240 gif.
First we resize the image. Because these are caps from a movie and not a TV show (resolutions are different for TV), the cap is wide but short, that means that I change the size of the image by height. To do this:
Image > Image Size

This window opens:

Where it says “height”, we type in 240 and click OK.
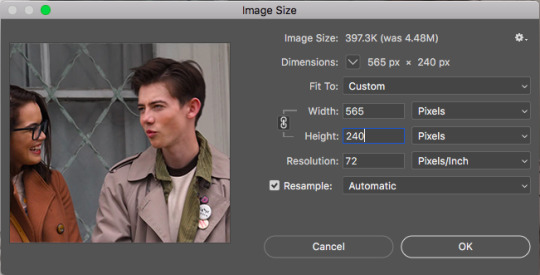
Then we zoom in to a 100%.
Next, we make sure the timeline is open. To do this:
Window > Timeline

Once that’s done, down at the timeline, we click “Create Frame Animation”:
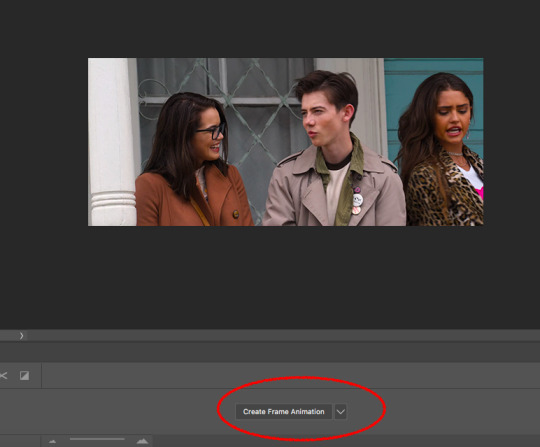
At the right of the timeline, right under the layers, we click on this little thing:
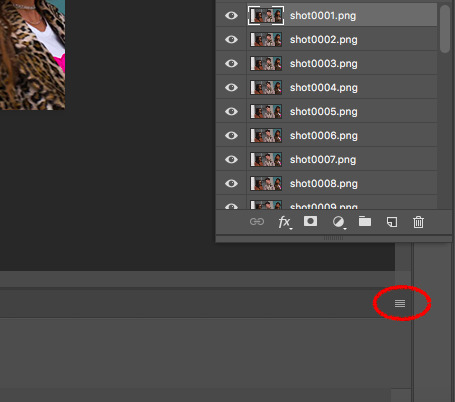
And choose “Make Frames from Layers”

The frames will now be in reversed order because that’s how the layers always upload, so we click on that little four lines thing in the upper right corner of the timeline again and choose “Reverse Frames”:

And now is the time to have a look at your frames and see if you need to delete any. Make sure that if you delete a frame, you delete a corresponding layer as well. The gif will have to be under 3mb for tumblr to display it correctly, so make sure there aren’t too many frames. But this isn’t a huge issue because once you’ve saved the ready gif, you can always reopen it and delete some frames.
In this case I have 36 frames, and I’m going to take it down to 34 just to be safe. This is what the gif looks like at this stage:

Once that’s done, the next step is to set the delay. Every giffer does this according to their personal preferences, but I personally do this. If your gif doesn’t involve any talking - so you won’t be adding text, then set the delay to 0.07. If it involves adding text later, don’t touch the delay at all at the moment, it’ll have to be done later.
Because this gif doesn’t involve adding any text, I’m setting the delay to 0.07. Again, hold Shift to choose all the frames.


The slowed down gif looks like this:
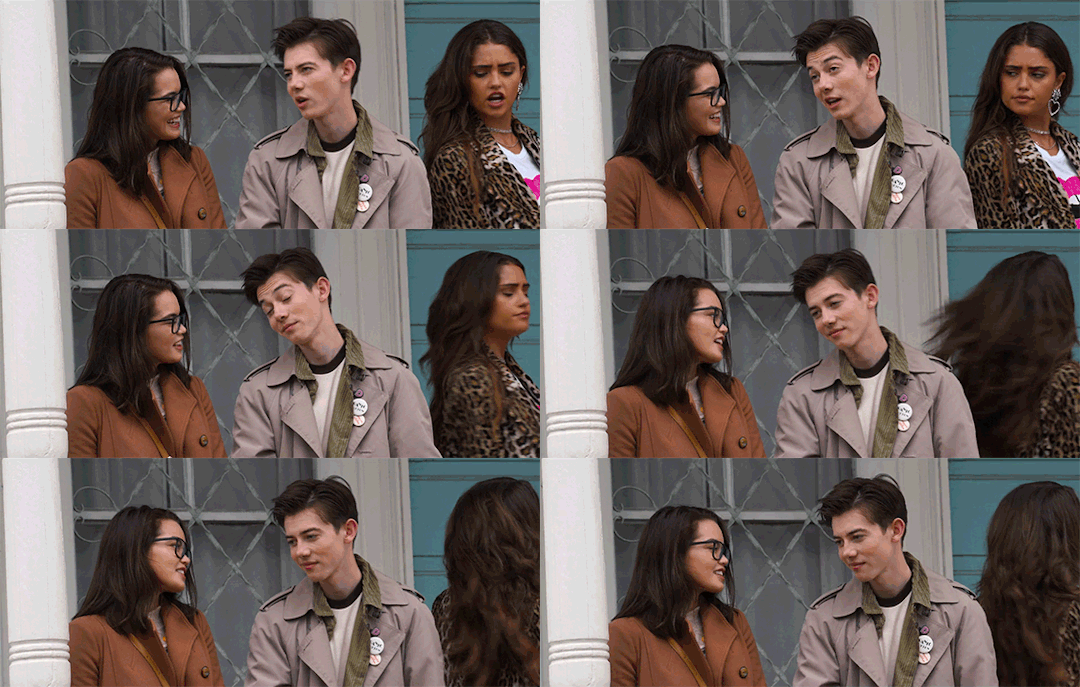
Now it’s time to crop! Choose the cropping tool and type 540x240 where it says “ratio”:
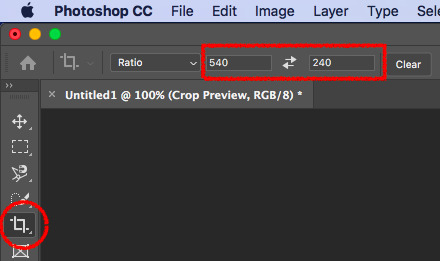
Choose the crop positioning to your liking and press enter.
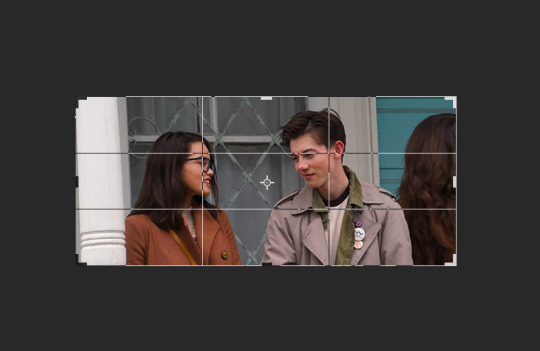
The gif at the moment:

Now we do last preparations before colouring. For this, click at the little four lines again:

And choose “Convert to Video Timeline”.
Then choose all the layers and go Filter > Convert for Smart Filters.

Then go Filter > Sharpen > Smart Sharpen:

Which will open the window for smart sharpening, and here are my settings:
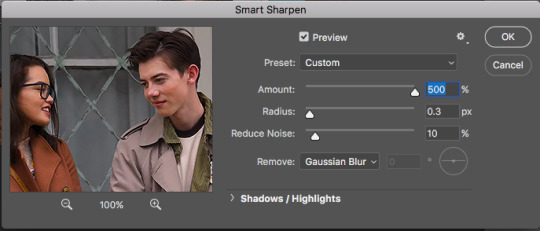
This is another one of those things that is down to each giffer, but what I usually do is, if it’s a really small gif, like 268x150 for example, I set radius to 0.2. If it’s a huge close up to a person’s face or a really big gif, like 540x540, I set the radius to 0.4. For all other gifs I always keep it on 0.3.
Then click OK.
Next, go Filter > Noise > Add Noise. Here are my settings for this:

Then, move the noise layer under the sharpening layer (I don’t know if this changes anything, but I always do it this way lol):
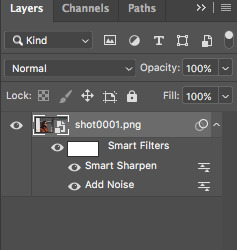
The gif ends up looking like this:

Now the editing is done, and it’s time to colour!
Step 5. Colouring
This is by far the hardest thing a giffer has to do, so if you don’t immediately get the hang of it, don’t be upset. You’ll learn eventually. I’m still learning, personally.
Again, all of this is very much down to each giffer, but here’s the way I do it.
Press the little “fill layer” button and choose Curves:

So the way I use curves is to even out the entire shot’s colouring. So if the scene is too red or too green or too blue or too yellow, it gets rid of the excess of that colouring and brings it down to normal. Can help so much in some cases.
What you do is choose the middle pipette in the window, which is to sample image to set grey point.

There’s also the option to set white point (bottom pipette) or black point (top pipette), but I don’t use those because it screws with your lighting too much.
To choose a point, I usually use the person’s eyebrows or hair. Sounds ridiculous, but it does work. In this case clicking on Dunkleman’s eyebrow makes the image too green:

So what I do instead is click on his hair, where it’s reddish brown, somewhere here.

This makes the image noticeably less red compared to the original:

But also, it made the image less vibrant, so we’re fixing that next. Fill layer > Vibrance:
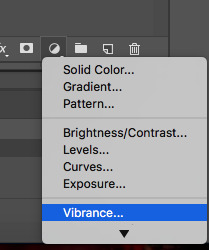
And then I set Vibrance to 100, always. If the image is still not vibrant enough for my liking, I set saturation (in the same window) to 10 or 25 in some cases. And for this gif, I will set saturation to 10.
Here’s how the image ends up looking (just make sure it doesn’t make their faces ridiculously red or something, but if there’s some excess of colour, don’t worry):
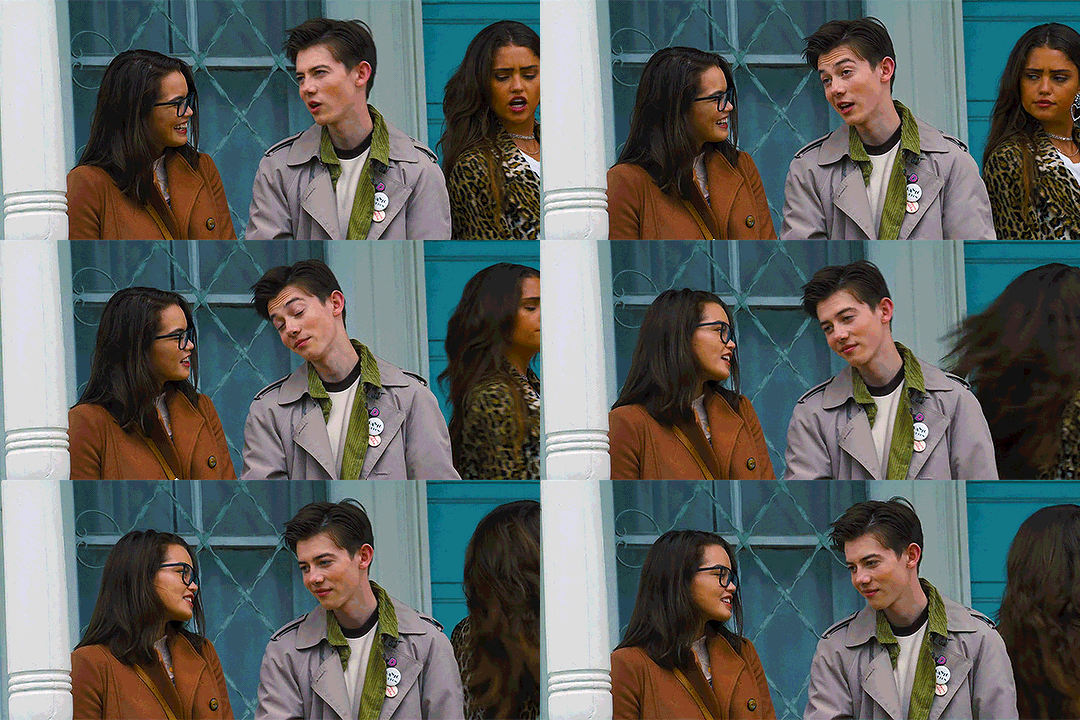
Now go Fill layer > Exposure.

Here are my settings for this gif:
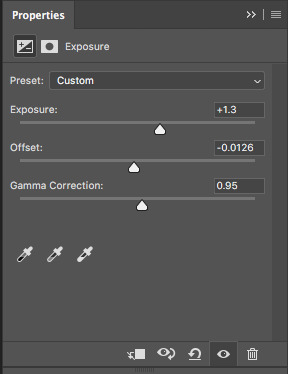
With exposure, it’s just a matter of keeping that balance between lightening it as much as possible but without their faces or bodies looking as bright as a christmas tree, and then adding offset and gamma correction to return normalcy to the picture.
Here’s what the image looks like now:

It’s obvious right now that their faces are a little too red and too yellow, so we’re going to fix that. Go Fill Layer > Selective Colour:
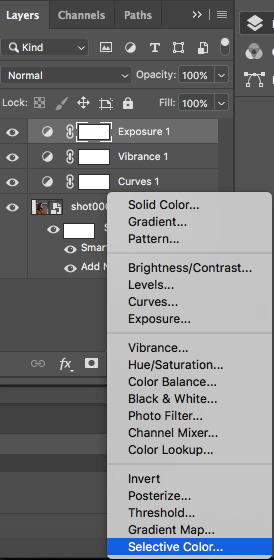
The task here is to make their faces appear as if they’re stood in normal daylight with no other filters. So as close to normal skin colour as possible. Be careful when giffing people of colour so that you don’t whitewash them.
In this case, I’m adding cyan in reds:

And taking down yellow in yellows:
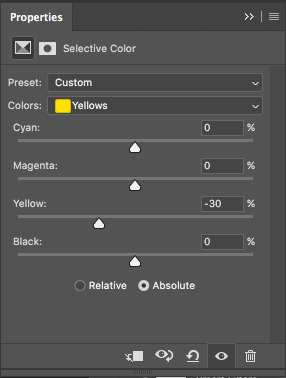
And here’s what the image ends up looking like:
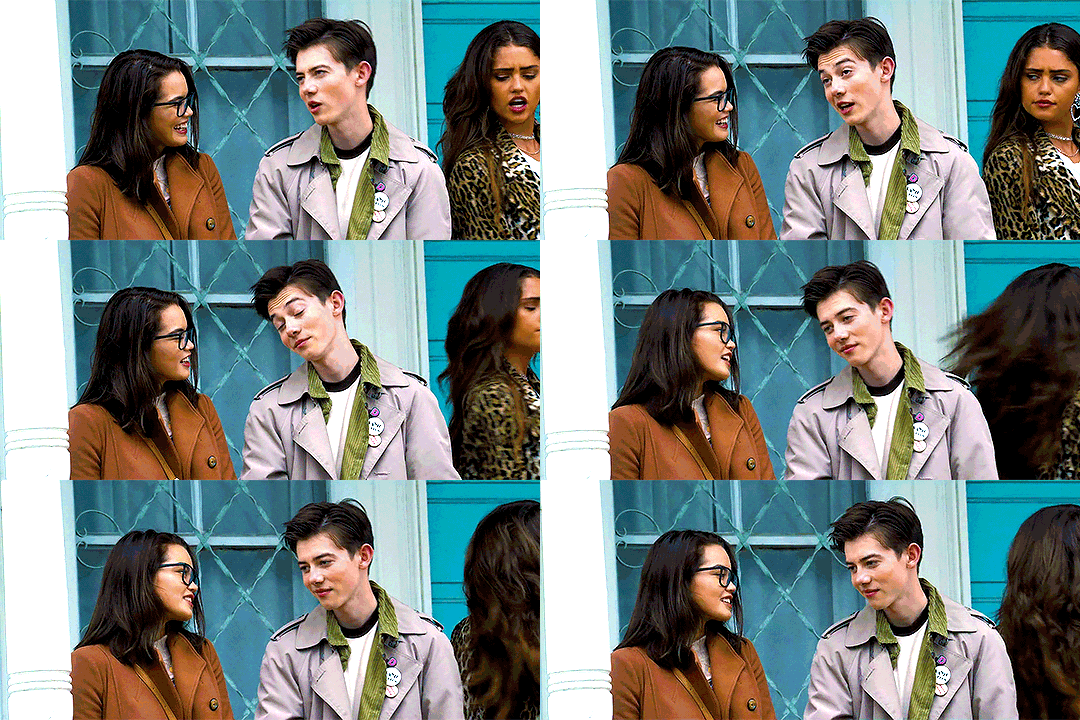
I’m quite satisfied with this result, so I’m going to leave it how it is, but sometimes I will tweak things more and use colour balance and other things.
Step 6. Add Text
Make sure you group your colouring layers at this point and then add your text as the top layer.
Step 7. Save the gif
To save a gif moving, you go File > Export > Save for Web:
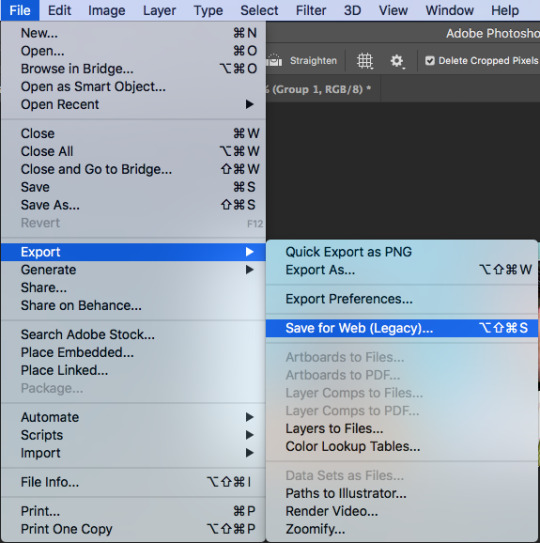
This window opens up, and make sure that in the bottom right corner, where it says “looping options”, it’s set to “forever”:
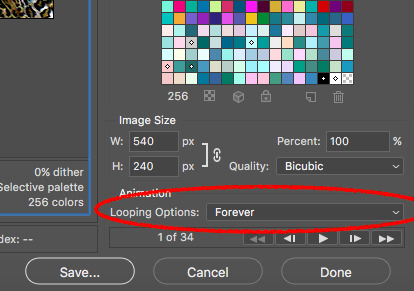
As the last step, I add dither because it evens out the edited colours in the background. I tend to use “pattern”:

Then we press “save” and our gif is done!

Step 9. Reopen
If you added text to the gif and followed my advice, you wouldn’t have touched the delay back at the beginning. This is because converting to video timeline kicks the delay either into 0.03 (too fast) or into 0.07 (too slow for speaking gifs). So you have to reopen the gif now and set the delay to 0.06 (that’s the speed I like for my gifs where someone’s talking on them).
This is also a good time to delete some frames if your gif is 3mb or over. Remember it won’t move if it’s not under 3mb!
Hope all of this makes sense, and let me know if you have any questions!
146 notes
·
View notes
Text
How I Color in Photoshop
I’ve been asked before how I do coloring. I hesitate to call this a tutorial as that implies this is the RIGHT way to do it. Instead, this is just how I do it. My image is a bit risque, but I think Tumblr will be okay with it. This assumes you already have a drawing saved as some sort of file that can be opened in Photoshop. The principal is the same in about every program, but the specifics of how to do things are different. So I’m starting with this:
(BTW, if the images are too small, try right-clicking and Open In New Tab. Seems to show a bigger image.)
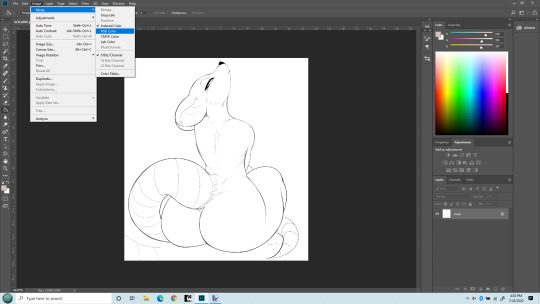
So first off, you may need to change the mode to RGB to work with it. I’ve opened the file here and am changing the mode to RGB. (Edit > Mode > RGB). Once that’s done, we can start working with adding a flat color, a soft shade and a shine layer to it. That’s what I’ll be up to here.

Next, I like to make the line layer editable, so I click the little lock icon there. By default when you do this it will name it Layer 0. That’s fine. If you’re anal you can change it to Line Layer or something.
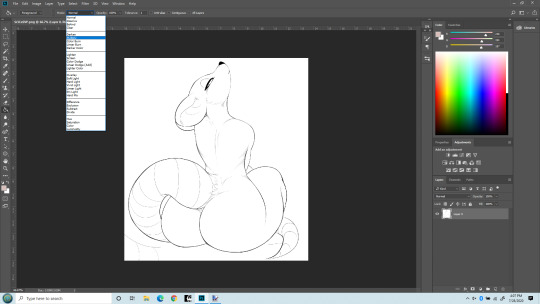
Next I’m changing the Line Layer to Multiply. This is pretty critical. You can do it from the top menu there, or there’s a place just above the layer name (where we Unlocked earlier) too. Either does the same thing. As best I understand, Multiply says to combine other layers with this layer So when we color, the white areas will be colored, the black lines won’t be.
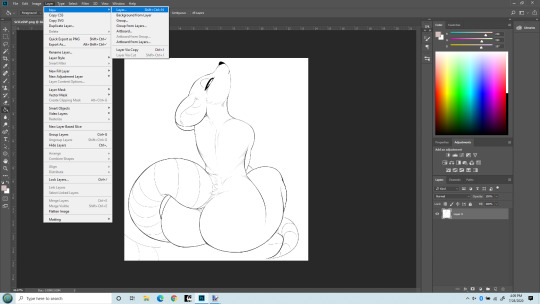
Now I’m adding a new layer that my flat colors will “live” on. It can be a Normal layer since it’s going UNDER the line layer and nothing needs be seen underneath it.

Okay, you can see my new layer on the bottom right I named Flat Color. That’s where our actual colors will be painted. (or more accurately, PENCILED!). You can drag layers above and below each other there, and this layer needs to be under the line layer. I used to make this the Multiply layer and had the line layer underneath it. That works, but will lead to issues later on as you learn to do more layers, so best to just always keep the line layer on top and MOST other layers under it.

Last step before we get to work. I do NOT paint flat colors with a paintbrush. I use a PENCIL. Because the pencil tool is pixel-perfect. That is, there’s no soft edges on a pencil line. Each pixel is either fully colored, or it’s not at all. Even the hardest brushes still have bleed over from pixel to pixel. The size of the pencil really depends on the size of the lines in the line art, but typically I set it at about 5 pixels. That’s pretty small, but lets me get into tight places. I’ve seen others do this differently - but this isn’t about them. It’s how I do it.
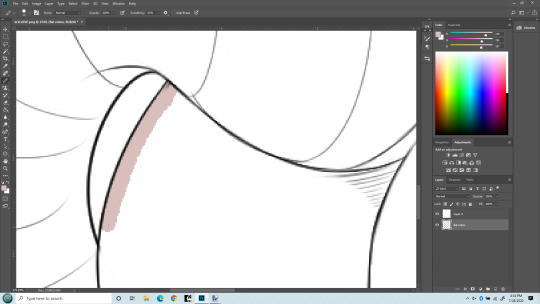
Time to zoom in and get coloring. I’ve chosen my color. Obviously this pencil is bigger than 5 pixels, but I wanted it to be clear what I’m doing. I’m drawing with my pencil right into the line itself. If I stray outside, I use the eraser (ALSO SET TO PENCIL SO IT ERASES PIXEL PERFECT) and keep the edge of the color underneath the black lines. I don’t care about the other side because Flood Fill/Paint Bucket will handle that later.
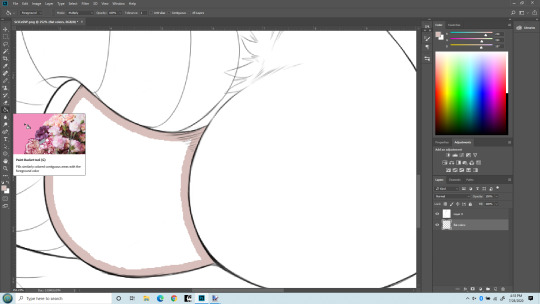
Here I’ve finished drawing the color inside her butt cheek, keeping the edge under the black lines. In practice I’d have gone on to everything that needs to be colored with the same flat color, but keeping this simple. Now I’m switching to Flood Fill/Paint bucket and am going to fill in the rest with one click. It normally will fill the entire section pixel-perfect, though sometimes around very tight angles it may miss a few. Those I fix with a pencil directly.

Bang! Butt cheek filled with a solid flat color. Now draw the rest of the damn owl. No, but seriously I will do this for the entire character with the various colors I want. For her I did this color for her body, a pinkish color for the tail and nose, a white and a green for the eyes. But there’s another advantage of doing this - I can select entire body parts by just selecting the Flat Color layer and use the magic wand to select everything that is that one color. Trust me, that’s a real benefit. You can get stylish later on, but having this flat layer is still awfully handy to keep FLAT. Okay. On to shading. Notice I now have a 3rd layer in between the Line and the Flat layers. It’s where I’m going to do Soft Shading. I also put it in between the line and flat layers, and I set the layer type again to MULTIPLY. Because I do want the flat colors showing through it.
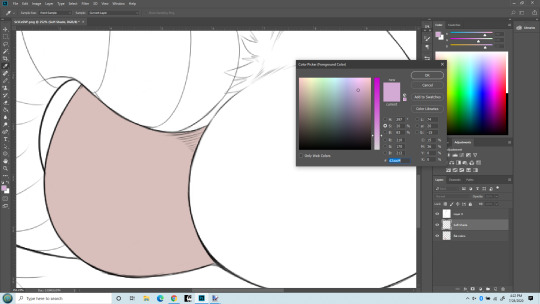
Now I’m getting ready for soft shading. I almost always you a greyish-purple color for shading. For me, it just seems to work the best. I know there are more intricate things, but this is a basics lesson. Another thing, when doing Soft Shading, I use a HUGE paintbrush set to the softest possible setting. Typically the brush spans the entire size of the body part I’m painting. I also SELECT just the part I’m shading. Sometime that takes some patience with the lasso tool, sometimes you get lucky and can just use the Flat layer to select, then move back to the Soft Shade layer. The important thing is to select only the part you are going to shade. You’ll have to do it over again on the other parts. Ideally the separation between the body parts will be a nice line you can hide the transition inside of. Othewise the Smudge tool is your friend to correct small mistakes in shading.

HUGE soft round brush. I think I used about 400px here. But the important part is, you don’t even put the center of the brush inside the section you’re shading! The shading is done with the edge of the brush. Essentially you’re almost doing a gradient.

Zoomed out with a nice soft shading. I did use a similarly soft eraser to work it back a little too.
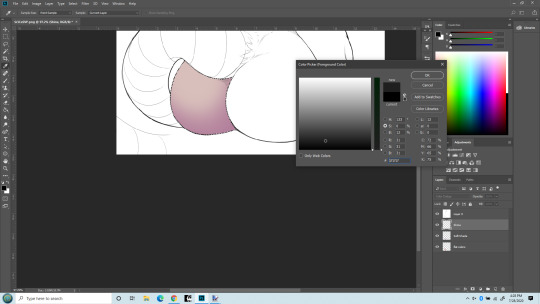
BONUS! Notice the new layer? SHINE layer! I put it above the soft shade. Really I’d probably do a hard shade layer in as well, done similarly to the soft shade in the same color but with a smaller, harder edged brush and just in limited places.
But I want to show the MAGIC of COLOR DODGE! That’s what my Shine layer is set to. Essentially if you color in black, nothing changes. If you color in a grey, it lightens the colors underneath. If you color in white, no matter the underlaying color, you get white. There are other blending types that work similarly but I just like the effect of color dodge best.
Also, note the color I’m chosing. It’s ALMOST black (which would result in no change). It takes only a very small bit of not-black to make a big difference. Going to give that cheek a highlight. First, with a soft brush at maybe 40px.
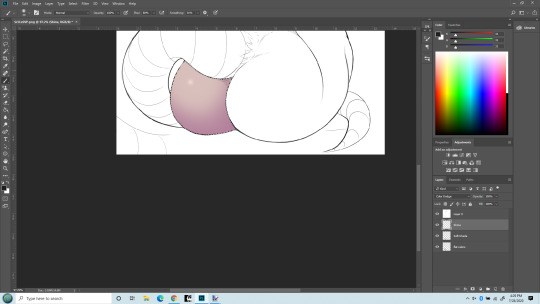
What a difference a little dot makes!!! Now that cheek’s really popping out! The type of brush used when making a highlight makes a big difference too. I do tend to overdo this, I know - but I like it! I can’t help myself! One last thing - what if I use a hard-edge brush instead of soft for the highlight?

Same size brush, but now its hard edged highlight. Really the softness (or other texture used) defines the kind of surface it’s on. The soft looks more natural, esp. on skin. The hard edge looks more like rubber/latex surface. (Neither look like rat fur, but sometimes you don’t care!)
That’s it. This is how I do stuff. Plenty of other things I could have mentioned. Reflection layer is a biggie. I like to do both soft and hard shading too. Eyes of course. Nothing makes a picture shine like good eyes. And then there’s what I truly call Highlights - a layer that goes on top of the line layer, so it can obscure even the lines. Backgrounds, which I’m not very good at but I almost always do them anyway because I like pictures that define a place and time as well as just a character. Shadows (as opposed to shading) which is frankly an art form in itself. But I’ve already put in more pictures of a rat butt than Tumblr is happy with so I’ll end it here.
5 notes
·
View notes
Text
*✧・゚ — GIF TUTOTIAL ・゚✧ *
I’ve been asked a couple times to put together a tutorial on how I make my gifs so this is me doing my best. Please be aware that I use Photoshop in German so all screenshots are in German. I’ll explain things in English of course and I think if you have basic knowledge of Photoshop and know how things look, it shouldn’t pose a huge problem. I am using Photoshop CC 2018 for this, so depending on your version, some things may vary.
1. Preparation
Your source material should be either 720 or 1080p for this and be in MP4. I’m using The Possession of Hannah Grace for this because I’m currently giffing it anyway. If your video isn’t MP4 already, I use xMedia Recode to copy videos over into that format. I’ll include this here because it’s a super easy and quick way to do it that changed my life.
Open the program and drag your source video (mine tend to come in .mkv) into it. In the ‘Format’ tab, choose .mp4. Now you’ll want to select the ‘Video’ tab and change the Mode from Convert to Copy. This is essential because it makes the difference between this taking 2 hours vs. 6 seconds. Do the same in the ‘Audio’ tab. Specify a folder to save the finished MP4 in at the very bottom. When you’re done, click the little green plus sign (”Add Job”) I marked below and after that, the “Code” button I also marked.
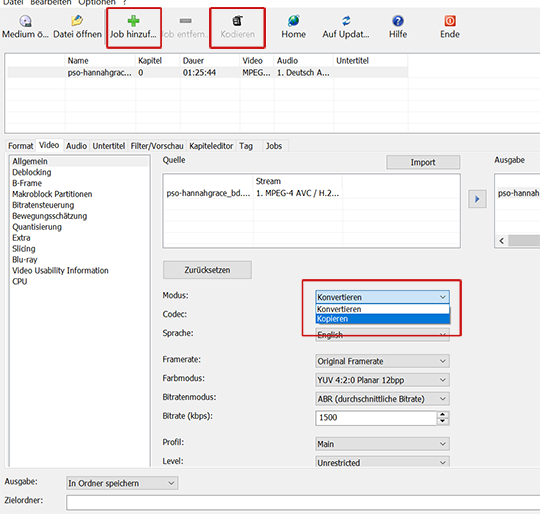
Now you’re done and have your .mp4 video. Open this into Photoshop by simply drag/dropping or going to File > Open... and selecting it. If it isn’t already displayed in timeline view, switch to it by clicking the little button in the bottom left left corner circled below. If you don’t have this bar at all, go to Window > Timeline.

Next change the speed of the video by right-clicking on the track (blue below). I always use 66% for my gifs. Click enter.

Because we’ve slowed the video down, you now need to drag the track back to its full length, otherwise you’ll miss the last third or so of your video. do this simply by grabbing the right edge of the blue track and dragging it to the right until it doesn’t move any further:

2. Resizing
Next, I resize the video. I actually make 3 versions of this for copping’s sake but because this is already complicated enough, i’ll stick to one for now. My gifs tend to be 268x151 so for this video, I went with the dimensions below:
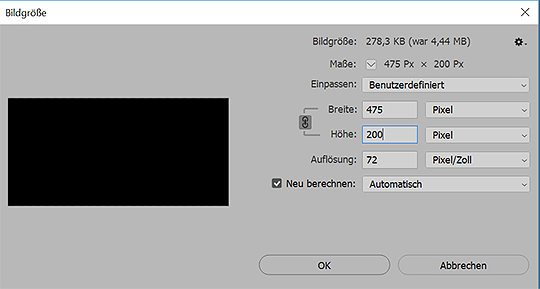
When you hit enter, you’re going to get a pop-up telling you Photoshop wants to convert your video into a Smartobject, just click ‘convert’.
Now, make a new image the size you want your gifs to be, so for me 268x151. Now drag the video layer on the right onto this new image and center it a bit. you’ll be moving this around later plenty anyway. Turn the timeline feature back on (button circled below):
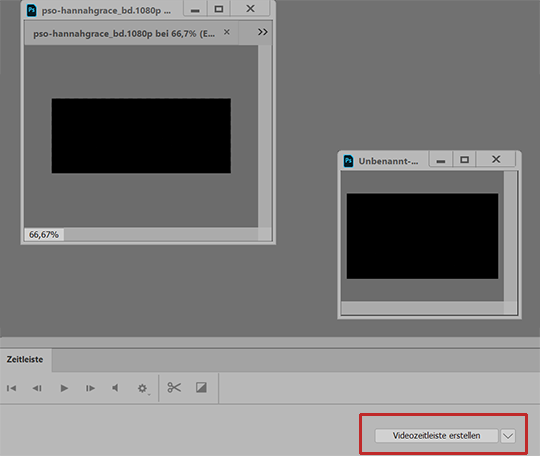
3. Editing/Sharpening/Coloring:
Cool, the hard part is done! Now onto sharpening. You can download an action for this or sharpen however you like. I personally do it this way: First I apply a selective sharpening (Filter > Sharpening > Selective Sharpening) as pictured below:

Next,
I’ll duplicate (ctrl + j) that layer and add a Gaussian Blur (Filter > Blur > Gaussian Blur) as follows on that duplicated layer:
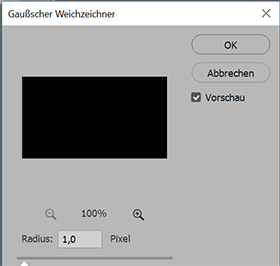
Things should look like below right now. Next, I put the opacity of the top (the duplicated) layer to usually around 27%. You can play around and see what you like best.
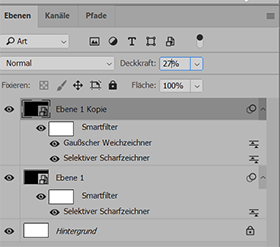
I then tend to put these two layers together in a Group (select both layers and then crtl + g) to make resizing and moving things around easier later. If you just applied a sharpening action or sharpened the one layer, you don’t need to do that. Next comes the psd. You can make your own or download one of the many available on tumblr:
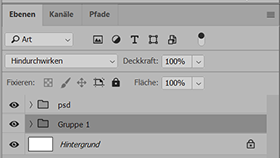
4. Giffing
And now to the actual part of making the gifs. For this, we use the timeline feature at the bottom. Using the current time indicator (the blue triangle thingy with the red line at the bottom that I circled) find the first little bit you want to turn into a gif/the first scene with your FC in it. I usually have the video open on the side in any video player so i can skip through and find the estimated position of where the scene is in the video (photoshop tends to be a bit slower than video players for me, so it’s faster to figure out whether I can just skip the next quarter of the timeline because there’s no scene I want to gif in it than slowly skipping through it with the time indicator).
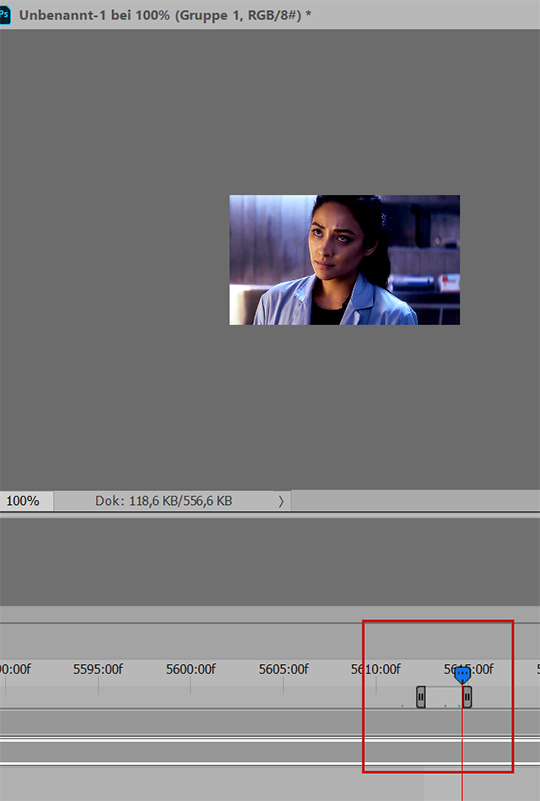
Once you found a scene, zoom in using the slider circled below. I usually do this until the markers are going by frame (the little f pictured above).

Now, move the start and end markers (the grey brackets above in the photo with the time indicator) to the position of where you want the gif to start and end. I use the time indicator to locate those points and to make sure there’s nothing else in the middle that I don’t actually want in the gif (you can see the little green dots above that indicate the time indicator has been placed there before). You’ll get a feeling for how wide you can make this bracket without the gif having like 200 frames. What’s pictured above is 32 frames.
5. Saving / Cropping
And that’s the hard part done, honestly! If you need to crop a certain scene differently, you can do this by selecting your video layer/the Group with your layers in it. Then go to Edit > Transform > Scale. Make sure to lock dimensions by selecting the little chain-link at the top and then you can just drag the video larger or smaller until it pictures exactly what you want it to.
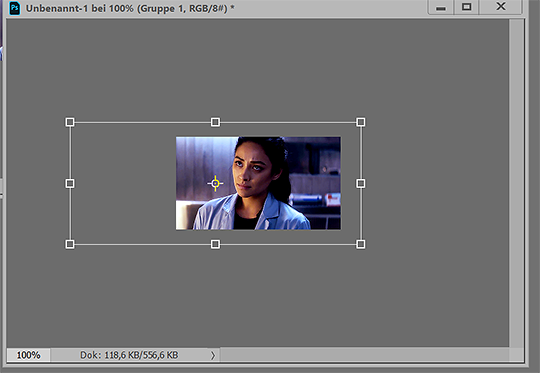
And now we just save the gif as per usual. So just go to File > Export > Save for Web and we’re done:
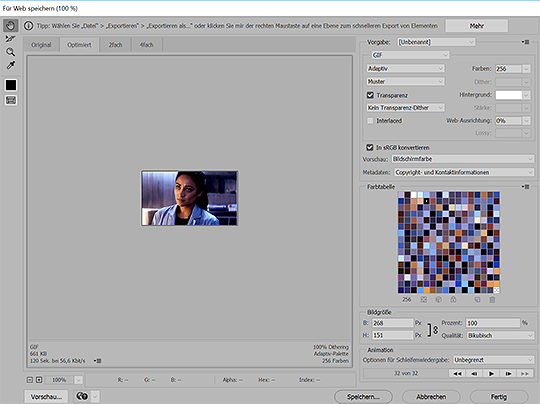
And that is how I make gifs. I hope this was at all useful. If anything is unclear, please don’t hesitate to message me about it and I’ll do my best to clear things up!

242 notes
·
View notes
Text
6 Ways To Incorporate SEO While Building A Business in 2020
There’s no quick fix, or “one and done” solution when it comes to search engine optimization (SEO). You have to be prepared to play the long game to see the full advantages of SEO when developing a site — and it's worth it to see your site rank highly on search engine result pages.
That said, there are some methods that will give you a quick boost. Shift more attention to the most significant ranking factors and tactics that will give your site the ability to rise to the top of the search results this year.
Choose a Responsive Design
User experience is a big deal these days. Google loves to serve its users the best results possible. If your website isn’t easy to use on a mobile device, you’re going to suffer a setback in ranking. Think about it, have you ever landed on a site where you had to zoom in to read the text and scroll side-to-side to read all of the content? This was most likely the desktop version of a website. It was made for larger screens and doesn’t reformat to fit on different screen sizes.
Responsive sites will resize images and reorganize the blocks of content according to the size of the screen. If you want to test whether a website is responsive, open up a web page on a desktop or laptop. From the full screen, shrink the window by clicking and dragging, and you’ll see the sidebars move, the navigation and header will take on new positions and the content and images will line up differently.
Mobile search volume accounts for more than half of the total searches made online (see chart below). A responsive, mobile friendly site is no longer an option, but a necessity, when it comes to providing an enjoyable user experience.
Create Keyword Clusters
Making a list of keywords that your ideal audience would use to find the content you’re offering will also boost your SEO ranking. Plug each keyword into a keyword tool to generate additional ideas. Assess the best options for keywords to include in your content strategy by grouping them into pools based on search intent. You’ll notice that many of those keyword options will be subtopics large enough to write an entire blog post about, in which you can provide more detailed content optimized for a related keyword.
For example, if you own a home improvement business, a central page on your site would be kitchen renovation. And because there are so many choices to make when renovating a kitchen, you could then go into depth and create a new page for every option, from counter tops and backsplash tile to faucets and refrigerators. When you’re planning your content, structure the website to feature central pages that are optimized for the most central, competitive keywords and most important aspects of your business.
Publish articles on the related subtopics in full detail in order to provide as much information on those major keyword topics, to show your expertise in your field, and to demonstrate authority within the content of your site. Google looks for this as partial evidence of your status as an expert in your niche.
Google also loves when there is a distinct organizational structure. By linking the subtopic posts to your major product pages, you signal what pages are most important to your site by creating a keyword cluster.
Image source: https://webstyleguide.com/wsg3/3-information-architecture/3-site-structure.html
Optimize Your Content
On-page optimization enhances the likelihood of your page being ranked for your target keywords. Avoid keyword stuffing and place your keywords strategically. For instance, use your target keywords in the front end of your titles, and keep your titles under 60 characters or they will get cut off in the search display.
Place your keyword in your URL. The most effective URLs are those that are under 5 words and summarize the title or content on the page. Keywords should also be included in the meta description. Using your keyword in the beginning of the meta description will improve the click-through rate for users. As will placing your keyword within the first 100 words in the first paragraph of your content, and using keywords and keyword synonyms in the subtitles.
Use structured data markup whenever possible. If you can provide a rich snippet, you may get a boost in the position your site is displayed.
Make Your Pages Quick and Nimble
With a heavy emphasis on user experience, page speed can make a huge difference in how your site performs. If you’re an ecommerce site, it becomes extremely important because every second your page takes to load will cost your business money from lower conversions.
mPulse Mobile Case Study on Page Speed Vs Conversion Rates, Image source: https://digitalducats.com/page-speed/
Test your mobile page speed here. You can improve your site speed by reducing image file sizes, using plugins, and using a content delivery network to give your website additional page speed.
To reduce the size of your images use Kraken or Smush.
W3 Cache is one of the most popular WordPress plugins that increase page speed, but you can decide for yourself by choosing one from this list.
Choose a CDN (Content Delivery Network) to reduce your pages load time from a list of options here.
Get Other Sites to Link to You
Establishing credibility and authority is a necessity to be competitive in search results. Backlinks are a powerful way to prove that your content is credible and authoritative because essentially it is being endorsed by the websites that link to you. But stay away from paid links, or any link scheme used to manipulate ranking in an underhanded way. Unnatural linking will lead to penalties and should be avoided altogether.
One approved method of link building is to become a guest author. There are guest posting sites in every niche and having knowledge about your business is all you need to create an article that can be submitted to a site for publication. It may take a few weeks to get a response, and you may need a few submissions before receiving acceptance. Get into a routine for guest posting to build backlinks as fast as possible.
Ask People to Share Your Content
A social network is a priceless asset for expanding your audience and getting more traffic to your website. Build your network by being active on the social media site that has the most impact on your business.
Install social sharing icons on your site and include a call to action to get the most shares. A retweet study revealed that content with share icons received 4 times as many retweets with the phrase “Please RT”.
Conclusion
Although there is a lot to put together to achieve a first page result, it’s a long-term game plan. Start building your website with SEO in mind to give your site the best chance at the top positions in search results.
from The Grasshopper Blog - Insights for Entrepreneurs https://grasshopper.com/blog/6 Ways To Incorporate SEO While Building A Business 2020/ via IFTTT
1 note
·
View note
Text
The Water Was Never Afraid - Chapter 6: Courage
Note: Scroll to the bottom for a glossary of the Japanese words.
--
Adrien slid open the shoji door and leaned over the threshold of the Tsurugi sitting room, loudly calling out the customary Japanese phrase to announce his entry. “Ojama shimasu!”
“Ah, Adrien!” Mrs. Tsurugi’s voice came from the sofa. The room was furnished with western pieces in a minimalistic style and a light, neutral color palette reminiscent of Japanese gardens. She removed her earbud headphones and set aside the tray she was using to catch wood shavings, picking up her smartphone to pause the audiobook she was listening to. The air carried the subtle scent of an earthy incense, though he couldn’t see any burning. “Come in.”
Adrien stepped inside and greeted her with a polite bow. Even though she couldn’t see him, her hearing was so sharp that he knew she would sense the gesture. “How are you, Tsurugi-san?”
“I’m very well—thank you, Adrien. And you?”
“Excellent, thank you.” He leaned forward to inspect her woodwork. “May I?”
“Go ahead.”
He picked up the half-finished sculpture, about the size of a pear. It was two koi intertwined in a double-helix, one facing upward and the other facing down, with the details in varying degrees of completion. Adrien ran his thumb over the intricate texture of the scales that was already starting to emerge. “This is exquisite.”
“Thank you.” She smiled. “Kagami is wrapping up her class. You are welcome to go in and watch, if you want.”
Adrien set down the sculpture, thanked her, and crossed the room into the inner hallway that led to the dojo.
The wide, paneless window overlooking the dojo revealed Kagami correcting one of her kendo students’ posture. There were five of them, children in their early teens, holding their bamboo shinai over their heads in a ready-to-strike stance. What was it called again? Chudan…? No, jodan-no-kamae. Not wanting to be too conspicuous, Adrien leaned his elbows on the window frame to watch from the hall.
Kagami stepped back, inspecting the students with a critical eye for several seconds before calling out, “Hai!”
With a loud yell, the students brought down their shinai in a strike.
Kagami nodded. “Very good. Rei.”
The students straightened, folded the shinai at their sides and bowed, mirroring Kagami.
“You are dismissed.” When the students relaxed, and a low chatter started among them, Kagami smiled, her formal composure loosening. “Well done today. See you next week.”
As the students removed their helmets and gloves, gathered their belongings, and filed out, Adrien slipped into the dojo and greeted Kagami with a kiss on the cheek. “I love watching you teach,” he murmured in her ear.
Her eyes twinkled up at him, a faint blush dusting her freckled cheeks. “You’re early. Give me some time to change… why don’t you wait in the sitting room? There’s cold mugicha on the table if you want.”
Adrien nodded as she exited the dojo through a different door, toward her room. He went back to the sitting room, poured himself a glass of barley tea, and made light conversation with her mother until Kagami appeared in the doorway, dressed in a red silk blouse and off-white fitted pants cropped at the ankle. “Ready to go?”
After giving Kagami’s mother their regards, they slipped on their shoes at the foyer and took their leave.
—
“So, I saw Marinette the other day.”
“Oh?” Kagami looked up at him. “Don’t you see her often…? She still works at Gabriel, doesn’t she?”
“Yes, she’s an intern.” Adrien hooked his arm in Kagami’s comfortably as they walked. “I don’t actually see her much, though. She’s always in the studio, and I usually only meet with the head designers.”
“Ah. So, what about her?” Kagami prompted.
Adrien shrugged. “We used to be good friends in high school, so I invited her out to coffee sometime to catch up. Just as friends, obviously. I didn’t think you’d mind, but I wanted to check if you were okay with that.”
Kagami pursed her lips, and Adrien’s mood soured with the premonition that he wouldn’t like her response.
“Adrien, it’s not that I don’t want you to see your friends.” She met his eyes solemnly. “I just want to remind you that all of Paris is watching you, and you have to consider what the media is going to say when you’re caught spending time with a girl who isn’t your girlfriend.”
Adrien furrowed his brow. “Am I not allowed to have a female friend?”
“I didn’t say that,” Kagami said cautiously, but the look she gave him implied that was exactly what she meant.
“Okay, so maybe not in public.”
“Do you think it will look any better if the media catches on to you having female visitors to your flat?”
Suddenly, Adrien felt like he couldn’t breathe. “The media this, the media that,” Adrien snapped bitterly, lowering his voice so passersby wouldn’t hear them having an argument. “Do I have to live in fear of the media for the rest of my life? Shouldn’t I be free to see the people I care about?”
They had arrived at the restaurant—Adrien pulled open the door with a tinkle and held it for Kagami, then followed her inside. They were greeted by a hostess, who led them to a booth. Kagami held her response until she had left them alone.
“The media is nothing to be afraid of—you just need to consider your actions carefully. Living without regard to the public eye is not a matter of courage, Adrien. It’s recklessness.”
Adrien scowled.
“You’re a public figure, Adrien. Whether you like it or not, your life is like a game of chess,” Kagami stated matter-of-factly.
Adrien knew, and he hated it. “Is there any way I can opt out of this life?”
Kagami gave him a look.
“Can we move to a distant island?”
“Adrien. You need to learn how to accept the way things are.”
He sighed.
Before they had even ordered their food, a girl with straight, honey-brown hair slightly past the shoulder appeared at their booth, looking flustered with a smartphone in her hand.
Kagami raised her eyebrow at the unexpected interruption, while Adrien gave her a bemused smile and asked, “Can we help you?”
“Adrien Agreste!” The girl squeaked. She had to be sixteen, at most.
“Yes, that’s me…?”
“I’m a fashion blogger! Melody Marcel. Do you mind confirming for the public if you and Miss Tsurugi are officially together? Everyone is dying to know!”
Adrien and Kagami exchanged a glance. Hers seemed to say, ‘See? I told you.’ He sighed. The news was going to get out somehow, may as well help this teenage blogger by letting her be the first to publish it.
“Yes, we are,” he confirmed.
“Ohmygawd! That’s so cute. I’m so happy for you two,” Melody gushed, and raised her smartphone. “Do you mind if I take a photo?”
Adrien shrugged. “Sure.” The table between him and Kagami didn’t allow them to make any intimate poses, so he took her hand and kissed it for the camera.
Melody squealed in glee once she had taken the photo. Then, pushing her luck, she piped up again, “Could we take a selfie?”
“Of course.” Adrien smiled warmly before catching Kagami’s unamused look. “What?”
Kagami shook her head, signaling now was not the time. She put on a smile for Melody and took the phone from her as she slid into the booth beside Adrien. She snapped a shot and handed the phone back to the blogger, whose face broke out into a huge grin.
“Thank you, thank you so much! You can find my blog at FashionPulse.com!”
Adrien waved kindly as she left. The girl reminded him of Alya following Ladybug and Cat Noir around during her LadyBlogging days—but the LadyBlog hadn’t been updated in about two years since her journalism career had begun taking off. He felt a pang of nostalgia. It felt good to help a young girl out, anyway.
When he turned back to Kagami, she was wearing a deadpan expression, practically oozing, ‘See? I’m right.’
Adrien sighed heavily, deflating. “Okay. I get it.” His mind strayed back to his friends. “Could we at least invite her for dinner sometime? Alya and Nino, too. I haven’t seen them in forever.”
Kagami’s face softened. “I suppose that shouldn’t be a problem.”
“Awesome!” Adrien grinned. “Thank you.”
Kagami peered up at him, seeming happy that he was happy. It was a moment before she spoke again. “Next time, you don’t have to agree to everything people ask you for. If you really don’t want the media following you around, you need to send them the clear message that you don’t want them intruding on your personal life.”
Adrien drummed his fingers on the table. “She was just a teenager blogger, Kagami. I wanted to help her out.”
Kagami shrugged as if Adrien were a lost cause. “Okay, Adrien—do what you like. I’m just trying to help you guide your life the way you want it to go, but you don’t have to listen to my advice.”
“It was just this once.” Adrien peered over to the window, at the outdoor seating, envying the way diners could enjoy a night out without worrying about who could see them and how to act. He wished he could carefreely sit out there instead of having to partially hide in a booth.
Kagami tugged at his fingers. “Let’s just forget it and enjoy the evening, shall we?”
He nodded, pushing his troubled thoughts to the back of his mind. Let them get candids, or say whatever—this was Kagami, whom the media had already been circulating rumors about for months, if not years. There was nothing to be said that hadn’t already been said. She was safe to be around.
So for now, he’d just focus on the two of them in this restaurant and do his best to be content.
—
When Adrien returned to his flat that evening, the first thing he did was collapse on his bed face-down with a frustrated shriek.
“Hey, don’t flatten me!” Plagg wailed indignantly, zooming out of his shirt pocket, which was now pressed against the bed. He pulled on strands of Adrien’s hair. “… What? What’s going on, kid?”
“I hate my life!” he moaned.
“Oh yeah, a billionaire with a pretty girlfriend, your life sucks!” Plagg mocked.
“I’m sick of walking on eggshells and having the ‘public’ watch my every move!” he wailed. “Why couldn’t I have been born as a normal person with a normal family? Let someone else have my money and my pretty face, I don’t want it!”
“So melodramatic,” Plagg said, settling on his shoulder. “I doubt you could part with your pretty face.”
Adrien lay in silence, one hand knotting his hair in frustration. “...Okay, I’d keep my face,” he conceded. “Kagami would probably dump me if I looked like an average Joe.” He meant it as a joke, but something about the thought rang painfully true. Was it true? He groaned and shoved his face into a pillow, feeling a dark mood claw at him.
“You know who doesn’t have to walk on eggshells?” Plagg tempted in a singsong voice.
Adrien sat bolt upright as realization struck. “Chat Noir!” Without hesitation, called out, “Plagg, transform me!”
Emerging onto his balcony and pole vaulting onto the roof, gratitude flooded his chest. The next meeting with Ladybug wasn’t for another couple of days, but he needed this now. The anonymity, the freedom, the wind in his hair. If he didn’t have the miraculous, he’d probably end up in a mental asylum.
For now, Paris was his playground.
--
Japanese Glossary:
shoji - paper door ojama shimasu - literally "I'm intruding!" - you say it when you are entering someone else's room shinai - bamboo weapon used for kendo (the way of the sword) chudan-no-kamae - middle level stance in kendo jodan-no-kamae - high level stance in kendo, sword over head hai - literally means yes, but in this case used to initiate the move rei - bow mugicha - barley tea
#Miraculous Ladybug#MiraculousLadybug#Miraculous Ladybug Fanfiction#MiraculousLadybugFanfiction#Adrigami#Marichat#The Water Was Never Afraid
8 notes
·
View notes