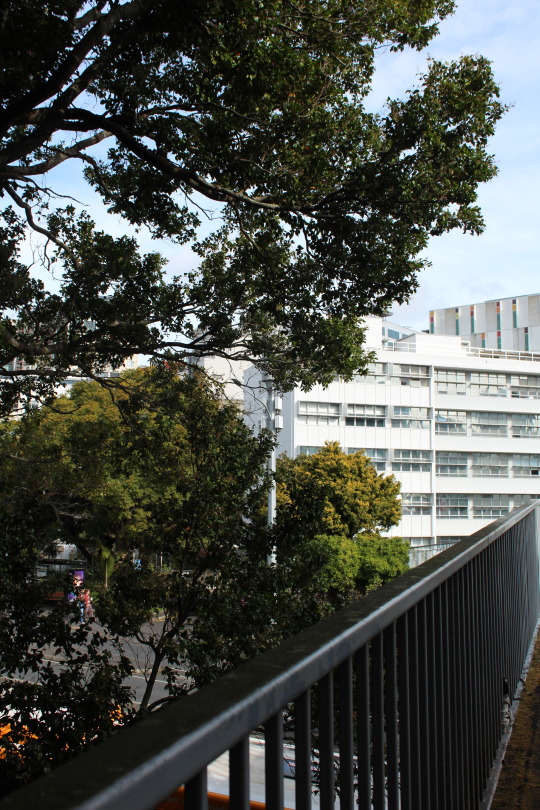
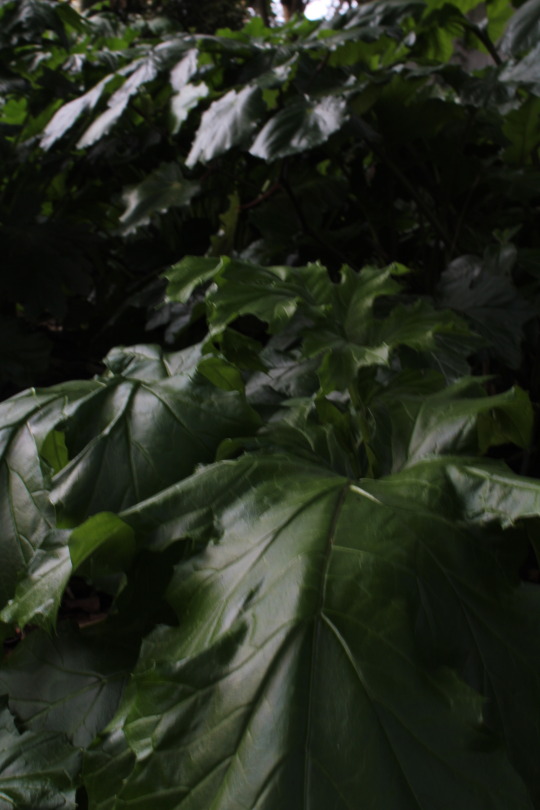
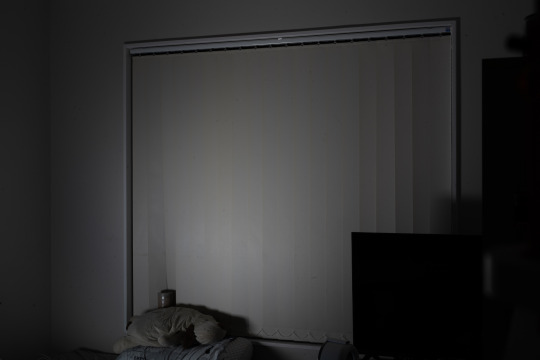
#400 iso shot at 1600 iso
Explore tagged Tumblr posts
Visit Tumblr Blog
Explore Tumblr blogs with no restrictions, modern design and the best experience.
Last Seen Tumblr Blogs


Fun Fact
The most popular pages on Tumblr are about Minecraft, GIFs, and David J. Peterson.
Text
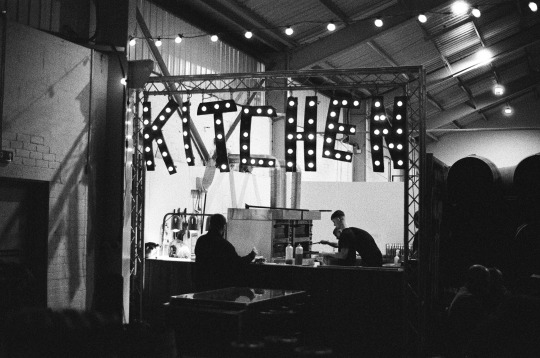
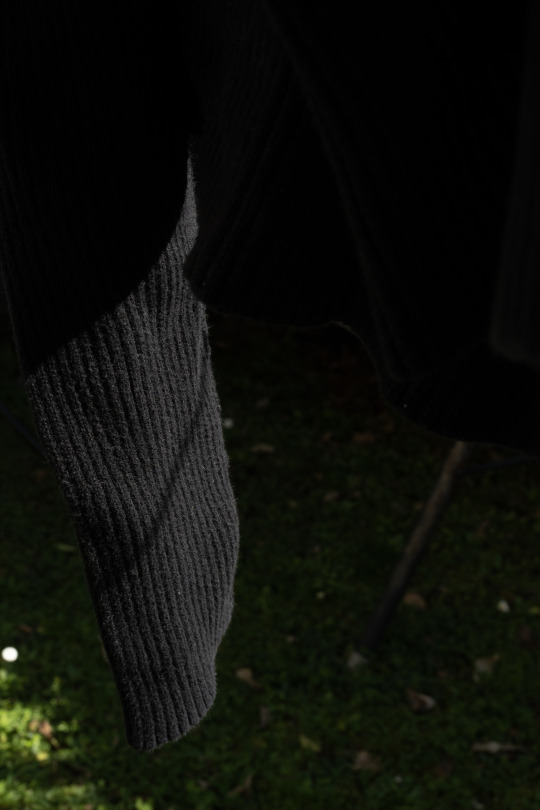
Nikon F65. Ilford XP5 (shot at 1600.)
I have used this technique many times. I just seem to like doing it. I get a high iso film (or one I can push as is the case here) attach a 50mm prime to the F65 and see that happens.
There is something about taking photos in the dark that I quite like. I love seeing the glow of electric lights against the dark in a street scene and how shallow depth of field affects the composition.
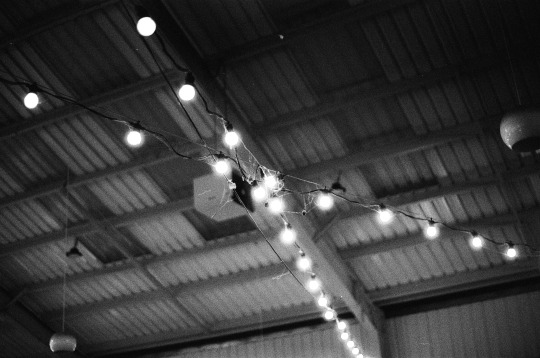

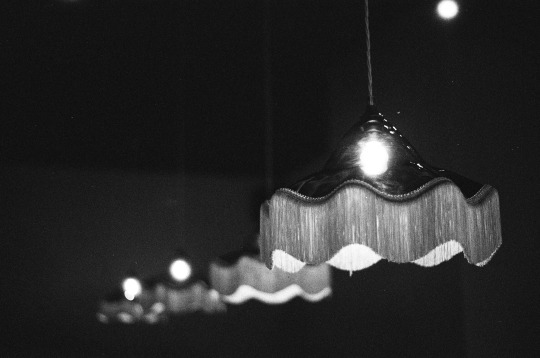
#liverpool#liverpoollomo#lomo#lomography#analogue photography#nikon f65#nikon slr#film slr#ilford hp5#400 iso shot at 1600 iso#exposure compensation#black and white photography#low light photography#50mm prime lens#film is not dead#don't think just shoot
4 notes
·
View notes
Text
quick & easy lightroom walkthrough or: shooting through dirty double-paned glass, and other hardships.

I'll tell you! (Original post here.)
✱ KIT Panasonic GH5 + LEICA DG 100-400 with rubber hood for shooting through windows.* ✱ SHUTTER 1/125 sec ✱ APERTURE f/6.3 ✱ ISO 1600
*I use this one. It works for me, but it's a little tricky. It was a gift, and I think if choosing for myself I'd find something easier to get on and off.
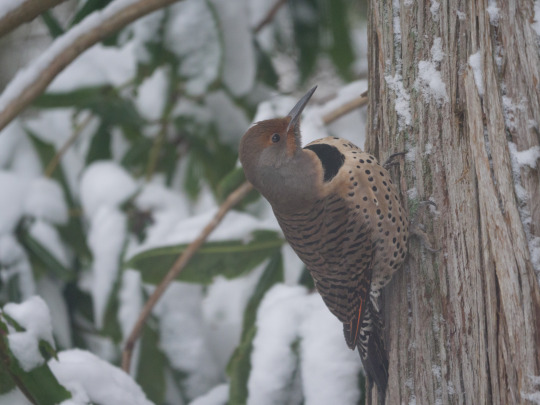
WHAT'S ALL THIS, THEN? It was cold outside, obviously. And the flickers bolt if I try to open the back door, so sometimes I'll post up in front of my dining room window and just get the best shot I can. I do this less and less these days, now that my arthritic hands and I have heated gloves. The 'after' photo is a brand new re-edit using better tools than were available when this was shot. I was never happy with how it looked, before now.
under the cut: EDITS
✱ Detail: Sharpness & Noise Reduction My main problem here is sharpness. The photo is in focus, but because I'm shooting through a thick storm window, I've lost that tack-sharpness I really want, and I have a whole bunch of noise to contend with. This would always be the case, but worse depending on the camera you're using, and in my case this was two generations ago - the GH5. I have tested window shots with the GH7, and they're a lot cleaner.
That being said, the trick is to always, always, always use masking along with sharpening. Like, a lot of masking, just so much masking, so that you avoid sharpening an already-noisy background. In Lightroom, you can hold down down the ALT key while using the masking slider to visualize exactly what is being sharpened.
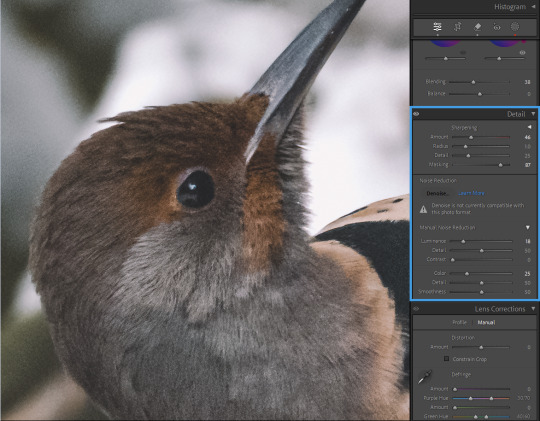
I'm choosing to leave the background noisier than I prefer, because even if I mask out the background, as I increase noise reduction, I lose detail in the edges. Leaving some noise in the feathers also preserves that sense of sharpness, generally.
This is a matter of personal preference and priority in your edits. I've had students absolutely hammer their photos with denoise and like it that way, and that is totally their call. I like it sharp.
Note: you could also do the sharpening/noise reduction at the end, after all your other edits, so that you have a better sense of how much you still need after toning. That's often my preference. I probably went backwards here only because I've edited this image before and had it pre-loaded in my brain.
✱ Tone Dehaze is the real MVP here. You could go even harder than I have on -blacks/+clarity/+dehaze, for a dramatic, crushed look. I decided to strike a balance between the soft darks I prefer but the clarity absolutely needed to make this look less smooshy. And my curve is pretty gentle.
Before toning and after:
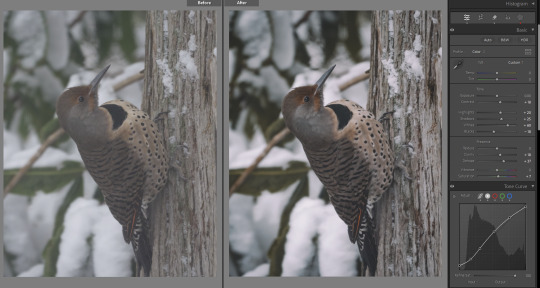
(You can see that I've also done some color grading. But because that part is entirely personal preference, I'm skipping it here.)
✱ Selective Adjustments With a photo as flattened as this one, I always want to add some depth to it with masking. I have just three masks in this case:
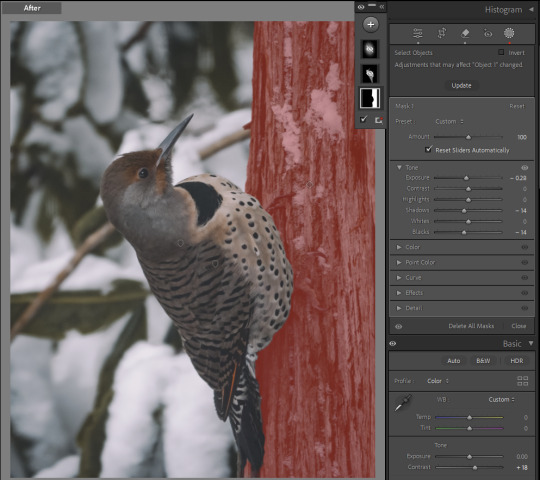
1. The tree was blown out, detracting from my subject and looking, frankly, unrealistic. So I've darkened this on its own, so that my subject will stand out.
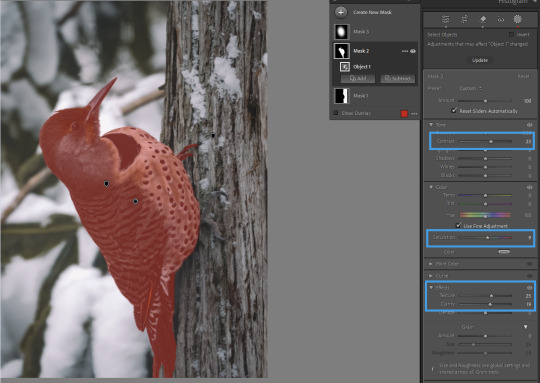
2. Contrast, texture, and clarity to bring out the detail in the feathers; a touch of saturation because the global color grading I wanted took away slightly from the bird's natural coloring. I want this on a mask, and not globally, because I do not want to exacerbate the noise in the background, or the texture of the leaves and snow.
And 3., to make the flicker really pop, I've got a 'spotlight' mask
...which is working together with a light vignette to draw the eye to the subject. You could also create an asymmetrical vignette with an inverted -exposure mask, if you needed to.
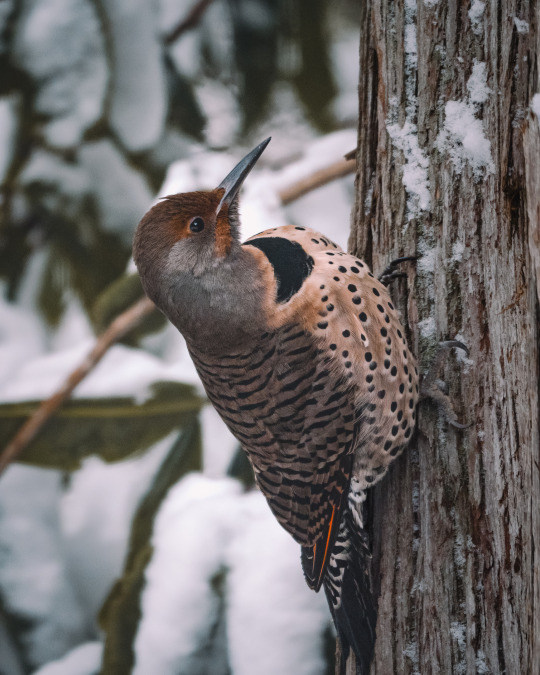
All together now...
And that's it!
As always, please feel absolutely free to send any questions to my ask box. I try to watch for comments and questions in the tags, but sometimes they get missed. And if there are any other edits you'd like to see, let me know!
Find my other walkthrough here.
#on photography#photography#pnwander edits#lightroom classic#editing tips#photography tips#pnwander bts#pacific northwest#pnw#nature photography#wildlife photography#photographers on tumblr#lensblr#how to#lightroom#original photographers#naturecore#photoshop#mine: photos
22 notes
·
View notes
Text
Bad Film - push/pull
Sometimes the lighting is not ideal for your film ISO. Or, sometimes you want to achieve a certain look (like increased grain, altered contrast, etc). So, you decide to push or pull your film.
Many more before me have made great long blog posts about the actual technique behind it (favorites of mine are this Richard Photo Lab's article and the darkroom), so I won't go into a ton of detail, but I'll share the little bit I know
If your lighting is poor and your film speed is not sensitive enough, you would want to push your film. For the twenty one pilot's concert, I took Cinestill 800T, and realized that I would have been better off with an ISO 1600, which equates to pushing +1 stop.
Side note: film speed generally increases exponentially - 200, 400, 800, 1600 - which is why 800 -> 1600 is +1 stop
I reset the ISO indicator so my light meter would accurately read for ISO 1600, and shot the roll as normal.
I don't develop my own film, so then I asked the lab to push the film +1 stop when I had it developed. From what I understand, the actual science behind pushing/pulling is increasing or decreasing the amount of time the film is in the developing chemicals.
This technique really saved me for the concert film, as I would have missed out on some phenomenal shots. The only downside was that pushing the film did increase the amount of grain present in the images.
Also shoutout to @atimeofbeing who saw my vision when I posted some of the concert photos during the grain segment. This one is for you, friend :)
#bad film series#photography#photoblog#photographers of tumblr#photo blog#photographers on tumblr#film photography#35mm#35mm camera#35mm color film#35mm photography#35mm film#film#film camera#pushed film#iye415
13 notes
·
View notes
Text
Fujica ST705 with Paragon 400mm f6.3 lens and 2x extender, shot on Portra 400 pushed 2 stops to ISO 1600
#photography#film photography#ishootfilm#analog photography#filmisnotdead#nature photography#colour photography#wildlife photography#fujica#telephoto#teleconverter#kodak portra 400#pheasant#bird photography#birdwatching#35mm film
11 notes
·
View notes
Text
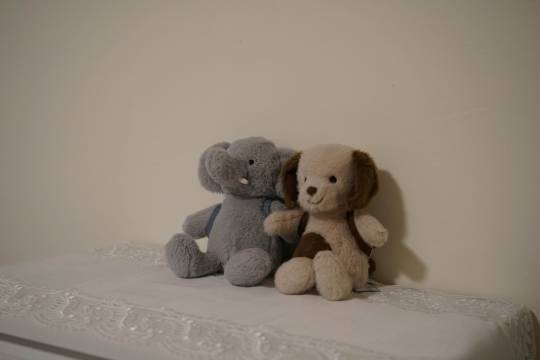

Inside vs. Outside
The first one I use 1/125, F4.0 and ISO 1600, since it is inside my bedroom. There are two dolls by Jellycat. I like them so much and one of them is an elephant. I brought it to travel to 12 cities.
The second one I use 1/125, F5.0 and ISO 3200. It is the same object as the last one, but I took it at a different shot angle. So the data of F-stop and ISO is different and I wanted it to be more light.
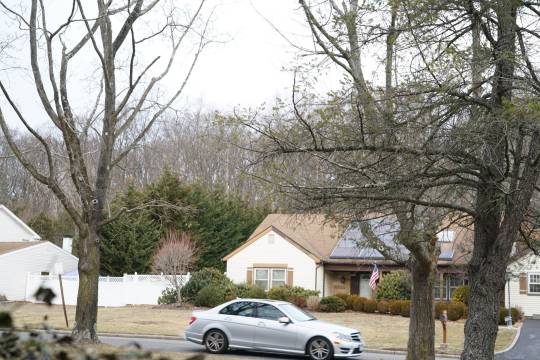
The third one I use 1/125, F5.6 and ISO 320. I took it outside my front door. It was very coincidental that a car passed by during the shoot. I also learned from this that the ISO is lower in good light.
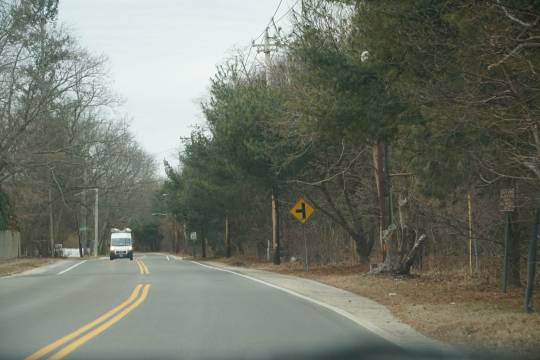
The fourth one I use 1/200, F5.6 and ISO 320. This one I mainly wanted to compare what difference a different shutter speed would make to the photo, even if these two aren't the same thing. However, I did remember that the M-index varied during the shot and it would be closer to zero.
The fifth one I use 1/200, F5.6 and ISO 400. This one I mainly wanted to compare what difference a different ISO would make to the photo. Also, it became more light.
The sixth one I use 1/125, F4.0 and ISO 3200. This one I wanted to compare to the second one, and got to know the difference of F-stop.
Therefore, Whether it's aperture, shutter speed and ISO they all affect the image quality and sharpness of the picture. Indoors I will often have to turn up the ISO because there is not enough light, whereas outdoors there will be less need to adjust.
2 notes
·
View notes
Photo
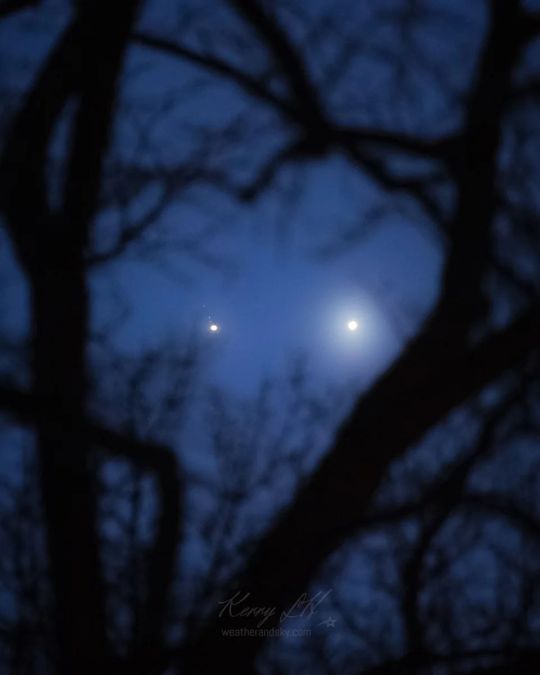
Here's another shot of Venus and Jupiter. I took this one between the walnut tree branches from home yesterday evening. I was too tired to leave home so I had to get a little creative. If you zoom in, you can see Jupiter's moons! The pair will still look close tonight... in the west after sunset. I'll have to reshare this image on Halloween. Some how it came out looking quite spooky🫣. Totally opposite vibe compared to my last image. Canon R6 iso 1600, 1/2 sec. Canon 100-400 @400mm f5.6, single exposure _______________ #weatherandskyphotography #astrophotography #universetoday #astrophoto #nightsky #NightScaper #nightscape #starphotography #starscape #starrynight #awesomeearth #starrysky #astro_photography #stars #naturescape #earthpix #nightphotography #instagram #instanight #NeverStopExploring #ourplanetdaily #shareyourweather #explorecanada #ontario #venus #planetaryconjunction #venusandjupiter #twanight #skyandtelescope (at Niagara Escarpment) https://www.instagram.com/p/CpSzvRtp_hD/?igshid=NGJjMDIxMWI=
#weatherandskyphotography#astrophotography#universetoday#astrophoto#nightsky#nightscaper#nightscape#starphotography#starscape#starrynight#awesomeearth#starrysky#astro_photography#stars#naturescape#earthpix#nightphotography#instagram#instanight#neverstopexploring#ourplanetdaily#shareyourweather#explorecanada#ontario#venus#planetaryconjunction#venusandjupiter#twanight#skyandtelescope
13 notes
·
View notes
Text
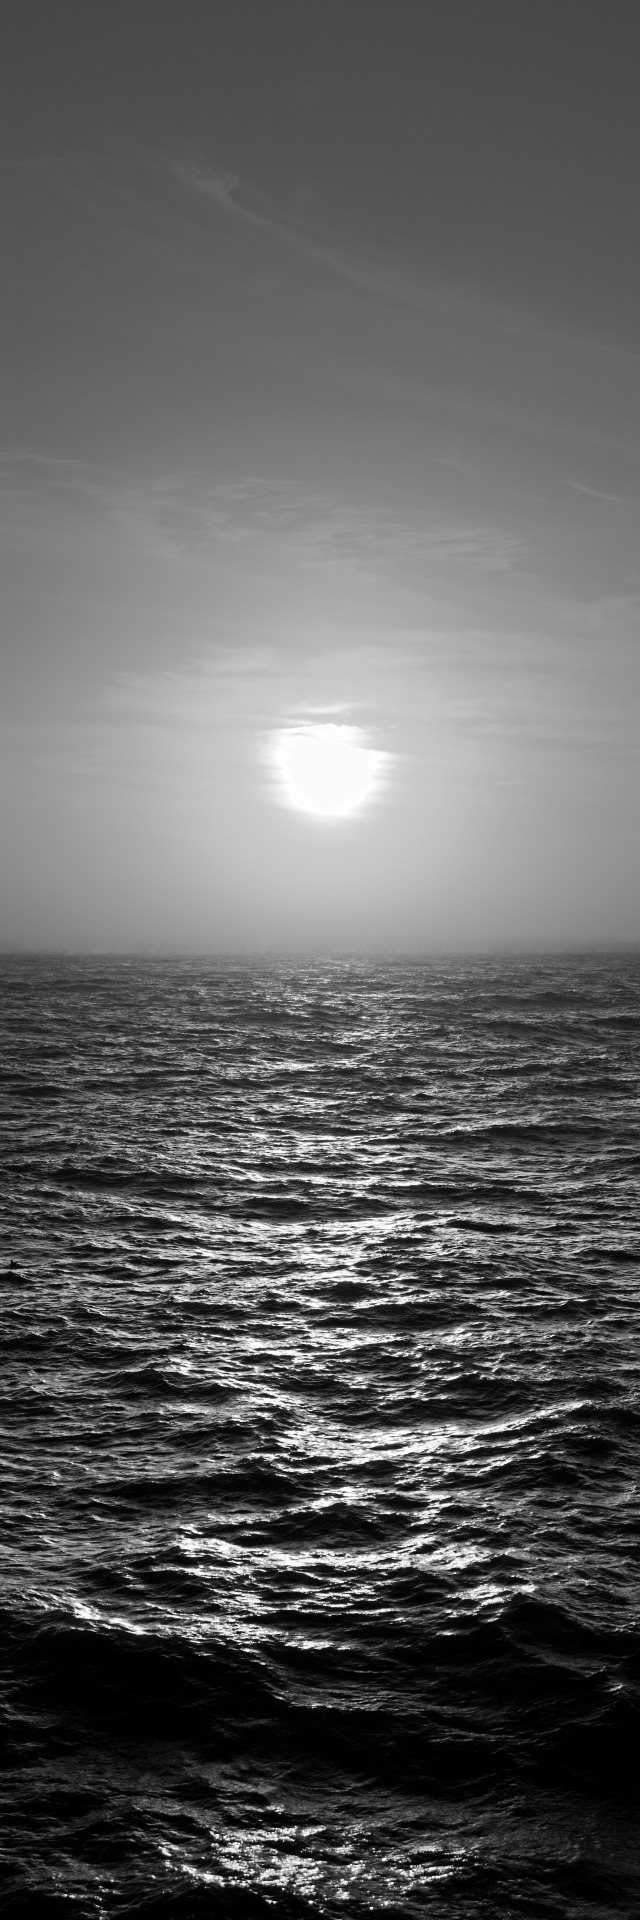
Sunset
Nikon D50; (1/400, 1/800, 1/1600, 1/4000); F/8; ISO 200; 55mm, Four Image Vertical Panorama
Shot 27/11/2006 Edited 03/02/2011
#Nikon D50#1/400#1/800#1/1600#1/4000#F/8#ISO 200#55mm#27/11/2006#03/02/2011#photography#art#archive#panorama
2 notes
·
View notes
Text
Workshop: Exposure | Week One.
Task 1 : 3x Photographs of the same scene -> Take an exposure reading from highlight, mid-tone and shadow + using all the different metering systems available. -> How do these different light qualities impact on your image?


-> First photo is shot in a shutter speed of 1/200, F stop 5.6, ISO 100 and an evaluative metering system. -> Second photo is shot in a shutter speed of 1/320, F stop 5.6, ISO 100 and a partial metering system. -> Third photo is shot in a shutter speed of 1/320, F stop 5.6, ISO 100 and a centre-weighted metering system.
The photos look pretty much the same even shot in somewhat different settings besides not in the exact same position. The first one looks like there is more brightness within the photo compared to the other two.
-> First photo is shot in a shutter speed 1/320, F stop 7.1, ISO 100 and an evaluative metering system. -> Second photo is shot in a shutter speed of 1/160, F stop 8 and ISO 100 and a partial metering system. -> Third photo is shot in a shutter speed of 1/200, F stop 5.6 and ISO 100 and a centre-weighted metering system.
These photos are quite different, probably due to the different settings

Task 2 : Produce a correctly exposed image using an aperture of f16, f8, f5.6, adjusting the shutter speed to suit the lighting situation. -> How will you ensure a correct exposure even though you are using a different aperture/shutter speed combination?
-> First photo was shot in shutter speed 1/15, F stop 16 and ISO 100. -> Second photo was shot in shutter speed 1/40, F stop 8 and ISO 100. -> Third photo was shot in a shutter speed 1/80, F stop 5.6 and ISO 100.
In order to keep the exposure correct, I kept adjusting the shutter speed but I had kept the same ISO (next time I think i'd adjust the ISO speed as there wasn't that much light and it was more gloomy). I had adjusted the shutter speed to a smaller for the first photo so that I could get more light into the photo but it's a little shaky/blurry so I would use a tripod next time so that the photo is more steady and clear. The second photo I made the shutter speed a bit slower so that light was still being let in but it was not over exposing the photo. For the third photo I made the shutter speed 1/80 as the aperture was quite small and already letting light in so I needed to balance the both out.
Task 3 : Set ISO to 100 and take an in-focus photograph at 9pm at home using the smallest aperture your lens allow. -> How will you determine if the shutter speed is too slow and thereby will cause camera shake? Will you need a tripod?
Task 4 : In low-light situation, produce a series of images from different ISO's of 100, 200, 400, 800 and 1600. Use F11 and corresponding shutter speed. -> Will you need a tripod?
-> First photo was shot with a shutter speed 1/8, F stop 11, ISO 100. -> Second photo was shot with a shutter speed 1/10, F stop 11, ISO 200. -> Third photo was shot with a shutter speed 1/15, F stop 11, ISO 400. -> Fourth photo was shot with a shutter speed 1/20, F stop 11, ISO 800. -> Fifth photo was shot with a shutter speed 1/30, F stop 11, ISO 1600.
Photos gradually get better brighter as I made sure to adjust the shutter speed to produce somewhat of a equally exposed photo while using the different ISO's as they became less sensitive to light.
Task 5 : Photograph something placed in front of a window at around midday without it becoming a silhouette. -> Where will you need to take your exposure reading from?
Task 5.1 : Photograph a white T-Shirt outside in the midday sun and produce an exposure where you can see the detailed texture in the fabric. Then repeat with a black T-Shirt.
Task 5.2 : Repeat these with an aperture of f16. Make sure the object fills the frame.
0 notes
Text
Manual Mode / Same shot at different ISO
Shutter Speed: 1/4 | Aperture: f/3.5 | ISO: 100
Shutter Speed: 1/6 | Aperture: f/3.5 | ISO: 200
Shutter Speed: 1/10 | Aperture: f/4 | ISO: 400
Shutter Speed: 1/15 | Aperture: f/4 | ISO: 800
Shutter Speed: 1/25 | Aperture: f/4 | ISO: 1600
Shutter Speed: 1/30 | Aperture: f/5 | ISO: 3200
Shutter Speed: 1/60 | Aperture: f/5 | ISO: 6400
0 notes
Text
ExposureWorksheet_task4
In order from top to bottom, ISO 100, 200, 400, 800, 1600 For these low light shots i used a tripod and long exposure times to make sure the image was of a descant even exposure, from 30s to 5s
0 notes
Text
Practice Exercise: Low Light Image Series
[1] F10 (Set 11), 30, ISO 125
[2] F10 (Set 11), 30, ISO 200
[3] F10 (Set 11), 1.1, ISO 400
[4] F10 (Set 11), 1, ISO 800
[5] F10 (Set 11), 0.6, ISO 1600

For these shots, I did also need a tripod for the first two shots; maybe even for the third as well.
0 notes
Text
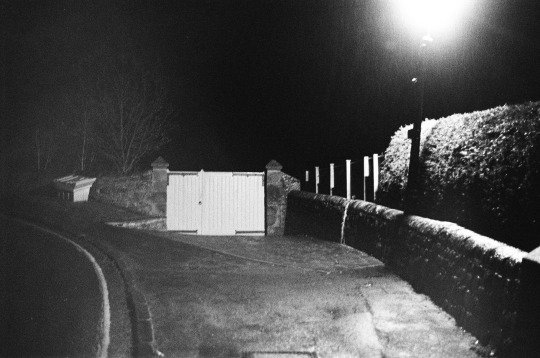
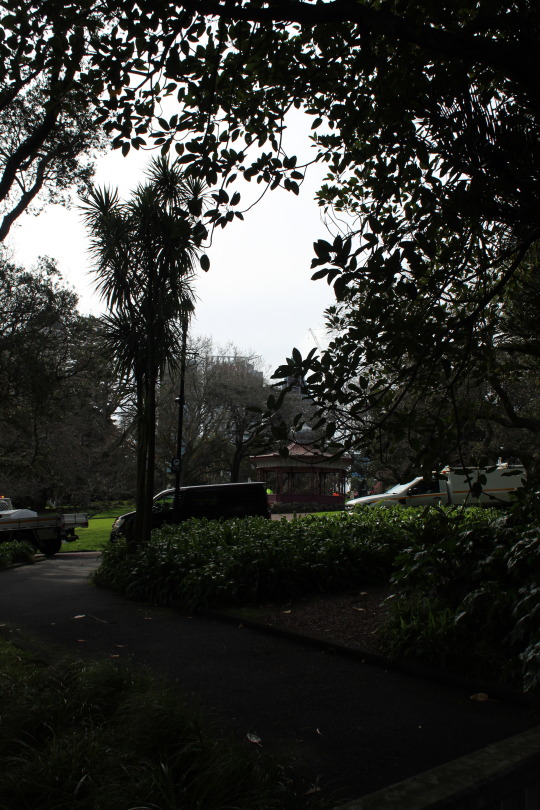
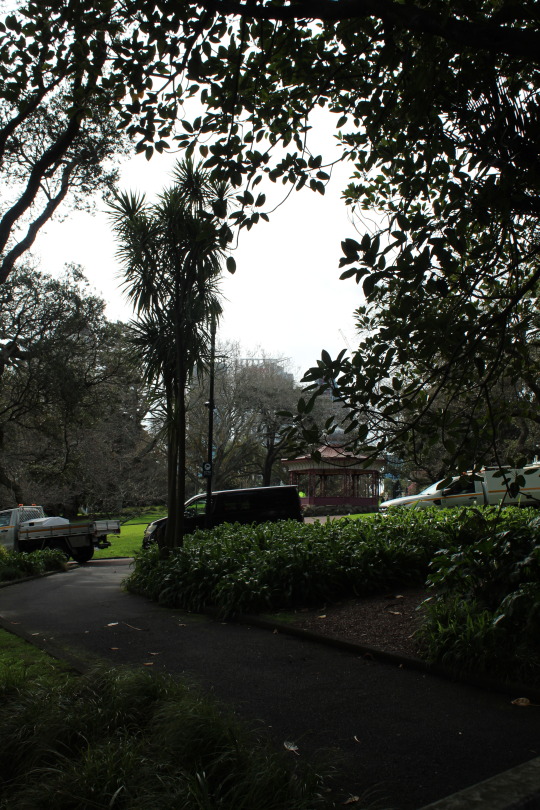
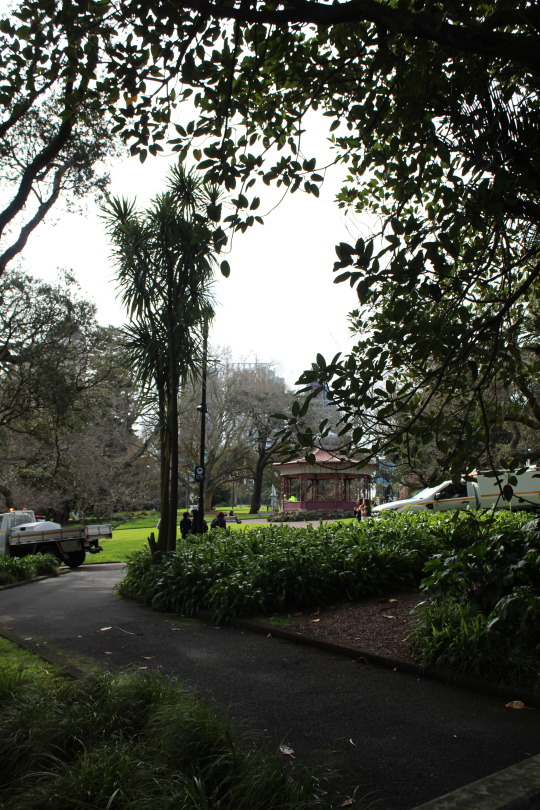
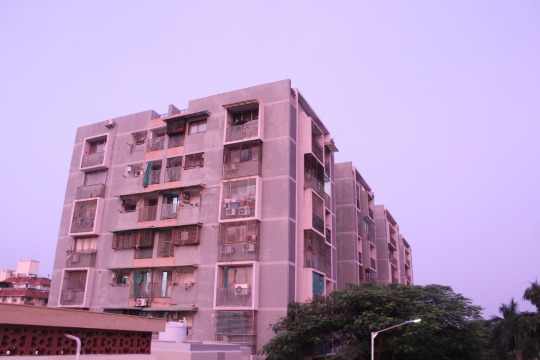
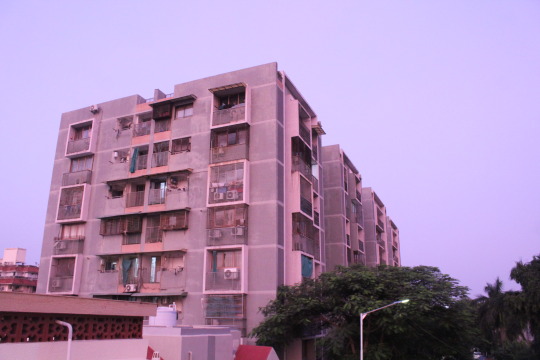
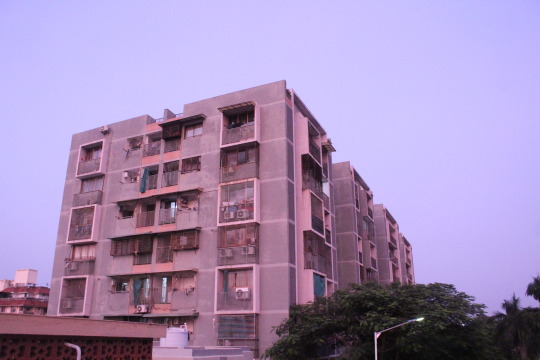
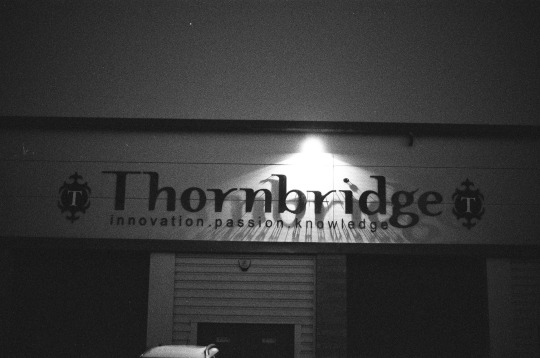
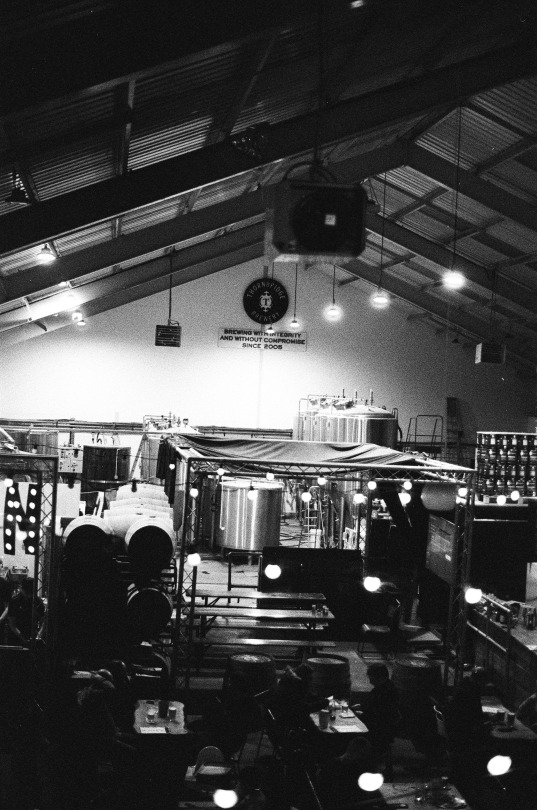
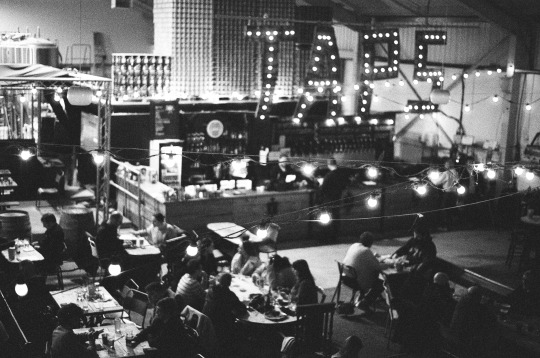
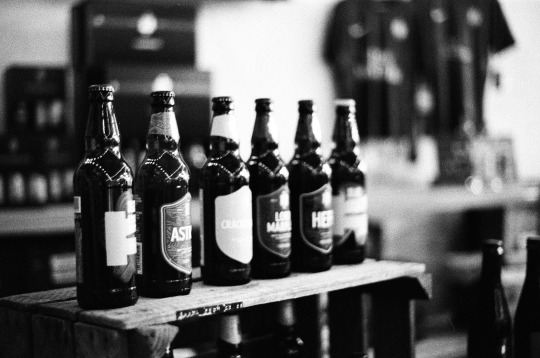
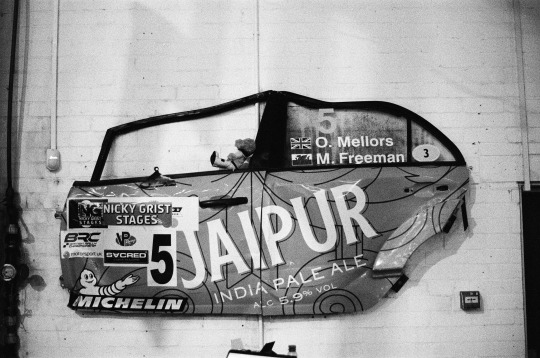
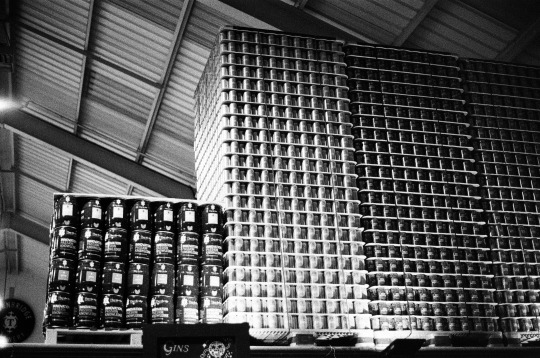
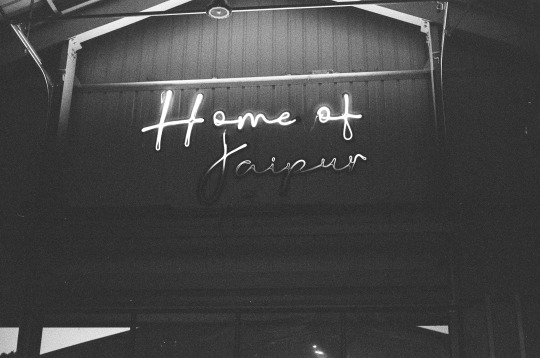
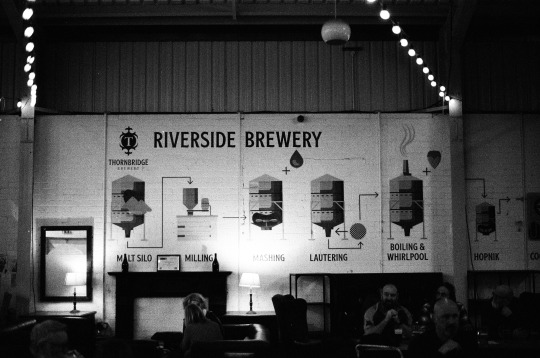
Thornbridge Tap Room. Nikon F65. Ilford XP5 (shot at 1600.)
Whilst visiting The Joiners Arms I was informed by the barman that the Thornbridge Brewery was "just up the road." I made up my mind to visit the next day as I was yet to decide what to do for dinner that evening and an enthusiastic customer also informed me that their pizza was well worth the journey.
As I was driving I did not sample any of their beers and (perhaps unwisely) I did not purchase any to take back to the cottage with me as I reasoned I had quite enough beers already. If I ever visit Bakewell again I shall be making a return visit to taste all the beers I cannot easily get in Liverpool.


#liverpool#liverpoollomo#lomo#lomography#analogue photography#nikon f65#nikon slr#film slr#ilford hp5#400 iso shot at 1600 iso#exposure compensation#black and white photography#low light photography#50mm prime lens#thornbridge brewery#tap room#craft beer#bakewell#peak district#film is not dead#don't think just shoot
2 notes
·
View notes
Text
Hey friends! ICYMI, I was asked to share some before & after walkthroughs, so I thought I'd start with Cheveyo the bald eagle (original post here). This is an older edit, but I had it on hand, and it speaks to a little bit of everything that was asked for (in-camera & post).
BEFORE
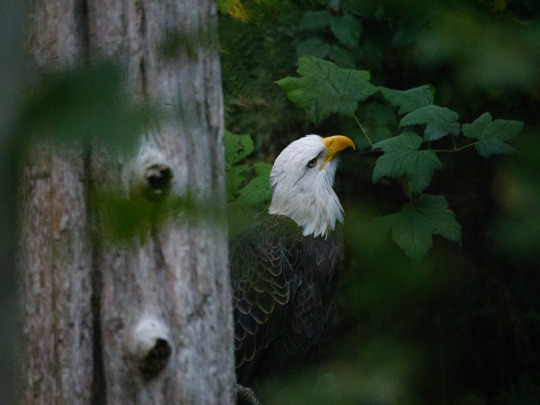
✱ KIT Panasonic GH6 + LEICA DG 100-400 ✱ SHUTTER 1/125 sec ✱ APERTURE f/4.8 ✱ ISO 12800
WHAT'S ALL THIS, THEN?
I took this at Northwest Trek's Hoot 'n Howl event, meaning this is late in the evening, very low light, with the widest aperture I could get under the circumstances. I did bring my tripod but felt bad about pulling it out given the kids all around, so I held my breath and shot this handheld. All of which is to explain my buckwild ISO of 12800. I normally cap it at 6400.* *if none of that made any sense, and you'd like it to, check the cut at the end of this post. So we've got a whole bunch of noise, and some pretty lackluster lighting, but sharpness could be worse:
We used to have to deal with ISO noise manually in Photoshop. These days, I like Lightroom's Denoise button pretty well, within limits, and that's what I used here. Sometimes Topaz Sharpen and/or Denoise can also help, though with fur and feathers it can get sort of smooshy and odd.
EDITS


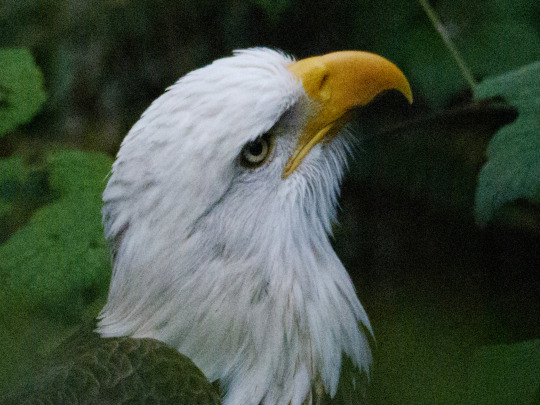
Curves for that sort of cinematic look; color grading to taste. That's pretty much it here. I did a lot of desaturating in greens/blues to make Cheveyo pop, along with some color grading in the shadows and midtones. Some people hate this look, but I'm less interested in how the camera captured it than how it felt at the time. YMMV! Throw on a gradient mask to brighten her up and draw the eye where we want it, and I would normally add another mask around the iris, but apparently I didn't find it necessary this time. And we're done!*
AFTER

*But remember that I'm simplifying the edit for the sake of clarity. I usually start with one of my baseline presets that I've made for myself, and then I tinker with it a while. Just play around with the edit til you're happy. It's not always linear.
Feel free to send any questions to my ask box! I try to catch tags & comments, but there's always a risk they'll get buried in my notifications. Let me know if there's any shot in particular you'd like me to deconstruct next! 🤍
under the cut: CAMERA SETTINGS ANNOTATED
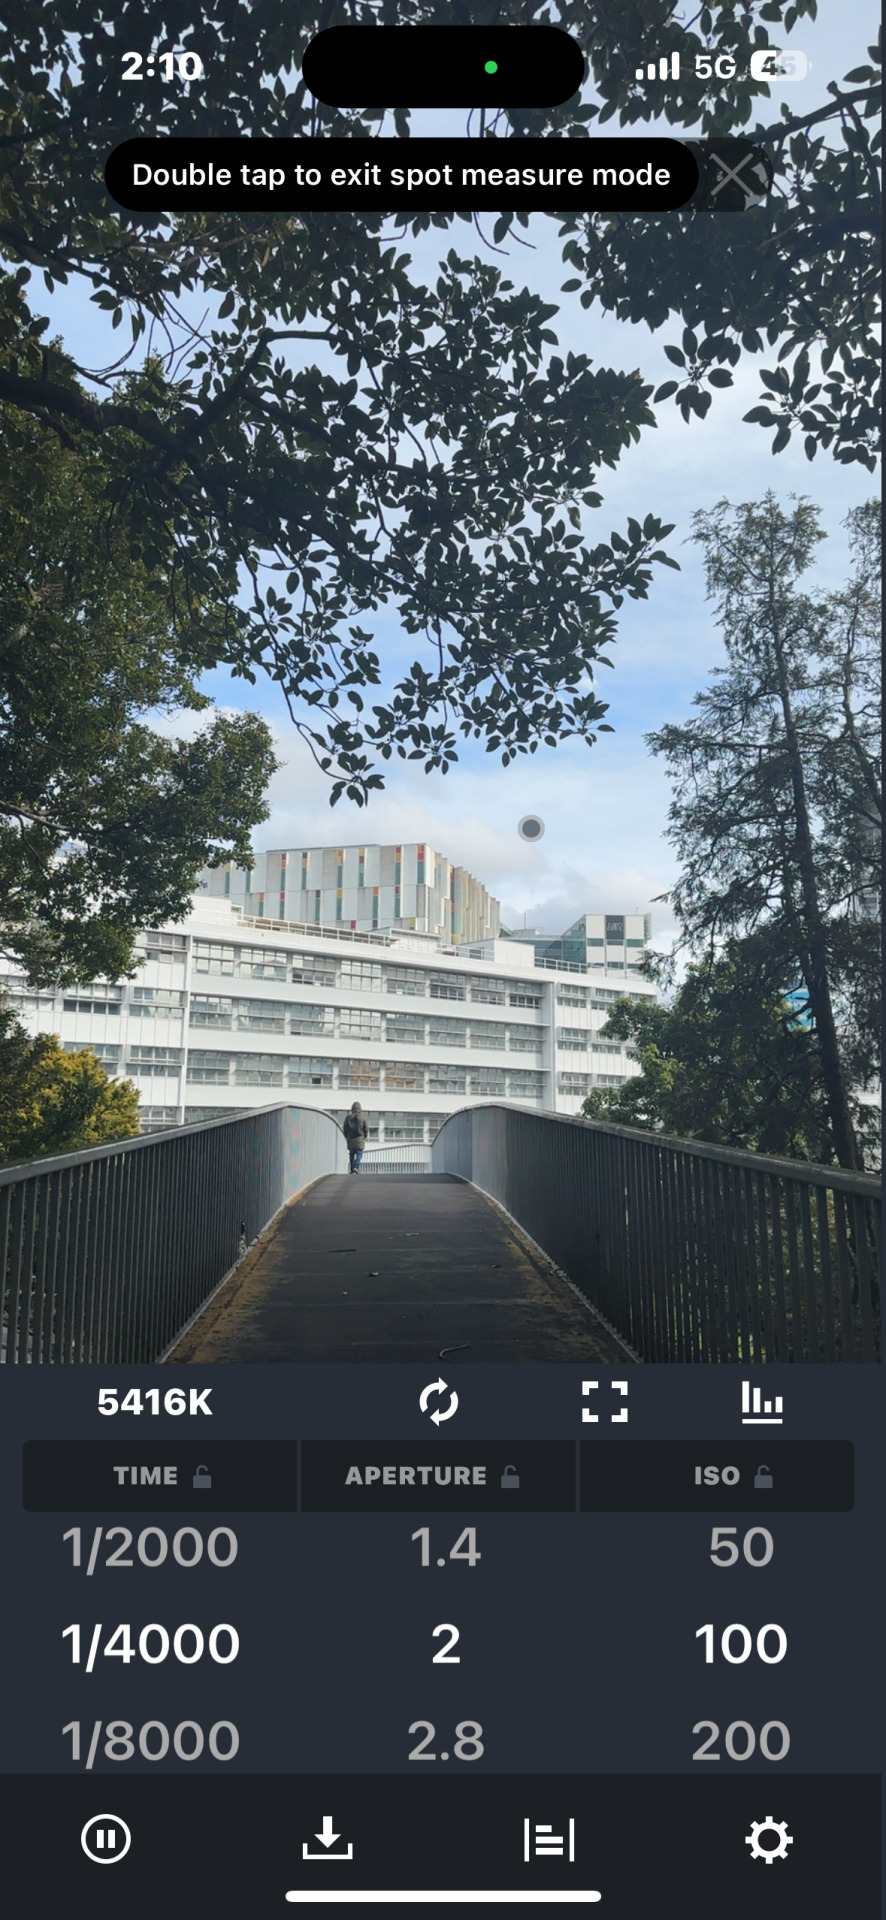
✱ KIT Panasonic GH6 + LEICA DG 100-400 This means: I'm using a really long lens. I shot this at 161mm. The widest aperture I can get at that zoom is f/4.8, and shooting handheld makes me less steady, risking an out of focus shot. ✱ SHUTTER 1/125 sec I was in Aperture Priority mode (AP), so this setting was automatically adjusted by the camera according to the ambient light available. It's as high as it is because my aperture is as wide as it is and because my ISO is as high as it is. ✱ APERTURE f/4.8 The lower the number ("f-stop"), the wider the lens opening, the more light gets in. More light = faster shutter speed & a lower ISO = less noise, less risk of motion blur. Also a shallower depth of field. If you think of aperture like an eyeball, if you're at f/1.2, your eyes are absolutely bugging out and you can practically see in the dark. At f/22, you are squinting like your life depends on it. People tend to confuse this because they think a "bigger" number (f/22) should mean "wider." Instead, think of it like that your eyeball is 22% closed, versus 1.2% closed. This is not real camera math, but it can help you remember. ✱ ISO 12800 The higher the ISO, the greater your sensor's sensitivity to light. A higher ISO increases your shutter speed, reducing the risk of motion blur. On a bright sunny day, your ISO, if set to auto, might be 100. Anything over about 1600-3200, depending on the camera, starts to risk ISO noise, which has to be handled in post. Sometimes it can't be fixed, so you want your ISO only as high as it has to be to get the shot. (I'm in my office right now, pointing my camera at my bookshelf. If I manually adjust my ISO to 100, my shutter speed drops to 1/2 sec. At ISO 6400, my shutter speed is 1/200 sec.)
My camera is usually capped at 6400, because it's built for that to be okay, if not ideal. This means that my camera will read the light situation and decide what my ISO should be, but it will not go over 6400 unless I tell it to. For this shoot, I turned it up because I was photographing animals at night.
TL;DR: Shoot in Aperture Priority, as wide open as possible, with ISO on auto or set to something high that you know your camera can handle, for a low-light shot of a subject that is moving little, if at all.
#on photography#photography#pacific northwest#pnw#nature photography#wildlife photography#photographers on tumblr#mine: photos#lensblr#how to#photography tips#editing tips#photoshop#lightroom#lightroom classic#original photographers#naturecore#long post#pnwander bts#pnwander edits
47 notes
·
View notes
Text
Week One In-Class assignments.
Task One:
Produce three photographs of the same scene. With each image take an exposure reading from the highlight, mid-tone and shadow. How do these different light qualities impact on your image? Repeat this exercise using all of the different metering systems available on your camera.
Task Two:
Produce a correctly exposed image (that is different to what you did for the first exercise) using an aperture of f16 and whatever shutter speed corresponds to the lighting situation. Now produce two more of the same image again, but this time adjust your aperture to f8 and then to f5.6 – how will you ensure a correct exposure even though you are using a different aperture/shutter speed combination?
f/16

f/8

f/5.6
Whilst on mirrorless, its far easier to know when you think you have the right exposure through your own eyes, I still used the built in light meter to determine when the camera sees the scene being captured live and shows + 0.0 on the light meter.
Task Three:
Set the ISO on your camera to 100, and take an in focus (i.e.: no camera shake) photograph at 9pm somewhere inside your home, using the smallest aperture your lens allows. How will you determine if the shutter speed is too slow and thereby will cause camera shake? Will you need a tripod?
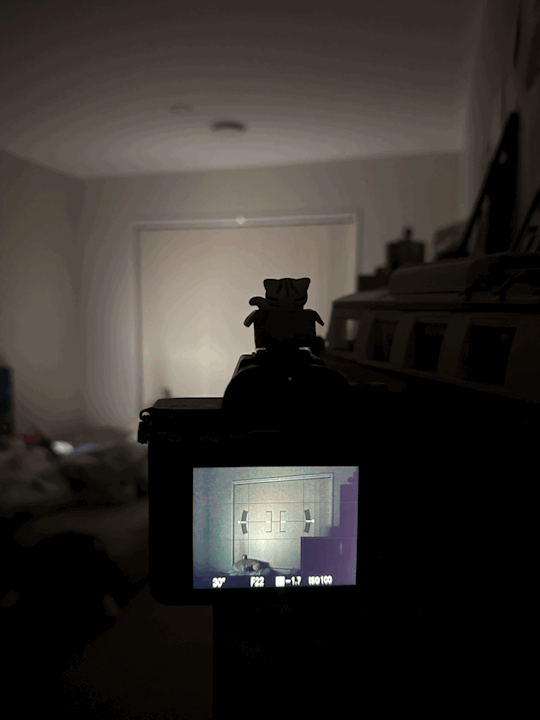
For my lens, the smallest apeature that I can go down is F/22. In my bedroom at approx 9:00pm, its obviously very dark, and the only thing keeping it illuminated is the light coming from my laptop screen.
Even with my laptop screen at full brightness, i'd still need the maximum amount of time (30s) that the sensor would need to be exposed without resorting to using bulb mode in order to get a somewhat exposed image. I placed my camera on top of one of my cupboards facing my bedroom window to prevent any movement during the period when the sensor is exposed.

This is what my camera looks like when doing long exposure.
This is what the image came out looking like. Can see what is in the picture frame, but this shows that I either need to raise my ISO, or use a tripod to get a better exposure in dark situations.
Task 4:
Produce a series of images (in a low light situation which you determine) utilizing an ISO of 100, 200, 400, 800, 1600. All of your images need to be f11 and whatever corresponding shutter speed. Will you need a tripod?

From the top 2 to the bottom photo, from iso 100 up to 1600.
iso 100: 0.6s
iso 200: 1/4s
iso 400: 1/8s
iso 800: 1/15s
iso 1600: 1/30s
The images may look bright, but in reality that environment was really dark. This is a place where a tripod would be ideal. Some pictures even have motion blur, despite my best to be as stable as I could taking those shots.
Task 5:
Photograph something placed in front of a window (i.e.: a person, an object, etc.) at around midday without it becoming a silhouette. Where will you need to take your exposure reading from? Next, photograph a white t-shirt outside in the midday sun and produce an exposure where you can see the detailed texture in the fabric. Now repeat the exercise using a piece of black clothing. Now repeat all three exercises, but this time ensure that your exposure utilizes an aperture of f16. With all these exercises, you want the person/object, t-shirt, black clothing to mostly fill the frame.
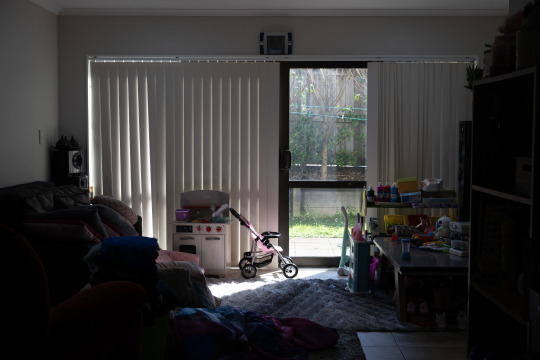
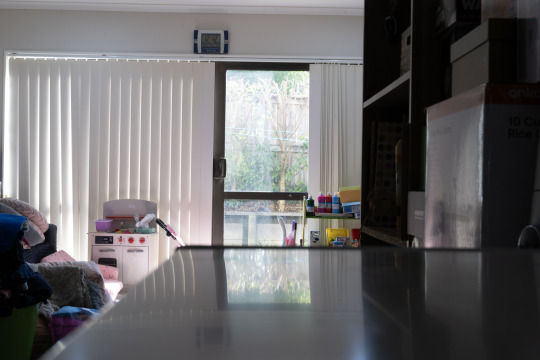
The light here in the living room is clearly shining on the stroller, so i'll use that as "something placed in front of a window".
With modern advances in camera technology, it's ideal to shoot for the highlights (this photo, it would be the window itself). Raw files can recover a lot of detail, even when pushed in post.

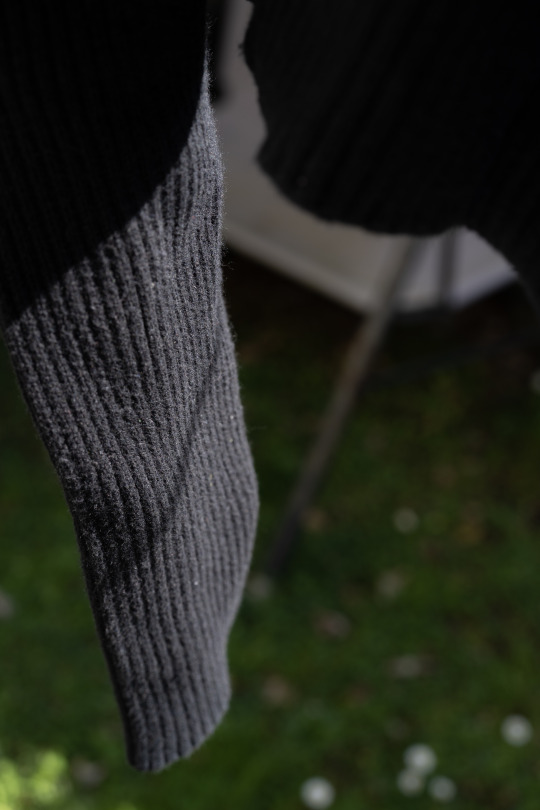
these ones taken at f/8
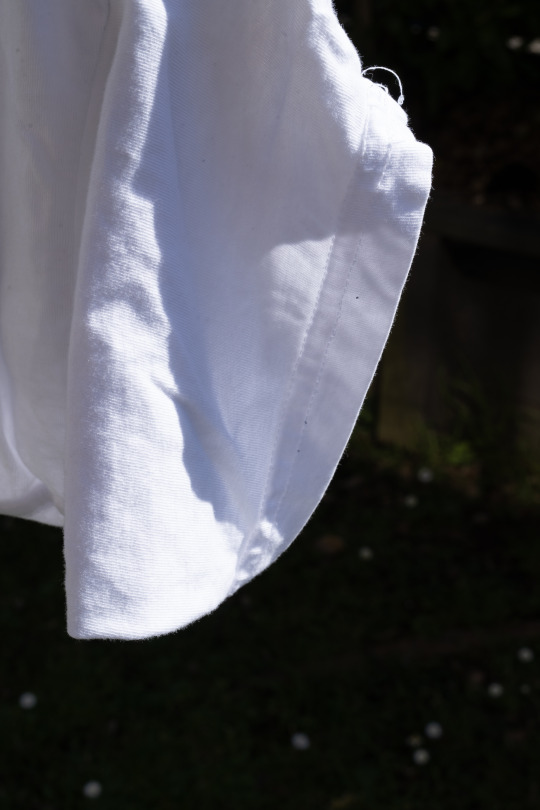
These ones taken at f/16.
It's hard to tell in Tumblr because of compression, but at f/16 there is less detail to be seen of the fabrics on both the white and black shirts. This is due to defraction that occurs on the lens because we have stopped down beyond the lenses peak sharpness.
0 notes
Text
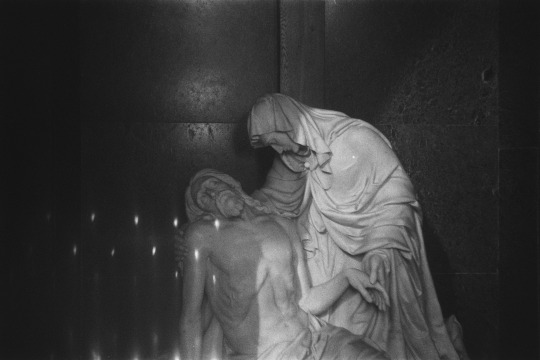
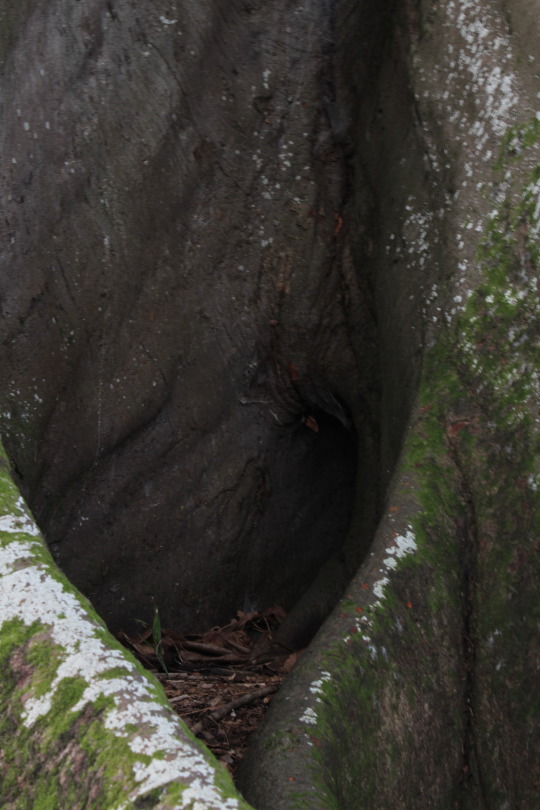
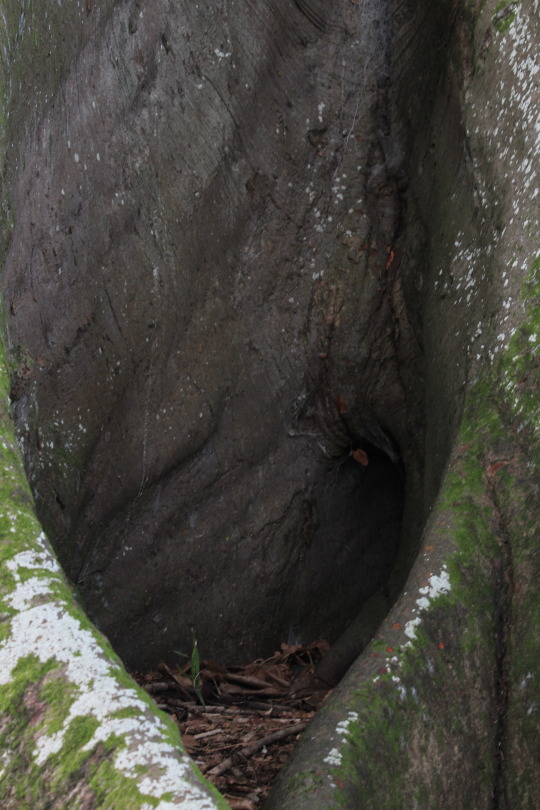
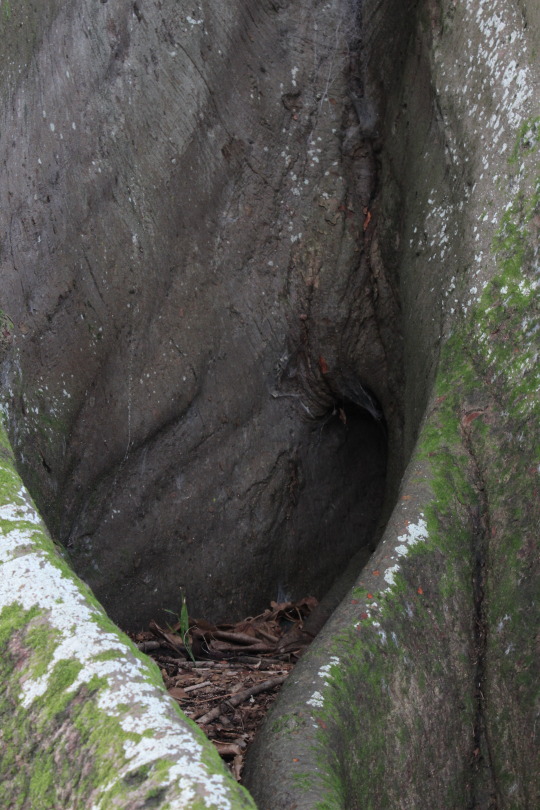
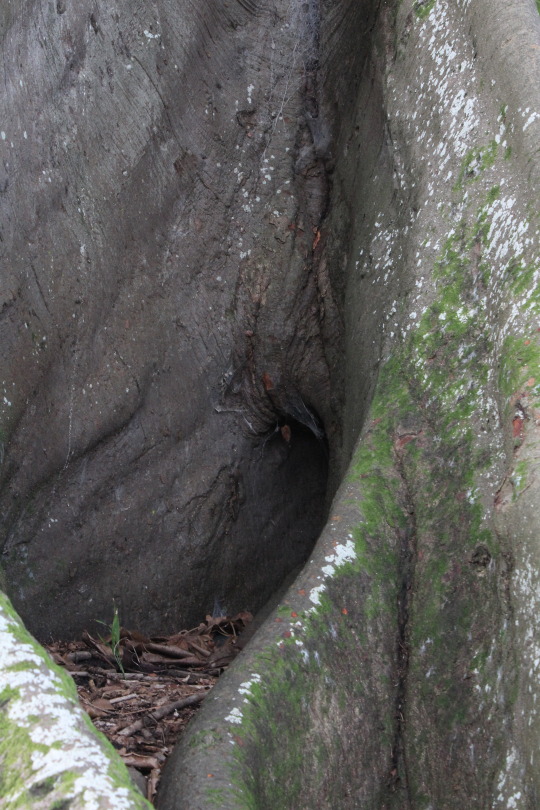
Ilford Sportsman shot on Ilford HP5 400 pushed 2 stops to ISO 1600 and developed with Rodinal
#photography#film photography#ishootfilm#analog photography#filmisnotdead#b&w photography#ilford sportsman#ilford hp5#marble statue#statue#old church#church#35mm film
10 notes
·
View notes
Text

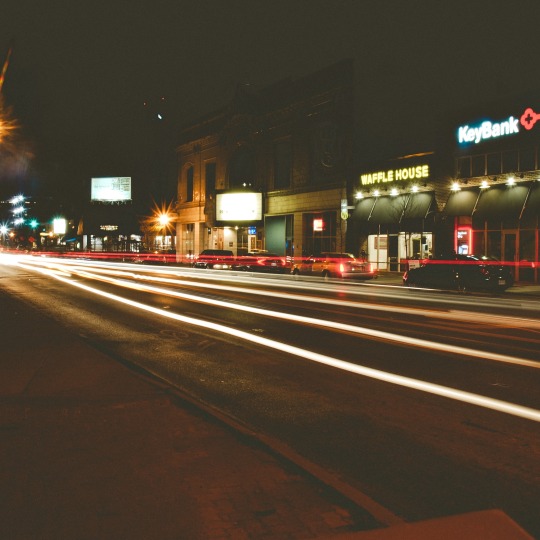
first 2 shots:
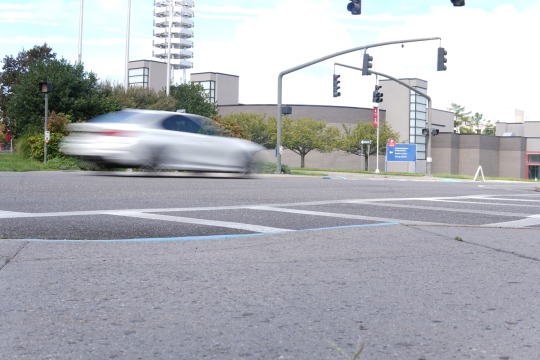
cars on stony brook campus taken at different shutter speeds
1. 1/13 f16 ISO: 50
2. 1/250 f5.6 ISO: 50
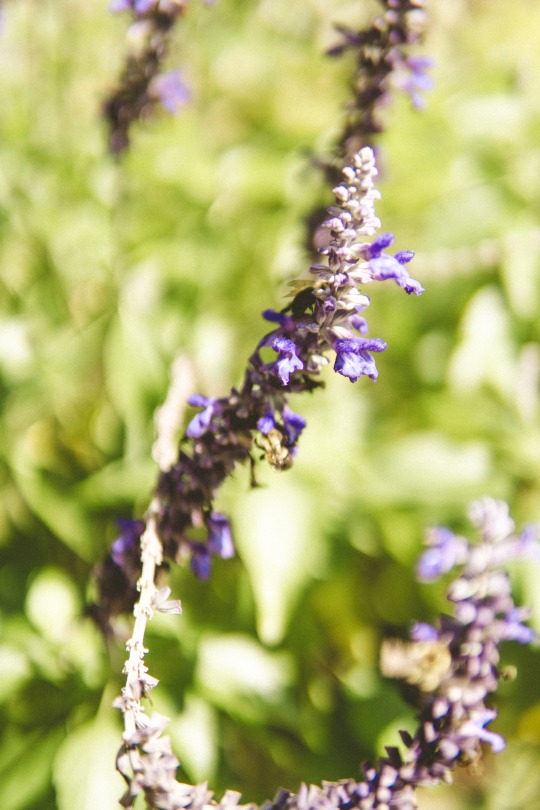
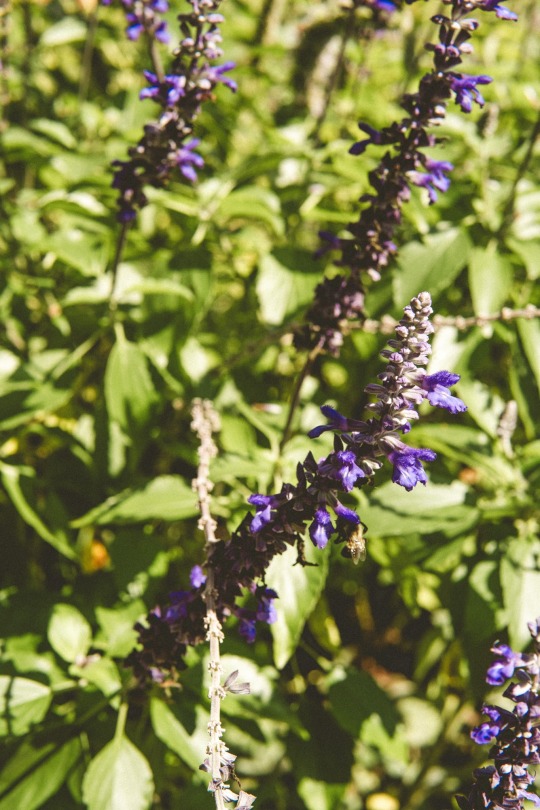
next 2 pictures: flowers on stony brook campus at different apertures
1. 1/4000 f1.4 ISO: 50
2. 1/500 f5.6 ISO: 50
next 2 pictures: studio shoot i did for safi
1. 1/400 f2.8 ISO 800
2. 1/125 f2.8 ISO 200
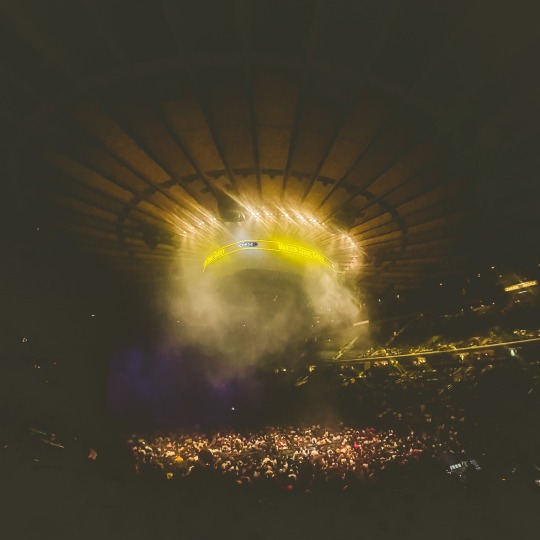
last 2 pictures: smoked out MSG and super long exposure
1. 1/35 f2.4 ISO:1600
2. 15” f22 ISO:100
1 note
·
View note