#3d scuplting
Video
undefined
tumblr
Seven years ago today I sculpted this guy for my first daily challenge. Today I made this little 2D animation test out of the old renders. More to come!
This was my 2015 3D-sculpture of a Mano (Hand) alien from the classic Argentinian graphic novel "El Eternauta".
0 notes
Text
3D Mappi and Mikoto!!!
it's them!! the sillies!!
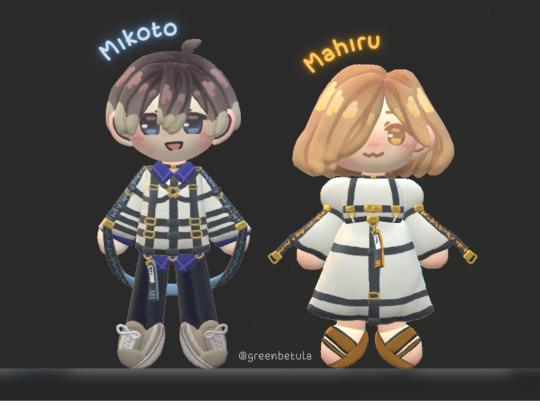
took me 2 days to draw mikoto's face, i underestimed how hard it is to draw front view eyes in 3d 😭 i should've made haruka, kotoko or es instead, at least i only have to draw one eye
+ with background and different lightings
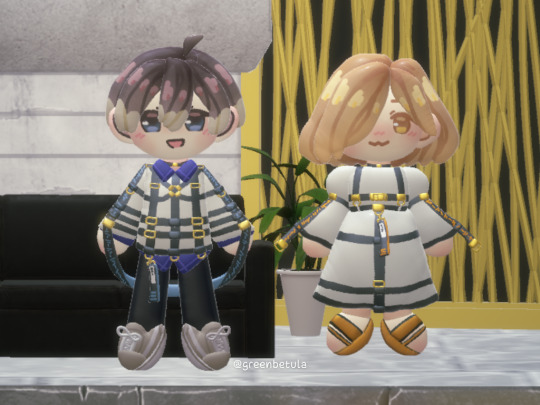


i didn't use a proper 3d sculpting program, so i can't turn around the models otherwise they'd look like a molten gingerbread man (but i do want to properly sculpt them in 3d in the future!)
(i didn't make the background btw, they were 3d assets included in the program i used, i just arranged and changed some colors)
#milgram#milgram project#mikoto kayano#mahiru shiina#the program i used is “paint 3d” btw#i tried to use some online 3d scuplting websites but i couldn't understand a thing aghsgdlhglashalglfawdgd#also i just found out that paint 3d had a high display quality toggle for smoother graphics#i didn't know that so that's why they look so damn pixelated#MIKOTO LOOKS SO GOOFY IM CRYING#my stuff#fanart#digital art#3d#green's gallery#silly creatures
109 notes
·
View notes
Text


Some silly class notes
#TO BE CLEAR: my teachers are not nft bros but they have to put them in presentations sometimes unfortunately#regrettably.#but anyway I had an impulse to buy nomad scuplt and learn 3d modelling like a week ago I’m so fucking smart
13 notes
·
View notes
Text


#3d print#deathknight#dnd#dnd miniatures#I've gotten better at scuplting now I need to prioritise making minis that are reliably printable and easier to paint
12 notes
·
View notes
Photo

Sculpted my dog recently, he’s very good model <3
1 note
·
View note
Text

6087 - Kenna Heart a 3d sculpture of two beautiful transgender women hugging and kissing
#aesthetic#art#clothes#fashion#fashionista#fashionporn#girly#lingerie#sexy#style#ai art#ai artwork#ai beauty#ai fashion#ai fashionista#ai girl#ai image#ai model#ai sexy#ai woman#kenna heart#3d sculpting#porcelain#porcelain doll#ai scuplting#ai sculpture#brunette#long hair#pretty#pretty girl
0 notes
Text
Thinking about returning to my NPR (nonphotorealistic rendering) research for my WOR style guide thingy.
Fell off of it last year, but since I'm working on these three characters here, it's important to remind myself of the goals for WOR's style.
Also, need to make a moodboard and media example list for WOR's fantasy 3D/2D aesthetic.
With this said, guess what I found recently!
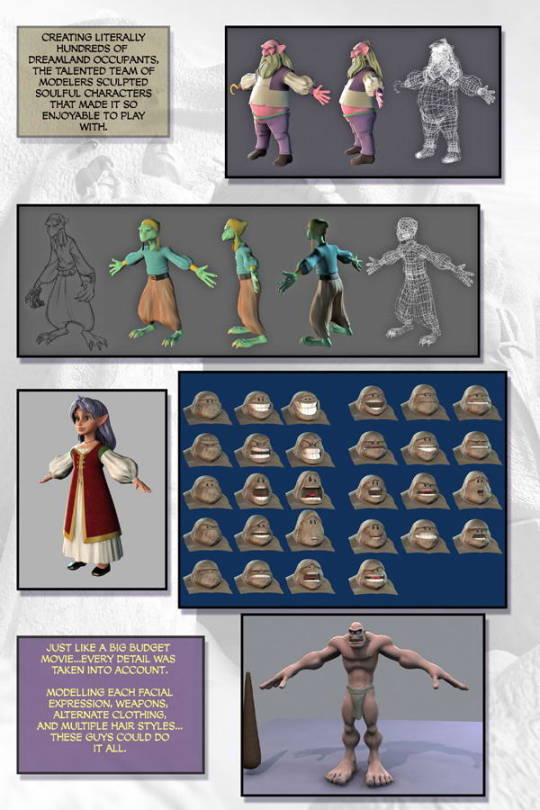
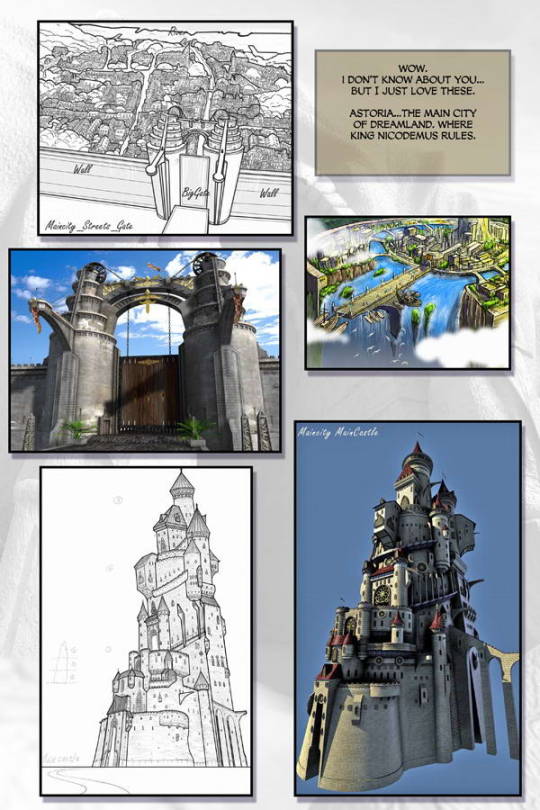
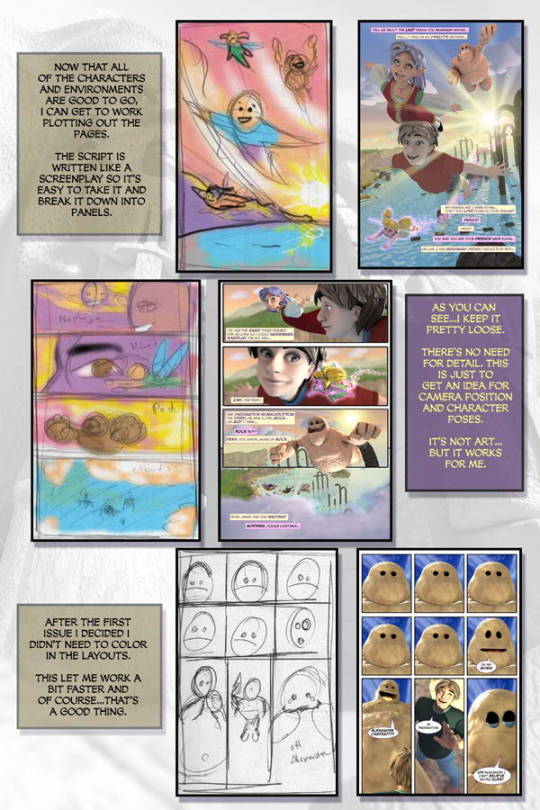
So, I was revisiting an old webcomic I had read in my teens called The Dreamland Chronicles by Scott Christian Sava. This site is currently an archive of the 3D comic series that started in 2006. If you visit, just know that some of the pages, both the old 3D comic and the 2016 drawn comic, are either missing or misplaced throughout the site. I'm not sure if this site is still updated or maintained.
I found a series of pages that explained how The Dreamland Chronicles was made. Pages start here! This gives me a good starting point for developing and designing 3D characters, environments, and assets for a comic. The only thing that's missing is the render time (the style is similar to most 3D animation during the early 2000s on a 3D Studio Max version during that time) and how they organize all the files.
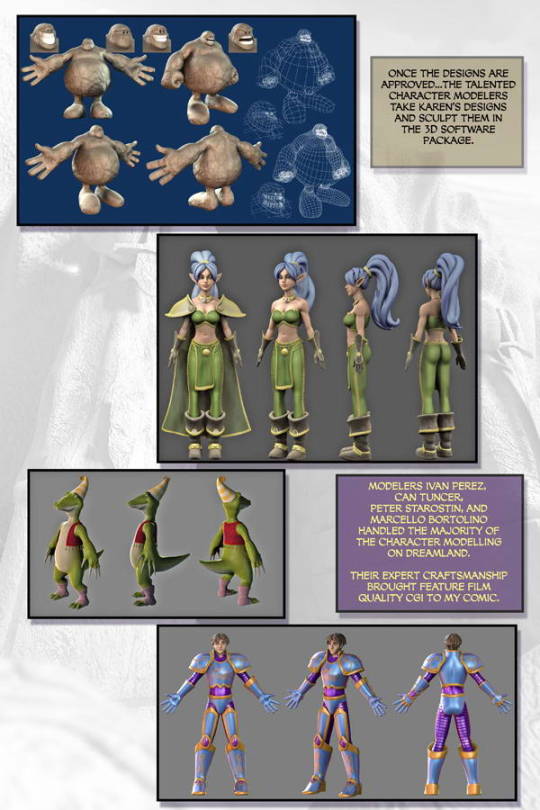


I did check the comments under one of these pages on the site and the creator did mention that (mind you, this was back in 2008 with 2000s 3D software) it took either a few hours or days to render a single frame. Nowadays, Blender, Maya, 3D Studio Max, and other 3D software are more advanced, so something like this would take half the time on a good computer rig.
Got some more information about the comic from the FAQ section here. It's no longer on the main site, but still accessible on the Wayback Machine.
What I found interesting is that once all the characters, sets, environments, and other assets are completed, it takes about a day or so to create a page. Depending on what the scene calls for, maybe more pages created within a day. Back when Dreamland Chronicles was running, the comic updates five times per week.
~ I mean, still, there's render time. So maybe, pages were created one week, then rendered out while the next pages were created, and so on?
Considering this comic's semi-realism style, yeah, that render time is going to take a while.
For WOR's style, I'm going for a cel-shaded 3D style similar to my own drawn style.
Example, my Spoon Ballerina character from last year, from concept to 3D model. Note: the 3D render on the right was less than a minute for a single character and plane using EVEE (Blender 4.0).


Another example is the anime 3D models by Bran Sculpts like the one below:
youtube
Both examples use Blender, and while Bran uses Blender's emission shader nodes to create the flat colors and shadows (with painted shadows), the Lightning Boy Shader I use also works off of emission nodes. Lightning Boy has the advantage of layer shader nodes, thus simplifying the setup for more complex models. The painted shadows I might had to do for certain areas of the character depending on how they are lit in an environment.
Rendering time might not take long for these- hang on
Downloaded and rendered the Akko rig - in less than half a minute. That's just with one character, tho, how long would it take with a full scene with a fully modeled environment? Idk, but maybe time might not be an issue for this style lol. And the character models might not need a high poly count for rendering, either. Interesting!
The most time-consuming thing I could see for WOR's style is modeling and texturing (gods, humans, all mimic/war and civilian object types, assets, environments, etc) per issue for Rise of Relics (maybe for months depending). Setting up for a scene (for panels and so on) might not take long at all...
#mystuff#npr#nonphotorealistic rendering#blender#blender 3d#3ds max#dreamland chronicles#webcomics#3d modeling#wor research and inspo#worldofrelics research notes#worldofrelics#art#bran scuplts#Youtube
1 note
·
View note
Text
been back on my space engineers grindset. ive turned the SCS TERN into a series of ships based on my traveller TTRPG setting. I still feel super new at the game even though ive built like a half dozen ships now of all different types. the current lineup is the Isopod utility shuttle(with a mining and repair variant), Gig orbital shuttle (with cargo or personnel variants), the tern cargo ship, the Kingfisher frigate, and my current project, the Eagle modular cruiser. (all of these pics are in various stages of development so the ships may look dif between frames. this is the most up to date lineup
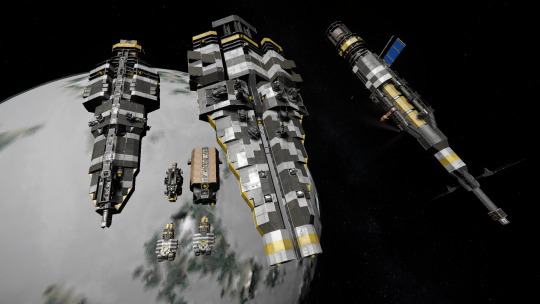
my favorite part is the sort of reiterative process of drawing sketches of ships, then scuplting the hull to get a vibe for how it looks in 3d, and then resketching


even though its not complete, the Eagle is already my favorite because of how it can tactically dismember itself into distinct self sufficient hull sections. This means that in the future when i need new specific functions for a proper big boy ship i can swap out the hull sections for new ones. this feature took a lot of head scratching on how i would manage to make it look flush and in one piece (including airtight corridors between sections) while also not fusing it permanently via merge block.

With this feature in place ive already got a good idea for replacement parts like a carrier section and cargo section

it ofc isnt the only vessel with a fun gimmick involving subgrids, the kingfisher has a mounting gantry on the back for a drop tank like a fighter jet (the orange vessel whos 3d inertial stablizers, initialily installed to allow easier retrieval, turned it into just a small high capacity tanker). this tank is inert while connected and flashes on the second you disconnect, so youre encouraged to flick the nose up and "kick" it off the back of the ship before combat; letting the drop tank figure itself out. so you dont have a huge ungainly bomb dangling between your thrusters.
#yeah i guess thisll count as art#skitcherins#canisposting#if i was the kind of autist that could do *math* itd be fucking over for all of you#i bought this game a month ago and have 200+ hours in it already#i just LOVE space game
2 notes
·
View notes
Photo


Making a furious horse head in Scupltris: Easy, soothing, non-problematic
Trying to make a smiling human head in ZBrush: Ohno oh no oh no, where’s everything? What am I doing? Why does it looks so WEIRD?
#I won't show you the human head since it's not done yet#and it doesn't look good yet XD#But either I have a really poor knowledge of human anatomy (possible)#Or ZBrush has a really complicated interface that makes everything harder if you don't know how to use it (also possible)#I hope I'll learn how to use it properly before my trial ends XD#WIP#3D scuplting#this one has too big eyes and too small ears but I'm happy with it
10 notes
·
View notes
Link
Zbrush Training by Dark-Saron
1 note
·
View note
Video
undefined
tumblr
Got me final 3D assignment done. All sculpted in VR then brought to life in maya
41 notes
·
View notes
Photo


Molly!! Chose to sculp Molly for this assignment because there was a DEVELOPMENT that week in critical role.
#art#my art#digital art#digital scuplting#3d modeling#zbrush#critical role#critical role art#molly#mollymauk tealeaf#mollymauk
8 notes
·
View notes
Photo

Moon Lady (2019)
Instagram : https://www.instagram.com/_ledrame/
#blender#blender 2.8#animation#3D#design#pink#blue#water#source#twirls#scuplt#sculpting#art#montreal#montreal artist#trees#moon#moonlady#instagram#queer art#queer
1 note
·
View note
Photo

Art Fight 2022 #14
A really fun tiltbrush model!! i love this
-
-
Consider checking out my Kofi! ko-fi.com/zacharieribbit
Posted using PostyBirb
0 notes
Photo


I named him Mints Mintly
1 note
·
View note
Text
Angie build update Part 3
Part 1 Part 2
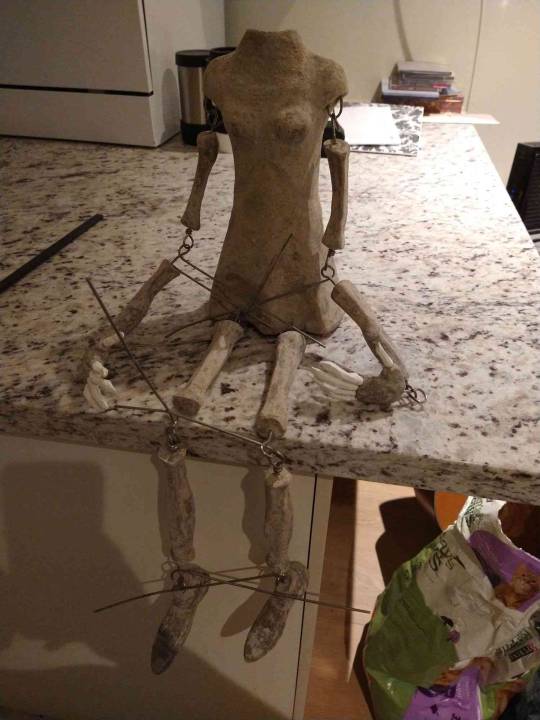
Oops haven’t been updating that much, but here’s how far I am! I haven’t closed any of the loops because I’m not gonna permanently attach things until everything’s painted which is why there are extra wires everywhere.
My Dad is still working on the internals so I can’t work on the head or finish the neck just yet.
Close ups and trials and tribulations under the readmore
Close ups first!
Hands, the fingers aren’t glued in yet so they kept falling out as I tried to get this shot.

Upper and Lower arms, I’m still debating the order of operations on the cuffs on her wrists, I think I’m going to add the worbla after I varnish them but before I paint. Maybe. We’ll see.

Legs
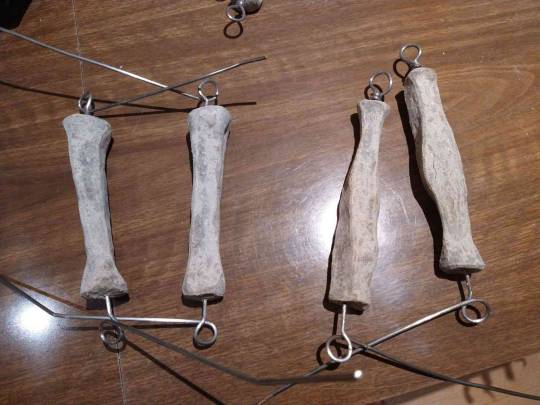
And Feet, I put down the sand paper down to stop the terrible glare that’s on my table and it was the closest thing available, but it confused my camera about colours, the feet are the same colour as everything else, not weirdly blue.

And the torso
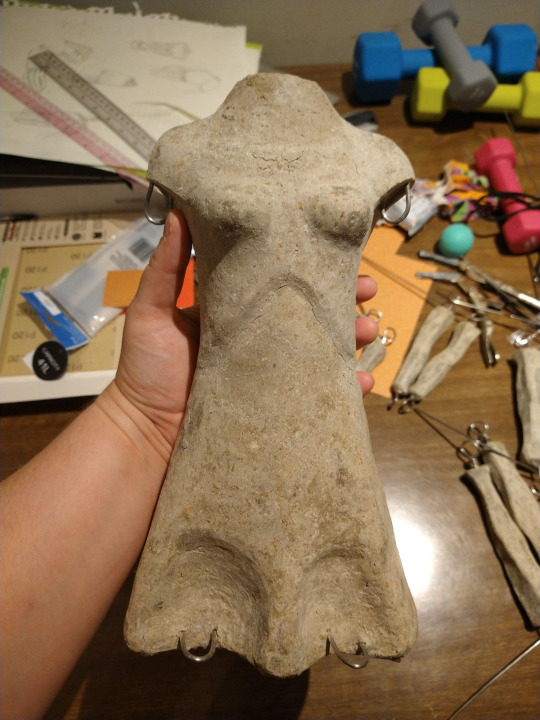
Now for all the issues I had with getting this far.
First off, the original hooks I had in the shoulder sockets were way way way too long. Unfortunately I only figured this out after I had put a few layers of clay on it.
And knowing myself I wouldn’t be satisfied unless I fixed it, so

Here’s a comparison of the old piece to the new

So a significant difference, and honestly were I making her again I probably would have gone even smaller, but uh, not redoing it again from here.
The good thing this taught me is that this clay is super durable because it was a huge pain to try and break it away so that’s good at least?
Fast forward a few more layers of clay and things that I realize that cracks that I’ve been trying to patch as I’ve been adding clay in other areas actually go all the way through to the inside.
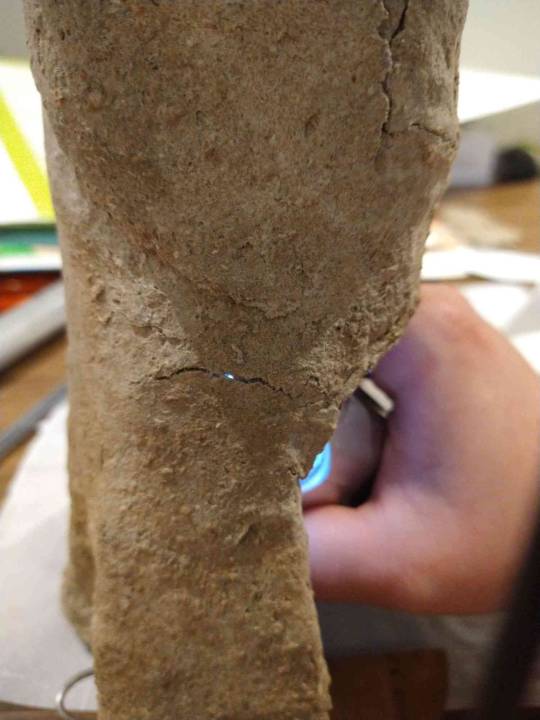
Most of them aren’t too concerning, except for this one.

At this point I’m just keeping an eye on it and making sure it doesn’t grow larger. This is foreshadowing for later issues.
But for now let’s look at the limbs for a bit.
What I did to keep all of the limbs separate was to cut some marks into the end of the wires that are eventually going to get cut off after I wrap them around to close the ends.
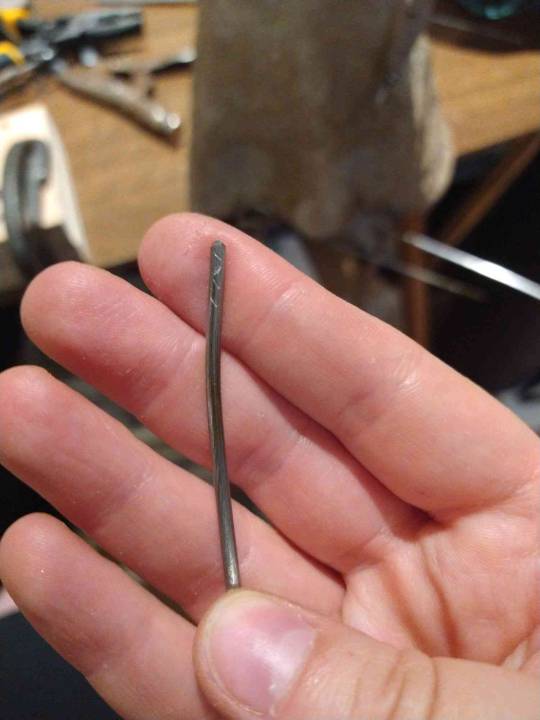
I did this because otherwise I was probably going to get the pieces mixed up extremely quickly

The next big issue was with the fingers, I realized that this clay wasn’t going to be able to do fine enough detail for me to sculpt them directly from the clay, so I decided to just make a blobs of clay and dremel them into shape.
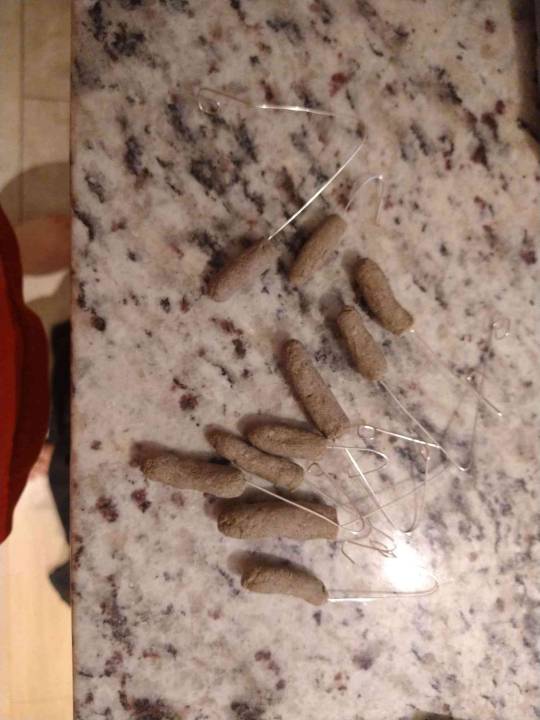
The issue is, I made this decision while I was adding the second layer of clay to them (there was no way I was going to be able to scuplt it without at least one layer of base to keep it from falling apart as I tried to get details in.
However, this stuff tends to form air pockets in between layers, this fact has become the biggest frustration with this clay, and here is where it starts to become really apparent.


so at this point my options were
1) continue with this set of fingers, knowing that they are full of air pockets and would need some serious patching afterwards
2) create new blobs all in one layer and then dremel them down again
3) switch to polymer clay, which is much more fragile, but much better at detail
I ended up going with option 3 there, option 2 probably would have gone fine as well, but chances of success were much more sure with the polymer clay.
Don’t be fooled by my sudden jump to all 10 fingers this took like 3 days of not doing much else other than sculpting fingers to get done, I am not a professional with sculpting so I am taking extra time to get it to look right.
At this point I’ve got everything up to the neck on the torso sanded down, and there’s some stuff to patch. That in itself is not a surprise, however, I realize that an area that I’ve been trying to patch has a giant air pocket in it. Yup that issue again.
I pulled off everything that was flexing when I pushed on it, but you can see from the pencil line just how far I’m estimating the pocket goes.
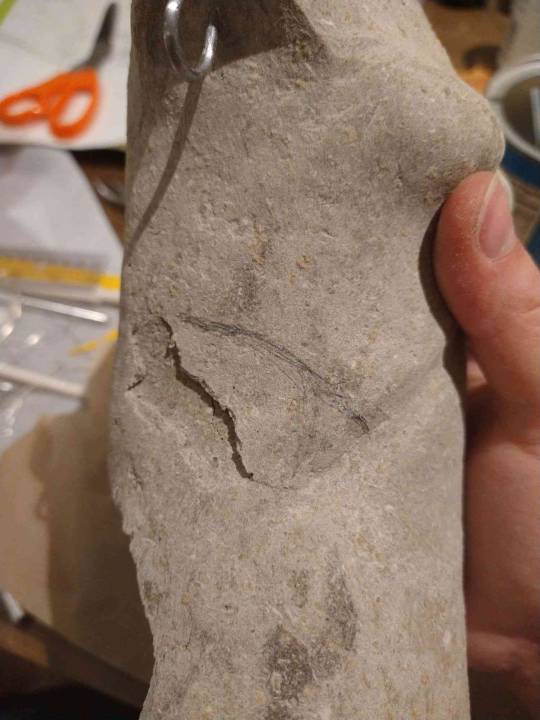
Once that was patched and sanded back down it seems to be alright in that area at least but that was a bit of a scare.
However, the more times I put this thing in the oven, the more cracks are appearing in the same locations. And I realized that, because this piece is too tall to fit in my oven and I had to lay it down and do a front layer and then a back layer for every layer I put on, the cracks were appearing along those lines, and the ones where I did the shoulder surgery.
The cracks aren’t all that easy to see in the photos so here they are both plain and with me drawing over the photos so you can see where they are.
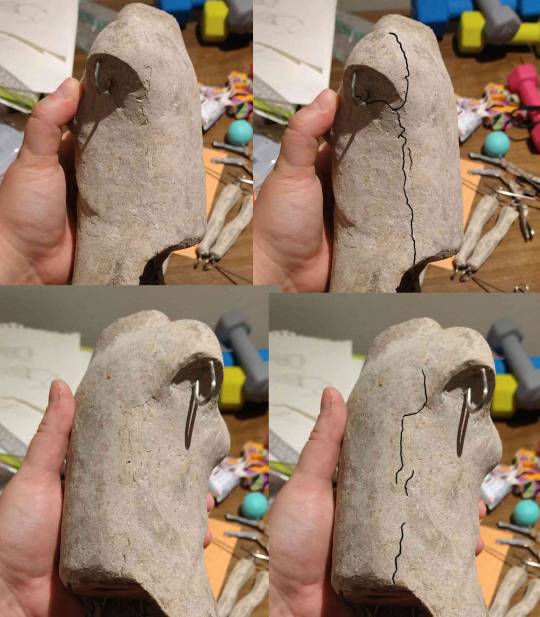
And while these cracks are fairly fine they go all the way through to the hollow inside. The chicken wire inside should keep things together alright, but what I’m going to do is after I varnish it I’m going to put some strong glue in there and paint over it, just to be safe.
I dremeled down the shoes, (needed some patching on the toe of this one) and I was planning to hand file down the design on the top of them, just to prove I could.
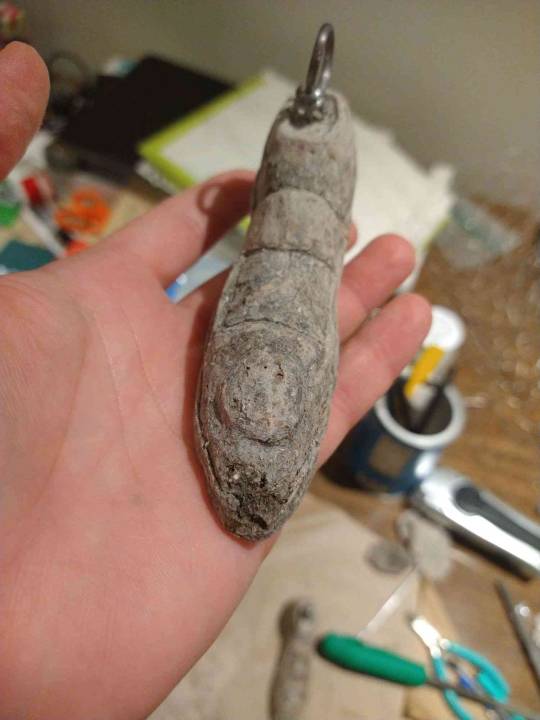
but of course there’s an air pocket under the raised portion of one of them that I find out about once I’m half way through filing. You can see it’s under the center of the design, and by the fact that the spoke I was working on just fell off.

I dremeled them off, I’ll be using 3D fabric paint for them when I get to the painting stage.
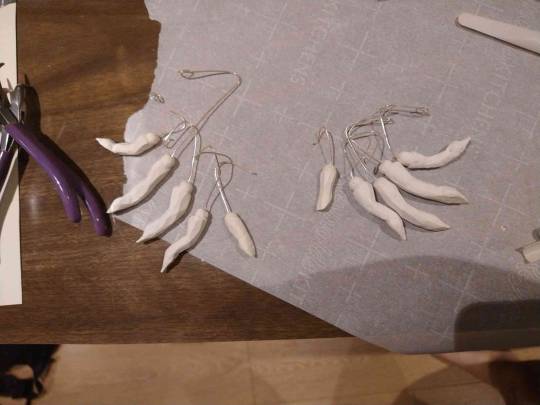
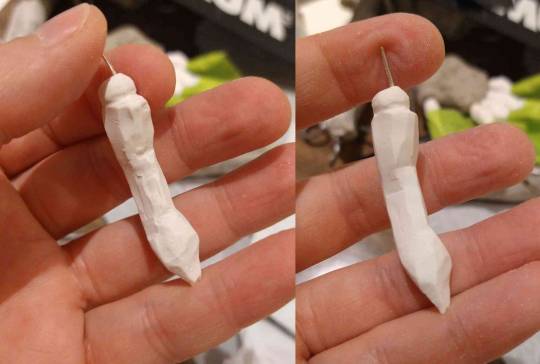
After that I hand sanded down the fingers, because the dremel would be too aggressive on the polymer clay and leave behind so much scraping that it might show through the paint, and that took a few days to get done.
Before and after sanding
That’s where I am right now.
Next steps are paint tests (already started) and in between the 600 years of drying time on those I’m working on the mock up for my shirt.
I’m gonna try (try, no promises) to give more frequent updates even if I haven’t gotten a huge step done just so I don’t end up doing such a huge dump of stuff every time.
11 notes
·
View notes
Last Seen Blogs

lazereyessquire-blog
Lazereyes

laxmivizag6
Untitled

kayratastaki
Untitled

rakeshbhabhor
Untitled

lavoniaspeaksmiller-blog
Untitled