#2N7002
Text
5.1 channel analog audio processor
In this project, we developed a 5.1-channel analog audio processor using PT2322 IC. PT2322 is an inexpensive analog audio processor introduced by Princeton Technology Corporation. It contains 6-channel individual channel attenuators, a 3-way tone control system for front-end speakers, and a 3D audio simulation system.

In this design, we combine PT2322 with Arduino Nano and interface it with PC/embedded computing boards through a USB port. Native GTK UI application provides to control all functions of the PT2322 IC.
The Arduino Nano can directly plugin to the PT2322 module. There are three push buttons on the panel itself to control the volume and mute the audio.
To reduce the cost and minimize the PCB size, we use both SMD and through-hole-type components in this PCB. The dimension of the PCB is 59mm × 60mm. The PCB of this module can directly order from the PCBWay project page. Using the PCBWay service, you can order high-quality PCBs at low prices. Use the PCBWay online quote tool for pricing and more details.

The Arduino firmware in this project is developed using PlatformIO. The host-side control application is written using GCC C. This UI application can be compiled and run on any Linux/GTK compatible board like PCs, Raspberry Pi, Orange Pi, BeagleBone Black, etc. All communication between the host and the module is performed through the USB UART interface provided by the Arduino Nano board.

At the prototyping stage, we test this board using an ASUS Xonar SE 5.1 channel soundcard and Creative Inspire T6300 - 5.1 analog speaker system. The above setup delivers clean audio output without any noticeable distortion.
In PT2322, the tone control system applies to front-end channels only. The remaining channels work independently from the tone control system. This is a design limitation of the IC. From our experience, this can sometimes adversely affect the surrounding listening experience.
The PT2322 has a 3-way tone control system that allows bass, mid-range, and treble control over a range of -14dB to +14dB. A 6-channel attenuation system provides up to 15dB attenuation per channel. All these controls divide into 15 steps. The master volume control can use to adjust attenuation from 79dB to 0dB in 80 steps.

This audio processing module is an open-source hardware project. All the design files, source codes, and compiled binaries are in the project repository at github.com.
#2N7002#PT2322#Arduino#Arduino Nano#Audio#USB#Linux#GTK#Surround#raspberry pi#orange pi#banana pi#BeagleBone Black#platformIO#I2C#LM78M08#UART#serial#gcc
0 notes
Text
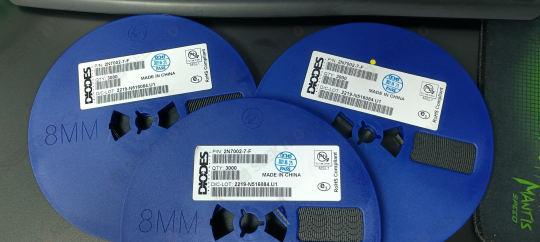
Today's delivery:2N7002-7-F
Inquiry: [email protected]
Find more: www.seektronics.com
#JSCJ#components#semiconductor#semiconductors#powerelectronics#chipshortage#electronics#powersupply#mcu#mosfet#igbt#electroniccomponents#electronicsmanufacturing#semiconductorindustry#electronicshop
0 notes
Text
https://www.futureelectronics.com/p/semiconductors--discretes--transistors--bipolar-transistors/2n7002-215-nexperia-4072377
2N7002 Series N-Channel 60 V 5 Ohm 0.83 W TrenchMOS FET
#Nexperia#2N7002#215#Transistors#Bipolar (BJT) Transistors#Audio transistor#Bipolar junction transistor#switching#Emergency lighting#Voltage regulators#bipolar transistor manufacturer#bipolar transistor switch#High voltage transistor#transistor manufacturers
1 note
·
View note
Photo

I did a new version of the DCC decoder for US searchlight signals! No real point other than I wanted to try out a few things. Major changes compared to the last version include:
Enough capacitors! No more ugly additional capacitors added on top.
Mounting holes, really tiny ones, so I can mount this on a layout somewhere with tiny screws.
DCC ack via a resistor. Okay, so when setting values on a model railroad DCC decoder, or trying to read what's there, there is no real way for the decoder to answer. But since decoders in locomotives control big motors, the decision was made that a decoder acknowledges something by just turning the motor a bit. My decoder for signals does not have an attached motor, so it has generate an increased power draw through some other means. Originally the plan was simply to turn on the LEDs really bright, which actually does work. But for N scale, I'm using smaller Neopixel LEDs which don't draw as much power, so I need to add a dedicated power draw resistor. And a transistor to turn power through that resistor on and off, of course. The transistor is the black three-legged thing labelled 2N7002 (the other black three-legged things are diodes; yes, they're all using the same housing, and yes, that is very confusing).
And it all works. I've built two of these, because I had the parts, and both of them worked basically instantly. I am very happy about that. I'm not entirely sure what I'll be using them for, but I'm very happy to have them nonetheless.
Of course, there's always something to improve, and I did just order the parts for version 3, which will use a different way to generate the 5V DC; one that is way more efficient, but also way more complicated, so it'll be interesting to see whether it works. The new circuit boards will arrive in early September.
To be honest, I always thought "nah, I can't do my own circuit boards, I'm just a little hobbyist, it's not allowed or something". But nah, designing them is something you can learn relatively easily, and there are plenty of companies that will then build them for you surprisingly cheaply (this one costs about 2,60€ per PCB, including VAT and standard shipping). Also, soldering SMD components, really not that hard if you keep to larger ones (the smallest here are 0805) and have a good soldering station and cheap SMD tweezers. If you've worked with an Arduino before, you can learn how to do this, and I found it to be a lot of fun.
1 note
·
View note
Link
1 note
·
View note
Link
Zener diodes that are used in circuit that needs Zener diode voltage regulator, power Zener diode.
1 note
·
View note
Text
STM8S005C6T6 Ethernet development board
In this project, we built an STM8S005C6T6 based Ethernet development board for our IoT experiments. This development board consists of ENC28J60, 10BASE-T stand-alone Ethernet controller, CH340G, USB serial interface, 2 LED indicators, and passive buzzer unit.
The firmware framework for this development board has been developed using SDCC. To enable IPv4 support, we convert the EtherCard driver, which is available for the Arduino platform. The current version of this driver supports all other EtherCard functions except TCP support.

In the given design, the SPI terminals of the MCU are connected to the ENC28J60 Ethernet controller. All SPI terminals, such as MISO / PC7, MOSI / PC6, and SCK / PC5, are connected directly to the Ethernet controller. In addition, the PC4 terminal of the MCU is used as ENC28J60, CHIP-SELECT.
The CH340G USB serial interface is connected to the UART2 terminals of the MCU. In STM8S005C6T6, the UART2 is mapped to the PD6 and PD5 terminals of the MCU. The USB interface of this development board consists of the jack-sense feature. The jack-sense status can access from PD7.
The minor peripherals such as LED indicators and buzzer are connected to the PORTD of the MCU. The LED indicators are connected to terminals PD0 and PD1 and can be activated or deactivated via jumpers. The passive buzzer is connected to PD4 and can run through the STM8 beep sound generator unit.
All peripherals of this development board are powered by a 3.3V supply. The recommended supply voltage for this development board is 5V to 9V.

In addition to the STM8S005C6T6, this development board supports the following STM8 series, LQFP48 packaged microcontrollers: STM8S007C8T6, STM8S207C8T6, and STM8S105C6T6.
All the resources of this development board are available at the GitHub project repository. The supplied firmware is developed and tested with SDCC version 3.8 on a Linux environment. Before compiling and flashing the MCU, make sure to install the stm8flash application on the system. The supplied makefile use this application to program the fuses and flash memory of the MCU.
The schematic and PCB design of this project is released under the terms of CERN-OHL-W Version 2.0. The firmware framework is released under the terms of the GNU GPL 2.0 license.
#STM8S005C6T6#STM8S007C8T6#STM8S207C8T6#STM8S105C6T6#ENC28J60#CH340G#SDCC#stm8flash#Ethernet#USBLC6-2SC6#MMBT3904#HR911105A#IPv4#2N7002#AMS1117-3.3#SPI#Development Board
0 notes
Text

Today's delivery:2N7002
Inquiry: [email protected]
Find more: www.seektronics.com
#JSCJ#components#semiconductor#semiconductors#powerelectronics#chipshortage#electronics#powersupply#mcu#mosfet#igbt#electroniccomponents#electronicsmanufacturing#semiconductorindustry
0 notes
Link
Metal Oxide Semiconductor Field Effect - MOSFET, transistor is a semiconductor device which is used for switching and amplifying electronic signals in the electronic devices.
1 note
·
View note
Video
instagram
Hot air magic! ♨️💨🧙♂️ • Finally got to shoot this SMD reflow/rework soldering video. More details about the components in the previous post. • This is learning and practice until my new PCBs with lots of SMD pads will arrive. I've also ordered some low temperature paste to reduce the heat stress on the components. • #smd #soldering #tinkering #reflow #rework #hotair #pcb #mosfet #FDV301N #BSS138 #2N7002 #esp8266 #esp8285 #esp01 #ws2812b #neopixel #hardware #hardwareporn #electronics #maker #sunday #lazy #hobby (hier: Berlin, Germany) https://www.instagram.com/p/Bu1k038Hyk_/?utm_source=ig_tumblr_share&igshid=1oxzi7qurtd8f
#smd#soldering#tinkering#reflow#rework#hotair#pcb#mosfet#fdv301n#bss138#2n7002#esp8266#esp8285#esp01#ws2812b#neopixel#hardware#hardwareporn#electronics#maker#sunday#lazy#hobby
0 notes
Video
undefined
tumblr
Zeus Mining Maintenance Tutorial: Replacing the 2N7002mos Tube Chip on the Antminer S19 Control Board
The 2N7002 is a logic level MOSFET with low on-resistance. MOSFETs have a low gate-to-source threshold voltage of 2.1V, which typically makes MOSFETs even suitable for 3.3V application circuits.
To replace:
https://www.zeusbtc.com/ASIC-Miner-Repair/Parts-Tools-Details.asp?ID=1175
0 notes
Text
100pcs/lot 2N7002 2N7002LT1G 702 SOT-23 In Stock
100pcs/lot 2N7002 2N7002LT1G 702 SOT-23 In Stock

lastest_volume
1
Just For Today
Click Here To Visit The Shop
N€W 100pcs/lot 2N7002 2N7002LT1G 702 SOT-23 In Stock
0 notes
Link
0 notes
Photo

Inventory list updated, anyone who wants please leave email in comments!!!😁😁
TLV70033DSE
LQM18PN2R2MFRL(2.2UH)
2N7002
74LVC2G34GW
LNK302DG-TL
BCP56-16
NAND512W3A2SZA6E
JS28F128P33TF70A
AD835ARZ
ADE7758ARWZRL
CL05A105KQ5NNNC
CC0402KRX5R7BB224
MAX1968EUI+T
[email protected]
Whatsapp: +86 17626042392
Skype: Hermione_keming electronics
0 notes
Last Seen Blogs

catkingcasino-blog
เว็บพนันยอดฮิต

lesbin
lesbin

streetteafamily
StarDreams

strawhatking-blog1
♛; FUTURE KING

damianpol
alternatywnie.