Don't wanna be here? Send us removal request.
Statistics
We looked inside some of the posts by punkertons and here's what we found interesting.
Average Info
Notes Per Post
4K
Likes Per Post
3K
Reblog Per Post
1K
Reply Per Post
13
Time Between Posts
29 days ago
Number of Posts By Type
Text
9
Last Seen Tumblr Blogs


Fun Fact
Tumblr has 411 employees.
Text


Matching outfits with my darling
Going to get a job so i can pay for my chronic thrift shopping addiction
My dear also got me a beautiful old style black rosary to wear ( i was very happy and don’t worry i spoiled her back with a dress making mannequin)
#alternative#death rock#goth#goth music#gothic#trad goth#diy goth#goth fashion#trad goth makeup#alternative guy#goth male#80s goth#gothic guy#goth guy#goth girl#goth gf#goth bf#anti fast fashion#goth culture#goth couple#post punk#post punk music#punk#long hair guy
7 notes
·
View notes
Text
My girlfriend did more makeup for me


Its very pretty and suited my eyes
#alternative#death rock#goth#goth music#gothic#trad goth#diy goth#goth fashion#goth male#alternative guy#goth guy#trad goth makeup#gothic guy#emo#80s goth#makeup
4 notes
·
View notes
Text


New shirt and jacket dropped
Pretty fire I got the shirt from Facebook marketplace and the jacket at a thrift store
#alternative#anti capitalism#anti fast fashion#death rock#diy goth#goth#goth fashion#goth music#gothic#occult#trad goth#antifascist#goth guy#goth male#romantic goth#deathrock guy#goth couple#gothic guy#Alternative guy#Alternative Male#post punk music#post punk#punk#Aussie goth#Australian goth#emo#emo guy#emo scene#goth thrifting#punk guy
29 notes
·
View notes
Text

#goth fashion#diy goth#bone collecting#vulture culture#diy punk#post punk#occult#goth#gothic#VHS#short film#goth film makering#trad goth makeup#post punk music#goth music#makeup#macabre#trad goth#romantic goth#death rock#fire#I am a pyromaniac#goth photography#goth aesthetic#alternative goth#alternative#antifascist#anti capitalism#anti fast fashion
22 notes
·
View notes
Text


Me being a goth goober with my girlfriend doing my makeup
#gothic#goth#goth fashion#diy goth#post punk#punk#occult#trad goth#trad goth makeup#spooky#death rock#romantic goth#no fast fashion#anti fast fashion#anti capitalism#vulture culture#cult leader#antifascist#goth music#post punk music#punk music#goth makeup#goth guy#goth enby#alternative#Alternative enby#alternative guy#alt guys#macabre
45 notes
·
View notes
Text
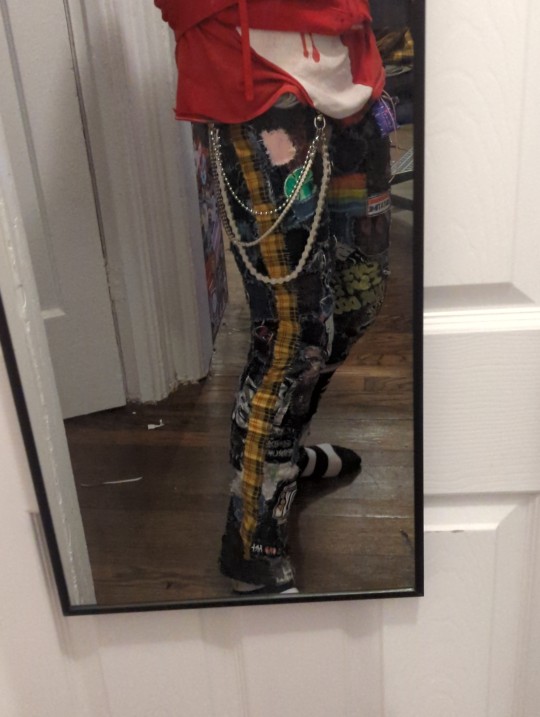
Well it happened. I could no longer fit in my pants as the patches made it too tight. So time to make them bigger and relieve some tightness!

I chose this yellow plaid I found at Jo Ann's (and bought way too much of. Though it's a reversible and has red on the other end. So when I inevitably need to expand them again I can use the red for that

Cutting the pants apart!
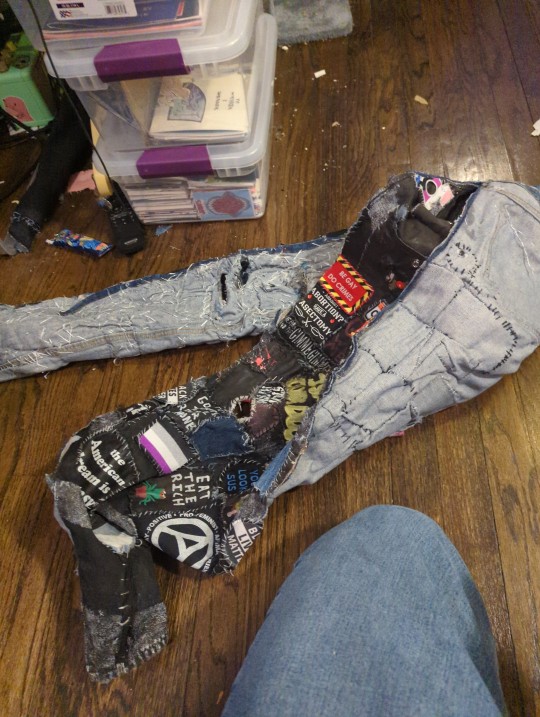
I cut straight through patches too. So lots got bifracated.

The left pant leg has so. Many. Layers. In some spots. That's like 6-7 layers there.

And here's the finished product at this point. I know I didn't do this the "right" way. I used the strongest stitches I've learned to stich the plaid to the denim and in some cases, layers of patches. I also used floss just like I have been doing on most of these pants. I did underestimate the amount of space I would want on the plaid strips so they weren't long enough to hem, so got lazy and cut off the bottom of some old jeans and painted them and just sewed them on the bottom there. Good enough. When I do this again I'll give myself a bit more space for those.


A closer look at some patches that got cut in half.
I should also note that I did this all by hand and nonstop for like 3-4 hours. And yes I hate myself and my hands were very sore.
As a result i can finally easily get into these pants (for now) although the left leg is tighter than the right leg but it kind of always has been because the left leg has way more patches.
We get closer and closer to making the Pants of Theseus here!
1K notes
·
View notes
Text
How to start a pair of punk patch pants
(a potentially really shitty tutorial)
I've seen a couple videos on this but a lot of them seem to skip out on some really key information and tricks so I thought I'd just write a probably really long and really rambly post about it!!!
Step one: gathering supplies
In terms of supplies the main things you'll need are:
The pants
Approximately 4 rolls of dental floss (this can change depending on number of patches and your pant size)
A needle with a big enough eye to fit the floss through
Acrylic paints
Brushes
Scrap denim or other scraps of fabric for the patches
Pins
Some kind of marker or pencil that will work on the fabric you've chosen
I will be going into some detail below about why you need each of these items!!
The pants themselves
personally I prefer either using a pair of jeans I already own or thrifting a pair to be as sustainable as possible, however if you really need to go out and buy a new pair for whatever reason get a high quality pair, this will help in the long run with preventing them from falling apart as easily.
The second main point I want to make is that the pants should not be skinny jeans. This is because when you sew on patches it slightly cinches in the fabric, and with skinny jeans generally being stretchy, this is going to result in the thread of the patches stretching out and snapping. Your patches will all just start falling off and it'll ruin your hard work.
This is why I'd recommend using a pair of jeans or pants that are a bit looser of a fit, such as straight legged pants or a pair of pants a size up from your actual size if possible!
Dental floss
The reason it's generally suggested to use dental floss rather than actual thread is because dental floss tends to overall be a lot stronger than your average thread, as well as often being more easily accessible to buy.
Needle
This ones pretty self-explanatory, just make sure you get a needle with a long/wide enough eye (the hole the thread goes through) for your floss to be able to fit through without trouble.
Acrylic paints
You may be wondering why I'm suggesting acrylics over fabric paints and there are a few reasons!
The first is simply that they're both cheaper and far easier to purchase for the average person than fabric paints, and I want this tutorial to be as accessible as possible for as many people as possible.
The second reason is that fabric paints require a lot of fucking around with setting the paint, whereas acrylics can just be left to dry and be finished, and so long as your pants are hand washed, the paints won't come out (unless you layer it on super thick or are really rough when you clean them).
Brushes
Another pretty obvious one, these are needed so you can actually paint your patches!!!
Fabric/spare denim
You need fabric or scraps to be able to actually create patches for your pants, so this is essential.
Any kind of scrap fabric can do, a lot of fabric stores tend to have bins of scrap fabric that are either pre-priced or priced by weight and that can be a really good opportunity to acquire the fabric you need!
Another way (the method I tend to use) is thrifting a few pairs of jeans alongside the pair I want to patch and then ripping them up into patch-sized pieces!
Either way, I really advise against buying straight up new fabrics by the metre for this as it kinda goes against the entire idea of sustainability and reuse.
A really big tip I have for when you're cutting the fabric of your choice up for patches is to actually only cut a little slit, and then rip. This produces a really nice distressed edge and will help add some texture and more of a fucked up look to your pants a lot quicker than if you waited for the fabric to fray by itself!
Marker/pencil
This is literally just so you can draw your designs onto your patches! I've personally found that either a black or white (depending on how dark the fabric you're using is) pastel pencil is generally good enough to get the general gist of what you want down well enough for you to paint it on.
Pins
These are literally just to hold your patches in place and literally any kind from proper sewing pins to safety pins will work! (just don't forget they're in the jeans before you put them on I promise you it isn't fun to put on a pair of jeans full of pins).
Optional: a sketchbook
You may want a sketchbook or alternatively scraps of paper if you have any kind of original concept for a patch so you can draw it out a few times first to really nail it, and it's also helpful to have if you aren't as confident in your painting and drawing abilities!
Step two: patch making
I personally pre-rip/cut all of my patches before I paint anything on them generally speaking and then fit whatever design I want onto whatever piece I think it would fit on, however if you want to paint your patches and then rip/cut the design out that's also an option (and probably a much smarter one I'm just incredibly stubborn).
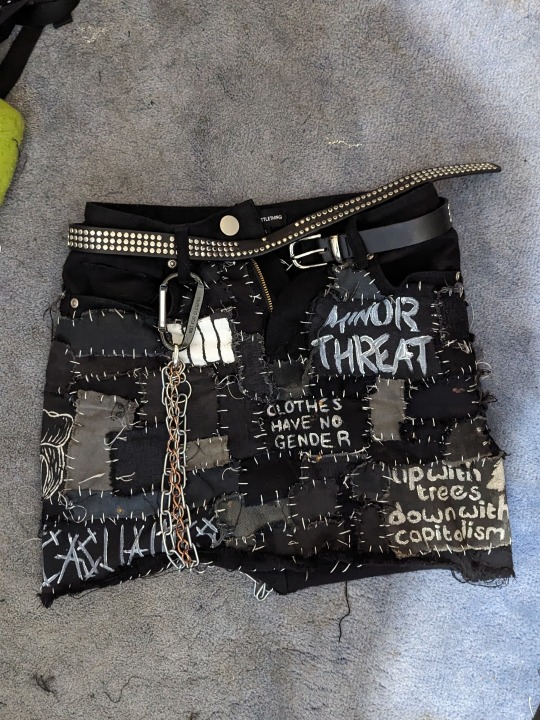
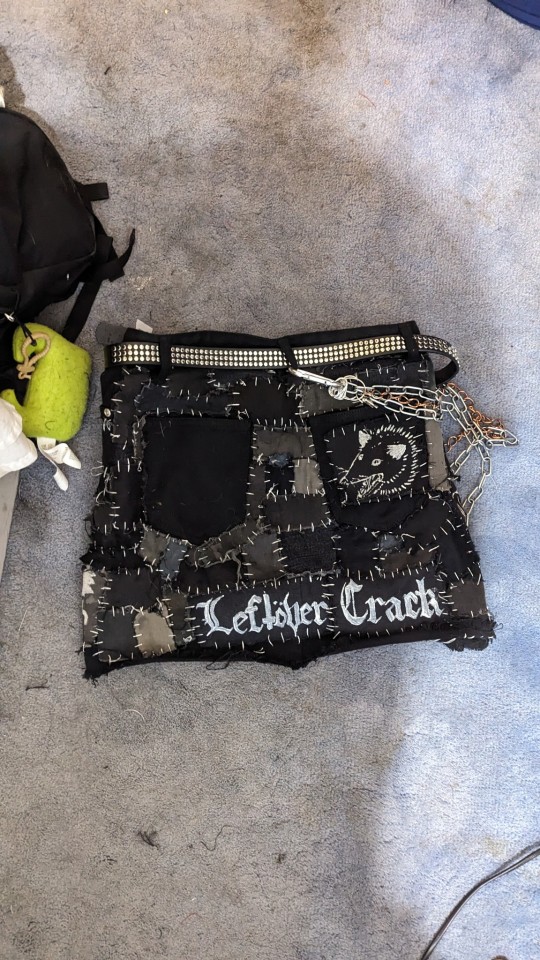
For punk pants you want a good mix of both punk bands, politics, and also maybe something a bit daft (I have the "he scream at he own ass" possum on the back pocket of a patched skirt for example). If you don't have bands and such, it kinda defeats the point of them being punk patched pants.
I personally generally pick a theme (eg. colourful patches, all black and white) when making anything patched because I think it makes everything look a bit more cohesive, but that is by no means a rule you actually have to follow I'm just autistic a fuck tbh.
Step three: the assembly
I personally put my main/bigger patches on first and put them on in a few different places until I get the placement I like, and then sew them on with the floss like this:

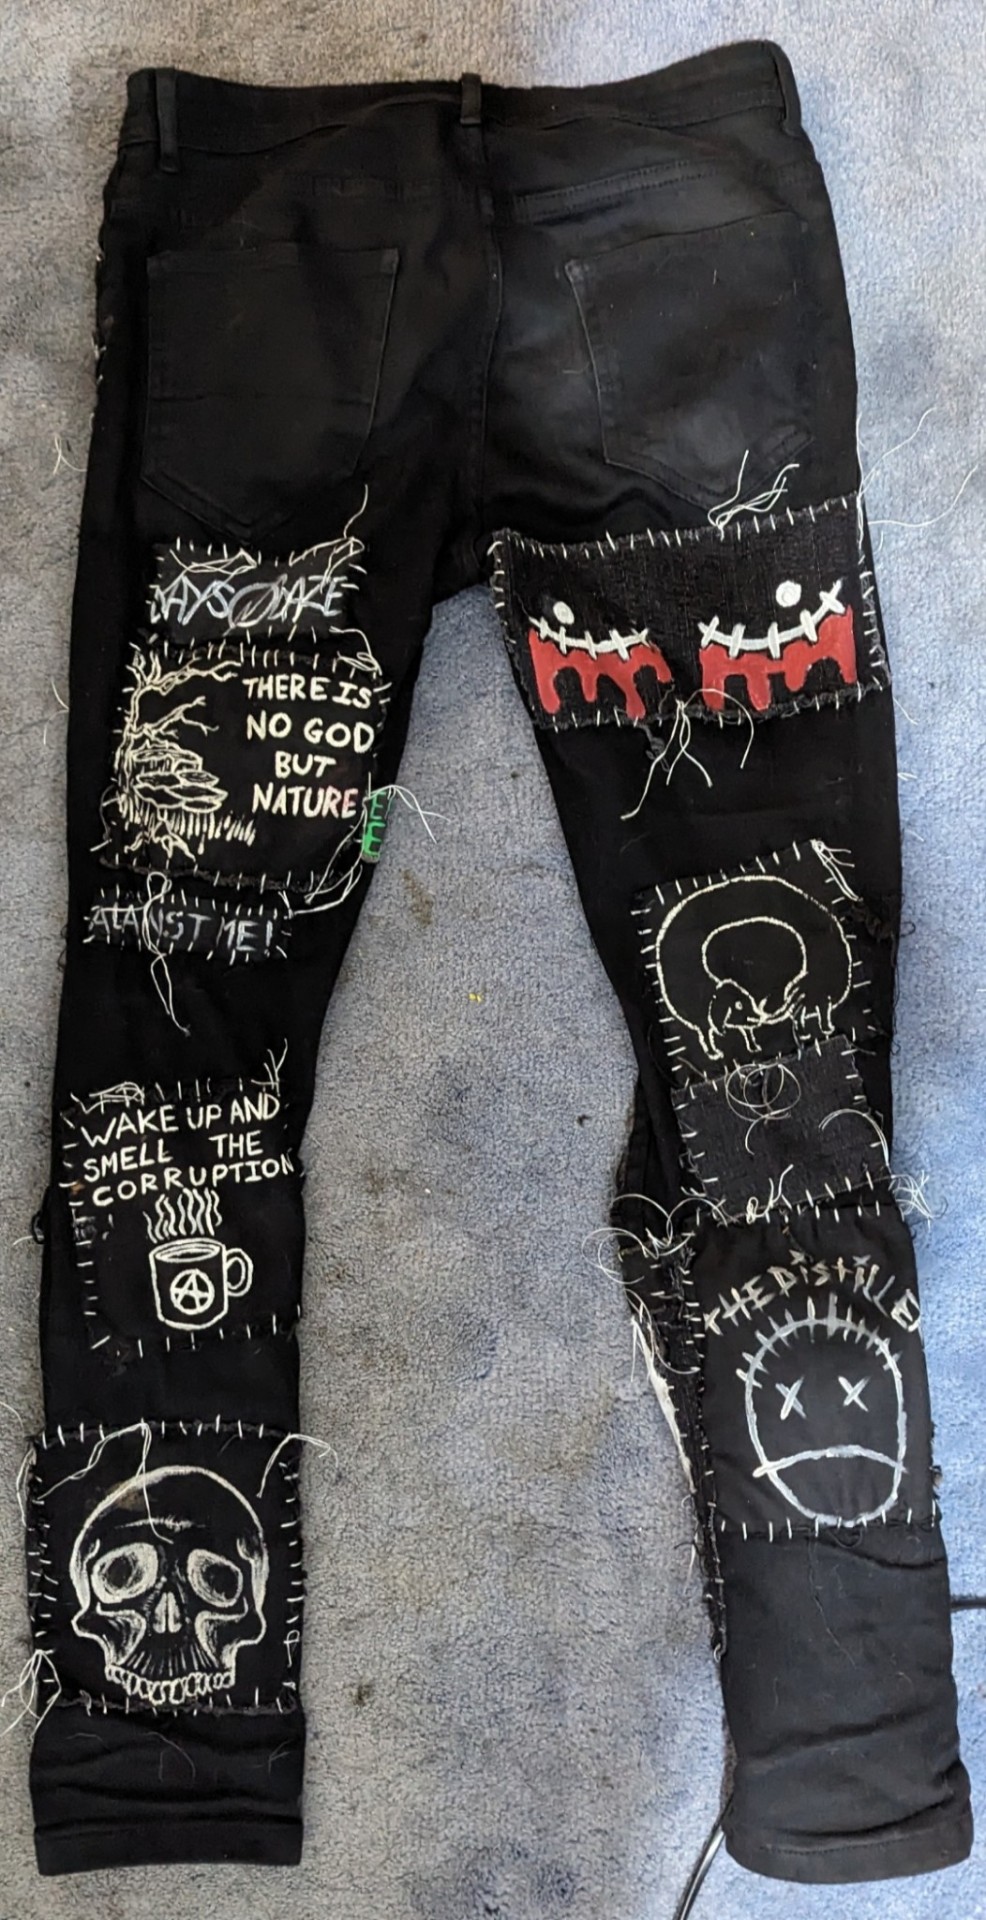
The main thing you want to do to make sure your pants don't wind up looking a bit weird or bare is to fill in any gaps between your painted patches with small, blank patches. Like this:
and that's pretty much it!!! I can't really explain via written text how to sew and how I personally tie off etc but if anyone would like a video tutorial lmk!!!
2K notes
·
View notes