Build log on a shipping container transformed into a home. Blue Mountains - Australia
Don't wanna be here? Send us removal request.
Photo

(via Uncontainable: Drew Bezanson’s quest for fear)
Great video here of some pretty dare-devil stunts setup on huge ramps with big air off shipping containers.
0 notes
Photo


One week down and we've been hard at it, so much so that we've not had time (or energy) to update the blog. In short we've been: - patching rust holes in the roof, and cleaning and addition preventitive stuff to others - painting wall (white) and roof (black) MDF pannels - adding Silver Sarking lining to the walls, and - CUT OUT THE KITCHEN WINDOW - a big one off the list finally done.
Now we can secure the kitchen in place and put up the ceiling which will allow the walls to go in. On the home strech this week...
TODO: add costing tags when I have the reciepts...
0 notes
Photo


After almost 2 years living up on the coast at Queensland's Burleigh Heads it's time for another new life-direction. But before then; let's finish this container!!!
We are back in Kurrajong with 3 weeks to make it happen... happen while trying to juggle some client [web development] work and while my girlfriend studies her English. We can do it.
Generously my mates Dad (where who I brought the container from and who's property on where it still sits) has allowed us to store all my personal belongings in his nearby shed so we can access the walls and just generally get to the areas we need to to finish it.
One issue is, that while away, the container was broken in to (the locks cut off it). My inital check over the phone with the mate that discovered it open; lead me to devise that a PlayStation 1, a iPhone stereo system and an un-plugged security camera was all that was taken. Once being at the container a few times, and not knowing exactly what I had in it at the time, I think I can add a motorbike road helmet and my drill to that list. Luckly my brand-new dropsaw, work bench and tons of other non-expensive but priceless items weren't taken.
Come back regularly as I update this log as we progress.
#shippingcontainer#shippingcontainerhome#storage#cost:bunnings=79#cost:gasweld=164.20#cost:c&n=9#cost:kremetal=22.10#cost:total=12103.23
0 notes
Quote
Looking forward to getting back to building next week
0 notes
Photo


How's this for another great use of shipping containers? Here in New Zealand at the Mt Hutt ski fields the beginners "magic carpet" is contained in about 20 odd shipping containers lined up with the ends cut out of them. While keeping all the equipment dry(er) it also acts as a back to hold back a wall of snow on one side, and protects the newbies on the inside.
0 notes
Photo


Just a quick visit to the container this afternoon to pack all the wood way and lock it up for a while (off to NZ for 3 weeks of skiing).
Even on a very overcast day the skylights still flood the container with light and the super clear perspex makes the rain mesmerising. The skylights were the best idea! As I won't be around to fix any issues (aka new vent skylight leaking), I decided to test out the "bomb shelter shutters" - they do a good job at blocking out the light. At the moment they're not bolted on, but they are figgen' heavy. I don't think even a huge wind would shift them from just sitting on top of the windows.
As you can see the containers reverted to just being a storage container again :-(
0 notes
Photo


After waking early to get a few hours of coding done (still gotta make a buck), I headed up to Kurrajong via Riverstone to return about $200 of electrical items that I over zealously brought (dimmer switches, multi-colour LED strip lighting) and brought some junction boxes from the good guys at Direct Electrical (one of those great business that treat you like a friend and know/use your name like you go there all the time - I've been there twice now). Then it was on to Bunnings for some more screws and new drill bits (I'm sick of using half length broken ones).
Up at the container I got on with putting the plastic sheeting on the back of the batting to line the insulation from any moisture build up on the steel walls. Dad came over to help after lunch and together we lined most of the walls, made a missing wall, welded on tabs to hold the walls up and then lifted all the kitchen cabinets and batts. Another productive day working into the dark with the single flood light running and getting closer to getting the roof up. But it's great to see the final layout starting to appear (checkout how good that window looks - too bad the view's sub-par).
#DIY#shippingcontainer#shippingcontainerhome#window#walls#kitchen#cabinets#cost:directelectrical=-187#cost:bunnings=27.10#cost:homehardware=76.97#cost:bunnings=9.95#cost:total=11822.83
0 notes
Photo
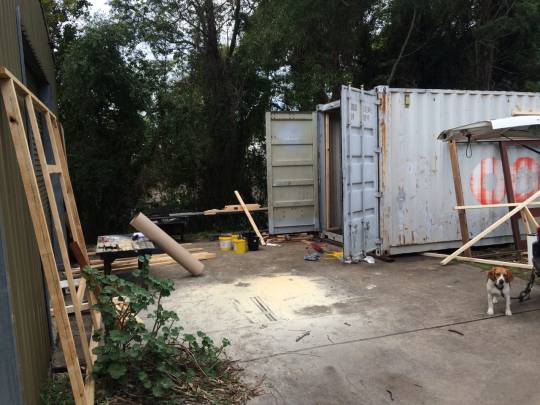
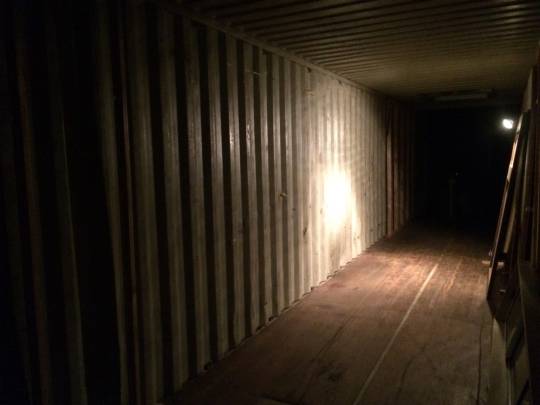
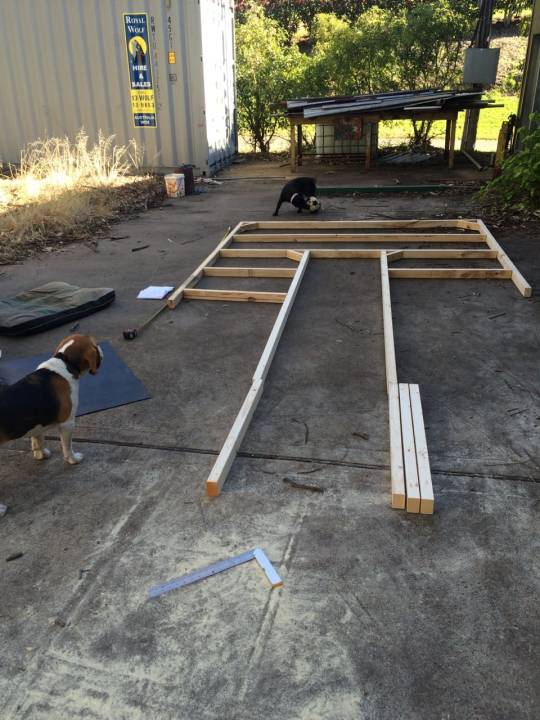
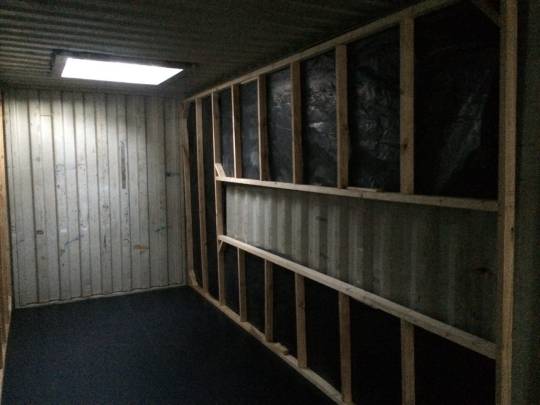
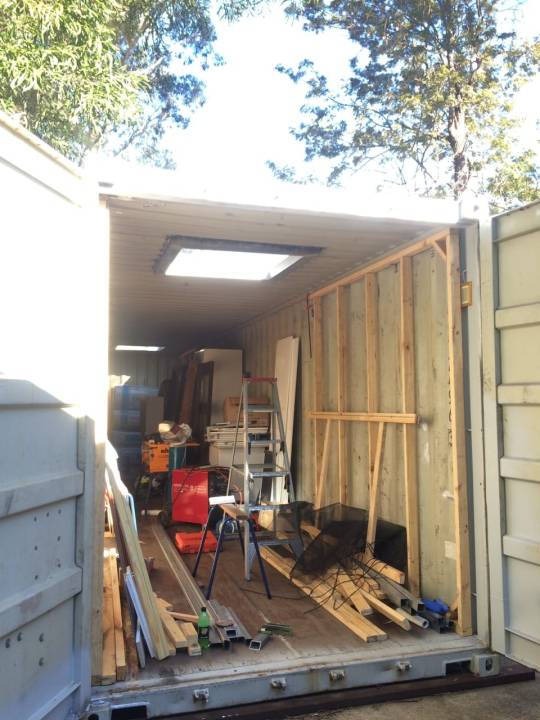
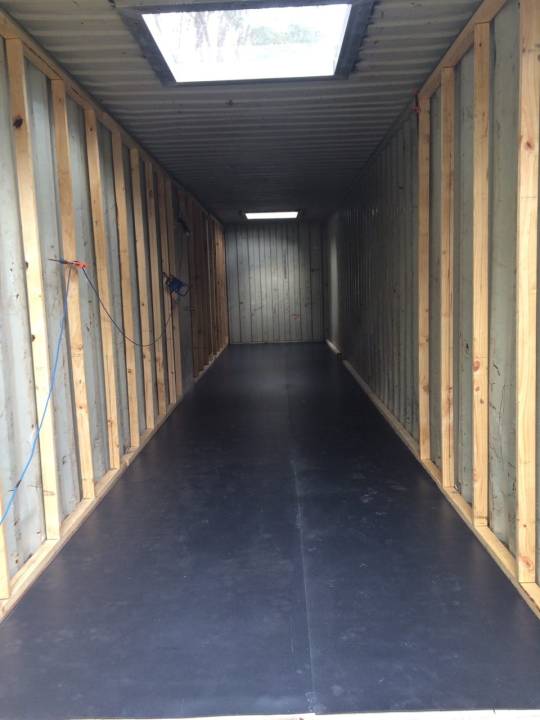
HUGE weekend working on the container. While it might not look like it there was a lot involved; from moving everything out, cleaning it and then the task of laying the floor. I couldn't have done half of this without a massive help from my mate Cookie. He cam around lunchtime on Saturday and worked well into the night (working off the lights of the van with some strategic parking). He helped with many of the jobs that 2 hands alone would have struggled with (like lifting the skylight ventilation on to the roof). So this weekend I can finally tick off the skylight vents, laying of the rubber (surprisingly easy - the mat didn't cure and rubber can be stretched into place), and with layout of the kitchen - the wall behind with the placement of the window.
Now I need to chuck everything back inside before I head to NZ for a month!
0 notes
Photo


Thursday after lunch I took the hr drive up to the container (the first time in a bout 6 weeks) to get it ready for the floor laying on the weekend.
Fortunately Scott was their and let me use the drill press while made doing the 40 odd remaining holes in my venation idea much easier and without the brain-shake headaches of doing it by hand. After getting all the holes done I gave it a gal spray to stop any rust on the cut metal and then putting through some flyscreen I'd shaped with a strip of wood just wide enough to fit inside the RHS.
My local "sparky" mate James dropped by with his new Kelpie and we went through the box of electrical goodies (mainly lights, outlets and switches). Using a "scaled model" floor plan I laid out where everything was to go, so he could get an idea of how it will be done and what else I need. Turns out the lights I got aren't dim-able, so the $70 worth of dimmers can go back (expensive little things), and I need some "j boxes" to run the wires for the external flood-lights and power output and input (in the photo; the square boxes are the down-lights, black outlets are for 300mm off the floor on the walls, white ones are for along the kitchen bench).
Then mum dropped by, which was handy as I was in the process of moving the kitchen into the shed to clear the floor for the weekend. She helped me shift some of the heavy draw cabinets into the shed. Next: pick up the rubber flooring, return the dimmers and get jboxes, and get 2 metal beams to hang the bed. Big weekend coming up...
#DIY#ventaltion#metalwork#lights#electrical#container#shippingcontainer#shippingcontainerhome#progress#australia
0 notes
Link
In what will be the most controversial* move in my container; I've just ordered nearly $2k worth of recycled rubber for the flooring.
I originally wanted cork floor after my sister suggested it, in black. After finding one of the few retailers in Sydney that do cork (most only do laminate, tiles, parquetry or carpet), I found that black cork is only a die on think top layer of light-coloured cork, one small chip or gouge in this soft flooring an your have a very noticeable contrasting mark. Also cork can sock up water and swell - one of my big unknowns is ventilation and moisture build up. At this same store I noticed they had rubber underlay - I like the feeling or rubber; think about that energising bounce at kids playgrounds. It also goes well with the whole reuse / industrial theme I'm going for. Why didn't I think of this earlier. Finding the sources of the product I discovered that Regupol can to a "sealed" version that gives the product a finished look as opposed to that compressed flaky wood-chip look. What's also awesome is that it comes in a roll (not tiles) that is 2.1 metres wide, meaning that I only have one nice clean join the entire length of the container.
I should be able to pick up the product from their Smeaton Grange Head Office this Friday to lay over the weekend. Once the floor is glued down I can then bolt the kitchen in.
"controversial" as I the few people I've told about the idea hate it. Some think it's cheap and will look awful. I can tell you it's not cheap and the finished seal product almost looks like a soft laminate. I like it, I just hope it'll work. If it doesn't it'll make a great underlay.
#rubber#recycled#building#floor#everroll#shippingcontainer#DIY#bounce#cost:regupol=1780.04#cost:total=11805.81
0 notes
Photo

Still no updates on the container. I've been busy with a big project at work and other stuff on the weekends.
What I have seen around is this converted shipping container into a mobile pizza shop. I first saw Happy as Larry at the GABS Beer Festival at Carriage Works at the end of may, and now again this weekend at the Throttle Roll Street Party. It's been designed to be permanently attached to the truck (with airbag suspension between the container and the truck chassis). Between the wheels, one section has a drop-down so that the cashier staff are a bit closer to the customers on the street. Good to see another use for a shipping container. It also reminded me that I also need to find someone that can supply the rubber seals around the windows for insulating my shutters.
#throttleroll#party#food#vendor#truck#shippingcontainer#pizza#shop#eat#festival#weekend#sydney#happyaslarry#transport#mobile
0 notes
Link
Good question - no good answers...
0 notes
Photo

Very true - this is one of the reasons hy I think most European countries are more liveable than Australia
austin maynard believes that as a result of large homes and their associated sprawl, services and infrastructure are stretched at great expense to the public, both financially and environmentally. dwellings with deep floorplates are less responsive to the climates of australia’s cities, meaning that heating and cooling demands are increased. this urbanization also results in more residents requiring the use of private cars — a means of transport considered to be environmentally harmful. ‘in short, large homes are an environmental disaster for our cities, whilst also being a cultural and social disaster for our communities,’ surmises the design team.
(via ‘that house’ in melbourne by austin maynard architects)
2 notes
·
View notes
Photo


This weekend I extended to Monday as it was my birthday (and who wants to go to work on their birthday)?
So after a night of fires and beers down on the Colo river in my mate Ben's converted shed, I woke the next morning and did some garndening for him (and general cleaning up - as he lives in QLD) before attempting some mountain climbing on my Husky 300 2 stroke. After getting the shits with flooding it and running out of fuel, I went for a dip to cool off. And COOL off I did - the Colo river is already freezing for the year.
I didn't get back up to the container untill 1:30pm and Mum (who lives nearby) came over with surprise birthday cake - the first cake in the container. Looked pretty cool with star all over it. Thanks mum - too bad that bloody dog Watson ate HALF!!! of it!
#DIY#cake#birthday cake#stars#candle#skylight#frame#build#wood#shippingcontainer#shippingcontainerhome#cost:bunnings=27.33#cost:total=10025.77
1 note
·
View note
Photo


Skylight Ventilation
So one of the common questions about shipping container living is how do you make sure you have oxygen inside - this is particularly stressed in Kurrajong where, last year, a couple died in their shipping container when they took some hot coals into their container to keep them warm on a winter night. As they slept, the coals stole the breathable air and they were later found... dead.
I've looked into whirly birds and pop-up hatches, but they aren't in my self-set-brief of having the container look like a container from the outside - as soon as you see an ugly round spinning thing on a shed or container I instantly think, "someones living in there". I don't want that. With the skylight, from the outside you can't even see them as they only sit about 50mm about the roof, and if you do look for them, they just look like "something on the roof" - not a tell-tale instantly recognisable whirly bird. While a pop-up shutter would be too much effort every time you had to open and close it - and has greater rain/water inside issues, and lowers security.
My idea (which I should have done before finishing the skylights...ah well), is to have secondary RHS ring between the top of the skylight frame and below the perspex, which is drilled with holes (160 holes in fact) and lined with fly-screen. The large 12.5mm drill bit was a total ripoff from Kurrajong Building Supplies at $49.55 (and it's blunt already and I haven't even done half the job), but the 2nd hand fly-screen was free from some old doors from mums.
After getting C&N Metals at North Richmond to do a special order on some very rectangular RHS and getting a hand from James and Rob to cut it, I started the long and painful (literally) task of drilling the holes. To finish I still have another 80+ holes to enlarge, fill with fly-screen, weld and then try to ripp off the already siliconed perspex before putting in this new frame and glueing and bolting back down. A lot of work for something that may not even work well...
This along with both ends of the container opening, and more installation breathing holes on the walls, there should be plenty of air flow (and I'd never start a heating fire inside... without a proper chimney).
#DIY#vent#air#H2O#oxygen#airflow#RHS#metal#drill#hole#plan#drawing#cost:kurrajonghardware=49.55#cost:total=10075.32
0 notes
Photo

Last weekend I had Maggie for a short time, so after a quick Bunnings shop (polythene film roll - to keep the condensation off the batting, and some merbau) we delivered it to the container around 5pm. With darknes coming on and a [little] helper on hand I threw her up on the roof to keep the bolt tops from spinning while I tightened them from below - another job done.
While not much was done on the container, I did help my mat Wozza put in the foundations for an awesome cubby house for his boy. He put me on to a place that throws out heaps of pallets in Brookvale (I managed to load 10 into the van). We found a massive pallet (nearly 4 times the size of a regular one) that we put on the roof of his new car - we weren't letting this find pass.
#DIY#project#cubby houses#cubbyhouse#recycled pallet#pallet#recycle#treehouse#platform#woodwork#wood#reduce reuse recycle#reused#coat:bunnings=103.91#cost:total=9998.44
1 note
·
View note
Photo


Last Friday was just a quick "drop and check" before I headed north for a weekend of motorbike riding up with my cousin up Thunderbolts Way and then east down the Oxley Hwy (need new tyres now).
I picked up some pre-cut 75mm x 25mm RHS from C&N North Richmond and took it easy up to Kurrajong. Then tried to bolt on the skylights, but without someone else on the roof stopping the bolt spinning; that was a waste of time. So I had lunch (from the deli - Euro style).
NOTE: Total is back under $10k as I returned the dodge plastic exhaust fans to Bunnings along with a head of wrong size cutting discs ($210.53 back - Dimity & Dad, your Xmas gift vouchers live on to see another day!).
#shippingcontainer#shippingcontainerhome#bmwmotorrad#dualsport#f800gs#lunch#ham#freshbread#DIY#cost:c&n=63.69#cost:bunnings=-210.53#cost:total=9894.53
1 note
·
View note