
Statistics
We looked inside some of the posts by accidentallywhiskey and here's what we found interesting.
Average Info
Notes Per Post
205K
Likes Per Post
111K
Reblog Per Post
94K
Reply Per Post
46
Time Between Posts
12 days
Number of Posts By Type
Photo
12
Text
3
Link
1
Note
1
Last Seen Tumblr Blogs


Fun Fact
China blocked Tumblr because of pornography and censorship problems in 2013.
Photo


EVENT ANNOUNCEMENT: NWI COMIC-CON 2016!
I’ll bringing prints and art cards to a table at NWI Comic-Con in Schererville, IN.
This one-day-only local convention has always been a favorite of mine. It’s very family-friendly, wallet-friendly, and contains a ton of local art/media talents from the Midwest. The cosplay contest is a lot of fun as well! If you’re in the area and haven’t been to NWI-CC yet, check it out! Stop by the Fandom Tandem table, say hi, and request a sketch commission from yours truly, if you like!
See you all there~ ~TnJb
7 notes
·
View notes
Text
When you try to replay PS1 games but the nostalgia has worn off:

95K notes
·
View notes
Photo


Gravityfallsderps. Because I am a very serious cosplayer.
(10 days till the next [and final, wah] episode!!)
37 notes
·
View notes
Link
Useful and will use later.
7K notes
·
View notes
Photo
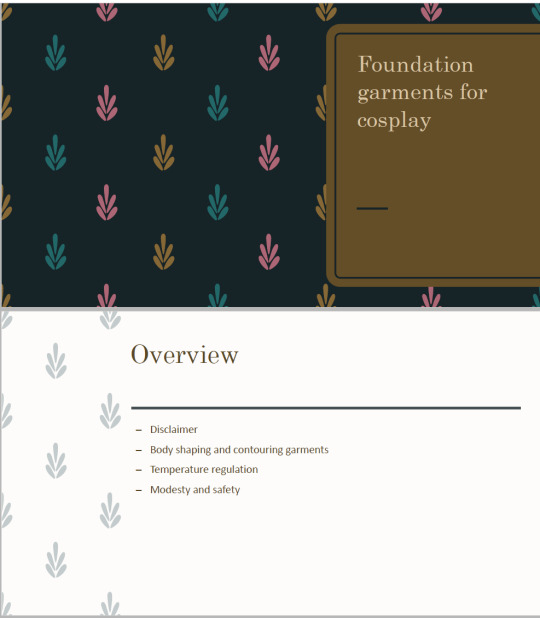
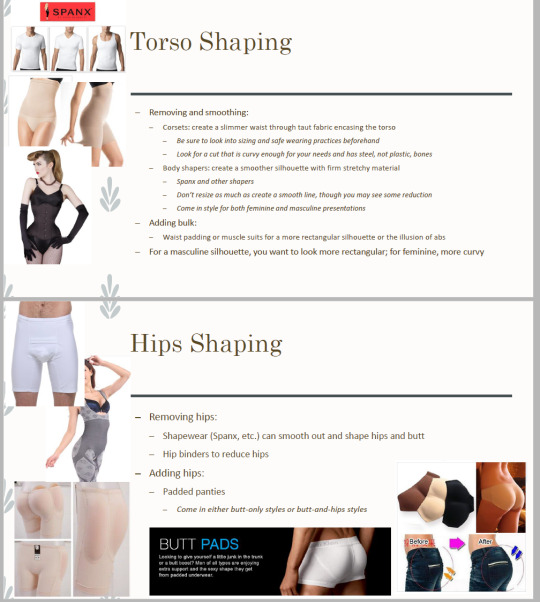
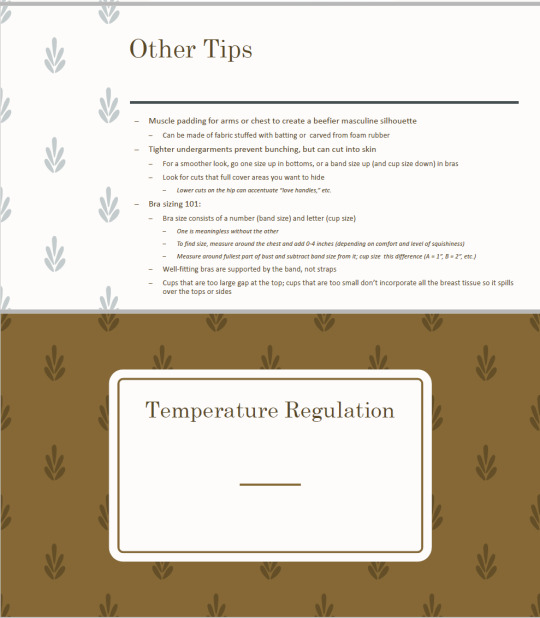
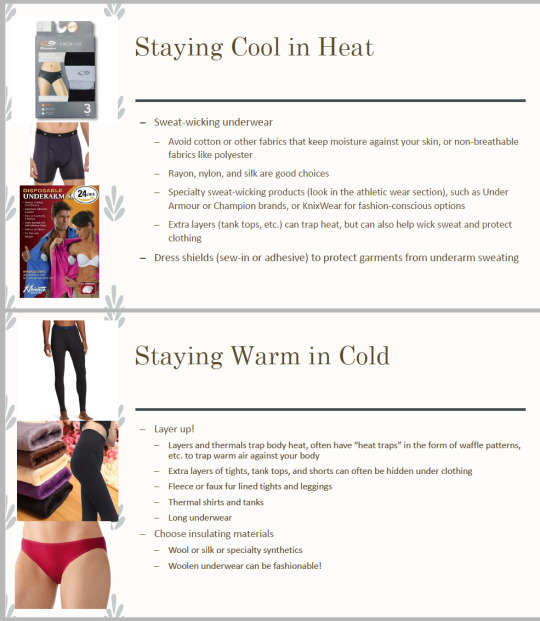

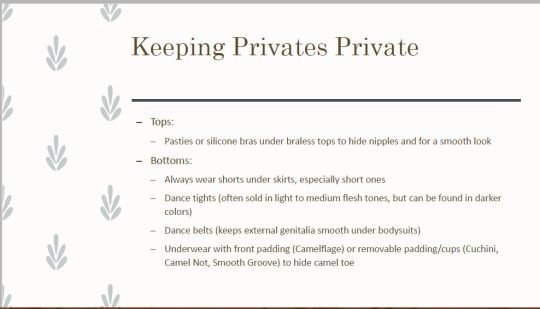
Foundation Garments for Cosplay Panel, as given at SacAnime Winter 2016
Having the right foundation can vastly improve the look of a cosplay. This panel covers the often overlooked realm of what is worn underneath the costume. We will discuss both masculine and feminine undergarments for varying body types and across gender presentations (crossplay). Learn how the right foundation can help your cosplays lay smoother on your body, create an idealized ‘anime’ figure, keep your privates private, and overall enhance your cosplay!
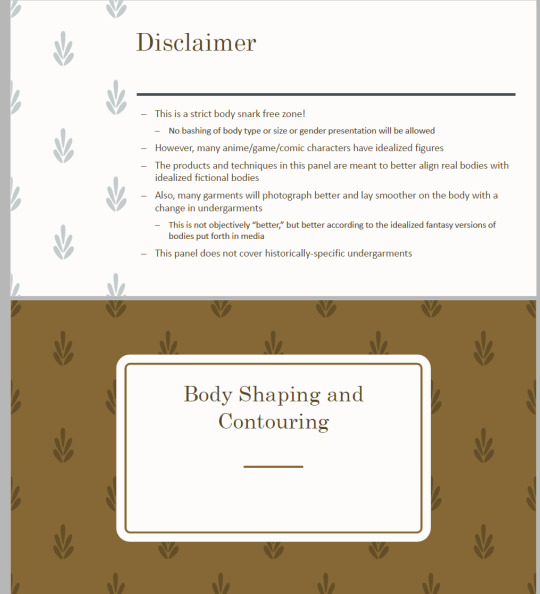
The information here tends to skew feminine just because that’s what the majority of lingerie is, and because that’s my area of expertise. However, I tried to keep this as gender-neutral as possible, since a lot of the information can be used varying sexed bodies. (Seriously, cis dudes who are cosplaying as men, don’t be afraid of shapewear and such!)
This is just the bare bones of the panel, as many of the examples were elaborated on in-person. It is not meant to be exhaustive or definitive, and is just meant for general advice and suggestion purposes only. If anyone has feedback they would like to give, feel free to do so. That said, I hope that people find this information useful.
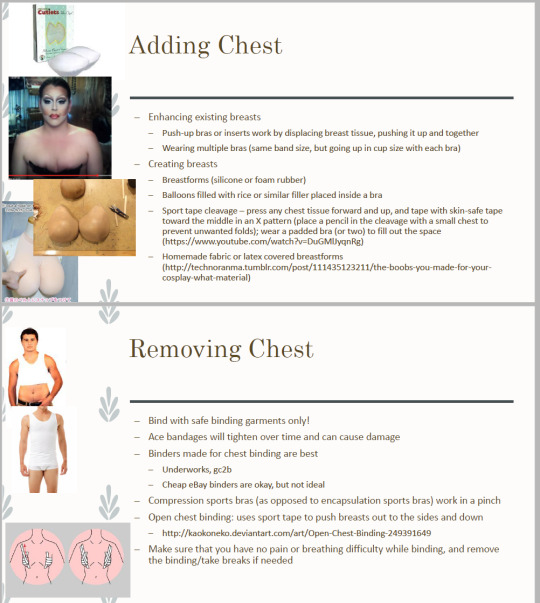
Another note on safety with some of the more extreme shaping methods (such as corsetry): I am not an expert on corsets, and even if I were, the topic could take up its own hour-long panel (which is the amount of time this panel is). That said, there is a lot of safe corsetry information online, as well as information about fitting, seasoning or breaking in a corset, and wearing practices. My Google-fu is probably no better than yours on this subject, so please do your research before starting to wear a corset for body reshaping purposes. Also, if you are under the age of 16, please do not wear a corset, as you could potentially damage your growing bone structure. I would also advise anyone who is young and still developing breasts to not bind. (Also, if you bind incorrectly, it can break down the collagen in your breast tissue, aka the stuff that makes boobs bouncy, and collagen does /not/ grow back.)
Here is a link to a pdf of the presentation. You may download for personal use, but please do not alter the presentation, repost without permission, or do any sort of other unauthorized use. (If you have a question about how you can use this presentation, please send me a message with your question and we can work it out. I promise I’m not scary. ;]) Feel free to reblog this post as much as you want, though. I do these panels and post them because I want the information to be shared.
I hope someone finds this helpful! :]
5K notes
·
View notes
Photo

(Sketchpost) - Tales Of Zestiria/Xillia character redesigns: Dezel and Milla Maxwell
@accidentalvodka expressed frustrations about some design choices, and I agreed. So these were drawn. [Redbubble] [Instagram] [Twitter] [Commissions/Trades]
#WHO I GOTTA KILL TO GET THESE REAL LIFE???#tales of#milla redesign#dezel redesign#zestiria#xillia#tnjb-art#i love love love theeese
32 notes
·
View notes
Photo

Tips:
1. I highly recommend that you make sure that your legs are freshly shaved before applying either product.
2. It Stays can also be used to help hold a wig cap in place.
3. If you are layering thigh-highs over a pair of panty hose you can also use It Stays to stick then together.
19K notes
·
View notes
Photo
reblogging to share the beauty of dis lazy blue skelton. u all welcome.

Spending most of Christmas as a lazy, blue skeleton. Happy Holidays!
10 notes
·
View notes
Photo

Sorey from Tales of Zestiria
Photo by the talented UMOPhoto
22 notes
·
View notes
Photo


Sorey & Jade got lost and ended up at Con-Alt-Delete 2015!
Photos taken by Vincent Kan Photography & UMOPhoto
Sorey is me (accidentalvodka)
Jade is NerdShark Cosplay
31 notes
·
View notes
Photo


I ship it.
@the-brave-archer is Alphys.
[ More of my Undertale Cosplay Stuff ]
66 notes
·
View notes
Photo


[ More of my Undertale Cosplay Stuff ]
Undertale Selfies at Con Alt Delete!
I am Frisk Sans is @tnjb-art Papyrus is @iamtheprophet-god Alphys is @the-brave-archer Napstablook is @accidentalvodka Fido the Gaster Blaster is himself!
51 notes
·
View notes
Photo

You can’t understand how this feels.
Sans is @tnjb-art
Fido the Gaster Blaster was made by me!
[ More of my Undertale Cosplay Stuff ]
86 notes
·
View notes
Text
Free Flap Pocket pattern and Tutorial

Here is a Free pattern with step by step instruction for Slanted flap pockets! It’s perfect for the Yuzu raglan coat and the Pepernoot hooded coat patterns. Sewing flap pockets takes time and patience, but it is totally worthy and adds professional look on your coat! Off course, you can use this pattern for any other suitable jacket/coat patterns. Download Free Flap Pocket Sewing Pattern here!
How to sew the Slanted Flap Pocket
<< Cut Fabric / Interfacing >>

Cut the parts as the pattern indication. (Be careful the photo shows only right side parts, please double them for L/R sides pockets). Put interfacing on the Placket and the Flap (outside) parts.
<< Marking >>

1. Mark the pocket placement on the Bodice. (You can find the template in the downloaded pattern) The upper line is for the Flap and the under line is for the placket. If you’ll make Yuzu coat, you can use the Pocket A’s outside line as the flap place. Put interfacing on the placement of the wrong side of the bodice. (For the sample in the photo, I use a square fabric piece instead of the bodice for the explanation.)

2. Mark the stitch line on the placket, press and crease the fold line before stitching.
<< Making flap >>

1. Place the outside and inside flap pieces right sides together. Sew the outline keeping open the upper seam. Trim 0.6 cm ( ≈1/4”) width the allowance of the inside. 2. Turn it right side out. Topstitch from the right side. Baste the open side.
<< Stitch placket and Flap >>

1. Place the Placket onto the placket place of the bodice right sides together, matching the markings. Sew the stitch line. 2. Place the flap onto the flap place of the bodice, matching the markings and stitch. The inside flap faces up. Don’t sew the placket.
<< Cut slit on bodice >>

1. Flip the Placket and the Flap and cut a slit on the Bodice as shown. Get close to the corner, but be careful not to cut into the stitching.
<< Shape Placket and Flap >>

1. Push the Placket to the wrong side of the Bodice through the slit. Turn it to the wrong side. Open and press the inside seam and the triangle shaped seams. 2. Fold and press the placket on the fold line.

3. Turn it to the right side. Baste on the stitch line of the placket. 4. The wrong side facing, turn over the bodice. Stitch the placket and the seam.

5. Push the seam allowance of the Flap to the wrong side through the cut line. Press and shape.
<<Pocket Pouch >>

1. Place the Pocket Pouch Front onto the Placket right sides together like the pic and stitch. Press the seam to the Pocket Pouch side. 2. Place the Pocket Pouch back and the Facing right sides together like and stitch. Press the seam to the Pocket Pouch side.

3. They will be like this.
<< Fix Pocket Pouch Pieces >>

1. Put the Pocket Pouch Back onto the Pocket Pouch Front and pin. *Depend on your fabric thickness, the parts might not line up correctly. Put on naturally avoiding wrinkles or warps.

2. Turn it to the right side. Flip the bodice and stitch together the Facing, the Flap and the seam allowance through all 3 layers. Be careful not to stitch the placket.

3. Double stitch the front and back Pocket Pouch pieces. Sew the triangle shaped seams, too.
<< Finishing >>

1. Make short top stitches on the both side of the flap. Put button if you need.
***** Voila! ******

If you have any questions about the pattern and instruction, please contact me. If you put your photos of your creation from my patterns on your blog or other media, please share with Waffle Pattern’s address and don’t forget #wafflepatterns on the SNSs!
*********************
follow me! Instagram /// Twitter /// Facebook /// Shop /// Pinterest //// Etsy Shop /// Newsletter
2K notes
·
View notes
Note
How the hell do you get so precise with got glue?
You mean hot glue?
I’ve had about 7 years of experience using hot glue as a detailing tool, so thats one thing.
Honestly I could write a book of tricks with hot glue.
But the key things Ive learned are…
-Let your gun sit for about 40 minutes before use. GET THAT SHIT HOT, the hotter the gun, the smoother and less clumpy the glue.
-METAL NOZZLES ONLY. Like this:

NONE OF THAT PLASTIC CONE OF SAFETY BULLSHIT

CRAP.- Get gluesticks that are REALLY long. Dont get the mini shorts unless you have too. It saves you from getting that little gap of time where the glue stick cant be pushed anymore, and ends up pumping out dollops of a mess. AND ALWAYS have one on hand, so when that does happens you can immediately push it along.
-IGNORE THE LITTLE STRINGIE THINGS. Ignore them. Do all your detailing, riding, rivets, what have you. Let the strings happen. They will happen, let them. When your done and it all dries, just dab some duck tape or roll your hand or a brush over the detailing and pick up all the strings. They will just snap off.
-WHEN YOU FUCK UP KEEP GOING. Line got too fat? Leaked over the edge? JUST KEEP GOING! Nothing you can do when the glue is still hot. Just let it dry. Honestly. The whole of your line or detail is more important than the fuck up. AND AFTER IT DRIES, just use an Xacto to go back and cut off the fuck up. Either cut it down to size or cut it off completely and redo that little area.
-To make your edges look welded instead of all puffy or raised, while your glue is still hot take another stick and smear it through against the creases. Do another line and smear again. Bam, glued together and when its painted it looks like welded armor.

-Faster is better. Taking your time means your squeezing slower, so the glue comes out slower. It dries pretty fast on itself, so it clumps as it goes down like that, making that rainwater effect. If you want smooth raising lines you gotta go fast! GO FAST! My trick is to lay down a scrap piece of cardboard or foam and squeeze out some practice lines like you would a paintbrush. Swipe a few time on the cardboard, swipe the armor. Back and forth, back and forth. It keeps the glue flowin.
HAPPY HOT GLUING!
8K notes
·
View notes
Photo

Review: Yaya Han’s Ultimate Bodysuit Pattern
I gave this pattern a try while prepping for my recent Zero Suit Samus cosplay. I have a few bodysuit options in my pattern stash already; in the past, I’ve constructed bodysuits using my own drafted patterns and Kwik Sew 3052, as well as customizing multiple derivative patterns using either of the above as a base. When I got my hands on Yaya Han’s Ultimate Bodysuit Pattern, I wanted to see how it stacked up and whether it could live up to its title as a go-to bodysuit pattern in the future.
The major difference between this pattern and other bodysuit patterns I’ve used before is the large number of panels. The torso consists of 12 panels alone, plus two panels for each leg, and one for each arm and collar. Bodysuits can be made with as few as one panel for the legs and torso combined; this pattern breaks up the same area into 16 different pieces. More panels means more time spent cutting, pinning, and sewing; however, every seam provides another opportunity to more finely-tune the fit. If your end goal is to make a solid color bodysuit or one with simple seam lines, an experienced seamstress will probably end up combining some panels where the extra seams are unnecessary. With this in mind, having a multitude of panels has limited benefits. If your end goal is to make a bodysuit with complex seams and many panels, such as the Zero suit or a plugsuit, starting with a closely fit mockup has more of an advantage.
Each section of the bodysuit is divided up with reconfiguration in mind. For instance, separating the leg and arm pieces allows you to omit them if desired. Another example is the undercup seam, which is not really necessary unless your bust size rivals Yaya Han’s (in which case, congratulations.) However, isolating the bust on its own pattern piece allows you to easily select your cup size from the pattern’s three available options.
The versatility of these pieces is one of the pattern’s main selling points. It’s convenient to have both a center front and center back seam to choose the placement of your zipper. However, unless you enjoy the aesthetic of having many seams, it will take some extra leg work to eliminate them (spoiler alert: neither the center front or center back panels can be cut on the fold straight out of the envelope).
The packaging states that the pattern is for use with two-way stretch knit fabric only. It’s written on every piece so that you can’t miss it. I suppose that this is intended to discourage the use of non-stretchy fabric moreso than four-way stretch fabric, because four-way stretch fabric will also work just fine if you’re prepared to make any corresponding fit adjustments. From an instructional standpoint, it’s more practical to identify a specific fabric type as a standard point of reference. For this pattern, the intended outcome is a two-way stretch bodysuit which stretches along the body’s length but not its width. For this reason, accurate fitting is crucial.
The pattern does not include instructions for fitting after construction. To be fair, the specifics of fitting a bodysuit vary widely based on the individual figure and the fabric used. In my particular case, the torso fit pretty well with only minor adjustments. However, the armscye was extremely large for my shoulder, while the legs were very small in both length and width. These types of fit issues can be completely different from person to person, so this is not a complaint about the pattern or a suggested alteration for the rest of you. Instead, I stress the importance of measuring your body ahead of time and making flat alterations to the paper pattern before cutting anything. It will save you a lot of time and cut fabric, particularly with a pattern which needs to be as closely fit as this one.
Once you’ve put in the work to customize it to your size, this pattern is as good as bodysuits get. It’s designed as a catch-all intended to be useful in the greatest possible number of situations. But that does not always make it the easiest or most straightforward base pattern for your specific situation. If your end goal is a complex, closely-fit bodysuit with many panels, this pattern will facilitate a more finely-tuned mockup than any other commercial pattern I’ve seen on the market. If you’re looking to make a very basic bodysuit with limited colors and seams, you can save yourself some time and effort by starting with a simpler base pattern.
Verdict: this is a good and useful bodysuit pattern, but not necessarily accessible to a beginner. If you are a competent seamstress who is willing to put in some time and several mockups to arrive at the perfect fit, this pattern is a fantastic starting point! But if you are inexperienced or intimidated by the thought of putting together a bodysuit, this pattern will not hold your hand. There are far simpler options on the market which are more suited for learning.
#pattern review#cosplay#bodysuit#cosplay help#i honestly was looking for exactly something like this! for Shepard! Lovely and thorough!
577 notes
·
View notes
Text
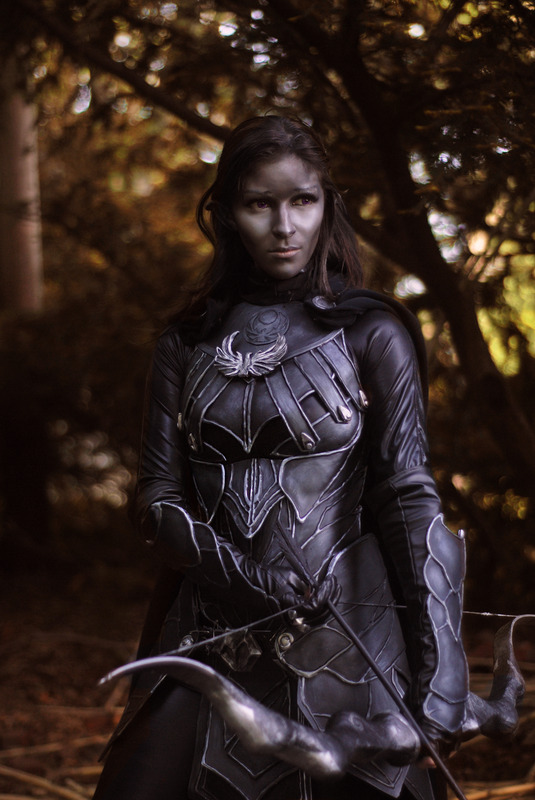
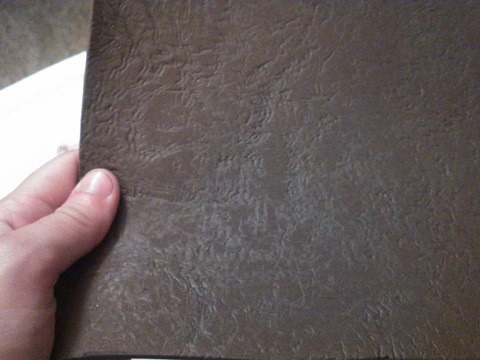
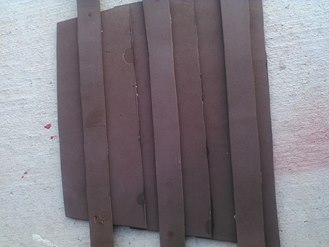
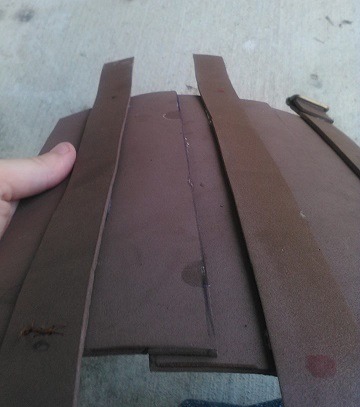
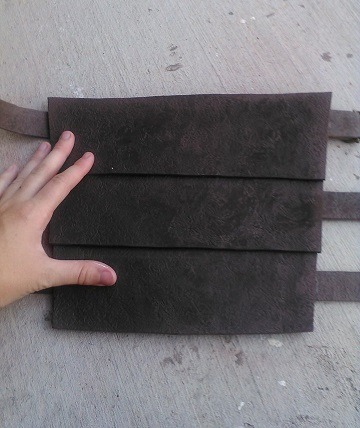
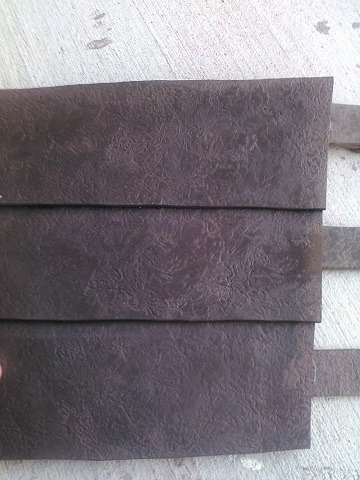
Foam to Leather (Tutorial)
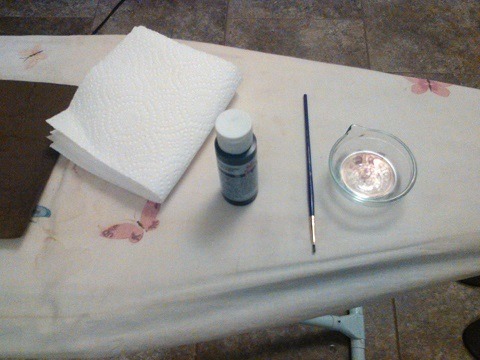
Things you’ll need:
Brown craft foam
Aluminum foil
Clothes iron
Ironing board
Black paint
Brown paint (lighter than your foam)
Paint brush
Paper towel
Grab some aluminum foil and crumble it into a ball. Not too tight of a ball though! The next step is almost impossible if you do.
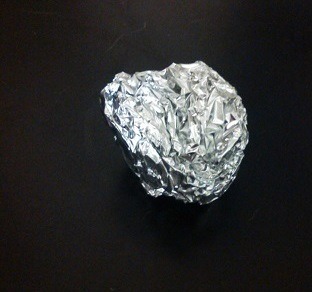
Next, un-crumple the ball. Flatten it out into one layer. It’s fine if there are a few holes.

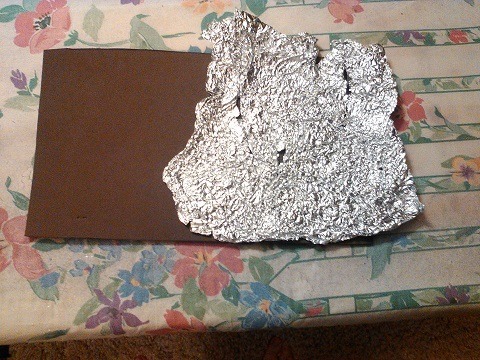
Place it on top of your foam.
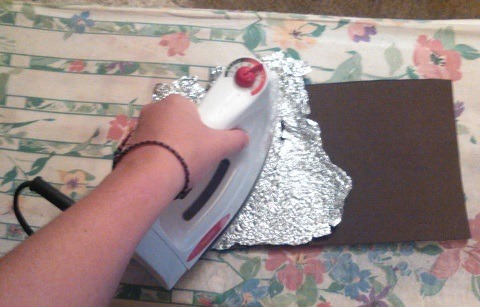
Take your iron and firmly press it on the foam and aluminum. My iron was set to 3 (polyester) but the correct temperature may be different for other irons. Just remember not to use steam! Before doing this on a large piece, be sure to experiment and figure out what the best temperature and what the best pressure is. On larger pieces, you’ll have to move the aluminum around a lot. It’s not a quick process.
Now you’ve got this crinkly affect on the foam. Next is painting!
Grab you’re brush, black paint, and a dish with some water. The idea is to dilute the black paint enough so that when you apply it the paint will seep into the divets the aluminum created.
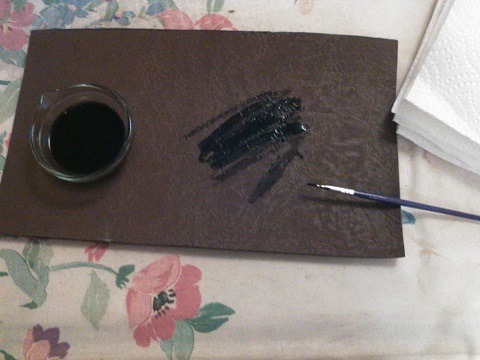
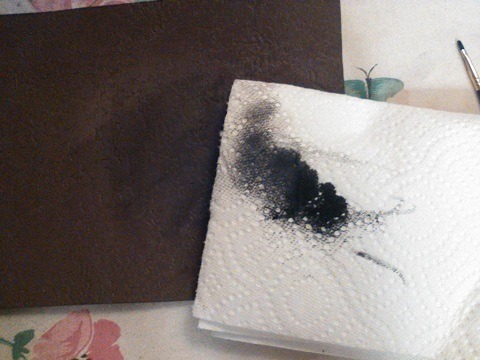
Once the watery paint is applied, wipe it off with a paper towel. Continue to do this for your whole piece of foam.
Now here’s an optional step (of which I haven’t done myself but I’ve known others who have):
Grab the light brown paint and, without diluting it, paint it on. It’s best to use a coarse brush in this case and to try to keep it out of the divets. Wipe some of the paint off.
Remember, imperfections are always good! Uneven paint isn’t necessarily bad so just experiment with it.
Here’s an example of a bracer I did with this method. The first two pictures are an example of the foam I began with and the rest show the end result. I hope this helps you guys out!

68K notes
·
View notes