#zsphere
Explore tagged Tumblr posts
Visit Tumblr Blog
Explore Tumblr blogs with no restrictions, modern design and the best experience.
Last Seen Tumblr Blogs


Fun Fact
In 2020, 27% of US Tumblr users had an annual household income of over $100,000.
Text


it's been way too long - i kind of abandoned this place but i'll give it another go
2 notes
·
View notes
Text
me in 2022: I AM NOT TAKING THIS CLASS ON FRIDAYS I CANNOT EVEN STAY AWAKE FUCK ITS THE FIRST EXAM ALREADY AND I HAVENT EVEN DOWNLOADED THE PROGRAM I CANT UNDERSTAND ANYTHING I AM QUITTING IT
me now in 2024, finally taking the class: Wait this is cool actually lmao


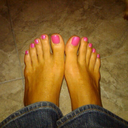
#zagreus rambling#I guess it also helps that I'm taking it with a friend lmao#This was my homework from last week btw we had to choose a beast from anywhere and model it#and my sleepy ass chose kurama lol#I think it came out good tho#just don- dont look at the feet#ignore the feet#I misscalculated the original zspheres in the feet and had a hard time re shaping them into a coherent thing 😭😭
1 note
·
View note
Text
Here's a list of Free tools and resources for your daily work!🎨
2D
• Piskelapp Pixel art + animation • Krita general digital painting + animation • Gimp image manipulation + painting • MapEditor Level builder (orthogonal, isometric, hexagonal) • Terawell manipulate 3D mannequin as a figure drawing aid (the free version has everything) • Storyboarder Storyboard
3D
• Blender general 3D software (modeling, sculpting, painting, SFX , animation…). • BlockBench low-poly 3D + animation. • Dust3D low-poly 3D (similar to Zbrush Zsphere)
Sound Design
• Audacity Audio editor (recording, editing, mixing) • LMMS digital audio workstation (music production, composition, beat-making). • plugins4free audio plugins (work with both audacity and lmms) • Beepcomp chiptune/8-bit/16-bit music synthesizer
Video
• davinciresolve video editing (the free version has everything) • OBS Studio video recording + live streaming.
2D Animation
• Synfig Vector and puppet animation, frame by frame. Easy. • OpenToon Vector and puppet animation, frame by frame. Hard.
↳ You can import your own drawings.
For learning and inspiration
• models-resource 3D models from retro games (mostly) • spriters-resource 2D sprites (same) • textures-resource 2D textures (same) • TheCoverProject video game covers • Setteidreams archive of animation production materials • Livlily collection of animated lines
694 notes
·
View notes
Quote
ふふふ……ところがですね、我々官能小説家は「陰阜」という言葉で阜の字を使うんですよ……w
Xユーザーの日下春生(zsphere)さん
10 notes
·
View notes
Text
How come nobody's ever told me how damn NICE the zSpheres are in ZBrush??? I BEEN MANUALLY MAKING BODY MESHES OH MY GOD MY LIFE IS CHANGED-
#zbrush#3d artists#ok look man im new to zbrush dont hurt me#*shivers*#3d artist#artist#art#3d art#siggy speaketh
3 notes
·
View notes
Text
Sculpting a squirrel
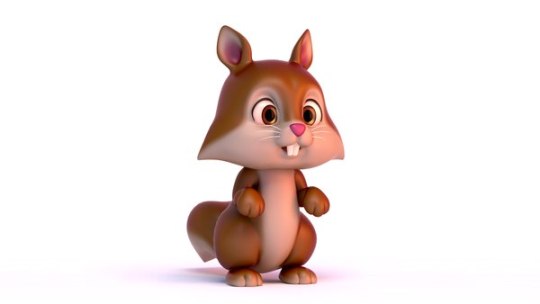
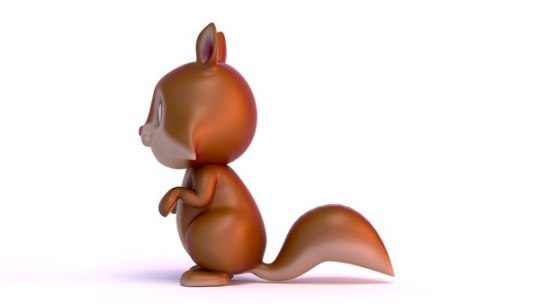
We were tasked with sculpting a squirrel from the above reference image on a 1:1 ratio.


I tried.
Problems: -head too small -tail too big -body might need to be shorter -hands, legs needs to be bigger
For this task I learnt how to use Zsphere. Which basically is like a skeletal that you extrude and move, scale to your liking and then add a skin to make it have some poly count to sculpt with.
0 notes
Text
Production Phase
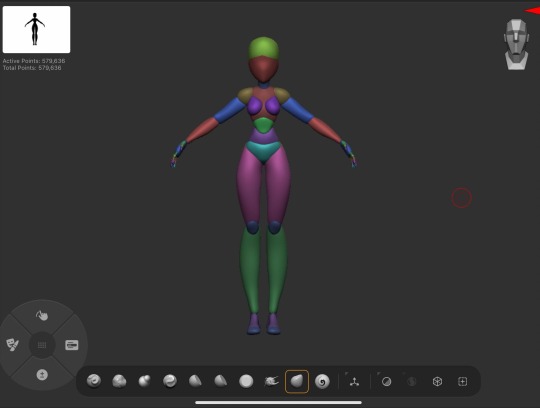
Character Blockout and Sculpting
Creation began in ZBrush with a simple ZSphere blockout, which can establish the shape and proportions fast, defining the silhouette early for later detailing. ZSpheres provided a flexible, adjustable base, while Dynamesh was used to refine shapes and create smooth transitions. Silhouette polishing ensured that the visible cat-woman pose and elegant stance of the figure were effectively captured.
Once the basic forms were set, the sculpt was further refined by adding layers of detail in the muscles and facial structure. The final sculpt features:
● A sleek, humanoid feline silhouette.
● Smooth, stylized, completely black skin.
● Large, blue eyes that enhance the mystical aura.
● Gold jewelry, including bracelets and Egyptian-inspired pieces.
Retopology
Retopology was done using ZBrush's ZRemesher. It was an excellent tool to work with in generating a clean, optimized low-poly mesh from the high-resolution sculpt. The reason for employing ZRemesher was to simplify the process of retopology and gain a base mesh that would be suitable for texturing.
UV-unwrapping
After completing the sculpture, the mesh was taken into Maya for UV unwrapping. Particular attention was given to the UV layout to reduce stretching and overlap. A mix of automatic and manual unwrapping methods was used to ensure the organic surfaces of the character were correctly mapped for the next stage of texturing.
Baking and Texturing
The low-poly mesh and UVs were prepared, so the high-resolution details of the sculpt were transferred to the low-poly version. This process is necessary for retaining small details such as muscles or wrinkles would be lost on the lower-resolution mesh.
Lighting and Rendering
A three-point lighting setup created a controlled lighting environment that allowed for a diffused illumination of the character, while still retaining the detailed sculpt and textures. Then I used HDRI environment map to give natural reflections and enhance the depth of the scene.
0 notes
Text
Week 1
It's been a bit difficult to get my Exploratory 3D project off the ground this week. In Zbrush, I started by working with a default sphere and the Clay Build-up tool, hoping that I'd find some sort of inspiration for how I wanted the final head to look, but nothing looked right to me.
I started over again, this time using the Zsphere to see if I could at least get an idea of how the head shape should look, but as convenient as the tool seems, I got a bit frustrated when I saw how the head with look when I previewed it with "A." if the sphere wasn't turned just the right way, it made parts of the head look twisted and kind of ugly.

It wasn't until I decided to take a dive into my YouTube playlist of 3D modeling tutorials that I found something that just might work for me:
youtube
Success. It looks more like a person!

I think I can work with this. I think that instead of modeling a head completely before moving on to the rest of the body, I'll have better luck blocking out simple shapes and really get an idea of how the overall body should look before I move on to the finer details.

Fingers crossed. 🤞
0 notes
Text
Class Activity.
Sculpting a hand.
After the questionable first attempt that was,
I decided to follow a tutorial.
youtube
However, in this video the person mentions that we should watch his other video first, which is specifically on how to use Zspheres, the mesh used in this tutorial.
So I watched and followed that first.
youtube


2025/01/27
0 notes
Text
Class Activity: Hand
we were tasked with sculpting a hand and we were initially advised to first block out the shape out the hand with different objects.
However, I followed a separate tutorial where I got to learn about Zsphere
Intro to Zsphere:
youtube
Tutorial on how to make hand with Zsphere:
youtube
Process work:


i first practiced out with Zsphere and managed to block out the parts of the hand and then moved and scaled the necessary parts to the appropriate placement and size
after that I had used the preview to then finally sculpt the remainder of the rest of the hand.
At first it was mainly the fingers until i started adding the rest of the palm and due to the hand having an almost gripped position i had to modify the position and shape to the palm to that.
Delete parts: Ctrl + Alt + Shift Keep that part and delete everything else: Shift + Ctrl
Final Product:


overall Im pretty satisfied with the gay outcome of the exercise
0 notes
Quote
何か良い設定やアイディアがあっても、マニアが「それはもう過去にやった」みたいに騒ぎ立てて抑制しちゃうと、新規に入って来た視聴者や読者はその素晴らしいアイディアに出会えなくなったりするんだよね。 どんな使い古されたネタも、誰かにとっては初めての新鮮なネタなのだ。
Xユーザーの日下春生(zsphere)さん: 「何か良い設定やアイディアがあっても、マニアが「それはもう過去にやった」みたいに騒ぎ立てて抑制しちゃうと、新規に入って来た視聴者や読者はその素晴らしいアイディアに出会えなくなったりするんだよね。 どんな使い古されたネタも、誰かにとっては初めての新鮮なネタなのだ。」 / Twitter
0 notes
Text
modelling with zspheres is kinda silly like. this guy is Orbs
0 notes
Text
Red Vs Blue; Moving on with the Project, inital tests and lookdev.
Blog #4
So after the presentation was done, I started working on the intial slap comps of the project, so my plan at this stage was to get my simulations in maya using the nfluids, and making the scene in unreal engine.
After which I had planned to take render the scene in unreal engine, with essential passes like AO, Reflectivity, and Diffuse, while taking the essential scene models and the camera and using them as matte in maya, to get the proper cutouts of the simulations. After which, I planned to use Arnold's infamous GPU based sampling to render volume passes of the simulation and compose everything together in nuke. But after testing with some test scenes in maya, it turned out that arnold we have in LRCs couldnot handle the level of polygons that I wanted it to work with, as the renders were not loading in the engine itself.
After a bit of troubleshooting, I came up with 3 different solutions to this problem.
First was to try the arnold debug logs along with camera culling, instancing and geometry caches to reduce the scene size and then try rendering.
The second was to transfer the simulation scene file and fluid cache, to the maya in my personal computer and then use VDB workflow to export the simulation as an Open VDB file, import it in unreal engine and render there.
And the third option was to use niagara and do the entire pipeline in unreal.
Finally, I ended up with the this solution as I anyhow had to learn niagara and this is just a good opportunity.

Fig; Single frame from the naigara fluid sim.

Fig; Single frame from one of my test files.
After figuring this part of the project, I switched to modeling. So, for this particular concept, I planned on modeling 3 models, the grim reaper, the pumpkin monster and the scyth. So I started with the grim reaper, I model from zbrush, I used the zsphere rigging method to pose that model, the I masked the area to that I wanted the cloak to be in the i used the move brush to shape it and then I manually gave all the folds and creases using standard and dam standard brush. And I used hard surface mdoeling in maya for the scythe.

Fig; Grim Reaper model

Fig; Grim Reaper's scythe model Then I started modeling the pumpkin monster, which was actually tricky because I had no clue how to approach the jacket on the model, Initally i thought of implementing low poly to high poly workflow from maya to ZBrush, but then that was not very viable, instead I crossed my fingers and used the Zbrush masking method to get the initial jacket, and that somehow worked. and once I had the base model, all the was left was sculpting and giving the details.

Fig; Pumpkin Monster Model
0 notes
Text
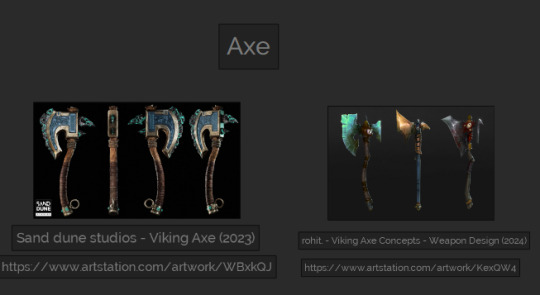
Snake and the Weapon
For the animal companion, I chose to create a snake, an animal rich in symbolism across various cultures. Snakes often embody dualistic qualities, representing both good and evil, healing and harm. In religious contexts, serpents are frequently seen as symbols of temptation and knowledge. Specifically, in Viking culture, they are associated with destruction and chaos, but also with protection and power.


I began by sculpting the snake’s basic form in ZBrush using ZSpheres, then refined the details of the head and body on a subdivided mesh. After that, I UV unwrapped the model in Maya and proceeded to bake and texture it in Substance Painter. To illustrate the connection between the snake and the Valkyrie, I added emissive details around the scales. Finally, I exported the 2K textures as PNG files. For the weapon, I created a large battle axe using ZBrush. I primarily used ZModeler for blocking out the shapes and the Dam Standard brush to carve intricate Viking-inspired details. I followed the same pipeline as with the snake, beginning with the sculpting in ZBrush, then moving on to UV unwrapping in Maya, and finally baking and texturing in Substance Painter. In the texturing phase, I incorporated emissive cracks similar to those on the snake and on the armor, further emphasizing the connection to the Valkyrie


Korolev, E. (2023). Ancient Bronze Snake Sculpture . [Online] Available at: https://www.artstation.com/artwork/XgxQRw.
mythologis.com (n.d.). Viking Symbols and Their Powerful Meanings. [online] Mythologis®. Available at: https://mythologis.com/blogs/norse-mythology/viking-symbols [Accessed 2024].
rohit. (2024). Viking Axe Concepts - Weapon Design. Available at: https://www.artstation.com/artwork/KexQW4.
Sand dune studios (2023). Viking Axe. Available at: https://www.artstation.com/artwork/WBxkQJ.
nicholaswells.com (2022). Snake Symbolism & Their Meaning in the Arts - Nicholas Wells Antiques Ltd. [online] nicholaswells.com. Available at: https://nicholaswells.com/news/snake-symbolism-their-meaning-in-the-arts/. TVH (2023). Explaining Viking snake symbolism. [online] The Viking Herald. Available at: https://thevikingherald.com/article/explaining-viking-snake-symbolism/445.
0 notes
Text
80. Lvl
Week 7
For beginner 3D artists
How to create a head from a Zsphere?

Introduction
Hello! My name is Nikolett, I’m a graduate character artist. I love to create characters for fantasy themes, my biggest inspirations are coming from video games and 2D illustrations. I started my journey on the path of 3D in 2020 when I enrolled at a British university to learn game art. I finished my BA in 2023. I’m currently honing and expanding my knowledge and skills at the University of Hertfordshire on the MA Games and Design course. As an artist without any previous art studies besides my BA, creating art can be challenging, confusing, and a complicated process. With this blog, I would like to share my perspective, and knowledge on how to create a head sculpt from a simple sphere in ZBrush.
References
Using good references is crucial. This is the first, most important step towards a convincing 3D asset. References can come from many different sources such as videogames, Sketchfab 3D models, or 2D images. Collecting them and laying them out in PureRef is a major help during the sculpting process. For this project I created a Karlach blockout sculpt inspired by the game Baldur’s Gate 3. My main references are from Artstation.

The Blockout
Every beginner’s biggest mistake in 3D sculpting is getting into the details before defining the overall shape of the bust. In my work pipeline creating a sculpture is divided into 3 stages – primary block-out, secondary block-out, and detailing. The detailing is also divided into primary and secondary details. In the primary block-out stage I focus on creating the overall shapes forms from in 3D space. It’s crucial to move around the 3D scene as much as possible to see different angles of the sculpture. In secondary block-out I add and define the major features of the face such as the location of the eyes, nose … etc. Primary detailing includes defining the facial features based on the references and secondary detailing involves adding fine details such as pores and scars.

For this sculpt I started with a sphere and modified its shape with the move tool, then I created a second sphere for the neck and adjusted it with the same tool. I added the ears in a separate tool too. I carved the eye socket with the clay buildup tool and started to add the nose and mouth with the same tool too. It doesn’t matter if it looks bad at this stage, you have to trust the process. After this, I used the move tool to adjust the features to the approximately anatomically correct location and started to define the secondary shapes of the block-out such as the mouth and nose. To refine the shapes more using flatten and damstandard brushes are crucial. The best advice in this stage is to look at the differences between the sculpt and the references. It will guide you to a better result. For the horns I worked on a separate tool and use deformation master and array mesh. For the hair, I also worked on a separate sub-tool from a Sphere.
Here is a really good tutorial about horn creation:
youtube
Pablo Muñoz Gómez-, 4 Ways to Create Horns in ZBrush -, 2022-, Youtube, https://www.youtube.com/watch?v=TN9ARiC_82w

This sculpture is missing the secondary details which is a bit more complicated process. The head itself is still in the primary detailing phase, which means it must be modified to achieve a closer look compared to the reference.
Try to get simultaneous practice, watch tutorials, and follow them along. Making this a habit really helps to learn faster and get a better result and understanding of 3D. Asking for help and feedback is also super useful on multiple web pages, such as Reddit. Don’t be afraid to make mistakes, they are part of the learning process.
0 notes
Text
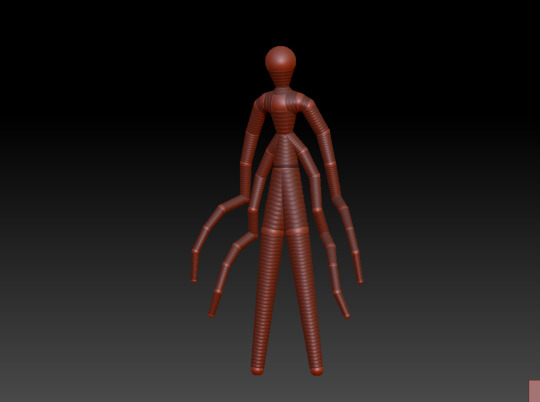
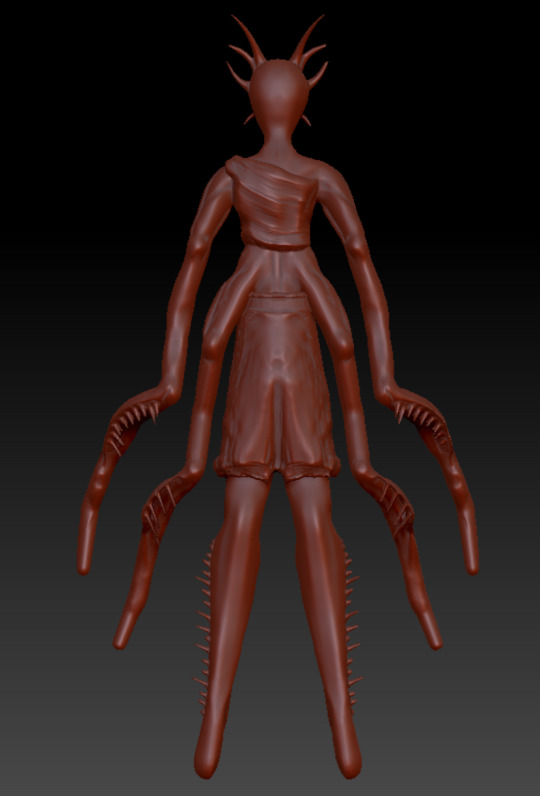
3D Model
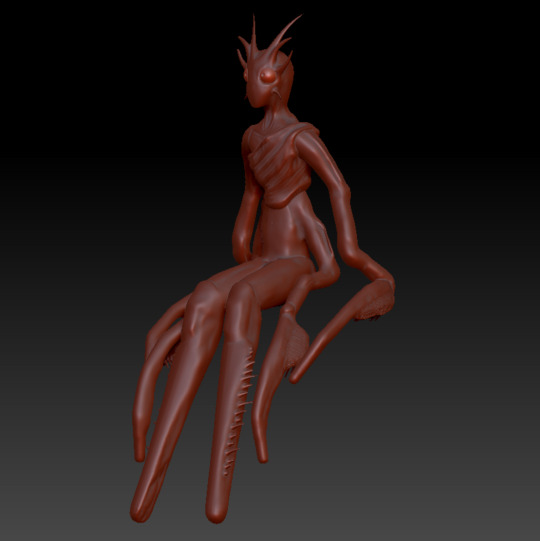
On the other side of the module, we were tasked with designing and creating a 3D character model (using ZBrush) along with an environment (using Maya). I started with creating a moodboard and sketching some ideas. I wanted my character to be nature-themed in some way, and I decided to do this by basing them off of a preying mantis. I initially also wanted to include elements of a willow tree, however this was cut due to issues with modelling it as well as my own concerns with how well it could be 3D printed. Once I had a design down, I took to ZBrush to start sculpting it. I started out with a zsphere base, allowing me to block out the general shape of the character and where their arms, legs and head would be.
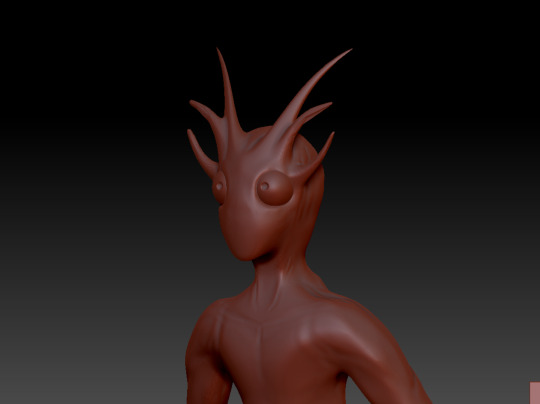
After this was done, I started using the clay buildup brush to start forming actual muscle definition and shape on top of the basic skeleton model, allowing me to make the body look more like an actual body.

I then worked on adding a face and eyes, intended to have an emphasis on being buglike. I also continued to refine the rest of the model, such as cleaning up the muscles.
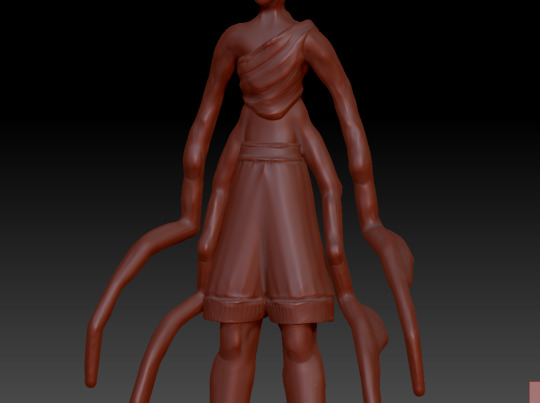
Once the main body was done, I started on sculpting some clothes. As per my design sketches, I wanted to keep it simple so I started with a wrap top and added creases in an attempt to mimic fabric. I also modelled shorts, although this took a few iterations as I was struggling to get them to fit the model as well as having issues with keeping the mesh intact and stable when sculpting.

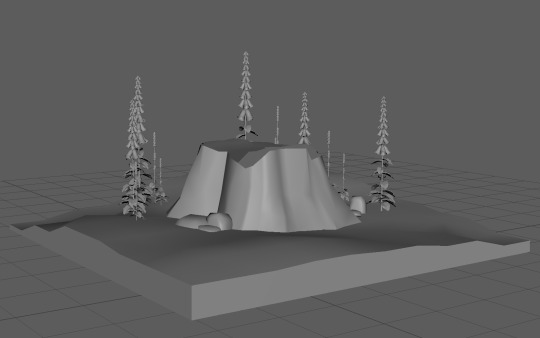
After the model was done, I started on the environment in Maya. I wanted my character to sit on a tree stump surrounded by flowers. While initially, the plan had been to make my models using photogrammertry, I was unable to find and photograph a tree stump, and the flowers I'd decided on were out of season and therefore not yet growing, meaning I instead opted to do it myself. Other than general teething issues with Maya (struggling with subdivisions and random polygons), this went pretty well. I used photo references of tree stumps I'd found online to make the stump as well as references of foxglove flowers to model one.
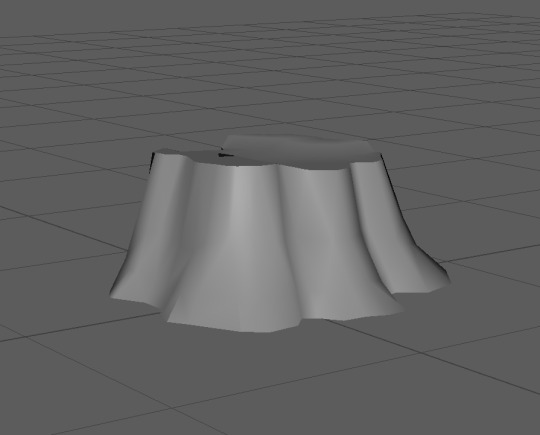
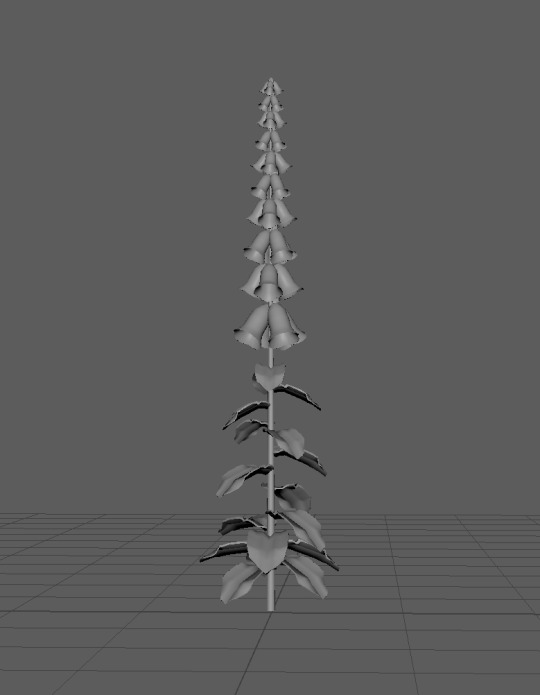
After combining the flower (which I duplicated to fill out the environment) and stump in ZBrush, teacher feedback led me to make a second version of the flower to help add some variation to the environment, as one type of plant made it too monotonous. I also made some rocks to scatter about that would help fill the space.
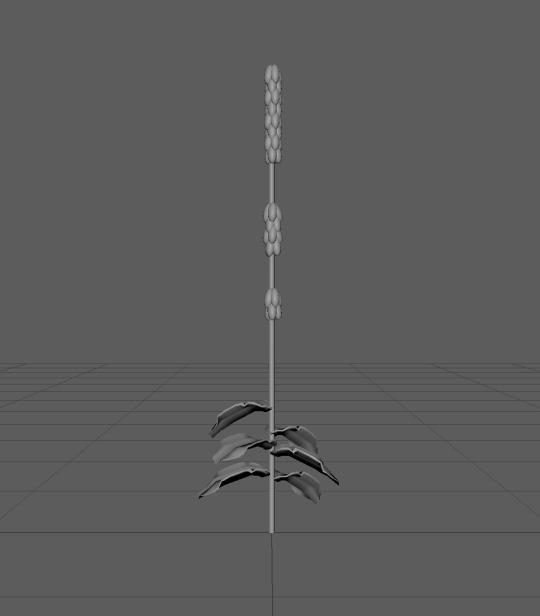
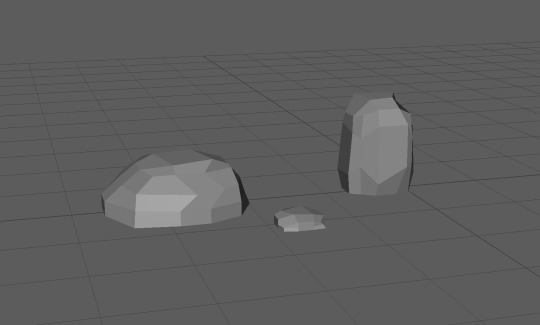
I then added the extra two models into the full environment and added some undulating terrain underneath, which gave me my final result for the Maya section of my work.

I then went back to ZBrush and posed the 3D model using the masking brush tool in order to pose the character to be sitting. To do this, I used a cube as a stand-in for the tree stump, which I deleted when the character was fully posed and ready to export.

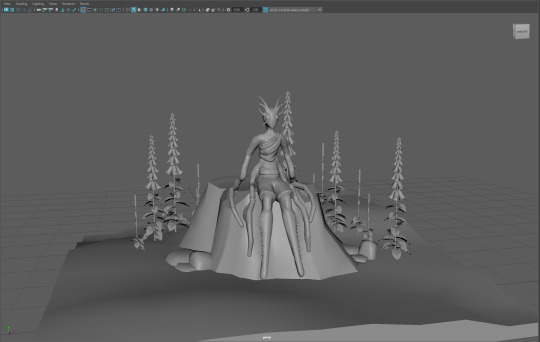
Lastly, I loaded the posed model into Maya and had my finished result.
One issue I had during this project was struggling to merge the separate zspheres, which then led to problems loading the ZBrush sculpt into Maya, as I had to load and position each .obj separately. This was solved later down the line.
If I could do this project again, I would try to be more ambitious. As this was my first time making a 3D model, I was apprehensive at first and therefore made my initial design simpler in order to compensate for that. Now that I'm more familiar with ZBrush and Maya, attempting something more complex seems far less daunting.
0 notes