#wireless n repeater setup
Explore tagged Tumblr posts
Visit Tumblr Blog
Explore Tumblr blogs with no restrictions, modern design and the best experience.
Last Seen Tumblr Blogs


Fun Fact
Tumblr has 4 main sources of revenue.
Video
youtube
Wireless N Repeater Setup (No brand Name)- 2 Methods
0 notes
Text
Price: [price_with_discount] (as of [price_update_date] - Details) [ad_1] From the manufacturer Use the 2.4 GHz band for everyday tasks, while leaving the high-speed 5 GHz 11AC band free for video streaming, online gaming and large file transfers. With fewer devices using the high-speed 5 GHz band, there’s less interference and congestion, giving you better performance and a lag-free wireless experience. The built-in Quality of Service (QoS) engine allows you to prioritize important traffic to ensure that your favorite applications are receiving optimal bandwidth. AC 1200 Mbps WAVE 2 Concurrent dual band wireless Router with 4 High gain Omni Antenna 802.11 a/b/g/n/ac standards with speed of 300 Mbps on 2.4Ghz & 867 Mbps on 5Ghz Gigabit Ports -- One Gigabit WAN & Four Gigabit LAN ports for high speed wired connectivity. MU-MIMO -- MU-MIMO, which transmits data to multiple wireless devices simultaneously to increase speed and efficiency Multiple Operating modes: Router mode : to access the internet. Access Point mode : to extend wired network over wireless .Repeater mode : to extend the range of existing wireless router. Easy Setup: Super simple set-up with the D-Link Assistant Mobile APP Or with intuitive WEB GUI setup wizard [ad_2]
0 notes
Text
D-Link DIR-615 | 300Mbps Wi-Fi Router | Affordable Wi-Fi| Fast Ethernet ports (WAN/LAN) | High-Gain Antennas | WI-FI Extender for Home | Easy Setup |MTCTE Certified
Price: [price_with_discount](as of [price_update_date] – Details) [ad_1] From the manufacturer . N 300 Mbps wireless Router with high gain Omni Antenna. Dynamic IP (DHCP) : Yes;Support Multiple operating modes: Router | AP | Repeater | Client;Easy Setup: Super simple set-up with the D-Link Assistant Mobile APP Or with intuitive WEB GUI setup wizard.;Advance security with WPA/WPA2 and firewall…
0 notes
Text
Are you looking for good bulbs at low prices? This is for you.
(33% Off) Sengled Smart Light Bulbs, Color Changing Alexa Light Bulb Bluetooth Mesh, Smart Bulbs That Work with Alexa Only, Dimmable LED Bulb A19 E26 Multicolor, High CRI, High Brightness, 8.7W 800LM,

Brand
Sengled
Light Type
LED
Special Feature
Dimmable, Color Changing
Wattage
8.7 watts
Bulb Shape Size
A19

About this item
Get Started in Seconds: Ultra simple Plug-n-Play setup. Simply twist in the Sengled smart light bulbs and start enjoying with Alexa smart devices in seconds (automatic linking to Alexa account required).
Certified for Humans, struggle-free, tinker-free, stress-free. No patience needed – it's actually simple.
Brilliant Colors to Light Up Every Moment: Turn the color changing light bulb on/off, dim, brighten, set up routines, schedules, and more using the Amazon Alexa App. Use 16 Million brilliant and soft colors plus tunable whites to create the perfect mood; High brightness (800 lumens); Great for parties, entertaining and everyday use.
Voice Control with Alexa: Use hands-free Voice Control to turn on, off, or adjust brightness of the Alexa light bulb. You can also use voice via smart home devices to use advanced features like wake-up routine or away mode.
Whole Home Smart Lighting: Bluetooth Low Energy (BLE) Mesh 5.0 wireless technology allows for a farther reach, enabling whole-home installations. Each A19 smart bulb multicolor serves as a signal repeater, so that even if a Bluetooth light bulb is out of reach from the Alexa Echo device, it can still be controlled using the Mesh network.
For More Info >>>>>Click Here<<<<<
0 notes
Text
Wavlink WING 12M Extender Setup
You may connect the extender to your wireless router or modem by following the Wavlink AC1200 WING 12M setup guide. By using a WIFI setup you can improve the signal of your existing wireless network and guarantee continuous access to far-reaching devices.
Installation of the Wavlink WING 12M extender
Instruction manual for The Wing AC1200 12m Range Extender:
Connect the wireless devices to the Wing Extender.
To launch the browser, type ap.setup or the IP address 192.168.10.1.
To access the setup page, log in using the default username and password.
The repeater looks around for indications.
Click it to select the WiFi network at your residence.
After entering the WiFi setup, click Next.
Before linking the amp to your home network, wait 30 seconds.
Now that installation of the Wing 12m Extender units is complete.
To improve connectivity, put the extender near the area without internet.
Manual setup for the Wavlink WING 12M Extender
how to get to the manual setup page for the Wing 12m wifi extender:
The Wing 12m extender must be inserted into the outlet after the package has been opened.
Press the power button as soon as the power LED light goes green.
Now connect your WiFi device to the Ap extender configuration _Ext network.
In any active online browser, type Ap.setup.
You are presently on the setup page for the Wavlink Wing 12m Ac1200.
After creating your account, follow the AP Login procedures.
Note: If you need any assistance regarding your Wing 12m wifi extender so contact our technician or visit the official website that is ap setup login.
Wavlink Wing 12m Extender WPS Setup
One of the most common methods to connect the extender to an existing wifi network during installation is by pressing the wireless protected setup (W.P.S) button.
To install the extender, set up your Wing ac1200 according to by the following instructions:
Place the extension near to the main wifi modem or router as a first move.
The Wavlink wifi extender is working right now.
then watch for an important green power edge to appear.
To switch on the extension's power light, press the W.P.S button.
Click the W.P.S icon on the modem or network now.
Your extender and router's green light is blinking.
Allow 1-2 minutes for the extender and home wifi to join.
meets the specifications of IEEE 802 11a, b, g, and n.
The Dual-Band RJ45 Connection with setup Integrated Passive Power Over Ethernet (PoE), Up to 2.4GHz 300Mbps and 5GHz 867Mbps Speeds, and is intended for flexible placement based on its antenna offers excellent long-distance performance.
can generate 1000mW of energy and has a superior receiver design.
A sturdy, waterproof receptacle can withstand severe weather.
WPA and WPA2 3 LED Lightning Adapter with Built-in Bluetooth Signal Power and Maximum Security (15kV ESD)
Wavlink WING 12M access mode setup
You can begin the installation process once the real connection and wavlink ac1200 login steps are complete. Follow these simple guidelines:
The Wavlink AC1200's display will show the settings signs.
By using the drop-down options, you can select your time zone and country/region.
To access your web interface page, log in using the updated information.
After selecting the "Access Point" operating mode, adhere to the directions shown on the screen.
Choose the wifi network that is linked to the primary device and to which you want to add a second connection.
You should use the same wifi password for your external extender as you did for your home network.
Give the change a chance to take effect. There could be some labour necessary.
0 notes
Link
Are you looking for the steps on wireless N Wifi Repeater 192.168.10.1 setup? Here you will get to know how to set up wireless N Wifi Repeater on your device without facing any difficulty. So follow the guide and for any query, you can visit us.
1 note
·
View note
Link
How can I login wireless-n repeater device
0 notes
Text
D-Link Wireless N Range Extender DAP‑1360
D-Link Wireless N Range Extender DAP‑1360
View On WordPress
#AES MAC address filtering SSID broadcast disable function WPS (Wi-Fi Protected Setup) Advanced Features Quality of Service (QoS): Wi-Fi Mult#C-Tick#CCK#CE#D-Link Wireless N Range Extender DAP‑1360 D-Link Wireless N Range Extender DAP‑1360 | AutoPlay Specs Features Connectivity Wireless N connec#DBPSK#Firefox 3.0 or higher#IC#OFDM Functionality Operating Modes Access Point Wireless Client Bridge Bridge with AP Repeater (Range Extender) WISP Client Router WISP Repe#or other Java-enabled browser Status LEDs Power Wireless Security LAN Physical Dimensions 147.5 x 113 x 31.5 mm (5.81 x 4.45 x 1.24 inches)#Wi-Fi Certified To Buy This Products Click the Below Link https://autoplay.com.pk/product/d-link-wireless-n-range-extender-dap1360/#WPA2-EAP TKIP#WPA2-PSK WPA-EAP
0 notes
Text
0 notes
Text
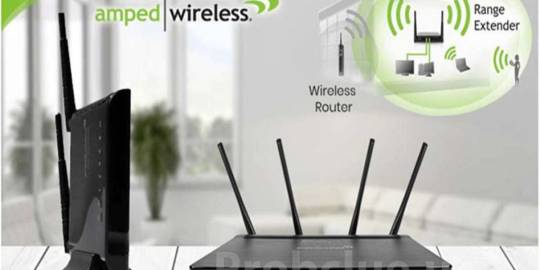
Installing Amped Wireless High Power Wireless-N Pro Smart Repeater and Range Extender?
To setup Amped Wireless-N Pro Smart Repeater and Range Extender, firstly position your amped extender for amped wireless setup, for this;
Find a suitable setup location which should be midway between the amped wireless router and the wireless dead zone area.
The amped range extender must get a strong wifi signal from your amped wifi router.
The signal strength signalled from the amped router should be preferable more than 70% in the place where you want setup.ampedwireless.com setup.
The recommended optimal positioning of the Amped Wireless-N Pro Smart Repeater and Range Extender makes it function well. Once you have kept the amped pro repeater at a suitable location,establish hardware connections.
To setup Amped Wireless High Power Wireless-N Pro Smart Repeater and Range Extender using setup.ampedireless.com:
Step 1: Setup connect of your computer to the Amped Wireless-N Pro Smart Repeater and Range Extender (amped router setup) using following steps
The Ethernet cable of the Amped Wireless-N Pro Smart Repeater and Range Extender must be attached to its Ethernet or POE port.
Affix the Ethernet cable wire to the Amped Wireless-N Pro Smart Repeater‘s repeater port on the PoE adapter.
Plug the Amped Wireless-N Pro Smart Repeater and Range Extender to power source using PoE adapter fixed at PWR port.
Ultimately, connect PoE adapter of the amped extender to the LAN port of your computer.
It is also possible to setup Amped Wireless High Power Wireless-N Pro Smart Repeater and Range Extender using wireless settings. For this, connect the computer to the amped range extender’snetwork using its default wireless network settings, usually ending with 2.4 and 5.0
Note: It is advisable to not connect the Amped Wireless-N Pro Smart Repeater and Extender with a wireless connection during installation and amped extender setup.
Step 2: Access the Smart Setup Wizard of Amped Wireless-N Pro Smart Repeater and Range Extender via setup.ampedwireless.com:
Open amped supporting web browser on your computer.
Enter amped wireless login default address setup.ampedwireless.com in the browser’s field.
If the setup.ampedwireless.com web menu fails to open, use default login IP address http://192.168.1.240 into your web address bar.
o The amped extender’s web menu need not require any internet network connection as it can be directly reached from the range extender.
The Smart Setup Wizard auto-launches to access the web menu of the Amped Wireless-N Pro Smart Repeater and Range Extender.
The smart setup wizard guides through amped wireless setup process.
Step 3: scanning for available home router’s network that needs to be extended using Amped Wireless-N Pro Smart Repeater and Range Extender via setup.ampedwireless.com:
SCAN to search for the amped wireless router’s wifi network name that requires to be extended with setup.ampedwireless.com setup.
Select the amped router’s Wi-Fi network SSID to extend using the Amped Wireless-N Pro Smart Repeater and Range Extender.
If you have a dual band amped router, select SSID of both 2.4 GHz and 5GHz bands.
Always select the router’s wireless signal with signal strength of 70% or greater. If signal strength is less than recommended, Move your Amped Wireless-N Pro Smart Repeater and Range Extender towards the amped router.
Click Next.
Step 4: Enter home wireless network default security settings – SSID and password:
Enter the security key or password for your security enabled amped router’s wifi network.
Type separate wireless network keys for both bands of amped router wifi.
Step 5: Allow wireless network configuration:
Allow the Range Extender’s setup wizard to automatically detect your router’swireless network security settings.
The newly extended Wi-Fi network settings will be displayed with "_RE” prefix at the end of its wireless network name/SSID.
You can opt to enter a new wireless network name /SSID and password for your extender wireless network.
Click on /next to save the applied settings.
The smart setup wizard guides you though countdown process in completion of setup.ampedwireless.com setup.
The Amped Wireless-N Pro Smart Repeater and Range Extender will reboot during the smart setup wizard countdown.
It will disconnect from the Wi-Fi connection during the reboot.
Then, reconnect your wireless devices to the Amped Wireless-N Pro Smart Repeater and Range Extender’s newly setup Extended Wi-Fi Network.
Use the wireless network name SSID and wireless network password to connect to either band.
Click next to apply wireless settings and complete the Amped Wireless-N Pro Smart Repeater and Range Extender setup process.

The Amped Wireless High Power Wireless-N Pro Smart Repeater and Range Extender gets successfully setup using setup.ampedwireless.com login to access the smart setup wizard. You can now attach any wired networking devices to the Ethernet port on the bottom of the amped range extender. It is also possible to manage and control the amped wireless repeater cum extender’s settings from web menu accessible through setup.ampedwireles.com login
After the setup.ampedwireless.com setup, the smart setup wizard lets you know if any firmware version file is available and if your Amped Wireless High Power Wireless-N Pro Smart Repeater and Range Extender require a firmware update.
Also, if you had not previously placed your amped wireless range extender at a recommended location, you can position it at an optimal location now, all the setup.ampedwireless.com settings are saved and it is safe and secure to be relocated to different location.
#setup.ampedwireless.com#setup.ampedwireless.com login#amped wireless repeater#amped wireless login#amped wireless setup
2 notes
·
View notes
Text
The Arlo Camera Setup Process, Keep Your House Security On Your Fingertips.

Now you can keep your eye on the suspected area by moving your finger on your device by using the Arlo security camera. This wireless camera provides you complete security features to secure your house. But you have to perform all the required Arlo Camera Setup steps. If you are willing to know how you can set up your camera with the Arlo base stations, then you should read this complete post to get your answers.
OK! Let’s know about the Arlo camera setup steps.
● The first thing you need to do is open the battery compartment by pressing the latch & you need to pull back gently.
● Then you have to insert your camera’s battery very carefully & close the battery door.
● After this, you should bring your camera’s battery within one to three feet of the Arlo base station.
● Now you need to sync your wireless camera to the base station.
1- To sync the camera, you need to press the sync button on the side of the base station approx two seconds & after two seconds, you need to release it.
2- If you use the Arlo pro or pro two base station, then you will have to press the button on the top of your base station approx two seconds & after a few seconds, release it.
● You have to wait until the LED blinks in green color.
● Next, you need to press the sync button on top of your Arlo camera approx 2 seconds, then release it after two seconds.
● If a blue LED on your camera blinks continuously, which means the sync process has confirmed.
● In case, you notice the LED on the camera blinks amber, and then your sync procedure isn’t complete yet!
● Now check the camera LED on the base station. If you notice your camera LED on the base station blinks n solid green color, then your sync procedure has completed.
● You can repeat these steps for the Arlo camera. In case you are not able to complete the sync procedure within sixty seconds, then you need to press the button on the top of your base station & try again.
If you are getting an issue with your base station also, you do not have much info about it. Then it would be best if you got in touch with the Netgear certified team. They will tell you to check your Arlo Base Station Offline Issue or not. If you notice your base station is offline, then the team will provide you some necessary information to fix your base station issue.
Summary
In this article, you will know what steps you will have to take for the Arlo camera setup. If you Arlo base station offline, then you can take help from the Netgear certified team.
#Arlo Camera Setup#Arlo Base Station Offline Issue#Arlo Base Station#Arlo Base Station Setup#Reset Arlo Base Station#Arlo Security Camera#Arlo Pro 2#arlo pro 3
1 note
·
View note
Text
192.168.10.1 wifi repeater setup
1 note
·
View note
Text
MSRM US302 Extender Setup
The MSRM US302 Wi-Fi extender provides the best speed and complete coverage across your house. It is simple to include into the design of your house because of its small size. providing for 300 Mbps of Internet bandwidth and 802.11b/g/n Wi-Fi connection. Learn MSRM US302 Extender setup steps and connect a range of devices to it, including a tablet, gaming console, PC, phone, and monitor.
MSRM US302 Extender Installation
Turn on your MSRM US302 after unboxing it.
Watch for the power LED to become completely green after you click the button.
Remember to keep the booster near the router.
Connect by setting up an AP extender.
To launch any web browser, type after entering Ap.setup or 192.168.10.1.
Enter your personal details to sign in.
To finish the installation, follow the instructions.
Your extender can be moved to a new spot once it has been untangled.
Note: Go to the instructions shown on the screen if you need help utilising your wifi range extender. Visit the official website, ap.setup, for further details.
Note:- If you need any help regarding your wifi extender so contact our tech or visit the official site that is ap.setup.
MSRM US302 wifi Extender Setup via using browser
Your extender must span the distance between your router and the place where you need internet access.
Now grab your laptop or smartphone and look for the MSRM network name in your Wi-Fi list. Wireless-N or Wireless-AC may be present in the transmission.
The MSRM may display you and no internet for up to 10 seconds after you join the network.
Open a new tab on the same computer and type AP into the address box.
Enter OR 192.168.10.1 to finish the MSRM US302 extender setup.
Your username and password must be entered on the admin login page after being forwarded there.
By selecting next, choose the repeated option from the list of available choices.
MSRM US302 extender setup using wps button
The Wavlink AC1200's WPS setup instructions are as follows:
Start the MSRM US302.
Make that it is not too far from your home's router.
Simply hit the WPS button on your booster.
On your home router, hit the same WPS button now.
If your repeater shows three consecutive green lights, it has most likely been set up and set up.
You may unhook the repeater and put it anywhere you choose.
MSRM US302 extender setup firmware update
You can upgrade the MSRM US302 extender's firmware by following the easy steps below:
On the company website, you may find the most recent firmware file.
Enter the extender username and password on the app setup page.
Select "System Tools" by opening it.
the firmware update button
Examine the firmware file you downloaded after making the choice to upgrade.
Launch the extender after an upgrade. Okay, the firmware for your extension has been successfully updated.
MSRM US302 extender reset procedure?
Before trying to factory reset the Victony extender, make sure it is hooked into the power outlet properly.
Find the repeater's factory reset pinhole now.
Furthermore, press the reset hole down for 10 to 15 seconds with perhaps a needle or paper clip.
When you restart the wifi booster, the power led indication will become amber.
On the power lead, watch for a continuous green turn.
For instructions on how to install the set Victony WIFI extender, see the section that follows this one.
0 notes
Text
Wavlink AC1200 Setup
Wavlink AC1200 setup is very easy and will be done in different ways. It extend the range of your current wireless connection to the farthest corner of your home or office.
How to Use the Wavlink AC1200
With the Wavlink AC1200 wireless range extender, you can easily extend the range of your current wireless network anywhere. Four antennas are set up in a way that makes them work in all directions. This makes your existing network better and more reliable. With the help of the Wavlink AC1200 dual-band wireless range extender, you can slowly improve your wireless network. Because it is small and easy to use, it lets you set it up without much trouble. Also, its sleek design makes it easy to fit in with the rest of your home or office decor.
You can connect all of your devices from anywhere in your house because the antennas are so good. Also, the Wavlink setup connects to your router wirelessly. So, it automatically finds your router's signals and starts to boost them.
Wavlink AC1200 Setup using WPS
Follow the step-by-step instructions below for Wavlink AC1200 Setup using WPS:
Plug the Wavlink AC1200 into a power source.
Wait until the solid blue light comes on. This shows that the extender is working.
Now, push the WPS button on the extender as well as the wireless router or modem.
Don't unplug the AC1200 while the extender's light is blinking.
The WPS method for setting up the Wavlink AC1200 has now been completed successfully.
On the WIFI repeater, the power, client, device, and WPS lights will all be solid green.
Now, put the Wavlink extender in the spot where the signal is weakest. And make sure your WIFI works well.
Wavlink AC1200 Setup with wifi.wavlink.com web URL?
To finish setting up the AC1200 WiFi extender, you just need to plug the repeater into a power outlet.
Check to see if the button on the extender is set to the repeater mode.
Once the extender's power led light is on, you can move on.
Get all of your wireless devices together, go to the WiFi settings option in the menu, and then connect to the Wavlink network.
After connecting, open any browser and type wifi.wavlink.com into the address bar.
You are now on the screen where you can set up the Wavlink AC1200 extender.
Make sure to follow the on-screen instructions when connecting your Wavlink WIFI AC1200 Dual-band repeater to your home's WiFi router or modem.
How to setup my Wavlink AC1200 WIFI Range Extender?
Follow the steps below in order to connect the Wavlink AC1200 extender using a web browser:
Use the plug that came with your AC1200 Range Extender to connect it to a power source.
At this point, you will need to set your extender to work in the repeater mode.
Get a portable computer, like a laptop or tablet, and go to the WIFI settings.
Also, look for the Wavlink-N network and set up a connection to it.
Once you're connected to the extender network, open a web browser like Google Chrome, Mozilla Firefox, Microsoft Edge, or another one.
Then, type 192.168.10.1 or wifi.wavlink.com where it asks for the address.
You have reached the page for setting up the Wavlink AC1200.
Follow the steps that show up on the screen to add your extender to your home network.
How to reset Wavlink AC1200 Dual-band WIFI extender?
To start resetting the Wavlink AC1200, plug it into a power outlet.
When the extender's power led light is on, move on to the next step.
Use something like a toothpick or a paperclip.
You can let go of the pinhole after you press and hold the reset button for ten to fifteen seconds.
At this point, you have to wait until the power led light turns solid green.
You have now set the extender back to how it was when it came out of the factory.
Follow the steps for setting up the Wavlink AC1200 to put the WiFi extender back in place.
Wavlink AC1200 setup using Wifi.wavlink.com
Plug the Wavlink AC1200 wifi extender into an outlet.
Make sure the repeat button is set on the extension button.
When the power led light on the extender is turned on.
You can connect to the Wavlink network on any wireless device by going to the WIFI settings menu.
Once you're connected, open any web browser and type wifi.wavlink.com into the address bar.
You have reached the screen for setting up the Wavlink AC1200 extender.
Follow the steps on the screen to connect your Wavlink WIFI AC1200 Dual-band repeater to your home WiFi network or modem.
Troubleshooting steps for Wavlink AC1200
By default, the WPS button is turned off on some IP 192.168.10.1 gateways. If you can't connect using the WPS button, you can go to the Wavlink wifi extender setup management website for your extender and set it up there.
Make sure that your wireless router is close to where you put your extender.
If you don't, the way your improved network works will be very different. Keep the extender one metre away from your router.
Make sure that your extension is far away from any electronic equipment that could cause trouble. Things like baby monitors, microwaves, and cordless phones that use Bluetooth should be avoided.
How do I set up Wavlink AC1200 as an access point?
After you've connected the hardware and registered into the WAVLINK AC1200, you can start the installation process.
Follow these simple, straight-forward steps:
You will be taken to the page for setting up the wavlink ac1200.
Use the drop-down menus to choose your country/region and time zone.
Fill in the new login information for your page's web interface.
After choosing the "Access Point" mode of work, follow the instructions on the screen.
Choose the primary router's wireless network that you want to add an extension to.
Enter the same wifi password you used for your home router into your outdoor extender.
Give the setting some time to take effect. This might take some time.
Then, look up the name of your outside ap wireless network and use its wifi password to connect to it.
Your wavlink ac1200 outdoor extender is now set up the way you want it. Now you can put the thing wherever you want.
Wifi Extender Setup is an independent third-party service provider. Wifi Extender Setup is not connected to any of the companies whose trademarks, brands, products, or services are used on this site, unless that connection is made clear. All of these references are just there to give you information.
#Wavlink AC1200 Setup#Wavlink AC1200 Setup with wifi.wavlink.com web URL#Wavlink AC1200 setup using Wifi.wavlink.com
1 note
·
View note