#when i was uploading the full version to imgur
Explore tagged Tumblr posts
Visit Tumblr Blog
Explore Tumblr blogs with no restrictions, modern design and the best experience.
Last Seen Tumblr Blogs


Fun Fact
Tumblr has 411 employees.
Text
Chapter 62: Repose
Previous Chapters: The Sablier Arc Masterpost (35-42) || 43 || 44 || 45 || 46 || 47 || 48 || [ Ceremony Arc: 49 || 50 || 51 || 52 || 52.5 || 53 || 54 || 55 || 56 || 57 || 57.5 || 58 || 59 || 60 || 61 ] bonus: 61.5 Read the manga: imgur || mangaread (ad warning)

Though there's still an underlying sadness in his eyes, Oz is finally starting to look just a little like himself again. Except, his default outfit just got a much, much needed upgrade. thank god.
There's a festival on in Reveille. Duke Barma had called off the trio's bodyguards and sent them into town with orders to have as much fun as possible, saying their gloomy faces had been making the Duchess Rainsworth worry.
Alice runs off chasing the smell of meat, and Oz runs off after her, a refreshing callback to the simpler times of the Story's first act.

Duke Barma and Duchess Rainsworth take a stroll through Pandora's gardens as they discuss matters. And one of those matters is Xerxes Break, who's finally come to after more than a week.
Inside, Sharon races through the halls to meet him after receiving the news herself. She finds him wrapped in a sheet and brooding on the floor.


Sharon thinks about why Break is so hard on himself, refusing to accept help from others. It must be because of his past, but she knows very little about it. It doesn't really matter anyway, she likes the way he is now. Her awkward, lonely, good for nothing big brother.
Back in town, Gilbert drops his crepe in shock at the news Oz has just given him.

As Oz and Gil discuss Oz's Incuse, Alice remembers a conversation she'd had with him recently. Oz had sat her down, and told her about her missing memories that he'd seen way back in chapter 19.
After racing through the halls filled with bodies during the Tragedy of Sablier, he had followed a young Vincent, and found Alice back when she was human. But it was too late. She had already been killed, stabbed with scissors.
Unfortunately, Vincent had forced Break to destroy the bell that memory was stored in by holding Sharon hostage.

Back in the present, Oz and Gil are starting to get on her nerves. They're still carrying on back and forth, Gilbert fussing over Oz, Oz fussing over Gilbert for being too uptight.
Finally, they turn to Alice to decide which of them is being unreasonable. She says she doesn't know, to her, it sounds like they're both saying the same thing.


Leo apologizes for interrupting their conversation.
Oz smiles sadly to himself without turning around. It's been a while, hasn't it?
Leo notices Oz doesn't seem surprised to see him.
Sadly, no, he admits. Whenever they're allowed to move around freely, without a guard, it's usually because they're being used as bait to lure out an enemy.

#ooc#let's read ph together#gonna be real w you#Leo's hair looks soooooooooo bad there#the back like#gets shorter as the manga goes on#and it's an improvement#this chapter is so short#when i was uploading the full version to imgur#i saw there were only 29 pages#and had to go count them to make sure I didn't miss something#nope#just an extremely short chapter where nothing really important happens zhabdbqhsbq#tonight I am going to try to remember to make a ceremony arc masterpost and shorten that block of links a little bit
4 notes
·
View notes
Text
How to submit screenshots of Emotional Pieces/CGs:


Since there haven't been official posts of the initial R, SR, and UR sets in Live Emotion, I'm requesting that people send in screenshots so I can archive them here. I'm mostly focusing on images of the Pieces themselves, but feel free to submit CGs as well.
See the list of which Pieces/Stills I'm missing here.
Submit via Tumblr Submissions
Submit via Google Form
Send me a link to them uploaded on your own drive/imgur etc
Submit via DMs (if tumblr doesn't lower the image quality)
Screenshot guide and format guidelines:


Navigate to the Emotional Pieces screen, and select the Piece you are submitting.

Once you're on this screen, tap the Piece itself or the button circled in red to view it. (You could also tap the button circled in blue to swap between idolized and unidolized art, and the button circled in yellow to view the Still/CG.)


Send in screenshots of this screen (or whatever the largest image you can get is) when submitting. You can tap the Piece to view the Still/CG, and tap the button circled in red to swap between idolized and unidolized versions.
How to submit CGs Option 2:


Tap the menu button in the top right and go to the 'Idol' screen.


Select the idol whose CGs you're submitting and tap the スチル button


Navigate through the CGs you have and send in screenshots with them full screen.
*Screenshots of Stills/CGs from iPads or similar devices are preferred as they show a larger portion of the illustration, but all are accepted.
Thank you!

17 notes
·
View notes
Text
I said I'd do it and I made good on my promise. This video exists now and there is nothing any of you can do about it. :) I did make a full version but Tumblr keeps giving me errors when I try to upload a video and imgur has a 1 minute video limit :(

youtube
Found the Gif on pinterest.
11 notes
·
View notes
Text
Talli here
Talli here - I see the argument against the video being real, and I’m willing to send in a video taken from Discord on ios to prove the legitimacy. To my knowledge, inspect element doesn’t exist on the Discord mobile. I do have a few points to refute, though. This is in reference to the post made by Dalton, which I was informed of by searching Dalton’s account. Aggy regularly talked about you, and while I’m glad you’re a good friend to her, you’re wrong this time.
1. About my pings: I have all servers set to only notify me for @mentions, minus the Valorant server. A new map was released very recently and I unmuted the server so I could participate in general chat. The majority of my notifications come from that. Because I do have one or two regular pings in the mix, it shows the “ping” alert with the number of notifications. Try it for yourself
2 . About the download button: I am in beta tester mode, and it simply exists to download the newest update for Discord. You might be on a different version, but that’s what it is for me. The icon does not indicate it being in the browser.
3. About the task bar: A) There is no browser there and B) Yes, Discord does disappear behind the task bar, unlike your claim. Try it out for yourself. Click the window to make the Discord app full screen, then click off the taskbar. I am a gamer. It would be incredibly obnoxious to have the taskbar visible at all times. I don’t know what kind of settings your computer has, but mine is only visible while hovering over it. Again, try it for yourself.
4. About my friends list: Some of the people on there are close friends of mine, while 1 or 2 are streamers who I just opened the message tab to see when they’re streaming. I never have twitch open unless I see the purple notification on their discord. It is weird that you went out of the way to bother these people, but I will admit that a few of them aren’t my friends. They’re in my inbox for my convenience
5. About the Google doc: No, I can’t see the emails of people who viewed the Google document. It doesn’t even require you to be signed in to view. Imgur wouldn’t allow a 2+ minute video, and it was over the 500 mb Vimeo limit.
And as a final message, I am asking blog mod: Can I submit the mobile video to you, or is a link necessary? After being accused of “viewing people’s emails��� I don’t feel comfortable with uploading to Google documents again.
3 notes
·
View notes
Text
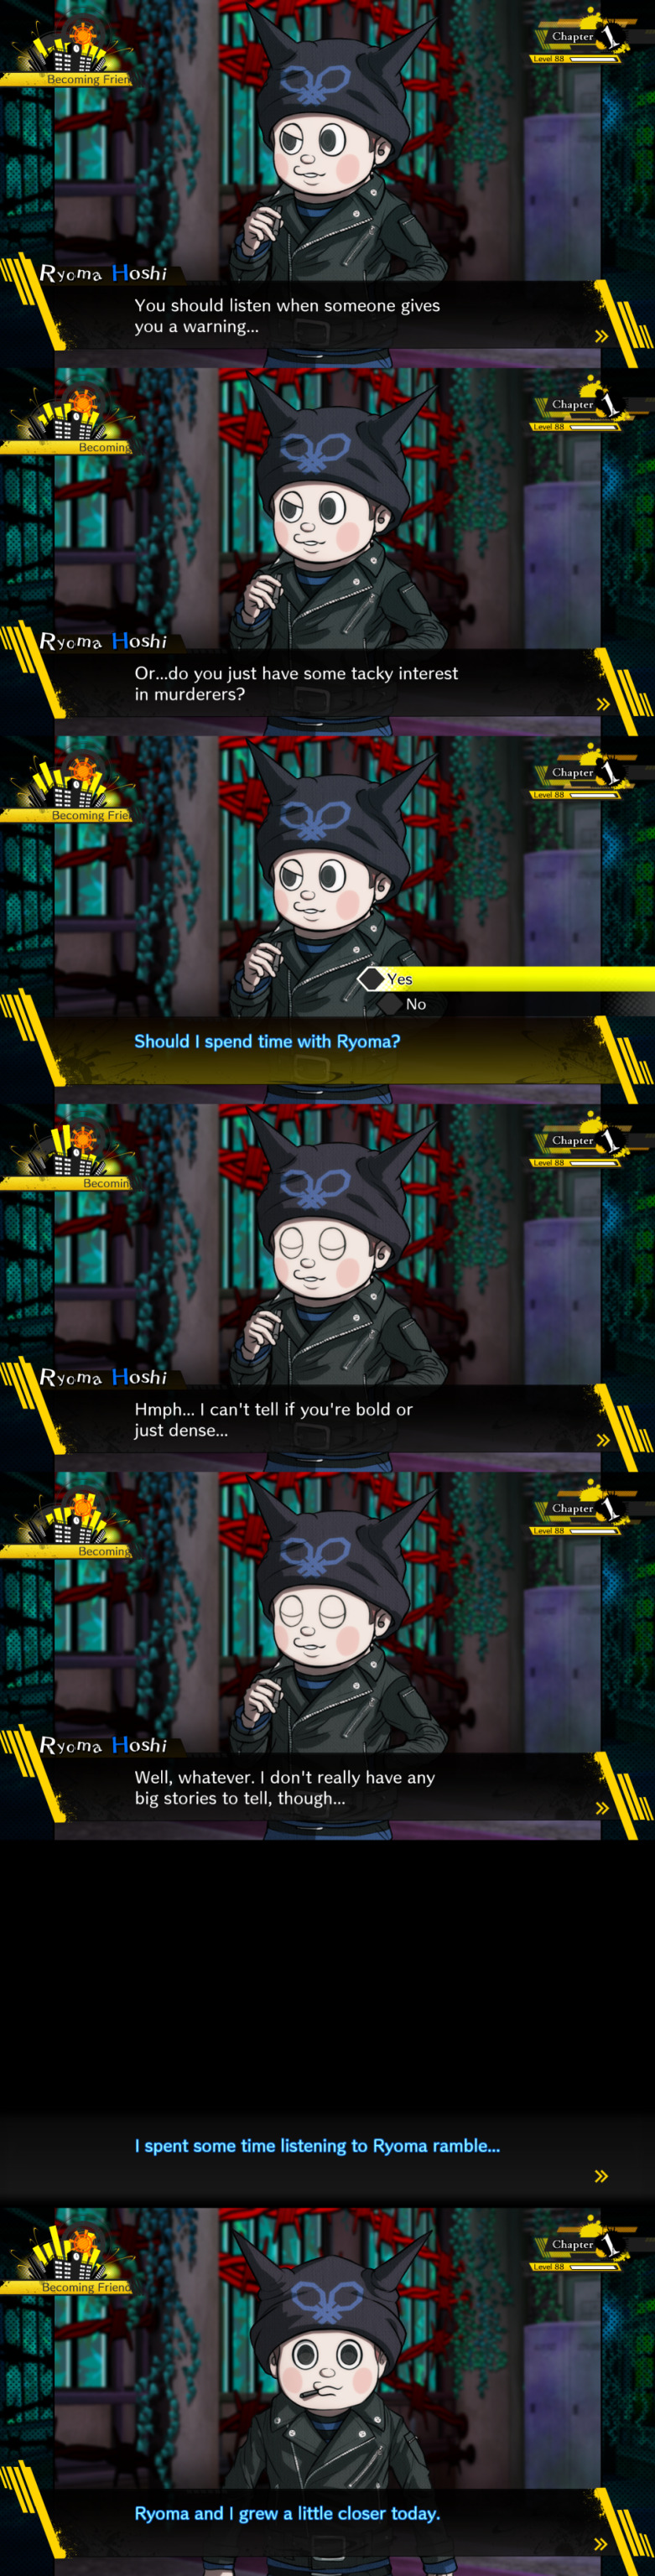
Danganronpa v3 Pre-FTE Dialog (Chapter 1 - Part 1)
Alright, so I’ve kind of been flip-flopping between getting screenshots of all the pre-FTE dialog first and then editing everything together and posting it in one go, or editing things as I go and posting each chapter when it’s ready. For now, I’m posting Chapter 1, so expect Chapter 2 in a couple of days.
I’ve decided to go with the latter because I am impatient and I also needed a couple of days of break from getting screenshots and a couple of days to get Becoming Friends out of my head, which didn’t really work because that song is an earworm to the nth degree.
There are four FTE slots in Chapter 1, and this post is FTE slot #1. Check out my Danganronpa Masterlist for the rest of these, along with other things. Just as a warning, there may be spoilers for the whole series there, depending on how far in the future you’re reading this.
Anyway!
The full post is below the cut, and spoiler warning: there are going to be spoilers for the full game, because I have Things To Say and there is a surprising amount of foreshadowing in these.
Because of my internet and tumblr conspiring to make my life pain, plus the length of some of these conversations, these screenshots aren’t going to be high quality. However, I do have the full-quality versions of these, and will be uploading them--and the gift reactions I collected--on imgur or something once I’m in a place where the internet isn’t actually garbage.
Characters are listed alphabetically by first name, but it may be faster to just ctrl+f and search for them due to the fact that some of these are pretty long.
And to reiterate my spoiler warning: there are going to be spoilers for the full game mentioned.
Angie Yonaga

Gonta Gokuhara

Himiko Yumeno

Kaito Momota

K1-B0

Kirumi Tojo

Kokichi Oma

Korekiyo Shinguji

when I first played through v3 I really wanted to like kiyo and like in a sense I still do I appreciate horror aesthetics, I love history/anthropology, and 3-3 has my favorite investigation in the series, but man why did he have to be this way at least there’s that one theory about his sister being a less-than-stellar person
Maki Harukawa

Miu Iruma

it’s obviously the +2 persuasion granted by her... goggles yeah those
Rantaro Amami

I still wonder what v3 would’ve been like if rantaro had decided to work with kaede and shuichi cooperation is what kills the killing game, y’know
Ryoma Hoshi
Shuichi Saihara

Tenko Chabashira

Tsumugi Shirogane

it’s interesting how out of everybody, tsumugi is the one to say that there’s nothing to be done and that they can’t fight the situation even himiko tries to cheer people up in her own way at one point, and being hilariously inactive for a magician is her entire thing!
#danganronpa v3#drv3#free time events#spoilers#drv3 spoilers#danganronpa v3 spoilers#angie yonaga#gonta gokuhara#himiko yumeno#kaito momota#K1-B0#drv3 keebo#drv3 kiibo#kirumi tojo#kokichi oma#kokichi ouma#korekiyo shinguji#maki harukawa#miu iruma#drv3ftedialog#rantaro amami#ryoma hoshi#shuichi saihara#tenko chabashira#tsumugi shirogane
13 notes
·
View notes
Text
My Favorite Video Downloaders (ALL FREE)
Download Managers/Software
The advantage of download managers is that they let you keep all your downloads in one place, download multiple things at once, and most importantly restart, pause, or resume downloads (this is super useful if your internet goes out because the download manager will usually be able to resume the progress from where you left off, while for example if your internet goes out while downloading from your browser it can sometimes mess up the download and make you restart the entire thing from the beginning).
JDownloader 2: THE GOAT
http://jdownloader.org/jdownloader2
This is my favorite video downloader for sure! It lets you choose the quality, frame rate, and format of your video download. It can load entire channels or playlists from YouTube. It combines and extracts ts part files (.ts.001, .ts.002, etc.). Many sites are supported besides YouTube like dailymotion, vimeo, facebook, vk, twitter, ok.ru, archive.org, etc. You can also paste the m3u8 links to download videos from sites like NBC Sports (video clips and full event replays/streams), NBC Gold, NBC Olympics, Olympic Channel, 1tv, FISU, eurovisionsports, radikal.ru, rutube, vs-mobi, etc. It works for managing downloads from sites like google drive, mediafire, sendspace, mega.nz, etc. too. You can even use a proxy to download geo-blocked videos.
You can find the m3u8 links to copy and paste using any of these browser extensions:
The Stream Detector (Firefox): https://addons.mozilla.org/en-US/firefox/addon/hls-stream-detector/
This only grabs links and doesn’t download. I use this to get m3u8 links on Firefox.
HLS Downloader (Chrome/Opera): https://chrome.google.com/webstore/detail/hls-downloader/apomkbibleomoihlhhdbeghnfioffbej
HLS Downloader can also download videos as mp4s, but you have to re-encode the video using avidemux for smooth playback, uploading, importing the video for gifing in photoshop, etc. so I prefer to just use it for copying the m3u8 links into JDownloader 2, where the videos download PERFECTLY. I use this to get m3u8 links on Opera and Chrome and I prefer this to Adobe HDS/HLS Video Saver in terms of user interface. The downside to this extension is that it makes videos unplayable on dailymotion and rutube.
Adobe HDS/HLS Video Saver (Chrome/Opera): https://chrome.google.com/webstore/detail/adobe-hds-hls-video-saver/fkbfbopjoockkhmfnchmacgpmkofcfaj/
Adobe HDS/HLS Video Saver can also download videos as .ts files, but I prefer my files as mp4s so I didn’t use this to download videos, but only to get the m3u8 links to paste into JDownloader 2. I uninstalled this extension when I found HLS Downloader though because I prefer that one and don’t need two m3u8 link grabbers from Opera/Chrome. You have to clear your downloads or refresh your page a lot if you just want a link for a specific video because it captures a lot of m3u8 links and they sometimes stay in the url bar when it’s just videos from browsing and not ones you want to download.
Xtreme Download Manager
http://xdman.sourceforge.net
You use this along with downloading the XDM Browser Monitor extension for whatever browser you use to download videos. Many sites are supported (it doesn’t detect NBC Gold videos tho). The original files will usually be .ts files (and for YouTube MKV), but when downloading it lets you choose MP4 best quality to save/convert as. I use this to download videos from Disney Now and to download and convert 4K YouTube videos to MP4 (all the other downloaders only let you download 4K videos as MKV or WEBM).
You can also click on file and then “download video” and enter URLs to download and those will actually be MP4 files already and not require conversion with the built in converter that takes a lot more time/cpu power. It doesn’t find downloads or work for as many sites as the XDM Browser Monitor though.
Megabasterd
https://github.com/tonikelope/megabasterd
A MEGA downloader that has no download limit. It also lets you get streaming links for MEGA that you can view in your browser. You can also upload to MEGA, split files, or combine files.
Browser Extensions
Flash Video Downloader
NOTE: DO NOT USE THE VERSION CURRENTLY IN THE FIREFOX ADD-ON STORE (https://addons.mozilla.org/en-US/firefox/addon/flash-videodownloader/) IT IS A KNOCK OFF OF THE ORIGINAL THAT WAS TAKEN OFF THE STORE AND DOES NOT WORK WITH THE FVD DOWNLOADER MODULE
This was my favorite Firefox extension, but Firefox disabled it after the latest update. There’s still a way to get it though! This is very easy to use since it’s a browser extension and can download from nearly every site. This can download from NBC Gold and is the only add-on that can do so. Other sites it works on are NBC Sports (both videos clips and full event replays/streams), Olympic Channel, vimeo, dailymotion, archive.org, niconico, rutube, vs-mobi, youku, 1tv, ok.ru, vk, radikal.ru, etc.
Download this folder:
https://drive.google.com/file/d/1-dcatnY2BHN6Ryt4dwHOTdIMP2LXCovh/view
Download the FVD Downloader Module from here:
http://fvdmedia.com/fvd-welcome-ff/
Go to Firefox add-ons

Click install Add-on From File

Choose the file [email protected] (835 KB) from the ValidLatest-v16.2.9 folder, which will be in the google drive folder you downloaded.

You should have the extension downloaded and now just go to options and click off from automatic updates!
Stream Video Downloader
https://chrome.google.com/webstore/detail/stream-video-downloader/imkngaibigegepnlckfcbecjoilcjbhf
Basically the Chrome extension equivalent of Firefox’s Flash Video Downloader. It can’t download from YouTube though because of chrome extension store rules. But it works for nearly every other site including NBC Sports videos, Olympic Channel, vimeo, dailymotion, archive.org, niconico, rutube, vs-mobi, youku, 1tv, ok.ru, vk, radikal.ru, etc. It also sometimes works on Disney Now. Sometimes it says network error and sometimes it works. On NBC Gold it’s similar... it sometimes says network error after downloading everything, it sometimes fails in the middle and downloads a part of the stream. I feel like NBC Gold videos are too large for this extension to download well in full, so I would just stick with JDownloader 2 or Flash Video Downloader for NBC Gold.
Video DownloadHelper
https://addons.mozilla.org/en-US/firefox/addon/video-downloadhelper/
You can see a lot of the supported sites here: https://www.downloadhelper.net/asites/f/standard/1
Note: there’s also a Chrome extension, but you should use the Firefox version since the Firefox version has no restrictions, while the Chrome version you have to log into your Chrome account to have no restrictions, while if you don’t you have to wait 2 hours between each video download.
I originally didn’t include this in my list because I didn’t like how this caused dropped frame rate or big lags in downloads from NBC Sports, Olympic Channel, youku, 1tv, vk, dailymotion, etc. I’m including it now though because it works for Disney Now (correct frame rate and no lags) and was able to download 720p of one Disney Now episode that XDM kept failing to download. XDM and Video DownloadHelper are the only downloaders that can consistently download from Disney Now. Disney Now is really the only site I use this for downloads (besides all the testing I did for this post lol) since it doesn’t need to convert from .ts to mp4 like XDM and therefore takes a lot less time/CPU power, even if it’s not as high quality as XDM MP4 best quality conversion setting. It also works without video lags or dropped frame rates in rutube and radikal.ru though I would just use JDownloader 2, FVD, or Stream Video Downloader for these since I prefer those downloaders. Don’t use Video DownloadHelper for YouTube or vimeo because any 480p, 1080p, or 60fps videos will need ADP conversion which takes a long time and also leaves an ugly watermark.
Command Line
YouTube-DL
https://www.youtube.com/embed/fKe9rV-gl1c?feature=oembed&enablejsapi=1&origin=https://safe.txmblr.com&wmode=opaque
Really fast command line downloader. Guide on how to set up and use is here. Supported sites are here: https://ytdl-org.github.io/youtube-dl/supportedsites.html
This is the only downloader that works really well with bilbili (downloads entire video and in the best quality). Bilbili downloads are .flv files though, so you will have to use avidemux to convert to mp4 if that’s your preferred file format (it is mine). It’s also the best downloader for youku imo.
It can also download entire YouTube channels and playlists.
BTW for YouTube videos that are 480p or 1080p when you just enter the URL, it downloads mp4 video and webm audio and combines them into a MKV. I prefer mp4 files and to get mp4 just use this command:
-f bestvideo[ext=mp4]+bestaudio[ext=m4a]
Some more command tips:
To choose or check the video download qualities available use --list-formats
To specify where you want your video downloaded use -o and then the file path (ie. C:/Users/user/Downloads/%(title)s.%(ext)s)
Websites (no software or extensions required)
DiStillVideo
distillvideo.com
An easy to use online video downloader! Imo the best online video downloader. It requires no program installation or extension or command line use. It can download from NBC Sports site and gives direct link you can either use to view or save video as. Afaik the only other website downloader that could do that was QDownloader, but that got taken down. :( The description on supported sites says these are all supported:
Youtube, Twitter, Vimeo, Facebook, Dailymotion, SoundCloud, Instagram, Liveleak, Break, Imgur, TED, CNN, Mashable, 1TV, 9gag and 5000 more websites
9xbuddy
https://9xbuddy.com
A video downloader recommended by @decemberelegy. See supported sites here: https://9xbuddy.com/sites It supports downloads for YouTube, a lot of Russian sites, and a lot of the free TV streaming sites likes yesmovies.
ddownr
https://ddownr.com
This is a site (no software required) that actually lets you download YouTube playlists (up to 250 videos). Your videos will be put together in a .zip file that you can download and extract to your computer.
Streamable
streamable.com
This lets you paste the link of youtube videos and then it will upload and save it to it’s server! You don’t even have to download anything yourself. But you can download it easily from the site too. You can also upload and host videos from your computer too. And it lets you choose time stamps to upload or download only a clip of a video. There is a 10 minute and 1 GB max limit though per video.
ClipConverter
clipconverter.cc
This lets you download only clips (you can still download the entire video though) from YouTube, vimeo, facebook, and dailymotion. It also lets you choose video quality and format and sometimes frame rate. The downside is that it doesn’t work for YouTube videos that include copyrighted music. This is really useful for downloading only clips instead of the whole video when you want to make gifs.
Media Players
KMPlayer
http://www.kmplayer.com/home
The latest version of KMPlayer is suuuuuuuch an improvement from the older versions. It no longer has annoying ads in the box. And it can play a lot of media m3u8 links (you can get the links from the extensions I mentioned in my JDownloader 2 description earlier) and it can play sooooo many video formats and subtitle files (.sub and .idx both work on KMPlayer, but not other media players afaik). Also it has an option to download videos. You can go to file and then download URL. You can download from YouTube, Facebook, Instagram, NBC Sports, dailymotion, nicovideo, v-s mobi, etc. Usually if you paste actual URL and it finds a download, it can download it. m3u8 links usually don’t download though with download URL option even though they can be played through play url/youtube.
PotPlayer
https://potplayer.daum.net
PotPlayer is my new favorite media player. It can basically play all the files and links KMPlayer can. It has much better color quality than KMPlayer though and better default aspect ratio detection. Another cool feature it has over KMPlayer is that when you play TV episodes in the same folder it will create an ordered playlist, which makes things easy to watch. It doesn’t have a URL download option like KMPlayer, but this isn’t an issue for me because anything that can be downloaded in URL download from KMPlayer, I can download with a different downloader on this list. PotPlayer has an even more useful feature that sets it apart from everything else on this list, which is video recording that records directly from the source video (much better than screen recording). This works on things KMPlayer URL Download can’t work on like playable m3u8 links or playable live-streams. There is a guide on how to use the function here: https://www.journeybytes.com/2018/01/how-to-use-potplayer-to-record-videos-from-different-sources.html
Userscripts
Userscripts can be easily downloaded via the browser extension userscript managers Tampermonkey or ViolentMonkey
Local YouTube Downloader
https://greasyfork.org/en/scripts/369400-local-youtube-downloader
This shows you the direct audio and video links under YouTube videos. You can click on the links to simply view or click “save video as” and download. That’s all you need to do if you want 360p or 720p streams. For 480p or 1080p quality you have to download the audio and video streams separately and combine them with ffmpeg. I don’t do this since it’s easier to just have them download and combined with JDownloader 2 or YouTube-DL. I love this script mostly for having direct links I can view in new tab instead of on YouTube site or downloading geo-blocked YouTube videos with just browser (instead of computer wide) extension VPN.
VK Media Player
https://greasyfork.org/en/scripts/38614-vk-media-downloader
This puts a download button on VK videos where you can click and download to your computer or open the link in a new tab and show/view the direct video. I find this really useful since VK’s video playing layout can be annoying with the playlists and slowish loading times.
Torrents
qBittorent
https://www.qbittorrent.org
This is what I use to download torrents and the best torrent download manager imo. It’s open source and has no ads or malware. You can also use the search engine (it will download with python) and add search plugins to search from torrent sites. It’s better than uTorrent which I tried and would always open on start up even when I put not to in my options and would be stuck at 0% when trying to download magnet links.
Screen Recording
If you’re a windows user, Windows 10 has a built in screen recorder in it’s game center that is very high quality. Here is a guide to how to use it: https://www.laptopmag.com/articles/how-to-video-screen-capture-windows-10
OBS Studio
https://obsproject.com/download
OBS lets you record and/or stream your entire screen/display capture, specific windows (browser, media player, game, etc.), media files, and even has a built in browser capture you can interact with.
243 notes
·
View notes
Text
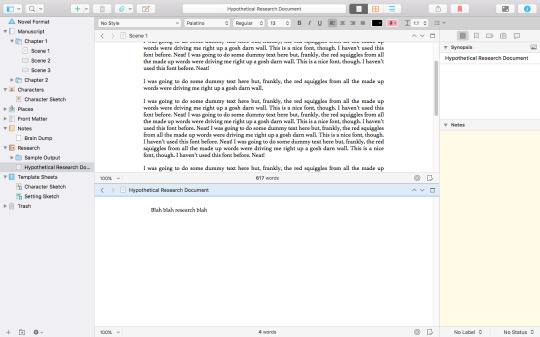
Getting Started With Scrivener: A Quick and Dirty Guide
So, this is inspired by a recent conversation with @incandescent-creativity , but honestly, it’s a sentiment I’ve heard on writeblr pretty often. “I want to try Scrivener, but it looks intimidating!” Well, I’m here to (hopefully) make it a little less intimidating, by showing you exactly how I use it. Me, a rather non-tech-savvy person. Please note that I’m using Scrivener 3 on a Mac, but the stuff I’m about to go over should be found on just about any version. I also implore you to try the free trial first, because that’s really the only way you’ll know if you like it or not.
Okay, ready?
Why Use Scrivener?
Why do I like Scrivener so much? There are a few reasons.
All of my documents. In one place. All of my plotting, planning, references, and previous drafts are super easy to call up and organized! It’s amazing!
The split-screen feature makes editing and rewriting a breeze.
Because the chapters each get their own document within the document, there’s less lag and it’s easy to jump around!
THE COMPILE FEATURE IS SUPES HELPFUL WHEN YOU’RE DONE DRAFTING.
It auto-saves, y’all.
Honestly, there’s probably a billion things I’m forgetting, but suffice to say, I really, REALLY love Scrivener.
How do I create a new story in Scrivener?
Maybe I’ve sold you on Scrivener, but you’re still a little wary on how to use it. So, I decided to make this test document to show you what it looks like!

Here’s the dialogue box Scrivener launches when you open it. There are a bunch of cool options, but honestly, most of the time you’re going to be just fine with the “Novel” option, found under the “Fiction” tab.
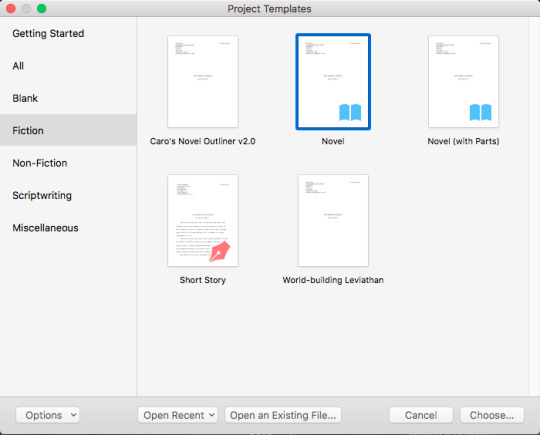
(Please note that I downloaded some of these templates from the internet, just to see. They were a little involved for me, personally. The built-in “novel” template works just fine.) You’ll get a dialogue box that prompts you to name the file and save it to the location of your choice, aaaaand ...
(Click here if you’re having trouble reading this screenshot.)
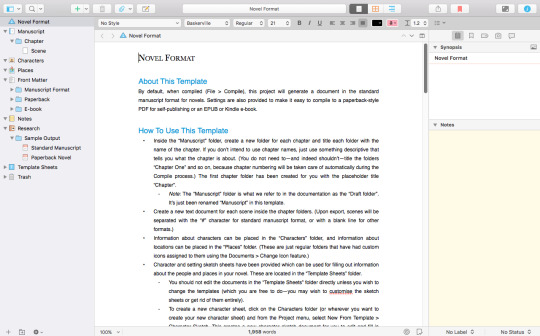
So, this is what a brand-spanking new “Novel” document looks like! As you can see, there’s a tutorial on how to write the thing built right into the document! But if you’re still feeling a little overwhelmed, I’m going to focus in on four aspects, in order of how I use them:
Notes
Characters
Manuscript
Research
Notes - Where The Brain Dumps Go
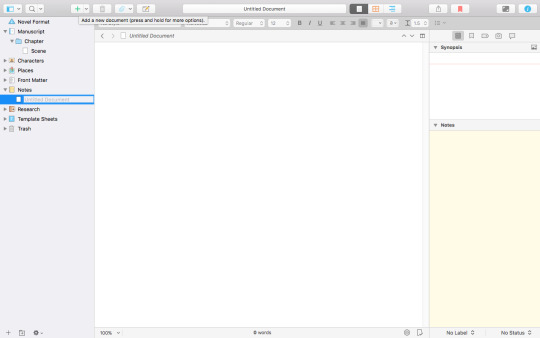
So, my first step when opening up a shiny new document is to write down my story idea! The “notes” folder is the best place to store this, I’ve found. Simply click the “notes” folder, then the little green plus sign towards the top left. A new document will automatically be created, and you’ll be prompted to name it.
(Click here if you’re having trouble viewing this screenshot.)
At this phase of the game, I’ll usually name this file something like “Brain Dump” or “Plot Vomit” and put all of my ideas into it. Here’s an example of a finished “plot vomit,” from Morning’s Edge, a silly little project of mine. (Ignore the rest of the stuff for now. That comes later!)
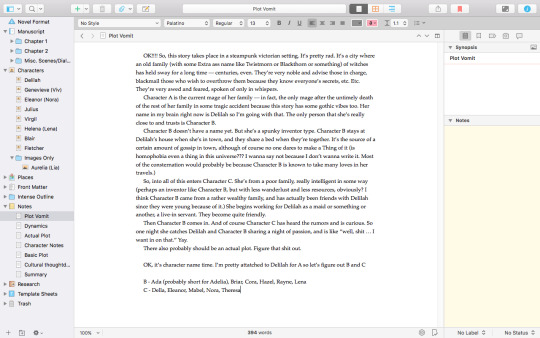
(I’m not including an imgur shot because, let’s be real, you don’t need to read a plot vomit lmao)
At this point you might want to create a more detailed outline and stick that in your notes, too. Or, if you’re like me, you might want to move on to ...
Characters!
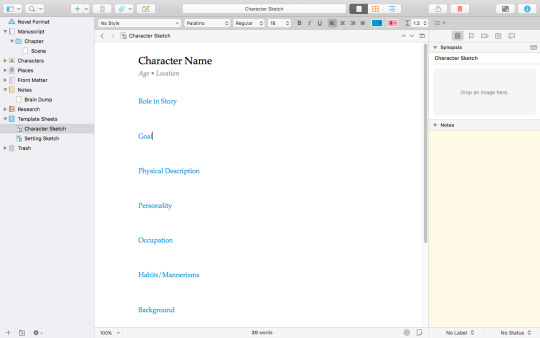
Scrivener does this really cool thing where it has a built-in character sheet. When you click the “character” folder and hit the little plus button, it’ll automatically add a character sheet instead of a blank one! To edit what that template looks like, you just have to click “Template Sheets” and go to “Character Sketch.”
(Click here for imgur.)
You can add or subtract elements as needed, or replace it with your own! I find their built-in thing to be pretty good, though. Here’s an example of a filled-out one.

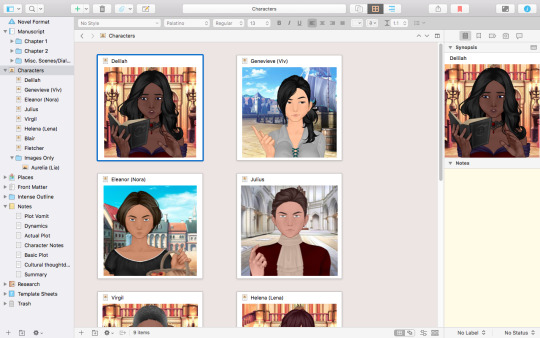
As you can see, you can even upload a picture. I personally love using dollmakers for this (Rinmaru’s fantasy avatar creator is a personal favorite), but you can use whatever you want, or just don’t add any, if you prefer! When you click on the “character folder” it will display all of your character images and it’s just ... really satisfying.
So once you’ve gotten your characters and plot all sorted out, you’re ready to move on to ...
Manuscript - Actually writing the thing!
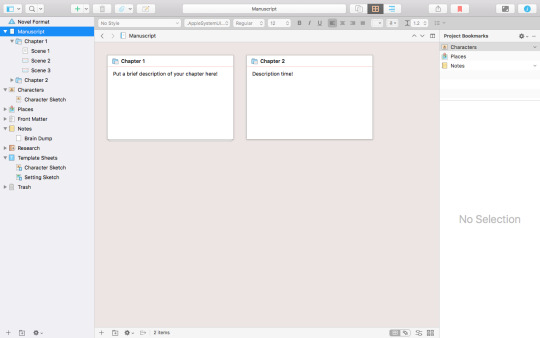
The basic way to explain the Scrivener manuscript is this: each folder is a chapter, and each document inside the folder is a scene. You don’t have to do things that way, of course—you can delete folders entirely and have each document be a chapter, or whatever. But this is a quick and dirty guide, and you can read the more comprehensive tutorial Scrivener gave to figure out other methods.
The first chapter and scene are already created for you. Give the folder your chapter name (if you have one), name your scene document whatever you’d like, pick a font that tickles your fancy, and get writing!

(Click here for imgur. Note the further instruction off to the right.)
When you want to add a new scene, just click the plus button! When you want to make a new chapter, highlight the current chapter folder, press the little arrow NEXT to your plus button, and click “new folder.” (If you accidentally create a chapter, just click-and-drag it to its rightful spot! You can also rearrange chapters and scenes easily by clicking-and-dragging. Another nifty feature.)
It’s worth noting that selecting “Manuscript” will show all your chapter folders with descriptions, and selecting one of your chapter folders will show all of your scene documents! If you don’t add a description, it will display the first few words in the document.

It’s beautifully organized, you guys.
While I’m writing, sometimes I need to refer to something. I dump all of those things right into ...
Research - My Catch-All
So, I don’t know how everyone else uses the research folder, but this is how I use it.

(Click here for Imgur.)
Anything I need — photo references, old drafts, and things of that nature — tends to wind up in the research folder. Uploading old word docs is easy enough. Just go to File > Import > Files. You can even upload full web pages to reference! (These sometimes lag, though.)

To reference something in your research folder while writing, just click command, option, and = at once. This will split the screen and let you open up two things at once!
Scrivener has a lot of powerful features (including the compile feature, which I’m not touching on here but lets you export your complete manuscript in a bunch of different formats, including ebook), but this is all you should really need while drafting. If you want to learn more about how Scrivener works, Literature and Latte has a lot of very helpful tutorials that you should definitely check out! This is just how I use it.
You can download Scrivener’s free trial here! If you have any questions, don’t hesitate to reach out :) Scrivener lovers, feel free to share your own reasons for loving Scrivener!
207 notes
·
View notes
Text
Xnviewmp clear directory

#XNVIEWMP CLEAR DIRECTORY ARCHIVE#
#XNVIEWMP CLEAR DIRECTORY FULL#
#XNVIEWMP CLEAR DIRECTORY PORTABLE#
#XNVIEWMP CLEAR DIRECTORY SOFTWARE#
Other tools allow for deleting selected folders from the catalogue or all of them in one go.
clean files - remove all files from the catalogue which have no metadata recorded from them.
clean thumbnails - will clean out the thumbnails from the db, which can be just too many (and still around since the files have been deleted) and it can't harm, especially if you use the Webp format which is speedy.
remove empty directories - does what it says.
#XNVIEWMP CLEAR DIRECTORY ARCHIVE#
optimize - basically this defragments the catalogue, which can get large with files scattered about in it, it builds a new db archive and then replaces the old one.Switching tabs: Ctrl-Tabto move to next tab, also Left/Rightto move between tabs once focused and Tabto return to the browser thumbs - or, use the mouse scroll button on tabs. + show tagged, select tagged, untag allĪlso useful on the tool bar: Layout >, Info pane >, Data pane >, clipboard >, rating stars, no rating, colour label, show tagged, select tagged, untag all, select alletc, Untag all only works when tagged files are shown!Īdd the Select allbutton to the toolbar, it will be handy when your hands are off the keyboard.
#XNVIEWMP CLEAR DIRECTORY FULL#
Under View mode (also for full screen), set toggle tag to Space use optimise db once in a while to clear up missing files or empty folders - see here for what it does memory usage set to 150mb or higher, for faster browsing too. check enable thumbs caching and set to WebP format, which will greatly reduce the database size on disk and make browsing very fast. importXMP comment orIPTCkeywordsto db (to get data from files which are browsed) To change colours of file names under thumbnails when in "Thumbnails + Filename" mode, you have to go to Browser> Item colors and add a file type, then set its color, or default color (I struggle to make it work) note that setting colours here effects the labels only in Thumbnails + Labels" viewing mode.
Support for working with TWAIN and WIA.Name, modified, size, image properties, IPTC keywords.
The mode of viewing images in full screen.
Application of various effects (lenses, waves, etc.).
The use of various filters (blur, bump, etc.).
Change the number of colors in the image.
Rotate and crop images without loss of quality.
Support for resizing, rotating and cropping photos.
Support for automatic image rotation based on EXIF information.
View and support EXIF and IPTC meta data.
Support for multi-page TIFF files, animated GIFs and ICO files.
Import of more than 500 graphic formats.
Rapidweaver 7 0 2 – create template based websites rapidly. It's even better with the Platform for easy installs and automatic updates.
#XNVIEWMP CLEAR DIRECTORY PORTABLE#
XnView Portable can run from a cloud folder, external drive, or local folder without installing into Windows. While it doesn't allow serious retouching work, it's a great choice for basic. XnView Portable is a surprisingly feature-filled image editor that's made for easy, on-the-go image editing. As of 2018 XnView also supported HEIF and FLIF. Version 2.30 released in 2015 supports the Netpbm PAM format, can read Better Portable Graphics, and offers an add-on for Imgur uploads. XnView 2.13 (2013) was the last version for Windows platforms older than Windows XP. Classic XnView is also distributed in the PortableApps format. XnView Portable features the same design and tools as older brother XnView, which makes it a really convenient photo editor that can be carried with you anywhere. XnView Portable is, put simply, a file explorer that has been especially adapted for image files and developed to be run from a USB key. )Ĭreate or edit Multi-page file (TIFF, DCX, LDF) Multipage TIFF, Animated GIF, Animated ICO supportĪpply filters (blur, average, emboss. The most important features are: Import about 400 graphic file formats and Export about 50 graphic file formats. XnView exists for Windows, MacOS X, Linux x86, Linux ppc, FreeBSD x86, OpenBSD x86, NetBSD x86, Solaris sparc, Solaris x86, Irix mips, HP-UX, AIX. Support of more than 400 graphics formats.
#XNVIEWMP CLEAR DIRECTORY SOFTWARE#
XnView, a software to view and convert graphic files, really simple to use. XnView 2.49.4 Complete Multilingual Portable
0 notes
Text
Lightshot For Mac Download

Download Lightshot for free. Download for Windows. Download for Mac. Lightshot downloads. Install lightshot in your most advanced Mac OS X operating system. Capture screen images and share them via Facebook and Twitter with your Macintosh. Mac hotkey is ⇧⌘ 9. LightShot Download (Latest) for Windows 10, 8, 7 – This LightShot App installation file is absolutely not hosted on our Server. Whenever you click the “ Download ” hyperlink on this web page, files will downloading directly from the owner sources Official Website.
Screenshots come in handy to show something that’d be harder to explain in words. You may have spotted them in tutorials, software reviews, tech support troubleshooting, or when you want to share your screen image and save snippets that you can’t easily print.
While you can take a screenshot on your computer using the native screen capturing tools and keyboard shortcuts, a time comes when your requirements get more advanced. That’s when you turn to specialized screen capturing tools.
Most free screenshot tools are available for Windows. That's why we are going an extra mile to get a few good ones for Mac owners as well.
We have compiled the five free screenshot tools you can use to get you started.
Also on Guiding Tech
How to Easily Take Screenshots and Video Recordings of Your Desktop Using Snip
Read More
1. Skitch
This screenshot tool from the folks at Evernote performs screen capture and markup among other tasks, and edit the image too.
You can annotate screenshots with arrows, shapes, text, and stamps, perform basic cropping without using an external image editor, and save them in eight formats, which includes PNG, JPEG, GIF, and more.
Also included is the camera mode feature for taking selfies with your webcam, and then dress it up with a host of editing tools including call-outs, highlights, pixellation to blur personal information and more.
After that, you can share your creations via social media accounts, AirDrop, FTP, or Notes.
Skitch isn't without its drawbacks, though. From my time with this tool, I've found that I can't open more than one image at a time to annotate or edit.
For Mac, it's also not possible to save snaps to the local drive; the export command is used instead.
Download Skitch
2. Monosnap
This free screen capturing program only lets you snap full screen or a selected area, and it comes with a few good enhancements. So what if may not have capture options as robust as Skitch? It's still mighty useful.
The few of the coolest features are a timer, auto upload selection that captures screenshots and sends them automatically to FTP or cloud storage, screen recording captures, and selfie mode.
Its powerful editor lets you annotate your image using text, lines, arrows, cropping, drawings, and even redact personal or sensitive information. If you want a sneak peek of your snaps, the Preview feature lets you do that with the click of a button.
You can also rename your snaps and keep them in order before saving them as JPG or PNG files, and share them if you want on social media.
Monosnap is available for Windows and Mac, or you can download the Chrome extension and use it in your browser.
Download Monosnap
Also on Guiding Tech
#screenshots='bp-purple>
Click here to see our screenshots articles page
3. ShareX
ShareX is a free screenshot tool (for Windows), but it isn’t as simple as using the native options for Windows or Mac. If you’re able to work your way around its interface though, you’ll find an extensive array of useful tools buried somewhere in its slightly messy interface.
The lord of the rings the battle for middle-earth ii download mac. Besides the different capture techniques like choosing specific regions, windows, or monitors, you can select from a variety of shapes and capture the particular area you want.
Once you’re done, you can edit using the in-house image editor. Apart from that, the editor lets you annotate, pixelate, add text, shapes, and more to your snap.
The “Scrolling Capture” option so you can screenshot a long document in any application, or capture any web address using the Webpage Capture tool.
ShareX also lets you add watermarks, blur personal or sensitive information, copy, upload, and even shorten and share the links to the images wherever you want.
It integrates with a spread of cloud storage services, and online services like Flickr, Imgur, and more than 80 other destinations.
Download ShareX
4. Lightshot
Like Monosnap, this tool lives in your system tray until you’re ready to use it.

The app packs a miniature editor for adding notes, annotations, and highlights to your snaps. After that, you can upload them to printscm.com where you can backup and share them via links.
Monosnap is an easy to use, and lightweight but is heavily loaded. The only drawback I found is that all screenshots uploaded to the cloud are open to the public. https://ohioload211.tumblr.com/post/657066366900289536/download-discord-for-mac. So it’s easy for others whom you shared links with to access your snaps with a few tweaks to the URL.
Download Lightshot
5. Nimbus Capture: Screenshot
Nimbus Capture is a free, browser-based screenshot tool you can use on Chrome or Firefox, but also as an application for Windows and Mac.
With the help of Paragon Mac Toolbox, users can write, copy, edit or delete files on Microsoft NTFS-formatted drives from Mac or read and write files on APFS- or HFS+ formatted HDD, SSD or flash drive from your PC. Its brilliant features enable developers to access different file systems without panic switching of OSs or platforms. Ntfs paragon for mac download free.
It can capture fullscreen, an entire webpage, or selected region depending on what you want. Like other tools listed here, Nimbus Capture also offers annotation and editing tools. Also, you get a special markup tools like number stamps which can be useful for tech support tutorials or other things.
After editing the screenshots, you can print them or save to your clipboard, drive, or cloud storage for easy sharing.
A desktop version is available that offers screencasting for video recording based on the desired section of your screen, which you can access from your iOS device or the web.
Download Nimbus Capture
Also on Guiding Tech
3 Useful Chrome Extensions to Capture Screenshot of a Webpage
Read More
Take Better Screenshots
Windows and Mac may have their native screenshot tools, but when you need more advanced features to annotate and edit your snaps, you can always choose any of the five listed here. The best part is they’re free to download and use, so you’re sure to find something that’ll fit your needs.
We’d love to hear your recommendations on other free screenshot tools you use that didn’t make it to our list. Tell us in a comment below.
Next up: Want to capture scrolling screenshots on your Mac? Here are some of the best apps to take scrolling screenshots on macOS.
Download wget for mac os. I update mac to Sierra, 10.12.3. My wget stop working. When I tried to install by typing. Brew install wget -with-libressl I got the following warning. Warning: wget-1.19.1 already installed, it's just not linked. Then tried to unsintall by typing. Brew uninstall wget -with-libressl Then I reinstalled by typing. Brew install wget. Express VPN Best for privacy. Number of IP addresses: 30,000 Number of servers: 3,000+ 3 months free with 1-year plan. Install wget on Mac OS X. In simple words, it is a command to download file from a given URL and port. Most Linux users and some windows users are familiar to this handy command download tool and on most Linux distributions it is pre-installed, but on Max OSX it. There are many alternatives to Wget for Mac if you are looking to replace it. The most popular Mac alternative is aria2, which is both free and Open Source.If that doesn't suit you, our users have ranked 48 alternatives to Wget and many of them are available for Mac so hopefully you can find a.
The above article may contain affiliate links which help support Guiding Tech. However, it does not affect our editorial integrity. The content remains unbiased and authentic.Read NextTop 4 Amazing Tools to Capture Scrolling Screenshots on macOSAlso See#screenshots #macos
Did You Know
SpaceX is the first private company to build and launch its own rockets.
More in Windows
Top 3 Fixes for Camera Not Working on Windows 10 PC
Lightshot Screenshot Download
If you’re looking for a simple app to capture, edit, and share screenshots, Lightshot fits the bill. Lightshot is a screenshot tool that allows you to capture a customizable image of your screen with options to easily share or upload it. It is a multiplatform program supported by Windows, Mac, Firefox, Opera, Chrome, and Internet Explorer. The lightweight and simple user interface makes it a popular tool to quickly capture a screenshot and do so much more before instantly uploading it to the cloud or sharing it across Google + or social networks like Facebook or Twitter. Capture the full screen or a selected window, and let the PrtScr key screenshot the image to upload to prntscr.com and get a short url. The speed and ease of use make it useful for remote collaboration on team projects.
The fastest screenshot app on the market
Ultrasimple screen shot capture, highly efficient and reliable.
Lightshot is an excellent screenshot tool and arguably one of the best on the market. In fact, the Lightshot 2.0 free version has earned awards and contains the same core engine as Sagelight, enabling several editing functions simultaneously. It is not without its flaws, however. Let’s cover the positive aspects of this cutting-edge program.
Firstly, it is extremely lightweight. Download it in just mere seconds. Taking up very little space on your computer, the program uses few resources while running in the background. It’s the fastest way to take an easily customizable screenshot. In just two clicks, you can capture whole or part of your screen, edit it in any place, before saving it to your computer, uploading it to the cloud, or sharing it on multi-platforms. To access your screenshots, simply create an account by clicking 'sign in'. (You need a Google or Facebook account). Once you download Lightshot, just use the PrtScr key to save your screen. Press down on the mouse and voilà – SCREENSHOT. There’s no need to open the application each time. Just look for the purple feather icon at the top or bottom right-hand side of your screen. The tool provides all you need for simple, effective on-the-spot editing: hotkeys include a pen, arrow, blur and brush features, and my favorite, the rectangle! Really ideal for some instant and clear highlighting.
Another awesome feature is that by simply holding down the Ctrl key as you take the screenshot, you instantly copy the image to your clipboard. Use Ctrl+A to capture the whole screen. Paste it into Word, Paint, Photoshop etc, for more complex editing. Ctrl+S hotkey will save your screenshot as JPG, PNG or BMP. Or, click “upload” to share it with colleagues or friends, or save it on the cloud. Now cue the major negative feature.
The default setting will let you automatically upload screenshots to the cloud. Bad news. Why? The convenience of the short url comes at a sacrifice of data privacy, with anyone being able to see your image. Another drawback of this otherwise excellent software is the limited formats to store the images. Lightshot can only capture static images and does not support video. You may experience trouble changing language; be prepared to possibly reload the page with /en to get the right language.
Where can you run this program?
Lightshot is a multiplatform tool. It is available for Windows or Mac, and can operate on various browsers—Chrome, Firefox, IE, and Opera. Lightshot Chrome will work with Chrome OS or any other OS capable of running chrome. There is no Lightshot app specifically for Linux, but you can run it using Wine. It has also tested compatible with Ubuntu Linux. A mobile version of Lightshot is also available for android and iOS phones. While it is running in the background of your computer, the app will hide in your bar, with a feather-like icon.
Is there a better alternative?
Lightshot isn’t the only screenshot tool in town. Puush is a highly rated screenshot app with one hotkey combo that allows for instant, linkable screenshots. Simple but effective. Greenshot is a much-lauded app for instantly capturing images, but it cannot match Lightshot’s ability to preset the capture window size. ShareX offers itself up as a great alternative, being popular among gamers due to its ability to screenshot games and provide custom domains. Of course, before you even download an app, you can enjoy built-in features to do the job for you: the PrtScr in combination with Ctrl + Alt will allow you to screenshot everything or just the active monitor or window. As a free open source software that is surprisingly light given the features, ShareX is an impressive tool. However, at the end of the day, with its easily-located purple brush, and instant sharing, Lightshot wins on the user-friendly front.
Our take
For quick and easy image capture, and instant editing and sharing for work or pleasure, Lightshot is probably the best screenshot app on the market. Sure, ShareX has more features, or the preinstalled Windows Snipping Tools does the job, but Lightshot beats the others for its ease of use.
Should you download it?
Lightshot Download For Windows 10
Yes, but whether or not Lightshot is the screenshot app for you depends on what you need. For basic screenshots, use the built-in screenshot tool on your computer or laptop. For complex editing, check out the alternatives. For simple editing and instant sharing however, take advantage of Lightshot. The essential hot keys provide all you need for effective highlighting, and it is ultralight to run. What’s the catch? The unsecured short urls are a privacy issue (it would be great if they added a 'blur' feature allowing you to anonymize sections of your screenshot before uploading it).For easily edited screenshots, Lightshot is worth a shot!
Lightshot For Mac Download Software
Fusion download for mac. 3.2.0.0
0 notes
Text
LESSON 3
IMAGING AND DESIGN FOR THE ONLINE ENVIRONMENT
PRINCIPLES OF GRAPHICS AND DESIGN
Balance in design is similar to balance in physics. A large shape close to the center can be balanced by a small shape close to the edge. Balance provides stability and structure to a design. It’s the weight distributed in the design by the placement of your elements.


Movement principle in graphic design refers on how the human eye interact with your design, and the most important element in your design must be the first thing people see, and after seeing it your design needs to lead viewer to the next most important element.

Unity the sense of oneness of the elements that creates balance and harmony

The principle of repetition simply means the reusing of the same or similar elements throughout your design. Repetition of certain design elements in a design will bring a clear sense of unity, consistency, and cohesiveness. REPETITION can be regular or irregular and even or uneven.

proximity is a principle of design that refers to the spatial relationship between the elements of the design. The rules of proximity are pretty simple: things that are related should be nearer to each other, and things that are unrelated should be placed further from each other.

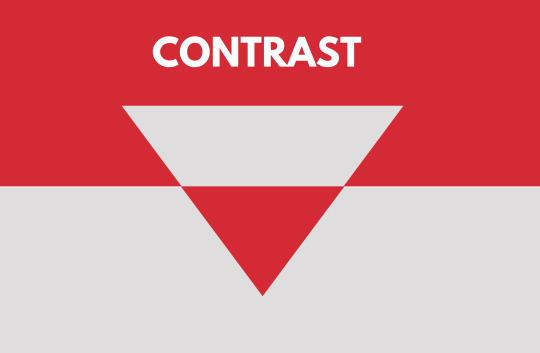
principle of art, contrast refers to the arrangement of opposite elements and effects. For example, light and dark colors, smooth and rough textures, large and small shapes. Contrast can be used to create variety, visual interest, and drama in an artwork.
White space is the area between design elements. It is also the space within individual design elements, including the space between typography glyphs (readable characters). Despite its name, white space does not need to be white. It can be any color, texture, pattern, or even a background image.

infographic visualises the six guiding principles of Unity/Harmony, Balance, Hierarchy, Scale/Proportion, Dominance/Emphasis, Similarity & Contrast. ... The footer should include the URL directly to the infographic landing page to make it easier for readers to find the original.

THESIS/STORY isthe subject and the main idea of your infographic must be clear.
Data must be well- organized and supports the main idea.
Simplicity Style must be able to attract your readers so as not to make your infographic full of text

Sources-You must cite your resources so as to give credibility to your data.
Branding/Shareability -Your infographic must be creative and innovative
IMAGE FILE FORMATS
JPEG stands for “Joint Photographic Experts Group”. It's a standard image format for containing lossy and compressed image data. Despite the huge reduction in file size JPEG images maintain reasonable image quality.

The Graphics Interchange Format (GIF; /dʒɪf/ JIF or /ɡɪf/ GHIF) is a bitmap image format that was developed by a team at the online services provider CompuServe led by American computer scientist Steve Wilhite on 15 June 1987.
The BMP file format, also known as bitmap image file, device independent bitmap (DIB) file format and bitmap, is a raster graphics image file format used to store bitmap digital images, independently of the display device (such as a graphics adapter), especially on Microsoft Windows and OS/2 operating systems.
TIFF - IS A FILE FORMAT CREATED ORIGINALLY BY ALDUS CORPORATION FOR DESKTOP PUBLISHING.CONSIDERED AS A HIGH QUALITY IMAGE FORMAT
Portable Network Graphics and is another raster image type. The main difference between a PNG and a JPG is that a PNG file can have a transparent background and is generally larger and of higher quality. PNGs are great for interactive documents such as web pages but are not suitable for print.

PRINCIPLES AND BASIC TECHNIQUE IN IMAGE MANIPULATION
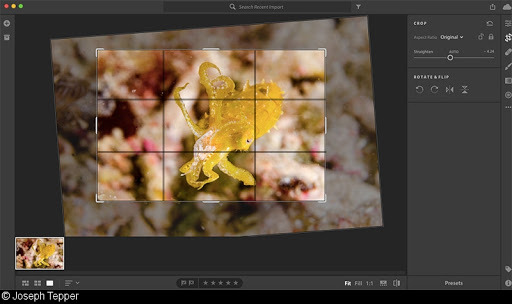
Cropping is the removal of unwanted outer areas from a photographic or illustrated image. ... Depending on the application, this can be performed on a physical photograph, artwork, or film footage, or it can be achieved digitally by using image editing software.
color balance is the global adjustment of the intensities of the colors (typically red, green, and blue primary colors). An important goal of this adjustment is to render specific colors – particularly neutral colors – correctly. Hence, the general method is sometimes called gray balance, neutral balance, or white balance. Color balance changes the overall mixture of colors in an image and is used for color correction. Generalized versions of color balance are used to correct colors other than neutrals or to deliberately change them for effect.
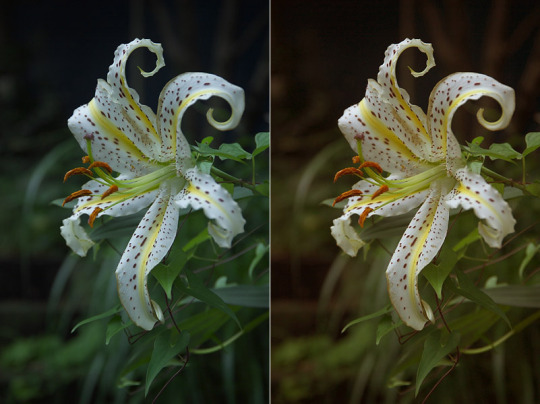
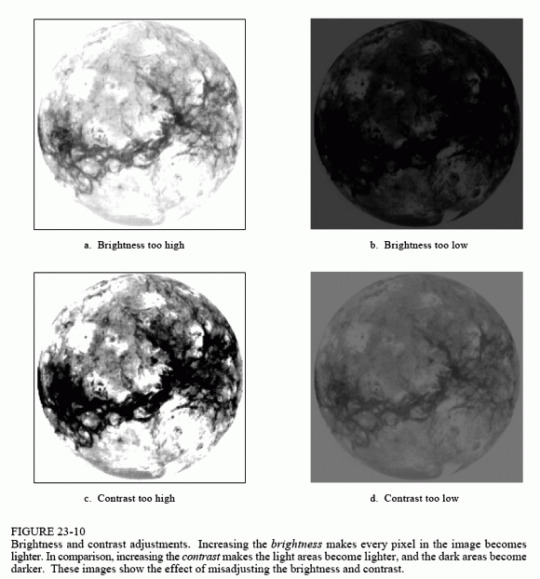
Brightness is the easiest of the three functions. It is simply a linear conversion of the measured image intensity to display intensity. Adjusting the slider affects each pixel the same way in a linear fashion. Contrast is the ratio of the brightest spot to the darkest spot in the image.
Resizing is making the picture smaller (or bigger). If you resize and don't compress, you can still get a picture that has lots of KB's. Compressing is a means of reducing file size and retaining most of the information in the picture (or file). JPEG (there are many other formats as well) is a form of compression.
Blending is a painting technique where two different colors are slightly mixed together when wet, giving a smooth transition from one color to the next. The transition color will be a product of the two blended colors (i.e if you are blending blue into a yellow, the transition color will be a green)
Combining multiple image -composition must be planned and conceptualized first so that you will be able to render the best image and message possible

Picasa is a discontinued, cross-platform image organizer and image viewer for organizing and editing digital photos, integrated with a now defunct photo-sharing website, originally created by a company named Lifescape in 2002.

Fotor is a photo editing platform, utilizing exclusive technology to bring an unprecedented level of editing control to everyone. Fotor's softwares are available on every major mobile device, desktop computer and online.
PIXLR-T IS ALSO A PLATFORM IMAGE EDITING PROGRAM. YOU CAN CHOOSE BETWEEN THE EDITOR FOR EDITING IMAGES OR CREATING AN ORIGINAL IMAGE RIGHT THROGH THE BROWSER.

IMAGE HOSTING SITES
Imgur (/ˈɪmɪdʒər/ IM-ij-ər,[2] stylized as imgur) is an American online image sharing community and image host founded by Alan Schaaf in 2009. The service has been popular with hosting viral images and memes, particularly those posted on Reddit.

Flickr is an American image hosting and video hosting service, as well as an online community. It was created by Ludicorp in 2004 and is a popular way for amateur and professional photographers to host high-resolution photos. It has changed ownership several times and has been owned by SmugMug since April 20, 2018.

Photobucket is an American image hosting and video hosting website, web services suite, and online community. Photobucket hosts more than 10 billion images from 100 million registered members. Photobucket's headquarters are in Denver, CO.


SlickPic is a photo sharing site offering unlimited uploads, but it's limited in features, interface, and community.

Zenfolio is a hosting service for photo galleries where the user can upload and elegantly share an unlimited number of photos using simple and intuitive tools. Zenfolio allows users to create and customize professional-looking galleries using an advanced Web interface.


WHAT I’VE LEARNED
In this lesson ive learned how to know some apps or websites that i can use in posting some pictures or what do i want to post and also ive learned that its good if we know what is the type of editing we should use in our picture so that it will have a nice and good outcome. Also it is helpful for me and for them that it is useful for us if what we want use in editing,the brightness and contrast of the picture should be nice also the cropping if you want to get the good shot only and etc.
0 notes
Photo

Pokèmon Fanbook Magazine: Issue 4 (Complete Scan)
Senseless and his mega archive of gaming-related magazines have brought us another blast from the past! Among his stash, he has found an italian issue of Pokèmon Fanbook‘s magazine, and has scanned each and every page for me to upload here. It’s 40-something pages, so I’ve uploaded them on my Imgur gallery. Here it goes!
POKE’MON FANBOOK MAGAZINE ISSUE 4: FULL MAG SCANS!
Memories have come flowing back while I was optimizing scans: I had bought three issues of this magazine during the best years of Pokèmon’s phenomenon: although I soon recognized it had much less “official info” compared to Pokèmon World, I felt like this publication had a much more “underground”, “niche” and “intimate” feeling about it, as it was written by kids of our own age or just a few years older. Which is actually pretty pleasant! It reminds me of more innocent times, when everything about these pocket monsters mesmerized us. Moreover, all graphics and decorations are easily found on Project Studio, which leads me to believe the layout was actually done with that software! A real FANbook from head to toe, true to its name. And yes, it’s entirely written in Comic Sans. It indeed is miles away from Pokèmon World in terms of quality.
The magazine’s contents centered mostly on Pokèmon’s TV series airing during those years, specifically the first and second seasons. Quite in fact, it almost exclusively features a lenghty and detailed episode summary, each page filled with many cartoon frames. This would sound useless now, but at the time, it made sense: most little kids were actually anime Pokèfans and not many of them had the priviledge of owning a Game Boy, so if they happened to miss an episode or two, Pokèmon Fanbook would keep them up to date. Hey, we didn’t have streaming services back then... The rest was dedicated to simple puzzles and crosswords, some minor videogame related info (for example, this particular issue provided readers with the same type chart that can be found on Red and Blue’s manuals), or fun Pokèmon-related trivia: one of the issues I owned (oh how I wish I still had these to scan! ;w; ) had a section regarding real life trivia that could be linked back to each Pokèmon type. And lastly, the ever-present fanmail section. Fanbook’s last pages were filled with readers’ letters, drawings, top 10 favourite monsters, and so on.
Another nice knick-knack this magazine gave out to its readers were detatchable cardboard “file-cards” with monster cliparts and basic information. Senseless hasn’t used them, so they’ve been scanned among the pages: instead, I used to rip them off, and I still have them in my elementary school diary!
I don’t know much about its printing company, Diamond, or for how long this magazine has been published. but I’ve seen some german versions while looking for other issues on Internet. If I had lotsa money to spend on my hobby, though, I’d like to find more issues of this and Pokèmon World, and scan them all to post everything on my blog!
0 notes
Note
Is it just my Tumblr interface being weird, or have your screeenshots been displaying way lower-res over the past couple of months? I used to use 'em for wallpaper all the time, but nowadays they all seem to be 540x720!
Sadly, it's not your tumblr interface doing that. :( Quite a few months back someone sent a message saying some of my posts weren't turning up when you'd search for certain tags. Sure enough, after checking, i realized none of my posts were. After a few weeks of trying to figure out what it was, turns out tumblr quietly did an update blocking posts from showing up in search if they had certain external links attached (like how i redirected to imgur for the higher res versions). Since almost every screenshot i posted had external links, it pretty much made 5-6 years worth and close to 10,000 posts invisible, if you were searching for something in particular. Over the years, only a small portion of people (around 15%) actually clicked through to the higher res versions, but quite a lot more used tumblr's search to find specific screenshots/posts, so i figured that was more important to have working. I do hate not having the higher res versions easily available though, so i continually try new ways to have both things work like they used to (so far, no luck). For now, the image sizes you see are due to the the dashboard image constraints put in place by tumblr. If there are ever any screenshots you want for a background though, just send me a quick message and i'll upload the full size versions for you!
10 notes
·
View notes
Text
Kapwing is Adobe for the meme generation
Need to resize a video for IGTV? Add subtitles for Twitter? Throw in sound effects for YouTube? Or collage it with other clips for the Instagram feed? Kapwing lets you do all that and more for free from a mobile browser or website. This scrappy new startup is building the vertical video era’s creative suite full of editing tools for every occasion.
Pronounced “Ka-pwing,” like the sound of a ricocheted bullet, the company was founded by two former Google Image Search staffers. Now after six months of quiet bootstrapping, it’s announcing a $1.7 million seed round led by Kleiner Perkins.
Kapwing hopes to rapidly adapt to shifting memescape and its fragmented media formats, seizing on opportunities like creators needing to turn their long-form landscape videos vertical for Instagram’s recently launched IGTV. The free version slaps a Kapwing.com watermark on all its exports for virality, but users can pay $20 a month to remove it.
While sites like Imgur and Imgflip offer lightweight tools for static memes and GIFs, “the tools and community for doing that for video are kinda inaccessible,” says co-founder and CEO Julia Enthoven. “You have something you install on your computer with fancy hardware. You should able to create and riff off of people,” even if you just have your phone, she tells me. Indeed, 100,000 users are already getting crafty with Kapwing.
“We want to make these really relevant trending formats so anyone can jump in,” Enthoven declares. “Down the line, we want to make a destination for consuming that content.”
Kapwing co-founders Eric Lu and Julia Enthoven
Enthoven and Eric Lu both worked at Google Image Search in the lauded Associate Product Manager (APM) program that’s minted many future founders for companies like Quip, Asana and Polyvore. But after two years, they noticed a big gap in the creative ecosystem. Enthoven explains that “The idea came from using outdated tools for making the types of videos people want to make for social media — short-form, snackable video you record with your phone. It’s so difficult to make those kinds of videos in today’s editors.”
So the pair of 25-year-olds left in September to start Kapwing. They named it after their favorite sound effect from the Calvin & Hobbes comics when the make-believe tiger would deflect toy gunshots from his best pal. “It’s an onomatopoeia, and that’s sort of cool because video is all about movement and sound.”
After starting with a meme editor for slapping text above and below images, Kapwing saw a sudden growth spurt as creators raced to convert landscape videos for vertical IGTV. Now it has a wide range of tools, with more planned.
The current selection includes:
Meme Maker
Subtitles
Multi-Video Montage Maker
Video Collage
Video Filters
Image To Video Converter
Add Overlaid Text To Video
Add Music To Video With MP3 Uploads
Resize Video
Reverse Video
Loop Video
Trim Video
Mute Video
Stop Motion Maker
Sound Effects Maker
Kapwing definitely has some annoying shortcomings. There’s an 80mb limit on uploads, so don’t expect to be messing with much 4K videos or especially long clips. You can’t subtitle a GIF, and the meme maker flipped vertical photos sideways without warning. It also lacks some of the slick tools that Snapchat has developed, like a magic eraser for Photoshopping stuff out and a background changer.
The No. 1 thing it needs is a selective cropping tool. Instead of letting you manually move the vertical frame around inside a landscape video so you always catch the action, it just grabs the center. That left me staring at blank space between myself and an interview subject when I uploaded this burger robot startup video. It’s something apps like RotateNFlip and Flixup already offer.
Beyond meme-loving teens and semi-pro creators, Kapwing has found an audience amongst school teachers. The simplicity and onscreen instructions make it well-suited for young students, and it works on Chromebooks because there’s no need to download software.
The paid version has found some traction with content marketers and sponsored creators who don’t want a distracting watermark included. That business model is always in danger of encroachment from free tools, though, so Kapwing hopes to also become a place to view the meme content it exports. That network model is more defensible if it gains a big enough audience, and could be monetized with ads. Though it will put it in competition with Imgur, Reddit and the big dogs like Instagram.
“We aspire to become a hub for consumption,” Enthoven concluded. “Consume, get an idea, and share with each other.”
0 notes
Text
Kapwing is Adobe for the meme generation
Need to resize a video for IGTV? Add subtitles for Twitter? Throw in sound effects for YouTube? Or collage it with other clips for the Instagram feed? Kapwing lets you do all that and more for free from a mobile browser or website. This scrappy new startup is building the vertical video era’s creative suite full of editing tools for every occasion.
Pronounced “Ka-pwing,” like the sound of a ricocheted bullet, the company was founded by two former Google Image Search staffers. Now after six months of quiet bootstrapping, it’s announcing a $1.7 million seed round led by Kleiner Perkins.
Kapwing hopes to rapidly adapt to shifting memescape and its fragmented media formats, seizing on opportunities like creators needing to turn their long-form landscape videos vertical for Instagram’s recently launched IGTV. The free version slaps a Kapwing.com watermark on all its exports for virality, but users can pay $20 a month to remove it.
While sites like Imgur and Imgflip offer lightweight tools for static memes and GIFs, “the tools and community for doing that for video are kinda inaccessible,” says co-founder and CEO Julia Enthoven. “You have something you install on your computer with fancy hardware. You should able to create and riff off of people,” even if you just have your phone, she tells me. Indeed, 100,000 users are already getting crafty with Kapwing.
“We want to make these really relevant trending formats so anyone can jump in,” Enthoven declares. “Down the line, we want to make a destination for consuming that content.”
Kapwing co-founders Eric Lu and Julia Enthoven
Enthoven and Eric Lu both worked at Google Image Search in the lauded Associate Product Manager (APM) program that’s minted many future founders for companies like Quip, Asana and Polyvore. But after two years, they noticed a big gap in the creative ecosystem. Enthoven explains that “The idea came from using outdated tools for making the types of videos people want to make for social media — short-form, snackable video you record with your phone. It’s so difficult to make those kinds of videos in today’s editors.”
So the pair of 25-year-olds left in September to start Kapwing. They named it after their favorite sound effect from the Calvin & Hobbes comics when the make-believe tiger would deflect toy gunshots from his best pal. “It’s an onomatopoeia, and that’s sort of cool because video is all about movement and sound.”
After starting with a meme editor for slapping text above and below images, Kapwing saw a sudden growth spurt as creators raced to convert landscape videos for vertical IGTV. Now it has a wide range of tools, with more planned.
The current selection includes:
Meme Maker
Subtitles
Multi-Video Montage Maker
Video Collage
Video Filters
Image To Video Converter
Add Overlaid Text To Video
Add Music To Video With MP3 Uploads
Resize Video
Reverse Video
Loop Video
Trim Video
Mute Video
Stop Motion Maker
Sound Effects Maker
Kapwing definitely has some annoying shortcomings. There’s an 80mb limit on uploads, so don’t expect to be messing with much 4K videos or especially long clips. You can’t subtitle a GIF, and the meme maker flipped vertical photos sideways without warning. It also lacks some of the slick tools that Snapchat has developed, like a magic eraser for Photoshopping stuff out and a background changer.
The No. 1 thing it needs is a selective cropping tool. Instead of letting you manually move the vertical frame around inside a landscape video so you always catch the action, it just grabs the center. That left me staring at blank space between myself and an interview subject when I uploaded this burger robot startup video. It’s something apps like RotateNFlip and Flixup already offer.
Beyond meme-loving teens and semi-pro creators, Kapwing has found an audience amongst school teachers. The simplicity and onscreen instructions make it well-suited for young students, and it works on Chromebooks because there’s no need to download software.
The paid version has found some traction with content marketers and sponsored creators who don’t want a distracting watermark included. That business model is always in danger of encroachment from free tools, though, so Kapwing hopes to also become a place to view the meme content it exports. That network model is more defensible if it gains a big enough audience, and could be monetized with ads. Though it will put it in competition with Imgur, Reddit and the big dogs like Instagram.
“We aspire to become a hub for consumption,” Enthoven concluded. “Consume, get an idea, and share with each other.”
via Social – TechCrunch https://ift.tt/2LlUkwV
0 notes
Text
Kapwing is Adobe for the meme generation
Need to resize a video for IGTV? Add subtitles for Twitter? Throw in sound effects for YouTube? Or collage it with other clips for the Instagram feed? Kapwing lets you do all that and more for free from a mobile browser or website. This scrappy new startup is building the vertical video era’s creative suite full of editing tools for every occasion.
Pronounced “Ka-pwing” like the sound of a ricocheted bullet, the company was founded by two former Google Image Search staffers. Now after six months of quiet bootstrapping, it’s announcing a $1.7 million seed round led by Kleiner Perkins.
Kapwing hopes to rapidly adapt to shifting memescape and its fragmented media formats, seizing on opportunities like creators needing to turn their long-form landscape videos vertical for Instagram’s recently launched IGTV. The free version slaps a Kapwing.com watermark on all its exports for virality, but users can pay $20 a month to remove it.
While sites like Imgur and Imgflip offer lightweight tools for static memes and GIFs, “the tools and community for doing that for video are kinda inaccessible” says co-founder and CEO Julia Enthoven. “You have something you install on your computer with fancy hardware. You should able to create and riff off of people” even if you just have your phone, she tells me. 100,000 users are already getting crafty with Kapwing.
“We want to make these really relevant trending formats so anyone can jump in” Enthoven declares. “Down the line, we want to make a destination for consuming that content.”
Kapwing co-founders Eric Lu and Julia Enthoven
Enthoven and Eric Lu both worked at Google Image Search in the lauded Associate Product Manager (APM) program that’s minted many future founder for companies like Quip, Asana, and Polyvore. But after two years, they noticed a big gap in the creative ecosystem. Enthoven explains that “The idea came from using outdated tools for making the types of videos people want to make for social media — short-form, snackable video you record with your phone. It’s so difficult to make those kinds of videos in today’s editors.”
So the pair of 25-year-olds left in September to start Kapwing. They named it after their favorite sound effect from the Calvin & Hobbes comics when the make-believe tiger would deflect toy gunshots from his best pal. “It’s an onomonpeia, and that’s sort of cool because video is all about movement and sound.”
After starting with a meme editor for slapping text above and below images, Kapwing saw a sudden growth spurt as creators raced to convert landscape videos for vertical IGTV. Now it has wide range of tools with more planned.
The current selection includes:
Meme Maker
Subtitles
Multi-Video Montage Maker
Video Collage
Video Filters
Image To Video Converter
Add Overlaid Text To Video
Add Music To Video With MP3 Uploads
Resize Video
Reverse Video
Loop Video
Trim Video
Mute Video
Stop Motion Maker
Sound Effects Maker
Kapwing definitely has some annoying shortcomings. There’s an 80mb limit on uploads, so don’t expect to be messing with much 4K videos or especially long clips. You can’t subtitle a GIF, and the meme maker flipped vertical photos sideways without warning. It also lacks some of the slick tools that Snapchat has developed, like a magic eraser for photoshopping stuff out and a background changer.
The #1 thing it needs is a selective cropping tool. Instead of letting you manually move the vertical frame around inside a landscape video so you always catch the action, it just grabs the center. That left me staring at blank space between myself and an interview subject when I uploaded this burger robot startup video. It’s somethig apps like RotateNFlip and Flixup already offer.
Beyond meme-loving teens and semi-pro creators, Kapwing has found an audience amongst school teachers. The simplicity and onscreen instructions make it well-suited for young students, and it works on Chromebooks since there’s no need to download software.
The paid version has found some traction with content marketers and sponsored creators who don’t want a distracting watermark included. That business model is always endanger of encroachment from free tools, though, so Kapwing hopes to also become a place to view the meme content it exports. That network model is more defensible if it gains a big enough audience, and could be monetized with ads. Though it will put it in competition with Imgur, Reddit, and the big dogs like Instagram.
“We aspire to become a hub for consumption” Enthoven concluded. “Consume, get an idea, and share with each other.”
0 notes
Text
How to make Tiny Planets [and Panoramas]
Make fancy looking things without going broke buying Creative Cloud.
By now, you’ve probably seen a lot of those fancy looking panoramas, 3D photospheres, or images that look like Tiny Planets / a Super Mario Galaxy level / King Kai’s Planet. The way this is done is similar to how NVIDIA Ansel creates 360 pictures, but isn’t automated (yet…).
You’ll need: Microsoft Research’s Image Composite Editor (ICE) A first-person camera
You’ll want: Image Editing Software (Paint.NET or FastStone Image Viewer are my go-to) Access to a Dedicated Capture Mode – OR – the ability to use Time-stop, No HUD, No First Person Player Model, FOV control, and Free cam/No Clip.
Game and Camera Setup
Have a look through your library, and find a game where you’ve got access to a First-Person camera. While any FPS will work here, many other games have these hidden away as a debug camera. For instance, XCOM2 and ABZU have these, despite not being first-person games. Third-Person cameras won’t work with this method, since the “pivot point” of the camera is out in the scene, rather than at the “lens” of the camera. If a game has a dedicated Capture Mode (Mad Max , Shadow Warrior 2, or anything that has NVIDIA Ansel), use this. If the game doesn’t have a dedicated capture mode, see if you can make one with the console (Things like Noclip, Time-stop, Disabling HUD), using GeDoSaTo to get rid of HUD items or great big things that say “PAUSED” in the middle of the screen, or using Cheat Engine to take control of the camera when I shouldn’t. I tend to check things like DeadEndThrills or PCGamingWiki for an idea of what I’ve got available to work with.
If the game doesn’t have either of these, don’t worry! This process will still work, you’ll just have a few extra steps (These are covered in the Tips section).
Image quality is the highest priority when making these things. We’re not trying to be playable, we’re after capturing the mood of the environment. That said, I tend to turn off post-processing effects that add things like dirt or scratches to the lens, such as the psuedo Bokeh effect in XCOM2, but that’s up to you. On FOV and Capture Resolution: Wider angles will make the capturing process *much* faster at the expensive of image quality, but tighter FOV will give you more environmental detail (Most games don’t include Perspective Distortion, so it’s like cruddy version of supersampling that won’t turn your GPU into molten slag). Our software can do Gigapixel resolution panoramas if you’ve got the RAM (and ability to open the final image), but for most games, you’ll have massively diminishing returns for FOVs below 80. You may also note that I didn’t mention the resolution of your screenshots. While this is normally a big deal in screenshots, higher resolutions have diminishing returns when you’re making panoramas this way. Worry about getting the smallest object you care about in the scene looking good, rather than trying to force as many pixels as you can into each shot. Feel free to use GeDoSaTo to capture at 16K if you want, but it probably won’t be worth the effort / fire hazard.
Capture Method
With your scene all set up, start taking screenshots in all directions. I like to start at the horizon, do a 360 degree (Azimuth, in Spherical Coordinates) sweep, capturing about every 45 degrees for an FOV of 90 (i.e. take a shot, look at the objects at the edge of the screen, move the camera so those are now in the middle, take another shot.). Once I’m back to the start, change the elevation (Altitude, in Spherical Coordinates), and repeat this process until you’ve got a screenshot of every single direction. If you’re not sure that you’ve got a shot, take an extra one. The more photos, the better (provided your scene isn’t moving).

Stitching
When you’re reasonably satisfied that you’ve got everything, quit the game and look at the collection of screenshots you’ve got. Open Image Composite Editor (ICE), and drag-and-drop them into the main window. Once you’ve got them all in there, check that Camera Motion is set to AutoDetect, then click Next. This will start the stitching process, where ICE does some quick optical object recognition, and finds a way to overlap as many of the images as it can. This can take a while, so go have a nice cuppa tea, a Bex, and a lie down (Don’t worry, it never takes more than 3 minutes on my machine, even with a few hundred images).
Projection
When the stitching is complete, you should see something like this:
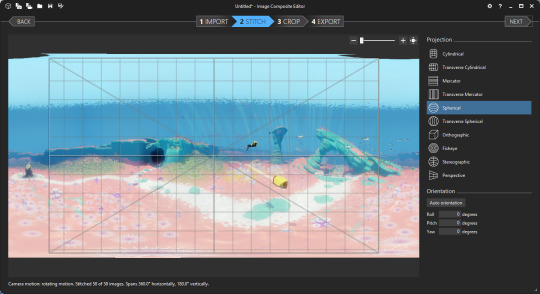
The Spans 360 degree Horizontally and 180 degree Vertically underneath tells you that ICE was able to find enough information in all directions to recreate the entire scene.
Now comes the most important part: Choose a projection.
To Make a Planet: we select Stereographic, and set the Orientation to: Roll 0 Degrees Pitch -90 Degrees Yaw 0 Degrees
If this works, you should have a little planet! You can adjust the shape of this using the mouse, but I tend just rotate the scene instead so I don’t introduce additional distortions.
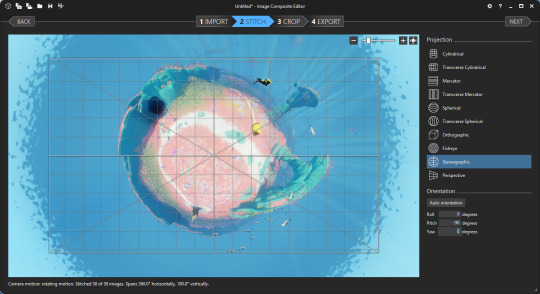
[Alternatively, if you just want a fancy panorama like you see of GTA V or The Witcher 3 on Steam Community with several hundred likes: try another projection then just crop out the area you want. Easy Peasy Lemon Squeezy! YOUR WINNER!]
Cropping
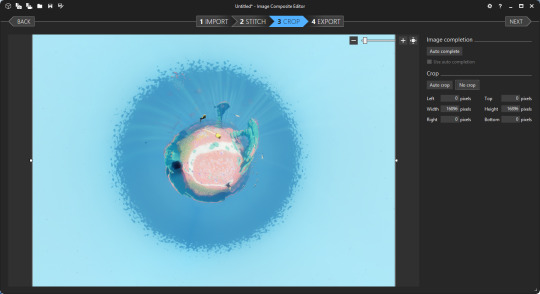
So, you’ve got your pretty pretty all set up, now it’s time to get it into a saveable format. Select Crop from u the top, and after the panorama is projected, you’ll have your scene again. Looking at the Width and Height, you’ll probably notice that the full image is a mite over 15000x15000 pixels. That’s great and all, but a lot of programs will flat out refuse to deal with files this big. Also, there’s probably a lot of extra space around the interesting parts that you’ll want gone, or maybe missing bits of the sky if you didn’t get Zenith. If you’ve followed the guide and only rotated the planet scene, the middle of the planet will be the centre of the image, making auto-centering and cropping super easy. Here, a 10000x10000 pixel crop looks good to me, but this is down to personal taste. My general advice is to see if 7500x7500 will contain everything of interest to your scene. Once you’re happy with the crop, hit Next and move on to Export.

File Formats
I do two exports here. The first is a high quality PNG at 100% scale copy of the scene. I’ll then make a 95-100 Quality JPEG with a Width and Height between 4500-5500 pixels. This is to keep the image size under the 8MB that Steam requires, and to prevent Steam from throwing up additional errors (I’ve had a lot of problems getting it to accept images above 30 megapixels, but your experience may differ).

Alternatively, use a good image editor to downsample the PNG to something under 30 megapixels and below 8MB. I really like FastStone Image Editor for this, the Crop board is excellent.
Sharing
Upload your JPEG to the Steam Community Hub / Flickr / Imgur / Tumblr /, give it a name, and feel the glow of adding something beautiful to this world. Or just print it out and throw it out the window at a passing dog. That works too.
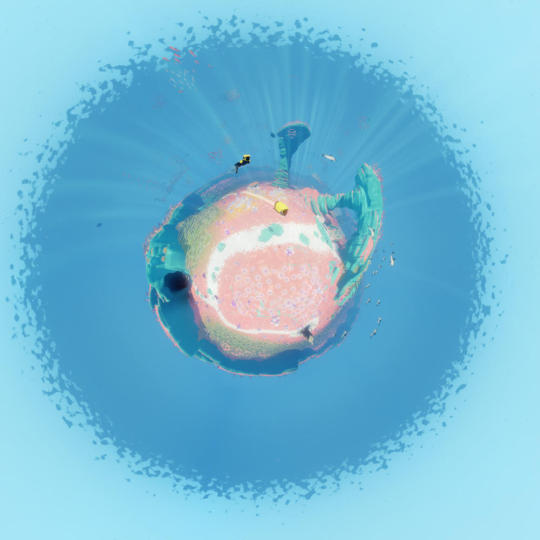
Troubleshooting
Sometimes ICE will get confused by a scene and fail to project properly. In this case, you can try importing the bare minimum number of images, as something in the scene might have moved or asset reuse in the game will have caused a problem. If this fails again, I often just recapture the scene.
ICE comes with a very basic Autocomplete function for filling in gaps in panoramas. If you notice Grey holes (or if the Autocrop button doesn’t select the whole image), these are missing bits. If they’re not in your scene when you crop at the end, you can ignore them, but otherwise you can try the (quite computationally intensive) Autocomplete system. This will produce variable results, but can work in a pinch. Otherwise, load up a dedicated image editor (Paint.NET or GIMP if you’re broke like me) and clean up the errors in that.
Tips
Everything ICE does, Adobe’s Creative Cloud can do. But ICE is free, extremely easy to use, doesn’t require an internet connection, and can run on any version of Windows newer than XP.
Get Steam to screenshot in PNG, and use these instead of the default JPEGs. Since ICE accepts PNGs as inputs, you can cut out bad parts of the inputs and leave them transparent.
The general rule of thumb: avoid scenes where you’ll have big objects 30 degrees above the horizon. Buildings or Mountains will distort like crazy, and you’ll have this weird bulbous mass that can look very weird. Sometimes trees will look ok though, so experiment and you should get a good idea.
The closer an object is to the camera, the greater the distortion. If you want an object to look relatively normal (Say, a car or a person), try to keep it at least 5 meters from the camera and within 15 degrees of the horizon. However, distortion on people can look *really good* if you’ve got a good eye for composition (See this GTAV shot by a very clever peep).
Another rule of thumb is try to avoid putting anything too interesting directly underneath the camera. Keep this part of the scene relatively boring and go for more eye-catching detail around the horizon. If you’ve got something like a highlighted path in your scene, capturing the scene directly on top of the path doesn’t look as nice as being a few meters away.
Some games will have HUDs that you can’t turn off. In this case, crop out the HUD before stitching, and just take your screenshots a little closer together. Same goes for games with really strong Vignetting that can’t be disabled at all (Looking at you, Mass Effect 2).
There will be games where you’ve got no access to anything that makes capturing a scene easy (The Long Dark is my favourite example. There’s no console, subtle vignetting, no pause, and the player’s breathing makes little clouds in the middle of the screen). In these cases, I do my best to try and capture as quickly as possible. Things like moving clouds and horrible animals coming to gnaw on my guts will mostly be dealt with by ICE, or can be photoshopped out later. Or use it to turn one deer into a distributed herd. Up to you!
This technique will work in the real world, too. Camera + Tripod + the ability to edit out shadows = Good Times.
Worried about Perspective Distortion making everything look weird? ICE should be able to compensate for it in almost all cases, unless you’ve somehow turned your camera into a Duck eye. I’ve done a real-world shot with a 14mm fisheye lens, and ended up with a panorama that had no noticeable perspective effects on it with ICE.
Don’t worry about needing a powerful PC. I used to do this on my first gen i7 with 8GB of RAM and an ATi 5870 (“ Top of the line in ’09! ”), and got the same quality as I get with my NVIDIA GTX 1070 and 32GB of RAM. Image projection, stitching, and editing can be computationally intensive, but if you can run Steam on Windows, you can make pretties.
Example Materials
Here’s a link to the source materials I used to make this. You’ll notice there’s a hole at the top of the scene, but the Autocorrect can fix it for you if you want to use that. Try playing with a few projections to see how these things work without stressing about the capture process, but most of all, have fun trying this stuff!

10 notes
·
View notes